Uhr Vestamatic Rolltec Pro
Uhr Vestamatic Rolltec Pro
Uhr Vestamatic Rolltec Pro

Sie wollen auch ein ePaper? Erhöhen Sie die Reichweite Ihrer Titel.
YUMPU macht aus Druck-PDFs automatisch weboptimierte ePaper, die Google liebt.
83100811.qxd 11.09.01 12:17 Seite 1<br />
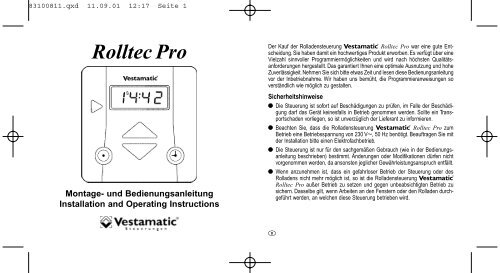
<strong>Rolltec</strong> <strong>Pro</strong><br />
Montage- und Bedienungsanleitung<br />
Installation and Operating Instructions<br />
Der Kauf der Rolladensteuerung <strong>Vestamatic</strong> <strong>Rolltec</strong> <strong>Pro</strong> war eine gute Entscheidung.<br />
Sie haben damit ein hochwertiges <strong>Pro</strong>dukt erworben. Es verfügt über eine<br />
Vielzahl sinnvoller <strong>Pro</strong>grammiermöglichkeiten und wird nach höchsten Qualitätsanforderungen<br />
hergestellt. Das garantiert Ihnen eine optimale Ausnutzung und hohe<br />
Zuverlässigkeit. Nehmen Sie sich bitte etwas Zeit und lesen diese Bedienungsanleitung<br />
vor der Inbetriebnahme. Wir haben uns bemüht, die <strong>Pro</strong>grammieranweisungen so<br />
verständlich wie möglich zu gestalten.<br />
Sicherheitshinweise<br />
· Die Steuerung ist sofort auf Beschädigungen zu prüfen, im Falle der Beschädigung<br />
darf das Gerät keinesfalls in Betrieb genommen werden. Sollte ein Transportschaden<br />
vorliegen, so ist unverzüglich der Lieferant zu informieren.<br />
· Beachten Sie, dass die Rolladensteuerung <strong>Vestamatic</strong> <strong>Rolltec</strong> <strong>Pro</strong> zum<br />
Betrieb eine Betriebsspannung von 230 VW, 50 Hz benötigt. Beauftragen Sie mit<br />
der Installation bitte einen Elektrofachbetrieb.<br />
· Die Steuerung ist nur für den sachgemäßen Gebrauch (wie in der Bedienungsanleitung<br />
beschrieben) bestimmt. Änderungen oder Modifikationen dürfen nicht<br />
vorgenommen werden, da ansonsten jeglicher Gewährleistungsanspruch entfällt.<br />
· Wenn anzunehmen ist, dass ein gefahrloser Betrieb der Steuerung oder des<br />
Rolladens nicht mehr möglich ist, so ist die Rolladensteuerung <strong>Vestamatic</strong><br />
<strong>Rolltec</strong> <strong>Pro</strong> außer Betrieb zu setzen und gegen unbeabsichtigten Betrieb zu<br />
sichern. Dasselbe gilt, wenn Arbeiten an den Fenstern oder den Rolladen durchgeführt<br />
werden, an welchen diese Steuerung betrieben wird.<br />
D
83100811.qxd 11.09.01 12:17 Seite 3<br />
Kurzinformation / Short description<br />
Detaillierte Angaben und <strong>Pro</strong>grammierhinweise finden Sie auf den folgenden Seiten.<br />
Please find details and programming instructions on the following pages.<br />
A Reset-Taste B Sommer-/Winterzeit C Tageszeit D Auffahrzeit E Abfahrzeit<br />
Nach erfolgter Installation die Abdeckhaube<br />
durch leichtes Ziehen entfernen und Reset-<br />
Taste drücken. Dadurch werden die werksseitig<br />
voreingestellten Zeiten aktiviert.<br />
.<br />
Entspricht die momentane Einstellung nicht<br />
der aktuellen Zeit, aktualisieren Sie diese<br />
durch Drücken der S/W-Taste. Die gewählte<br />
Einstellung erscheint im Display und die<br />
Tageszeit ändert sich um eine Stunde.<br />
1. Stell-Taste drücken (gedrückt halten)<br />
2. <strong>Uhr</strong>-Taste drücken R schneller Vorlauf<br />
<strong>Uhr</strong>-Taste tippen R langsamer Vorlauf<br />
oder<br />
1. <strong>Uhr</strong>-Taste drücken (gedrückt halten)<br />
2. Stell-Taste drücken L schneller Rücklauf<br />
Stell-Taste tippen L langsamer Rücklauf<br />
Wichtig: Wahltaster auf (AUTO) stellen<br />
1. Stell-Taste drücken (gedrückt halten)<br />
2. Auf-Taste drücken R schneller Vorlauf<br />
Auf-Taste tippen R langsamer Vorlauf<br />
oder<br />
1. Auf-Taste drücken (gedrückt halten)<br />
2. Stell-Taste drücken L schneller Rücklauf<br />
Stell-Taste tippen L langsamer Rücklauf<br />
Wichtig: Wahltaster auf (AUTO) stellen<br />
1. Stell-Taste drücken (gedrückt halten)<br />
2. Ab-Taste drücken R schneller Vorlauf<br />
Ab-Taste tippen R langsamer Vorlauf<br />
oder<br />
1. Ab-Taste drücken (gedrückt halten)<br />
2. Stell-Taste drücken L schneller Rücklauf<br />
Stell-Taste tippen L langsamer Rücklauf<br />
A Reset button B Summer/winter time C Current time D Up time E Down time<br />
After having completed the installation, carefully<br />
pull to remove the cover cap and press<br />
the reset button. This will activate the times<br />
preset by the manufacturer.<br />
If the manufacturer setting does not correspond<br />
to the correct current time, update the<br />
setting to the current time by pressing the<br />
summer/winter button. The display will indicate<br />
the selected time and the time will be<br />
changed by one hour.<br />
1. Keep the set button pressed<br />
2. Press the time button R fast forward<br />
Tap the time button R slow forward<br />
or<br />
1. Keep the time button pressed<br />
2. Press the set button L fast reverse<br />
Tap the set button L slow reverse<br />
Important: Set the selector button to (AUTO)<br />
1. Keep the set button pressed<br />
2. Press the up button R fast forward<br />
Tap the up button R slow forward<br />
or<br />
1. Keep the up button pressed<br />
2. Press the set button L fast reverse<br />
Tap the set button L slow reverse<br />
Important: Set the selector button to (AUTO)<br />
1. Keep the set button pressed<br />
2. Press the down button R fast forward<br />
Tap the down button R slow forward<br />
or<br />
1. Keep the down button pressed<br />
2. Press the set button L fast reverse<br />
Tap the set button L slow reverse
83100811.qxd 11.09.01 12:17 Seite 5<br />
Einleitung Allgemeines Seite 5<br />
Hand-Steuerung Seite 6<br />
Automatik-Steuerung Seite 7<br />
Inhalt<br />
Inhalt<br />
Installation Hinweise für den Elektrofachbetrieb Seite 29 –30<br />
Montageanleitung / Technische Daten Seite 31<br />
Anschlussplan Seite 32<br />
<strong>Pro</strong>grammierung Allgemeines Seite 8<br />
der Grund- Sommer-/Winterzeit Seite 9<br />
funktionen Tageszeit (aktuelle <strong>Uhr</strong>zeit) Seite 10<br />
Hinweis Seite 11<br />
Auffahrzeit Seite 12<br />
Abfahrzeit Seite 13<br />
Zufallsgenerator Seite 14<br />
Anschlussbild Seite 33<br />
Übersicht Bedienungselemente Seite 34<br />
<strong>Pro</strong>grammierung Allgemeines Seite 15<br />
der Sonder- Grundeinstellung Seite 16 – 17<br />
funktionen Wochen-Funktion Seite 18 – 19<br />
Astro-Funktion Seite 20 – 26<br />
Motorlaufzeit Seite 27<br />
Wende-Funktion Seite 28<br />
- 3 - D<br />
D<br />
- 4 -
83100811.qxd 11.09.01 12:17 Seite 7<br />
Allgemeines<br />
Einleitung<br />
Einleitung<br />
Hand-Steuerung<br />
Die Rolladensteuerung <strong>Vestamatic</strong> <strong>Rolltec</strong> <strong>Pro</strong> dient der manuellen,<br />
sowie der automatischen Steuerung von elektrisch angetriebenen<br />
Rolladen. Die zahlreichen Funktionen können individuell auf die persönlichen<br />
Erfordernisse abgestimmt werden.<br />
Der Lieferumfang der Rolladensteuerung <strong>Vestamatic</strong> <strong>Rolltec</strong> <strong>Pro</strong><br />
besteht aus:<br />
1. Abdeckhaube<br />
2. Grundgehäuse<br />
3. Tragrahmen Grundgehäuse<br />
4. Kombinationsrahmen 1-fach – Jung „CD 500“, alpinweiß<br />
Im Falle eines Stromausfalls bleiben die zuvor programmierten Zeiten<br />
bis zu 6 Stunden gespeichert. Während dieser Zeit ist das Display<br />
ohne Anzeige. Nach Wiederkehr der Betriebsspannung befindet sich<br />
die Rolladensteuerung <strong>Vestamatic</strong> <strong>Rolltec</strong> <strong>Pro</strong> im Schnelllauf und<br />
stoppt automatisch bei der aktuellen <strong>Uhr</strong>zeit. (Bei einem Stromausfall<br />
von 6 Stunden kann dieser Nachstellprozess der <strong>Uhr</strong>zeit bis zu<br />
4 Minuten betragen). Während des Nachstellprozesses der <strong>Uhr</strong>zeit<br />
kann die Rolladensteuerung nicht bedient werden.<br />
Sollte während des Netzausfalls ein Auf- oder Abfahrbefehl anstehen,<br />
so wird der letzte Befehl nach Erreichen der aktuellen <strong>Uhr</strong>zeit nachgefahren.<br />
Die Rolladensteuerung <strong>Vestamatic</strong> <strong>Rolltec</strong> <strong>Pro</strong> verfügt über einen<br />
Wahltaster, der die Auswahl Hand-Steuerung (MAN) oder Automatik-<br />
Steuerung (AUTO) festlegt.<br />
Um die Hand-Steuerung zu aktivieren, Wahltaster betätigen, bis das<br />
Display (MAN) anzeigt.<br />
Alle Automatik-Funktionen sind somit außer Kraft gesetzt. Wird die<br />
Auf-Taste bzw. Ab-Taste gedrückt, fährt der Rolladen hoch bzw.<br />
runter.<br />
Um die Fahrt zu stoppen, drücken Sie einfach die Gegentaste, d.h.:<br />
· fährt der Rolladen gerade hoch, drücken Sie die Ab-Taste,<br />
· fährt der Rolladen gerade runter, drücken Sie die Auf-Taste.<br />
Ein weiteres Hoch- bzw. Runterfahren ist erst nach erneutem Drücken<br />
der Auf-Taste bzw. Ab-Taste möglich. Das garantiert eine exakte<br />
Positionierung des Rolladens.<br />
- 5 - D<br />
D<br />
- 6 -
83100811.qxd 11.09.01 12:17 Seite 9<br />
Automatik-Steuerung<br />
Einleitung<br />
<strong>Pro</strong>grammierung der Grundfunktionen<br />
Allgemeines<br />
Um die Automatik-Steuerung zu aktivieren, Wahltaster betätigen,<br />
bis das Display (AUTO) anzeigt.<br />
Die Automatik-Steuerung ist somit aktiviert. Der Rolladen fährt nun zu<br />
den jeweilig programmierten Zeiten hoch und runter. Es ist aber auch<br />
weiterhin möglich, den Rolladen außerhalb der programmierten<br />
Zeiten durch Drücken der Auf-Taste bzw. Ab-Taste hoch bzw. runter<br />
zu fahren (der <strong>Pro</strong>grammablauf wird dadurch nicht gestört).<br />
Wird die Auf-Taste bzw. Ab-Taste länger als 2 Sekunden gedrückt,<br />
fährt der Rolladen hoch bzw. runter.<br />
Um die Fahrt zu stoppen, drücken Sie einfach die Gegentaste, d.h.:<br />
· fährt der Rolladen gerade hoch, drücken Sie die Ab-Taste,<br />
· fährt der Rolladen gerade runter, drücken Sie die Auf-Taste.<br />
Ein weiteres Hoch- bzw. Runterfahren ist erst nach erneutem Drücken<br />
der Auf-Taste bzw. Ab-Taste möglich.<br />
Die Automatik kann auch für längere Zeit unterbrochen werden. Hierzu<br />
genügt es, den Wahltaster auf Hand-Steuerung (MAN) zu stellen.<br />
Nach Rückstellung auf Automatik-Steuerung wird dann der letzte<br />
Befehl ausgeführt, den die Rolladensteuerung <strong>Vestamatic</strong> <strong>Rolltec</strong><br />
<strong>Pro</strong> in Automatik-Stellung ausgeführt hätte. Das Gleiche geschieht bei<br />
Wiedereinschaltung des Stromes nach einem Netzausfall.<br />
Nachdem die fachgerechte Installation beendet ist (Hinweise dazu auf<br />
den Seiten 29 bis 32), können Sie mit der <strong>Pro</strong>grammierung beginnen.<br />
Alle enthaltenen Funktionen können nun in Betrieb genommen werden.<br />
Wichtig: Beachten Sie bitte, dass sich die Rolladensteuerung<br />
<strong>Vestamatic</strong> <strong>Rolltec</strong> <strong>Pro</strong> bei Netzausfall nicht programmieren<br />
lässt.<br />
Entfernen Sie durch leichtes Ziehen die Abdeckhaube und drücken<br />
Sie die Reset-Taste. Nehmen Sie dazu einen Kugelschreiber oder<br />
etwas in ähnlicher Form.<br />
Das Drücken der Reset-Taste bewirkt, dass die werksseitig vorprogrammierten<br />
Zeiten aktiviert werden. Falls Sie eine komplette Neueinstellung<br />
vornehmen möchten oder aus anderen Gründen die gesamten<br />
Daten löschen möchten, so drücken Sie ebenfalls die Reset-Taste.<br />
Werksseitig vorprogrammierte Zeiten:<br />
· Aktuelle Tageszeit – 0ß8:0ß0 <strong>Uhr</strong><br />
· Auffahrzeit – 0ß8:0ß0 <strong>Uhr</strong><br />
· Abfahrzeit – 2ß0:0ß0 <strong>Uhr</strong><br />
Auf den nächsten Seiten wird beschrieben, wie Sie diese Zeiten auf<br />
Ihre persönlichen Bedürfnisse einstellen können.<br />
- 7 - D<br />
D<br />
- 8 -
83100811.qxd 11.09.01 12:17 Seite 11<br />
Sommer-/Winterzeit<br />
<strong>Pro</strong>grammierung der Grundfunktionen<br />
<strong>Pro</strong>grammierung der Grundfunktionen<br />
Tageszeit<br />
Im Display sehen Sie, welche Zeit eingestellt ist.<br />
Das (S) oben links im Display steht für Sommerzeit.<br />
(0S9:0ß0)<br />
Das (W) oben rechts im Display steht für Winterzeit (Werksvorgabe).<br />
(0ß8:0W0)<br />
Entspricht die momentane Einstellung nicht der aktuellen Zeit, können<br />
Sie diese einfach durch Drücken der S/W-Taste aktualisieren. Die<br />
gewählte Einstellung erscheint dann sofort im Display und die Tageszeit<br />
ändert sich entsprechend um eine Stunde.<br />
Zur Einstellung der aktuellen Tageszeit bedienen Sie sich der Tastenkombination<br />
aus Stell-Taste und <strong>Uhr</strong>-Taste.<br />
Die Einstellung kann wie folgt durchgeführt werden:<br />
1. Zuerst die Stell-Taste drücken (gedrückt halten), danach:<br />
A. <strong>Uhr</strong>-Taste drücken (gedrückt halten) erzeugt einen schnellen<br />
Vorlauf der Tageszeit.<br />
B. Ein kurzes Tippen der <strong>Uhr</strong>-Taste erzeugt einen langsamen<br />
Vorlauf der Tageszeit.<br />
oder<br />
2. Zuerst die <strong>Uhr</strong>-Taste drücken (gedrückt halten), danach:<br />
A. Stell-Taste drücken (gedrückt halten) erzeugt einen schnellen<br />
Rücklauf der Tageszeit.<br />
B. Ein kurzes Tippen der Stell-Taste erzeugt einen langsamen<br />
Rücklauf der Tageszeit.<br />
- 9 - D<br />
D<br />
- 10 -
83100811.qxd 11.09.01 12:17 Seite 13<br />
Hinweis<br />
<strong>Pro</strong>grammierung der Grundfunktionen<br />
<strong>Pro</strong>grammierung der Grundfunktionen<br />
Auffahrzeit<br />
Ausgeliefert wird die Rolladensteuerung <strong>Vestamatic</strong> <strong>Rolltec</strong> <strong>Pro</strong> mit<br />
einer werksseitigen Einstellung folgender Auf- bzw. Abfahrzeiten:<br />
· Tägliche Auffahrzeit – 0ß8:0ß0 <strong>Uhr</strong><br />
· Tägliche Abfahrzeit – 2ß0:0ß0 <strong>Uhr</strong><br />
Wichtig: Für die nächsten <strong>Pro</strong>grammierschritte ist es wichtig, dass<br />
die Steuerung auf Automatikbetrieb eingestellt ist. Prüfen<br />
Sie die momentane Einstellung. Im Display erscheint (AUTO).<br />
Wenn (MAN) angezeigt wird, Wahltaster 1 x drücken um<br />
die Steuerung auf Automatik-Steuerung (AUTO) umzuschalten.<br />
Zur Einstellung der Auffahrzeit bedienen Sie sich der Tastenkombination<br />
aus Stell-Taste und Auf-Taste.<br />
Die Einstellung kann wie folgt durchgeführt werden:<br />
1. Zuerst die Stell-Taste drücken (gedrückt halten), danach:<br />
A. Auf-Taste drücken (gedrückt halten) erzeugt einen schnellen<br />
Vorlauf der Auffahrzeit.<br />
B. Ein kurzes Tippen der Auf-Taste erzeugt einen langsamen<br />
Vorlauf der Auffahrzeit.<br />
oder<br />
2. Zuerst die Auf-Taste drücken (gedrückt halten), danach:<br />
A. Stell-Taste drücken (gedrückt halten) erzeugt einen schnellen<br />
Rücklauf der Auffahrzeit.<br />
B. Ein kurzes Tippen der Stell-Taste erzeugt einen langsamen<br />
Rücklauf der Auffahrzeit.<br />
Im Display können Sie den eingestellten Wert ablesen. Wird die zur <strong>Pro</strong>grammierung<br />
notwendige Tastenkombination nicht mehr betätigt, schaltet<br />
das Display wieder auf die aktuelle Tageszeit um. Zur Überprüfung des<br />
eingestellten Wertes genügt ein kurzes Drücken der Auf-Taste. Im Display<br />
erscheint jetzt abermals die von Ihnen eingestellte Auffahrzeit. Nach ca.<br />
3 Sekunden schaltet das Display wieder auf die aktuelle Tageszeit um.<br />
- 11 - D<br />
D<br />
- 12 -
83100811.qxd 11.09.01 12:17 Seite 15<br />
Abfahrzeit<br />
<strong>Pro</strong>grammierung der Grundfunktionen<br />
<strong>Pro</strong>grammierung der Grundfunktionen<br />
Zufallsgenerator<br />
Zur Einstellung der Abfahrzeit bedienen Sie sich der Tastenkombination<br />
aus Stell-Taste und Ab-Taste.<br />
Die Einstellung kann wie folgt durchgeführt werden:<br />
1. Zuerst die Stell-Taste drücken (gedrückt halten), danach:<br />
A. Ab-Taste drücken (gedrückt halten) erzeugt einen schnellen<br />
Vorlauf der Abfahrzeit.<br />
B. Ein kurzes Tippen der Ab-Taste erzeugt einen langsamen<br />
Vorlauf der Abfahrzeit.<br />
oder<br />
2. Zuerst die Ab-Taste drücken (gedrückt halten), danach:<br />
A. Stell-Taste drücken (gedrückt halten) erzeugt einen schnellen<br />
Rücklauf der Abfahrzeit.<br />
B. Ein kurzes Tippen der Stell-Taste erzeugt einen langsamen<br />
Rücklauf der Abfahrzeit.<br />
Im Display können Sie den eingestellten Wert ablesen. Wird die zur <strong>Pro</strong>grammierung<br />
notwendige Tastenkombination nicht mehr betätigt, schaltet<br />
das Display wieder auf die aktuelle Tageszeit um. Zur Überprüfung des<br />
eingestellten Wertes genügt ein kurzes Drücken der Ab-Taste. Im Display<br />
erscheint jetzt abermals die von Ihnen eingestellte Abfahrzeit. Nach ca.<br />
3 Sekunden schaltet das Display wieder auf die aktuelle Tageszeit um.<br />
Der Zufallsgenerator erzeugt eine sogenannte Zufallszeit. Sie bewirkt,<br />
dass der Rolladen mit einer Abweichung von bis zu +/-15 Minuten von<br />
den zuvor programmierten Zeiten(*) hoch- bzw. runterfährt.<br />
Das „unregelmäßige“ Hoch- und Runterfahren des Rolladens vermittelt<br />
den Eindruck eines bewohnten Hauses und bietet somit einen<br />
zusätzlichen Schutz bei längerer Abwesenheit.<br />
Um den Zufallsgenerator zu aktivieren, drücken Sie einfach die<br />
Zufall-Taste (Z).<br />
Im Display erscheint jetzt<br />
oben rechts ein (Z).<br />
(0ß8:0ß0Z<br />
Hinweis: Der Zufallsgenerator setzt die ggf. eingestellte Wende-<br />
Funktion (siehe Seite 28) außer Kraft.<br />
Zum Deaktivieren des Zufallsgenerators drücken Sie bitte erneut die<br />
Zufall-Taste (Z). Jetzt ist der Zufallsgenerator wieder ausgeschaltet,<br />
das (Z) im Display erlischt und der Rolladen fährt dann wieder exakt<br />
zu den von Ihnen programmierten Zeiten hoch und runter.<br />
(*)Anmerkung:<br />
Bei Aktivierung der Astro-Funktion +/-15 Minuten von<br />
der sich dort ergebenden Zeit.<br />
- 13 - D<br />
D<br />
- 14 -
83100811.qxd 11.09.01 12:17 Seite 17<br />
Allgemeines<br />
<strong>Pro</strong>grammierung der Sonderfunktionen<br />
<strong>Pro</strong>grammierung der Sonderfunktionen<br />
Grundeinstellung<br />
Ihre Rolladensteuerung <strong>Vestamatic</strong> <strong>Rolltec</strong> <strong>Pro</strong> verfügt über eine<br />
Vielzahl zusätzlicher Sonderprogramme, welche einer individuellen<br />
<strong>Pro</strong>grammierung auf Ihre persönlichen Bedürfnisse dienen.<br />
Um die folgenden Einstellungen vorzunehmen legen Sie sich bitte<br />
einen Kugelschreiber oder etwas Ähnliches zurecht und entfernen die<br />
Abdeckhaube der Rolladensteuerung <strong>Vestamatic</strong> <strong>Rolltec</strong> <strong>Pro</strong> durch<br />
leichtes Ziehen.<br />
Die im Folgenden beschriebene <strong>Pro</strong>grammierung der Sonderfunktionen<br />
ist so aufgebaut, dass jede Sonderfunktion einzeln programmiert<br />
werden kann. Möchten Sie alle Sonderfunktionen unmittelbar<br />
nacheinander durchführen, so aktivieren Sie den <strong>Pro</strong>grammiermodus,<br />
indem Sie die Stell-Taste 1 x zusammen mit der <strong>Pro</strong>grammier-Taste<br />
(P) drücken. Innerhalb des <strong>Pro</strong>grammiermodus wechseln Sie jeweils<br />
in das nächste Einstellprogramm, indem Sie die Stell-Taste jeweils<br />
1 x betätigen.<br />
Für die erste <strong>Pro</strong>grammierung empfehlen wir Ihnen jeden Menüpunkt<br />
einzeln (wie in den folgenden Seiten beschrieben) zu programmieren.<br />
Die <strong>Pro</strong>grammierung kann jederzeit durch Drücken der <strong>Uhr</strong>-Taste<br />
beendet und abgespeichert werden.<br />
Für alle weiteren Sonderprogramme ist es notwendig, den aktuellen<br />
Wochentag sowie die aktuelle Kalenderwoche voreinzustellen:<br />
<strong>Pro</strong>grammierung Wochentag<br />
Drücken Sie die Stell-Taste 1 x zusammen mit der <strong>Pro</strong>grammier-<br />
Taste (P) und dann die Stell-Taste allein so oft, bis folgende Anzeige<br />
im Display erscheint:<br />
(!ßßßßß1)<br />
Sie befinden sich nun im Menüpunkt „Einstellung Wochentag“.<br />
Drücken Sie nun die Auf-Taste so oft, bis der aktuelle Wochentag im<br />
Display angezeigt wird.<br />
Nach ca. 2 Minuten werden die Einstellungen automatisch abgespeichert<br />
und im Display wird wieder die aktuelle Tageszeit angezeigt.<br />
- 15 - D<br />
D<br />
- 16 -
83100811.qxd 11.09.01 12:17 Seite 19<br />
Grundeinstellung<br />
<strong>Pro</strong>grammierung der Sonderfunktionen<br />
<strong>Pro</strong>grammierung der Sonderfunktionen Wochen-Funktion<br />
<strong>Pro</strong>grammierung Kalenderwoche<br />
Drücken Sie die Stell-Taste 1 x zusammen mit der <strong>Pro</strong>grammier-<br />
Taste (P) und dann die Stell-Taste allein so oft, bis folgende<br />
Anzeige im Display erscheint:<br />
(ßßßß0W1)<br />
Sie befinden sich nun im Menüpunkt „Einstellung Kalenderwoche“.<br />
Durch Drücken der Auf-Taste stellen Sie nun die aktuelle Kalenderwoche<br />
ein.<br />
Nach ca. 2 Minuten werden die Einstellungen automatisch abgespeichert<br />
und im Display wird wieder die aktuelle Tageszeit angezeigt.<br />
Die Wochen-Funktion ermöglicht es Ihnen, für jeden Tag der Woche<br />
eine eigene Auf- bzw. Abfahrzeit zu programmieren.<br />
Drücken Sie die Stell-Taste 1 x zusammen mit der <strong>Pro</strong>grammier-<br />
Taste (P) und dann die Stell-Taste allein so oft, bis folgende Anzeige<br />
im Display erscheint:<br />
(!“D$f&v)<br />
Sie befinden sich nun im Menüpunkt „Wochen-Funktion“.<br />
Drücken Sie nun die Auf-Taste, „0ßn“ erscheint im Display, die Wochen-<br />
Funktion ist nun aktiviert.<br />
Um die Einstellung der Auf- und Abfahrzeiten der Wochentage mit<br />
dem Montag zu beginnen, drücken Sie die <strong>Pro</strong>grammier-Taste (P)<br />
1 x. Die Auffahrzeit lässt sich nun mit der Auf-Taste oder Ab-Taste<br />
verändern. Zur Einstellung der Abfahrzeit drücken Sie 1 x die <strong>Pro</strong>grammier-Taste<br />
(P). Nun erscheint im Display die werksseitig eingestellte<br />
Abfahrzeit, welche Sie mit der Auf- und Ab-Taste nach Ihren<br />
Wünschen verändern können.<br />
- 17 - D<br />
D<br />
- 18 -
83100811.qxd 11.09.01 12:17 Seite 21<br />
Wochen-Funktion<br />
<strong>Pro</strong>grammierung der Sonderfunktionen<br />
<strong>Pro</strong>grammierung der Sonderfunktionen<br />
Astro-Funktion<br />
Folgende Zeiten sind in dieser Betriebsart werksseitig voreingestellt:<br />
· Auffahrzeit – 0ß8:0ß0 <strong>Uhr</strong><br />
· Abfahrzeit – 2ß0:0ß0 <strong>Uhr</strong><br />
Um die Auf- und Abfahrzeiten des nächsten Wochentages einzustellen,<br />
drücken Sie wieder 1 x die <strong>Pro</strong>grammier-Taste (P) und wiederholen<br />
die vorher beschriebene Einstellung.<br />
Sollten Sie an einem bestimmten Wochentag keine Auf- oder Abfahrzeit<br />
wünschen, deaktivieren Sie die Auf- bzw. Abfahrzeit, indem Sie<br />
die entsprechenden Zeiten so lange verstellen, bis im Display folgende<br />
Anzeige erscheint. Die Deaktivierung liegt zwischen 23:59 <strong>Uhr</strong> und<br />
00:00 <strong>Uhr</strong>.<br />
(-ß-:-ß-)<br />
Nun wird an dem gewählten Tag keine Auffahr- oder Abfahrzeit ausgeführt.<br />
Nach ca. 2 Minuten werden die Einstellungen automatisch<br />
abgespeichert und im Display wird wieder die aktuelle Tageszeit<br />
angezeigt.<br />
Die Astro-Funktion ist im Prinzip ein elektronischer Kalender. In Abhängigkeit<br />
aller gespeicherten Sonnenauf- und Sonnenuntergangszeiten<br />
wird (unter Berücksichtigung der geographischen Lage Ihres<br />
Wohnortes) eine automatische Fahrzeitkorrektur durchgeführt. Grundlage<br />
der Fahrzeitkorrektur sind die zuvor von Ihnen eingestellten Aufund<br />
Abfahrzeiten.<br />
Beispiel:<br />
Sie haben die Astro-Funktion aktiviert und zuvor folgende Auf- bzw.<br />
Abfahrzeiten gemäß Anleitung (Seiten 12 und 13) programmiert:<br />
Auffahrzeit – 0ß6:3ß0 <strong>Uhr</strong> (½ Std. vor Sonnenaufgangszeit,<br />
gemäß Diagramm Seite 22)<br />
Abfahrzeit – 1ß9:3ß0 <strong>Uhr</strong> (½ Std. vor Sonnenuntergangszeit,<br />
gemäß Diagramm Seite 22)<br />
Die aktuelle Kalenderwoche sei KW 14.<br />
In unserem Beispiel fährt der Rolladen nicht, wie programmiert, um<br />
6§= <strong>Uhr</strong> hoch, sondern zum Sonnenaufgang um ca. 7== <strong>Uhr</strong>.<br />
Am Abend fährt der Rolladen zur programmierten Zeit um 19§= <strong>Uhr</strong><br />
runter.<br />
- 19 -<br />
D<br />
D<br />
- 20 -
83100811.qxd 11.09.01 12:17 Seite 23<br />
Astro-Funktion<br />
<strong>Pro</strong>grammierung der Sonderfunktionen<br />
<strong>Pro</strong>grammierung der Sonderfunktionen<br />
Astro-Funktion<br />
Merke:<br />
Liegt die programmierte Auffahrzeit vor der Sonnenaufgangszeit,<br />
fährt der Rolladen zur Sonnenaufgangszeit (Astrozeit) hoch.<br />
Liegt die programmierte Auffahrzeit nach der Sonnenaufgangszeit,<br />
fährt der Rolladen zur programmierten Auffahrzeit hoch.<br />
Schaltungsverlauf im Laufe eines Jahres, unter Berücksichtigung von Sommer-/<br />
Winterzeit, bei einer vorgewählten Auffahrzeit von 6§= <strong>Uhr</strong> und einer Abfahrzeit von<br />
19§= <strong>Uhr</strong>. Diese Zeiten beziehen sich auf 10° östliche Länge und 50° nördliche Breite.<br />
Das entspricht etwa der geographischen Lage der Stadt Würzburg.<br />
Liegt die programmierte Abfahrzeit nach der Sonnenuntergangszeit,<br />
fährt der Rolladen zur Sonnenuntergangszeit (Astrozeit) runter.<br />
Liegt die programmierte Abfahrzeit vor der Sonnenuntergangszeit,<br />
fährt der Rolladen zur programmierten Abfahrzeit runter.<br />
- 21 -<br />
D<br />
D<br />
- 22 -
83100811.qxd 11.09.01 12:17 Seite 25<br />
Astro-Funktion<br />
<strong>Pro</strong>grammierung der Sonderfunktionen<br />
<strong>Pro</strong>grammierung der Sonderfunktionen<br />
Astro-Funktion<br />
Um die Astro-Funktion zu aktivieren, bedienen Sie sich der Tastenkombination<br />
aus Stell- und <strong>Pro</strong>grammier-Taste (P). Entfernen Sie<br />
zuvor durch leichtes Ziehen die Abdeckhaube und nehmen Sie zur<br />
Einstellung einen Kugelschreiber oder etwas in ähnlicher Form.<br />
Drücken Sie die Stell-Taste 1 x zusammen mit der <strong>Pro</strong>grammier-<br />
Taste (P) und dann die Stell-Taste allein so oft, bis folgende Anzeige<br />
im Display erscheint:<br />
(ßß0ßFßFA<br />
Sie befinden sich nun im Menüpunkt „Astro-Funktion“.<br />
Drücken Sie nun die Auf-Taste, „ 0ßn“ erscheint im Display, die Astrozeit<br />
ist nun aktiviert. Jetzt sollten Sie die Steuerung auf die individuelle<br />
geographische Lage einstellen, da die Zeit von Sonnenaufgang und<br />
Sonnenuntergang auch davon abhängig ist, wo sich Ihr Wohnort befindet.<br />
Drücken Sie nun bei Anzeige „ 0ßn“ im Display die <strong>Pro</strong>grammier-<br />
Taste (P) einmal. Folgende Anzeige erscheint im Display:<br />
(1ßßß0ß3A<br />
Stellen Sie mit der Auf-Taste mittels der auf Seite 24 aufgeführten<br />
Tabelle Ihr Wohngebiet ein.<br />
- 23 -<br />
D<br />
D<br />
Code Gebiet<br />
1 Schleswig-Holstein, Nord-Niedersachsen<br />
2 Mecklenburg-Vorpommern<br />
3 Nordrhein-Westfalen, Süd-Niedersachsen<br />
4 Brandenburg, Sachsen-Anhalt<br />
5 Rheinland-Pfalz, Saarland, Hessen<br />
6 Sachsen, Thüringen<br />
7 Baden-Württemberg<br />
8 Bayern<br />
9 Skandinavien<br />
10 Großbritannien<br />
11 Nord-Frankreich, Benelux<br />
12 Deutschland<br />
13 Süd-Frankreich<br />
14 Schweiz, Österreich, Nord-Italien<br />
15 Spanien<br />
16 Süd-Italien, Sizilien, Korsika, Sardinien<br />
- 24 -
83100811.qxd 11.09.01 12:17 Seite 27<br />
Astro-Funktion<br />
<strong>Pro</strong>grammierung der Sonderfunktionen<br />
<strong>Pro</strong>grammierung der Sonderfunktionen<br />
Astro-Funktion<br />
Sollten Sie mit den werksseitig programmierten Astrozeiten nicht<br />
zufrieden sein, so haben Sie die Möglichkeit, diese Zeiten +/- 59<br />
Minuten zu korrigieren. Drücken Sie die Stell-Taste 1 x zusammen mit<br />
der <strong>Pro</strong>grammier-Taste (P) und dann die Stell-Taste allein so oft, bis<br />
folgende Anzeige im Display erscheint:<br />
(ßßßßOßNA<br />
Dann drücken Sie 2 x die <strong>Pro</strong>grammier-Taste (P) und im Display<br />
erscheint folgende Anzeige:<br />
o2ßßß0ß0A<br />
Sie befinden sich nun im <strong>Pro</strong>gramm „Astro-Funktion“ – Untermenü<br />
„Korrekturzeit Astrozeit Auf“.<br />
Stellen Sie nun mit der Auf-Taste die Zeit in Minuten ein, welche zu<br />
der Astrozeit hinzugerechnet wird, mit der Ab-Taste – negative<br />
Anzeige – stellen Sie die Zeit ein, welche von der Astrozeit abgerechnet<br />
werden soll. Zur Einstellung der Korrekturzeiten der Abfahrzeiten<br />
drücken Sie nochmals die <strong>Pro</strong>grammier-Taste (P) und verfahren<br />
wie oben beschrieben.<br />
Sollten Sie wünschen, dass an einem bestimmten Tag der Woche der<br />
Rolladen nicht zu einer Astrozeit öffnet und schließt, haben Sie die<br />
Möglichkeit, diesen gewünschten Tag aus der <strong>Pro</strong>grammierung herauszunehmen<br />
und an diesem Wochentag die von Ihnen eingestellten<br />
Auf- und Abfahrzeiten berücksichtigen zu lassen. HINWEIS: Dieser<br />
Menüschritt ist nur anwählbar, wenn zuvor die Wochen-Funktion aktiviert<br />
wurde (siehe Seiten 18 und 19).<br />
Drücken Sie die Stell-Taste 1 x zusammen mit der <strong>Pro</strong>grammier-<br />
Taste (P) und dann die Stell-Taste allein so oft, bis folgende Anzeige<br />
im Display erscheint:<br />
(!ßßßOßNA<br />
Sie befinden sich nun im Menüpunkt „Astro-Wochentag-Abwahl“.<br />
Durch Drücken der <strong>Pro</strong>grammier-Taste (P) wählen Sie nun den<br />
Wochentag, welcher nicht nach den programmierten Astrozeiten<br />
schalten soll und drücken danach einmal die Auf-Taste. Das Display<br />
zeigt nun „0ßfßf“ und die Schaltzeiten des gewählten Wochentages<br />
basieren auf den von Ihnen eingestellten Auf- und Abfahrzeiten.<br />
Nach ca. 2 Minuten werden die Einstellungen automatisch abgespeichert<br />
und im Display wird wieder die aktuelle Tageszeit angezeigt.<br />
- 25 - D<br />
D<br />
- 26 -
83100811.qxd 11.09.01 12:17 Seite 29<br />
Motorlaufzeit<br />
<strong>Pro</strong>grammierung der Sonderfunktionen<br />
<strong>Pro</strong>grammierung der Sonderfunktionen<br />
Wende-Funktion<br />
Die werksseitige Einstellung der Motorlaufzeit beträgt 120 Sekunden.<br />
Über den <strong>Pro</strong>grammpunkt Einstellung Motorlaufzeit haben Sie die<br />
Möglichkeit, die Motorlaufzeit von 3 Sekunden bis 120 Sekunden einzustellen.<br />
Drücken Sie die Stell-Taste 1 x zusammen mit der <strong>Pro</strong>grammier-<br />
Taste (P) und dann die Stell-Taste allein so oft, bis folgende Anzeige<br />
im Display erscheint:<br />
(=ß1ß2ß0)<br />
Sie befinden sich nun im Menüpunkt „Motorlaufzeit“.<br />
Durch Drücken der Auf-Taste stellen Sie nun die Zeit in Sekunden<br />
ein, welche der Rolladen insgesamt abfahren soll.<br />
Nach ca. 2 Minuten werden die Einstellungen automatisch abgespeichert<br />
und im Display wird wieder die aktuelle Tageszeit angezeigt.<br />
Die Wende-Funktion bewirkt, dass der Rolladen, nachdem er zur programmierten<br />
Zeit automatisch heruntergefahren ist, für kurze Zeit<br />
wieder hochfährt (z.B. zur Belüftung oder als Öffnung für Haustiere).<br />
Die Wendezeit ist einstellbar von 0,0 bis 20 Sekunden und wird im<br />
Automatikbetrieb zu den programmierten Tages-, Wochen- und Astro-<br />
Abfahrzeiten ausgeführt.<br />
Wichtig: Erst nach Ablauf des Abfahr-Impulses wird die Wende-<br />
Funktion eingeleitet.<br />
Drücken Sie die Stell-Taste 1 x zusammen mit der <strong>Pro</strong>grammier-<br />
Taste (P) und dann die Stell-Taste allein so oft, bis folgende Anzeige<br />
im Display erscheint:<br />
(0ß0:0ßßr K K<br />
Anzeige: Sek. !ß10 Sek.<br />
Sie befinden sich nun im Menüpunkt „Wende-Funktion“.<br />
Durch Drücken der Auf-Taste stellen Sie nun die Zeit in Sekunden ein,<br />
welche der Rolladen nach dem Abfahrbefehl wieder auffahren soll.<br />
Nach ca. 2 Minuten werden die Einstellungen automatisch abgespeichert<br />
und im Display wird wieder die aktuelle Tageszeit angezeigt.<br />
- 27 - D<br />
D<br />
- 28 -
83100811.qxd 11.09.01 12:17 Seite 31<br />
Hinweise für den Elektrofachbetrieb<br />
Installation<br />
Installation<br />
Hinweise für den Elektrofachbetrieb<br />
Einbau und Grundeinstellungen:<br />
1. Betriebsspannung abschalten.<br />
2. Tragrahmenanschlussklemme gemäß Anschlussplan (siehe Seite 32)<br />
anschließen.<br />
Achtung: Beim Anschluss sind die geltenden VDE-Bestimmungen,<br />
insbesondere DIN VDE 0100/0700 sowie die<br />
geltenden Vorschriften der örtlichen EVU und UVV<br />
zu beachten.<br />
3. Tragrahmen in die Unterputzdose montieren.<br />
4. Kombinationsrahmen vorsichtig auf den Tragrahmen schieben, sodass<br />
die Zentrierstifte des Tragrahmens den Rahmen mittig fixieren.<br />
5. Grundgehäuse in den Tragrahmen schieben.<br />
6. Betriebsspannung einschalten und Reset-Taste drücken.<br />
7. Überprüfen, ob die Motorlaufrichtung mit den Richtungstasten übereinstimmt.<br />
Liegt keine Übereinstimmung vor, Klemmen 4 und 5 vertauschen.<br />
Wichtig: Eine parallele Ansteuerung von mehreren Rolladen-<br />
Antriebsmotoren lässt sich nur über Trennrelais bzw. Gruppensteuergeräte<br />
realisieren.<br />
Ferner ist zu berücksichtigen, dass die Rolladensteuerung<br />
<strong>Vestamatic</strong> <strong>Rolltec</strong> <strong>Pro</strong> ca. 1 Stunde am Netz angeschlossen<br />
sein muss, damit alle Speicherfunktionen störungsfrei<br />
arbeiten.<br />
Passende Abdeckrahmen sind in folgenden Ausführungen der Marke<br />
Jung „CD 500“, alpinweiß, lieferbar:<br />
Kombinationsrahmen 1-fach, Artikel-Nr. 01400201<br />
Kombinationsrahmen 2-fach, Artikel-Nr. 01400202<br />
Kombinationsrahmen 3-fach, Artikel-Nr. 01400203<br />
Kombinationsrahmen 4-fach, Artikel-Nr. 01400204<br />
Kombinationsrahmen 5-fach, Artikel-Nr. 01400205<br />
Zur Aufputzmontage verwenden<br />
Sie bitte unser Aufputzgehäuse, Artikel-Nr. 01030753<br />
Zur Ansteuerung von 2 Antrieben empfehlen wir unsere Trennrelais:<br />
Trennrelais TR N2S, Artikel-Nr. 01054220<br />
Trennrelais TR N2A, Artikel-Nr. 01054120.<br />
- 29 - D<br />
D<br />
- 30 -
83100811.qxd 11.09.01 12:17 Seite 33<br />
Montageanleitung / Technische Daten<br />
Installation<br />
Installation<br />
Anschlussplan<br />
Montageanleitung<br />
Technische Daten<br />
Betriebsspannung: 230 VW, 50 Hz<br />
Leistungsaufnahme: 2 W<br />
Ausgang (Auf/Ab): 230 VW, 50 Hz<br />
Schaltleistung: 3A, 230 VW, 50 Hz, cos f > 0,8<br />
Schaltzeit:<br />
3 – 120 Sekunden<br />
Betriebstemperaturbereich: 0 – 40 °C<br />
Technische Änderungen vorbehalten!<br />
- 31 - D<br />
D<br />
- 32 -
83100811.qxd 11.09.01 12:17 Seite 35<br />
Anschlussbild<br />
Übersicht Bedienungselemente<br />
<strong>Vestamatic</strong> <strong>Rolltec</strong> <strong>Pro</strong><br />
<strong>Vestamatic</strong> <strong>Rolltec</strong> <strong>Pro</strong><br />
- 33 - D D<br />
- 34 -
83100811.qxd 11.09.01 12:17 Seite 37<br />
<strong>Rolltec</strong> <strong>Pro</strong><br />
Congratulations for buying the <strong>Vestamatic</strong> <strong>Rolltec</strong> <strong>Pro</strong> roller shutter control. You<br />
have purchased a high-quality product that features many practical programming<br />
options and has been manufactured according to the highest quality standards which<br />
will guarantee optimum efficiency and reliability. Please take the time to read these<br />
operating instructions carefully before starting up. We have tried to make sure that all<br />
programming instructions are easy to understand.<br />
Safety precautions<br />
· Check the control for any signs of damage immediately after unpacking. Do not<br />
start up the control in case there is any damage. If there is damage due to the<br />
shipping, please notify the supplier immediately.<br />
· Please note that the <strong>Vestamatic</strong> <strong>Rolltec</strong> <strong>Pro</strong> roller shutter control requires<br />
an operating voltage of 230 VW, 50 Hz. Make sure to contact a professional electrician<br />
for the installation.<br />
· The control was designed for correct use as described in the operating instructions.<br />
Any changes or modifications thereof are not permissible and result in loss<br />
of all warranty claims.<br />
· If safe operation of control or roller shutter can not be guaranteed, the <strong>Vestamatic</strong><br />
<strong>Rolltec</strong> <strong>Pro</strong> must be turned off immediately and protected against unintentional<br />
operation. The same applies for work on windows or roller shutters that are operated<br />
by this control.<br />
Installation and Operating Instructions<br />
G<br />
- 36 -
83100811.qxd 11.09.01 12:17 Seite 39<br />
Introduction General page 39<br />
Manual mode page 40<br />
Automatic mode page 41<br />
Contents<br />
Contents<br />
Installation Notes for professional electricians page 63 – 64<br />
Installation instructions / Technical data page 65<br />
Wiring diagram page 66<br />
<strong>Pro</strong>gramming General page 42<br />
the basic Summer/winter time page 43<br />
functions Current time page 44<br />
Note page 45<br />
Up time page 46<br />
Down time page 47<br />
Random generator page 48<br />
Overview operating elements<br />
Wiring diagram<br />
Inside back cover<br />
Back cover<br />
<strong>Pro</strong>gramming General page 49<br />
the special Basic settings page 50 – 51<br />
functions Week function page 52 – 53<br />
Astro function page 54 – 60<br />
Motor run time page 61<br />
Reverse function page 62<br />
- 37 - G<br />
G<br />
- 38 -
83100811.qxd 11.09.01 12:17 Seite 41<br />
General<br />
Introduction<br />
Introduction<br />
Manual mode<br />
The <strong>Vestamatic</strong> <strong>Rolltec</strong> <strong>Pro</strong> roller shutter control is used for the<br />
manual and automatic mode of electrically driven roller shutters. Its<br />
numerous functions can be customised to your personal requirements.<br />
The delivery extent of the <strong>Vestamatic</strong> <strong>Rolltec</strong> <strong>Pro</strong> roller shutter control<br />
includes the following items:<br />
1. Cover cap<br />
2. Basic housing<br />
3. Supporting frame basic housing<br />
4. Combination frame one-fold – Jung “CD 500”, alpine-white<br />
In case of power failure, the previously programmed times remain<br />
stored for 6 hours. During that time, the display does not indicate.<br />
After the line voltage has been restored, the <strong>Vestamatic</strong> <strong>Rolltec</strong> <strong>Pro</strong><br />
roller shutter control automatically fast forwards to the current time. If<br />
a power failure lasts 6 hours, the readjusting process can take up to<br />
4 minutes. The roller shutter control is not ready for operation during<br />
the readjusting process.<br />
The last pending up or down command during power failures will be<br />
executed after the current time is readjusted.<br />
The <strong>Vestamatic</strong> <strong>Rolltec</strong> <strong>Pro</strong> roller shutter control features a selector<br />
button with which manual mode (MAN) or automatic mode (AUTO)<br />
can be selected.<br />
Press the selector button until the display indicates (MAN) in order to<br />
activate the manual mode.<br />
All automatic functions are now disabled. Pressing the up or down<br />
button will move the roller shutters up or down.<br />
Simply press the opposite button to stop the motion, i.e.:<br />
· press the down button, if the roller shutter is moving up,<br />
· press the up button, if the roller shutter is moving down.<br />
Accurate positioning of the roller shutter is guaranteed because the<br />
roller shutter will only move up or down again after the up or down<br />
button has been pressed.<br />
- 39 - G<br />
G<br />
- 40 -
83100811.qxd 11.09.01 12:17 Seite 43<br />
Automatic mode<br />
Introduction<br />
<strong>Pro</strong>gramming the basic functions<br />
General<br />
Press the selector button until the display indicates (AUTO) in order<br />
to activate the automatic mode.<br />
The automatic mode is now activated and the roller shutter will move<br />
up and down at the programmed times. Regardless of the programmed<br />
times, it is still possible to move the roller shutter up and<br />
down by pressing the up or down button and the programming<br />
remains unaffected.<br />
If you press the up or down button longer than 2 seconds, the roller<br />
shutter moves up or down.<br />
Simply press the opposite button to stop the motion, i.e.:<br />
· press the down button, if the roller shutter is moving up,<br />
· press the up button, if the roller shutter is moving down.<br />
The roller shutter will only move up or down again after the up or<br />
down button has been pressed.<br />
By simply setting the selector button to manual mode (MAN), the<br />
automatic mode can be interrupted for an extended period of time.<br />
After selecting automatic mode again, the <strong>Vestamatic</strong> <strong>Rolltec</strong> <strong>Pro</strong><br />
roller shutter control will execute the last pending command from the<br />
automatic mode. The last pending command will also be executed<br />
when resetting after power failure.<br />
After the installation has been completed correctly (for instructions<br />
please see pages 63 to 66), you can start programming. All featured<br />
functions are now ready to be operated.<br />
Important: Please note that the <strong>Vestamatic</strong> <strong>Rolltec</strong> <strong>Pro</strong> roller shutter<br />
control cannot be programmed in case of power failure.<br />
Carefully pull to remove the cover cap and press the reset button with<br />
a ball-point pen or something else suitable.<br />
Pressing the reset button will activate default times pre-programmed<br />
by the manufacturer. Also press the reset button, if you want to enter<br />
completely new settings or delete the existing data for some other<br />
reason.<br />
Times pre-programmed by the manufacturer:<br />
· Current time – 0ß8:0ß0<br />
· Up time – 0ß6:0ß0<br />
· Down time – 2ß0:0ß0<br />
On the following pages, you will find instructions how to customize<br />
these times to your personal requirements.<br />
- 41 - G<br />
G<br />
- 42 -
83100811.qxd 11.09.01 12:17 Seite 45<br />
Summer/winter time<br />
<strong>Pro</strong>gramming the basic functions<br />
<strong>Pro</strong>gramming the basic functions<br />
Current time<br />
The display will indicate which time has been set.<br />
The (S) in the upper left hand corner of the display stands for summer<br />
time.<br />
(0S9:0ß0)<br />
The (W) in the upper right hand corner of the display stands for winter<br />
time (manufacturer setting).<br />
(0ß8:0W0)<br />
By operating the combination of set and time button you can set the<br />
current time.<br />
Setting the time can be performed as follows:<br />
1. Press the set button first and keep it pressed, then:<br />
A. Press the time button and keep it pressed to fast forward the<br />
time.<br />
B. Shortly tap the time button to slow forward the time.<br />
or<br />
2. Press the time button first and keep it pressed, then:<br />
A. Press the set button and keep it pressed to fast reverse the<br />
time.<br />
B. Shortly tap the set button to slow reverse the time.<br />
If the present setting is incorrect and does not correspond with the<br />
current time, you can simply update the time by pressing the summer/<br />
winter button. The selected setting will appear in the display and the<br />
time will be changed by one hour.<br />
- 43 - G<br />
G<br />
- 44 -
83100811.qxd 11.09.01 12:17 Seite 47<br />
Note<br />
<strong>Pro</strong>gramming the basic functions<br />
<strong>Pro</strong>gramming the basic functions<br />
Up time<br />
The <strong>Vestamatic</strong> <strong>Rolltec</strong> <strong>Pro</strong> roller shutter control is delivered with the<br />
following manufacturer’s default up and down times:<br />
· Daily up time – 0ß8:0ß0 p.m.<br />
· Daily down time – 2ß0:0ß0 a.m.<br />
Important: It is important to set the control to the automatic mode in<br />
order to be able to perform the following programming<br />
steps. Check the current setting. The display will indicate<br />
(AUTO). If (MAN) is indicated, press the selector button<br />
once to switch the control to the automatic mode (AUTO).<br />
By operating the combination of set and up button you can set the<br />
up time.<br />
Setting the up time can be performed as follows:<br />
1. Press the set button first and keep it pressed, then:<br />
A. Press the up button and keep it pressed to fast forward the<br />
up time.<br />
B. Shortly tap the up button to slow forward the up time.<br />
or<br />
2. Press the up button first and keep it pressed, then:<br />
A. Press the set button and keep it pressed to fast reverse the up<br />
time.<br />
B. Shortly tap the set button to slow reverse the up time.<br />
The display will now indicate the set value. Once the programming<br />
buttons are no longer operated, the display will indicate the current<br />
time again. Tapping the up button will check the set value and the display<br />
will again indicate the previously set up time. After approx. 3 seconds,<br />
the display will indicate the current time again.<br />
- 45 - G<br />
G<br />
- 46 -
83100811.qxd 11.09.01 12:17 Seite 49<br />
Down time<br />
<strong>Pro</strong>gramming the basic functions<br />
<strong>Pro</strong>gramming the basic functions<br />
Random generator<br />
By operating the combination of set and down button you can set the<br />
down time.<br />
Setting the down time can be performed as follows:<br />
1. Press the set button first and keep it pressed, then:<br />
A. Press the down button and keep it pressed to fast forward the<br />
down time.<br />
B. Shortly tap the down button to slow forward the down time.<br />
or<br />
2. Press the down button first and keep it pressed, then:<br />
A. Press the set button and keep it pressed to fast reverse the<br />
down time.<br />
B. Shortly tap the set button to slow reverse the down time.<br />
The display will now indicate the set value. Once the programming<br />
buttons are no longer operated, the display will indicate the current<br />
time again. Tapping the down button will check the set value and the<br />
display will again indicate the previously set down time. After approx.<br />
3 seconds, the display will indicate the current time again.<br />
The random generator generates the so-called random time which<br />
causes the roller shutters to move up or down with a deviation of<br />
+/-15 minutes to the previously programmed times(*).<br />
The “randomly” moving up and down roller shutters give the impression<br />
of an inhabited house and thus provide additional protection in<br />
case the house owner is absent for an extended period of time.<br />
Simply press the random button (Z) to activate the random generator.<br />
The display will now indicate<br />
a (Z) in the upper right hand<br />
corner.<br />
(0ß8:0ß0Z<br />
Note: The random generator will disable any previously set reverse<br />
function (please see page 62).<br />
Press the random button (Z) again to deactivate the random generator.<br />
The random generator is now turned off, the (Z) in the display will<br />
disappear and the roller shutter will move up and down accurately at<br />
the times you have previously programmed.<br />
(*)Annotation: If the Astro function is activated, the times will deviate<br />
by +/-15 minutes from the actual sunrise and sunset<br />
times.<br />
- 47 - G<br />
G<br />
- 48 -
83100811.qxd 11.09.01 12:17 Seite 51<br />
General<br />
<strong>Pro</strong>gramming the special functions<br />
<strong>Pro</strong>gramming the special functions<br />
Basic settings<br />
The <strong>Vestamatic</strong> <strong>Rolltec</strong> <strong>Pro</strong> roller shutter control features numerous<br />
additional programs which help to program according to your individual<br />
perferences.<br />
Have a ball-point pen ready for the following settings and carefully pull<br />
to remove the cover cap of the <strong>Vestamatic</strong> <strong>Rolltec</strong> <strong>Pro</strong>.<br />
The following described programming of the special functions is structured<br />
in such a way that it allows individual programming of each special<br />
function. If you want to perform all special functions consecutively,<br />
activate the programming mode by pressing set and programming<br />
(P) button simultaneously. Within the programming mode you can<br />
change to the next setting program by pressing the set button once.<br />
For the initial programming, we recommend to program each menu<br />
option individually as described on the following pages. Pressing the<br />
time button will exit and store the programming.<br />
For all additional special programs, it is necessary to preset the current<br />
day of the week as well as the current calendar week:<br />
<strong>Pro</strong>gramming the day of the week<br />
Press set and programming button (P) simultaneously. Then repeat<br />
pressing only the set button until the display indicates the following:<br />
(!ßßßßß1)<br />
This is the menu option “setting day of the week”.<br />
Press the up button repeatedly until the display indicates the current<br />
day of the week.<br />
After approx. 2 minutes, the setting will be automatically stored and<br />
the display will indicate the current time again.<br />
- 49 - G<br />
G<br />
- 50 -
83100811.qxd 11.09.01 12:17 Seite 53<br />
Basic settings<br />
<strong>Pro</strong>gramming the special functions<br />
<strong>Pro</strong>gramming the special functions<br />
Week function<br />
<strong>Pro</strong>gramming the calendar week<br />
Press set and programming button (P) simultaneously. Then repeat<br />
pressing only the set button until the display indicates the following:<br />
(ßßßß0W1)<br />
This is the menu option “setting calendar week”.<br />
Press the up button repeatedly until the display indicates the current<br />
calendar week.<br />
After approx. 2 minutes the setting will be automatically stored and<br />
the display will indicate the current time again.<br />
The week function enables you to program a particular up and down<br />
time for each individual day of the week.<br />
Press set and programming button (P) simultaneously. Then repeat<br />
pressing only the set button until the display indicates the following:<br />
(!“D$f&v)<br />
This is the menu option “week function”.<br />
Press the up button. The display will indicate “0ßn” and the week function<br />
is now activated.<br />
Press the programming button (P) once in order to start setting the<br />
up and down times for weekdays with a Monday. The up time can now<br />
be changed by pressing the up and down button. Press the programming<br />
button (P) once in order to set the down time. The display<br />
will indicate the default down time which you can change to your preference<br />
by pressing the up and down button.<br />
- 51 - G<br />
G<br />
- 52 -
83100811.qxd 11.09.01 12:17 Seite 55<br />
Week function<br />
<strong>Pro</strong>gramming the special functions<br />
<strong>Pro</strong>gramming the special functions<br />
Astro function<br />
The following times were preset for this operation mode by the manufacturer:<br />
· Up time – 0ß8:0ß0<br />
· Down time – 2ß0:0ß0<br />
Press the programming button (P) once again and repeat the previously<br />
described setting in order to change the up or down times to<br />
the next weekday.<br />
If you want one particular weekday not to have any up or down times,<br />
deactivate the up or down time by changing the corresponding times<br />
until the display indicates the following:<br />
(-ß-:-ß-)<br />
The deactivated time is now set in between 23:59 and 00:00 and no<br />
up or down time will be displayed for the selected weekday. After<br />
approx. 2 minutes the settings will be automatically stored and the<br />
display will indicate the current time again.<br />
The Astro function is basically an electronical calendar. Depending on<br />
the stored sunrise and sunset times, the up or down times are automatically<br />
corrected under consideration of the geographical location<br />
of your residence. This correction is based on the up or down times<br />
you previously set.<br />
Example:<br />
You have activated the Astro function and previously programmed the<br />
following up and down times according to the instructions on page 46<br />
and page 47:<br />
Up time – 0ß6:3ß0 (½ an hour before sunrise according to<br />
the diagram on page 56)<br />
Down time – 1ß9:3ß0 (½ an hour before sunset according to<br />
the diagram on page 56)<br />
Given the current calendar week 14.<br />
In this example, the roller shutter does not move up at 6:30, as programmed<br />
but moves up at 7:00 when the sun rises.<br />
In the evening, it moves down at 19:30 at the programmed time.<br />
- 53 - G<br />
G<br />
- 54 -
83100811.qxd 11.09.01 12:17 Seite 57<br />
Astro function<br />
<strong>Pro</strong>gramming the special functions<br />
<strong>Pro</strong>gramming the special functions<br />
Astro function<br />
Note:<br />
If the up time is programmed before sunrise, the roller shutter moves<br />
up at sunrise (sunrise/sunset time).<br />
If the up time is programmed after sunrise, the roller shutter moves<br />
up at the programmed up time.<br />
Below the switching sequence is presented in the course of an entire year under consideration<br />
of summer/winter time, at an up time preset at 6:30 and a down time preset<br />
at 19:30. These times relate to 10° of eastern longitude and 50° of northern latitude<br />
which corresponds to the geographical location of the city of Würzburg.<br />
If the down time is programmed after sunset, the roller shutter moves<br />
down at sunset (sunrise/sunset time).<br />
If the down time is programmed before sunset, the roller shutter moves<br />
down at the programmed down time.<br />
- 55 - G G<br />
- 56 -
83100811.qxd 11.09.01 12:17 Seite 59<br />
Astro function<br />
<strong>Pro</strong>gramming the special functions<br />
<strong>Pro</strong>gramming the special functions<br />
Astro function<br />
Press set and programming button (P) to activate the Astro function.<br />
Carefully pull to remove the cover cap and use a ball-point pen or<br />
something similar to perform the settings.<br />
Activate the Astro function by pressing the set and programming button<br />
(P) simultaneously. Then repeat pressing only the set button until the<br />
display indicates the following:<br />
(ßß0ßFßFA<br />
This is the menu option “Astro function”.<br />
Press the up button to activate the Astro function. The display will then<br />
indicate “ 0ßn”, the Astro function is activated. Since sunrise and sunset<br />
depend on the location of your residence, you should now set the<br />
control to the individual geographical location.<br />
With the display indicating “ 0ßn”, press the programming button (P)<br />
once. The display will indicate the following:<br />
(1ßßß0ß3A<br />
Set your geographical location according to the table on page 58 by<br />
pressing the up button.<br />
- 57 - G G<br />
Code Area<br />
1 Schleswig-Holstein, Northern Lower-Saxony<br />
2 Mecklenburg-Vorpommern<br />
3 North-Rhine Westphalia, Southern Lower-Saxony<br />
4 Brandenburg, Saxony-Anhalt<br />
5 Rhineland-Palatinate, Saarland, Hesse<br />
6 Saxony, Thuringia<br />
7 Baden-Württemberg<br />
8 Bavaria<br />
9 Scandinavia<br />
10 Great Britain<br />
11 Northern France, Benelux<br />
12 Germany<br />
13 Southern France<br />
14 Switzerland, Austria, Northern Italy<br />
15 Spain<br />
16 Southern Italy, Sicily, Corsica, Sardinia<br />
- 58 -
83100811.qxd 11.09.01 12:17 Seite 61<br />
Astro function<br />
<strong>Pro</strong>gramming the special functions<br />
<strong>Pro</strong>gramming the special functions<br />
Astro function<br />
If you want to change the sunrise/sunset times programmed by the<br />
manufacturer, you have the option to correct theses times by +/- 59<br />
minutes. Press set and programming button (P) simultaneously.<br />
Then repeat pressing only the set button until the display indicates<br />
the following:<br />
(ßßßßOßNA<br />
Then press the programming button (P) twice and the display will<br />
indicate the following:<br />
o2ßßß0ß0A<br />
This is the submenu “corrected sunrise time up” of the program “Astro<br />
function”.<br />
Press the up button to set the minutes which shall be added to the<br />
sunrise time and the down button to set the minutes which shall be<br />
substracted from the sunset time. Press the programming button (P)<br />
again and perform the corresponding steps as described above to set<br />
the corrected down times.<br />
If you want the roller shutter not to open and close at sunrise/sunset<br />
on a particular day of the week, you have the option to take this day<br />
out of the programming and instead use the previously set up or down<br />
times for this day of the week. NOTE: You must activate the week<br />
function before you can apply this menu option (please see pages 52<br />
and 53).<br />
Press set and programming button (P) simultaneously. Then repeat<br />
pressing only the set button until the display indicates the following:<br />
(!ßßßOßNA<br />
This is the menu option “cancel Astro weekday”.<br />
Press the programming button (P) to select the weekday that shall<br />
be taken out of the programmed sunrise/sunset times and press the<br />
up button once. The display will now indicate “ 0ßfßf” and the switching<br />
times of the selected weekday are now based on the set up and down<br />
times.<br />
After approx. 2 minutes the display switches to the current time and<br />
the roller shutter control switches to the programmed up and down<br />
times.<br />
- 59 - G<br />
G<br />
- 60 -
83100811.qxd 11.09.01 12:17 Seite 63<br />
Motor run time<br />
<strong>Pro</strong>gramming the special functions<br />
<strong>Pro</strong>gramming the special functions<br />
Reverse function<br />
The motor run time is set to 120 seconds by the manufacturer. With<br />
the program option “set motor run time” you can set the motor run<br />
time variably from 3 seconds to 120 seconds.<br />
Press set and programming button (P) simultaneously. Then repeat<br />
pressing only the set button until the display indicates the following:<br />
(=ß1ß2ß0)<br />
This is the menu option “motor run time”.<br />
By pressing the up button you can set the time in seconds at which<br />
the roller shutter shall move down.<br />
After approx. 2 minutes the display switches to the current time and<br />
the roller shutter control switches to the programmed up and down<br />
times.<br />
After the roller shutter has moved down at the programmed time, the<br />
reverse function causes it to shortly move up for airing purposes or to<br />
let pets go outside.<br />
The reverse time can be variably set between 0.0 and 20 seconds<br />
and will be executed in the automatic operation at the programmed<br />
times of the day, week and sunrise/sunset.<br />
Important: The reverse function will only be activated after the down<br />
pulse is released.<br />
Press set and programming button (P) simultaneously. Then repeat<br />
pressing only the set button until the display indicates the following:<br />
(0ß0:0ßßr K K<br />
display: sec. !ß10 sec.<br />
This is the menu option “reverse function”.<br />
Press the up button to set the time in seconds at which the roller<br />
shutter shall move up again after the down command.<br />
After approx. 2 minutes the display switches to the current time and the<br />
roller shutter control switches to the programmed up and down times.<br />
- 61 - G<br />
G<br />
- 62 -
83100811.qxd 11.09.01 12:17 Seite 65<br />
Notes for professional electricians<br />
Installation<br />
Installation<br />
Notes for professional electricians<br />
Installation and basic settings:<br />
1. Switch off the power supply.<br />
2. Connect the supporting frame terminal according to the wiring diagram<br />
(see page 66).<br />
Attention: Currently valid VDE standards must be observed<br />
when connecting the device, in particular DIN VDE<br />
0100/0700 as well as the currently valid regulations<br />
of your local power company and accident prevention<br />
regulations.<br />
3. Mount the supporting frame in the flush-type box.<br />
4. Slide the combination frame carefully in the supporting frame so that<br />
the centring pins of the supporting frame fix the frame in the centre.<br />
5. Slide the basic housing in the supporting frame.<br />
6. Switch on the power supply and press the reset button.<br />
7. Check, if the direction of the motor rotation corresponds with the<br />
direction buttons. If not, exchange terminal 4 with terminal 5.<br />
Important: Parallel control of several roller shutter drive motors can<br />
only be implemented by means of isolating relays or<br />
group control devices.<br />
For trouble-free operation of all storing functions, it is<br />
necessary that the <strong>Vestamatic</strong> <strong>Rolltec</strong> <strong>Pro</strong> roller shutter<br />
control is connected to the line voltage for approx. 1 hour.<br />
The following versions of cover frame Jung “CD 500”, alpine-white,<br />
are available:<br />
Combination frame one-fold, article-no. 01400201<br />
Combination frame two-fold, article-no. 01400202<br />
Combination frame three-fold, article-no. 01400203<br />
Combination frame four-fold, article-no. 01400204<br />
Combination frame five-fold, article-no. 01400205<br />
For surface-type installation<br />
please use our surface-type housing, article-no. 01030753<br />
For controlling two drives, we recommend our isolating relays:<br />
Isolating relays TR N2S, article-no. 01054220<br />
Isolating relays TR N2A, article-no. 01054120.<br />
- 63 - G<br />
G<br />
- 64 -
83100811.qxd 11.09.01 12:17 Seite 67<br />
Installation instructions / Technical data<br />
Installation<br />
Installation<br />
Wiring diagram<br />
Installation instructions<br />
Technical data<br />
Power supply: 230 VW, 50 Hz<br />
Rated power:<br />
2 W<br />
Output (up/down): 230 VW, 50 Hz<br />
Maximum load: 3A, 230 VW, 50 Hz, cos f > 0.8<br />
Switching time: 3 – 120 seconds<br />
Operating temperature: 0 °C (32 °F) to +40 °C (104 °F)<br />
All technical data is subject to change!<br />
- 65 - G<br />
G<br />
- 66 -
83100811.qxd 11.09.01 12:17 Seite 69<br />
Notizen / Notes<br />
Übersicht Bedienungselemente / Overview operating elements<br />
<strong>Vestamatic</strong> <strong>Rolltec</strong> <strong>Pro</strong><br />
D G<br />
D G
83100811.qxd 11.09.01 12:17 Seite 71<br />
Anschlussbild / Wiring diagram<br />
<strong>Vestamatic</strong> <strong>Rolltec</strong> <strong>Pro</strong><br />
Art.-Nr.: 83100811 H1<br />
D G