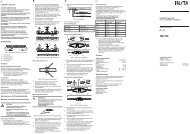
LEDLUX® linear LX Sicherheitshinweise ... - Insta Elektro GmbH
LEDLUX® linear LX Sicherheitshinweise ... - Insta Elektro GmbH
LEDLUX® linear LX Sicherheitshinweise ... - Insta Elektro GmbH

Erfolgreiche ePaper selbst erstellen
Machen Sie aus Ihren PDF Publikationen ein blätterbares Flipbook mit unserer einzigartigen Google optimierten e-Paper Software.
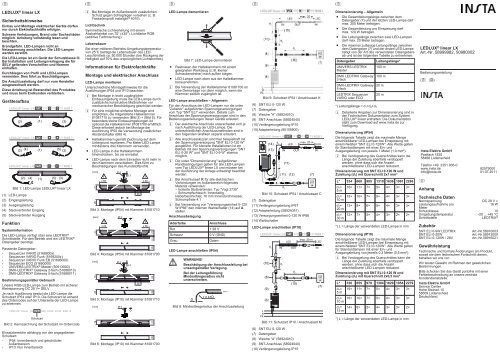
LEDLUX ® <strong>linear</strong> <strong>LX</strong><br />
<strong>Sicherheitshinweise</strong><br />
Einbau und Montage elektrischer Geräte dürfen<br />
nur durch <strong>Elektro</strong>fachkräfte erfolgen.<br />
Schwere Verletzungen, Brand oder Sachschäden<br />
möglich. Anleitung vollständig lesen und<br />
beachten.<br />
Brandgefahr. LED-Lampen nicht an<br />
Netzspannung anschließen. Die LED-Lampen<br />
werden zerstört.<br />
Die LED-Lampe ist ein Gerät der Schutzklasse III.<br />
Bei <strong>Insta</strong>llation und Leitungsverlegung die für<br />
SELV geltenden Vorschriften und Normen<br />
einhalten.<br />
Durchbiegen von Profil und LED-Lampen<br />
vermeiden. Dies führt zu Beschädigungen.<br />
Die Anschlussleitung darf nur vom Hersteller<br />
ausgewechselt werden.<br />
Diese Anleitung ist Bestandteil des Produktes<br />
und muss beim Endkunden verbleiben.<br />
Geräteaufbau<br />
LEDLUX ® <strong>linear</strong> <strong>LX</strong> IP54 ??? K??? K??? RGB ?<br />
(2) (1) (3)<br />
LEDLUX ® <strong>linear</strong> <strong>LX</strong> IP54 ??? C??? C??? RGB ?<br />
(2) (4)<br />
(1)<br />
(5)<br />
(3)<br />
LEDLUX ® <strong>linear</strong> <strong>LX</strong> IP10 ??? M??? M??? RGB ?<br />
(2) (4) (1) (5) (3)<br />
Bild 1: LED-Lampe LEDLUX ® <strong>linear</strong> <strong>LX</strong><br />
(1) LED-Lampe<br />
(2) Eingangsleitung<br />
(3) Ausgangsleitung<br />
(4) Steckverbinder Eingang<br />
(5) Steckverbinder Ausgang<br />
Funktion<br />
Systeminformation<br />
Die LED-Lampe verfügt über eine LEDTRIX ®<br />
Schnittstelle. Für den Betrieb wird ein LEDTRIX ®<br />
Datengeber benötigt.<br />
Passende Datengeber:<br />
- Sequenzer VARIO (5168900x)<br />
- Sequenzer VARIO Funk (5169200x)<br />
- Sequenzer VARIO Funk EB (51696000)<br />
- Sequenzer ECO (51690000)<br />
- UNIVERS LEDTRIX ® Master (50913000)<br />
- DMX-LEDTRIX ® Gateway 2-fach (51688013)<br />
- DMX-LEDTRIX ® Gateway 5-fach (51688011)<br />
Bestimmungsgemäßer Gebrauch<br />
Lineare RGB-LED-Lampe zum Betrieb mit sicherer<br />
Kleinspannung DC 28 V= SELV.<br />
Je nach Ausführung besitzt die LED-Lampe die<br />
Schutzart IP54 oder IP10. Die Schutzart ist anhand<br />
des Ordercodes auf der Unterseite der LED-Lampe<br />
zu erkennen.<br />
LEDLUX ® <strong>linear</strong> <strong>LX</strong> IP54 660 K102 K102 RGB A<br />
Schutzart<br />
Bild 2: Kennzeichnung der Schutzart im Ordercode<br />
Einsatzbereiche abhängig von der angegebenen<br />
Schutzart:<br />
- IP54: Innenbereich und geschützter<br />
Außenbereich<br />
- IP10: Nur Innenbereich<br />
i Bei Montage im Außenbereich zusätzlichen<br />
Schutz gegen Schlagregen vorsehen (z. B.<br />
Fassadenprofil instalight ® 4010).<br />
Lichttechnik<br />
Symmetrische Lichtverteilung mit einem<br />
Abstrahlwinkel von 70° (±35°). Lichtfarbe RGB<br />
(additive Farbmischung).<br />
Lebensdauer<br />
Bei einer mittleren Betriebs-Umgebungstemperatur<br />
von 25°C beträgt die Lebensdauer des LED-<br />
Leuchtmittels ca. 50.000 Stunden (bei Rückgang der<br />
Helligkeit auf 70% des ursprünglichen Lichtstromes).<br />
Informationen für <strong>Elektro</strong>fachkräfte<br />
Montage und elektrischer Anschluss<br />
LED-Lampe montieren<br />
Unterschiedliche Montagehinweise für die<br />
Ausführungen IP54 und IP10 beachten.<br />
i Bei Montage in leicht zugänglicher<br />
Einbauumgebung muss die LED-Lampe durch<br />
zusätzliche konstruktive Maßnahmen vor<br />
mechanischer Beschädigung geschützt werden.<br />
i Für eine möglichst einfache Montage wird<br />
empfohlen, die mitgelieferte Halteklammer<br />
81081710 zu verwenden (Bild 3) + (Bild 5). Für<br />
besonders kleine Einbauumgebungen ist<br />
optional die Halteklammer 81081700 erhältlich.<br />
Diese erfordert jedoch bei Montage der<br />
Ausführung IP54 die Verwendung zusätzlicher<br />
Abstandshalter (Bild 4).<br />
o Halteklammern gemäß Zeichnung auf dem<br />
Untergrund montieren. Pro Meter LED-Lampe<br />
mindestens drei Klammern verwenden.<br />
o LED-Lampe in die Halteklammern<br />
hineindrücken, bis sie einrastet.<br />
o LED-Lampe nach dem Einrasten nicht mehr in<br />
den Klammern verschieben. Dies führt zu<br />
Beschädigungen des Kunststoffprofils.<br />
[mm]<br />
21<br />
26<br />
Ø 4<br />
≤ 3<br />
! !<br />
≥ 60 ≥ 60<br />
Bild 3: Montage (IP54) mit Klammer 81081710<br />
[mm]<br />
21<br />
≥ 60<br />
Ø 3<br />
26<br />
! !<br />
≥ 60<br />
Bild 4: Montage (IP54) mit Klammer 81081700<br />
[mm]<br />
19<br />
26<br />
Ø 4<br />
Bild 5: Montage (IP10) mit Klammer 81081710<br />
[mm]<br />
19<br />
Ø 3<br />
Bild 6: Montage (IP10) mit Klammer 81081700<br />
≤ 3<br />
26<br />
25<br />
20<br />
22<br />
≥ 3<br />
20<br />
23<br />
20<br />
21<br />
20<br />
LED-Lampe demontieren<br />
Bild 7: LED-Lampe demontieren<br />
o Rastnasen der Halteklammern mit einem<br />
geeigneten Werkzeug (z. B. kleiner<br />
Schraubendreher) nach außen biegen.<br />
o LED-Lampe nach oben aus der Halteklammer<br />
herausnehmen.<br />
i Bei Verwendung der Halteklammer 81081700 ist<br />
eine Demontage nur dann möglich, wenn die<br />
Klammer seitlich zugänglich ist.<br />
LED-Lampe anschließen – Allgemein<br />
Für den Anschluss der LED-Lampen nur die unter<br />
"Zubehör" aufgeführten Spannungsversorgungen<br />
vom Typ "SNT ELI" verwenden. Details zum<br />
Anschluss der Spannungsversorgungen sind in den<br />
Bedienungsanleitungen dieser Geräte erläutert.<br />
i Der elektrische Anschluss unterscheidet sich je<br />
nach Ausführung der LED-Lampe. Die<br />
unterschiedlichen Anschlussmethoden sind in<br />
den folgenden Grafiken separat erläutert.<br />
i Alle Anschlussskizzen sind hier beispielhaft mit<br />
der Spannungsversorgung "SNT ELI 0-120 W"<br />
ausgeführt. Für kleinere <strong>Insta</strong>llationen ist ein<br />
Betrieb mit den Spannungsversorgungen "SNT<br />
ELI 0-20 W" und "SNT ELI 0-9 W" ebenso<br />
möglich.<br />
i Die unter "Dimensionierung" aufgeführten<br />
Randbedingungen gelten für alle LED-Lampen<br />
vom Typ LEDLUX ® <strong>linear</strong> <strong>LX</strong> und müssen bei<br />
der Ausführung der Anlage unbedingt beachtet<br />
werden.<br />
i Bei Anschlussart K für alle elektrischen<br />
Verbindungen im Außenbereich folgendes<br />
Material verwenden:<br />
– Isolierte Stoßverbinder: Typ "Vogt 3735"<br />
– Schrumpfschlauch: Innenseitig<br />
kleberbeschichtet, 16 mm Innendurchmesser,<br />
Schrumpfrate 4:1<br />
i Bei Verwendung von "Versorgungseinheit 0-120<br />
W IP66" den internen Wahlschalter (14) auf A<br />
stellen.<br />
Anschlussbelegung<br />
Aderfarbe Anschluss<br />
Rot + 28 V<br />
Schwarz 0 V (GND)<br />
Grau Daten<br />
LED-Lampe anschließen (IP54)<br />
WARNUNG!<br />
Beschädigung der Anschlussleitung bei<br />
unsachgemäßer Verlegung.<br />
Bei der Leitungsführung<br />
Mindestbiegeradius nicht<br />
unterschreiten.<br />
D<br />
r ≥ 4×D<br />
Bild 8: Mindestbiegeradius der Anschlussleitung<br />
Bild 9: Schutzart IP54 / Anschlussart K<br />
(6) SNT ELI 0-120 W<br />
(7) Datengeber<br />
(8) Weiche "A" (58924010)<br />
(9) SNT-Anschluss (58924040)<br />
(10) Verlängerungsleitung IP10<br />
(15) Adapterleitung (85155900)<br />
LEDLUX ® <strong>linear</strong> <strong>LX</strong> IP54 ??? C??? C??? RGB ?<br />
A<br />
M<br />
(14)<br />
(13)<br />
d 1<br />
d 3<br />
(11)<br />
d 2<br />
(11)<br />
max. 20 m<br />
LED LED<br />
IN OUT<br />
IN<br />
(12)<br />
(7)<br />
Bild 10: Schutzart IP54 / Anschlussart C<br />
(7) Datengeber<br />
(11) Verlängerungsleitung IP67<br />
(12) Adapterleitung (58924051)<br />
(13) Versorgungseinheit 0-120 W IP66<br />
(14) Wahlschalter<br />
LED-Lampe anschließen (IP10)<br />
LEDLUX ® <strong>linear</strong> <strong>LX</strong> IP10 ??? M??? M??? RGB ?<br />
L<br />
N<br />
PE<br />
(9)<br />
(6)<br />
d 3<br />
(10) d 1<br />
(8)<br />
+ -<br />
<strong>LX</strong><br />
max. 20 m<br />
LED LED<br />
IN OUT<br />
IN<br />
d 2<br />
(10)<br />
<strong>LX</strong><br />
(7)<br />
Bild 11: Schutzart IP10 / Anschlussart M<br />
(6) SNT ELI 0-120 W<br />
(7) Datengeber<br />
(8) Weiche "A" (58924010)<br />
(9) SNT-Anschluss (58924040)<br />
(10) Verlängerungsleitung IP10<br />
Dimensionierung – Allgemein<br />
o Die Gesamtleitungslänge zwischen dem<br />
Datengeber (7) und der letzten LED-Lampe darf<br />
max. 200 Meter betragen.<br />
o Die Gesamtleistung pro Einspeisung darf<br />
max. 120 W betragen.<br />
o Die Leitungslänge zwischen zwei LED-Lampen<br />
darf max. 20 Meter betragen.<br />
o Die maximal zulässige Leitungslänge zwischen<br />
dem Datengeber (7) und der ersten LED-Lampe<br />
hängt von der Art des verwendeten Datengebers<br />
ab und ist der folgenden Tabelle zu entnehmen:<br />
Datengeber Leitungslänge*<br />
UNIVERS LEDTRIX<br />
Master<br />
DMX LEDTRIX Gateway<br />
2-fach<br />
DMX-LEDTRIX Gateway<br />
5-fach<br />
LEDTRIX Sequenzer<br />
VARIO oder ECO<br />
*) Leitungslänge = d1+d2+d3<br />
100 m<br />
100 m<br />
20 m<br />
20 m<br />
i Detailierte Angaben zur Dimensionierung sind in<br />
der Technischen Dokumentation zum System<br />
LEDLUX ® <strong>linear</strong> enthalten. Die Dokumentation<br />
steht zum Download auf www.insta.de zur<br />
Verfügung.<br />
Dimensionierung (IP54)<br />
Die folgende Tabelle zeigt die maximale Menge<br />
anschließbarer LED-Lampen bei Einspeisung mit<br />
einem Netzteil "SNT ELI 0-120W". Alle Werte gelten<br />
für Standardlampen mit einer Ein- und<br />
Ausgangsleitung von jeweils 1 Meter (1,0 mm²).<br />
i Bei Verdoppelung des Querschnittes kann die<br />
Länge der Zuleitung ebenfalls verdoppelt<br />
werden, ohne dass sich die Anzahl<br />
anschließbarer LED-Lampen reduziert.<br />
Dimensionierung mit SNT ELI 0-120 W und<br />
Zuleitung (d1) mit Querschnitt 2x1 mm²<br />
L* 334 660 985 1310 1636 1961 2286<br />
d1=<br />
5 m<br />
d1=<br />
10 m<br />
d1=<br />
20 m<br />
d1=<br />
30 m<br />
16× 11× 7× 5× 4× 3× 3×<br />
15× 10× 7× 5× 4× 3× 3×<br />
13× 8× 6× 5× 4× 3× 3×<br />
12× 7× 5× 4× 3× 2× 2×<br />
*) L = Länge der verwendeten LED-Lampe in mm<br />
Dimensionierung (IP10)<br />
Die folgende Tabelle zeigt die maximale Menge<br />
anschließbarer LED-Lampen bei Einspeisung mit<br />
einem Netzteil "SNT ELI 0-120W". Alle Werte gelten<br />
für Standardlampen mit einer Ein- und<br />
Ausgangsleitung von jeweils 0,3 Meter (0,5 mm²).<br />
i Bei Verdoppelung des Querschnittes kann die<br />
Länge der Zuleitung ebenfalls verdoppelt<br />
werden, ohne dass sich die Anzahl<br />
anschließbarer LED-Lampen reduziert.<br />
Dimensionierung mit SNT ELI 0-120 W und<br />
Zuleitung (d1) mit Querschnitt 2x0,5 mm²<br />
L* 330 655 979 1304 1629 1954 2279<br />
d1=<br />
5 m<br />
d1=<br />
10 m<br />
d1=<br />
15 m<br />
19× 11× 7× 5× 4× 3× 3×<br />
16× 10× 7× 5× 4× 3× 3×<br />
14× 8× 5× 4× 3× 3× 2×<br />
*) L = Länge der verwendeten LED-Lampe in mm<br />
LEDLUX ® <strong>linear</strong> <strong>LX</strong><br />
Art.-Nr. 58999982, 50980002<br />
Bedienungsanleitung<br />
<strong>Insta</strong> <strong>Elektro</strong> <strong>GmbH</strong><br />
Postfach 1830<br />
58468 Lüdenscheid<br />
Telefon +49 2351 936-0<br />
www.insta.de<br />
info@insta.de<br />
Anhang<br />
Technische Daten<br />
Nennspannung DC 28 V =<br />
Leistungsaufnahme pro<br />
Meter<br />
16 W<br />
Schutzklasse III<br />
Umgebungstemperatur -20 ... +45 °C<br />
Schnittstelle LEDTRIX ®<br />
Zubehör<br />
SNT ELI 0-9W LEDTRIX Art.-Nr.58910003<br />
SNT ELI 0-20W Art.-Nr.58913000<br />
SNT ELI 0-120W / 28V Art.-Nr.58916021<br />
Gewährleistung<br />
Technische und formale Änderungen am Produkt,<br />
soweit sie dem technischen Fortschritt dienen,<br />
behalten wir uns vor.<br />
Wir leisten Gewähr im Rahmen der gesetzlichen<br />
Bestimmungen.<br />
Bitte schicken Sie das Gerät portofrei mit einer<br />
Fehlerbeschreibung an unsere zentrale<br />
Kundendienststelle:<br />
<strong>Insta</strong> <strong>Elektro</strong> <strong>GmbH</strong><br />
Service Center<br />
Hohe Steinert 10<br />
58509 Lüdenscheid<br />
Deutschland<br />
82579000<br />
01.07.2011
LEDLUX ® <strong>linear</strong> <strong>LX</strong><br />
Safety instructions<br />
Electrical equipment may only be installed and<br />
fitted by electrically skilled persons.<br />
Serious injuries, fire or property damage<br />
possible. Please read and follow manual fully.<br />
Fire hazard. Do not connect the LED lamps to the<br />
mains voltage. The LED lamps will be destroyed.<br />
The LED lamp is a device of safety class III.<br />
During installation and cable routing, comply<br />
with the regulations and standards which apply<br />
for SELV.<br />
Avoid bending the profile and LED lamps. This<br />
can cause damage.<br />
Only the manufacturer may exchange the<br />
connecting cable.<br />
These instructions are an integral part of the<br />
product, and must remain with the end customer.<br />
Device components<br />
LEDLUX ® <strong>linear</strong> <strong>LX</strong> IP54 ??? K??? K??? RGB ?<br />
(2) (1) (3)<br />
LEDLUX ® <strong>linear</strong> <strong>LX</strong> IP54 ??? C??? C??? RGB ?<br />
(2) (4)<br />
(1)<br />
(5)<br />
(3)<br />
LEDLUX ® <strong>linear</strong> <strong>LX</strong> IP10 ??? M??? M??? RGB ?<br />
(2) (4) (1) (5) (3)<br />
Figure 1: LED lamp LEDLUX ® <strong>linear</strong> LS<br />
(1) LED lamp<br />
(2) Input cable<br />
(3) Output cable<br />
(4) Plug connector input<br />
(5) Plug connector output<br />
Function<br />
System information<br />
The LED lamp possesses a LEDTRIX ® interface. A<br />
LEDTRIX ® data encoder is required for operation.<br />
Suitable data encoder:<br />
- Sequencer VARIO (5168900x)<br />
- Sequencer VARIO Radio (5169200x)<br />
- Sequencer VARIO Radio EB (51696000)<br />
- Sequencer ECO (51690000)<br />
- UNIVERS LEDTRIX ® Master (50913000)<br />
- DMX-LEDTRIX ® Gateway 2gang (51688013)<br />
- DMX-LEDTRIX ® Gateway 5gang (51688011)<br />
Intended use<br />
Linear RGB LED lamp for operation with secure<br />
extra-low voltage DC 28 V= SELV.<br />
Depending on the version, the LED lamp has the<br />
protection rating IP54 or IP10. The protection rating<br />
can be determined using the order code on the<br />
bottom side of the LED lamp.<br />
LEDLUX ® <strong>linear</strong> <strong>LX</strong> IP54 660 K102 K102 RGB A<br />
Schutzart<br />
Figure 2: Protection rating labelling in the order code<br />
Areas of use dependent on the specified protection<br />
rating:<br />
- IP54: Indoors and protected outdoor areas<br />
- IP10: Only indoors<br />
i When mounted in outdoor areas, provide<br />
additional protection against heavy rain (e.g.<br />
facade profile instalight ® 4010).<br />
Light technology<br />
Symmetrical light distribution with a transmission<br />
angle of 70° (±35°). Light colour RGB (additive<br />
colour mixing).<br />
Lifespan<br />
At a medium operation ambient temperature of 25°C,<br />
the lifespan of the LED lamp is approx. 50,000 hours<br />
(when the brightness is reduced to 70% of the<br />
original light current).<br />
Information for electrically skilled<br />
persons<br />
Fitting and electrical connection<br />
Mounting the LED lamp<br />
Comply with the different mounting instructions for<br />
the IP54 and IP10 versions.<br />
i When mounted in an easily accessible<br />
installation environment, the LED lamp must be<br />
protected against mechanical damage by<br />
additional construction measures.<br />
i To simplify mounting as much as possible, we<br />
recommend using the supplied retaining bracket<br />
81081710 (Figure 3) + (Figure 5). The retaining<br />
bracket 81081700 is available as an option for<br />
particularly small installation environments.<br />
However, when the IP54 version is mounted,<br />
this also requires the use of additional spacers<br />
(Figure 4).<br />
o Mount the retaining brackets on the substrate in<br />
accordance with the drawing. Use at least three<br />
brackets for each metre of LED lamp.<br />
o Push the LED lamp into the retaining brackets<br />
until it locks.<br />
o After locking, do not push the LED lamp into the<br />
brackets any further. This can cause damage to<br />
the plastic profile.<br />
[mm]<br />
21<br />
26<br />
Ø 4<br />
≤ 3<br />
! !<br />
≥ 60 ≥ 60<br />
Figure 3: Mounting (IP54) with bracket 81081710<br />
[mm]<br />
21<br />
≥ 60<br />
Ø 3<br />
26<br />
! !<br />
≥ 60<br />
Figure 4: Mounting (IP54) with bracket 81081700<br />
[mm]<br />
19<br />
26<br />
Ø 4<br />
Figure 5: Mounting (IP10) with bracket 81081710<br />
[mm]<br />
19<br />
Ø 3<br />
Figure 6: Mounting (IP10) with bracket 81081700<br />
≤ 3<br />
26<br />
25<br />
20<br />
22<br />
≥ 3<br />
20<br />
23<br />
20<br />
21<br />
20<br />
Dismantling the LED lamp<br />
Figure 7: Dismantling the LED lamp<br />
o Using a suitable tool (e.g. small screwdriver),<br />
bend the locking noses of the retaining brackets<br />
outwards.<br />
o Remove the LED lamp out of the retaining<br />
bracket in an upwards direction.<br />
i When using the retaining bracket 81081700,<br />
dismantling is only possible when the bracket<br />
can be accessed from the side.<br />
Connecting the LED lamp – General<br />
To connect the LED lamps, use only the "SNT ELI"<br />
power supply units listed under "Accessories". The<br />
operation manuals of these devices contain details<br />
on connecting the power supply units.<br />
i Depending on the version of the LED lamp, the<br />
electrical connection may change. The following<br />
graphics explain the different connection<br />
methods.<br />
i Here, all the connection sketches use the power<br />
supply unit "SNT ELI 0-120 W" as an example.<br />
For smaller installations, operating with the<br />
power supply units "SNT ELI 0-20 W" and "SNT<br />
ELI 0-9 W" are also possible.<br />
i The general conditions listed under<br />
"Dimensioning" apply to all the LED lamps of the<br />
type LEDLUX ® <strong>linear</strong> LN and must be observed<br />
when planning the system.<br />
i For connection type K, use the following<br />
material for all the outdoor electrical<br />
connections:<br />
– Insulated connectors: Type "Vogt 3735"<br />
– Heat-shrink hose: Adhesive-coated on the<br />
inside, 16 mm internal diameter, shrink ratio 4:1<br />
i When using the "Supply unit 0-120 W IP66", turn<br />
the internal operating mode switch (14) to A.<br />
Connection assignment<br />
Wire colour Connection<br />
Red + 28 V<br />
Black 0 V (GND)<br />
Grey Data<br />
Connecting the LED lamp (IP54)<br />
WARNING!<br />
Improper routing may damage the<br />
connecting cable.<br />
When routing the cable, comply with the<br />
minimum bend radius.<br />
D<br />
r ≥ 4×D<br />
Figure 8: Minimum bend radius of the connection<br />
cable<br />
Figure 9: Protection rating IP54 / Connection type K<br />
(6) SNT ELI 0-120 W<br />
(7) Data encoder<br />
(8) Separating filter "A" (58924010)<br />
(9) PSU connection (58924040)<br />
(10) Extension cable IP10<br />
(15) Adapter cable (85155900)<br />
LEDLUX ® <strong>linear</strong> <strong>LX</strong> IP54 ??? C??? C??? RGB ?<br />
A<br />
M<br />
(14)<br />
(13)<br />
d 1<br />
d 3<br />
(11)<br />
d 2<br />
(11)<br />
max. 20 m<br />
LED LED<br />
IN OUT<br />
IN<br />
(12)<br />
(7)<br />
Figure 10: Protection rating IP54 / Connection type C<br />
(7) Data encoder<br />
(11) Extension cable IP67<br />
(12) Adapter cable (58924051)<br />
(13) Power supply unit 0-120 W IP66<br />
(14) Operating mode switch<br />
Connecting the LED lamp (IP10)<br />
LEDLUX ® <strong>linear</strong> <strong>LX</strong> IP10 ??? M??? M??? RGB ?<br />
L<br />
N<br />
PE<br />
(9)<br />
(6)<br />
d 3<br />
(10) d 1<br />
(8)<br />
+ -<br />
<strong>LX</strong><br />
max. 20 m<br />
LED LED<br />
IN OUT<br />
IN<br />
d 2<br />
(10)<br />
<strong>LX</strong><br />
(7)<br />
Figure 11: Protection rating IP10 / Connection type<br />
M<br />
(6) SNT ELI 0-120 W<br />
(7) Data encoder<br />
(8) Separating filter "A" (58924010)<br />
(9) PSU connection (58924040)<br />
(10) Extension cable IP10<br />
Dimensioning - General<br />
o The total cable length between the data encoder<br />
(7) and the last LED lamp may be<br />
max. 200 metres.<br />
o The total power per supply may be max. 120 W.<br />
o The cable length between two LED lamps may<br />
be max. 20 metres.<br />
o The maximum permitted cable length between<br />
the data encoder (7) and the first LED lamp is<br />
dependent on the type of data encoder use and<br />
can be found in the following table:<br />
Data encoder Cable length*<br />
UNIVERS LEDTRIX<br />
Master<br />
DMX-LEDTRIX Gateway<br />
2gang<br />
DMX-LEDTRIX Gateway<br />
5gang<br />
LEDTRIX sequencer<br />
VARIO or ECO<br />
*) Cable length = d1+d2+d3<br />
100 m<br />
100 m<br />
20 m<br />
20 m<br />
i You can find details on dimensioning in the<br />
technical documentation of the LEDLUX ® <strong>linear</strong><br />
system. The documentation is available at www.<br />
insta.de for downloading.<br />
Dimensioning (IP54)<br />
The following table shows the maximum number of<br />
connectable LED lamps when powered with a power<br />
supply "SNT ELI 0-120 W". All the values apply for<br />
standard lamps with input and output cables each of<br />
1 metre in length (1.0 mm²).<br />
i When the cross-section is doubled, the length of<br />
the supply cable can also be doubled, without<br />
reducing the number of connectable LED lamps.<br />
Dimensioning with SNT ELI 0-120 W and<br />
supply cable (d1) with cross-section 2x1 mm²<br />
L* 334 660 985 1310 1636 1961 2286<br />
d1=<br />
5 m<br />
d1=<br />
10 m<br />
d1=<br />
20 m<br />
d1=<br />
30 m<br />
16× 11× 7× 5× 4× 3× 3×<br />
15× 10× 7× 5× 4× 3× 3×<br />
13× 8× 6× 5× 4× 3× 3×<br />
12× 7× 5× 4× 3× 2× 2×<br />
*) L = Length of the LED lamp used in mm<br />
Dimensioning (IP10)<br />
The following table shows the maximum number of<br />
connectable LED lamps when powered with a power<br />
supply "SNT ELI 0-120 W". All the values apply for<br />
standard lamps with input and output cables each of<br />
0.3 metres in length (0.5 mm²).<br />
i When the cross-section is doubled, the length of<br />
the supply cable can also be doubled, without<br />
reducing the number of connectable LED lamps.<br />
Dimensioning with SNT ELI 0-120 W and<br />
supply cable (d1) with cross-section 2x0.5 mm²<br />
L* 330 655 979 1304 1629 1954 2279<br />
d1=<br />
5 m<br />
d1=<br />
10 m<br />
d1=<br />
15 m<br />
19× 11× 7× 5× 4× 3× 3×<br />
16× 10× 7× 5× 4× 3× 3×<br />
14× 8× 5× 4× 3× 3× 2×<br />
*) L = Length of the LED lamp used in mm<br />
Appendix<br />
Technical data<br />
Rated voltage DC 28 V =<br />
Power consumption per<br />
metre<br />
16 W<br />
Safety class III<br />
Ambient temperature -20 ... +45 °C<br />
Interface LEDTRIX ®<br />
Accessories<br />
SNT ELI 0-9W LEDTRIX Art.-No.58910003<br />
SNT ELI 0-20W Art.-No.58913000<br />
SNT ELI 0-120W / 28V Art.-No.58916021<br />
Warranty<br />
We reserve the right to make technical and formal<br />
changes to the product in the interest of technical<br />
progress.<br />
We provide a warranty as provided for by law.<br />
Please send the unit postage-free with a description<br />
of the defect to our central customer service office:<br />
<strong>Insta</strong> <strong>Elektro</strong> <strong>GmbH</strong><br />
Service Center<br />
Hohe Steinert 10<br />
58509 Lüdenscheid<br />
Deutschland