Handbuch ICY BOX IB-RD2252 - Raidsonic
Handbuch ICY BOX IB-RD2252 - Raidsonic
Handbuch ICY BOX IB-RD2252 - Raidsonic

Erfolgreiche ePaper selbst erstellen
Machen Sie aus Ihren PDF Publikationen ein blätterbares Flipbook mit unserer einzigartigen Google optimierten e-Paper Software.
http://www.icybox.de<br />
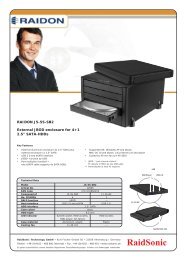
External 2bay 2.5" SATA RAID Enclosure<br />
Benutzerhandbuch / Manual<br />
Version 1.0<br />
<strong>IB</strong>-<strong>RD2252</strong>
http://www.icybox.de<br />
2x 2,5" RAID Gehäuse<br />
1 EInlEITunG<br />
1.1 Systemanforderungen<br />
<strong>IB</strong>-<strong>RD2252</strong><br />
1.1.1 PC Anforderungen<br />
• Minimum Intel Pentium III CPU 500MHz, 128 MB RAM<br />
• PC mit eSATA Anschluss: Windows XP/Vista/7<br />
• PC mit FireWire 800 Anschluss: Windows XP/Vista/7<br />
• PC mit USB 2.0 Anschluss: Windows XP/Vista/7<br />
• Ihre Hardware muss über eine entsprechende Datenschnittstelle verfügen<br />
(z.B. USB 2.0 Host Controller)<br />
• Plug & Play Unterstützung für eSATA Host Controller<br />
1.1.2 Mac Anforderungen<br />
• Minimum Apple G4 Prozessor, 128 MB RAM<br />
• Mac mit eSATA Anschluss: Mac OS 10.4 oder höher<br />
• Mac mit FireWire 800 Anschluss: Mac OS 10.2 oder höher<br />
• Mac mit USB 2.0 Anschluss: Mac OS 10.2 oder höher<br />
• Ihre Hardware muss über eine entsprechende Datenschnittstelle verfügen<br />
(z.B. USB 2.0 Host Controller)<br />
• Plug & Play Unterstützung für eSATA Host Controller<br />
1.1.3 Unterstützte Festplatten<br />
• Zwei 2,5" SATA-I oder SATA-II Festplatten (1.5 Gbit/s oder 3 Gbit/s)<br />
• Höhe bis zu 12,5mm<br />
• 20 GB – 1 TB je Festplatte<br />
• Festplatten der gleichen Kapazität sind zu bevorzugen.<br />
Anmerkung<br />
Damit ein Computer auf Datenträger größer 2 TB zugreifen kann, muss die Hardware, sowie das Betriebssystem<br />
diese Funktion unterstützen (z.B. Windows Vista 32bit/64bit oder Mac OS 10.4 und höher).<br />
1.2 Verpackungsinhalt<br />
Der Verpackungsinhalt kann, abhängig von Version und Ausführung, von den folgenden Angaben<br />
abweichen.<br />
• <strong>IB</strong>-<strong>RD2252</strong> (Festplatten nicht enthalten)<br />
• Externes Steckernetzteil<br />
• Datenübertragungskabel<br />
• Bedienungsanleitung (Englisch/Deutsch)<br />
1.3 Über dieses <strong>Handbuch</strong><br />
Die in dieser Anleitung dargestellten Anzeigebeispiele und Beschreibungen können von den<br />
tatsächlichen Anzeigen des aktuellen Produkts oder dem Inhalt etwas abweichen.<br />
1.4 Warenzeichen<br />
• MS-DOS, Microsoft, Windows XP/Vista/7 sind Markenzeichen der Microsoft Corporation.<br />
• Apple Macintosh und Mac sind Markenzeichen von Apple Computer.<br />
• Alle anderen Drittanbietermarken und -namen sind Eigentum der jeweiligen Inhaber.<br />
1
http://www.icybox.de<br />
2x 2,5" RAID Gehäuse<br />
1.5 Übersicht <strong>IB</strong>-<strong>RD2252</strong><br />
1.5.1 Frontansicht <strong>IB</strong>-<strong>RD2252</strong><br />
lED/Taste Status<br />
A B<br />
<strong>IB</strong>-<strong>RD2252</strong><br />
• Grün = Datenzugriff (lesen/schreiben)<br />
• Rot = Fehler oder leerer Festplattensteckplatz<br />
• Aus = Festplattenstatus normal<br />
• Orange = Datenwiederherstellung<br />
Select • Wählen des Auswahl- oder Setupmenüs<br />
OK • Bestätigung der aktuellen Auswahl oder Setupmenü aktivieren.<br />
2
http://www.icybox.de<br />
2x 2,5" RAID Gehäuse<br />
1.5.2 Rückansicht <strong>IB</strong>-<strong>RD2252</strong><br />
Beschriftung Bedeutung<br />
DC IN<br />
USB 2.0<br />
Stromanschluss<br />
<strong>IB</strong>-<strong>RD2252</strong><br />
USB 2.0 Datenschnittstelle<br />
FW800 FireWire 800 Datenschnittstelle<br />
eSATA eSATA Datenschnittstelle<br />
RAID RAID Modus ist gesperrt und kann nicht verändert werden.<br />
RAID RAID Modus kann über das LCD Display verändert werden.<br />
3
http://www.icybox.de<br />
2x 2,5" RAID Gehäuse<br />
1.6 RAID Modi<br />
<strong>IB</strong>-<strong>RD2252</strong><br />
Bevorzugt sollten Festplatten der gleichen Kapazität verwendet werden. Sollten die Kapazitäten unterschiedlich<br />
sein, wird die Summe der zur Verfügung stehenden Gesamtkapazität immer nur der kleineren<br />
Festplatte entsprechen. Einen Geschwindigkeitsunterschied wird immer nur über schnelle Datenschnittstellen<br />
wie z.B. eSATA erkennbar und nutzbar sein.<br />
1.6.1 RAID 0 – Disk Striping (Zugriffsbeschleunigung ohne Redundanz)<br />
Hier werden beide Festplatten als ein großes Laufwerk abgebildet, allerdings wird nur die Kapazität der<br />
kleineren Platte verdoppelt. Diese Einstellung sollte verwendet werden, wenn es primär um sehr schnelle<br />
Datenzugriffe geht, allerdings steht dann keine Redundanz zur Verfügung. Wenn also eine Festplatte<br />
ausfällt, bedeutet dies meist den Verlust sämtlicher gespeicherten Daten.<br />
Storage Capacity Data Safety Performance<br />
1.6.2 RAID 1 - Disk Mirroring (Festplattenspiegelung)<br />
Hier werden beide Festplatten ebenfalls als ein Laufwerk abgebildet, allerdings nur mit 50% der Gesamtkapazität<br />
beider Festplatten, basierend auf der kleineren Festplatte. Im RAID 1 Modus wird eine genaue<br />
Kopie der ersten Festplatte auf die zweite Festplatte erstellt (Spiegelung). Diese Einstellung sollte verwendet<br />
werden, wenn Datensicherheit einer höheren Kapazität vorzuziehen ist. Wenn also eine Festplatte<br />
ausfällt, kann die entsprechende Festplatte einfach ausgetauscht werden, wonach eine automatische<br />
Datenwiederherstellung (Rebuild) von der verbliebenen Festplatte initialisiert wird.<br />
Storage Capacity Data Safety Performance<br />
1.6.3 Einstellen eines RAID Modus<br />
Der RAID Modus sollte nach dem Einsetzen der Festplatten, aber vor dem ersten Formatieren<br />
eingestellt werden.<br />
1. Stellen Sie sicher, dass die Stromzufuhr unterbrochen ist und setzen anschließend<br />
die Festplatten ein.<br />
2. Entriegeln Sie den RAID Schiebeschalter an der Rückseite des Gerätes.<br />
3. Verbinden Sie das Netzteil mit dem Gerät und anschließend mit der Stromversorgung.<br />
4. Wählen Sie nun im Einstellungsmenü Ihren bevorzugten RAID Modus aus.<br />
Das Gerät wird neu gestartet und fragt nach einer Bestätigung des Vorganges.<br />
5. Über Ihr Betriebssystem nehmen Sie nun bitte die Initialisierung,<br />
Erstellung der Partition und Formatierung der Festplatten vor.<br />
6. Sperren Sie nun den RAID Schiebeschalter auf der Rückseite des Gerätes wieder<br />
um eine versehentliche Veränderung des RAID Modus zu verhindern.<br />
4<br />
2 Festplatten<br />
2 Festplatten
http://www.icybox.de<br />
2x 2,5" RAID Gehäuse<br />
Anmerkung<br />
<strong>IB</strong>-<strong>RD2252</strong><br />
Das Wechseln des RAID Modus erfordert ein Neuformatieren der Festplatten. Durch diesen Vorgang<br />
werden alle Daten auf den Festplatten gelöscht. Stellen Sie sicher, das vorher alle vorhanden Daten auf<br />
einen anderen Datenträger gesichert werden.<br />
Wichtig<br />
Damit ein Computer auf Datenträger größer 2 TB zugreifen kann, muss die Hardware, sowie das Betriebssystem<br />
diese Funktion unterstützen (z.B. Windows Vista 32bit/64bit oder Mac OS 10.4 und höher).<br />
2. SYSTEM EInRICHTunG<br />
2.1 <strong>IB</strong>-<strong>RD2252</strong> Festplatteninstallation<br />
Zur Festplatteninstallation gehen Sie bitte wie folgt vor:<br />
1. Entfernen Sie die Schrauben an der Rückseite des Gerätes und entfernen<br />
den oberen Teil der Abdeckung.<br />
2. Ziehen Sie den Festplattenträger aus dem Gehäuse heraus.<br />
5
http://www.icybox.de<br />
2x 2,5" RAID Gehäuse<br />
<strong>IB</strong>-<strong>RD2252</strong><br />
3. Setzen Sie die Festplatte in den Träger ein und befestigen Sie diese mit<br />
zwei Schrauben auf jeder Seite.<br />
4. Wiederholen die vorhergehenden Schritte für die zweite Festplatte.<br />
5. Schieben Sie die Festplattenträger<br />
mit eingesetzter Festplatte unter leichtem<br />
Druck in das Gehäuse zurück.<br />
7. Verbinden Sie das Gerät mit der Stromversorgung und stellen unter Verwendung des<br />
LCD Displays Ihren bevorzugten RAID Modus ein.<br />
8. Verbinden Sie das <strong>IB</strong>-<strong>RD2252</strong> mittels Datenkabel mit Ihrem Computer. PC Benutzer können<br />
unter Verwendung der Datenträgerverwaltung, MAC Benutzer unter Verwendung der<br />
Festplattenverwaltung, eine entsprechende Partitionierung und anschließende Formatierung<br />
vornehmen.<br />
9. Fertig! Ihre <strong>IB</strong>-<strong>RD2252</strong> ist nun einsatzbereit.<br />
6<br />
6. Setzen Sie die Abdeckung der Rückseite<br />
wieder ein und drehen die Schrauben<br />
wieder ein um die Installation<br />
abzuschließen.
http://www.icybox.de<br />
2x 2,5" RAID Gehäuse<br />
<strong>IB</strong>-<strong>RD2252</strong><br />
Anmerkung<br />
Dieses Gerät wurde für die Verwendung von zwei Laufwerken entwickelt und funktioniert nicht,<br />
wenn nur eine Festplatte installiert ist.<br />
Wichtig<br />
Bei Erstinstallation und Wechsel des RAID Modus werden alle vorhandenen Daten auf den Festplatten<br />
gelöscht. Stellen Sie sicher, das vorher alle vorhanden Daten auf einen anderen Datenträger gesichert<br />
werden.<br />
2.2 Festplatten ersetzen<br />
Wenn eine Festplatte im System ausfällt, wird dies durch das Leuchten der zugehörigen, roten Festplatten<br />
LED angezeigt. Wenn nur eine Festplatte im RAID 1 Modus ausfällt, kann weiterhin auf die Daten<br />
zugegriffen werden, es wird aber empfohlen, die fehlerhafte Festplatte sofort auszutauschen um fortlaufende<br />
Datenbackups und –sicherheit zu gewährleisten.<br />
Sollte mehr als eine Festplatte gleichzeitig ausfallen oder ein RAID 0 Modus eingestellt sein, können die<br />
Daten in der Regel, nach dem Austausch der defekten Festplatten, nicht wieder hergestellt werden.<br />
1. Überprüfen Sie die Festplatten LED an der Vorderseite. Wenn ein Festplattenfehler vorliegt, wird<br />
dies durch die zugehörige, rote Festplatten LED angezeigt.<br />
2. Im Falle eine Festplattenausfalls unterbrechen Sie die Stromzufuhr zum Gerät.<br />
3. Öffnen Sie das Gerät und tauschen die defekte(n) Festplatte(n), wie weiter oben beschrieben,<br />
aus.<br />
4. Schließen Sie den Austausch der Festplatten durch den abschließenden Zusammenbau ab und<br />
verbinden das Gerät wieder mit der Stromzufuhr.<br />
5. Ist ein RAID 1 Modus eingestellt, wird der Datenträgerverbund automatisch wiederhergestellt.<br />
Während dieses Prozesses blinkt die Wiederherstellungs-LED. Der Wiederherstellungsprozess des<br />
RAID-Verbundes kann abhängig von der Festplattenkapazität, einige Stunden in Anspruch nehmen.<br />
6. Ist ein RAID 0 Modus eingestellt, wechseln Sie in das RAID-Einstellungsmenü, wählen erneut<br />
RAID 0 und bestätigen diese Einstellung. Nach dem Neustart des Gerätes, formatieren Sie das<br />
entstandene Laufwerk in gewohnter Weise.<br />
Anmerkung<br />
Stellen Sie sicher, dass die Stromversorgung während des Wiederherstellungsprozesses nicht unterbrochen<br />
wird. Sollte dies trotzdem geschehen, wird der Wiederherstellungsprozess nach der Verbindung mit<br />
der Stromquelle fortgesetzt.<br />
2.3 Verbindung mit dem Computer<br />
Einige Anmerkungen zur Verwendung des <strong>IB</strong>-<strong>RD2252</strong>:<br />
• Setzen Sie das Gerät keine Nässe oder hoher Luftfeuchtigkeit aus.<br />
• Verdecken Sie auf keinen Fall die Lüftungsöffnungen.<br />
• Vor der ersten Verbindung mit dem Computer setzen Sie bitte entsprechende Festplatten ein und<br />
wählen den bevorzugten RAID Modus.<br />
• Zum sicheren Entfernen der <strong>IB</strong>-<strong>RD2252</strong> vom Computer unter der Vermeidung von Datenverlust,<br />
folgen Sie der korrekten Trennung Ihrer Hardware entsprechend Ihres Betriebssystems.<br />
• Damit ein Computer auf Datenträger größer 2 TB zugreifen kann, muss die Hardware, sowie das<br />
Betriebssystem diese Funktion unterstützen (z.B. Windows Vista 32bit/64bit oder Mac OS 10.4<br />
und höher). Ist dies nicht der Fall, deaktivieren Sie die > 2 TB Option im Einstellungsmenü.<br />
• Wenn der Computer in den Stand-By Modus gesetzt wird, erfolgt ein Festplatten Spin-Down<br />
(Ruhezustand).<br />
• Es kann nur eine Datenschnittstelle zur gleichen Zeit verwendet werden.<br />
7
http://www.icybox.de<br />
2x 2,5" RAID Gehäuse<br />
2.4 Zur Datensicherheit<br />
<strong>IB</strong>-<strong>RD2252</strong><br />
Um Ihre Daten zu sichern und Datenverlust zu vermeiden, sollten Sie immer mindestens zwei Kopien<br />
Ihre Daten anlagen. Einmal auf der <strong>IB</strong>-<strong>RD2252</strong> und einmal auf einem anderen Laufwerk oder entsprechenden<br />
Speichermedien wie CD, DVD, Blu-Ray o.ä.<br />
Jeglicher Datenverlust oder -schaden durch die Benutzung der <strong>IB</strong>-<strong>RD2252</strong> liegt in der Verantwortung des<br />
Benutzers und es kann unter keinen Umständen der Hersteller für die Wiederherstellung der Daten oder<br />
deren Kosten zur Verantwortung gezogen werden.<br />
3 lCD DISPlAY<br />
Um ein Menü zu wählen oder Einstellungen zu verändern, verwenden Sie die SELECT Taste an der<br />
Vorderseite. Um ein Menü zu öffnen oder eine Änderung zu bestätigen, verwenden Sie die OK Taste an<br />
der Vorderseite. Für zusätzliche Details, folgen Sie den Anweisungen am LCD Display oder lesen die<br />
folgenden Schritt für Schritt Anleitungen:<br />
3.1 Startmenü<br />
Verwenden Sie die SELECT Taste um zwischen den verschiedenen Menüpunkten zu wechseln und betätigen<br />
die OK Taste um ein Menü auszuwählen.<br />
1. Die Standardanzeige stellt den Produktnamen und den derzeit eingestellten RAID Modus dar.<br />
2. Die Systeminformation gibt Auskunft über nähere Informationen zur Konfiguration und Hardware<br />
des Gerätes.<br />
3. Die Festplatten Information gibt Auskunft über die installierten Festplatten.<br />
4. Das Einstellungsmenü ermöglicht die Konfiguration des Gerätes zu verändern.<br />
8
http://www.icybox.de<br />
2x 2,5" RAID Gehäuse<br />
3.2 System Informationen<br />
<strong>IB</strong>-<strong>RD2252</strong><br />
Um diesen Menüpunkt zu aktivieren drücken Sie die SELECT Taste bis das System Informationsmenü erscheint<br />
und drücken anschließend die OK Taste um weitere Optionen zu Einstellungen und Konfiguration<br />
aufzurufen. Die verschiedenen Unteroptionen werden automatisch alle ca. 8 Sekunden weitergescrollt.<br />
Für ein schnelleres erreichen der gewünschten Unteroption verwenden Sie die SELECT Taste.<br />
1. Startanzeige des System-Informationsmenüs.<br />
2. Die Seriennummer ist eine Kombination der 1394 Hersteller ID, der Chip ID Hi und der<br />
Chip ID Lo.<br />
3. Zeigt die aktuelle Firmwareversion der <strong>IB</strong>-<strong>RD2252</strong> an.<br />
4. Der I/O Status zeigt die aktuell verwendete Datenschnittstelle zum Computer an.<br />
5. Zeigt den aktuellen Status der >2 TB- und Alarmfunktion an.<br />
6. Zeigt an, wie der RAID Modus gesetzt wurde (LCM = über LCD Display, AP = Computerprogramm)<br />
und die zur Verfügung stehende Gesamtkapazität des Systems.<br />
3.3 Festplatteninformation<br />
Um diesen Menüpunkt zu aktivieren drücken Sie die SELECT Taste bis das Festplatten Informationsmenü<br />
erscheint und drücken anschließend die OK Taste um weitere Optionen zu den eingebauten Festplatten<br />
aufzurufen. Die verschiedenen Unteroptionen werden automatisch alle ca. 8 Sekunden weitergescrollt.<br />
Für ein schnelleres erreichen der gewünschten Unteroption verwenden Sie die SELECT Taste.<br />
1. Startanzeige des Festplatteninformationsmenüs.<br />
2. Zeigt die Bezeichnung und die Seriennummer der installierten Festplatte 1 an.<br />
3. Zeigt die Gesamtkapazität und Temperatur der installierten Festplatte 1 an.<br />
4. Zeigt die Bezeichnung und die Seriennummer der installierten Festplatte 2 an.<br />
5. Zeigt die Gesamtkapazität und Temperatur der installierten Festplatte 2 an.<br />
9
http://www.icybox.de<br />
2x 2,5" RAID Gehäuse<br />
3.4 Einstellungen<br />
<strong>IB</strong>-<strong>RD2252</strong><br />
Um diesen Menüpunkt zu aktivieren drücken Sie die SELECT Taste bis das Einstellungsmenü erscheint<br />
und drücken anschließend die OK Taste um weitere Optionen aufzurufen.<br />
Für ein erreichen der gewünschten Unteroption verwenden Sie die SELECT Taste und drücken anschließend<br />
die OK Taste um Einstellungen vornehmen zu können.<br />
1. Einstellung zum aktivieren oder deaktivieren der Unterstützung für Datenträgervolumen<br />
größer 2 TB.<br />
2. Einstellungsmenü für die RAID Funktionen.<br />
3. Einstellung zum aktivieren oder deaktivieren der Alarmfunktion.<br />
4. Einstellungsmenü für die Dauer der LCD Display Hintergrundbeleuchtung.<br />
5. Verlassen des Einstellungsmenüs und Rückkehr zu Startmenü.<br />
3.4.1 > 2TB Volume Modus<br />
Damit ein Computer auf Datenträger größer 2 TB zugreifen kann, muss die Hardware, sowie das Betriebssystem<br />
diese Funktion unterstützen (z.B. Windows Vista 32bit/64bit oder Mac OS 10.4 und höher).<br />
Ist dies nicht der Fall, deaktivieren Sie die > 2 TB Option im Einstellungsmenü<br />
• [Enabled] Unterstützt Datenträger größer 2 TB Kapazität. Sollte die Gesamtkapazität 2 TB überschreiten,<br />
können ältere Betriebssysteme das Laufwerk weder mounten noch darauf zugreifen.<br />
• [Disabled] Unterstützt nur Datenträger bis zu 2 TB Kapazität. Sollte die Gesamtkapazität 2 TB<br />
überschreiten, kann auf die verbleibende Speicherkapazität nicht zugegriffen werden, aber ältere<br />
Betriebssysteme hätten die Möglichkeit auf den Datenträger zuzugreifen.<br />
Drücken Sie die [OK] Taste um in das Setupmenü zu gelangen und verwenden die [Select] Taste um<br />
durch die verschiedenen Optionen zu scrollen.<br />
• Um das Menü zu verlassen ohne Änderungen vorzunehmen, drücken Sie bitte die [Select] Taste<br />
bis die EXIT Anzeige erscheint und drücken dann die [OK] Taste.<br />
• Um die Einstellungen zu ändern drücken Sie bitte die [Select] Taste um die bevorzugte Einstellung<br />
auszuwählen, dann die [OK] Taste um die Auswahl vorzunehmen und nochmals die [OK] Taste um<br />
die Änderung zu bestätigen.<br />
10
http://www.icybox.de<br />
2x 2,5" RAID Gehäuse<br />
3.4.2 Einstellung des RAID Modus<br />
<strong>IB</strong>-<strong>RD2252</strong><br />
<strong>IB</strong>-<strong>RD2252</strong>:<br />
Um Einstellungen des RAID Modus vornehmen zu können, stellen Sie bitte sicher, dass der RAID Schiebeschalter<br />
an der Rückseite des Gerätes entriegelt ist.<br />
• [RAID 1] RAID 1 Spiegelungsmodus bestätigen.<br />
• [RAID 0->1] Ändern des Modus von RAID 0 zu RAID 1.<br />
• [RAID 0] RAID 0 Beschleunigungssmodus bestätigen.<br />
• [RAID 1->0] Ändern des Modus von RAID 1 zu RAID 0.<br />
Drücken Sie die [OK] Taste um in das Setupmenü zu gelangen und verwenden die [Select] Taste um<br />
durch die verschiedenen Optionen zu scrollen.<br />
• Um das Menü zu verlassen ohne Änderungen vorzunehmen, drücken Sie bitte die [Select] Taste<br />
bis die EXIT Anzeige erscheint und drücken dann die [OK] Taste.<br />
• Um die Einstellungen zu ändern drücken Sie bitte die [Select] Taste um die bevorzugte Einstellung<br />
auszuwählen, dann die [OK] Taste um die Auswahl vorzunehmen und nochmals die [OK] Taste<br />
um die Änderung zu bestätigen. Anschließend ein weiteres Mal die [OK] Taste drücken um zu bestätigen,<br />
dass alle Daten gelöscht werden sollen. Das Gerät daraufhin automatisch neu gestartet.<br />
Nach dem Neustart ist eine weitere Bestätigung des neu eingestellten RAID Modus notwendig.<br />
11
http://www.icybox.de<br />
2x 2,5" RAID Gehäuse<br />
<strong>IB</strong>-<strong>RD2252</strong><br />
Anmerkung<br />
Bei Erstinstallation und Wechsel des RAID Modus werden alle vorhandenen Daten auf den Festplatten<br />
gelöscht. Stellen Sie sicher, das vorher alle vorhanden Daten auf einem anderen Datenträger gesichert<br />
werden.<br />
3.4.3 Alarm Einstellungen<br />
Der allgemeine Alarmton ist ein kurzes Piepen, das Sie hören, wenn das Gerät gestartet wird oder ein<br />
Fehler vorliegt. Um den Alarmton zu aktivieren oder zu deaktivieren, wählen Sie entsprechend die Einstellung<br />
ON oder OFF.<br />
• [ON] Signalton und Alarm ist aktiviert.<br />
• [OFF] Signalton und Alarm ist deaktiviert.<br />
Drücken Sie die [OK] Taste um in das Setupmenü zu gelangen und verwenden die [Select] Taste um<br />
durch die verschiedenen Optionen zu scrollen.<br />
• Um das Menü zu verlassen ohne Änderungen vorzunehmen, drücken Sie bitte die [Select] Taste bis<br />
die EXIT Anzeige erscheint und drücken dann die [OK] Taste.<br />
• Um die Einstellungen zu ändern drücken Sie bitte die [Select] Taste um die bevorzugte Einstellung<br />
auszuwählen, dann die [OK] Taste um die Auswahl zu bestätigen.<br />
12
http://www.icybox.de<br />
2x 2,5" RAID Gehäuse<br />
<strong>IB</strong>-<strong>RD2252</strong><br />
3.4.4 Einstellungen der Hintergrundbeleuchtung<br />
Die Hintergrundbeleuchtung des LCD Displays kann aktiviert, deaktiviert oder auf Automatik gestellt<br />
werden, so dass die Beleuchtung nach voreingestellter Zeit selbstständig erlischt.<br />
• [ON] Immer aktiviert.<br />
• [OFF] Immer deaktiviert.<br />
• [1min] Die Hintergrundbeleuchtung erlischt automatisch, wenn das LCD Display länger als eine Minute<br />
nicht verwendet wird.<br />
• [3min] Die Hintergrundbeleuchtung erlischt automatisch, wenn das LCD Display länger als drei Minuten<br />
nicht verwendet wird.<br />
• [5min] Die Hintergrundbeleuchtung erlischt automatisch, wenn das LCD Display länger als fünf Minuten<br />
nicht verwendet wird.<br />
Drücken Sie die [OK] Taste um in das Setupmenü zu gelangen und verwenden die [Select] Taste um<br />
durch die verschiedenen Optionen zu scrollen.<br />
• Um das Menü zu verlassen ohne Änderungen vorzunehmen, drücken Sie bitte die [Select] Taste bis<br />
die EXIT Anzeige erscheint und drücken dann die [OK] Taste.<br />
• Um die Einstellungen zu ändern drücken Sie bitte die [Select] Taste um die bevorzugte Einstellung<br />
auszuwählen, dann die [OK] Taste um die Auswahl zu bestätigen.<br />
13
http://www.icybox.de<br />
2x 2,5" RAID Gehäuse<br />
3.5 Display Informationen<br />
<strong>IB</strong>-<strong>RD2252</strong><br />
Zusätzlich zu den Details zur Hardware- und Geräteinformation, zeigt das LCD Display bestimmte Informationen<br />
zu verschiedenen Vorkommnissen an. Eine Liste der Meldungen und ihrer Bedeutungen lauten<br />
wie folgt:<br />
• [HDD Error / Remaining 1xHDD]<br />
Wenn im RAID 0 Modus eine Festplatte ausfällt, ertönt zunächst der Alarm und das Display zeigt<br />
an, dass nur noch eine funktionstüchtige Festplatte verbleibt. Die defekte Festplatte wird durch die<br />
zugehörige LED in der Front angezeigt.<br />
• [RAID Warning / Degraded Array]<br />
Wenn im RAID 1 Modus eine Festplatte ausfällt, ertönt zunächst der Alarm und das Display zeigt<br />
diese Meldung an. Drücken Sie die [OK] Taste um den Alarm vorrübergehend zu deaktivieren. Die<br />
defekte Festplatte wird durch die zugehörige LED in der Front angezeigt.<br />
• [XX Cable / Connected]<br />
Zeigt an welches Schnittstellenkabel verbunden ist.<br />
• [Cable / Disconnected]<br />
Zeigt an, dass das Schnittstellenkabel getrennt wurde.<br />
• [Rebuilding… / Hrs left xhxxmin]<br />
Zeigt an, wie viele Stunden und Minuten voraussichtlich verbleiben, bis ein Wiederherstellungsprozess<br />
eines RAID 1 Verbundes abgeschlossen ist.<br />
• [Detecting Disk / Starting…]<br />
Anzeige während der Startfrequenz.<br />
• [XX / Starting …]<br />
Anzeige während der Startfrequenz.<br />
• [RAID Mode locked]<br />
Wird angezeigt, wenn Sie versuchen den RAID Modus zu wechseln, der Sperrschalter an der Rückseite<br />
des Gerätes aber in der gesicherten Position steht.<br />
© Copyright 2011 RaidSonic Technology GmbH. Alle Rechte vorbehalten.<br />
Änderungen des Inhaltes dieser Anleitung sind ohne Vorankündigung vorbehalten. Kein Teil dieser Anleitung<br />
darf ohne die schriftliche Genehmigung des Herstellers reproduziert werden. Die in dieser Anleitung<br />
dargestellten Anzeigebeispiele und Beschreibungen können von den tatsächlichen Anzeigen des aktuellen<br />
Produkts oder dem Inhalt etwas abweichen. RaidSonic Technology GmbH ist nicht verantwortlich für<br />
irgendwelche Schäden oder Verluste, die auf die Verwendung dieser Anleitung zurückzuführen sind.<br />
14
http://www.icybox.de<br />
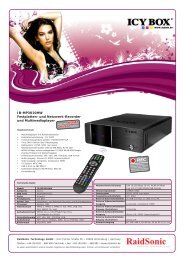
Dual-Bay RAID Storage Enclosure<br />
1 InTRoDuCTIon<br />
1.1 System Requirements<br />
<strong>IB</strong>-<strong>RD2252</strong><br />
1.1.1 PC Requirements<br />
• Minimum Intel Pentium III CPU 500 MHz, 128 MB RAM<br />
• eSATA equipped PC; Windows XP/Vista/7<br />
• FireWire 800 equipped PC; Windows XP/Vista/7<br />
• USB 2.0 equipped PC; Windows XP/Vista/7<br />
• Your hardware device must have the correct corresponding port (e.g. USB 2.0 host controller)<br />
• Plug & Play support for eSATA host controller<br />
1.1.2 Mac Requirements<br />
• Minimum Apple G4 processor, 128 MB RAM<br />
• eSATA equipped Mac; Mac OS 10.4 or above<br />
• FireWire 800 equipped Mac; Mac OS 10.2 or above<br />
• USB 2.0 equipped Mac; Mac OS 10.2 or above<br />
• Your hardware device must have the correct corresponding port (e.g. USB 2.0 host controller)<br />
• Plug & Play support for eSATA host controller<br />
1.1.3 Supported Hard Drives<br />
• Two 2.5" SATA-I or SATA-II hard drives (1.5 Gbit/s or 3.0 Gbit/s)<br />
• Height 9.5mm or 12.5mm<br />
• 20GB - 1TB per HDD<br />
• Hard drives of identical capacities are recommended<br />
note<br />
In order for the computer to access volumes larger than 2 TB, both the hardware and OS need to have<br />
the capacity to support large volumes (e.g.: WinVista 32bit/64bit or Mac OS 10.4 and above).<br />
1.2 Package Contents<br />
Package content may vary depending on vendor & version.<br />
• <strong>IB</strong>-<strong>RD2252</strong> (hard drives not included)<br />
• External power supply<br />
• Interface cables<br />
• User manual (English/German)<br />
1.3 About this Manual<br />
Firmware, images and descriptions may vary slightly between this manual and the actual product you<br />
have. Functions and features may change depending on the firmware version. Please read your warranty<br />
carefully, as this may vary between different vendors!<br />
1.4 Trademarks<br />
• MS-DOS, Microsoft, Windows XP/Vista/7 are trademarks of Microsoft Corporation.<br />
• Apple Macintosh and Mac are trademarks of Apple Computer.<br />
• All other third party brands and names are the property of their respective owners.<br />
15
http://www.icybox.de<br />
Dual-Bay RAID Storage Enclosure<br />
1.5 Detailed View <strong>IB</strong>-<strong>RD2252</strong><br />
1.5.1 Front View <strong>IB</strong>-<strong>RD2252</strong><br />
lED/Button Status<br />
A B<br />
<strong>IB</strong>-<strong>RD2252</strong><br />
• Green = Data access (read/write)<br />
• Red = Error or empty drive bay<br />
• OFF = HDD status normal<br />
• Orange = Rebuilding data<br />
Select • Select setup menu or mode<br />
OK • Confirm current option or enter setup menu<br />
16
http://www.icybox.de<br />
Dual-Bay RAID Storage Enclosure<br />
1.5.2 Rear View <strong>IB</strong>-<strong>RD2252</strong><br />
Icon/label Meaning<br />
DC IN<br />
USB 2.0<br />
Power receptacle<br />
<strong>IB</strong>-<strong>RD2252</strong><br />
USB 2.0 High Speed port<br />
FW800 FireWire 800 port<br />
eSATA External SATA port<br />
RAID RAID mode is locked and cannot be changed<br />
RAID RAID mode can be set via LCD display<br />
17
http://www.icybox.de<br />
Dual-Bay RAID Storage Enclosure<br />
1.6 RAID Modes<br />
<strong>IB</strong>-<strong>RD2252</strong><br />
Hard drives of identical capacities are recommended. If the capacities are different, the total amount of<br />
the space that can be used will depend on the drive with the smallest capacity. The difference in performance<br />
is only visible for fast interfaces like eSATA.<br />
1.6.1 RAID 0 - Disk Striping<br />
The drives are shown as one large single volume but the total size will depend on the drive with the<br />
smallest capacity. This setting is used where speed is the primary objective but RAID Level 0 (also called<br />
striping) is not redundant. This form of array splits each piece of data across the drives in segments;<br />
since data is written without any form of parity data-checking, it allows for the fastest data transfer. On<br />
the downside, if one drive becomes damaged, the whole array can become corrupted.<br />
Storage Capacity Data Safety Performance<br />
1.6.2 RAID 1 - Disk Mirroring<br />
Two drives show up as one volume but only 50% of the total capacity, depending on the drive with the<br />
smallest capacity, can be used. RAID 1 creates an exact copy (or mirror) of a set of data on the second<br />
drive. This is useful when reliability and backup take precedence over storage capacity. Should one hard<br />
drive fail, it can be replaced and the data rebuilt automatically.<br />
Storage Capacity Data Safety Performance<br />
1.6.3 Changing the RAID Mode<br />
The RAID mode should be set after installing the drives and before first formatting the drives.<br />
1. Make sure the power is off and then install the hard drives.<br />
2. Unlock the RAID switch on the rear of the device.<br />
3. Connect the power supply to the device and then plug it into the power outlet to turn the<br />
device on.<br />
4. Enter the setup menu and set your preferred RAID mode. The system will restart and ask<br />
for confirmation.<br />
5. Initialize the disk, create a partition and format the drives.<br />
6. Lock the RAID switch to prevent an accidental change of the RAID mode.<br />
18<br />
2 Festplatten<br />
2 Festplatten
http://www.icybox.de<br />
Dual-Bay RAID Storage Enclosure<br />
Note<br />
<strong>IB</strong>-<strong>RD2252</strong><br />
Changing the RAID mode requires you to re-format the drives. This will erase all data on the hard drives<br />
that are being formatted. Make sure to backup all existing data first!<br />
Important<br />
In order for the computer to access volumes larger than 2 TB, both the hardware and Operating System<br />
need to have the capacity to support large volumes (e.g.: WinVista 32bit/64bit or Mac OS 10.4 and<br />
above).<br />
2. SYSTEM SETuP<br />
2.1 <strong>IB</strong>-<strong>RD2252</strong> Hard Drive Assembly<br />
Your unit may come with pre-installed hard drives. Before opening such an enclosure, please read the<br />
warranty from your vendor carefully, as this could void your warranty.<br />
1. Remove the two screws at top rear of the device and then remove the<br />
upper part part of of the the rear panel. panel.<br />
2. Grab the HDD tray and pull it out of the case.<br />
19
http://www.icybox.de<br />
Dual-Bay RAID Storage Enclosure<br />
<strong>IB</strong>-<strong>RD2252</strong><br />
3. Align the hard drive with the HDD tray as illustrated below and mount it with two<br />
screws on each side.<br />
4. Repeat the previous two steps for the second HDD tray.<br />
5. 5. Slide the HDD tray(s) back into<br />
the case and push it lightly into place.<br />
7. Turn on the power and use the LCD display to set your preferred RAID mode.<br />
8. Connect the device to your computer. For PC users, use the disk management tool or for Mac<br />
users, use the disk utility to create a new partition and format the drives.<br />
9. Done! Your drive is now ready to use.<br />
20<br />
6. Align the rear panel with the case and<br />
fasten the hand-tightening screws to<br />
finish the assembly.
http://www.icybox.de<br />
Dual-Bay RAID Storage Enclosure<br />
<strong>IB</strong>-<strong>RD2252</strong><br />
Note<br />
This device is designed for two hard drives and does not work when only one HDD is installed.<br />
Important<br />
Upon initial start up of the device and when changing the RAID mode, any existing data on the installed<br />
hard drives will be erased. Please make sure you backup all data prior to installing the hard drives and<br />
prior to changing the RAID mode!<br />
2.2 Replacing Hard Drives<br />
When a drive fails, the corresponding HDD LED will light up red. If only one drive is defective and the<br />
RAID mode is set to RAID 1, the data can still be accessed, however, we strongly recommend replacing<br />
the faulty drive immediately to assure continued proper backup and data safety.<br />
If more than one drive fails at the same time or if the RAID mode is set to RAID 0, the data will be lost<br />
and the system cannot be accessed again until the drive(s) have been replaced.<br />
1. Check the HDD LED. The corresponding LED will light up red, indicating the defective drive.<br />
2. Turn off the power by removing the power supply from the wall socket.<br />
3. Open the enclosure and replace the faulty hard drive(s) with a new one.<br />
4. Finish the assembly and re-connect the power supply.<br />
5. For RAID 1, the RAID array will be rebuilt automatically. During this process, the Rebuild LED will<br />
be flashing until all data is backed up. Rebuilding the RAID array will take several hours, depending<br />
on the drive capacity.<br />
6. For RAID 0, unlock the RAID switch, go to the RAID setup menu, select RAID 0 and confirm the<br />
settings. After the system restart, simply format the drives.<br />
Note<br />
We recommend not turning off the power during the rebuild process but if the process is interrupted, it<br />
will continue rebuilding the data as soon as the power is turned back on.<br />
2.3 Connection to Computer<br />
A few precautions and notes when using <strong>IB</strong>-<strong>RD2252</strong>:<br />
• Do not expose the product to water or humid conditions.<br />
• Do not cover the enclosure’s ventilation holes.<br />
• Before connecting the device, install the hard drives and set your preferred RAID mode.<br />
• For the safe removal of your drive and to assure that no data is lost, always follow the correct<br />
unplug procedure for external hardware (e.g.: Eject the drive before removal).<br />
• In order for the computer to access volumes larger than 2 TB, both the hardware and Operating<br />
System need to have the capacity to support large volumes (e.g.: WinVista 32bit/64bit or Mac OS<br />
10.4 and above) or the >2 TB option should be disabled.<br />
• When the computer goes into stand-by mode, the external hard drives will spin down as well.<br />
• Only one interface can be used at any given time.<br />
2.4 About Data Backup<br />
To protect your files and help prevent the loss of your data, we strongly recommend that you keep two<br />
copies of your data, one copy on your <strong>IB</strong>-<strong>RD2252</strong> and a second copy either on your internal drive or<br />
another storage media such as CD, DVD, Tape or an additional external drive.<br />
Any loss or corruption of data while using the <strong>IB</strong>-<strong>RD2252</strong> is the sole responsibility of the user, and under<br />
no circumstances will the manufacturer be held liable for compensation or the recovery of this data.<br />
21
http://www.icybox.de<br />
Dual-Bay RAID Storage Enclosure<br />
3 lCD DISPlAY<br />
<strong>IB</strong>-<strong>RD2252</strong><br />
To select a menu or change an option, use the [Select] button. To enter a menu and confirm a change,<br />
use the [OK] button. For further details, follow the on-screen wizard or refer to the following step by step<br />
descriptions.<br />
3.1 Main Menu<br />
Press the [Select] button to change between the different menus and press the [OK] button to enter a<br />
menu.<br />
1. The main screen displays the product name and the current RAID mode.<br />
2. The system information will show further details about the configuration and the hardware.<br />
3. The HDD information will show further details about the installed hard drives.<br />
4. The settings menu offers options to change the device configuration.<br />
3.2 System Information<br />
Press the [Select] button until the system information menu is selected and then press the [OK] button<br />
to start displaying further details about the device configuration and the hardware. It will automatically<br />
cycle through the different information displaying each screen for about 8 seconds and then return to the<br />
main screen. To fast forward, press the [Select] button.<br />
1. The main screen of the system information menu.<br />
2. The serial number is a combination of the 1394 vendor ID, the chip ID Hi and the chip ID Lo.<br />
3. Displays the current firmware version of the <strong>IB</strong>-<strong>RD2252</strong>.<br />
4. The I/O status shows the interface that is currently used for the connection to the computer.<br />
5. Displays the current status of the >2TB and the alarm function.<br />
6. Shows how the RAID mode was set (LCM = LCD display, AP = computer program) and the<br />
total storage capacity.<br />
22
http://www.icybox.de<br />
Dual-Bay RAID Storage Enclosure<br />
3.3 HDD Information<br />
<strong>IB</strong>-<strong>RD2252</strong><br />
Press the [Select] button until the HDD information menu is selected and then press the [OK] button<br />
to start displaying further details about the installed hard drives. It will automatically cycle through the<br />
different information displaying each screen for about 8 seconds and then return to the main screen. To<br />
fast forward, press the [Select] button.<br />
1. The main screen of the HDD information menu.<br />
2. Displays the model number and serial number of the drive installed at HDD1.<br />
3. Displays the total storage capacity and the temperature of the drive installed at HDD1.<br />
4. Displays the model number and serial number of the drive installed at HDD2.<br />
5. Displays the total storage capacity and the temperature of the drive installed at HDD2.<br />
3.4 Settings<br />
Press the [Select] button until the settings menu is selected and then press the [OK] button to enter the<br />
configuration menu. You can now use the [Select] button to cycle through the different settings and the<br />
[OK] button to further configure the device settings.<br />
1. Option to enable or disable the support for large volumes in excess of 2TB.<br />
2. Setup menu for the RAID settings.<br />
3. Option to enable or disable the general alarm sound.<br />
4. Setup menu to define how long the backlight for the LCD display stays lit.<br />
5. To exit the settings menu and return to the main menu.<br />
23
http://www.icybox.de<br />
Dual-Bay RAID Storage Enclosure<br />
3.4.1 > 2TB Volume Mode<br />
<strong>IB</strong>-<strong>RD2252</strong><br />
In order for the computer to access volumes larger than 2 TB, both the hardware and Operating System<br />
need to have the capacity to support large volumes (e.g.: WinVista 32bit/64bit or Mac OS 10.4 and<br />
above) or the >2 TB option should be disabled.<br />
• [Enabled] Supports volumes in excess of 2 TB. If the total storage capacity exceeds 2 TB, older<br />
Operating Systems will not be able to mount and access the drive.<br />
• [Disabled] Only supports volumes up to 2 TB. If the total storage capacity exceeds 2TB, the<br />
remaining storage space cannot be accessed but on the other hand, older Operating Systems<br />
are still able to use the drive.<br />
Press the [OK] button to enter the setup menu and press the [Select] button to cycle through the<br />
different options.<br />
• To exit the menu without changing any of the settings, press the [Select] button until you see the<br />
Exit screen and then press the [OK] button.<br />
• To change the setting, press the [Select] button to choose your preferred mode, press the [OK]<br />
button to select it and then press the [OK] button again to confirm the change.<br />
24
http://www.icybox.de<br />
Dual-Bay RAID Storage Enclosure<br />
3.4.2 RAID Mode Setup<br />
<strong>IB</strong>-<strong>RD2252</strong><br />
<strong>IB</strong>-<strong>RD2252</strong>:<br />
In order to set the RAID mode, make sure the RAID switch is in the unlocked position.<br />
• [RAID 1] Confirm RAID 1 mirroring mode.<br />
• [RAID 0->1] Change the mode from RAID 0 striping to RAID 1 mirroring.<br />
• [RAID 0] Confirm RAID 0 striping mode.<br />
• [RAID 1->0] Change the mode from RAID 1 mirroring to RAID 0 striping.<br />
Press the [OK] button to enter the setup menu and press the [Select] button to cycle through the<br />
different options.<br />
• To exit the menu without changing any of the settings, press the [Select] button until you see the<br />
Exit screen and then press the [OK] button.<br />
• To change the setting, press the [Select] button to choose your preferred mode, press the [OK]<br />
button to select it, press the [OK] button again to confirm the change and once more to acknowledge<br />
that all data will be erased by this change. The device will restart automatically and after<br />
start up, one more confirmation is required to set the new RAID mode.<br />
Note<br />
Changing the RAID mode requires you to re-format the drives. Make sure to backup all existing data<br />
first!<br />
25
http://www.icybox.de<br />
Dual-Bay RAID Storage Enclosure<br />
3.4.3 Alarm Setup<br />
<strong>IB</strong>-<strong>RD2252</strong><br />
The general alarm sound is the short beep you hear when starting up the system and it will also sound<br />
when something is wrong. To enable or disable the alarm, select ON or OFF respectively.<br />
• [ON] Beeper and alarm is enabled.<br />
• [OFF] Beeper and alarm is disabled.<br />
Press the [OK] button to enter the setup menu and press the [Select] button to cycle through the different<br />
options.<br />
• To exit the menu without changing any of the settings, press the [Select] button until you see the<br />
Exit screen and then press the [OK] button.<br />
• To change the setting, press the [Select] button to choose your preferred mode and then press the<br />
[OK] button to confirm the change.<br />
26
http://www.icybox.de<br />
Dual-Bay RAID Storage Enclosure<br />
3.4.4 Backlight Setup<br />
<strong>IB</strong>-<strong>RD2252</strong><br />
The backlight for the LCD display can be enabled, disabled or set so that it turns off automatically, when<br />
the screen has been idle for a certain amount of time.<br />
• [ON] Always ON.<br />
• [OFF] Always OFF.<br />
• [1min] Backlight turns off when the screen has been idle for more than one minute.<br />
• [3min] Backlight turns off when the screen has been idle for more than three minutes.<br />
• [5min] Backlight turns off when the screen has been idle for more than five minutes.<br />
Press the [OK] button to enter the setup menu and press the [Select] button to cycle through the different<br />
options.<br />
• To exit the menu without changing any of the settings, press the [Select] button until you see the<br />
Exit screen and then press the [OK] button.<br />
• To change the setting, press the [Select] button to choose your preferred mode and then press the<br />
[OK] button to confirm the change.<br />
27
http://www.icybox.de<br />
Dual-Bay RAID Storage Enclosure<br />
3.5 Display Information<br />
<strong>IB</strong>-<strong>RD2252</strong><br />
In addition to the details about the hardware and device configuration, the LCD display will also show<br />
certain event information. Following is a list of possible messages and their meanings.<br />
• [HDD Error / Remaining 1xHDD]<br />
When using RAID 0 and one of the drives fails, the alarm will go off and the display indicates that<br />
only one good drive remains. Refer to the HDD LED’s in order to locate the defective drive.<br />
• [RAID Warning / Degraded Array]<br />
When using RAID 1 and one of the drives fails, the alarm will go off and the display shows this<br />
message. Press the [OK] button to temporarily mute the alarm and use the HDD LED’s in order<br />
to locate the defective drive.<br />
• [XX Cable / Connected]<br />
Shows which cable has been connected.<br />
• [Cable / Disconnected]<br />
Shows when the cable has been unplugged.<br />
• [Rebuilding… / Hrs left xhxxmin]<br />
Shows during the rebuild process of a RAID 1 array with an approximate time in hours and<br />
minutes indicating how long it takes until the backup is done.<br />
• [Detecting Disk / Starting…]<br />
Shows during start up of the system.<br />
• [XX / Starting …]<br />
Shows during start up of the system.<br />
• [RAID Mode locked]<br />
Shows when trying to change the RAID mode but the RAID switch is still in the locked position.<br />
28
© Copyright 2011 by RaidSonic Technology GmbH. All Rights Reserved<br />
The information contained in this manual is believed to be accurate and reliable. RaidSonic Technology GmbH assumes no<br />
responsibility for any errors contained in this manual. RaidSonic Technology GmbH reserves the right to make changes in the<br />
specifications and/or design of the above mentioned product without prior notice. The diagrams contained in this manual may<br />
also not fully represent the product that you are using and are there for illustration purposes only. RaidSonic Technology GmbH<br />
assumes no responsibility for any differences between the product mentioned in this manual and the product you may have.