
Erfolgreiche ePaper selbst erstellen
Machen Sie aus Ihren PDF Publikationen ein blätterbares Flipbook mit unserer einzigartigen Google optimierten e-Paper Software.
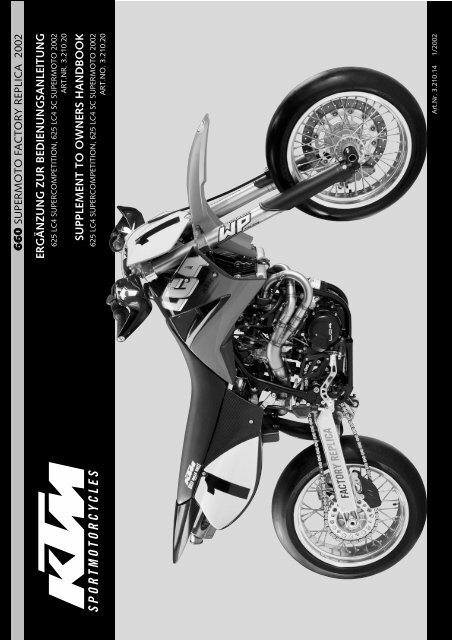
660 SUPERMOTO FACTORY REPLICA 2002<br />
ERGÄNZUNG ZUR BEDIENUNGSANLEITUNG<br />
625 LC4 SUPERCOMPETITION, 625 LC4 SC SUPERMOTO 2002<br />
ART.NR. 3.210.20<br />
SUPPLEMENT TO OWNERS HANDBOOK<br />
625 LC4 SUPERCOMPETITION, 625 LC4 SC SUPERMOTO 2002<br />
ART.NO. 3.210.20<br />
Art.Nr. 3.210.14 1/2002
DEUTSCH 2<br />
1<br />
4<br />
5<br />
A<br />
B<br />
2<br />
3<br />
BEDIENUNGSELEMENTE<br />
Kupplungshebel<br />
Der Kupplungshebel 1 ist am Lenker links angebracht. Mit der Einstellschraube<br />
A kann die Grundstellung des Kupplungshebels verändert werden<br />
(siehe Wartungsarbeiten).<br />
Handdekompressorhebel<br />
Der Handdekompressorhebel 2 wird nur benötigt, wenn nach einem Sturz<br />
der Vergaser übergelaufen ist. Zum „Freipumpen“ des Motors zieht man<br />
während des Startvorganges den Handdekompressorhebel.<br />
Am Hebel muß außen immer ein Spiel von ca. 10 mm vorhanden sein. Erst<br />
dann dürfen die Ventile bewegt werden (am stärkeren Widerstand des<br />
Handdekompressorhebels zu erkennen).<br />
! VORSICHT !<br />
– STELLEN SIE DEN MOTOR NICHT MIT DEM HANDDEKOMPRESSORHEBEL AB. VERWEN-<br />
DEN SIE DAZU DEN KURZSCHLUSSTASTER ODER DEN NOT-AUS-TASTER.<br />
– KONTROLLIEREN SIE REGELMÄSSIG DIE EINSTELLUNG DES DEKOMPRESSOR-SEILZUGES<br />
(SIEHE WARTUNGSARBEITEN). WENN DER HANDDEKOMPRESSORHEBEL KEINEN LEER-<br />
WEG HAT, FÜHRT DIES ZUM MOTORSCHADEN.<br />
Handbremshebel<br />
Der Handbremshebel 3 befindet sich am Lenker rechts und betätigt die<br />
Vorderradbremse. Mit der Einstellschraube B kann die Grundstellung des<br />
Handbremshebels verändert werden (siehe Wartungsarbeiten).<br />
� ACHTUNG �<br />
WENN SICH DER WIDERSTAND AM HANDBREMSHEBEL BZW. FUSSBREMSHEBEL SCHWAM-<br />
MIG ANFÜHLT, IST AM BREMSSYSTEM ETWAS NICHT IN ORDNUNG. LASSEN SIE DAS<br />
BREMSSYSTEM IN EINER <strong>KTM</strong> FACHWERKSTÄTTE ÜBERPRÜFEN, BEVOR SIE MIT DEM<br />
MOTORRAD FAHREN.<br />
Kraftstoffhahn<br />
Der Kraftstoffhahn 4 ist am Tank links montiert.<br />
Öffnen: Drehknopf bis zum Anschlag gegen den Uhrzeigersinn drehen<br />
Schließen: Drehknopf bis zum Anschlag im Uhrzeigersinn drehen<br />
! VORSICHT !<br />
WIRD DAS FAHRZEUG ABGESTELLT, IST DER KRAFTSTOFFHAHN IMMER ZU SCHLIESSEN.<br />
WIRD DIESER NICHT GESCHLOSSEN, KANN MÖGLICHERWEISE DER VERGASER ÜBERLAUFEN<br />
UND KRAFTSTOFF IN DEN MOTOR GELANGEN.<br />
Heißstartknopf<br />
Der Vergaser ist mit einer Heißstarteinrichtung ausgerüstet, die das Anspringen<br />
des heißen Motors erleichtert. Heißstartknopf 5 ziehen, bis er einrastet.<br />
Dadurch wird eine Luftbohrung freigegeben. Wenn der Motor läuft<br />
Heißstartknopf wieder in seine Grundstellung drücken.
1<br />
3<br />
2<br />
5<br />
4<br />
Federvorspannung der Gabel ändern<br />
Sie können die Federvorspannung mit der Einstellschraube 1 ± 5 mm<br />
ändern.<br />
Drehen im Uhrzeigersinn erhöht die Vorspannung, drehen gegen den Uhrzeigersinn<br />
verringert sie.<br />
Eine Veränderung der Federvorsapnnung hat keinen Einfluss auf die Dämpfungseinstellung<br />
der Zugstufe.<br />
Grundsätzlich sollte jedoch bei mehr Federvorspannung auch mehr Zugstufendämpfung<br />
eingestellt werden.<br />
STANDARDEINSTELLUNG:<br />
Drehen Sie die Einstellschraube bis zum Anschlag heraus, und 5 Umdrehungen<br />
hinein. Ausgehend von dieser Stellung können Sie die Federvorspannung<br />
5 mm erhöhen oder reduzieren (1 Umdrehung = 1 mm).<br />
Druckstufendämpfung des Federbeines<br />
Das Federbein verfügt über die Möglichkeit, im Low- und Highspeed<br />
Bereich die Druckstufendämpfung getrennt abzustimmen (Dual Compression<br />
Control).<br />
Die Bezeichnung Low- und Highspeed ist auf die Bewegung des Federbeins<br />
beim Einfedern bezogen und nicht auf die Fahrtgeschwindigkeit des Motorrades.<br />
Die Low- und Highspeed Technik arbeitet übergreifend.<br />
Von langsamer bis normaler Einfederungsgeschwindigkeit des Federbeines<br />
wirkt in erster Linie die Lowspeed Einstellung.<br />
Die Highspeed Einstellung zeigt ihre Wirkung beim schnellen Einfedern.<br />
Drehen im Uhrzeigersinn erhöht die Dämpfung, drehen gegen den Uhrzeigersinn<br />
verringert die Dämpfung.<br />
STANDARDEINSTELLUNG LOWSPEED:<br />
– Einstellschraube 2 mit einem Schraubendreher bis zum Anschlag im<br />
Uhrzeigersinn drehen.<br />
– Dem Federbeintyp entsprechende Anzahl von Klicks gegen den Uhrzeigersinn<br />
zurückdrehen.<br />
Typ White Power 1218W755 . . . . .15 Klicks<br />
STANDARDEINSTELLUNG HIGHSPEED:<br />
– Einstellschraube 3 mit einem Schlüssel (17 mm) bis zum Anschlag im<br />
den Uhrzeigersinn drehen.<br />
– Dem Federbeintyp entsprechende Anzahl von Umdrehungen gegen den<br />
Uhrzeigersinn drehen.<br />
Typ White Power 1218W755 . . . . . . 1,5 Umdrehungen<br />
� ACHTUNG �<br />
DIE DÄMPFEREINHEIT DES FEDERBEINES IST MIT HOCHVERDICHTETEM STICKSTOFF<br />
GEFÜLLT. VERSUCHEN SIE NIE DAS FEDERBEIN ZU ZERLEGEN ODER WARTUNGSARBEITEN<br />
SELBST DURCHZUFÜHREN, SCHWERE VERLETZUNGEN KÖNNTEN DIE FOLGE SEIN.<br />
LÖSEN SIE DAHER AUCH NIE DIE SCHWARZE VERSCHRAUBUNG 4 (24 MM).<br />
Zugstufendämpfung des Federbeines<br />
Der Dämpfungsgrad der Zugstufe kann mit der Einstellschraube 5 verstellt<br />
werden. Drehen nach rechts erhöht die Dämpfung, Drehen nach links verringert<br />
die Dämpfung beim Ausfedern.<br />
STANDARDEINSTELLUNG:<br />
– Einstellschraube bis zum Anschlag im Uhrzeigersinn drehen<br />
– dem Federbeintyp entsprechende Anzahl von Klicks gegen den Uhrzeigersinn<br />
zurückdrehen.<br />
Typ White Power 1218W755 .............20 Klicks<br />
DEUTSCH<br />
3
DEUTSCH 4<br />
RÄDER FAHRWERK BREMSEN ANBAUTEILE VERGASER MOTOR<br />
SCHMIER- UND WARTUNGSTABELLE 2002<br />
Ein gewaschenes Fahrzeug ermöglicht kürzere Inspektionen und spart Geld!<br />
660 Supermoto Factory Replica<br />
1. Service nach<br />
3 Stunden<br />
nach / alle<br />
6 Stunden<br />
Motoröl und Ölfilter wechseln ● ●<br />
Ölsieb und Magnet der Ablaßschraube reinigen ● ●<br />
Ölleitungen auf Beschädigung und knickfreie Verlegung prüfen ● ●<br />
Zündkerze erneuern ●<br />
Ventilspiel kontrollieren und einstellen ● ●<br />
Motorbefestigungsschrauben auf Festsitz prüfen ● ●<br />
Vergaser reinigen und einstellen ●<br />
Vergasermanschetten auf Risse und Dichtheit prüfen ● ●<br />
Leerlaufeinstellung prüfen ● ●<br />
Entlüftungsschläuche auf Beschädigung und knickfreie Verlegung prüfen ● ●<br />
Kühlsystem auf Dichtheit ● ●<br />
Auspuffanlage auf Dichtheit sowie Aufhängung prüfen ● ●<br />
Seilzüge auf Beschädigung, Leichtgängigkeit und knickfreie Verlegung prüfen, sowie ● ●<br />
einstellen und schmieren<br />
Ölstand im Geberzylinder der hydraulischen Kupplung prüfen ● ●<br />
Luftfilter und -kasten reinigen ● ●<br />
Kabel auf Beschädigung und knickfreie Verlegung kontrollieren ●<br />
Bremsflüssigkeitsstand, Belagstärke, Bremsscheiben prüfen ● ●<br />
Bremsflüssigkeit wechseln ●<br />
Bremsleitungen auf Beschädigung und Dichtheit prüfen ● ●<br />
Leichtgängigkeit, Leerweg von Hand-/Fußbremshebel prüfen/einstellen ● ●<br />
Schrauben der Bremsanlage auf Festsitz prüfen ● ●<br />
Federbein und Gabel auf Dichtheit und Funktion prüfen ● ●<br />
Gabelbeine entlüften ● ●<br />
Schwingenlagerung prüfen ●<br />
Steuerkopflager prüfen/einstellen ● ●<br />
Alle Fahrwerksschrauben auf Festsitz prüfen (Gabelbrücken, Gabelfaust, ● ●<br />
Achsmuttern/-schrauben, Schwingenlagerung, Federbein)<br />
Speichenspannung und Felgenschlag prüfen ● ●<br />
Reifenzustand und Luftdruck kontrollieren ● ●<br />
Kette, Kettenräder, -führungen auf Verschleiß, Festsitz und Spannung prüfen ● ●<br />
Kette schmieren ● ●<br />
Radlager auf Spiel prüfen ●<br />
WICHTIGE EMPFOHLENE WARTUNGSARBEITEN, DIE MIT GESONDERTEM ZUSATZAUFTRAG DURCHGEFÜHRT WERDEN KÖNNEN<br />
Mindestens Mindestens<br />
2x jährlich<br />
1x jährlich<br />
Gabel vollständig warten ●<br />
Federbein vollständig warten ●<br />
Steuerkopflager und Dichtungselemente reinigen und fetten ●<br />
Glasfasergarn-Füllung des Auspuff-Enddämpfers erneuern ●<br />
Elektrische Kontakte und Kurzschlusstaster mit Kontaktspray behandeln ●<br />
Öl der hydraulischen Kupplung wechseln ●<br />
DIE LAUFLEISTUNG FÜR DIE INSPEKTIONSINTERVALLE SOLLTE KEINESFALLS UM MEHR ALS 2 STUNDEN ÜBERSCHRITTEN WERDEN.<br />
WARTUNGSARBEITEN DER <strong>KTM</strong>-FACHWERKSTÄTTE ERSETZEN NICHT DIE KONTROLL- UND PFLEGEARBEITEN DES FAHRERS!
DURCHFÜHRUNG VON DRINGENDEN KONTROLL- UND PFLEGEARBEITEN DURCH DEN FAHRER<br />
Vor jeder<br />
Inbetriebnahme<br />
Nach jeder<br />
Reinigung<br />
Ölstand kontrollieren ●<br />
Bremsflüssigkeitsstand kontrollieren ●<br />
Bremsbeläge auf Verschleiß prüfen ●<br />
Seilzüge und Nippel schmieren und einstellen ●<br />
Gabelbeine regelmäßig entlüften ●<br />
Staubmanschetten regelmäßig abziehen und reinigen ●<br />
Kette reinigen und schmieren, Spannung überprüfen bzw. nach Bedarf ● ●<br />
Luftfilter und Filterkasten reinigen ●<br />
Reifenluftdruck und Verschleiß kontrollieren ●<br />
Kühlflüssigkeitsstand kontrollieren ●<br />
Kraftstoffleitungen auf Undichtigkeiten prüfen ●<br />
Überlaufbehälter-Kraftstoff entleeren ● ●<br />
Schwimmerkammer entleeren ●<br />
Leichtgängigkeit aller Bedienelemente prüfen ●<br />
Bremswirkung überprüfen ● ●<br />
Blanke Metallteile (Brems- und Auspuffanlage ausgenommen) mit ●<br />
Korrosionsschutzmitteln auf Wachsbasis behandeln<br />
Alle Schrauben, Muttern und Schlauchklemmen regelmäßig auf Festsitz prüfen ●<br />
EMPFOHLENE ÜBERPRÜFUNGEN AM 660 LC4 SUPERMOTO FACTORY REPLICA MOTOR DURCH DIE<br />
<strong>KTM</strong> FACHWERKSTÄTTE (ZUSATZAUFTRAG FÜR DIE <strong>KTM</strong> FACHWERKSTÄTTE)<br />
nach / alle<br />
6 Stunden<br />
mindestens<br />
1x jährlich<br />
Festsitz Sechskantmutter Primärrad ●<br />
Verschleiss Kupplungslamellen ●<br />
Verschleiss Zylinder und Kolben ●<br />
Verschleiss Nut Kolbenbolzensicherung ●<br />
Verschleiss Nockenwelle ●<br />
Radialspiel Lager Nockenwelle ●<br />
Länge Ventilfedern ●<br />
Verschleiß Federauflage ●<br />
Schlag Ventilteller ●<br />
Verschleiss Ventilführungen ●<br />
Radialspiel der Kipphebelrollen ●<br />
Längung Steuerkette ●<br />
Verschleiss Steuerkettenführungen ●<br />
Verschleiss Verzahnung Kettenspanner ●<br />
Schlag Kurbelzapfen Kurbelwelle ●<br />
Radialspiel Pleuellager ●<br />
Radialspiel Lager Kolbenbolzen ●<br />
Verschleiss Lager Ausgleichswelle ●<br />
Verschleiss Lager Kurbelwelle ●<br />
Verschleiss Getriebe ●<br />
Biegung Getriebewellen ●<br />
Länge Feder Bypassventil ●<br />
DEUTSCH<br />
5
DEUTSCH 6<br />
WARTUNGSARBEITEN AN FAHRGESTELL UND MOTOR<br />
2<br />
2<br />
3 3<br />
6<br />
12,5 mm 7,5 mm<br />
A<br />
4<br />
1<br />
6<br />
5<br />
5<br />
Steuerkopflagerung prüfen und nachstellen *<br />
Die Steuerkopflagerung sollte regelmäßig auf Spiel geprüft werden. Zum<br />
Prüfen stützt man das Motorrad am Rahmen so ab, daß das Vorderrad<br />
angehoben ist. Nun versucht man die Gabel nach vorne und hinten zu<br />
bewegen, dabei darf kein Spiel spürbar sein.<br />
Zum Nachstellen die Bundschraube 1 und die 6 Klemmschrauben 2 + 3<br />
der oberen Gabelbrücke lockern. Einen Durchschlag (6 mm) 4 in die Einstellmutter<br />
5 stecken und diese entsprechend nachdrehen. Keinesfalls die<br />
Einstellmutter fest anziehen, da sonst die Lager beschädigt werden.<br />
Bundschraube 1 mit 40 Nm festziehen und nochmals Lagerung auf Leichtgängigkeit<br />
prüfen. Mit einem Kunststoffhammer leicht auf die obere Gabelbrücke<br />
klopfen, um ein Verspannen zu vermeiden, die Klemmschrauben 2<br />
mit 20 Nm festziehen, die Klemmschrauben 3 mit 10 Nm festziehen.<br />
� ACHTUNG �<br />
IST DIE STEUERKOPFLAGERUNG NICHT SPIELFREI EINGESTELLT, TRITT UNRUHIGES FAHRVER-<br />
HALTEN AUF. DAS MOTORRAD KANN DABEI AUSSER KONTROLLE GERATEN.<br />
! VORSICHT !<br />
WIRD ÜBER LÄNGERE ZEIT MIT SPIEL IN DER STEUERKOPFLAGERUNG GEFAHREN, WERDEN<br />
DIE LAGER UND IN WEITERER FOLGE DIE LAGERSITZE IM RAHMEN ZERSTÖRT.<br />
Die Steuerkopflager sollten mindestens einmal jährlich nachgefettet werden<br />
(z.B. mit Shell Advance Grease).<br />
Versatz der Gabel (Nachlauf) verstellen *<br />
Der Versatz der Gabel (Mitte Gabelbeine - Mitte Steuerkopflager) kann verändert<br />
werden, um das Handling den Rennstrecken anzupassen.<br />
Dazu die Klemmschrauben 6 an den Gabelbrücken lösen. Einen Durchschlag<br />
(6 mm) in die Einstellmutter 5 stecken und Gabelschaftrohr 180°<br />
gegen den Uhrzeigersinn drehen (nicht im Uhrzeigersinn, da sonst die Einstellung<br />
der Steuerkopflager beeinflusst wird). Die Nut A muß sich mit dem<br />
Schlitz der oberen Gabelbrücke decken. Klemmschrauben mit 20 Nm festziehen.<br />
Ist die Nut A links, beträgt der Versatz 12,5 mm und der Nachlauf 97,4 mm.<br />
Mit dieser Einstellung erzielen Sie besseres Handling in Kurven.<br />
Ist die Nut A rechts, beträgt der Versatz 7,5 mm und der Nachlauf 99,2 mm.<br />
Mit dieser Einstellung erzielen Sie bessere Fahrstabilität auf Geraden.<br />
� ACHTUNG �<br />
DIE NUT A MUSS SICH IMMER MIT DEM SCHLITZ IN DER OBEREN GABELBRÜCKE<br />
DECKEN. IST DAS NICHT DER FALL, LÄUFT DAS MOTORRAD AUS DER SPUR WAS ZU<br />
INSTABILEM FAHRVERHALTEN FÜHRT.
2<br />
3<br />
4<br />
1<br />
LOCTITE 243<br />
6<br />
5<br />
5<br />
Lenkerposition ändern<br />
Die Lenkerposition kann um 37 mm verstellt werden. Sie haben dadurch die<br />
Möglichkeit den Lenker in die für Sie angenehmste Position zu bringen.<br />
An der oberen Gabelbrücke 1 befinden sich 3 Bohrungen mit einem<br />
Abstand von 15 mm. Die Bohrungen an der Lenkeraufnahme 2 sind<br />
3,5 mm aus der Mitte plaziert. Sie haben also die Möglichkeit den Lenker in<br />
6 verschiedenen Positionen zu montieren.<br />
Dazu entfernen Sie die Schrauben 3 der Lenkerklemmbrücken und die<br />
Schrauben 4 der Lenkeraufnahme. Lenkeraufnahme positionieren, Schrauben<br />
4 mit Loctite 243 bestreichen und mit 40 Nm festziehen. Lenker und<br />
Lenkerklemmbrücken montieren und Schrauben 3 mit 20 Nm festziehen.<br />
Der Spalt zwischen Lenkeraufnahme und Lenkerklemmbrücke muß hinten<br />
und vorne gleich groß sein.<br />
STANDARDEINSTELLUNG:<br />
Mittlere Bohrung der Gabelbrücke und Versatz der Lenkerbrücke nach<br />
vorne.<br />
Heckhöhe verstellen<br />
Die Heckhöhe kann sehr einfach um 48 mm verstellt werden, um das Handling<br />
den Rennstrecken anzupassen. Das Federbein ist oben in Exzenterbüchsen<br />
befestigt.<br />
Bevor Sie die Heckhöhe verstellen, sollte die Grundeinstellung gemessen<br />
werden. Dazu Motorrad aufbocken, Abstand vom Schwingarm zum Ende<br />
des Rahmenauslegers messen und notieren.<br />
„HOHES HECK“ = besseres Handling in Kurven<br />
„NIEDRIGES HECK“ = bessere Fahrstabilität auf Geraden<br />
mehr Traktion am Hinterrad beim Beschleunigen<br />
mehr Bremsstabilität.<br />
Zum Verstellen der Heckhöhe die Klemmschrauben 5 lockern. Einen Steckschlüssel<br />
19 mm auf den Sechskant 6 stecken und Exzenter entsprechend<br />
verdrehen. Ausgehend von der Standardeinstellung, den Exzenter maximal<br />
90° nach oben bzw. 90° nach unten verdrehen. Der Verstellbereich beträgt<br />
± 24 mm am Hinterrad.<br />
Klemmschrauben mit 25 Nm festziehen.<br />
STANDARDEINSTELLUNG:<br />
Die Bohrungen im linken Exzenter<br />
müssen mit dem Schlitz der<br />
Klemmung fluchten (siehe Abbildung).<br />
DEUTSCH<br />
7
DEUTSCH 8<br />
3<br />
1<br />
4<br />
2<br />
Grundstellung des Handbremshebels einstellen<br />
Die Grundstellung des Handbremshebels kann mit der Stellschraube 1 verändert<br />
werden. Dadurch kann die Position des Druckpunktes (jener Widerstand,<br />
der am Handbremshebel spürbar wird, wenn die Bremsklötze an die<br />
Bremsscheibe gepreßt werden) für jede Handgröße eingestellt werden.<br />
Bremsflüssigkeitsstand vorne prüfen<br />
Der Bremsflüssigkeitsbehälter ist am Lenker montiert. Der Bremsflüssigkeitsstand<br />
darf bei waagrechtem Behälter nicht unter die MIN-Marke sinken.<br />
Nötigenfalls Bremsflüssigkeit DOT 5.1 (z.B. Shell Advance Brake 5.1) nachfüllen.<br />
� ACHTUNG �<br />
– FÄLLT DER BREMSFLÜSSIGKEITSSTAND UNTER DEN MINIMALWERT, DEUTET DIES AUF<br />
UNDICHTHEIT IM BREMSSYSTEM BZW. TOTAL ABGENÜTZTE BREMSKLÖTZE HIN.<br />
– DER BREMSFLÜSSIGKEITSBEHÄLTER MUSS WAAGRECHT MONTIERT SEIN, SONST KANN<br />
LUFTINDASBREMSSYSTEM GELANGEN.<br />
Reifen, Reifenluftdruck<br />
Reifentyp, Reifenzustand und Reifenluftdruck beeinflussen das Fahrverhalten<br />
des Motorrades. Sie müssen vor jeder Fahrt kontrolliert werden.<br />
– Reifentyp und Reifendimension finden Sie in den Technischen Daten<br />
– Der Reifenzustand muß vor jeder Fahrt kontrolliert werden.<br />
– Der Reifenluftdruck sollte regelmäßig bei "kalten" Reifen kontrolliert<br />
werden.<br />
Luftdruck Vorderrad: 1,4-1,8 bar<br />
Luftdruck Hinterrad: 1,4-1,7 bar<br />
� ACHTUNG �<br />
– BESCHÄDIGTE REIFEN MÜSSEN IM INTERESSE IHRER SICHERHEIT SOFORT ERNEUERT<br />
WERDEN.<br />
– ZUGERINGER REIFENLUFTDRUCK FÜHRT ZU ABNORMALEM VERSCHLEISS UND ZUR<br />
ÜBERHITZUNG DES REIFENS.<br />
Tank-Belüftungsventil<br />
Das Tank-Belüftungsventil 2 funktioniert nur dann korrekt, wenn es richtig<br />
montiert ist.<br />
Der Pfeil muss Richtung Tankverschluss zeigen.<br />
Überlaufbehälter für Kraftstoff entleeren<br />
Der Überlaufbehälter 3 für den Kraftstoff ist am Rahmen-Brustrohr unten<br />
angeschraubt. Er muss nach jeder Fahrt entleert werden.<br />
Überlaufbehälter abschrauben (gegen den Uhrzeigersinn drehen) und Kraftstoff<br />
vorschriftsmässig entsorgen.<br />
Gummidichtring 4 fetten und Überlaufbehälter montieren. Nur mit der<br />
Hand fest anziehen.<br />
HINWEIS:<br />
Der Überlaufbehälter hat die gleiche Form wie der Feinfilter (Ölfilter) bei<br />
den LC4 Modellen, hat aber keine Filterfunktion. Verwenden sie diesen<br />
daher nie an einer <strong>KTM</strong> LC4.
3<br />
3<br />
1<br />
4<br />
2<br />
Luftfilter reinigen *<br />
Ein verschmutzter Luftfilter beieinträchtigt den Luftdurchsatz, vermindert<br />
die Motorleistung und erhöht den Kraftstoffverbrauch. Im Extremfall kann<br />
sogar Schmutz in den Motor gelangen und Schäden verursachen. Warten<br />
Sie daher den Luftfilter regelmäßig.<br />
Dazu Sitzbank abnehmen, Schlauchklemme 1 lösen und Luftfilter aus dem<br />
Filterkasten nehmen.<br />
! VORSICHT !<br />
– LUFTFILTER NICHT MIT KRAFTSTOFF ODER PETROLEUM REINIGEN! <strong>KTM</strong> EMPFIEHLT<br />
FÜR DIE LUFTFILTERWARTUNG DIE PRODUKTE VON K&N 2 ZUM REINIGEN UND<br />
ZUM ÖLEN DES LUFTFILTERS (ART.NR 573.12.030.000).<br />
– NEHMEN SIE IHR MOTORRAD NIE OHNE LUFTFILTER IN BETRIEB. DER EINDRINGENDE<br />
STAUB UND SCHMUTZ KANN SCHÄDEN UND ERHÖHTEN VERSCHLEISS VERURSACHEN.<br />
Luftfilter mit spezieller Reinigungsflüssigkeit gründlich waschen und gut<br />
trocknen lassen. Trockenen Luftfilter mit K&N Filteröl einölen. Luftfilterkasten<br />
ebenfalls reinigen. Vergasermanschette auf Beschädigungen und festen<br />
Sitz prüfen.<br />
Luftfilter und Sitzbank montieren.<br />
HINWEIS<br />
Bei staubigen Rennstrecken sollte der Vorfilter 3 über den Luftfilter<br />
gestülpt werden, um starke Verschmutzung des Luftfilters zu vermeiden.<br />
Glasfasergarnfüllung des Auspuff-Enddämpfers erneuern*<br />
Der Auspuff-Enddämpfer ist zur Schalldämpfung mit Glasfasergarn gefüllt.<br />
Durch die Hitzeeinwirkung wird das Glasfasergarn locker. Das kann zu Leistungsverlust<br />
führen und die Dämpfung des Schalldämpfers wird<br />
vermindert.<br />
Zum Erneuern der Glasfasergarnfüllung Auspuff-Enddämpfer demontieren.<br />
Alle 8 Nieten aufbohren und Enddämpfer zerlegen. Teile reinigen und auf<br />
Risse kontrollieren.<br />
Zur leichteren Montage der Glasfasergarn-Packung das hintere Ende des<br />
Auspuffrohres 4 mit Gewebeband umwickeln. Glasfasergarn-Packung auf<br />
das Auspuffrohr schieben, Aussenrohr montieren und vorne mit 4 Nieten<br />
fixieren. Auspufrohr zentrieren, Endkappe und Nieten montieren.<br />
� ACHTUNG �<br />
DIE AUSPUFFANLAGE WIRD BEIM BETRIEB DES MOTORRADES SEHR HEISS. BEGINNEN SIE<br />
MIT DEN ARBEITEN AN DER AUSPUFFANLAGE ERST NACH DEM ABKÜHLEN UM VERBREN-<br />
NUNGEN ZU VERMEIDEN.<br />
DEUTSCH<br />
9
DEUTSCH 10<br />
10 mm<br />
7<br />
4<br />
9<br />
10<br />
2 3<br />
5<br />
6<br />
8<br />
1<br />
Einstellung des Handdekompressorseilzuges prüfen *<br />
Zur Überprüfung Kolben auf Kompression stellen, damit die Ventile<br />
geschlossen sind. Betätigen Sie dazu langsam den Kickstarter, bis das<br />
Klicken (Ausrasten) des Autodekos hörbar ist. Nun muß sich der Dekohebel<br />
10 mm betätigen lassen, bis ein Widerstand spürbar wird (die Auslaßventile<br />
beginnen zu öffnen).<br />
Zum Einstellen Schutzkappe 1 zurückschieben, Kontermutter 2 lockern<br />
und Einstellschraube 3 entsprechend verstellen. Kontermutter festziehen<br />
und Schutzkappe aufschieben.<br />
! VORSICHT !<br />
WENN AM DEKOHEBEL KEIN LEERWEG VORHANDEN IST, FÜHRT DIES ZUM MOTORSCHADEN.<br />
Hinweis:<br />
Am Autodeko sind keinerlei Einstellarbeiten erforderlich.<br />
Grundstellung des Kupplungshebels ändern<br />
Mit der Einstellschraube 4 läßt sich die Grundstellung des Kupplungshebels<br />
individuell anpassen. So kann für jede Handgröße eine optimale Position des<br />
Kupplungshebels eingestellt werden.<br />
Wenn die Einstellschraube im Uhrzeigersinn verdreht wird, nähert sich der<br />
Kupplungshebel dem Lenker. Wenn die Einstellschraube gegen den Uhrzeigersinn<br />
verdreht wird, entfernt sich der Kupplungshebel vom Lenker.<br />
! VORSICHT !<br />
DER VERSTELLBEREICH IST BEGRENZT. DREHEN SIE DIE EINSTELLSCHRAUBE NUR MIT DER<br />
HAND UND WENDEN SIE KEINE GEWALT AN.<br />
Ölstand der hydraulischen Kupplung prüfen<br />
Zum Prüfen des Ölstandes im Geberzylinder der Kupplung muß der Deckel<br />
abgenommen werden. Dazu Schrauben 5 entfernen und Deckel 6 samt<br />
Gummibalg 7 abnehmen. Der Ölpegel sollte bei waagrechtem Vorratsbehälter<br />
4 mm unter der Oberkante liegen.<br />
Nötigenfalls biologisch abbaubares Hydrauliköl SAE 10 (z.B. Shell Naturelle<br />
HF-E15) nachfüllen. Bei Ihrem <strong>KTM</strong>- Händler erhältlich (50ml).<br />
! VORSICHT !<br />
– <strong>KTM</strong> VERWENDET FÜR DIE HYDRAULISCHE KUPPLUNGSBETÄTIGUNG BIOLOGISCH<br />
ABBAUBARES HYDRAULIKÖL. BIOLOGISCH ABBAUBARE HYDRAULIKÖLE DÜRFEN NIE<br />
MIT MINERALISCHEN GEMISCHT WERDEN.<br />
– VERWENDEN SIE ZUM BEFÜLLEN DES GEBERZYLINDERS NUR BIOLOGISCH ABBAUBARES<br />
HYDRAULIKÖL SAE 10. KEINESFALLS MINERALISCHES HYDRAULIKÖL ODER BREMS-<br />
FLÜSSIGKEIT EINFÜLLEN.<br />
Entlüften der hydraulischen Kupplung *<br />
Schrauben 5 entfernen und Deckel 6 samt Gummibalg 7 abnehmen. Öl<br />
im Vorratsbehälter absaugen. Die Entlüftungsspritze 8 (bei Ihrem <strong>KTM</strong>-<br />
Händler erhältlich) mit biologisch abbaubarem Hydrauliköl SAE 10 (z.B.<br />
Shell Naturelle HF-E15) füllen. Am Nehmerzylinder die Entlüftungsschraube<br />
9 lockern und Schlauch der Entlüftungsspritze aufstecken. Nun mit der Entlüftungsspritze<br />
so lange Öl einfüllen, bis aus der Bohrung bk im Geberzylinder<br />
das Öl blasenfrei austritt. Achten Sie darauf, dass kein Öl überläuft.<br />
Ölstand im Vorratsbehälter berichtigen und Deckel montieren.<br />
Biologisch abbaubares Hydrauliköl ist bei Ihrem <strong>KTM</strong>-Händler in 50 ml<br />
Gebinden erhältlich.<br />
! VORSICHT !<br />
– <strong>KTM</strong> VERWENDET FÜR DIE HYDRAULISCHE KUPPLUNGSBETÄTIGUNG BIOLOGISCH<br />
ABBAUBARES HYDRAULIKÖL. SOLCHE ÖLE DÜRFEN NIE MIT MINERALISCHEN GEMISCHT<br />
WERDEN.<br />
– VERWENDEN SIE ZUM BEFÜLLEN DER HYDRAULISCHEN KUPPLUNG NUR BIOLOGISCH<br />
ABBAUBARES HYDRAULIKÖL SAE 10 (Z.B. SHELL NATURELLE HF-E15). KEINESFALLS<br />
MINERALISCHES HYDRAULIKÖL ODER BREMSFLÜSSIGKEIT EINFÜLLEN.
TECHNISCHE DATEN - FAHRGESTELL 660 SUPERMOTO FACTORY REPLICA 2002<br />
Rahmen Zentralrohrrahmen aus Chrom-Molybdän-Stahlrohren<br />
Gabel White Power Up Side Down 48<br />
Federweg vorne/hinten 270 / 290 mm<br />
Hinterradfederung Zentralfederbein (WP) mit PRO-LEVER-Anlenkung zur nadelgelagerten Alu-Hinterradschwinge<br />
Bremse vorne Scheibenbremse mit schwimmender, gelochter Bremsscheibe, 4-Kolben Bremssattel<br />
Bremsscheibe vorne Ø 320 mm<br />
Bremse hinten Scheibenbremse mit gelochter Bremsscheibe Ø 220 mm, Bremssattel schwimmend gelagert<br />
Bereifung vorne 120/60-17<br />
Luftdruck 1,4 - 1,8 bar<br />
Bereifung hinten 165/65-17<br />
Luftdruck 1,4 - 1,7 bar<br />
Tankinhalt 5,7 Liter<br />
Übersetzung-Hinterrad 16:40<br />
Kette 5/8 x 1/4"<br />
Steuerkopfwinkel 63,5°<br />
Radstand 1510 ± 10 mm<br />
Sitzhöhe unbelastet 915 ± 8 mm<br />
Bodenfreiheit unbelastet 290 mm<br />
Trockengewicht 116 kg<br />
STANDARD-EINSTELLUNG – GABEL<br />
WP4860MXMA<br />
1418W724<br />
Druckstufendämpfung 15<br />
Zugstufendämpfung 10<br />
Feder 4,4 N/mm<br />
Federvorspannung 5 mm<br />
Luftkammerlänge 110 mm<br />
Gabelöl SAE 5<br />
STANDARD-EINSTELLUNG – FEDERBEIN<br />
WP 5018 MX<br />
DCC<br />
1218W755<br />
Druckstufendämpfung 15 LS (low speed)<br />
1,5 HS (high speed)<br />
Zugstufendämpfung 20<br />
Feder 65 / 240<br />
Federvorspannung 14 mm<br />
ANZUGSDREHMOMENTE - FAHRGESTELL 660 SUPERMOTO FACTORY REPLICA 2002<br />
Bundmutter Steckachse vorne M24x1,5 40 Nm<br />
Bundmutter Steckachse hinten M20x1,5 80 Nm<br />
Federbein oben M10 (10.9) 45 Nm<br />
Federbein unten M10 (10.9) 45 Nm<br />
Bundschrauben Bremsscheiben M6 (10.9) Loctite 243 + 10 Nm<br />
Schrauben Bremszangenträger vorne M8 Loctite 243 + 25 Nm<br />
Innensechskantschrauben Bremszange vorne M10 Loctite 243 + 45 Nm<br />
Bundmuttern Lagerbolzen Verbindungsstange/Rahmen M12 60 Nm<br />
Bundmuttern Winkelhebelbolzen M14x1,5 100 Nm<br />
Motortragschraube M10 45 Nm<br />
Kugelgelenk für Druckstange Fußbremszylinder M8 Loctite 243 + 25 Nm<br />
Kettenradschrauben an Mutter M8 Loctite 243 + 35 Nm<br />
Bundmutter Schwingarmbolzen M14x1,5 100 Nm<br />
Klemmschrauben der Gabelbeine Gabelbrücke oben M8 10 Nm<br />
Klemmschrauben des Gabelschaftrohres Gabelbrücke oben M8 20 Nm<br />
Klemmschrauben der Gabelbeine Gabelbrücke unten M8 10 Nm<br />
Klemmschrauben des Gabelschaftrohres Gabelbrücke unten M8 20 Nm<br />
Klemmschrauben Gabelfäuste M8 10 Nm<br />
Bundschraube Steuerkopf M20x1,5 40 Nm<br />
Bundschrauben Lenkerklemmbrücken M8 20 Nm<br />
Innensechskantschraube Lenkeraufnahme M10 Loctite 243 + 40 Nm<br />
Speichennippel M4 4 Nm<br />
Restliche Schrauben / Bundmuttern Fahrgestell M6 10 Nm / 15 Nm<br />
M8 25 Nm / 30 Nm<br />
M10 45 Nm / 50 Nm<br />
DEUTSCH<br />
11
DEUTSCH 12<br />
TECHNISCHE DATEN – MOTOR 660 LC4 SUPERMOTO FACTORY REPLICA 2002<br />
Motor 660 LC4<br />
Bauart 1-Zylinder 4-Takt Otto-Motor mit Ausgleichswelle, flüssigkeitsgekühlt<br />
Hubraum 653 cm 3<br />
Bohrung/Hub 102 / 80 mm<br />
Verdichtung 12,5 : 1<br />
Kraftstoff bleifreier Superkraftstoff mit mindestens ROZ 98<br />
Steuerung 4 Ventile über Kipphebel u. 1 Nockenwelle gesteuert, Antrieb der Nockenwelle mit Einfachkette<br />
Nockenwelle MSP1<br />
Ventildurchmesser Einlaß: 36 mm Auslaß: 32 mm<br />
Ventilspiel kalt Einlaß: 0,15 mm Auslaß: 0,15 mm<br />
Kurbelwellenlagerung 2 Zylinderrollenlager<br />
Pleuellager Nadellager<br />
Kolbenbolzenlager Bronzebüchse<br />
Kolben Leichtmetall geschmiedet<br />
Kolbenringe 1 Kompressionsring, 1 Minutenring, 1 Ölabstreifring<br />
Motorschmierung Druckumlaufschmierung mittels Eatonpumpe<br />
Motoröl siehe Tabelle #<br />
Füllmenge Motoröl 1,6 Liter<br />
Primärtrieb gerade verzahnte Stirnräder 31:79 Z<br />
Kupplung Mehrscheibenkupplung im Ölbad<br />
Getriebe 5-Gang klauengeschaltet<br />
Getriebeübersetzung 1. Gang 15:33<br />
2. Gang 15:24<br />
3. Gang 18:21<br />
4. Gang 20:19<br />
5. Gang 22:18<br />
Zündanlage kontaktlos gesteuerte DC-CDI Zündanlage mit digitaler Zündverstellung, Typ KOKUSAN 4K3<br />
Generator 12V 110W<br />
Zündkerze NGK DPR8 EA-9<br />
Elektrodenabstand 0,9 mm<br />
Kühlung Flüssigkeitskühlung, permanente Umwälzung der Kühlflüssigkeit durch Wasserpumpe<br />
Kühlflüssigkeit 1 Liter, Mischungsverhältnis 40% Frostschutz, 60% Wasser, mindestens –25° C<br />
Starthilfe Kickstarter - Kaltstarthilfe - Heisstarthilfe<br />
#<br />
TEMPERATUR<br />
0°C � – 32°F + �<br />
10W 40<br />
10W 50<br />
API: SG, SH<br />
15W 40<br />
15W 50<br />
Motoröl<br />
Verwenden Sie nur vollsynthetische Markenöle (Shell<br />
Advance Ultra 4), welche die Qualitätsanforderungen der<br />
API-Klassen SG oder SH (Angaben auf dem Behälter) erfüllen<br />
oder übertreffen.<br />
! VORSICHT !<br />
ZU WENIG MOTORÖL ODER QUALITATIV MINDERWERTIGES ÖL FÜHRT<br />
ZU VORZEITIGEM VERSCHLEISS DES MOTORS.<br />
VERGASER-GRUNDEINSTELLUNG<br />
Vergasertype<br />
Hauptdüse<br />
Düsennadel<br />
Leerlaufdüse<br />
Hauptluftdüse<br />
Leerlaufluftdüse<br />
Nadelposition<br />
Schieber<br />
Startdüse<br />
660 SUPERMOTO<br />
FACTORY REPLICA<br />
Keihin FCR MX 41<br />
190<br />
OBEKR<br />
45<br />
200<br />
100<br />
4.von oben<br />
15<br />
85
ANZUGSDREHMOMENTE - MOTOR 660 SUPERMOTO FACTORY REPLICA 2002<br />
Sechskantmutter Primärrad M20x1,5 Loctite 243 + 220 Nm<br />
Sechskantmutter Schwungrad M12x1 links 60 Nm<br />
Sechskantmutter für Kupplungsmitnehmer M18x1,5 Loctite 243 + 80 Nm<br />
Kickstarter-Anschlagschraube M12x1,5 50 Nm<br />
Sechskantschrauben der Ölpumpen M6 Loctite 243 + 8 Nm<br />
Sechskantschraube Nockenwellenrad M10 Loctite 243 + 35 Nm<br />
Schrauben Zylinderkopf-Oberteil M6x25/M6x35/M6x65/M6x70 (8.8) 8 Nm<br />
Schrauben Zylinderkopf-Oberteil M7x50/M7x55 (12.9) 20 Nm<br />
Zylinderkopfschrauben M10 60 Nm<br />
Bundmuttern am Zylinderfuß M10 50 Nm<br />
Sechskantschraube Kettenrad M10 Loctite 243 + 40 Nm<br />
Ölablaßschraube M22x1,5 30 Nm<br />
Magnetschraube M12x1,5 20 Nm<br />
Verschlußschraube Bypaßventil M12x1,5 20 Nm<br />
Hohlschrauben Ölleitungen M8x1 10 Nm<br />
Hohlschrauben Ölleitungen M10x1 15 Nm<br />
Düsenschraube Kupplungsdeckel M8 10 Nm<br />
Verschlußschraube Steuerkettenspanner M12x1,5 20 Nm<br />
Kontermutter Ventileinstellschrauben M7x0,75 20 Nm<br />
Kurbelwellen- Blockierschraube M8 25 Nm<br />
Zündkerze M12x1,25 20 Nm<br />
Motorbefestigungsschrauben M8 40 Nm<br />
Motorbefestigungsschrauben M10 70 Nm<br />
TOLERANZEN, EINBAUSPIELE, VERSCHLEISSGRENZEN<br />
Kurbelwelle Axialspiel 0,15 - 0,25 mm<br />
Kurbelzapfenschlag max. 0,04 mm<br />
Pleuellager Radialspiel max. 0,05 mm<br />
Axialspiel max. 1,00 mm<br />
Kolben geschmiedet Einbauspiel max. 0,12 mm<br />
Kolbenringe Stoßspiel Kompressionsringe max. 0,60 mm<br />
Ölabstreifring max. 0,80 mm<br />
Ventile Dichtsitzbreite Einlaß max. 1,50 mm<br />
Dichtsitzbreite Auslaß max. 2,00 mm<br />
Ventilteller Schlag max. 0,03 mm<br />
Ventilführung Durchmesser max. 7,05 mm<br />
Ölpumpen Spiel Außenrotor - Gehäuse max. 0,20 mm<br />
Spitzenspiel Außen - Innenrotor max. 0,20 mm<br />
Bypaßventil Druckfeder Mindestlänge 25 mm<br />
Kupplungslamellen Mindeststärke (organischer Belag) 2,5 mm<br />
Kupplungsfedern Mindestlänge 30,5 mm (neu 33 mm)<br />
Getriebewellen Axialspiel 0,1 - 0,4 mm<br />
DEUTSCH<br />
13
DEUTSCH 14<br />
Datenblatt <strong>KTM</strong> 660 Supermoto Factory Replica 2002<br />
Datum: Fahrzeug:<br />
Strecke: Modell:<br />
Wetter: Baujahr:<br />
Fahrer: Fg.Nr.:<br />
Motor: Vergaser:<br />
Nockenwelle Hauptdüse<br />
Auspuff Leerlaufdüse<br />
Zündung Düsennadel<br />
Getriebe Nadelposition<br />
Kupplung Schieber<br />
Gemischregelung<br />
Sekundärübersetzung:<br />
Standard Nachher<br />
Standard Nachher<br />
Gabel: Federbein:<br />
Standard Nachher Standard Nachher<br />
Druckstufe Druckstufe lowspeed<br />
Zugstufe Druckstufe highspeed<br />
Federvorspannung Zugstufe<br />
Feder Federrate<br />
Luftkammer Federvorspannung<br />
Gabel Überstand Heckhöhe<br />
Versatz (Offset) Durchhang<br />
Negativ Federweg<br />
Bremsen: Standard vorne Nachher vorne Standard hinten Nachher hinten<br />
Beläge<br />
Scheibe<br />
Reifen: Größe Bezeichnung Bemerkung<br />
Vorne<br />
Hinten<br />
Testprogramm:_______________________________________________________________<br />
___________________________________________________________________________<br />
Fahrzeiten<br />
Notizen:____________________________________________________________________<br />
___________________________________________________________________________<br />
___________________________________________________________________________<br />
___________________________________________________________________________<br />
___________________________________________________________________________
1<br />
4<br />
5<br />
A<br />
B<br />
2<br />
3<br />
OPERATION INSTRUMENTS<br />
Clutch lever<br />
The clutch lever 1 is located on the left side of the handlebar. The adjusting<br />
screw A is used to change the original position of the clutch lever (see<br />
maintenance work on chassis and engine).<br />
Hand decompression lever<br />
The hand decompression lever 2 is needed only if a fall on your motorcycle<br />
causes overflowing in the carburetor. To "pump the engine free", pull the<br />
hand decompression lever during the starting procedure.<br />
The outer end of the lever must at all times provide for a backlash of<br />
approx. 10mm (0,4 in). Only thereafter may it cause valve motion (to be<br />
recognized by the stronger resistance which the hand decompression level<br />
encounters).<br />
! CAUTION !<br />
– NEVER USE THE HAND DECOMPRESSION LEVER TO TURN OFF THE ENGINE. RATHER,<br />
USE THE SHORT-CIRCUIT BUTTON OR THE EMERGENCY-OFF BUTTON.<br />
– THE SETTING OF THE DECOMPRESSION CABLE SHOULD BE REGULARLY CHECKED. A<br />
LACK OF PLAY IN THE DECOMPRESSION LEVER CAN RESULT IN ENGINE DAMAGE.<br />
Hand brake lever<br />
The hand brake lever 3 is mounted on the handle bars on the right and<br />
actuates the front wheel brake. The adjusting screw B can be used to<br />
change the basic position of the hand brake lever (see "Maintenance").<br />
� WARNING �<br />
IF THE RESISTANCE IN THE HAND BRAKE LEVER OR FOOT BRAKE PEDAL FEELS “SPONGY”<br />
(TOO MUCH GIVE), THIS IS AN INDICATION THAT SOMETHING IS WRONG WITH THE<br />
BRAKE SYSTEM. DON’T RIDE YOUR MOTORCYCLE ANYMORE WITHOUT FIRST HAVING THE<br />
BRAKE SYSTEM LOOKED OVER BY A <strong>KTM</strong> DEALER.<br />
Fuel tap<br />
The fuel tap 4 is located on the left side of the tank.<br />
Opening the fuel tap: Turn the knob all the way to the left.<br />
Closing the fuel tap: Turn the knob all the way to the right.<br />
! CAUTION !<br />
THE FUEL TAP SHOULD BE LOCKED WHENEVER THE MOTORCYCLE IS PARKED. IF THE TAP<br />
IS NOT CLOSED THE CARBURETOR MAY OVERFLOW AND FUEL GET INTO THE ENGINE.<br />
Hot start knob<br />
The carburetor is equipped with a hot start feature to make it easier to start<br />
a hot engine. Pull the hot start knob 5 until it engages. This causes an air<br />
passage to open. Push the hot start knob back into its original position<br />
when the engine is running.<br />
ENGLISH<br />
15
ENGLISH<br />
16<br />
1<br />
3<br />
2<br />
5<br />
4<br />
Adjusting the spring preload on the fork<br />
You can change the spring preload by ± 5 mm with the adjusting screw 1.<br />
Turning in a clockwise direction will increase the prestress, turning in a<br />
counterclockwise direction will decrease the prestress.<br />
Changing the spring preload will not affect the rebound damping adjustment.<br />
Generally, if the spring preload is higher, the rebound damping should also<br />
be set higher.<br />
STANDARD SETTING:<br />
Unscrew the adjusting screw to the limit and then back 5 turns. From this<br />
position you can either increase or reduce the spring preload by up to 5 mm<br />
(1 turn = 1 mm).<br />
Damping action during compression of shock absorber<br />
The shock absorber can synchronize the compression damping in the low<br />
and high-speed range separately (Dual Compression Control).<br />
Low and high speed refers to the movement of the shock absorber during<br />
compression and not to the speed of the motorcycle.<br />
The low and high-speed technology overlaps.<br />
The low-speed setting is primarily for slow to normal shock absorber compression<br />
rates.<br />
The high-speed setting is effective at fast compression rates.<br />
Turning in a clockwise direction will increase the damping, turning counterclockwise<br />
will decrease the damping.<br />
STANDARD LOW-SPEED SETTING:<br />
– Turn the adjusting screw 2 to the limit in a clockwise direction using a<br />
screwdriver.<br />
– Unscrew the respective number of clicks for the specific type of shock<br />
absorber in a counterclockwise direction.<br />
Type White Power 1218W755 . . . . . . .15 clicks<br />
STANDARD HIGH-SPEED SETTING:<br />
– Turn the adjusting screw 3 clockwise to the stop using a wrench<br />
(17 mm).<br />
– Turn in a counterclockwise direction for the respective type of shock<br />
absorber.<br />
Type White Power 1218W75 . . . . . . . . 1,5 turns<br />
� WARNING �<br />
THE DAMPING UNIT OF THE SHOCK ABSORBER IS FILLED WITH HIGH-COMPRESSION<br />
NITROGEN. NEVER TRY TO TAKE THE SHOCK ABSORBER APART OR TO DO ANY MAINTEN-<br />
ANCE WORK YOURSELF. SEVERE INJURIES COULD BE THE RESULT.<br />
NEVER UNSCREW THE BLACK SCREW CONNECTION 4 (24MM).<br />
Rebound damping of shock absorber<br />
By using the adjusting screw 5, the degree of damping of the rebound can<br />
be adjusted. Turn the knob to the right side to increase damping, turn it to<br />
the left side to reduce damping during rebounding.<br />
STANDARD ADJUSTMENT:<br />
– Turn the adjusting screw clockwise to the stop.<br />
– Then turn the adjusting screw counterclockwise, counting the number of<br />
clicks that corresponds to the respective type of shock absorber.<br />
Type White Power 1218W755.............20 clicks
WHEELS CHASSIS BRAKES ADD- ON PARTS CARBURETOR ENGINE<br />
PERIODIC MAINTENANCE SCHEDULE 2002<br />
A washed motorcycle can be checked more quickly which saves money!<br />
660 Supermoto Factory Replica<br />
1. service after<br />
3 hours<br />
after/every<br />
6 hours<br />
Change engine oil and oil filters ● ●<br />
Clean oil screen and drain plug magnet ● ●<br />
Check oil lines for damage or bends ● ●<br />
Replace spark plug ●<br />
Check and adjust valve clearance ● ●<br />
Check engine mounting bolts for tightness ● ●<br />
Clean and adjust carburetor ●<br />
Check carburetor connection boot for cracks and leaks ● ●<br />
Check idle speed setting ● ●<br />
Check vent hoses for damage or bends ● ●<br />
Check cooling system for leaks, check quantity of anti freeze ● ●<br />
Check exhaust system for leaks and fitment ● ●<br />
Check cables for damage, smooth operation and bends, adjust and lubricate ● ●<br />
Check fluid level of the clutch master cylinder ● ●<br />
Clean air filter and filter box ● ●<br />
Check electric wires for damage and bends ●<br />
Check brake fluid level, lining thickness, brake discs ● ●<br />
Change brake fluid ●<br />
Check brake lines for damage and leaks ● ●<br />
Check smooth operation and adjust free travel of handbrake/foot brake lever ● ●<br />
Check tightness of brake system screws ● ●<br />
Check shock absorber and fork for leaks and function ● ●<br />
Bleed fork legs ● ●<br />
Check swing arm bearings ●<br />
Check/adjust steering head bearings ● ●<br />
Check tightness of chassis screws (triple clamps, fork leg axle passage) ● ●<br />
Check spoke tension and rim joint ● ●<br />
Check tyres and air pressure ● ●<br />
Check chain, rear sprockets and chain guides for wear, fit and tension ● ●<br />
Lubricate chain ● ●<br />
Check clearance of wheel bearings ●<br />
IMPORTANT RECOMMENDED MAINTENANCE WORK THAT CAN BE CARRIED OUT BY EXTRA ORDER<br />
at least<br />
twice a year<br />
at least<br />
once a year<br />
Complete maintenance of fork ●<br />
Complete maintenance of shock absorber ●<br />
Clean and grease steering head bearings and gasket elements ●<br />
Replace glass fibre yarn filling of the exhaust main silencer ●<br />
Treat electric contacts and short circuit button with contact spray ●<br />
Change hydraulic clutch fluid ●<br />
SERVICE INTERVALLS SHOULD NEVER BE EXCEED BY MORE THAN 2 HOURS<br />
MAINTENANCE WORK DONE BY <strong>KTM</strong> AUTHORISED WORKSHOPS IS NOT A SUBSTITUTE OF CARE AND CHECKS DONE BY THE RIDER!<br />
ENGLISH<br />
17
ENGLISH 18<br />
IMPORTANT CHECKS AND MAINTENANCE TO BE CARRIED OUT BY THE RIDER<br />
Befor each<br />
start<br />
After every<br />
cleaning<br />
Check oil level ●<br />
Check brake fluid level ●<br />
Check brake pads for wear ●<br />
Lubricate and adjust cables and nipples ●<br />
Bleed fork legs regulary ●<br />
Remove and clean fork dust bellows regulary ●<br />
Clean and lubricate chain, check tension and adjust if necessary ● ●<br />
Clean air filter and filter box ●<br />
Check tyres for pressure and wear ●<br />
Check cooling fluid level ●<br />
Check fuel lines for leaks ●<br />
Drain the fuel overflow reservoir ● ●<br />
Drain and clean float chamber ●<br />
Check all control elements for smooth operation ●<br />
Check brake performance ● ●<br />
Treat blank metal parts (with the exception of brake and exhaust system) ●<br />
with wax-based anti corrosion agent<br />
Check tightness of screws, nuts and hose clamps regular ●<br />
CONTINUED TESTS OF THE 660 LC4 SUPERMOT FACTORY REPLICA FOR <strong>KTM</strong>'S SPECIALIZED WORKSHOP<br />
(ADDITIONAL ORDER FOR <strong>KTM</strong>'S SPECIALIZED WORKSHOP)<br />
after / every<br />
6 hours<br />
at least<br />
once a year<br />
Force fit of nut primary wheel ●<br />
Clutch disk wear ●<br />
Cylinder and piston wear ●<br />
Groove piston-pin retainer wear ●<br />
Camshaft wear ●<br />
Radial clearance of camshaft bearing ●<br />
Valve spring length ●<br />
Spring washer wear ●<br />
Valve disk slack ●<br />
Valve guide wear ●<br />
Radial clearance of rocker-arm roller ●<br />
Elongation of timing chain ●<br />
Timing chain guides wear ●<br />
Wear of toothing on chain tensioner ●<br />
Crankshaft journal/crankshaft wear ●<br />
Radial clearance of conrod bearing ●<br />
Radial clearance of piston pin bearing ●<br />
Wear of balancing shaft bearing ●<br />
Wear of crankshaft bearing ●<br />
Transmission wear ●<br />
Flection of transmission shafts ●<br />
Length of bypass valve spring ●
MAINTENANCE WORK ON CHASSIS AND ENGINE<br />
2<br />
2<br />
3 3<br />
6<br />
12,5 mm 7,5 mm<br />
A<br />
4<br />
1<br />
6<br />
5<br />
5<br />
Checking and adjusting the steering head bearing *<br />
Check steering head bearing for play periodically. For check put motorcycle<br />
on stand so that the front wheel is off the ground. Now try to move the<br />
fork forward and backward.<br />
To adjust, loosen the collar screw 1 and the 6 clamping screws 2 + 3 on<br />
the upper triple clamp. Insert a pin (6 mm) 4 in the adjusting nut 5 and<br />
adjust as required. Do not tighten the adjusting nut since this might damage<br />
the bearings. Tighten the collar screw 1 to 40 Nm and check the bearing<br />
for easy action. Tap the upper triple clamp with a plastic hammer to avoid<br />
distortion, tighten the clamping screws 2 to 20 Nm and the clamping<br />
screws 3 to 10 Nm.<br />
� WARNING �<br />
IF THE STEERING HEAD BEARING IS NOT ADJUSTED TO BE FREE OF PLAY, THE MOTORCYCLE<br />
WILL EXHIBIT UNSTEADY DRIVING CHARACTERISTICS AND CAN GET OUT OF CONTROL.<br />
! CAUTION !<br />
IF YOU DRIVE WITH PLAY IN THE STEERING HEAD BEARING FOR LONGER PERIODS, THE<br />
BEARINGS AND SUBSEQUENTLY THE BEARING SEATS IN THE FRAME WILL BE DESTROYED.<br />
The steering head bearings should be regreased at least once a year<br />
(i.e. Shell Advance Grease).<br />
Adjusting the fork offset (caster) *<br />
The fork offset (center fork legs – center steering head bearing) can be<br />
adjusted to adapt the handling to the race course.<br />
To adjust, loosen the clamping screws 5 on the fork stabilizers. Insert a pin<br />
(6 mm) in the adjusting nut 6 and turn the fork tube 180° in a counterclockwise<br />
direction (not clockwise or you will change the positioning of the<br />
steering head bearings). The groove A must match the slot on the upper<br />
triple clamp. Tighten the clamping screws to 20 Nm.<br />
If the groove A is on the left, the offset is 12.5 mm and the caster<br />
97.4 mm. This setting will give you better handling in curves.<br />
If the groove A is on the right, the offset is 7.5 mm and the caster<br />
99.2 mm. This setting will give you better driving stability on straight<br />
stretches.<br />
� WARNING �<br />
THE GROOVE A MUST ALWAYS MATCH THE SLOT IN THE UPPER TRIPLE CLAMP. IF NOT,<br />
THE MOTORCYCLE WILL RUN OFF TRACK WHICH LEADS TO UNSTABLE HANDLING.<br />
ENGLISH<br />
19
ENGLISH<br />
20<br />
2<br />
3<br />
4<br />
1<br />
LOCTITE 243<br />
6<br />
5<br />
5<br />
How to change the handlebar position<br />
The handlebar position can be readjusted by 37 mm. Thus, you can put the<br />
handlebar to the position that is the most convenient for you.<br />
The upper triple clamp 1 includes 3 bores arranged at a distance of 15 mm<br />
(0,6 in) from one another. The bores at the handlebar support 2 are offset<br />
from the center by 3.5 mm. Accordingly, you can mount the handlebar in<br />
6 different positions.<br />
For this purpose, remove screws 3 of the handlebar clamps and screws 4<br />
of the handlebar support. Position handlebar support, apply Loctite 243 and<br />
tighten screws 4 to 40 Nm (30 ft.lb). Mount handlebar and handlebar<br />
clamps, and tighten screws 3 to 20 Nm (15 ft.lb). The gap between handlebar<br />
support and handlebar clamps is to be of equal size in the front and in<br />
the rear.<br />
STANDARD POSITION:<br />
The middle hole in the triple clamp and the offset in the handlebar support<br />
facing the front.<br />
Changing the height of the tail end<br />
The height of the tail end can be adjusted by 48 mm to adapt the handling<br />
to the race course. The shock absorber is fastened at the top in a eccentric<br />
bushing.<br />
Before changing the height of the tail end, measure the original position. To<br />
measure, jack up the motorcycle, measure and write down the distance between<br />
the swing arm and the end of the subframe.<br />
"HIGH TAIL END"= better handling in curves<br />
"LOW TAIL END"= better driving stability on straight stretches<br />
more traction on the rear wheel when accelerating<br />
more braking stability.<br />
To change the height of the tail end, loosen the clamping screws 5. Place a<br />
19 mm socket wrench on the HH screw 6 and turn the eccentric accordingly.<br />
Do not turn the eccentric more than 90 ° up or 90 ° down from the<br />
standard position. The adjustment range is ± 24 mm on the rear wheel.<br />
Tighten the clamping screws to 25 Nm.<br />
STANDARD POSITION.<br />
The holes in the left eccentric must be<br />
aligned with the slot in the clamping<br />
(see illustration).
3<br />
1<br />
4<br />
2<br />
Adjusting of basic position at the hand brake lever<br />
The basic position of the hand brake lever may be readjusted by using<br />
adjustment screw 1. In this way, the position of the point of pressure (i.e.,<br />
the resistance you feel on the hand brake lever when the brake pads are<br />
pressed against the brake disc) can be adjusted for any hand size.<br />
Checking of brake fluid level - front brake<br />
The brake fluid reservoir is mounted on the handlebars. The brake fluid<br />
level should not drop below the MIN mark in a horizontal position. If<br />
necessary, add DOT 5.1 brake fluid (e.g. Shell Advance Brake 5.1).<br />
� WARNING �<br />
– IFTHE BRAKE FLUID LEVEL DROPS BELOW THE MINIMUM EITHER THE BRAKE SYSTEM<br />
HAS A LEAK OR THE BRAKE PADS ARE COMPLETELY WORN. IN THIS CASE, CONSULT AN<br />
AUTHORIZED <strong>KTM</strong> DEALER IMMEDIATELY.<br />
– THE BRAKE FLUID RESERVOIR MUST BE MOUNTED IN A HORIZONTAL POSITION,<br />
OTHERWISE AIR CAN GET INTO THE BRAKE SYSTEM.<br />
Tires, air pressure<br />
Tire type, tire condition, and air pressure level affect the way your motorcycle<br />
rides, and they must therefore be checked whenever you are getting<br />
ready to go anywhere on your motorcycle.<br />
– Tire size can be found in the technical specifications and in their homologation<br />
certificate<br />
– Tire condition has to be checked every time you want to ride your<br />
motorcycle. Before leaving, check tires for punctures and nails or other<br />
sharp objects that might have become embedded in them.<br />
– Tire pressure should be checked regularly on a “cold” tire. Proper pressure<br />
ensures optimum driving comfort and extends the life of your tires.<br />
air pressure front wheel: 1,4-1,8 bar<br />
air pressure rear wheel: 1,4-1,7 bar<br />
� WARNING �<br />
– FOR YOUR OWN SAFETY REPLACE DAMAGED TIRES IMMEDIATELY.<br />
– IFAIR PRESSURE IS TOO LOW, ABNORMAL WEAR AND OVERHEATING OF THE TIRE CAN<br />
RESULT.<br />
Tank vent valve<br />
The tank vent valve 2 will only work properly if mounted correctly.<br />
The arrow must point towards the tank cap.<br />
Draining the fuel overflow reservoir<br />
The fuel overflow reservoir 3 is screwed onto the bottom of the frame<br />
breast tube. It should be drained after every ride.<br />
Unscrew the overflow reservoir (turning counterclockwise) and dispose of<br />
fuel as required by law.<br />
Grease the rubber sealing ring 4 and mount the overflow reservoir. Tighten<br />
by hand.<br />
NOTE:<br />
The overflow reservoir has the same shape as the fine filter (oil filter) in the<br />
LC4 models but does not function as a filter. Never use the overflow reservoir<br />
for a <strong>KTM</strong> LC4.<br />
ENGLISH<br />
21
ENGLISH<br />
22<br />
3<br />
3<br />
1<br />
4<br />
2<br />
Cleaning the air filter *<br />
A dirty air filter impairs the air-flow rate, reduces the engine performance,<br />
and increases the fuel consumption. In extreme cases, dirt may even get<br />
into the engine and cause damage. Therefore, change the air filter in<br />
regular intervals.<br />
To service the air filter, remove the seat, open the hose clamp 1 and lift the<br />
air filter from the filter box.<br />
! CAUTION !<br />
– DO NOT CLEAN THE AIR FILTER WITH FUEL OR PETROLEUM. <strong>KTM</strong> RECOMMENDS<br />
K&N PRODUCTS 2 TO CLEAN AND OIL THE AIR FILTER (ITEM NO<br />
573.12.030.000)<br />
– NEVER START YOUR MOTORCYCLE WITHOUT ANY AIR FILTERS. OTHERWISE, DUST<br />
AND DIRT MAY PENETRATE AND CAUSE DAMAGE AND INCREASED WEAR.<br />
Rinse the air filter thoroughly with a special cleaning fluid and allow to dry.<br />
Oil the dry air filter with K&N filter oil. Also clean the air filter box. Check<br />
the carburetor connection boot for damage and a tight fit.<br />
Mount the air filter and seat.<br />
NOTE:<br />
A prefilter 3 should be put over the air filter on dusty race courses to prevent<br />
dirt from accumulating in the air filter.<br />
Replacing the glass fiber yarn packing of the silencer *<br />
The silencer is filled with glass-fiber yarn to reduce the noise. The effect of<br />
heat causes the glass fiber yarn to become loose. This may lead to a loss of<br />
performance and reduce the silencer's muffling power.<br />
To replace the glass-fiber yarn, remove the silencer. Bore out all 8 rivets and<br />
disassemble the silencer. Clean parts and check for cracks.<br />
For easy mounting of the glass-fiber yarn pack, wrap fabric tape around the<br />
rear end of the exhaust pipe 4. Slide the glass-fiber yarn pack onto the<br />
exhaust pipe. Mount the outer pipe and fix in the front with 4 rivets. Center<br />
the exhaust pipe. Mount the end cap and the rivets.<br />
� WARNING �<br />
THE EXHAUST SYSTEM BECOMES VERY HOT WHILE THE MOTORCYCLE IS RUNNING. TO<br />
AVOID BURNS DO NOT START WORK ON THE EXHAUST SYSTEM UNTIL IT HAS PROPERLY<br />
COOLED DOWN.
10 mm<br />
7<br />
4<br />
9<br />
10<br />
2 3<br />
5<br />
6<br />
8<br />
1<br />
Checking the adjustment of the hand decompression release<br />
cable *<br />
To check, set piston at compression, so that the valves are closed. While<br />
doing this, slowly kick the kick starter through its stroke until the clicking<br />
sound (disengaging) of the automatic decompression release can be heard.<br />
Now the deko-lever must be operated 10 mm until resistance is felt (the<br />
exhaust valves begin to open).<br />
To adjust move back the protective cover 1, loosen the counter nut 2 and<br />
correct the adjustment screw 3 accordingly. Tighten counter nut and push<br />
back protective cover.<br />
! CAUTION !<br />
IF THERE IS NO PLAY IN THE DEKO-LEVER, THIS CAN RESULT IN ENGINE DAMAGE.<br />
NOTE:<br />
No adjustment need be made to the automatic decompressor.<br />
Changing the original position of the clutch lever<br />
The adjusting screw 4 can be used for individual adjustment of the original<br />
position of the clutch lever, thus allowing adjustment to an optimal position<br />
for every hand size.<br />
Turning the adjusting screw clockwise reduces the distance between the<br />
clutch lever and the handlebar. Turning the adjusting screw counterclockwise<br />
increases the distance between the clutch lever and the handlebar.<br />
! CAUTION !<br />
ADJUSTMENT OF THE CLUTCH LEVER POSITION IS ONLY POSSIBLE WITHIN CERTAIN LIMITS.<br />
ONLY TURN THE ADJUSTING SCREW MANUALLY AND NEVER APPLY EXCESSIVE FORCE.<br />
Checking the oil level of the hydraulic clutch<br />
To check the oil level in the master cylinder of the clutch remove the<br />
cover. For this purpose, remove screws 5 and cover 6 together with<br />
the rubber boot 7. The oil level in the horizontal-standing master cylinder<br />
should be 4 mm below the upper edge.<br />
If necessary, fill up with biodegradable hydraulic oil SAE 10 (e.g. Shell<br />
Naturelle HF-E15).Biodegradable hydraulic oil is available from your<br />
<strong>KTM</strong> dealer (50ml).<br />
! CAUTION !<br />
– <strong>KTM</strong> USES BIODEGRADABLE HYDRAULIC OIL FOR THE HYDRAULIC CLUTCH CONTROL.<br />
NEVER MIX THIS OIL WITH MINERAL OIL.<br />
– ONLY USE SAE 10 BIODEGRADABLE HYDRAULIC OIL (E.G. SHELL NATURELLE HF-<br />
E15) TO FILL THE HYDRAULIC CLUTCH. NEVER USE MINERAL HYDRAULIC OIL OR<br />
BRAKE FLUID.<br />
Bleeding of the hydraulic clutch<br />
Remove the screws 5 and cover 6 including the rubber boot 7. Extract<br />
the oil from the reservoir. Fill the bleeder syringe (available from your <strong>KTM</strong><br />
dealer) with SAE 10 biodegradable hydraulic oil (e.g. Shell Naturelle HF-<br />
E15). Loosen the bleeder screw 9 on the slave cylinder and attach the hose<br />
on the bleeder syringe. Add oil with the bleeder syringe until the bubblefree<br />
oil starts to leak out of the hole bk in the master cylinder. Make sure<br />
the oil does not overflow. Correct the oil level in the reservoir and mount<br />
the cover.<br />
Biodegradable hydraulic oil is available from your <strong>KTM</strong> dealer in 50 ml cans.<br />
! CAUTION !<br />
– <strong>KTM</strong> USES BIODEGRADABLE HYDRAULIC OIL FOR THE HYDRAULIC CLUTCH CONTROL.<br />
NEVER MIX THIS OIL WITH MINERAL OIL.<br />
– ONLY USE SAE 10 BIODEGRADABLE HYDRAULIC OIL (E.G. SHELL NATURELLE HF-<br />
E15) TO FILL THE HYDRAULIC CLUTCH. NEVER USE MINERAL HYDRAULIC OIL OR<br />
BRAKE FLUID.<br />
ENGLISH<br />
23
ENGLISH 24<br />
TECHNICAL SPECIFICATIONS – ENGINE 660 SUPERMOTO FACTORY REPLICA 2002<br />
Engine 660 LC4<br />
Design Liquid-cooled single cylinder 4-stroke engine with balancer shaft<br />
Displacement 653 ccm<br />
Bore / Stroke 102 / 80 mm<br />
Ratio 12,5 : 1<br />
Fuel unleaded premium gasoline with a least RON 95<br />
Valve timing 4 valves over rocker arm and 1 overhead camshaft, camshaft drive through single chain<br />
Camshaft MSP1<br />
Valve diameter Intake: 36 mm Exhaust: 32 mm<br />
Valve clearence cold Intake: 0,15 mm Exhaust: 0,15 mm<br />
Crank shaft bearing 2 cylinder roller bearing<br />
Connecting rod bearing needle bearing<br />
Top end bearing bronze bushing<br />
Piston forged aluminium alloy<br />
Piston rings 1 compression ring, 1 taper face ring, 1 oil scraper ring<br />
Engine lubrication two Eaton-oilpumps<br />
Engine oil see table #<br />
Engine oil quantity 1,6 liters (0,42 US gallons)<br />
Primary ratio straight geared spur wheels 31 : 79 teeth<br />
Clutch multi disc clutch in oil bath<br />
Transmission 5-speed claw shifted<br />
Gear ratio 1st 15:33<br />
2nd 15:24<br />
3rd 18:21<br />
4th 20:19<br />
5th 22:18<br />
Ignition system contactless DC-CDI ignition with digital advanced system type KOKUSAN 4K3<br />
Generator 12V 110W<br />
Spark plug NGK DPR8 EA-9<br />
Spark plug gap 0,9 mm<br />
Cooling system liquid cooled, permanent rotation of cooling liquid through mechanic driven water pump<br />
Cooling liquid 1 liter, 40% antifreeze, 60% water, at least –25°C (–13°F)<br />
Starting equipment Kickstarter, cold start knob and hot start knob on carburetor<br />
#<br />
TEMPERATURE<br />
0°C � – 32°F + �<br />
10W 40<br />
10W 50<br />
API: SG, SH<br />
15W 40<br />
15W 50<br />
Engine oil<br />
Use only synthetic oil brands, which meet quality<br />
requirements (Shell Advance Ultra 4) of API-classes<br />
SG or SH (informations on bottles) or higher.<br />
! CAUTION !<br />
POOR OIL QUALITY OR MINOR QUANTITY EFFECT EARLY<br />
ENGINE-WEAR.<br />
BASIC CARBURETOR SETTING<br />
Carburetor<br />
Main jet<br />
Needle jet<br />
Idling jet<br />
Main air jet<br />
Idling air jet<br />
Needle position from top<br />
Throttle valve<br />
Starting jet<br />
660 SUPERMOTO<br />
FACTORY REPLICA<br />
Keihin FCR MX 41<br />
190<br />
OBEKR<br />
45<br />
200<br />
100<br />
4th<br />
15<br />
85
TIGHTENING TORQUES - ENGINE 660 SUPERMOTO FACTORY REPLICA 2002<br />
Hexagon nut at primary gear M20x1,5 Loctite 243 + 220 Nm (162 ft.lb)<br />
Collar nut flywheel M12x1 left 60 Nm (44 ft.lb)<br />
Hexagon nut for inner clutch hub M18x1,5 Loctite 243 + 80 Nm (59ft.lb)<br />
Kickstarter stop screw M12x1,5 50 Nm (37ft.lb)<br />
Allan head screw oil pumps M6 Loctite 243 + 8 Nm (6ft.lb)<br />
Hexagon screw camshaft gear M10 Loctite 243 + 35 Nm (25ft.lb)<br />
Allan head screw cylinder head top sect. M6x25/m6x35/M6x65/M6x70 (8.8) 8 Nm (6ft.lb)<br />
Allan head screw cylinder head top sect. M7x50/M7x55 (12.9) 20 Nm (15ft.lb)<br />
Cylinder head screws M10 60 Nm (44ft.lb)<br />
Collar nuts at cylinder base M10 50 Nm (37ft.lb)<br />
Hexagon screw chain sprocket M10 Loctite 243 + 40 Nm (30ft.lb)<br />
Oil drain plug M22x1,5 30 Nm (22ft.lb)<br />
Magnetic plug M12x1,5 20 Nm (15ft.lb)<br />
Plug bypass valve M12x1,5 20 Nm (15ft.lb)<br />
Hollow screws oil lines M8x1 10 Nm (7ft.lb)<br />
Hollow screws oil lines M10x1 15 Nm (11ft.lb)<br />
Jet screw clutch cover M8 10 Nm (7ft.lb)<br />
Screw plug timing-chain tensioner M12x1,5 20 Nm (15ft.lb)<br />
Counternuts valve adjusting screws M7x0,75 20 Nm (15ft.lb)<br />
Crankshaft locking bolt M8 25 Nm (19ft.lb)<br />
Spark plug M12x1,25 20 Nm (15ft.lb)<br />
Engine mounting bolt M8 40 Nm (30ft.lb)<br />
Engine mounting bolt M10 70 Nm (52ft.lb)<br />
ASSEMBLY CLEARANCE, WEAR LIMIT<br />
Crank shaft axial play . . . . . . . . . . . . . . . . . . . . . . . . . . . . . . . . . . . . . . . . . . .0.15 - 0.25 mm<br />
run out of crank stud . . . . . . . . . . . . . . . . . . . . . . . . . . . . . . . . . . .max. 0.04 mm<br />
Connecting rod bearing radial play . . . . . . . . . . . . . . . . . . . . . . . . . . . . . . . . . . . . . . . . . . . .max. 0.05 mm<br />
axial play . . . . . . . . . . . . . . . . . . . . . . . . . . . . . . . . . . . . . . . . . . . .max. 1.00 mm<br />
Cylinder 400 bore . . . . . . . . . . . . . . . . . . . . . . . . . . . . . . . . . . . . . . . . . . . . . . .max. 89.04 mm<br />
Cylinder 640 bore . . . . . . . . . . . . . . . . . . . . . . . . . . . . . . . . . . . . . . . . . . . . . .max. 101.04 mm<br />
Piston forged assembly clearance . . . . . . . . . . . . . . . . . . . . . . . . . . . . . . . . . . . .max. 0.12 mm<br />
Piston rings end gap compression rings . . . . . . . . . . . . . . . . . . . . . . . . . . . . . . . . . . . . . .max. 0.60 mm<br />
oil scraper ring . . . . . . . . . . . . . . . . . . . . . . . . . . . . . . . . . . . . . . . .max. 0.80 mm<br />
Valves seat sealing intake . . . . . . . . . . . . . . . . . . . . . . . . . . . . . . . . . . . . .max. 1.50 mm<br />
seat sealing exhaust . . . . . . . . . . . . . . . . . . . . . . . . . . . . . . . . . . . .max. 2.00 mm<br />
run out of valve heads . . . . . . . . . . . . . . . . . . . . . . . . . . . . . . . . . .max. 0.03 mm<br />
valve guides diameter . . . . . . . . . . . . . . . . . . . . . . . . . . . . . . . . . . .max. 7.05 mm<br />
Oil pumps clearance outer rotor - housing . . . . . . . . . . . . . . . . . . . . . . . . . . . .max. 0.20 mm<br />
clearance outer rotor - inner rotor . . . . . . . . . . . . . . . . . . . . . . . . . .max. 0.20 mm<br />
Bypaß valve minimum spring length . . . . . . . . . . . . . . . . . . . . . . . . . . . . . . . . . . . . .25.00 mm<br />
Clutch Length of springs . . . . . . . . . . . . . . . . . . . . . . . . .min. 30.5 mm (new 33.00 mm)<br />
wear limit organic . . . . . . . . . . . . . . . . . . . . . . . . . . . . . . . . . . . . . .min. 2.50 mm<br />
Camshaft diameter of bearing bolt (needle bearing) . . . . . . . . . . . . . . . . . . .min. 19.97 mm<br />
Transmission shafts axial play . . . . . . . . . . . . . . . . . . . . . . . . . . . . . . . . . . . . . . . . . . .0.10 - 0.40 mm<br />
ENGLISH<br />
25
ENGLISH 26<br />
TECHNICAL SPECIFICATIONS - CHASSIS 660 SUPERMOTO FACTORY REPLICA 2002<br />
Frame Central chrome-moly-steel frame<br />
Fork White Power Up Side Down 48<br />
Wheel travel front/rear 270 / 290 mm<br />
Rear suspension Central shock absorber (WP) with PRO-LEVER linkage to rear- swing-arm with needle bearing<br />
Front brake Disc brake with floating brake disc, 4-piston brake caliper<br />
Front brake disc Ø 320 mm<br />
Rear brake Disc brake,l brake disc � 220 mm, brake caliper floated<br />
Tyres front 120/60-17<br />
Air pressure 1,4 – 1,8 bar<br />
Tyres rear 165/65-17<br />
Air press. road 1,4 – 1,7 bar<br />
Fuel tank capacity 5,7 liter<br />
Final drive ratio 16:40 t<br />
Chain 5/8 x 1/4"<br />
Steering angle 63,5°<br />
Wheel base 1510 ± 10 mm<br />
Seat high 915 mm ± 8 mm<br />
Ground clearance 290 mm<br />
Dead weight without fuel 116 kg<br />
STANDARD ADJUSTMENT - FORK<br />
WP4860MXMA<br />
1418W724<br />
Compression adjuster 15<br />
Rebound adjuster 10<br />
Spring 4,4 N/mm<br />
Spring preload 5 mm<br />
Air chamber length 110 mm<br />
Fork oil SAE 5<br />
TIGHTENING TORQUES - CHASSIS 660 SUPERMOTO FACTORY REPLICA 2002<br />
STANDARD-ADJUSTMENT - SHOCK ABSORBER<br />
WP5018MX-DCC<br />
1218W755<br />
Compression adjuster 15 LS (low speed)<br />
1,5 HS (high speed)<br />
Rebound adjuster 20<br />
Spring 65 / 240<br />
Spring preload 14 mm<br />
Collar nut front axle M24x1,5 40 Nm (30ft.lb)<br />
Collar nut rear axle M20x1,5 80 Nm (59ft.lb)<br />
Shock absorber top M10 (10.9) 45 Nm (33ft.lb)<br />
Shock absorber bottom M10 (10.9) 45 Nm (33ft.lb)<br />
Collar screws brake disks M6 (10.9) Loctite 243 + 10Nm (7ft.lb)<br />
Screws brake caliper support front M8 Loctite 243 + 25 Nm (19ft.lb)<br />
Screws brake caliper front M10 Loctite 243 + 45 Nm (33ft.lb)<br />
Bearing bolt linkage arm/frame M12 60 Nm (44ft.lb)<br />
Collar nuts rocker arm bolts M14x1,5 100 Nm (74ft.lb)<br />
Engine mounting screw M10 45 Nm (33ft.lb)<br />
Ball joint for push rod foot brake cylinder M8 Loctite 243 + 25 Nm (19ft.lb)<br />
Sprocket screws on nuts M8 Loctite 243 + 35 Nm (25ft.lb)<br />
Collar nut swingarm bolt M14x1,5 100 Nm (74ft.lb)<br />
Clamping screws fork legs top triple clamp M8 10 Nm (7ft.lb)<br />
Clamping screws steering stem top triple clamp M8 20 Nm (15ft.lb)<br />
Clamping screws fork legs bottom triple clamp M8 10 Nm (7ft.lb)<br />
Clamping screws steering stem bottom triple clamp M8 20 Nm (15ft.lb)<br />
Clamping screws fork stubs M8 10 Nm (7ft.lb)<br />
Collar screw steering head M20x1,5 40 Nm (30ft.lb)<br />
Screws handlebar clamp M8 20 Nm (15ft.lb)<br />
Allan head screw handle bar support M10 Loctite 243 + 40 Nm (30ft.lb)<br />
Spoke nipple M4 4 Nm (3ft.lb)<br />
Other screws/collar nuts on chassis M6 10 Nm/15 Nm (7ft.lb)/(11ft.lb)<br />
M8 25 Nm/30 Nm (19ft.lb)/(22ft.lb)<br />
M10 45 Nm/50 Nm (33ft.lb)/(37ft.lb)
Data sheet <strong>KTM</strong> 660 Supermoto Factory Replica 2002<br />
date: motorcycle:<br />
trak: model:<br />
weather: model year<br />
driver: chassis no.:<br />
engine: carburetor:<br />
camshaft main jet<br />
exhaust Idle jet<br />
ignition Jet needle<br />
transmission needle position<br />
clutch throttle<br />
mixture adj.scr.<br />
final drive ratio:<br />
standard afterwards<br />
standard afterwards<br />
telecopic fork: shock absorber:<br />
standard afterwards standard afterwards<br />
compression damp. com.damp lowspeed<br />
rebound damping com.damp. highspeed<br />
spring preload rebound damping<br />
spring spring rate<br />
air chamber spring preload<br />
fork leg protrusion height tail end<br />
fork offset static sag<br />
ride hight sag<br />
brakes: standard vorne afterwards vorne standard hinten afterwards hinten<br />
linings<br />
disk<br />
tyres: dimmension description note<br />
front<br />
rear<br />
testing programm:____________________________________________________________<br />
___________________________________________________________________________<br />
driv. time<br />
note:____________________________________________________________________<br />
___________________________________________________________________________<br />
___________________________________________________________________________<br />
___________________________________________________________________________<br />
___________________________________________________________________________
<strong>KTM</strong> SPORTMOTORCYCLE AG<br />
5230 Mattighofen<br />
Austria<br />
Internet: www.ktm.at