BETRIEBSHANDBUCH ROOKIE - Nova Paragliding
BETRIEBSHANDBUCH ROOKIE - Nova Paragliding
BETRIEBSHANDBUCH ROOKIE - Nova Paragliding
Erfolgreiche ePaper selbst erstellen
Machen Sie aus Ihren PDF Publikationen ein blätterbares Flipbook mit unserer einzigartigen Google optimierten e-Paper Software.
1<br />
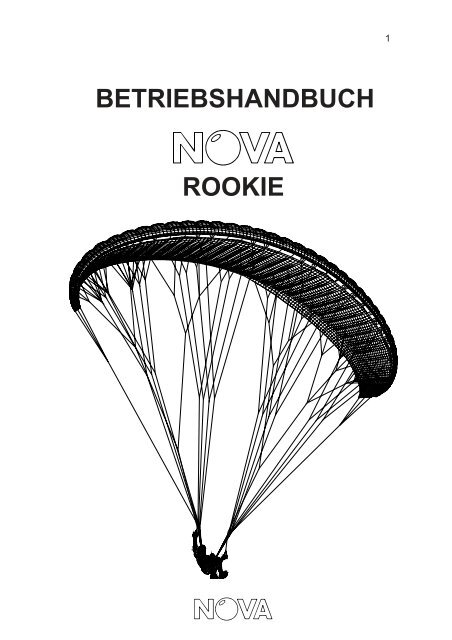
<strong>BETRIEBSHANDBUCH</strong><br />
<strong>ROOKIE</strong>
2<br />
Inhaltsverzeichnis<br />
Technische Daten: .................................................................... 7<br />
Technische Beschreibung des NOVA <strong>ROOKIE</strong>: ..................... 8<br />
Aufbau der Kappe: ................................................................................... 8<br />
Aufhängungssystem des NOVA <strong>ROOKIE</strong>: .............................................. 9<br />
Beschleunigungssystem: ....................................................................... 10<br />
Gurtzeuge: ............................................................................................. 12<br />
Flugpraxis: ................................................................................12<br />
Vorflugcheck und Startvorbereitungen: ................................................. 12<br />
Der Start: ................................................................................................ 13<br />
Kurvenflug: ............................................................................................. 14<br />
Steilspirale: ............................................................................................ 14<br />
„Aktives Fliegen“: ................................................................................... 15<br />
Beschleunigtes Fliegen: ......................................................................... 15<br />
Die Landung: ......................................................................................... 16<br />
Windenschlepp: ..................................................................................... 16<br />
Motorflug: ............................................................................................... 16<br />
Motor-Tragegurt: .................................................................................... 16<br />
Kunstflug: ............................................................................................... 18<br />
Verhalten in extremen Fluglagen: ..........................................18<br />
Einklapper: ............................................................................................. 18<br />
Verhänger / Leinenüberwurf: ................................................................. 18<br />
Frontstall: ............................................................................................... 19<br />
Sackflug: ................................................................................................ 19<br />
Fullstall:.................................................................................................. 19<br />
Trudeln: .................................................................................................. 20<br />
Wingover: .............................................................................................. 20<br />
Abstiegshilfen: .........................................................................21<br />
Steilspirale: ............................................................................................ 21<br />
B-Stall: ................................................................................................... 21<br />
„Ohren anlegen“: .................................................................................... 21<br />
Wartung, Pflege und Reparaturen: .........................................23<br />
Lagerung: ............................................................................................... 23<br />
Reinigung: .............................................................................................. 23<br />
Reparatur: .............................................................................................. 23<br />
Materialverschleiß: ................................................................................. 23<br />
Einige abschließende Worte: ..................................................25<br />
Übersichtszeichnung ...............................................................26<br />
Leinenpläne ..............................................................................27
3<br />
Table of Contents<br />
Technical Data: .........................................................................33<br />
NOVA <strong>ROOKIE</strong> Technical Description: ..................................34<br />
Buildup of canopy: ................................................................................. 34<br />
Rigging system of the NOVA <strong>ROOKIE</strong>: ................................................. 34<br />
Speed system: ....................................................................................... 36<br />
The Harness: ......................................................................................... 38<br />
The Flight: ................................................................................38<br />
Preflight check and launch preparations: .............................................. 38<br />
Launch: .................................................................................................. 39<br />
Turns: ..................................................................................................... 40<br />
Spiral dive: ............................................................................................. 40<br />
”Active flying”: ........................................................................................ 41<br />
Flying with speed system: ..................................................................... 41<br />
Landing: ................................................................................................. 42<br />
Towing: ................................................................................................... 42<br />
Motored Flight / Aerobatics:................................................................... 42<br />
Extreme Flying Manoeuvres: ..................................................43<br />
Collapse: ................................................................................................ 43<br />
Line over: ............................................................................................... 43<br />
Front stall: .............................................................................................. 43<br />
Parachutal Stall (deep stall): .................................................................. 44<br />
Full stall: ................................................................................................ 44<br />
Spin (or negative spin): .......................................................................... 45<br />
Wingover: .............................................................................................. 45<br />
Rapid Descents: .......................................................................46<br />
Spiral dive: ............................................................................................. 46<br />
Big ears: ................................................................................................. 46<br />
B-line stall: ............................................................................................. 47<br />
Looking after your Paraglider: ................................................48<br />
Storage:.................................................................................................. 48<br />
Cleaning: ................................................................................................ 48<br />
Repair: ................................................................................................... 48<br />
Deterioration: a few tips! ........................................................................ 48<br />
In Conclusion: ..........................................................................50<br />
Overall Plan: .............................................................................52<br />
Lineplans: .................................................................................53
4<br />
Version vom 21.10.2006<br />
Für den Inhalt verantwortlich :<br />
Mario Eder, Toni Bender, Hannes Papesh<br />
Titelgrafik : Hannes Papesh
5<br />
WILLKOMMEN IN DER FAMILIE DER<br />
NOVA - PILOTEN!<br />
WIR GRATULIEREN DIR ZUM KAUF DEINES NEUEN GLEIT-<br />
SCHIRMES UND WÜNSCHEN DIR VIELE STUNDEN GENUSS-<br />
VOLLEN FLIEGENS MIT DEM NEUEN<br />
NOVA <strong>ROOKIE</strong><br />
ALS NOVA PILOT HAST DU DIE MÖGLICHKEIT,<br />
KRITIK ZU ÜBEN UND ZU ANREGUNGEN BEIZUTRAGEN.<br />
DU KANNST UNS ANRUFEN, SCHREIBEN ODER FAXEN.<br />
WENN DU FRAGEN HAST, STEHEN WIR DIR GERNE ZUR<br />
VERFÜGUNG.<br />
VERTRIEBSGESELLSCHAFT M.B.H.<br />
BERNHARD HÖFEL - STR. 14<br />
6020 INNSBRUCK<br />
ÖSTERREICH<br />
TEL.: 0512 / 361340<br />
FAX: 0512 / 361342<br />
E-MAIL: INFO@NOVA-WINGS.COM<br />
WWW: HTTP://WWW.NOVA-WINGS.COM<br />
WIR WÜRDEN UNS FREUEN, VON DIR ZU HÖREN!
6<br />
BITTE DIESE BESCHREIBUNG SORGFÄLTIG DURCHLESEN<br />
UND FOLGENDE HINWEISE BEACHTEN:<br />
DIESER GLEITSCHIRM ENTSPRICHT ZUM<br />
ZEITPUNKT SEINER AUSLIEFERUNG<br />
DEN BESTIMMUNGEN DES<br />
DEUTSCHEN HÄNGEGLEITERVERBANDES (DHV)<br />
ODER DER CEN (EUROPÄISCHEN NORM).<br />
JEDE EIGENMÄCHTIGE ÄNDERUNG HAT<br />
EIN ERLÖSCHEN DER BETRIEBSERLAUBNIS<br />
ZUR FOLGE!<br />
DIE BENUTZUNG DIESES GLEITSCHIRMES ERFOLGT<br />
AUSSCHLIESSLICH AUF EIGENE GEFAHR!<br />
JEDE HAFTUNG VON HERSTELLER UND VERTREIBER IST<br />
AUSGESCHLOSSEN!<br />
DER PILOT TRÄGT DIE VERANTWORTUNG FÜR DIE LUFT-<br />
TÜCHTIGKEIT SEINES FLUGGERÄTES!<br />
ES WIRD VORAUSGESETZT, DASS DER PILOT DIE GESETZ-<br />
LICHEN BESTIMMUNGEN RESPEKTIERT<br />
UND SEINE FÄHIGKEITEN DEN ANSPRÜCHEN DES<br />
GERÄTES ENTSPRECHEN!
7<br />
Technische Daten:<br />
Typ XXS XS S M L<br />
Zoomfaktor 0.87 0.91 0.96 1 1.035<br />
Anzahl der Zellen 31 + 8<br />
Spannweite projiziert m 8.3 8.69 9.16 9.55 9.88<br />
Fläche - m² 19.17 20.97 23.33 25.31 27.11<br />
Streckung - 3.6 3.6 3.6 3.6 3.6<br />
Spannweite über alles m 10.76 11.26 11.87 12.37 12.8<br />
Fläche - m² 22.6 24.73 27.52 29.86 31.98<br />
Streckung - 5.12 5.12 5.12 5.12 5.12<br />
Leinendicke mm 1 / 1.4 / 1.85<br />
Leinenlänge m 6.7 6.83 7.2 7.5 7.76<br />
Gesamtleinenbedarf m 233 243 257 268 277<br />
Profiltiefe maximal m 2.61 2.73 2.88 3.0 3.105<br />
Profiltiefe minimal m 0.55 0.576 0.608 0.633 0.655<br />
Gewicht kg 5 5.4 5.8 6.3 6.8<br />
Zuläss. Startgewicht * kg 55-80 65-90 75-100 85-110 100-130<br />
Startgewicht Motor kg - - 85-150 95-150 110-180<br />
* Pilot + circa 17 kg Ausrüstung<br />
Weitere Details der Konstruktion und Abmessungen sind dem DHV-Typenkennblatt<br />
zu entnehmen, das Bestandteil dieser Betriebsanleitung ist.<br />
Die Maße der Leinenelemente sind im Typenkennblatt oder den Leinenplänen<br />
aufgeführt, sie werden mit 5 kg Last gemessen.<br />
Der DHV misst vom Leinenschloß zum Untersegel.<br />
Auf den Leinenplänen sind die Längen der ausgeschlauften Leinenelemente<br />
angegeben.<br />
Das Typenschild ist auf den rechten Außenflügel gedruckt.<br />
DATUM UND PILOT DES ERSTFLUGES SIND EINZUTRAGEN!<br />
DIE GÜTESIEGELPLAKETTE MUSS AM SCHIRM ANGEBRACHT SEIN!
8<br />
Technische Beschreibung des NOVA <strong>ROOKIE</strong>:<br />
Im NOVA <strong>ROOKIE</strong> wird modernste Technologie eingesetzt, um möglichst hohe<br />
Leistung mit absolut unkritischem Extremflugverhalten und maximalem<br />
Flugspaß zu vereinen.<br />
Die Grundform des NOVA <strong>ROOKIE</strong> ist eine schlanke Ellipse mit leicht positiver<br />
Pfeilung.<br />
Aufbau der Kappe:<br />
Der NOVA <strong>ROOKIE</strong> besteht aus 39 Zellen über die gesamte Spannweite. Der<br />
Außenflügel ist etwas heruntergezogen und damit der Übergang zu einem<br />
„Stabilisator“ fließend.<br />
2 bis 3 aufgehängte Profile nebeneinander bilden eine Aufhängungsgruppe, die<br />
durch eine kurze Gabel der obersten Leinenelemente zusammengefasst wird.<br />
Zwischen diesen Aufhängungsgruppen werden die Zwischenrippen durch<br />
Diagonalrippen gestützt.<br />
Dieser Aufbau sorgt für eine glatte Oberfläche, hohe Profiltreue, größtmögliche<br />
Verwindungsstabilität und vor allem sehr wenige Leinenmeter, dadurch einen<br />
sehr geringen Rest-Widerstand eine hervorragende Gleitleistung.<br />
Das Profil des NOVA <strong>ROOKIE</strong> wurde völlig neu entwickelt. Viele computerberechnete<br />
Modifikationen wurden gebaut, ausprobiert und daraus das Beste<br />
selektiert.<br />
Es zeichnet sich durch sehr hohe Stabilität, leichtgängiges Handling sehr hohe<br />
Leistung und einen großen Geschwindigkeitsbereich aus.<br />
In der geschlossenen Profilnase garantieren Trilam- Verstärkungen hohe<br />
Formtreue und Stabilität. Zusätzliche Verstärkungen an den Aufhängungspunkten<br />
sorgen für eine gleichmäßige Verteilung der Belastung. An der Vorderkante<br />
läuft ein dehnungsfreies Dacronband über die gesamte Spannweite, das<br />
in Verbindung mit einer ausgeklügelten Strategie zur Spannungsverteilung im<br />
Segel dem Flügel ein hohes Maß an Formstabilität gibt.<br />
Die Belüftung der Tragfläche des NOVA <strong>ROOKIE</strong> erfolgt durch Stauöffnungen<br />
auf der Unterseite der Profilnase. Die Querbelüftung erfolgt durch genau<br />
abgestimmte Löcher in den tragenden Rippen und Zwischenrippen.
9<br />
Aufhängungssystem des NOVA <strong>ROOKIE</strong>:<br />
Die Leinen des NOVA <strong>ROOKIE</strong> bestehen aus einer dehnungsarmen und<br />
hochfesten Kernmantelkonstruktion: der Mantel aus gefärbtem Polyester, der<br />
Kern aus weißem Polyäthylen.<br />
Das gesamte Aufhängungssystem wird aus einzelnen Leinenelementen, die an<br />
beiden Enden geschlauft und vernäht sind, gebildet.<br />
Die Stammleinen und die Hauptbremsleinen sind 1.85mm, die mittleren<br />
Leinenelemente 1.4mm dick, die oberen Leinen sind aus 1mm dicken<br />
Dyneemaleinen. Die Bremsspinne und die Stabilisatorleinen sind 1mm stark.<br />
Bei den tragenden Fangleinen unterscheidet man zwischen Gabelleinen (oben<br />
an der Schirmkappe), Zwischenelementen (fassen 2 bis 3 Gabelleinen zusammen)<br />
und Stammleinen, diese fassen 2 Zwischenelemente zusammen und<br />
führen zum Leinenschloß (Rapidglied, das die Fangleinen mit den Tragegurten<br />
verbindet).<br />
Die Stabilisatorleinen verbinden die oberen Stabilisatorgabelleinen und die<br />
Gabelleinen der äußersten Aufhängung mit dem Leinenschloß.<br />
Die Bremsleinen sind nicht tragend und führen von der Schirmhinterkante<br />
( = Austrittskante) über die Hauptbremsleine durch die Bremsrolle am C-<br />
Tragegurt zum Bremsgriff.<br />
Auf der Hauptbremsleine befindet sich eine Markierung, an deren Höhe der<br />
Bremsgriff angeknotet ist. Diese Einstellung sollte nicht verändert werden, um<br />
einerseits in extremen Flugsituationen und bei der Landung genügend Bremsweg<br />
zur Verfügung zu haben, und um andererseits den Gleitschirm nicht<br />
ständig zu bremsen!<br />
Zur besseren Unterscheidung sind die A-Leinen, die Stabilisatorleinen, die<br />
Bremsspinnen und die A-Gurte rot gefärbt, die Hauptbremsleinen blau, alle<br />
anderen Leinen gelb.<br />
Ebenso hat die Hauptaufhängungsschlaufe an der Basis des Tragegurtes eine<br />
rote Manschette. In diese Schlaufe wird der Hauptkarabiner eingehängt, der<br />
das Gurtzeug mit den Tragegurten verbindet.<br />
Die Leinenschlösser sind dreieckig, ein Gummiring verhindert das Verrutschen<br />
der eingeschlauften Leinen.
10<br />
Der NOVA <strong>ROOKIE</strong> besitzt je Seite 5 Tragegurte. Die A-Stammleinen hängen<br />
auf den beiden A-Tragegurten. Die B-Leinen und die Stabilisatorleinen hängen<br />
auf dem B-Tragegurt. Die C-Stammleinen auf dem C- und die D auf dem D-<br />
Gurt. Die Hauptbremsleine führt zu Rollen am D-Tragegurt.<br />
Leinenanordnung siehe Leinenpläne im Anhang.<br />
Beschleunigungssystem:<br />
Der NOVA <strong>ROOKIE</strong> kann mit einem Fußpedal- Beschleunigungssystem<br />
ausgestattet werden.<br />
Das Beschleunigungssystem wirkt auf die A-, B- und C-Gurte.<br />
In der Ausgangsstellung sind alle Gurte gleich lang: 52cm über alles (beim XS<br />
und XXS 47cm).<br />
Bei Betätigung des Beschleunigungssystems werden die A- und B-Gurte bis zu<br />
14cm und der C-Gurt um 7cm verkürzt. Der D-Gurt behält seine ursprüngliche<br />
Länge. Diese Maße beziehen sich auf das DHV Gütesiegel!<br />
Werden durch falsche Montage falsche Wege erzielt, hat das den Verlust des<br />
Gütesiegels zur Folge!<br />
Montage:<br />
An den meisten handelsüblichen Gurtzeugen sind Rollen für den Beinstrecker<br />
montiert. Sollten sich am Sitzgurt noch keine Rollen oder Schlaufen zur<br />
Befestigung von Rollen befinden, so muß man beim Annähen die Position<br />
genau überdenken, um ein „Aushebeln“ des Körpers beim Beschleunigen zu<br />
verhindern.<br />
Die dem NOVA Beinstreckerset beiliegenden Rollen sind Anhand der Anleitung<br />
zusammenzubauen.<br />
Die Beschleunigerseile werden am Alurohr des Beinstreckers befestigt, von<br />
vorne durch die Rollen am Gurtzeug nach oben geführt und in der richtigen<br />
Länge an die „Brummel-Haken“ geknotet.<br />
Bei richtiger Einstellung der Beschleunigerseile ist einerseits das Pedal mit<br />
angewinkelten Beinen während des Fluges leicht zu erreichen und andererseits<br />
durch Strecken der Beine der gesamte Trimmweg nutzbar.<br />
Funktion:<br />
Der Pilot betätigt mit dem Fußpedal einen Flaschenzug, der die Kraft drittelt<br />
und die A-, B- und C-Gurte verkürzt.
11<br />
A1<br />
A2<br />
B<br />
C<br />
D<br />
Tragegurte<br />
rote<br />
Manschette<br />
Bremsleinenrolle<br />
obere<br />
Rolle<br />
Druckknopf<br />
Brummelhaken<br />
Tragegurte<br />
Beschleunigungssystem<br />
untere<br />
Rolle<br />
Zugrichtung<br />
rote<br />
Manschette<br />
Bremsgriff<br />
Hauptkarabiner<br />
Gurtzeug<br />
Fußpedal
12<br />
Handhabung:<br />
Vor dem Start werden die Verbindungshaken („Brummelhaken“) vom Fußbeschleuniger<br />
und vom Beschleunigungssystem am Tragegurt zusammen<br />
gehängt.<br />
Es ist darauf zu achten, daß das Beschleunigerseil frei läuft.<br />
Gurtzeuge:<br />
Für den NOVA <strong>ROOKIE</strong> sind alle Gütesiegelgeprüften Gurtzeuge mit Aufhängung<br />
etwa in Brusthöhe ca. 37-50cm geeignet.<br />
Empfohlen wird eine Aufhängungsbreite zwischen den Karabinern von<br />
45-60cm. Dies hängt immer von der Größe des Piloten und der Gurtzeugtype<br />
ab.<br />
Das <strong>Nova</strong> Testpilotenteam fliegt tendenziell mit tiefer und breiter Aufhängeposition,<br />
da dadurch ein besseres Feedback zum Schirm vermittelt wird.<br />
Es ist darauf zu achten, dass sich mit der Höhe der Aufhängung auch der<br />
relative Bremsweg verändert.<br />
ACHTUNG:<br />
EFFEKTIVE KREUZVERSPANNUNGEN KÖNNEN DAS HANDLING DRAS-<br />
TISCH VERSCHLECHTERN UND TRAGEN NICHT ZU HÖHERER<br />
SICHERHEIT BEI!<br />
Flugpraxis:<br />
Vorflugcheck und Startvorbereitungen:<br />
Ein sorgfältiger Vorflugcheck ist vor jedem Flug durchzuführen. Dabei sind<br />
Leinen, Tragegurte und Schirmkappe auf Beschädigungen zu überprüfen! Auch<br />
bei kleinen Mängeln darf auf keinen Fall gestartet werden!<br />
Auch ist sicherzustellen, daß die Leinenschlösser (Schraubschäkel) fest<br />
geschlossen sind.<br />
Das Gurtzeug ist mit größter Sorgfalt anzulegen und alle Schnallen zu prüfen.<br />
Darüberhinaus empfiehlt es sich, den sicheren Sitz des Rettungsgerätegriffs<br />
und den korrekten Zustand der Außencontainer-Splints zu checken.<br />
Die Leinenebenen sind sorgfältig zu trennen und die Tragegurte zu ordnen.<br />
Sind die Tragegurte nicht verdreht, verlaufen die Bremsleinen frei durch die<br />
Öse zur Hinterkante des Schirmes. Alle Leinen müssen frei und ohne Verschlingung<br />
vom Tragegurt zur Kappe laufen. Verknotete Leinen lassen sich<br />
während des Fluges oft nicht lösen!
13<br />
Die Bremsleinen liegen direkt auf dem Boden, deshalb ist besonders darauf zu<br />
achten, daß sie beim Start nicht hängenbleiben können.<br />
Es darf keine Leinen unter der Schirmkappe liegen. Ein Leinenüberwurf kann<br />
verhängnisvolle Folgen haben!<br />
Die Kappe wird halbkreisförmig gegen den Wind ausgelegt. Beim Aufziehen<br />
spannen sich die A-Leinen in der Mitte des Schirms zuerst, er füllt sich gleichmäßig<br />
und ein leichter, richtungsstabiler Start ist gewährleistet.<br />
Der Start:<br />
Der NOVA <strong>ROOKIE</strong> ist sehr einfach zu starten.<br />
Der startbereite Pilot hält je Seite beide A-Gurte und die Bremsgriffe in den<br />
Händen. Zur besseren Orientierung und Kontrolle sind die A-Leinen sowie die<br />
Manschette an den A-Gurten rot gefärbt. Alternativ dazu kann auch nur mit den<br />
mittleren A-Gurten gestartet werden (ein Gurt je Seite).<br />
Die Arme sind in Verlängerung der A-Gurte seitlich nach hinten gestreckt.<br />
Vor dem Anlauf sind der ausgelegte Schirm, die Windrichtung und der Luftraum<br />
zu überprüfen!<br />
Mit konsequentem Anlauf wird die Fläche des NOVA <strong>ROOKIE</strong> aufgezogen. Die<br />
Kalotte füllt sich schnell und zuverlässig. Sobald der Zug beim Aufziehen<br />
nachlässt, ist die Gleitschirmkappe durch dosiertes Bremsen senkrecht über<br />
dem Piloten zu halten.<br />
Eingeklappte Zellen sollten durch Pumpen auf der betroffenen Seite geöffnet<br />
werden. Notwendige Richtungskorrekturen sind jetzt durchzuführen.<br />
Der Pilot führt den Kontrollblick durch und vergewissert sich, daß die Kalotte<br />
vollständig geöffnet, ohne Knoten in den Leinen, über ihm steht.<br />
Die endgültige Entscheidung zu starten fällt erst, wenn alle Störungen erfolgreich<br />
behoben sind.<br />
Ansonsten ist der Start aus Sicherheitsgründen sofort abzubrechen!<br />
Bei Rückwärts- und Starkwindstarts kann der Schirm stärker als gewöhnlich<br />
vorschießen oder früher als beabsichtigt abheben. Um dies zu verhindern, läuft<br />
man in der Aufziehphase hangaufwärts der Kappe nach.<br />
Es empfiehlt sich, diese anspruchsvolle Starttechnik auf einem flachen Hang<br />
zu üben!<br />
Um den Schirm beim Starkwind-Rückwärtstsart zu kontrollieren und ein<br />
Vorschießen zu verhindern, empfielt es sich, den C Traggurt zu ziehen. Da am<br />
D-Gurt nur eine Fangleine hängt, kann man damit nicht die gesamte Fläche<br />
stallen.
14<br />
Kurvenflug:<br />
Der neue NOVA <strong>ROOKIE</strong> ist wendig und reagiert auf Steuerimpulse direkt und<br />
verzögerungsfrei.<br />
Durch reine Gewichtsverlagerung lassen sich flache Kurven mit minimalem<br />
Höhenverlust fliegen.<br />
Eine kombinierte Steuertechnik: Gewichtsverlagerung und Zug der kurveninneren<br />
Bremsleine eignet sich besonders für schnelle Richtungswechsel.<br />
Während des Kreisens werden durch zusätzliches Anbremsen der kurvenäußeren<br />
Seite die Geschwindigkeit, der Kurvenradius und die Querlage<br />
kontrolliert. Gegenläufiges Ziehen bzw. Lösen der Bremsleinen verändert diese<br />
Parameter am effektivsten.<br />
VORSICHT: BEI ZU WEITEM UND ZU SCHNELLEM DURCHZIEHEN DER<br />
BREMSLEINEN BESTEHT DIE GEFAHR EINES STRÖMUNGSABRISSES!<br />
Ein einseitiger Strömungsabriß kündigt sich deutlich an: der Schirm fängt an<br />
um die Kurve zu „schmieren“: die kurveninnere Flügelhälfte bleibt stehen und<br />
wird weich. In dieser Phase ist die kurveninnere Bremse sofort zu lösen.<br />
Sollte eine Bremsleine reißen, oder sich vom Bremsgriff lösen, lässt der<br />
NOVA <strong>ROOKIE</strong> sich mit Hilfe der D-Gurte eingeschränkt steuern und landen.<br />
Steilspirale:<br />
Die Steilspirale wird durch vorsichtiges Erhöhen des Bremsleinenzugs und<br />
deutliche Gewichtsverlagerung zur Kurveninnenseite eingeleitet. Der NOVA<br />
<strong>ROOKIE</strong> nimmt eine hohe Seitenneigung ein und fliegt eine schnelle und steile<br />
Kurve. Die Schräglage und die Sinkgeschwindigkeit werden durch dosiertes<br />
Ziehen bzw. Nachlassen der kurveninneren Bremsleine kontrolliert. Leichtes<br />
Anbremsen des kurvenäußeren Flügels verhindert das Einklappen in steilen<br />
Spiralen.<br />
Wegen des extremen Höhenverlustes in der Steilspirale, ist immer ausreichend<br />
Sicherheitshöhe einzuhalten!<br />
Um starke Pendelbewegungen bei der Ausleitung der Steilspirale zu vermeiden<br />
wird die kurveninnere Bremse langsam gelöst, die kurvenäußere Bremse bleibt<br />
leicht angebremst.
15<br />
Der NOVA <strong>ROOKIE</strong> hat keine Tendenz zur stabilen Steilspirale. Sollte er unter<br />
ungünstigen Einflüssen weiterdrehen (z.B. unbeabsichtigte Asymmetrie oder zu<br />
enge Kreuzverspannung), ist die Steilspirale aktiv auszuleiten, d.h. sofortige<br />
Gewichtsverlagerung nach Außen und gleichzeitig die Kurvenaußenseite<br />
deutlich mehr anbremsen, bis der Flügel sich aufrichtet.<br />
ACHTUNG: EINE STABILE STEILSPIRALE AUSZULEITEN ERFORDERT<br />
AUFGRUND DER HOHEN G-BELASTUNG EINEN UNGEWÖHNLICH<br />
GROSSEN KRAFTAUFWAND!<br />
„Aktives Fliegen“:<br />
Aktives Fliegen ist die Technik mittels welcher der NOVA <strong>ROOKIE</strong>, bewusst<br />
durch Steuerimpulse und Gewichtsverlagerung so stabil und effizient wie<br />
möglich, geflogen wird.<br />
In turbulenten Bedingungen hält der Pilot durch feinfühliges Betätigen der<br />
Bremsleinen die Kappe senkrecht über sich.<br />
Beispiel: beim Einfliegen in starke Aufwinde werden die Bremsen gelöst, beim<br />
Einfliegen in Abwinde gezogen. Dadurch werden zu große Veränderungen des<br />
Anstellwinkels vermieden.<br />
„Aktives Fliegen“ verhindert fast alle Störungen der Kappe im Vorfeld.<br />
Beschleunigtes Fliegen:<br />
Bei Betätigung des Beschleunigungssystems wird der Anstellwinkel verringert,<br />
wodurch die Geschwindigkeit zunimmt, aber der Gleitschirm auch instabiler<br />
wird und leichter einklappt. Deshalb sollte das Beschleunigungssystem immer<br />
mit genügend Sicherheitsabstand zum Boden, zu Hindernissen und zu anderen<br />
Fluggeräten betätigt werden.<br />
Beim Einflug in Turbulenzen ist das Beschleunigungssystem sofort zu<br />
deaktivieren!<br />
Eine zu kurze Einstellung der Bremsleinen ist zu vermeiden.<br />
Beschleunigte Klapper sind in der Regel impulsiver und erfordern erhöhte<br />
Reaktionsbereitschaft!<br />
NIEMALS IN TURBULENTER LUFT BESCHLEUNIGEN!<br />
NIEMALS DIE BREMSGRIFFE LOSLASSEN!<br />
NICHT IM VOLLBESCHLEUNIGTEN ZUSTAND ANBREMSEN!
16<br />
SOLLTE DIE FLÄCHE EINKLAPPEN, SO IST DAS BESCHLEUNIGUNGS-<br />
SYSTEM SOFORT ZU LÖSEN, DER GLEITSCHIRM ZU STABILISIEREN<br />
UND ZU ÖFFNEN!<br />
Die Landung:<br />
Der NOVA <strong>ROOKIE</strong> ist einfach zu landen. Im Endanflug gegen den Wind lässt<br />
man den Schirm leicht angebremst ausgleiten. In ca. 1m Höhe über Grund<br />
wird der Anstellwinkel durch zunehmendes Bremsen erhöht und der Schirm<br />
abgefangen. Ist die Minimalgeschwindigkeit erreicht, werden die Bremsen<br />
vollständig durchgezogen.<br />
Bei starkem Gegenwind bremst man sehr dosiert. Erst wenn der Pilot sicher<br />
am Boden steht, bringt er die Kappe mit Vorsicht in den Strömungsabriß.<br />
Landungen mit steilen Kurvenwechseln im Endanflug sind unbedingt zu<br />
vermeiden (Pendelgefahr).<br />
Windenschlepp:<br />
Der NOVA <strong>ROOKIE</strong> weist beim Windenschlepp keine Besonderheiten auf.<br />
Es ist darauf zu achten, in flachem Winkel vom Boden wegzusteigen.<br />
Motorflug:<br />
Der NOVA <strong>ROOKIE</strong> hat die DULV Zulassung für Motorflug. Jede Kombination<br />
Motor / Schirm muss zugelassen sein (siehe DULV Datenbank im Web:<br />
www.dulv.de).<br />
Motor-Tragegurt:<br />
Optional kann der NOVA <strong>ROOKIE</strong> mit einem Kombigurt ausgestattet werden:<br />
dieser bietet eine niedrige Aufhängung für den Bergflug und eine hohe für den<br />
Motorflug. Die hohe Aufhängung (kurze Tragegurte) empfiehlt sich bei einer<br />
hohen Motoraufhängung. Damit sind die Gurte und Bremsgriffe leichter zu<br />
erreichen.<br />
Zudem bietet der Kombigurt einen Trimmer. Dieser ermöglicht durch einseitiges<br />
Öffnen die Möglichkeit, das Drehmoment des Motors komfortabel auszugleichen<br />
(Trimmer auf der Seite öffnen, auf welche der Schirm fliegen würde).<br />
Für den Bergflug sind die Trimmergriffe in die Hauptkarabiner einzuhängen und<br />
der Trimmer damit in Normalstellung zu blockieren.
17<br />
Die Motor-Tragegurte<br />
Bremsleinenrolle<br />
D<br />
C B<br />
A2<br />
A1<br />
Bremsgriff<br />
rote<br />
Manschette<br />
Beschleunigerrolle<br />
Brummelhaken<br />
Trimmer<br />
offen<br />
Trimmer<br />
geschlossen in<br />
Bergflugstellung<br />
obere<br />
Aufhängungsschlaufe<br />
untere<br />
Aufhängungsschlaufe<br />
Hauptkarabiner (Stahl)<br />
Der DULV (Deutsche Ultralight Verband) hat den NOVA <strong>ROOKIE</strong> nur ohne<br />
Beschleunigungssystem getestet! Von der Benützung des Speedsystems beim<br />
Motorfliegen wird abgeraten!<br />
ACHTUNG! DIE BENÜTZUNG DER TRIMMER IM BERGLFUG IST NICHT<br />
DHV ZUGELASSEN!
18<br />
Kunstflug:<br />
Der NOVA <strong>ROOKIE</strong> ist nicht für Kunstflug zugelassen.<br />
Einklapper:<br />
Verhalten in extremen Fluglagen:<br />
Bei Turbulenzen sind Einklapper nicht auszuschließen. Diese treten beim<br />
NOVA <strong>ROOKIE</strong> meist nur im Aussenflügelbereich auf.<br />
Um bei einseitig kollabierter Tragfläche die Flugrichtung beizubehalten, muß<br />
die gegenüberliegende, offene Flügelhälfte angebremst werden!<br />
Bei einer sehr stark kollabierten Fläche ist das Anbremsen der offenen Hälfte<br />
zu dosieren, um einen Strömungsabriß zu vermeiden!<br />
Wird durch Gegenlenken ein Wegdrehen verhindert, so kann gleichzeitig die<br />
Kalotte durch Pumpen der eingeklappten Seite geöffnet werden.<br />
Wird nicht gegengesteuert, so öffnet der NOVA <strong>ROOKIE</strong> Einklapper meist<br />
selbständig. Sollte die Kalotte nicht von selbst öffnen, geht der Schirm ohne<br />
Zutun des Piloten in eine Steilspirale über.<br />
Verhänger / Leinenüberwurf:<br />
Sollte, aus welchem Grund auch immer, der Umstand eintreten, daß im Flug<br />
Fangleinen in sich verheddert sind, oder über einen Teil der Tragfläche laufen,<br />
so sind folgende Verhaltensregeln zu beachten :<br />
Der Pilot stabilisiert durch gefühlvolles Gegenbremsen den Schirm. Ohne<br />
Pilotenreaktion geht ein verhängter Schirm in eine stabile Steilspirale über.<br />
Um den Verhänger zu lösen, gibt es verschiedene Möglichkeiten:<br />
- Pumpen auf der eingeklappten Seite<br />
- Ziehen der Stabilo- Leine<br />
- Führen beide Maßnahmen nicht zum Erfolg, bietet sich die Möglichkeit, den<br />
Verhänger durch einen Fullstall zu öffnen.<br />
Dieses Manöver sollte nur von routinierten Piloten mit Extremflugerfahrung<br />
bzw. regelmäßigen Sicherheitstrainings in ausreichender Sicherheitshöhe<br />
durchgeführt werden.
19<br />
ACHTUNG:<br />
FÜHREN DIESE FLUGMANÖVER NICHT ZUM ERFOLG ODER FÜHLT SICH<br />
DER PILOT ÜBERFORDERT BZW. IST NICHT GENÜGEND HÖHE VORHAN-<br />
DEN, IST SOFORT DAS RETTUNGSSYSTEM ZU BETÄTIGEN.<br />
Frontstall:<br />
Ein Gleitschirm gerät durch starkes Ziehen an den A-Gurten oder durch<br />
plötzlich auftretende starke Abwinde in einen Frontstall. Die Eintrittskante<br />
klappt über die ganze Spannweite ein.<br />
Durch dosiertes anbremsen werden die Pendelbewegungen um die Querachse<br />
verringert und gleichzeitig der Öffnungsvorgang beschleunigt.<br />
Der NOVA <strong>ROOKIE</strong> öffnet den Frontstall selbständig.<br />
Sackflug:<br />
Der Gleitschirm hat keine Vorwärtsfahrt und gleichzeitig stark erhöhte Sinkwerte.<br />
Verursacht wird der Sackflug u.a. durch einen zu langsam ausgeleiteten<br />
B-Stall. Besonders anfällig für den Sackflug sind Schirme mit porösem Tuch<br />
(UV- Strahlung) oder durch Einsatz beim Windenschlepp, mit hoher Last stark<br />
beanspruchte Schirme (gedehnte A-Leinen).<br />
Wird die Kappe nass, oder ist die Luftthemperatur sehr niedrig (unter 0°C), ist<br />
die Tendenz zum Sackflug ebenfalls höher.<br />
Der Pilot beendet den stabilen Sackflug durch leichtes Vordrücken der A-Gurte<br />
in Höhe der Leinenschlösser oder durch Treten des Beschleunigungssystems.<br />
Der NOVA <strong>ROOKIE</strong> leitet den Sackflug normalerweise selbständig aus.<br />
VORSICHT: SOBALD IM SACKFLUG DIE BREMSEN BETÄTIGT WERDEN,<br />
GEHT EIN GLEITSCHIRM UNVERZÜGLICH IN DEN FULLSTALL ÜBER. IN<br />
BODENNÄHE DARF EIN STABILER SACKFLUG WEGEN DER PENDEL-<br />
BEWEGUNGEN NICHT AUSGELEITET WERDEN, DER PILOT RICHTET<br />
SICH STATT DESSEN IM GURTZEUG AUF UND BEREITET SICH AUF EINE<br />
HARTE LANDUNG VOR.<br />
Fullstall:<br />
Um einen Fullstall einzuleiten, sind beide Bremsleinen durchzuziehen. Der<br />
Schirm wird stetig langsamer, bis die Strömung komplett abreißt. Die Kappe<br />
kippt plötzlich nach hinten. Trotz dieser unangenehmen Schirmreaktion sind<br />
beide Bremsleinen konsequent unten zu halten, bis sich der Schirm stabilisiert.<br />
Der NOVA <strong>ROOKIE</strong> fliegt im Fullstall rückwärts und bildet nicht immer eine<br />
Rosette nach vorne.<br />
Eine Rosette nach vorne kann durch langsames Einleiten des Fullstalls erreicht<br />
werden.
20<br />
Bei zu schnell oder zu weit durchgezogenen Bremsen geht die Kappe oft nicht<br />
in die gewünschte Rosette nach vorne!<br />
Zur Ausleitung werden beide Bremsleinen symmetrisch nach oben geführt<br />
(Schaltzeit >= 1sec). Der Schirm öffnet sich und pendelt nach vorne, um Fahrt<br />
aufzunehmen. Durch symmetrisches Anbremsen wird ein zu starkes Vorschießen<br />
verhindert. Bremst der Pilot nicht an, schießt der NOVA <strong>ROOKIE</strong> maximal<br />
90° vor. Ein Einklappen ist nur im ungünstigsten Fall möglich.<br />
Durch eine asymmetrische Fullstallausleitung ist ein Einklappen möglich.<br />
Bei allen dynamischen Extremflugfiguren besteht die Gefahr das der Pilot<br />
falsch reagiert: Es sollte immer durch dosierte Bremsbewegungen korrigiert<br />
werden!<br />
WIRD DER FULLSTALL ZU FRÜH, ZU SCHNELL ODER FALSCH AUS-<br />
GELEITET, KANN DIES EIN EXTREM WEITES VORSCHIESSEN DER<br />
SCHIRMKAPPE ZUR FOLGE HABEN!<br />
Trudeln:<br />
Ein Schirm dreht negativ, wenn auf einer Flügelhälfte die Strömung abreißt.<br />
Dabei dreht die Schirmkappe um die Hochachse mit dem Drehzentrum innerhalb<br />
der Spannweite. Der Innenflügel fliegt rückwärts.<br />
Für das Trudeln gibt es zwei Ursachen:<br />
- eine Bremsleine wird zu weit und zu schnell durchgezogen (z.B. beim Einleiten<br />
der Steilspirale)<br />
- im Langsamflug wird eine Seite zu stark gebremst (z.B. beim Themikfliegen)<br />
Wird eine versehentlich eingeleitete Negativkurve sofort ausgeleitet, geht der<br />
NOVA <strong>ROOKIE</strong> ohne großen Höhenverlust in den Normalflug über. Die zu weit<br />
gezogene Bremse wird zurückgenommen, bis die Strömung am Innenflügel<br />
wieder anliegt.<br />
Nach einer länger gehaltenen Negativkurve schießt der Gleitschirm eventuell<br />
einseitig vor. Dies kann ein impulsives Einklappen oder einen Verhänger zur<br />
Folge haben.<br />
Zu enge Kreuzverspannungen erhöhen bei fast allen Schirmen die<br />
Trudeltendenz.<br />
Wingover:<br />
Es werden abwechselnd enge Kurven geflogen, die Querneigung des Schirmes<br />
wird dabei zunehmend erhöht.
21<br />
Bei Wingovers mit großer Schräglage beginnt der kurvenäußere Flügel zu<br />
entlasten. Weiteres erhöhen der Querneigung ist zu vermeiden, da ein eventuelles<br />
Einklappen sehr impulsiv sein kann!<br />
FULLSTALL, TRUDELN UND WINGOVER (ÜBER 90°) SIND VERBOTENE<br />
KUNSTFLUGFIGUREN UND DÜRFEN IM NORMALEN FLUGBETRIEB NICHT<br />
DURCHGEFÜHRT WERDEN. FALSCHES AUSLEITEN ODER ÜBER-<br />
REAKTIONEN DES PILOTEN KÖNNEN UNABHÄNGIG VOM SCHIRMTYP<br />
SEHR GEFÄHRLICHE FOLGEN HABEN.<br />
Steilspirale:<br />
Abstiegshilfen:<br />
In der Steilspirale wird am schnellsten Höhe abgebaut. Hohe Sinkwerte führen<br />
durch die dabei auftretende Zentrifugalkraft zu einer starken Körperbelastung<br />
des Piloten und sind von ungeübten Piloten nicht lange durchzuhalten. Das<br />
anspannen der Bauchmuskulatur während der Steilspirale kann sehr hilfreich<br />
sein!<br />
Sobald Schwindel oder Ohnmachtsgefühl auftreten, ist die Steilspirale sofort<br />
auszuleiten!<br />
B-Stall:<br />
Die B-Gurte werden langsam, symmetrisch bis zu 20cm heruntergezogen. Die<br />
Strömung reißt ab und der Schirm geht in einen vertikalen Sinkflug ohne<br />
Vorwärtsfahrt über. Lösen der B-Gurte beendet diesen Flugzustand, der Schirm<br />
nickt nach vorne und nimmt wieder Fahrt auf.<br />
ACHTUNG: DURCH ZU WEITES ZIEHEN DER B-GURTE KANN MAN DIE<br />
FLÄCHE ZUSÄTZLICH VERKLEINERN UND DIE SINKGESCHWINDIGKEIT<br />
ERHÖHEN, ALLERDINGS BESTEHT DABEI DIE GEFAHR, DAß DIE KAPPE<br />
EINE ROSETTE NACH VORNE BILDET.<br />
DER B-STALL IST SOFORT AUSZULEITEN!<br />
ÖFFNET DIE KAPPE NICHT, IST DIES DURCH BEIDSEITIGES DOSIERTES<br />
ANBREMSEN ZU UNTERSTÜTZEN.<br />
„Ohren anlegen“:<br />
Im Gegensatz zur Steilspirale und dem B-Stall ist mit „angelegten Ohren“ die<br />
Vorwärtsfahrt höher als die Sinkgeschwindigkeit. Diese Abstiegshilfe wird<br />
verwendet, um Gefahrenbereiche in eine gewünschte Richtung schnell horizontal<br />
zu verlassen.<br />
Beispiele:
22<br />
- wird der Pilot von starkem Wind oder einer Gewitterwolke mit wenig Höhe<br />
über einem Gipfel überrascht, können zunächst weder eine B-Stall noch eine<br />
Steilspirale aus der Notsituation helfen.<br />
- befindet sich der Pilot in sehr starkem Steigen, empfiehlt es sich, diesen<br />
Bereich mit „angelegten Ohren“ zu verlassen und nach Möglichkeit in sinkender<br />
Luft Höhe abzubauen.<br />
Um den Außenflügel einzuklappen, werden die äußeren A-Gurte und somit die<br />
äußersten A-Leinen gezogen. Dadurch werden die Außenflügel eingeklappt und<br />
der NOVA <strong>ROOKIE</strong> befindet sich in einem stabilen Sinkflug.<br />
Der Bremsgriff bleibt zusammen mit dem äußeren A-Gurt in der Hand. Durch<br />
Gewichtsverlagerung bleibt der Schirm steuerbar.<br />
Um sowohl Sinken als auch die Vorwärtsgeschwindigkeit zu erhöhen, sollte<br />
dieses Manöver mit einer gleichzeitingen Betätigung des Beschleunigungssystems<br />
kombiniert werden. Die Gefahr von Kappenstörungen in turbulenter<br />
Luft ist mit „angelegten Ohren“ deutlich reduziert.<br />
Zur Ausleitung werden die äußeren A-Gurte wieder frei gegeben, die Kalotte<br />
öffnet nicht immer selbständig. Um die Öffnung zu beschleunigen, bremst der<br />
Pilot leicht an.<br />
ALLE ABSTIEGSHILFEN SOLLTEN BEI RUHIGER LUFT UND IN AUSREI-<br />
CHENDER SICHERHEITSHÖHE GEÜBT WERDEN, UM SIE IN NOT-<br />
SITUATIONEN BEI TURBULENTER LUFT<br />
EINSETZEN ZU KÖNNEN!<br />
FÜR ALLE EXTREMFLUGMANÖVER UND ABSTIEGSHILFEN GILT:<br />
- ERSTES ÜBEN UNTER ANLEITUNG EINES LEHRERS IM RAHMEN EINER<br />
SCHULUNG ODER EINES SICHERHEITSTRAININGS<br />
- VOR DEM EINLEITEN DER MANÖVER VERGEWISSERT SICH DER PILOT,<br />
DASS DER LUFTRAUM UNTER IHM FREI IST<br />
- WÄHREND DER MANÖVER MUSS DER PILOT BLICKKONTAKT ZUR<br />
KAPPE HABEN UND DIE HÖHE ÜBER GRUND KONTROLLIEREN
23<br />
Wartung, Pflege und Reparaturen:<br />
Bei guter Pflege und Wartung wird der NOVA <strong>ROOKIE</strong> über mehrere Jahre<br />
lufttüchtig bleiben.<br />
Lagerung:<br />
Man lagert den Gleitschirm trocken, lichtgeschützt und nie in der Nähe von<br />
Chemikalien!<br />
Reinigung:<br />
Zur Reinigung verwendet man einen Schwamm und Wasser (keine Lösungsmittel)!<br />
Reparatur:<br />
Reparaturen sind nur vom Hersteller, Importeur oder von autorisierten Betrieben<br />
durchzuführen!<br />
Materialverschleiß:<br />
Der NOVA <strong>ROOKIE</strong> besteht hauptsächlich aus NYLON- Tuch. Dieses Material<br />
zeichnet sich dadurch aus, daß es unter dem Einfluß von UV- Strahlen nur<br />
wenig an Festigkeit und Luftdichte verliert.<br />
Trotzdem sollte der Gleitschirm erst kurz vor dem Start ausgelegt bzw. unmittelbar<br />
nach der Landung eingepackt werden, um ihn vor unnötiger Sonneneinstrahlung<br />
zu schützen.<br />
Die Fangleinen des NOVA <strong>ROOKIE</strong> bestehen aus einem POLYÄTHYLEN<br />
(DYNEEMA)- Kern und einem POLYESTER- Mantel.<br />
Der tragende POLYETHYLEN- Kern der Leinen ist hitzeempfindlich! Nicht mit<br />
dem Feuerzeug lose Fadenenden an den Leinen abbrennen! Kontakt mit<br />
heißen Oberflächen vermeiden!<br />
Eine Überbelastung einzelner Leinen ist zu vermeiden, da eine sehr starke<br />
Überdehnung irreversibel ist!<br />
Wiederholtes Knicken der Leinen an der gleichen Stelle vermindert die Festigkeit.
24<br />
Beim Auslegen des Gleitschirmes ist darauf zu achten, daß weder Schirmtuch<br />
noch Leinen stark verschmutzen, da in den Fasern eingelagerte Schmutzpartikel<br />
die Leinen verkürzen können und das Material schädigen!<br />
Verhängen sich Leinen am Boden, können sie beim Start überdehnt oder<br />
abgerissen werden. Nicht auf die Leinen treten!<br />
Es ist darauf zu achten, daß kein Schnee, Sand oder Steine in die Kalotte<br />
gelangen, da das Gewicht in der Hinterkante den Schirm bremsen oder sogar<br />
stallen kann. Scharfe Kanten verletzten das Tuch!<br />
Bei Starkwindstarts kann eine unkontrollierte Schirmfläche mit sehr hoher<br />
Geschwindigkeit in den Boden schlagen. Dies kann zu Profilrissen, Beschädigung<br />
der Nähte oder des Tuchs führen!<br />
Eine in den Fangleinen verwickelte Hauptbremsleine kann diese durchscheuern!<br />
Nach der Landung sollte die Fläche nicht mit der Nase voran zu Boden fallen,<br />
da dies auf die Dauer das Material im Nasenbereich schädigen kann!<br />
Nach Baum- und Wasserlandungen sollte man die Leinenlängen überprüfen!<br />
Nach Salzwasserkontakt ist das Gerät sofort sorgfältig mit Süßwasser zu<br />
spülen!<br />
Niemals den ausgebreiteten Schirm über rauhen Boden schleifen: dies führt zu<br />
Tuchbeschädigungen an den Reibestellen. Besonders beim Ausbreiten am<br />
Starplatz ist darauf zu achten, daß der ausgebreitete Schirm nicht über den<br />
Boden gezogen wird. Es ist immer besser, den Schirm in der weichen Wiese zu<br />
packen, als auf einem rauhen Untergrund.<br />
Ein Leinenplan der aktuellen Version liegt dieser Betriebsanleitung bei oder<br />
kann beim Hersteller bzw. Importeur angefordert werden.<br />
Die Schirmfläche möglichst locker packen, um das Material zu schonen.<br />
Der NOVA <strong>ROOKIE</strong> sollte jährlich zur Überprüfung zum Hersteller bzw. Importeur<br />
gebracht werden!<br />
Der DHV schreibt einen Wartungsintervall von 2 Jahren vor. Die Wartung ist<br />
durch den DHV-Stempel zu bestätigen. Bei Nichteinhaltung verfällt das Gütesiegel.<br />
Weitere Informationen zum Wartungscheck siehe Checkanweisung auf<br />
der NOVA Homepage (http://www.nova-wings.com): Downloads: Check.
25<br />
Einige abschließende Worte:<br />
Der NOVA <strong>ROOKIE</strong> steht an der Spitze des Entwicklungsstandards von<br />
Gleitschirmen.<br />
Der NOVA <strong>ROOKIE</strong> wird über Jahre viel Freude bereiten, wenn er ordnungsgemäß<br />
behandelt wird.<br />
Respekt vor den Anforderungen und Gefahren des Fliegens sind Voraussetzung<br />
für erfolgreiche Flüge.<br />
Auch der sicherste Gleitschirm ist bei Fehleinschätzung meteorologischer<br />
Bedingungen oder durch Pilotenfehler absturzgefährdet!<br />
Wir bitten alle Piloten vorsichtig zu fliegen und die gesetzlichen Bestimmungen<br />
im Interesse unseres Sportes zu respektieren.<br />
SEE YOU IN THE SKY!<br />
NOVA
26<br />
Kappe = Kalotte = Fläche<br />
Übersichtszeichnung<br />
obere<br />
mittlere<br />
Leinenelemente<br />
Typenschild<br />
Zellöffnungen<br />
Anströmkante<br />
Hinterkante =<br />
Auströmkante<br />
Stabilisatorleine<br />
Bremsleinen<br />
Stammleinen<br />
Leinenschlösser =<br />
Rapidglieder<br />
Handschuhe<br />
Helm<br />
Hauptkarabiner<br />
Gurtzeug<br />
Hauptbremsleine<br />
Tragegurte<br />
Bremsgriffe<br />
NOVA <strong>ROOKIE</strong> M
27<br />
Leinenpläne<br />
Die hier dargestellten Leinenpläne des NOVA <strong>ROOKIE</strong> dienen nur zur Veranschaulichung<br />
der Leinenkonfiguration. Pläne für weitere Größen sind über den<br />
Importeur oder direkt über NOVA erhältlich.<br />
Auch stellt die <strong>Nova</strong> Homepage auf der Downloads Seite alle Leinenpläne zur<br />
Verfügung : http://www.nova-wings.com
29<br />
MANUAL<br />
<strong>ROOKIE</strong>
31<br />
WELCOME TO THE FAMILY OF NOVA<br />
PILOTS!<br />
WE CONGRATULATE YOU ON BUYING<br />
YOUR NEW NOVA <strong>ROOKIE</strong><br />
AND WISH YOU MANY ENJOYABLE FLYING HOURS!<br />
IF YOU HAVE ANY QUESTIONS,<br />
SUGGESTIONS OR CRITICISM<br />
REGARDING ANY NOVA PRODUCT PLEASE<br />
DO NOT HESITATE TO CONTACT US.<br />
WE ARE HAPPY TO GIVE HELP AND ADVICE.<br />
VERTRIEBSGESELLSCHAFT M.B.H.<br />
BERNHARD HÖFEL-STR. 14<br />
A-6020 INNSBRUCK<br />
AUSTRIA<br />
TEL.: 0043-(0)512-361340<br />
FAX: 0043-(0)512-361342<br />
E-MAIL: INFO@NOVA-WINGS.COM<br />
WWW: HTTP://WWW.NOVA-WINGS.COM<br />
WE ARE LOOKING FORWARD TO HEAR FROM YOU!
32<br />
PLEASE READ THIS MANUAL CAREFULLY AND<br />
NOTE THE FOLLOWING DETAILS:<br />
THIS PARAGLIDER MEETS AT THE TIME OF DELIVERY THE<br />
REQUIREMENTS OF THE DHV GUETESIEGEL (GERMAN<br />
HANG / PARAGLIDING ASSOCIATION’S CERTIFICATE)<br />
OR OF THE CEN (EUROPEAN NORM).<br />
ANY ALTERATIONS TO THE PARAGLIDER WILL<br />
RENDER ITS CERTIFICATION INVALID!<br />
THE USE OF THIS PARAGLIDER IS SOLELY<br />
AT THE USER’S OWN RISK!<br />
MANUFACTURER AND DISTRIBUTOR DO NOT<br />
ACCEPT ANY LIABILITY.<br />
PILOTS ARE RESPONSIBLE FOR THEIR OWN SAFETY AND<br />
THEIR PARAGLIDER’S AIRWORTHINESS.<br />
THE PARAGLIDER CARRYS NO WARRANTY!<br />
THE AUTHOR ASSUMES, THAT THE PILOT IS<br />
IN POSSESSION OF A VALID PARAGLIDING<br />
LICENCE!
33<br />
Technical Data:<br />
Type XXS XS S M L<br />
Zoom factor 0.87 0.91 0.96 1 1.035<br />
No. of cells 31+ 8<br />
Projected wingspan m 8.3 8.69 9.16 9.55 9.88<br />
- surface area m² 19.17 20.97 23.33 25.31 27.11<br />
- aspect ratio 3.6 3.6 3.6 3.6 3.6<br />
Flat wingspan m 10.76 11.26 11.87 12.37 12.8<br />
- surface area m² 22.6 24.73 27.52 29.86 31.98<br />
- aspect ratio 5.12 5.12 5.12 5.12 5.12<br />
Line diameter mm 1 / 1.4 / 1.85<br />
Line length m 6.53 6.83 7.2 7.5 7.76<br />
Line consumption m 233 243 257 268 277<br />
max. profile depth m 2.61 2.73 2.88 3.0 3.105<br />
min. profile depth m 0.55 0.576 0.608 0.633 0.655<br />
Weight kg 5 5.4 5.8 6.3 6.8<br />
Legal takeoff weight* kg 55-75 65-85 75-100 85-110 95-130<br />
* Pilot + approx. 17kg of equipment<br />
Further details concerning measurements and design may be taken from the<br />
DHV certificate forming part of the operators manual.<br />
Line specifications are detailed in the DHV certificate or in the line plans. They<br />
are measured under a 5kg load.<br />
The DHV measures lines from the quick link to the undersurface.<br />
The line lengths as specified in the line plans include the end loops.<br />
The paragliders’ details are printed onto the right wing tip.<br />
DATE OF, AND PILOT’S NAME COMPLETING<br />
TEST FLIGHT SHOULD BE WRITTEN IN SPACE PROVIDED!
34<br />
NOVA <strong>ROOKIE</strong> Technical Description:<br />
The concept behind the new NOVA <strong>ROOKIE</strong> demonstrates a wing with a<br />
perfect combination of maximum performance, uncritical extreme flying<br />
manoeuvres and maximum fun.<br />
The basic form of the NOVA <strong>ROOKIE</strong> is a slim, elliptical, slightly rearward<br />
swept wing.<br />
Buildup of canopy:<br />
The canopy of the <strong>ROOKIE</strong> is built by 39 cells over the wingspan. The wingtip<br />
is slightly pulled down, building a kind of stabilizer.<br />
2 to 3 suspended ribs are building a suspension group, which are connected by<br />
short forks of the top line elements. Between those suspended ribs, the ribs are<br />
suspended by diagonal ribs.<br />
This buildup ensures a smooth top surface, exact airfoil reproduction, and yet<br />
most importantly, very few suspension points. So the NOVA <strong>ROOKIE</strong> has very<br />
few lines and thus associated parasitic drag, which gives it an excellent glide<br />
angle.<br />
The profile of the NOVA <strong>ROOKIE</strong> is computer calculated and selected from<br />
many variations. The best profile was selected. It excels with very high stability,<br />
easy handling, a big speed range and amazingly high performance.<br />
The NOVA <strong>ROOKIE</strong> presents a closed leading edge to the airflow. Internal<br />
Trilam reinforcements maintain its precise form and provides stability. The cell<br />
openings on the undersurface of the profile’s nose provide airflow into the<br />
glider. Stretch resistant flares, integrated with diagonal ribs at the suspension<br />
points, ensure an even distribution of load throughout the canopy. A stretch<br />
resistant Mylar stripe on the trailing edge defines the wingspan and guarantees,<br />
together with an optimized sail tension, a high form stability.<br />
Large cross port vents allow effective airflow inside the canopy, providing good<br />
reinflation without reducing the profile accuracy.<br />
Rigging system of the NOVA <strong>ROOKIE</strong>:<br />
The lines of the NOVA <strong>ROOKIE</strong> are made of strong and stretch resistant<br />
Polyester/ Polyethylene lines.<br />
The entire rigging system comprises individual suspension lines looped and<br />
stitched at each end.
35<br />
The A- and B- main lines and the main brake lines are 1.85mm in diameter, the<br />
middle elements 1.4, the top lines are made of 1mm Dyneema, the brake<br />
cascades and stabilizer lines are all 1mm.<br />
The suspension lines are comprised of “cascaded top lines” (attached to the<br />
undersurface), ”cascaded middle lines” (cascade 2 to 3 top lines together), and<br />
”main lines”. These cascade 2 middle elements and lead to the ”quick link” (a<br />
Maillon Rapide that connects lines and risers).<br />
The ”stabilizer lines” connect the upper stabilizer lines on the outer suspension<br />
points with the quick link.<br />
The ”brake lines” are not load carrying suspension lines. They lead from the<br />
trailing edge of the canopy to the ”main brake lines” running through the<br />
”pulleys” on the D- risers to the ”brake handles”.<br />
A mark on the main brake line indicates the position of the brake handle.<br />
This adjustment, on the one hand, allows sufficient brake to be applied during<br />
extreme flying situations and when landing, while on the other hand, it ensures<br />
that the canopy is not permanently braked (especially when fully accelerated).<br />
This trimming should not be altered.<br />
For differentiation purposes A-lines, A-risers, stabilizer lines and the upper<br />
brake lines are coloured red, all brake lines are blue and all remaining lines are<br />
yellow.<br />
Also the main suspension loop, on the bottom of the riser, is covered red. Here<br />
the main carabiner has to be hooked in, which is connecting the risers with the<br />
harness.<br />
The line connections are made to triangular Maillon rapides (quick links) fitted<br />
with a rubber ”o- ring” (normally used as a seal) in the form of a ”figure eight”<br />
which prevents any slipping of the lines on the quick link.<br />
The NOVA <strong>ROOKIE</strong> is equipped with 5 risers per side. The A-lines are attached<br />
to the two A-risers (an additional one with the outer A lines to enable easy<br />
“bigears”). The B-lines and the stabilizer lines are attached to the B-riser. The<br />
C-lines to the C-riser and the D- and brake-lines attach to the D-riser.<br />
See line plan at the end of this manual for further details.
36<br />
Speed system:<br />
The NOVA <strong>ROOKIE</strong> can be equipped with a stirrup operated speed system.<br />
The speed system affects the A-, B- and C-risers. In normal flight all risers<br />
have an overall length of 52cm (the risers of the XS and XXS are only 47cm<br />
long).<br />
When the stirrup is pushed out the A- and B-risers are shortened by up to max.<br />
14cm, the C-risers by 7cm, the D-risers retain their original length.<br />
This measurements influence the DHV certification.<br />
An incorrectly fitted speed system causes a loss of certification!<br />
How is it fitted?<br />
Most modern harnesses have pulleys attached for speed system fitting. In case<br />
not, it is important to attach pulleys (sewn on tabs) in such a way that allows<br />
the pilot to maximize the power vector of his / her legs without ”pushing back”<br />
in the harness.<br />
The NOVA speed system, including ”Brummel-hooks” supplied, must be<br />
assembled as per instructions.<br />
The speed system cord is firmly attached (use bowline or other nonslip knot) to<br />
the foot stirrup (webbing or alloy bar). The other end of the cord is run through<br />
a pulley on the harness and then in an upward direction to be then firmly<br />
attached to the ”Brummel-hooks”!<br />
The length of the cord leading to the stirrup should be adjusted so that it is<br />
easy to put your feet into the stirrup in flight but still short enough to allow full<br />
speed system travel. (Use of 2 stirrups in a ladder fashion can enable you to<br />
reach the full range if your legs are not long enough.)<br />
Ensure both cords on the stirrup are of equal length, to avoid putting a turn in<br />
the glider.<br />
Test your speed system for the correct length of cord on the ground first, with<br />
your harness and risers, before flying with it! The full range is reached when<br />
the 2 pulleys join together.<br />
How does it work?<br />
The speed system utilizes a 3 to 1 pulley mechanism which results in shortening<br />
the A-, B-risers and C-risers as described above.
37<br />
A1<br />
A2<br />
B<br />
C<br />
D<br />
risers<br />
brakeline-pulley<br />
red cover<br />
top<br />
pulley<br />
press button<br />
control handle<br />
brummelhook<br />
speedsystem<br />
bottom<br />
pulley<br />
risers<br />
traction<br />
red cover<br />
control handle<br />
main carabiner<br />
harness<br />
stirrup<br />
pulley
38<br />
How to use it?<br />
Before launch, attach the paraglider’s risers to the harness with the main<br />
carabiners. Then attach the ”Brummel-hook” on the end of each speed system<br />
cord to the Brummel hook on the end of the cord which runs through the 2<br />
pulleys on the A risers.<br />
Ensure that the speed system is untangled and operates freely before flying!<br />
The Harness:<br />
Any DHV certified harness with a hang point at about chest height may be<br />
used with a NOVA <strong>ROOKIE</strong> (37-50cm over seat plate).<br />
Please note: the hang point position changes the position of the brakes relative<br />
to the pilots body.<br />
The distance between left and right hangpoint should be between 45 and<br />
60cm, depending on the size of the pilot and the type of the harness.<br />
The NOVA test crew prefers flying with low hangpoint and wide distance<br />
between main carabiners, to get a maximum of feedback from the wing.<br />
CAUTION! CROSS STRAPS THAT ARE ADJUSTED TOO TIGHTLY CAN<br />
DRASTICALLY EFFECT YOUR GLIDERS HANDLING, AND THUS MAY NOT<br />
CONTRIBUTE TO HIGHER ACTIVE SAFETY! HAVE THEM TIGHTENED THE<br />
CORRECT AMOUNT.<br />
The Flight:<br />
Preflight check and launch preparations:<br />
As for any aircraft a thorough preflight check must be made prior to each flight<br />
on the NOVA <strong>ROOKIE</strong>!<br />
Having unpacked and laid out the paraglider in a slight horseshoe pattern the<br />
following checks must be made:<br />
Before every launch check lines, risers and canopy for damage! Do not launch<br />
in case of even the smallest damage!<br />
Also check the rapid links connecting the lines and the risers. They have to be<br />
closed tight.<br />
Put on the harness with maximum care and check the handle of the safety<br />
system and that all the splints of the outer container are placed correctly.<br />
When laying out the glider, the wind direction should be observed. The canopy<br />
should be deployed into the wind so both halves of it are loaded symmetrically.
39<br />
The paraglider should be arranged in a semicircle against the wind. This<br />
ensures that the A-lines in the centre section of the canopy will tension before<br />
the ones at the wing tips. Thus the canopy inflates evenly and an easy launch<br />
in the desired direction is guaranteed. Alternatively, the glider can also be<br />
pulled up only with the 2 middle A-risers.<br />
All lines and risers should be carefully untangled and arranged in a way that<br />
they do not catch on anything. Special attention should be paid to the A-lines,<br />
which should run free and untangled from the A-risers (red sleeve) to the<br />
canopy.<br />
It is equally important to untangle the brake lines so that they are clear and can<br />
not catch on any thing during launch. The brake lines should run freely through<br />
the pulleys to the trailing edge of the canopy.<br />
Make sure the risers are not twisted. When not, the brake lines will be able to<br />
run freely through their pulleys.<br />
It is often impossible to untangle lines during flight.<br />
It is important that no lines are looped around the canopy. Also called a “lineover”,<br />
this may have disastrous consequences during take off.<br />
Launch:<br />
The NOVA <strong>ROOKIE</strong> is very easy to launch.<br />
When the pilot is ready to take off he / she holds the A-risers and the brake<br />
handles in each hand.<br />
To facilitate differentiation between the risers, the A-lines, including the sleeves<br />
on the A-risers, are coloured red.<br />
Hold the A risers with arms outstretched behind you.<br />
Before take off recheck the canopy, the direction of the wind and the air space<br />
around you! A good progressive run ensures your NOVA <strong>ROOKIE</strong> will inflate<br />
and come up equally and quickly.<br />
After the initial effort of inflation, keep applying forward pressure on the A-risers<br />
(pushing them forward, not pulling down) until the pressure on the A risers<br />
eases. The canopy should now be directly over the pilot’s head. Should the<br />
canopy surge forward, control it by braking gently. The paraglider should be<br />
braked gently to stabilize the glider and possibly correct for drift. Moving the<br />
pilots body to the centre of the glider is the best method of correction, if there is<br />
sufficient room.<br />
The pilot looks up and checks that the canopy is fully inflated with no line tangles.
40<br />
Only then is the final decision to continue the launch taken!<br />
If anything is not completely safe the launch should be aborted!<br />
The NOVA <strong>ROOKIE</strong> is easy to reverse launch.<br />
When doing a reverse launch or when launching in strong winds the paraglider<br />
can possibly surge forward more quickly or lift off sooner than desired. To<br />
avoid this, walk uphill following the canopy during inflation.<br />
As this launch technique can be difficult and turning the wrong way can result<br />
in the pilot taking off with twisted risers. It is recommended to practice the reverse<br />
launch on a training hill or slight slope first.<br />
When deflating the canopy in strong winds, or aborting a launch, use the C-<br />
risers, not the brakes. Using the brakes in strong wind will cause more lift, lifting<br />
the pilot up and dragging him/her much further back.<br />
Because of the fact, that the <strong>ROOKIE</strong> has only one line on the D-riser, pulling<br />
the D-riser will not stall the complete wing, so use the C-riser instead.<br />
Turns:<br />
The NOVA <strong>ROOKIE</strong> is responsive and reacts directly and instantly to any<br />
steering input. Weight shift input quickens turns and ensures minimal height<br />
loss.<br />
A combined technique of weight shift and pulling on the inside brake line is the<br />
most efficient turning method, whereby the radius of the turn is determined by<br />
the amount of inside brake pulled and weight shift<br />
A stalling wing tip announces itself by a gentle surge backwards of the wingtip.<br />
In this situation you have to loosen brakes immediately.<br />
In case it is impossible to control the NOVA <strong>ROOKIE</strong> with the brake lines the<br />
D-risers may be used to steer and land the canopy.<br />
CAUTION: PULLING A BRAKE TOO FAST OR TOO HARD CAN RESULT IN<br />
THE CANOPY ENTERING A NEGATIVE SPIN.<br />
(SEE ”SPIN” FOR REMEDY)<br />
Spiral dive:<br />
To enter a spiral dive with a NOVA <strong>ROOKIE</strong> the pilot must use weight shift<br />
while slowly applying more and more brake on one side.<br />
During a spiral dive the angle of bank can be controlled by increasing or reducing<br />
the amount of inside brake.
41<br />
When spiralling the NOVA <strong>ROOKIE</strong> it is recommended to apply some outside<br />
brake. This helps stabilize the wing and enables an easier and safer exit from<br />
the spiral.<br />
To exit, ease off the inside brake slowly. The NOVA <strong>ROOKIE</strong> did not show a<br />
tendency to remain in a stable spiral during testing. However, should a glider in<br />
abnormal conditions (e.g. asymmetrical cross strap settings) continue to spiral,<br />
it should be actively exited. This is done by weight shifting to the outside wing<br />
and more gentle braking of the outside wing.<br />
ATTENTION: TO EXIT A SPIRAL ACTIVELY NEEDS MORE POWER CAUSE<br />
OF THE HIGHER G-FORCE!<br />
NEVER DO BIG EARS IN SPIRALS, AS THIS MAY DRASTICALLY REDUCE<br />
THE NUMBER OF LINES TAKING THE ALREADY HIGH LOADS, CAUSING<br />
STRUCTURAL FAILURE.<br />
”Active flying”:<br />
In turbulent conditions the glider should be flown actively. The canopy should<br />
be flown with a small amount of brake applied. This improves stability by increasing<br />
the angle of attack of the canopy. The canopy should not rock back or<br />
surge forward much but should remain above the pilot. Thus, the pilot should<br />
increase speed by carefully reducing applied brake when entering a strong<br />
thermal. The pilot should brake the canopy on exiting. This is part of basic active<br />
flying.<br />
Flying with speed system:<br />
When flying with the speed system applied the angle of attack is lower and the<br />
canopy can collapse more easily than in normal trim. The faster the canopy is<br />
flown the more dynamic the collapses and stalls will be and the more skill will<br />
be required for quick recoveries.<br />
To use the speed system, simply place your feet on the stirrup and push<br />
forward in a horizontal plane. If a loss of back pressure of the stirrup on your<br />
legs is noticed, this is a warning that the canopy is probably about to collapse.<br />
Release the stirrup and thus the speed system immediately.<br />
With this ”feeling” you may actually prevent most collapses from happening<br />
while using the speed system. If a collapse still happens, release the speed<br />
system immediately and correct the collapse as described in ”Collapses”<br />
section.
42<br />
BE CAREFUL!<br />
WHEN USING THE SPEEDSYSTEM THE ANGLE OF ATTACK IS LOWERED,<br />
THUS AIRSPEED IS INCREASING, AND THE CANOPY IS DESTABILIZING.<br />
THEREFORE DO NOT USE THE SPEEDSYSTEM IN TURBULENT CONDI-<br />
TIONS, CLOSE TO THE GROUND OR NEAR OTHER AIRSPACE USERS!<br />
NEVER RELEASE THE BRAKE HANDLES!<br />
DON’T APPLY BRAKE WHEN FULLY ACCELERATED!<br />
SHOULD YOU HAVE A COLLAPSE, RELEASE THE SPEED SYSTEM IMME-<br />
DIATELY, TO ENABLE THE GLIDER TO RETURN TO STANDARD TRIM AND<br />
THEN RECOVER WITH CORRECT PILOT INPUT AS<br />
IN A NORMAL COLLAPSE.<br />
DO NOT USE THE SPEEDSYSTEM IN ANY EXTREME MANOEUVRES!<br />
Landing:<br />
The NOVA <strong>ROOKIE</strong> is easy to land. The final leg of the landing approach must<br />
be into the wind. During this final glide the paraglider should be decelerated<br />
slowly and at approximately one meter above the ground, according to conditions,<br />
the pilot should ”flare” the canopy. The glider may climb again, gaining<br />
height, if too much brake is used too early.<br />
Strong wind landings require little brake. Do not apply full brake before the pilot<br />
is safely on the ground.<br />
The final glide during the landing approach should be straight and not marked<br />
by steep or alternating turns as these can result in a dangerous pendulum effect<br />
near the ground.<br />
Towing:<br />
The NOVA <strong>ROOKIE</strong> has no special towing characteristics, although a relatively<br />
low angle of attack and thus low tow tension should be maintained during<br />
launch and the initial part of the tow.<br />
Motored Flight / Aerobatics:<br />
Contact the manufacturer or importer for the current legality of motorized flight.<br />
The NOVA <strong>ROOKIE</strong> is not designed to be used for aerobatics.
43<br />
Extreme Flying Manoeuvres:<br />
Collapse:<br />
A negative angle of attack will cause the NOVA <strong>ROOKIE</strong> to collapse (e.g. in<br />
turbulent air).<br />
If one wing tucks, straight flight should be maintained by ”correcting for direction”<br />
- braking gently on the inflated side.<br />
In case of a big collapse, this braking should be applied very carefully to avoid<br />
stalling the remaining inflated wing. The pilot’s ”correction for direction” can be<br />
aided by a ”pumping out of the deflation”, a slow, long pumping action on the<br />
brake of the deflated side of the wing helps the canopy to re-inflate.<br />
If the pilot does not correct, the NOVA <strong>ROOKIE</strong> usually self-recovers. However,<br />
if it does not self recover and the pilot does not correct the canopy can enter a<br />
stable spiral dive.<br />
Line over:<br />
The pilot stabilizes the glider by gently applying the brakes. Without the pilot’s<br />
action the line over will result in a stable spiral dive.<br />
Here are various possibilities to untangle a line over:<br />
- pumping the collapsed side.<br />
- pulling the stabilizer line or lines causing problem.<br />
- should both measures fail, it is possible to untangle the line over by inducing<br />
a full stall. This manoeuvre, however, should only be carried out by advanced<br />
pilots with experience in extreme flight situations and with sufficient altitude<br />
available.<br />
IF THESE MANOEUVRES FAIL OR IF IN ANY DOUBT, THE PILOT SHOULD<br />
INSTANTLY USE THE RESCUE SYSTEM!<br />
Front stall:<br />
A front stall can be induced by strongly pulling the A-risers or by sudden, heavy<br />
turbulence. The entire leading edge impulsively collapses.<br />
Gentle braking on both sides will reduce the lateral pendulum motions and<br />
simultaneously accelerate reinflation. The NOVA <strong>ROOKIE</strong> generally self recovers<br />
from an initiated front stall.<br />
When having a very big frontstall, a front rosette can happen (wingtips are<br />
moving forwards: the wing is shaping a horse shoe). Gentle braking can avoid<br />
this deformation.
44<br />
Parachutal Stall (deep stall):<br />
The paraglider has no forward momentum combined with a high descent rate.<br />
A parachutal stall is caused, among other reasons, by a too slowly exited B-<br />
stall or severe turbulence.<br />
Porous canopies or canopies out of trim (stretched or shrunken lines) are<br />
much more susceptible to a parachutal stall and therefore should not be flown.<br />
These are some of the reasons regular checks should be carried out on your<br />
glider.<br />
The NOVA <strong>ROOKIE</strong> generally is self recovering from parachutal stall. If the<br />
canopy remains in a parachutal stall, it is sufficient to gently push both A risers<br />
forward or to push the accelerator.<br />
WARNING: IF BRAKES ARE APPLIED WHILE IN A PARACHUTAL STALL,<br />
THE GLIDER MAY SUDDENLY ENTER A FULL STALL.<br />
In close proximity to the ground, due to the forward surging pendulum effect, a<br />
recovery may be more dangerous than a hard landing in parachutal. If landing<br />
in a parachutal stall, the pilot should prepare for a hard landing and make a<br />
parachute roll landing.<br />
Full stall:<br />
To induce a full stall, apply full brake on both sides.<br />
The glider slows down steadily until it stalls completely. The canopy suddenly<br />
surges backwards a long way. In spite of this uncomfortable reaction of the<br />
canopy, both brake lines must be consequently held down with all your<br />
strength until the canopy is stabilized (directly overhead).<br />
The NOVA <strong>ROOKIE</strong> generally flies backwards during a full stall but doesn’t<br />
always form a front rosette.<br />
A frontal rosette can be formed by entering the full stall slowly. When entering<br />
(braking) fast, the canopy will not always form the desired front rosette.<br />
ALWAYS APPLY BOTH BRAKES EVENLY!<br />
To recover from a full stall, both brakes must be let up symmetrically at a fast<br />
to moderate speed (within 1 second).<br />
The NOVA <strong>ROOKIE</strong> surges forward a moderate amount after recovering from<br />
a full stall, whereby a resulting front collapse is possible. Gentle symmetrical<br />
braking as soon as the wing begins to move forward is recommended. If the<br />
pilot does not brake the canopy, the NOVA <strong>ROOKIE</strong> surges forward to 90° angel.<br />
In the worst case a big collapse will follow.
45<br />
An ”asymmetric” recovery (one control released faster than the other) from a<br />
full stall can cause a big dynamic collapse.<br />
IF A FULL STALL IS RELEASED TOO EARLY, TOO SLOW OR TOO FAST,<br />
OR OTHERWISE INCORRECTLY, THE CANOPY CAN SURGE EXTREMELY<br />
FAR FORWARD.<br />
The danger of over correcting and overreacting exists during all extreme flight<br />
manoeuvres. Thus, any corrective action must be gentle and steady and done<br />
with feel!<br />
Spin (or negative spin):<br />
During a spin the canopy turns relatively fast around the centre section of the<br />
canopy while the inner wing flies backwards (hence the term negative).<br />
There are two usual reasons for an unintentional spin:<br />
- one brake line is being pulled down too far and too fast (e.g. when inducing a<br />
spiral dive)<br />
- when flying at low speed one side is being braked too hard (e.g. when<br />
thermalling).<br />
To recover from an unintentional spin, the pulled down brake line should be<br />
immediately released as soon as a spin is suspected. The canopy will accelerate<br />
and return to its normal straight and stable flying position, without losing<br />
too much height.<br />
In case the spin is allowed to develop for some time, the NOVA <strong>ROOKIE</strong><br />
surges far forward on one side and a dynamic asymmetric collapse or a line<br />
over can occur. If so, brake gently to stop canopy surging and correct any collapse:<br />
See ”collapses”.<br />
Too tight cross bracing increases the probability of a spin with most<br />
paragliders!<br />
NEVER DO AN INTENTIONAL SPIN OVER LAND OR IF YOU DON’T HAVE<br />
SUFFICIENT EXPERIENCE!<br />
Wingover:<br />
To induce a wingover the pilot flies consecutive alternating turns to gradually<br />
steepen the angle of bank.<br />
During wingovers with high bank angle, the outside wing begins to unload.<br />
Further increase of the angle of bank must be avoided, for a possible resulting<br />
collapse may be quite dynamic!
46<br />
WARNING:<br />
FULLSTALL, SPIN AND WINGOVER (OVER 90 DEGREE ANGLE OF BANK)<br />
ARE ILLEGAL AEROBATIC MANOEUVRES AND MAY NOT BE PERFORMED<br />
DURING NORMAL FLYING.<br />
INCORRECT RECOVERY PROCEDURES OR OVERREACTING OF THE<br />
PILOT MAY HAVE DANGEROUS CONSEQUENCES WITH ANY TYPE OF<br />
PARAGLIDER!<br />
Spiral dive:<br />
Rapid Descents:<br />
The spiral dive is the fastest way to lose altitude. As explained previously (see<br />
under main section ”Flight” ) they have a rapid descent rate, however, the very<br />
high G-forces make it difficult to sustain a spiral dive for long and it can place<br />
high loads on the pilot and glider. As soon as any, even slight, light dizziness or<br />
impaired vision is noticed the spiral should be exited immediately.<br />
If done in strong winds the pilot may drift off course.<br />
Big ears:<br />
When doing big ears, the horizontal speed is higher than the sink rate, unlike a<br />
spiral dive or a B-line stall. This rapid descent technique is used to quickly and<br />
horizontally exit a dangerous area into desired direction.<br />
In order to collapse the outside wing, pull the outside A-lines .<br />
When the pilot holds the outside A-risers on both sides and pulls them down,<br />
the NOVA <strong>ROOKIE</strong> easily tucks the outside wings and enters a stable descent<br />
mode .<br />
The pilot keeps the brake handles along with the outside A-risers in his hands.<br />
By braking on one side and shifting weight the canopy remains steer able.<br />
In order to increase the sink rate as well as the horizontal speed, this manoeuvre<br />
should be done together with use of the speed system. Apply speed system<br />
after big ears are induced (step into the pedal before you grab the outher A-<br />
risers).<br />
Big ears substantially reduces the risk of canopy stability problems in turbulent<br />
air.<br />
To exit the Big ears release the A-risers. The canopy does not always self-recover.<br />
If not, or to quicken the recovery, the pilot gently brakes the glider.
47<br />
B-line stall:<br />
To induce a B-line stall symmetrically pull down both B-risers by about 20cm.<br />
The airflow over the top surface is almost fully detached and the canopy enters<br />
a vertical descent flight mode without forward movement.<br />
Further pulling of the B-risers reduces the surface area more and increases the<br />
sink rate. (up to 10 m/s)<br />
Be careful, pulling too far may cause a frontal horseshoe to form.<br />
To exit from this flight mode release the B-risers quickly (1 sec).<br />
The canopy surges forward reattaching airflow over the top surface again and<br />
resumes normal flight.<br />
When the B-risers are released, the brakes should not be activated. This will<br />
give the canopy the possibility to gain speed and resume normal flight.<br />
If canopy does not recover apply both brakes gently to recover.<br />
ALL RAPID DESCENT TECHNIQUES SHOULD FIRST BE PRACTISED IN<br />
CALM AIR AND WITH SUFFICIENT HEIGHT SO THE PILOT CAN USE THEM<br />
IN EMERGENCY SITUATIONS!<br />
FULL STALLS AND SPINS ARE TO BE AVOIDED AS WRONG RECOVERY<br />
PROCEDURES, IRRESPECTIVE OF THE TYPE OF PARAGLIDER, MAY<br />
HAVE DANGEROUS CONSEQUENCES!<br />
BY FAR THE BEST TECHNIQUE IS TO FLY CORRECTLY AND SAFELY, SO<br />
YOU NEVER HAVE TO DESCEND RAPIDLY!<br />
FOR ALL EXTREME MANOEUVRES AND RAPID DESCENTS PLEASE<br />
NOTE:<br />
- FIRST PRACTICE MANOEUVRES WITH AN INSTRUCTOR DURING<br />
SAFETY TRAINING<br />
- BEFORE INDUCING THE MANOEUVRE THE PILOT MUST MAKE SURE<br />
THAT THERE ARE NO OTHER<br />
- AIR SPACE USERS BELOW HIM!<br />
- DURING THE MANOEUVRE THE PILOT MUST HAVE THE CANOPY<br />
WITHIN HIS VIEW!
48<br />
Looking after your Paraglider:<br />
Looking after your canopy correctly will prolong the life of your NOVA <strong>ROOKIE</strong>.<br />
Storage:<br />
Store the paraglider in a dry space away from chemicals and UV light. Never<br />
pack up or store the glider wet. This shortens the life of the cloth. Always dry<br />
glider thoroughly before any packing or storage.<br />
Cleaning:<br />
Clean the paraglider with water and a soft sponge. Do not use any chemicals<br />
or spirits for cleaning, as these can permanently damage the cloth.<br />
Repair:<br />
Repairs should only be carried out by the manufacturer, distributor or authorized<br />
workshops.<br />
Deterioration: a few tips!<br />
The NOVA <strong>ROOKIE</strong> is mainly made of NYLON, cloth which, like any synthetic<br />
material, deteriorates through excessive exposure to UV. Hence, it is recommended<br />
to reduce UV exposure to a minimum by keeping the paraglider<br />
packed away when not in use. Even when packed in the bag do not leave in the<br />
sun.<br />
The lines of the NOVA <strong>ROOKIE</strong> are made of an inner core of POLYETHYLENE<br />
(DYNEEMA) and an outer sheath of POLYESTER. Any over stretching of lines<br />
apart from the strain imposed during normal flight, should be avoided as over<br />
stretching is irreversible.<br />
POLYETHYLENE (line core) has a low melting point and can be easily damaged<br />
by heat influence. So never burn loose thread ends with fire and avoid the<br />
contact with hot surfaces!<br />
Ensure that the lines are not folded tightly. It’s extremely important to avoid any<br />
sharp bending of the lines, especially the main lines.<br />
Prevent lines from catching on anything as they may be over stretched.<br />
Do not step onto the lines.<br />
The brake line can chafe badly if tangled with another line.
49<br />
Uncontrolled strong wind takeoffs or landings can result in the leading edge of<br />
the canopy hitting the ground at high speed which may cause rips in the profile<br />
and damage the rib material.<br />
Keep the canopy and lines clean as dirt may penetrate into the fibre and<br />
shorten the lines or damage the cloth.<br />
Check line length after tree or water landings. They can stretch or shrink lines.<br />
Clean the paraglider with fresh water after contact with salt water. Salt water<br />
crystal can weaken line strength, even after rinsing in fresh water. Replace<br />
lines immediately after contact with salt water. Also check canopy material<br />
after water landings, as waves can place uneven forces and cause cloth to<br />
distort in specific areas. Always remove gliders from the water by holding only<br />
the trailing edge.<br />
A line plan is enclosed in this operators manual or may be requested from the<br />
manufacturer or importer.<br />
Be careful, not to allow snow, sand or stones to enter inside the canopy’s cells:<br />
the weight can brake, or even stall the glider, as well as the sharp edges can<br />
destroy the cloth!<br />
Never drag the wing over rough ground! This will damage the cloth on the wear<br />
points. When preparing the wing on a takeoff with rough ground, don’t pull the<br />
wing over it (i.e. by pulling the brakes). Please try to pack the wing on soft<br />
ground.<br />
Do not always fold the canopy symmetrically to the centre cell as this can<br />
cause constant stress on the centre cell (centre cell always to the outside).<br />
You should arrange an annual inspection of the NOVA <strong>ROOKIE</strong> to be carried<br />
out by the manufacturer or distributor.<br />
The DHV requires a two yearly maintenance check. A DHV-stamp is required to<br />
confirm the check, otherwise the Guetesiegel certification is rendered invalid.<br />
All necessary documents for the inspection can be found on the NOVA<br />
homepage: http://www.nova-wings.com.
50<br />
In Conclusion:<br />
The NOVA <strong>ROOKIE</strong> is at the forefront of modern paraglider design.<br />
You will enjoy many safe years of flying with your NOVA <strong>ROOKIE</strong> if you look<br />
after it correctly and adopt a mature and responsible approach to the demands<br />
and dangers flying can pose.<br />
It must be clearly understood that all air sports are potentially dangerous and<br />
that your safety is ultimately dependent upon you.<br />
We strongly urge you to fly safely. This includes your choice of flying conditions<br />
as well as safety margins during flying manoeuvres.<br />
We recommend once more that you only fly with a Guetesiegel approved harness,<br />
reserve chute, and helmet.<br />
Also the certification placard must be present on the glider.<br />
Every pilot should have a valid license and 3rd party insurance.<br />
FLYING YOUR CANOPY IS AT YOUR OWN RISK!<br />
SEE YOU IN THE SKY!<br />
NOVA
52<br />
Overall Plan:<br />
leading edge<br />
canopy<br />
cell openings (intakes)<br />
trailing edge<br />
glider<br />
information<br />
and<br />
certification<br />
sticker<br />
stabilo line<br />
top<br />
middle<br />
elements<br />
main lines<br />
brake lines<br />
main brake<br />
line<br />
brake handles<br />
risers<br />
helmet<br />
rapid links<br />
NOVA <strong>ROOKIE</strong> M
53<br />
Lineplans:<br />
The here printed line plan shows the line configuration. Plans for the other<br />
sizes are available from your dealer, or importer.<br />
You can also download all lineplans from the NOVA hompage:<br />
http://www.nova-wings.com


