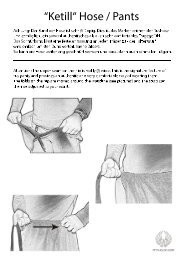
Flyer Nockaustausch // Nock replacement
Eine Anleitung in deutsch und englisch, wie man bei Bedarf eine Pfeilnock an Glasfaserpfeilen austauschen kann // An instruction, how to replace the nock on a glass fibre arrow
Eine Anleitung in deutsch und englisch, wie man bei Bedarf eine Pfeilnock an Glasfaserpfeilen austauschen kann // An instruction, how to replace the nock on a glass fibre arrow

Erfolgreiche ePaper selbst erstellen
Machen Sie aus Ihren PDF Publikationen ein blätterbares Flipbook mit unserer einzigartigen Google optimierten e-Paper Software.
Anleitung zum <strong>Nock</strong>-Austausch<br />
Ihr möchtet eine gebrochene Pfeilnock ersetzen? Nichts einfacher<br />
als das! Dafür werdet ihr folgende Utensilien benötigen:<br />
1. Cutter-Messer<br />
2. Feile<br />
3. Sekundenkleber<br />
4. Ersatz-<strong>Nock</strong><br />
5. ggf. Schutzkleidung: Handschuhe, Schutzbrille, Mundschutz<br />
Schritt 1:<br />
Entfernt die alte, kaputte <strong>Nock</strong> mit ein Paar beherzten<br />
Schnitten vom Pfeilschaft. Benutzt dazu einen Cutter<br />
mit einer stabilen neuen Klinge oder ein kleines scharfes<br />
Küchenmesser.<br />
Achtung: Schneidet immer vom Körper weg!<br />
Tragt dabei am besten eine Schutzbrille und Handschuhe.<br />
Die <strong>Nock</strong> kann splittern und aus dem Pfeilschaft<br />
können Glasfasern austreten. Außerdem sollte<br />
der Staub, der dabei entsteht möglichst nicht eingeatmet<br />
werden. Tragt einen Mundschutz oder ein Tuch<br />
um euch davor zu schützen. Man kann diesen Arbeitsschritt<br />
auch unter fließendem Wasser durchführen,<br />
das minimiert die Staubbildung und die Splitter<br />
landen gleich im Waschbecken.<br />
Schritt 2:<br />
Reinigt den Pfeilschaft von Kleberesten und Resten der <strong>Nock</strong>. Benutzt<br />
dazu am besten eine Feile oder Nagelfeile. Der Schaft sollte danach vollständig<br />
sauber sein.<br />
Auch hier entsteht Staub, der nicht eingeatmet werden darf. Handschuhe,<br />
Schutzbrille und Mundschutz sind auch hier zu empfehlen..<br />
Schritt 3:<br />
Tragt einen handelsüblichen Sekundenkleber auf den Pfeilschaft auf. Folgt<br />
dabei den Hinweisen des Herstellers auf der Verpackung eures Klebstoffes.<br />
Schritt 4:<br />
Schiebt nun die neue <strong>Nock</strong> ein wenig auf den Pfeilschaft.<br />
Richtet dabei die kleine Markierung auf die Führfeder aus.<br />
Wenn die <strong>Nock</strong> richtig sitzt, drückt sie ganz auf den Schaft und lasst den<br />
Klebstoff gemäß der Angaben des Herstellers aushärten.<br />
Nun seid ihr fertig und könnt den Pfeil wieder benutzen.
Instructions for nock <strong>replacement</strong><br />
You need to replace a broken arrow nock? Nothing easier than that!<br />
For this you will need the following utensils:<br />
1. Cutter<br />
2. File<br />
3. Instant or Super Glue<br />
4. Spare nock<br />
5. Protective clothing advised: Gloves, goggles, breathing protection<br />
Step 1:<br />
Remove the old, broken nock from the arrow. Use a<br />
cutter with a sturdy blade or a small kitchen knife.<br />
Attention: Always cut away from the body!<br />
It is adviced to wear goggles and gloves. The nock can<br />
splinter and glass fibres can poke out of the arrow. In<br />
addition, the dust that arises should not be inhaled.<br />
Wear a breathing protection or a cloth to protect<br />
yourself from it. This step can also be carried out under<br />
flowing water, which minimizes the dust and the<br />
splinters end up in the sink.<br />
Step 2:<br />
Clean the arrow of remnants of glue and nock. Use a<br />
file or nail file for this. The shaft should then be<br />
completely clean.<br />
Here too, dust is created that should not be inhaled. Gloves, goggles<br />
and breathing protection are recommended.<br />
Step 3:<br />
Apply a standard instant- or super glue on the tip of the arrow. Follow<br />
the manufacturer‘s instructions on the packaging of your adhesive.<br />
Step 4:<br />
Push the new nock a little onto the arrow.<br />
Align the small mark with the colored flight.<br />
If the nock is seated correctly, press it completely onto the shaft and let<br />
the adhesive harden according to the manufacturer‘s specifications.<br />
Now you‘re done and you can use the arrow again.