01 8 Instruction Montreal Print - Rottner Tresor GmbH
01 8 Instruction Montreal Print - Rottner Tresor GmbH
01 8 Instruction Montreal Print - Rottner Tresor GmbH

Erfolgreiche ePaper selbst erstellen
Machen Sie aus Ihren PDF Publikationen ein blätterbares Flipbook mit unserer einzigartigen Google optimierten e-Paper Software.
<strong>01</strong>-8 <strong>Montreal</strong> instruction 10-09:1 – 8 Mobil-5.06 print 27.10.2009 12:06 Uhr Seite 1<br />
USER INSTRUCTIONS<br />
www.comsafe.at<br />
www.rottner-tresor.com<br />
www.rottner-security.co.uk
<strong>01</strong>-8 <strong>Montreal</strong> instruction 10-09:1 – 8 Mobil-5.06 print 27.10.2009 12:06 Uhr Seite 2<br />
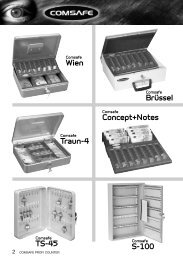
Comsafe<br />
TS-45<br />
2 MONTREAL Electronic Safe<br />
Comsafe<br />
Wien<br />
Comsafe<br />
Traun-4<br />
Comsafe<br />
Brüssel<br />
Comsafe<br />
Concept+Notes<br />
Comsafe<br />
S-100
<strong>01</strong>-8 <strong>Montreal</strong> instruction 10-09:1 – 8 Mobil-5.06 print 27.10.2009 12:06 Uhr Seite 3<br />
Comsafe<br />
Torino-Set<br />
Comsafe<br />
Aosta-Set<br />
CONTENT<br />
D<br />
GB<br />
4 + 5<br />
6 + 7<br />
MONTREAL Electronic Safe 3
<strong>01</strong>-8 <strong>Montreal</strong> instruction 10-09:1 – 8 Mobil-5.06 print 27.10.2009 12:06 Uhr Seite 4<br />
D A CH<br />
Bedienungsanleitung für<br />
den Touchscreen-<strong>Tresor</strong><br />
<strong>Montreal</strong><br />
ACHTUNG: Bitte lesen Sie diese Bedienungsanleitung<br />
sorgfältig durch, b e v o r Sie das Schloß betätigen<br />
oder eine neue Kombination einstellen wollen. Wir übernehmen<br />
keinerlei Haftung weder für Funktionsstörungen<br />
bedingt durch fehlerhaftes Umstellen bzw. Gewaltanwendung<br />
oder unsachgemäße Behandlung noch bei<br />
Sach- oder Vermögensschäden, die z. B. auf das nicht<br />
ordnungsgemäße Verschließen des Safes zurückzuführen<br />
sind.<br />
Verwahren Sie die Notschlüssel keinesfalls im Safe.<br />
ALLGEMEINES:S<br />
Bei der Auslieferung ist 1-2-3-4-5-6 als Code 1 UND<br />
8-8-8-8-8-8-8-8 als Code 2 werksseitig eingespeichert<br />
– wir empfehlen aus Sicherheits-gründen umgehend<br />
diese Codes auf jeweils einen persönlichen Code umzustellen.<br />
Jede Tastenbetätigung erzeugt einen kurzen Signalton.<br />
Der Abstand zwischen den Tastenbetätigungen darf 10<br />
Sekunden nicht überschreiten.<br />
1. INBETRIEBNAHME DES SAFES:<br />
1.1. Entfernen Sie die Schutzfolie am Touchscreen.<br />
1.2. Entfernen Sie die Abdeckung am Beschlag<br />
rechts unten (Abdeckung mit der Aufschrift<br />
„.....“).<br />
1.3. Stecken Sie einen der beiden mitgelieferten Notöffnungsschüssel<br />
(mit der Kerbe nach oben) an.<br />
1.4. Drehen Sie den Schlüssel nach rechts. Sie können<br />
die Tür nun öffnen.<br />
1.5. Ziehen Sie den Notöffnungsschlüssel ab.<br />
1.6. Geben Sie die Abdeckung wieder auf die dafür<br />
vorgesehene Ausnehmung.<br />
1.7. Entfernen Sie die Abdeckung des Batteriefaches<br />
an der Türinnenseite.<br />
1.8. Legen Sie vier Batterien Typ AA (nicht im Lieferumfang<br />
enthalten) ein. Achten Sie auf die korrekte<br />
Polung beim Einlegen der Batterien.<br />
1.9. Nach Einlegen der letzen Batterie erscheint<br />
am Display „ALrAdY“.<br />
Die Elektronik ist nun betriebsbereit.<br />
1.10. Verschließen Sie die Batterieabdeckung wieder.<br />
4 MONTREAL Electronic Safe<br />
2. ÖFFNEN DES SAFES MIT<br />
WERKSCODE:<br />
2.1. Aktivieren Sie die Elektronik indem Sie den<br />
Touchscreen an einer beliebigen Stelle<br />
berühren.<br />
2.2. Geben Sie einen beiden Werkscode<br />
(1-2-3-4-5-6 oder 8-8-8-8-8-8-8-8) durch das<br />
Berühren der entsprechenden Ziffern am<br />
Touchscreen ein.<br />
2.3. Bestätigen Sie die Eingabe durch das Berühren der<br />
Rautetaste „#“.<br />
2.4. Nach Eingabe eines korrekten Codes erscheint am<br />
Display „OPEN“.<br />
Die Öffnung wird nun durchgeführt.<br />
2.5. Nach abgeschlossener Öffnung erscheint am<br />
Display „OPENEd“.<br />
Sie können die Tür nun öffnen.<br />
2.6. Erscheint am Display nach dem Drücken<br />
der Rautetaste „#“, „Error“, führen sie die<br />
Öffnung wie oben angeführt erneut aus.<br />
3. VERSCHLIESSEN DES SAFES:<br />
3.1. Drücken Sie die Tür bis zum Anschlag zu.<br />
Halten Sie die Tür in dieser Position.<br />
3.2. Am Display erscheint „CLOSE“.<br />
Das Verschließen des Safes wird durchgeführt.<br />
3.3. Erscheint am Display „CLOSEd“ so ist der <strong>Tresor</strong><br />
verschlossen.<br />
Überzeugen Sie sich stets davon, dass der <strong>Tresor</strong><br />
ordnungsgemäß verschlossen ist.<br />
4. PROGRAMMIERUNG EINES<br />
NEUEN CODES:<br />
Vor der Benutzung Ihres Safes muss aus Sicherheitsgründen<br />
ein persönlicher Code gespeichert werden. Bevor Sie die sehr<br />
einfache Programmierung durchführen, legen Sie den Code<br />
erst einmal fest. Verwenden Sie für den Code keine persönlichen<br />
Daten wie z. B. Geburtstage oder andere<br />
Daten, auf die durch Kenntnis Ihrer Person rückgeschlossen<br />
werden könnte. Bewahren Sie Ihren Code<br />
sowie die Notschlüssel sorgfältig auf, so daß sie nur<br />
Ihnen zugänglich sind.<br />
Verwahren Sie die Notschlüssel keinesfalls im Safe.<br />
Programmierung CODE 1:<br />
• Aktivieren Sie die Elektronik bei geöffneter Tür<br />
indem Sie den Touchscreen an einer beliebigen<br />
Stelle berühren.<br />
• Drücken Sie den roten Knopf an der Türinnenseite<br />
(bei den Scharnieren).
<strong>01</strong>-8 <strong>Montreal</strong> instruction 10-09:1 – 8 Mobil-5.06 print 27.10.2009 12:06 Uhr Seite 5<br />
• Am Display erscheint „INPUt“ gefolgt von<br />
„- - - - - - - - „.<br />
• Geben Sie nun den von Ihnen gewählten Code 1<br />
(aus Sicherheitsgründen mindestens drei<br />
maximal acht Stellen) durch berühren der ensprechenden<br />
Ziffern am Tastenfeld ein.<br />
• Bestätigen Sie die Eingabe durch das Berühren<br />
der Rautetaste „#“.<br />
• Es erfolgt ein akustisches Signal und am Display<br />
erscheint „INtO“.<br />
• Der von Ihnen als Code 1 eingegebene Code wird<br />
zur Bestätigung angezeigt.<br />
• Code 1 wurde somit erfolgreich gespeichert.<br />
Programmierung CODE 2:<br />
• Aktivieren Sie die Elektronik bei geöffneter Tür<br />
indem Sie den Touchscreen an einer beliebigen<br />
Stelle berühren.<br />
• Geben Sie über das Tastenfeld „0-0“ ein.<br />
• Drücken Sie den roten Knopf an der Türinnenseite<br />
(bei den Scharnieren).<br />
• Am Display erscheint „INPUt“ gefolgt von<br />
„- - - - - - - - „.<br />
• Geben Sie nun den von Ihnen gewählten Code 2<br />
(aus Sicherheitsgründen mindestens drei maximal<br />
acht Stellen) durch berühren der<br />
entsprechenden Ziffern am Tastenfeld ein.<br />
• Bestätigen Sie die Eingabe durch Berühren<br />
der Rautetaste „#“.<br />
• Es erfolgt ein akustisches Signal und am<br />
Display erscheint „INtO“.<br />
• Der von Ihnen als Code 2 eingegebene Code wird<br />
zur Bestätigung angezeigt.<br />
• Code 2 wurde somit erfolgreich gespeichert.<br />
5. ÖFFNEN DES SAFES MIT<br />
PERSÖNLICHEM CODE:<br />
5.1. Aktivieren Sie die Elektronik indem Sie den<br />
Touchscreen an einer beliebigen Stelle berühren.<br />
5.2. Geben Sie einen beiden persönlichen Codes durch<br />
Berühren der entsprechenden Ziffern am<br />
Touchscreen ein.<br />
5.3. Bestätigen Sie die Eingabe durch das Berühren<br />
der Rautetaste „#“.<br />
5.4. Nach Eingabe eines korrekten Codes erscheint am<br />
Display „OPEN“.<br />
Die Öffnung wird nun durchgeführt.<br />
5.6. Nach abgeschlossener Öffnung erscheint am Display<br />
„OPENEd“. Sie können die Tür nun öffnen.<br />
5.7. Erscheint am Display nach dem Drücken der<br />
Rautetaste „#“, „Error“, führen Sie die Öffnung wie<br />
oben angeführt erneut aus.<br />
6. ÖFFNUNG MIT NOTSCHLÜSSEL:<br />
Sollten Sie den Code vergessen haben, oder die<br />
Batterien leer sein, gehen Sie wie folgt vor:<br />
6.1. Entfernen Sie die Abdeckung am Beschlag rechts<br />
unten (Abdeckung mit der Aufschrift „.....“).<br />
6.2. Stecken Sie einen der beiden mitgelieferten Notöffnungsschüssel<br />
(mit der Kerbe nach oben) an.<br />
6.3. Drehen Sie den Schlüssel nach rechts.<br />
Sie können die Tür nun öffnen.<br />
7. BATTERIEWECHSEL:<br />
7.1. Öffnen Sie die Tür.<br />
7.2. Entfernen Sie die Abdeckung des Batteriefaches<br />
an der Türinnenseite.<br />
7.3. Entfernen Sie die eingelegten Batterien.<br />
7.4. Legen Sie vier neue Batterien Typ AA ein.<br />
7.5. Achten Sie auf die korrekte Polung beim<br />
Einlegen der Batterien.<br />
7.6. Nach Einlegen der letzen Batterie erscheint<br />
am Display „ALrAdY“.<br />
Die Elektronik ist nun betriebsbereit.<br />
7.7. Verschließen Sie die Batterieabdeckung wieder.<br />
SPERRZEIT BEI FEHLEINGABE:<br />
Bei Eingabe eines falschen Codes ertönt ein akustisches<br />
Signal und am Display erscheint „Error“. Sie<br />
haben nun zwei weitere Versuche, den richtigen Code<br />
einzugeben. Haben Sie dreimal einen falschen Code<br />
eingegeben, so wird die Elektronik drei Minuten für<br />
jede Eingabe gesperrt und am Display ist das<br />
Symbol zu sehen.<br />
Während der Sperrzeit von drei Minuten reagiert das<br />
Tastenfeld auf keinerlei Eingabe. Während der Sperrzeit<br />
kann mit dem Notschlüssel geöffnet werden.<br />
Achtung:<br />
Ihr neuer <strong>Tresor</strong> und der<br />
Inhalt sind nicht automatisch<br />
versichert.<br />
Teilen Sie den gewünschten<br />
Versicherungswert Ihrer<br />
Versicherung schriftlich mit.<br />
MONTREAL Electronic Safe 5
<strong>01</strong>-8 <strong>Montreal</strong> instruction 10-09:1 – 8 Mobil-5.06 print 27.10.2009 12:06 Uhr Seite 6<br />
GB USA<br />
Operating unstruction for<br />
the Electronic Touchscreen<br />
Lock <strong>Montreal</strong><br />
Attention: Please read this operating instruction carefully,<br />
before you operate the lock or you try to tailor a new<br />
combination of numbers. We do not undertake any liability<br />
for functional disorder because of faulty switch<br />
over or use of violence or improper use and neither for<br />
damage nor for loss of property which could be put<br />
down i.e. to the not proper bar of the safe.<br />
Never keep the emergency key inside the safe!<br />
GENERAL:<br />
At delivery 1-2-3-4-5-6 as Code 1 AND 8-8-8-8-8-8-8-8<br />
as Code 2 is programmed – for security reasons please<br />
change both codes to your personal ones immediately.<br />
Any button activity is confirmed by a brief tone.<br />
The maximum distance between 2 activities may not be<br />
more than 10 seconds.<br />
1. START OF OPERATION:<br />
1.1. Remove the protective foil of the Touchscreen.<br />
1.2. Remove the plastic lid on the right below corner of<br />
the cover.<br />
1.3. Insert one of the two delivered emergency keys<br />
(the notch should face upwards).<br />
1.4. Turn the key to the right. Now you can open the<br />
door.<br />
1.5. Turn the emergency key back into its original<br />
position and take the key out.<br />
1.6. Put the plastic lid again onto the cover.<br />
1.7. Open the plastic lid on the inside of the door to<br />
insert the batteries.<br />
1.8. Insert 4 pieces 1,5V AA batteries (not included) in<br />
the correct manner.<br />
1.9. After putting in the last battery, the display shows<br />
„ALrAdY“. The electronic is now ready for use.<br />
1.10. Finally close the plastic lid of the batteries.<br />
2. OPEN THE SAFE WITH THE<br />
FACTORY CODE:<br />
2.1. To activate the electronic please touch the display<br />
at any place.<br />
6 MONTREAL Electronic Safe<br />
2.2. Enter one of the two factory codes (1-2-3-4-5-6 or<br />
8-8-8-8-8-8-8-8) by touching the numbers on the<br />
display.<br />
2.3. Confirm the number by touching the symbol „#“.<br />
2.4. After entering a right code, the display shows<br />
„OPEN“.<br />
The opening of the lock works automatically.<br />
2.5. After opening, the display shows „OPENEd“.<br />
Now you can open the door of the safe.<br />
2.6. If the display shows „Error“ after entering the<br />
code and pressing „#“, try the above points again.<br />
3. LOCKING OF THE SAFE:<br />
3.1. Close the door until the Stopp bar.<br />
Keep the door in this position.<br />
3.2. The display then shows „CLOSE“.<br />
The lock closes automatically.<br />
3.3. The display shows „CLOSEd“ and the safe is<br />
locked now.<br />
Always make sure that the safe is definitely closed!<br />
4. PROGRAMMING A NEW CODE:<br />
For security reasons always change the factory codes to your<br />
personal ones BEFORE using the safe. First think about the<br />
code you want to use. Never use codes, which are easy to find<br />
out for other persons, e.g. date of birth. Keep the emergency<br />
keys and the code always in safe custody.<br />
Never keep the emergency key inside the safe!<br />
Programming CODE 1:<br />
• To activate the electronic please touch the display<br />
at any place.<br />
• Press the red button inside the safe (at the back of<br />
the door, near the hinges).<br />
• The display shows „INPUt“ and „- - - - - - - - „.<br />
• Type in the code (for security reasons at least<br />
3 numbers but maximum 8 numbers) that you<br />
want by touching the numbers on the display.<br />
• Touch the “#” button to confirm your code.<br />
• You will hear a brief tone and the display shows<br />
„INtO“.<br />
• For confirmation the display shows your new code<br />
1 for e few seconds.<br />
• Code 1 has been saved now.<br />
• If the display shows „Error“ after entering the code<br />
and pressing „#“, try the above points again.
<strong>01</strong>-8 <strong>Montreal</strong> instruction 10-09:1 – 8 Mobil-5.06 print 27.10.2009 12:06 Uhr Seite 7<br />
Programming CODE 2:<br />
• To activate the electronic please touch the display<br />
at any place.<br />
• Enter „0-0“ by touching the number „0“ on the<br />
display two times.<br />
• Press the red button inside the safe (at the back of<br />
the door, near the hinges).<br />
• The display shows „INPUt“ and „- - - - - - - - „.<br />
• Type in the code (for security reasons at least 3<br />
numbers but maximum 8 numbers) that you want<br />
by touching the numbers on the display.<br />
• Touch the “#” button to confirm your code.<br />
• You will hear a brief tone and the display shows<br />
„INtO“.<br />
• For confirmation the display shows your new code<br />
2 for e few seconds.<br />
• Code 2 has been saved now.<br />
• If the display shows „Error“ after entering the<br />
code and pressing „#“, try the above points again.<br />
5. OPEN THE SAFE WITH PERSONAL<br />
CODE 1 OR 2:<br />
5.1. To activate the electronic please touch the display<br />
at any place.<br />
5.2. Enter one of your 2 personal codes by touching<br />
the numbers on the display.<br />
5.3. Touch the “#” button to confirm your code.<br />
5.4. After entering a right code, the display shows<br />
„OPEN“.<br />
The safe now opens automatically.<br />
5.6. After opening the display shows „OPENEd“.<br />
Now you can open the door of the safe.<br />
5.7. If the display shows „Error“ after entering the<br />
code and pressing „#“, try the above points again.<br />
6. USING THE EMERGENCY OPENING:<br />
If you forget your code or the batteries are empty, follow<br />
this:<br />
6.1. Remove the plastic lid on the right below corner of<br />
the cover.<br />
6.2. Insert one of the two delivered emergency keys<br />
(the notch should face upwards).<br />
6.3. Turn the emergency key to the right.<br />
Now you are able to open the door.<br />
7. BATTERY CHANGE:<br />
7.1. Open the door.<br />
7.2. Remove the plastic lid of the battery box.<br />
7.3. Remove the old batteries.<br />
7.4. Put in four new batteries Type AA.<br />
7.5. Take care of the right position of the batteries.<br />
7.6. After the last battery has been put in, the display<br />
shows „ALrAdY“.<br />
The electronic is now again ready for use.<br />
7.7. Finally close the plastiv lid of the battery box.<br />
WRONG CODE:<br />
When entering a wrong code, a brief tone will sound<br />
and the display shows „Error“. There are two more<br />
attempts left now. When entering the wrong code three<br />
times, the electronic blocks for 3 minutes and shows<br />
this symbol: . During these 3 minutes the display<br />
does not react to any touches, but you can open the<br />
safe with the emergency key.<br />
Attention:<br />
Your new Safe and it’s content<br />
aren’t automatically insured.<br />
Please write a letter to your<br />
insurance about the insurance<br />
value you’d like.<br />
MONTREAL Electronic Safe 7
<strong>01</strong>-8 <strong>Montreal</strong> instruction 10-09:1 – 8 Mobil-5.06 print 27.10.2009 12:06 Uhr Seite 8<br />
www.rottner-tresor.com<br />
www.comsafe.at<br />
www.rottner-tresor.at<br />
www.rottner-security.co.uk<br />
www.rottner-tresor.hu<br />
www.rottner-tresor.cz<br />
www.rottner-tresor.sk<br />
www.rottner-tresor.ro<br />
www.rottner-tresor.eu<br />
www.rottner-tresor.be<br />
www.rottner-tresor.de<br />
www.rottner-tresor.nl<br />
www.rottner-tresor.ch<br />
Technische Änderungen<br />
vorbehalten (1. 10. 2009).<br />
Technics subject to<br />
alterations (1. 10. 2009).<br />
Österreich<br />
<strong>Rottner</strong> <strong>Tresor</strong> <strong>GmbH</strong><br />
A-4880 St. Georgen i. A.<br />
Deutschland<br />
<strong>Rottner</strong> Security <strong>GmbH</strong><br />
D-83395 FREILASSING<br />
United Kingdom<br />
<strong>Rottner</strong> Security UK Ltd.<br />
BEDFORD MK41 9WE<br />
©<br />
�<br />
Nederland, België en Luxemburg<br />
<strong>Rottner</strong> <strong>Tresor</strong> BV<br />
NL-2050 AB OVERVEEN<br />
Slovakia<br />
<strong>Rottner</strong> Security<br />
SK-902<strong>01</strong> PEZINOK<br />
Czech Republic<br />
<strong>Rottner</strong> Security<br />
CZ-61200 BRNO<br />
�<br />
�<br />
�<br />
�<br />
�<br />
�<br />
�<br />
�<br />
�<br />
�<br />
THE EUROPEAN SECURITY GROUP<br />
�<br />
�<br />
�<br />
�<br />
�<br />
�<br />
�<br />
�<br />
�<br />
�<br />
� � �<br />
�<br />
� �<br />
Romania, Bulgaria<br />
<strong>Rottner</strong> Security<br />
Romania Srl.<br />
RO-50<strong>01</strong>83 BRASOV<br />
Hungary, Ukraine<br />
<strong>Rottner</strong> Security<br />
H-1161 BUDAPEST<br />
Croatia, Slovenia,<br />
Bosnia-Herzegovina<br />
<strong>Rottner</strong> Security<br />
HR-51000 RIJEKA<br />
�<br />
�<br />
�<br />
�<br />
�<br />
�
<strong>01</strong>-8 <strong>Montreal</strong> instruction 10-09:1 – 8 Mobil-5.06 print 27.10.2009 12:06 Uhr Seite 1<br />
<strong>Print</strong>ing <strong>Instruction</strong><br />
Paper 100 g/m2 paper<br />
offset<br />
size 148 x 210 mm<br />
<strong>Print</strong>ing color black only<br />
pages 8 pages<br />
with 2 paperclip