

Preps Marks Data - Kodak
Preps Marks Data - Kodak
Preps Marks Data - Kodak

You also want an ePaper? Increase the reach of your titles
YUMPU automatically turns print PDFs into web optimized ePapers that Google loves.
2 <strong>Preps</strong> <strong>Marks</strong> <strong>Data</strong> 1.2 User Guide<br />
Exporting a <strong>Preps</strong> <strong>Marks</strong> <strong>Data</strong> File<br />
To export a <strong>Preps</strong> <strong>Marks</strong> <strong>Data</strong> file:<br />
1. Start the <strong>Preps</strong> <strong>Marks</strong> <strong>Data</strong> software.<br />
2. Click Select, and then locate the <strong>Preps</strong> <strong>Marks</strong> folder (you might need to ask a<br />
<strong>Preps</strong> software operator for the location of this folder).<br />
Note: In shops with more than one <strong>Preps</strong> software licence, the <strong>Marks</strong> folder<br />
might be located on a network server, so that operators can access the same<br />
marks from any <strong>Preps</strong> software installation in the shop.<br />
3. Select the <strong>Marks</strong> folder, and then click Choose (Mac OS) or OK (Windows<br />
operating system).<br />
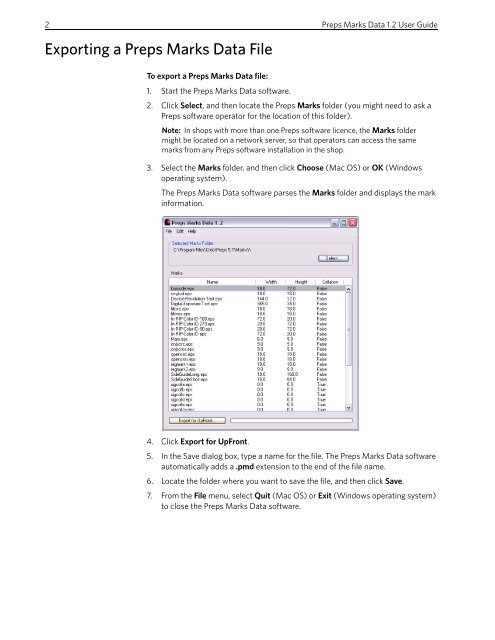
The <strong>Preps</strong> <strong>Marks</strong> <strong>Data</strong> software parses the <strong>Marks</strong> folder and displays the mark<br />
information.<br />
4. Click Export for UpFront.<br />
5. In the Save dialog box, type a name for the file. The <strong>Preps</strong> <strong>Marks</strong> <strong>Data</strong> software<br />
automatically adds a .pmd extension to the end of the file name.<br />
6. Locate the folder where you want to save the file, and then click Save.<br />
7. From the File menu, select Quit (Mac OS) or Exit (Windows operating system)<br />
to close the <strong>Preps</strong> <strong>Marks</strong> <strong>Data</strong> software.


