Quick-Start Guide: RoomView Express - Crestron
Quick-Start Guide: RoomView Express - Crestron
Quick-Start Guide: RoomView Express - Crestron

You also want an ePaper? Increase the reach of your titles
YUMPU automatically turns print PDFs into web optimized ePapers that Google loves.
1<br />
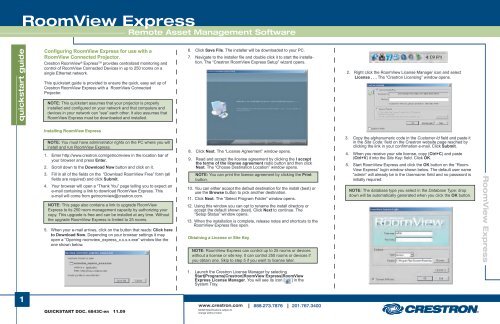
<strong>Crestron</strong> <strong>RoomView</strong> ® <strong>Express</strong>TM Configuring <strong>RoomView</strong> <strong>Express</strong> for use with a<br />
<strong>RoomView</strong> Connected Projector.<br />
provides centralized monitoring and<br />
control of <strong>RoomView</strong> Connected Devices in up to 250 rooms on a<br />
single Ethernet network.<br />
This quickstart guide is provided to ensure the quick, easy set up of<br />
<strong>Crestron</strong> <strong>RoomView</strong> <strong>Express</strong> with a <strong>RoomView</strong> Connected<br />
Projector.<br />
NOTE: This quickstart assumes that your projector is properly<br />
installed and configured on your network and that computers and<br />
devices in your network can “see” each other. It also assumes that<br />
<strong>RoomView</strong> <strong>Express</strong> must be downloaded and installed.<br />
quickstart guide <strong>RoomView</strong> <strong>Express</strong><br />
Installing <strong>RoomView</strong> <strong>Express</strong><br />
NOTE: You must have administrator rights on the PC where you will<br />
install and run <strong>RoomView</strong> <strong>Express</strong>.<br />
1. Enter http://www.crestron.com/getroomview in the location bar of<br />
your browser and press Enter.<br />
2. Scroll down to the Download Now button and click on it.<br />
3. Fill in all of the fields on the “Download <strong>RoomView</strong> Free” form (all<br />
fields are required) and click Submit.<br />
4. Your browser will open a “Thank You” page telling you to expect an<br />
e-mail containing a link to download <strong>RoomView</strong> <strong>Express</strong>. This<br />
e-mail will come from getroomview@crestron.com.<br />
NOTE: This page also contains a link to upgrade <strong>RoomView</strong><br />
<strong>Express</strong> to its 250 room management capacity by authorizing your<br />
copy. This upgrade is free and can be installed at any time. Without<br />
the upgrade <strong>RoomView</strong> <strong>Express</strong> is limited to 25 rooms.<br />
5. When your e-mail arrives, click on the button that reads: Click here<br />
to Download Now. Depending on your browser settings it may<br />
open a “Opening roomview_express_x.x.x.x.exe” window like the<br />
one shown below.<br />
QUICKSTART DOC. 6843C-en 11.09<br />
Remote Asset Management Software<br />
6. Click Save File. The installer will be downloaded to your PC.<br />
7. Navigate to the installer file and double click it to start the installation.<br />
The “<strong>Crestron</strong> <strong>RoomView</strong> <strong>Express</strong> Setup” wizard opens.<br />
8. Click Next. The “License Agreement” window opens.<br />
9. Read and accept the license agreement by clicking the I accept<br />
the terms of the license agreement radio button and then click<br />
Next. The “Choose Destination Location” window opens.<br />
NOTE: You can print the license agreement by clicking the Print<br />
button.<br />
10. You can either accept the default destination for the install (best) or<br />
use the Browse button to pick another destination.<br />
11. Click Next. The “Select Program Folder” window opens.<br />
12. Using this window you can opt to rename the install directory or<br />
accept the default shown (best). Click Next to continue. The<br />
“Setup Status” window opens.<br />
13. When the installation is complete, release notes and shortcuts to the<br />
<strong>RoomView</strong> <strong>Express</strong> files open.<br />
Obtaining a License or Site Key<br />
NOTE: <strong>RoomView</strong> <strong>Express</strong> can control up to 25 rooms or devices<br />
without a license or site key. It can control 250 rooms or devices if<br />
you obtain one. Skip to step 5 if you want to license later.<br />
1. Launch the <strong>Crestron</strong> License Manager by selecting<br />
<strong>Start</strong>|Programs|<strong>Crestron</strong>|<strong>RoomView</strong> <strong>Express</strong>|<strong>RoomView</strong><br />
<strong>Express</strong> License Manager. You will see its icon [ ] in the<br />
System Tray.<br />
www.crestron.com 888.273.7876 201.767.3400<br />
©2009 Specifications subject to<br />
change without notice<br />
2. Right click the <strong>RoomView</strong> License Manager icon and select<br />
License . . . The “<strong>Crestron</strong> Licensing” window opens.<br />
3. Copy the alphanumeric code in the Customer Id field and paste it<br />
in the Site Code: field on the <strong>Crestron</strong> website page reached by<br />
clicking the link in your confirmation e-mail. Click Submit.<br />
4. When you receive your site license, copy (Ctrl+C) and paste<br />
(Ctrl+V) it into the Site Key: field. Click OK.<br />
5. <strong>Start</strong> <strong>RoomView</strong> <strong>Express</strong> and click the OK button on the “Room-<br />
View <strong>Express</strong>” login window shown below. The default user name<br />
“admin” will already be in the Username: field and no password is<br />
initially required.<br />
NOTE: The database type you select in the Database Type: drop<br />
down will be automatically generated when you click the OK button.<br />
<strong>RoomView</strong> <strong>Express</strong>
2<br />
Adding a Projector to <strong>RoomView</strong> <strong>Express</strong><br />
Once <strong>RoomView</strong> <strong>Express</strong> is installed and licensed the next step is to<br />
add your projector. Since your projector must be in a room in your<br />
facility, adding the projector is the same as adding a room.<br />
NOTE: If your projector is equipped with an on-screen text display<br />
system or is running the <strong>RoomView</strong> Connected web interface and<br />
you plan on using <strong>RoomView</strong> <strong>Express</strong>’ Emergency Broadcast<br />
feature, establishing a group for your new room is important. See<br />
“Emergency Broadcasts” on page 4.<br />
1. Select Rooms . . . from the Edit menu.<br />
quickstart guide <strong>RoomView</strong> <strong>Express</strong><br />
2. When the “Edit Rooms” window opens, click the New Room button<br />
at the bottom. The “Edit Room: New” window opens.<br />
QUICKSTART DOC. 6843C-en 11.09<br />
Remote Asset Management Software<br />
3. The Name, IP Address and IPID/Port fields are required to ensure<br />
minimum control of your projector. Call your room something like<br />
“Conference Room 1”.<br />
NOTE: Use the IP Address (or hostname) found in the projector’s<br />
onscreen menu (refer to manufacturer’s instructions) and an IPID of<br />
02. Use the reserved <strong>Crestron</strong> control port; 41794 in the Port field.<br />
4. Click Save Room and then OK.<br />
5. Click Close to dismiss the “Edit Rooms” window.<br />
6. You should see a green check mark in the Online column of your<br />
room as shown below. If you scroll to the right, you will see a green<br />
icon in the Display Power column indicating that your projector is<br />
on.<br />
NOTE: A red icon in the System Power column is normal for this<br />
<strong>RoomView</strong> Connected Projector. The projector assumes the role of<br />
a <strong>Crestron</strong> Control System when properly installed.<br />
7. Congratulations! You have installed your projector. Now that your<br />
projector is installed as a <strong>RoomView</strong> Connected Projector, it is time to<br />
get acquainted with the application.<br />
www.crestron.com 888.273.7876 201.767.3400<br />
©2009 Specifications subject to<br />
change without notice<br />
Controlling Your <strong>RoomView</strong> Connected Projector.<br />
Turning your Projector On and Off from the Main Window<br />
One of <strong>RoomView</strong>’s powerful features is controlling and monitoring the<br />
power status of your projector.<br />
1. To turn power on left-click the red icon in the Display Power column.<br />
The “Toggle Digital” window will open and the Toggle On<br />
radio button will be selected. Click OK to turn the power on.<br />
NOTE: A red icon in the Display Power column indicates the display<br />
power is off. A green icon indicates that it is on.<br />
2. If the power is on and you wish to turn it off, the procedure is the<br />
same. The only difference will be that the Toggle Off radio button<br />
will be selected.<br />
NOTE: These functions can also be performed by right clicking on<br />
the Display Power icon and selecting Display Power On or Display<br />
Power Off from the menu.<br />
Turning your Projector On and Off Automatically<br />
Your projector can be turned on and off automatically by scheduling<br />
a Display On and a Display Off event. To do this, proceed as follows:<br />
1. Select Events . . . from the Edit menu.<br />
<strong>RoomView</strong> <strong>Express</strong>
3<br />
2. When the “Edit Events” window opens select an event. In this case,<br />
select Display Off.<br />
NOTE: Only the Display events shown in the “Edit Events” window<br />
on the next page apply to this projector. The System events apply to<br />
other devices which are not covered by this quick start guide.<br />
quickstart guide <strong>RoomView</strong> <strong>Express</strong><br />
3. Select the Display Off event and click on the Edit button. The<br />
“Edit Event: Display Off” window will open.<br />
QUICKSTART DOC. 6843C-en 11.09<br />
Remote Asset Management Software<br />
4. Click Repeat event, if it is not already selected, and set the Time:<br />
field to the time you would like the projector to turn off.<br />
5. Select the weekdays for your Display Off event, if not already<br />
selected, and click OK. Your projector will now turn off at the time<br />
and on the days you specified.<br />
Monitoring Lamp Life<br />
The Display Usage column monitors the lamp life of the device. The Lamp<br />
Life indicators in the column show when the bulb or lamp needs to be<br />
replaced.<br />
In order for the Lamp Life indicators to display accurately, the Default Max<br />
Value: field on the “Edit Attribute: Display Usage” window must be set to<br />
the rated life–in hours–of the lamp.<br />
NOTE: For example, if the lamp is rated at 1500 hours, enter 1500<br />
in the Default Max Value: field. The lamp life will be in the projector’s<br />
documentation.<br />
1. Select Attribute . . . from the Edit menu.<br />
2. Select Display Usage on the “Edit Attribute” window and click the<br />
Edit button.<br />
www.crestron.com 888.273.7876 201.767.3400<br />
©2009 Specifications subject to<br />
change without notice<br />
3. Enter the lamp life in hours in the Default Max Value: field and click OK.<br />
4. The Lamp Life indicator should show:<br />
green through 50% usage<br />
yellow at the 51-80% mark<br />
red when usage reaches the 81-100% mark<br />
Create a Contact and Set Up E-mail Notification<br />
In order to send notifications when there is a problem with your projector,<br />
at least one contact must be created. This contact will receive e-mail<br />
notifications based on the attributes assigned to your projector. This allows<br />
monitoring things like lamp life and online status.<br />
<strong>RoomView</strong> <strong>Express</strong>
4<br />
1. Select Contacts . . . from the Edit menu.<br />
2. When the “Edit Contacts” window opens, click the New Contact button<br />
to display the “Edit Contact: New” window.<br />
quickstart guide <strong>RoomView</strong> <strong>Express</strong><br />
3. Fill out the fields on the the Phone & E-mail, Groups, Rooms and<br />
Attributes tabs. On the Phone & E-mail tab, enter the main e-mail<br />
address for your contact so <strong>RoomView</strong> can alert the contact to changes.<br />
On the Groups tab, select All Groups On the Rooms tab, select the<br />
room your projector is in. On the Attributes tab, select the attributes that<br />
will trigger a notification.<br />
4. Click OK and then Close when your selections are complete.<br />
Emergency Broadcasts<br />
NOTE: Emergency Broadcasts and alerts only apply to projectors<br />
equipped with the <strong>RoomView</strong> Connected web interface or an onscreen<br />
text display system. The Emergency Broadcast will appear in<br />
the web interface or on-screen text display field.<br />
Emergency Broadcasts or alerts are sent by an administrator or user to<br />
all rooms, a group of rooms or a single room to warn of an emergency.<br />
Built-in emergency categories transmit pre-defined messages that can<br />
also be tailored to your needs.<br />
Remote Asset Management Software<br />
To use the emergency broadcast feature effectively, you must create groups<br />
for the rooms in your system. This can also help you organize your rooms<br />
by function, location, size, or other criteria that may be suitable to your<br />
situation.<br />
1. Right click on All Rooms in the navigation pane and Select Add<br />
Group. Name the new group something like “Building One”.<br />
2. Select Rooms . . . from the Edit menu as described in step 1 of “Adding<br />
a Projector to <strong>RoomView</strong> <strong>Express</strong>” on page 2.<br />
3. Click the Edit button on the “Edit Rooms” window and then the Groups<br />
tab on the “Edit Room: Conference Room 1” window.<br />
4. Check the group you wish to add your room to and click OK and then<br />
Close.<br />
5. Right click on All Rooms or the group you created and select Send<br />
Emergency Broadcast . . . from the drop down menu.<br />
6. The Emergency Broadcast Message Center opens. Select the group<br />
or room(s) to receive the broadcast and then select one of the<br />
pre-defined emergencies. Click the Send Emergency button.<br />
www.crestron.com 888.273.7876 201.767.3400<br />
QUICKSTART DOC. 6843C-en 11.09 ©2009 Specifications subject to<br />
<strong>Crestron</strong> is not responsible for errors in typography or photography. <strong>Crestron</strong> <strong>RoomView</strong> and <strong>RoomView</strong><br />
change without notice<br />
<strong>Express</strong> are trademarks of <strong>Crestron</strong> Electronics, Inc. Other trademarks and trade names may be used in this<br />
document to refer to either the entities claiming the marks and names or their products. <strong>Crestron</strong> disclaims<br />
proprietary interest in the marks and names of others.<br />
NOTE: An emergency can be cleared from this window by clicking<br />
the Clear Emergency button.<br />
7. Sent and cleared emergencies will be displayed in the All Messages<br />
and Outgoing Messages tabs. Messages returned by the rooms<br />
receiving the broadcast are displayed in the Incoming Messages tab.<br />
Click on the Incoming Messages tab to see if there has been a reply.<br />
If there has been a reply, click on the Reply tab. The Emergency<br />
Message Center opens the Reply tab as shown below.<br />
8. Type your reply into the field displayed by the Reply tab at the bottom<br />
of the window and click Reply. Your reply will be broadcast to the<br />
selected rooms and displayed in the All Messages and Outgoing<br />
Messages tabs.<br />
9. You can click Close to dismiss the entire Emergency Message Center<br />
or the Send tab to return to the main area.<br />
10. Congratulations! <strong>RoomView</strong> <strong>Express</strong> and your <strong>RoomView</strong> Connected<br />
Projector are configured for operation!<br />
<strong>RoomView</strong> ® <strong>Express</strong>