Rails%203%20In%20Action
Rails%203%20In%20Action
Rails%203%20In%20Action

You also want an ePaper? Increase the reach of your titles
YUMPU automatically turns print PDFs into web optimized ePapers that Google loves.
IN ACTION<br />
Ryan Bigg<br />
Yehuda Katz<br />
MANNING
Rails 3 in Action
Rails 3 in Action<br />
RYAN BIGG<br />
YEHUDA KATZ<br />
MANNING<br />
SHELTER ISLAND
iv<br />
For online information and ordering of this and other Manning books, please visit<br />
www.manning.com. The publisher offers discounts on this book when ordered in quantity.<br />
For more information, please contact<br />
Special Sales Department<br />
Manning Publications Co.<br />
20 Baldwin Road<br />
PO Box 261<br />
Shelter Island, NY 11964<br />
Email: orders@manning.com<br />
©2012 by Manning Publications Co. All rights reserved.<br />
No part of this publication may be reproduced, stored in a retrieval system, or transmitted, in<br />
any form or by means electronic, mechanical, photocopying, or otherwise, without prior written<br />
permission of the publisher.<br />
Many of the designations used by manufacturers and sellers to distinguish their products are<br />
claimed as trademarks. Where those designations appear in the book, and Manning<br />
Publications was aware of a trademark claim, the designations have been printed in initial caps<br />
or all caps.<br />
Recognizing the importance of preserving what has been written, it is Manning’s policy to have<br />
the books we publish printed on acid-free paper, and we exert our best efforts to that end.<br />
Recognizing also our responsibility to conserve the resources of our planet, Manning books<br />
are printed on paper that is at least 15 percent recycled and processed without the use of<br />
elemental chlorine.<br />
Manning Publications Co. Development editor: Cynthia Kane<br />
20 Baldwin Road Copyeditors: Kevin Hobson, Linda Kern<br />
PO Box 261 Proofreader: Tiffany Taylor<br />
Shelter Island, NY 11964 Typesetter: Dottie Marsico<br />
Cover designer: Marija Tudor<br />
ISBN 978-1-935182-27-6<br />
Printed in the United States of America<br />
1 2 3 4 5 6 7 8 9 10 – MAL – 16 15 14 13 12 11
1 ■ Ruby on Rails, the framework 1<br />
2 ■ Testing saves your bacon 23<br />
3 ■ Developing a real Rails application 44<br />
4 ■ Oh CRUD! 83<br />
5 ■ Nested resources 99<br />
6 ■ Authentication and basic authorization 117<br />
7 ■ Basic access control 136<br />
8 ■ More authorization 164<br />
9 ■ File uploading 213<br />
10 ■ Tracking state 243<br />
11 ■ Tagging 286<br />
12 ■ Sending email 312<br />
13 ■ Designing an API 347<br />
14 ■ Deployment 385<br />
15 ■ Alternative authentication 412<br />
16 ■ Basic performance enhancements 434<br />
17 ■ Engines 468<br />
18 ■ Rack-based applications 516<br />
v<br />
brief contents
1<br />
2<br />
preface xv<br />
acknowledgments xvii<br />
about this book xx<br />
about the authors xxiii<br />
about the cover illustration xxiv<br />
Ruby on Rails, the framework 1<br />
1.1 What is Ruby on Rails? 2<br />
Benefits 2 ■ Common terms 3 ■ Rails in the wild 4<br />
1.2 Developing your first application 5<br />
vii<br />
contents<br />
Installing Rails 5 ■ Generating an application 6 ■ Starting the<br />
application 6 ■ Scaffolding 7 ■ Migrations 8 ■ Viewing<br />
and creating purchases 9 ■ Validations 13 ■ Showing off 14<br />
Routing 15 ■ Updating 16 ■ Deleting 20<br />
1.3 Summary 21<br />
Testing saves your bacon 23<br />
2.1 Test- and behavior-driven development 24<br />
2.2 Test-driven development 24<br />
Why test? 25 ■ Writing your first test 25 ■ Saving bacon 27<br />
2.3 Behavior-driven development 28<br />
RSpec 29 ■ Cucumber 35<br />
2.4 Summary 42
viii<br />
3<br />
4<br />
5<br />
6<br />
CONTENTS<br />
Developing a real Rails application 44<br />
3.1 Application setup 45<br />
The application story 45 ■ Version control 47 ■ The Gemfile<br />
and generators 50 ■ Database configuration 53 ■ Applying a<br />
stylesheet 54<br />
3.2 First steps 55<br />
Creating projects 55 ■ RESTful routing 60 ■ Committing<br />
changes 72 ■ Setting a page title 72 ■ Validations 76<br />
3.3 Summary 81<br />
Oh CRUD! 83<br />
4.1 Viewing projects 83<br />
Writing a feature 84 ■ The Factory Girl 85 ■ Adding a link to<br />
a project 86<br />
4.2 Editing projects 88<br />
The edit action 88 ■ The update action 90<br />
4.3 Deleting projects 91<br />
Writing a feature 92 ■ Adding a destroy action 92 ■ Looking<br />
for what isn’t there 93<br />
4.4 Summary 97<br />
Nested resources 99<br />
5.1 Creating tickets 99<br />
Nested routing helpers 100 ■ Creating a tickets controller 101<br />
Defining a has_many association 103 ■ Creating tickets within a<br />
project 104 ■ Finding tickets scoped by project 105 ■ Ticket<br />
validations 106<br />
5.2 Viewing tickets 108<br />
Listing tickets 110 ■ Culling tickets 111<br />
5.3 Editing tickets 112<br />
Adding the edit action 113 ■ Adding the update action 114<br />
5.4 Deleting tickets 115<br />
5.5 Summary 116<br />
Authentication and basic authorization 117<br />
6.1 What Devise does 118<br />
Installing Devise 118
7<br />
8<br />
6.2 User signup 121<br />
6.3 Confirmation link sign-in 122<br />
CONTENTS ix<br />
Testing email 122 ■ Confirming confirmation 123<br />
6.4 Form sign-in 126<br />
6.5 Linking tickets to users 128<br />
Attributing tickets to users 129 ■ We broke something! 131<br />
Fixing the Viewing Tickets feature 132 ■ Fixing the Editing<br />
Tickets feature 133 ■ Fixing the Deleting Tickets feature 134<br />
6.6 Summary 135<br />
Basic access control 136<br />
7.1 Projects can be created only by admins 137<br />
7.2 Adding the admin field to the users table 138<br />
7.3 Restricting actions to admins only 138<br />
Fixing three more broken scenarios 143 ■ Hiding the New Project<br />
link 144 ■ Hiding the edit and delete links 146<br />
7.4 Namespace routing 148<br />
7.5 Namespace-based CRUD 151<br />
Adding a namespace root 151 ■ The index action 152<br />
The new action 153 ■ The create action 154<br />
7.6 Creating admin users 155<br />
7.7 Editing users 157<br />
The show action 158 ■ The edit and update actions 159<br />
7.8 Deleting users 161<br />
Ensuring you can’t delete yourself 162<br />
7.9 Summary 163<br />
More authorization 164<br />
8.1 Restricting read access 165<br />
8.2 Restricting by scope 168<br />
8.3 Fixing what you broke 172<br />
Fixing Editing Projects 173 ■ Fixing the four failing<br />
features 173 ■ One more thing 176 ■ Fixing Signing Up 178<br />
8.4 Blocking access to tickets 183<br />
Locking out the bad guys 183
x<br />
9<br />
10<br />
CONTENTS<br />
8.5 Restricting write access 185<br />
Rewriting a feature 185 ■ Blocking creation 187 ■ What is<br />
CanCan? 188 ■ Adding abilities 189<br />
8.6 Restricting update access 190<br />
No updating for you! 191 ■ Authorizing editing 192<br />
8.7 Restricting delete access 193<br />
Enforcing destroy protection 193 ■ Hiding links based on<br />
permission 194<br />
8.8 Assigning permissions 198<br />
Viewing projects 198 ■ And the rest 206<br />
8.9 Seed data 209<br />
8.10 Summary 212<br />
File uploading 213<br />
9.1 Attaching a file 214<br />
A feature featuring files 214 ■ Enter stage right, Paperclip 216<br />
Using Paperclip 217<br />
9.2 Attaching many files 220<br />
Two more files 221 ■ Using nested attributes 224<br />
9.3 Serving files through a controller 226<br />
Protecting files 227 ■ Showing your assets 228 ■ Public<br />
assets 230 ■ Privatizing assets 230<br />
9.4 Using JavaScript 231<br />
JavaScript testing 232 ■ Introducing jQuery 233 ■ Adding<br />
more files with JavaScript 234 ■ Responding to an asynchronous<br />
request 235 ■ Sending parameters for an asynchronous<br />
request 237<br />
9.5 Summary 241<br />
Tracking state 243<br />
10.1 Leaving a comment 244<br />
Where’s the ticket? 245 ■ The comment form 247<br />
The comment model 247 ■ The comments controller 249<br />
10.2 Changing a ticket’s state 252<br />
Creating the State model 253 ■ Selecting states 255<br />
Callbacks 257 ■ Seeding states 259 ■ Fixing creating<br />
comments 261
11<br />
12<br />
10.3 Tracking changes 263<br />
CONTENTS xi<br />
Ch-ch-changes 263 ■ Another c-c-callback 264 ■ Displaying<br />
changes 265 ■ Show me the page 266 ■ Automatic escaping<br />
saves your bacon 267 ■ Styling states 268<br />
10.4 Managing states 269<br />
Adding additional states 270 ■ Defining a default state 273<br />
10.5 Locking down states 278<br />
Hiding a select box 278 ■ Bestowing changing state<br />
permissions 280 ■ Hacking a form 282 ■ Ignoring a<br />
parameter 283<br />
10.6 Summary 285<br />
Tagging 286<br />
11.1 Creating tags 287<br />
Creating tags feature 287 ■ Using text_field_tag 288<br />
Showing tags 288 ■ Defining the tags association 289<br />
The Tag model 289 ■ Displaying a ticket’s tags 290<br />
11.2 Adding more tags 292<br />
Adding tags through a comment 292 ■ Fixing the<br />
CommentsController spec 294<br />
11.3 Tag restriction 295<br />
Testing tag restriction 295<br />
Tags are allowed, for some 296<br />
11.4 Deleting a tag 297<br />
Testing tag deletion 298 ■ Adding a link to delete the<br />
tag 299 ■ Actually removing a tag 302<br />
11.5 Finding tags 303<br />
Testing search 303 ■ Searching by state with<br />
Searcher 305 ■ Searching by state 307 ■ Search, but<br />
without the search 309<br />
11.6 Summary 310<br />
Sending email 312<br />
12.1 Sending ticket notifications 313<br />
Automatically watching a ticket 314 ■ Using observers 315<br />
Defining the watchers association 316 ■ Introducing Action<br />
Mailer 318 ■ An Action Mailer template 320 ■ Delivering<br />
HTML emails 322
xii<br />
13<br />
14<br />
CONTENTS<br />
12.2 Subscribing to updates 325<br />
Testing comment subscription 325 ■ Automatically adding a user<br />
to a watchlist 327 ■ Unsubscribing from ticket notifications 328<br />
12.3 Real-world email 333<br />
Testing real-world email 334 ■ Configuring Action Mailer 336<br />
Connecting to Gmail 337<br />
12.4 Receiving emails 340<br />
Setting a reply-to address 340 ■ Receiving a reply 342<br />
12.5 Summary 345<br />
Designing an API 347<br />
13.1 The projects API 349<br />
Your first API 351 ■ Serving an API 354 ■ API<br />
authentication 355 ■ Error reporting 356 ■ Serving<br />
XML 358 ■ Creating projects 360 ■ Restricting access to only<br />
admins 362 ■ A single project 365 ■ No project for you! 368<br />
Updating a project 370 ■ Exterminate! 372<br />
13.2 Beginning the tickets API 374<br />
13.3 Rate limiting 377<br />
One request, two request, three request, four 377 ■ No more,<br />
thanks! 379 ■ Back to zero 380<br />
13.4 Versioning an API 381<br />
Creating a new version 381<br />
13.5 Summary 384<br />
Deployment 385<br />
14.1 Server setup 386<br />
Setting up a server using VirtualBox 386 ■ Installing the<br />
base 388<br />
14.2 RVM and Ruby 389<br />
Installing RVM 389 ■ Installing Ruby 390<br />
14.3 Creating a user for the app 391<br />
Key-based authentication 391 ■ Disabling password<br />
authentication 393<br />
14.4 The database server 394<br />
Creating a database and user 394 ■ Ident authentication 395
15<br />
16<br />
17<br />
14.5 Deploy away! 395<br />
CONTENTS xiii<br />
Deploy keys 396 ■ Configuring Capistrano 397 ■ Setting up<br />
the deploy environment 400 ■ Deploying the application 401<br />
Bundling gems 403 ■ Choosing a database 405<br />
14.6 Serving requests 407<br />
Installing Passenger 408 ■ An init script 410<br />
14.7 Summary 410<br />
Alternative authentication 412<br />
15.1 How OAuth works 413<br />
15.2 Twitter authentication 415<br />
Setting up OmniAuth 415 ■ Registering an application with<br />
Twitter 416 ■ Setting up an OmniAuth testing<br />
environment 417 ■ Testing Twitter sign-in 419<br />
15.3 GitHub authentication 425<br />
Registering and testing GitHub auth 425<br />
15.4 Summary 433<br />
Basic performance enhancements 434<br />
16.1 Pagination 435<br />
Introducing Kaminari 436 ■ Paginating an interface 437<br />
Paginating an API 443<br />
16.2 Database query enhancements 444<br />
Eager loading 445 ■ Database indexes 446<br />
16.3 Page and action caching 448<br />
Caching a page 448 ■ Caching an action 451 ■ Cache<br />
sweepers 454 ■ Client-side caching 457 ■ Caching page<br />
fragments 460<br />
16.4 Background workers 462<br />
16.5 Summary 466<br />
Engines 468<br />
17.1 A brief history of engines 469<br />
17.2 Why engines are useful 470<br />
17.3 Brand-new engine 471<br />
Creating an engine 471 ■ The layout of an engine 472<br />
Engine routing 476
xiv<br />
18<br />
CONTENTS<br />
17.4 Setting up a testing environment 478<br />
Removing Test::Unit 479 ■ Installing RSpec and<br />
Capybara 481<br />
17.5 Writing your first engine feature 482<br />
Your first Capybara test 483 ■ Setting up routes 484 ■ The<br />
topics controller 485 ■ The index action 485 ■ The new<br />
action 488 ■ The create action 489 ■ The show action 490<br />
Showing an association count 492<br />
17.6 Adding more posts to topics 493<br />
17.7 Classes outside your control 497<br />
Engine configuration 497 ■ A fake User model 500<br />
Authenticating topics 501 ■ Adding authorship to topics 505<br />
Post authentication 506 ■ Showing the last post 509<br />
17.8 Releasing as a gem 512<br />
17.9 Integrating with an application 513<br />
17.10 Summary 514<br />
Rack-based applications 516<br />
18.1 Building Rack applications 517<br />
A basic Rack application 518<br />
18.2 Building bigger Rack applications 522<br />
You’re breaking up 522 ■ Running a combined Rack<br />
application 524<br />
18.3 Mounting a Rack application with Rails 525<br />
Mounting Heartbeat 526 ■ Introducing Sinatra 527<br />
The API, by Sinatra 528 ■ Basic error checking 532<br />
18.4 Middleware 533<br />
Middleware in Rails 534 ■ Investigating<br />
ActionDispatch::Static 536 ■ Crafting middleware 538<br />
18.5 Summary 540<br />
appendix A Why Rails? 541<br />
appendix B Tidbits 546<br />
index 551
xv<br />
preface<br />
This book has been through quite the development process! It began in 2008 with<br />
Michael Ivey, Yehuda Katz, and Ezra Zygmuntowicz and was called Merb in Action. Since<br />
then it has changed name and hands a couple of times, winding up with people such as<br />
James Cox and the great Mike Gunderloy, the latter of whom is probably most famous<br />
for his work on Factsheet Five and many .NET books, not to mention being one of the<br />
founding members of the RailsBridge (http://railsbridge.org) organization.<br />
Then, somehow, I became involved with this book.<br />
I received an email on a cold April morning in 2010 from Christina Rudloff at<br />
Manning asking if I would have any interest in joining the project. I was exceptionally<br />
excited! I had been writing short blog posts about Rails for years, and the idea of<br />
focusing that effort into writing a book made me extremely happy. Long story short:<br />
Yehuda Katz liked what he saw on my blog and wanted me to join the project. Working<br />
with Yehuda has been brilliant. He’s got to be one of the smartest and most patient<br />
people I have ever met.<br />
Shortly after receiving that initial email from Christina, I talked with another person<br />
from Manning, Michael Stephens, first via email and then very late at night over<br />
the phone (we are on different continents) about the project. I worked out the initial<br />
chapter layout, and I distinctly remember one thing that Michael asked me: “You<br />
know what you’re getting yourself into, right?” I thought “Sure, I’ve written blog posts<br />
before, how hard could it be?” and replied in much the same manner. How little did<br />
I know!<br />
Since then, I have learned a lot about the book-writing process. For starters, it<br />
involves a lot more than just the two people and the publishing company on the front
xvi<br />
PREFACE<br />
cover. It also takes a very long time to write a book. This book has been my life for the<br />
past year and a bit. I’ve spent many weekends, mornings before work, and evenings<br />
after work (and way too often, time even in my dreams) writing chapters for this book.<br />
I’ve talked about it (perhaps too much) as well. It’s become such a running joke<br />
among people I know that when I’m introduced, they ask, “Do you know he’s writing a<br />
book?”<br />
Writing is sometimes easy, but other times it can be a struggle to come up with anything<br />
at all. There have been bad days, sure, but the good days outnumber those massively.<br />
The feeling of achievement you get when you finish a chapter, or even a section,<br />
is awesome. Receiving positive feedback from people has been a huge boon to completing<br />
this book.<br />
Now, in 2011, the book is finally done, and what an amazing feeling that is! I’d like<br />
to think that it offers a unique perspective on developing a full Ruby on Rails application<br />
from scratch in the same (or at least, similar) manner that people are developing<br />
Rails applications at this time. It’s also the first book to cover the latest features of<br />
Rails found in version 3.1.<br />
RYAN BIGG
xvii<br />
acknowledgments<br />
This has been an amazing process, full of amazing people. A large portion of this<br />
book would not have been possible without the support of my employer, Mikel Lindsaar,<br />
and company, RubyX, allowing me to take time off to write the book. The support<br />
of the community at large has also been enormous in helping me complete this<br />
book. Winning the Ruby Hero award at RailsConf, partially due to my work on this<br />
very book, was the highlight of my career so far. After I won the award, Mikel also provided<br />
me with a new laptop at no expense to replace my previous one that was three<br />
years old. Bloody champion!<br />
Of course, a lot of this wouldn’t have been as easy if it wasn’t for the Rails Core<br />
Team’s valiant efforts on their maintenance of the framework over the years and their<br />
constant focus on improving people’s lives on an almost daily basis. Also there are<br />
Yehuda Katz, Carl Lerche, and André Arko to thank for their work on an important<br />
part of developing not only Rails applications, but also Ruby libraries such as Bundler<br />
and Thor. These people are my idols, and I love them dearly.<br />
Through a Rails-based review system called Twist that I built myself over a single<br />
day, I’ve collected more than 1,200 notes from people from around the world who<br />
have been reviewing the book as I have been writing it. A special mention goes to the<br />
three people who’ve left the most notes in Twist: Roy Hacker, Deryl Doucette, and<br />
Peter Ley. An almost-as-special mention goes to the 33 other people who’ve also left<br />
notes. Without your help, this book wouldn’t be half as brilliant as it is today.<br />
Also thanks to Tim McEwan for the ideas for the engines chapter, Chris Darroch<br />
for an initial read-through of the first chapters, and Rob Zolkos for helping with some
xviii<br />
ACKNOWLEDGMENTS<br />
gnarly ePub Ruby and XLST code. And yes, thanks to Andrew Snow for assisting with a<br />
difficult moral problem in chapter 16 at Railscamp in June 2011.<br />
In addition to those who’ve been leaving notes in Twist, there are the people at<br />
Manning. First, thanks to Christina Rudloff for the initial contact and Michael Stephens<br />
for the late-night chats and management of the process. Candace Gillhooley<br />
and Nick Chase have also been enormously helpful.<br />
Cynthia Kane, my development editor at Manning, is particularly special. Her job<br />
was to tell me when I was doing things wrong, such as not segueing between sections<br />
or making the text flow too fast, and to leave me notes such as “FIGURE!!!” when I<br />
needed an image to go along with the text. Our almost weekly catch-ups were well<br />
worthwhile; it was great always having someone there, prodding me for more content<br />
and talking through the process. Marjan Bace, fearless leader of Manning Publications,<br />
should also be credited for supporting this project for as long as it has been<br />
around.<br />
The production team at Manning, including Troy Mott, has been great throughout<br />
this process too. The extreme focus they’ve shown in finishing this book is stunning. I<br />
also need to mention the wonderful work by Doug Warren in the final technical<br />
proofing of the book, as well as Manning’s copyeditors, who touched up basically<br />
every single paragraph in the book.<br />
Special thanks to the reviewers who took time out of their busy schedules to provide<br />
feedback on the manuscript at different stages during development. They<br />
include Jason Rogers, Craig Smith, Emmanuel Asante, Chad Moone, Dr. Jamie P. Finlay,<br />
Dave Nicolette, Grant Oladipo, Jean-Philippe Castro, Americo Savinon, Thomas<br />
Athanas, Chris Kelly, Greg Vaughn, Pete Helgren, Joshua R Cronemeyer, Peter Melo,<br />
Robby O’Connor, Philip Hallstrom, Curtis Miller, Patrick Peak, Anthony J. Topper,<br />
Brian Rose, Daniel Bretoi, Wesley Moxam, Jon Agnes, and David Workman<br />
Finally, my friends and family have been amazing throughout my entire life, all the<br />
way from my parents—who supported my career choice in Ruby on Rails and technical<br />
writing, even though they paid for me to study Network Admin at TAFE and always<br />
told me that I should “get out the house more”—to my current housemate, who<br />
accepts that we don’t see much of each other (or at least I think so). You’re all wonderful<br />
people, and I hope now that the book is over I will see more of you. I would list<br />
you all here if only it didn’t require this book to be printed in a multivolume series.<br />
RYAN BIGG<br />
Rails 3 in Action is a long-time coming. To give you some perspective, the book was<br />
originally called Merb in Action, and it managed a perpetual beta through the Merb<br />
merge, the release of Rails 3.0, and is finally ready just in time for Rails 3.1.<br />
I can say with confidence that Rails 3 in Action would not exist without the hard,<br />
tireless work of Ryan Bigg. It was Ryan’s idea to focus the book around real-world testing<br />
from the ground up, and it makes Rails 3 in Action the first book for Rails practitioners<br />
that teaches Rails the way professional Rails developers do it.
ACKNOWLEDGMENTS xix<br />
Since we merged Merb with Rails, I have had the benefit of not insignificant support<br />
from friends and family, who helped keep me on course in the long process that<br />
eventually delivered Rails 3.0. I want to especially call out Aaron Patterson, José Valim,<br />
Santiago Pastorino, and Xavier Noria, who stepped up and brought life back to a community<br />
that was starting to show signs of age by the time Rails 2.3 hit the shelves. And<br />
Carl Lerche, who helped me keep focus on doing things right, even when it was<br />
tempting not to.<br />
Finally, I would be remiss if I didn't thank my wife, Leah, who has been there for<br />
me through the amazing trajectory of my development career, through good times<br />
and bad. Without her, I would have given up long ago.<br />
YEHUDA KATZ
xx<br />
about this book<br />
Ruby on Rails is a leading web application framework built on top of the fantastic<br />
Ruby programming language. Both the language and the framework place an<br />
extreme emphasis on having a principle of least surprise and getting out of the way of<br />
the developers using it.<br />
Ruby on Rails has been growing at a rapid pace, with large internet companies<br />
such as Yellow Pages and Groupon using it for their core functionality. With the latest<br />
release of Rails, version 3.1, comes a set of changes that improve the already brilliant<br />
framework that has been constructed over the past seven years. The fantastic community<br />
around the framework has also been growing at a similar pace.<br />
This book is designed to take you through developing a full-featured Rails application<br />
from step one, showing you exactly how professionals in the real world are developing<br />
applications right now.<br />
Who should read this book<br />
This book is primarily for those who are looking to begin working with the Ruby on<br />
Rails framework and who have some prior experience with Ruby, although that is not<br />
entirely necessary.<br />
Later chapters, such as chapter 13, “Designing an API,” chapter 17, “Engines,” and<br />
chapter 18, “Rack-based applications,” delve into more advanced topics, so these chapters<br />
are suitable for people who already have a foundation with Rails and are looking<br />
to expand their skillset a little further.<br />
If you’re looking for a book that teaches you the same practices that are used in<br />
the real world, then this is the book you are looking for.
Roadmap<br />
ABOUT THIS BOOK xxi<br />
Chapter 1 introduces the Ruby on Rails framework and begins to show how you can<br />
develop the beginnings of an application.<br />
Chapter 2 shows off test-driven development and behavior-driven development,<br />
which are two core concepts in this book and for developing Rails applications. By<br />
testing the code you write, you can be assured that it’s always working that way.<br />
Chapters 3 and 4 discuss the application you develop in this book—a project-management<br />
app of sorts—and delve into the core concepts of a Rails application. They<br />
also look at developing the first core features of your application.<br />
Chapter 5 begins an introduction to nested resources, building on top of the features<br />
developed in the previous two chapters.<br />
Chapter 6 introduces authentication, requiring users to sign in to the application<br />
before they can perform certain tasks.<br />
Chapter 7 builds on the work in chapter 6 by adding new areas of the application<br />
that are accessible only to users with a certain flag set in the database. You also use<br />
namespaces for the first time.<br />
Chapter 8 builds on the basic authorization created in chapter 7, fleshing it out<br />
into something neater and more scalable.<br />
In chapter 9, you learn about file uploading using the Paperclip gem. In this chapter<br />
you also learn about testing parts of your application that use JavaScript and about<br />
CoffeeScript, a neater language that compiles down to JavaScript.<br />
Chapter 10 builds not one but two new features for the application, adding the<br />
ability to comment on a ticket as well as track the ticket’s lifecycle through varying<br />
states.<br />
In chapter 11, you add a feature that lets users assign tags to tickets so they can be<br />
easily grouped. You also add a feature to allow users to search for tickets matching a<br />
certain state or tag, or both.<br />
Chapter 12 begins our foray into dealing with email in a Rails application. You’ll<br />
see not only how to send email but also how to receive messages and parse them into<br />
meaningful data in your application.<br />
Chapter 13 involves creating an API for the project resources in an application<br />
that provide other applications with a standardized way to access your application’s<br />
data. We also look at token-based authentication and how to create multiple versions<br />
of an API.<br />
In chapter 14, you deploy the application to an Ubuntu box and set it up to act like<br />
a normal web server using a RubyGem called Passenger and a web server called nginx.<br />
In chapter 15, you create a “nice to have” feature: the ability to sign up or sign in<br />
using either Twitter or GitHub. When this is complete, people are no longer required<br />
to provide you with an email and password when they sign up; instead, they can use<br />
GitHub and Twitter as authentication providers.
xxii<br />
ABOUT THIS BOOK<br />
By chapter 16, your application is all grown up and needs to handle any kind of<br />
performance issues it encounters. We cover basic performance enhancements, such<br />
as pagination, database indexing, and page and fragment caching.<br />
Chapter 17 introduces a new feature for Rails 3: engines. You develop one of your<br />
own from scratch—a forum system—and then integrate it with the existing application.<br />
Chapter 18 delves into the depths of Rack, explaining how Rack applications are<br />
made and can be tied into Rails. The chapter also explains, and contains examples of,<br />
middleware being used in Rails.<br />
Code conventions and downloads<br />
Code conventions in the book follow the style of other Manning books in the In Action<br />
series. All code in listings and in text appears in a monospaced font like this to separate<br />
it from ordinary text. In some cases, the original source code has been reformatted<br />
to fit on the pages. In general, the original code was written with page-width<br />
limitations in mind, but sometimes you may find a slight formatting difference<br />
between the code in the book and that provided in the source download. In a few rare<br />
cases, where long lines could not be reformatted without changing their meaning, the<br />
book listings contain line-continuation markers. Code annotations accompany many<br />
of the listings, highlighting important concepts. In many cases, numbered bullets link<br />
to explanations that follow in the text.<br />
Source code for all the working examples in this book is available for download<br />
from the publisher’s website at www.manning.com/Rails3inAction.<br />
Author Online<br />
The purchase of Rails 3 in Action includes free access to a private forum run by Manning<br />
Publications where you can make comments about the book, ask technical questions,<br />
and receive help from the authors and other users. To access and subscribe to<br />
the forum, point your browser to www.manning.com/Rails3inAction, and click the<br />
Author Online link. This page provides information on how to get on the forum once<br />
you are registered, what kind of help is available, and the rules of conduct in the<br />
forum.<br />
Manning’s commitment to our readers is to provide a venue where a meaningful<br />
dialogue between individual readers and between readers and the authors can take<br />
place. It’s not a commitment to any specific amount of participation on the part of the<br />
authors, whose contribution to the book’s forum remains voluntary (and unpaid). We<br />
suggest you try asking the authors some challenging questions, lest their interest stray!<br />
The Author Online forum and the archives of previous discussions will be accessible<br />
from the publisher’s website as long as the book is in print.
xxiii<br />
about the authors<br />
RYAN BIGG has been developing Ruby on Rails since version 1.2 and can be found<br />
helping out the community by answering questions on IRC or StackOverflow or writing<br />
documentation. He currently works for a web consultancy based in Sydney called<br />
RubyX.<br />
YEHUDA KATZ is well known not only for his work on this third version of Ruby on<br />
Rails, but also for other web-related projects such as jQuery, Bundler, Merb, and<br />
SproutCore. He currently works for Strobe in San Francisco as a lead developer on<br />
SproutCore and is the coauthor of Manning’s jQuery in Action, Second Edition.
about the cover illustration<br />
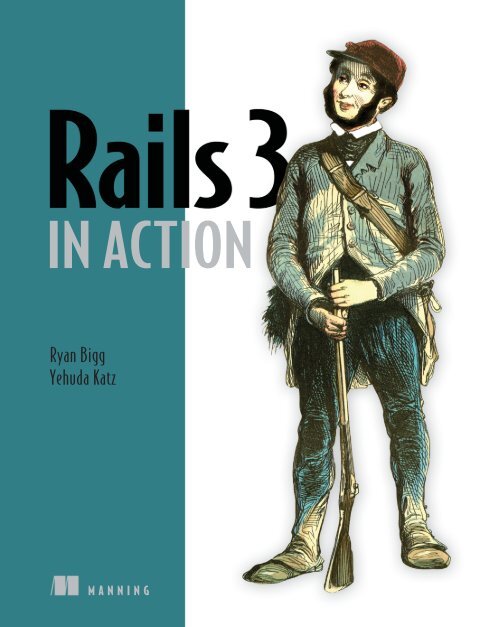
The figure on the cover of Rails 3 in Action is captioned “A Soldier.” The illustration is<br />
taken from a nineteenth-century edition of Sylvain Maréchal’s four-volume compendium<br />
of regional and military dress customs published in France. Each illustration is<br />
finely drawn and colored by hand. The rich variety of Maréchal’s collection reminds<br />
us vividly of how culturally apart the world’s towns and regions were just 200 years ago.<br />
Isolated from each other, people spoke different dialects and languages. In the streets<br />
or in the countryside, it was easy to identify where they lived and what their trade or<br />
station in life was just by their dress.<br />
Dress codes have changed since then and the diversity by region, so rich at the<br />
time, has faded away. It is now hard to tell apart the inhabitants of different continents,<br />
let alone different towns or regions. Perhaps we have traded cultural diversity<br />
for a more varied personal life—certainly for a more varied and fast-paced technological<br />
life.<br />
At a time when it is hard to tell one computer book from another, Manning celebrates<br />
the inventiveness and initiative of the computer business with book covers<br />
based on the rich diversity of regional life of two centuries ago, brought back to life by<br />
Maréchal’s pictures.<br />
xxiv
This chapter covers<br />
� Exploring Ruby on Rails<br />
� Building the foundations of a Ruby on Rails app<br />
� Working with the scaffold generator<br />
1<br />
Ruby on Rails,<br />
the framework<br />
Welcome aboard! It’s great to have you with us on this journey through the world of<br />
Ruby on Rails. Ruby on Rails is known throughout the lands as a powerful web<br />
framework that helps developers rapidly build modern web applications. In particular,<br />
it provides lots of niceties to help you in your quest to develop a full-featured<br />
real-world application and be happy doing it. Great developers are happy developers.<br />
There’s much more to the Rails world than might appear at first glance, but<br />
not overwhelmingly too much. And what a first glance! Oh, you two haven’t met?<br />
Well, time for some introductions then!
2 CHAPTER 1 Ruby on Rails, the framework<br />
1.1 What is Ruby on Rails?<br />
Ruby on Rails is a framework built on the Ruby language, hence the name Ruby on<br />
Rails. The Ruby language was created back in 1993 by Yukihiro “Matz” Matsumuto of<br />
Japan. Ruby was released to the general public in 1995. Since then, it has earned both<br />
a reputation and an enthusiastic following for its clean design, elegant syntax, and<br />
wide selection of tools available in the standard library and via a package management<br />
system called RubyGems. It also has a worldwide community and many active contributors<br />
constantly improving the language and the ecosystem around it.<br />
Ruby on Rails was created in 2004 by David Heinemeier Hansson during the development<br />
of 37signals’ flagship product: Basecamp. When Rails was needed for other<br />
37signals projects, the team extracted the Rails code from it, crafted the beginnings of<br />
the framework, and released it as open source under the MIT license. 1 Since then,<br />
Ruby on Rails has quickly progressed to become one of the leading web development<br />
frameworks. This is in no small part due to the large community surrounding it who<br />
are constantly working on submitting patches to add new features or to fix existing<br />
bugs. Version 3 of this framework indicates yet another significant milestone in the<br />
project’s history and introduces some new concepts, but won’t leave those already<br />
familiar with the framework in the dark. The latest version of Rails is the primary<br />
focus of this book.<br />
1.1.1 Benefits<br />
Ruby on Rails allows for rapid development of applications by using a concept known<br />
as convention over configuration. When you begin writing a Ruby on Rails application,<br />
you run an application generator, which creates a basic skeleton of directories and<br />
files for your application. These files and directories provide categorization for pieces<br />
of your code, such as the app/models directory for containing files that interact with<br />
the database and the public/images directory for images. Because all of this is already<br />
there for you, you won’t be spending your time configuring the way your application is<br />
laid out. It’s done for you.<br />
How rapidly can you develop a Ruby on Rails application? Take the annual Rails<br />
Rumble event. This event aims to bring together small teams of one to four developers<br />
around the world to develop Ruby on Rails 2 applications in a 48-hour period. Using<br />
Rails, these teams can deliver amazing web applications in just two days. 3 Another<br />
great example of rapid development of a Rails application is the 20-minute blog<br />
screencast recorded by Yehuda Katz. 4 This screencast takes you from a no-application<br />
state to having a basic blogging and commenting system.<br />
Ruby on Rails affords you a level of productivity unheard of in other web frameworks<br />
because every Ruby on Rails application starts out the same way. The similarity<br />
1 The MIT license: http://en.wikipedia.org/wiki/MIT_License.<br />
2 And now other Ruby-based web frameworks, such as Sinatra.<br />
3 To see an example of what has come out of previous Rails Rumbles, take a look at their alumni archive:<br />
http://r09.railsrumble.com/entries.<br />
4 20-minute blog screencast: http://vimeo.com/10732081.
What is Ruby on Rails?<br />
between the applications is so close that the paradigm shift between different Rails<br />
applications is not tremendous. If and when you jump between Rails applications, you<br />
don’t have to relearn how it all connects—it’s mostly the same.<br />
The core features of Rails are a conglomerate of many different parts called Railties<br />
(when said aloud it rhymes with “bowties”), such as Active Record, Active Support,<br />
Action Mailer, and Action Pack. 5 These different Railties provide a wide range of methods<br />
and classes that help you develop your applications. They prevent you from performing<br />
boring, repetitive tasks—such as coding how your application hooks into<br />
your database—and let you get right down to writing valuable code for your business.<br />
Ever wished for a built-in way of writing automated tests for your web application?<br />
Ruby on Rails has you covered with Test::Unit, part of Ruby’s standard library. It’s<br />
incredibly easy to write automated test code for your application, as you’ll see<br />
throughout this book. Test::Unit saves your bacon in the long term, and that’s a fantastic<br />
thing. We touch on Test::Unit in the next chapter before moving on to RSpec and<br />
Cucumber, two other test frameworks that are preferred over Test::Unit and a little<br />
easier on the eyes too.<br />
In addition to testing frameworks, the Ruby community has produced several highquality<br />
libraries (called RubyGems, or gems for short) for use in your day-to-day development<br />
with Ruby on Rails. Some of these libraries add additional functionality to<br />
Ruby on Rails; others provide ways to turn alternative markup languages such as Markdown<br />
and Textile into HTML. Usually, if you can think it, there’s a gem out there that<br />
will help you do it.<br />
Noticing a common pattern yet? Probably. As you can see, Ruby on Rails (and the<br />
great community surrounding it) provides code that performs the trivial application<br />
tasks for you, from setting up the foundations of your application to handling the<br />
delivery of email. The time you save with all these libraries is immense! And because<br />
the code is open source, you don’t have to go to a specific vendor to get support. Anybody<br />
who knows Ruby can help you if you’re stuck.<br />
1.1.2 Common terms<br />
You’ll hear a few common Ruby on Rails terms quite often. This section explains what<br />
they mean and how they relate to a Rails application.<br />
MVC<br />
The Model-View-Controller (MVC) paradigm is not unique to Ruby on Rails but provides<br />
much of the core foundation for a Ruby on Rails application. This paradigm is<br />
designed to keep the logically different parts of the application separate while providing<br />
a way for data to flow between them.<br />
In applications that don’t use MVC, the directory structure and how the different<br />
parts connect to each other is commonly left up to the original developer. Generally,<br />
5 Railties share the same version number as Rails, which means when you’re using Rails 3.1, you’re using the<br />
3.1 version of the Railtie. This is helpful to know when you upgrade Rails because the version number of the<br />
installed Railties should be the same as the version number of Rails.<br />
3
4 CHAPTER 1 Ruby on Rails, the framework<br />
this is a bad idea because different people have different opinions on where things<br />
should go. In Rails, a specific directory structure makes all developers conform to the<br />
same layout, putting all the major parts of the application inside an app directory.<br />
This app directory has three main subdirectories: models, controllers, and views.<br />
Domain logic—how the records in your database are retrieved—is kept in models.<br />
In Rails applications, models define the code that interacts with the database’s tables<br />
to retrieve and set information in them. Domain logic also means things such as validations<br />
or particular actions to perform on the data.<br />
Controllers interact with the models to gather information to send to the view.<br />
They call methods on the model classes, which can return single objects representing<br />
rows in the database or collections (arrays) of these objects. Controllers then make<br />
these objects available to the view through instance variables.<br />
Views display the information gathered by the controller, by referencing the<br />
instance variables set there, in a user-friendly manner. In Ruby on Rails, this display is<br />
done by default with a templating language known as Embedded Ruby (ERB). ERB<br />
allows you to embed Ruby (hence the name) into any kind of file you wish. This template<br />
is then preprocessed on the server side into the output that’s shown to the user.<br />
The assets, helpers, and mailers directories aren’t part of the MVC paradigm, but<br />
they are important parts of Rails. The assets directory is for the static assets of the<br />
application, such as JavaScript files, images, and Cascading Style Sheets (CSS) for making<br />
the application look pretty. We look more closely at this in chapter 3.<br />
The helpers directory is a place to put Ruby code (specifically, modules) that provides<br />
helper methods for just the views. These helper methods can help with complex<br />
formatting that would otherwise be messy in the view or is used in more than one place.<br />
Finally, mailers is a home for the classes of your application that deal with sending<br />
email. In previous versions of Rails, these classes were grouped with models but have<br />
since been given their own home. We look at them in chapter 11.<br />
REST<br />
MVC in Rails is aided by REST, a routing paradigm. Representational State Transfer<br />
(REST) is the convention for routing in Rails. When something adheres to this convention,<br />
it’s said to be RESTful. Routing in Rails refers to how requests are routed within<br />
the application itself. You benefit greatly by adhering to these conventions, because<br />
Rails provides a lot of functionality around RESTful routing, such as determining<br />
where a form can, or will, send to.<br />
1.1.3 Rails in the wild<br />
A question sometimes asked by people new to Rails is, “Is Rails ready?” Of course it is!<br />
The evidence is stacked mightily in Rails’ favor with websites such as Twitter, Yellow<br />
Pages, and of course Basecamp, serving millions and millions of page requests daily. 6<br />
6 Some of the more well-known applications that run on Ruby on Rails can be found at http://rubyonrails.org<br />
/applications.
Developing your first application<br />
If any site is a testament to the power of Ruby on Rails, Twitter is it. Even though<br />
Twitter suffered from scaling problems back in 2008 (due to its massive growth and<br />
other technological problems, not due to Rails), it is now the eleventh most popular<br />
website, according to Alexa, and is exceptionally stable.<br />
Another well-known site that runs Ruby on Rails is GitHub, a hosting service for<br />
Git repositories. This site was launched in February 2008 and is now the leading Git<br />
web-hosting site. GitHub’s massive growth was in part due to the Ruby on Rails community<br />
quickly adopting it as their de facto repository hosting site. Now GitHub is<br />
home to over a million repositories for just about every programming language on the<br />
planet. It’s not exclusive to programming languages either; if it can go in a Git repository,<br />
it can go on GitHub. As a matter of fact, this book and its source code are kept on<br />
GitHub!<br />
Now that you know what other people have accomplished with this framework,<br />
let’s dive into creating your own application.<br />
1.2 Developing your first application<br />
We covered the theory behind Rails and showed how quickly and easily you can<br />
develop an application. Now it’s your turn to get an application going.<br />
1.2.1 Installing Rails<br />
To get started, you must have these three things installed:<br />
� Ruby<br />
� RubyGems<br />
� Rails<br />
If you’re on a UNIX-based system (Linux or Mac), we recommend you use RVM<br />
(http://rvm.beginrescueend.com) to install Ruby and RubyGems. It is the preferred<br />
solution of the community because it works so simply. Installing from a package management<br />
system such as Ubuntu’s Aptitude has been known to be broken. 7 After<br />
installing RVM, you must run this command to install a 1.9.2 version of Ruby:<br />
rvm install 1.9.2<br />
To use this version of Ruby, you would need to use rvm use 1.9.2 every time you wished<br />
to use it or else set up a .rvmrc file in the root of your project, which is explained on the<br />
RVM site in great detail. Alternatively, you can set this version of Ruby as the default<br />
with the command rvm use --default 1.9.2, and use rvm use system if you ever want<br />
to swap back to the system-provided Ruby install if you have one.<br />
If you’re on Windows, you can’t use RVM and you can’t use a 1.9.* version of Ruby,<br />
but that’s okay. Rails 3 works with Ruby 1.8 versions of Rails too. We would recommend<br />
the use of the Rails Installer program (http://railsinstaller.org) from Engine<br />
Yard, or installing the Ruby 1.8.7-p352 binary from ruby-lang.org as an alternative.<br />
7 Broken Ubuntu Ruby explained here: http://ryanbigg.com/2010/12/ubuntu-ruby-rvm-rails-and-you/.<br />
5
6 CHAPTER 1 Ruby on Rails, the framework<br />
Next, you need to install the rails gem. The following command installs both<br />
Rails and its dependencies. If you’re using the Rails installer you will not need to run<br />
this command because Rails will already be installed:<br />
gem install rails -v 3.1.0<br />
1.2.2 Generating an application<br />
With Rails now installed, to generate an application, you run the rails command and<br />
pass it the new argument and the name of the application you want to generate:<br />
things_i_bought. When you run this command, it creates a new directory called<br />
things_i_bought, which is where all your application’s code will go. You can call your<br />
application anything you wish, but it can’t be given the same name as a reserved word<br />
in Rails. For example, you wouldn’t call your application rails because it defines a Rails<br />
constant, which is internal to Rails, and the two constants would clash.<br />
The application that you’re going to generate will be able to record purchases you<br />
have made. You can generate it using this command:<br />
rails new things_i_bought<br />
The output from this command may seem a bit overwhelming at first, but rest assured:<br />
it’s for your own good. All of the directories and files generated here provide the<br />
building blocks for your application, and you’ll get to know each of them as we progress.<br />
For now, let’s get rolling and learn by doing, which is the best way of learning.<br />
1.2.3 Starting the application<br />
To get the server running, you must first change into the newly created application’s<br />
directory and then run these commands to start the application server:<br />
cd things_i_bought<br />
bundle install<br />
rails server<br />
The bundle install command installs all the gems required for your application.<br />
This is explained in further detail in chapter 3.<br />
This starts a web server on your local address on port 3000 using a Ruby standard<br />
library web server known as WEBrick. It will say it’s “starting in development on<br />
http://0.0.0.0:3000,” which indicates to you that the server will be available on port<br />
3000 on all network interfaces of this machine. 8 To connect to this server, go to<br />
http://localhost:3000 in your favorite browser. You’ll see the “Welcome aboard”<br />
page, which is so famous in Rails (see figure 1.1).<br />
If you click About Your Application’s Environment, you’ll find your Ruby, Ruby-<br />
Gems, Ruby on Rails, and Rack versions and other environmental data. One of the<br />
things to note here is that the output for Environment is Development. Rails provides<br />
8 This is what the 0.0.0.0 address represents. It is not an actual address, so to speak, and so localhost or<br />
127.0.0.1 should be used.
Figure 1.1 Welcome aboard!<br />
Developing your first application<br />
three environments for running your application: development, test, and production.<br />
How your application functions can depend on the environment in which it is running.<br />
For example, in the development environment, classes are not cached; so if you<br />
make a change to a class when running an application in development mode, you<br />
don’t need to restart the server, but the same change in the production environment<br />
would require a restart.<br />
1.2.4 Scaffolding<br />
To get started with this Rails application, you generate a scaffold. Scaffolds in Rails provide<br />
a lot of basic functionality but are generally not used for full-scale development<br />
because you may want something more customized, in which case you’d build it yourself.<br />
But for this example of what Rails can do, let’s generate a scaffold by running this<br />
command:<br />
rails generate scaffold purchase name:string cost:float<br />
When you used the rails command earlier, it generated an entire Rails application.<br />
You can use this command inside of an application to generate a specific part of the<br />
application by passing the generate argument to the rails command, followed by<br />
what it is you want to generate.<br />
7
8 CHAPTER 1 Ruby on Rails, the framework<br />
The scaffold command generates a model, a controller, and views based on the<br />
name passed after scaffold in this command. These are the three important parts<br />
needed for your purchase tracking. The model provides a way to interact with a database.<br />
The controller interacts with the model to retrieve and format its information<br />
and defines different actions to perform on this data. The views display the information<br />
from the controller in a neat format.<br />
Everything after the name for the scaffold are the fields for the database table and<br />
the attributes for the objects of this scaffold. Here you tell Rails that the table for your<br />
purchase scaffold will contain name and cost fields, which are a string and a float. 9 To<br />
create this table, the scaffold generator generates what’s known as a migration. Let’s<br />
have a look at what migrations are.<br />
1.2.5 Migrations<br />
Migrations are used in Rails as a form of version control for the database, providing a<br />
way to implement incremental changes to the schema of the database. Each migration<br />
is timestamped right down to the second, which provides you (and anybody else developing<br />
the application with you) an accurate timeline of your database. When two<br />
developers are working on separate features of an application and both generate a<br />
new migration, this timestamp will stop them from clashing. Let’s open the only file in<br />
db/migrate now and see what it does. Its contents are shown in the following listing.<br />
Listing 1.1 db/migrate/[date]_create_purchases.rb<br />
class CreatePurchases < ActiveRecord::Migration<br />
def self.up<br />
create_table :purchases do |t|<br />
t.string :name<br />
t.float :cost<br />
t.timestamps<br />
end<br />
end<br />
def self.down<br />
drop_table :purchases<br />
end<br />
end<br />
Migrations are Ruby classes that inherit from ActiveRecord::Migration. Inside the<br />
class, two class methods are defined: up and down. Inside the up method is the code<br />
you want to be run when you run the migration, and inside the down method is the<br />
code that runs when you roll the migration back.<br />
Inside both of these methods you use database-agnostic commands to create and<br />
drop a table. In the up method, you create a table and specify the fields you want in<br />
9 Usually you wouldn’t use a float for storing monetary amounts because it can lead to incorrect-rounding<br />
errors. Generally, you store the amount in cents as an integer and then do the conversion back to a full dollar<br />
amount. This example uses a float because it’s easier to not have to define the conversion at this point.
Developing your first application<br />
that table by calling methods on the t block variable. The string and float methods<br />
create fields of those particular types on any Rails-compatible database system. 10 You<br />
specified these fields when you used the scaffold command. The timestamps<br />
method is special; it creates two fields called created_at and updated_at, which have<br />
their values set when records are created and updated automatically by Rails.<br />
To run the migration, type this command into the console:<br />
rake db:migrate<br />
This command run the self.up part of this migration. Because this is your first time<br />
running migrations in your Rails application, and because you’re using a SQLite3<br />
database, Rails first creates the database in a new file at db/development.sqlite3 and<br />
then creates the purchases table inside that. When you run rake db:migrate, it<br />
doesn’t just run the self.up method from the latest migration but runs any migration<br />
that hasn’t yet been run, allowing you to run multiple migrations sequentially.<br />
Your application is, by default, already set up to talk to this new database, so you<br />
don’t need to change anything. If you ever want to roll back this migration, you’d use<br />
rake db:rollback, which rolls back the latest migration by running the self.down<br />
method of the migration. 11<br />
Rails keeps track of the last migration that was run by storing it using this line in<br />
the db/schema.rb file:<br />
ActiveRecord::Schema.define(:version => [timestamp]) do<br />
This version should match the prefix of the migration you just created, 12 and Rails uses<br />
this value to know what migration it’s up to. The remaining content of this file shows<br />
the combined state of all the migrations to this point. This file can be used to restore<br />
the last-known state of your database if you run the rake db:schema:load command.<br />
With your database set up with a purchases table in it, let’s look at how you can<br />
add rows to it through your application<br />
1.2.6 Viewing and creating purchases<br />
Start your browser now and go to http://<br />
localhost:3000/purchases. You’ll see the<br />
scaffolded screen for purchases, as shown in<br />
figure 1.2. No purchases are listed yet, so<br />
let’s add a new purchase by clicking New<br />
Purchase.<br />
Figure 1.2 Purchases<br />
10 So far, MySQL, PostgreSQL, SQLite3, Oracle, Frontbase, and IBM DB.<br />
11 If you want to roll back more than one migration, use the rake db:rollback STEP=3 command, which rolls<br />
back the three most recent migrations.<br />
12 Where [timestamp] in this example is an actual timestamp formatted like YYYYmmddHHMMSS.<br />
9
10 CHAPTER 1 Ruby on Rails, the framework<br />
In figure 1.3, you see two inputs for the fields you generated. This page is the result<br />
of the new action from thePurchasesController controller. What you see on the page<br />
comes from the view located at app/views/purchases/new.html.erb, and it looks like<br />
the following listing.<br />
Listing 1.2 app/views/purchases/new.html.erb<br />
New purchase<br />
<br />
<br />
This is an ERB file, which allows you to mix HTML and<br />
Ruby code to generate dynamic pages. The beginning of<br />
an ERB tag indicates that the result of the code inside the<br />
tag will be output to the page. If you want the code to be<br />
evaluated but not output, you use the
Developing your first application<br />
This half is responsible for defining the form by using the form_for helper. The<br />
form_for method is passed one argument—an instance variable called @purchase—<br />
and with @purchase it generates a form. This variable comes from the Purchases-<br />
Controller’s new action, which is shown in the following listing.<br />
Listing 1.4 app/controllers/purchases_controller.rb<br />
def new<br />
@purchase = Purchase.new<br />
respond_to do |format|<br />
format.html # new.html.erb<br />
format.xml { render :xml => @purchase }<br />
end<br />
end<br />
The first line in this action sets up a new @purchase variable by calling the new method<br />
on the Product model, which initializes a new object of this model. The variable is<br />
then automatically passed through to the view by Rails.<br />
Next in the controller is the respond_to method that defines what formats this<br />
action responds to. Here, the controller responds to the html and xml formats. The<br />
html method here isn’t given a block and so will render the template from app/views/<br />
purchases/new.html.erb, whereas the xml method, which is given a block, will execute<br />
the code inside the block and return an XML version of the @purchase object. You’ll<br />
be looking at what the html response does from here forward because that is the<br />
default format requested.<br />
So far, all of this functionality is provided by Rails. You’ve coded nothing yourself.<br />
With the scaffold generator, you get an awful lot for free.<br />
Going back to the view, the block for the form_for is defined between its do and<br />
the %> at the end of the file. Inside this block, you check the @purchase object for any<br />
errors by using the @purchase.errors.any? method. These errors will come from the<br />
model if the object did not pass the validation requirements set in the model. If any<br />
errors exist, they’re rendered by the content inside this if statement. Validation is a<br />
concept covered shortly.<br />
The second half of this partial looks like the following listing.<br />
Listing 1.5 Second half of app/views/purchases/_form.html.erb<br />
<br />
<br />
<br />
<br />
<br />
<br />
<br />
<br />
<br />
<br />
<br />
<br />
11
12 CHAPTER 1 Ruby on Rails, the framework<br />
Here, the f object from the form_for block is used to define<br />
labels and fields for your form. At the end of this partial, the<br />
submit method provides a dynamic submit button.<br />
Let’s fill in this form now and click the submit button. You<br />
should see something similar to figure 1.4.<br />
What you see here is the result of your posting: a successful<br />
creation of a Purchase. Let’s see how it got there. The submit<br />
button posts the data from the form to the create action, which looks like the following<br />
listing.<br />
Listing 1.6 app/controllers/purchases_controller.rb<br />
def create<br />
@purchase = Purchase.new(params[:purchase])<br />
respond_to do |format|<br />
if @purchase.save<br />
format.html { redirect_to(@purchase, :notice => 'Purchase was successfu<br />
lly created.') }<br />
format.xml { render :xml => @purchase, :status => :created, :location<br />
=> @purchase }<br />
else<br />
format.html { render :action => "new" }<br />
format.xml { render :xml => @purchase.errors, :status => :unprocessabl<br />
e_entity }<br />
end<br />
end<br />
end<br />
Here, you use the Purchase.new you first saw used in the new action. But this time you<br />
pass it an argument of params[:purchase]. params (short for parameters) is a method<br />
that returns the parameters sent from your form in a Hash-like object. When you pass<br />
this params hash into new, Rails sets the attributes 13 to the values from the form.<br />
Inside the respond_to is an if statement that calls @purchase.save. This method<br />
validates the record, and if it’s valid, the method saves the record to the database and<br />
returns true.<br />
If the return value is true, the action responds by redirecting to the new<br />
@purchase object using the redirect_to method, which takes either a path or an<br />
object that it turns into a path (as seen in this example). The redirect_to method<br />
interprets what the @purchase object is and determines that the path required is<br />
purchase_path because it’s an object of the Purchase model. This path takes you to<br />
the show action for this controller. The :notice option passed to the redirect_to sets<br />
up a flash message. A flash message is a message that can be displayed on the next<br />
request.<br />
You’ve seen what happens when the purchase is valid, but what happens when it’s<br />
invalid? Well, it uses the render method to show the new action’s template again. We<br />
13 The Rails word for fields.<br />
Figure 1.4<br />
Your first purchase
Developing your first application<br />
should note here that this doesn’t call the new action/method again 14 but only renders<br />
the template.<br />
You can make the creation of the @purchase object fail by adding a validation.<br />
Let’s do that now.<br />
1.2.7 Validations<br />
You can add validations to your model to ensure that the data conforms to certain<br />
rules or that data for a certain field must be present or that a number you enter must<br />
be above a certain other number. You’re going to write your first code for this application<br />
and implement both of these things now.<br />
Open up your Purchase model and change the whole file to what’s shown in the<br />
following listing.<br />
Listing 1.7 app/models/purchase.rb<br />
class Purchase < ActiveRecord::Base<br />
validates_presence_of :name<br />
validates_numericality_of :cost, :greater_than => 0<br />
end<br />
You use the validates_presence_of method to define a validation that does what it<br />
says on the box: validates that the field has a value. The other validation method,<br />
validates_numericality_of, does more than what it initially claims: it validates that<br />
the cost attribute is a number and that it is greater than 0.<br />
Let’s test out these validations by going back to http://localhost:3000/purchases,<br />
clicking New Purchase, and clicking Create Purchase. You should see the errors shown<br />
in figure 1.5.<br />
Figure 1.5<br />
Errors on purchase<br />
14 To do that, you call redirect_to new_purchase_path, but that wouldn’t persist the state of the<br />
@purchase object to this new request without some seriously bad hackery. By rerendering the template, you<br />
can display information about the object if the object is invalid.<br />
13
14 CHAPTER 1 Ruby on Rails, the framework<br />
Great! Here, you’re told that Name can’t be blank and that the value you entered for<br />
Cost isn’t a number. Let’s see what happens if you enter foo for the Name field and<br />
-100 for the Cost field, and click Create Purchase. You should get a different error for<br />
the Cost field now, as shown in figure 1.6.<br />
Good to see! Both of your validations are working now. When you change Cost to<br />
100 and click Create Purchase, it should be considered valid by the validations and<br />
take you to the show action. Let’s look at what this particular action does now.<br />
1.2.8 Showing off<br />
This action displays the content such as shown in figure 1.7.<br />
The number at the end of the URL is the unique numerical ID for this purchase. But<br />
what does it mean? Let’s look at the view for this show action now, as shown in the following<br />
listing.<br />
Listing 1.8 app/views/purchases/show.html.erb<br />
<br />
<br />
Name:<br />
<br />
<br />
<br />
Cost:<br />
Figure 1.7 A single purchase<br />
Figure 1.6 Cost must<br />
be greater than 0
<br />
Developing your first application<br />
|<br />
<br />
On the first line is the notice method, which displays the notice set on the<br />
redirect_to from the create action. After that, field values are displayed in p tags by<br />
simply calling them as methods on your @purchase object. This object is defined in<br />
your PurchasesController’s show action, as shown in the following listing.<br />
def show<br />
@purchase = Purchase.find(params[:id])<br />
...<br />
end<br />
The find method of the Purchase class is used to find the record with the ID of<br />
params[:id] and instantiate a new Purchase object from it with params[:id] as the<br />
number on the end of the URL.<br />
Going back to the view (app/views/purchases/show.html.erb) now, at the end of<br />
this file you see link_to, which generates a link using the first argument as the text<br />
for it and the second argument as the href for that URL. The second argument for<br />
link_to is a method itself: edit_purchase_path. This method is provided by a<br />
method call in config/routes.rb, which we now look at.<br />
1.2.9 Routing<br />
Listing 1.9 app/controllers/purchases_controller.rb<br />
The config/routes.rb file of every Rails application is where the application routes are<br />
defined in a succinct Ruby syntax. The methods used in this file define the pathways<br />
from requests to controllers. If you look in your config/routes.rb while ignoring the<br />
commented-out lines for now, you’ll see what’s shown in the following listing.<br />
Listing 1.10 config/routes.rb<br />
ThingsIBought::Application.routes.draw do<br />
resources :purchases<br />
end<br />
Inside the block for the draw method is the resources method. Collections of similar<br />
objects in Rails are referred to as resources. This method defines the routes and routing<br />
helpers (such as the edit_purchase_path method) to your purchases resources. Look<br />
at table 1.1 for a list of the helpers and their corresponding routes.<br />
In this table, :id can be substituted for the ID of a record. Each routing helper has<br />
an alternative version that will give you the full URL to the resource. Simply use the<br />
_url extension rather than _path, and you’ll get a URL such as http://localhost:3000/<br />
purchases for purchases_url.<br />
15
16 CHAPTER 1 Ruby on Rails, the framework<br />
From this table, two of these routes will act differently depending on how they’re<br />
requested. The first route, /purchases, takes you to the index action of Purchases-<br />
Controller if you do a GET request. GET requests are the standard type of requests<br />
for web browsers, and this is the first request you did to this application. If you do a<br />
POST request to this route, it will go to the create action of the controller. This is the<br />
case when you submit the form from the new view. Let’s go to http://localhost:3000/<br />
purchases/new now and look at the source of the page. You should see the beginning<br />
tag for your form looking like the following listing.<br />
<br />
The two attributes to note here are the action and method attributes. The action dictates<br />
the route to where this form goes, and the method tells the form what kind of<br />
HTTP request to make.<br />
How’d this tag get rendered in the first place? Well, as you saw before, the app/<br />
views/purchases/new.html.erb template uses the form partial from app/views/<br />
purchases/_form.html.erb, which contains this as the first line:<br />
<br />
This one simple line generates that form tag. When we look at the edit action shortly,<br />
you’ll see that the output of this tag is different, and you’ll see why.<br />
The other route that responds differently is the /purchases/{id} route, which<br />
acts in one of three ways. You already saw the first way: it’s the show action to which<br />
you’re redirected (a GET request) after you create a purchase. The second of the<br />
three ways is when you update a record, which we look at now.<br />
1.2.10 Updating<br />
Helper Route<br />
purchases_path /purchases<br />
new_purchase_path /purchases/new<br />
edit_purchase_path /purchases/:id/edit<br />
purchase_path /purchases/:id Table 1.1 Routing helpers<br />
and their routes<br />
Listing 1.11 The HTML source of app/views/purchases/new.html.erb<br />
Let’s change the cost of the foo purchase now. Perhaps it only cost 10. To change it, go<br />
back to http://localhost:3000/purchases and click the Edit link next to the foo<br />
record. You should now see a page that looks similar to the new page, shown in<br />
figure 1.8.<br />
This page looks similar because it re-uses the partial used in the new action. Such is<br />
the power of partials: you can use the same code for two different requests to your<br />
application. The template for this action can be seen in the following listing.
Developing your first application<br />
Listing 1.12 app/views/purchases/edit.html.erb<br />
Editing purchase<br />
<br />
|<br />
<br />
For this action, you’re working with a pre-existing object rather than a new object,<br />
which you used in new. This pre-existing object is found by the edit action in<br />
PurchasesController, shown in the next listing.<br />
Listing 1.13 app/controllers/purchases_controller.rb<br />
# GET /purchases/1/edit<br />
def edit<br />
@purchase = Purchase.find(params[:id])<br />
...<br />
end<br />
Figure 1.8 Editing a purchase<br />
The code to find the @purchase object here is identical to what you saw earlier in the<br />
show action.<br />
Back in the view for a moment, at the bottom of it you can see two uses of link_to.<br />
The first creates a Show link, linking to the @purchase object, which is set up in the<br />
edit action of your controller. Clicking this link would take you to purchase_<br />
path(@purchase) or /purchases/:id. Rails will figure out where the link needs to go<br />
according to the class of the object. Using this syntax, it will attempt to call the<br />
purchase_path method because the object has a class of Purchase and will pass the<br />
object along to that call, generating the URL. 15<br />
The second use of link_to in this view generates a Back link, which uses the routing<br />
helper purchases_path. It can’t use an object here because it doesn’t make sense<br />
to; calling purchases_path is the easy way to go back to the index action.<br />
15 This syntax is exceptionally handy if you have an object and are not sure of its type but still want to generate<br />
a link for it. For example, if you had a different kind of object called Order and it was used instead, it would<br />
use order_path rather than purchase_path.<br />
17
18 CHAPTER 1 Ruby on Rails, the framework<br />
In the beginning...<br />
In really early versions of Rails, you had to generate links like this:<br />
link_to "Back", { :controller => "purchases",<br />
:action => "show",<br />
:id => @purchase.id }<br />
This hash was then interpreted and matched to a route, like /purchases/1. You can<br />
still use it today in Rails 3 if you wish, but it’s not best practice. The hash can be<br />
shortened:<br />
link_to "Back", "/purchases/#{@purchase.id}"<br />
These days, the following is best:<br />
link_to "Back", @purchase<br />
By using the routing helpers introduced in Rails 2 and still available in Rails 3.1, you<br />
can have much shorter link_to calls in your application, increasing the readability<br />
of the code throughout.<br />
Let’s try filling in this form now, for example, by changing the cost from 100 to 10 and<br />
clicking Update Purchase. You now see the show page but with a different message,<br />
shown in figure 1.9.<br />
Clicking Update Purchase brought you back to the show page. How did that happen?<br />
Click the back button on your browser and view the source of this page, specifically<br />
the form tag and the tags directly underneath, shown in the following listing.<br />
Listing 1.14 The HTML source of app/views/purchases/edit.html.erb<br />
form action="/purchases/<br />
2" class="edit_purchase" id="edit_purchase_2" method="post"<br />
div style="margin:0;padding:0;display:inline"<br />
input name="_method" type="hidden" value="put" /<br />
/div<br />
...<br />
This form’s action points at /purchases/2, which is the route to the show action in<br />
PurchasesController. You should also note two other things. The method attribute of<br />
this form is a post, but there’s also the input tag underneath.<br />
The input tag passes through the _method parameter with the value set to "put".<br />
Rails catches this parameter and turns the request from a POST into a PUT. This is the<br />
Figure 1.9 Viewing an updated purchase
Developing your first application<br />
second (of three) ways the /purchases/{id} responds according to the method. By<br />
making a PUT request to this route, you’re taken to the update action in Purchases-<br />
Controller. Let’s take a look at this in the following listing.<br />
Listing 1.15 app/controllers/purchases_controller.rb<br />
def update<br />
@purchase = Purchase.find(params[:id])<br />
respond_to do |format|<br />
if @purchase.update_attributes(params[:purchase])<br />
format.html { redirect_to(@purchase,<br />
:notice => 'Purchase was successfully updated.') }<br />
format.xml { head :ok }<br />
else<br />
format.html { render :action => "edit" }<br />
format.xml { render :xml => @purchase.errors,<br />
:status => :unprocessable_entity }<br />
end<br />
end<br />
end<br />
Just as in the show and edit actions, you fetch the object first by using the find<br />
method. The parameters from the form are sent through in the same fashion as they<br />
were in the create action, coming through as params[:purchase]. Rather than instantiating<br />
a new object by using the new class method, you use update_attributes on the<br />
@purchase object. This does what it says on the tin: updates the attributes. What it<br />
doesn’t say on the tin, though, is that it validates the attributes and, if the attributes are<br />
valid, saves the record and returns true. If they aren’t valid, it returns false.<br />
When update_attributes returns true, you’re redirected back to the show action<br />
for this particular purchase by using redirect_to.<br />
If it returns false, you’re shown the edit action’s template again, just as back in<br />
the create action where you were shown the new template again. This works in the<br />
same fashion and displays errors if you enter something wrong. Let’s try editing a purchase<br />
and setting the name to blank and then clicking Update Purchase. It should<br />
error exactly like the create method did, as shown in figure 1.10.<br />
Figure 1.10<br />
Update fails!<br />
19
20 CHAPTER 1 Ruby on Rails, the framework<br />
As you can see by this example, the validations you defined in your Purchase model<br />
take effect for both the creation and updating of records automatically.<br />
Now what would happen if, rather than update a purchase, you wanted to delete<br />
it? That’s built in to the scaffold too.<br />
1.2.11 Deleting<br />
In Rails, delete is given a much more forceful name: destroy. This is another sensible<br />
name because to destroy a record is to put an end to its existence. 16 Once this record’s<br />
gone, it’s gone, baby, gone.<br />
You can destroy a record by going to http://localhost:3000/purchases and clicking<br />
the Destroy link shown in figure 1.11 and then clicking OK on the confirmation<br />
box that pops up.<br />
When that record’s destroyed, you’re taken back to the Listing Purchases page.<br />
You’ll see that the record no longer exists. You should now only have one record, as<br />
shown in figure 1.12.<br />
How does all of this work? Let’s look at the index template in the following listing<br />
to understand, specifically the part that’s used to list the purchases.<br />
<br />
<br />
<br />
<br />
<br />
<br />
'Are you sure?',<br />
:method => :delete %><br />
<br />
<br />
<br />
<br />
<br />
16 Mac OS X dictionary.<br />
Listing 1.16 app/views/purchases/index.html.erb<br />
Figure 1.11 Destroy! Figure 1.12 Last record standing
Summary<br />
In this template, @purchases is a collection of all the objects from the Purchase<br />
model, and each is used to iterate over each, setting purchase as the variable used in<br />
this block.<br />
The methods name and cost are the same methods used in app/views/purchases/<br />
show.html.erb to display the values for the fields. After these, you see the three uses of<br />
link_to.<br />
The first link_to passes in the purchase object, which links to the show action of<br />
PurchasesController by using a route such as/purchases/{id}, where {id} is the ID<br />
for this purchase object.<br />
The second link_to links to the edit action using edit_purchase_path and<br />
passes the purchase object as the argument to this method. This routing helper determines<br />
the path is /purchases/{id}/edit.<br />
The third link_to links seemingly to the purchase object exactly as the first, but it<br />
doesn’t go there. The :method option on the end of this route specifies the method of<br />
:delete, which is the third and final way the /purchases/{id} route can be used. If<br />
you specify :delete as the method of this link_to, Rails interprets this request and<br />
takes you to the destroy action in the PurchasesController. This action is shown in<br />
the following listing.<br />
def destroy<br />
@purchase = Purchase.find(params[:id])<br />
@purchase.destroy<br />
respond_to do |format|<br />
format.html { redirect_to(purchases_url) }<br />
format.xml { head :ok }<br />
end<br />
end<br />
Just as in the show, edit, and update actions shown earlier, this action finds the<br />
@purchase object by using Purchase.find and then destroys the record by calling<br />
destroy on it, which permanently deletes the record. Then it uses redirect_to to take<br />
you to the purchases_url, which is the route helper defined to take you to http://<br />
localhost:3000/purchases. Note that this action uses the purchases_url method<br />
rather than purchases_path, which generate a full URL back to the purchases listing,<br />
such as http://localhost:3000/purchases/1.<br />
That wraps up our application run-through!<br />
1.3 Summary<br />
Listing 1.17 app/controllers/purchases_controller.rb<br />
In this chapter you learned what Rails is and how to get an application started with it,<br />
the absolute bare, bare, bare essentials of a Rails application. But look how fast you got<br />
going! It took only a few simple commands and an entire two lines of your own code<br />
to get the bones of a Rails application going. From this basic skeleton, you can keep<br />
adding on bits and pieces to develop your application, and all the while you get things<br />
21
22 CHAPTER 1 Ruby on Rails, the framework<br />
for free from Rails. You don’t have to code the logic of what happens when Rails<br />
receives a request or specify what query to execute on your database to insert a<br />
record—Rails does it for you.<br />
You also saw that some big-name players—such as Twitter and GitHub—use Ruby<br />
on Rails. This clearly answers the question “Is Rails ready?” Yes, it very much is. A wide<br />
range of companies have built successful websites on the Rails framework, and a lot<br />
more will do so in the future.<br />
Still wondering if Ruby on Rails is right for you? Ask around. You’ll hear a lot of<br />
people singing its praises. The Ruby on Rails community is passionate not only about<br />
Rails but also about community building. Events, conferences, user group meetings,<br />
and even camps are held all around the world for Rails. Attend these and discuss Ruby<br />
on Rails with the people who know about it. If you can’t attend these events, you can<br />
explore the IRC channel on Freenode #rubyonrails, the mailing list rubyonrails-talk on<br />
Google Groups, not to mention Stack Overflow and a multitude of other areas on the<br />
internet where you can discuss with experienced people what they think of Rails.<br />
Don’t let this book be the only source for your knowledge. There’s a whole world out<br />
there, and no book could cover it all!<br />
The best way to answer the question “What is Rails?” is to experience it for yourself.<br />
This book and your own exploration can eventually make you a Ruby on Rails expert.<br />
When you added validations to your application earlier, you manually tested that<br />
they were working. This may seem like a good idea for now, but when the application<br />
grows beyond a couple of pages, it becomes cumbersome to manually test them.<br />
Wouldn’t it be nice to have some automated way of testing your applications? Something<br />
to ensure that all the individual parts always work? Something to provide the<br />
peace of mind that you crave when you develop anything? You want to be sure that it’s<br />
continuously working with the most minimal effort possible, right?<br />
Well, Ruby on Rails does that too. There are several testing frameworks for Ruby<br />
and Ruby on Rails, and in chapter 2 we look at three of them: Test::Unit, RSpec, and<br />
Cucumber.
This chapter covers<br />
Testing saves your bacon<br />
� Writing tests with RSpec and Cucumber<br />
� Maintaining code through tests<br />
� Test- and behavior-driven development<br />
Chapter 1 presented an extremely basic layout of a Rails application and an example<br />
of the scaffold generator. 1 One question remains, though: how do you make<br />
your Rails applications maintainable?<br />
The answer is that you write automated tests for the application as you develop<br />
it, and you write these all the time.<br />
By writing automated tests for your application, you can quickly ensure that<br />
your application is working as intended. If you didn’t write tests, your alternative<br />
would be to check the entire application manually, which is time consuming and<br />
error prone. Automated testing saves you a ton of time in the long run and leads to<br />
fewer bugs. Humans make mistakes; programs (if coded correctly) do not. We’re<br />
going to be doing it right from step one. 2<br />
1 We won’t use the scaffold generator for the rest of the book because people tend to use it as a crutch, and<br />
it generates extraneous code.<br />
2 Unlike certain other books.<br />
23
24 CHAPTER 2 Testing saves your bacon<br />
2.1 Test- and behavior-driven development<br />
In the Ruby world a huge emphasis is placed on testing, specifically on test-driven development<br />
(TDD) and behavior-driven development (BDD). This chapter covers three testing<br />
tools, Test::Unit, RSpec, and Cucumber, in a basic fashion so you can quickly learn<br />
their format.<br />
By learning good testing techniques now, you’ve got a solid way to make sure nothing<br />
is broken when you start to write your first real Rails application. If you didn’t test,<br />
there’s no telling what could go wrong in your code.<br />
TDD is a methodology consisting of writing a failing test case first (usually using a<br />
testing tool such as Test::Unit), then writing the code to make the test pass, and finally<br />
refactoring the code. This process is commonly called red-green-refactor. The reasons for<br />
developing code this way are twofold. First, it makes you consider how the code<br />
should be running before it is used by anybody. Second, it gives you an automated test<br />
you can run as often as you like to ensure your code is still working as you intended.<br />
We’ll be using the Test::Unit tool for TDD.<br />
BDD is a methodology based on TDD. You write an automated test to check the<br />
interaction between the different parts of the codebase rather than testing that each<br />
part works independently.<br />
The two tools used for BDD are RSpec and Cucumber, both of which this book uses<br />
heavily.<br />
Let’s begin by looking at TDD and Test::Unit.<br />
2.2 Test-driven development<br />
A cryptic yet true answer to the question “Why should I test?” is “because you are<br />
human.” Humans—the large majority of this book’s audience—make mistakes. It’s one<br />
of our favorite ways to learn. Because humans make mistakes, having a tool to inform<br />
them when they make one is helpful, isn’t it? Automated testing provides a quick safety<br />
net to inform developers when they make mistakes. By they, of course, we mean you.<br />
We want you to make as few mistakes as possible. We want you to save your bacon!<br />
TDD and BDD also give you time to think through your decisions before you write<br />
any code. By first writing the test for the implementation, you are (or, at least, you<br />
should be) thinking through the implementation: the code you’ll write after the test<br />
and how you’ll make the test passes. If you find the test difficult to write, then perhaps<br />
the implementation could be improved. Unfortunately, there’s no clear way to quantify<br />
the difficulty of writing a test and working through it other than to consult with<br />
other people who are familiar with the process.<br />
Once the test is implemented, you should go about writing some code that your<br />
test can pass. If you find yourself working backward—rewriting your test to fit a buggy<br />
implementation—it’s generally best to rethink the test and scrap the implementation.<br />
Test first, code later.
2.2.1 Why test?<br />
Test-driven development<br />
Automated testing is much, much easier than manual testing. Have you ever gone<br />
through a website and manually filled in a form with specific values to make sure it<br />
conforms to your expectations? Wouldn’t it be faster and easier to have the computer<br />
do this work? Yes, it would, and that’s the beauty of automated testing: you won’t<br />
spend your time manually testing your code because you’ll have written test code to<br />
do that for you.<br />
On the off chance you break something, the tests are there to tell you the what,<br />
when, how, and why of the breakage. Although tests can never be 100% guaranteed,<br />
your chances of getting this information without first having written tests are 0%.<br />
Nothing is worse than finding out something is broken through an early-morning<br />
phone call from an angry customer. Tests work toward preventing such scenarios by<br />
giving you and your client peace of mind. If the tests aren’t broken, chances are high<br />
(though not guaranteed) that the implementation isn’t either.<br />
You’ll likely at some point face a situation in which something in your application<br />
breaks when a user attempts to perform an action you didn’t consider in your tests.<br />
With a base of tests, you can easily duplicate the scenario in which the user encountered<br />
the breakage, generate your own failed test, and use this information to fix the<br />
bug. This commonly used practice is called regression testing.<br />
It’s valuable to have a solid base of tests in the application so you can spend time<br />
developing new features properly rather than fixing the old ones you didn’t do quite<br />
right. An application without tests is most likely broken in one way or another.<br />
2.2.2 Writing your first test<br />
The first testing library for Ruby was Test::Unit, which was written by Nathaniel Talbott<br />
back in 2000 and is now part of the Ruby core library. The documentation for this<br />
library gives a fantastic overview of its purpose, as summarized by the man himself:<br />
The general idea behind unit testing is that you write a test method that makes certain<br />
assertions about your code, working against a test fixture. A bunch of these test methods<br />
are bundled up into a test suite and can be run any time the developer wants. The results<br />
of a run are gathered in a test result and displayed to the user through some UI.<br />
—Nathaniel Talbott<br />
The UI Talbott references could be a terminal, a web page, or even a light. 3<br />
A common practice you’ll hopefully by now have experienced in the Ruby world is<br />
to let the libraries do a lot of the hard work for you. Sure, you could write a file yourself<br />
that loads one of your other files and runs a method and makes sure it works, but why<br />
do that when Test::Unit already provides that functionality for such little cost? Never<br />
re-invent the wheel when somebody’s done it for you.<br />
Now you’re going to write a test, and you’ll write the code for it later. Welcome to<br />
TDD.<br />
3 Such as the one GitHub has made: http://github.com/blog/653-our-new-build-status-indicator.<br />
25
26 CHAPTER 2 Testing saves your bacon<br />
To try out Test::Unit, first create a new directory called example and in that directory<br />
make a file called example_test.rb. It’s good practice to suffix your filenames with<br />
_test so it’s obvious from the filename that it’s a test file. In this file, you’re going to<br />
define the most basic test possible, as shown in the following listing.<br />
Listing 2.1 example/example_test.rb<br />
require 'test/unit'<br />
class ExampleTest < Test::Unit::TestCase<br />
def test_truth<br />
assert true<br />
end<br />
end<br />
To make this a Test::Unit test, you begin by requiring test/unit, which is part of<br />
Ruby’s standard library. This provides the Test::Unit::TestCase class inherited from<br />
on the next line. Inheriting from this class provides the functionality to run any<br />
method defined in this class whose name begins with test. Additionally, you can<br />
define tests by using the test method:<br />
test "truth" do<br />
assert true<br />
end<br />
To run this file, you run ruby example_test.rb in the terminal. When this command<br />
completes, you see some output, the most relevant being two of the lines in the middle:<br />
.<br />
1 tests, 1 assertions, 0 failures, 0 errors, 0 skips<br />
The first line is a singular period. This is Test::Unit’s way of indicating that it ran a test<br />
and the test passed. If the test had failed, it would show up as an F; if it had errored, an<br />
E. The second line provides statistics on what happened, specifically that there was<br />
one test and one assertion, and that nothing failed, there were no errors, and nothing<br />
was skipped. Great success!<br />
The assert method in your test makes an assertion that the argument passed to it<br />
evaluates to true. This test passes given anything that’s not nil or false. When this<br />
method fails, it fails the test and raises an exception. Go ahead, try putting 1 there<br />
instead of true. It still works:<br />
.<br />
1 tests, 1 assertions, 0 failures, 0 errors, 0 skips<br />
In the following listing, you remove the test_ from the beginning of your method<br />
and define it as simply a truth method.<br />
Listing 2.2 example/example_test.rb, alternate truth test<br />
def truth<br />
assert true<br />
end
Test-driven development<br />
Test::Unit tells you there were no tests specified by running the default_test method<br />
internal to Test::Unit:<br />
No tests were specified.<br />
1 tests, 1 assertions, 1 failures, 0 errors<br />
Remember to always prefix Test::Unit methods with test!<br />
2.2.3 Saving bacon<br />
Let’s make this a little more complex by creating a bacon_test.rb file and writing the<br />
test shown in the following listing.<br />
Listing 2.3 example/bacon_test.rb<br />
require 'test/unit'<br />
class BaconTest < Test::Unit::TestCase<br />
def test_saved<br />
assert Bacon.saved?<br />
end<br />
end<br />
Of course, you want to ensure that your bacon 4 is always saved, and this is how you do<br />
it. If you now run the command to run this file, ruby bacon_test.rb, you get an error:<br />
NameError: uninitialized constant BaconTest::Bacon<br />
Your test is looking for a constant called Bacon and cannot find it because you haven’t<br />
yet defined the constant. For this test, the constant you want to define is a Bacon class.<br />
You can define this new class before or after the test. Note that in Ruby you usually<br />
must define constants and variables before you use them. In Test::Unit tests, the code<br />
is only run when it finishes evaluating it, which means you can define the Bacon class<br />
after the test. In the next listing, you follow the more conventional method of defining<br />
the class above the test.<br />
Listing 2.4 example/bacon_test.rb<br />
require 'test/unit'<br />
class Bacon<br />
end<br />
class BaconTest < Test::Unit::TestCase<br />
def test_saved<br />
assert Bacon.saved?<br />
end<br />
end<br />
Upon rerunning the test, you get a different error:<br />
NoMethodError: undefined method `saved?' for Bacon:Class<br />
4 Both the metaphorical and the crispy kinds.<br />
27
28 CHAPTER 2 Testing saves your bacon<br />
Progress! It recognizes there’s now a Bacon class, but there’s no saved? method for<br />
this class, so you must define one, as in the following listing.<br />
class Bacon<br />
def self.saved?<br />
true<br />
end<br />
end<br />
One more run of ruby bacon_test.rb and you can see that the test is now passing:<br />
.<br />
1 tests, 1 assertions, 0 failures, 0 errors, 0 skips<br />
Your bacon is indeed saved! Now any time that you want to check if it’s saved, you can<br />
run this file. If somebody else comes along and changes that true value to a false,<br />
then the test will fail:<br />
F<br />
Listing 2.5 example/bacon_test.rb<br />
1) Failure:<br />
test_saved(BaconTest) [bacon_test.rb:11]:<br />
Failed assertion, no message given.<br />
Test::Unit reports “Failed assertion, no message given” when an assertion fails. You<br />
should probably make that error message clearer! To do so, you can specify an additional<br />
argument to the assert method in your test, like this:<br />
assert Bacon.saved?, "Our bacon was not saved :("<br />
Now when you run the test, you get a clearer error message:<br />
1) Failure:<br />
test_saved(BaconTest) [bacon_test.rb:11]:<br />
Our bacon was not saved :(<br />
And that, my friend, is the basics of TDD using Test::Unit. Although we don’t use this<br />
method in the book, it’s handy to know about because it establishes the basis for TDD<br />
in Ruby in case you wish to use it in the future. Test::Unit is also the default testing<br />
framework for Rails, so you may see it around in your travels. From this point on, we<br />
focus on RSpec and Cucumber, the two gems you’ll be using when you develop your<br />
next Rails application.<br />
2.3 Behavior-driven development<br />
BDD is similar to TDD, but the tests for BDD are written in an easier-to-understand language<br />
so that developers and clients alike can clearly understand what is being tested.<br />
The two tools we cover for BDD are RSpec and Cucumber.<br />
RSpec tests are written in a Ruby domain-specific language (DSL), like this:<br />
describe Bacon do<br />
it "is edible" do
2.3.1 RSpec<br />
Bacon.edible?.should be_true<br />
end<br />
end<br />
Behavior-driven development<br />
The benefits of writing tests like this are that clients can understand precisely what<br />
the test is testing and then use these steps in acceptance testing; 5 a developer can<br />
read what the feature should do and then implement it; and finally, the test can be<br />
run as an automated test. With tests written in DSL, you have the three important elements<br />
of your business (the clients, the developers, and the code) all operating in the<br />
same language.<br />
RSpec is an extension of the methods already provided by Test::Unit. You can even<br />
use Test::Unit methods inside of RSpec tests if you wish. But we’re going to use the<br />
simpler, easier-to-understand syntax that RSpec provides.<br />
Cucumber tests are written in a language called Gherkin, which goes like this:<br />
Given I am reading a book<br />
When I read this example<br />
Then I should learn something<br />
Each line indicates a step. The benefit of writing tests in the Gherkin language is that<br />
it’s closer to English than RSpec is, making it even easier for clients and developers to<br />
read.<br />
RSpec is a BDD tool written by Steven R. Baker and now maintained by David Chelimsky<br />
as a cleaner alternative to Test::Unit, with RSpec being built as an extension to<br />
Test::Unit. With RSpec, you write code known as specs that contain examples, which are<br />
synonymous to the tests you know from Test::Unit. In this example, you’re going to<br />
define the Bacon constant and then define the edible? method on it.<br />
Let’s jump right in and install the rspec gem by running gem install rspec. You<br />
should see the following output:<br />
Successfully installed rspec-core-2.6.4<br />
Successfully installed rspec-expectations-2.6.4<br />
Successfully installed rspec-mocks-2.6.4<br />
Successfully installed rspec-2.6.4<br />
You can see that the final line says the rspec gem is installed, with the version number<br />
specified after the name. Above this line, you also see a thank-you message and,<br />
underneath, the other gems that were installed. These gems are dependencies of the<br />
rspec gem, and as such, the rspec gem won’t work without them.<br />
When the gem is installed, create a new directory for your tests called bacon anywhere<br />
you like, and inside that, create another directory called spec. If you’re running<br />
a UNIX-based operating system such as Linux or Mac OS X, you can run the<br />
mkdir -p bacon/spec command to create these two directories. This command will<br />
5 A process whereby people follow a set of instructions to ensure a feature is performing as intended.<br />
29
30 CHAPTER 2 Testing saves your bacon<br />
generate a bacon directory if it doesn’t already exist, and then generate in that directory<br />
a spec directory.<br />
Inside the spec directory, create a file called bacon_spec.rb. This is the file you use<br />
to test your currently nonexistent Bacon class. Put the code from the following listing<br />
in spec/bacon_spec.rb.<br />
describe Bacon do<br />
it "is edible" do<br />
Bacon.edible?.should be_true<br />
end<br />
end<br />
You describe the (undefined) Bacon class and write an example for it, declaring that<br />
Bacon is edible. The describe block contains tests (examples) that describe the<br />
behavior of bacon. In this example, whenever you call edible? on Bacon, the result<br />
should be true. should serves a similar purpose to assert, which is to assert that its<br />
object matches the arguments passed to it. If the outcome is not what you say it should<br />
be, then RSpec raises an error and goes no further with that spec.<br />
To run the spec, you run rspec spec in a terminal in the root of your bacon directory.<br />
You specify the spec directory as the first argument of this command so RSpec<br />
will run all the tests within that directory. This command can also take files as its arguments<br />
if you want to run tests only from those files.<br />
When you run this spec, you get an uninitialized constant Object::Bacon<br />
error, because you haven’t yet defined your Bacon constant. To define it, create<br />
another directory inside your Bacon project folder called lib, and inside this directory,<br />
create a file called bacon.rb. This is the file where you define the Bacon constant, a<br />
class, as in the following listing.<br />
class Bacon<br />
end<br />
Listing 2.6 bacon/spec/bacon_spec.rb<br />
Listing 2.7 bacon/lib/bacon.rb<br />
You can now require this file in spec/bacon_spec.rb by placing the following line at the<br />
top of the file:<br />
require 'bacon'<br />
When you run your spec again, because you told it to load bacon, RSpec has added the<br />
lib directory on the same level as the spec directory to Ruby’s load path, and so it will<br />
find the lib/bacon.rb for your require. By requiring the lib/bacon.rb file, you ensure<br />
the Bacon constant is defined. The next time you run it, you get an undefined method<br />
for your new constant:<br />
1) Bacon is edible<br />
Failure/Error: Bacon.edible?.should be_true
Behavior-driven development<br />
NoMethodError:<br />
undefined method `edible?' for Bacon:Class<br />
This means you need to define the edible? method on your Bacon class. Re-open lib/<br />
bacon.rb and add this method definition to the class:<br />
def self.edible?<br />
true<br />
end<br />
Now the entire file looks like the following listing.<br />
Listing 2.8 bacon/lib/bacon.rb<br />
class Bacon<br />
def self.edible?<br />
true<br />
end<br />
end<br />
By defining the method as self.edible?, you define it for the class. If you didn’t prefix<br />
the method with self., it would define the method for an instance of the class<br />
rather than for the class itself. Running rspec spec now outputs a period, which indicates<br />
the test has passed. That’s the first test—done.<br />
For the next test, you want to create many instances of the Bacon class and have the<br />
edible? method defined on them. To do this, open lib/bacon.rb and change the<br />
edible? class method to an instance method by removing the self. from before the<br />
method, as in the next listing.<br />
Listing 2.9 bacon/lib/bacon.rb<br />
class Bacon<br />
def edible?<br />
true<br />
end<br />
end<br />
When you run rspec spec again, you get the familiar error:<br />
1) Bacon edible?<br />
Failure/Error: its(:edible?) { should be_true }<br />
expected false to be true<br />
Oops! You broke a test! You should be changing the spec to suit your new ideas before<br />
changing the code! Let’s reverse the changes made in lib/bacon.rb, as in the following<br />
listing.<br />
Listing 2.10 bacon/lib/bacon.rb<br />
class Bacon<br />
def self.edible?<br />
true<br />
end<br />
end<br />
31
32 CHAPTER 2 Testing saves your bacon<br />
When you run rspec spec, it passes. Now let’s change the spec first, as in the next<br />
listing.<br />
Listing 2.11 bacon/spec/bacon_spec.rb<br />
describe Bacon do<br />
it "is edible" do<br />
Bacon.new.edible?.should be_true<br />
end<br />
end<br />
In this code, you instantiate a new object of the class rather than using the Bacon class.<br />
When you run rspec spec, it breaks once again:<br />
NoMethodError in 'Bacon is edible'<br />
undefined method `edible?' for #<br />
If you remove the self. from the edible? method, your test will now pass, as in the<br />
following listing.<br />
Listing 2.12 Terminal<br />
$ rspec spec<br />
.<br />
1 example, 0 failures<br />
Now you can go about breaking your test once more by adding additional functionality:<br />
an expired! method, which will make your bacon inedible. This method sets an<br />
instance variable on the Bacon object called @expired to true, and you use it in your<br />
edible? method to check the bacon’s status.<br />
First you must test that this expired! method is going to actually do what you think<br />
it should do. Create another example in spec/bacon_spec.rb so that the whole file now<br />
looks like the following listing.<br />
Listing 2.13 bacon/spec/bacon_spec.rb<br />
require 'bacon'<br />
describe Bacon do<br />
it "is edible" do<br />
Bacon.new.edible?.should be_true<br />
end<br />
it "expired!" do<br />
bacon = Bacon.new<br />
bacon.expired!<br />
bacon.should be_expired<br />
end<br />
end<br />
When you find you’re repeating yourself, stop! You can see here that you’re defining a<br />
bacon variable to Bacon.new and that you’re also using Bacon.new in the first example.<br />
You shouldn’t be repeating yourself like that!
Behavior-driven development<br />
A nice way to tidy this up is to move the call to Bacon.new into a subject block.<br />
subject calls allow you to create an object to reference in all specs inside the<br />
describe block, 6 declaring it the subject (both literally and figuratively) of all the tests<br />
inside the describe block. You can define a subject like this:<br />
subject { Bacon.new }<br />
In the context of the entire spec, it looks like the following listing.<br />
Listing 2.14 bacon/spec/bacon_spec.rb<br />
require 'bacon'<br />
describe Bacon do<br />
subject { Bacon.new }<br />
it "is edible" do<br />
Bacon.new.edible?.should be_true<br />
end<br />
it "expired!" do<br />
bacon = Bacon.new<br />
bacon.expired!<br />
bacon.expired.should be_true<br />
end<br />
end<br />
Now that you have the subject, you can cut a lot of the code out of the first spec and<br />
refine it:<br />
its(:edible?) { should be_true }<br />
First, the its method takes the name of a method to call on the subject of these tests.<br />
The block specified should contain an assertion for the output of that method. Unlike<br />
before, you’re not calling should on an object, as you have done in previous tests, but<br />
rather on seemingly nothing at all. If you do this, RSpec figures out that you mean the<br />
subject you defined, so it calls should on that.<br />
You can also reference the subject manually in your tests, as you’ll see when you<br />
write the expired! example shown in the following listing.<br />
Listing 2.15 bacon/spec/bacon_spec.rb<br />
it "expired!" do<br />
subject.expired!<br />
subject.should_not be_edible<br />
end<br />
Here, the expired! method must be called on the subject because it is only defined<br />
on your Bacon class. For readability’s sake, you explicitly call the should_not method<br />
on the subject and specify that edible? should return false.<br />
6 Or inside a context block, which we use later. It works in a similar way to the describe blocks.<br />
33
34 CHAPTER 2 Testing saves your bacon<br />
If you run rspec spec again, your first spec still passes, but your second one fails<br />
because you have yet to define your expired! method. Let’s do that now in lib/<br />
bacon.rb, as shown in the following listing.<br />
Listing 2.16 bacon/lib/bacon.rb<br />
class Bacon<br />
def edible?<br />
true<br />
end<br />
def expired!<br />
self.expired = true<br />
end<br />
end<br />
By running rspec spec again, you get an undefined method error:<br />
NoMethodError in 'Bacon expired!'<br />
undefined method `expired=' for #<br />
This method is called by the following line in the previous example:<br />
self.expired = true<br />
To define this method, you can use the attr_accessor method provided by Ruby, as<br />
shown in listing 2.17; the attr prefix of the method means attribute. If you pass a<br />
Symbol (or collection of symbols) to this method, it defines methods for setting<br />
(expired=) and retrieving the attribute expired values, referred to as a setter and a getter<br />
respectively. It also defines an instance variable called @expired on every object of<br />
this class to store the value that was specified by the expired= method calls.<br />
WARNING In Ruby you can call methods without the self. prefix. You<br />
specify the prefix because otherwise the interpreter will think that you’re<br />
defining a local variable. The rule for setter methods is that you should<br />
always use the prefix.<br />
Listing 2.17 bacon/lib/bacon.rb<br />
class Bacon<br />
attr_accessor :expired<br />
...<br />
end<br />
With this in place, if you run rspec spec again, your example fails on the line following<br />
your previous failure:<br />
Failure/Error: subject.should_not be_edible<br />
expected edible? to return false, got true<br />
Even though this sets the expired attribute on the Bacon object, you’ve still hardcoded<br />
true in your edible? method. Now change the method to use the attribute<br />
method, as in the following listing.
def edible?<br />
!expired<br />
end<br />
Behavior-driven development<br />
When you run rspec spec again, both your specs will pass:<br />
..<br />
2 examples, 0 failures<br />
Let’s go back in to lib/bacon.rb and remove the self. from the expired! method:<br />
def expired!<br />
expired = true<br />
end<br />
If you run rspec spec again, you’ll see your second spec is now broken:<br />
Failure/Error: Bacon expired!<br />
expected edible? to return false, got true<br />
Tests save you from making mistakes such as this. If you write the test first and then<br />
write the code to make the test pass, you have a solid base and can refactor the code to<br />
be clearer or smaller and finally ensure that it’s still working with the test you wrote in<br />
the first place. If the test still passes, then you’re probably doing it right.<br />
If you change this method back now<br />
def expired!<br />
self.expired = true<br />
end<br />
and then run your specs using rspec spec, you’ll see that they once again pass:<br />
..<br />
2 examples, 0 failures<br />
Everything’s normal and working once again, which is great!<br />
That ends our little foray into RSpec for now. You’ll use it again later when you<br />
develop your application. If you’d like to know more about RSpec, The RSpec Book:<br />
Behavior-Driven Development with RSpec, Cucumber, and Friends (David Chelimsky et al.,<br />
Pragmatic Bookshelf, 2010) is recommended reading.<br />
2.3.2 Cucumber<br />
Listing 2.18 bacon/lib/bacon.rb<br />
For this section, we retire the Bacon example and go for something more formal with<br />
Cucumber.<br />
NOTE This section assumes you have RSpec installed. If you don’t, use this<br />
command to install it: gem install rspec.<br />
Whereas RSpec and Test::Unit are great for unit testing (testing a single part), Cucumber<br />
is mostly used for testing the entire integration stack.<br />
35
36 CHAPTER 2 Testing saves your bacon<br />
Cucumber’s history is intertwined with RSpec, so the two are similar. In the beginning<br />
of BDD, as you know, there was RSpec. Shortly thereafter, there were RSpec Stories,<br />
which looked like the following listing.<br />
Listing 2.19 Example<br />
Scenario "savings account is in credit" do<br />
Given "my savings account balance is", 100 do |balance|<br />
@account = Account.new(balance)<br />
end<br />
...<br />
end<br />
The idea behind RSpec Stories is that they are code- and human-readable stories that<br />
can be used for automated testing as well as quality assurance (QA) testing by stakeholders.<br />
Aslak Hellesoy rewrote RSpec Stories during October 2008 into what we<br />
know today as Cucumber. The syntax remains similar, as seen in the following listing.<br />
Listing 2.20 Example<br />
Scenario: Taking out money<br />
Given I have an account<br />
And my account balance is 100<br />
When I take out 10<br />
Then my account balance should be 90<br />
What you see here is known as a scenario in Cucumber. Under the scenario’s title, the<br />
remainder of the lines are called steps, which are read by Cucumber’s parser and<br />
matched to step definitions, where the logic is kept. Scenarios are found inside a feature,<br />
which is a collection of common scenarios. For example, you may have one feature for<br />
dictating what happens when a user creates projects and another for when a user creates<br />
tickets.<br />
Notice the keywords Given, And, When, and Then. These are just some of the keywords<br />
that Cucumber looks for to indicate that a line is a step. If you’re going to be<br />
using the same keyword on a new line, it’s best practice to instead use the And keyword<br />
because it reads better. Try reading the first two lines aloud from the previous listing,<br />
then replace the And with Given and try it again. It just sounds right to have an And<br />
there rather than a Given.<br />
Given steps are used for setting up the scene for the scenario. This example sets up<br />
an account and gives it a balance of 100.<br />
When steps are used for defining actions that should happen during the scenario.<br />
The example says, When I take out 10.<br />
Then steps are used for declaring things that take place after the When steps have<br />
completed. This example says, When I take out 10 Then my account balance should<br />
be 90.<br />
These different step types add a great deal of human readability to the scenarios in<br />
which they’re used, even though they can be used interchangeably. You could define
Behavior-driven development<br />
all the steps as Givens, but it’s not really readable. Let’s now implement this example<br />
scenario in Cucumber. First, run mkdir -p accounts/features, which, much as in the<br />
RSpec example, creates a directory called accounts and a directory inside of that<br />
called features. In this features directory, create a file called account.feature. In this file,<br />
you write a feature definition, as shown in the following listing.<br />
Listing 2.21 accounts/features/account.feature<br />
Feature: My Account<br />
In order to manage my account<br />
As a money minder<br />
I want to ensure my money doesn't get lost<br />
This listing lays out what this feature is about and is more useful to human readers<br />
(such as stakeholders) than it is to Cucumber.<br />
Next, you put in your scenario underneath the feature definition, as in the following<br />
listing.<br />
Listing 2.22 accounts/features/account.feature<br />
Scenario: Taking out money<br />
Given I have an account<br />
And it has a balance of 100<br />
When I take out 10<br />
Then my balance should be 90<br />
The whole feature should now look like the following listing.<br />
Listing 2.23 accounts/features/account.feature<br />
Feature: My Account<br />
In order to manage my account<br />
As a money minder<br />
I want to ensure my money doesn't get lost<br />
Scenario: Taking out money<br />
Given I have an account<br />
And it has a balance of 100<br />
When I take out 10<br />
Then my balance should be 90<br />
As you can see in listing 2.23, it’s testing the whole stack of the transaction rather than<br />
a single unit. This process is called integration testing. You set the stage by using the Given<br />
steps, play out the scenario using When steps, and ensure that the outcome is as you<br />
expected by using Then steps. The And word is used when you want a step to be defined<br />
in the same way as the previous step, as seen in the first two lines of this scenario.<br />
To run this file, you first need to ensure Cucumber is installed, which you can do<br />
by installing the Cucumber gem: gem install cucumber. When the Cucumber gem is<br />
installed, you can run this feature file by going into the accounts directory and running<br />
cucumber features, as in the next listing.<br />
37
38 CHAPTER 2 Testing saves your bacon<br />
Listing 2.24 Terminal<br />
Feature: My Account<br />
In order to manage my account<br />
As a money minder<br />
I want to ensure my money doesn't get lost<br />
Scenario: Taking out money<br />
Given I have an account<br />
And it has a balance of 100<br />
When I take out 10<br />
Then my balance should be 90<br />
This output appears in color in the terminal with the steps of the scenario in yellow, 7<br />
followed by a summary of this Cucumber run, and then a list of what code you used to<br />
define the missing steps (not shown in this example output), again in yellow. What<br />
this output doesn’t tell you is where to put the step definitions. Luckily, this book does.<br />
All these step definitions should go into a new file located at features/step_definitions/<br />
account_steps.rb. The file is called account_steps.rb and not account.rb to clearly separate<br />
it from any other Ruby files, so when looking for the steps file, you don’t get it<br />
confused with any other file. In this file, you can copy and paste in the steps Cucumber<br />
gave you, as in the following listing.<br />
Listing 2.25 features/step_definitions/account_steps.rb<br />
Given /^I have an account$/ do<br />
pending # express the regexp above with the code you wish you had<br />
end<br />
Given /^it has a balance of (\d+)$/ do |arg1|<br />
pending # express the regexp above with the code you wish you had<br />
end<br />
When /^I take out (\d+)$/ do |arg1|<br />
pending # express the regexp above with the code you wish you had<br />
end<br />
Then /^my balance should be (\d+)$/ do |arg1|<br />
pending # express the regexp above with the code you wish you had<br />
end<br />
If you run cucumber features again, you’ll see that all your steps are defined but not<br />
run (signaled by their blue coloring) except the very first one, which is yellow because<br />
it’s pending. Now you’re going to restructure the first step to make it not pending. It<br />
will now instantiate an Account object that you’ll use for the rest of this scenario.<br />
7 If you’re running Windows, you may need to install ANSICON in order to get the colored output. This process<br />
is described at https://github.com/adoxa/ansicon, and you can download ANSICON from http://adoxa<br />
.110mb.com/ansicon/.
Given /^I have an account$/ do<br />
@account = Account.new<br />
end<br />
Behavior-driven development<br />
Steps are defined by using regular expressions, which are used when you wish to match<br />
strings. In this case, you’re matching the step in the feature with this step definition by<br />
putting the text after the Given keyword into a regular expression. After the regular<br />
expression is the do Ruby keyword, which matches up with the end at the end. This<br />
syntax indicates a block, and this block is run (“called”) when this step definition is<br />
matched.<br />
With this step defined, you can try running cucumber features/account.feature<br />
to see if the feature will pass. No—it fails with this error:<br />
Given I have an account<br />
uninitialized constant Object::Account (NameError)<br />
Similar to the beginning of the RSpec showcase, create a lib directory inside your<br />
accounts directory. To define this constant, you create a file in this new directory<br />
called account.rb. In this file you put code to define the class, shown in the following<br />
listing.<br />
class Account<br />
end<br />
Listing 2.26 features/step_definitions/account_steps.rb<br />
Listing 2.27 accounts/lib/account.rb<br />
This file is not loaded automatically, of course: you have to require it just as you did in<br />
RSpec with lib/bacon.rb. Cucumber’s authors already thought of this and came up<br />
with a solution. Any file inside of features/support is automatically loaded, with one<br />
special file being loaded before all the others: features/support/env.rb. This file<br />
should be responsible for setting up the foundations for your tests. Now create features/support/env.rb<br />
and put these lines inside it:<br />
$LOAD_PATH
40 CHAPTER 2 Testing saves your bacon<br />
Listing 2.28 features/step_definitions/account_steps.rb<br />
Given /^it has a balance of (\d+)$/ do |amount|<br />
@account.balance = amount<br />
end<br />
With this step, you’ve used a capture group inside the regular expression. The capture<br />
group captures whatever it matches. In Cucumber, the match is returned as a variable,<br />
which is then used in the block. An important thing to remember is that these variables<br />
are always String objects.<br />
When you run this feature again, this step fails because you haven’t yet defined the<br />
method on the Account class:<br />
And it has a balance of 100<br />
undefined method `balance=' for # (NoMethodError)<br />
To define this method, open lib/account.rb and change the code in this file to look<br />
exactly like the following listing.<br />
Listing 2.29 accounts/lib/account.rb<br />
class Account<br />
def balance=(amount)<br />
@balance = amount<br />
end<br />
end<br />
The method is defined as balance=. In Ruby, these methods are called setter methods<br />
and, just as their name suggests, they’re used for setting things. Setter methods are<br />
defined without the space between the method name and the = sign, but they can be<br />
called with or without the space, like this:<br />
@account.balance=100<br />
# or<br />
@account.balance = 100<br />
The object after the equals sign is passed in as the single argument for this method. In<br />
this method, you set the @balance instance variable to that value. Now when you run<br />
your feature, this step passes and the third one is the pending one:<br />
Scenario: Taking out money<br />
Given I have an account<br />
And it has a balance of 100<br />
When I take out 10<br />
TODO (Cucumber::Pending)<br />
Go back into features/step_definitions/account_steps.rb and change the third step to<br />
take some money from your account:<br />
When /^I take out (\d+)$/ do |amount|<br />
@account.balance = @account.balance - amount<br />
end
Behavior-driven development<br />
Now when you run this feature, it’ll tell you there’s an undefined method balance,<br />
but didn’t you just define that?<br />
When I take out 10<br />
undefined method `balance' for # (NoMethodError)<br />
Actually, the method you defined was balance= (with an equals sign), which is a setter<br />
method. balance (without an equals sign) in this example is a getter method, which is<br />
used for retrieving the variable you set in the setter method. Not all methods without<br />
equal signs are getter methods, however. To define this method, switch back into lib/<br />
account.rb and add this new method directly under the setter method, as shown in the<br />
following listing.<br />
Listing 2.30 accounts/lib/account.rb<br />
def balance=(amount)<br />
@balance = amount<br />
end<br />
def balance<br />
@balance<br />
end<br />
Here you define the balance= and balance methods you need. The first method is a<br />
setter method, which is used to set the @balance instance variable on an Account object<br />
to a specified value. The balance method returns that specific balance. When you run<br />
this feature again, you’ll see a new error:<br />
When I take out 10<br />
String can't be coerced into Fixnum (TypeError)<br />
./features/step_definitions/account_steps.rb:10:in `-'<br />
This error occurred because you’re not storing the balance as a Fixnum but as a<br />
String. As mentioned earlier, the variable returned from the capture group for the<br />
second step definition is a String. To fix this, you coerce the object into a Fixnum by<br />
calling to_i 8 inside the setter method, as shown in the following listing.<br />
Listing 2.31 accounts/lib/account.rb<br />
def balance=(amount)<br />
@balance = amount.to_i<br />
end<br />
Now anything passed to the balance= method will be coerced into an integer. You also<br />
want to ensure that the other value is also a Fixnum. To do this, open features/<br />
step_definitions/account_steps.rb and change the third step to look exactly like the following<br />
listing.<br />
8 For the sake of simplicity, we use to_i. Some will argue that to_f (converting to a floating-point number) is<br />
better to use for money. They’d be right. This is not a real-world system, only a contrived example. Chill.<br />
41
42 CHAPTER 2 Testing saves your bacon<br />
When /^I take out (\d+)$/ do |amount|<br />
@account.balance -= amount.to_i<br />
end<br />
That makes this third step pass, because you’re subtracting a Fixnum from a Fixnum.<br />
When you run this feature, you’ll see that this step is definitely passing and the final<br />
step is now pending:<br />
Scenario: Taking out money<br />
Given I have an account<br />
And it has a balance of 100<br />
When I take out 10<br />
Then my balance should be 90<br />
TODO (Cucumber::Pending)<br />
This final step asserts that your account balance is now 90. You can implement it in<br />
features/step_definitions/account_steps.rb, as shown in the following listing.<br />
Then /^my balance should be (\d+)$/ do |amount|<br />
@account.balance.should eql(amount.to_i)<br />
end<br />
Here you must coerce the amount variable into a Fixnum again so you’re comparing a<br />
Fixnum with a Fixnum. With this fourth and final step implemented, your entire scenario<br />
(which also means your entire feature) passes:<br />
Scenario: Taking out money<br />
Given I have an account<br />
And it has a balance of 100<br />
When I take out 10<br />
Then my balance should be 90<br />
1 scenario (1 passed)<br />
4 steps (4 passed)<br />
As you can see from this example, Cucumber allows you to write tests for your code in<br />
syntax that can be understood by developers, clients, and parsers alike. You’ll see a lot<br />
more of Cucumber when you use it in building your next Ruby on Rails application.<br />
2.4 Summary<br />
Listing 2.32 features/step_definitions/account_steps.rb<br />
Listing 2.33 features/step_definitions/account_steps.rb<br />
This chapter demonstrated how to apply TDD and BDD principles to test some rudimentary<br />
code. You can (and should!) apply these principles to all code you write,<br />
because testing the code ensures it’s maintainable from now into the future. You don’t<br />
have to use the gems shown in this chapter to test your Rails application; they are just<br />
preferred by a large portion of the community.<br />
You’ll apply what you learned in this chapter to building a Rails application from<br />
scratch in upcoming chapters. You’ll use Cucumber from the outset by developing
Summary<br />
features to describe the behavior of your application and then implementing the necessary<br />
steps to make them pass. Thankfully, there’s another gem that generates some<br />
of these steps for you.<br />
When you wish to test that a specific controller action is inaccessible, you use<br />
RSpec because it’s better suited for single-request testing. You use Cucumber when<br />
you want to test a series of requests, such as when creating a project. You’ll see plenty<br />
of examples of when to use Cucumber and when to use RSpec in later chapters.<br />
Let’s get into it!<br />
43
This chapter covers<br />
� Building the foundation for a major app<br />
� Diving deep into app foundations<br />
� Generating the first functionality for an app<br />
Developing a real<br />
Rails application<br />
This chapter gets you started on building a Ruby on Rails application from scratch<br />
using the techniques covered in the previous chapter plus a couple of new ones.<br />
With the techniques you learned in chapter 2, you can write features describing the<br />
behavior of the specific actions in your application and then implement the code<br />
you need to get the feature passing.<br />
For the remainder of the book, this application is the main focus. We guide you<br />
through it in an Agile-like fashion. Agile focuses largely on iterative development,<br />
developing one feature at a time from start to finish, then refining the feature until<br />
it’s viewed as complete before moving on to the next one. 1<br />
1 More information about Agile can be found on Wikipedia: http://en.wikipedia.org/wiki/Agile_software<br />
_development.<br />
44
Application setup<br />
Some of the concepts covered in this chapter were explained in chapter 1. Rather<br />
than using scaffolding, as you did previously, you write this application from the<br />
ground up using the behavior-driven development (BDD) process and other generators<br />
provided by Rails.<br />
The scaffold generator is great for prototyping, but it’s less than ideal for delivering<br />
simple, well-tested code that works precisely the way you want it to work. The code<br />
provided by the scaffold generator often may differ from the code you want. In this<br />
case, you can turn to Rails for lightweight alternatives to the scaffold code options,<br />
and you’ll likely end up with cleaner, better code.<br />
First, you need to set up your application!<br />
3.1 Application setup<br />
Chapter 1 explained how to quickly start a Rails application. This chapter explains a<br />
couple of additional processes that improve the flow of your application development.<br />
One process uses BDD to create the features of the application; the other process uses<br />
version control. Both will make your life easier.<br />
3.1.1 The application story<br />
Your client may have a good idea of the application they want you to develop. How<br />
can you transform the idea in your client’s brain into beautifully formed code? First,<br />
you sit down with your client and talk through the parts of the application. In the<br />
programming business, we call these parts stories, and we use Cucumber to develop<br />
the stories.<br />
Start with the most basic story and ask your client how they want it to behave.<br />
Then write the Cucumber scenario for it using the client’s own terms. You define the<br />
step definitions when it’s time to implement the function of the story. The client can<br />
also provide helpful information about the form—what the application should look<br />
like. With the function and form laid out, you have a pretty good idea of what the client<br />
wants.<br />
You may find it helpful to put these stories into a system such as Pivotal Tracker<br />
(http://pivotaltracker.com) so you can keep track of them. Pivotal Tracker allows you<br />
to assign points of difficulty to a story and then, over a period of weeks, estimate which<br />
stories can be accomplished in the next iteration on the basis of how many were completed<br />
in previous weeks. This tool is exceptionally handy to use when working with<br />
clients because the client can enter stories and then follow the workflow process. In<br />
this book, we don’t use Pivotal Tracker because we aren’t working with a real client,<br />
but this method is highly recommended.<br />
For this example application, your imaginary client, who has limitless time and<br />
budget (unlike those in the real world), wants you to develop a ticket-tracking application<br />
to track the company’s numerous projects. You’ll develop this application using<br />
the methodologies outlined in chapter 2: you’ll work iteratively, delivering small working<br />
pieces of the software to the client and then gathering the client’s feedback to<br />
45
46 CHAPTER 3 Developing a real Rails application<br />
improve the application as necessary. If no improvement is needed, then you can<br />
move on to the next prioritized chunk of work.<br />
BDD is used all the way through the development process. It provides the client<br />
with a stable application, and when (not if) a bug crops up, you have a nice test base<br />
you can use to determine what is broken. Then you can fix the bug so it doesn’t happen<br />
again, a process called regression testing (mentioned in chapter 2).<br />
As you work with your client to build the Cucumber stories, the client may ask why<br />
all of this prework is necessary. This can be a tricky question to answer. Explain that<br />
writing the tests before the code and then implementing the code to make the tests<br />
pass creates a safety net to ensure that the code is always working. Note: Tests will<br />
make your code more maintainable, but they won’t make your code bug-proof.<br />
Features also give you a clearer picture of what the clients really want. By having it<br />
all written down in features, you have a solid reference to point to if clients say they<br />
suggested something different. Story-driven development is simply BDD with emphasis<br />
on things a user can actually do with the system.<br />
By using story-driven development, you know what clients want, clients know you<br />
know what they want, you have something you can run automated tests with to ensure<br />
that all the pieces are working, and finally if something does break, you have the test<br />
suite in place to catch it. It’s a win-win-win situation.<br />
To start building the application you’ll be developing throughout this book, run<br />
the good old rails command, preferably outside the directory of the previous application.<br />
Call this app ticketee, the Australian slang for a person who checks tickets on<br />
trains. It also has to do with this project being a ticket-tracking application, and a Rails<br />
application, at that. To generate this application, run this command:<br />
rails new ticketee<br />
Presto, it’s done! From this bare-bones application, you’ll build an application that<br />
� Tracks tickets (of course) and groups them into projects<br />
� Provides a way to restrict users to certain projects<br />
� Allows users to upload files to tickets<br />
� Lets users tag tickets so they’re easy to find<br />
� Provides an API on which users can base<br />
development of their own applications<br />
You can’t do all of this with a command as simple<br />
as rails new [application_name], but you<br />
can do it step by step and test it along the way so<br />
you develop a stable and worthwhile application.<br />
Throughout the development of the application,<br />
we advise you to use a version control system.<br />
The next section covers that topic using<br />
Git. You’re welcome to use any other, but this<br />
book uses Git exclusively.<br />
Help!<br />
If you want to see what else<br />
you can do with this new command<br />
(hint: there’s a lot!), you<br />
can use the --help option:<br />
rails new --help<br />
The --help option shows you<br />
the options you can pass to<br />
the new command to modify<br />
the output of your application.
3.1.2 Version control<br />
Application setup<br />
It is wise during development to use version control software to provide checkpoints<br />
in your code. When the code is working, you can make a commit, and if anything goes<br />
wrong later in development, you can revert to the commit. Additionally, you can create<br />
branches for experimental features and work on those independently of the main<br />
code base without damaging working code.<br />
This book doesn’t go into detail on how to use a version control system, but it does<br />
recommend using Git. Git is a distributed version control system that is easy to use and<br />
extremely powerful. If you wish to learn about Git, we recommend reading Pro Git, a<br />
free online book by Scott Chacon. 2<br />
Git is used by most developers in the Rails community and by tools such as Bundler,<br />
discussed shortly. Learning Git along with Rails is advantageous when you come<br />
across a gem or plugin that you have to install using Git. Because most of the Rails<br />
community uses Git, you can find a lot of information about how to use it with Rails<br />
(even in this book!) should you ever get stuck.<br />
If you do not have Git already installed, GitHub’s help site offers installation guides<br />
for Mac, 3 Linux, 4 and Windows. 5 The precompiled installer should work well for Macs,<br />
and the package distributed versions (APT, eMerge, and so on) work well for Linux<br />
machines. For Windows, the msysGit application does just fine.<br />
For an online place to put your Git repository, we recommend GitHub, 6 which offers<br />
free accounts. If you set up an account now, you can upload your code to GitHub as you<br />
progress, ensuring that you don’t lose it if anything were to happen to your computer.<br />
To get started with GitHub, you first need to generate a secure shell (SSH) key, which<br />
is used to authenticate you with GitHub when you do a git push to GitHub’s servers. 7<br />
Once you generate the key, copy the public key’s content (usually found at ~/.ssh/<br />
id_rsa.pub) into the SSH Public Key field on the Signup page or, if you’ve already signed<br />
up, click the Account Settings link (see figure 3.1) in the menu at the top, select SSH<br />
Public Keys, and then click Add Another Public Key to enter it there (see figure 3.2).<br />
Figure 3.1 Click Account Settings.<br />
2 http://progit.org/book/.<br />
3 http://help.github.com/mac-set-up-git/. Note this lists four separate ways, not four separate steps, to install Git.<br />
4 http://help.github.com/linux-set-up-git/.<br />
5 http://help.github.com/win-set-up-git/.<br />
6 http://github.com.<br />
7 A guide for this process can be found at http://help.github.com/linux-key-setup/.<br />
47
48 CHAPTER 3 Developing a real Rails application<br />
Figure 3.2 Add an SSH key.<br />
Now that you’re set up with GitHub, click<br />
the New Repository button on the dashboard<br />
to begin creating a new repository<br />
(see figure 3.3).<br />
On this page, enter the Project Name as<br />
ticketee and click the Create Repository button<br />
to create the repository on GitHub. Now<br />
you are on your project’s page. Follow the<br />
Figure 3.3 Create a new repository.<br />
instructions, especially concerning the configuration of your identity. In listing 3.1,<br />
replace "Your Name" with your real name and you@example.com with your email<br />
address. The email address you provide should be the same as the one you used to<br />
sign up to GitHub. The git commands should be typed into your terminal or command<br />
prompt.<br />
Listing 3.1 Configuring your identity in GitHub<br />
git config --global user.name "Your Name"<br />
git config --global user.email you@example.com<br />
You already have a ticketee directory, and you’re probably inside it. If not, you should<br />
be. To make this directory a git repository, run this easy command:<br />
git init<br />
Your ticketee directory now contains a .git directory, which is your git repository. It’s all<br />
kept in one neat little package<br />
To add all the files for your application to this repository’s staging area, run<br />
git add .
Application setup<br />
The staging area for the repository is the location where all the changes for the next<br />
commit are kept. A commit can be considered as a checkpoint of your code. If you<br />
make a change, you must stage that change before you can create a commit for it. To<br />
create a commit with a message, run<br />
git commit -m "Generated the Rails 3 application"<br />
This command generates quite a bit of output, but the most important lines are the<br />
first two:<br />
Created initial commit cdae568: Generated the Rails 3 application<br />
35 files changed, 9280 insertions(+), 0 deletions(-)<br />
cdae568 is the short commit ID, a unique identifier for the commit, so it changes with<br />
each commit you make. The number of files and insertions may also be different. In<br />
Git, commits are tracked against branches, and the default branch for a git repository is<br />
the master branch, which you just committed to.<br />
The second line lists the number of files changed, insertions (additional line<br />
count), and deletions. If you modify a line, it’s counted as both an insertion and a<br />
deletion because, according to Git, you’ve removed the line and replaced it with the<br />
modified version.<br />
To view a list of commits for the current branch, type git log. You should see an<br />
output similar to the following listing.<br />
Listing 3.2 Viewing the commit log<br />
commit cdae568599251137d1ee014c84c781917b2179e1<br />
Author: Your Name <br />
Date: [date stamp]<br />
Generated the Rails 3 application<br />
The hash after the word commit is the long commit ID; it’s the longer version of the previously<br />
sighted short commit ID. A commit can be referenced by either the long or the<br />
short commit ID in Git, providing no two commits begin with the same short ID. 8 With<br />
that commit in your repository, you have something to push to GitHub, which you can<br />
do by running<br />
git remote add origin git@github.com:yourname/ticketee.git<br />
git push origin master -u<br />
The first command tells Git that you have a remote server called origin for this repository.<br />
To access it, you use the git@github.com:[your github username]/ticketee<br />
.git path, which connects to the repository using SSH. The next command pushes<br />
the named branch to that remote server, and the -u option tells Git to always pull<br />
from this remote server for this branch unless told differently. The output from this<br />
command is similar to the following listing.<br />
8 The chances of this happening are 1 in 268,435,456.<br />
49
50 CHAPTER 3 Developing a real Rails application<br />
Listing 3.3 Terminal<br />
Counting objects: 73, done.<br />
Compressing objects: 100% (58/58), done.<br />
Writing objects: 100% (73/73), 86.50 KiB, done.<br />
Total 73 (delta 2), reused 0 (delta 0)<br />
To git@github.com:rails3book/ticketee.git<br />
* [new branch] master -> master<br />
Branch master set up to track remote branch master from origin.<br />
The second to last line in this output indicates that your push to GitHub succeeded<br />
because it shows that a new branch called master was created on GitHub. Next, you<br />
must set up your application to use RSpec and Cucumber.<br />
3.1.3 The Gemfile and generators<br />
The Gemfile is used for tracking which gems are used in your application. The Bundler<br />
gem is responsible for everything to do with this file; it’s the Bundler’s job to ensure that<br />
all the gems are installed when your application is initialized. Let’s look at the following<br />
listing to see how this looks inside (commented lines are removed for simplicity).<br />
Listing 3.4 Gemfile<br />
source 'http://rubygems.org'<br />
gem 'rails', '3.1.0'<br />
gem 'sqlite3'<br />
group :assets do<br />
gem 'sass-rails', " ~> 3.1.0"<br />
gem 'coffee-rails', "~> 3.1.0"<br />
gem 'uglifier'<br />
end<br />
gem 'jquery-rails'<br />
group :test do<br />
# Pretty printed test output<br />
gem 'turn', :require => false<br />
end<br />
In this file, Rails sets a source to be http://rubygems.org (the canonical repository for<br />
Ruby gems). All gems you specify for your application are gathered from the source.<br />
Next, it tells Bundler it requires version 3.1.0.beta of the rails gem. Bundler<br />
inspects the dependencies of the requested gem as well as all gem dependencies of<br />
those dependencies (and so on), then does what it needs to do to make them available<br />
to your application.<br />
This file also requires the sqlite3 gem, which is used for interacting with SQLite3<br />
databases, the default when working with Rails. If you were to use another database<br />
system, you would need to take out this line and replace it with the relevant gem, such<br />
as mysql2 for MySQL or pg for PostgreSQL.<br />
The assets group inside the Gemfile contains two gems called sass-rails and<br />
coffee-rails. The sass-rails gem provides a bridge into the sass gem, which
Application setup<br />
provides much better templating for stylesheets, and the coffee-rails gem provides<br />
a similar bridge between Rails and the CoffeeScript templating languages. We’ll look<br />
at these in further detail when they're required.<br />
Finally, at the bottom of the Gemfile, the turn gem is specified. This gem is for<br />
making the Test::Unit output a lot prettier, but you’re not going to be using Test::Unit,<br />
you can remove these lines:<br />
group :test do<br />
# Pretty printed test output<br />
gem 'turn', :require => false<br />
end<br />
While you’re removing Test::Unit things, remove the test directory too: you won’t<br />
need that either. You’ll be using the spec directory for your tests instead.<br />
Chapter 2 focused on BDD and, as was more than hinted at, you’ll be using it to<br />
develop this application. First, alter the Gemfile to ensure you have the correct gems<br />
for RSpec and Cucumber for your application. Add the lines from the following listing<br />
to the bottom of the file.<br />
Listing 3.5 Check for RSpec and Cucumber gems<br />
group :test, :development do<br />
gem 'rspec-rails', '~> 2.5'<br />
end<br />
group :test do<br />
gem 'cucumber-rails'<br />
gem 'capybara'<br />
gem 'database_cleaner'<br />
end<br />
In the Gemfile, you specify that you wish to use the latest 2.x release of RSpec in the<br />
test and development groups. You put this gem inside the development group<br />
because without it, the tasks you can use to run your specs will be unavailable. Additionally,<br />
when you run a generator for a controller or model, it’ll use RSpec, rather<br />
than the default Test::Unit, to generate the tests for that class.<br />
With rspec-rails, you specified a version number with ~> 2.5, which tells Ruby-<br />
Gems you want RSpec 2.5 or higher. This means when RSpec releases 2.5.1 or 2.6 and<br />
you go to install your gems, RubyGems will install the latest version it can find rather<br />
than only 2.5.<br />
A new gem is used in listing 3.5: Capybara. Capybara is a browser simulator in Ruby<br />
that is used for integration testing. Cucumber and Capybara are two distinct entities.<br />
Cucumber is the testing tool that interacts with Capybara to perform tasks on a simulated<br />
application. Integration testing using Cucumber and Capybara ensures that<br />
when a link is clicked in your application, it goes to the correct page, or when you fill<br />
in a form and click the Submit button, an onscreen message tells you it was successful.<br />
Capybara also supports real browser testing by launching an instance of Firefox. You<br />
can then test your application’s JavaScript, which you’ll use extensively in chapter 8.<br />
51
52 CHAPTER 3 Developing a real Rails application<br />
An alternative to Capybara is Webrat, which is now less preferred because of the<br />
cleaner syntax and real browser testing features of Capybara. Capybara is the better<br />
alternative, hands down. 9<br />
Another new gem in listing 3.5 is the database_cleaner gem, which is used by<br />
cucumber_rails to clear out the database at the end of each test run to ensure you’re<br />
working with a pristine state each time.<br />
Groups in the Gemfile are used to define gems that should be loaded in specific<br />
scenarios. When using Bundler with Rails, you can specify a gem group for each Rails<br />
environment, and by doing so, you specify which gems should be required by that environment.<br />
A default Rails application has three standard environments: development,<br />
test, and production.<br />
Development is used for your local application, such as when you’re playing with it<br />
in the browser. In development mode, page and class caching is turned off, so<br />
requests may take a little longer than they do in production mode. Don’t worry. This is<br />
only the case for larger applications. We’re not there yet.<br />
Test is used when you run the automated test suite for the application. This environment<br />
is kept separate from the development environment so your tests start with a<br />
clean database to ensure predictability.<br />
Production is used when you finally deploy your application. This mode is<br />
designed for speed, and any changes you make to your application’s classes are not<br />
effective until the server is restarted.<br />
This automatic requiring of gems inside the Rails environment groups is done by<br />
this line in config/application.rb:<br />
Bundler.require(:default, Rails.env) if defined?(Bundler)<br />
To install these gems to your system, run bundle install --binstubs at the root of<br />
your application. It tells the Bundler gem to read your Gemfile and install the gems<br />
specified in it.<br />
The --binstubs option stores executable files in the bin directory for the gems<br />
that have executables. Without it, you’d have to type bundle exec rspec spec to run<br />
your RSpec tests. With it, you can just run bin/rspec spec. Much better! You don’t<br />
need to run bundle install --binstubs every time because Bundler remembers this<br />
configuration option for later.<br />
You don’t even have to run bundle install! Just bundle will do the same thing.<br />
NOTE If you’re running Ubuntu, you must install the build-essential<br />
package because some gems build native extensions and require the<br />
make utility. You may also have to install the libxslt1-dev package<br />
because the nokogiri gem (a dependency of Cucumber) depends on it.<br />
You’ll also need to install the libsqlite3-dev package to allow the<br />
sqlite3 gem to install.<br />
9 As of this writing, Webrat has an open bug: https://github.com/brynary/webrat/pull/46. If we were using<br />
Webrat, we could run into it and be stuck in the mud (so to speak).
Application setup<br />
This command installs not only the rspec-rails, cucumber, and capybara gems but<br />
also their dependencies (and so on)! How great is that? You’re just getting started.<br />
The bundle install --binstubs command also creates a Gemfile.lockfile that contains<br />
a list of the gems and their relative versions. Once Gemfile.lock is created,<br />
whenever you run bundle install, Bundler reads this file rather than Gemfile to work<br />
out the dependencies of the application and installs from it. You commit this file to<br />
your repository so that when other people work on your project and run bundle<br />
install, they get exactly the same versions that you have.<br />
Next, you want to generate the skeleton for Cucumber. A generator can generate<br />
either static or dynamic content, depending on the generator. For the Cucumber skeleton<br />
generator, it’s set content. To run this generator, you use the rails command<br />
rails generate cucumber:install<br />
or simply<br />
rails g cucumber:install<br />
Rails doesn’t mind if you use generate or g: it’s all the same to Rails.<br />
Let’s not mind too much about all the files it has generated at the moment; they’re<br />
explained in time. With the Cucumber skeleton now generated, you have a base on<br />
which to begin writing your features.<br />
While you’re generating things, you may as well run the RSpec generator too:<br />
rails generate rspec:install<br />
With this generated code in place, you should make a commit so you have another<br />
base to roll back to if anything goes wrong:<br />
git add .<br />
git commit -m "Ran the cucumber and rspec generators"<br />
git push<br />
3.1.4 Database configuration<br />
By default, Rails uses a database system called SQLite3, which stores each environment’s<br />
database in separate files inside the db directory. SQLite3 is the default database<br />
system because it’s the easiest to set up. Out of the box, Rails also supports the<br />
MySQL and PostgreSQL databases, with gems available that can provide functionality<br />
for connecting to other database systems such as Oracle.<br />
If you want to change which database your application connects to, you can open<br />
config/database.yml (development configuration shown in the following listing) and<br />
alter the settings to the new database system.<br />
Listing 3.6 config/database.yml<br />
development:<br />
adapter: sqlite3<br />
database: db/development.sqlite3<br />
pool: 5<br />
timeout: 5000<br />
53
54 CHAPTER 3 Developing a real Rails application<br />
For example, if you want to use PostgreSQL, you change the settings to read like the<br />
following listing. It’s common convention, but not mandatory, to call the environment’s<br />
database [app_name]_[environment].<br />
Listing 3.7 config/database.yml<br />
development:<br />
adapter: postgresql<br />
database: ticketee_development<br />
username: root<br />
password: t0ps3cr3t<br />
You’re welcome to change the database if you wish. Rails will go about its business. It’s<br />
good practice to develop and deploy on the same database system to avoid strange<br />
behavior between two different systems. Systems such as PostgreSQL perform faster<br />
than SQLite, so switching to it may increase your application’s performance. Be mindful,<br />
however, that switching database systems doesn’t automatically switch your data<br />
over for you.<br />
It’s generally wise to use different names for the different database environments<br />
because if you use the same database in development and test, the database will be<br />
emptied of all data when the tests are run, eliminating anything you may have set up<br />
in development mode. You should never work on the live production database<br />
directly unless you are absolutely sure of what you’re doing, and even then extreme<br />
care should be taken.<br />
Finally, if you’re using MySQL, it’s wise to set the encoding to utf8 for the database,<br />
using this setup in the config/database.yml file:<br />
development:<br />
adapter: mysql2<br />
database: ticketee_development<br />
username: root<br />
password: t0ps3cr3t<br />
encoding: utf8<br />
This way, the database is set up automatically to work with UTF-8 (UCS Transformation<br />
Format–8-bit), eliminating any potential encoding issues that may be encountered<br />
otherwise.<br />
That’s database configuration in a nutshell. Now we look at how to use a preprepared<br />
stylesheet to make an application look prettier than its unstyled brethren.<br />
3.1.5 Applying a stylesheet<br />
So that your application looks good as you’re developing it, we have a pre-prepared<br />
stylesheet you can use to style the elements on your pages. You can download the<br />
stylesheet from http://github.com/rails3book/ticketee/raw/master/app/assets/<br />
stylesheets/application.css and put it in the app/stylesheets directory. By default, your<br />
Rails application includes this stylesheet; you can configure it in the app/views/<br />
layouts/application.html.erb file using this line:<br />
First steps<br />
No further configuration is necessary: just drop and use. Simple.<br />
With a way to make your application decent looking, let’s develop your first feature<br />
to use this new style: creating projects.<br />
3.2 First steps<br />
You now have version control for your application, and you’re hosting it on GitHub.<br />
You also cheated a little and got a pre-prepared stylesheet. 10<br />
It’s now time to write your first Cucumber feature, which isn’t nearly as daunting as<br />
it sounds. We explore things such as models and RESTful routing while we do it. It’ll<br />
be simple, promise!<br />
3.2.1 Creating projects<br />
The CRUD (create, read, update, delete) acronym is something you see all the time in<br />
the Rails world. It represents the creation, reading, updating, and deleting of something,<br />
but it doesn’t say what that something is.<br />
In the Rails world, CRUD is usually referred to when talking about resources.<br />
Resources are the representation of the information from your database throughout<br />
your application. The following section goes through the beginnings of generating a<br />
CRUD interface for a resource called Project by applying the BDD practices learned in<br />
chapter 2 to the application you just bootstrapped. What comes next is a sampler of<br />
how to apply these practices when developing a Rails application. Throughout the<br />
remainder of the book, you continue to apply these practices to ensure you have a stable<br />
and maintainable application. Let’s get into it!<br />
The first story for your application is the creation (the C in CRUD). You create a<br />
resource representing projects in your application by writing a feature, creating a controller<br />
and model, and adding a resource route. Then you add a validation to ensure<br />
that no project can be created without a name.<br />
First, you generate a feature file at features/creating_projects.feature, and in this<br />
file, you put the story you would have discussed with the client, as shown in the following<br />
listing.<br />
Listing 3.8 features/creating_projects.feature<br />
Feature: Creating projects<br />
In order to have projects to assign tickets to<br />
As a user<br />
I want to create them easily<br />
Scenario: Creating a project<br />
Given I am on the homepage<br />
When I follow "New Project"<br />
And I fill in "Name" with "TextMate 2"<br />
And I press "Create Project"<br />
Then I should see "Project has been created."<br />
10 You wouldn’t have a pre-prepared stylesheet in the real world, where designers would design at the same time<br />
you’re developing features.<br />
55
56 CHAPTER 3 Developing a real Rails application<br />
To run all features for your application, run rake cucumber:ok. This command causes<br />
the following error message:<br />
...db/schema.rb doesn't exist yet. Run "rake db:migrate" to<br />
create it then try again. If you do not intend to use a database,<br />
you should instead alter ...ticketee/config/application.rb to limit<br />
the frameworks that will be loaded<br />
The db/schema.rb file referenced here (when generated) will contain a Ruby version<br />
of your database’s schema, which can be used to import the structure of your database.<br />
The great thing is that this file is database agnostic, so if you choose to switch<br />
databases during the life of your project, you won’t have to re-create this schema file.<br />
To generate this file, run this command:<br />
rake db:migrate<br />
For now, this command prints out the standard first line of rake output, the path to<br />
the application:<br />
(in /home/us/ticketee)<br />
When you run any Rake task, the first line will be this line. Its only purpose is to indicate<br />
which directory you’re running inside. When you run this particular task, it generates<br />
the db/schema.rb file your feature required. Therefore, you can run rake<br />
cucumber:ok again to have it fail on the second step of your feature:<br />
When I follow "New Project"<br />
no link with title, id or text 'New Project' found<br />
The first step here passes, but you haven’t written a step definition for it, as you did in<br />
chapter 2! It nevertheless passes because of the features/step_definitions/web_steps.rb<br />
file, which was generated when you ran the rails generate cucumber:install command.<br />
This file contains a step definition that matches your first step:<br />
Given /^(?:|I )am on (.+)$/ do |page_name|<br />
visit path_to(page_name)<br />
end<br />
First, Cucumber interprets this step on the basis of the definition from within this file.<br />
The visit method inside this definition comes from Capybara and emulates going to<br />
a specific path in a virtual browser. The path_to method is also defined, but it’s in the<br />
features/support/paths.rb file inside the NavigationHelpers module, again provided<br />
by Cucumber:<br />
module NavigationHelpers<br />
...<br />
def path_to(page_name)<br />
case page_name<br />
when /the home\s?page/<br />
'/'<br />
...<br />
Therefore, the path that Capybara will visit is /. If you start the server for the application<br />
by running rails server (or rails s) and navigate to http://localhost:3000 in
Figure 3.4 Welcome aboard: take #2<br />
First steps<br />
your browser, you’ll see the famous Welcome Aboard page from Rails (the same one<br />
you saw when you generated your first application in chapter 1), shown in figure 3.4.<br />
This is the page Capybara sees, and the reason the first step passes is that Capybara<br />
can go to the homepage successfully. This Welcome Aboard page lives at public/<br />
index.html in your application. To proceed, delete this file using this command:<br />
git rm public/index.html<br />
Run rake cucumber:ok again. This time you’ll see that the first step fails:<br />
Given I am on the homepage<br />
No route matches [GET] "/" (ActionController::RoutingError)<br />
The first step fails because you removed the public/index.html file that Rails was originally<br />
serving up at the root path, so the task goes to Rails. Rails claims it can’t handle<br />
that route and throws an exception. You have to tell Rails what to do with a request for<br />
/, or the root route comes in. You can do this easily in config/routes.rb. At the moment,<br />
this file has the content seen in the following listing (comments removed).<br />
Listing 3.9 config/routes.rb<br />
Ticketee::Application.routes.draw do<br />
end<br />
57
58 CHAPTER 3 Developing a real Rails application<br />
The comments are good for a read if you’re interested in the other routing syntax, but<br />
you needn’t look at these right now. To define a root route, you put the following<br />
directly under the first line of this file:<br />
root :to => "projects#index"<br />
This defines the root route to point at the ProjectsController’s index action. This<br />
controller doesn’t exist yet, and when you run rake cucumber:ok again, Cucumber<br />
complains about a missing constant, ProjectsController:<br />
Given I am on the homepage<br />
uninitialized constant ProjectsController ...<br />
To define this constant, you generate a controller. The controller is the first port of call<br />
for your routes (as you can see now!) and is responsible for querying the model for<br />
information inside an action and then doing something with that information (such<br />
as rendering a template). (Lots of new terms are explained later. Patience, grasshopper.)<br />
To generate this controller, run this command:<br />
rails g controller projects<br />
This command produces output similar to the output produced when you ran rails<br />
new earlier, but this time it creates files just for the projects controller, the most important<br />
of these being the controller itself, which is housed in app/controllers/<br />
projects_controller.rb. This is where all the actions will live, just like your app/controllers/purchases_controller.rb<br />
back in chapter 1. Before we dive into that, a couple of<br />
notes about the output.<br />
app/views/projects contains the views relating to your actions (more on this<br />
shortly).<br />
invoke helper shows that the helper generator was called here, generating a file<br />
at app/helpers/projects_helper.rb. This file defines a ProjectsHelper module. Helpers<br />
generally contain custom methods to use in your view, and they come as blank<br />
slates when they are first created.<br />
invoke erb signifies that the Embedded Ruby (ERB) generator was invoked.<br />
Actions to be generated for this controller have corresponding ERB views located in<br />
app/views/projects.<br />
invoke rspec shows that the RSpec generator was invoked at this point also. This<br />
means that RSpec has generated a new file at spec/controllers/projects_controller.rb,<br />
which you can use to test your controller; you won’t use this for the time being. By generating<br />
RSpec tests rather than Test::Unit tests, a long-standing issue within Rails has<br />
been fixed. (In previous versions of Rails, even if you specified the RSpec gem, all the<br />
default generators would still generate Test::Unit tests. With Rails 3, the testing framework<br />
you use is just one of a large number of configurable things in your application.)<br />
As mentioned previously when you ran rails generate rspec:install, this generator<br />
has generated an RSpec controller spec for your controller, spec/controllers/<br />
projects_controller_spec.rb, rather than a Test::Unit functional test. This file is used for<br />
testing the individual actions in your controller.
First steps<br />
Now, you’ve just run the generator to generate a new ProjectsController class<br />
and all its goodies. This should fix the “uninitialized constant” error message. If you<br />
run rake cucumber:ok again, it declares that the index action is missing:<br />
Given I am on the homepage<br />
The action 'index' could not be found for ProjectsController ...<br />
To define the index action in your controller, you must define a method inside the<br />
ProjectsController class, just as you did when you generated your first application,<br />
shown in the following listing.<br />
Listing 3.10 app/controllers/projects_controller.rb<br />
class ProjectsController < ApplicationController<br />
def index<br />
end<br />
end<br />
If you run rake cucumber:ok again, this time Rails complain of a missing template<br />
projects/index:<br />
Given I am on the homepage<br />
Missing template projects/index, application/index<br />
with {:handlers=>[:erb, :builder],<br />
:formats=>[:html],<br />
:locale=>[:en, :en]}.<br />
Searched in:<br />
* ".../ticketee/app/views"<br />
The error message isn’t the most helpful, but it’s quite detailed. If you know how to<br />
put the pieces together, you can determine that it’s trying to look for a template called<br />
projects/index or application/index, but it’s not finding it. These templates are primarily<br />
kept at app/views, so it’s fair to guess that it’s expecting something like app/<br />
views/projects/index.<br />
The extension of this file is composed of two parts: the format followed by the handler.<br />
In your output, you’ve got a handler of either :erb or :builder and a format of<br />
:html, so it’s fair to assume from this that the file it’s looking for is either<br />
index.html.erb or index.html.builder. Either of these is fine, but we’ll use the first one<br />
for consistency’s sake.<br />
The first part, index, is the name of the action; that’s the easy part. The second<br />
part, html, indicates the format of this template. Actions in Rails can respond to different<br />
formats (using respond_to, which you saw in chapter 1); the default format is<br />
html. The third part, erb, indicates the templating language you’re using, or the handler<br />
for this specific template. Templates in Rails can use different templating languages/handlers,<br />
but the default in Rails is ERB, hence the erb extension.<br />
You could also create a file at app/views/application/index.html.erb to provide the<br />
view for the index action. This would work because the ProjectsController inherits<br />
from the ApplicationController. If you had another controller inherit from<br />
59
60 CHAPTER 3 Developing a real Rails application<br />
ProjectsController, you could put an action’s template at app/views/application,<br />
app/views/projects, or app/views/that_controller, and Rails would still pick up on it.<br />
This allows different controllers to share views in a simple fashion.<br />
To generate this view, create the app/views/projects/index.html.erb file for now.<br />
When you run rake cucumber:ok again, you get back to what looks like the original<br />
error:<br />
Given I am on the homepage<br />
When I follow "New Project"<br />
no link with title, id or text 'New Project' found<br />
Although this looks like the original error, it’s actually your first step truly passing now.<br />
You’ve defined a homepage for your application by generating a controller, putting an<br />
action in it, and creating a view for that action. Now Cucumber (via Capybara) can<br />
navigate to it. That’s the first step in the first feature passing for your first application,<br />
and it’s a great first step!<br />
The second step in your features/creating_projects.feature file is now failing, and<br />
it’s up to you to fix it. You need a link on the root page of your application that reads<br />
"New Project". Open app/views/projects/index.html.erb, and put the link in by using<br />
the link_to method:<br />
<br />
This single line re-introduces two old concepts and one new one: ERB output tags, the<br />
link_to method (both of which you saw in chapter 1), and the mysterious<br />
new_project_path method.<br />
As a refresher, in ERB, when you use
First steps<br />
using the resources method, putting it directly under the root method in this file, as<br />
shown in the following listing.<br />
Listing 3.11 config/routes.rb<br />
resources :projects<br />
This is called a resource route, and it defines the routes to the seven RESTful actions in<br />
your projects controller. When something is said to be RESTful, it means it conforms<br />
to the Representational State Transfer (REST) standard. In Rails, this means the<br />
related controller has seven actions:<br />
� index<br />
� show<br />
� new<br />
� create<br />
� edit<br />
� update<br />
� destroy<br />
These seven actions match to just four request paths:<br />
� /projects<br />
� /projects/new<br />
� /projects/:id<br />
� /projects/:id/edit<br />
How can four be equal to seven? It can’t! Not in this world, anyway. Rails will determine<br />
what action to route to on the basis of the HTTP method of the requests to these<br />
paths. Table 3.1 lists the routes, HTTP methods, and corresponding actions to make it<br />
clearer.<br />
The routes listed in the table are provided when you use resources :projects.<br />
This is yet another great example of how Rails takes care of the configuration so you<br />
can take care of the coding.<br />
Table 3.1 RESTful routing matchup<br />
HTTP method Route Action<br />
GET /projects index<br />
POST /projects create<br />
GET /projects/new new<br />
GET /projects/:id show<br />
PUT /projects/:id update<br />
DELETE /projects/:id destroy<br />
GET /projects/:id/edit edit<br />
61
62 CHAPTER 3 Developing a real Rails application<br />
To review the routes you’ve defined, you can run the rake routes command and<br />
get output similar to the following.<br />
Listing 3.12 rake routes output<br />
root /<br />
{:controller=>"projects", :action=>"index"}<br />
projects GET /projects(.:format)<br />
{:action=>"index", :controller=>"projects"<br />
POST /projects(.:format)<br />
{:action=>"create", :controller=>"projects"}<br />
new_project GET /projects/new(.:format)<br />
{:action=>"new", :controller=>"projects"<br />
edit_project GET /projects/:id/edit(.:format)<br />
{:action=>"edit", :controller=>"projects"}<br />
project GET /projects/:id(.:format)<br />
{:action=>"show", :controller=>"projects"}<br />
PUT /projects/:id(.:format)<br />
{:action=>"update", :controller=>"projects"}<br />
DELETE /projects/:id(.:format)<br />
{:action=>"delete", :controller=>"projects"}<br />
The words in the leftmost column of this output are the beginnings of the method<br />
names you can use in your controllers or views to access them. If you want just the<br />
path to a route, such as /projects, then use projects_path. If you want the full URL,<br />
such as http://yoursite.com/projects, use projects_url. It’s best to use these helpers<br />
rather than hardcoding the URLs; doing so makes your application consistent across<br />
the board. For example, to generate the route to a single project, you would use either<br />
project_path or project_url:<br />
project_path(@project)<br />
This method takes one argument and generates the path according to this object.<br />
You’ll see later how you can alter this path to be more user friendly, generating a URL<br />
such as /projects/1-our-project rather than the impersonal /projects/1.<br />
The four paths mentioned earlier match up to the helpers in table 3.2. Running<br />
rake cucumber:ok now produces a complaint about a missing new action:<br />
When I follow "New Project"<br />
The action 'new' could not be found for ProjectsController<br />
In the following listing, you define the new action in your controller by defining a new<br />
method directly underneath the index method.<br />
URL Helper<br />
GET /projects projects_path<br />
/projects/new new_project_path<br />
/projects/:id project_path<br />
/projects/:id/edit edit_project_path<br />
Table 3.2<br />
RESTful routing matchup
First steps<br />
class ProjectsController < ApplicationController<br />
end<br />
Listing 3.13 app/controllers/projects_controller.rb<br />
def index<br />
end<br />
def new<br />
end<br />
Running rake cucumber:ok now results in a complaint about a missing new template,<br />
just as it did with the index action:<br />
When I follow "New Project"<br />
Missing template projects/new with {<br />
:handlers=>[:erb, :builder, :sass, :scss],<br />
:formats=>[:html],<br />
:locale=>[:en, :en]<br />
} in view paths "/home/rails3/ticketee/app/views"<br />
You can create the file at app/views/projects/new.html.erb to make this step pass,<br />
although this is a temporary solution. You come back to this file later to add content<br />
to it. The third step should now be the failing step, given the second one is passing, so<br />
run rake cucumber:ok to see if this is really the case:<br />
And I fill in "Name" with "TextMate 2"<br />
cannot fill in, no text field, text area or password field with<br />
id, name, or label 'Name' found (Capybara::ElementNotFound)<br />
Now Capybara is complaining about a missing "Name" field on the page it’s currently<br />
on, the new page. You must add this field so that Capybara can fill it in. Before you do<br />
that, however, fill out the new action in the ProjectsController so you have an object<br />
to base the fields on. Change the new to this:<br />
def new<br />
@project = Project.new<br />
end<br />
The Project constant is going to be a class, located at app/models/project.rb, thereby<br />
making it a model. A model is used to retrieve information from the database. Because<br />
this model inherits from Active Record, you don’t have to set up anything extra. Run<br />
the following command to generate your first model:<br />
rails g model project name:string<br />
This syntax is similar to the controller generator’s syntax except that you specified you<br />
want a model, not a controller. The other difference is that you gave it one further<br />
argument comprising a field name and a field type separated by a colon. When the<br />
generator runs, it generates not only the model file but also a migration containing the<br />
code to create this table and the specified field. You can specify as many fields as you<br />
like after the model’s name.<br />
63
64 CHAPTER 3 Developing a real Rails application<br />
Migrations are effectively version control for the database. They are defined as<br />
Ruby classes, which allows them to apply to multiple database schemas without having<br />
to be altered. All migrations have a change method in them when they are first<br />
defined. For example, the code shown in the following listing comes from the migration<br />
that was just generated.<br />
Listing 3.14 db/migrate/[date]_create_projects.rb<br />
class CreateProjects < ActiveRecord::Migration<br />
def change<br />
create_table :projects do |t|<br />
t.string :name<br />
t.timestamps<br />
end<br />
end<br />
end<br />
The change method is a new addition to Rails 3.1. When you run the migration forward<br />
(using rake db:migrate), it creates the table. When you roll the migration back<br />
(with rake db:rollback), it deletes (or drops) the table from the database. In previous<br />
versions of Rails, this migration would have been written as follows:<br />
class CreateProjects < ActiveRecord::Migration<br />
def self.up<br />
create_table :projects do |t|<br />
t.string :name<br />
t.timestamps<br />
end<br />
end<br />
def self.down<br />
drop_table :projects<br />
end<br />
end<br />
Here, the self.up method would be called if you ran the migration forward, and the<br />
self.down method if you ran it backward.<br />
In Rails 3.1, you can still use this syntax if you wish, but instead of self.up and<br />
self.down, you simply define the up and down methods:<br />
class CreateProjects < ActiveRecord::Migration<br />
def up<br />
# code<br />
end<br />
def down<br />
# code<br />
end<br />
end<br />
This syntax is especially helpful if the migration does something that has a reverse<br />
function that isn’t clear, such as removing a column:
First steps<br />
class CreateProjects < ActiveRecord::Migration<br />
def up<br />
remove_column :projects, :name<br />
end<br />
def down<br />
add_column :projects, :name, :string<br />
end<br />
end<br />
This is because ActiveRecord won’t know what type of field to re-add this column as,<br />
so you must tell it what to do in the case of this migration being rolled back.<br />
The first line tells Active Record you want to create a table called projects. You<br />
call this method in the block format, which returns an object that defines the table. To<br />
add fields to this table, you call methods on the block’s object (called t in this example<br />
and in all model migrations), the name of which usually reflects the type of column<br />
it is, and the first argument is the name of that field. The timestamps method is<br />
special: it creates two fields, the created_at and updated_at datetime fields, which<br />
are by default set to the current time in coordinated universal time (UTC) by Rails<br />
when a record is created and updated, respectively.<br />
A migration doesn’t automatically run when you create it—you must run it yourself<br />
using rake db:migrate. This command migrates the database up to the latest migration,<br />
which for now is the only migration. If you create a whole slew of migrations at<br />
once, this command migrates them in the order they were created.<br />
With this model created and its related migration run, you can now run the feature<br />
and have the second step passing once again and the third one failing:<br />
When I follow "New Project"<br />
And I fill in "Name" with "TextMate 2"<br />
cannot fill in, no text field, text area or password field with<br />
id, name, or label 'Name' found (Capybara::ElementNotFound)<br />
Now you are back to the missing field error. To add this field to the new action’s view,<br />
you use a partial. Partials allow you to render dynamic content chunks in your views<br />
and are helpful for reducing duplicate code. You put this form in a partial because<br />
you must use it later in the edit action of your controller. To create a partial for your<br />
projects, create a new file called app/views/projects/_form.html.erb; the underscore<br />
prefix to this file’s name indicates that it’s a partial. You fill this file with the content<br />
from the following listing.<br />
Listing 3.15 app/views/projects/_form.html.erb<br />
<br />
<br />
<br />
<br />
<br />
<br />
<br />
65
66 CHAPTER 3 Developing a real Rails application<br />
So many new things! The form_for call allows you to specify the values for the attributes<br />
of your new Project object when this partial is rendered under the new action,<br />
and it allows you to edit the values for an existing object when you’re on the edit<br />
action. This works because you’ll set @project in both of these actions to point to new<br />
and existing objects respectively.<br />
The form_for method is passed the @project object as the first argument, and<br />
with this, the helper does more than simply place a form tag on the page. form_for<br />
inspects the @project object and creates a form builder specifically for that object.<br />
The two main things it inspects are (1) whether or not it’s a new record and (2) what<br />
the class name is.<br />
Determining what action attribute the form has (where the form sends to) is<br />
dependent on whether the object is a new record. A record is classified as new when it<br />
hasn’t been saved to the database, and this check is performed internally to Rails<br />
using the persisted? method, which returns true if the record is stored in the database<br />
or false if it’s not. The class of the object also plays a pivotal role in where the<br />
form is sent. Rails inspects this class and from it determines what the route should be.<br />
In this case, it is /projects. Because the record is new, the path is /projects and the<br />
method for the form is post. Therefore, a request is sent to the create action in<br />
ProjectsController.<br />
After that part of form_for is complete, you use the block syntax to receive an f<br />
variable, which is a FormBuilder object. You can use this object to define your forms<br />
fields. The first element you define is a label. label tags correspond to their field elements<br />
on the page and serve two purposes in the application. First, they give users a<br />
larger area to click rather than just the field, radio button, or check box. The second<br />
purpose is so you can reference the label’s text in the Cucumber story, and Cucumber<br />
will know what field to fill in.<br />
TIP If you want to customize a label, you can pass a second argument:<br />
<br />
After the label, you put the text_field, which renders an input tag corresponding to<br />
the label and the field. The output tag looks like this:<br />
<br />
Then you use the submit method to provide users with a Submit button for your form.<br />
Because you call this method on the f object, a check is made regarding checks<br />
whether or not the record is new and sets the text to read “Create Project” if the<br />
record is new or “Update Project” if it is not.<br />
The great thing about this partial is that later on, you can use it to implement your<br />
edit action. To use this partial for the new action, put the following code inside the<br />
app/views/projects/new.html.erb:<br />
New project<br />
First steps<br />
The render method in this variation renders the app/views/projects/_form.html.erb<br />
partial at this location.<br />
Now, running rake cucumber:ok once more, you can see that your feature is one<br />
step closer to finishing: the field is filled in. How did Capybara know where to find the<br />
correct field to fill in? Simple. When you defined the field inside app/views/projects/<br />
_form.html.erb, you used the syntax shown in the following listing.<br />
<br />
<br />
Capybara finds the label containing the "Name" text you ask for in your scenario and<br />
fills out the corresponding field. Capybara has a number of ways to locate a field, such<br />
as by the name of the corresponding label, the id attribute of the field, or the name<br />
attribute. The last two look like this:<br />
When I fill in "project_name" with "TextMate 2"<br />
# or<br />
When I fill in "project[name]" with "TextMate 2"<br />
These aren’t human friendly ways to find a field, so let’s use "Name" instead.<br />
When you run the feature again with rake cucumber:ok, you get this error:<br />
And I press "Create Project"<br />
The action 'create' could not be found for ProjectsController<br />
The feature now complains of a missing action called create. To define this action,<br />
you define the create method underneath the new method in the Projects-<br />
Controller, as in the following listing.<br />
def create<br />
@project = Project.new(params[:project])<br />
@project.save<br />
flash[:notice] = "Project has been created."<br />
redirect_to @project<br />
end<br />
The new method takes the argument params, which is available inside controller methods<br />
and returns the parameters passed to the action, such as those from the form, as a<br />
HashWithIndifferentAccess object. These are different from normal Hash objects,<br />
because you can reference a String key by using a matching Symbol and vice versa. In<br />
this case, the params hash is<br />
{<br />
Listing 3.16 app/views/projects/_form.html.erb<br />
Listing 3.17 app/controllers/projects_controller.rb<br />
"commit" => "Create Project",<br />
"action" => "create",<br />
"project" => {<br />
"name" => "TextMate 2"<br />
67
68 CHAPTER 3 Developing a real Rails application<br />
}<br />
},<br />
"controller" => "projects"<br />
TIP If you’d like to inspect the params hash at any point in time, you can<br />
put p params in any action and then run the action either by accessing it<br />
through rails server or by running a scenario that will run an action<br />
containing this line. This outputs to the console the params hash and is<br />
equivalent to doing puts params.inspect.<br />
All the hashes nested inside this hash are also HashWithIndifferentAccess hashes. If<br />
you want to get the name key from the project hash here, you can use either { :name =><br />
"TextMate 2" }[:name], as in a normal Hash object, or { :name => "TextMate 2"<br />
}['name']; you may use either the String or the Symbol version—it doesn’t matter.<br />
The first key in the params hash, commit, comes from the Submit button, which<br />
has the value Create Project. This is accessible as params[:commit]. The second key,<br />
action, is one of two parameters always available, the other being controller. These<br />
represent exactly what their names imply: the controller and action of the request,<br />
accessible as params[:controller] and params[:action] respectively. The final key,<br />
project, is, as mentioned before, a HashWithIndifferentAccess. It contains the<br />
fields from your form and is accessible via params[:project]. To access the name field,<br />
use params[:project][:name], which calls the [] method on params to get the value<br />
of the :project key and then, on the result, calls [] again, this time with the :name<br />
key to get the name of the project passed in.<br />
When new receives this HashWithIndifferentAccess, it generates a new Project<br />
object with the attributes based on the parameters passed in. The Project object will<br />
have a name attribute set to the value from params[:project][:name].<br />
You call @project.save to save your new Project object into the projects table.<br />
The flash method in your create action is a way of passing messages to the next<br />
request, and it’s also a HashWithIndifferentAccess. These messages are stored in the<br />
session and are cleared at the completion of the next request. Here you set the<br />
:notice key to be Project has been created. to inform the user what has happened. This<br />
message is displayed later, as is required by the final step in your feature.<br />
The redirect_to method takes either an object, as in the create action, or a path<br />
to redirect to as a string. If an object is given, Rails inspects that object to determine<br />
what route it should go to, in this case, project_path(@project) because the object<br />
has now been saved to the database. This method generates the path of something<br />
such as /projects/:id, where :id is the record id attribute assigned by your database<br />
system. The redirect_to method tells the browser to begin making a new request to<br />
that path and sends back an empty response body; the HTTP status code will be a 302<br />
Redirected to /projects/1, which is the currently nonexistent show action.<br />
Upon running rake cucumber:ok again, you are told that your app doesn’t know<br />
about a show action:<br />
And I press "Create Project"<br />
The action 'show' could not be found for ProjectsController
First steps<br />
Combining redirect_to and flash<br />
You can combine flash and redirect_to by passing the flash as an option to the<br />
redirect_to. If you want to pass a success message, you use the notice flash key;<br />
otherwise you use the alert key. By using either of these two keys, you can use this<br />
syntax:<br />
redirect_to @project,<br />
:notice => "Project has been created."<br />
# or<br />
redirect_to @project,<br />
:alert => "Project has not been created."<br />
If you do not wish to use either notice or alert, you must specify flash as a hash:<br />
redirect_to @project,<br />
:flash => { :success => "Project has been created."}<br />
The show action is responsible for displaying a single record’s information. To retrieve<br />
a record, you need an ID to fetch. You know the URL for this page is going to be something<br />
like /projects/1, but how do you get the 1 from that URL? Well, when you use<br />
resource routing, as you have done, this 1 is available as params[:id], just as<br />
params[:controller] and params[:action] are also automatically made available by<br />
Rails. You can then use this params[:id] parameter in your show action to find a specific<br />
Project object.<br />
Put the code from the following listing into app/controllers/projects_controller.rb<br />
to do this right now.<br />
Listing 3.18 app/controllers/projects_controller.rb<br />
def show<br />
@project = Project.find(params[:id])<br />
end<br />
You pass the params[:id] object to Project.find here, which gives you a single<br />
Project object that relates to a record in the database, which has its id field set to<br />
whatever params[:id] is. If Active Record cannot find a record matching that ID, it<br />
raises an ActiveRecord::RecordNotFound exception.<br />
When you run rake cucumber:ok, you get an error telling you the show action’s<br />
template is missing:<br />
And I press "Create Project"<br />
Missing template projects/show, application/show<br />
with { :handlers=>[:erb, :builder],<br />
:formats=>[:html],<br />
:locale=>[:en, :en]}.<br />
Searched in:<br />
* "/Users/ryanbigg/Sites/book/edge-ticketee/app/views"<br />
69
70 CHAPTER 3 Developing a real Rails application<br />
You can create the file app/views/projects/show.html.erb with the following content<br />
for now:<br />
<br />
When you run rake cucumber:ok, you see this message:<br />
And I press "Create Project"<br />
Then I should see "Project has been created."<br />
expected #has_content?("Project has been created.")<br />
to return true, got false<br />
This error message shows the has_content? method from Capybara, which is used to<br />
see if the page has specific content on it. It’s checking for "Project has been<br />
created." and is not finding it. Therefore, you must put it somewhere, but where?<br />
The best location is in the application layout, located at app/views/layouts/<br />
application.html.erb. This file provides the layout for all templates in your application,<br />
so it’s a great spot for the flash message.<br />
Here is quite the interesting file:<br />
<br />
<br />
Ticketee<br />
<br />
<br />
<br />
<br />
<br />
<br />
<br />
<br />
The first line sets up the doctype to be HTML for the layout, and three new methods<br />
are used: stylesheet_link_tag, javascript_include_tag, and csrf_meta_tags.<br />
stylesheet_link_tag is for including stylesheets from the app/assets/stylesheets<br />
directory. Using this tag results in the following output:<br />
<br />
The /assets path is served by a gem called sprockets. In this case, you’re specifying<br />
the /assets/application.css path, so Sprockets looks for a file called app/assets/application.css,<br />
which would usually act as a manifest file listing the Cascading Style Sheets<br />
(CSS) files that need to be included for the application. The current manifest file just<br />
provides a stylesheet for the entire application.<br />
For your CSS files, you can use the Sass language to produce more powerful<br />
stylesheets. Your application depends on the sass-rails gem, which itself depends on
First steps<br />
sass, the gem for these stylesheets. We don’t go into detail here because the Sass site<br />
covers most of that ground: http://sass-lang.com/. Rails automatically generates<br />
stylesheets for each controller that uses Sass, as indicated by its .css.scss extension. This<br />
final extension tells Sprockets to process the file using Sass before serving it as CSS.<br />
javascript_include_tag is for including JavaScript files from the public/<br />
javascripts directory. When the application string is specified here, Rails loads the<br />
application JavaScript manifest file, app/assets/javascripts/application.js, which looks<br />
like this:<br />
//= require jquery<br />
//= require jquery_ujs<br />
//= require_tree .<br />
This file includes the jquery.js and jquery_ujs.js files located in the jquery-rails gem<br />
that your application depends on (see the Gemfile) and compiles them into one superfile<br />
called application.js, which is referenced by this line in the output of your pages:<br />
<br />
This file is also served through the sprockets gem. As with your CSS stylesheets, you<br />
can use an alternative syntax called CoffeeScript (http://coffeescript.org), which provides<br />
a simpler JavaScript syntax that compiles into proper JavaScript. Just as with the<br />
Sass stylesheets, Rails generates CoffeeScript files inside app/assets/javascripts with the<br />
extension .js coffee, indicating to Sprockets they are to be parsed by a CoffeeScript<br />
interpreter first, then served as JavaScript. We use CoffeeScript a little later, in<br />
chapter 9.<br />
csrf_meta_tags is for protecting your forms from cross-site request forgery<br />
(CSRF) 11 attacks. It creates two meta tags, one called csrf-param and the other csrftoken.<br />
This unique token works by setting a specific key on forms that is then sent<br />
back to the server. The server checks this key, and if the key is valid, the form is submitted.<br />
If the key is invalid, an ActionController::InvalidAuthenticityToken<br />
exception occurs.<br />
Later in the file is the single line<br />
<br />
This line indicates to the layout where the current action’s template is to be rendered.<br />
Create a new line just before and place the following code on it:<br />
<br />
<br />
<br />
<br />
<br />
11 http://en.wikipedia.org/wiki/CSRF.<br />
71
72 CHAPTER 3 Developing a real Rails application<br />
This code renders all the flash messages that get defined, regardless of their name. It<br />
displays the flash[:notice] you set up in the controller. Run rake cucumber:ok<br />
again and see that not only the last step in your scenario is passing,<br />
Then I should see "Project has been created."<br />
but the entire scenario is passing!<br />
1 scenario (1 passed)<br />
5 steps (5 passed)<br />
Yippee! You have just written your first BDD feature for this application! That’s all<br />
there is to it. If this process feels slow, that’s how it’s supposed to feel when you’re new<br />
to any process. Remember when you were learning to drive a car? You didn’t drive like<br />
Michael Schumacher first off. You learned by doing it slowly and methodically. As you<br />
progress, it becomes quicker, as all things do with practice.<br />
3.2.3 Committing changes<br />
You’re at a point where all (just the one for now) your features are running, and<br />
points like this are great times to make a commit:<br />
git add .<br />
git commit -m "Creation of projects feature complete"<br />
You should commit often because commits provide checkpoints you can revert back<br />
to if anything goes wrong. If you’re going down a path where things aren’t working<br />
and you want to get back to the last commit, you can revert all your changes by using<br />
git checkout .<br />
WARNING This command doesn’t prompt you to ask whether you’re sure<br />
you want to take this action. You should be incredibly sure that you want<br />
to destroy your changes. If you’re not sure and want to keep your changes<br />
while reverting back to the previous revision, it’s best to use the git stash<br />
command. This command stashes your unstaged changes to allow you to<br />
work on a clean directory and allows you to restore the changes using git<br />
stash apply.<br />
With the changes committed to your local repository, you can push them off to the<br />
GitHub servers. If for some reason the code on your local machine goes missing, you<br />
have GitHub as a backup. Run git push to put it up to GitHub’s servers. You don’t<br />
need to specify the remote or branch because you did that the first time you pushed.<br />
Commit early. Commit often.<br />
3.2.4 Setting a page title<br />
Before you completely finish working with this story, there is one more thing to point<br />
out: the templates are rendered before the layout. You can use this to your benefit by<br />
setting an instance variable such as @title in the show action’s template; then you can
First steps<br />
reference it in your application’s layout to show a title for your page at the top of the<br />
tab or window.<br />
To test that the page title is correctly implemented, add an addendum to your<br />
Cucumber scenario for it. At the bottom of the scenario in features/creating<br />
_projects.feature, add the two lines shown in the following listing.<br />
Listing 3.19 features/creating_projects.feature<br />
And I should be on the project page for "TextMate 2"<br />
And I should see "TextMate 2 - Projects - Ticketee"<br />
The first line ensures that you’re in the ProjectsController’s show action, or at least<br />
it would if you had defined the path to it. If you run rake cucumber:ok now, this first<br />
step fails:<br />
Can't find mapping from "the project page for "TextMate 2"" to a path.<br />
Now, go and add a mapping in .../ticketee/features/support/paths.rb<br />
Then it tells you to add a mapping in features/support/paths.rb, which is what you<br />
should do. You visited this file at the beginning of your feature when you saw that it<br />
had this path to the home page defined:<br />
when /the home\s?page/<br />
'/'<br />
To define your own path, simply add another when directly underneath this one, as in<br />
the following listing.<br />
Listing 3.20 features/support/paths.rb<br />
when /the project page for "([^\"]*)"/<br />
project_path(Project.find_by_name!($1))<br />
These two whens together should now look like the following listing.<br />
Listing 3.21 features/support/paths.rb<br />
when /the home\s?page/<br />
'/'<br />
when /the project page for "([^\"]*)"/<br />
project_path(Project.find_by_name!($1))<br />
When the when is fully matched to whatever page_name is, the part in the quotation<br />
marks is captured and stored as the variable $1. This is referred to as a capture group.<br />
You then use this variable to find the project by the given name so that<br />
project_path has a record to act on, thereby returning the path to the project. You<br />
find this record by using a dynamic method. This find_by_name! method doesn’t exist,<br />
and in Ruby when methods don’t exist, another method named method_missing is<br />
called.<br />
The method_missing method is passed the name of the method that cannot be<br />
found, and any arguments passed to it are passed as additional arguments to<br />
73
74 CHAPTER 3 Developing a real Rails application<br />
method_missing. These are then used to construct a real method call and make Ruby<br />
act as though the method exists. When you use the bang (find_by_name! with an<br />
exclamation mark as opposed to find_by_name) version of this method, Active<br />
Record raises an ActiveRecord::RecordNotFound exception if the record isn’t found.<br />
This can prove helpful if, for example, you misspell a project’s name when trying to<br />
use this step. The exception raised if you don’t capitalize the M in TextMate (thereby<br />
making it Textmate) is this:<br />
Then I should be on the project page for "Textmate 2"<br />
Couldn't find Project with name = Textmate 2 (ActiveRecord::RecordNotFound)<br />
If you don’t use the bang version of this method, the finder returns nil. If<br />
project_path is passed nil, you get a hard-to-debug error:<br />
Then I should be on the project page for "Textmate 2"<br />
No route matches {:action => "show", :controller => "projects"}<br />
This error claims that no route matches up to the ProjectsController’s show action,<br />
but there actually is one: /projects/:id. The difference is that this route requires<br />
you to pass through the id parameter too; otherwise the error occurs.<br />
To debug something like this, you check and double check what values were being<br />
passed where, particularly what $1 was coming back as, and whether Project.find_by_name<br />
was returning any record. If you checked those two things, you’d<br />
find that Project.find_by_name isn’t returning what you think it should be returning,<br />
and hopefully you’d realize you were passing in the wrong name.<br />
Upon running rake cucumber:ok, you now see that a step passes, but the rest of<br />
the feature fails:<br />
And I should be on the project page for "TextMate 2"<br />
And I should see "TextMate 2 - Projects - Ticketee"<br />
expected #has_content?("TextMate 2 - Projects - Ticketee")<br />
to return true, got false<br />
Why are you getting an error seemingly from RSpec? Because Capybara uses its helpers<br />
internally to determine if it can find content. This error therefore means that Capybara<br />
can’t find the content it’s looking for. What content? Have a look at the last line<br />
of the backtrace:<br />
features/creating_projects.feature:13:<br />
Line 13 of features/creating_projects.feature is the And I should see "TextMate 2 -<br />
Projects - Ticketee" step, which checks for content shown on the page. To make<br />
this step pass, you need to define the content it should see. Write the code from the<br />
following listing into app/views/projects/show.html.erb.<br />
Listing 3.22 app/views/projects/show.html.erb<br />
First steps<br />
Then enter the following code in app/views/layouts/application.html.erb where the<br />
title tag currently is.<br />
Listing 3.23 app/views/layouts/application.html.erb<br />
<br />
In Ruby, instance variables that aren’t set return nil as their values. If you try to access<br />
an instance variable that returns a nil value, you can use || to return a different<br />
value, as in this example.<br />
With this in place, your step passes when you run rake cucumber:ok:<br />
And I should see "TextMate 2 - Projects - Ticketee"<br />
With this scenario now passing, you can change your code and have a solid base to<br />
ensure that whatever you change works as you expect. To demonstrate this point,<br />
change the code in show to use a helper instead of setting a variable.<br />
Helpers are methods you can define in the files inside app/helpers, and they are<br />
made available in your views. Helpers are for extracting the logic from the views, as<br />
views should just be about displaying information. Every controller that comes from<br />
the controller generator has a corresponding helper, and another helper exists for<br />
the entire application. Now open app/helpers/application_helper.rb and insert the<br />
code from the following listing.<br />
Listing 3.24 app/helpers/application_helper.rb<br />
module ApplicationHelper<br />
def title(*parts)<br />
unless parts.empty?<br />
content_for :title do<br />
(parts
76 CHAPTER 3 Developing a real Rails application<br />
though, you should change the line in the feature that checks for the title on the page<br />
to the following:<br />
And I should see "TextMate 2 - Projects - Ticketee"<br />
When you run this feature, it should be broken:<br />
expected #has_content?("TextMate 2 - Projects - Ticketee")<br />
to return true, got false<br />
Now you can fix it by replacing the line that sets @title in your show template with<br />
this one:<br />
<br />
You don’t need Ticketee here any more because the method puts it in for you. Let’s<br />
replace the title tag line with this:<br />
<br />
<br />
<br />
<br />
Ticketee<br />
<br />
<br />
This code uses a new method called content_for?, which checks that the specified<br />
content block is defined. If it is, you use yield and pass it the name of the content<br />
block, which causes the content for that block to be rendered. If it isn’t, then you just<br />
output the word Ticketee, and that becomes the title.<br />
When you run this feature again, it passes:<br />
...<br />
And I should see "TextMate 2 - Projects - Ticketee"<br />
1 scenario (1 passed)<br />
7 steps (7 passed)<br />
That’s a lot neater now, isn’t it? Let’s create a commit for that functionality and push<br />
your changes:<br />
git add .<br />
git commit -m "Added title functionality for show page"<br />
git push<br />
Next up, we look at how to stop users from entering invalid data into your forms.<br />
3.2.5 Validations<br />
The next problem to solve is preventing users from leaving a required field blank. A<br />
project with no name isn’t useful to anybody. Thankfully, Active Record provides validations<br />
for this issue. Validations are run just before an object is saved to the database,<br />
and if the validations fail, then the object isn’t saved. When this happens, you want to<br />
tell the user what went wrong, so you write a feature that looks like the following listing.
First steps<br />
Listing 3.25 features/creating_projects.feature<br />
Scenario: Creating a project without a name<br />
Given I am on the homepage<br />
When I follow "New Project"<br />
And I press "Create Project"<br />
Then I should see "Project has not been created."<br />
And I should see "Name can't be blank"<br />
The first two steps are identical to the ones you placed inside the other scenario. You<br />
should eliminate this duplication by making pour code DRY (Don’t Repeat Yourself!).<br />
This is another term you’ll hear a lot in the Ruby world. It’s easy to extract common<br />
code from where it’s being duplicated and into a method or a module you can use<br />
instead of the duplication. One line of code is 100 times better than 100 lines of duplicated<br />
code. To DRY up your code, before the first scenario, you define a background.<br />
For Cucumber, backgrounds have a layout identical to scenarios but are executed<br />
before every scenario inside the feature. Delete the two steps from the top of both of<br />
these scenarios so that they now look like the following listing.<br />
Listing 3.26 features/creating_projects.feature<br />
Scenario: Creating a project<br />
And I fill in "Name" with "TextMate 2"<br />
And I press "Create Project"<br />
Then I should see "Project has been created."<br />
And I should be on the project page for "TextMate 2"<br />
And I should see "TextMate 2 - Projects - Ticketee"<br />
Scenario: Creating a project without a name<br />
And I press "Create Project"<br />
Then I should see "Project has not been created."<br />
And I should see "Name can't be blank"<br />
Then on the line before the first Scenario, define the Background, as in the next listing.<br />
Listing 3.27 features/creating_projects.feature<br />
Background:<br />
Given I am on the homepage<br />
When I follow "New Project"<br />
Now when you run rake cucumber:ok, this will fail because it cannot see the error<br />
message on the page:<br />
Then I should see "Project has not been created."<br />
To get this feature to do what you want it to do, add a validation. Validations are<br />
defined on the model and typically are run before the data is put into the database,<br />
but this can be made optional, as you’ll see later. To define a validation ensuring the<br />
name attribute is there, open the app/models/project.rb file and make it look like the<br />
following listing.<br />
77
78 CHAPTER 3 Developing a real Rails application<br />
Listing 3.28 app/models/project.rb<br />
class Project < ActiveRecord::Base<br />
validates :name, :presence => true<br />
end<br />
This validates method tells the model that you want to validate the name field and<br />
that you want to validate its presence. There are other kinds of validations as well,<br />
such as the :uniqueness key, which, when passed true as the value, validates the<br />
uniqueness of this field as well. In prior versions of Rails, to do this you would have to<br />
use the validates_presence_of method instead:<br />
class Project < ActiveRecord::Base<br />
validates_presence_of :name<br />
end<br />
This syntax is still supported in Rails 3, but with the new syntax in Rails 3, you can<br />
specify multiple validation types for multiple fields on the same line, thereby reducing<br />
duplication in your model.<br />
Beware race conditions with the uniqueness validator<br />
The validates_uniqueness_of validator works by checking to see if a record<br />
matching the validation criteria exists already. If this record doesn’t exist, the validation<br />
will pass.<br />
A problem arises if two connections to the database both make this check at almost<br />
exactly the same time. Both connections will claim that a record doesn’t exist and<br />
therefore will allow a record to be inserted for each connection, resulting in nonunique<br />
records.<br />
A way to prevent this is to use a database uniqueness index so the database, not<br />
Rails, does the uniqueness validation. For information about how to do this, consult<br />
your database’s manual.<br />
Although this problem doesn’t happen all the time, it can happen, so it’s something<br />
to watch out for.<br />
With the presence validation in place, you can experiment with the validation by using<br />
the Rails console, which allows you to have all the classes and the environment from<br />
your application loaded in a sandbox environment. You can launch the console with<br />
this command<br />
rails console<br />
or with its shorter alternative:<br />
rails c<br />
If you’re familiar with Ruby, you may realize that this is effectively IRB with some Rails<br />
sugar on top. For those of you new to both, IRB stands for Interactive Ruby, and it pro-
First steps<br />
vides an environment for you to experiment with Ruby without having to create new<br />
files. The console prompt looks like this:<br />
Loading development environment (Rails 3.1.0.beta)<br />
irb(main):001:0><br />
At this prompt, 12 you can enter any valid Ruby and it’ll be evaluated. But for now, the<br />
purpose of opening this console is to test the newly appointed validation. To do this,<br />
try to create a new project record by calling the create method. The create method<br />
is similar to the new method, but it attempts to create an object and then a database<br />
record for it rather than just the object. You use it identically to the new method:<br />
irb(main):001:0> Project.create<br />
=> #<br />
Here you get a new Project object with the name attribute set to nil, as you should<br />
expect because you didn’t specify it. The id attribute is nil too, which indicates that<br />
this object is not persisted (saved) in the database.<br />
If you comment out or remove the validation from inside the Project class and<br />
type reload! in your console, the changes you just made to the model are reloaded.<br />
When the validation is removed, you have a slightly different outcome when you call<br />
Project.create:<br />
irb(main):001:0> Project.create<br />
=> #<br />
Here, the name field is still expectedly nil, but the other three attributes have values.<br />
Why? When you call create on the Project model, Rails builds a new Project object<br />
with any attributes you pass it 13 and checks to see if that object is valid. If it is, Rails sets<br />
the created_at and updated_at attributes to the current time and then saves it to the<br />
database. After it’s saved, the id is returned from the database and set on your object.<br />
This object is valid, according to Rails, because you removed the validation, and therefore<br />
Rails goes through the entire process of saving.<br />
The create method has a bigger, meaner brother called create! (pronounced create<br />
BANG!). Re-add or uncomment the validation from the model and type reload! in<br />
the console, and you’ll see what this mean variant does with this line:<br />
irb(main):001:0> Project.create!<br />
ActiveRecord::RecordInvalid: Validation failed: Name can't be blank<br />
12 Although you may see something similar to ruby-1.9.2-p180 :001 > too, which is fine.<br />
13 The first argument for this method is the attributes. If there is no argument passed, then all attributes default<br />
to their default values.<br />
79
80 CHAPTER 3 Developing a real Rails application<br />
The create! method, instead of nonchalantly handing back a Project object regardless<br />
of any validations, raises an ActiveRecord::RecordInvalid exception if any of the<br />
validations fail, showing the exception followed by a large stacktrace, which you can<br />
safely ignore for now. You are notified which validation failed. To stop it from failing,<br />
you must pass in a name attribute, and it will happily return a saved Project object:<br />
irb(main):002:0> Project.create!(:name => "TextMate 2")<br />
=> #<br />
That’s how to use create to test it in the console, but in your ProjectsController,<br />
you use the method shown in the following listing instead.<br />
Listing 3.29 app/controllers/projects_controller.rb<br />
@project = Project.new(params[:project])<br />
@project.save<br />
save doesn’t raise an exception if validations fail, as create! did, but instead returns<br />
false. If the validations pass, save returns true. You can use this to your advantage to<br />
show the user an error message when this returns false by using it in an if statement.<br />
Make the create action in the ProjectsController, as in the following listing.<br />
Listing 3.30 app/controllers/projects_controller.rb<br />
def create<br />
@project = Project.new(params[:project])<br />
if @project.save<br />
flash[:notice] = "Project has been created."<br />
redirect_to @project<br />
else<br />
flash[:alert] = "Project has not been created."<br />
render :action => "new"<br />
end<br />
end<br />
Now if the @project object is valid, then save returns true and executes everything<br />
between the if and the else. If it isn’t valid, then everything between the else and<br />
the following end is executed. In the else, you specify a different key for the flash message<br />
because you’ll want to style alert messages differently from notices later in the<br />
application’s lifecycle.<br />
When you run rake cucumber:ok here, the second step of your second scenario<br />
passes because you now have the flash[:alert] set:<br />
Then I should see "Project has not been created."<br />
And I should see "Name can't be blank"<br />
expected #has_content?("Name can't be blank")<br />
to return true, got false<br />
...<br />
12 steps (1 failed, 11 passed)
Summary<br />
This scenario passes because of the changes you made to the controller and application<br />
layout, where you display all the flash messages. Of course, the third step is now<br />
failing. To display error messages in the view, you need to install the dynamic_form<br />
gem. To install it, add this line to your Gemfile underneath the line for the coffeerails<br />
gem:<br />
gem 'coffee-rails'<br />
gem 'dynamic_form'<br />
Then you must run bundle install to install it. Alternatively, you could install it as a<br />
plugin by using this command:<br />
rails plugin install git://github.com/rails/dynamic_form.git<br />
This command executes a git clone on the URL passed in and creates a new folder<br />
called vendor/plugins/dynamic_form in your application, putting the plugin’s code<br />
inside of it. Installing it as a plugin would lead to a “polluted” repository, so installing<br />
it as a gem is definitely preferred here. Also, when it’s installed as a gem, RubyGems<br />
and Bundler provide an exceptionally easy way of keeping it up to date, whereas the<br />
plugin architecture in Rails doesn’t. This is a good reason to try to use gems instead of<br />
plugins.<br />
The helpful method you’re installing this gem for is the error_messages method<br />
on the FormBuilder object—that is, what f represents when you use form_for in your<br />
app/views/projects/_form.html.erb view:<br />
<br />
Directly under this form_for line, on a new line, insert the following to display the<br />
error messages for your object inside the form:<br />
<br />
Error messages for the object represented by your form, the @project object, will now<br />
be displayed. When you run rake cucumber:ok, you get this output:<br />
2 scenarios (2 passed)<br />
12 steps (12 passed)<br />
Commit and push, and then you’re done with this story!<br />
git add .<br />
git commit -m "Add validation to ensure names are<br />
specified when creating projects"<br />
git push<br />
3.3 Summary<br />
We first covered how to version-control an application, which is a critical part of the<br />
application development cycle. Without proper version control, you’re liable to lose<br />
valuable work or be unable to roll back to a known working stage. We used Git and<br />
GitHub as examples, but you may use alternatives, such as SVN or Mercurial, if you<br />
prefer. This book covers only Git, because covering everything would result in a multivolume<br />
series, which is difficult to transport.<br />
81
82 CHAPTER 3 Developing a real Rails application<br />
Next we covered the basic setup of a Rails application, which started with the rails<br />
new command that initializes an application. Then we segued into setting up the Gemfile<br />
to require certain gems for certain environments, such as RSpec in the test environment,<br />
and then running the installers for these gems so your application is fully<br />
configured to use them. For instance, after running rails g rspec:install, your<br />
application is set up to use RSpec and so will generate RSpec specs rather than the<br />
default Test::Unit tests for your models and controllers.<br />
Finally, you wrote the first story for your application, which involved generating a<br />
controller and a model as well as an introduction to RESTful routing and validations.<br />
With this part of your application covered by Cucumber features, you can be notified<br />
if it is broken by running rake cucumber:ok, a command that runs all the features of<br />
the application and lets you know if everything is working or if anything is broken. If<br />
something is broken, the feature fails, and then it’s up to you to fix it. Without this<br />
automated testing, you would have to do it all manually, and that just isn’t any fun.<br />
Now that you’ve got a first feature under your belt, let’s get into writing the next<br />
one!
This chapter covers<br />
� Expanding on the functionality of your app<br />
� Building a RESTful resource<br />
� Creating, updating, and deleting a resource<br />
83<br />
Oh CRUD!<br />
In chapter 3, you began writing stories for a CRUD (create, read, update, delete)<br />
interface for your Project resource. Here, you continue in that vein, beginning<br />
with writing a story for the R part of CRUD: reading. We often refer to reading as<br />
viewing in this and future chapters—we mean the same thing, but sometimes viewing<br />
is just a better word.<br />
For the remainder of the chapter, you’ll round out the CRUD interface for projects,<br />
providing your users with ways to edit, update, and delete projects too. Best of<br />
all, you’ll be doing this using behavior-driven development the whole way through.<br />
4.1 Viewing projects<br />
The show action generated for the story in chapter 3 was only half of this part of<br />
CRUD. The other part is the index action, which is responsible for showing a list of<br />
the projects. From this list, you can navigate to the show action for a particular project.<br />
The next story is about adding functionality to allow you to do that.
84 CHAPTER 4 Oh CRUD!<br />
4.1.1 Writing a feature<br />
Create a new file in the features directory called viewing_projects.feature, shown in the<br />
following listing.<br />
Listing 4.1 features/viewing_projects.feature<br />
Feature: Viewing projects<br />
In order to assign tickets to a project<br />
As a user<br />
I want to be able to see a list of available projects<br />
Scenario: Listing all projects<br />
Given there is a project called "TextMate 2"<br />
And I am on the homepage<br />
When I follow "TextMate 2"<br />
Then I should be on the project page for "TextMate 2"<br />
If you run rake cucumber:ok here, all the features will run. Instead, you want to run<br />
just the feature you’re working on because you don’t want the other feature to be<br />
altered by what you do here. When you’re done, you’ll run rake cucumber:ok to<br />
ensure that everything is still working.<br />
To run just this one feature, use the bin/cucumber executable, which was added to<br />
your project when you ran bundle install --binstubs. If you didn’t use the<br />
--binstubs option, you would have to use bin/cucumber instead, and typing all of<br />
that gets a bit boring after a while.<br />
Now, to run this single feature, you run the following command:<br />
bin/cucumber features/viewing_projects.feature<br />
You should always use bin/cucumber rather than straight cucumber to run the bundled<br />
version of your gems because you could be using different versions of the same<br />
gem across separate projects. By running the bin/cucumber command, you ensure<br />
that you’re loading the version of the gem specified by your bundle rather than the<br />
system version of that gem.<br />
The first line of the only scenario in the feature fails, all because you haven’t<br />
defined the “there is a project” step yet, as Cucumber informs you in the output:<br />
3 scenarios (1 undefined, 2 passed)<br />
15 steps (3 skipped, 1 undefined, 11 passed)<br />
You can implement step definitions for<br />
undefined steps with these snippets:<br />
Given /^there is a project called "([^"]*)"$/ do |arg1|<br />
pending # express the regexp above with the code you wish you had<br />
end<br />
As you can see in the step output, you’ve got one undefined step. Underneath that,<br />
Cucumber very handily gives you a step definition you can use to define this step. In this<br />
step, you need to create a new Project object. Rather than doing it manually by calling<br />
Project.create everywhere you need it, you can set up a little thing called factories.
Viewing projects<br />
Factories allow you to create new example objects for all of your models in a simple<br />
and elegant syntax. This functionality doesn’t come with Rails, unfortunately, so you<br />
must rely on a gem for it: factory_girl.<br />
4.1.2 The Factory Girl<br />
The factory_girl, created by thoughtbot, 1 provides an easy way to use factories to create<br />
new objects for your tests. Factories define a bunch of default values for an object,<br />
allowing you to have easily craftable objects you can use to run your tests on.<br />
Before you can use this gem, you need to add it to the :test group in your Gemfile.<br />
Now the whole group looks like this:<br />
group :test do<br />
gem 'cucumber-rails'<br />
gem 'capybara'<br />
gem 'database_cleaner'<br />
gem 'factory_girl'<br />
end<br />
To install, run bundle. You’ll now use Factory Girl in your new step definition.<br />
Create a new file at features/step_definitions/project_steps.rb, and add this small<br />
chunk of code:<br />
Given /^there is a project called "([^\"]*)"$/ do |name|<br />
Factory(:project, :name => name)<br />
end<br />
The Factory method 2 looks for the :project factory and generates a new object based<br />
on the details it contains. You don’t have a factory defined yet, but you will shortly.<br />
When you define the factory, you give it a default name. The :name => name part<br />
of this method call changes the default name to the one passed in from your feature.<br />
You use factories here because you needn’t be concerned about any other attribute on<br />
the Project object. If you weren’t using factories, you’d have to use this method to<br />
create the object instead:<br />
Project.create(:name => name)<br />
Although this code is about the same length as its Factory variant, it isn’t futureproof.<br />
If you were to add another field to the projects table and add a validation (say,<br />
a presence one) for that field, you’d have to change all occurrences of the create<br />
method to contain this new field. When you use factories, you can change it in one<br />
place—where the factory is defined. If you cared about what that field was set to, you<br />
could modify it by passing it as one of the key-value pairs in the Factory call.<br />
That’s a lot of theory—now how about some practice? Let’s see what happens<br />
when you run bin/cucumber features/viewing_projects.feature:<br />
Not registered: project (ArgumentError)<br />
1 Thoughtbot’s website: http://thoughtbot.com.<br />
2 Yes, methods can begin with a capital letter.<br />
85
86 CHAPTER 4 Oh CRUD!<br />
Aha! You’re now told there’s no such factory! Then you’d better get around to creating<br />
one. You use these factories not only in your Cucumber features but also later in<br />
your RSpec tests. Placing the factories inside the features directory isn’t fair to the<br />
RSpec tests, and placing them inside the spec isn’t fair to the Cucumber tests. So<br />
where do they go? Create a new folder at the root of your application for them, and<br />
name it factories. Inside this directory, create your Project factory by creating a new<br />
file called project_factory.rb and filling it with the following content:<br />
Factory.define :project do |project|<br />
project.name 'Ticketee'<br />
end<br />
This small snippet defines your project factory, which creates a new instance of the<br />
Project class, defaulting the name attribute to Ticketee. These files aren’t going to<br />
load themselves, so you must create a new file at features/support/factories.rb and put<br />
this content in it:<br />
Dir[Rails.root + "factories/*.rb"].each do |file|<br />
require file<br />
end<br />
All .rb files in features/support are loaded automatically before Cucumber starts, so all<br />
the files in the factories are required, and they define all the factories in the files.<br />
With this factory defined, your feature should have nothing to whine about. Let’s<br />
look at the following listing to see what happens now when you run bin/cucumber<br />
features/viewing_projects.feature<br />
Listing 4.2 features/viewing_projects.feature failure<br />
Given there is a project called "TextMate 2"<br />
And I am on the homepage<br />
When I follow "TextMate 2"<br />
no link with title, id or text 'TextMate 2' found ...<br />
A link appears to be missing. You’ll add that right now.<br />
4.1.3 Adding a link to a project<br />
Capybara is expecting a link on the page with the words “TextMate 2” but can’t find it.<br />
The page in question is the homepage, which is the index action from your<br />
ProjectsController. Capybara can’t find it because you haven’t yet put it there,<br />
which is what you’re going to do now. Open app/views/projects/index.html.erb, and<br />
add the contents of the following listing underneath the first link.<br />
Listing 4.3 app/views/projects/index.html.erb<br />
Projects<br />
<br />
<br />
<br />
<br />
Viewing projects<br />
If you run the Cucumber feature again, you get this error, which isn’t helpful at first<br />
glance:<br />
Showing /[path to ticketee]/app/views/projects/index.html.erb<br />
where line #5<br />
raised:<br />
You have a nil object when you didn't expect it!<br />
You might have expected an instance of Array.<br />
This error points at line 5 of your app/views/projects/index.html.erb file. From this<br />
you can determine that the error has something to do with the @projects variable.<br />
This variable isn’t yet been defined, and because there’s no each method on nil, you<br />
get this error. As mentioned in chapter 3, instance variables in Ruby return nil rather<br />
than raise an exception if they’re undefined. Watch out for this in Ruby—as seen<br />
here, it can sting you hard.<br />
To define this variable, open ProjectsController at app/controllers/<br />
projects_controller.rb and change the index method definition to look like the following<br />
listing.<br />
Listing 4.4 app/controllers/projects_controller.rb<br />
def index<br />
@projects = Project.all<br />
end<br />
By calling all on the Project model, you retrieve all the records from the database as<br />
Project objects, and they’re available as an Array-like object. Now that you’ve put all<br />
the pieces in place, you can run the feature with bin/cucumber features/<br />
viewing_projects.feature, and all the steps should pass:<br />
1 scenario (1 passed)<br />
4 steps (4 passed)<br />
The feature now passes. Is everything else still working, though? You can check by running<br />
rake cucumber:ok. At the bottom, you should see this:<br />
3 scenarios (3 passed)<br />
16 steps (16 passed)<br />
All of your scenarios and their steps are passing, meaning all of the functionality<br />
you’ve written so far is working as it should. Commit and push this using<br />
git add .<br />
git commit -m "Added the ability to view a list of all projects"<br />
git push<br />
The reading part of this CRUD resource is done! You’ve got the index and show<br />
actions for the ProjectsController behaving as they should. Now you can move on<br />
to updating.<br />
87
88 CHAPTER 4 Oh CRUD!<br />
4.2 Editing projects<br />
With the first two parts of CRUD (creating and reading) done, you’re ready for the<br />
third part: updating. Updating is similar to creating and reading in that it has two<br />
actions for each part (creation has new and create, reading has index and show). The<br />
two actions for updating are edit and update. Let’s begin by writing a feature and creating<br />
the edit action.<br />
4.2.1 The edit action<br />
As with the form used for creating new projects, you want a form that allows users to<br />
edit the information of a project that already exists. You first put an Edit Project link<br />
on the show page that takes users to the edit action where they can edit the project.<br />
Write the feature from the following listing into features/editing_projects.feature.<br />
Listing 4.5 features/editing_projects.feature<br />
Feature: Editing Projects<br />
In order to update project information<br />
As a user<br />
I want to be able to do that through an interface<br />
Scenario: Updating a project<br />
Given there is a project called "TextMate 2"<br />
And I am on the homepage<br />
When I follow "TextMate 2"<br />
And I follow "Edit Project"<br />
And I fill in "Name" with "TextMate 2 beta"<br />
And I press "Update Project"<br />
Then I should see "Project has been updated."<br />
Then I should be on the project page for "TextMate 2 beta"<br />
In this story, you again use the bin/cucumber command to run just this one feature:<br />
bin/cucumber features/editing_projects.feature.<br />
The first three steps pass for this feature because of the work you’ve already done,<br />
but it fails on the fourth step when it tries to follow the as-yet nonexistent Edit Project<br />
link on the show page:<br />
no link with title, id or text 'Edit Project' found (Capybara::ElementNotFound)<br />
To add this link, open app/views/projects/show.html.erb and add the link from the<br />
following listing underneath the code currently in that file.<br />
Listing 4.6 app/views/projects/show.html.erb<br />
<br />
The edit_project_path method generates the link to the Project object, pointing at<br />
the ProjectsController’s edit action. This method is provided to you because of the<br />
resources :projects line in config/routes.rb.
Editing projects<br />
If you run bin/cucumber features/editing_projects.feature again, it now<br />
complains about the missing edit action:<br />
The action 'edit' could not be found for ProjectsController<br />
You should now define this action in your ProjectsController, underneath the show<br />
action, as in the following listing.<br />
Listing 4.7 app/controllers/projects_controller.rb<br />
def edit<br />
@project = Project.find(params[:id])<br />
end<br />
As you can see, this action works in an identical fashion to the show action, where the<br />
ID for the resource is automatically passed as params[:id]. Let’s work on DRYing 3 this<br />
up once you’re done with this controller. When you run feature again, you’re told that<br />
the edit view is missing:<br />
Given I am on the homepage<br />
Missing template projects/edit, application/edit<br />
with {:handlers=>[:erb, :builder],<br />
:formats=>[:html],<br />
:locale=>[:en, :en]}.<br />
Searched in:<br />
* ".../ticketee/app/views"<br />
It looks like you need to create this template. For this edit action’s template, you can<br />
re-use the form partial (app/views/projects/_form.html.erb) you created in chapter 3<br />
by putting the code from the following listing into app/views/projects/edit.html.erb.<br />
Listing 4.8 app/views/projects/edit.html.erb<br />
Edit project<br />
<br />
When you pass a string to the render method, Rails looks up a partial in the current<br />
directory matching the string and renders that instead. Using the partial, the next<br />
step passes without any further intervention from you when you run bin/cucumber<br />
features/editing_projects.feature, but the output now says it can’t find the<br />
update action:<br />
And I fill in "Name" with "TextMate 2 beta"<br />
And I press "Update Project"<br />
The action 'update' could not be found for ProjectsController<br />
Great! It looks like the edit action is working fine, so your next step is to define the<br />
update action.<br />
3 As a reminder: DRY = Don’t Repeat Yourself!<br />
89
90 CHAPTER 4 Oh CRUD!<br />
4.2.2 The update action<br />
As the following listing shows, you can now define this update action underneath the<br />
edit action in your controller.<br />
Listing 4.9 app/controllers/projects_controller.rb<br />
def update<br />
@project = Project.find(params[:id])<br />
@project.update_attributes(params[:project])<br />
flash[:notice] = "Project has been updated."<br />
redirect_to @project<br />
end<br />
Notice the new method here, update_attributes. It takes a hash of attributes identical<br />
to the ones passed to new or create, updates those specified attributes on the<br />
object, and then saves them to the database if they are valid. This method, like save,<br />
returns true if the update is valid or false if it is not.<br />
Now that you’ve implemented the update action, let’s see how the feature is going<br />
by running bin/cucumber features/editing_projects.feature:<br />
1 scenario (1 passed)<br />
8 steps (8 passed)<br />
What happens if somebody fills in the name field with a blank value? The user receives<br />
an error, just as in the create action. You should move the first four steps from the<br />
first scenario in features/editing_projects.feature into a Background so the Feature<br />
now looks like the following listing.<br />
Listing 4.10 features/editing_projects.feature<br />
Feature: Editing Projects<br />
In order to update project information<br />
As a user<br />
I want to be able to do that through an interface<br />
Background:<br />
Given there is a project called "TextMate 2"<br />
And I am on the homepage<br />
When I follow "TextMate 2"<br />
And I follow "Edit Project"<br />
Scenario: Updating a project<br />
And I fill in "Name" with "TextMate 2 beta"<br />
And I press "Update Project"<br />
Then I should see "Project has been updated."<br />
Then I should be on the project page for "TextMate 2 beta"<br />
Now you can add a new scenario, shown in the following listing, to test that the user is<br />
shown an error message for when the validations fail on update directly under the<br />
other scenario in this file.
Deleting projects<br />
Listing 4.11 features/editing_projects.feature<br />
Scenario: Updating a project with invalid attributes is bad<br />
And I fill in "Name" with ""<br />
And I press "Update Project"<br />
Then I should see "Project has not been updated."<br />
When you run bin/cucumber features/editing_projects.feature, the first step<br />
passes but the second doesn’t:<br />
expected there to be content "Project has not been updated." in "[text]"<br />
Again, this error means that it was unable to find the text “Project has not been<br />
updated.” on the page. This is because you haven’t written any code to test for what to<br />
do if the project being updated is now invalid. In your controller, use the code in the<br />
following listing for the update action.<br />
Listing 4.12 app/controllers/projects_controller.rb<br />
def update<br />
@project = Project.find(params[:id])<br />
if @project.update_attributes(params[:project])<br />
flash[:notice] = "Project has been updated."<br />
redirect_to @project<br />
else<br />
flash[:alert] = "Project has not been updated."<br />
render :action => "edit"<br />
end<br />
end<br />
And now you can see that the feature passes when you rerun it:<br />
2 scenarios (2 passed)<br />
15 steps (15 passed)<br />
Again, you should ensure everything else is still working by running rake cucumber<br />
:ok; you should see this summary:<br />
5 scenarios (5 passed)<br />
31 steps (31 passed)<br />
Let’s make a commit and push now:<br />
git add .<br />
git commit -m "Added updating projects functionality"<br />
git push<br />
The third part of CRUD, updating, is done. The fourth and final part is deleting.<br />
4.3 Deleting projects<br />
We’ve reached the final stage of CRUD: deletion. This involves implementing the final<br />
action of your controller, the destroy action, which allows you to delete projects.<br />
91
92 CHAPTER 4 Oh CRUD!<br />
4.3.1 Writing a feature<br />
You’re going to need a feature to get going: a Delete Project link on the show page<br />
that, when clicked, prompts the user for confirmation. You put the feature at features/<br />
deleting_projects.feature using the following listing.<br />
Listing 4.13 features/deleting_projects.feature<br />
Feature: Deleting projects<br />
In order to remove needless projects<br />
As a project manager<br />
I want to make them disappear<br />
Scenario: Deleting a project<br />
Given there is a project called "TextMate 2"<br />
And I am on the homepage<br />
When I follow "TextMate 2"<br />
And I follow "Delete Project"<br />
Then I should see "Project has been deleted."<br />
Then I should not see "TextMate 2"<br />
When you run this feature using bin/cucumber features/deleting_projects<br />
.feature, the first three steps pass, and the fourth fails:<br />
And I follow "Delete Project"<br />
no link with title, id or text 'Delete Project' found ...<br />
4.3.2 Adding a destroy action<br />
Of course, you need to create a Delete Project link for the show action’s template,<br />
app/views/projects/show.html.erb. You put this on the line after the Edit Project link<br />
using the following listing.<br />
Listing 4.14 app/views/projects/show.html.erb<br />
:delete,<br />
:confirm => "Are you sure you want to delete this project?" %><br />
Here you pass two new options to the link_to method, :method and :confirm.<br />
The :method option tells Rails what HTTP method this link should be using, and<br />
here’s where you specify the :delete method. In the previous chapter, the four HTTP<br />
methods were mentioned; the final one is DELETE. When you developed your first<br />
application, chapter 1 explained why you use the DELETE method, but let’s review why.<br />
If all actions are available by GET requests, then anybody can send you a link to, say,<br />
the destroy action for one of your controllers, and if you click that, it’s bye-bye precious<br />
data.<br />
By using DELETE, you protect an important route for your controller by ensuring<br />
that you have to follow the link from the site to make the proper request to delete this<br />
resource.<br />
The :confirm option brings up a prompt, using JavaScript, that asks users if<br />
they’re sure of what they clicked. Because Capybara doesn’t support JavaScript by
Deleting projects<br />
default, this prompt is ignored, so you don’t have to tell Capybara to click OK on the<br />
prompt—there is no prompt because Rails has a built-in fallback for users without<br />
JavaScript enabled. If you launch a browser and follow the steps in the feature to get<br />
to this Delete Project link, and then click the link, you see the confirmation prompt.<br />
This prompt is exceptionally helpful for preventing accidental deletions.<br />
When you run the feature again, it complains of a missing destroy action:<br />
And I follow "Delete Project"<br />
The action 'destroy' could not be found for ProjectsController<br />
The final action you need to implement is in your controller, and you’ll put it underneath<br />
the update action. This action is shown in the following listing.<br />
Listing 4.15 app/controllers/projects_controller.rb<br />
def destroy<br />
@project = Project.find(params[:id])<br />
@project.destroy<br />
flash[:notice] = "Project has been deleted."<br />
redirect_to projects_path<br />
end<br />
Here you call the destroy method on the @project object you get back from your<br />
find. No validations are run here, so no conditional setup is needed. Once you call<br />
destroy on that object, the relevant database record is gone for good but the object<br />
still exists. When it’s gone, you set the flash[:notice] and redirect back to the project’s<br />
index page by using the projects_path routing helper.<br />
With this last action in place, your newest feature should pass when you run bin/<br />
cucumber features/deleting_projects.feature:<br />
1 scenario (1 passed)<br />
6 steps (6 passed)<br />
Let’s see if everything else is running with rake cucumber:ok:<br />
6 scenarios (6 passed)<br />
37 steps (37 passed)<br />
Great! Let’s commit that:<br />
git add .<br />
git commit -m "Implemented delete functionality for projects"<br />
git push<br />
Done! Now you have the full support for CRUD operations in your Projects-<br />
Controller. Let’s refine this controller into simpler code before we move on.<br />
4.3.3 Looking for what isn’t there<br />
People sometimes poke around an application looking for things that are no longer<br />
there, or they muck about with the URL. As an example, launch your application’s<br />
server by using rails server and try to navigate to http://localhost:3000/projects/<br />
not-here. You’ll see the exception shown in figure 4.1.<br />
93
94 CHAPTER 4 Oh CRUD!<br />
Figure 4.1 ActiveRecord::RecordNotFound exception<br />
The ActiveRecord::RecordNotFound exception is Rails’ way of displaying exceptions<br />
in development mode. Underneath this error, more information is displayed, such as<br />
the backtrace of the error.<br />
If you were running in the production environment, you would see a different error.<br />
Stop the server that is currently running, and run these commands to start in production<br />
mode:<br />
rake db:migrate RAILS_ENV=production<br />
rails server -e production<br />
Here you must specify the RAILS_ENV environment variable to tell Rails you want to<br />
migrate your production database. By default in Rails, the development and production<br />
databases are kept separate so you don’t make the mistake of working with production<br />
data and deleting something you shouldn’t. This problem is also solved by<br />
placing the production version of the code on a different server from the one you’re<br />
developing on. You only have to run the migration command when migrations need<br />
to be run, not every time you need to start your server.<br />
You also pass the -e production option to the rails server command, which<br />
tells it to use the production environment. Next, navigate to http://[our-localip]:3000/project/not-here,<br />
where [our-local-ip] is whatever the IP of your computer is<br />
on the local network, like 10.0.0.2 or 192.168.0.3. When you do this, you get the standard<br />
Rails 404 page (see figure 4.2), which, to your users, is unhelpful.<br />
It’s not the page that’s gone missing, but rather the resource you’re looking for isn’t<br />
found. If users see this error, they’ll probably have to click the Back button and then<br />
refresh the page. You could give users a much better experience by dealing with the<br />
error message yourself and redirecting them back to the home page.<br />
To do so, you capture the exception and, rather than letting Rails render a 404<br />
page, you redirect the user to the index action with an error message. To test that<br />
users are shown an error message rather than a “Page does not exist” error, you’ll<br />
write an RSpec controller test rather than a Cucumber feature, because viewing projects<br />
that aren’t there is something a users can do, but not something they should do.<br />
Plus, it’s easier.<br />
Figure 4.2 “Page does not exist” error
Deleting projects<br />
The file for this controller test, spec/controllers/projects_controller_spec.rb, was<br />
automatically generated when you ran the controller generator because you have the<br />
rspec-rails gem in your Gemfile. 4 Open this controller spec file and take a look. It<br />
should look like the following listing.<br />
require 'spec_helper'<br />
describe ProjectsController do<br />
end<br />
Listing 4.16 spec/controllers/projects_controller_spec.rb<br />
The spec_helper.rb file it references is located at spec/spec_helper.rb and it, like the<br />
previous examples of spec/spec_helper.rb (in chapter 2), is responsible for setting up<br />
the environment for your tests. This time, however, it already has code, which includes<br />
the Rails environment and the Rails-associated RSpec helpers as well as any file inside<br />
the spec/support directory or its subdirectories.<br />
In this controller spec, you want to test that you get redirected to the Projects page<br />
if you attempt to access a resource that no longer exists. You also want to ensure that a<br />
flash[:alert] is set.<br />
To do all this, you put the following code inside the describe block:<br />
it "displays an error for a missing project" do<br />
get :show, :id => "not-here"<br />
response.should redirect_to(projects_path)<br />
message = "The project you were looking for could not be found."<br />
flash[:alert].should eql(message)<br />
end<br />
The first line inside this RSpec test—more commonly called an example—tells RSpec to<br />
make a GET request to the show action for the ProjectsController. How does it<br />
know which controller should receive the GET request? RSpec infers it from the class<br />
used for the describe block.<br />
In the next line, you tell RSpec that you expect the response to take you back to<br />
the projects_path through a redirect_to call. If it doesn’t, the test fails, and nothing<br />
more in this test is executed: RSpec stops in its tracks.<br />
The final line tells RSpec that you expect the flash[:alert] to contain a useful<br />
messaging explaining the redirection to the index action. 5<br />
To run this spec, use the bin/rspec spec/controllers/projects_controller<br />
_spec.rb command.<br />
It may seem like nothing is happening at first, because RSpec must load the Rails<br />
environment and your application, and loading takes time. The same delay occurs<br />
when you start running a Rails server.<br />
4 The rspec-rails gem automatically generates the file using a Railtie, the code of which can be found at<br />
https://github.com/rspec/rspec-rails/blob/master/lib/rspec-rails.rb.<br />
5 The lines for the flash[:alert] are separated into two lines to accommodate the page width of this book.<br />
You can put it on one line if you like. We won’t yell at you.<br />
95
96 CHAPTER 4 Oh CRUD!<br />
F<br />
When the test runs, you get a failure:<br />
1) ProjectsController displays an error<br />
message when asked for a missing project<br />
Failure/Error: get :show, :id => "not-here"<br />
Couldn't find Project with ID=not-here<br />
This is the same failure you saw when you tried running the application using rails<br />
server. Now that you have a failing test, you can fix it.<br />
Open the app/controllers/projects_controller.rb file, and put the code from the<br />
following listing underneath the last action in the controller but before the end of the<br />
class.<br />
Listing 4.17 app/controllers/projects_controller.rb<br />
private<br />
def find_project<br />
@project = Project.find(params[:id])<br />
rescue ActiveRecord::RecordNotFound<br />
flash[:alert] = "The project you were looking" +<br />
" for could not be found."<br />
redirect_to projects_path<br />
end<br />
This method has the private method before it, so the controller doesn’t respond to<br />
this method as an action. To call this method before every action, use the<br />
before_filter method. Place these lines directly under the class Projects-<br />
Controller definition:<br />
before_filter :find_project, :only => [:show,<br />
:edit,<br />
:update,<br />
:destroy]<br />
What does all this mean? Let’s start with the before_filter. before_filters are run<br />
before all the actions in your controller unless you specify either the :except or :only<br />
option. Here you have the :only option defining actions you want the before_filter<br />
to run for. The :except option is the opposite of the :only option, specifying the<br />
actions you do not want the before_filter to run for. The before_filter calls the<br />
find_project method before the specified actions, setting up the @project variable<br />
for you. This means you can remove the following line from all four of your actions<br />
(show, edit, update, and destroy):<br />
@project = Project.find(params[:id])<br />
By doing this, you make the show and edit actions empty. If you remove these actions<br />
and run rake cucumber:ok again, all the scenarios still pass. Controller actions don’t<br />
need to exist in the controllers if there are templates corresponding to those actions,<br />
which you have for these actions. For readability’s sake, it’s best to leave these in the
Summary<br />
controller so anyone who reads the code knows that the controller responds to these<br />
actions.<br />
Back to the spec now: if you run bin/rspec spec/controllers/projects<br />
_controller_spec.rb once more, the test now passes:<br />
.<br />
1 example, 0 failures<br />
Let’s check to see if everything else is still working by running rake cucumber:ok and<br />
then rake spec. You should see these outputs:<br />
6 scenarios (6 passed)<br />
37 steps (37 passed)<br />
# and<br />
.<br />
3 examples, 0 failures, 2 pending<br />
The RSpec output shows two pending examples. These come from the spec files for<br />
ProjectsHelper (spec/helpers/projects_helper_spec.rb) and Project model (spec/<br />
models/project_spec.rb) respectively. You can delete these files or remove the pending<br />
lines from them to make your RSpec output green instead of yellow when it passes.<br />
Other than that, these two specs have no effect on your test output.<br />
It’s great to see that everything is still going! Let’s commit and push that!<br />
git add .<br />
git commit -m "Users should be redirected back to the projects page<br />
if they try going to a project that doesn't exist."<br />
git push<br />
This completes the basic CRUD implementation for your project’s resource. Now you<br />
can create, read, update, and delete projects to your heart’s content, and these features<br />
are all well covered with tests, which leads to greater maintainability.<br />
4.4 Summary<br />
This chapter covered developing the first part of your application using BDD practices<br />
and Cucumber and then making each step pass. Now you have an application that is<br />
truly maintainable. If you want to know if these features or specs are working later in<br />
the project, you can run rake cucumber:ok or rake spec and if something is broken,<br />
you’ll know about it. Doesn’t that beat manual testing? Just think of all the time you’ll<br />
save in the long run.<br />
You learned firsthand how rapidly you can develop the CRUD interface for a<br />
resource in Rails. There are even faster ways to do it (such as by using scaffolding, discussed<br />
in chapter 1), but to absorb how this whole process works, it’s best to go<br />
through it yourself, step by step, as you did in this chapter.<br />
So far you’ve been developing your application using BDD techniques, and as your<br />
application grows, it will become more evident how useful these techniques are. The<br />
main thing they’ll provide is assurance that what you’ve coded so far is still working<br />
exactly as it was when you first wrote it. Without these tests, you may accidentally break<br />
97
98 CHAPTER 4 Oh CRUD!<br />
functionality and not know about it until a user—or worse, a client—reports it. It’s<br />
best that you spend some time implementing tests for this functionality now so that<br />
you don’t spend even more time later apologizing for whatever’s broken and fixing it.<br />
With the basic project functionality done, you’re ready for the next step. Because<br />
you’re building a ticket-tracking application, it makes sense to implement functionality<br />
that lets you track tickets, right? That’s precisely what you do in the next chapter.<br />
We also cover nested routing and association methods for models. Let’s go!
This chapter covers<br />
� Building a nested resource<br />
� Declaring data associations between two<br />
database tables<br />
� Working with objects within an association<br />
99<br />
Nested resources<br />
With the project resource CRUD done, the next step is to set up the ability to create<br />
tickets within the scope of a given project. The term for performing actions for<br />
objects within the scope of another object is nesting. This chapter explores how to<br />
set up nested routing for Ticket resources by creating a CRUD interface for them,<br />
scoped underneath the projects resource that you just created.<br />
5.1 Creating tickets<br />
To add the functionality to create tickets underneath the projects, you first develop<br />
the Cucumber features and then implement the code required to make them pass.<br />
Nesting one resource under another involves additional routing, working with associations<br />
in Active Record, and using more before_filters. Let’s get into this.<br />
To create tickets for your application, you need an idea of what you’re going to<br />
implement. You want to create tickets only for particular projects, so you need a
100 CHAPTER 5 Nested resources<br />
New Ticket link on a project’s show page. The link must lead to a form where a title<br />
and a description for your ticket can be entered, and the form needs a button that<br />
submits it to a create action in your controller. You also want to ensure the data is<br />
valid, just as you did with the Project model. Start by using the code from the following<br />
listing in a new file.<br />
Listing 5.1 features/creating_tickets.feature<br />
Feature: Creating Tickets<br />
In order to create tickets for projects<br />
As a user<br />
I want to be able to select a project and do that<br />
Background:<br />
Given there is a project called "Internet Explorer"<br />
And I am on the homepage<br />
When I follow "Internet Explorer"<br />
And I follow "New Ticket"<br />
Scenario: Creating a ticket<br />
When I fill in "Title" with "Non-standards compliance"<br />
And I fill in "Description" with "My pages are ugly!"<br />
And I press "Create Ticket"<br />
Then I should see "Ticket has been created."<br />
Scenario: Creating a ticket without valid attributes fails<br />
When I press "Create Ticket"<br />
Then I should see "Ticket has not been created."<br />
And I should see "Title can't be blank"<br />
And I should see "Description can't be blank"<br />
When you run the code in listing 5.1 using the bin/cucumber features/<br />
creating_tickets.feature command, your background fails, as shown here:<br />
And I follow "New Ticket"<br />
no link with title, id or text 'New Ticket' found ...<br />
You need to add this New Ticket link to the app/views/projects/show.html.erb template.<br />
Add it underneath the Delete Project link, as shown in the following listing.<br />
Listing 5.2 app/views/projects/show.html.erb<br />
<br />
This helper is called a nested routing helper and is just like the standard routing helper.<br />
The similarities and differences between the two are explained in the next section.<br />
5.1.1 Nested routing helpers<br />
In listing 5.2, you used a nested routing helper—new_project_ticket_path—rather<br />
than a standard routing helper such as new_ticket_path because you want to create a<br />
new ticket for a given project. Both helpers work in a similar fashion, except the<br />
nested routing helper takes one argument always, the @project object for which you<br />
want to create a new ticket: the object that you’re nested inside. The route to any
Creating tickets<br />
ticket URL is always scoped by /projects/:id in your application. This helper and its<br />
brethren are defined by changing this line in config/routes.rb<br />
resources :projects<br />
to the lines in the following listing.<br />
Listing 5.3 config/routes.rb<br />
resources :projects do<br />
resources :tickets<br />
end<br />
This code tells the routing for Rails that you have a tickets resource nested inside the<br />
projects resource. Effectively, any time you access a ticket resource, you access it within<br />
the scope of a project too. Just as the resources :projects method gave you helpers to<br />
use in controllers and views, this nested one gives you the helpers (where id represents<br />
the identifier of a resource) shown in table 5.1.<br />
Table 5.1 Nested RESTful routing matchup<br />
As before, you can use the *_url alternatives to these helpers, such as project<br />
_tickets_url, to get the full URL if you so desire. The :project_id symbol here<br />
would normally be replaced by the project ID as well as the :id symbol, which would<br />
be replaced by a ticket’s ID.<br />
In the left column are the routes that can be accessed, and in the right, the routing<br />
helper methods you can use to access them. Let’s make use of them by first creating<br />
your TicketsController.<br />
5.1.2 Creating a tickets controller<br />
Route Helper<br />
/projects/:project_id/tickets project_tickets_path<br />
/projects/:project_id/tickets/new new_project_ticket_path<br />
/projects/:project_id/tickets/:id/edit edit_project_ticket_path<br />
/projects/:project_id/tickets/:id project_ticket_path<br />
Because you defined this route in your routes file, Capybara can now click the link in<br />
your feature and proceed before complaining about the missing TicketsController,<br />
spitting out an error followed by a stack trace:<br />
And I follow "New Ticket"<br />
uninitialized constant TicketsController ...<br />
Some guides may have you generate the model before you generate the controller,<br />
but the order in which you create them is not important. In Cucumber, you just<br />
follow the bouncing ball, and if Cucumber tells you it can’t find a controller, then<br />
you generate the controller it’s looking for next. Later, when you inevitably receive<br />
101
102 CHAPTER 5 Nested resources<br />
an error that it cannot find the Ticket model, as you did for the Project model, you<br />
generate that too.<br />
To generate this controller and fix this uninitialized constant error, use this<br />
command:<br />
rails g controller tickets<br />
You may be able to pre-empt what’s going to happen next if you run Cucumber: it’ll<br />
complain of a missing new action that it’s trying to get to by clicking the New Ticket<br />
link. Open app/controllers/tickets_controller.rb and add the new action, shown in the<br />
following listing.<br />
Listing 5.4 app/controllers/tickets_controller.rb<br />
def new<br />
@ticket = @project.tickets.build<br />
end<br />
The build method simply instantiates a new record for the tickets association on the<br />
@project object, working in much the same way as the following code would:<br />
Ticket.new(:project_id => @project.id)<br />
Of course, you haven’t yet done anything to define the @project variable in Tickets-<br />
Controller, so it would be nil. You must define the variable using a before_filter,<br />
just as you did in the ProjectsController. Put the following line just under the class<br />
definition in app/controllers/tickets_controller.rb:<br />
before_filter :find_project<br />
You don’t restrict the before_filter here: you want to have a @project to work with<br />
in all actions because the tickets resource is only accessible through a project. Underneath<br />
the new action, define the method that the before_filter uses:<br />
private<br />
def find_project<br />
@project = Project.find(params[:project_id])<br />
end<br />
Where does params[:project_id] come from? It’s made available through the wonders<br />
of Rails’s routing, just as params[:id] was. It’s called project_id instead of id<br />
because you could (and later will) have a route that you want to pass through an ID for<br />
a ticket as well, and that would be params[:id]. Now how about that tickets method<br />
on your @project object? Let’s make sure it doesn’t already exist by running bin/<br />
cucumber features/creating_tickets.feature:<br />
And I follow "New Ticket"<br />
undefined method 'tickets' for # (NoMethodError)<br />
No Rails magic here yet.
5.1.3 Defining a has_many association<br />
Creating tickets<br />
The tickets method is defined by an association method in the Project class called<br />
has_many, which you can use as follows, putting it directly above the validation you put<br />
there earlier:<br />
has_many :tickets<br />
As mentioned before, this defines the tickets method you need but also gives you a<br />
whole slew of other useful methods, such as the build method, which you call on the<br />
association. The build method is equivalent to new for the Ticket class (which you<br />
create in a moment) but associates the new object instantly with the @project object<br />
by setting a foreign key called project_id automatically. Upon running the feature,<br />
you get this:<br />
And I follow "New Ticket"<br />
uninitialized constant Project::Ticket (NameError)<br />
You can determine from this output that the method is looking for the Ticket class,<br />
but why? The tickets method on Project objects is defined by the has_many call in<br />
the Project model. This method assumes that when you want to get the tickets, you<br />
actually want objects of the Ticket model. This model is currently missing; hence, the<br />
error. You can add this model now with the following command:<br />
rails generate model ticket title:string description:text project:references<br />
The project:references part defines an integer column for the tickets table called<br />
project_id in the migration. This column represents the project this ticket links to<br />
and is called a foreign key. You should now run the migration by using rake<br />
db:migrate and load the new schema into your test database by running rake<br />
db:test:prepare.<br />
The rake db:migrate task runs the migrations and then dumps the structure of<br />
the database to a file called db/schema.rb. This structure allows you to restore your<br />
database using the rake db:schema:load task if you wish, which is better than running<br />
all the migrations on a large project again! The rake db:test:prepare task<br />
loads this schema into the test database, making the fields that were just made available<br />
on the development database by running the migration also now available on<br />
the test database.<br />
Now when you run bin/cucumber features/creating_tickets.feature, you’re<br />
told the new template is missing:<br />
And I follow "New Ticket"<br />
Missing template tickets/new, application/new<br />
with {:handlers=>[:erb, :builder],<br />
:formats=>[:html],<br />
:locale=>[:en, :en]}.<br />
Searched in:<br />
* ".../ticketee/app/views"<br />
A file seems to be missing! You must create this file in order to continue.<br />
103
104 CHAPTER 5 Nested resources<br />
5.1.4 Creating tickets within a project<br />
Create the file at app/views/tickets/new.html.erb, and put the following inside:<br />
New Ticket<br />
<br />
This template renders a form partial, which will be relative to the current folder and will<br />
be placed at app/views/tickets/_form.html.erb, using the code from the next listing.<br />
Listing 5.5 app/views/tickets/_form.html.erb<br />
<br />
<br />
<br />
<br />
<br />
<br />
<br />
<br />
<br />
<br />
<br />
<br />
Note that form_for is passed an array of objects rather than simply<br />
<br />
This code indicates to form_for that you want the form to post to the nested route<br />
you’re using. For the new action, this generate a route like /projects/1/tickets, and for<br />
the edit action, it generates a route like /projects/1/tickets/2. When you run bin/<br />
cucumber features/creating_tickets.feature again, you’re told the create action<br />
is missing:<br />
And I press "Create Ticket"<br />
The action 'create' could not be found for TicketsController<br />
To define this action, put it directly underneath the new action but before the private<br />
method:<br />
def create<br />
@ticket = @project.tickets.build(params[:ticket])<br />
if @ticket.save<br />
flash[:notice] = "Ticket has been created."<br />
redirect_to [@project, @ticket]<br />
else<br />
flash[:alert] = "Ticket has not been created."<br />
render :action => "new"<br />
end<br />
end<br />
Inside this action, you use redirect_to and specify an Array B—the same array you<br />
used in the form_for earlier—containing a Project object and a Ticket object. Rails<br />
B<br />
Specify array
Creating tickets<br />
inspects any array passed to helpers, such as redirect_to and link_to, and determines<br />
what you mean from the values. For this particular case, Rails determine that<br />
you want this helper:<br />
project_ticket_path(@project, @ticket)<br />
Rails determines this helper because, at this stage, @project and @ticket are both<br />
objects that exist in the database, and you can therefore route to them. The route generated<br />
would be /projects/1/tickets/2 or something similar. Back in the form_for,<br />
@ticket was new, so the route happened to be /projects/1/tickets.<br />
You could have been explicit and specifically used project_ticket_path in the<br />
action, but using an array is DRYer.<br />
When you run bin/cucumber features/creating_tickets.feature, both scenarios<br />
report the same error:<br />
And I press "Create Ticket"<br />
The action 'show' could not be found TicketsController<br />
Therefore, you must create a show action for the TicketsController, but when you<br />
do so, you’ll need to find tickets only for the given project.<br />
5.1.5 Finding tickets scoped by project<br />
Currently, the first scenario is correct, but the second one is not.<br />
Of course, now you must define the show action for your controller, but you can<br />
anticipate that you’ll need to find a ticket for the edit, update, and destroy actions<br />
too and pre-empt those errors. You can also make this a before_filter, just as you<br />
did in the ProjectsController with the find_project method. You define this<br />
finder underneath the find_project method in the TicketsController:<br />
def find_ticket<br />
@ticket = @project.tickets.find(params[:id])<br />
end<br />
find is yet another association method provided by Rails when you declared that your<br />
Project model has_many :tickets. This code attempts to find tickets only within the<br />
scope of the project. Put the before_filter at the top of your class, just underneath<br />
the one to find the project:<br />
before_filter :find_project<br />
before_filter :find_ticket, :only => [:show,<br />
:edit,<br />
:update,<br />
:destroy]<br />
The sequence here is important because you want to find the @project before you go<br />
looking for tickets for it. With this before_filter in place, create an empty show<br />
action in your controller to show that it responds to this action:<br />
def show<br />
end<br />
105
106 CHAPTER 5 Nested resources<br />
Then create the view for this action at app/views/tickets/show.html.erb using this code:<br />
<br />
<br />
<br />
<br />
The new method, simple_format, converts the line breaks 1 entered into the description<br />
field into HTML break tags () so that the description renders exactly how the<br />
user intends it to.<br />
Based solely on the changes that you’ve made so far, your first scenario should be<br />
passing. Let’s see with a quick run of bin/cucumber features/creating_tickets<br />
.feature:<br />
Then I should see "Ticket has been created."<br />
...<br />
2 scenarios (1 failed, 1 passed)<br />
16 steps (1 failed, 2 skipped, 13 passed)<br />
This means that you’ve got the first scenario under control and that users of your<br />
application can create tickets within a project. Next, you need to add validations to<br />
the Ticket model to get the second scenario to pass.<br />
5.1.6 Ticket validations<br />
The second scenario fails because the @ticket that it saves is valid, at least according<br />
to your application in its current state:<br />
expected there to be content "Ticket has not been created" in "[text]"<br />
You need to ensure that when somebody enters a ticket into the application, the<br />
title and description attributes are filled in. To do this, define the following validations<br />
inside the Ticket model.<br />
Listing 5.6 app/models/ticket.rb<br />
validates :title, :presence => true<br />
validates :description, :presence => true<br />
Now when you run bin/cucumber features/creating_tickets.feature, the entire<br />
feature passes:<br />
2 scenarios (2 passed)<br />
16 steps (16 passed)<br />
Before we wrap up here, let’s add one more scenario to ensure that what is entered<br />
into the description field is longer than 10 characters. You want the descriptions to be<br />
useful! Let’s add this scenario to the features/creating_tickets.feature file:<br />
Scenario: Description must be longer than 10 characters<br />
When I fill in "Title" with "Non-standards compliance"<br />
And I fill in "Description" with "it sucks"<br />
1 Line breaks are represented as \n and \r\n in strings in Ruby rather than as visible line breaks.
Creating tickets<br />
Alternative validation syntax<br />
You can use a slightly differently named method call to accomplish the same thing<br />
here:<br />
validates_presence_of :title<br />
validates_presence_of :description<br />
Some people prefer this syntax because it’s been around for a couple of years; others<br />
prefer the newer style. It’s up to you which to choose. A number of other<br />
validates_* methods are available.<br />
And I press "Create Ticket"<br />
Then I should see "Ticket has not been created."<br />
And I should see "Description is too short"<br />
The final line here is written this way because you do not know what the validation<br />
message is, but you’ll find out later. To implement this scenario, add another option<br />
to the end of the validation for the description in your Ticket model, as shown in<br />
the following listing.<br />
Listing 5.7 app/models/ticket.rb<br />
validates :description, :presence => true,<br />
:length => { :minimum => 10 }<br />
If you go into rails console and try to create a new Ticket object by using create!,<br />
you can get the full text for your error:<br />
irb(main):001:0> Ticket.create!<br />
ActiveRecord::RecordInvalid: ... Description is too short<br />
(minimum is 10 characters)<br />
That is the precise error message you are looking for in your feature. When you run<br />
bin/cucumber features/creating_tickets.feature again, you see that all three scenarios<br />
are now passing:<br />
3 scenarios (3 passed)<br />
25 steps (25 passed)<br />
You should ensure that the rest of the project still works. Because you have both features<br />
and specs, you should run the following command to check everything:<br />
rake cucumber:ok spec<br />
The summary for these two tasks together is 2<br />
9 scenarios (9 passed)<br />
62 steps (62 passed)<br />
# and<br />
5 examples, 0 failures, 4 pending<br />
2 The summary is altered to cut down on line noise with only the important parts shown.<br />
107
108 CHAPTER 5 Nested resources<br />
Great! Everything’s still working. Push the changes!<br />
git add .<br />
git commit -m "Implemented creating tickets for a project"<br />
git push<br />
This section covered how to create tickets and link them to a specific project through<br />
the foreign key called project_id on records in the tickets table.<br />
The next section shows how easily you can list tickets for individual projects.<br />
5.2 Viewing tickets<br />
Now that you have the ability to create tickets, you use the show action to create the<br />
functionality to view them individually.<br />
When displaying a list of projects, you use the index action of the Projects-<br />
Controller. For tickets, however, you use the show action because this page is currently<br />
not being used for anything else in particular. To test it, put a new feature at<br />
features/viewing_tickets.feature using the code from the following listing.<br />
Listing 5.8 features/viewing_tickets.feature<br />
Feature: Viewing tickets<br />
In order to view the tickets for a project<br />
As a user<br />
I want to see them on that project's page<br />
Background:<br />
Given there is a project called "TextMate 2"<br />
And that project has a ticket:<br />
| title | description |<br />
| Make it shiny! | Gradients! Starbursts! Oh my! |<br />
And there is a project called "Internet Explorer"<br />
And that project has a ticket:<br />
| title | description |<br />
| Standards compliance | Isn’t a joke. |<br />
And I am on the homepage<br />
Scenario: Viewing tickets for a given project<br />
When I follow "TextMate 2"<br />
Then I should see "Make it shiny!"<br />
And I should not see "Standards compliance"<br />
When I follow "Make it shiny!"<br />
Then I should see "Make it shiny" within "#ticket h2"<br />
And I should see "Gradients! Starbursts! Oh my!"<br />
When I follow "Ticketee"<br />
And I follow "Internet Explorer"<br />
Then I should see "Standards compliance"<br />
And I should not see "Make it shiny!"<br />
When I follow "Standards compliance"<br />
Then I should see "Standards compliance" within "#ticket h2"<br />
And I should see "Isn't a joke."<br />
B<br />
Check element<br />
using CSS<br />
selector
Viewing tickets<br />
Quite the long feature! We’ll go through it piece by piece in just a moment. First, let’s<br />
examine the within usage in your scenario. Rather than checking the entire page for<br />
content, this step checks the specific element using Cascading Style Sheets (CSS)<br />
selectors. The #ticket prefix finds all elements with an ID of ticket that contain an<br />
h2 element with the content you specified. This content should appear inside the<br />
specified tag only when you’re on the ticket page, so this is a great way to make sure<br />
that you’re on the right page and that the page is displaying relevant information.<br />
The first step passes because you defined it previously; the next one is undefined.<br />
Let’s see this by running bin/cucumber features/viewing_tickets.feature:<br />
Undefined step: "that project has a ticket:" (Cucumber::Undefined)<br />
The bottom of the output tells you how to define the step:<br />
Given /^that project has a ticket:$/ do |table|<br />
# table is a Cucumber::Ast::Table<br />
pending # express the regexp above with the code you wish you had<br />
end<br />
This step in the scenario is defined using the following syntax:<br />
| title | description |<br />
| Make it shiny! | Gradients! Starbursts! Oh my! |<br />
For Cucumber, this syntax represents a table, which is what the step definition hints at.<br />
Using the code shown in the following listing, define this step inside a new file at features/step_definitions/ticket_steps.rb.<br />
Listing 5.9 features/step_definitions/ticket_steps.rb<br />
Given /^that project has a ticket:$/ do |table|<br />
table.hashes.each do |attributes|<br />
@project.tickets.create!(attributes)<br />
end<br />
end<br />
Because you used a table here, Cucumber provides a hashes method for the table<br />
object, which uses the first row in the table as keys and the rest of the rows (as many as<br />
you need) for the values of hashes stored in an array. In this step, you iterate through<br />
this array, and each hash represents the attributes for the tickets you want to create.<br />
One thing that you haven’t done yet is define the @project variable used inside<br />
this iterator. To do that, open features/step_definitions/project_steps.rb and change<br />
this line<br />
Factory(:project, :name => name)<br />
to the following:<br />
@project = Factory(:project, :name => name)<br />
Instance variables are available throughout the scenario in Cucumber, so if you define<br />
one in one step, you may use it in the following steps. If you run the feature again, you<br />
109
110 CHAPTER 5 Nested resources<br />
see that it can’t find the text for the first ticket because you’re not displaying any tickets<br />
on the show template yet:<br />
expected there to be content "Make it shiny!" in "[text]"<br />
5.2.1 Listing tickets<br />
To display a ticket on the show template, you can iterate through the project’s tickets<br />
by using the tickets method, made available by the has_many :tickets call in your<br />
model. Put this code at the bottom of app/views/projects/show.html.erb, as shown in<br />
the next listing.<br />
Listing 5.10 app/views/projects/show.html.erb<br />
<br />
<br />
<br />
# - <br />
<br />
<br />
<br />
TIP If you use a @ticket variable in place of the ticket variable in the<br />
link_to’s second argument, it will be nil. You haven’t initialized the<br />
@ticket variable at this point, and uninitialized instance variables are nil<br />
by default. If @ticket rather than the correct ticket is passed in here, the<br />
URL generated will be a projects URL, such as /projects/1, rather than the<br />
correct /projects/1/tickets/2.<br />
Here you iterate over the items in @project.tickets using the each method, which<br />
does the iterating for you, assigning each item to a ticket variable inside the block.<br />
The code inside this block runs for every single ticket. When you run bin/cucumber<br />
features/viewing_tickets.feature, you get this error:<br />
When I follow "Ticketee"<br />
no link with title, id or text 'Ticketee' found<br />
The reasoning behind wanting this not-yet-existing link is that when users click it, it<br />
takes them back to the homepage, which is where you want to go in your feature to get<br />
back to the projects listing. To add this link, put it into app/views/layouts/application<br />
.html.erb (as shown in the following listing) so that it’s available on every page, just<br />
above the .<br />
Listing 5.11 app/views/layouts/application.html.erb<br />
<br />
<br />
The call to yield should be used only once. If you put then the content<br />
of the page would be rendered twice.
Viewing tickets<br />
The root_path method is made available by the call to the root method in config/<br />
routes.rb. This simply outputs / when it’s called, providing a path to the root of your<br />
application.<br />
Running bin/cucumber features/viewing_tickets.feature again, you can see<br />
this is all working:<br />
1 scenario (1 passed)<br />
18 steps (18 passed)<br />
Your code expressly states that inside the TextMate 2 project, you should see only the<br />
"Make it shiny!" ticket, and inside the Internet Explorer project, you should see only<br />
the "Standards compliance" ticket. Both statements worked.<br />
Time to make sure everything else is still working by running rake cucumber:ok<br />
spec. You should see that everything is green:<br />
10 scenarios (10 passed)<br />
80 steps (80 passed)<br />
# and<br />
5 examples, 0 failures, 4 pending<br />
Fantastic! Push!<br />
git add .<br />
git commit -m "Implemented features for displaying a list of relevant<br />
tickets for projects and viewing particular tickets"<br />
git push<br />
Now you can see tickets just for a particular project, but what happens when a project<br />
is deleted? The tickets for that project would not be deleted automatically. To implement<br />
this behavior, you can pass some options to the has_many association, which will<br />
delete the tickets when a project is deleted.<br />
5.2.2 Culling tickets<br />
When a project is deleted, its tickets become useless: they’re inaccessible because of<br />
how you defined their routes. Therefore, when you delete a project, you should also<br />
delete the tickets for that project, and you can do that by using the :dependent option<br />
on the has_many association defined in your Project model.<br />
This option has three choices that all act slightly differently from each other. The<br />
first one is the :destroy value:<br />
has_many :tickets, :dependent => :destroy<br />
If you put this in your Project model, any time you call destroy on a Project object,<br />
Rails iterates through each ticket for this project and calls destroy on them, then calls<br />
any destroy callbacks (such as any has_manys in the Ticket model, which also have the<br />
dependent option) 3 the ticket objects have on them, any destroy callbacks for those<br />
objects, and so on. The problem is that if you have a large number of tickets, destroy<br />
is called on each one, which will be slow.<br />
3 Or any callback defined with after_destroy or before_destroy.<br />
111
112 CHAPTER 5 Nested resources<br />
The solution is the second value for this option:<br />
has_many :tickets, :dependent => :delete_all<br />
This simply deletes all the tickets using a SQL delete, like this:<br />
DELETE FROM tickets WHERE project_id = :project_id<br />
This operation is quick and is exceptionally useful if you have a large number of tickets<br />
that don’t have callbacks. If you do have callbacks on Ticket for a destroy operation,<br />
then you should use the first option, :dependent => :destroy.<br />
Finally, if you just want to disassociate tickets from a project and unset the<br />
project_id field, you can use this option:<br />
has_many :tickets, :dependent => :nullify<br />
When a project is deleted with this type of :dependent option defined, it will execute<br />
an SQL query such as this:<br />
UPDATE tickets SET project_id = NULL WHERE project_id = :project_id<br />
Rather than deleting the tickets, this option keeps them around, but their project_id<br />
fields are unset.<br />
Using this option would be helpful, for example, if you were building a tasktracking<br />
application and instead of projects and tickets you had users and tasks. If you<br />
delete a user, you may want to reassign rather than delete the tasks associated with that<br />
user, in which case you’d use the :dependent => :nullify option instead.<br />
In your projects and tickets scenario, though, you use :dependent => :destroy if<br />
you have callbacks to run on tickets when they’re destroyed or :dependent =><br />
:delete_all if you have no callbacks on tickets.<br />
This was a little bit of a detour for the work you’re doing now, but it’s a nice thing<br />
to know if you ever need to delete an associated object when the original object is<br />
deleted.<br />
Let’s look at how to edit the tickets in your application.<br />
5.3 Editing tickets<br />
You want users to be able to edit tickets, the updating part of this CRUD interface. This<br />
section covers creating the edit and update actions for the TicketsController.<br />
The next feature you’re going to implement is the ability to edit tickets. This functionality<br />
follows a thread similar to the projects edit feature where you follow an Edit<br />
link in the show template. With that in mind, you can write this feature using the code<br />
in the following listing and put it in a file at features/editing_tickets.feature.<br />
Listing 5.12 features/editing_tickets.feature<br />
Feature: Editing tickets<br />
In order to alter ticket information<br />
As a user<br />
I want a form to edit the tickets
Editing tickets<br />
Background:<br />
Given there is a project called "TextMate 2"<br />
And that project has a ticket:<br />
| title | description |<br />
| Make it shiny! | Gradients! Starbursts! Oh my! |<br />
Given I am on the homepage<br />
When I follow "TextMate 2"<br />
And I follow "Make it shiny!"<br />
When I follow "Edit Ticket"<br />
Scenario: Updating a ticket<br />
When I fill in "Title" with "Make it really shiny!"<br />
And I press "Update Ticket"<br />
Then I should see "Ticket has been updated."<br />
And I should see "Make it really shiny!" within "#ticket h2"<br />
But I should not see "Make it shiny!"<br />
Scenario: Updating a ticket with invalid information<br />
When I fill in "Title" with ""<br />
And I press "Update Ticket"<br />
Then I should see "Ticket has not been updated."<br />
When you run this feature using bin/cucumber features/editing_tickets.feature,<br />
the first two steps pass, but the third fails:<br />
When I follow "Edit"<br />
no link with title, id or text 'Edit Ticket' found<br />
To fix this, add the Edit Ticket link to the TicketsController’s show template,<br />
because that’s where you’ve navigated to in your feature. Put it on the line underneath<br />
the tag in app/views/tickets/show.html.erb:<br />
<br />
Here is yet another use of the Array argument passed to the link_to method, but<br />
rather than passing all Active Record objects, you pass a Symbol first. Rails, yet again,<br />
works out from this Array what route you wish to follow. Rails interprets this array to<br />
mean the edit_project_ticket_path method, which is called like this:<br />
edit_project_ticket_path(@project, @ticket)<br />
Now that you have an Edit Project link, you need to add the edit action to the<br />
TicketsController.<br />
5.3.1 Adding the edit action<br />
The next logical step is to define the edit action in your TicketsController, which<br />
you can leave empty because the find_ticket before filter does all the hard lifting for<br />
you (shown in the following listing).<br />
def edit<br />
end<br />
Listing 5.13 app/controllers/tickets_controller.rb<br />
113
114 CHAPTER 5 Nested resources<br />
Again, you’re defining the action here so that anybody coming through and reading<br />
your TicketsController class knows that this controller responds to this action. It’s<br />
the first place people will go to determine what the controller does, because it is the<br />
controller.<br />
The next logical step is to create the view for this action. Put it at app/views/<br />
tickets/edit.html.erb and fill it with this content:<br />
Editing a ticket in <br />
<br />
Here you re-use the form partial you created for the new action, which is handy. The<br />
form_for knows which action to go to. If you run the feature command here, you’re<br />
told the update action is missing:<br />
And I press "Update"<br />
The action 'update' could not be found TicketsController<br />
5.3.2 Adding the update action<br />
You should now define the update action in your TicketsController, as shown in the<br />
following listing.<br />
Listing 5.14 app/controllers/tickets_controller.rb<br />
def update<br />
if @ticket.update_attributes(params[:ticket])<br />
flash[:notice] = "Ticket has been updated."<br />
redirect_to [@project, @ticket]<br />
else<br />
flash[:alert] = "Ticket has not been updated."<br />
render :action => "edit"<br />
end<br />
end<br />
Remember that in this action you don’t have to find the @ticket or @project objects<br />
because a before_filter does it for the show, edit, update, and destroy actions. With<br />
this single action implemented, both scenarios in your ticket-editing feature pass:<br />
2 scenarios (2 passed)<br />
20 steps (20 passed)<br />
Now check to see if everything works:<br />
12 scenarios (12 passed)<br />
100 steps (100 passed)<br />
# and<br />
5 examples, 0 failures, 4 pending<br />
Great! Let’s commit and push that:<br />
git add .<br />
git commit -m "Implemented edit action for the tickets controller"<br />
git push
Deleting tickets<br />
In this section, you implemented edit and update for the TicketsController by<br />
using the scoped finders and some familiar methods, such as update_attributes.<br />
You’ve got one more part to go: deletion.<br />
5.4 Deleting tickets<br />
We now reach the final story for this nested resource, the deletion of tickets. As with<br />
some of the other actions in this chapter, this story doesn’t differ from what you used<br />
in the ProjectsController, except you’ll change the name project to ticket for your<br />
variables and flash[:notice]. It’s good to have the reinforcement of the techniques<br />
previously used: practice makes perfect.<br />
Let’s use the code from the following listing to write a new feature in features/<br />
deleting_tickets.feature.<br />
Listing 5.15 features/deleting_tickets.feature<br />
Feature: Deleting tickets<br />
In order to remove tickets<br />
As a user<br />
I want to press a button and make them disappear<br />
Background:<br />
Given there is a project called "TextMate 2"<br />
And that project has a ticket:<br />
| title | description |<br />
| Make it shiny! | Gradients! Starbursts! Oh my! |<br />
Given I am on the homepage<br />
When I follow "TextMate 2"<br />
And I follow "Make it shiny!"<br />
Scenario: Deleting a ticket<br />
When I follow "Delete Ticket"<br />
Then I should see "Ticket has been deleted."<br />
And I should be on the project page for "TextMate 2"<br />
When you run this using bin/cucumber features/deleting_tickets.feature, the<br />
first step fails because you don’t yet have a Delete Ticket link on the show template for<br />
tickets:<br />
When I follow "Delete Ticket"<br />
no link with title, id or text 'Delete Ticket' found (Capybara::ElementNotFound)<br />
You can add the Delete Ticket link to the app/views/tickets/show.html.erb file just<br />
under the Edit link (shown in the next listing), exactly as you did with projects.<br />
Listing 5.16 app/views/tickets/show.html.erb<br />
:delete,<br />
:confirm => "Are you sure you want to delete this ticket?" %><br />
The :method => :delete is specified again, turning the request into one headed for<br />
the destroy action in the controller. Without this :method option, you’d be off to the<br />
115
116 CHAPTER 5 Nested resources<br />
show action because the link defaults to the GET method. Upon running bin/cucumber<br />
features/deleting_tickets.feature, you’re told a destroy action is missing:<br />
When I follow "Delete Ticket"<br />
The action 'destroy' could not be found in TicketsController<br />
The next step must be to define this action, right? Open app/controllers/<br />
tickets_controller.rb, and define it directly under the update action:<br />
def destroy<br />
@ticket.destroy<br />
flash[:notice] = "Ticket has been deleted."<br />
redirect_to @project<br />
end<br />
With that done, your feature should now pass:<br />
1 scenario (1 passed)<br />
8 steps (8 passed)<br />
Yet again, check to see that everything is still going as well as it should by using rake<br />
cucumber:ok spec. If it is, you should see output similar to this:<br />
13 scenarios (13 passed)<br />
108 steps (108 passed)<br />
and<br />
5 examples, 0 failures, 4 pending<br />
Commit and push!<br />
git add .<br />
git commit -m "Implemented deleting tickets feature"<br />
git push<br />
You’ve now completely created another CRUD interface, this time for the tickets<br />
resource. This resource is accessible only within the scope of a project, so you must<br />
request it using a URL such as /projects/1/tickets/2 rather than /tickets/2.<br />
5.5 Summary<br />
In this chapter, you generated another controller, the TicketsController, which<br />
allows you to create records for your Ticket model that will end up in your tickets<br />
table. The difference between this controller and the ProjectsController is that the<br />
TicketsController is accessible only within the scope of an existing project because<br />
you used nested routing.<br />
In this controller, you scoped the finds for the Ticket model by using the tickets<br />
association method provided by the association helper method has_many call in your<br />
Project model. has_many also provides the build method, which you used to begin to<br />
create new Ticket records that are scoped to a project.<br />
In the next chapter, you learn how to let users sign up and sign in to your application<br />
using a gem called devise. You also implement a basic authorization for actions<br />
such as creating a project.
This chapter covers<br />
� Working with engine code and generators<br />
Authentication<br />
and basic authorization<br />
� Building an authentication system with an engine<br />
� Implementing basic authorization checking<br />
You’ve now created two resources for your Ticketee application: projects and tickets.<br />
Now you’ll use a gem called Devise, which provides authentication, to let users<br />
sign in to your application. With this feature, you can track which tickets were created<br />
by which users. A little later, you’ll use these user records to allow and deny<br />
access to certain parts of the application.<br />
The general idea behind having users for this application is that some users are<br />
in charge of creating projects (project owners) and others use whatever the projects<br />
provide. If they find something wrong with it or wish to suggest an improvement,<br />
filing a ticket is a great way to inform the project owner of their request. You<br />
don’t want absolutely everybody creating or modifying projects, so you’ll learn to<br />
restrict project creation to a certain subset of users.<br />
117
118 CHAPTER 6 Authentication and basic authorization<br />
To round out the chapter, you’ll create another CRUD interface, this time for the<br />
users resource, but with a twist.<br />
Before you start, you must set up Devise!<br />
6.1 What Devise does<br />
Devise is an authentication gem that provides a lot of the common functionality for<br />
user management, such as letting users sign in and sign up, in the form of a Rails<br />
engine. An engine can be thought of as a miniature application that provides a small<br />
subset of controllers, models, views, and additional functionality in one neat little<br />
package. You can override the controllers, models, and views if you wish, though, by<br />
placing identically named files inside your application. This works because Rails looks<br />
for a file in your application first before diving into the gems and plugins of the application,<br />
which can speed up the application’s execution time.<br />
6.1.1 Installing Devise<br />
To install Devise, first add the following line to the Gemfile, right after the end for the<br />
:test group:<br />
gem 'devise', '~> 1.4.3'<br />
To install the Devise gem, run bundle. Once Devise is installed, you need to run the<br />
generator, but how do you know the name of it? Simple! You can run the generate<br />
command with no additional arguments to list all the generators:<br />
rails generate<br />
In this output, you’ll see devise:install listed. Hey, that’ll probably help you get<br />
things installed! Let’s try it:<br />
rails g devise:install<br />
This code generates two files, config/initializers/devise.rb and config/locales/<br />
devise.en.yml:<br />
� config/initializers/devise.rb sets up Devise for your application and is the source<br />
for all configuration settings for Devise.<br />
� config/locales/devise.en.yml contains the English translations for Devise and is<br />
loaded by the internationalization (I18n) part of Rails. You can learn about<br />
internationalization in Rails by reading the official I18n guide: http://<br />
guides.rubyonrails.org/i18n.html.<br />
The code also gives you three setup tips to follow. The first setup tip tells you to set up<br />
some Action Mailer settings, which you can place in your development environment’s<br />
configuration at config/environments/development.rb and in your test environment’s<br />
configuration at config/environments/test.rb:<br />
config.action_mailer.default_url_options = { :host => 'localhost:3000' }
What Devise does<br />
The files in config/environments are used for environment-specific settings, like the<br />
one you just added. If you wish to configure something across all environments for<br />
your application, you put it in config/application.rb.<br />
The second tip tells you to set up a root route, which you have done already. The<br />
third tip tells you to add displays for notice and alert in your application layout,<br />
which you’ve also done, except with different code than what it suggests.<br />
The next step to get Devise going is to run this command:<br />
rails g devise user<br />
This generator generates a model for your user and adds the following line to your<br />
config/routes.rb file:<br />
devise_for :users<br />
By default, this one simple line adds routes for user registration, signup, editing and<br />
confirmation, and password retrieval. The magic for this line comes from inside the<br />
User model that was generated, which contains the code from the following listing.<br />
Listing 6.1 app/models/user.rb<br />
class User < ActiveRecord::Base<br />
# Include default devise modules. Others available are:<br />
# :token_authenticatable, :encryptable, :confirmable,<br />
# :lockable, :timeoutable and :omniauthable<br />
devise :database_authenticatable, :registerable,<br />
:recoverable, :rememberable, :trackable, :validatable<br />
# Setup accessible (or protected) attributes for your model<br />
attr_accessible :email, :password,<br />
:password_confirmation, :remember_me<br />
end<br />
The devise method here comes from the Devise gem and configures the gem to provide<br />
the specified functions. These modules are shown in the following two tables.<br />
Table 6.1 shows default functions, and table 6.2 shows the optional functions.<br />
Table 6.1 Devise default modules<br />
Module Provides<br />
:database_authenticatable Adds the ability to authenticate via an email and password field<br />
in the database.<br />
:registerable Provides the functionality to let a user sign up.<br />
:recoverable Adds functionality to let the user recover their password if they<br />
ever lose it.<br />
:rememberable Provides a check box for users to check if they want their session<br />
to be remembered. If they close their browser and revisit the<br />
application, they are automatically signed in on their return.<br />
119
120 CHAPTER 6 Authentication and basic authorization<br />
Table 6.1 Devise default modules (continued)<br />
Module Provides<br />
:trackable Adds functionality to track users, such as how many times they<br />
sign in, when they last signed in, and the current and last IPs<br />
they signed in from.<br />
:validatable Validates the user has entered correct data, such as a valid<br />
email address and password.<br />
Table 6.2 Devise optional modules (off by default)<br />
Module Provides<br />
:token_authenticatable Lets the user authenticate via a token; can be used in conjunction<br />
with :database_authenticatable<br />
:encryptable Adds support for other methods of encrypting passwords; by<br />
default, Devise uses bcrypt<br />
:confirmable When users register, sends them an email with a link they click to<br />
confirm they’re a real person (you’ll switch on this module shortly<br />
because it’s one step to prevent automated signups)<br />
:lockable Locks the user out for a specific amount of time after a specific<br />
number of retries (configurable in the initializer); default is a lockout<br />
time of 1 hour after 20 retries<br />
:timeoutable If users have no activity in their session for a specified period of<br />
time, they are automatically signed out; useful for sites that may<br />
be used by multiple people on the same computer, such as email<br />
or banking sites<br />
:omniauthable Adds support for the OmniAuth gem, which allows for alternative<br />
authentication methods using services such as OAuth and<br />
OpenID<br />
The devise call is followed by a call to attr_accessible. This method defines fields<br />
that are accessible via attribute mass-assignment. Attribute mass-assignment happens<br />
when you pass a whole slew of attributes to a method such as create or<br />
update_attributes; because these methods take any and all parameters passed to<br />
them by default, users may attempt to hack the form and set an attribute they are not<br />
supposed to set, such as an admin boolean attribute. By using attr_accessible, you<br />
define a white list of fields you want the user to access. Any other fields passed<br />
through in an attribute mass-assignment are ignored.<br />
The final step here is to run rake db:migrate to create the users table from the<br />
Devise-provided migration in your development database and run rake<br />
db:test:prepare so it’s created in the test database too.
6.2 User signup<br />
User signup<br />
With Devise set up, you’re ready to write a feature that allows users to sign up. The<br />
Devise gem provides this functionality, so this feature will act as a safeguard to ensure<br />
that if the functionality were ever changed, the feature would break.<br />
To make sure this functionality is always available, you write a feature for it, using<br />
the following listing, and put it in a new file at features/signing_up.feature.<br />
Listing 6.2 features/signing_up.feature<br />
Feature: Signing up<br />
In order to be attributed for my work<br />
As a user<br />
I want to be able to sign up<br />
Scenario: Signing up<br />
Given I am on the homepage<br />
When I follow "Sign up"<br />
And I fill in "Email" with "user@ticketee.com"<br />
And I fill in "Password" with "password"<br />
And I fill in "Password confirmation" with "password"<br />
And I press "Sign up"<br />
Then I should see "You have signed up successfully."<br />
When you run this feature using bin/cucumber features/signing_up.feature,<br />
you’re told it can’t find a Sign Up link, probably because you haven’t added it yet:<br />
no link with title, id or text 'Sign up' found<br />
You should now add this link in a nav: 1<br />
<br />
<br />
<br />
You previously used the menu on the app/views/tickets/show.html.erb page to style the<br />
links there. Here you use a nav tag because this is a major navigation menu for the<br />
entire application, not just a single page’s navigation.<br />
With this link now in place, the entire feature passes when you run it because<br />
Devise does all the heavy lifting for you:<br />
1 scenario (1 passed)<br />
7 steps (7 passed)<br />
Because Devise has already implemented this functionality, you don’t need to write<br />
any code for it. This functionality could be overridden in your application, and this<br />
feature is insurance against anything changing for the worse.<br />
With the signup feature implemented, this is a great point to see if everything else<br />
is working by running rake cucumber:ok spec. You should see this output:<br />
1 nav is an HTML5 tag and may not be supported by some browsers. As an alternative, you could put instead, in app/views/layouts/application.html.erb, directly underneath the h1 tag for your<br />
application’s title.<br />
121
122 CHAPTER 6 Authentication and basic authorization<br />
14 scenarios (14 passed)<br />
115 steps (115 passed)<br />
# and<br />
6 examples, 0 failures, 5 pending<br />
Great! Commit that!<br />
git add .<br />
git commit -m "Added feature to ensure Devise signup is always working"<br />
git push<br />
In this section, you added a feature to make sure Devise is set up correctly for your<br />
application. When users sign up to your site, they’ll receive an email as long as you<br />
configured your Action Mailer settings correctly. The next section covers how Devise<br />
automatically signs in users who click the confirmation link provided in the email<br />
they’ve been sent.<br />
6.3 Confirmation link sign-in<br />
With users now able to sign up to your site, you should make sure they’re also able to<br />
sign in. When users are created, they should be sent a confirmation email in which<br />
they have to click a link to confirm their email address. You don’t want users signing<br />
up with fake email addresses! Once confirmed, the user is automatically signed in by<br />
Devise.<br />
6.3.1 Testing email<br />
First, you enable the confirmable module for Devise because (as you saw earlier) it’s<br />
one of the optional modules. With this module turned on, users will receive a confirmation<br />
email that contains a link for them to activate their account. You need to write<br />
a test that checks whether users receive a confirmation email when they sign up and<br />
can confirm their account by clicking a link inside that email.<br />
For this test, you use another gem called email_spec. To install this gem, add the<br />
following line to your Gemfile inside the test group:<br />
gem 'email_spec'<br />
Now run bundle to install it.<br />
Next, run the generator to get the steps for email_spec with the following<br />
command:<br />
rails g email_spec:steps<br />
This command generates steps in a file at features/step_definitions/email_steps.rb that<br />
you can use in your features to check whether a user received a specific email and<br />
more. This is precisely what you need to help you craft the next feature: signing in,<br />
receiving an email, and clicking the confirmation link inside it.<br />
One additional piece you must set up is to require the specific files from the<br />
email_spec library. Create a new file at features/support/email.rb, which you use for<br />
requiring the email_spec files. Inside this file, put these lines:
# Email Spec helpers<br />
require 'email_spec'<br />
require 'email_spec/cucumber'<br />
6.3.2 Confirming confirmation<br />
Confirmation link sign-in<br />
With the email_spec gem now fully installed and set up, let’s write a feature for signing<br />
users in when they click the confirmation link they should receive in their email.<br />
Insert the following listing at features/signing_in.feature.<br />
Listing 6.3 features/signing_in.feature<br />
Feature: Signing in<br />
In order to use the site<br />
As a user<br />
I want to be able to sign in<br />
Scenario: Signing in via confirmation<br />
Given there are the following users:<br />
| email | password |<br />
| user@ticketee.com | password |<br />
And "user@ticketee.com" opens the email with subject<br />
➥"Confirmation instructions"<br />
And they click the first link in the email<br />
Then I should see "Your account was successfully confirmed"<br />
And I should see "Signed in as user@ticketee.com"<br />
With this scenario, you make sure that when users are created, they receive an email<br />
called “Confirmation instructions” that should contain confirmation instructions.<br />
This email will contain a link, and when users click it, they should see two things: a<br />
message saying “Your account was successfully confirmed” and notification that they<br />
are now “Signed in as user@ticketee.com” where user@ticketee.com represents the<br />
username.<br />
The first step in this scenario is currently undefined, so when you run this feature<br />
using bin/cucumber features/signing_in.feature, it fails with the undefined step:<br />
Given /^there are the following users:$/ do |table|<br />
pending # express the regexp above with the code you wish you had<br />
end<br />
This step definition allows you to create as many users as you wish using Cucumber’s<br />
table syntax. Put this step definition inside a new file called features/step_definitions/<br />
user_steps.rb, using the code from the following listing.<br />
Listing 6.4 features/step_definitions/user_steps.rb<br />
Given /^there are the following users:$/ do |table|<br />
table.hashes.each do |attributes|<br />
@user = User.create!(attributes)<br />
end<br />
end<br />
123
124 CHAPTER 6 Authentication and basic authorization<br />
In this step definition, you use Cucumber’s table format again to specify more than<br />
one user to create. To get to these attributes, iterate through table.hashes, storing<br />
each set of attributes as attributes for each iteration. Inside the iteration, the<br />
create! method creates the user record using these attributes. All of this should look<br />
pretty familiar—you used it to create tickets for a project.<br />
The second step in this scenario is provided by the email_spec gem, and it fails<br />
when you run bin/cucumber features/signing_in.feature again:<br />
And "user@ticketee.com" opens the email with subject "Confirmation<br />
➥instructions"<br />
Could not find email With subject "Confirmation instructions".<br />
Found the following emails:<br />
[]<br />
This is email_spec telling you it can’t find an email with the title “Confirmation<br />
instructions,” which is what Devise would send out if you had told it you wanted users<br />
to be confirmable. You haven’t yet done this, so no emails are being sent.<br />
To make users confirmable, add the :confirmable symbol at the end of the<br />
devise call in app/models/user.rb:<br />
devise :database_authenticatable, :registerable,<br />
:recoverable, :rememberable, :trackable,<br />
:validatable, :confirmable<br />
Now Devise will send confirmation emails when users sign up. When you run bin/<br />
cucumber features/signing_in.feature again, your first step is failing:<br />
Given there are the following users:<br />
| email | password | unconfirmed |<br />
| user@ticketee.com | password | true |<br />
undefined local variable or method 'confirmed_at' for #<br />
The confirmed_at attribute is used by Devise to determine whether or not a user has<br />
confirmed their account. By default, this attribute is nil, indicating the user hasn’t<br />
confirmed yet. The attribute doesn’t exist at the moment, so you get this error.<br />
You could add this attribute to the existing db/migrate/[timestamp]<br />
_devise_create_users.rb migration, but because you already pushed that migration, you<br />
should avoid changing it, as others will have to rerun the migration to get those<br />
changes. Even though it’s just you working on the project at the moment, it’s a good<br />
rule of thumb to not modify migrations that have already been pushed.<br />
Instead, create a new migration to add the confirmed_at field and two others,<br />
confirmation_token and confirmation_sent_at. The confirmation_token is generated<br />
by Devise and used to identify users attempting to confirm their account when<br />
they click the confirmation link from the email. The confirmation_sent_at field is<br />
used also by Devise and tracks the time when the confirmation email was sent:<br />
rails g migration add_confirmable_fields_to_users<br />
Let’s now open this migration and put the code from the following listing inside it.
Confirmation link sign-in<br />
Listing 6.5 db/migrate/[timestamp]_add_confirmable_fields_to_users.rb<br />
class AddConfirmableFieldsToUsers < ActiveRecord::Migration<br />
def change<br />
add_column :users, :confirmation_token, :string<br />
add_column :users, :confirmed_at, :datetime<br />
add_column :users, :confirmation_sent_at, :datetime<br />
end<br />
end<br />
This migration adds the specified columns to the users table when you run rake<br />
db:migrate or removes them when you run rake db:rollback.<br />
When users sign up, a confirmation token is generated for them. An email with a<br />
link containing this token is sent (and the confirmation_sent_at field is set). When<br />
users click the link, their account is confirmed, and the confirmed_at field is set to<br />
the current time in the process.<br />
You now need to run rake db:migrate and rake db:test:prepare to update your<br />
test database with this latest change. With these fields in place, you should be much<br />
closer to having your scenario pass. Let’s see with a quick run of bin/cucumber features/signing_in.feature:<br />
Scenario: Signing in via confirmation<br />
Given there are the following users:<br />
| email | password |<br />
| user@ticketee.com | password |<br />
And "user@ticketee.com" opens the email with subject "Confirmation<br />
➥instructions"<br />
And they click the first link in the email<br />
Then I should see "Your account was successfully confirmed"<br />
Then I should see "Signed in as user@ticketee.com"<br />
expected there to be content "Created by user@ticketee.com" in "[text]"<br />
Everything but the final step is passing. The final step checks for “Signed in as<br />
user@ticketee.com” somewhere on the page, but it can’t find it. You must add it to<br />
your application’s layout, replacing the Sign Up link with “Signed in as [username]”<br />
so users don’t have the option to sign up if they’re already signed in!<br />
Let’s open app/views/layouts/application.html.erb and change this line<br />
<br />
to the following:<br />
<br />
Signed in as <br />
<br />
<br />
<br />
The user_signed_in? and current_user methods are provided by Devise. The<br />
user_signed_in? method returns true if the user is signed in; otherwise it returns<br />
false. The current_user method returns a User object representing the current<br />
user, and from that object you can call the email method to display the user’s email.<br />
125
126 CHAPTER 6 Authentication and basic authorization<br />
When you run bin/cucumber features/signing_up.feature, the entire feature is<br />
passing:<br />
1 scenario (1 passed)<br />
5 steps (5 passed)<br />
In addition to signing-up facilities, Devise handles all the signing-in facilities too. All<br />
you need to add is the :confirmable symbol to the devise call in the model, the confirmation<br />
fields to the users table, and the message “Signed in as [user]” in your<br />
application—three easy steps.<br />
Does everything else pass? Run rake cucumber:ok spec, and you should see the<br />
following output:<br />
15 scenarios (15 passed)<br />
120 steps (120 passed)<br />
# and<br />
6 examples, 0 failures, 5 pending<br />
Great! Push that!<br />
git add .<br />
git commit -m "Added feature for ensuring that a user is signed in<br />
via a confirmation email by using email spec"<br />
git push<br />
Now that users can sign up and confirm their email addresses, what should happen<br />
when they return to the site? They should be able to sign in! Let’s make sure this can<br />
happen.<br />
6.4 Form sign-in<br />
The previous story covered the automatic sign-in that happens when users follow the<br />
confirmation link from the email they receive when they sign up. Now you must write<br />
a story for users who have confirmed their account and are returning and need to sign<br />
in again.<br />
Place the scenario in the following listing directly underneath the previous scenario<br />
in features/signing_in.feature.<br />
Listing 6.6 features/signing_in.feature<br />
Scenario: Signing in via form<br />
Given there are the following users:<br />
| email | password |<br />
| user@ticketee.com | password |<br />
And I am on the homepage<br />
When I follow "Sign in"<br />
And I fill in "Email" with "user@ticketee.com"<br />
And I fill in "Password" with "password"<br />
And I press "Sign in"<br />
Then I should see "Signed in successfully."<br />
When you run bin/cucumber features/signing_in.feature, it complains about the<br />
missing Sign In link:
Form sign-in<br />
When I follow "Sign in"<br />
no link with title, id or text 'Sign in' found (Capybara::ElementNotFound)<br />
You should add the link directly under the Sign Up link in app/views/layouts<br />
/application.html.erb, as shown in the following listing.<br />
Listing 6.7 app/views/layouts/application.html.erb<br />
<br />
When you run the feature again, it still fails, but this time on the final step:<br />
And I press "Sign in"<br />
Then I should see "Signed in successfully."<br />
expected there to be content "Signed in successfully." in "[text]"<br />
It fails because users who have not yet confirmed their account by clicking the link in<br />
the email can’t sign in. To fix this, you could confirm the users with the first step in<br />
this scenario, but it would break the first scenario because it requires users to be<br />
unconfirmed.<br />
To fix this, alter the first scenario in this feature to contain the following as its first<br />
step:<br />
Given there are the following users:<br />
| email | password | unconfirmed |<br />
| user@ticketee.com | password | true |<br />
With this small change, the step now has an additional key available in the attributes<br />
hash in the step definition. If this step is called with an unconfirmed user, it doesn’t<br />
confirm the user; otherwise it does. Let’s alter this step definition in features/<br />
step_definitions/user_steps.rb:<br />
Given /^there are the following users:$/ do |table|<br />
table.hashes.each do |attributes|<br />
unconfirmed = attributes.delete("unconfirmed") == "true"<br />
@user = User.create!(attributes)<br />
@user.confirm! unless unconfirmed<br />
end<br />
end<br />
At the top of the iteration over table.hashes, you now call attributes<br />
.delete("unconfirmed"), which removes the unconfirmed key from the attributes<br />
hash, returning its value in the process. If that value is equal to true then<br />
unconfirmed is also set to true. If that’s the case, the final line in the iterator isn’t<br />
called and the user isn’t confirmed. Otherwise, as in the case in the second scenario of<br />
the feature, the user is confirmed and allowed to sign in.<br />
When you run bin/cucumber features/signing_in.feature again, both scenarios<br />
pass:<br />
2 scenarios (2 passed)<br />
12 steps (12 passed)<br />
127
128 CHAPTER 6 Authentication and basic authorization<br />
Run your tests again before you commit these changes with rake cucumber:ok spec.<br />
Even though you didn’t change much code in this section, it’s still a good habit to run<br />
your tests before every commit to stop unintentional regressions. You should see the<br />
following summaries:<br />
16 scenarios (16 passed)<br />
127 steps (127 passed)<br />
# and<br />
6 examples, 0 failures, 5 pending<br />
Great, let’s commit and push:<br />
git add .<br />
git commit -m "Added feature for signing in via the Devise-provided form"<br />
git push<br />
6.5 Linking tickets to users<br />
Now that users can sign in and sign up to your application, it’s time to link a ticket<br />
with a user when it’s created automatically, clearly defining which user created the<br />
ticket. You also want to ensure that the user who created the ticket gets attribution on<br />
the ticket page.<br />
That part is easy: you need a “Created by [user]” message displayed on the ticket<br />
page. The setup before it is a little more difficult, but you’ll get through it.<br />
You can test for this functionality by amending the Creating a Ticket scenario<br />
inside features/creating_tickets.feature to have the following line as the final line for<br />
the scenario:<br />
Then I should see "Created by user@ticketee.com"<br />
When you run the feature using bin/cucumber features/creating_tickets.feature,<br />
it fails on this new step because it isn’t on the ticket show template:<br />
expected #has_content?("Created by user@ticketee.com")<br />
to return true, got false ...<br />
You need to make sure the user is signed in before they can create a ticket; otherwise,<br />
you won’t know who to make the owner of that ticket. When users go to a project page<br />
and click the New Ticket link, they should be redirected to the sign-in page and asked<br />
to sign in. Once they’re signed in, they should be able to create the ticket. Change the<br />
Background of the Feature in features/creating_tickets.feature to ensure this process<br />
happens, using the code from the following listing.<br />
Listing 6.8 features/creating_tickets.feature<br />
Given there is a project called "Internet Explorer"<br />
And there are the following users:<br />
| email | password |<br />
| user@ticketee.com | password |<br />
And I am on the homepage<br />
When I follow "Internet Explorer"<br />
And I follow "New Ticket"
Linking tickets to users<br />
Then I should see "You need to sign in or sign up before continuing."<br />
When I fill in "Email" with "user@ticketee.com"<br />
And I fill in "Password" with "password"<br />
And I press "Sign in"<br />
Then I should see "New Ticket"<br />
The step that checks for the text “You need to sign in or sign up before continuing”<br />
fails because you’re not ensuring the user is signed in before the new action in the<br />
TicketsController.<br />
To do so, you can use the Devise-provided method authenticate_user! as a<br />
before_filter. Put this method directly underneath the class definition for Tickets-<br />
Controller inside app/controllers/tickets_controller.rb. The placement of this<br />
before_filter ensures that if it fails, the other two before_filters underneath it<br />
will not needlessly run, eventually saving valuable CPU cycles.<br />
The line you put in the TicketsController is<br />
before_filter :authenticate_user!, :except => [:index, :show]<br />
This line ensures that users are authenticated before they go to any action in the controller<br />
that isn’t the index or show, including the new and create actions.<br />
By ensuring this authentication, you’ll know which user created a ticket during the<br />
creation process, so let’s link tickets to users.<br />
6.5.1 Attributing tickets to users<br />
To link tickets to specific users, you alter the build line in your create action in<br />
TicketsController from this line<br />
@ticket = @project.tickets.build(params[:ticket])<br />
to this:<br />
@ticket = @project.tickets.build(params[:ticket].merge!(:user => current_user))<br />
The merge! method here is a Hash and HashWithIndifferentAccess method, which<br />
merges the provided keys into the hash and overrides any keys already specified. 2<br />
When you run the feature again using bin/cucumber features/creating_tickets<br />
.feature, it complains about an unknown attribute in all three scenarios:<br />
unknown attribute: user (ActiveRecord::UnknownAttributeError)<br />
This error occurs because you haven’t added a belongs_to association between the<br />
Ticket and User. Let’s open app/models/ticket.rb and add this line directly under the<br />
belongs_to :project line:<br />
belongs_to :user<br />
The belongs_to method defines methods for accessing the association, as has_many<br />
does, except here you retrieve only one record. Active Record knows which record<br />
to retrieve when you call either project or user on a Ticket object because it<br />
2 Which could happen if someone hacked the form and attempted to pass their own user attribute.<br />
129
130 CHAPTER 6 Authentication and basic authorization<br />
intelligently uses the name of the belongs_to association to imply that the fields are<br />
project_id and user_id, respectively. When looking up a user, Active Record performs<br />
a query like this:<br />
SELECT * FROM users WHERE id = #{@ticket.user_id}<br />
This query then returns a row from the database that matches the ID (if there is one),<br />
and Active Record creates a new User object from this result.<br />
With these associations set up, you now need to add a field on the tickets table to<br />
store the ID of the user that a ticket links to. Run this command:<br />
rails g migration add_user_id_to_tickets user_id:integer<br />
Based solely on how you wrote the name of this feature, Rails will understand that you<br />
want to add a particular column to the tickets table. You specify the name and type<br />
of the column after the migration name, and Rails creates the migration with the field<br />
prefilled for you.<br />
If you open the new migration file (it’s the last one in the db/migrate directory),<br />
you’ll see the output in the following listing.<br />
Listing 6.9 db/migrate/[timestamp]_add_user_id_to_tickets.rb<br />
class AddUserIdToTickets < ActiveRecord::Migration<br />
def change<br />
add_column :tickets, :user_id, :integer<br />
end<br />
end<br />
It’s all done for you! You can close this file and then run the migration with rake<br />
db:migrate and prepare the test database by using rake db:test:prepare.<br />
Let’s rerun bin/cucumber features/creating_tickets.feature and see where it<br />
stands now:<br />
Then I should see "Created by user@ticketee.com"<br />
expected there to be content "Created by user@ticketee.com" in "[text]"<br />
Bash migrate alias<br />
If you’re using bash as a shell (which is probably the case if you’re on a UNIX operating<br />
system), you could add an alias to your ~/.bashrc to do both of these steps<br />
for you rather than having to type them out:<br />
alias migrate='rake db:migrate && rake db:test:prepare'<br />
Then type source ~/.bashrc, and the alias will be available to you in your current<br />
terminal window. It’ll also be available in new terminal windows even if you didn’t use<br />
source, because this file is processed every time a new bash session is started. If<br />
you don’t like typing source, then . ~/.bashrc will do.
Linking tickets to users<br />
Make sure to run db:test:prepare<br />
If you don’t prepare the test database, the following error occurs when you run the<br />
feature:<br />
And I press "Create Ticket"<br />
undefined method 'email' for nil:NilClass (ActionView::Template::Error)<br />
Watch out for that one.<br />
Only one scenario fails now. We’re right back to the missing “Created by user@ticketee<br />
.com” text. Open app/views/tickets/show.html.erb and, above the ticket description,<br />
put the following line:<br />
Created by <br />
This line adds the text the feature needs to pass, so when you run bin/cucumber<br />
features/creating_tickets.feature, you get the following output:<br />
3 scenarios (3 passed)<br />
44 steps (44 passed)<br />
You should run rake cucumber:ok spec as usual to ensure you haven’t broken anything:<br />
Failing Scenarios:<br />
cucumber features/deleting_tickets.feature:15<br />
cucumber features/editing_tickets.feature:16<br />
cucumber features/viewing_tickets.feature:18<br />
Oops, it looks like you did! If you didn’t have these tests in place, you wouldn’t have<br />
known about this breakage unless you tested the application manually or guessed (or<br />
somehow knew) that your changes would break the application in this way. Let’s see if<br />
you can fix it.<br />
6.5.2 We broke something!<br />
Luckily, all the failed tests have the same error<br />
When I follow "Make it shiny!"<br />
undefined method 'email' for nil:NilClass (ActionView::Template::Error)<br />
...<br />
./app/views/tickets/show.html.erb:4:in ...<br />
Whatever is causing this error is on line 4 of app/views/tickets/show.html.erb:<br />
Created by <br />
Aha! The error is undefined method 'email' for nil:NilClass, and the only place<br />
you call email on this line is on the user object from @ticket, so you can determine<br />
that user must be nil. But why? Let’s have a look at how to set up the data in the<br />
features/viewing_tickets.feature feature, as shown in the following listing.<br />
131
132 CHAPTER 6 Authentication and basic authorization<br />
Listing 6.10 features/viewing_tickets.feature<br />
Given there is a project called "TextMate 2"<br />
And that project has a ticket:<br />
| title | description |<br />
| Make it shiny! | Gradients! Starbursts! Oh my! |<br />
No user is assigned to this ticket for the second step, and that’s why user is nil. You<br />
should rewrite this feature to make it create a ticket and link it to a specific user.<br />
6.5.3 Fixing the Viewing Tickets feature<br />
The first step is to create a user you can link to, so change the first lines of the<br />
Background to this:<br />
Given there are the following users:<br />
| email | password |<br />
| user@ticketee.com | password |<br />
And there is a project called "TextMate 2"<br />
And that project has a ticket:<br />
| title | description |<br />
| Make it shiny! | Gradients! Starbursts! Oh my! |<br />
Next, change the third step a little so it creates a ticket with a user:<br />
And "user@ticketee.com" has created a ticket for this project:<br />
| title | description |<br />
| Make it shiny! | Gradients! Starbursts! Oh my! |<br />
Also be sure to change the other ticket-creation lines further down:<br />
And "user@ticketee.com" has created a ticket for this project:<br />
| title | description |<br />
| Standards compliance | Isn’t a joke. |<br />
When you run bin/cucumber features/viewing_tickets.feature, you get the new<br />
version of this step definition:<br />
Given /^"([^\"]*)" has created a ticket for this project:$/ do |arg1, table|<br />
# table is a Cucumber::Ast::Table<br />
pending # express the regexp above with the code you wish you had<br />
end<br />
Copy the first line of this step definition, open features/step_definitions/<br />
ticket_steps.rb, and replace the first line in the file with this new line. Then replace<br />
arg1 with email, making the entire step definition<br />
Given /^"([^\"]*)" has created a ticket for this project:$/ do |email, table|<br />
table.hashes.each do |attributes|<br />
@project.tickets.create!(attributes)<br />
end<br />
end<br />
Next, link this new ticket to the user who has the email you pass in. Change the step<br />
definition as follows:<br />
Given /^"([^\"]*)" has created a ticket for this project:$/ do |email, table|<br />
table.hashes.each do |attributes|
Linking tickets to users<br />
attributes = attributes.merge!(:user => User.find_by_email!(email))<br />
@project.tickets.create!(attributes)<br />
end<br />
end<br />
With this step definition in place, the feature should pass. Let’s do another run of<br />
bin/cucumber features/viewing_tickets.feature:<br />
1 scenario (1 passed)<br />
19 steps (20 passed)<br />
Let’s now fix up the other two, beginning with the Editing Tickets feature.<br />
6.5.4 Fixing the Editing Tickets feature<br />
You can re-use the step definition you created in the previous section in the features/<br />
editing_tickets.feature by changing the first few lines of the Background to be identical<br />
to the next listing.<br />
Listing 6.11 features/editing_tickets.feature<br />
Given there are the following users:<br />
| email | password |<br />
| user@ticketee.com | password |<br />
Given there is a project called "TextMate 2"<br />
And "user@ticketee.com" has created a ticket for this project:<br />
| title | description |<br />
| Make it shiny! | Gradients! Starbursts! Oh my! |<br />
When you run the feature—unlike the Viewing Tickets feature—it doesn’t pass, complaining<br />
that it can’t find the field called Title. Uh oh:<br />
cannot fill in, no text field, text area or password field with id,<br />
name, or label 'Title' found (Capybara::ElementNotFound)<br />
Back in the TicketsController, you restricted some of the actions by using the<br />
before_filter:<br />
before_filter :authenticate_user!, :except => [:index, :show]<br />
This before_filter restricts any access to the edit action for people who are not<br />
signed in. In this feature then, you should sign in as the user you create so you can<br />
edit this ticket. Change the first line of the Background to sign in as that user:<br />
Background:<br />
Given there are the following users:<br />
| email | password |<br />
| user@ticketee.com | password |<br />
And I am signed in as them<br />
When you run this feature, you see the last step in the example is undefined. You must<br />
define this new step so you can sign in as the user set up in the first step of the<br />
Background. Because you assigned @user in the there are the following users step,<br />
you can reference this variable in the new step. Define this new step at the bottom of<br />
features/step_definitions/user_steps.rb by copying the lines from features/signing_in<br />
.feature and doing a couple of replacements, as shown in the following listing.<br />
133
134 CHAPTER 6 Authentication and basic authorization<br />
Listing 6.12 features/user_steps.rb<br />
Given /^I am signed in as them$/ do<br />
steps(%Q{<br />
Given I am on the homepage<br />
When I follow "Sign in"<br />
And I fill in "Email" with "#{@user.email}"<br />
And I fill in "Password" with "password"<br />
And I press "Sign in"<br />
Then I should see "Signed in successfully."<br />
})<br />
end<br />
In this step definition, you use a method called steps. Because step definitions are<br />
written in Ruby, you can’t use step definitions as you do in Cucumber features. To get<br />
around this restriction, use the steps method and specify each step you want to call<br />
inside %Q{}, a kind of super-String that allows you to use double and single quotes<br />
inside. The steps method then takes each of these steps and runs them as if they were<br />
inside a feature.<br />
Because this step is essentially a duplicate of what’s already in features/<br />
signing_in.feature, you can remove the similar lines and turn the Signing in via Form<br />
scenario into what’s shown in the following listing.<br />
Listing 6.13 features/signing_in.feature<br />
Scenario: Signing in via form<br />
Given there are the following users:<br />
| email | password |<br />
| user@ticketee.com | password |<br />
And I am signed in as them<br />
Much simpler!<br />
Now if you run bin/cucumber features/editing_tickets.feature, this feature<br />
passes because you’re signing in as a user before attempting to edit a ticket!<br />
2 scenarios (2 passed)<br />
27 steps (27 passed)<br />
One more feature to go: the Deleting Tickets feature.<br />
6.5.5 Fixing the Deleting Tickets feature<br />
To fix the Deleting Tickets feature, take the first couple of lines from features/<br />
editing_tickets.feature and put them into features/deleting_tickets.feature so that the<br />
first few lines of the Background for this feature look like the following listing.<br />
Listing 6.14 features/deleting_tickets.feature<br />
Given there are the following users:<br />
| email | password |<br />
| user@ticketee.com | password |<br />
And I am signed in as them<br />
Given there is a project called "TextMate 2"
Summary<br />
And "user@ticketee.com" has created a ticket for this project:<br />
| title | description |<br />
| Make it shiny! | Gradients! Starbursts! Oh my! |<br />
When you run bin/cucumber features/deleting_tickets.feature, this feature<br />
passes once again:<br />
1 scenario (1 passed)<br />
11 steps (11 passed)<br />
There! The last of the broken features is fixed.<br />
Now that the known failing scenarios are working, let’s check for any other breakages<br />
with rake cucumber:ok spec. You should see this output:<br />
16 scenarios (16 passed)<br />
148 steps (148 passed)<br />
# and<br />
6 examples, 0 failures, 4 pending<br />
Great! Let’s commit and push that to GitHub now:<br />
git add .<br />
git commit -m "When creating tickets, attribute them to the creator."<br />
git push<br />
You’ve added the feature to add attribution to the tickets so that when a ticket is created,<br />
you know who created it. You’ve also restricted certain actions in the Tickets-<br />
Controller on the basis of whether or not a user is signed in.<br />
6.6 Summary<br />
This chapter covered how to set up authentication so that users can sign up and sign<br />
in to your application to accomplish certain tasks.<br />
We began with Devise, a gem that provides the signing up and signing in capabilities<br />
right out of the box by way of being a Rails engine. Using Devise, you tested the<br />
functionality provided by the gem in the same way you tested functionality you wrote<br />
yourself: by writing Cucumber features to go with it.<br />
Then you moved into testing whether emails were sent out to the right people by<br />
using another gem called email_spec. The gem allows you to click a link in an email to<br />
confirm a user’s account and then have Devise automatically sign in the user.<br />
Then came linking tickets to users, so you can track which user created which<br />
ticket. This was done by using the setter method provided by the belongs_to<br />
method’s presence on the Ticket class. You were also able to use Hash’s lovely merge!<br />
method in the TicketsController’s create action to link any ticket that was being<br />
created to the currently signed-in user.<br />
In the next chapter, we look at restricting certain actions to only users who are<br />
signed in or who have a special attribute set on them.<br />
135
This chapter covers<br />
� Adding an authorization flag to a<br />
database table<br />
� Locking down access based on a<br />
database flag<br />
Basic access control<br />
As your application now stands, anybody, whether they’re signed in or not, can create<br />
new projects. As you did for the actions in the TicketsController, you must<br />
restrict access to the actions in the ProjectsController. The twist here is that<br />
you’ll allow only a certain subset of users—users with one particular attribute set in<br />
one particular way—to access the actions.<br />
You’ll track which users are administrators by putting a boolean field called<br />
admin in the users table. This is the most basic form of user authorization, which is<br />
not to be confused with authentication, which you implemented in chapter 6.<br />
Authentication is the process users go through to confirm their identity, whereas<br />
authorization is the process users go through to gain access to specific areas.<br />
136
Projects can be created only by admins<br />
7.1 Projects can be created only by admins<br />
To restrict the creation of projects to admins, you alter the existing Background in<br />
features/creating_projects.feature and insert the following listing as the first three lines.<br />
Listing 7.1 features/creating_projects.feature<br />
Given there are the following users:<br />
| email | password |<br />
| admin@ticketee.com | password |<br />
And I am signed in as them<br />
This listing creates a user. The Background should now look like the following listing.<br />
Listing 7.2 features/creating_projects.feature<br />
Given there are the following users:<br />
| email | password | admin |<br />
| admin@ticketee.com | password | true |<br />
And I am signed in as them<br />
Given I am on the homepage<br />
When I follow "New Project"<br />
There’s a problem here: the admin attribute for User objects isn’t mass-assignable. You<br />
saw this issue in chapter 6 when the attr_accessible method was introduced. This<br />
restriction means that you can’t assign the admin attribute along with other attributes<br />
using the new, build, create, or update_attributes method.<br />
You have to set this attribute manually by using either update_attribute or the<br />
setter, user.admin = [value]. You use the latter here, so change this step in features/<br />
step_definitions/user_steps.rb<br />
Given /^there are the following users:$/ do |table|<br />
table.hashes.each do |attributes|<br />
unconfirmed = attributes.delete("unconfirmed") == "true"<br />
@user = User.create!(attributes)<br />
@user.confirm! unless unconfirmed<br />
end<br />
end<br />
to this:<br />
Given /^there are the following users:$/ do |table|<br />
table.hashes.each do |attributes|<br />
unconfirmed = attributes.delete("unconfirmed") == "true"<br />
@user = User.create!(attributes)<br />
@user.update_attribute("admin", attributes["admin"] == "true")<br />
@user.confirm! unless unconfirmed<br />
end<br />
end<br />
If you pass the admin attribute in your table, it’ll be a string. You check whether the<br />
string is equal to true, and if it is, you use update_attribute to set the admin field manually<br />
to true or false, depending on whether or not attributes["admin"]is true.<br />
137
138 CHAPTER 7 Basic access control<br />
When you run this feature, it can’t find the admin field for your users table,<br />
because you haven’t added it yet:<br />
Given there are the following users:<br />
| email | password | admin |<br />
| admin@ticketee.com | password | true |<br />
undefined method `admin=’ for #<br />
7.2 Adding the admin field to the users table<br />
You can generate a migration to add the admin field by running rails generate<br />
migration add_admin_to_users admin:boolean. You want to modify this migration so<br />
that when users are created, the admin field is set to false rather than defaulting to<br />
nil. Open the freshly generated migration and change this line<br />
add_column :users, :admin, :boolean<br />
to this:<br />
add_column :users, :admin, :boolean, :default => false<br />
When you pass in the :default option here, the admin field defaults to false, ensuring<br />
that users aren’t accidentally created as admins.<br />
The command rake db:migrate db:test:prepare runs the migration, adds the<br />
admin field to the users table, and sets up the test database. Now you see that the step<br />
is passing:<br />
Given there are the following users:<br />
| email | password | admin |<br />
| admin@ticketee.com | password | true |<br />
With this step definition implemented, run rake cucumber:ok and rake spec to make<br />
sure you haven’t broken anything. According to this output, you haven’t:<br />
16 scenarios (16 passed)<br />
152 steps (152 passed)<br />
Great! Now you can go about restricting the acts of creating, updating, and destroying<br />
projects to only those users who are admins.<br />
7.3 Restricting actions to admins only<br />
For this step, you implement a before_filter that checks not only whether the user<br />
is signed in but also whether the user is an admin.<br />
Before you write this before_filter, you write a controller spec rather than a<br />
Cucumber feature to test it. Cucumber features are great for defining a set of actions<br />
that a user can perform in your system, but controller specs are much better for<br />
quickly testing singular points, such as whether or not a user can go to a specific<br />
action in the controller. You used this same reasoning back in chapter 4 to test what<br />
happens when a user attempts to go to a project that doesn’t exist.<br />
You want to ensure that all visits to the new, create, edit, update, and destroy<br />
actions are done by admins and are inaccessible to other users. Open spec/controllers/
Restricting actions to admins only<br />
projects_controller_spec.rb, and add a let inside the describe so the top of the spec<br />
looks like the following listing.<br />
describe ProjectsController do<br />
let(:user) do<br />
user = Factory(:user)<br />
user.confirm!<br />
user<br />
end<br />
context "standard users" do<br />
it "cannot access the new action" do<br />
sign_in(:user, user)<br />
end<br />
end<br />
...<br />
end<br />
Listing 7.3 spec/controllers/projects_controller_spec.rb<br />
Here you use a multilined block for the let method. This method defines a user<br />
method, which returns a newly created and confirmed user. You create this user using<br />
Factory Girl.<br />
You then use this object in your test to sign in as that user. The benefit of using let<br />
over defining an instance variable in a before block is that the let code is called only<br />
when it’s referenced, whereas all the code in a before is evaluated regardless. This is<br />
helpful if some of your tests don’t need a User object.<br />
Underneath the let, you add a short placeholder test that signs in as the user,<br />
attempting to use the userlet method. With this test, the let block is called, and you<br />
should get an error when you run this spec using bin/rspec spec/controllers/<br />
projects _controller_spec.rb:<br />
Not registered: user (ArgumentError)<br />
Therefore, you should create a user factory that creates a user object with a random<br />
email address (because you may wish to create more than one user at a time using this<br />
factory), and the password should default to password. Define this factory in a new file<br />
called factories/user_factory.rb:<br />
Factory.define :user do |user|<br />
user.sequence(:email) { |n| "user#{n}@ticketee.com" }<br />
user.password "password"<br />
user.password_confirmation "password"<br />
end<br />
In this factory, you use the sequence method provided by Factory Girl, which passes a<br />
unique number to the block and makes your user’s email addresses unique.<br />
The files within the factories directory aren’t yet required by RSpec, so their factories<br />
aren’t available for you. To make RSpec load them, create a new file at spec/support<br />
/factories.rb and put this content in it:<br />
139
140 CHAPTER 7 Basic access control<br />
Dir[Rails.root + "factories/*.rb"].each do |file|<br />
require file<br />
end<br />
When the value of the email method is inside a block, it’s evaluated every time this<br />
factory is called and generates a new (hopefully random) email address.<br />
The next bit of code to write is in your spec and is the first example to ensure that<br />
users who are not admins (such as the user object) cannot access the new action. The<br />
code in the following listing should replace the placeholder "cannot access the new<br />
action" example you’ve already got.<br />
Listing 7.4 spec/controllers/projects_controller_spec.rb<br />
context "standard users" do<br />
it "cannot access the new action" do<br />
sign_in(:user, user)<br />
get :new<br />
response.should redirect_to(root_path)<br />
flash[:alert].should eql("You must be an admin to do that.")<br />
end<br />
end<br />
This spec is placed inside a context block because you’ll have specs for standard users<br />
later. context blocks function similarly to describe blocks; they’re mainly used to<br />
specify the context of an example rather than to describe what it does.<br />
On the first line of the example, you use the sign_in method, which is available in<br />
Devise, but the appropriate part isn’t yet included. This method takes two arguments:<br />
the scope and the resource. Because you have only one scope for Devise, you don’t<br />
have to worry about what this means right now. What you do care about is that this<br />
method will sign in a user.<br />
To add this method, you must include a module in your RSpec configuration: the<br />
Devise::TestHelpers module. Open spec/spec_helper.rb, and you’ll see the<br />
RSpec.configure block (comments stripped) shown in the following listing.<br />
Listing 7.5 spec/spec_helper.rb<br />
RSpec.configure do |config|<br />
config.mock_with :rspec<br />
end<br />
This configure method is responsible for setting up RSpec. To include the<br />
Devise::TestHelpers method, you could use it like this:<br />
RSpec.configure do |config|<br />
config.mock_with :rspec<br />
config.include Devise::TestHelpers<br />
end<br />
But you may want to rerun the RSpec generator to update your spec/spec_helper.rb<br />
file and its associates when you update RSpec. If this file is updated, you’ll lose your
Restricting actions to admins only<br />
changes. To fix this problem, use RSpec.configure in another file: spec/support/<br />
devise.rb. RSpec automatically loads files in this directory. Let’s create this file now and<br />
fill it with the content from the following listing.<br />
Listing 7.6 spec/support/devise.rb<br />
RSpec.configure do |config|<br />
config.include Devise::TestHelpers<br />
end<br />
You should include this module only for controller tests by passing a filter to the end:<br />
config.include Devise::TestHelpers, :type => :controller<br />
If you don’t restrict where this module is included, it could lead to problems further<br />
down the line. It’s better to be safe than sorry.<br />
TIP You can specify :type => :model as a filter if you want to include a<br />
module only in your model specs. If you ever write any view specs, you can<br />
use :type => :view to include this module only in the view specs. Similarly,<br />
you can use :controller for controller specs.<br />
Going back to your spec, you make a request on the third line to the new action in the<br />
controller. The before_filter that you haven’t yet implemented should catch the<br />
request before it gets to the action; it won’t execute the request but instead redirects<br />
the user to root_path and shows a flash[:alert] saying the user “must be an admin<br />
to do that.”<br />
If you run this spec with bin/rspec spec/controllers/projects_controller<br />
_spec.rb, it fails as you expect:<br />
Failure/Error: response.should redirect_to(root_path)<br />
Expected response to be a , but was <br />
This error message tells you that although you expected to be redirected, the<br />
response was actually a 200 response, indicating a successful response. This isn’t what<br />
you want. Now let’s get it to pass.<br />
The first step is to define a new method that checks whether a user is an admin,<br />
and if not, displays the “You must be an admin to do that” message and then redirects<br />
the requester to the root_path. First define this new method inside app/controllers/<br />
application_controller.rb, which is the base class for all controllers and makes any<br />
methods defined here available to all controllers. Define the method using the following<br />
listing inside the ApplicationController class.<br />
Listing 7.7 app/controllers/application_controller.rb<br />
private<br />
def authorize_admin!<br />
authenticate_user!<br />
unless current_user.admin?<br />
141
142 CHAPTER 7 Basic access control<br />
flash[:alert] = "You must be an admin to do that."<br />
redirect_to root_path<br />
end<br />
end<br />
This method uses the authenticate_user! method (provided by Devise) to ensure<br />
that the user is signed in. If the user isn’t signed in when this method is called, they’re<br />
asked to sign in. If the user isn’t an admin after signing in, they’re shown the “You<br />
must be an admin to do that” message and redirected to the homepage.<br />
To call this method, call before_filter at the top of your ProjectsController, as<br />
shown in the following listing.<br />
Listing 7.8 app/controllers/projects_controller.rb<br />
before_filter :authorize_admin!, :except => [:index, :show]<br />
With that in place, you can rerun the spec bin/rspec spec/controllers/projects<br />
_controller_spec.rb, which should now pass:<br />
2 examples, 0 failures<br />
Great, now you know this is working for the new action, but does it work for create,<br />
edit, update, and destroy? You can replace the "cannot access the new action"<br />
example you just wrote with the code from the following listing.<br />
Listing 7.9 spec/controllers/projects_controller_spec.rb<br />
{ "new" => "get",<br />
"create" => "post",<br />
"edit" => "get",<br />
"update" => "put",<br />
"destroy" => "delete" }.each do |action, method|<br />
it "cannot access the #{action} action" do<br />
sign_in(:user, user)<br />
send(method, action.dup, :id => project.id)<br />
response.should redirect_to(root_path)<br />
flash[:alert].should eql("You must be an admin to do that.")<br />
end<br />
end<br />
In this example, you use a project variable, which you need to set up by using a let,<br />
as you did for user. Under the let for user, add one for project:<br />
let(:project) { Factory(:project) }<br />
The attributes of this project object are unimportant: you only need a valid object,<br />
and Factory Girl provides that for you.<br />
The keys for the hash on the first line of listing 7.9 contain all the actions you want<br />
to ensure are protected; the values are the methods you use to make the request to<br />
the action. You use the action here to give your examples dynamic names, and you use<br />
them further down when you use the send method. The send method allows you to<br />
dynamically call methods and pass arguments to them. It’s used here because for each
Restricting actions to admins only<br />
key-value pair of the hash, the action 1 and method change. You pass in the :id parameter<br />
because, without it, the controller can’t route to the edit, update, or destroy<br />
action. The new and create actions ignore this parameter.<br />
The remainder of this spec is unchanged, and when you run bin/rspec spec/controllers/projects_controller_spec.rb,<br />
you should see all six examples passing:<br />
6 examples, 0 failures<br />
Now’s a good time to ensure you haven’t broken anything, so let’s run rake cucumber<br />
:ok spec:<br />
cucumber features/deleting_projects.feature:6<br />
cucumber features/editing_projects.feature:12<br />
cucumber features/editing_projects.feature:18<br />
Oops. Three scenarios are broken. They failed because, for these features, you’re not<br />
signing in as an admin user—or, in fact, as any user!—which is now required for performing<br />
the actions in the scenario. You can fix these scenarios by signing in as an<br />
admin user.<br />
7.3.1 Fixing three more broken scenarios<br />
For the features/deleting_projects.feature, add a new Background, as shown in the following<br />
listing.<br />
Listing 7.10 features/deleting_projects.feature<br />
Background:<br />
Given there are the following users:<br />
| email | password | admin |<br />
| admin@ticketee.com | password | true |<br />
And I am signed in as them<br />
When you run this feature, it once again passes:<br />
1 scenario (1 passed)<br />
8 steps (8 passed)<br />
For the editing_projects.feature, use the steps from listing 7.10 again, putting them at<br />
the top of the already existing Background:<br />
Given there are the following users:<br />
| email | password | admin |<br />
| admin@ticketee.com | password | true |<br />
And I am signed in as them<br />
Now this feature also passes. Check it using bin/cucumber features/editing<br />
_projects.feature:<br />
2 scenarios (2 passed)<br />
21 steps (21 passed)<br />
1 The action variable is a frozen string in Ruby 1.9.2 (because it’s a block parameter), so you need to duplicate<br />
the object because Rails forces the encoding on it to be UTF-8.<br />
143
144 CHAPTER 7 Basic access control<br />
That should be the last of it. When you run rake cucumber:ok, everything once again<br />
passes:<br />
16 scenarios (16 passed)<br />
158 steps (158 passed)<br />
Great! Now that accessing the actions is restricted, let’s make a commit here:<br />
git add .<br />
git commit -m "Restrict access to project<br />
actions to admins only"<br />
git push<br />
You should also hide the links from the users who are not admins, because it’s useless<br />
to show actions to people who can’t perform them.<br />
7.3.2 Hiding the New Project link<br />
Next you’ll learn how to hide certain links, such as the New Project link, from users<br />
who have no authorization to perform that action in your application. To begin,<br />
write a new feature called features/hidden_links.feature, which looks like the following<br />
listing.<br />
Listing 7.11 features/hidden_links.feature<br />
Feature: Hidden Links<br />
In order to clean up the user experience<br />
As the system<br />
I want to hide links from users who can't act on them<br />
Background:<br />
Given there are the following users:<br />
| email | password | admin |<br />
| user@ticketee.com | password | false |<br />
| admin@ticketee.com | password | true |<br />
And there is a project called "TextMate 2"<br />
Scenario: New project link is hidden for non-signed-in users<br />
Given I am on the homepage<br />
Then I should not see the "New Project" link<br />
Scenario: New project link is hidden for signed-in users<br />
Given I am signed in as "user@ticketee.com"<br />
Then I should not see the "New Project" link<br />
Scenario: New project link is shown to admins<br />
Given I am signed in as "admin@ticketee.com"<br />
Then I should see the "New Project" link<br />
When you run this feature using bin/cucumber features/hidden_links.feature,<br />
you’re given three new steps to define:<br />
Then /^I should not see the "([^\"]*)" link$/ do |arg1|<br />
pending # express the regexp above with the code you wish you had<br />
end
Restricting actions to admins only<br />
Given /^I am signed in as "([^\"]*)"$/ do |arg1|<br />
pending # express the regexp above with the code you wish you had<br />
end<br />
Then /^I should see the "([^\"]*)" link$/ do |arg1|<br />
pending # express the regexp above with the code you wish you had<br />
end<br />
Put the first and last steps in a new file called features/step_definitions/link_steps.rb,<br />
using the code from the next listing.<br />
Listing 7.12 features/step_definitions/link_steps.rb<br />
Then /^I should see the "([^\"]*)" link$/ do |text|<br />
page.should(have_css("a", :text => text),<br />
"Expected to see the #{text.inspect} link, but did not.")<br />
end<br />
Then /^I should not see the "([^\"]*)" link$/ do |text|<br />
page.should_not(have_css("a", :text => text),<br />
"Expected to not see the #{text.inspect} link, but did.")<br />
end<br />
These two steps use the have_css method provided by Capybara, which checks that a<br />
page has an element matching a Cascading Style Sheets (CSS) matcher, in this case an<br />
element called a. The option you pass after it (:text => text) tells Capybara that<br />
you’re checking for an a element that contains the text specified. If this matcher fails,<br />
it outputs a custom error message that is the optional second argument to the should<br />
and should_not method calls here, with have_css being the first argument.<br />
With these steps defined, you can now add the other new step to features/<br />
step_definitions/user_steps.rb using the code from the following listing.<br />
Listing 7.13 features/step_definitions/user_steps.rb<br />
Given /^I am signed in as "([^\"]*)"$/ do |email|<br />
@user = User.find_by_email!(email)<br />
steps("Given I am signed in as them")<br />
end<br />
This step finds the user mentioned and then calls the "Given I am signed in as them"<br />
step. Providing you always set up your users with “password” as their password, this<br />
new step will pass.<br />
When you run your feature using bin/cucumber features/hidden_links<br />
.feature, the first two scenarios are failing:<br />
Failing Scenarios:<br />
cucumber features/hidden_links.feature:13<br />
cucumber features/hidden_links.feature:17<br />
They fail, of course, because you’ve done nothing yet to hide the link! Open app/<br />
views/projects/index.html.erb, and change the New Project link to the following:<br />
145
146 CHAPTER 7 Basic access control<br />
<br />
<br />
<br />
You’ll define the admins_only method soon, and it’ll take a block. Inside this block,<br />
you specify all the content you want shown if the user is an admin. No content will be<br />
shown if the user is not an admin. To define the admins_only helper, open app/helpers<br />
/application_helper.rb and define the method inside the module using this code:<br />
def admins_only(&block)<br />
block.call if current_user.try(:admin?)<br />
nil<br />
end<br />
The admins_only method takes a block, which is the code between the do and end in<br />
your view. To run this code inside the method, call block.call, which runs the specified<br />
block but only if current_user.try(:admin?) returns a value that evaluates to<br />
true. This try method tries a method on an object, and if that method doesn’t exist<br />
(as it wouldn’t if current_user were nil), then it returns nil. At the end of the<br />
method, you return nil so the content doesn’t show again.<br />
When you run this feature using bin/cucumber features/hidden_links.feature,<br />
it passes:<br />
3 scenarios (3 passed)<br />
12 steps (12 passed)<br />
Now that you’ve got the New Project link hiding if the user isn’t an admin, let’s do the<br />
same thing for the Edit Project and Delete Project links.<br />
7.3.3 Hiding the edit and delete links<br />
Add this admins_only helper to the Edit Project and Delete Project links on the projects<br />
show view, but not before adding further scenarios to cover these links to features/<br />
hidden_links.feature, as shown in the following listing.<br />
Listing 7.14 features/hidden_links.feature<br />
Scenario: Edit project link is hidden for non-signed-in users<br />
Given I am on the homepage<br />
When I follow "TextMate 2"<br />
Then I should not see the "Edit Project" link<br />
Scenario: Edit project link is hidden for signed-in users<br />
Given I am signed in as "user@ticketee.com"<br />
When I follow "TextMate 2"<br />
Then I should not see the "Edit Project" link<br />
Scenario: Edit project link is shown to admins<br />
Given I am signed in as "admin@ticketee.com"<br />
When I follow "TextMate 2"<br />
Then I should see the "Edit Project" link
Restricting actions to admins only<br />
Scenario: Delete project link is hidden for non-signed-in users<br />
Given I am on the homepage<br />
When I follow "TextMate 2"<br />
Then I should not see the "Delete Project" link<br />
Scenario: Delete project link is hidden for signed-in users<br />
Given I am signed in as "user@ticketee.com"<br />
When I follow "TextMate 2"<br />
Then I should not see the "Delete Project" link<br />
Scenario: Delete project link is shown to admins<br />
Given I am signed in as "admin@ticketee.com"<br />
When I follow "TextMate 2"<br />
Then I should see the "Delete Project" link<br />
To make these steps pass, change the ProjectsController’s show template to wrap<br />
these links in the admins_only helper, as shown in the next listing.<br />
Listing 7.15 app/views/projects/show.html.erb<br />
<br />
<br />
:delete,<br />
:confirm => "Are you sure you want to delete this project?" %><br />
<br />
When you run this entire feature using bin/cucumber features/hidden_links<br />
.feature, all the steps should pass:<br />
9 scenarios (9 passed)<br />
42 steps (42 passed)<br />
All right, that was a little too easy! But that’s Rails.<br />
This is a great point to ensure that everything is still working by running rake<br />
cucumber:ok spec. According to the following output, it is:<br />
25 scenarios (25 passed)<br />
200 steps (200 passed)<br />
# and<br />
11 examples, 0 failures, 5 pending<br />
Let’s commit and push that:<br />
git add .<br />
git commit -<br />
m "Lock down specific projects controller actions for admins only"<br />
git push<br />
In this section, you ensured that only users with the admin attribute set to true can get<br />
to specific actions in your ProjectsController as an example of basic authorization.<br />
Next, you learn to “section off” part of your site using a similar methodology and<br />
explore the concept of namespacing.<br />
147
148 CHAPTER 7 Basic access control<br />
7.4 Namespace routing<br />
Although it’s fine and dandy to ensure that admin users can get to special places in<br />
your application, you haven’t yet added the functionality for triggering whether or not<br />
a user is an admin from within the application itself. To do so, you create a new<br />
namespaced section of your site called admin. The purpose of namespacing in this case<br />
is to separate a controller from the main area of the site so you can ensure that users<br />
accessing this particular controller (and any future controllers you create in this<br />
namespace) have the admin field set to true.<br />
You begin by generating a namespaced controller with an empty index action by<br />
using this command:<br />
rails g controller admin/users index<br />
When the / separator is used between parts of the controller, Rails knows to generate<br />
a namespaced controller called Admin::UsersController at app/controllers/admin/<br />
users_controller.rb. The views for this controller are at app/views/admin/users, and<br />
the spec is at spec/controllers/admin/users_controller_spec.rb.<br />
This command also inserts a new route into your config/routes.rb file. You don’t<br />
want that, so remove this line:<br />
get "users/index"<br />
Now you must write a spec for this newly generated controller to ensure only users<br />
with the admin attribute set to true can access it. Open spec/controllers/admin/<br />
users_controller_spec.rb and write an example to ensure non-signed-in users can’t<br />
access the index action, as shown in the following listing.<br />
Listing 7.16 spec/controllers/admin/users_controller_spec.rb<br />
require 'spec_helper'<br />
describe Admin::UsersController do<br />
let(:user) do<br />
user = Factory(:user)<br />
user.confirm!<br />
user<br />
end<br />
context "standard users" do<br />
before do<br />
sign_in(:user, user)<br />
end<br />
it "are not able to access the index action" do<br />
get 'index'<br />
response.should redirect_to(root_path)<br />
flash[:alert].should eql("You must be an admin to do that.")<br />
end<br />
end<br />
end
Namespace routing<br />
The new RSpec method, before, takes a block of code that’s executed before every<br />
spec inside the current context or describe.<br />
You use the lengthy let(:user) block again, which is effectively the same as what<br />
you have in spec/controllers/projects_controller_spec.rb. Rather than duplicating the<br />
code inside this block, move it into a new file in your spec/support directory. Its job is<br />
to provide methods to help you seed your test data, so call it seed_helpers.rb. In this<br />
file, create a module called SeedHelpers, which contains a create_user! method that<br />
uses the code from the let. This file is shown in the following listing.<br />
Listing 7.17 spec/support/seed_helpers.rb<br />
module SeedHelpers<br />
def create_user!(attributes={})<br />
user = Factory(:user, attributes)<br />
user.confirm!<br />
user<br />
end<br />
end<br />
RSpec.configure do |config|<br />
config.include SeedHelpers<br />
end<br />
With this new spec/support/seed_helpers.rb file, you can now use create_user!<br />
rather than the three lines of code you’re currently using. Let’s change the<br />
let(:user) in spec/controllers/projects_controller_spec.rb to this:<br />
let(:user) { create_user! }<br />
Ah, much better! Let’s also change it in the new spec/controllers/admin/users<br />
_controller_spec.rb file:<br />
let(:user) { create_user! }<br />
When you run this spec file using bin/rspec spec/controllers/admin/users<br />
_controller_spec.rb, you see that there’s no route to the index action:<br />
1) Admin::UsersController regular users are not able to access the<br />
➥index action<br />
Failure/Error: get 'index'<br />
No route matches {:controller => "admin/users"}<br />
In fact, there’s no route to the controller at all! To define this route, open config/<br />
routes.rb and insert the following code before the final end in the file.<br />
Listing 7.18 config/routes.rb<br />
namespace :admin do<br />
resources :users<br />
end<br />
This code defines similar routes to the vanilla resources but nests them under an<br />
admin/ prefix. Additionally, the routing helpers for these routes have an admin part to<br />
149
150 CHAPTER 7 Basic access control<br />
them: what would normally be users_path becomes admin_users_path, and new<br />
_user_path becomes new_admin_user_path.<br />
With this namespace defined, when you run bin/rspec spec/controllers/admin<br />
/users_controller_spec.rb, you should see it fail with a different error:<br />
Failure/Error: response.should redirect_to(root_path)<br />
Expected response to be a , but was <br />
This error appears because you need to implement the authorize_admin<br />
!before_filter for your namespace. To apply it to all controllers in this namespace,<br />
you create a new supercontroller whose only job (for now) is to call the before_filter.<br />
You can also put methods that are common to the admin section here.<br />
Create a new file at app/controllers/admin/base_controller.rb, and fill it with this<br />
code:<br />
class Admin::BaseController < ApplicationController<br />
before_filter :authorize_admin!<br />
end<br />
This file can double as an eventual homepage for the admin namespace and as a class<br />
that the other controllers inside the admin namespace can inherit from, which you’ll<br />
see in a moment. You inherit from ApplicationController with this controller so you<br />
receive all the benefits it provides, like the authorize_admin! method and the Action<br />
Controller functionality.<br />
Open app/controllers/admin/users_controller.rb, and change the first line of the<br />
controller from this<br />
class Admin::UsersController < ApplicationController<br />
to this:<br />
class Admin::UsersController < Admin::BaseController<br />
Because Admin::UsersController inherits from Admin::BaseController, the<br />
before_filter from Admin::BaseController now runs for every action inside<br />
Admin::UsersController, and therefore in your spec, should pass.<br />
Run it with bin/rspec spec/controllers/admin/users_controller_spec.rb<br />
now, and you should see this:<br />
.<br />
1 example, 0 failures<br />
With that done, you should ensure that everything is working as expected by running<br />
rake cucumber:ok spec:<br />
25 scenarios (25 passed)<br />
200 steps (200 passed)<br />
# and<br />
14 examples, 0 failures, 7 pending<br />
Great, everything is still green! Let’s commit that:
Namespace-based CRUD<br />
git add .<br />
git commit -m "Added admin namespaced users controller"<br />
git push<br />
7.5 Namespace-based CRUD<br />
Now that only admins can access this namespace, you can create the CRUD actions for<br />
this controller too, as you did for the TicketsController and ProjectsController<br />
controllers. Along the way, you’ll also set up a homepage for the admin namespace.<br />
For this new CRUD resource, you first write a feature for creating a user and put it<br />
at features/creating_users.feature, as shown in the following listing.<br />
Listing 7.19 features/creating_users.feature<br />
Feature: Creating Users<br />
In order to add new users to the system<br />
As an admin<br />
I want to be able to add them through the backend<br />
Background:<br />
Given there are the following users:<br />
| email | password | admin |<br />
| admin@ticketee.com | password | true |<br />
And I am signed in as them<br />
Given I am on the homepage<br />
When I follow "Admin"<br />
And I follow "Users"<br />
When I follow "New User"<br />
Scenario: Creating a new user<br />
And I fill in "Email" with "newbie@ticketee.com"<br />
And I fill in "Password" with "password"<br />
And I press "Create User"<br />
Then I should see "User has been created."<br />
Scenario: Leaving email blank results in an error<br />
When I fill in "Email" with ""<br />
And I fill in "Password" with "password"<br />
And I press "Create User"<br />
Then I should see "User has not been created."<br />
And I should see "Email can't be blank"<br />
When you run this feature using bin/cucumber features/creating_users.feature,<br />
the first four steps pass; but when you follow the Admin link, it fails because the link<br />
doesn’t exist yet:<br />
When I follow "Admin"<br />
no link with title, id or text 'Admin' found (Capybara::ElementNotFound)<br />
7.5.1 Adding a namespace root<br />
Of course, you need this link for the feature to pass, but you want to show it only for<br />
admins. You can use the admins_only helper you defined earlier and put the link in<br />
app/views/layouts/application.html.erb in the nav element:<br />
151
152 CHAPTER 7 Basic access control<br />
<br />
<br />
<br />
At the moment, admin_root_path doesn’t exist. To define it, open config/routes.rb<br />
and change the namespace definition from this<br />
namespace :admin do<br />
resources :users<br />
end<br />
to this:<br />
namespace :admin do<br />
root :to => "base#index"<br />
resources :users<br />
end<br />
When you rerun the feature, it fails because you don’t have an index action for the<br />
Admin::BaseController controller:<br />
When I follow "Admin"<br />
The action 'index' could not be found for Admin::BaseController<br />
Let’s add that now.<br />
7.5.2 The index action<br />
Open app/controllers/admin/base_controller.rb, and add the index action so the class<br />
definition looks like the following listing.<br />
class Admin::BaseController < ApplicationController<br />
before_filter :authorize_admin!<br />
def index<br />
end<br />
end<br />
Listing 7.20 app/controllers/admin/base_controller.rb<br />
You define the action here to show users that this controller has an index action. The<br />
next step is to create the view for the index action by creating a new file at app/views/<br />
admin/base/index.html.erb and filling it with the following content:<br />
<br />
Welcome to Ticketee's Admin Lounge. Please enjoy your stay.<br />
You needn’t wrap the link in an admins_only here because you’re inside a page that’s<br />
visible only to admins. When you run the feature, you don’t get a message saying The<br />
action 'index' could not be found even though you should. Instead, you get this:<br />
When I follow "New User"<br />
no link with title, id or text 'New User' found
Namespace-based CRUD<br />
This unexpected output occurs because the Admin::UsersController inherits from<br />
Admin::BaseController, where you just defined an index method. By inheriting<br />
from this controller, Admin::UsersController also inherits its views. When you<br />
inherit from a class like this, you get the methods defined in that class too. You can<br />
override the index action from Admin::BaseController by redefining it in<br />
Admin::UsersController, as in the following listing.<br />
Listing 7.21 app/controllers/admin/users_controller.rb<br />
class Admin::UsersController < Admin::BaseController<br />
def index<br />
@users = User.all(:order => "email")<br />
end<br />
end<br />
Next, you rewrite the template for this action, which lives at app/views/admin/users/<br />
index.html.erb, so it contains the New User link and lists all the users gathered up by<br />
the controller, as shown in the following listing.<br />
Listing 7.22 app/views/admin/users/index.html.erb<br />
<br />
<br />
<br />
<br />
<br />
<br />
In this example, when you specify a Symbol as an element in the route for the<br />
link_to, Rails uses that element as a literal part of the route generation, making it use<br />
admin_user_path rather than user_path. You saw this in chapter 5 when you used it<br />
with [:edit, @project, ticket], but it bears repeating here.<br />
When you run bin/cucumber features/creating_users.feature again, you’re<br />
told the new action is missing:<br />
When I follow "New User"<br />
The action 'new' could not be found for Admin::UsersController<br />
7.5.3 The new action<br />
Let’s add the new action Admin::UsersController now by using this code:<br />
def new<br />
@user = User.new<br />
end<br />
And let’s create the view for this action at app/views/admin/users/new.html.erb:<br />
New User<br />
<br />
153
154 CHAPTER 7 Basic access control<br />
Using the following listing, create the form partial that’s referenced in this new view at<br />
app/views/admin/users/_form.html.erb. It must contain the email and password<br />
fields, which are the bare essentials for creating a user.<br />
Listing 7.23 app/views/admin/users/_form.html.erb<br />
<br />
<br />
<br />
<br />
<br />
<br />
<br />
<br />
<br />
<br />
<br />
<br />
For this form_for, you use the array form you saw earlier with [@project, @ticket],<br />
but this time you pass in a symbol rather than a model object. Rails interprets the<br />
symbol literally, generating a route such as admin_users_path rather than<br />
users_path, which would normally be generated. You can also use this array syntax<br />
with link_to and redirect_to helpers. Any symbol passed anywhere in the array is<br />
interpreted literally.<br />
When you run the feature once again, you’re told there’s no action called create:<br />
And I press "Create User"<br />
The action 'create' could not be found for Admin::UsersController<br />
7.5.4 The create action<br />
Let’s create that action now by using this code:<br />
def create<br />
@user = User.new(params[:user])<br />
if @user.save<br />
flash[:notice] = "User has been created."<br />
redirect_to admin_users_path<br />
else<br />
flash[:alert] = "User has not been created."<br />
render :action => "new"<br />
end<br />
end<br />
With this action implemented, both scenarios inside this feature now pass:<br />
2 scenarios (2 passed)<br />
21 steps (21 passed)<br />
This is another great middle point for a commit, so let’s do so now. As usual, you<br />
should run rake cucumber:ok spec to make sure everything’s still working:
27 scenarios (27 passed)<br />
221 steps (221 passed)<br />
# and<br />
14 examples, 0 failures, 7 pending<br />
Great! Let’s push that:<br />
Creating admin users<br />
git add .<br />
git commit -m "Added the ability to create users through the admin backend"<br />
git push<br />
Although this functionality allows you to create new users through the admin backend,<br />
it doesn’t let you create admin users. That’s up next.<br />
7.6 Creating admin users<br />
To create admin users, you need a check box on the form that, when clicked, sets the<br />
user’s admin field to true. But, because the admin attribute isn’t on the list of accessible<br />
attributes (attr_accessible inside app/models/user.rb), it can’t be mass-assigned<br />
as the other fields can. Therefore, you must manually set this parameter in the controller<br />
before the user is saved.<br />
To get started, let’s add another scenario to the features/creating_users.feature<br />
using the code from the following listing.<br />
Listing 7.24 features/creating_users.feature<br />
Scenario: Creating an admin user<br />
When I fill in "Email" with "newadmin@ticketee.com"<br />
And I fill in "Password" with "password"<br />
And I check "Is an admin?"<br />
And I press "Create User"<br />
Then I should see "User has been created"<br />
And I should see "newadmin@ticketee.com (Admin)"<br />
Now when you run bin/cucumber features/creating_users.feature, it fails on the<br />
"Is an admin?" step:<br />
cannot check field, no checkbox with id, name,<br />
or label 'Is an admin?' found (Capybara::ElementNotFound)<br />
You want to add this check box to the form for creating users, which you can do by<br />
adding the following code to the form_for block inside app/views/admin/users/<br />
_form.html.erb:<br />
<br />
<br />
<br />
<br />
With this check box in place, when you run bin/cucumber features/creating<br />
_users.feature, you’re told "newadmin@ticketee.com (Admin)" can’t be found anywhere<br />
on the page:<br />
155
156 CHAPTER 7 Basic access control<br />
expected #has_content?("newadmin@ticketee.com (Admin)")<br />
to return true, got false<br />
This failure occurs because admin isn’t a mass-assignable attribute and therefore isn’t<br />
set and because the user’s admin status isn’t displayed anywhere on the page. One<br />
thing at a time. First, change the create action in Admin::UsersController to set the<br />
admin field before you attempt to save the user, as shown in the following listing.<br />
Listing 7.25 app/controllers/admin/users_controller.rb<br />
...<br />
@user = User.new(params[:user])<br />
@user.admin = params[:user][:admin] == "1"<br />
if @user.save<br />
...<br />
This code sets the admin attribute on the user, which is one of the two things you need<br />
to get this step to pass. The second problem is that only the user’s email address is displayed:<br />
no text appears to indicate they’re a user. To get this text to appear, change<br />
the line in app/views/admin/users/index.html.erb from this<br />
<br />
to this:<br />
<br />
By not calling any methods on the user object and attempting to write it out of the<br />
view, you cause Ruby to call to_s on this method. By default, this outputs something<br />
similar to the following, which isn’t human friendly:<br />
#<br />
You can override the to_s method on the User model to provide the string containing<br />
the email and admin status of the user by putting the following code inside the class<br />
definition in app/models/user.rb, underneath the attr_accessible line:<br />
def to_s<br />
"#{email} (#{admin? ? "Admin" : "User"})"<br />
end<br />
Now that the admin field is set and displayed on the page, the feature should pass<br />
when you run bin/cucumber features/creating_users.feature:<br />
3 scenarios (3 passed)<br />
33 steps (33 passed)<br />
This is another great time to commit, and again, run rake cucumber:ok spec to make<br />
sure everything works:<br />
28 scenarios (28 passed)<br />
288 steps (288 passed)<br />
# and<br />
14 examples, 0 failures, 7 pending
Good stuff. Push it:<br />
Editing users<br />
git add .<br />
git commit -<br />
m "Added the ability to create admin users through the admin backend"<br />
git push<br />
Now you can create normal and admin users through the backend. In the future, you<br />
may need to modify an existing user’s details or delete a user, so we examine the updating<br />
and deleting parts of the CRUD next.<br />
7.7 Editing users<br />
This section focuses on creating the updating capabilities for the Admin::Users-<br />
Controller. Additionally, you need some functionality on the backend to enable users<br />
to confirm their account, and you can put it on the editing page.<br />
As usual, you start by writing a feature to cover this functionality, placing the file at<br />
features/editing_users.feature and filling it with the content from the following listing.<br />
Listing 7.26 features/editing_users.feature<br />
Feature: Editing a user<br />
In order to change a user's details<br />
As an admin<br />
I want to be able to modify them through the backend<br />
Background:<br />
Given there are the following users:<br />
| email | password | admin |<br />
| admin@ticketee.com | password | true |<br />
And I am signed in as them<br />
Given there are the following users:<br />
| email | password |<br />
| user@ticketee.com | password |<br />
Given I am on the homepage<br />
When I follow "Admin"<br />
And I follow "Users"<br />
And I follow "user@ticketee.com"<br />
And I follow "Edit User"<br />
Scenario: Updating a user's details<br />
When I fill in "Email" with "newguy@ticketee.com"<br />
And I press "Update User"<br />
Then I should see "User has been updated."<br />
And I should see "newguy@ticketee.com"<br />
And I should not see "user@ticketee.com"<br />
Scenario: Toggling a user's admin ability<br />
When I check "Is an admin?"<br />
And I press "Update User"<br />
Then I should see "User has been updated."<br />
And I should see "user@ticketee.com (Admin)"<br />
Scenario: Updating with an invalid email fails<br />
157
158 CHAPTER 7 Basic access control<br />
When I fill in "Email" with "fakefakefake"<br />
And I press "Update User"<br />
Then I should see "User has not been updated."<br />
And I should see "Email is invalid"<br />
When you run this feature using bin/cucumber features/editing_users.feature,<br />
you discover the show action is missing:<br />
And I follow "user@ticketee.com"<br />
The action 'show' could not be found for Admin::UsersController<br />
7.7.1 The show action<br />
Define the show action in the Admin::UsersController, shown in listing 7.28, directly<br />
under the index action, because grouping the different parts of CRUD is conventional.<br />
The method you define is blank because you need to use a before_filter to<br />
find the user, as you’ve done in other controllers to find other resources.<br />
def show<br />
end<br />
Listing 7.27 app/controllers/admin/users_controller.rb<br />
You call the method to find the user object find_user and define it under the actions<br />
in this controller, like this:<br />
private<br />
def find_user<br />
@user = User.find(params[:id])<br />
end<br />
You then need to call this method using a before_filter, which should run before<br />
the show, edit, update, and destroy actions. Put this line at the top of your class definition<br />
for Admin::UsersController:<br />
before_filter :find_user, :only => [:show, :edit, :update, :destroy]<br />
With this method in place, you can write the template for the show action to make this<br />
step pass. This file goes at app/views/admin/users/show.html.erb and uses the following<br />
code:<br />
<br />
<br />
Now when you run bin/cucumber features/editing_users.feature, the step that<br />
previously failed passes, and you’re on to the next step:<br />
And I follow "user@ticketee.com"<br />
And I follow "Edit User"<br />
The action 'edit' could not be found for Admin::UsersController<br />
Good, you’re progressing nicely. You created the show action for the Admin::Users-<br />
Controller, which displays information for a user to a signed-in admin user. Now you<br />
need to create the edit action so admin users can edit a user’s details.
7.7.2 The edit and update actions<br />
Editing users<br />
Add the edit action directly underneath the create action in your controller. It<br />
should be another blank method like the show action:<br />
def edit<br />
end<br />
With this action defined and the @user variable used in its view already set by the<br />
before_filter, you now create the template for this action at app/views/admin/<br />
users/edit.html.erb. This template renders the same form as the new template:<br />
<br />
When you run bin/cucumber features/editing_users.feature, you’re told the<br />
update action doesn’t exist:<br />
The action 'update' could not be found for Admin::UsersController<br />
Indeed, it doesn’t, so let’s create it! Add the update action to your Admin::Users-<br />
Controller, as shown in the following listing. You needn’t set up the @user variable<br />
here because the find_user before_filter does it for you.<br />
Listing 7.28 app/controllers/admin/users_controller.rb<br />
def update<br />
if @user.update_attributes(params[:user])<br />
flash[:notice] = "User has been updated."<br />
redirect_to admin_users_path<br />
else<br />
flash[:alert] = "User has not been updated."<br />
render :action => "edit"<br />
end<br />
end<br />
With this action in place, you need to delete the password parameters from<br />
params[:user] if they are blank. Otherwise, the application will attempt to update a<br />
user with a blank password, and Devise won’t allow that. Above update_attributes,<br />
insert this code:<br />
if params[:user][:password].blank?<br />
params[:user].delete(:password)<br />
end<br />
Now the entire action looks like the following listing.<br />
Listing 7.29 app/controllers/admin/users_controller.rb<br />
def update<br />
if params[:user][:password].blank?<br />
params[:user].delete(:password)<br />
params[:user].delete(:password_confirmation)<br />
end<br />
if @user.update_attributes(params[:user])<br />
159
160 CHAPTER 7 Basic access control<br />
flash[:notice] = "User has been updated."<br />
redirect_to admin_users_path<br />
else<br />
flash[:alert] = "User has not been updated."<br />
render :action => "edit"<br />
end<br />
end<br />
When you run bin/cucumber features/editing_users.feature again, the first and<br />
third scenarios pass, but the second one fails because you haven’t set the user’s admin<br />
capabilities inside the update action, as you did in the create action. To do so,<br />
remove the following line from the create action:<br />
@user.admin = params[:user][:admin] == "1"<br />
Now define a method called set_admin, which you can use in both actions. This<br />
method goes directly underneath find_user under the private keyword, as shown in<br />
the following listing.<br />
Listing 7.30 app/controllers/admin/users_controller.rb<br />
private<br />
def set_admin<br />
@user.admin = params[:user][:admin] == "1"<br />
end<br />
To use this method in the update action, place it directly above the call to update<br />
_attributes:<br />
set_admin<br />
if @user.update_attributes(params[:user])<br />
Placing set_admin above update_attributes ensures that the user is made an admin<br />
directly before the save for update_attributes is triggered. You should also put it<br />
before the save in the create action:<br />
set_admin<br />
if @user.save(params[:user])<br />
Now when you run the feature, all the scenarios pass:<br />
3 scenarios (3 passed)<br />
41 steps (41 passed)<br />
In this section, you added two more actions to your Admin::UsersController: edit<br />
and update. Admin users can now update users’ details if they please.<br />
Run rake cucumber:ok spec to ensure nothing was broken by your latest changes.<br />
You should see this output:<br />
31 scenarios (31 passed)<br />
270 steps (270 passed)<br />
# and<br />
14 examples, 0 failures, 7 pending
Deleting users<br />
Let’s make a commit for this new feature:<br />
git add .<br />
git commit -m "Added ability to edit and update users"<br />
git push<br />
With the updating done, there’s only one more part to go for your admin CRUD<br />
interface: deleting users.<br />
7.8 Deleting users<br />
There comes a time in an application’s life when you need to delete users. Maybe they<br />
asked for their account to be removed. Maybe they were being pesky. Or maybe you<br />
have another reason to delete them. Whatever the case, having the functionality to<br />
delete users is helpful.<br />
Keeping with the theme so far, you first write a feature for deleting users (using the<br />
following listing) and put it at features/deleting_users.feature.<br />
Listing 7.31 features/deleting_users.feature<br />
Feature: Deleting users<br />
In order to remove users<br />
As an admin<br />
I want to click a button and delete them<br />
Background:<br />
Given there are the following users:<br />
| email | password | admin |<br />
| admin@ticketee.com | password | true |<br />
| user@ticketee.com | password | false |<br />
And I am signed in as "admin@ticketee.com"<br />
Given I am on the homepage<br />
When I follow "Admin"<br />
And I follow "Users"<br />
Scenario: Deleting a user<br />
And I follow "user@ticketee.com"<br />
When I follow "Delete User"<br />
Then I should see "User has been deleted"<br />
When you run this feature, you get right up to the first step with no issue and then it<br />
complains:<br />
no link with title, id or text 'Delete' found (Capybara::ElementNotFound)<br />
Of course, you need the Delete link! Add it to the show template at app/views/admin/<br />
users/show.html.erb, right underneath the Edit User link:<br />
:delete,<br />
:confirm => "Are you sure you want to delete this user?" %><br />
You need to add the destroy action next, directly under the update action in<br />
Admin::UsersController, as shown in the following listing.<br />
161
162 CHAPTER 7 Basic access control<br />
Listing 7.32 app/controllers/admin/users_controller.rb<br />
def destroy<br />
@user.destroy<br />
flash[:notice] = "User has been deleted."<br />
redirect_to admin_users_path<br />
end<br />
When you run bin/cucumber features/deleting_users.feature, the feature passes<br />
because you now have the Delete User link and its matching destroy action:<br />
1 scenario (1 passed)<br />
8 steps (8 passed)<br />
There’s one small problem with this feature, though: it doesn’t stop you from deleting<br />
yourself!<br />
7.8.1 Ensuring you can’t delete yourself<br />
To make it impossible to delete yourself, you must add another scenario to the<br />
deleting_users.feature, shown in the following listing.<br />
Listing 7.33 features/deleting_users.feature<br />
Scenario: Userscannot delete themselves<br />
When I follow "admin@ticketee.com"<br />
And I follow "Delete User"<br />
Then I should see "You cannot delete yourself!"<br />
When you run this feature with bin/cucumber features/deleting_users.feature,<br />
the first two steps of this scenario pass, but the third one fails, as you might expect,<br />
because you haven’t added the message! Change the destroy action in the<br />
Admin::UsersController to the following listing.<br />
Listing 7.34 app/controllers/admin/users_controller.rb<br />
def destroy<br />
if @user == current_user<br />
flash[:alert] = "You cannot delete yourself!"<br />
else<br />
@user.destroy<br />
flash[:notice] = "User has been deleted."<br />
end<br />
redirect_to admin_users_path<br />
end<br />
Now, before the destroy method does anything, it checks to see if the user attempting<br />
to be deleted is the current user and stops it with the "You cannot delete yourself!"<br />
message. When you run bin/cucumber features/deleting_users.feature this time,<br />
the scenario passes:<br />
2 scenarios (2 passed)<br />
16 steps (16 passed)
Summary<br />
Great! With the ability to delete users implemented, you’ve completed the CRUD for<br />
Admin::UsersController and for the users resource entirely. Now make sure you<br />
haven’t broken anything by running rake cucumber:ok spec. You should see this<br />
output:<br />
33 scenarios (33 passed)<br />
286 steps (286 passed)<br />
# and<br />
14 examples, 0 failures, 7 pending<br />
Fantastic! Commit and push that:<br />
git add .<br />
git commit -m "Added feature for deleting users,<br />
including protection against self-deletion"<br />
With this final commit, you’ve got your admin section created, and it provides a great<br />
CRUD interface for users in this system so that admins can modify their details when<br />
necessary.<br />
7.9 Summary<br />
For this chapter, you dove into basic access control and added a field called admin to<br />
the users table. You used admin to allow and restrict access to a namespaced controller.<br />
Then you wrote the CRUD interface for the users resource underneath the admin<br />
namespace. This interface is used in the next chapter to expand on the authorization<br />
that you’ve implemented so far: restricting users, whether admin users or not, to certain<br />
actions on certain projects. You rounded out the chapter by not allowing users to<br />
delete themselves.<br />
The next chapter focuses on enhancing the basic permission system you’ve implemented<br />
so far, introducing a gem called cancan. With this permission system, you’ll<br />
have much more fine-grained control over what users of your application can and<br />
can’t do to projects and tickets.<br />
163
This chapter covers<br />
� Expanding with a more advanced system<br />
� Setting permissions to control user actions<br />
� Implementing a seed of data for the app<br />
More authorization<br />
At the end of chapter 7, you learned a basic form of authorization based on a boolean<br />
field on the users table called admin. If this field is set to true, identifying<br />
admin users, those users can access the CRUD functions of the Project resource as<br />
well as an admin namespace where they can perform CRUD on the User resource.<br />
In this chapter, we expand on authorization options by implementing a broader<br />
authorization system using a Permission model. The records for this model’s table<br />
define the actions specified users can take on objects from your system, such as<br />
projects. Each record tracks the user who has a specific permission, the object to<br />
which the permission applies, and the type of permission granted.<br />
The authorization implemented in this chapter is whitelist authorization. Under<br />
whitelist authorization, all users are denied access to everything by default, and you<br />
must specify what the user can do. The opposite is blacklist authorization, under<br />
which all users are allowed access to everything by default and you must block what<br />
they may not access. You use whitelist authorization for your application because<br />
164
Restricting read access<br />
you may have a large number of projects and want to assign a user to only one of<br />
them. Whitelist authorization involves fewer steps in restricting a user to one project.<br />
A good way to think about whitelist authorization is as the kind of list a security<br />
guard would have at an event. If you’re not on the list, you don’t get in. A blacklist<br />
comparison would be if the security guard had a list of people who weren’t allowed in.<br />
This chapter guides you through restricting access to the CRUD operations of<br />
TicketsController one by one, starting with reading and then moving into creating,<br />
updating, and deleting. Any time users want to perform one of these actions, they<br />
must be granted permission to do so, or added to “the list.”<br />
During this process, you’ll see another gem called CanCan, which provides some<br />
methods for your controllers and views that help you check the current user’s permission<br />
to perform a specific action.<br />
You first set up permissions through the Cucumber features, and once you’re done<br />
with restricting the actions in your controller, you’ll generate functionality in the<br />
backend to allow administrators of the application to assign permissions to users.<br />
8.1 Restricting read access<br />
A time comes in every ticket-tracking application’s life when it’s necessary to restrict<br />
which users can see which projects. For example, you could be operating in a consultancy<br />
where some people are working on one application, and others are working on<br />
another. You want the admins of the application to be able to customize which projects<br />
each user can see.<br />
First, you create a model called Permission that tracks which users have which permissions<br />
for which actions. Before you create that model, you must update one of<br />
your Viewing Projects features to make sure only users who have permission to view a<br />
project are able to do so.<br />
Add a background and change the scenario in this feature to set up a user with the<br />
correct permissions, and then make the user visit that project, changing the code in<br />
the scenario in this feature to what is shown in the following listing.<br />
Listing 8.1 features/viewing_projects.feature<br />
Background:<br />
Given there are the following users:<br />
| email | password |<br />
| user@ticketee.com | password |<br />
And I am signed in as them<br />
And there is a project called "TextMate 2"<br />
And "user@ticketee.com" can view the "TextMate 2" project<br />
Scenario: Listing all projects<br />
And I am on the homepage<br />
When I follow "TextMate 2"<br />
Then I should be on the project page for "TextMate 2"<br />
You’ve effectively rewritten a large portion of this feature, which is common practice<br />
when implementing such large changes.<br />
B<br />
165<br />
Let user<br />
view project
166 CHAPTER 8 More authorization<br />
Underneath the there is a project step in the Background for this feature is a<br />
new step B. It’s responsible for giving the specified user access to the specified project,<br />
but not just any permission: permission to view the project. This step is currently<br />
undefined, so when you run bin/cucumber features/viewing_projects.feature,<br />
you get the step definition for it:<br />
Given /^"([^"]*)" can view the "([^"]*)" project$/ do |arg1, arg2|<br />
pending # express the regexp above with the code you wish you had<br />
end<br />
To implement this step, you use the not-yet-existent Permission model, which stores<br />
the permissions in the database. This model needs a related table called permissions,<br />
which contains three fields.<br />
The first field is the action field, which keeps track of the type of permission a<br />
user has on particular objects. The objects can be of different types, so you must create<br />
two fields to track the association to the object: thing_type and thing_id. This<br />
kind of association is called a polymorphic association, poly meaning “many” and morphic<br />
meaning “forms,” which is fitting. You’ll see more on these in a little while.<br />
One more field you add to this permissions table is a user_id column linking that<br />
Permission to a User.<br />
With all of that in mind, you can define this step in a new file at features/<br />
step_definitions/permission_steps.rb, as shown in the following listing.<br />
Listing 8.2 features/step_definitions/permission_steps.rb<br />
Given /^"([^"]*)" can view the "([^"]*)" project$/ do |user, project|<br />
Permission.create!(:user => User.find_by_email!(user),<br />
:thing => Project.find_by_name!(project),<br />
:action => "view")<br />
end<br />
In listing 8.2, you create a new Permission record with the action defined as view<br />
linking the project and user passed in. This record defines the users who can access<br />
the project. When you run this feature, you get an error because the Permission class<br />
is not yet defined:<br />
And "user@ticketee.com" can view the "TextMate 2" project<br />
uninitialized constant Permission (NameError)<br />
Define it now by generating the model using the following command, typed all on<br />
one line:<br />
rails generate model permission user_id:integer thing_id:integer<br />
thing_type:string action:string<br />
With this model and its related migration, you can run rake db:migrate and rake<br />
db:test:prepare to set up the development and test databases. When you run your<br />
feature again, you get this error message:<br />
And "user@ticketee.com" can view the "TextMate 2" project<br />
unknown attribute: user (ActiveRecord::UnknownAttributeError)
Restricting read access<br />
This message occurs because you haven’t defined a belongs_to association between<br />
the Permission objects and the users they relate to. To set up this association, open<br />
app/models/permission.rb and define it using a simple belongs_to:<br />
belongs_to :user<br />
That’s the first association you need to define, and when you run this feature again,<br />
you get a second error that looks similar to the first:<br />
And "user@ticketee.com" can view the "TextMate 2" project<br />
unknown attribute: thing (ActiveRecord::UnknownAttributeError)<br />
This code represents a polymorphic association, which as mentioned earlier, needs to<br />
associate with many types of objects. A polymorphic association uses the thing_type<br />
and thing_id fields to determine what object a Permission object relates to.<br />
To define this association in your model, use this line:<br />
belongs_to :thing, :polymorphic => true<br />
Figure 8.1 illustrates how this association works.<br />
When you assign an object to the thing polymorphic association, instead of just<br />
saving thing_id as in a normal belongs_to, Rails also saves the thing_type field,<br />
which is the string version of the object’s class, or thing.class.to_s. In this step of<br />
your application, the thing_type field is set to Project because you’re assigning a<br />
Project object to thing. Therefore, the new record in the table has both thing_type<br />
and thing_id attributes set.<br />
When Rails loads this object, it goes through the process shown in figure 8.2. Rails<br />
knows this is a polymorphic association because you told it in the Permission model,<br />
and it therefore uses the thing_id and thing_type fields to find the object. By knowing<br />
thing_type, Rails can figure out what model the association is and then use that<br />
Permission<br />
thing = Project(id = 1)<br />
thing.id thing.class.to_s<br />
Permission(thing_id<br />
= thing.id)<br />
Permission(thing_type =<br />
thing.class.to_s)<br />
Permission(thing_id = 1, thing_type = Project)<br />
Figure 8.1 Polymorphic saving<br />
167
168 CHAPTER 8 More authorization<br />
permission.thing<br />
Okay nding "thing". What is thing_type ?<br />
It's "Project"<br />
Okay nding a Project object. What is thing_id?<br />
Project.find(1) is thing<br />
model to load a specific object with the id of thing_id. Then, boom, you’ve got a<br />
Project object.<br />
Now when you run bin/cucumber features/viewing_projects.feature, it<br />
passes:<br />
1 scenario (1 passed)<br />
7 steps (7 passed)<br />
The feature should pass with or without the new permission step because, at the<br />
moment, the permission settings have no bearing on what projects a user can see.<br />
The easiest way to specify which projects users can see is to restrict the scope of the<br />
projects the show action searches on so that projects the user doesn’t have access to<br />
don’t show up in this list. By default, a find on a model searches all records in the<br />
related table, but you can add a scope method to your model to allow you to search<br />
on restricted sets of records.<br />
8.2 Restricting by scope<br />
To restrict the show action to certain record sets, you implement a scope on the<br />
Project model that returns only the projects with related Permission records that<br />
declare the user is authorized to read them.<br />
Before you scope down this find, you must write a spec to test that the show action<br />
in the ProjectsController really does scope down this find, and if the project can’t<br />
be found, the controller should deny all knowledge of a project ever having existed.<br />
The spec goes into spec/controllers/projects_controller_spec.rb directly under the<br />
spec for testing that standard users can’t access specified actions, but still inside the<br />
context block for standard users. This spec is shown in the following listing.<br />
Listing 8.3 spec/controllers/projects_controller_spec.rb<br />
it "cannot access the show action" do<br />
sign_in(:user, user)<br />
get :show, :id => project.id<br />
Figure 8.2 Polymorphic loading
Restricting by scope<br />
response.should redirect_to(projects_path)<br />
flash[:alert].should eql("The project you were looking for could not be fou<br />
nd.")<br />
end<br />
You use the same error message from the missing project spec because you don’t<br />
want to acknowledge to unauthorized users that the project they’re looking for exists<br />
when they don’t have access to read it. When you run this spec using bin/rspec spec<br />
/controllers/projects_controller_spec.rb, it fails:<br />
1) ProjectsController standard users cannot access the show action<br />
Failure/Error: response.should redirect_to(projects_path)<br />
The spec fails because you haven’t yet scoped down the find call in the find_project<br />
method, which is called using a before_filter in ProjectsController.<br />
With a failing spec testing the nonexistent behavior, open app/controllers/<br />
projects_controller.rb and change the find_project method to look for projects that<br />
the current user has access to so your spec will pass. But there’s one problem: you’re<br />
not restricting the show action to only users who are signed in now.<br />
You must make it so that the user has to sign in before accessing the show action<br />
because you need to use the current_user method to check what permissions this<br />
user has access to within the find_project method.<br />
To do so, call the authenticate_user! method as a before_filter in this controller,<br />
just as you did for certain actions in the TicketsController. Place this<br />
method above the find_project to ensure that a user is authenticated before<br />
find_project does its job. The filters in ProjectsController should now look like<br />
the following listing.<br />
Listing 8.4 app/controllers/projects_controller.rb<br />
before_filter :authorize_admin!, :except => [:index, :show]<br />
before_filter :authenticate_user!, :only => [:show]<br />
before_filter :find_project, :only => [:show, :edit, :update, :destroy]<br />
Now alter the find_project method to check the permissions of the project before<br />
letting authorized users see it or refusing unauthorized users access. Change the line<br />
that defines the @project variable from this<br />
@project = Project.find(params[:id])<br />
to this:<br />
@project = Project.readable_by(current_user).find(params[:id])<br />
The readable_by method doesn’t exist yet; you’ll define it in just a moment. The<br />
readable_by method returns a scope of only the projects the user is allowed to view.<br />
This scope has exactly the same methods that an Active Record class has, so you can<br />
treat it just like one. You can define this method using the scope class method in your<br />
Project mode.<br />
169
170 CHAPTER 8 More authorization<br />
The scope method provides a method you can call on your class or on an association<br />
collection for this class that returns a subset of records. The following scope call,<br />
for example, defines a method called admins:<br />
scope :admins, where(:admin => true)<br />
If you wanted to, you could call this admins method on your User model to return all<br />
the users who are admins:<br />
User.admins<br />
If you didn’t have the scope method, you’d have to specify the where manually on<br />
your queries everywhere you used them, like this:<br />
User.where(:admin => true)<br />
As you can see, manually specifying where isn’t nearly as pretty as simply calling<br />
User.admins. This may seem like a contrived example, but trust us: it gets ugly when<br />
the conditions become more complex. Scopes are yet another great example of the<br />
DRY (Don’t Repeat Yourself) convention seen throughout Rails. Because the scope<br />
method defines your scope’s logic in one central location, you can easily change all<br />
uses of this scope by changing it in this one spot.<br />
Scopes are also chainable. Imagine that you had another scope defined on your<br />
User model, such as the following, as well as a field for storing the gender, appropriately<br />
called gender:<br />
scope :female, where(:gender => "Female")<br />
You can call this scope by itself<br />
User.female<br />
which return all of your female users, or you can get all your female admins by doing<br />
either this<br />
User.admin.female<br />
or this<br />
User.female.admin<br />
Rails builds up the queries by applying the scopes one at a time, and calling them in<br />
any order will result in the same query.<br />
Let’s define a real scope now, along with the permissions association it needs to<br />
use. Put this scope under the validation inside the Project model, as shown in the following<br />
lines:<br />
validates :name, :presence => true, :uniqueness => true<br />
B<br />
Link to thing<br />
has_many :permissions, :as => :thing<br />
association<br />
scope :readable_by, lambda { |user|<br />
joins(:permissions).where(:permissions => { :action => "view",<br />
:user_id => user.id })<br />
}
Restricting by scope<br />
The :as option on the has_many :permissions association B links your projects to<br />
the thing association on the Permission objects. You need this association defined<br />
here because it’s used by the scope below it.<br />
Usually, you use scope without passing a block (represented by the lambda), but<br />
here the outcome of this scope is dynamic according to which user is passed to it. You<br />
therefore use a block to be able to pass this argument to the method generated by the<br />
scope call, which then becomes available in the block for use in the where statement.<br />
The joins method here joins the permissions table using a SQL INNER JOIN,<br />
allowing you to perform queries on columns from that table too. You do just that with<br />
the where method, specifying a hash that contains the permissions key, which points<br />
to another hash containing the fields you want to search on and their expected values.<br />
This scope then returns all the Project objects containing a related record in the<br />
permissions table that has the action field set to view and the user ID equal to that<br />
of the passed-in user.<br />
With this scope method in place, when you run this spec file again with bin/<br />
rspec spec/controllers/projects_controller_spec.rb, your tests pass because<br />
you’re now scoping down the find in the find_project method. But you still have<br />
one failure:<br />
7 examples, 1 failure<br />
This failing spec is the last one in this file where you assert that users receive the message<br />
“The project you were looking for could not be found” if they attempt to access a<br />
project that is unknown to the system. It fails with this error:<br />
Expected response to be a redirect to <br />
but was a redirect to <br />
Rather than redirecting back to /projects as it should, this code now redirects to the<br />
/users/sign_in path. This would happen only if the user attempted to access an<br />
action that you had locked down to be visible only to those who were signed in.<br />
Recent changes to the show action fit this bill: users are now required to sign in before<br />
you run the find_project method.<br />
Therefore, you just need to make a small fix to this final spec: you must sign in as a<br />
user before you make the get :show request. Let’s change the first two lines of this<br />
spec in spec/controllers/projects_controller.rb from this<br />
it "displays an error for a missing project" do<br />
get :show, :id => "not-here"<br />
to this:<br />
it "displays an error for a missing project" do<br />
sign_in(:user, user)<br />
get :show, :id => "not-here"<br />
Now when you run bin/rspec spec/controllers/projects_controller_spec.rb,<br />
all the examples pass:<br />
171
172 CHAPTER 8 More authorization<br />
.......<br />
7 examples, 0 failures<br />
All right! The examples for this controller are passing, but how about the feature—<br />
the one you wrote previously to test that users can access this show action if they have<br />
the correct permissions? This spec tested the negative, making sure a user without<br />
permission can’t access this project.<br />
With the code you just implemented, this feature should still pass as it did the last<br />
time you ran it. Let’s find out by running bin/cucumber features/viewing<br />
_projects.feature:<br />
1 scenario (1 passed)<br />
7 steps (7 passed)<br />
Isn’t that wonderful? You rewrote the feature and it still passed! You’ve tested both the<br />
granted and denied facets of this particular permission by writing a feature and spec<br />
respectively.<br />
Now that you implemented that little chunk of functionality and everything seems<br />
to be going smoothly, let’s make sure the entire application is going the same way by<br />
running rake cucumber:ok spec. Oh dear! You broke just about every feature in some<br />
way:<br />
Failing Scenarios:<br />
cucumber features/creating_projects.feature:14<br />
cucumber features/creating_tickets.feature:20<br />
cucumber features/deleting_projects.feature:12<br />
cucumber features/deleting_tickets.feature:19<br />
cucumber features/editing_projects.feature:16<br />
cucumber features/editing_tickets.feature:20<br />
cucumber features/hidden_links.feature:35<br />
cucumber features/hidden_links.feature:50 cucumber<br />
features/viewing_tickets.feature:20<br />
33 scenarios (9 failed, 4 skipped, 20 passed)<br />
289 steps (9 failed, 87 skipped, 193 passed)<br />
These features are all broken because you restricted the permissions on the find_project<br />
method, and all of these features depend on this functionality in one way or another.<br />
Let’s fix these, from the top, one at a time.<br />
8.3 Fixing what you broke<br />
Currently, you have a whole bundle of features that are failing! When this happens, it<br />
may seem like everything’s broken (and maybe some things are on fire), but in reality<br />
it’s not as bad as it seems. The best way to fix a mess like this is to break it down into<br />
smaller chunks and tackle it one chunk at a time. The output from rake cucumber:ok<br />
spec provided a list of the broken features: they are your chunks. Let’s go through<br />
them and fix them, starting with the Editing Projects feature.
8.3.1 Fixing Editing Projects<br />
Fixing what you broke<br />
When you run bin/cucumber features/editing_projects.feature:14, Cucumber<br />
can’t find the Edit Project link:<br />
And I follow "Edit Project"<br />
no link with title, id or text 'Edit Project' found<br />
➥(Capybara::ElementNotFound)<br />
This error occurs because when Cucumber follows the TextMate 2 link, it’s taken to<br />
the show action, which redirects it to the projects_path because the user doesn’t<br />
have access to this project, and the page the user would now be on doesn’t have an<br />
Edit Project link. But the users for this feature are the all-seeing admins and therefore<br />
should be able to access all projects regardless of whether or not they have permission<br />
to do so. Therefore, you must change how you declare @project in the find_project<br />
method in ProjectsController to account for admins. Change it from this<br />
@project = Project.readable_by(current_user).find(params[:id])<br />
to this:<br />
@project = if current_user.admin?<br />
Project.find(params[:id])<br />
else<br />
Project.readable_by(current_user).find(params[:id])<br />
end<br />
As you can see, this code won’t scope the find using the readable_by scope if the user<br />
is an admin, but it will if the user isn’t. When you run bin/cucumber features/editing<br />
_projects.feature, it should now pass:<br />
2 scenarios (2 passed)<br />
19 steps (19 passed)<br />
This change should fix a couple of other features as well, so rerun rake cucumber:ok<br />
to find the ones that are still broken. You have a much shorter list now:<br />
cucumber features/creating_tickets.feature:20<br />
cucumber features/deleting_tickets.feature:19<br />
cucumber features/editing_tickets.feature:20<br />
cucumber features/viewing_tickets.feature:20<br />
You reduced your failing scenarios from nine to only four, which is pretty good. Let’s<br />
fix the first of these, the Creating Tickets feature.<br />
8.3.2 Fixing the four failing features<br />
Let’s run the first feature with bin/cucumber features/creating_tickets.feature.<br />
You’ll see that it can’t find the New Ticket link:<br />
And I follow "New Ticket"<br />
no link with title, id or text 'New Ticket' found (Capybara::ElementNotFound)<br />
173
174 CHAPTER 8 More authorization<br />
This is the same problem as before: the user doesn’t have permission to access that<br />
project. To fix this problem, alter the Background, put the permission step underneath<br />
the user-creation step, and sign in as that user, like this:<br />
Given there are the following users:<br />
| email | password |<br />
| user@ticketee.com | password |<br />
And "user@ticketee.com" can view the "Internet Explorer" project<br />
And I am signed in as them<br />
This Background also contains code that ensures users are asked to sign in if they click<br />
the New Ticket link when they’re not signed in. Because you’ll log in as a user before<br />
you get to this point, you can remove the last few lines from this Background:<br />
Then I should see "You need to sign in or sign up before continuing."<br />
When I fill in "Email" with "user@ticketee.com"<br />
And I fill in "Password" with "password"<br />
And I press "Sign in"<br />
Then I should see "New Ticket"<br />
When you run this feature again, all the scenarios pass:<br />
3 scenarios (3 passed)<br />
35 steps (35 passed)<br />
One down, three to go. The next failing feature is the Deleting Tickets feature.<br />
It fails for the same reason as the previous one: the user doesn’t have access to the<br />
project to delete a ticket. Let’s fix this now by putting the following line underneath<br />
where your project is created:<br />
Given there is a project called "TextMate 2"<br />
And "user@ticketee.com" can view the "TextMate 2" project<br />
That’s a little too easy! When you run bin/cucumber features/deleting_tickets<br />
.feature, this feature now passes:<br />
1 scenario (1 passed)<br />
11 steps (11 passed)<br />
Next up is the Editing Tickets feature, which contains not one but two broken scenarios.<br />
The two scenarios in this feature, similar to the Editing Projects scenario, are broken<br />
because the feature can’t find a link:<br />
And I follow "Make it shiny!"<br />
no link with title, id or text 'Make it shiny!' found<br />
➥(Capybara::ElementNotFound)<br />
Again, the error occurs because the user doesn’t have permission to access this particular<br />
project. You must specify that this user has access to this project in the<br />
Background, just as you did for the Creating Tickets and Editing Tickets features. Add<br />
this line directly under the line that creates the project in the Background:<br />
And "user@ticketee.com" can view the "TextMate 2" project
Fixing what you broke<br />
When you run bin/cucumber features/editing_tickets.feature, both scenarios<br />
should pass:<br />
2 scenarios (2 passed)<br />
26 steps (26 passed)<br />
Great! You fixed another feature. The one remaining feature that fails is Viewing Tickets,<br />
which you fix in the same way as you fixed the previous features. Add this line<br />
again underneath where you create the TextMate 2 project, this time in features/<br />
viewing_tickets.feature:<br />
And "user@ticketee.com" can view the "TextMate 2" project<br />
You also need to add one for the Internet Explorer project:<br />
And "user@ticketee.com" can view the "Internet Explorer" project<br />
Also in this feature, you’re not signing in as the user who has these permissions, so<br />
directly underneath the first step in your Background, add the following step:<br />
And I am signed in as them<br />
Running bin/cucumber features/viewing_tickets.feature, you’ll see that this feature<br />
is passing:<br />
1 scenario (1 passed)<br />
23 steps (23 passed)<br />
That was fast! All four failing features are fixed. Well, so we hope. You independently<br />
verified them, but run rake cucumber:ok spec to make sure nothing else is broken:<br />
33 scenarios (33 passed)<br />
287 steps (287 passed)<br />
# and<br />
16 examples, 0 failures, 8 pending<br />
Great! Everything’s working again! Let’s commit that:<br />
git add .<br />
git commit -m "Made projects only visible to users with<br />
permission to see them"<br />
git push<br />
In these first two sections, you added the restriction on the ProjectsController that<br />
projects should be accessible only to users with Permission records with the action<br />
set to view. In the process, you broke a couple of features, but fixing them was really<br />
simple.<br />
However, these changes only protect the actions in the ProjectsController that<br />
use the find_project method and not those in the TicketsController. Before you<br />
make changes in the TicketsController, note that the links to all projects are still visible<br />
to all users through the ProjectsController’s index, which is definitely something<br />
you should fix first.<br />
175
176 CHAPTER 8 More authorization<br />
8.3.3 One more thing<br />
As described previously, the links to all projects are still visible to all users on the<br />
homepage. The way to fix it is to write a new scenario to test that this behavior is<br />
always present. You don’t have to write the whole scenario because you already have a<br />
scenario you can modify instead, the one inside features/viewing_projects.feature.<br />
To test that the links are hidden on the index action, add a new step to the<br />
Background and one to the scenario. The one in the Background goes directly under<br />
the line that creates the TextMate 2 project, and it creates another project called<br />
Internet Explorer:<br />
And there is a project called "Internet Explorer"<br />
Place the line that goes in the scenario directly under the line that takes you to the<br />
homepage, making the first two lines of this scenario look like this:<br />
And I am on the homepage<br />
Then I should not see "Internet Explorer"<br />
This feature will now ensure that the user who doesn’t have permission to view the<br />
TextMate 2 project no longer can see the Internet Explorer project. When you run<br />
this feature using bin/cucumber features/viewing_projects.feature, it fails:<br />
expected #has_no_content?("Internet Explorer")<br />
to return true, got false<br />
To fix it, open app/controllers/projects_controller.rb and modify the index method to<br />
do exactly what the find_project method does: restrict. You could re-use the code<br />
from the find_project method in the index action, but that isn’t very DRY. Instead,<br />
extract the code from find_project and move it into the Project model. Take the<br />
code from this method<br />
@project = if current_user.admin?<br />
Project.find(params[:id])<br />
else<br />
Project.readable_by(current_user).find(params[:id])<br />
end<br />
and change it to this much shorter version:<br />
@project = Project.for(current_user).find(params[:id])<br />
The model is a better place than the controller for this logic. Open app/models/project<br />
.rb and define this new for class method using the code shown next. You’ll also refactor<br />
the method:<br />
def self.for(user)<br />
user.admin? ? Project : Project.readable_by(user)<br />
end<br />
The first line of this method uses a ternary statement, which is a shorter version of this:<br />
if current_user.admin?<br />
Project
Fixing what you broke<br />
else<br />
Project.readable_by(current_user)<br />
end<br />
This statement is useful when you have short conditional statements like this one, but<br />
it shouldn’t be (ab)used for longer conditional statements. As a general rule of<br />
thumb, if the line for a ternary statement is longer than 80 characters, it’s probably<br />
best to split it out over multiple lines for better readability.<br />
In the find_project method, you can call find on what this new for method<br />
returns, and now in the index method, you can use it in an identical fashion, but just<br />
replace the call to find with all, like this:<br />
def index<br />
@projects = Project.for(current_user).all<br />
end<br />
Because you are referencing current_user in this action, you must modify the<br />
before_filter line that references authenticate_user! to ensure that users are<br />
signed in before they visit this page. Let’s change it to this:<br />
before_filter :authenticate_user!, :only => [:index, :show]<br />
When you run the feature again with bin/cucumber features/viewing_projects<br />
.feature, it passes:<br />
1 scenario (1 passed)<br />
9 steps (9 passed)<br />
Ensure that everything is working as it should by running rake cucumber:ok spec.<br />
Oops! You broke some of the scenarios inside the Hidden Links feature, as shown by<br />
this output from the cucumber:ok part of the command you just ran:<br />
cucumber features/hidden_links.feature:23<br />
cucumber features/hidden_links.feature:27<br />
cucumber features/hidden_links.feature:36<br />
cucumber features/hidden_links.feature:40<br />
If you run the first one of these features with bin/cucumber features/hidden_links<br />
.feature:23, you’ll see that it can’t find the TextMate 2 link.<br />
When I follow "TextMate 2"<br />
no link with title, id or text 'TextMate 2' found (Capybara::ElementNotFound)<br />
This error occurs because the user in this feature doesn’t have permission to view the<br />
TextMate 2 project. But if you look at this scenario, it’s for users who are not signed<br />
in—users who can no longer visit this page because, when they do, they are redirected<br />
to the sign-in page. This means that the following scenarios no longer apply and can<br />
be deleted:<br />
Scenario: Edit project link is hidden for non-signed-in users<br />
Scenario: Delete project link is hidden for non-signed-in users<br />
177
178 CHAPTER 8 More authorization<br />
Removing these scenarios removes two of the failing scenarios, but two more are still<br />
failing:<br />
Failing Scenarios:<br />
cucumber features/hidden_links.feature:21<br />
cucumber features/hidden_links.feature:31<br />
These two scenarios fail because user@ticketee.com doesn’t have access to the Text-<br />
Mate 2 project. To give it access, you can put the permission step underneath the<br />
project-creation step in the Background, like this:<br />
And there is a project called "TextMate 2"<br />
And "user@ticketee.com" can view the "TextMate 2" project<br />
When you run this feature again using bin/cucumber features/hidden_links<br />
.feature, it passes:<br />
7 scenarios (7 passed)<br />
39 steps (39 passed)<br />
You fixed the scenarios in the Hidden Links feature, but the Signing Up feature still<br />
fails. These two features aren’t closely related, so it’s best to make a commit but not<br />
push it to GitHub now so you have all related changes in one commit and other<br />
changes in separate commits. For this commit, the ProjectsController’s index<br />
action is restricted to displaying projects only the user can see, so the commit commands<br />
are as follows:<br />
git add .<br />
git commit -m "Don’t show projects that a<br />
user doesn't have permission to see"<br />
Now let’s see why the Signing Up feature is acting up. When you run it using bin<br />
/cucumber features/signing_up.feature, the final step fails:<br />
Then I should see "You have signed up successfully"<br />
expected #has_content?("You have signed up successfully.")<br />
to return true, got false<br />
When users sign up to your application, they’re shown the “You have signed up successfully”<br />
message, as the feature says they should, and they’re also redirected to the<br />
root of your application. The problem lies with this final step: people are redirected to<br />
the root of the application, the ProjectsController’s index action, which is now<br />
locked down to require that users be authenticated before they can view this action.<br />
This is problematic, but it’s fixable.<br />
8.3.4 Fixing Signing Up<br />
The Signing Up feature is broken, and the problem lies solely with the latest changes<br />
you made to the ProjectsController. When users sign up, they’re sent to the<br />
root_path in the application, which resolves to the index action in the Projects-<br />
Controller. This controller has the authenticate_user! method called before all
Fixing what you broke<br />
actions in it, checking if users are authenticated. If they aren’t, they’re redirected to<br />
the sign-in page.<br />
You can see all of this in action if you start your server using rails server and<br />
attempt to sign up. Rather than being properly shown the “You have signed up successfully”<br />
message, you’ll see the Sign In page, as shown in figure 8.3.<br />
The configuration to send users to the root_path after sign-up is in Devise’s<br />
Devise::RegistrationsController 1 and is defined in a method called after<br />
_inactive_sign_up_path_for:<br />
# The path used after sign up for inactive accounts.<br />
➥You need to overwrite<br />
# this method in your own RegistrationsController.<br />
def after_inactive_sign_up_path_for(resource)<br />
root_path<br />
end<br />
As you can see, this method is hardcoded to return root_path. The comment above this<br />
method suggests that you override the method in your own RegistrationsController.<br />
It means you must create a new controller called RegistrationsController 2 and,<br />
inside this controller, override the after_inactive_sign_up_path_for method. To<br />
give this controller the same functionality as Devise’s Devise::Registrations<br />
Controller, you need to inherit from that controller. Finally, you can no longer redirect<br />
to root_path, so you generate a new part of your application to present new users with<br />
a message telling them they must confirm their account.<br />
Figure 8.3 Sign-in page<br />
1 The Devise::RegistrationsController can be found at https://github.com/plataformatec/devise/<br />
blob/v1.4.2/app/controllers/devise/registrations_controller.rb#L93-95.<br />
2 The controller could be called anything: it just needs a name so you can point Devise at it later.<br />
179
180 CHAPTER 8 More authorization<br />
Create a new controller now at app/controllers/registrations_controller.rb and fill it<br />
with this content:<br />
class RegistrationsController < Devise::RegistrationsController<br />
private<br />
def after_inactive_sign_up_path_for(resource)<br />
confirm_user_path<br />
end<br />
end<br />
By defining this new controller as inheriting from Devise::Registrations-<br />
Controller, you inherit all the behavior from that controller and gain the ability to<br />
override things such as the after_inactive_sign_up_path_for, of which you take<br />
full advantage here. The resource argument is the User object representing who’s<br />
signing up. You could use it, but in this context, don’t. Next, you need to tell Devise to<br />
use this controller instead of its own. Alter the following line in config/routes.rb<br />
devise_for :users<br />
to this:<br />
devise_for :users, :controllers => { :registrations => "registrations" }<br />
The :controllers option tells Devise you want to customize the controllers it uses,<br />
and with this new hash, you tell it to use the RegistrationsController you defined<br />
for registrations. In this controller, you override after_inactive_sign_up_path_for<br />
to go to a new route: confirm_user_path.<br />
Because you’re overriding Devise’s controller, Rails won’t use Devise’s views. You<br />
must copy the views from Devise into your application and move them into the app<br />
/views/registrations directory. Lucky for you, Devise has a generator that places<br />
Devise’s views in your application: devise:views. You can run the generator with<br />
this command:<br />
rails g devise:views<br />
This command places Devise’s views into the app/views/devise directory of your application.<br />
This directory shares the same name as the directory internal to Devise where<br />
these views came from, and if a view exists in your application first, then Rails doesn’t<br />
look for it in the engines attached to the application. With these files copied over,<br />
move the app/views/devise/registrations directory out to app/views/registrations so<br />
you have some views to use for your new RegistrationsController.<br />
Now you must address the problem that although the confirm_users_path<br />
method used in your RegistrationsController isn’t defined yet, redirect_to takes<br />
users to that location. Define a route for it by opening config/routes.rb and inserting<br />
this line underneath devise_for :users:<br />
get '/awaiting_confirmation',<br />
:to => "users#confirmation",<br />
:as => 'confirm_user'
Fixing what you broke<br />
Post, put, delete, and anything<br />
You can define routes that respond only to POST, PUT, and DELETE requests using<br />
the post, put, and delete methods, respectively. All of these methods use the<br />
same syntax and work in similar manners, but they define routes that respond only<br />
to certain HTTP methods.<br />
If it doesn’t matter which HTTP method a route responds to, you can use the match<br />
method:<br />
match '/some_route',<br />
:to => "some#where"<br />
This would respond to GET, POST, PUT and DELETE methods. This method is actually<br />
used by the get, post, put, and delete methods internally, except they call it like this:<br />
match '/some_route',<br />
:to => "some#where",<br />
:conditions => { :method => :get }<br />
You could use conditions to filter the HTTP methods to which a route would respond,<br />
but it’s better to just use the relevant HTTP method’s method.<br />
The get method defines a new route in your application that responds to only GET<br />
requests to /awaiting_confirmation. This route goes to the confirmation action in<br />
UsersController, which you haven’t created yet either. Soon!<br />
The :as option tells Rails that you want routing helpers generated for this route<br />
and you want the helpers to have the prefix confirm_user. This generates<br />
confirm_user_path, which you use in your new check_for_sign_up action in<br />
ProjectsController as well as in a confirm_user_url method.<br />
When you run the Signing Up feature again with bin/cucumber features/signing<br />
_up.feature you don’t get the same error, but you get one that can be easily fixed:<br />
Given I am on the homepage<br />
uninitialized constant UsersController<br />
This is the controller you’ll use to show users the confirmation page, so let’s create it<br />
with a confirmation action that you’ll need with this command:<br />
rails g controller users confirmation<br />
This command adds a route to your routes file that you don’t want (because it overrides<br />
a route that Devise uses), so remove this line from config/routes.rb:<br />
get "users/confirmation"<br />
The added bonus of putting the action here is that you get a view for free at app/<br />
views/users/confirmation.html.erb. In this view you’ll display the “You have signed up<br />
successfully” message as well as a “Please confirm your account before signing in” message.<br />
Before you add these messages to the template, add a line at the bottom of the<br />
scenario inside features/signing_up.feature to check for this confirmation message:<br />
Then I should see "Please confirm your account before signing in."<br />
181
182 CHAPTER 8 More authorization<br />
This line ensures that you’re always taken to the correct page upon sign-up. Now<br />
replace the code inside app/views/users/confirmation.html.erb with the following<br />
code to make this feature pass again:<br />
You have signed up successfully.<br />
Please confirm your account before signing in.<br />
When users sign up, rather than seeing a confusing page telling them they must be<br />
signed in, they’ll instead see the page shown in figure 8.4.<br />
The Signing Up feature is probably fixed now, but the only true way to make sure<br />
it’s working is to test it manually or to run the feature. Running the feature is easier, so<br />
let’s do that with bin/cucumber features/signing_up.feature:<br />
1 scenario (1 passed)<br />
7 steps (7 passed)<br />
Everything is green. Awesome! This feature is passing again. Let’s make a commit for<br />
that:<br />
git add .<br />
git commit -m "Fix signing up feature,<br />
take user to alternative confirmation page"<br />
Is everything else working, though? Let’s check with rake cucumber:ok spec:<br />
31 scenarios (31 passed)<br />
285 steps (285 passed)<br />
# and<br />
19 examples, 0 failures, 10 pending<br />
Now everything’s working! Let’s push those changes to GitHub:<br />
git push<br />
You’ve limited the ability of users to take action on things inside the Projects-<br />
Controller and fixed the Signing Up feature that broke because of the changes you<br />
made. But you haven’t protected the TicketsController. This is a problem because<br />
users who can’t view a project will still be able to view its tickets, which could pose a<br />
security risk. A project’s most vital assets (for now) are the tickets associated with it,<br />
and users who don’t have permission to see the project shouldn’t be able to see the<br />
associated tickets. Let’s add this restriction next.<br />
Figure 8.4 “Please confirm<br />
your account”
8.4 Blocking access to tickets<br />
Blocking access to tickets<br />
When implementing permissions, you have to be careful to ensure that all users who<br />
should have access to something do, and all users who shouldn’t have access to something<br />
don’t. All of the TicketsController’s actions are still available to all users<br />
because it has no permission checking. If you leave it in that state, users who are<br />
unable to see the project can still make requests to the actions inside Tickets-<br />
Controller. They shouldn’t be able to do anything to the tickets in a project if they<br />
don’t have permission to view tickets for it. Let’s implement permission checking to<br />
remedy this problem.<br />
8.4.1 Locking out the bad guys<br />
To prevent users from seeing tickets in a project they’re unauthorized to see, you must<br />
lock down the show action of TicketsController.<br />
To test that when you put this restriction in place, it’s correct, write a spec in the<br />
spec/controllers/tickets_controller_spec.rb file, just as you did for the Projects-<br />
Controller. This file should now look like the following listing.<br />
Listing 8.5 spec/controllers/tickets_controller_spec.rb<br />
require 'spec_helper'<br />
describe TicketsController do<br />
let(:user) { create_user! }<br />
let(:project) { Factory(:project) }<br />
let(:ticket) { Factory(:ticket, :project => project,<br />
:user => user) }<br />
context "standard users" do<br />
it "cannot access a ticket for a project" do<br />
sign_in(:user, user)<br />
get :show, :id => ticket.id, :project_id => project.id<br />
response.should redirect_to(root_path)<br />
flash[:alert].should eql("The project you were looking for could not be<br />
found.")<br />
end<br />
end<br />
end<br />
This test sets up a project, a ticket, and a user who has no explicit permission to view<br />
the project and therefore shouldn’t be able to view the ticket. You test this spec by<br />
signing in as the unauthorized user and trying to go to the show action for this ticket,<br />
which requires you to pass through a project_id to help it find what project the<br />
ticket is in. The test should pass if the user is redirected to the root_path and if, upon<br />
the user seeing the flash[:alert], the application denies all knowledge of this project<br />
ever having existed.<br />
When you run this test using bin/rspec spec/controllers/tickets_controller<br />
_spec.rb, you see the ticket factory is undefined:<br />
No such factory: ticket (ArgumentError)<br />
183
184 CHAPTER 8 More authorization<br />
Define this factory now in a new file called factories/ticket_factory.rb. This file will be<br />
automatically loaded by the code in spec/support/factories.rb:<br />
Factory.define :ticket do |ticket|<br />
ticket.title "A ticket"<br />
ticket.description "A ticket, nothing more"<br />
ticket.user { |u| u.association(:user) }<br />
ticket.project { |p| p.association(:project) }<br />
end<br />
Here you set up some defaults for the title and description fields for a factoryprovided<br />
ticket, but you do something new with the user method. You pass a block<br />
and call the association method on the object returned from the block, and the user<br />
for this ticket becomes one user factory-created object. Nifty. You do the same thing<br />
for the project method, so you can create tickets using this factory and have them<br />
related to a project automatically if you want. For this spec, however, you override it.<br />
When you run bin/rspec spec/controllers/tickets_controller_spec.rb<br />
again, this test fails because the user can still access this action:<br />
TicketsController standard users cannot access a ticket for a project<br />
Failure/Error: response.should redirect_to(root_path)<br />
With this test failing correctly, you can work on restricting the access to only the projects<br />
the user has access to. Open app/controllers/tickets_controller.rb and remove the<br />
:except option from the authenticate_user! filter, so it goes from this<br />
before_filter :authenticate_user!, :except => [:index, :show]<br />
to this:<br />
before_filter :authenticate_user!<br />
Now users should always be asked to sign in before accessing the index and show<br />
actions for this controller, meaning that current_user will always return a User object.<br />
You can reference the current_user method in find_project and use the for<br />
method to limit the project find scope to only the projects to which that user has<br />
access. You can change the find_project method to the following example:<br />
def find_project<br />
@project = Project.for(current_user).find(params[:project_id])<br />
rescue ActiveRecord::RecordNotFound<br />
flash[:alert] = "The project you were looking for could not be found."<br />
redirect_to root_path<br />
end<br />
The rewritten find_project method will retrieve a Project only if the current_user<br />
has permission to view that project or is an admin. Otherwise, an ActiveRecord<br />
::RecordNotFound exception will be thrown and rescued here, showing users “The<br />
project you were looking for could not be found.”
Restricting write access<br />
When you run the spec again with bin/rspec spec/controllers/tickets<br />
_controller_spec.rb, it now passes because this user can no longer see this project<br />
and is shown the error:<br />
.<br />
1 example, 0 failures<br />
You scoped the project find for the TicketsController in the same way you did for<br />
the ProjectsController, limiting it to only those projects to which the current user<br />
has access.<br />
That’s the end of that! Now ensure that all your specs and features are passing by<br />
running rake cucumber:ok spec. You should see this output:<br />
31 scenarios (31 passed)<br />
285 steps (285 passed)<br />
# and<br />
20 examples, 0 failures, 10 pending<br />
In this section, you altered the TicketsController so that only users with permission<br />
to access a project can see the tickets inside it. Let’s commit that:<br />
git add .<br />
git commit -m "Restrict reading tickets to correct project scope"<br />
git push<br />
Now let’s add a new permission that restricts who can create tickets in a project.<br />
8.5 Restricting write access<br />
Sometimes when working on a project, you’ll want to limit the creation of tickets to a<br />
certain person or a group of people, such as to only developers or only clients. For<br />
this, you want the New link to be hidden from people who don’t have this permission,<br />
and you need both the new and create actions to reject such users.<br />
8.5.1 Rewriting a feature<br />
You’re lucky to already have the feature for creating tickets, so you just need to add a<br />
step to the Background declaring that the user can create tickets in the project. Place<br />
this step directly under the one declaring that users can view the project. Open<br />
features/creating_tickets.feature, and modify the Background so it contains these two<br />
lines:<br />
And "user@ticketee.com" can view the "Internet Explorer" project<br />
And "user@ticketee.com" can create tickets in the "Internet Explorer" project<br />
When you run bin/cucumber features/creating_tickets.feature, you’re told this<br />
step is undefined:<br />
Given /^"([^"]*)" can create tickets in the "([^"]*)"<br />
➥ project$/ do |arg1, arg2|<br />
pending # express the regexp above with the code you wish you had<br />
end<br />
185
186 CHAPTER 8 More authorization<br />
Define it in features/step_definitions/permission_steps.rb directly under the viewing<br />
projects step. This new step goes like this:<br />
Given /^"([^"]*)" can create tickets in the "([^"]*)" project$/<br />
do |user, project|<br />
Permission.create!(:user => User.find_by_email!(email),<br />
:thing => Project.find_by_name!(project),<br />
:action => "create tickets")<br />
end<br />
This step is similar to the step before it. You changed the word view to create tickets and<br />
made a few other small changes, so you should DRY these steps up now. Change the<br />
steps to read exactly like the following listing.<br />
Listing 8.6 features/step_definitions/permission_steps.rb<br />
permission_step = /<br />
^"([^"]*)" can ([^"]*?) ([o|i]n)?\s?the "([^"]*)" project$/<br />
Given permission_step do |user, permission, on, project|<br />
create_permission(user, find_project(project), permission)<br />
end<br />
def create_permission(email, object, action)<br />
Permission.create!(:user => User.find_by_email!(email),<br />
:thing => object,<br />
:action => action)<br />
end<br />
def find_project(name)<br />
Project.find_by_name!(name)<br />
end<br />
Here we separated the regular expression onto its own line to make the line a little<br />
shorter. It can all be put on one line without any adverse effects; this just makes it<br />
neater.<br />
Now you extract creating permissions, finding the user, and finding the project<br />
into separate methods, which means you won’t have to change each step if you want to<br />
change the way a permission is created. You also combine the acts involved in creating<br />
permissions into one step that matches all currently defined step definitions using a<br />
regular expression that conforms to the style of other steps:<br />
Given "user@ticketee.com" can create tickets on the "Ticketee" project<br />
Given "user@ticketee.com" can view the "Ticketee" project<br />
Given "user@ticketee.com" can edit tickets in the "Ticketee" project<br />
This new step definition allows greater flexibility in how your steps are defined yet<br />
leaves them easy to parse.<br />
With this permission step defined, run bin/cucumber features/creating<br />
_tickets.feature, and the entire feature passes:<br />
3 scenarios (3 passed)<br />
35 steps (35 passed)
Restricting write access<br />
This feature will pass whether the user has permission to create a ticket or not. You’re<br />
now basically in the same situation you faced with the Viewing Tickets feature: the feature<br />
would pass either way. So, just like before, you use RSpec to test that users can’t<br />
create a ticket if they don’t have permission to do so.<br />
8.5.2 Blocking creation<br />
Let’s write the specs to test that users with permission to view the project but without<br />
permission to create tickets can’t create tickets. Put the specs shown in the following<br />
listing in spec/controllers/tickets_controller_spec.rb inside the standard users context<br />
block so all the examples are grouped nicely.<br />
Listing 8.7 spec/controllers/tickets_controller_spec.rb<br />
context "with permission to view the project" do<br />
before do<br />
sign_in(:user, user)<br />
Permission.create!(:user => user, :thing => project, :action => "view")<br />
end<br />
def cannot_create_tickets!<br />
response.should redirect_to(project)<br />
flash[:alert].should eql("You cannot create tickets on this project.")<br />
end<br />
it "cannot begin to create a ticket" do<br />
get :new, :project_id => project.id<br />
cannot_create_tickets!<br />
end<br />
it "cannot create a ticket without permission" do<br />
post :create, :project_id => project.id<br />
cannot_create_tickets!<br />
end<br />
end<br />
You first set up the specs using a before, signing in as a user, and defining a permission<br />
for that user to view the project. Next, you define a method called cannot<br />
_create_tickets! asserting that unauthorized users should be redirected to the project<br />
and shown an alert stating they’re not allowed to create tickets. Rather than duplicating<br />
these two lines in each spec where you want to check that a user receives the<br />
correct message, you just call the cannot_create_tickets! method in that place. The<br />
two examples you just added ensure that unauthorized visitors to the new and create<br />
actions can’t create tickets.<br />
When you run this file with bin/rspec spec/controllers/tickets_controller<br />
_spec.rb, the specs fail, just as you might expect:<br />
Failure/Error: response.should redirect_to(project)<br />
Expected response to be a , but was <br />
187
188 CHAPTER 8 More authorization<br />
To make the spec pass, you need to implement the permission checking on the new<br />
and create actions in your TicketsController.<br />
Run a before_filter before the new action that checks whether the current user<br />
has permission; if not, then redirect the user to the project page and display the error<br />
described in the spec.<br />
Now change the before_filter calls to include this new one, as shown in the following<br />
lines:<br />
before_filter :authenticate_user!<br />
before_filter :find_project<br />
before_filter :find_ticket, :only => [:show, :edit, :update, :destroy]<br />
before_filter :authorize_create!, :only => [:new, :create]<br />
This authorize_create!before_filter is placed after the authenticate_user! and<br />
find_project before_filters because it uses the current_user object set up by the<br />
authenticate_user! method and the @project object from find_project.<br />
In this new filter, you call a new method called cannot?, which returns true or<br />
false to indicate whether the currently signed-in user can’t or can do a particular<br />
action. You define the authorize_create! method code shown next:<br />
def authorize_create!<br />
if !current_user.admin? && cannot?("create tickets".to_sym, @project)<br />
flash[:alert] = "You cannot create tickets on this project."<br />
redirect_to @project<br />
end<br />
end<br />
In this example, you use to_sym to create a symbolized version of a string, which is<br />
required because the cannot? method takes only symbols. You also check whether or<br />
not the user is an admin; if so, the user should be allowed to create tickets. If you run<br />
the controller’s spec again with bin/rspec spec/controllers/tickets_controller<br />
_spec.rb, the example fails because the cannot? method is undefined:<br />
Failure/Error: get :new, :project_id => project.id<br />
undefined method 'cannot?' for #<br />
Rails doesn’t come with a cannot? method, but a gem called cancan (stylized as Can-<br />
Can) does. This gem helps you tie together the User and Permission records. Let’s<br />
install it now.<br />
8.5.3 What is CanCan?<br />
CanCan is a gem written by Ryan Bates of Railscasts fame; it provides some nice helper<br />
methods (such as the cannot? method and its antithesis, can?) to use in controllers<br />
and views.<br />
The can? and cannot? methods use the same permissions table you created to<br />
check that a user has permission to perform a specific action on a specific object.<br />
To install CanCan, add this line to your Gemfile directly underneath the line for<br />
Devise:<br />
gem 'cancan'
Restricting write access<br />
(There’s no particular reason to put this gem underneath Devise other than that it’s<br />
sensible to group together gems dealing with similar functions.) To install the CanCan<br />
gem, run bundle install.<br />
8.5.4 Adding abilities<br />
When you run bin/rspec spec/controllers/tickets_controller_spec.rb, you get<br />
this output:<br />
Failure/Error: get :new, :project_id => project.id<br />
uninitialized constant Ability<br />
This error occurs because CanCan is now defining the cannot? method for the controller,<br />
which uses a CanCan in-built method called current_ability:<br />
@current_ability ||= ::Ability.new(current_user)<br />
The ||= sets @current_ability if it isn’t already set. The :: before Ability indicates<br />
to Ruby that you want the Ability at the root namespace. This allows you to have a<br />
module called CanCan::Ability and a class at Ability and to differentiate between<br />
the two. In this example, it’s trying to access just Ability, which is a class that doesn’t<br />
yet exist.<br />
This new Ability class will provide the link between users and their permissions.<br />
You define it in a new file at app/models/ability.rb exactly like the following listing.<br />
Listing 8.8 app/models/ability.rb<br />
class Ability<br />
include CanCan::Ability<br />
def initialize(user)<br />
user.permissions.each do |permission|<br />
can permission.action.to_sym,<br />
➥permission.thing_type.constantize do |thing|<br />
thing.nil? ||<br />
permission.thing_id.nil? ||<br />
permission.thing_id == thing.id<br />
end<br />
end<br />
end<br />
end<br />
The Ability class’s initialize method defines how can? and cannot? will act. In<br />
this example, you iterate over all the users’ permissions and use the can? method to<br />
say that a user can perform a specific function. Users who shouldn’t be able to perform<br />
that function won’t have an entry in the permissions table for it. This is the<br />
whitelist authorization described at the beginning of the chapter.<br />
When you run bin/rspec spec/controllers/tickets_controller_spec.rb, you<br />
get this error:<br />
Failure/Error: get :new, :project_id => project.id<br />
undefined method 'permissions' for #<br />
189
190 CHAPTER 8 More authorization<br />
This error occurs because you haven’t yet defined a has_many association on the User<br />
model to the Permission model. To do so, open app/models/user.rb and add this line<br />
within the class:<br />
has_many :permissions<br />
This is another case where there’s no reason other than that it makes sense to put it<br />
directly underneath the line for the tickets association. It’s best if you group all similar<br />
methods together. With this association in place, run bin/rspec spec/controllers/<br />
tickets_controller_spec.rb, and the whole spec file passes:<br />
...<br />
3 examples, 0 failures<br />
Great! Now that the spec’s passing, unauthorized users don’t have access to the new<br />
and create actions. How about checking that those who have permissions can access<br />
these actions? Let’s check on the Creating Tickets feature. With this permission<br />
checking in place, any user with the right permissions should still be able to create<br />
tickets. Run bin/cucumber features/creating_tickets.feature to make sure. It<br />
should pass:<br />
3 scenarios (3 passed)<br />
38 steps (38 passed)<br />
Good. Users without permission to create tickets no longer can do so.<br />
Now that you’ve implemented this story, it’s time to commit. As usual, you should<br />
ensure that everything is still working by running rake cucumber:ok spec. Everything<br />
should pass:<br />
31 scenarios (31 passed)<br />
288 steps (288 passed)<br />
# and<br />
22 examples, 0 failures, 10 pending<br />
Let’s commit the changes:<br />
git add .<br />
git commit -m "Restricting creating tickets to only users<br />
➥who have permissions to do it"<br />
git push<br />
In this section, you limited the creation of tickets to only those users who’re granted<br />
permission to do so by using the Permission class and the CanCan gem.<br />
8.6 Restricting update access<br />
You just learned how to restrict access to the creation of tickets; your next step is to<br />
restrict which users can update tickets. Thankfully, you can re-use the framework<br />
that’s already in place with CanCan to make this a cinch. You can also re-use the Editing<br />
Tickets feature to test the restriction.
Restricting update access<br />
For this feature, at features/editing_tickets.feature, you set up a Permission that<br />
says the user you sign in as has permission to update tickets. To do this, write a step in<br />
the Background directly under the other one that sets up read access, as shown here:<br />
And "user@ticketee.com" can view the "TextMate 2" project<br />
And "user@ticketee.com" can edit tickets in the "TextMate 2" project<br />
When you run bin/cucumber features/editing_tickets.feature, it all passes, just<br />
as you expect. This step covers the scenario in which the user has permission to<br />
update tickets; to cover the scenario in which the user doesn’t have permission, you<br />
need to write a couple of specs first.<br />
8.6.1 No updating for you!<br />
In this section, you restrict updating of tickets in the same way you restricted creating<br />
tickets. You start by writing two examples: one to test the edit action and the other to<br />
test the update action. Inside spec/controllers/tickets_controller_spec.rb, within the<br />
“with permission to view the project” context, define a cannot_update_tickets!<br />
method right under the cannot_create_tickets! method, as shown next:<br />
def cannot_update_tickets!<br />
response.should redirect_to(project)<br />
flash[:alert].should eql("You cannot edit tickets on this project.")<br />
end<br />
Then, underneath the existing examples, put the specs, as shown in the following<br />
listing.<br />
Listing 8.9 Update tests for spec/controllers/tickets_controller_spec.rb<br />
it "cannot edit a ticket without permission" do<br />
get :edit, { :project_id => project.id, :id => ticket.id }<br />
cannot_update_tickets!<br />
end<br />
it "cannot update a ticket without permission" do<br />
put :update, { :project_id => project.id,<br />
:id => ticket.id,<br />
:ticket => {}<br />
}<br />
cannot_update_tickets!<br />
end<br />
These two examples make requests to their respective actions and assert that the user<br />
is redirected away from them with an error message explaining why. With both of<br />
these actions, you need to pass a project_id parameter so the find_project method<br />
can find a project and an id parameter so the find_ticket method can find a ticket.<br />
For the update action, you pass an empty hash so params[:ticket] is set. If you didn’t<br />
do this, you would get a confusing error in your test:<br />
NoMethodError:<br />
undefined method 'stringify_keys' for nil:NilClass<br />
191
192 CHAPTER 8 More authorization<br />
This error occurs because the update_attributes call in the update action would be<br />
passed nil, because that’s what params[:ticket] defaults to if you don’t pass it in<br />
here. This error would happen only if the user had permission to update a ticket,<br />
which all users have for now (but not for long).<br />
When you run this file using bin/rspec spec/controllers/tickets_controller<br />
_spec.rb, these two examples fail:<br />
1) TicketsController standard users with permission to view the project<br />
cannot edit a ticket without permission<br />
Failure/Error: response.should redirect_to(project)<br />
2) TicketsController standard users with permission to view the project<br />
cannot update a ticket without permission<br />
Failure/Error: response.should redirect_to(project)<br />
Now you can implement this feature in your controller!<br />
8.6.2 Authorizing editing<br />
Before the edit and update actions are run, you want to authorize the user for them.<br />
Write another before_filter for TicketsController: the before_filter list for this<br />
controller should now look like the following listing.<br />
Listing 8.10 app/controllers/tickets_controller.rb<br />
before_filter :authenticate_user!<br />
before_filter :find_project<br />
before_filter :find_ticket, :only => [:show, :edit, :update, :destroy]<br />
before_filter :authorize_create!, :only => [:new, :create]<br />
before_filter :authorize_update!, :only => [:edit, :update]<br />
At the bottom of this controller class, define the new method shown in the following<br />
listing:<br />
def authorize_update!<br />
if !current_user.admin? && cannot?(:"edit tickets", @project)<br />
flash[:alert] = "You cannot edit tickets on this project."<br />
redirect_to @project<br />
end<br />
end<br />
Now check whether the specs pass by running bin/rspec spec/controllers/tickets<br />
_controller_spec.rb:<br />
5 examples, 0 failures<br />
Wasn’t that easy? The edit and update actions in the TicketsController are now<br />
restricted, just like the create action. How’s the feature going? Let’s see if those with<br />
permission can still update tickets. Run bin/cucumber features/editing_tickets<br />
.feature:<br />
2 scenarios (2 passed)<br />
28 steps (28 passed)
Restricting delete access<br />
Just like that, you’re finished restricting updating tickets to only some users.<br />
Now run rake cucumber:ok spec to make sure nothing is broken. Everything<br />
should be good:<br />
31 scenarios (31 passed)<br />
290 steps (290 passed)<br />
# and<br />
24 examples, 0 failures, 10 pending<br />
Fantastic! Let’s commit that:<br />
git add .<br />
git commit -m "Restricting ticket updating to only those who have permission"<br />
git push<br />
Good stuff. In this section, you learned how to restrict the edit and update actions<br />
using the permissions you implemented earlier. There’s one last port of call for this<br />
restricting business: the destroy action.<br />
8.7 Restricting delete access<br />
The final action you restrict is the destroy action in the TicketsController. Again,<br />
you can re-use a feature to test this behavior: the Deleting Tickets feature.<br />
As you did with the Creating Tickets and Updating Tickets features, you implement<br />
a step here in the Deleting Tickets feature to give the user permission to delete tickets.<br />
Under the line that grants users permission to view the TextMate 2 project, put another<br />
one to grant them permission to delete tickets, as shown here:<br />
And "user@ticketee.com" can view the "TextMate 2" project<br />
And "user@ticketee.com" can delete tickets in the "TextMate 2" project<br />
When you run this feature, the whole thing passes because you already have the step<br />
that supports the different permissions you require:<br />
1 scenario (1 passed)<br />
12 steps (12 passed)<br />
This feature ensures that anybody with permission can delete tickets for projects, but<br />
you need another spec to test that anybody without permission is prevented from deleting<br />
tickets.<br />
8.7.1 Enforcing destroy protection<br />
To ensure that users without permission to delete tickets can’t do so, you write a spec<br />
(shown next) directly under the one for the update action in spec/controllers/<br />
tickets_controller_spec.rb:<br />
it "cannot delete a ticket without permission" do<br />
delete :destroy, { :project_id => project.id, :id => ticket.id }<br />
response.should redirect_to(project)<br />
flash[:alert].should eql("You cannot delete tickets from this project.")<br />
end<br />
193
194 CHAPTER 8 More authorization<br />
You don’t have to put the last two lines in their own method because you won’t use<br />
them more than once. When you run this spec, it fails on the final line rather than on<br />
the third line:<br />
1) TicketsController standard users with permission to view the project<br />
cannot delete a ticket without permission<br />
Failure/Error: flash[:alert].should eql<br />
➥("You cannot delete tickets from this project.")<br />
This error occurs because the destroy action is actually being processed, and it redirects<br />
the user to the project once it’s complete. The spec doesn’t know the difference<br />
between a redirect from within the action or within the before_filter, nor should it.<br />
To make this spec pass, define a new method called authorize_delete! at the bottom<br />
of the TicketsController:<br />
def authorize_delete!<br />
if !current_user.admin? && cannot?(:"delete tickets", @project)<br />
flash[:alert] = "You cannot delete tickets from this project."<br />
redirect_to @project<br />
end<br />
end<br />
Then you can call this method in a before_filter too:<br />
before_filter :authorize_delete!, :only => :destroy<br />
When you run this spec using bin/rspec spec/controllers/tickets_controller<br />
_spec.rb, it’s all passing:<br />
6 examples, 0 failures<br />
Now that you’re stopping users without permission, how goes your feature? Run bin/<br />
cucumber features/deleting_tickets.feature to find out:<br />
1 scenario (1 passed)<br />
12 steps (12 passed)<br />
Great! With this last permission in place, all the actions in the TicketsController are<br />
restricted to their appropriate users. Let’s make a commit:<br />
git add .<br />
git commit -m "Restrict destroy action to only people with permission"<br />
git push<br />
Because the controller’s actions are restricted, the links associated with these actions<br />
should be hidden from users who are unable to perform these actions.<br />
8.7.2 Hiding links based on permission<br />
To ensure that these links are hidden from those who shouldn’t be able to see them<br />
but are still visible to admins (because admins should be able to do everything), you<br />
use features/hidden_links.feature. Start with the New Ticket link by adding the scenarios<br />
from the following listing.
Restricting delete access<br />
Listing 8.11 features/hidden_links.feature<br />
Scenario: New ticket link is shown to a user with permission<br />
Given "user@ticketee.com" can view the "TextMate 2" project<br />
And "user@ticketee.com" can create tickets on the "TextMate 2" project<br />
And I am signed in as "user@ticketee.com"<br />
When I follow "TextMate 2"<br />
Then I should see "New Ticket"<br />
Scenario: New ticket link is hidden from a user without permission<br />
Given "user@ticketee.com" can view the "TextMate 2" project<br />
And I am signed in as "user@ticketee.com"<br />
When I follow "TextMate 2"<br />
Then I should not see the "New Ticket" link<br />
Scenario: New ticket link is shown to admins<br />
Given I am signed in as "admin@ticketee.com"<br />
When I follow "TextMate 2"<br />
Then I should see the "New Ticket" link<br />
These three scenarios test all three permutations of users who could possibly see this<br />
page. Users with permission and admins should be able to see the link, and users without<br />
permission should not. When you run this feature with bin/cucumber features/<br />
hidden_links.feature, the second scenario fails:<br />
Expected to not see the "New Ticket" link, but did.<br />
(RSpec::Expectations::ExpectationNotMetError)<br />
This error occurs because the link is visible independently of whether or not the user<br />
has permission. With these scenarios in place, you can work on making them pass. You<br />
can wrap the New Ticket in a helper method, similar to the admins_only helper used<br />
in chapter 6. Open app/views/projects/show.html.erb, and change the New Ticket link<br />
from this<br />
<br />
to this:<br />
<br />
<br />
<br />
Currently, this authorized? method is undefined. This is the method you need in<br />
views all across your application to determine if the user has permission to see the specific<br />
action and if that user is an admin. Because you’ll use this helper everywhere,<br />
define it inside app/helpers/application_helper.rb, as shown here:<br />
def authorized?(permission, thing, &block)<br />
block.call if can?(permission.to_sym, thing) ||<br />
current_user.try(:admin?)<br />
nil<br />
end<br />
This helper uses CanCan’s can? method to check if the user is authorized to perform<br />
this action. If so, then all is fine and dandy. If not, then you check to see if the<br />
195
196 CHAPTER 8 More authorization<br />
current_user is set (it won’t be set if the user isn’t signed in), and if it is, check to see<br />
if that user is an admin by using the try method, which returns nil. If the method<br />
specified can’t be found on thing, try is called. If it’s found, then you use<br />
block.call, which runs the passed-in block.<br />
With this helper implemented, all three new scenarios should pass. Run bin/<br />
cucumber features/hidden_links.feature to find out:<br />
10 scenarios (10 passed)<br />
60 steps (60 passed)<br />
Great! They’re passing! Now let’s implement another few for testing the Edit link for<br />
tickets. Add the three scenarios from the following listing to the bottom of features/<br />
hidden_links.feature.<br />
Listing 8.12 features/hidden_links.feature<br />
Scenario: Edit ticket link is shown to a user with permission<br />
Given "user@ticketee.com" can view the "TextMate 2" project<br />
And "user@ticketee.com" can edit tickets on the "TextMate 2" project<br />
And I am signed in as "user@ticketee.com"<br />
When I follow "TextMate 2"<br />
And I follow "Shiny!"<br />
Then I should see the "Edit" link<br />
Scenario: Edit ticket link is hidden from a user without permission<br />
Given "user@ticketee.com" can view the "TextMate 2" project<br />
And I am signed in as "user@ticketee.com"<br />
When I follow "TextMate 2"<br />
And I follow "Shiny!"<br />
Then I should not see the "Edit" link<br />
Scenario: Edit ticket link is shown to admins<br />
Given I am signed in as "admin@ticketee.com"<br />
When I follow "TextMate 2"<br />
And I follow "Shiny!"<br />
Then I should see the "Edit" link<br />
When you run these scenarios using bin/cucumber feature/hidden_links.feature,<br />
the link to Shiny! can’t be found for any of them:<br />
And I follow "Shiny!"<br />
no link with title, id or text 'Shiny!' found (Capybara::ElementNotFound)<br />
The Shiny! link should be a link to a ticket, but you haven’t yet created this ticket. To<br />
do so, under the line where you created the TextMate 2 project in the Background,<br />
add the following to create a ticket:<br />
And "user@ticketee.com" has created a ticket for this project:<br />
| title | description |<br />
| Shiny! | My eyes! My eyes! |<br />
Now when you run this feature, the middle scenario fails, just like when you implemented<br />
the Create link filtering:
Restricting delete access<br />
Expected to see the "Edit" link, but did not.<br />
(RSpec::Expectations::ExpectationNotMetError)<br />
This time, you edit the file app/views/tickets/show.html.erb. Change the Edit link<br />
from this<br />
<br />
to this:<br />
<br />
<br />
<br />
With this one small change to use the authorized? helper to check for the permission<br />
to edit tickets for the current project, the Hidden Links feature now passes when you<br />
run bin/cucumber features/editing_tickets.feature:<br />
13 scenarios (13 passed)<br />
97 steps (97 passed)<br />
Great! You’ve got one last link to protect now: the Delete Project link on the tickets<br />
show page. Add another three scenarios to this feature, shown in the following listing.<br />
Listing 8.13 features/deleting_tickets.feature<br />
Scenario: Delete ticket link is shown to a user with permission<br />
Given "user@ticketee.com" can view the "TextMate 2" project<br />
And "user@ticketee.com" can delete tickets in the "TextMate 2" project<br />
And I am signed in as "user@ticketee.com"<br />
When I follow "TextMate 2"<br />
And I follow "Shiny!"<br />
Then I should see "Delete"<br />
Scenario: Delete ticket link is hidden from a user without permission<br />
Given "user@ticketee.com" can view the "TextMate 2" project<br />
And I am signed in as "user@ticketee.com"<br />
When I follow "TextMate 2"<br />
And I follow "Shiny!"<br />
Then I should not see the "Delete" link<br />
Scenario: Delete ticket link is shown to admins<br />
Given I am signed in as "admin@ticketee.com"<br />
When I follow "TextMate 2"<br />
And I follow "Shiny!"<br />
Then I should see the "Delete" link<br />
When you run this feature, the middle scenario fails again:<br />
Then I should not see "Delete"<br />
Expected to not see the "Delete" link, but did.<br />
(RSpec::Expectations::ExpectationNotMetError)<br />
To fix it, open or switch back to app/views/tickets/show.html.erb and wrap the Delete<br />
Ticket link in the warm embrace of the authorized? method, just as you did with the<br />
Edit Ticket link:<br />
197
198 CHAPTER 8 More authorization<br />
<br />
:delete,<br />
:confirm => "Are you sure you want to delete this ticket?" %><br />
<br />
When you run bin/cucumber features/hidden_links.feature, all 15 scenarios pass:<br />
16 scenarios (16 passed)<br />
124 steps (124 passed)<br />
Fantastic! Now you’ve stopped displaying links to the users who shouldn’t see them<br />
and switched to displaying them only to people who should be able to see them.<br />
What a whirlwind adventure! First you learned to check for permissions for all the<br />
actions in the TicketsController, and then you learned to hide links from users in<br />
the views. Let’s make sure everything is working by running rake cucumber:ok spec:<br />
40 scenarios (40 passed)<br />
376 steps (376 passed)<br />
# and<br />
17 examples, 0 failures, 3 pending<br />
Great! Now let’s commit:<br />
git add .<br />
git commit -m "Restrict actions in TicketsController<br />
➥based on permissions and hide links"<br />
git push<br />
With all that done, you now have the scaffold for setting up permissions but no interface<br />
to it! There’s currently no way in the system for a user (in particular, an admin) to<br />
set up the permissions on other users. We now implement that.<br />
8.8 Assigning permissions<br />
In chapter 6, you added an admin field to the users table and then triggered it<br />
through the admin backend by checking or unchecking a check box. You’re going to<br />
do the same thing with the permissions for the projects. When you’re done, you’ll see<br />
a permissions screen that allows you to pick and choose the permissions for the users<br />
and projects.<br />
You implement this screen one check box at a time because you must confirm that<br />
the permissions you assign through this interface work just as well as when you use the<br />
step definitions in Cucumber. Let’s get started with the permission to view projects.<br />
8.8.1 Viewing projects<br />
In this section, you implement the foundations for assigning the permissions through<br />
the admin backend, starting with the permission to view projects. Create a new feature<br />
called features/assigning_permissions.feature, and start it out with the code from the<br />
following listing.
Assigning permissions<br />
Listing 8.14 features/assigning_permissions.feature<br />
Feature: Assigning permissions<br />
In order to set up users with the correct permissions<br />
As an admin<br />
I want to check all the boxes<br />
Background:<br />
Given there are the following users:<br />
| email | password | admin |<br />
| admin@ticketee.com | password | true |<br />
And I am signed in as them<br />
And there are the following users:<br />
| email | password |<br />
| user@ticketee.com | password |<br />
And there is a project called "TextMate 2"<br />
When I follow "Admin"<br />
And I follow "Users"<br />
And I follow "user@ticketee.com"<br />
And I follow "Permissions"<br />
Scenario: Viewing a project<br />
When I check "View" for "TextMate 2"<br />
And I press "Update"<br />
And I follow "Sign out"<br />
Given I am signed in as "user@ticketee.com"<br />
Then I should see "TextMate 2"<br />
This scenario has two users: an admin user and a standard user. You sign in as the<br />
admin user, go to the permissions page, check a box, click Update, and then sign out.<br />
Then you sign in as the user who was just granted permission to test that permission,<br />
which you do in the next step. This ensures that the assigning of the permissions always<br />
works. For now, you’re only testing the permission to view a project permission.<br />
When you run bin/cucumber features/assigning_permissions.feature, it fails<br />
when it tries to follow the Permissions link:<br />
And I follow "Permissions"<br />
no link with title, id or text 'Permissions' found<br />
➥(Capybara::ElementNotFound)<br />
If you look at how the Background gets to this point, you can see that it follows the<br />
Admin link, which leads to the admin dashboard, then to Users to take you to the place<br />
where you can see users, and finally clicks a user, taking you to the Admin::Users-<br />
Controllershow action. Therefore, you need to add the missing Permissions link to<br />
the app/views/admin/users/show.html.erb directly underneath the Delete User link:<br />
:delete,<br />
:confirm => "Are you sure you want<br />
➥to delete this user?" %><br />
<br />
199
200 CHAPTER 8 More authorization<br />
The path for this link_to (which is not yet defined) takes you to the Admin<br />
::PermissionsController’s index action. To get this link_to to work, define that<br />
permissions are nested under users in the config/routes.rb, and add the admin<br />
namespace in the definition using this code:<br />
namespace :admin do<br />
root :to => "base#index"<br />
resources :users do<br />
resources :permissions<br />
end<br />
end<br />
With these changes in the config/routes.rb file, the admin_user_permissions_path<br />
used in the link_to will now be defined. When you run the feature using bin/cucumber<br />
features/assigning_permissions.feature, you see there’s more to be done for this<br />
step:<br />
And I follow "Permissions"<br />
uninitialized constant Admin::PermissionsController<br />
➥(ActionController::RoutingError)<br />
Ah, of course! You must create the controller for this link!<br />
THE PERMISSIONS CONTROLLER<br />
You can generate the Admin::PermissionsController file by running this command:<br />
rails g controller admin/permissions<br />
Along with an app/controllers/admin/permissions_controller.rb file, this command<br />
generates other goodies, such as a helper and a directory for the views at app/views/<br />
admin/permissions. Before you go further, you must modify this file to make the class<br />
inherit from the right place so that only admins can access it. Open the file, and<br />
change the first line to this:<br />
class Admin::PermissionsController < Admin::BaseController<br />
This line makes the controller inherit from the Admin::BaseController class, which<br />
restricts all actions in this controller to only admin users. When you run the feature<br />
again, the index action is missing from this controller:<br />
And I follow "Permissions"<br />
The action 'index' could not be found for Admin::PermissionsController<br />
Obviously, you need to define this action before you carry on. Inside this action, load<br />
all the permissions for the user you’re currently looking at, and then, with the view,<br />
display a page from which an admin can choose what permissions this user has on<br />
each project. It’d be helpful if this user was loaded by a before_filter because you’ll<br />
need it for the action that updates the permissions later. With all this in mind, update<br />
the entire controller to resemble the following listing.
Assigning permissions<br />
class Admin::PermissionsController < Admin::BaseController<br />
before_filter :find_user<br />
end<br />
Listing 8.15 app/controllers/admin/permissions_controller.rb<br />
def index<br />
@ability = Ability.new(@user)<br />
@projects = Project.all<br />
end<br />
private<br />
def find_user<br />
@user = User.find(params[:user_id])<br />
end<br />
The new Ability instance created here lets you check the user’s ability to perform<br />
specific actions on any project by simply calling this code:<br />
@ability.can?(:"view", @project)<br />
This syntax may look similar to the syntax used in TicketsController—it is. In that<br />
controller, you used the cannot? method, which is the opposite of the can? method.<br />
These methods are added to the controller by CanCan and are just shorter helper<br />
methods to do almost exactly what you did in this controller. The only difference is<br />
that you’re not acting on the current_user here, so you must define an Ability<br />
object yourself and use that instead.<br />
THE PERMISSIONS SCREEN<br />
Now that you have the index action up, you need to make its view look like what is<br />
shown in figure 8.5. Create a new file at app/views/admin/permissions/index.html.erb,<br />
and fill it with the content from the following listing.<br />
Figure 8.5 The permissions screen<br />
201
202 CHAPTER 8 More authorization<br />
Listing 8.16 app/views/admin/permissions/index.html.erb<br />
Permissions for <br />
:put do %><br />
<br />
<br />
Project<br />
<br />
<br />
<br />
<br />
<br />
<br />
<br />
<br />
<br />
<br />
<br />
<br />
<br />
<br />
<br />
<br />
<br />
<br />
<br />
This template defines the table discussed earlier. It provides a header row of permission<br />
titles and rows for each project containing that project’s name followed by check<br />
boxes for each of the permissions. In this view, you use the form_tag, which generates<br />
a form that points to the path specified by its first argument. You also use a<br />
permissions helper method B, which isn’t currently defined but will provide a list of<br />
permissions to iterate through to check on each project.<br />
Right underneath where you use permissions, you use another helper method<br />
called cycle B. This method is built into Rails and cycles through its given arguments<br />
for each iteration of whatever it’s encapsulated in, so when this page displays the first<br />
project, the method sets the class of that tr tag to odd and the second one to even. It<br />
cycles between these two classes until it runs out of projects. This is how you can easily<br />
get different rows in this table to be styled differently.<br />
Before we look at how to define the permissions method, run bin/cucumber<br />
cucumber features/assigning_permissions.feature:<br />
undefined local variable or method<br />
'update_user_permissions_path' [...]<br />
You get an error because you haven’t yet defined the route for the form. The<br />
Admin::PermissionsController serves a different purpose than the standard REST<br />
controllers. For this controller, you use the update action to update a whole slew of<br />
permissions rather than a single one. To map to this action by using the update<br />
B<br />
C
Assigning permissions<br />
method, you must define another named route in your config/routes.rb file using the<br />
put method:<br />
put '/admin/users/:user_id/permissions',<br />
:to => 'admin/permissions#update',<br />
:as => :update_user_permissions<br />
With this method, you define a new route for your application that will only respond<br />
to PUT requests to this route. The :user_id inside the route is a variable and is passed<br />
to the action as params[:user_id]. The controller and action are defined using the<br />
:to symbol, and finally the method itself is given a name with the :as option.<br />
Now when you run the feature again, this route method is defined, but the<br />
permissions method isn’t:<br />
And I follow "Permissions"<br />
undefined local variable or method 'permissions' [...]<br />
➥(ActionView::Template::Error)<br />
Great! It seems like your page just requires this permissions helper method.<br />
DEFINING A HELPER METHOD<br />
Back in chapter 6, you defined a helper method called admins_only in Application-<br />
Helper, which allowed you to show links only for admin users. This time, you define<br />
the permissions method, which contains a list of permissions to display check boxes<br />
on this page. Because this method is specific to views from the Admin ::Permissions-<br />
Controller controller, place it in app/helpers/admin/permissions _helper.rb and<br />
define it as shown in the following listing.<br />
Listing 8.17 app/helpers/admin/permissions_helper.rb<br />
module Admin::PermissionsHelper<br />
def permissions<br />
{<br />
"view" => "View"<br />
}<br />
end<br />
end<br />
This permissions method returns a hash containing only one key-value pair at the<br />
moment because you’re testing only one particular check box. You use this method to<br />
display all the permissions you want to be configurable by admins, and you revisit this<br />
method later to define more pairs. You use this method in your view twice; the first<br />
time, you iterate over it like this:<br />
<br />
<br />
<br />
When you iterate over a Hash object with the each method, the key for the hash<br />
becomes the first block variable and the value becomes the second block variable;<br />
these variables change for each key-value pair of the Hash object. In this case, it renders<br />
headers for the table in this view. You use this helper later in the view too:<br />
203
204 CHAPTER 8 More authorization<br />
<br />
<br />
<br />
<br />
<br />
Here you use just the key from the hash to define a uniquely identifiable name for this<br />
check box. The second argument is the value returned to the controller, which you<br />
use to determine whether or not this check box is checked. The third argument uses<br />
the @ability object to determine whether or not this check box is displayed as<br />
checked. By using this method, you get a tag like this:<br />
<br />
You’re given both the id and name attributes, which are generated from the first argument<br />
you passed to check_box_tag. The id attribute indicates not the permission’s ID<br />
but the ID of the project that you’re determining the permission is for. You use the id<br />
attribute shortly to check this box using Capybara and the parsed-into-params version<br />
of the name attribute just after that in your controller.<br />
When you run bin/cucumber features/assigning_permissions.feature again,<br />
you reach the following undefined step:<br />
When I check "View" for "TextMate 2"<br />
Undefined step: "I check "View" for "TextMate 2"" (Cucumber::Undefined)<br />
...<br />
When /^I check "([^"]*)" for "([^"]*)"$/ do |arg1, arg2|<br />
pending # express the regexp above with the code you wish you had<br />
end<br />
Take the snippet at the end of the output and put it in features/step_definitions/<br />
permission_steps.rb underneath the other step definitions but above the methods. You<br />
should end up with a step definition like this:<br />
When /^I check "([^"]*)" for "([^"]*)"$/ do |permission, name|<br />
project = Project.find_by_name!(name)<br />
permission = permission.downcase.gsub(" ", "_")<br />
field_id = "permissions_#{project.id}_#{permission}"<br />
steps(%Q{When I check "#{field_id}"})<br />
end<br />
For this step definition, you must first find the project by its name so you can get its ID,<br />
because a later part of this step that checks the permission check box requires the ID<br />
of the project to compile the ID for the fields. 3 Then you use the handy steps method<br />
you used in chapter 7 to call another step where you pass in the downcase’d and<br />
3 The project name won’t change, but the ID might, so you use the identifier that’s unlikely to change.
Assigning permissions<br />
gsub’d version of the permission string. The name passed in is the titleize’d version<br />
of the permission and should match the title in the permissions table heading.<br />
When you run this feature again, it passes because this step is defined and because<br />
it can check this check box, but it fails because the form tries to go to the update<br />
action inside Admin::PermissionsController, which doesn’t exist yet:<br />
And I press "Update"<br />
The action 'update' could not be found for Admin::PermissionsController<br />
This action’s a little tricky. Not only do you want it to add permissions for users, you<br />
also want to delete those permissions. 4 This action receives params[:permissions] in<br />
this Hash format from the form:<br />
{"1"=>{"view"=>"1"}}<br />
The first key is the ID of the project, and the hash inside contains the permissions for<br />
that project. If no check boxes are checked for that project, then no hash exists in<br />
params[:permissions] for it. Therefore, you use this hash to update the permissions<br />
that a user can do now, as shown in the following listing.<br />
Listing 8.18 update action inside app/controllers/admin/permissions_controller.rb<br />
def update<br />
@user.permissions.clear<br />
params[:permissions].each do |id, permissions|<br />
project = Project.find(id)<br />
permissions.each do |permission, checked|<br />
Permission.create!(:user => @user,<br />
:thing => project,<br />
:action => permission)<br />
end<br />
end<br />
flash[:notice] = "Permissions updated."<br />
redirect_to admin_user_permissions_path<br />
end<br />
You first clear all the users’ permissions using the association method clear. Next, you<br />
iterate through all the key-value pairs in params[:permissions] and find the project<br />
for each one. Then you iterate through the permissions for the parameter and create<br />
a new permission for every project. Finally, you set a flash[:notice] and redirect<br />
back to the permissions page. Now when you run this feature, the Sign Out link is<br />
missing:<br />
no link with title, id or text 'Sign out' found (Capybara::ElementNotFound)<br />
You didn’t add this link in chapter 7 because you didn’t need it, but in hindsight, you<br />
should have. Add this link now to app/views/layouts/application.html.erb directly<br />
under the Signed in as text:<br />
4 Which is possibly why the action is called update.<br />
205
206 CHAPTER 8 More authorization<br />
Signed in as <br />
<br />
:delete %><br />
This link now shows only to people who are signed in. The routing helper<br />
destroy_user_session_path is provided for free by Devise. When you rerun the<br />
Assigning Permissions feature with bin/cucumber features/assigning_permissions<br />
.feature, everything passes:<br />
1 scenario (1 passed)<br />
13 steps (13 passed)<br />
Great! You created a way for admins to choose which users can see which projects<br />
through an interface of check boxes and confirmed that users can see the project they<br />
have access to and can’t see the projects they aren’t authorized to see. Let’s run all the<br />
tests with rake cucumber:ok spec to make sure everything is working:<br />
41 scenarios (41 passed)<br />
389 steps (389 passed)<br />
# and<br />
26 examples, 0 failures, 11 pending<br />
All systems green! Let’s make a commit before you go any further:<br />
git add .<br />
git commit -m "Added permissions screen for admins"<br />
Next, you implement this feature for the other permissions used.<br />
8.8.2 And the rest<br />
Now that you have the foundation in place for this check box screen, you can add the<br />
rest of the permissions you’ve implemented. The next permission you implemented<br />
after the restriction of read access was the restriction of write access, restricting which<br />
users could and couldn’t perform the new and create actions on TicketsController.<br />
With an interface in place for admins to assign permissions through the backend, you<br />
should ensure that they can assign the permission to create tickets and that users to<br />
whom they assign this permission can perform that action.<br />
CREATING TICKETS<br />
Open features/assigning_permissions.feature, and add the scenario shown in the following<br />
listing right under the scenario currently in this file.<br />
Listing 8.19 features/assigning_permissions.feature<br />
Scenario: Creating tickets for a project<br />
When I check "View" for "TextMate 2"<br />
When I check "Create tickets" for "TextMate 2"<br />
And I press "Update"<br />
And I follow "Sign out"<br />
Given I am signed in as "user@ticketee.com"<br />
When I follow "TextMate 2"<br />
And I follow "New Ticket"
Assigning permissions<br />
And I fill in "Title" with "Shiny!"<br />
And I fill in "Description" with "Make it so!"<br />
And I press "Create"<br />
Then I should see "Ticket has been created."<br />
Just as in your first scenario, you check the View check box for the project. Otherwise,<br />
the user wouldn’t be able to see the project where the new ticket link was. Then you<br />
check the Create Tickets check box, update the user’s permissions, and sign out. Next,<br />
you sign in as that user and make sure you can do what you just gave that user permission<br />
to do. When you run this feature with bin/cucumber features/assigning<br />
_permissions.feature, the first step fails because it can’t find the check box:<br />
cannot check field, no checkbox with id, name,<br />
or label 'permissions_1_create_tickets' found (Capybara::ElementNotFound)<br />
Let’s add this check box then! Open app/helpers/admin/permissions_helper.rb, and<br />
add the permission to your hash, changing this method from<br />
def permissions<br />
{<br />
"view" => "View"<br />
}<br />
end<br />
to<br />
def permissions<br />
{<br />
"view" => "View",<br />
"create tickets" => "Create Tickets"<br />
}<br />
end<br />
Keep in mind that the key must match the intended action for the Permission object;<br />
the value is just a label for this permission. The action is what you use in your<br />
authorized? helpers around the application.<br />
When you another key-value pair in this hash, the code inside app/views/admin/<br />
permissions/index.html.erb automatically shows a check box for this new permission.<br />
When you run this feature again, it passes because this new check box is visible and<br />
the permission is applied correctly:<br />
2 scenarios (2 passed)<br />
35 steps (35 passed)<br />
Wasn’t that a piece of cake? Let’s move on to the next permission now: updating tickets.<br />
Actually, let’s do both updating tickets and deleting tickets at the same time.<br />
THE DOUBLE WHAMMY<br />
Just to show the world how great you are at developing this application, you’ll now<br />
write two scenarios and get them both to pass at the same time. Add both of these<br />
scenarios to the end of features/assigning_permissions.feature, as shown in the following<br />
listing.<br />
207
208 CHAPTER 8 More authorization<br />
Listing 8.20 features/assigning_permissions.feature<br />
Scenario: Updating a ticket for a project<br />
When I check "View" for "TextMate 2"<br />
And I check "Edit tickets" for "TextMate 2"<br />
And I press "Update"<br />
And I follow "Sign out"<br />
Given I am signed in as "user@ticketee.com"<br />
When I follow "TextMate 2"<br />
And I follow "Shiny!"<br />
And I follow "Edit"<br />
And I fill in "Title" with "Really shiny!"<br />
And I press "Update Ticket"<br />
Then I should see "Ticket has been updated"<br />
Scenario: Deleting a ticket for a project<br />
When I check "View" for "TextMate 2"<br />
And I check "Delete tickets" for "TextMate 2"<br />
And I press "Update"<br />
And I follow "Sign out"<br />
Given I am signed in as "user@ticketee.com"<br />
When I follow "TextMate 2"<br />
And I follow "Shiny!"<br />
And I follow "Delete"<br />
Then I should see "Ticket has been deleted."<br />
The scenarios should be descriptive enough to understand—no particular magic<br />
going on here. But you’re acting on a ticket in both these scenarios that doesn’t exist:<br />
the Shiny! ticket. You need to create this ticket in your Background if you want these<br />
scenarios to pass. Add this step definition right under the line in the Background that<br />
creates the TextMate 2 project, as shown next:<br />
And "user@ticketee.com" has created a ticket for this project:<br />
| title | description |<br />
| Shiny! | Eye-blindingly so |<br />
Now when you run this feature, your two newest scenarios are failing, both with similar<br />
errors:<br />
cannot check field, no checkbox with id, name,<br />
or label 'permissions_1_update_tickets' found<br />
# and<br />
cannot check field, no checkbox with id, name,<br />
or label 'permissions_1_delete_tickets' found<br />
Of course! You have no check boxes for Capybara to check yet! Add them now by changing<br />
the permissions method in app/helper/admin/permissions_helper.rb from this<br />
def permissions<br />
{<br />
"view" => "View",<br />
"create tickets" => "Create Tickets"<br />
}<br />
end
to this:<br />
Seed data<br />
def permissions<br />
{<br />
"view" => "View",<br />
"create tickets" => "Create Tickets",<br />
"edit tickets" => "Edit Tickets",<br />
"delete tickets" => "Delete Tickets"<br />
}<br />
end<br />
By adding these two permissions here, you display the check boxes that should make<br />
your scenarios all green. Let’s run the feature with bin/cucumber features/assigning<br />
_permissions.feature to find out:<br />
4 scenarios (4 passed)<br />
72 steps (72 passed)<br />
How great are you? Two features with one blow. Awesome stuff.<br />
That’s the final piece of the authorization puzzle. You now have a way for admins<br />
to assign permissions to users. But does everything work? Here’s hoping! Let’s run<br />
rake cucumber:ok spec:<br />
44 scenarios (44 passed)<br />
448 steps (448 passed)<br />
# and<br />
26 examples, 0 failures, 11 pending<br />
Awesome! Let’s commit this:<br />
git add .<br />
git commit -m "Added creating, editing, updating and deleting<br />
tickets to assigning permissions interface"<br />
git push<br />
Although it’s great that you now have an interface for assigning permissions, you<br />
don’t have a way to do it without first having an admin user set up. You can set up an<br />
admin user manually through the console, or you can do it by creating seed data.<br />
8.9 Seed data<br />
Seed data is records created for the purpose of providing the minimal viable requirements<br />
to get an application running. Before Rails 2.2, many applications implemented<br />
such records through using plugins such as seed_fu, but since 2.2, seed data is<br />
built in.<br />
Seed data allows you to create records for your application to provide a usable base<br />
if you or anybody else wants to get set up with the application quickly and easily. For<br />
your application’s seed data, you’ll create an admin user and an example project.<br />
From there, anybody using the admin user will be able to perform all the functions of<br />
the application.<br />
Seed data lives under db/seeds.rb, and you can run this file by running rake<br />
db:seed. The code for this rake task is this:<br />
load Rails.root + "db/seeds.rb"<br />
209
210 CHAPTER 8 More authorization<br />
The load method works in a similar fashion to require, loading and executing the<br />
code inside the file. One difference, however, is that load expects the given string (or<br />
Pathname) to be the full path, with the extension, to the file.<br />
First write a feature to ensure that when the seed data is loaded, you can sign in<br />
with the email admin@ticketee.com and the password password and you can get to the<br />
TicketeeBeta project. Put this feature in features/seed.feature, and write it as shown in<br />
the following listing.<br />
Listing 8.21 features/seed.feature<br />
Feature: Seed Data<br />
In order to fill the database with the basics<br />
As the system<br />
I want to run the seed task<br />
Scenario: The basics<br />
Given I have run the seed task<br />
And I am signed in as "admin@ticketee.com"<br />
Then I should see "Ticketee Beta"<br />
It’s a pretty basic feature, but your seed file will be equally basic. Before you create it,<br />
however, you should define the first step of this scenario. You can get the definition<br />
for this step by running bin/cucumber features/seed.feature. The step definition<br />
looks like this:<br />
Given /^I have run the seed task$/ do<br />
pending # express the regexp above with the code you wish you had<br />
end<br />
Put this step definition in a new file called features/step_definitions/<br />
application_steps.rb because it doesn’t really tie in with the other step files you’ve<br />
defined. If you have more steps like this, you can put them into this file later too. The<br />
code for this file is simple:<br />
Given /^I have run the seed task$/ do<br />
load Rails.root + "db/seeds.rb"<br />
end<br />
Now when you run your feature again, it can’t find the user your seed data is supposed<br />
to create:<br />
And I am signed in as "admin@ticketee.com"<br />
Couldn't find User with email = admin@ticketee.com<br />
➥(ActiveRecord::RecordNotFound)<br />
It can’t find this user because you haven’t yet created one for this scenario. This user<br />
should be created by the db/seeds.rbfile. Open this file now, and add a couple of lines<br />
to create this user, set the user up as an admin, and confirm the user, as shown in the<br />
following listing.
Listing 8.22 db/seeds.rb<br />
Seed data<br />
admin_user = User.create(:email => "admin@ticketee.com",<br />
:password => "password")<br />
admin_user.admin = true<br />
admin_user.confirm!<br />
Now run bin/cucumber features/seed.feature to ensure that you can sign in as this<br />
user. If you can, you should see the step passing and the next step failing:<br />
And I am signed in as "admin@ticketee.com"<br />
Then I should see "Ticketee Beta"<br />
Failed assertion, no message given. (MiniTest::Assertion)<br />
To get this last step of the scenario to pass, you must add the project to db/seeds.rb by<br />
putting this line in there:<br />
Project.create(:name => "Ticketee Beta")<br />
Your entire seeds file should look like the following listing.<br />
Listing 8.23 db/seeds.rb<br />
admin_user = User.create(:email => "admin@ticketee.com",<br />
:password => "password")<br />
admin_user.admin = true<br />
admin_user.confirm!<br />
Project.create(:name => "Ticketee Beta")<br />
This is all you need to get this feature to pass. Let’s run it now with bin/cucumber<br />
features/seed.feature to make sure:<br />
1 scenario (1 passed)<br />
3 steps (3 passed)<br />
Great! With this seeds file, you now have data to put in the database so you can bootstrap<br />
your application. Let’s run rake db:seed to load this data. Start your application’s<br />
server by typing rails server into a terminal, and then go to your server at<br />
http://localhost:3000 in your browser. Sign in as the admin user using the same email<br />
and password you set up in your seeds file. You should see the display shown in<br />
figure 8.6.<br />
When you’re signed in as a user, you should be<br />
able to do everything from creating a new ticket<br />
to creating a new user and setting up user permissions.<br />
Go ahead and play around with what you’ve<br />
created so far.<br />
When you’re done playing, run rake<br />
cucumber:ok spec for the final time this chapter: Figure 8.6 What admins see<br />
211
212 CHAPTER 8 More authorization<br />
45 scenarios (45 passed)<br />
451 steps (451 passed)<br />
# and<br />
26 examples, 0 failures, 11 pending<br />
Everything’s still green, which means it’s time for another commit:<br />
git add .<br />
git commit -m "Added a seeds file"<br />
git push<br />
Now you’re done!<br />
8.10 Summary<br />
This chapter covered implementing authorization for your application and setting up<br />
a permissions-based system for both the ProjectsController and TicketsController.<br />
You started with a Permission model, which you used in a scope on the Project<br />
model to show only the projects a user should be able to access. Then you used the<br />
CanCan plugin, which provided the can? and cannot? methods to use first in the controllers<br />
to stop users from accessing specified actions and then in the views, through<br />
the authorized? method, to stop users from seeing specified links.<br />
You implemented a way for admins to change the permissions of a user through<br />
the admin backend of the system by displaying a series of check boxes. Here you used<br />
an update action that wasn’t quite like the normal update action, and you had to<br />
define a custom-named route for it.<br />
Finally, you learned how to set up seed data for your application so you have a solid<br />
base of objects to work from. Without using seed data, you’d have to manually set up<br />
the data not only for your local development environment but also for your production<br />
server, which can be tedious. Seed data saves you that effort. You also wrote a test<br />
for this data in the form of a feature that ensures the data from the seed file is always<br />
created when the seed task is run.<br />
In chapter 9, you learn how to attach files to tickets. File uploading is an essential<br />
part of any ticket-tracking application because files can provide that additional piece of<br />
context required for a ticket, such as a screenshot, a patch, or any type of file. You also<br />
learn about restricting the availability of these files on the basis of users’ permissions.
This chapter covers<br />
� Uploading files to the app<br />
� Locking down file access based on declared<br />
permissions<br />
� Uploading multiple files using JavaScript, jQuery,<br />
and CoffeeScript<br />
213<br />
File uploading<br />
In chapter 9, you learned how to restrict access to specific actions in your application,<br />
such as viewing projects and creating tickets, by defining a Permission model<br />
that keeps track of which users have access to which actions.<br />
Ticketee’s getting pretty useful now. This chapter focuses on file uploading, the<br />
next logical step in a ticket-tracking application. Sometimes, when people file a<br />
ticket on an application such as Ticketee, they want to attach a file to provide more<br />
information for that ticket, because words alone can only describe so much. For<br />
example, a ticket description saying, “This button should move up a bit,” could be<br />
better explained with a picture showing where the button is now and where it<br />
should be. Users may want to attach any kind of file: a picture, a crash log, a text<br />
file, you name it. Currently, Ticketee has no way to attach files to the ticket: people<br />
would have to upload them elsewhere and then include a link with their ticket<br />
description.
214 CHAPTER 9 File uploading<br />
By providing Ticketee the functionality to attach files to the ticket, you provide the<br />
project owners a useful context that will help them more easily understand what the<br />
ticket creator means. Luckily, there’s a gem called Paperclip that allows you to implement<br />
this feature easily.<br />
Once you’re familiar with Paperclip, you’ll change your application to accept multiple<br />
files attached to the same ticket using a JavaScript library called Prototype (which<br />
comes with Rails) and some custom JavaScript code of your own. Because you’re using<br />
JavaScript, you have to alter the way you test parts of your application. To test<br />
JavaScript functionality, you’ll be using WebDriver, 1 which is a framework built for<br />
automatic control of web browsers. WebDriver is especially useful because you can use<br />
the same steps you use for standard Cucumber and Capybara tests and because Capybara<br />
will take care of driving the browser. By running the tests inside the browser, you<br />
ensure the JavaScript on the page will be executed, and then you can run the tests on<br />
the results. Pretty handy!<br />
Finally, you’ll see how you can restrict access to the files contained within the projects<br />
of your application so that confidential information isn’t shared with people who<br />
don’t have access to a particular project.<br />
File uploading is also useful in other types of applications. Suppose you wrote a<br />
Rails application for a book. You could upload the chapters to this application, and<br />
then people could provide notes on those chapters. Another example is a photo gallery<br />
application that allows you to upload images of your favorite cars for people to<br />
vote on. File uploading has many different uses and is a cornerstone of many Rails<br />
applications.<br />
9.1 Attaching a file<br />
You start off by letting users attach files when they begin creating a ticket. As<br />
explained before, files attached to tickets can provide useful context as to what feature<br />
a user is requesting or can point out a specific bug. A picture is worth a thousand<br />
words, as they say. It doesn’t have to be an image; it can be any type of file. This kind of<br />
context is key to solving tickets.<br />
To provide this functionality, you must add a file-upload box to the new ticket<br />
page, which allows users to select a file to upload. When the form is submitted, the file<br />
is submitted along with it. You use the Paperclip gem to store the file inside your application’s<br />
directory.<br />
9.1.1 A feature featuring files<br />
You first need to write a scenario to make sure the functionality works. This scenario<br />
shows you how to deal with file uploads when creating a ticket. Users should be able to<br />
create a ticket, select a file, and upload it. Then they should be able see this file, along<br />
with the other ticket details, on the ticket’s page. They may choose to click the filename,<br />
which would download the file. Let’s test all this by adding a scenario at the<br />
1 There’s a great post explaining WebDriver on the Google Open Source blog: http://google-opensource<br />
.blogspot.com/2009/05/introducing-webdriver.html.
Attaching a file<br />
bottom of features/creating_tickets.feature that creates a ticket with an attachment, 2 as<br />
shown in the following listing.<br />
Listing 9.1 features/creating_tickets.feature<br />
Scenario: Creating a ticket with an attachment<br />
When I fill in "Title" with "Add documentation for blink tag"<br />
And I fill in "Description" with "The blink tag has a speed attribute"<br />
And I attach the file "spec/fixtures/speed.txt" to "File"<br />
And I press "Create Ticket"<br />
B<br />
Attach file<br />
Then I should see "Ticket has been created."<br />
Then I should see "speed.txt" within "#ticket .asset"<br />
In this feature you introduce a new concept: the Attach the File step B of this scenario,<br />
which attaches the file found at the specified path to the specified field. The<br />
path here is deliberately in the spec/fixtures directory because you may use this file for<br />
functional tests later. This directory would usually be used for test fixtures, except that<br />
at the moment, you don’t have any. 3 Create the spec/fixtures/speed.txt file now, and<br />
fill it with some random filler text like this:<br />
The blink tag can blink faster if you use the speed="hyper" attribute.<br />
Try running this feature using bin/cucumber features/creating_tickets.feature<br />
:37 and see how far you get. It fails on the attaching step because the File field isn’t<br />
yet available:<br />
And I attach the file "spec/fixtures/speed.txt" to "File"<br />
cannot attach file, no file field with id, name,<br />
or label 'File' found (Capybara::ElementNotFound)<br />
Add the File field to the ticket form partial directly underneath the p tag for the<br />
description field using the code in the following listing.<br />
Listing 9.2 app/views/tickets/_form.html.erb<br />
<br />
<br />
<br />
<br />
You call this field asset internally, but the user will see File. The reason for this is<br />
explained a little later.<br />
In earlier versions of Rails, you were required to specify that this form is multipart.<br />
A multipart form should be used for any HTML form that contains a file-upload field.<br />
In earlier versions, if you didn’t enable this form setting, you’d only get the filename<br />
from the field rather than the file itself. In Rails 3.1, you don’t need to do this because<br />
it’s done automatically if the form uses the file_field. But it’s preferable to indicate<br />
2 Please note that although the blink tag was once a part of HTML, it should never be used. Same goes for the<br />
marquee tag.<br />
3 Nor will you ever, as factories replace them in your application.<br />
215
216 CHAPTER 9 File uploading<br />
that the form is multipart anyway, so you should do this now by changing the<br />
form_for line in app/views/tickets/_form.html.erb from this<br />
<br />
to this:<br />
{ :multipart => true } do |f| %><br />
Now we come to a very interesting point in implementing file uploading. When you<br />
run bin/cucumber features/creating_tickets.feature, all of the scenarios are<br />
broken and all for the same reason:<br />
And I press "Create Ticket"<br />
unknown attribute: asset (ActiveRecord::UnknownAttributeError)<br />
Because you added this file_field, the create action’s code dutifully tries to assign<br />
it as an attribute, only to find that it’s not defined and so causes this error. Rather than<br />
running a migration to add an attribute by this name, you use the Paperclip gem to<br />
handle it.<br />
9.1.2 Enter stage right, Paperclip<br />
Just as you would use a normal paperclip to attach paper files together, in your application<br />
you use the Paperclip gem to provide the attachment functionality you need<br />
for tickets. This gem was created by thoughtbot, 4 which has a whole slew of other useful<br />
gems, such as Hoptoad. 5<br />
To install Paperclip, you need to add a line to the Gemfile to tell Bundler that you<br />
want to use this gem. Put this underneath the line specifying the CanCan gem, separated<br />
by a line because it’s a different type of gem (CanCan has to do with users,<br />
paperclip has to do with files):<br />
gem 'cancan'<br />
gem 'paperclip'<br />
Next, you must run bundle install to install this gem.<br />
With Paperclip now installed, you can work on defining the asset attribute that<br />
your model wants. It’s not really an attribute; the error message is misleading in that<br />
respect. All it needs is a setter method (asset=) and it would be happy. But you need<br />
this method to do more than set an attribute on this object; you need it to accept the<br />
uploaded file and store it locally. Paperclip lets you define this fairly easily with its<br />
has_attached_file method. This method goes in the Ticket model, defines the setter<br />
method you need, and gives four application the ability to accept and process this<br />
file. Add it to your Ticket model with this line:<br />
has_attached_file :asset<br />
Now this asset= method is defined, but it’s not yet over!<br />
4 http://thoughtbot.com.<br />
5 For a full list of thoughtbot’s gems, see its GitHub page: http://github.com/thoughtbot.
9.1.3 Using Paperclip<br />
Attaching a file<br />
When you run bin/cucumber features/creating_tickets.feature again, you’re<br />
told your model is missing one more thing:<br />
When I press "Create Ticket"<br />
Ticket model missing required attr_accessor<br />
for 'asset_file_name' (Paperclip::PaperclipError)<br />
attr_accessor references a Ruby method that defines a setter and a getter method<br />
named after its arguments, such as in the following listing.<br />
Listing 9.3 attr_accessor example<br />
attr_accessor :foo<br />
# is the same as...<br />
def foo<br />
@foo<br />
end<br />
def foo=(value)<br />
@foo = value<br />
end<br />
These getter and setter methods are defined automatically by Active Model for the<br />
fields in your database. Paperclip wants the asset_file_name method defined on<br />
your Ticket instance’s method. asset_file_name is one of four methods used by<br />
Paperclip to track details about the file. The other methods are asset_content_type,<br />
asset_file_size, and asset_updated_at. To define the asset_file_name method<br />
and its siblings, create a migration that adds them as attributes of the Ticket model by<br />
running this command:<br />
rails g paperclip ticket asset<br />
This paperclip generator (provided by the Paperclip gem) adds the proper fields to<br />
your tickets table. You tell it you want the attachment to be called asset.<br />
By running this command, you get a new file in db/migrate that ends with<br />
_add_attachment_asset_to_ticket.rb. If you open this file now, you should see a prefilled<br />
migration, as shown in the following listing.<br />
Listing 9.4 db/migrate/[time]_add_attachment_asset_to_ticket.rb<br />
class AddAttachmentAssetToTicket < ActiveRecord::Migration<br />
def self.up<br />
add_column :tickets, :asset_file_name, :string<br />
add_column :tickets, :asset_content_type, :string<br />
add_column :tickets, :asset_file_size, :integer<br />
add_column :tickets, :asset_updated_at, :datetime<br />
end<br />
def self.down<br />
remove_column :tickets, :asset_file_name<br />
remove_column :tickets, :asset_content_type<br />
217
218 CHAPTER 9 File uploading<br />
remove_column :tickets, :asset_file_size<br />
remove_column :tickets, :asset_updated_at<br />
end<br />
end<br />
Remember that you call the field asset internally, but to the user, it’s called File? This<br />
column-naming convention is the reason for the different names. To ease confusion<br />
for people working on the application (you!), you call these fields with the asset prefix<br />
so that the column names are asset_file_name and not file_file_name. There’s<br />
also another reason, which is explained in section 9.2.<br />
To add these columns to your development environment’s database, run rake db<br />
:migrate. Then run rake db:test:prepare to add them to your test environment’s<br />
database. If you run the feature with bin/cucumber features/creating_tickets<br />
.feature, all the scenarios that were previously passing are still passing. But the scenario<br />
you just added fails with this error:<br />
Then I should see "speed.txt" within "#ticket .asset"<br />
You can see that the scenario failed because Capybara can’t find the text within this<br />
element on the TicketsController’s show page: this text and this element don’t<br />
exist! You need to add at least the filename for your scenario to pass, so add it underneath<br />
the spot in the show view where you currently have the following:<br />
Created by <br />
<br />
You must also wrap all the code in this view inside a div tag with the id attribute<br />
ticket and spice it up a little by adding the content type and file size there too, as<br />
shown in the following listing.<br />
Listing 9.5 app/views/tickets/show.html.erb<br />
Created by <br />
<br />
<br />
Attached File<br />
<br />
<br />
<br />
<br />
<br />
()<br />
<br />
<br />
Provide<br />
download link<br />
Here you use the exists? method defined on the asset method (which was defined<br />
by Paperclip and returns a Paperclip::Attachment object); the exists? method<br />
returns true if the file exists. You use it because you don’t want it trying to display the<br />
path or any other information of a file when there isn’t one.<br />
B
Attaching a file<br />
You use the url B method here with link_to to provide the user with a link to<br />
download 6 this file. In this case, the URL for this file would be something like http://<br />
localhost:3000/system/assets/1/original/file.txt.<br />
Where is this system route defined? Well, it’s not a route. It’s actually a directory<br />
inside the public folder of your application where Paperclip saves your files.<br />
Requests to files from the public directory are handled by the server rather than by<br />
Rails, and anybody who enters the URL in their browser can access them. This is bad<br />
because the files in a project should be visible only to authorized users. You’ll handle<br />
that problem a little later in the chapter.<br />
Underneath the filename, you display the size of the file, which is stored in the<br />
database as the number of bytes. To convert it to a human-readable output (such as<br />
“71 Bytes,” which will be displayed for your file), you use the number_to_human_size<br />
Action View helper.<br />
With the file’s information now being output in app/views/tickets/show.html.erb,<br />
this feature passes when you run bin/cucumber features/creating_tickets<br />
.feature:<br />
4 scenarios (4 passed)<br />
52 steps (52 passed)<br />
Awesome! Your files are being uploaded and taken care of by Paperclip, which stores<br />
them at public/system/assets. Let’s see if your changes have brought destruction or salvation<br />
by running rake cucumber:ok spec:<br />
46 scenarios (46 passed)<br />
466 steps (466 passed)<br />
# and<br />
26 examples, 0 failures, 11 pending<br />
What I will say when I get through this book! Let’s commit but not push this just yet:<br />
git add .<br />
git commit -m "Added the ability to attach a file to a ticket"<br />
Have a look at the commit output. It contains this line:<br />
create mode 100644 public/system/assets/1/original/speed.txt<br />
This line is a leftover file from your test and shouldn’t be committed to the repository<br />
because you could be testing using files much larger than this. You can tell Git to<br />
ignore the entire public/system directory by adding it to the .gitignore file. Open that<br />
file now and add this line to the bottom:<br />
public/system<br />
6 Some browsers open certain files as pages rather than downloading them. Modern browsers do so for .txt files<br />
and the like.<br />
219
220 CHAPTER 9 File uploading<br />
This file tells Git which files you don’t want versioned. The whole file should look like<br />
this now:<br />
.bundle<br />
db/*.sqlite3<br />
log/*.log<br />
tmp/**/*<br />
public/system<br />
By default, the .bundle directory (for Bundler’s configuration), the SQLite3 databases,<br />
the logs for the application, and any files in tmp are ignored. With public/system<br />
added, this directory is now ignored by Git too. You should also remove this<br />
directory from your latest commit, and thankfully, Git provides a way to do so by using<br />
these two commands:<br />
git rm public/system/assets/1/original/speed.txt<br />
git commit --amend -m "Added the ability to attach a file to a ticket"<br />
The first command removes the file from the filesystem and tells Git to remove it from<br />
the repository. The second command amends your latest commit to exclude this file,<br />
and it will be as if your first commit with this message never existed. Let’s push this<br />
change:<br />
git push<br />
Great! Now you can attach a file to a ticket. There’s still some work to do, however.<br />
What would happen if somebody wanted to add more than one file to a ticket? Let’s<br />
take a look at how to do that.<br />
9.2 Attaching many files<br />
You have an interface for attaching a single file to a ticket but no way for a user to<br />
attach more than one. Let’s imagine your pretend client asked you to boost the number<br />
of file-input fields on this page to three.<br />
If you’re going to add these three file-input fields to your view, you need some<br />
more fields in your database to handle them. You could define four fields for each fileupload<br />
field, but a much better way to handle this is to add another model.<br />
Creating another model gives you the advantage of being able to scale it to not just<br />
three file-input fields but more if you ever need them. Call this model Asset, after the<br />
name you gave to the has_attached_file in the Ticket model.<br />
When you’re done with this feature, you should see three fileupload<br />
fields as shown in figure 9.1.<br />
You can create new instances of this model through the ticket<br />
form by using nested attributes. Nested attributes have been a feature<br />
of Rails since version 2.3, and they allow the attributes of an associ-<br />
ation to be passed from the creation or update of a particular<br />
resource. In this case, you’ll be passing nested attributes for new<br />
Figure 9.1<br />
File-upload boxes
Attaching many files<br />
asset objects while creating a new Ticket model. The best part is that the code to do all<br />
of this remains the same in the controller.<br />
You need to modify the scenario for creating a ticket with an attachment in your<br />
Creating Tickets feature so it uploads two additional files.<br />
9.2.1 Two more files<br />
Let’s take the scenario for creating a ticket with an attachment from features/<br />
creating_tickets.feature and add these two additional file upload fields so the entire<br />
scenario looks like the following listing.<br />
Listing 9.6 File attachment scenario, features/creating_tickets.feature<br />
Scenario: Creating a ticket with an attachment<br />
When I fill in "Title" with "Add documentation for blink tag"<br />
And I fill in "Description" with "The blink tag has an undocumented<br />
➥speed attribute"<br />
And I attach the file "spec/fixtures/speed.txt" to "File #1"<br />
And I attach the file "spec/fixtures/spin.txt" to "File #2"<br />
And I attach the file "spec/fixtures/gradient.txt" to "File #3"<br />
And I press "Create Ticket"<br />
Then I should see "Ticket has been created."<br />
And I should see "speed.txt" within "#ticket .assets"<br />
And I should see "spin.txt" within "#ticket .assets"<br />
And I should see "gradient.txt" within "#ticket .assets"<br />
In this scenario, you attach three files to your ticket and assert that you see them<br />
within the assets element, which was previously called #ticket .asset but now has<br />
the pluralized name of #ticket .assets.<br />
You download only the one file here and check for the content. It’s not at all likely<br />
that the other two files wouldn’t work in the same way given that they’re interpreted<br />
and rendered identically.<br />
Now run this single scenario using bin/cucumber features/creating_tickets<br />
.feature:36. It should fail on the first Attach the File step, because you renamed the<br />
label of this field:<br />
And I attach the file "spec/fixtures/speed.txt" to "File #1"<br />
cannot attach file, no file field with id, name,<br />
or label 'File #1' found (Capybara::ElementNotFound)<br />
To get this step to pass, you can change the label on the field in app/views/tickets/<br />
_form.html.erb to "File #1":<br />
<br />
<br />
<br />
<br />
While you’re changing things, you may as well change app/views/tickets/<br />
show.html.erb to reflect these latest developments. First, change the if around the<br />
221
222 CHAPTER 9 File uploading<br />
asset field to use the assets method, because it’ll need to check the assets of a ticket<br />
rather than the asset. You also need to change the h3 that currently reads Attached<br />
File so it reads Attached Files because there’s more than one file. You should also<br />
change the div that encapsulates your assets to have the class attribute of assets.<br />
These three changes mean that you now have these three lines in app/views/tickets/<br />
show.html.erb:<br />
<br />
Attached Files<br />
<br />
When you call exists? this time, it calls the ActiveRecord::Base association method,<br />
which checks if there are any assets on a ticket and returns true if there are. Although<br />
assets isn’t yet defined, you can probably guess what you’re about to do.<br />
First, though, you need to change the lines underneath the ones you just changed<br />
to the following:<br />
<br />
<br />
<br />
<br />
<br />
<br />
<br />
<br />
Here you switch to using the assets method and iterate through each element in the<br />
array, rendering the same output as you did when you had a single asset.<br />
All of these changes combined will help your scenario pass, which is a great thing.<br />
When you run this scenario again, the first file field step passes, but the second fails:<br />
And I attach the file "spec/fixtures/speed.txt" to "File #1"<br />
And I attach the file "spec/fixtures/spin.txt" to "File #2"<br />
cannot attach file, no file field with id, name,<br />
or label 'File #2' found (Capybara::ElementNotFound)<br />
You could add another field:<br />
<br />
<br />
<br />
<br />
But that’s a messy way of going about it. The best way to handle this problem is<br />
through an associated model, a has_many association, and by using nested attributes. To<br />
use nested attributes in the view, you use the fields_for helper. This helper defines<br />
the fields for an association’s records, as many as you like. Let’s remove the file field<br />
completely and replace it with this:<br />
<br />
<br />
<br />
B Number increment
Attaching many files<br />
<br />
<br />
<br />
<br />
Directly before the fields_for call, you set a local variable called number, which is<br />
incremented whenever you render a label B.<br />
You use fields_for much in the same way you use form_for. You call fields_for<br />
on the f block variable from form_for, which tells it you want to define nested fields<br />
inside this original form. The argument to fields_for—:assets C—tells Rails the<br />
name of the nested fields.<br />
The file field inside this fields_for now has the name attribute of<br />
ticket[assets][asset] rather than simply ticket[asset], meaning it will be available<br />
in the controller as params[:ticket][:assets][:asset].<br />
When you run this scenario with bin/cucumber features creating_tickets<br />
.feature:36, it now fails because it still can’t find the second file-upload field:<br />
And I attach the file "spec/fixtures/spin.txt" to "File #2"<br />
cannot attach file, no file field with id, name,<br />
or label 'File #2' found (Capybara::ElementNotFound)<br />
To make this appear, you must define an assets association in your Ticket model so<br />
the fields_for in your view will provide file_fields for three new Asset objects. If<br />
this method is available and you’ve declared that your model accepts nested attributes<br />
for this association, fields_for iterates through the output from this method and<br />
renders the fields from fields_for for each element.<br />
You can define this assets method by defining a has_many association in your<br />
Ticket model:<br />
has_many :assets<br />
Underneath this has_many, you also define that a Ticket model accepts nested attributes<br />
for assets by using accepts_nested_attributes_for:<br />
accepts_nested_attributes_for :assets<br />
This little helper tells your model to accept asset attributes along with ticket attributes<br />
whenever you call methods like new, build, and update. It has the added bonus of<br />
switching how fields_for performs in your form, making it reference the association<br />
and calling the attributes it defines assets_attributes rather than assets.<br />
When you run the scenario with bin/cucumber features/creating_tickets<br />
.feature:38, you see again that the Asset is not defined:<br />
And I follow "New Ticket"<br />
uninitialized constant Ticket::Asset (ActionView::Template::Error)<br />
You’d best get onto that then!<br />
C The assets<br />
223
224 CHAPTER 9 File uploading<br />
9.2.2 Using nested attributes<br />
You used the term Asset rather than File throughout this application because of this<br />
model. You can’t define a File model because there’s already a File class in Ruby.<br />
Asset is an alternative name you can use. To define this Asset constant in your application,<br />
you can run the model generator:<br />
rails g model asset<br />
Each record for this model refers to a single file that has been uploaded to a ticket.<br />
Therefore, each record in the assets table must have the same asset_* fields that<br />
each tickets record currently has. Storing the asset references in the assets table<br />
now makes the references in the tickets table irrelevant, so you should remove them.<br />
You should also add a relationship between the asset records and the ticket records by<br />
adding a ticket_id field to the assets table. Open the migration this generates, and<br />
change it to the following listing to reflect these ideas.<br />
Listing 9.7 db/migrate/[date]_create_assets.rb<br />
class CreateAssets < ActiveRecord::Migration<br />
def change<br />
create_table :assets do |t|<br />
t.string :asset_file_name<br />
t.integer :asset_file_size<br />
t.string :asset_content_type<br />
t.datetime :asset_updated_at<br />
t.integer :ticket_id<br />
t.timestamps<br />
end<br />
[:asset_file_name,<br />
:asset_file_size,<br />
:asset_content_type,<br />
:asset_updated_at].each do |column|<br />
remove_column :tickets, column<br />
end<br />
end<br />
end<br />
Run this migration with rake db:migrate to migrate your development environment’s<br />
database, and then run rake db:test:prepare to migrate the test environment’s database.<br />
When you run the feature again with bin/cucumber features/creating<br />
_tickets.feature:36, your File #1 field is once again missing:<br />
And I attach the file "spec/fixtures/speed.txt" to "File #1"<br />
cannot attach file, no file field with id, name,<br />
or label 'File #1' found (Capybara::ElementNotFound)<br />
You’ve gone backward! Or so it seems.<br />
As mentioned earlier, fields_for detects that the assets method is defined on<br />
your Ticket object and then iterates through each object in this collection while rendering<br />
the fields inside fields_for for each. When you create a new ticket in
Attaching many files<br />
TicketsController’s new action, however, you don’t initialize any assets for this ticket,<br />
so assets returns an empty array and no fields at all are displayed.<br />
To get this action to render three file input fields, you must initialize three Asset<br />
objects associated to the Ticket object the form uses. Change your new action inside<br />
TicketsController to this:<br />
def new<br />
@ticket = @project.tickets.build<br />
3.times { @ticket.assets.build }<br />
end<br />
The final line of this action calls @ticket.assets.build three times, which creates<br />
the three Asset objects you need for your fields_for.<br />
When you run the scenario again, the three fields are available, but the scenario<br />
now fails because it can’t find a file to upload:<br />
And I attach the file "spec/fixtures/speed.txt" to "File #1"<br />
And I attach the file "spec/fixtures/spin.txt" to "File #2"<br />
And I attach the file "spec/fixtures/gradient.txt" to "File #3"<br />
And I press "Create Ticket"<br />
/home/you/ticketee/spec/fixtures/<br />
spin.txt file does not exist (RuntimeError)<br />
Create this spin.txt file now inside the spec/fixtures directory, and give it the following<br />
content:<br />
Spinning blink tags have a 200% higher click rate!<br />
You also need to add the gradient.txt file to the same directory, and it contains this:<br />
Everything looks better with a gradient!<br />
These two text pieces are random filler meant only to provide some text if you ever<br />
need to reference it. Let’s run the scenario again:<br />
And I press "Create Ticket"<br />
unknown attribute: asset (ActiveRecord::UnknownAttributeError)<br />
You got this message earlier when you were implementing single-file uploading<br />
because you didn’t define has_attached_file on the Ticket class. Let’s get more<br />
backtrace for this error by using the -b switch at the end of the command: bin/cucumber<br />
features/creating_tickets.feature:36 -b. This command provides the whole<br />
backtrace for an error. In this particular backtrace, you’re after anything to do with<br />
assets, because that’s the only thing that’s changed since this feature was passing. You<br />
should see a line like the following about 10 lines down:<br />
.../active_record/nested_attributes.rb:254:in 'assets_attributes='<br />
This line indicates that the failure most likely has to do with the assets_attributes=<br />
method, which was kindly enough provided by Rails through the call to<br />
accepts_nested_attributes_for. If this error occurs after the assets_attributes=<br />
method, then it definitely has to do with this method. In fact, it’s probably because<br />
225
226 CHAPTER 9 File uploading<br />
you haven’t yet defined the has_attached_file in the Asset model, right? Yup, you<br />
should do that!<br />
Open app/models/asset.rb, and add this line:<br />
has_attached_file :asset<br />
Remove the same line from app/models/ticket.rb because you no longer need it. Having<br />
this has_attached_file defined in the Asset model is probably all you need.<br />
You’ve had all three file fields displaying, and now you’ve got your Asset model set up<br />
to receive these files. When you run the scenario again using bin/cucumber features<br />
/creating_tickets.feature:38, it all passes:<br />
1 scenario (1 passed)<br />
18 steps (18 passed)<br />
Hooray, the scenario passed! In this section, you set up the form that creates new<br />
Ticket objects to also create three associated Asset objects by using nested attributes.<br />
This process was made possible by moving the responsibility of handling file uploads<br />
out of the Ticket model and into the associated Asset model.<br />
Let’s ensure that nothing is broken by running rake cucumber:ok spec:<br />
46 scenarios (46 passed)<br />
470 steps (470 passed)<br />
# and<br />
21 examples, 0 failures, 4 pending<br />
Awesome, let’s commit and push this:<br />
git add .<br />
git commit -m "Users can now upload 3 files at a time"<br />
git push<br />
Great. You’re done with nested attributes! Earlier, it was mentioned that the files<br />
uploaded to your application are publicly available for anybody to access because<br />
these files are in the public directory. Any file in the public directory is served up automatically<br />
by any Rails server, bypassing all the authentication and authorization in<br />
your application. This is a bad thing. What if one of the projects in your application<br />
has files that should be accessed only by authorized users?<br />
9.3 Serving files through a controller<br />
You can solve this issue by serving the uploaded files through a controller for your<br />
application. Using a before_filter similar to the one you used previously in the<br />
TicketsController, this controller will check that the user attempting to access a file<br />
has permission to access that particular project.<br />
When you implemented permission behavior before, you ensured that any unauthorized<br />
user would be blocked from accessing the resource you were trying to protect<br />
by writing a controller spec. You write this same kind of spec test for serving files.
9.3.1 Protecting files<br />
Serving files through a controller<br />
You first need to generate the controller through which you’ll serve the assets. Call it<br />
files, because assets is already reserved by Sprockets:<br />
rails g controller files<br />
Now write a spec to ensure that unauthorized users can’t see the files inside it. For this<br />
spec test, you must create two users, a project, a ticket, and an asset. The first user<br />
should have permission to read this project, and the second user shouldn’t.<br />
Open spec/controllers/files_controller_spec.rb, and add let definitions that set up<br />
your users, project, ticket, and asset inside the describe for FilesController, as<br />
shown in the following listing.<br />
Listing 9.8 spec/controllers/files_controller_spec.rb<br />
describe FilesController do<br />
let(:project) { Factory(:project) }<br />
let(:ticket) { Factory(:ticket, :project => project) }<br />
let(:good_user) { create_user! }<br />
let(:bad_user) { create_user! }<br />
let(:path) { Rails.root + "spec/fixtures/speed.txt" }<br />
let(:asset) do<br />
ticket.assets.create(:asset => File.open(path))<br />
end<br />
before do<br />
good_user.permissions.create!(:action => "view",<br />
:thing => project)<br />
end<br />
end<br />
You used a let for setting up a project, two users, a ticket for this project, a path to the<br />
file that’s served from the controller, and the asset for the ticket. This is the asset you’ll<br />
be serving from the controller for this spec test.<br />
You set up the permission in a before block because you won’t be referencing it<br />
anywhere in your tests, so having it as a let block wouldn’t work. You should use let<br />
blocks only when you’re going to be referencing them inside your tests. If you need<br />
code set up beforehand, you should use a before block instead.<br />
To serve the files from this controller, use the show action, using the id parameter<br />
to find the asset the user is requesting. When the application finds this asset, you want<br />
it to check that the user requesting the asset has permission to read the project this<br />
asset links to. The good_user object should be able to, and the bad_user object<br />
shouldn’t. Now add the spec to test the good_user’s ability to download this asset by<br />
using the code from the following listing.<br />
Listing 9.9 spec/controllers/assets_controller_spec.rb<br />
context "users with access" do<br />
before do<br />
227
228 CHAPTER 9 File uploading<br />
sign_in(:user, good_user)<br />
end<br />
it "can access assets in a project" do<br />
get 'show', :id => asset.id<br />
response.body.should eql(File.read(path))<br />
end<br />
end<br />
If you’re using Windows you may have to do this on the response.body line instead,<br />
because the line breaks on Windows are slightly different:<br />
response.body.gsub!(/\r\n?/, "\n").should eql(File.read(path))<br />
In this example, you sign in as the good_user by using another before block. Then<br />
you assert that when this user attempts to get this asset through the show action, the<br />
user should receive it as a response. Write another context and spec for the bad_user<br />
too, as shown in the following listing.<br />
Listing 9.10 spec/controllers/assets_controller_spec.rb<br />
context "users without access" do<br />
before do<br />
sign_in(:user, bad_user)<br />
end<br />
it "cannot access assets in this project" do<br />
get 'show', :id => asset.id<br />
response.should redirect_to(root_path)<br />
flash[:alert].should eql("The asset you were looking for<br />
➥could not be found.")<br />
end<br />
end<br />
Here you sign in as the bad_user and then deny all knowledge of the asset’s existence<br />
by redirecting to root and displaying an alert flash message. Let’s run these specs now<br />
with bin/rspec spec/controllers/assets_controller_spec.rb. Both examples<br />
complain:<br />
The action 'show' could not be found for FilesController<br />
Well, that’s no good. Now you need to define this show action.<br />
9.3.2 Showing your assets<br />
Open your FilesController file and define the show action, along with a<br />
before_filter to set the current_user variable, which you’ll need for permission<br />
checking. This code is shown in the following listing.<br />
Listing 9.11 app/controllers/files_controller.rb<br />
class FilesController < ApplicationController<br />
before_filter :authenticate_user!<br />
def show
Serving files through a controller<br />
asset = Asset.find(params[:id])<br />
send_file asset.asset.path, :filename => asset.asset_file_name,<br />
:content_type => asset.asset_content_type<br />
end<br />
end<br />
In this action, you find the Asset object by using the params[:id] the action receives.<br />
Then you use the asset object in combination with the send_file method to send<br />
the file back as a response rather than a view in your application.<br />
The first argument for send_file is the path to the file you’re sending. The next<br />
argument is an options hash used to pass in the filename and content_type options<br />
so the browser receiving the file knows what to call it and what type of file it is.<br />
To route requests to this controller, you need to define a route in your config/<br />
routes.rb file, which you can do with this line:<br />
resources :files<br />
When you run the specs for this controller again using bin/rspec spec/controllers<br />
/files_controller_spec.rb, the first spec passes, but the second one fails:<br />
FilesController users without access cannot access assets in this project<br />
...<br />
Expected response to be a , but was .<br />
The show action doesn’t redirect as this example expects because you’re not doing<br />
any permission checking in your action, which is what this example is all about:<br />
“users without access cannot access assets in this project.” To fix this problem,<br />
check that the user has permission to access this asset’s project by using the CanCan<br />
helpers you used in chapter 8. You can use them in your show action now, as shown in<br />
the following listing.<br />
Listing 9.12 app/controllers/files_controller.rb<br />
def show<br />
asset = Asset.find(params[:id])<br />
if can?(:view, asset.ticket.project)<br />
send_file asset.asset.path, :filename => asset.asset_file_name,<br />
:content_type => asset.asset_content_type<br />
else<br />
flash[:alert] = "The asset you were looking for could not be found."<br />
redirect_to root_path<br />
end<br />
end<br />
Now when you rerun these specs, you’re missing a method:<br />
undefined method 'ticket' for #<br />
This method is a simple belongs_to, which you must define inside the Asset model:<br />
belongs_to :ticket<br />
229
230 CHAPTER 9 File uploading<br />
When you rerun your specs, they both pass because the authorized user (good_user)<br />
can get a file and the unauthorized user (bad_user) can’t:<br />
2 examples, 0 failures<br />
Great! Now you’ve begun to serve the files from FilesController to only people who<br />
have access to the asset’s relative projects. There’s one problem, though: all users can<br />
still access these files without having to go through the FilesController.<br />
9.3.3 Public assets<br />
People can still get to your files as long as they have the<br />
link provided to them because the files are still stored<br />
in the public folder. Let’s see how this is possible by<br />
starting up the server using rails server, signing in,<br />
and creating a ticket. Upload the spec/fixtures/spin.txt<br />
file as the only file attached to this ticket. You should<br />
see a ticket like the one in figure 9.2.<br />
Hover over the spin.txt link on this page, and<br />
you’ll see a link like this:<br />
http://localhost:3000/system/assets/5/original/spin.txt?1282564953<br />
As you saw earlier in this chapter, this link is a route not to a controller in your application<br />
but to a file inside the public directory. Any file in the public directory is accessible<br />
to the public. Sensible naming schemes rock!<br />
If you copy the link to this file, sign out, and then paste the link into your browser<br />
window, you can still access it. These files need to be protected, and you can do that by<br />
moving them out of the public directory and into another directory at the root of your<br />
application called files. You should create this directory now.<br />
9.3.4 Privatizing assets<br />
Figure 9.2 A ticket with spin!<br />
You can make these files private by storing them in the files folder. You don’t have to<br />
move them there manually: you can tell Paperclip to put them there by default by<br />
passing the :path option to has_attached_file in app/models/asset.rb like this:<br />
has_attached_file :asset, :path => (Rails.root + "files/:id").to_s<br />
Now try creating another ticket and attaching the spec/fixtures/spin.txt file. This time<br />
when you use the link to access the file, you’re told there’s no route. This is shown in<br />
figure 9.3.<br />
Figure 9.3 No route!
Using JavaScript<br />
The URL generated for this file is incorrect because Paperclip automatically assumes<br />
all files are kept in the public folder. Because you changed the path of where the files<br />
are kept, the URL is out of sync. You should now tell Paperclip the new URL for your<br />
files, which is the URL for the show action for the FilesController:<br />
has_attached_file :asset, :path => (Rails.root + "files/:id").to_s,<br />
:url => "/files/:id"<br />
A great test to see if you can still see assets after this change is to run the scenario from<br />
features/creating_tickets.feature, which creates a ticket with three attachments and<br />
then opens one of them. Run bin/cucumber features/creating_tickets.feature<br />
:38 to see if this still works:<br />
1 scenario (1 passed)<br />
18 steps (18 passed)<br />
Great! With this feature still passing, the files are being served through the Files-<br />
Controller controller correctly. You’re done with implementing the functionality to<br />
protect assets from unauthorized access, so you should commit. First ensure that nothing<br />
is broken by running rake cucumber:ok spec:<br />
44 scenarios (44 passed)<br />
508 steps (508 passed)<br />
# and<br />
22 examples, 0 failures, 5 pending<br />
It’s great to see everything is still in working order. Now commit and push your<br />
changes:<br />
git add .<br />
git commit -m "Assets are now strictly served through FilesController"<br />
git push<br />
By serving these files through the FilesController, you can provide a level of control<br />
over who can see them and who can’t by allowing only those who have access to the<br />
asset’s project to have access to the asset.<br />
Inevitably, somebody’s going to want to attach more than three files to a ticket, and<br />
then what? Well, you could add more fields until people stop asking for them, or you<br />
could be lazy and code a solution to save time. This solution entails putting an Add<br />
Another File link underneath the final file field in your form that, when clicked, adds<br />
another file field. Users should be able to continue to do this ad infinitum. How do<br />
you implement this?<br />
You use JavaScript. That’s how.<br />
9.4 Using JavaScript<br />
You started this chapter with only one file field and then moved to three after you realized<br />
users may want to upload more than one file to your application. Although having<br />
three fields suits the purposes of many users, others may wish to upload yet more files.<br />
231
232 CHAPTER 9 File uploading<br />
You could keep adding file fields until all the users are satisfied, or you could be<br />
sensible about it and switch back to using one field and, directly underneath it, providing<br />
a link that, when clicked, adds another file field. Using this solution, you also<br />
clean up your UI a bit by removing possible extra file fields yet still allowing users to<br />
attach as many files as they like. This is where JavaScript comes in.<br />
When you introduce JavaScript into your application, you have to run any scenarios<br />
that rely on it through another piece of software called WebDriver. WebDriver is a<br />
browser driver, which was installed when the Capybara gem was installed, so you don’t<br />
have to do anything to set it up. Capybara without WebDriver won’t run JavaScript<br />
because it doesn’t support it by itself. By running these JavaScript-reliant scenarios<br />
through WebDriver, you ensure the JavaScript will be executed. One of the great<br />
things with this WebDriver and Capybara partnership is that you can use the same old,<br />
familiar Capybara steps to test JavaScript behavior.<br />
9.4.1 JavaScript testing<br />
Capybara provides an easy way to trigger WebDriver testing. You tag a scenario (or feature)<br />
with the @javascript tag, and it launches a new web browser window and tests<br />
your code by using the same steps as standard Capybara testing. Isn’t that neat? To tag<br />
a scenario, place @javascript above it. Let’s write a new scenario in the Creating<br />
Tickets feature for multifile uploading, as shown in the following listing.<br />
Listing 9.13 features/creating_tickets.feature<br />
@javascript<br />
Scenario: Creating a ticket with an attachment<br />
When I fill in "Title" with "Add documentation for blink tag"<br />
And I fill in "Description" with "The blank tag has an undocumented<br />
➥speed attribute"<br />
And I attach the file "spec/fixtures/speed.txt" to "File #1"<br />
And I follow "Add another file"<br />
And I attach the file "spec/fixtures/spin.txt" to "File #2"<br />
And I press "Create Ticket"<br />
Then I should see "Ticket has been created."<br />
And I should see "speed.txt" within "#ticket .assets"<br />
And I should see "spin.txt" within "#ticket .assets"<br />
When I follow "speed.txt"<br />
File<br />
field<br />
The @javascript tag at the top of this scenario tells Cucumber that the scenario uses<br />
JavaScript, so it should be run using WebDriver. Also in this scenario, you’ve filled in<br />
only one file field B because, as stated before, you’re going to reduce the number of<br />
initial file fields to one. After filling in this field, you follow the Add Another File link<br />
that triggers a JavaScript event, which renders the second file field that you can then<br />
fill in. The rest of this scenario remains the same: ensuring that the ticket is created C<br />
and that you can see the files inside the element with the class assets.<br />
When you run this scenario with bin/cucumber features/creating_tickets<br />
.feature:36, it fails because the Add Another File link doesn’t yet exist:<br />
C<br />
B<br />
Create<br />
ticket
Using JavaScript<br />
And I follow "Add another file"<br />
no link with title, id or text 'Add another file' found<br />
Before you fix it, however, let’s make the form render only a single asset field by<br />
changing this line in the new action in TicketsController<br />
3.times { @ticket.assets.build }<br />
to this:<br />
@ticket.assets.build<br />
By building only one asset to begin with, you show users that they may upload a file. By<br />
providing the link to Add Another File, you show them that they may upload more<br />
than one if they please. This is the best UI solution because you’re not presenting the<br />
user with fields they may not use.<br />
Now it’s time to make the Add Another File link exist and do something useful!<br />
9.4.2 Introducing jQuery<br />
The Add Another File link, when clicked, triggers an asynchronous call to an action,<br />
which renders a second file field.<br />
For the Add Another File link to perform an asynchronous request when it’s<br />
clicked, you can use the JavaScript framework called jQuery. In earlier versions of<br />
Rails, a JavaScript framework called Prototype came with it, but a large portion of the<br />
community prefers jQuery to Prototype. Developers can choose whether to use Prototype<br />
or jQuery or any other kind of JavaScript framework, but we use jQuery here<br />
because it’s favored in the community. 7<br />
To install jQuery in earlier versions of Rails, you would have had to go to http://<br />
jquery.com, download the latest version of jQuery, put it in your public/javascripts, and<br />
then include it in your application layout. Next, you would have had to install the<br />
jquery-rails gem. It was quite a lot of work for something that should have been<br />
simple!<br />
With Rails 3.1, you don’t need to download jQuery from the website or alter the<br />
default application in any way. With jquery-rails in the application’s Gemfile, you<br />
are already set up.<br />
Next, tell your application to include the JavaScript files from this gem if Rails hasn’t<br />
done it already. Currently, you have this line in your app/views/layouts/application<br />
.html.erb file:<br />
<br />
It generates HTML like this:<br />
<br />
<br />
7 Our choice totally has nothing to do with the fact that one of the authors is on the jQuery Core Team! We<br />
promise!<br />
233
234 CHAPTER 9 File uploading<br />
The /assets path here is handled by the sprockets gem, which comes standard with<br />
Rails 3.1. When this route is requested, the sprockets gem takes care of serving it. It<br />
begins by reading the assets/javascripts/application.js file, which specifies the following<br />
things:<br />
// FIXME: Tell people that this is a manifest file, real code should go<br />
➥into discrete files<br />
// FIXME: Tell people how Sprockets and CoffeeScript works<br />
//<br />
//= require jquery<br />
//= require jquery_ujs<br />
//= require_tree .<br />
The lines prefixed with // are comments, but the lines prefixed with //= are directives<br />
that tell Sprockets what to do. These directives require the jquery and jquery_ujs files<br />
from the jquery-rails gem. The jquery file is the jQuery framework itself, whereas<br />
the jquery-ujs file provides unobtrusive JavaScript helpers for things such as the confirmation<br />
box that pops up when you click on a link, which was defined using link_to’s<br />
:confirm helper.<br />
Rails has already required all the JavaScript files you need to get started here. Let’s<br />
define the Add Another File link now.<br />
9.4.3 Adding more files with JavaScript<br />
You must add the Add Another File link to your tickets form at app/views/tickets/<br />
_form.html.erb. Put it underneath the end for the fields_for so it’s displayed below<br />
existing file fields:<br />
true,<br />
:update => "files",<br />
:position => "after"<br />
%><br />
B Remote<br />
C Update<br />
D Position<br />
Here you use the link_to method to define a link, and you pass some options to it.<br />
The first option is :remote => true B, which tells Rails you want to generate a link<br />
that uses JavaScript to make a background request, called an asynchronous request, to<br />
the server. More precisely, the request uses the JavaScript provided by the jqueryujs.js<br />
file that came with the jquery-rails gem.<br />
This request then responds with some content, which is dealt with by the :update<br />
C and :position D options. The first option, :update, tells Rails to tell the JavaScript<br />
that handles the response that you want to insert the content from the background<br />
request into the element with the id attribute of files. The second, :position, tells it<br />
that you want to insert the content after any other content in the element, which would<br />
make your second file field appear after the first file field.
Using JavaScript<br />
The element this updates doesn’t currently exist, but you can easily create it by<br />
wrapping the fields_for inside a div with the id attribute set to files, as shown in<br />
the following listing.<br />
Listing 9.14 app/views/tickets/_form.html.erb<br />
<br />
number do |asset| %><br />
<br />
<br />
<br />
<br />
<br />
<br />
This div tag provides an element for your new link_to to insert a file field into. If you<br />
run this scenario with bin/cucumber features/creating_tickets.feature:36, the<br />
step that follows the Add Another File link passes, but the file field is still not visible:<br />
And I follow "Add another file"<br />
And I attach the file "spec/fixtures/spin.txt" to "File #2"<br />
cannot attach file, no file field with id, name, or label 'File #2'<br />
The Add Another File link currently uses the new_file_path helper, which generates<br />
a route such as /files/new. This route points to the new action in FilesController.<br />
This action isn’t defined at the moment, so the feature won’t work. Therefore, the<br />
next step is to define the action you need.<br />
9.4.4 Responding to an asynchronous request<br />
The job of the new action inside the FilesController is to render a single file field<br />
for the ticket form so users may upload another file. This action needs to render the<br />
fields for an asset, which you already do inside app/views/tickets/_form.html.erb by<br />
using these lines:<br />
<br />
<br />
<br />
<br />
<br />
<br />
<br />
<br />
To re-use this code for the new action in FilesController, move it into a partial<br />
located at app/views/files/_form.html.erb.<br />
In app/views/tickets/_form.html.erb, you can replace the lines with this simple<br />
line:<br />
"files/form",<br />
:locals => { :number => number } %><br />
235
236 CHAPTER 9 File uploading<br />
When you pass the :locals option to render, you can set local variables that can be<br />
used in the partial. Local variables in views are usable only in the views or partials in<br />
which they’re defined unless you pass them through by using this :locals. You pass<br />
through the number of your file field and the asset object provided by fields_for<br />
:assets.<br />
To get the new action to render this partial, you can use the same code in the new<br />
action in FilesController but with a small change:<br />
def new<br />
asset = Asset.new<br />
render :partial => "files/form",<br />
:locals => { :asset => asset }<br />
end<br />
Here you must pass the name of the partial using the :partial option so the controller<br />
will attempt to render a partial. If you left it without the option, the controller<br />
would instead try to render the template at app/views/files/form.html.erb, which<br />
doesn’t exist.<br />
Before this line, you need to set up the asset variable that you reference. Add<br />
these two lines directly above the first line inside the new action:<br />
@ticket = Ticket.new<br />
asset = @ticket.assets.build<br />
Because the Ticket object for your form is only a new record, it isn’t important precisely<br />
what object it is: all new Ticket objects are the same until they’re saved to the<br />
database and given a unique identifier. You can exploit this by creating another<br />
Ticket object and building your new asset from it.<br />
It makes sense to do this because in your app/views/files/_form.html.erb file, you<br />
still reference the now-nonexistent f variable, which came from form_for @ticket in<br />
app/views/tickets/new.html.erb. Again, you can exploit the fact that all new Ticket<br />
objects are the same and use a fields_for instead of a form_for in this partial to get<br />
it to give the file field a proper name. Without this fields_for, the name of the field<br />
would be something like asset[asset], and you need it to be something more like<br />
ticket[asset_attributes][0][asset]. Now change the app/views/files/_form<br />
.html.erb partial to look like the following listing.<br />
Listing 9.15 app/views/files/_form.html.erb<br />
<br />
number do |asset| %><br />
<br />
<br />
<br />
<br />
<br />
<br />
The @ticket object here could either be from the new action in the Tickets-<br />
Controller or from the new action in the FilesController: it doesn’t matter.
Using JavaScript<br />
What does matter here is the number variable that identifies the number of file<br />
fields you are currently up to. You specify the child_index option in your fields_for<br />
so that each time these fields are rendered, they’re given different identifiers. The<br />
assets form partial gets this number variable only from the tickets partial; you’ve yet to<br />
set up a way the new action sets this variable. Without this variable set in the new<br />
action, you can’t render the app/views/files/_form.html.erb for a new asset without<br />
knowing what number you’re up to. Let’s set that up now.<br />
9.4.5 Sending parameters for an asynchronous request<br />
The number variable indicates what file field you are up to, so you need a way to tell<br />
the new action in FilesController how many file fields are currently on the page.<br />
Previous versions of Rails had an option for this called :with, which has now, unfortunately,<br />
been removed. No matter, you can do it in JavaScript. It’s better to put this<br />
code in JavaScript anyway, because it’ll already be using some to determine the number<br />
to pass through. Rather than using pure JavaScript, you’ll be using CoffeeScript,<br />
which comes with Rails 3.1 but can be used in any other language. Let’s learn some<br />
CoffeeScript now.<br />
LEARNING COFFEESCRIPT<br />
CoffeeScript is, in the words of its website, “a little language that compiles into<br />
JavaScript.” It’s written in a simple syntax, like this:<br />
square = (x) -> x * x<br />
This code compiles into the following JavaScript code:<br />
var square;<br />
square = function(x) {<br />
return x * x;<br />
};<br />
In the CoffeeScript version, you define a variable called square. Because this isn’t yet<br />
initialized, it is set up using var square; in the JavaScript output. You assign a function<br />
to this variable, specifying the arguments using parentheses (x) and then specifying<br />
the code of the function after ->. The code inside the function in this case is<br />
converted into literal JavaScript, making this function take an argument, multiply it by<br />
itself, and return the result.<br />
Although this is a pretty basic example of CoffeeScript, it shows off its power. What<br />
you would write on four lines of JavaScript requires just one line of extremely easy-tounderstand<br />
CoffeeScript.<br />
Each time you generate a controller using Rails, a new file called app/assets/<br />
javascripts/[controller_name].js.coffee is created. 8 This file is created so you have a<br />
location to put CoffeeScript code that is specific to views for the relevant controller.<br />
This is really helpful in your situation, because you’re going to use some CoffeeScript<br />
to tell your Add Another File link what to do when it’s clicked.<br />
8 If you have the coffee-rails gem in your Gemfile.<br />
237
238 CHAPTER 9 File uploading<br />
Open app/assets/javascripts/tickets.js.coffee, and we’ll build up your function line<br />
by line so you can understand what you’re doing. Let’s begin by putting this line first:<br />
$(-><br />
It seems like a random amalgamation of characters, but this line is really helpful. It<br />
calls the jQuery $ 9 function and passes it a function as an argument. This line runs the<br />
function only when the page has fully loaded. 10 You need this because the JavaScript<br />
otherwise would be executed before the link you’re going to be referencing is loaded.<br />
Let’s add a second line to this:<br />
$(-><br />
$('a#add_another_file').click(-><br />
This line uses jQuery’s $ function to select an element on the page called a, which has<br />
an id attribute of add_another_file that will soon be your Add Another File link. This<br />
would happen only after the page is ready. After this, you call the click function on it<br />
and pass it a function that runs when you click on this link. Let’s now add a third line:<br />
$(-><br />
$('a#add_another_file').click(-><br />
url = "/files/new?number=" + $('#files input').length<br />
The double-space indent here indicates to CoffeeScript that this code belongs inside<br />
the function passed to click. 11 Here, you define a variable called url, which will be<br />
the URL you use to request a new file field on your page. At the end of this URL you<br />
specify the number parameter with some additional jQuery code. This code selects all<br />
the input elements inside the element on the page with the id attribute of files<br />
and stores them in an array. To find out how many elements are in that array, you<br />
call length on it. The URL for the first time you click this link would now look something<br />
like /files/new?number=1, indicating that you already have one file field on<br />
your page.<br />
Let’s make the fourth line now:<br />
$(-><br />
$('a#add_another_file').click(-><br />
url = "/files/new?number=" + $('#files input').length<br />
$.get(url,<br />
This line is pretty simple; you call the jQuery function $, and then call the get 12 function<br />
on it, which starts an asynchronous request to the specified URL that is the first<br />
argument here, using the variable you set up on the previous line. Another line:<br />
$(-><br />
$('a#add_another_file').click(-><br />
url = "/files/new?number=" + $('#files input').length<br />
9 Aliased from the jQuery function: http://api.jquery.com/jquery/.<br />
10 For the meaning of “loaded,” see this: http://api.jquery.com/ready<br />
11 http://api.jquery.org/click.<br />
12 http://api.jquery.com/jQuery.get.
$.get(url,<br />
(data)-><br />
Using JavaScript<br />
This line is indented another two spaces again, meaning it is going to be an argument<br />
for the get function. This line defines a new function with an argument called data,<br />
which is called when the asynchronous request completes, with the data argument<br />
being the data sent back from the request. One more line:<br />
$(-><br />
$('a#add_another_file').click(-><br />
url = "/files/new?number=" + $('#files input').length<br />
$.get(url,<br />
(data)-><br />
$('#files').append(data)<br />
This final line takes the data received from the request and appends 13 it to the end of<br />
the element that has the id attribute of files on this page. That’s the one with the<br />
single file-input field currently.<br />
Finally, you need to close these functions you’ve defined, which you can do with<br />
three closing parentheses matching the levels of indentation, finalizing your code as<br />
this:<br />
$(-><br />
$('a#add_another_file').click(-><br />
url = "/files/new?number=" + $('#files input').length<br />
$.get(url,<br />
(data)-><br />
$('#files').append(data)<br />
)<br />
)<br />
)<br />
That’s all there is to it! When your server receives a request at /assets/application.js,<br />
the request will be handled by the Sprockets gem. The Sprockets gem will then combine<br />
jquery, jquery_ujs, and app/assets/javascripts/tickets.js.coffee into one JavaScript<br />
file, parsing the CoffeeScript into the following JavaScript:<br />
$(function() {<br />
return $('a#add_another_file').click(function() {<br />
var url;<br />
url = "/files/new?number=" + $('#files input').length;<br />
return $.get(url, function(data) {<br />
return $('#files').append(data);<br />
});<br />
});<br />
});<br />
In the production environment, this file is compiled upon the first request and then<br />
cached to save valuable processing time.<br />
13 http://api.jquery.com/append.<br />
239
240 CHAPTER 9 File uploading<br />
This is a little more verbose than the CoffeeScript and another great demonstration<br />
of how CoffeeScript allows you to write more with less. For more information and<br />
usage examples of CoffeeScript, see the CoffeeScript site: http://coffeescript.org.<br />
Let’s now give your link the id attribute that’s required to get this working so we<br />
can move on.<br />
PASSING THROUGH A NUMBER<br />
Open your app/views/tickets/_form.html.erb and replace the code for your Add<br />
Another File link with this:<br />
"add_another_file" %><br />
This gives the element the id attribute you require. Let’s witness this JavaScript in<br />
action now by running rails server to start up a server, signing in using the email<br />
address user@ticketee.com and the password password, and then creating a ticket on a<br />
project. Clicking the Add Another File link results in an error that you’ll fix shortly.<br />
Click it anyway. Afterward, go back to the window where rails server is running.<br />
This window shows information such as queries and results for every request, but<br />
you’re only interested in the last request made. This request should begin with the following<br />
line:<br />
Started GET "/files/new?number=1...<br />
This line tells you that Rails has begun serving a GET request to the /files/new route<br />
with a bunch of URL parameters. Your number parameter is the first one in this example.<br />
The following lines show the URL that was requested as well as what action and<br />
controller served this request:<br />
Started GET "/files/new?number=1" for 127.0.0.1 at [timestamps]<br />
Processing by FilesController#new as */*<br />
Parameters: {"number"=>"1"}<br />
The line you’re most interested in is the third line:<br />
Parameters: {"number"=>"1", ... }<br />
This is the params hash output in a semi-human-readable format. Here you can see it<br />
has the number parameter, so you can use this inside the new action. With all this in<br />
mind, you can change how you render the partial in the new action inside Files-<br />
Controller to this:<br />
render :partial => "files/form",<br />
:locals => { :number => params[:number].to_i,<br />
:asset => asset }<br />
You must convert the number parameter to an integer using the to_i method because<br />
it’ll be a String when it comes from params. It needs to be a Fixnum so the partial can<br />
add 1 to it.
Summary<br />
Now if you refresh this page and attempt to upload two files, you should see that it<br />
works. Does your scenario agree? Let’s find out by running bin/cucumber features/<br />
creating_tickets.feature:38:<br />
1 scenario (1 passed)<br />
18 steps (18 passed)<br />
Yup, all working! Great. You’ve switched the ticket form back to only providing one<br />
file field but providing a link called Add Another File, which adds another file field on<br />
the page every time it’s clicked. You originally had implemented this link using the<br />
:remote option for link_to, but switched to using CoffeeScript when you needed to<br />
pass the number parameter through. A couple of other small changes, and you got it<br />
all working very neatly again!<br />
This is a great point to see how the application is faring before committing. Let’s<br />
run the tests with rake cucumber:ok spec. You should see the following:<br />
46 scenarios (46 passed)<br />
469 steps (469 passed)<br />
# and<br />
30 examples, 0 failures, 13 pending<br />
Awesome! Let’s commit it:<br />
git add .<br />
git commit -m "Provide an 'Add another file link' that uses Javascript<br />
so that users can upload more than one file"<br />
git push<br />
This section showed how you can use JavaScript and CoffeeScript to provide the user<br />
with another file field on the page using some basic helpers. JavaScript is a powerful<br />
language and is a mainstay of web development that has gained a lot of traction in<br />
recent years thanks to libraries such as the two you saw here, jQuery and CoffeeScript,<br />
as well as others such as Prototype and Raphael.<br />
By using JavaScript, you can provide some great functionality to your users. The<br />
best part? Just as you can test your Rails code, you can make sure JavaScript is working<br />
by writing tests that use WebDriver.<br />
9.5 Summary<br />
This chapter covered two flavors of file uploading: single-file uploading and multiplefile<br />
uploading.<br />
You first saw how to upload a single file by adding the file_field helper to your<br />
view, making your form multipart, and using the Paperclip gem to handle the file<br />
when it arrives in your application.<br />
After you conquered single-file uploading, you tackled multiple-file uploading.<br />
You off loaded the file handling to another class called Asset, which kept a record for<br />
each file you uploaded. You passed the files from your form by using nested attributes,<br />
which allowed you to create Asset objects related to the ticket being created through<br />
the form.<br />
241
242 CHAPTER 9 File uploading<br />
After multiple-file uploading, you learned how to restrict which files are served<br />
through your application by serving them through a controller. By using a controller,<br />
you can use CanCan’s can? helper to determine if the currently signed-in user has<br />
access to the requested asset’s project. If so, then you give the user the requested asset<br />
using the send_file controller method. If not, you deny all knowledge of the asset<br />
ever having existed.<br />
Finally, you used a JavaScript library called jQuery, in combination with a simpler<br />
way of writing JavaScript called CoffeeScript, to provide users with an Add Another<br />
File link. jQuery does more than simple asynchronous requests, though, and if you’re<br />
interested, the documentation 14 is definitely worth exploring.<br />
In the next chapter, we look at giving tickets a concept of state, which enables users<br />
to see which tickets need to be worked on and which are closed. Tickets will also have<br />
a default state so they can be easily identified when they’re created.<br />
14 http://jquery.com.
This chapter covers<br />
� Adding a state-tracking ability to a model<br />
� Using callbacks within Active Record<br />
� Preventing basic form hacking<br />
243<br />
Tracking state<br />
In a ticket-tracking application such as Ticketee, tickets aren’t there to provide<br />
information about a particular problem or suggestion; rather, they’re there to provide<br />
the workflow for it. The general workflow of a ticket is that a user will file it and<br />
it’ll be classified as a “new” ticket. When the developers of the project look at this<br />
ticket and decide to work on it, they’ll switch the state on the ticket to “open” and,<br />
once they’re done, mark it as “resolved.” If a ticket needs more information on it<br />
then they’ll add another state, such as “needs more info.” A ticket could also be a<br />
duplicate of another ticket or it could be something that the developers determine<br />
isn’t worthwhile putting in. In cases such as this, the ticket may be marked as<br />
“duplicate” or “invalid,” respectively.<br />
The point is that tickets have a workflow, and that workflow revolves around<br />
state changes. You’ll allow the admin users of this application to add states, but not<br />
to delete them. The reason for this is if an admin were to delete a state that was
244 CHAPTER 10 Tracking state<br />
used, then you’d have no record of that state ever existing. It’s best if, once states are<br />
created and used on a ticket, they can’t be deleted. 1<br />
To track the states, you’ll let users leave a comment. With a comment, users will be<br />
able to leave a text message about the ticket and may also elect to change the state of<br />
the ticket to something else by selecting it from a drop-down box. But not all users will<br />
be able to leave a comment and change the state. You’ll protect both creating a comment<br />
and changing the state.<br />
By the time you’re done with all of this, the users of your application will have the<br />
ability to add comments to your tickets. Some users, due to permission restriction, will<br />
be able to change the state of a ticket through the comment interface.<br />
You’ll begin with creating that interface for a user to create a comment and then<br />
build on top of that the ability for the user to change the state of a ticket while adding<br />
a comment. Let’s get into it.<br />
10.1 Leaving a comment<br />
Let’s get started by adding the ability to leave<br />
a comment. When you’re done you will have<br />
a simple form that looks like figure 10.1.<br />
To get started with this you’ll write a<br />
Cucumber feature that goes through the<br />
process of creating a comment. When you’re<br />
done with this feature, you will have a comment<br />
form at the bottom of the show action<br />
for the TicketsController which you’ll<br />
then use as a base for adding your state dropdown<br />
box later on. Put this feature in a new<br />
file at features/creating_comments.feature,<br />
and make it look like the following listing.<br />
Listing 10.1 features/creating_comments.feature<br />
Feature: Creating comments<br />
In order to update a ticket's progress<br />
As a user<br />
I want to leave comments<br />
Figure 10.1 The comment form<br />
Background:<br />
Given there are the following users:<br />
| email | password |<br />
| user@ticketee.com | password |<br />
And I am signed in as them<br />
And there is a project called "Ticketee"<br />
And "user@ticketee.com" can view the "Ticketee" project<br />
And "user@ticketee.com" has created a ticket for this project:<br />
1 Alternatively, these states could be moved into an “archive” state of their own so they couldn’t be assigned to<br />
new tickets but still would be visible on older tickets.
Leaving a comment<br />
| title | description |<br />
| Change a ticket's state | You should be able to create a comment |<br />
Given I am on the homepage<br />
And I follow "Ticketee"<br />
Scenario: Creating a comment<br />
When I follow "Change a ticket's state"<br />
And I fill in "Text" with "Added a comment!"<br />
And I press "Create Comment"<br />
Then I should see "Comment has been created."<br />
Then I should see "Added a comment!" within "#comments"<br />
Scenario: Creating an invalid comment<br />
When I follow "Change a ticket's state"<br />
And I press "Create Comment"<br />
Then I should see "Comment has not been created."<br />
And I should see "Text can't be blank"<br />
Here you navigate from the homepage to the ticket page by following the respective<br />
links, fill in the box with the label Text, and create your comment. You’ve put the link<br />
to the ticket inside the scenarios rather than the Background because you’ll use this<br />
feature for permission checking later on. Let’s try running this feature now by running<br />
bin/cucumber features/creating_comments.feature.<br />
10.1.1 Where’s the ticket?<br />
You’ll see that, after it follows the Ticketee link on the page, it can’t find the ticket.<br />
What?<br />
And I follow "Change a ticket's state"<br />
no link with title, id or text 'Change a ticket's state'<br />
found (Capybara::ElementNotFound)<br />
Uh oh, something’s gone wrong and for some reason Capybara can’t find the link.<br />
Before the failing step in the scenario you put this line:<br />
Then show me the page<br />
This step will show the exact page that Capybara sees when it tries to follow this link,<br />
providing a certain gem is installed. If you run this feature by using bin/cucumber<br />
features/creating_comments.feature, you’ll be told to install the launchy gem:<br />
Sorry, you need to install launchy to open pages: `gem install launchy`<br />
WARNING Launchy is known to be problematic on Windows and just may<br />
not work at all. As a replacement, you may have to manually open the<br />
pages created in the tmp directory called capybara-[date].<br />
Launchy is the gem responsible for launching the browser to show you the page.<br />
Launchy also provides a common cross-platform of launching different applications.<br />
Rather than installing this using gem install launchy, you’ll add this to your Gemfile<br />
inside the cucumber group because you only need this gem for your Cucumber features.<br />
The whole cucumber group for your Gemfile should now look like this:<br />
245
246 CHAPTER 10 Tracking state<br />
group :test do<br />
gem 'cucumber-rails'<br />
gem 'capybara'<br />
gem 'database_cleaner'<br />
gem 'factory_girl'<br />
gem 'email_spec'<br />
gem 'launchy'<br />
end<br />
When you run bundle install, it will install the launchy gem for you. Let’s rerun<br />
your feature again. This time, a page pops up with your home page, as shown in<br />
figure 10.2.<br />
See how there are two Ticketee links on this page? Capybara’s dutifully following<br />
your instruction to click the Ticketee link, and it clicks the first link it finds on the<br />
page! You want it to click the second link. Let’s change the line in your features/<br />
creating_comments.feature that follows this link to the following:<br />
And I follow "Ticketee" within "#projects"<br />
Here you use the within version of this step which will look up the link within the element<br />
with the id attribute set to “projects.” No element currently has this attribute, so<br />
let’s preempt the scenario failing on this step and add this id to the ul element in<br />
app/views/projects/index.html.erb, as shown in the following listing.<br />
Listing 10.2 app/views/projects/index.html.erb<br />
<br />
<br />
<br />
<br />
<br />
Good! That should make your scenario follow the correct link. Try rerunning it now.<br />
You should see this:<br />
And I fill in "Text" with "Added a comment!"<br />
cannot fill in, no text field, text area or password field<br />
with id, name, or label 'Text' found (Capybara::ElementNotFound)<br />
Oops! A web page from the "Then show me the page" step came up. Remove this step<br />
from your scenario now.<br />
This failing step means that you’ve got work to do! The label it’s looking for is<br />
going to belong to the comment box underneath your ticket’s information.<br />
Figure 10.2 The home page
10.1.2 The comment form<br />
Leaving a comment<br />
Let’s continue building this comment form for the application, the same one to which<br />
you’ll eventually add a state-select box to complete this feature. This comment form<br />
will consist of a single text field in which the user can insert their comment.<br />
Add a single line to the bottom of app/views/tickets/show.html.erb to render the<br />
comment form partial:<br />
<br />
This line renders the partial from app/views/comments/_form.html.erb, which you<br />
now create and fill with the content from the following listing.<br />
Listing 10.3 app/views/comments/_form.html.erb<br />
New comment<br />
<br />
<br />
<br />
<br />
<br />
<br />
<br />
<br />
Pretty much the standard form_for here, except you use the Array-argument syntax<br />
again, which will generate a nested route. You need to do four things before this form<br />
will work.<br />
First, you must define the @comment variable in the show action in Tickets-<br />
Controller so this form_for has something to work with.<br />
Second, you need to create the Comment model and associate this with your Ticket<br />
model so you can create new records from the data in the form and associate it with<br />
the right ticket.<br />
Third, you need to define the nested resource so that the form_for knows to POST<br />
to the correct URL, one similar to /tickets/1/comments. Without this, you run into an<br />
undefined method of ticket_comments_path when the form_for tries to generate<br />
the URL by combining the classes of the objects in the array for its action.<br />
Finally, you need to generate the CommentsController and the create action<br />
along with it so that your form has somewhere to go when a user submits it.<br />
Now set up your TicketsController to use the Comment model for creating new<br />
comments, which you’ll create shortly afterward. To do this, you need to first build a<br />
new Comment object using the comments association on your @ticket object.<br />
10.1.3 The comment model<br />
The first step to getting this feature to pass is to set up the show action in your<br />
TicketsController to define a @comment variable for the comment form. To do this,<br />
change the show action, as shown in the following listing.<br />
247
248 CHAPTER 10 Tracking state<br />
Listing 10.4 app/controllers/tickets_controller.rb<br />
def show<br />
@comment = @ticket.comments.build<br />
end<br />
This will use the build method on the comments association for your @ticket object<br />
(which is set up by the find_ticketbefore_filter) to create a new Comment object<br />
for the view’s form_for.<br />
Next, you generate the Comment model so that you can define the comments association<br />
on your Ticket model. This model’s going to need to have an attribute called<br />
text for the text from the form, a foreign key to link it to a ticket, and another foreign<br />
key to link to a user record. Let’s generate this model using this command:<br />
rails g model comment text:text ticket_id:integer user_id:integer<br />
Then run the migration for this model on both your development and test databases<br />
by running these familiar commands:<br />
rake db:migrate<br />
rake db:test:prepare<br />
With these done, your next stop is to add the associations to the Ticket and Comment<br />
models. For this, you add this line to app/models/ticket.rb directly under the<br />
accepts_nested_attributes_for :assets line:<br />
has_many :comments<br />
Add a validation to your Comment model to validate the presence of text for the<br />
records by adding this line to app/models/comment.rb:<br />
validates :text, :presence => true<br />
This will help your second scenario pass, because it requires that an error message is<br />
displayed when you don’t enter any text. You also add a belongs_to association definition<br />
to this model, given that you have a user_id column in your comments table:<br />
belongs_to :user<br />
When you run your feature at this mid-point, you’re told that it can’t find the routing<br />
helper that form_for is trying to use:<br />
undefined method `ticket_comments_path' for ...<br />
This is because you don’t have a nested route for comments inside your tickets<br />
resource yet. To define one, you need to add it to config/routes.rb.<br />
Currently in your config/routes.rb you’ve got the tickets resource nested inside the<br />
projects resource with these lines:<br />
resources :projects do<br />
resources :tickets<br />
end
Leaving a comment<br />
This generates helpers such as project_tickets_path. But for your form it’s not<br />
important what comment the project is being created for, so you use ticket<br />
_comments_path instead. This means you need to define a separate nonnested<br />
resource for your tickets and then a nested resource under that for your comments, as<br />
shown in the following listing.<br />
Listing 10.5 config/routes.rb<br />
resources :projects do<br />
resources :tickets<br />
end<br />
resources :tickets do<br />
resources :comments<br />
end<br />
The last three lines in listing 10.5 are the lines you need in order for ticket<br />
_comments_path to be defined, which will make your form work.<br />
10.1.4 The comments controller<br />
Now finally you need to generate the CommentsController so that your form has<br />
somewhere to post to. You can do this by running the following command:<br />
rails g controller comments<br />
A create action in this controller will provide the receiving end for the comment<br />
form, so you should add this now. You need to define two before_filters in this controller.<br />
The first is to ensure the user is signed in, because you don’t want anonymous<br />
users creating comments; the other is to find the Ticket object. This entire controller<br />
is shown in the following listing.<br />
Listing 10.6 app/controllers/comments_controller.rb<br />
class CommentsController < ApplicationController<br />
before_filter :authenticate_user!<br />
before_filter :find_ticket<br />
def create<br />
@comment = @ticket.comments.build(params[:comment].merge(:user =><br />
➥current_user))<br />
if @comment.save<br />
flash[:notice] = "Comment has been created."<br />
redirect_to [@ticket.project, @ticket]<br />
else<br />
flash[:alert] = "Comment has not been created."<br />
render :template => "tickets/show"<br />
end<br />
end<br />
private<br />
def find_ticket<br />
B<br />
C Render template<br />
Redirect to<br />
ticket page<br />
249
250 CHAPTER 10 Tracking state<br />
end<br />
@ticket = Ticket.find(params[:ticket_id])<br />
end<br />
In this action you use the template option of render when your @comment.save<br />
returns false to render a template of another controller. Previously you’ve used the<br />
action option to render templates that are for the current controller. By doing this,<br />
the @ticket and @comment objects will be available when the app/views/tickets/<br />
show.html.erb template is rendered.<br />
If the object saves successfully you redirect back to the ticket’s page by passing an<br />
Array argument to redirect_to B, which compiles the path from the arguments<br />
passed in, like form_for does to a nested route similar to /projects/1/tickets/2.<br />
But if the object doesn’t save successfully you want it to render the template that<br />
TicketsController’s show action renders. You can do this by using the render<br />
method and passing it "tickets/show" C. Keep in mind that the render method<br />
doesn’t call the action, and so any code within the show method of TicketsController<br />
wouldn’t be run. This is fine, though, because you’re setting up the @ticket variable<br />
the template renders by using the find_ticket before filter in your controller.<br />
By creating the controller, you’ve now got all the important parts needed to create<br />
comments. Let’s run this feature again by running bin/cucumber features/creating<br />
_comments.feature to see how you’re progressing. You see that it’s able to create the<br />
comment but it’s unable to find the text within the #comments element on the page:<br />
Then I should see "Added a comment!" within "#comments"<br />
Unable to find css "#comments" (Capybara::ElementNotFound)<br />
This step is failing because you haven’t added the element with the id attribute of<br />
comments to the show template yet. This element will contain all the comments for a<br />
ticket. Let’s add it by entering the code from the following listing above the spot<br />
where you render the comment form partial.<br />
Listing 10.7 app/views/tickets/show.html.erb<br />
Comments<br />
<br />
<br />
<br />
<br />
There are no comments for this ticket.<br />
<br />
<br />
Here you create the element the scenario requires: one with an id attribute of<br />
comments. In this you check if there are no comments by using the exists? method<br />
from Active Record. This will do a light query similar to this to check if there are any<br />
comments:<br />
SELECT "comments"."id" FROM "comments"<br />
WHERE ("comments".ticket_id = 1) LIMIT 1
Leaving a comment<br />
It only selects the id column from the comments table and limits the result set to 1,<br />
which results in a super-fast query to check if there are any comments. You used<br />
exists? back in chapter 8 when you checked if a ticket had any assets. You could use<br />
empty? here instead, but that would load the comments association in its entirety and<br />
then check to see if the array was empty. If there were a lot of comments, then this<br />
would be slow. By using exists?, you stop this potential performance issue from cropping<br />
up.<br />
Inside this div, if there are comments, you call render and pass it the argument of<br />
@ticket.comments. On the end of that call, select on it.<br />
You use select here because you don’t want to render the comment object you’re<br />
building for the form at the bottom of the page. If you left off the select,<br />
@ticket.comments would include this new object and render a blank comment box.<br />
When you call select on an array, you can pass it a block that it will evaluate on all<br />
objects inside that array and return any element that makes the block evaluate to anything<br />
that’s not nil or false.<br />
The argument you pass to select is called a Symbol-to-Proc and is a shorter way of<br />
writing this:<br />
{ |x| x.persisted? }<br />
This is a new syntax versions of Ruby >= 1.8.7 and used to be in Active Support in Rails<br />
2. It’s a handy way of writing a shorter block syntax if you’re only looking to call a single<br />
method on an object.<br />
The persisted? method checks if an object is persisted in the database by checking<br />
if it has its id attribute set and will return true if that’s the case and false if not.<br />
By using render in this form, Rails will render a partial for every single element in<br />
this collection and will try to locate the partial using the first object’s class name.<br />
Objects in this particular collection are of the Comment class, so the partial Rails will try<br />
to find will be at app/views/comments/_comment.html.erb, but you don’t have this file<br />
right now. Let’s create it and fill it with the content from the following listing.<br />
Listing 10.8 app/views/comments/_comment.html.erb<br />
<br />
<br />
<br />
<br />
Here you’ve used a new method, div_for. This method generates a div tag around<br />
the content in the block and also sets class and id attributes based on the object<br />
passed in. In this instance, the div tag would be the following:<br />
<br />
The class method from this tag is used to style your<br />
comments so that they will look like figure 10.3 when<br />
the styles from the stylesheet are applied.<br />
Figure 10.3 A comment<br />
251
252 CHAPTER 10 Tracking state<br />
With the code in place not only to create comments but also to display them, your<br />
feature should pass when you run it with bin/cucumber features/creating<br />
_comments.feature:<br />
2 scenario (2 passed)<br />
23 steps (23 passed)<br />
Good to see. You’ve now got the base for users to be able to change the state of a<br />
ticket. Before proceeding further, you should make sure that everything is working as<br />
it should by running rake cucumber:ok spec, and you should also commit your<br />
changes. When you run the tests, you’ll see this output:<br />
48 scenarios (48 passed)<br />
492 steps (492 passed)<br />
# and<br />
32 examples, 0 failures, 15 pending<br />
Good stuff! Let’s commit and push this:<br />
git add .<br />
git commit -m "Users can now leave comments on tickets"<br />
git push<br />
With this form added to the ticket’s page, users are now able to leave comments on<br />
tickets. This feature of your application is useful because it provides a way for users of<br />
a project to have a discussion about a ticket and keep track of it. Next up, we’ll look at<br />
adding another way to provide additional context to this ticket by adding states.<br />
10.2 Changing a ticket’s state<br />
States provide a helpful way of standardizing the way that a ticket’s<br />
progress is tracked. By glancing at the state of a ticket, a user will be<br />
able to determine if that ticket needs more work or if it’s complete,<br />
as shown in figure 10.4.<br />
To change a ticket’s state, you’ll add a drop-down box on the<br />
comment form where a user can select a state from a list of states.<br />
These states will be stored in another table called states, and they’ll be accessed<br />
through the State model.<br />
Eventually, you’ll let some users of the application have the ability to add states for<br />
the select box and make one of them the default. For now, you’ll focus on creating the<br />
drop-down box so that states can be selected.<br />
As usual, you’ll cover creating a comment that changes a ticket’s state by writing<br />
another scenario. The scenario you’ll now write goes at the bottom of features/<br />
creating_comments.feature and is shown in the following listing.<br />
Listing 10.9 features/creating_comments.feature<br />
Scenario: Changing a ticket's state<br />
When I follow "Change a ticket's state"<br />
When I fill in "Text" with "This is a real issue"<br />
Figure 10.4<br />
A ticket’s state
Changing a ticket’s state<br />
And I select "Open" from "State"<br />
And I press "Create Comment"<br />
Then I should see "Comment has been created."<br />
And I should see "Open" within "#ticket .state"<br />
In this scenario, you follow a ticket’s link from the homepage (which you go to in the<br />
Background) and go through the process of creating a comment, much like in the<br />
Creating Comments feature, only this time you select a state. This is the first part of<br />
the scenario that you can expect to fail because you don’t have a state-select box yet.<br />
After the comment is created, you should see the state appear in the #ticket .state<br />
area. This is the second part of the scenario that will fail.<br />
When you run this scenario by running bin/cucumber features/creating<br />
_comments.feature:36, it will fail like this:<br />
And I select "Open" from "State"<br />
cannot select option, no select box with id,<br />
name, or label 'State' found (Capybara::ElementNotFound)<br />
As you can see from this output, the “I select” step attempts to select an option from a<br />
select box. In this case, it can’t find the select box because you haven’t added it yet!<br />
With this select box, users of your application should be able to change the ticket’s<br />
state by selecting a value from it, entering some comment text, and clicking the<br />
Create Comment button.<br />
Before you do all that, however, you need to create the State model and its related<br />
table, which is used to store the states.<br />
10.2.1 Creating the State model<br />
Right now you need to add a select box.<br />
When you’re done, you should have one<br />
that looks like figure 10.5.<br />
Before adding this select box, let’s set up<br />
the TicketsController’s show action to<br />
return a collection of states that you can<br />
populate the drop select box with. Change<br />
the show action to be like this now:<br />
def show<br />
@comment = @ticket.comments.build<br />
@states = State.all<br />
end<br />
Here you call all on the State class, which<br />
doesn’t exist yet. You’ll be storing the states in<br />
a table because you’d like the users to be able<br />
to create their own states. For now, you define<br />
this State model to have a name field as well<br />
as two other fields: color and background, Figure 10.5 State select box<br />
253
254 CHAPTER 10 Tracking state<br />
which define the colors of the label for this ticket. Later on, you’ll add a position field<br />
that you’ll use to determine the sort order of the states in the select box. Let’s create this<br />
State model and the associated migration by running this command:<br />
rails g model state name:string color:string background:string<br />
Before running this migration, you need to define a way that states link to comments<br />
and to tickets, but there are a couple of things worth mentioning beforehand. For<br />
comments, you want to track the previous state so you can display that a comment has<br />
changed the ticket’s state. For tickets, you want to track the state for which you’ll use a<br />
foreign key. With all of this in mind, let’s add these fields to the migration now. You<br />
also remove the timestamps call from within create_table because it’s not important<br />
when states were created or updated. When you’re done, the whole migration should<br />
look like the following listing.<br />
Listing 10.10 db/migrate/[date]_create_states.rb<br />
class CreateStates < ActiveRecord::Migration<br />
def up<br />
create_table :states do |t|<br />
t.string :name<br />
t.string :color<br />
t.string :background<br />
end<br />
add_column :tickets, :state_id, :integer<br />
add_index :tickets, :state_id<br />
add_column :comments, :state_id, :integer<br />
end<br />
def down<br />
drop_table :states<br />
remove_column :tickets, :state_id<br />
remove_column :comments, :state_id<br />
end<br />
end<br />
In this migration you use the add_index method to add a database index on the<br />
tickets table’s state_id field. By adding an index on this field, you can speed up<br />
queries made that search for this particular field. The side-effect of indexing is that it<br />
will result in slower writes and more disk space. It’s always important to have indexes<br />
on nonprimary-key fields 2 because of this great read speed increase.<br />
Let’s run this migration now by running these two commands:<br />
rake db:migrate<br />
rake db:test:prepare<br />
2 Primary key in this case is the id field that is automatically created for each model by create_table. Primary<br />
key fields are, by default, indexed.
Changing a ticket’s state<br />
There you have it! The State model is up and running. Let’s now<br />
associate this class with the Comment class by adding this line to the<br />
top of the Comment model’s definition:<br />
belongs_to :state<br />
The state method provided by this belongs_to will be used shortly to display the<br />
state on the ticket page, as in figure 10.6.<br />
Before doing that, however, you need to add the select box for the state to the<br />
comment form.<br />
10.2.2 Selecting states<br />
In the comment form partial, add this select box underneath the text box, as shown in<br />
the following listing.<br />
<br />
<br />
@ticket.state_id %><br />
<br />
Listing 10.11 app/views/comments/_form.html.erb<br />
Here you use a new method, select, which takes its first argument as the foreign-key<br />
attribute of your Comment object, not the association. You also use the :state_id value<br />
for the argument passed to the label, but Rails is smart enough to know the text for<br />
this should be “State”. select’s second argument is a two-dimensional 3 Array that you<br />
create by using map on the State objects returned from the controller in the @states<br />
variable. The first element of each array is the value you want shown as an option in<br />
the select box to the user, whereas the second element is the value that’s passed back<br />
to the controller.<br />
Use the :selected option in the select call to select the current state of the ticket<br />
from the list. This value must match the value argument for one of the options in the<br />
select box; otherwise it will default to the first option.<br />
Let’s assume for a moment that you’ve got three states: New, Open, and Closed.<br />
For a ticket that has its state set to New, the select box generated by f.select would<br />
look like this:<br />
<br />
New<br />
Open<br />
Closed<br />
<br />
3 A two-dimensional array is an array that contains arrays as elements.<br />
Figure 10.6<br />
A ticket’s state<br />
255
256 CHAPTER 10 Tracking state<br />
The first option tag in the select tag has an additional attribute: selected. When<br />
this attribute is set, the option is the one selected as the default option for the select.<br />
This is achieved by using the :selected option for f.select. The value for this<br />
option is the corresponding value attribute for the option tag. In this case, it’s the<br />
state_id of the @ticket object.<br />
With the select box in place, you’re almost at a point where this scenario will be<br />
passing. Let’s see how far you’ve gotten by running bin/cucumber features/creating<br />
_comments.feature. It won’t be able to find the Open option in your select box:<br />
And I select "Open" from "State"<br />
No such option 'Open' in this select box. Available options:<br />
➥(Capybara::OptionNotFound)<br />
This is because you need to add a state to your database! Let’s add this line to the bottom<br />
of your Background in features/creating_comments.feature to do this:<br />
Given there is a state called "Open"<br />
Let’s now run the scenario using bin/cucumber features/creating_comments<br />
.feature so you can get the step definition. Put this step definition in a new file called<br />
features/step_definitions/state_steps.rb using this code:<br />
Given /^there is a state called "([^"]*)"$/ do |name|<br />
State.create!(:name => name)<br />
end<br />
By defining this step and rerunning the scenario you’ll see that it’s now failing at the<br />
last step:<br />
And I should see "Open" within "#ticket .state"<br />
Unable to find css "#ticket .state" (Capybara::ElementNotFound)<br />
This output means it’s looking for any element with the id attribute of ticket that<br />
contains any type of element with the id of state, but it can’t find it.<br />
Rather than putting the state inside the TicketsController’s show template, put it<br />
in a partial. This is due to the fact that you’ll be reusing this to display a state wherever<br />
you need it in the future. Additionally, you’ll apply a dynamic class around the state so<br />
you can style it later on. Let’s create a new partial at app/views/states/_state.html.erb<br />
and fill it with this content:<br />
<br />
<br />
<br />
To style the element you need a valid CSS class name. You can get one by using the<br />
parameterize method. If, for example, you had a state called “Drop bears strike<br />
without warning!” and used parameterize on it, all the spaces and non-URL-valid<br />
characters would be stripped, leaving you with “drop-bears-strike-without-warning,”<br />
which is a perfectly valid CSS class name. You’ll use this later on to style the state using<br />
the color and background attributes.
Changing a ticket’s state<br />
You’re now going to render this partial underneath the “Created by” line on app/<br />
views/tickets/show.html.erb using the following line:<br />
<br />
You’re using the short form of rendering a partial here once again, and you conditionally<br />
render it if the ticket has a state. If you don’t have the if at the end and the<br />
state is nil, this will raise an exception because it will try to determine the model<br />
name of nil.<br />
To get this state method for your Ticket, you should add the association method<br />
to the model. This method should go directly above the belongs_to :user line in<br />
app/models/ticket.rb:<br />
belongs_to :state<br />
If you run the feature again it will fail because there’s nothing shown in the #ticket<br />
.state element:<br />
And I should see "Open" within "#ticket .state"<br />
is not true. (Test::Unit::AssertionFailedError)<br />
This is because you’re updating the state on the Comment object you’re creating, not<br />
the associated Ticket object! You’re trying to get the new state to display on the ticket<br />
object so that the users of the application can change the state of a ticket when they<br />
add a comment to it. For this to work, you need to define a callback in your Comment<br />
model.<br />
10.2.3 Callbacks<br />
When a user selects a state from the drop-down box attached to the comment form on<br />
a ticket’s page, you want that ticket’s state to be updated with what that user picked.<br />
To do this you can use a callback to set the ticket’s status when you change it<br />
through the comment form. A callback is a method that’s called either before or after<br />
a certain event. For models, there are before-and-after callbacks for the following<br />
events (where * can be substituted for either before or after):<br />
� Validation (*_validation)<br />
� Creating (*_create)<br />
� Updating (*_update)<br />
� Saving (*_save)<br />
� Destruction (*_destroy)<br />
You’re able to trigger a specific piece of code or method to run before or after any of<br />
these events. The Saving item in the list refers to when a record is saved to the database,<br />
which occurs when a record is created or updated. For your Comment model you want<br />
to define a callback that occurs after a record has been created, and for this you use the<br />
after_create method at the top of your Comment model, as well as a ticket association,<br />
transforming this model into the code shown in the following listing.<br />
257
258 CHAPTER 10 Tracking state<br />
class Comment < ActiveRecord::Base<br />
after_create :set_ticket_state<br />
belongs_to :ticket<br />
belongs_to :user<br />
belongs_to :state<br />
validates :text, :presence => true<br />
end<br />
While you’re here, you can also set it up so that you can access the project association<br />
that the ticket association has in this model by using the delegates method:<br />
delegate :project, :to => :ticket<br />
If you call the project method on a Comment object, this method will “delegate” the<br />
project method to the ticket object, making a call exactly like ticket .project. This<br />
makes your code shorter and will come in handy later on.<br />
The symbol passed to the after_create method here is the name of the method<br />
to call for this callback. You can define this method at the bottom of your Comment<br />
model using the code from the following listing.<br />
class Comment < ActiveRecord::Base<br />
...<br />
private<br />
end<br />
Listing 10.12 app/models/comment.rb<br />
Listing 10.13 app/models/comment.rb<br />
def set_ticket_state<br />
self.ticket.state = self.state<br />
self.ticket.save!<br />
end<br />
With this callback and associated method now in place, the associated ticket’s state will<br />
be set to the comment’s state after the comment is created. When you run your feature<br />
again by running bin/cucumber features/creating_comments.feature, it still fails:<br />
And I should see "Open" within "#ticket .state"<br />
Failed assertion, no message given. (MiniTest::Assertion)<br />
Even though you’re correctly assigning the state to the ticket, it still doesn’t display as<br />
the state in the view. But why is this? You can attempt to duplicate this issue by running<br />
the server using the rails server. By visiting http://localhost:3000, you can<br />
follow the steps inside the scenario to attempt to duplicate the behavior you’ve seen<br />
in your feature.<br />
Because you have no states in the development database, you won’t be able to<br />
reproduce this problem right away. Your feature uses the “Given there is a state<br />
called...” steps to define states, but you can’t use these in your development environment.<br />
It would be better if you added seed data to your database because then you’ll<br />
have a repeatable way of setting up the states in your application’s database.
10.2.4 Seeding states<br />
Changing a ticket’s state<br />
If you add some states to the db/seeds.rb file, users will be able to select them from the<br />
State drop-down box on the tickets page rather than leaving it blank and useless,<br />
much like it is now. With these states in the db/seeds.rb file, as mentioned before, you<br />
will have a repeatable way of creating this data if you ever need to run your application<br />
on another server, such as would be the case when you put the application on another<br />
computer.<br />
You’re adding these files to the db/seeds.rb so you have some to play around with<br />
in the development environment of your application. You’re attempting to figure out<br />
why, when a user picks Open from the State select box and clicks Create Comment,<br />
the state doesn’t display on the ticket that should be updated.<br />
When you go to the Ticketee Beta project to create a ticket and then attempt to create<br />
a comment on that ticket with the state of Open, you’ll see that there are no states<br />
(as shown in figure 10.7).<br />
You should add a couple of states to your seeds file now; they’ll<br />
be New, Open, and Closed. Ideally, New will be the default state of<br />
tickets, and you’ll set this up a little later on. Before adding these<br />
states, let’s add a couple of steps to features/seed.feature to always<br />
ensure that your states are defined.<br />
You extend this feature to go inside the Ticketee Beta project,<br />
create a ticket, and then begin to create a comment on that ticket. When it’s on the<br />
comment-creation screen, you check to see that all your states are in the state box. To<br />
do this, modify the scenario in this file to what’s shown in the following listing.<br />
Listing 10.14 features/seed.feature, the basics scenario<br />
Scenario: The basics<br />
Given I have run the seed task<br />
And I am signed in as "admin@ticketee.com"<br />
When I follow "Ticketee Beta"<br />
And I follow "New Ticket"<br />
And I fill in "Title" with "Comments with state"<br />
And I fill in "Description" with "Comments always have a state."<br />
And I press "Create Ticket"<br />
Then I should see "New" within "#comment_state_id"<br />
And I should see "Open" within "#comment_state_id"<br />
And I should see "Closed" within "#comment_state_id"<br />
The #comment_state_id element referenced here is the State select box for your comments,<br />
and you’re confirming that it’s got the three states you’re going to be seeding<br />
your database with. When you run this feature by running bin/cucumber features/<br />
seed.feature, it will fail because you don’t have your states yet:<br />
Then I should see "New" within "#comment_state_id"<br />
is not true. (Test::Unit::AssertionFailedError)<br />
Let’s add these states to your db/seeds.rb file by using the lines shown in the following<br />
listing.<br />
259<br />
Figure 10.7<br />
Oops! No states!
260 CHAPTER 10 Tracking state<br />
Listing 10.15 db/seeds.rb<br />
State.create(:name => "New",<br />
:background => "#85FF00",<br />
:color => "white")<br />
State.create(:name => "Open",<br />
:background => "#00CFFD",<br />
:color => "white")<br />
State.create(:name => "Closed",<br />
:background => "black",<br />
:color => "white")<br />
If you try to run rake db:seed now, you see that this task was aborted:<br />
rake aborted!<br />
Validation failed: Email has already been taken<br />
(See full trace by running task with --trace)<br />
When a rake task aborts, it means an exception has been raised. As the output suggests,<br />
you can see the backtrace by running the same command with --trace :rake<br />
db:seed --trace. You’ll now be given the complete backtrace of your rake task and<br />
can determine what broke. The first line of application-related backtrace in the output<br />
provides a useful clue:<br />
/home/you/ticketee/db/seeds.rb:1:in `'<br />
It’s the first line of db/seeds.rb that’s causing the problem! This is the line that creates<br />
your admin user, and it’s rightly failing because you already have a user with the email<br />
address admin@ticketee.com. Let’s comment out these first couple of lines as well as<br />
the line that creates the Ticketee Beta project, because you don’t want two Ticketee<br />
Beta projects. The only line left uncommented in your seeds file should be the line<br />
you’ve just added. When you run rake db:seed again, it will run successfully. Let’s<br />
uncomment these lines that you’ve just commented out.<br />
With these states now defined inside db/seeds.rb, your feature at features/seed<br />
.feature will pass:<br />
1 scenario (1 passed)<br />
10 steps (10 passed)<br />
Also, with your states seeding, you can go back to your<br />
server at http://localhost:3000 and create a comment on<br />
your ticket with any status, because you’re trying to figure<br />
out why the “Creating comments” feature is failing. After<br />
creating your comment, you should see that the ticket’s Figure 10.8 Ugly state output<br />
state doesn’t display as simple text like New, Open, or Closed, but rather as a standard<br />
inspect output, as shown in figure 10.8.<br />
Well, isn’t that ugly and not user-friendly? It flows off the end of the ticket box!<br />
Thankfully, you can fix this by defining the to_s method in your State model to call<br />
the name method:
def to_s<br />
name<br />
end<br />
Changing a ticket’s state<br />
By default, objects in Ruby have a to_s method that outputs the ugly version, the<br />
inspected version of this object, you saw earlier. By overriding this in the model to call<br />
the name method, you’ll get it to display the state’s name rather than its object output.<br />
When you refresh the page in your browser, you should see the<br />
correct state, as shown in figure 10.9.<br />
Great! This should mean that the last scenario in your “Creat-<br />
ing comments” feature will pass. Let’s run it with bin/cucumber<br />
features/creating_comments.feature and find out:<br />
1 scenario (1 passed)<br />
14 steps (14 passed)<br />
Indeed it’s passing! This is a good stage to ensure that everything is working by running<br />
rake cucumber:ok spec. Blast, one of the features is failing:<br />
Failing Scenarios:<br />
cucumber features/<br />
creating_comments.feature:26 # Scenario: Creating an invalid comment<br />
A broken feature often means a broken part of your code, so you should investigate<br />
this before continuing. If there are thoughts of “it’s only one feature,” think again. At<br />
what point do you draw the line? One? Two? Three failing scenarios? Let’s have a zerotolerance<br />
policy on these and fix them when they break.<br />
10.2.5 Fixing creating comments<br />
The entire reason why you write features before you write code is so that you can catch<br />
scenarios like this where something unexpectedly breaks. If you didn’t have these scenarios<br />
in place, then you wouldn’t be made aware of these scenarios until a user of<br />
your site stumbled across it. This isn’t what you want. You want your users to assume<br />
that you’re perfect.<br />
You should look into why this feature is failing and fix it right away. This particular<br />
scenario is failing with this backtrace:<br />
And I press "Create Comment"<br />
You have a nil object when you didn't expect it!<br />
You might have expected an instance of Array.<br />
The error occurred while evaluating nil.map (ActionView::Template::Error)<br />
./app/views/comments/_form.html.erb:12<br />
Here it claims you’re calling map on a nil object, and that it’s on line 12 of app/views/<br />
comments/_form.html.erb. The line it’s referencing is the following:<br />
<br />
Figure 10.9<br />
The correct state<br />
Alright, the only place where map is being called is on the @states variable, so it’s<br />
pretty straightforward that @states is the nil object. But how did it come to be? Let’s<br />
review this scenario, as shown in the following listing.<br />
261
262 CHAPTER 10 Tracking state<br />
Listing 10.16 features/creating_comments.feature:26<br />
Scenario: Creating an invalid comment<br />
When I follow "Change a ticket's state"<br />
And I press "Create Comment"<br />
Then I should see "Comment has not been created."<br />
And I should see "Text can't be blank"<br />
This scenario tests that you’re shown the “Text can’t be blank” error when you don’t<br />
enter any text for your comment. In this scenario, you click the Create Comment button,<br />
which submits your form, which goes to the create action in Comments-<br />
Controller. This action looks like the following listing.<br />
Listing 10.17 app/controllers/comments_controller.rb<br />
def create<br />
@comment = @ticket.comments.build(params[:comment].merge(:user<br />
➥=> current_user))<br />
if @comment.save<br />
flash[:notice] = "Comment has been created."<br />
redirect_to [@ticket.project, @ticket]<br />
else<br />
flash[:alert] = "Comment has not been created."<br />
render :template => "tickets/show"<br />
end<br />
end<br />
As you can see from this action, when the comment fails validation (when @comment<br />
.save returns false), then it rerenders the app/views/tickets/show.html.erb template.<br />
The problem with this is that, by rerendering this template, it calls the following line<br />
in the template:<br />
<br />
This inevitably leads you right back to app/views/comments/_form.html.erb, the<br />
source of the problem. Therefore, you can determine that you need to set up the<br />
@states variable during the “failed save” part of your action, and the best place for<br />
this is right after the else so that this part ends up looking like the following listing.<br />
Listing 10.18 app/controllers/comments_controller.rb<br />
else<br />
@states = State.all<br />
flash[:alert] = "Comment has not been created."<br />
render :template => "tickets/show"<br />
end<br />
Now that you’re correctly initializing your @states variable, this scenario will pass.<br />
Let’s run the whole feature now using bin/cucumber features/creating_comments<br />
.feature:<br />
3 scenarios (3 passed)<br />
39 steps (39 passed)
Tracking changes<br />
Awesome! Now let’s try rerunning rake cucumber:ok spec. That should be the last<br />
thing you need to fix. You should see the following output:<br />
49 scenarios (49 passed)<br />
515 steps (515 passed)<br />
# and<br />
33 examples, 0 failures, 16 pending<br />
Excellent, everything’s fixed. Let’s commit these changes now:<br />
git add .<br />
git commit -m "When updating a comment's status, it also updates<br />
➥the ticket's status"<br />
git push<br />
It’s great that you’ve now got the ticket status updating along with the comment status,<br />
but it would be handy to know what the timeline of a status change looks like. You can<br />
display this on the comment by showing a little indication of whether the state has<br />
changed during that comment. Let’s work on adding this tidbit of information to the<br />
comments right now.<br />
10.3 Tracking changes<br />
When a person posts a comment that changes the state of a ticket, you’d like this<br />
information displayed on the page next to the comment, as shown in figure 10.10.<br />
By visually tracking this state change, along with the text of the<br />
comment, you can provide context as to why the state was changed.<br />
At the moment, you only track the state of the comment and then<br />
don’t even display it alongside the comment’s text; you only use it to<br />
update the ticket’s status.<br />
10.3.1 Ch-ch-changes<br />
What you need now is some way of making sure that, when changing a ticket’s state by<br />
way of a comment, the “State: Open” text appears. A scenario would fit this bill, and<br />
luckily you wrote one that fits almost perfectly. This scenario is the final scenario<br />
(“Changing a ticket’s state”) in features/creating_comments.feature.<br />
To check for the state change text in your “Changing a ticket’s state” scenario, you<br />
add this single line to the bottom of it:<br />
Then I should see "State: Open" within "#comments"<br />
If the ticket was assigned the New state, this text would say “State: New ?' Open,” but<br />
because your tickets don’t have default states assigned to them the previous state for<br />
the first comment will be nil. When you run this scenario by using bin/cucumber<br />
features/creating_comments.feature:33, it will fail:<br />
Then I should see "State: Open" within "#comments"<br />
expected there to be content "State: Open"<br />
in "\n \n user@ticketee.com (User)\n<br />
This is a real issue\n\n"<br />
263<br />
Figure 10.10<br />
State transitions
264 CHAPTER 10 Tracking state<br />
Good, now you’ve got a way to test this state message that should be appearing when a<br />
comment changes the state of the ticket. Now, you’d like to track the state the ticket<br />
was at before the comment as well as the state of the comment itself. To track this extra<br />
attribute, you’ll create another field on your comments table called previous_state<br />
_id. Before you save a comment, you’ll update this field to be the current state of the<br />
ticket. Let’s create a new migration to add the previous_state_id field to your<br />
comments table by running the following command:<br />
rails g migration add_previous_state_id_to_comments previous_state_id:integer<br />
Again, Rails is pretty smart here and will use the name of the migration to infer that<br />
you want to add a column called previous_state_id to a table called comments. You<br />
only have to tell it what the type of this field is by passing previous_state_id<br />
:integer to the migration.<br />
If you open up this migration now, you’ll see that it defines a change method<br />
which calls the add_column method inside it. You can see the entire migration shown<br />
in the following listing.<br />
Listing 10.19 db/migrate_[date]_add_previous_state_id_to_comments.rb<br />
class AddPreviousStateIdToComments < ActiveRecord::Migration<br />
def change<br />
add_column :comments, :previous_state_id, :integer<br />
end<br />
end<br />
It’s done this way because Rails knows how to roll back this migration easily. It’s a simple<br />
call to remove_column passing in the first two arguments in this method.<br />
You don’t need to do anything else to this migration other than run it. Do this now<br />
by running rake db:migrate and rake db:test:prepare. This field will be used for<br />
storing the previous state’s id so that you can then use it to show a state transition on a<br />
comment, as pictured in figure 10.11.<br />
With this little bit of information, users can see what comments<br />
changed the ticket’s state, which is helpful for determining what<br />
steps the ticket has gone through to wind up at this point.<br />
To use the previous_state_id field properly, you’re going to<br />
need to add another callback to save it.<br />
10.3.2 Another c-c-callback<br />
Figure 10.11<br />
A state transition<br />
To set this field before a comment is created, you use a before_create callback on the<br />
Comment model. A before_create callback is triggered—as the name suggests—<br />
before a record is created, but after the validations have been run. This means that this<br />
callback will only be triggered for valid objects that are about to be saved to the database<br />
for the first time.
Tracking changes<br />
Put this new callback on a line directly above the after_create because it makes<br />
sense to have all your callbacks grouped together and in the order that they’re<br />
called in:<br />
before_create :set_previous_state<br />
Call the set_previous_state method for this callback, which you define at the bottom<br />
of the Comment model just before the set_ticket_state method, like this:<br />
def set_previous_state<br />
self.previous_state = ticket.state<br />
end<br />
The previous_state= method you call here isn’t yet defined. You can define this<br />
method by declaring that your Comment objects belongs_to a previous_state, which<br />
is a State object. Let’s put this line with the belongs_to in your Comment model:<br />
belongs_to :previous_state, :class_name => "State"<br />
Here you use a new option for belongs_to: class_name. The field in your comments<br />
table is called previous_state_id and so you call your association previous_state.<br />
To tell Rails what class this associated record is, you must use the class_name option,<br />
otherwise Rails will go looking for the PreviousState class.<br />
With this belongs_to defined, you get the previous_state= method for free and<br />
so your callback should work alright. There’s one way to make sure of this, and that’s<br />
to attempt to display these transitions between the states in your view so that your feature<br />
will potentially pass. You’ll now work on displaying these transitions.<br />
10.3.3 Displaying changes<br />
When you display a comment that changes a ticket’s state, you want to display this<br />
state transition along with the comment.<br />
To get this text to show up, add the following lines to app/views/comments/<br />
_comment.html.erb underneath the h4 tag:<br />
→<br />
<br />
This is almost correct, but there’s a slight problem. Your callback<br />
will set the previous_state regardless of what the current state is,<br />
and in this case you can end up with something like figure 10.12.<br />
To stop this from happening, you can wrap this code in an if<br />
statement, like this:<br />
<br />
→ <br />
<br />
Now this text will only show up when the previous state isn’t the same as the current<br />
state.<br />
265<br />
Figure 10.12<br />
State transition<br />
from itself to itself
266 CHAPTER 10 Tracking state<br />
You can go one step further and move this code into a helper. Views are more for<br />
displaying information than for deciding how it should be output, which should be left<br />
to the helpers and controllers. Move this code into the app/helpers/tickets_helper.rb<br />
because this partial is displayed from the TicketsController’s show template. The<br />
entire TicketsHelper should now look like the following listing.<br />
Listing 10.20 app/helpers/tickets_helper.rb<br />
module TicketsHelper<br />
def state_for(comment)<br />
content_tag(:div, :class => "states") do<br />
if comment.state<br />
if comment.previous_state && comment.state != comment.previous_state<br />
"#{render comment.previous_state} → #{render comment.state}"<br />
else<br />
"→" + render(comment.state)<br />
end<br />
end<br />
end<br />
end<br />
end<br />
In this example, you check to see if the comment has an assigned state and then if it<br />
has a previous state. If it has a previous state that isn’t the assigned state, then you<br />
show the state transition; otherwise you render the assigned state.<br />
You can now replace the whole if statement in app/views/comments/_comment<br />
.html.erb with this single line:<br />
<br />
Now check to see if this is working by running your scenario using bin/cucumber<br />
features/creating_comments.feature:33:<br />
Then I should see "State: Open" within "#comments"<br />
expected there to be content "State: Open" in<br />
"\n \n user@ticketee.com (User)\n \n<br />
Open\n\n This is a real issue\n\n"<br />
It’s still failing? Are you sure you’ve set everything up correctly? Absolutely. Capybara<br />
(through Cucumber) is telling you that it still can’t find this text on the page. Lucky<br />
for you there’s a way to see the page that Cucumber is seeing: the “Then show me the<br />
page” step you saw a little earlier.<br />
10.3.4 Show me the page<br />
When you use this step, it saves the current page to a file and opens it in the browser<br />
so you’re able to see exactly what Cucumber is seeing. Let’s put this step as the secondto-last<br />
step in “Changing a ticket’s state.” The last three steps in this scenario should<br />
look like the following:
Tracking changes<br />
And I should see "Open" within "#ticket .state"<br />
Then show me the page<br />
Then I should see "Open" within "#comments"<br />
When you run your scenario again, it should pop up a browser window that shows you<br />
the exact same page as Cucumber sees, shown in figure 10.13.<br />
Here you can see the partials rendered with their HTML shown on the page. This is<br />
because code coming from a string in a helper is automatically escaped, which is helpful—but<br />
sometimes things like this happen. Better safe than sorry!<br />
10.3.5 Automatic escaping saves your bacon<br />
This automatic escaping of strings is one of Rails 3’s big features. This saves your<br />
bacon because it stops malicious output being input into forms accidentally. This output<br />
would be things like your ticket’s description or comment text, which comes from<br />
the users. Never trust the users with outputting nonmalicious content!<br />
If this input wasn’t escaped before it was output to the page, it could potentially<br />
contain HTML tags like , which could contain malicious content. Rails 3 saves<br />
your bacon in this respect by automatically escaping all strings output to the view<br />
through ERB tags. Yes, sometimes it will be overzealous and escape things you don’t<br />
want it to escape, like your state partials.<br />
You can tell it that the string is safe by calling html_safe in your helper, changing<br />
it to this:<br />
"#{render comment.previous_state} → #{render comment.state}".html_safe<br />
The html_safe method effectively tells Rails, “It’s cool, man,” and Rails won’t escape<br />
anything inside the string. When you run bin/cucumber features/creating_tickets<br />
.feature:33, your scenario will now pass:<br />
1 scenario (1 passed)<br />
17 steps (17 passed)<br />
A browser window will appear, showing you the correct states, as shown in figure 10.14.<br />
Let’s remove the “Then show me the page” step from this scenario now, and you’re<br />
done. You’ve got your application showing the users what state a comment has<br />
switched the ticket to. Now’s a good time to check that you haven’t broken anything.<br />
When you run rake cucumber:ok spec, you should see that everything is A-OK:<br />
49 scenarios (49 passed)<br />
516 steps (516 passed)<br />
# and<br />
33 examples, 0 failures, 16 pending<br />
Figure 10.13 The states aren’t what they should be…<br />
267
268 CHAPTER 10 Tracking state<br />
You have state transition showing in your application neatly, which is great to see. Let’s<br />
commit and push this to GitHub:<br />
git add .<br />
git commit -m "Display a comment's state transition"<br />
git push<br />
Currently, your styles aren’t distinguishable. Look at figure 10.14, and gaze upon their<br />
ugliness.<br />
You could distinguish them by using the colors<br />
you’ve specified in the attributes. Earlier, you<br />
wrapped the state name in a special div that will<br />
allow you to style these elements, based on the<br />
class. For the New state, the HTML for the div Figure 10.14 The unescaped states<br />
looks like this:<br />
<br />
New<br />
<br />
The state_new part of this you can use to apply the colors from the record to this element.<br />
To do this, you put a style tag at the top of your application’s layout and<br />
dynamically define some CSS that will apply the colors.<br />
10.3.6 Styling states<br />
The states in your system can change at any point in time in the future, and so you<br />
can’t have set styles in public/stylesheets/application.css for them. To get around this<br />
little problem, put a style tag in your app/views/layouts/application.html.erb file,<br />
which will contain some ERB code to output the styles for the states. Directly underneath<br />
the stylesheet_link_tag line, put this code:<br />
<br />
<br />
.state_ {<br />
background: ;<br />
color: ;<br />
}<br />
<br />
<br />
You need to define the @states variable in a place that will be accessible in all views of<br />
your application. This means you can’t define it inside any controller other than<br />
ApplicationController. Lucky for you, this is like a normal controller, and you can use<br />
a before_filter to load the states. Underneath the class definition for Application-<br />
Controller, you can add this before_filter:<br />
before_filter :find_states<br />
Now you define the method under the authorize_admin! definition:
def find_states<br />
@states = State.all<br />
end<br />
Managing states<br />
With these few lines of code, your states should now be styled. If you visit a ticket page<br />
that has comments that have changed the state, you should see a state styled, as shown<br />
in figure 10.15.<br />
While you’re in the business of prettying things up, you<br />
can also add the state of your ticket to the listing on app/<br />
views/projects/show.html.erb so that users can easily glance at<br />
the list of tickets and see a state next to each of them. Let’s<br />
add this to the left of the ticket name so that the li element<br />
becomes<br />
<br />
<br />
# - <br />
270 CHAPTER 10 Tracking state<br />
You’ll start out by writing a feature to create new states, which will involve creating<br />
a new controller called Admin::StatesController. This controller will provide the<br />
admins of your application with the basic CRUD functionality for states, as well as the<br />
ability to mark a state as the default, which all tickets will then be associated with.<br />
We’re not going to look at adding an edit, update, or destroy action to this controller<br />
because it’s been covered previously and should be left as an exercise for you.<br />
10.4.1 Adding additional states<br />
You have three default states from the db/seeds.rb file currently: New, Open, and<br />
Closed. If the admin users of your application wish to add more, they can’t—not until<br />
you’ve created the Admin::StatesController and the new and create actions inside<br />
it. This will allow those users to create additional states which then can be assigned to<br />
a ticket.<br />
You have this lovely State model, but no way for admins of the application to add<br />
any new records to it. What if they want to add more states? You’ll create a new controller<br />
called Admin::StatesController and put a new and create action in it so that<br />
admins can create more states.<br />
But before you write any real code, you’ll write a feature that describes the process<br />
of creating a state. Put it in a new file called features/creating_states.feature, which is<br />
shown in the following listing.<br />
Listing 10.21 features/creating_states.feature<br />
Feature: Creating states<br />
In order to be able to specify other states for tickets<br />
As an admin<br />
I want to add them to the application<br />
Background:<br />
Given there are the following users:<br />
| email | password | admin |<br />
| admin@ticketee.com | password | true |<br />
And I am signed in as them<br />
Scenario: Creating a state<br />
When I follow "Admin"<br />
And I follow "States"<br />
And I follow "New State"<br />
And I fill in "Name" with "Duplicate"<br />
And I press "Create State"<br />
Then I should see "State has been created."<br />
Here you sign in as an admin user and go through the motions of creating a new state.<br />
When you run this feature through using the command bin/cucumber features/<br />
creating_states.feature, it will fail because it can’t find the States link:<br />
And I follow "States"<br />
no link with title, id or text 'States' found (Capybara::ElementNotFound)
Managing states<br />
The States link should take you to the StatesController’s index action, which is<br />
missing from the admin home page, located at app/views/admin/base/index.html<br />
.erb. You can add this link now by adding the following line to this file:<br />
<br />
The admin_states_path method isn’t defined yet, and you can fix this by adding<br />
another resources line inside the admin namespace in config/routes.rb like this:<br />
namespace :admin do<br />
...<br />
resources :states<br />
end<br />
With this line in the admin namespace, the admin_states_path method (and its siblings)<br />
are defined. Let’s run the feature again now to see what you have to do next:<br />
And I follow "States"<br />
uninitialized constant Admin::StatesController<br />
Ah, that’s right! You need to generate your controller. You can do this by running the<br />
controller generator:<br />
rails g controller admin/states<br />
When you run this feature again, you’re told that you’re missing the index action<br />
from this controller:<br />
And I follow "States"<br />
The action 'index' could not be found for Admin::StatesController<br />
You add this action to the app/controllers/admin/states_controller.rb file now, as well<br />
as making this controller inherit from Admin::BaseController. After you’re done,<br />
the whole controller class will appear as shown in the following listing<br />
Listing 10.22 app/controllers/admin/states_controller.rb<br />
class Admin::StatesController < Admin::BaseController<br />
def index<br />
@states = State.all<br />
end<br />
end<br />
Next on the menu is defining the view for this action in a brand new file to be located<br />
at app/views/admin/states/index.html.erb. This view must contain the New State link<br />
your feature will go looking for, and it should also include a list of states so that anyone<br />
looking at the page knows which states already exist The code to do all this is<br />
shown in the following listing.<br />
271
272 CHAPTER 10 Tracking state<br />
Listing 10.23 app/views/admin/states/index.html.erb<br />
<br />
<br />
<br />
<br />
<br />
<br />
With this view written, your feature will now whinge about the new action when you<br />
run bin/cucumber feature/creating_states.feature:<br />
And I follow "New State"<br />
The action 'new' could not be found<br />
for Admin::StatesController (AbstractController::ActionNotFound)<br />
Alright then, you should add the new action to Admin::StatesController if you want<br />
to continue any further. It should be defined like the following inside that controller:<br />
def new<br />
@state = State.new<br />
end<br />
You now need to create the view for this action at app/views/admin/states/<br />
new.html.erb and fill it in with the following content:<br />
New State<br />
<br />
You’re using a form partial here again because it’s best practice and also just in case<br />
you ever wanted to use it for an edit action. In a new file for your partial at app/views/<br />
admin/states/_form.html.erb, you put the form that will be used to create new states.<br />
This form is pretty simple—it only needs a text field for the name and a submit button<br />
to submit the form:<br />
<br />
<br />
<br />
<br />
<br />
<br />
<br />
Because the @state variable coming from the new is a new instance of the State<br />
model, the submit method will display a submit button with the text Create State, just<br />
like your feature needs. Speaking of which, with this form partial done, your feature<br />
should run a little further. You should check this now by running bin/cucumber<br />
features/creating_states.feature:<br />
And I press "Create State"<br />
The action 'create' could not be found<br />
for Admin::StatesController (AbstractController::ActionNotFound)
Managing states<br />
Right, so you need to create the create action too, which you define inside<br />
Admin::StatesController as shown in the following listing.<br />
Listing 10.24 app/controllers/admin/states_controller.rb<br />
def create<br />
@state = State.new(params[:state])<br />
if @state.save<br />
flash[:notice] = "State has been created."<br />
redirect_to admin_states_path<br />
else<br />
flash[:alert] = "State has not been created."<br />
render :action => "new"<br />
end<br />
end<br />
With the create action defined in your Admin::StatesController, you’ll now be able<br />
to run bin/cucumber features/creating_states.feature and have it pass:<br />
1 scenario (1 passed)<br />
8 steps (8 passed)<br />
Very good! By implementing a feature that lets the admin users of your site create<br />
states, you’ve provided a base to build the other state features upon. You shouldn’t<br />
have broken anything by these changes but it won’t hurt to run rake cucumber:ok<br />
spec to make sure. You should see the following summaries:<br />
50 scenarios (50 passed)<br />
571 steps (571 passed)<br />
# and<br />
25 examples, 0 failures, 9 pending<br />
Good to see everything’s still working. Commit and push this now:<br />
git add .<br />
git commit -m "Added Admin::StatesController for managing states"<br />
git push<br />
With this base defined, you can move on to more exciting things than CRUD, such as<br />
defining a default state for your tickets.<br />
10.4.2 Defining a default state<br />
A default state for the tickets in your application will provide a sensible way of grouping<br />
tickets that are new to the system, making it easier for them to be found. The easiest<br />
way to track which state is the default state is to add a boolean column called<br />
default to your states table, which is set to true if the state is the default, false if not.<br />
To get started, you write a feature that covers changing the default status. At the end<br />
of this feature, you end up with the default field in the states table, and then you can<br />
move on to making the tickets default to this state. Let’s create a new feature called features/managing_states.feature<br />
and fill it with the content from the following listing.<br />
273
274 CHAPTER 10 Tracking state<br />
Listing 10.25 features/managing_states.feature<br />
Feature: Managing states<br />
In order to change information about a state<br />
As an admin<br />
I want to be able to set a state's name and default status<br />
Background:<br />
Given I have run the seed task<br />
And I am signed in as "admin@ticketee.com"<br />
Scenario: Marking a state as default<br />
Given I am on the homepage<br />
When I follow "Admin"<br />
And I follow "States"<br />
And I follow "Make default" for the "New" state<br />
Then I should see "New is now the default state."<br />
In this scenario you’ve got one new step B, which you need to define for this feature<br />
to run. Let’s run this feature now to get the step definitions for these steps by running<br />
bin/cucumber features/managing_states.feature:<br />
When /^I follow "([^"]*)" for the "([^"]*)" state$/ do |arg1, arg2|<br />
pending # express the regexp above with the code you wish you had<br />
end<br />
You put this step definition inside features/step_definitions/state_steps.rb and work on<br />
getting the first definition to pass for now. This definition is used like this:<br />
And I follow "Make default" for the "New" state<br />
Which is a slightly modified version of the following:<br />
And I follow "Make Default" within "#some_state"<br />
B New step<br />
You’re not using the within variant here directly because you’re not going to be using<br />
a statically set id attribute for the state in the view but rather setting it to something<br />
like state_3 using this code:<br />
<br />
<br />
<br />
(Default)<br />
<br />
<br />
<br />
<br />
But you use this step within your custom step. You’re also not using the step When I<br />
follow "Make Default" because this will follow the first Make Default link on the<br />
page, which may or may not be the one that you want. With all of this in mind, you can<br />
redefine your step as follows:<br />
When /^I follow "([^"]*)" for the "([^"]*)" state$/ do |link, name|<br />
state = State.find_by_name!(name)<br />
steps(%Q{When I follow "#{link}" within "#state_#{state.id}"})<br />
end
Managing states<br />
Now in this step definition you find the state by the name given to you by the step and<br />
then find the link using the “When I follow [x] within [y]” step provided by Capybara.<br />
When you run this feature again, you’re told that it can’t find the state element you’re<br />
referencing:<br />
And I follow "Make default" for the "New" state<br />
scope '//*[@id = 'state_1']' not found on page (Capybara::ElementNotFound)<br />
This is because you haven’t added the id attribute to your state li tags inside the app/<br />
views/admin/states/index.html.erb. You can do this now by changing the following<br />
line inside this view; while you’re here, also add the Make Default link:<br />
<br />
To this:<br />
<br />
<br />
<br />
<br />
When you run your feature again you’ll rightly be told that the make_default_admin<br />
_state_path method is undefined. This method should take you to the make_default<br />
action in the Admin::StatesController, much like edit_admin_state_path takes<br />
you to the edit action. You can define this method as a member route on your states<br />
resource. A member route provides the routing helpers and, more important, the<br />
route itself, to a custom controller action for a single instance of a resource. To define<br />
this, you change the resources :states line inside the admin namespace inside<br />
config/routes.rb to the following:<br />
resources :states do<br />
member do<br />
get :make_default<br />
end<br />
end<br />
Inside the member block here, you define that each state resource has a new action<br />
called make_default that can be accessed through a GET request. As stated previously,<br />
by defining the route in this fashion you also get the<br />
make_default_admin_state_path helper which you use in app/views/admin/states/<br />
index.html.erb. With this member route now defined, your feature will complain that<br />
it’s missing the make_default action:<br />
And I follow "Make default" for the "New" state<br />
The action 'make_default' could not be found for<br />
Admin::StatesController (AbstractController::ActionNotFound)<br />
The make_default action will be responsible for making the state you’ve selected the<br />
new default state, as well as setting the old default state to not be the default anymore.<br />
You can define this action inside app/controllers/admin/states_controller.rb, as shown<br />
in the following listing.<br />
275
276 CHAPTER 10 Tracking state<br />
def make_default<br />
@state = State.find(params[:id])<br />
@state.default!<br />
flash[:notice] = "#{@state.name} is now the default state."<br />
redirect_to admin_states_path<br />
end<br />
Rather than putting the logic to change the selected state to the new default inside<br />
the controller, you place it in the model. To trigger a state to become the new default<br />
state, you call the default! method on it. It’s best practice to put code that performs<br />
functionality like this inside the model.<br />
This default! method can be defined in the State model, as shown in the following<br />
listing.<br />
def default!<br />
current_default_state = State.find_by_default(true)<br />
end<br />
Listing 10.26 app/controllers/admin/states_controller.rb<br />
Listing 10.27 app/models/state.rb<br />
self.default = true<br />
self.save!<br />
if current_default_state<br />
current_default_state.default = false<br />
current_default_state.save!<br />
end<br />
The find_by_default B method here is a dynamic finder method from Active<br />
Record. The find_by_default will either return the State object for the default<br />
state, or nil. If it doesn’t return nil C then you change its default state to false<br />
and save the record.<br />
When you run your feature again with bin/cucumber features/creating_states<br />
.feature, you see that the find_by_default method isn’t defined:<br />
And I follow "Make default" for the "New" state<br />
undefined method `find_by_default' for State...<br />
This dynamic method doesn’t exist because you haven’t yet defined the default column<br />
on your states table. If you had this column then Rails would have already<br />
defined the find_by_default method for you. To do this, you generate a migration<br />
that will add this column using the following command:<br />
rails g migration add_default_to_states default:boolean<br />
B Dynamic finder<br />
C Change default state<br />
Don’t run this migration just yet. With the default column being a boolean field, it’s<br />
going to need to know what its default value should be: either true or false. To set a
Managing states<br />
default for this column, open your newly created migration and change the line that<br />
adds the column to the following:<br />
add_column :states, :default, :boolean, :default => false<br />
With this small change, every State object that’s created will have the default attribute<br />
set to false by default. You now run your migration using rake db:migrate and<br />
rake db:test:prepare:<br />
When you run bin/cucumber features/managing_states.feature now, it will<br />
pass because you’ve got this default column allowing the whole process of making a<br />
state the default to complete:<br />
1 scenario (1 passed)<br />
7 steps (7 passed)<br />
Great to see! When a ticket is created, the state of that ticket will default to the<br />
State, which is set to default. You should make New the default state in your application<br />
by adding a default attribute from where you create it inside db/seeds.rb to<br />
the following:<br />
State.create(:name => "New",<br />
:background => "#85FF00",<br />
:color => "white",<br />
:default => true)<br />
When this seeds file is run later on, you’ll have a default state for your tickets so that<br />
they display properly in your tickets listing.<br />
You should now commit these change but, before that, you should make sure you<br />
haven’t caused anything to break. Let’s run rake cucumber:ok spec to find out:<br />
51 scenarios (51 passed)<br />
531 steps (531 passed)<br />
# and<br />
34 examples, 0 failures, 17 pending<br />
There’s nothing broken, so it’s time to commit:<br />
git add .<br />
git commit -m "Admins can now set a default state for tickets"<br />
git push<br />
You’re close to being done with states. So far, you’ve added the functionality for users<br />
to change the state through the comment form, to display the state transition on a<br />
comment, and (just recently) for admins to be able to create new states and toggle<br />
which state is the default.<br />
At the moment, any user is able to change the state of a ticket, which isn’t a good<br />
thing. You’d like some users to have the ability to leave a comment but not to change<br />
the state, and you’ll look at creating this feature right now. This is the final feature<br />
you’ll be implementing for states.<br />
277
278 CHAPTER 10 Tracking state<br />
10.5 Locking down states<br />
This feature is going to take a little more than hiding the State select box on the form;<br />
you also need to tell the application to ignore the state parameter if the user doesn’t<br />
have permission to change the state. You implement this one piece at a time, beginning<br />
with ensuring the State select box is hidden from those who should be unable to<br />
change the state.<br />
10.5.1 Hiding a select box<br />
In previous chapters you’ve seen how you can hide links from certain users by using<br />
the CanCan-provided can? view helper. You can also use this helper to hide the state<br />
field in your comment form from users without the permission to change the state.<br />
First, you write a Cucumber scenario to ensure that the State box is always hidden<br />
from these users.<br />
You add this particular scenario to the bottom of the features/creating<br />
_comments.feature because its operation is based around creating a comment. The scenario<br />
to ensure that you don’t see this state field is a short and simple one:<br />
Scenario: A user without permission cannot change the state<br />
When I follow "Change a ticket's state"<br />
Then I should not see the "#comment_state_id" element<br />
This scenario contains two simple steps: one to go to the ticket page and another to<br />
assert that you don’t see the State select box. When you run this scenario by running<br />
bundle exec features/creating_comments.feature:44, you see that the second step<br />
isn’t yet defined:<br />
Undefined step: "I should not see the "#comment_state_id" element"<br />
As usual, the definition for this step appears at the bottom of Cucumber’s output:<br />
Then /^I should not see the "([^"]*)" element$/ do |arg1|<br />
pending # express the regexp above with the code you wish you had<br />
end<br />
To define this step, you put its definition inside of features/step_definitions/<br />
application_steps.rb. To make it do the thing you want it to do, you can use one of<br />
Capybara’s helper methods called find.<br />
find can take many different forms, but in this case you’ll be using the following<br />
form:<br />
find(:css, css)<br />
By passing these two options to find, Capybara will look for any element on the page<br />
that matches the CSS selector. In this case, that would be css. If find does find an element<br />
or even a collection of elements, it will only return the first element from this list.<br />
If it can’t find anything, it will return nil. Using this knowledge, you can implement<br />
this step now as shown, putting it inside features/step_definitions/application_steps.rb:
Locking down states<br />
Then /^I should not see the "([^"]*)" element$/ do |css|<br />
page.should_not(have_css(css),<br />
"Expected to not see the #{css} element, but did.")<br />
end<br />
Here you use Capybara’s have_css matcher to see if the page has an element matching<br />
the CSS selector, which is passed to this step. You also use RSpec’s ability to specify<br />
a custom message if this assertion fails, returning “Expected to not see the<br />
#comment_state_id element, but did” if this element is visible on the page.<br />
If you run this feature using bin/cucumber features/creating_comments<br />
.feature:42, you see that this step is failing because it is seeing the element:<br />
Then I should not see the "#comment_state_id" element<br />
Expected to not see the #comment_state_id element, but did<br />
Right, now that you’ve got your feature to a good-enough point that it ensures that<br />
you shouldn’t see this field, it’s time to hide it and fix the feature. To do this, you use<br />
the can? method to check that the user has permission to change states for this project.<br />
If the user doesn’t have this permission, then you’ll hide the state field. With this<br />
change, the State select box code in app/views/comments/_form.html.erb will now<br />
look like the following listing.<br />
Listing 10.28 app/views/comments/_form.html.erb<br />
<br />
<br />
<br />
@ticket.state_id %><br />
<br />
<br />
Here you use the authorized? method defined in chapter 8 to only display the fields<br />
if the user is authorized to changed the states.<br />
This little change will make your scenario pass because the user you’re signing in<br />
as doesn’t have this particular permission set up. Let’s run it now with bin/cucumber<br />
features/creating_comments.feature:42 to make sure:<br />
1 scenario (1 passed)<br />
10 steps (10 passed)<br />
Good to see, but this view change has definitely broken the scenario in this feature,<br />
which does change the state. You can run this other scenario by running bin/cucumber<br />
features/creating_comments.feature:33; when you do that, you see that it’s<br />
indeed broken:<br />
cannot select option, no select box with id, name, or label 'State' found<br />
You’ve done something similar to this before in chapter 8. Back then, you used a step<br />
that set the current user up with a permission to perform a specific protected action.<br />
This is no different. Let’s write a new step underneath the title of the scenario on line<br />
279
280 CHAPTER 10 Tracking state<br />
33 of features/creating_comments.feature, which should be the scenario title of<br />
“Changing a ticket’s state”:<br />
Given "user@ticketee.com" can change states on the "Ticketee" project<br />
With the step in your scenario using this step definition now, the scenario will pass<br />
when you rerun it using bin/cucumber features/creating_comments.feature:33:<br />
1 scenario (1 passed)<br />
16 steps (16 passed)<br />
Good! All the scenarios in this feature should now be passing; you’ll check that in a<br />
minute. Your next step was going to be to ensure that the state_id parameter wasn’t<br />
passed through if the user doesn’t have access to create a state, but you’ve just added a<br />
new permission to the system. You should ensure that this permission is assignable to<br />
users before continuing, which you can do by adding a scenario to the Assigning Permissions<br />
feature.<br />
10.5.2 Bestowing changing state permissions<br />
The features/assigning_permissions.feature file contains the Assigning Permissions feature,<br />
which you’ve used to ensure that permissions are assignable from the permissions<br />
page in the backend accessible by admins. Let’s add another scenario now to test<br />
that you can assign this “change states” permission, as shown in the following listing.<br />
Listing 10.29 features/assigning_permissions.feature<br />
Scenario: Changing states for a ticket<br />
When I check "View" for "TextMate 2"<br />
And I check "Change States" for "TextMate 2"<br />
And I press "Update"<br />
And I follow "Sign out"<br />
Given I am signed in as "user@ticketee.com"<br />
When I follow "TextMate 2"<br />
And I follow "Shiny!"<br />
When I fill in "Text" with "Opening this ticket."<br />
And I select "Open" from "State"<br />
And I press "Create Comment"<br />
Then I should see "Comment has been created."<br />
And I should see "Open" within "#ticket .state"<br />
When you run this scenario with the command bec features/assigning<br />
_permissions.feature:73, you see that it can’t find the Change States select box for<br />
the TextMate 2 project:<br />
cannot check field, no checkbox ... 'permissions_1_change_states'<br />
This is fine. You haven’t added it to the list of permissions inside of app/helpers/<br />
admin/permissions_helper.rb yet. You can add this now by adding this key-value pair to<br />
the Hash object in the permissions method’s hash:<br />
"change states" => "Change States"
Locking down states<br />
With this added to the permissions hash, your scenario will move a little further<br />
toward success. When you rerun it, it will complain that it can’t find the Open state<br />
from your select box:<br />
And I select "Open" from "State"<br />
No such option 'Open' in this select box.<br />
Ah, not a problem! This means that the Open state isn’t yet defined in your test database.<br />
You need to create this state in the Background for this feature. You can do this<br />
by adding the following line at the bottom of the Background:<br />
Given there is a state called "Open"<br />
When you rerun this scenario using bin/cucumber features/assigning_permissions<br />
.feature:74, 4 it will now pass:<br />
1 scenario (1 passed)<br />
22 steps (22 passed)<br />
That’s good! Now admins are able to assign the “Change states” permission and users<br />
are able to see and touch the State select box on the comment form if they have this<br />
permission.<br />
This is a great halfway point before you go diving into the final stage of this particular<br />
set of features to run your Cucumber features and specs to ensure that nothing is<br />
broken. Let’s run rake cucumber:ok spec now; you should see that all your tests are<br />
passing:<br />
53 scenarios (53 passed)<br />
568 steps (568 passed)<br />
# and<br />
34 examples, 0 failures, 17 pending<br />
Yay! Everything is in working order, which means you can commit and push these<br />
changes to GitHub:<br />
git add .<br />
git commit -m "Only users with the 'change states' permission<br />
➥can change states"<br />
git push<br />
The final piece of your states puzzle is to stop the state parameter from being set in<br />
your CommentsController if a user passes it through and doesn’t have permission to<br />
set states. First, you’ll investigate how a user can fake this response. Afterward, you’ll<br />
write a controller spec that duplicates this and ensures that the state isn’t set.<br />
4 If you get no scenario and no steps running for this feature, are you sure you’re running the right line? Check<br />
to make sure you’re running line 75, not 74, which is now a blank line.<br />
281
282 CHAPTER 10 Tracking state<br />
10.5.3 Hacking a form<br />
Even if your state field is hidden from view, users are still able to submit a form<br />
containing this parameter, and your application will accept it. Let’s now see this in<br />
practice.<br />
The first things you need to do are to create a user and give it read access to a<br />
project, which you can do by starting rails console (or rails c) and running these<br />
commands:<br />
user = Factory(:user)<br />
user.confirm!<br />
user.permissions.create(:object => Project.first,<br />
:action => "view")<br />
Let’s quit the console by typing exit and then start up the application with rails<br />
server. Now you can sign in with the user@ticketee.com email and password password.<br />
Once you’re in, you should see the page shown in figure 10.16.<br />
Let’s go into this project and pick any<br />
ticket in the list or create your own. It<br />
doesn’t matter, you just need a ticket. When<br />
you’re on the ticket page, save this page by<br />
choosing File and then Save or Save Page As,<br />
and save this file in a memorable location.<br />
You’re going to be editing this saved file and<br />
adding a State select box of your own.<br />
Open this saved file in a text editor, and Figure 10.16 What the user sees<br />
look for the following lines:<br />
<br />
Text<br />
<br />
<br />
These lines display the Text label and the associated textarea for a new comment.<br />
You’re able to add the state field underneath the text field by adding this code 5 to<br />
the page:<br />
<br />
State<br />
<br />
New<br />
Open<br />
Closed<br />
<br />
<br />
When you save this page, you’ll now be able to choose a state when you open it in a<br />
browser. The action of the form tag on this page goes to http://localhost:3000/tickets<br />
5 Assuming you know the IDs of the states.
Locking down states<br />
/[id]/comments (where[id] is the id of the ticket this form will<br />
create a comment for), and this route will take you to the<br />
create action inside CommentsController.<br />
Let’s open this saved page in a browser now, fill in the text<br />
for the comment with anything, and select a value for the state.<br />
When you submit this form, it will create a comment and set the<br />
state. You should see your comment showing the state transition,<br />
as shown in figure 10.17.<br />
Obviously, hiding the state field isn’t a foolproof way to protect it. A better way to<br />
protect this attribute would be to delete it from the parameters before it gets to the<br />
method that creates a new comment.<br />
10.5.4 Ignoring a parameter<br />
If you remove the state_id key from the comment parameters before they’re passed to<br />
the build method in the create action for CommentsController, then this problem<br />
won’t happen. You should write a regression test. Regression tests are tests that save you<br />
from causing regressions.<br />
You now open spec/controllers/comments_controller_spec.rb and set up a project,<br />
ticket, state, and user for the spec you’re about to write by putting the code from the<br />
following listing inside the describe CommentsController block.<br />
Listing 10.30 spec/controllers/comments_controller_spec.rb<br />
let(:user) { create_user! }<br />
let(:project) { Project.create!(:name => "Ticketee") }<br />
let(:ticket) do<br />
project.tickets.create(:title => "State transitions",<br />
:description => "Can't be hacked.",<br />
:user => user)<br />
end<br />
let(:state) { State.create!(:name => "New") }<br />
The state you create is the one you’ll attempt to transition to in your spec, with the<br />
ticket’s default state being not set, and therefore nil. The user you set up is the user<br />
you use to sign in and change the state with. This user has no permissions at the<br />
moment and so they won’t be able to change the states.<br />
Your spec needs to make sure that a change doesn’t take place when a user who<br />
doesn’t have permission to change the status of a ticket for that ticket’s project<br />
submits a state_id parameter. You put this code, shown in the next listing, directly<br />
underneath the setup you just wrote.<br />
Listing 10.31 spec/controllers/comments_controller_spec.rb<br />
context "a user without permission to set state" do<br />
before do<br />
sign_in(:user, user)<br />
end<br />
283<br />
Figure 10.17<br />
Hacked state transition
284 CHAPTER 10 Tracking state<br />
it "cannot transition a state by passing through state_id" do<br />
post :create, { :comment => { :text => "Hacked!",<br />
:state_id => state.id },<br />
:ticket_id => ticket.id }<br />
ticket.reload<br />
B Reload Ticket object<br />
ticket.state.should eql(nil)<br />
end<br />
end<br />
This spec uses a before to sign in as the user before the example runs. Inside the<br />
example, you use the post method to make a POST request to the create action<br />
inside CommentsController, passing in the specified parameters. It’s this state_id<br />
parameter that should be ignored in the action.<br />
After the post method, you use a new method :reload B. When you call reload<br />
on an Active Record object, it will fetch the object again from the database and update<br />
the attributes for it. You use this because the create action acts on a different Ticket<br />
object and doesn’t touch the one you’ve set up for your spec.<br />
The final line here asserts that the ticket.state should be nil. When you run<br />
this spec by running bundle exec rspec spec/controllers/comments_controller<br />
_spec.rb, this final line will be the one to fail:<br />
Failure/Error: ticket.state.should eql(nil)<br />
expected nil<br />
got #<br />
The ticket.state is returning a state object because the user has been able to post<br />
it through the parameter hash. With a failing spec now in place, you can go about<br />
stopping this state parameter from going unchecked. To ignore this parameter, you<br />
can remove it from the params hash if the user doesn’t have permission to change<br />
states. At the top of the create action, inside of CommentsController, put the following<br />
lines:<br />
if cannot?(:"change states", @ticket.project)<br />
params[:comment].delete(:state_id)<br />
end<br />
This code will remove the state_id key from the params[:comment] hash if the user<br />
doesn’t have permission to change the states on the ticket’s project, thereby preventing<br />
them from being able to change the state. If you rerun your spec using bin/rspec spec<br />
/controllers/comments_controller_spec.rb, you’ll see that it passes:<br />
1 example, 0 failures<br />
Great! Now nobody without permission will be able to download the ticket page, make<br />
modifications to it to add a state field, and then be able to change the states.<br />
You’re done with this feature now so it’s time to make sure you didn’t break anything<br />
with your changes by running rake cucumber:ok spec. You should see that<br />
everything is squeaky clean:
53 scenarios (53 passed)<br />
615 steps (615 passed)<br />
# and<br />
26 examples, 0 failures, 9 pending<br />
Summary<br />
Great! You now commit and push this to Github:<br />
git add .<br />
git commit -m "Protect state_id from users who do<br />
not have permission to change it"<br />
git push<br />
The CommentsController will now reject the state_id parameter if the user doesn’t<br />
have permission to set it, thereby protecting the form from anybody hacking it to add<br />
a state_id field when they shouldn’t.<br />
The feature of protecting the state_id field from changes was the final piece of<br />
the state features puzzle. You’ve now learned how to stop a user from changing not<br />
only a particular record when they don’t have permission to, but also a specific field<br />
on a record.<br />
10.6 Summary<br />
You began this chapter by writing the basis for the work later on in the chapter: comments.<br />
By letting users posts comments on a ticket, you can let them add further information<br />
to it and tell a story.<br />
With the comment base laid down, you implemented the ability for users to be<br />
able to change a ticket’s state when they post a comment. For this, you tracked the<br />
state of the ticket before the comment was saved and the state assigned to the comment<br />
so you could show transitions (as shown in figure 10.18).<br />
You finished by limiting the ability to change states to only those who have permission<br />
to do so, much as you’ve previously limited the abilities to read projects and create<br />
tickets in previous chapters. While doing this, you saw how easy it was for<br />
somebody to download the source of your form and alter it to do their bidding and<br />
then how to protect it from that.<br />
In chapter 10, you will add tags to your tickets. Tags are<br />
words or short phrases that provide categorization for tickets,<br />
making them easier for users to manage. Additionally, you’ll<br />
implement a search interface that will allow users to find tickets<br />
with a given tag or state.<br />
285<br />
Figure 10.18<br />
Replay: state transitions
This chapter covers<br />
� Tagging specific records for easier searching<br />
� Restricting user access to tagging functionality<br />
� Searching for specific tags or specific states<br />
of a ticket<br />
286<br />
Tagging<br />
In chapter 10, you saw how to give your tickets states (New, Open, and Closed) so<br />
that their progress can be indicated.<br />
In this chapter, you’ll see how to give your tickets tags. Tags are useful for grouping<br />
similar tickets together into things such as iterations 1 or similar feature sets. If<br />
you didn’t have tags, you could crudely group tickets together by setting a ticket’s<br />
title to something such as “Tag - [name].” This method, however, is messy and difficult<br />
to sort through. Having a group of tickets with the same tag will make them<br />
much, much easier to find.<br />
To manage tags, you’ll set up a Tag model, which will have a<br />
has_and_belongs_to_many association to the Ticket model. You’ll set up a join<br />
table for this association, which is a table that contains foreign key fields for each<br />
1 For example, by using a process such as Agile, feature sets, or any other method of grouping.
Creating tags<br />
side of the association. A join table’s sole purpose is to<br />
join together the two tables whose keys it has. In this<br />
case, the two tables are the tickets and tags tables. As<br />
you move forward in developing this association, note<br />
that, for all intents and purposes, has_and_belongs_to<br />
_many works like a two-way has_many.<br />
Figure 11.1 The tag box<br />
You’ll create two ways to add tags to a ticket. A text<br />
field for new tickets beneath the ticket’s description field will allow users to add multiple<br />
tags by using a space to separate different tags, as shown in figure 11.1.<br />
Additional tags may also be added on a comment, with a text field similar to the<br />
one from the new ticket page providing the tagging mechanism. When a ticket is created,<br />
you’ll show these tags underneath the description, as shown in figure 11.2.<br />
When a user clicks a tag, they’ll be taken to a page where they can see all tickets<br />
with that particular tag. Alternatively, if the user clicks the little “x” next to the tag,<br />
that tag will be removed from the ticket. The actions of adding and removing a tag are<br />
both actions you’ll add to your permission checking.<br />
Finally, you’ll implement a way to search for tickets<br />
that match a state, a tag, or both, by using a gem called<br />
searcher. The query will look like tag:iteration_1<br />
state: open.<br />
That’s all there is to this chapter! You’ll be adding<br />
tags to Ticketee, which will allow you to easily group and<br />
sort tickets. Let’s dig into your first feature, adding tags Figure 11.2 A tag for a ticket<br />
to a new ticket.<br />
11.1 Creating tags<br />
Tags in this application will be extremely useful for making similar tickets easy to find<br />
and manage. In this section, you’ll create the interface for adding tags to a new ticket<br />
by adding a new field to the new ticket page and defining a has_and_belongs<br />
_to_many association between the Ticket model and the not-yet-existent Tag model.<br />
11.1.1 Creating tags feature<br />
You’re going to add a text field beneath the description field on the new ticket page<br />
for this feature, as you saw earlier in figure 11.1.<br />
The words you enter into this field will become the tags for this ticket, and you<br />
should see them on the ticket page. At the bottom of features/creating_tickets.feature,<br />
you add a scenario that creates a new ticket with tags, as shown in listing 11.1.<br />
Listing 11.1 features/creating_tickets.feature<br />
Scenario: Creating a ticket with tags<br />
When I fill in "Title" with "Non-standards compliance"<br />
And I fill in "Description" with "My pages are ugly!"<br />
And I fill in "Tags" with "browser visual"<br />
287
288 CHAPTER 11 Tagging<br />
And I press "Create Ticket"<br />
Then I should see "Ticket has been created."<br />
And I should see "browser" within "#ticket #tags"<br />
And I should see "visual" within "#ticket #tags"<br />
When you run the “Creating a ticket with tags” scenario using bin/cucumber features<br />
/creating_tickets.feature:50 it will fail, declaring that it can’t find the Tags field.<br />
Good! It’s not there yet:<br />
And I fill in "Tags" with "browser visual"<br />
cannot fill in, no text field, text area or password field<br />
with id, name, or label 'Tags' found (Capybara::ElementNotFound)<br />
You’re going to take the data from this field, process each word into a new Tag object,<br />
and then link the tags to the ticket when it’s created. You’ll use a text_field_tag to<br />
render the Tags field this way. text_field_tag is similar to a text_field tag, but it<br />
doesn’t have to relate to any specific object like text_field does. Instead, it will output<br />
an input tag with the type attribute set to text and the name set to whatever<br />
name you give it.<br />
11.1.2 Using text_field_tag<br />
To define this field, you put the following code underneath the p tag for the description<br />
in app/views/tickets/_form.html.erb:<br />
<br />
<br />
<br />
<br />
This field will be sent through to TicketsController as params[:tags], rather than<br />
the kind of attributes you’re used to, such as params[:ticket][:title].<br />
By specifying params[:tags] as the second argument to text_field_tag, you can<br />
re-populate this field when the ticket cannot be created due to it failing validation.<br />
When you re-run this scenario again with bin/cucumber features/creating<br />
_tickets.feature:51, it no longer complains about the missing Tags field, telling<br />
you instead that it can’t find the tags displayed on your ticket:<br />
And I should see "browser" within "#ticket #tags"<br />
Unable to find css "#ticket #tags" (Capybara::ElementNotFound)<br />
You now need to define this #tags element inside the #ticket element on the ticket’s<br />
page so that this part of the scenario will pass. This element will contain the tags for<br />
your ticket, which your scenario will assert are actually visible.<br />
11.1.3 Showing tags<br />
You can add this new element, with its id attribute set to tags, to app/views/tickets/<br />
show.html.erb by adding this simple line underneath where you render the ticket’s<br />
description:<br />
Creating tags<br />
This creates the #ticket #tags element that your feature is looking for, and will render<br />
the soon-to-be-created app/views/tags/_tag.html.erb partial for every element in<br />
the also-soon-to-be-created tags association on the @ticket object. Which of these<br />
two steps do you take next? If you run your scenario again, you see that it cannot find<br />
the tags method for a Ticket object:<br />
undefined method `tags' for #
290 CHAPTER 11 Tagging<br />
To define the tags_tickets table, put this code in the change section of your db/<br />
migrate/[timestamp]_create_tags.rb migration:<br />
create_table :tags_tickets, :id => false do |t|<br />
t.integer :tag_id, :ticket_id<br />
end<br />
The :id => false option passed to create_table here tells Active Record to create<br />
the table without the id field, because the join table only cares about the link between<br />
tickets and tags, and therefore does not need a unique identifier.<br />
Next, run the migration on your development database by running rake<br />
db:migrate, and on your test database by running rake db:test:prepare. This will<br />
create the tags and tags_tickets tables.<br />
When you run this scenario again with bin/cucumber features/creating<br />
_tickets:48, it is now satisfied that the tags method is defined and moves on to complaining<br />
that it can’t find the tag you specified:<br />
And I should see "browser" within "#ticket #tags"<br />
Failed assertion, no message given. (MiniTest::Assertion)<br />
This failure is because you’re not doing anything to associate the text from the Tags<br />
field to the ticket you’ve created. You need to parse the content from this field into<br />
new Tag objects and then associate them with the ticket you are creating, which you’ll<br />
do right now.<br />
11.1.6 Displaying a ticket’s tags<br />
The params[:tags] in TicketsController’s create is the value from your Tags field<br />
on app/views/tickets/_form.html.erb. This is also the field you need to parse into Tag<br />
objects and associate those tags with the Ticket object you are creating.<br />
To do this, alter the create action in TicketsController by adding this line<br />
directly after@ticket.save:<br />
@ticket.tag!(params[:tags])<br />
This new tag! method will parse the tags from params[:tags], convert them into new<br />
Tag objects, and associate them with the ticket. You can define this new method at the<br />
bottom of your Ticket model like this:<br />
def tag!(tags)<br />
tags = tags.split(" ").map do |tag|<br />
Tag.find_or_create_by_name(tag)<br />
end<br />
self.tags
Creating tags<br />
using find_by_default. find_or_create_by methods work in a similar fashion,<br />
except they will always return a record, whether it be a pre-existing one or a recently<br />
created one.<br />
After all the tags have been iterated through, you assign them to a ticket by using<br />
the
292 CHAPTER 11 Tagging<br />
11.2 Adding more tags<br />
The tags for a ticket can change<br />
throughout the ticket’s life; new tags<br />
can be added and old ones can be<br />
deleted. Let’s look at how you can add<br />
more tags to a ticket after it’s been created<br />
through the comments form.<br />
Underneath the comment form on a<br />
ticket’s page, add the same Tags field<br />
that you previously used to add tags to<br />
your ticket on the new ticket page. One<br />
thing you have to keep in mind here is<br />
that if someone enters a tag that’s<br />
already been entered, you don’t want it<br />
to show up.<br />
You’ve got two scenarios to implement<br />
then: the first is a vanilla addition<br />
of tags to a ticket through a comment,<br />
and the second is a scenario ensuring<br />
Figure 11.3 Comment form with tags<br />
that duplicate tags do not appear. Let’s implement this function one scenario at a<br />
time. When you’re done, you’ll end up with the pretty picture shown in figure 11.3.<br />
11.2.1 Adding tags through a comment<br />
To test that users can add tags when they’re creating a comment, you add a new scenario<br />
to the features/creating_comments.feature feature that looks like this listing:<br />
Listing 11.2 features/creating_comments.feature<br />
Scenario: Adding a tag to a ticket<br />
When I follow "Change a ticket's state"<br />
Then I should not see "bug" within "#ticket #tags"<br />
And I fill in "Text" with "Adding the bug tag"<br />
And I fill in "Tags" with "bug"<br />
And I press "Create Comment"<br />
Then I should see "Comment has been created"<br />
Then I should see "bug" within "#ticket #tags"<br />
First, you make sure you don’t see this tag within #ticket #tags, to ensure you don’t<br />
have a false positive. Next, you fill in the text for the comment so it’s valid, add the<br />
word “bug” to the Tags field, and click the Create Comment button. Finally, you<br />
ensure that the comment has been created and that the bug tag you entered into the<br />
comment form now appears in #ticket #tags.<br />
When you run this scenario using bin/cucumber features/creating_comments<br />
.feature:47, it will fail because there is no Tags field on the ticket’s page yet:
Adding more tags<br />
cannot fill in, no text field, text area or password<br />
field with id, name, or label 'Tags' found<br />
You can fix this by taking these lines from app/views/tickets/_form.html.erb and moving<br />
them into a new partial at app/views/tags/_form.html.erb:<br />
<br />
<br />
<br />
<br />
Replace the code you removed from app/views/tickets/_form.html.erb with this line:<br />
<br />
This new line will render your new tags partial. In order to make the failing step in<br />
your scenario now pass, you re-use this same line inside the authorized? block inside<br />
app/views/comments/_form.html.erb underneath the code you use to render the<br />
State select box.<br />
When you run bin/cucumber features/creating_comments.feature:47, you see<br />
that this step is indeed passing, but now it’s the final step of your scenario that is failing:<br />
Then I should see "bug" within "#ticket #tags"<br />
expected there to be content "bug" in ""<br />
This feature is not seeing the word “bug” within the content for the ticket’s tags<br />
(which is empty), and so the scenario fails. This is because the code to associate a tag<br />
with a ticket isn’t in the create action of CommentsController yet. In the create<br />
action in TicketsController, you use this line to tag the ticket that was created:<br />
@ticket.tag!(params[:tags])<br />
You can use this same method to tag a comment’s ticket. On the line immediately<br />
after if @comment.save in the create action inside CommentsController, you re-use<br />
the tag! line. That’s all you need to get this scenario to pass, right? Run bin/cucumber<br />
features/creating_comments.feature:47 to find out:<br />
1 scenario (1 passed)<br />
15 steps (15 passed)<br />
Boom, that’s passing! Good stuff. Now for the cleanup. Make sure you haven’t broken<br />
anything else by running rake cucumber:ok spec:<br />
55 scenarios (55 passed)<br />
598 steps (598 passed)<br />
# and<br />
27 examples, 1 failure, 10 pending<br />
It would seem your spec/controllers/comments_controller_spec.rb doesn’t want to<br />
play nice.<br />
293
294 CHAPTER 11 Tagging<br />
11.2.2 Fixing the CommentsController spec<br />
The CommentsController spec is failing with this error:<br />
You have a nil object when you didn't expect it!<br />
You might have expected an instance of Array.<br />
The error occurred while evaluating nil.split<br />
# ./app/models/ticket.rb:16:in `tag!'<br />
# ./app/controllers/comments_controller.rb:12:in `create'<br />
Ah, it seems to be from within the tag! method from the Ticket model. The sixteenth<br />
line of this model is<br />
tags = tags.split(" ").map do |tag|<br />
It’s the calling of tags.split that is making the spec fail, but why? tags comes from<br />
the argument passed to this method from the CommentsController’s create action by<br />
this line:<br />
@ticket.tag!(params[:tags])<br />
You’d get this error if params[:tags] was ever nil, because you cannot call split on<br />
nil. Why is it nil in your controller spec, though? It’s because you’re not sending it<br />
through with the other parameters in your spec:<br />
post :create, { :comment => { :text => "Hacked!",<br />
:state_id => state.id },<br />
:ticket_id => ticket.id }<br />
You can solve this problem in one of two ways. The first way is to check that<br />
params[:tags] is not nil before calling the tag! method by adding code to the<br />
CommentsController, or better still, by adding code to the tag! method in the Ticket<br />
model. The second way is to make the controller spec accurately reflect reality.<br />
Because the Tags field is always going to be on the comments page, its value will be<br />
set to an empty string if it is left as-is. The second fix is therefore better, because it<br />
fixes the problem rather than compensating for an issue that will only happen in your<br />
tests. You can change the post method in the test in spec/controllers/<br />
comments_controller_spec.rb to this:<br />
post :create, { :tags => "",<br />
:comment => { :text => "Hacked!",<br />
:state_id => state.id },<br />
:ticket_id => ticket.id }<br />
Due to this small change, all your specs will be passing when you run rake spec again:<br />
27 examples, 0 failures, 10 pending<br />
With all the specs and features passing, it’s commit time! In this section, you’ve created<br />
a way for your users to add more tags to a ticket when they add a comment, which<br />
allows your users to easily organize tickets into relevant groups. Let’s commit this<br />
change now:
Tag restriction<br />
git add .<br />
git commit -m "Users can add tags when adding a comment"<br />
git push<br />
With the ability to add tags when creating a ticket or a comment now available, you<br />
need to restrict this power to users with permission to manage tags. You don’t want all<br />
users to create tags willy-nilly, because it’s likely you would end up with an overabundance<br />
of tags. 2 Too many tags makes it hard to identify which tags are useful and<br />
which are not. People with permission to tag things will know that with great power,<br />
comes great responsibility.<br />
11.3 Tag restriction<br />
Using the permissions system you built in chapter 8, you can easily add another type<br />
of permission: one for tagging. If a user has this permission, they will be able to add<br />
and (later on) remove tags.<br />
11.3.1 Testing tag restriction<br />
When a user without permission attempts to submit a ticket or comment, the application<br />
should not tag the ticket with the tags they have specified. You’ll add this restriction<br />
to the CommentsController, but first you’ll write a controller spec to cover this<br />
behavior. In spec/controllers/comments_controller_spec.rb, put this spec underneath<br />
the one you just fixed:<br />
it "cannot tag a ticket without permission" do<br />
post :create, { :tags => "one two", :comment => { :text => "Tag!" },<br />
:ticket_id => ticket.id }<br />
ticket.reload<br />
ticket.tags.should be_empty<br />
end<br />
You can then run this spec using bin/rspec spec/controllers/comments_controller<br />
_spec.rb and see that it fails because the tags are still set:<br />
Failure/Error: ticket.tags.should be_empty<br />
expected empty? to return true, got false<br />
Good! A failing test is a good start to a new feature. To make this test pass, you should<br />
use the can? method in CommentsController to check the user’s permission. You now<br />
change this line<br />
@ticket.tag!(params[:tags])<br />
to these lines:<br />
if can?(:tag, @ticket.project) || current_user.admin?<br />
@ticket.tag!(params[:tags])<br />
end<br />
2 Such as the tags on the Rails Lighthouse account, at lower right of this page: https://rails.lighthouseapp<br />
.com/projects/8994-ruby-on-rails/overview.<br />
295
296 CHAPTER 11 Tagging<br />
Because the user that is set up in spec/controllers/comments_controller_spec.rb<br />
doesn’t have permission to tag, when you re-run your spec it will now pass:<br />
2 examples, 0 failures<br />
Good! You have something in place to block users from tagging tickets when they create<br />
a comment. Now you’re only missing the blocking code for tagging a ticket when it<br />
is being created. You can create a spec test for this too, this time in spec/controllers/<br />
tickets_controller_spec.rb. Underneath the “Cannot delete a ticket without permission”<br />
example, add this example:<br />
it "can create tickets, but not tag them" do<br />
Permission.create(:user => user, :thing => project,<br />
➥:action => "create tickets")<br />
post :create, :ticket => { :title => "New ticket!",<br />
:description => "Brand spankin' new" },<br />
:project_id => project.id,<br />
:tags => "these are tags"<br />
Ticket.last.tags.should be_empty<br />
end<br />
You can run this spec by running bin/rspec spec/controllers/tickets_controller<br />
_spec.rb:59, and you’ll see that it fails:<br />
Failure/Error: Ticket.last.tags.should be_empty<br />
expected empty? to return true, got false<br />
Because there is no restriction on tagging a ticket through the create action, there<br />
are tags for the ticket that was just created, and so your example fails. For your<br />
TicketsController’s create action, you can do exactly what you did in the<br />
CommentsController’s create action and change the line that calls tag! to this:<br />
if can?(:tag, @project) || current_user.admin?<br />
@ticket.tag!(params[:tags])<br />
end<br />
When you re-run your spec it will pass:<br />
1 example, 0 failures<br />
Great, now you’re protecting both the ways a ticket can be tagged. Because of this<br />
new restriction, the two scenarios that you created earlier to test this behavior will be<br />
broken.<br />
11.3.2 Tags are allowed, for some<br />
When you run rake cucumber:ok you see them listed as the only two failures:<br />
Failing Scenarios:<br />
cucumber features/creating_comments.feature:45<br />
cucumber features/creating_tickets.feature:48<br />
To fix these two failing scenarios, you use a new step, which you first put in the “Creating<br />
comments” feature underneath this line in the Background for this feature<br />
And "user@ticketee.com" can view the "Ticketee" project
Put this line:<br />
Deleting a tag<br />
And "user@ticketee.com" can tag the "Ticketee" project<br />
With your all-powerful step defined in features/step_definitions/permission_steps.rb,<br />
you don’t have to define a definition for this step to work. When you re-run this scenario<br />
using bin/cucumber features/creating_comments.feature:48, it will pass:<br />
1 scenario (1 passed)<br />
16 steps (16 passed)<br />
One scenario down, one to go! The next one is the features/creating_tickets.feature:51<br />
scenario. At the top of the feature, you can put the same line you used in the “Creating<br />
comments” feature, right under the view permission. Don’t forget to rename the<br />
project:<br />
And "user@ticketee.com" can tag the "Internet Explorer" project<br />
This scenario too will pass:<br />
1 scenario (1 passed)<br />
16 steps (16 passed)<br />
Great! Only certain users can now tag tickets. Let’s make sure that everything is still<br />
running at 100% by running rake cucumber:ok spec. You should see this:<br />
55 scenarios (55 passed)<br />
608 steps (608 passed)<br />
# and<br />
38 examples, 0 failures, 18 pending<br />
In this section, you have restricted the ability to add tags to a ticket—whether through<br />
the new ticket or comment forms—to only users who have the permission to tag.<br />
You’ve done this to restrict the flow of tags. Generally speaking, the people with the<br />
ability to tag should know only to create useful tags, so that the usefulness of the tags is<br />
not diluted. In the next section, you’ll use this same permission to determine what<br />
users are able to remove a tag from a ticket.<br />
11.4 Deleting a tag<br />
Removing a tag from a ticket is a helpful feature, because a tag may become irrelevant<br />
over time. Say that you’ve tagged a ticket as v0.1 for your project, but the feature isn’t<br />
yet complete and needs to be moved to v0.2. Without this feature, there will be no way<br />
to delete the old tag. Then what? Was this ticket for v0.1 or v0.2? Who knows? With the<br />
ability to delete a tag, you have some assurance that people<br />
will clean up tags if they’re able to.<br />
To let users delete a tag, add an X to the left of each<br />
of your tags, as shown in figure 11.4.<br />
When this X is clicked, the tag will disappear through<br />
the magic of JavaScript. Rather than making a whole<br />
request out to the action for deleting a tag and then<br />
redirecting back to the ticket page, remove the tag’s ele- Figure 11.4 X marks the spot<br />
297
298 CHAPTER 11 Tagging<br />
ment from the page and make an asynchronous behind-the-scenes request to the<br />
action.<br />
11.4.1 Testing tag deletion<br />
To click this link using Cucumber, you give the link around the X an id so you can easily<br />
locate it in your feature, which you’ll now write. Let’s create a new file at features/<br />
deleting_tags.feature and put in it the code from the following listing.<br />
Listing 11.3 features/deleting_tags.feature<br />
Feature: Deleting tags<br />
In order to remove old tags<br />
As a user<br />
I want to click a button and make them go away<br />
Background:<br />
Given there are the following users:<br />
| email | password |<br />
| user@ticketee.com | password |<br />
And I am signed in as them<br />
And there is a project called "Ticketee"<br />
And "user@ticketee.com" can view the "Ticketee" project<br />
And "user@ticketee.com" can tag the "Ticketee" project<br />
And "user@ticketee.com" has created a ticket for this project:<br />
| title | description | tags |<br />
| A tag | Tagging a ticket! | this-tag-must-die |<br />
Given I am on the homepage<br />
When I follow "Ticketee" within "#projects"<br />
And I follow "A tag"<br />
@javascript<br />
Scenario: Deleting a tag<br />
When I follow "delete-this-tag-must-die"<br />
Then I should not see "this-tag-must-die"<br />
In this scenario, it’s important to note that you’re passing through the tags field as a<br />
field in the “created a ticket” step, just like the other fields. The tags field isn’t in the<br />
tickets table. You’ll get to that in a second.<br />
In this feature, you create a new user and sign in as them. Then you create a new<br />
project called Ticketee and give the user the ability to view and tag the project. You<br />
create a ticket by the user and tag it with a tag called this_tag_must_die. Finally, you<br />
navigate to the page of the ticket you’ve created.<br />
In the scenario, you follow the delete-this-tag-must-die link, which will be the<br />
id on the link to delete this tag. When this link has been followed, you shouldn’t see<br />
this_tag_must_die, meaning that the action to remove the tag from the ticket has<br />
worked its magic.<br />
When you run this feature using bin/features/deleting_tags.feature, you get<br />
this error:<br />
undefined method `each' for "this_tag_must_die":String (NoMethodError)<br />
./features/step_definitions/ticket_steps.rb:10 ...
Deleting a tag<br />
This error is coming from ticket_steps.rb, line 10. Lines 8–11 of this file look like this:<br />
table.hashes.each do |attributes|<br />
attributes.merge!(:user => User.find_by_email!(email))<br />
@project.tickets.create!(attributes)<br />
end<br />
The error is happening because the tags key in the ticket hash wants to pretend it’s<br />
a field like the other keys. In this case, it’s assuming that you’re assigning a collection<br />
of tag objects to this new ticket, and is therefore trying to iterate over each of them so<br />
that it can generate the join between this ticket and those tags. Because you’re passing<br />
it a string, it’s not going to work!<br />
You should extract this column out of this hash and use the tag! method to assign<br />
the tags, rather than attempting to create them through create!. You can modify<br />
these four lines now to look like this:<br />
table.hashes.each do |attributes|<br />
tags = attributes.delete("tags")<br />
attributes.merge!(:user => User.find_by_email!(email))<br />
ticket = @project.tickets.create!(attributes)<br />
ticket.tag!(tags) if tags<br />
end<br />
On the first line of your iteration, you use the same delete method that you’ve used a<br />
couple of times previously. This method removes the key from a hash and returns the<br />
value of that key, which you assign to the tags variable. On the final line of the iteration,<br />
call the familiar tag! method and pass in tags, thereby tagging your ticket with<br />
the passed-in tags. You use if tags because otherwise it would attempt to pass in a<br />
nil object, resulting in the nil.split error you saw earlier.<br />
When you re-run your feature using bin/cucumber features/deleting_tags<br />
.feature, it gets to the guts of your scenario and tells you that it can’t find the delete<br />
link you’re looking for:<br />
When I follow "delete-this-tag-must-die"<br />
no link with title, id or text 'delete-this_tag_must_die'<br />
Alright, time to implement this bad boy.<br />
11.4.2 Adding a link to delete the tag<br />
You need a link with the id of delete-this-tag-must-die, which is the word delete,<br />
followed by a hyphen and then the parameterize’d version of the tag’s name. This<br />
link needs to trigger an asynchronous request to an action that would remove a tag<br />
from a ticket. The perfect name for an action like this, if you were to put it in the<br />
TicketsController, would be remove_tag. But because it’s acting on a tag, a better<br />
place for this action would be inside a new controller called TagsController.<br />
Before you go and define this action, let’s define the link that your scenario is looking<br />
for first. This link goes into the tag partial at app/views/tags/_tag.html.erb inside<br />
the span tag:<br />
299
300 CHAPTER 11 Tagging<br />
<br />
true,<br />
:url => remove_ticket_tag_path(@ticket, tag),<br />
:method => :delete,<br />
:html => { :id => "delete-#{tag.name.parameterize}" } %><br />
<br />
<br />
Here, you check that a user can tag in the ticket’s project. If they can’t tag, then you<br />
won’t show the X to remove the tag. This is to prevent everyone from removing tags as<br />
they feel like it. Remember? With great power comes great responsibility.<br />
You use the :remote option for the link_to, to indicate to Rails that you want this<br />
link to be an asynchronous request. This is similar to the Add Another File button you<br />
provided in chapter 9, except this time you don’t need to call out to any JavaScript to<br />
determine anything, you only need to make a request to a specific URL.<br />
For the :url option here, you pass through the @ticket object to remove_ticket<br />
_tag_path so that your action knows what ticket to delete the tag from. Remember:<br />
your primary concern right now is disassociating a tag and a ticket, not completely<br />
deleting the tag.<br />
Because this is a destructive action, you use the :delete method. You’ve used this<br />
previously for calling destroy actions, but the :delete method is not exclusive to the<br />
destroy action, and so you can use it here as well.<br />
The final option, :html, lets you define HTML attributes for the link. Inside this<br />
hash, you set the id key to be the word delete, followed by a hyphen and then the name<br />
of your tag parameterize’d. For the tag in your scenario, this is the id that you’ll use<br />
to click this link. Capybara supports following links by their internal text, the name<br />
attribute, or the id attribute.<br />
When you run your feature with bundle exec cucumber features/deleting_tags<br />
.feature, you see that it reports the same error message at the bottom:<br />
When I follow "delete-this-tag-must-die"<br />
no link with title, id or text 'delete-this-tag-must-die'<br />
Ah! A quick eye would have spotted an error when the browser launched by Web-<br />
Driver tried going to this page; it looks like figure 11.5.<br />
This error is coming up because you haven’t defined the route to the remove<br />
action yet. You can define this route in config/routes.rb inside the resources :tickets<br />
block, morphing it into this:<br />
Figure 11.5 Internal Server Error
esources :tickets do<br />
resources :comments<br />
resources :tags do<br />
member do<br />
delete :remove<br />
end<br />
end<br />
end<br />
Deleting a tag<br />
By nesting the tags resource inside the ticket’s resource, you are given routing helpers<br />
such as ticket_tag_path. With the member block inside the resources :tags, you can<br />
define further actions that this nested resource responds to. You’ll define that you<br />
should accept a DELETE request to a route to a remove action for this resource, which<br />
you should now create.<br />
Before you add this action to the TagsController, you must first generate this controller<br />
by using<br />
rails g controller tags<br />
Now that you have a controller to define your action in, let’s open app/controllers/<br />
tags_controller.rb and define the remove action in it like this:<br />
def remove<br />
@ticket = Ticket.find(params[:ticket_id])<br />
if can?(:tag, @ticket.project) || current_user.admin?<br />
@tag = Tag.find(params[:id])<br />
@ticket.tags -= [@tag]<br />
B Remove tag<br />
@ticket.save<br />
render :nothing => true<br />
end<br />
end<br />
In this action, you find the ticket based on the id passed through as params[:ticket],<br />
and then you do something new. On the left side of -= B you have @ticket.tags. On<br />
the right, is an array containing @tag. This combination will remove the tag from the<br />
ticket, but will not delete it from the database.<br />
On the second-to-last line of this action, you save the ticket minus one tag. On the<br />
final line you tell it to return nothing, which will return a 200 OK status to your<br />
browser, signaling that everything went according to plan.<br />
When you re-run your scenario it will now successfully click the link, but the tag is<br />
still there:<br />
When I follow "delete-this-tag-must-die"<br />
Then I should not see "this-tag-must-die"<br />
Failed assertion, no message given. (MiniTest::Assertion)<br />
Your tag is unassociated from the ticket but not removed from the page, and so your<br />
feature is still failing. The request is made to delete the ticket, but there’s no code currently<br />
that removes the tag from the page. There are two problems you must overcome<br />
to make this work. The first is that there’s no code. That part’s easy, and you’ll<br />
301
302 CHAPTER 11 Tagging<br />
get there pretty soon. The second is that there’s no unique identifier for the element<br />
rendered by app/views/tags/_tag.html.erb, which makes removing it from the page<br />
exceptionally difficult with JavaScript. Let’s add a unique identifier now and remove<br />
the element.<br />
11.4.3 Actually removing a tag<br />
You’re removing a tag’s association from a ticket, but you’re not yet showing people<br />
that it has happened on the page. You can fix the second of your aforementioned<br />
problems by changing the span tag at the top of this partial to be this:<br />
<br />
This will give the element a unique identifier, which you can use to locate the element<br />
and then remove it using JavaScript. Currently for the remove action, you’re rendering<br />
nothing. Let’s now remove the render :nothing => true line from this action,<br />
because you’re going to get it to render a template.<br />
If a request is made asynchronously, the format for that request will be js, rather<br />
than the standard html. For views, you’ve always used the html.erb extension, because<br />
HTML is all you’ve been serving. As of now, this changes. You’re going to be rendering<br />
a js.erb template, which will contain JavaScript code to remove your element. Let’s<br />
create the view for the remove action in a file called app/views/tags/remove.js.erb, and<br />
fill it with this content:<br />
$('#tag-').remove();<br />
This code will be run when the request to the remove action is complete. It uses the<br />
jQuery library’s $ function to locate an element with the id attribute of tag-this-tagmust-die<br />
and then calls remove() 3 on it, which will remove this tag from the page.<br />
When you run your feature using bin/cucumber features/deleting_tags<br />
.feature, you see that it now passes:<br />
1 scenario (1 passed)<br />
11 steps (11 passed)<br />
Awesome! With this feature done, users with permission to tag on a project will now<br />
be able to remove tags too. Before you commit this feature, let’s run rake cucumber<br />
:ok spec to make sure everything is ok:<br />
56 scenarios (55 passed)<br />
619 steps (619 passed)<br />
# and<br />
39 examples, 0 failures, 19 pending<br />
That’s awesome too! Commit and push this:<br />
git add .<br />
git commit -m "Added remove tag functionality"<br />
git push<br />
3 http://api.jquery.com/remove/.
Finding tags<br />
Now that you can add and remove tags, what is there left to do? Find them! By implementing<br />
a way to find tickets with a given tag, you make it easier for users to see only<br />
the tickets they want to see. As an added bonus, you’ll also implement a way for the<br />
users to find tickets for a given state, perhaps even at the same time as finding a tag.<br />
When you’re done with this next feature, you’ll add some more functionality that<br />
will let users go to tickets for a tag by clicking the tag name inside the ticket show<br />
page.<br />
11.5 Finding tags<br />
At the beginning of this chapter, we planned on covering searching for tickets using a<br />
query such as tag:iteration_1 state: open. This magical method would return all<br />
the tickets in association with the iteration_1 tag that were marked as open. This<br />
helps users scope down the list of tickets that appear on a project page to be able to<br />
better focus on them.<br />
There’s a gem developed specifically for this purpose called Searcher 4 that you can<br />
use. This provides you with a search method on specific classes, which accepts a query<br />
like the one mentioned and returns the records that match it.<br />
11.5.1 Testing search<br />
As usual, you should (and will) test that searching for tickets with a given tag works,<br />
which you can do by writing a new feature called features/searching.feature and filling<br />
it with the content from the following listing.<br />
Listing 11.4 features/searching.feature<br />
Feature: Searching<br />
In order to find specific tickets<br />
As a user<br />
I want to enter a search query and get results<br />
Background:<br />
Given there are the following users:<br />
| email | password |<br />
| user@ticketee.com | password |<br />
And I am signed in as them<br />
And there is a project called "Ticketee"<br />
And "user@ticketee.com" can view the "Ticketee" project<br />
And "user@ticketee.com" can tag the "Ticketee" project<br />
And "user@ticketee.com" has created a ticket for this project:<br />
| title | description | tags |<br />
| Tag! | Hey! You're it! | iteration_1 |<br />
And "user@ticketee.com" has created a ticket for this project:<br />
| title | description | tags |<br />
| Tagged! | Hey! I'm it now! | iteration_2 |<br />
Given I am on the homepage<br />
4 This gem is good for a lo-fi solution but shouldn’t be used in a high search-volume environment. For that,<br />
look into full text search support for your favorite database system.<br />
303
304 CHAPTER 11 Tagging<br />
And I follow "Ticketee" within "#projects"<br />
Scenario: Finding by tag<br />
When I fill in "Search" with "tag:iteration_1"<br />
And I press "Search"<br />
Then I should see "Tag!"<br />
And I should not see "Tagged!"<br />
In the Background for this feature, you create two tickets and give them two separate<br />
tags: iteration_1 and iteration_2. When you look for tickets tagged with<br />
iteration_1, you shouldn’t see tickets that don’t have this tag, such as the one that is<br />
only tagged iteration_2.<br />
Run this feature using bin/cucumber features/searching.feature, and it’ll complain<br />
because there’s no Search field on the page:<br />
When I fill in "Search" with "tag:iteration_1"<br />
cannot fill in ... 'Search'<br />
In your feature, the last thing you do before attempting to fill in this Search field is go<br />
to the project page for Ticketee. This means that the Search field should be on that<br />
page so that your feature and, more important, your users, can fill it out. You add the<br />
field above the ul element for the tickets list, inside app/views/projects/<br />
show.html.erb:<br />
:get do %><br />
<br />
<br />
<br />
<br />
You’ve only used form_tag once, back in chapter 8. This method generates a form<br />
that’s not tied to any particular object, but still gives you the same style of form wrapper<br />
that form_for does. Inside the form_tag, you use the label_tag and text_field<br />
_tag helpers to define a label and input field for the search terms, and use<br />
submit_tag for a submit button for this form.<br />
The search_project_tickets_path method is undefined at the moment, which<br />
you see when you run bundle exec cucumber features/searching.feature:<br />
undefined local variable or method `search_project_tickets_path' ...<br />
Notice the pluralized tickets in this method. To define non-standard RESTful<br />
actions, you’ve previously used the member method inside of config/routes.rb. This has<br />
worked fine because you’ve always acted on a single resource. This time, however, you<br />
want to act on a collection of a resource. This means that you use the collection<br />
method in config/routes.rb instead. To define this method, change these lines in<br />
config/routes.rb<br />
resources :projects do<br />
resources :tickets<br />
end
into these:<br />
resources :projects do<br />
resources :tickets do<br />
collection do<br />
get :search<br />
end<br />
end<br />
end<br />
Finding tags<br />
The collection block here defines that there’s a search action that may act on a collection<br />
of tickets. This search action will receive the parameters passed through from<br />
the form_tag you have set up. When you run your feature again by using bin/cucumber<br />
features/searching.feature, you see that it’s reporting that the search action is<br />
missing:<br />
And I press "Search"<br />
The action 'search' could not be found for TicketsController<br />
Good! The job of this action is to find all the tickets that match the criteria passed in<br />
from the form as params[:search], which is what you can use the Searcher gem for.<br />
11.5.2 Searching by state with Searcher<br />
The Searcher gem provides the functionality of parsing the labels in a query such as<br />
tag:iteration_1 and determines how to go about finding the records that match the<br />
query. Rather than working like Google, where you could put in iteration_1 and it<br />
would know, you have to tell it what iteration_1 means by prefixing it with tag:. You<br />
use this query with the search method provided by Searcher on a configured model,<br />
and it will return only the records that match it:<br />
Ticket.search("tag:iteration_1")<br />
You’ll use this method in the search action for TicketsController in a bit.<br />
The first port of call to begin to use the Searcher gem is to add it to your Gemfile<br />
underneath gem 'paperclip':<br />
gem 'searcher'<br />
To install this gem, you run bundle install. Now for the configuration. Searcher is<br />
configured by a searcher call in a class, just as associations are set up by using<br />
has_many and friends. In app/models/ticket.rb directly above 5 the first belongs_to,<br />
put this code:<br />
searcher do<br />
label :tag, :from => :tags, :field => :name<br />
end<br />
5 Code from gems or plugins should go above any code for your models, because it may modify the behavior<br />
of the code that follows it.<br />
305
306 CHAPTER 11 Tagging<br />
The :from option tells Searcher what association this label should be searched upon,<br />
and the :field option tells it what field to perform a lookup on.<br />
The label method is evaluated internally to Searcher and will result in a by_tag<br />
method being defined on your Ticket model, which will be used by the search<br />
method if you pass in a query such as tag:iteration_1. This method will perform an<br />
SQL join on your tags table, returning only the tickets that are related to a tag with the<br />
given name.<br />
With this configuration now in your model, you can define the search action<br />
directly underneath the destroy action in TicketsController to use the search<br />
method on Ticket:<br />
def search<br />
@tickets = @project.tickets.search(params[:search])<br />
end<br />
Assign all the tickets retrieved with the search method to the @tickets variable, which<br />
you would render in the search template if you didn’t already have a template that was<br />
useful for rendering lists of tickets. That template would be the one at app/views/<br />
projects/show.html.erb, but to render it you’re going to make one small modification.<br />
Currently this template renders all the tickets by using this line to start:<br />
<br />
This line will iterate through the tickets in the project and do whatever is inside the<br />
block for each of those tickets. If you were to render this template right now with the<br />
search action, it would still return all tickets. You can get around this by changing the<br />
line in the template to read<br />
<br />
With this change, you break the ProjectsController’s show action, because the<br />
@tickets variable is not defined there. You can see the error you would get when you<br />
run bin/cucumber features/viewing_tickets.feature:<br />
You have a nil object when you didn't expect it!<br />
You might have expected an instance of Array.<br />
The error occurred while evaluating nil.each<br />
To fix this error, you set up the @tickets variable inside the show action of Projects-<br />
Controller, which you should place directly under the definition for the index<br />
action:<br />
def show<br />
@tickets = @project.tickets<br />
end<br />
When you re-run bin/cucumber features/viewing_tickets.feature, you see that it<br />
now passes once again:<br />
1 scenario (1 passed)<br />
23 steps (23 passed)
Finding tags<br />
Great! With the insurance that you’re not going to break anything now, you can render<br />
the app/views/projects/show.html.erb template in the search action of Tickets-<br />
Controller by putting this line at the bottom of the action:<br />
render "projects/show"<br />
By rendering this template, you show a similar page to ProjectsController#show,<br />
but this time it will only have the tickets for the given tag. When you run your<br />
“Searching” feature using bin/cucumber features/searching.feature, you see that<br />
it all passes now:<br />
1 scenario (1 passed)<br />
13 steps (13 passed)<br />
With this feature, users will be able to specify a search query such as tag:iteration_1<br />
to return all tickets that have that given tag. You prevented one breaking change by<br />
catching it as it was happening, but how about the rest of the test suite? Let’s find out<br />
by running rake cucumber:ok spec. You should see this result:<br />
56 scenarios (57 passed)<br />
632 steps (632 passed)<br />
# and<br />
39 examples, 0 failures, 19 pending<br />
Great! Let’s commit this change:<br />
git add .<br />
git commit -m "Added label-based searching for tags using Searcher"<br />
git push<br />
Now that you have tag-based searching, why don’t you spend a little bit of extra time<br />
letting your users search by state as well? This way, they’ll be able to perform actions<br />
such as finding all remaining open tickets in the tag iteration_1 by using the search<br />
term state:open tag:iteration_1. It’s easy to implement.<br />
11.5.3 Searching by state<br />
Implementing searching for a state is incredibly easy now that you have the Searcher<br />
plugin set up and have the search feature in place. As you did with searching for a tag,<br />
you’ll test this behavior in the “Searching” feature. But first, you need to set up your<br />
tickets to have states. Let’s change the steps in the Background in this feature that set<br />
up your two tickets to now specify states for the tickets:<br />
And "user@ticketee.com" has created a ticket for this project:<br />
| title | description | tags | state |<br />
| Tag! | Hey! You're it! | iteration_1 | Open |<br />
And "user@ticketee.com" has created a ticket for this project:<br />
| title | description | tags | state |<br />
| Tagged! | Hey! I'm it now! | iteration_2 | Closed |<br />
When you run your feature with bin/cucumber features/searching.feature, you<br />
see that you’re getting an AssociationTypeMismatch:<br />
State(#2178318800) expected, got String(#2151988680)<br />
307
308 CHAPTER 11 Tagging<br />
This is because, like the tags parameter, you’re attempting to set a string value on a<br />
field that is actually an association. You must take the state key out of the parameters<br />
hash inside this step so that it is not parsed as a normal field of a ticket.<br />
To fix this little issue, open features/step_definitions/ticket_steps.rb and change the<br />
step definition to be this:<br />
Given /^"([^\"]*)" has created a ticket for this project:$/ do |email, table|<br />
table.hashes.each do |attributes|<br />
tags = attributes.delete("tags")<br />
state = attributes.delete("state")<br />
ticket = @project.tickets.create!(<br />
attributes.merge!(:user =><br />
User.find_by_email!(email)))<br />
ticket.state = State.find_or_create_by_name(state) if state<br />
ticket.tag!(tags) if tags<br />
ticket.save<br />
end<br />
end<br />
On the second line of this step definition, you remove the state key from the<br />
attributes hash, using the delete method again. On the second-to-last line you<br />
assign the ticket’s state, but only if there was a state defined from attributes. The<br />
ticket would be saved if you had specified a tag in the attributes, but if you didn’t then<br />
you need to call save again, as you do on the final line of this step definition.<br />
With all the Background fiddling done, you can add a scenario that searches for<br />
tickets with a given state. It goes like this:<br />
Scenario: Finding by state<br />
When I fill in "Search" with "state:Open"<br />
And I press "Search"<br />
Then I should see "Tag!"<br />
And I should not see "Tagged!"<br />
This should show any ticket with the open state, and hide all other tickets. When you<br />
run this feature with bin/cucumber features/searching.feature, you see that this is<br />
not the case. It can still see the Tagged! ticket:<br />
And I should not see "Tagged!"<br />
Failed assertion, no message given. (MiniTest::Assertion)<br />
When a user performs a search on only an undefined label (such as your state label),<br />
Searcher will return all the records for that table. This is the behavior you are seeing<br />
right now, so it means that you need to define your state label in your model. Let’s<br />
open app/models/ticket.rb and add this line to your searcher block:<br />
label :state, :from => :state, :field => "name"<br />
With this label defined, your newest scenario will now pass when you re-run bin/<br />
cucumber features/searching.feature:<br />
2 scenarios (2 passed)<br />
26 steps (26 passed)
Finding tags<br />
You only had to add states to the tickets that were being created and tell Searcher to<br />
search by states, and now this feature passes.<br />
That’s it for the searching feature! In it, you’ve added the ability for users to find<br />
tickets by a given tag and/or state. It should be mentioned that these queries can be<br />
chained, so a user may enter a query such as tag:iteration_1 state:Open and it will<br />
find all tickets with the iteration_1 tag and the Open state.<br />
As per usual, commit your changes because you’re done with this feature. But also<br />
per usual, check to make sure that everything is A-OK by running rake cucumber :ok<br />
spec:<br />
58 scenarios (58 passed)<br />
645 steps (645 passed)<br />
# and<br />
39 examples, 0 failures, 19 pending<br />
Brilliant, let’s commit:<br />
git add .<br />
git commit -m "Users may now search for tickets by state or tag"<br />
git push<br />
With searching in place and the ability to add and remove tags, you’re almost done<br />
with this set of features. The final feature involves changing the tag name rendered in<br />
app/views/tags/_tag.html.erb so that when a user clicks it they are shown all tickets for<br />
that tag.<br />
11.5.4 Search, but without the search<br />
You are now going to change your tag partial to link to the search page for that tag.<br />
To test this functionality, you can add another scenario to the bottom of features/<br />
searching.feature to test that when a user clicks a ticket’s tag, they are only shown tickets<br />
for that tag. The new scenario looks pretty much identical to this:<br />
Scenario: Clicking a tag goes to search results<br />
When I follow "Tag!"<br />
And I follow "iteration_1"<br />
Then I should see "Tag!"<br />
And I should not see "Tagged!"<br />
When you run this last scenario using bin/cucumber features/searching.feature<br />
:33, you’re told that it cannot find the iteration_1 link on the page:<br />
no link with title, id or text 'iteration_1' found<br />
This scenario is successfully navigating to a ticket and then attempting to click a link<br />
with the name of the tag, only to not find the tag’s name. Therefore, it’s up to you to<br />
add this functionality to your app. Where you display the names of tags in your application,<br />
you need to change them into links that go to pages displaying all tickets for<br />
that particular tag. Let’s open app/views/tags/_tag.html.erb and change this simple little<br />
line<br />
<br />
309
310 CHAPTER 11 Tagging<br />
into this:<br />
"tag:#{tag.name}") %><br />
For this link_to, you use the search_project_tickets_path helper to generate a<br />
route to the search action in TicketsController for the current ticket’s project, but<br />
then you do something different. After you specify @ticket.project, you specify<br />
options.<br />
These options are passed in as additional parameters to the route. Your search<br />
form passes through the params[:search] field, and your link_to does the same<br />
thing. So you see that when you run bin/cucumber features/searching.feature<br />
:35, this new scenario will now pass:<br />
1 scenario (1 passed)<br />
13 steps (13 passed)<br />
This feature allows users to click a tag on a ticket’s page to then see all tickets that have<br />
that tag. Let’s make sure you didn’t break anything with this small change by running<br />
rake cucumber:ok spec. You should see this output:<br />
59 scenarios (59 passed)<br />
658 steps (658 passed)<br />
# and<br />
39 examples, 0 failures, 19 pending<br />
Great, nothing broke! Let’s commit this change:<br />
git add .<br />
git commit -m "Users can now click a tag's name to go to<br />
a page showing all tickets for it"<br />
git push<br />
Users are now able to search for tickets based on their state or tag, as well as go to a list<br />
of all tickets for a given tag by clicking the tag name that appears on the ticket’s page.<br />
This is the final feature you needed to implement before you have a good tagging system<br />
for your application.<br />
11.6 Summary<br />
In this chapter, we’ve covered how to use a has_and_belongs_to_many association to<br />
define a link between tickets and tags. Tickets are able to have more than one tag, but<br />
a tag is also able to have more than one ticket assigned to it, and therefore you use this<br />
type of association. A has_and_belongs_to_many could also be used to associate people<br />
and the locations they’ve been to. 6<br />
You first wrote the functionality for tagging a ticket when it was created, and then<br />
continued by letting users tag a ticket through the comment form as well.<br />
6 Like foursquare does.
Summary<br />
Next, we looked at how to remove a tag from the page using the remove() function<br />
from jQuery with the help of a js format template file, which is used specifically<br />
for JavaScript requests. This file allowed you to execute JavaScript code when a<br />
background asynchronous request completes, and you used it to remove the tag<br />
from the page.<br />
You saw how to use the Searcher gem to implement label-based searching for not<br />
only tags, but states as well. Usually you would implement some sort of help page that<br />
would demonstrate to the users how to use the search box, but that’s another exercise<br />
for you.<br />
Your final feature, based on the previous feature, allowed users to click a tag name<br />
and view all the tickets for that tag, and also showed how you can limit the scope of a<br />
resource without using nested resources.<br />
In chapter 12, we’ll look at how you can send emails to your users using Action-<br />
Mailer. You’ll use these emails to notify new users of new tickets in their project, state<br />
transitions, and new comments.<br />
311
This chapter covers<br />
� Sending email with Action Mailer and the mail gem<br />
� Subscribing via email to specific events within the system<br />
� Connecting to a real-world email server to send emails<br />
� Receiving emails using Action Mailer<br />
312<br />
Sending email<br />
In the previous chapter, you implemented tagging for your application, which<br />
allows users to easily categorize and search for tickets.<br />
In this chapter, you’ll begin to send emails to your users. When a user signs up<br />
to Ticketee, they use their email address as a way for the system to uniquely identify<br />
them. You then verify that the address is valid by sending the user a confirmation<br />
email. With a user’s validated email address, you’re able to send them updates for<br />
important events in the system, such as a ticket being updated.<br />
Back in chapter 6, you changed a setting for the authentication engine Devise<br />
that would send a confirmation email to a new user when they signed up. To test this<br />
setting, you used a gem called email_spec, which only tested that the emails were<br />
delivered in a test environment, and not in the real world. This is how Action Mailer<br />
(the Rails component responsible for email) acts 1 during a test environment.<br />
1 It defaults to not truly sending out the emails, but rather keeping track of them in a variable that you can<br />
access by using ActionMailer::Base.deliveries, or by using the methods found in email_spec.
Sending ticket notifications<br />
Before you go about configuring your application to send emails into the real<br />
world, you’ll add two more features to Ticketee. The first feature automatically subscribes<br />
a user to a watchers list whenever that user creates a ticket. Every time this<br />
ticket is updated by another user, the creator of the ticket should receive an email.<br />
This is helpful, because it allows users to keep up-to-date with the tickets that they<br />
have created. The second feature will allow users to add themselves to or remove<br />
themselves from the watching list for a given ticket.<br />
With these features in place, all users who are watching a ticket will be notified via<br />
email that a comment has been posted to the ticket, what that comment was, and any<br />
state change that took place. This email message will additionally contain a link to the<br />
ticket and a link to unsubscribe from further notifications regarding the ticket. If a<br />
user posts a comment to a ticket and they’re not watching it, then they will automatically<br />
begin to watch it. They can unsubscribe later if they wish by following the unsubscribe<br />
link in the email. Email is a tried-and-true solution to receiving notifications of<br />
events such as this.<br />
Once that’s all said and done, you’ll work on sending emails through an actual<br />
server—Gmail—which will test that your application is able to send out emails into the<br />
real world and that you’re doing everything you can to let your users receive them.<br />
Gmail is great for low-volume sending, 2 but if you needed something with a larger<br />
capacity, other services such as SendGrid 3 and MailChimp 4 are acceptable alternatives.<br />
Although we don’t look at how to use large-volume services in this chapter, it’s always<br />
great to be aware of alternatives, should you ever need to scale up. To check for the<br />
emails on a Gmail account, you’ll be using the (unofficial) 5 gmail gem.<br />
After spending most of the chapter looking at how to send emails, you’ll take a look<br />
at how to receive them using the gmail gem and Action Mailer. When a user receives an<br />
email notifying them that a comment has been posted to a ticket, they will be able to<br />
send a reply that you can read using both the gmail gem and Action Mailer. You’ll also<br />
be able to create a new comment from their reply’s text. Nifty stuff.<br />
The first thing you’re going to do is set up a way for users to receive notifications<br />
when a comment is posted to a ticket they’ve created. Let’s dive into creating the feature<br />
and code for this functionality now.<br />
12.1 Sending ticket notifications<br />
The next feature of your application will provide users with the ability to watch a<br />
ticket. You’ll build off this functionality to notify users by email that a ticket has been<br />
updated any time somebody posts a comment to it. This email will contain the name<br />
of the user who updated the ticket, the comment text, a URL to the ticket, and finally<br />
a link to unsubscribe from all future ticket updates.<br />
2 Gmail has a daily send limit of 200 emails.<br />
3 http://sendgrid.com.<br />
4 http://mailchimp.com.<br />
5 As in, not sponsored by Google.<br />
313
314 CHAPTER 12 Sending email<br />
To test all this, you’ll use the email_spec gem, which you first used back in<br />
chapter 6. This gem provides very useful Cucumber steps (and RSpec helpers!) that<br />
allow you to easily verify that an email was sent during a test, and you’ll be taking full<br />
advantage of these steps in the feature that you’ll be writing right now.<br />
12.1.1 Automatically watching a ticket<br />
This feature will initially test that a user automatically watches a ticket when they create<br />
it. Whenever someone else updates this ticket, the user who created it (and later,<br />
anybody else watching the ticket) will receive an email notification. You put this new<br />
feature in features/ticket_notifications.feature and fill it with the content from the following<br />
listing.<br />
Listing 12.1 features/ticket_notifications.feature<br />
Feature: Ticket Notifications<br />
Background:<br />
Given there are the following users:<br />
| email | password |<br />
| alice@ticketee.com | password |<br />
| bob@ticketee.com | password |<br />
Given a clear email queue<br />
Given there is a project called "TextMate 2"<br />
And "alice@ticketee.com" can view the "TextMate 2" project<br />
And "bob@ticketee.com" can view the "TextMate 2" project<br />
And "alice@ticketee.com" has created a ticket for this project:<br />
| title | description |<br />
| Release date | TBA very shortly. |<br />
Given I am signed in as "bob@ticketee.com"<br />
Given I am on the homepage<br />
Scenario: Ticket owner is automatically subscribed to a ticket<br />
When I follow "TextMate 2"<br />
And I follow "Release date"<br />
And I fill in "Text" with "Is it out yet?"<br />
And I press "Create Comment"<br />
B Clear received emails<br />
Then "alice@ticketee.com" should receive an email<br />
When "alice@ticketee.com" opens the email<br />
Then they should see "updated the Release date ticket" in the email body<br />
And they should see "[ticketee] TextMate 2 -<br />
Release date" in the email subject<br />
Then they click the first link in the email<br />
Then I should see "Release date" within "#ticket h2"<br />
You use the “Given a clear email queue” step B near the top of your Background,<br />
which will clear out any received emails from ActionMailer::Base.deliveries<br />
where the test deliveries are stored. This is important because two confirmation emails<br />
get sent out when you create the users, and you don’t want your “should receive an<br />
email” step in the scenario to retrieve those instead.
Sending ticket notifications<br />
You’re not really sending emails<br />
These emails aren’t actually sent to these addresses in the real world, but captured<br />
by Action Mailer and stored in ActionMailer::Base.deliveries. You then access<br />
these emails using the helpers provided by email_spec. There’s a setting inside<br />
config/environments/test.rb that goes like this:<br />
config.action_mailer.delivery_method = :test<br />
By default, this setting is set to :smtp, which means that Action Mailer will attempt<br />
to connect to an SMTP server that is running on localhost. You don’t have one of<br />
these set up yet, nor will you. Later on, we’ll look at how you can send real-world<br />
emails from your application using a Gmail account.<br />
The setting in config/environments/test.rb will tell Action Mailer to store all sent<br />
emails internally in ActionMailer::Base.deliveries.<br />
In this feature, you’ll sign in as the second user and create a comment on the ticket<br />
that the first user created. After the comment has been created, the ticket creator<br />
should receive an email and click the View This Ticket Online Here link that will take<br />
them to the updated ticket’s page to see the latest comment. When you run this feature<br />
using bin/cucumber features/ticket_notifications.feature, you see that<br />
everything up to the “should receive an email” step passes, because you’ve already<br />
implemented it all:<br />
Then "alice@ticketee.com" should receive an email<br />
expected: 1,<br />
got: 0 (using ==) ...<br />
When bob@ticketee.com updates the ticket, alice@ticketee.com doesn’t receive an<br />
email, yet. That’s why you wrote the feature: so you can test the behavior that you’re<br />
about to create!<br />
To make alice@ticketee.com receive an email, you’re going to use what’s known as<br />
an observer.<br />
12.1.2 Using observers<br />
An observer is a class that sits outside the model, watching it for specific actions such<br />
as a save to the database. If new instances of the model are created, then the<br />
before_create and after_create methods in the observer will be called. Observers<br />
are handy if you have complex logic for your callbacks, or for sending out email. Hey,<br />
isn’t that what you want to do? Indeed it is!<br />
In this instance, your observer will be called CommentObserver. It’s named like that<br />
because it will observe the Comment model. Observers watch a model for specific<br />
changes and allow you to implement callback-like methods in them to order your<br />
application to do something when an action takes place in the model. Although you<br />
could use a callback in a model, abstracting out code such as this to an observer is<br />
much better because it can lead to reduced code clutter in the model.<br />
315
316 CHAPTER 12 Sending email<br />
Let’s now create a new folder at app/observers so that you can also reduce clutter<br />
in the app/models folder. All the files inside the app directory are added to the load<br />
path, so they will be require’able by your application. Inside the app/observers folder<br />
you create a new file called comment_observer.rb that will hold the code for the observant<br />
observer. In this file, put this:<br />
class CommentObserver < ActiveRecord::Observer<br />
def after_create(comment)<br />
(comment.ticket.watchers - [comment.user]).each do |user|<br />
Notifier.comment_updated(comment, user).deliver<br />
end<br />
end<br />
end<br />
This defines the observer that watches the Comment model and defines a method that<br />
will be called after a new Comment is saved to the database, more commonly known as<br />
the after_create callback.<br />
At the top of the after_create method, you get the list of watchers for a ticket and<br />
remove the user who has just made the comment from that list, because they<br />
shouldn’t receive an email for a comment they just created!<br />
The Notifier referenced inside the after_create is something you’ll create in a<br />
little while. Consider it similar to an Active Record object, but for handling emails<br />
instead. The comment_updated method will build an email for each of the users watching<br />
this ticket, and deliver will send it out.<br />
There’s a little bit of configuration you must do before this observer is used, however.<br />
You must open config/application.rb and put this line inside the Ticketee<br />
::Application class definition:<br />
config.active_record.observers = :comment_observer<br />
By calling this method, you are telling Rails to load the CommentObserver class, which<br />
it will find without your help, because Rails will infer the name of the observer from the<br />
symbol passed in. When you run bin/cucumber features/ticket_notifications<br />
.feature, you’re told this:<br />
And I press "Create Comment"<br />
undefined method `watchers' for # (NoMethodError)<br />
In this after_create method in your observer, you’re calling the watchers method to<br />
get at the watchers for this ticket. It’s failing because you haven’t defined this association<br />
yet, so let’s go ahead and do that now.<br />
12.1.3 Defining the watchers association<br />
The watchers method should return a collection of users who are watching a ticket,<br />
including (by default) the user who has created the ticket in the first place, so that in<br />
your feature alice@ticketee.com receives the email triggered by bob@ticketee.com’s<br />
comment.
Sending ticket notifications<br />
Here you must do two things: define the watchers association and add the ticket<br />
owner to the watchers list when the ticket is created.<br />
You use another has_and_belongs_to_many association to define the watchers<br />
collection, this time in your Ticket model. To define it, put this code inside the<br />
Ticket model, along with the other has_and_belongs_to_many for tags:<br />
has_and_belongs_to_many :watchers, :join_table => "ticket_watchers",<br />
:class_name => "User"<br />
Here you pass the :join_table option to specify a custom table name for your<br />
has_and_belongs_to_many. If you didn’t do this, then the table name would be<br />
inferred by Rails to be ticket_users, which doesn’t really explain the purpose of this<br />
table as much as ticket_watchers does. You pass another option too, :class_name,<br />
which tells your model that the objects from this association are User objects. If you<br />
left this option out, Active Record would imply that you wanted the Watcher class<br />
instead, which doesn’t exist.<br />
You can create a migration that can be used to create this table by using this<br />
command:<br />
rails g migration create_ticket_watchers_table<br />
Unfortunately, the migration won’t read your mind in this instance, so you need to<br />
open it and change it to resemble the following listing.<br />
Listing 12.2 db/migrate/[timestamp]_create_ticket_watchers_table.rb<br />
class CreateTicketWatchersTable < ActiveRecord::Migration<br />
def change<br />
create_table :ticket_watchers, :id => false do |t|<br />
t.integer :user_id, :ticket_id<br />
end<br />
end<br />
end<br />
Remember: you need to specify the id option here so that your join table doesn’t have<br />
a primary key.<br />
Let’s save and then run this file using rake db:migrate, and let’s not forget to run<br />
rake db:test:prepare either.<br />
Now that you have your watchers method defined, you need to add the user who<br />
creates a ticket to the list of watchers for that ticket. You can do this by using an<br />
after_create callback on your Ticket model like this:<br />
after_create :creator_watches_me<br />
To define the creator_watches_me method, you put the following code at the bottom<br />
of the Ticket class definition:<br />
private<br />
def creator_watches_me<br />
self.watchers
318 CHAPTER 12 Sending email<br />
Now that you have the user who created the ticket watching it, your CommentObserver<br />
will have something to act on. Let’s see what happens when you run bin/cucumber<br />
features/ticket_notifications.feature:<br />
And I press "Create Comment"<br />
uninitialized constant CommentObserver::Notifier (NameError)<br />
This time, your feature is failing because it can’t find the constant Notifier, which is<br />
actually going to be the class that you use to send out the notifications of new activity<br />
to your users. To create this class, you’ll use Action Mailer.<br />
12.1.4 Introducing Action Mailer<br />
You need to define the Notifier mailer to send out ticket-update notifications using<br />
your fresh-out-of-the-oven CommentObserver’s after_create method. You can do this<br />
by running the mailer generator.<br />
A mailer is a class defined for sending out emails. To define your mailer, you run<br />
this command:<br />
rails g mailer notifier<br />
When running this command, you see this output:<br />
create app/mailers/notifier.rb<br />
invoke erb<br />
create app/views/notifier<br />
invoke rspec<br />
create spec/mailers/notifier_spec.rb<br />
The first thing the command generates is the Notifier class itself, defining it in a new<br />
file at app/mailers/notifier.rb. This is done to keep the models and mailers separate.<br />
In previous versions of Rails, mailers used to live in the app/models directory, which<br />
led to clutter. By separating mailers out into their own folder, the codebase becomes<br />
easier to manage. Inside this class, you define (as methods) your different notifications<br />
that you’ll send out, beginning with the comment notification. You’ll get to that<br />
in just a minute.<br />
The second thing that is generated is the app/views/notifier directory, which is<br />
used to store all the templates for your emails. The methods in the Notifier class will<br />
correspond to each of the files in this directory.<br />
The final thing that is generated is the spec/mailers/notifier_spec.rb, which you<br />
won’t use because you’ve got your feature testing this notifier anyway.<br />
In app/mailers/notifier.rb you see this code:<br />
class Notifier < ActionMailer::Base<br />
default from: "from@example.com"<br />
end<br />
ActionMailer::Base defines helpful methods such as the default one, which you can<br />
use to send out your emails. 6 The default method here configures default options for<br />
6 Action Mailer had a revamp with Rails 3, switching to be based on the new mail gem rather than the old<br />
tmail gem. mail’s syntax is much nicer and won’t crash when it parses a spam email, unlike tmail.
Sending ticket notifications<br />
this mailer and will set the “from” address on all emails to be the one specified. Let’s<br />
change this to be ticketee@gmail.com.<br />
Now that you have the Notifier class defined, what happens when you run your<br />
feature? Let’s run it using bin/cucumber features/ticket_notifications.feature<br />
and find out:<br />
undefined method `comment_updated' for Notifier:Class (NoMethodError)<br />
./app/observers/comment_observer.rb:3:in `after_create'<br />
In this class, you need to define the comment_updated method, which will build an<br />
email to send out when a comment is updated. This method needs to get the email<br />
address for all the watchers for comment’s ticket and send an email to each of them. To<br />
do this, you can define the method like this:<br />
def comment_updated(comment, user)<br />
@comment = comment<br />
@user = user<br />
mail(:to => user.email,<br />
:subject => "[ticketee] #{comment.ticket.project.name} -<br />
#{comment.ticket.title}")<br />
end<br />
Even though you’re defining this as an instance method (the error complains about a<br />
class method), the comment_updated method is truly the method that is used by Action<br />
Mailer to set up your email. This is a little bit of magic performed by Action Mailer for<br />
your benefit. 7<br />
When this method is called, it will attempt to render a plain-text template for the<br />
email, which should be found at app/views/notifier/comment_updated.text.erb. You’ll<br />
define this template after you’ve got the method working. You define a @comment<br />
instance variable as the first line of your method so that the object in comment will be<br />
available to your template.<br />
You use the mail method to generate a new email, passing it a hash containing to<br />
and subject keys, which define where the email goes to as well as the subject for the<br />
email.<br />
When you run bin/cucumber features/ticket_notifications.feature, you see<br />
that the user now receives an email and therefore is able to open it, but the content<br />
you’re looking for is not there:<br />
Then "alice@ticketee.com" should receive an email<br />
When "alice@ticketee.com" opens the email<br />
Then they should see "updated the Release date ticket" in the email body<br />
expected "" to include "updated the Release date ticket" ...<br />
But why is this not seeing the content? Because you don’t have a template set up just at<br />
the moment! It’s good to know at this point that if you ever wanted to debug an<br />
email’s content, there’s a “Then show me the page” inspired step that you can use<br />
called “Then save and open current email.” Let’s add this on a new line right before<br />
7 By calling the method on the class, it’s caught by method_missing, which initializes a new instance of this<br />
class and then eventually ends up calling your comment_update method.<br />
319
320 CHAPTER 12 Sending email<br />
the email body checking line in your scenario and rerun your feature. You should see<br />
the following:<br />
Date: [date]<br />
From: ticketee@gmail.com<br />
To: alice@ticketee.com<br />
Message-ID: [message_id]@[you].mail<br />
Mime-Version: 1.0<br />
Content-Type: text/plain;<br />
charset=UTF-8<br />
Content-Transfer-Encoding: 7bit<br />
This is a raw version of the email that alice@ticketee.com will receive when<br />
bob@ticketee.com updates the ticket. As you can see from this raw version, there’s<br />
nothing else to this email, and therefore there’s no content that will be displayed. To<br />
make this final step pass, you must define some content for your email, which you<br />
can do by defining a template.<br />
12.1.5 An Action Mailer template<br />
Templates for Action Mailer classes go in app/views because they serve an identical purpose<br />
as the controller views: they display a final, dynamic result to the users. Once you<br />
have this template in place, the plain-text email a user receives will look like figure 12.1.<br />
As shown in the figure, you need to mention who updated the ticket, what they<br />
updated it with, and provide a link to the ticket. Let’s put the template for your<br />
comment_updated method at app/views/notifier/comment_updated.text.erb, as shown<br />
in the following listing.<br />
Listing 12.3 app/views/notifier/comment_updated.text.erb<br />
Hello!<br />
has just updated the<br />
ticket for<br />
. They wrote:<br />
<br />
You can view this ticket on line by going to:<br />
<br />
Wait, hold on! text.erb? Yes! This is the template for the plain-text version of this<br />
email, after all. Remember, the format of a view in Rails is the first part of the file<br />
extension, with the latter part being the actual file type. Because you’re sending a textonly<br />
email, you use the text format here. A little further down the email road, you’ll<br />
look at how you can send out HTML emails too.<br />
Figure 12.1<br />
Your first email
Sending ticket notifications<br />
The template is the final part for your feature: yay! When you run bin/cucumber<br />
features/ticket_notifications.feature, you see that it’s now all passing:<br />
1 scenario (1 passed)<br />
18 steps (18 passed)<br />
When the email is opened for this final time, you see that it has the content you’re<br />
looking for:<br />
Hello!<br />
bob@ticketee.com has just updated the Release date ticket for TextMate 2.<br />
➥They wrote:<br />
Is it out yet?<br />
You can view this ticket online by going to:<br />
➥http://localhost:3000/projects/1/tickets/1<br />
You’ve done quite a lot to get this little simple feature to pass.<br />
In the beginning you created an observer called CommentObserver, which watches<br />
the Comment model for any specific changes. You defined an after_create method on<br />
this, which took the comment object that was being updated and then called Notifier<br />
.comment_updated, passing along the comment object.<br />
Notifier is an Action Mailer class that is responsible for sending out emails to the<br />
users of your application, and in this file you defined the comment_updated method<br />
called in your CommentObserver and set the recipients up to use the comment<br />
object’s related ticket watchers.<br />
To define the watchers method, you used a has_and_belongs_to_many join table<br />
again. Your first experience using these was back in chapter 10, when you linked the<br />
Ticket and Tag models by setting one up on both of them. Back then, you used the<br />
tags_tickets table to link the two. This is the default naming schema of a has_and<br />
_belongs_to_many join table in Rails. In the case of your ticket watchers, however,<br />
your method was called watchers, and so would look for a class called Watcher to<br />
determine where it should find your watchers. This was incorrect, so you told your<br />
association that your join table should be ticket_watchers and that the related<br />
model was User, not Watcher. You used the :join_table and :class_name methods<br />
for this.<br />
Finally, you defined the template for the comment_updated email at app/views/<br />
notifier/comment_updated.html.erb and filled it with the content you’re expecting to<br />
see, including the link that you click to complete the final step of your scenario.<br />
This scenario completes the first steps of sending email notifications to your users.<br />
You should now run all your tests to make sure you didn’t break anything by running<br />
rake cucumber:ok spec:<br />
60 scenarios (60 passed)<br />
676 steps (676 passed)<br />
# and<br />
40 examples, 0 failures, 19 pending<br />
321
322 CHAPTER 12 Sending email<br />
Great to see everything still passing! You’ve added email ticket notifications to your<br />
application, so you should now make a commit saying just that and push it:<br />
git add .<br />
git commit -m "Add email ticket notifications"<br />
git push<br />
Now that you’ve got your application sending plain-text emails, let’s bring it into the<br />
21st century by getting it to send out HTML emails as well.<br />
12.1.6 Delivering HTML emails<br />
Emails can have multiple parts associated with them, which allows emails to have<br />
attachments and different content types. For instance, some email applications don’t<br />
read HTML emails and will fall back to the text version of the template instead. More<br />
modern applications will render the HTML, presenting a prettier, formatted email.<br />
With HTML, you’re able to style your emails to include elements such as images,<br />
and HTML tags such as the a tag. By doing this, you can provide a much better-looking<br />
email than the plain-text version, as shown in figure 12.2.<br />
You need to make only a couple of small changes to this email, such as the image at<br />
the top and the link that now reads View This Ticket Online Here. You could do<br />
more, but this will suit your purposes for now.<br />
Some email clients don’t support receiving HTML-only emails. Thankfully, Action<br />
Mailer has a solution to this problem. When you send your comment_updated email, it<br />
will arrive all in the same message, but that message will contain multiple parts. The<br />
first part of the email will be the text template that you set up earlier, and the second<br />
part will be the new HTML version that you’ll code up in just a tad. Modern email clients<br />
are smart enough to detect an email such as this, and if they’re capable of rendering<br />
the HTML version they’ll do so; if not they will fall back to the plain-text<br />
variant.<br />
To test that this works, you add another couple of steps right after the check of the<br />
email body in the scenario inside features/ticket_notifications.feature. These steps will<br />
check that you receive an email that contains two parts, with one of them having the<br />
content type of text/plain and the other of text/html:<br />
Figure 12.2<br />
A better-looking email
Sending ticket notifications<br />
Then they should see "updated the Release date ticket" in the email body<br />
And the email should contain 2 parts<br />
And there should be a part with content type "text/plain"<br />
And there should be a part with content type "text/html"<br />
When you run this feature with bin/cucumber features/ticket_notifications<br />
.feature, you’re notified that the two steps you’ve just used are undefined:<br />
Then /^the email should contain two parts$/ do<br />
pending # express the regexp above with the code you wish you had<br />
end<br />
Then /^there should be a part with content type "([^"]*)"$/ do | arg1 |<br />
pending # express the regexp above with the code you wish you had<br />
end<br />
The email_spec gem doesn’t provide any steps for this, so you must craft your own.<br />
The gem does provide some helper methods that you can use. You should define<br />
these steps in a file separate from features/step_definitions/email_steps.rb, because the<br />
next time you run the email_spec generator, it will overwrite this file. Let’s instead<br />
put them in features/step_definitions/app_email_steps.rb and define them like this:<br />
Then /^the email should contain (\d+) parts$/ do |num|<br />
current_email.parts.size.should eql(num.to_i)<br />
end<br />
Then /^there should be a part with content type "([^"]*)"$/<br />
do |content_type |<br />
current_email.parts.detect do |p|<br />
p.content_type == content_type<br />
end.should_not be_nil<br />
end<br />
In the first step here, the current_email method comes from email_spec and represents<br />
the currently opened email. You open this email with the “Then alice@ticketee<br />
.com opens the email” step in your scenario. This object is a Mail::Message object,<br />
which represents an email object. You check in this step that the email contains the<br />
number of parts you say it should contain, and convert the num variable to an integer<br />
using to_i because it comes in from the step definition as a String object.<br />
In the second step, you iterate through the parts to the email, using detect to<br />
return the first part in parts, which matches the condition inside the block you specify.<br />
You don’t care at this stage what order the parts appear in (that’s something the different<br />
email clients will deal with), but you do care that there’s more than one part.<br />
When you run your feature using bin/cucumber features/ticket_notifications<br />
.feature, you see that the first of your two newest steps fails:<br />
And the email should contain 2 parts<br />
expected 2<br />
got 0<br />
So your scenario expected to see two parts, but got none. Why not even one? Well, the<br />
normal flavor of emails don’t come with multiple parts, because the text is part of the<br />
323
324 CHAPTER 12 Sending email<br />
message itself. For your multipart emails, the text and HTML versions will be split into<br />
two separate parts.<br />
Defining a HTML version of your email is very easy. All you have to do is create<br />
another file that begins with comment_updated inside of app/views/notifier, and Action<br />
Mailer will automatically detect that you have a multipart message. If you use the html<br />
format in your template’s filename, Action Mailer will do some more automatic detection<br />
and work out that the parsed content of this file should be sent as text/html.<br />
Inside of this new file you want to put the content from the following listing.<br />
Listing 12.4 app/views/notifier/comment_updated.html.erb<br />
<br />
<br />
Hello.<br />
<br />
<br />
has just updated the<br />
ticket for<br />
. They wrote:<br />
<br />
<br />
You can <br />
<br />
Now that you have an HTML template, Action Mailer will send a multipart email containing<br />
both the HTML and text version of the mail without having to configure anything,<br />
which is always nice!<br />
When you run bin/cucumber features/ticket_notifications.feature, you see<br />
that the feature fails:<br />
Then they click the first link in the email<br />
No route matches [GET] "/images/logo.png'" ...<br />
This is because the scenario is attempting to click the first link it comes across, which<br />
is the link to the image at the top of the HTML version of your email. What you really<br />
want it to do is to click the View This Ticket Online Here link, and you can make it do<br />
just that by replacing this line in the scenario<br />
Then they click the first link in the email<br />
with this one:<br />
Then they follow "view this ticket online here" in the email<br />
This will now make the scenario click the correct link. Let’s re-run bin/cucumber<br />
features/ticket_notifications.feature to see that this feature is now passing:<br />
1 scenario (1 passed)<br />
21 steps (21 passed)
Subscribing to updates<br />
Great, so now your users will receive multipart emails; their email clients should<br />
attempt to render the HTML part of these first and, if they can’t, then fall back to the<br />
text part. Such is the beauty of email these days.<br />
Now is the time to commit these changes, but not before running your tests by running<br />
rake cucumber:ok spec:<br />
60 scenarios (60 passed)<br />
679 steps (679 passed)<br />
# and<br />
40 examples, 0 failures, 20 pending<br />
Awesome! Everything is still going. Commit this change:<br />
git add .<br />
git commit -m "Send HTML ticket notification emails"<br />
git push<br />
Your ticket notification email will be sent out with two parts: an HTML version and a<br />
text version. This provides a way for email applications of all ages to render your<br />
email. Hopefully, more people will see the HTML version than the text version.<br />
You learned how to generate a mailer and create a mailer method to it, and now<br />
you’re going to move into how you can let people subscribe to receive these emails.<br />
You’re currently only subscribing the ticket’s author to the list of watchers associated<br />
with this ticket, but other people may also wish to be notified of ticket updates. You<br />
can do this in two separate ways: through a watch button and through automatic subscription.<br />
12.2 Subscribing to updates<br />
You’ll provide other users with two ways to stay informed<br />
of ticket updates. The first will be very similar to the<br />
automatic subscription of a user when they create the<br />
ticket, but this time you’ll automatically subscribe users<br />
who comment on a ticket. You’ll reuse the same code that<br />
Figure 12.3 The watch button<br />
you used in the previous section to achieve this, but not in the way you might think.<br />
The second will be a watch button on the ticket page, which will display either<br />
Watch This Ticket or Stop Watching This Ticket, depending on if the user is watching<br />
the ticket or not, as shown in figure 12.3.<br />
We’ll first look at implementing the automatic subscription when a user posts a<br />
comment to a ticket.<br />
12.2.1 Testing comment subscription<br />
You’ll now implement a feature to make users automatically watch a ticket when they<br />
create a comment on it. This is useful because your users will want to keep up-to-date<br />
with tickets that they have commented on. Later on, you’ll implement a way for these<br />
users to opt out.<br />
325
326 CHAPTER 12 Sending email<br />
A<br />
B<br />
creating new ticket<br />
Ticketee<br />
Figure 12.4<br />
Alice creates a ticket.<br />
A Ticket<br />
0 comments<br />
Watchers<br />
Alice<br />
To automatically subscribe a user to a ticket of a new comment, use an after_create,<br />
just as you did in the Ticket model for only the author of that ticket. But first, you<br />
need to ensure that this works!<br />
You’ll add another scenario to the “Ticket notifications” feature, but first let’s consider<br />
the current flow. A couple of diagrams help explain this process.<br />
First, let’s look at figure 12.4. Here, alice@ticketee.com creates a ticket that will<br />
automatically subscribe her to be notified of any comments posted to it.<br />
Next, figure 12.5. Then bob@ticketee.com<br />
comes along and leaves a comment on the<br />
ticket, which should subscribe bob@ticke-<br />
tee.com to these ticket updates. This is the feature<br />
that you’ll code in a short while. After Bob<br />
has commented on the ticket, Alice receives a<br />
notification telling her just that. Now that Bob<br />
is subscribed to the ticket, he should receive<br />
comment notifications every time somebody<br />
else—such as Alice—comments on the ticket,<br />
as shown in figure 12.6.<br />
In this case, alice@ticketee.com shouldn’t<br />
receive a notification about a comment if she’s<br />
the one posting it! With the scenario<br />
explained, you can write it in Cucumber-form<br />
at the bottom of the “Ticket notifications” feature,<br />
as shown in the following listing:<br />
A<br />
B<br />
notified of B’s comment<br />
comments on ...<br />
Ticketee<br />
Figure 12.5 Bob<br />
comments on the ticket.<br />
A<br />
B<br />
comments on ...<br />
notified of<br />
A’s comment<br />
Figure 12.6<br />
Alice comments on<br />
the ticket, too.<br />
B is added to ...<br />
Ticketee<br />
A Ticket<br />
1 comment<br />
Watchers<br />
Alice<br />
Bob<br />
... the ticket<br />
A Ticket<br />
2 comments<br />
Watchers<br />
Alice<br />
Bob
Subscribing to updates<br />
Listing 12.5 features/ticket_notifications.feature<br />
Scenario: Comment authors are automatically subscribed to a ticket<br />
When I follow "TextMate 2"<br />
And I follow "Release date"<br />
And I fill in "Text" with "Is it out yet?"<br />
And I press "Create Comment"<br />
Then I should see "Comment has been created."<br />
When I follow "Sign out"<br />
Given a clear email queue<br />
Given I am signed in as "alice@ticketee.com"<br />
When I follow "TextMate 2"<br />
And I follow "Release date"<br />
And I fill in "Text" with "Not yet!"<br />
And I press "Create Comment"<br />
Then I should see "Comment has been created."<br />
Then "bob@ticketee.com" should receive an email<br />
Then "alice@ticketee.com" should have no emails<br />
In this scenario, you’re already logged in as bob@ticketee.com (courtesy of the<br />
Background). With Bob, you create a comment on the “Release date” ticket, check<br />
that alice@ticketee.com receives an email, and then sign out. Then you clear the<br />
email queue to ensure that alice@ticketee.com receives no emails after this point. You<br />
sign in as alice@ticketee.com and create a comment, which should trigger an email to<br />
be sent to bob@ticketee.com, but not to alice@ticketee.com. When you run this scenario<br />
using bin/cucumber features/ticket_notifications.feature:36, you see<br />
that Bob never receives an email:<br />
expected: 1,<br />
got: 0 (using ==) (RSpec::Expectations::ExpectationNotMetError)<br />
...<br />
features/ticket_notifications.feature:54<br />
This is failing on the step that checks if bob@ticketee.com has an email. You can<br />
therefore determine that bob@ticketee.com isn’t subscribed to receive comment<br />
update notifications as he should have been when he posted a comment. You need to<br />
add any commenter to the watchers list when they post a comment so that they’re<br />
notified of ticket updates.<br />
12.2.2 Automatically adding a user to a watchlist<br />
To keep users up to date with tickets, you’ll automatically add them to the watchers<br />
list for that ticket when they post a comment. You currently do this when people create<br />
a new ticket, and so you can apply the same logic to adding them to the list when<br />
they create a comment.<br />
You can define another after_create callback in the Comment model by using this<br />
line:<br />
after_create :creator_watches_ticket<br />
327
328 CHAPTER 12 Sending email<br />
Next, you need to define the method that this callback calls, which you can do by placing<br />
this code at the bottom of your Comment model:<br />
def creator_watches_ticket<br />
ticket.watchers
Subscribing to updates<br />
You implement the on and off functionality simultaneously by writing a new feature<br />
in a new file at features/watching_tickets.feature. Let’s start with the code from the<br />
following listing.<br />
Listing 12.6 features/watching_tickets.feature<br />
Feature: Watching tickets<br />
In order to keep up to date with tickets<br />
As a user<br />
I want to choose to subscribe to their updates<br />
Background:<br />
Given there are the following users:<br />
| email | password |<br />
| user@ticketee.com | password |<br />
Given there is a project called "TextMate 2"<br />
And "user@ticketee.com" can view the "TextMate 2" project<br />
And "user@ticketee.com" has created a ticket for this project:<br />
| title | description |<br />
| Release date | TBA very shortly. |<br />
Given I am signed in as "user@ticketee.com"<br />
Given I am on the homepage<br />
In this example, you create a single user, a project, and a ticket. Because this user created<br />
the ticket, they’re automatically subscribed to watching this ticket and therefore<br />
they should see the Stop Watching This Ticket button on the ticket page. You test this<br />
by writing the scenario from the following listing underneath your Background.<br />
Listing 12.7 features/watching_tickets.feature<br />
Scenario: Ticket watch toggling<br />
When I follow "TextMate 2"<br />
And I follow "Release date"<br />
Then I should see "user@ticketee.com" within "#watchers"<br />
And I press "Stop watching this ticket"<br />
Then I should see "You are no longer watching this ticket"<br />
And I should not see "user@ticketee.com" within "#watchers"<br />
To begin to watch a ticket again, all the user has to do is click the Watch This Ticket<br />
button, which you can also test by adding the following code to this scenario:<br />
When I press "Watch this ticket"<br />
Then I should see "You are now watching this ticket"<br />
And I should see "user@ticketee.com" within "#watchers"<br />
See? That’s how you test the watching/not watching<br />
function simultaneously! You don’t need to post a comment<br />
and test that a user is truly watching this ticket; you<br />
can instead check to see if a user’s name appears in a list<br />
of all the watchers on the right side of the ticket page,<br />
which will look like figure 12.8.<br />
329<br />
Figure 12.8 Who’s watching
330 CHAPTER 12 Sending email<br />
As usual, you see what you need to code right now to get your feature on the road to<br />
passing by running bin/cucumber features/waching.feature. You see that it’s actually<br />
this watchers list, indicated by Capybara telling you that it can’t find that element:<br />
Then I should see "user@ticketee.com" within "#watchers"<br />
Unable to find css "#watchers" (Capybara::ElementNotFound)<br />
To get this feature to continue, you’re going to need this element! You can add it to<br />
app/views/tickets/show.html.erb underneath the tag for <br />
by using the code from the following listing.<br />
Listing 12.8 app/views/tickets/show.html.erb<br />
<br />
Watchers<br />
<br />
<br />
<br />
<br />
<br />
<br />
You’ve created another div with the id attribute set to watchers, which is the element<br />
that your scenario looks for. In this div you iterate through all the watchers of the<br />
ticket and output a li tag for each of them, which will output a list of watchers when<br />
wrapped in a ul tag.<br />
When you have this element and you run your feature again with bin/cucumber<br />
features/watching_tickets.feature, you see that your feature gets one step closer<br />
to passing by locating user@ticketee.com in the #watchers element, but it now can’t<br />
find the Stop Watching This Ticket button:<br />
Then I should see "user@ticketee.com" within "#watchers"<br />
And I press "Stop watching this ticket"<br />
no button with value or id or text 'Stop watching this ticket'<br />
This button will toggle the watching status of the ticket of the current user, and the<br />
text will differ depending on if the user is or isn’t watching this ticket. In both cases,<br />
however, the button will go to the same action. To get this next scenario to pass, you<br />
add the button to the div#watchers element you just created by using a helper,<br />
changing the first few lines of the element to this:<br />
<br />
<br />
Watchers<br />
This toggle_watching_button helper will only appear in views for the Tickets-<br />
Controller, and so you should put the method definition in app/helpers/<br />
tickets_helper.rb inside the TicketsHelper module, using the code from the following<br />
listing to define the method.
Subscribing to updates<br />
Listing 12.9 app/helpers/tickets_helper.rb<br />
def toggle_watching_button<br />
text = if @ticket.watchers.include?(current_user)<br />
"Stop watching this ticket"<br />
else<br />
"Watch this ticket"<br />
end<br />
button_to(text, watch_project_ticket_path(@ticket.project, @ticket))<br />
end<br />
On the final line of this method, you use a new method: button_to. This method<br />
works in a similar fashion as link_to does, providing a user with an element to click to<br />
go somewhere. In this case, the element is a button wrapped in a form that points to<br />
the specified action. When the user clicks the button, it submits this form through a<br />
POST request, with the only parameter passed through being params[:commit], which<br />
contains the text of the button.<br />
Inside the button_to, you use a new route helper that you haven’t defined yet.<br />
When you run bin/cucumber features/watching_tickets.feature, it will complain<br />
that this method is undefined when it tries to render the app/views/tickets/<br />
show.html.erb page:<br />
And I follow "Release date"<br />
undefined method `watch_project_ticket_path' for ...<br />
This route helper points to a specific action on a project’s ticket. You can define it in<br />
config/routes.rb inside the resources :tickets block, which itself is nested inside<br />
the resources :projects block, as shown in the following listing.<br />
Listing 12.10 config/routes.rb<br />
resources :projects do<br />
resources :tickets do<br />
collection do<br />
get :search<br />
end<br />
member do<br />
post :watch<br />
end<br />
end<br />
end<br />
B Define member route<br />
The button_to’s purpose is to toggle the watch status of a single ticket, meaning you<br />
want to define a member route B for your ticket resource. You put it inside the tickets<br />
resource, nested under the projects resource, because for your watch action you want<br />
to confirm that the person has permission to view this project. You define the route to<br />
the watch action with post because button_to generates a form by default, and a<br />
form’s HTTP method will default to POST.<br />
331
332 CHAPTER 12 Sending email<br />
When you run your feature again using bin/cucumber features/watching<br />
_tickets.feature, it will complain now because there is no watch action for your<br />
button to go to:<br />
And I press "Stop watching this ticket"<br />
The action 'watch' could not be found for TicketsController<br />
You’re almost done! Defining this watch action is the last thing you have to do. This<br />
action will add the user who visits it to a specific ticket’s watcher list if they aren’t<br />
already watching it, or remove them if they are. To define this action you open app/<br />
controllers/tickets_controller.rb and use the code found in the following listing.<br />
Listing 12.11 app/controllers/tickets_controller.rb<br />
def watch<br />
if @ticket.watchers.exists?(current_user)<br />
@ticket.watchers -= [current_user]<br />
flash[:notice] = "You are no longer watching this ticket."<br />
else<br />
@ticket.watchers [:show,<br />
:edit,<br />
:update,<br />
:destroy]<br />
to these lines:<br />
before_filter :find_ticket,<br />
:only => [:show,<br />
:edit,<br />
:update,<br />
:destroy,<br />
:watch]<br />
In this method you use exists?, which will check if the given user is in the list of watchers.<br />
If they are, then you use watchers -= to remove a watcher from a ticket. If they<br />
aren’t on the watchers list, you use watchers
Real-world email<br />
Great! Now you have a way for users to toggle their watch status on any given ticket.<br />
Let’s make sure that everything is working by running rake cucumber:ok spec. You<br />
should see the following output:<br />
62 scenarios (62 passed)<br />
717 steps (717 passed)<br />
# and<br />
40 examples, 0 failures, 20 pending<br />
Everything is still A-OK, which is good to see. Let’s commit this change:<br />
git add .<br />
git commit -m "Add button so users can toggle<br />
watching on a ticket"<br />
git push<br />
You’ve now got a way that a user can start or stop watching a ticket. By watching a<br />
ticket, a user will receive an email when a comment is posted to the ticket. You’re<br />
doing great in theoretically testing email, but you haven’t yet configured your application<br />
to send out emails in the real world. Let’s do that now.<br />
12.3 Real-world email<br />
You’ve just created the beginnings of a way to send email in your application, but<br />
there’s still a part missing: the SMTP server that receives your mail objects and then<br />
sends them out to their recipients. You could spend a lot of time configuring one<br />
yourself, but many companies offer a free SMTP service, such as Gmail. 8 You’ll use a<br />
Gmail account to send out tests of your emails, and you can use Action Mailer to connect<br />
to this service.<br />
WARNING You wouldn’t use Gmail to send or receive your emails if you<br />
were running a much larger application, but rather another web service<br />
such as SendGrid. This is because Gmail has a limit of about 200 sent<br />
emails a day, and if there are 200 tickets updated in a single day then it’s<br />
goodbye email cap. Gmail is great for light email usage, but if you want to<br />
scale up your usage, SendGrid is one of the best options out there.<br />
Action Mailer has a setting that you can use to set up your SMTP connection:<br />
ActionMailer::Base.smtp_settings = {<br />
:username = "youraccount@example.com",<br />
:password = "yourpassword"<br />
...<br />
}<br />
Before you dive into setting this up, you’re going to need a feature to ensure that it<br />
always works. When you set up your application to send emails in the real world, it<br />
may work from the get-go, and you can test it manually by sending out emails in your<br />
8 SendGrid offers one too that you would use, but you’re going to need to receive emails next, and having a<br />
Gmail account will allow you to do that.<br />
333
334 CHAPTER 12 Sending email<br />
application through rails server. But how do you ensure that it works all the time?<br />
The feature will provide that insurance.<br />
When you’re done here, you’ll have your application hooked up to Gmail’s SMTP<br />
server so that you can send emails in the real world, and you’ll have a Cucumber feature<br />
to ensure that it’s never broken. 9 Let’s jump into it.<br />
12.3.1 Testing real-world email<br />
In this section, you’ll create a feature in which you set up Action Mailer to send out<br />
emails to Gmail’s SMTP service. You’ll then update a ticket’s comment, which should<br />
trigger the emails to be sent to the real world. Finally, you’ll check the Gmail account<br />
(using the mail gem on which Action Mailer is based), to make sure that the email<br />
was received. If it wasn’t received, then the cause is most likely a configuration problem,<br />
such as an invalid password.<br />
Let’s write this new feature in a new file called features/gmail.feature a bit at a time.<br />
You start with just these few lines:<br />
Feature: Gmail<br />
In order to send real world emails<br />
As the application<br />
I want to ensure my configuration is correct<br />
Background:<br />
Given there are the following users:<br />
| email | password |<br />
| alice@ticketee.com | password |<br />
| youraccount@example.com | password |<br />
And Action Mailer delivers via SMTP<br />
Here you have the standard feature setup on the first four lines, describing to any<br />
interested reader what this feature’s purpose is. The final few lines begin your feature’s<br />
Background, defining two users that you’ll use and an as-of-yet undefined step.<br />
The two users set up here are for setting up the ticket a little later on in your Background.<br />
The youraccount@example.com should be your actual Gmail account’s<br />
address 10 for reasons that you’ll see later. 11<br />
The current undefined step on the final line will be used to tell Action Mailer not<br />
to capture all emails that are being sent, but rather to send them out through the<br />
SMTP configuration that you’ll set up in a little while. When you run this feature using<br />
bin/cucumber features/gmail.feature, you’re given the step definition for this step:<br />
Given /^Action Mailer delivers via SMTP$/ do<br />
pending # express the regexp above with the code you wish you had<br />
end<br />
9 That is to say, if you run all the tests and they all pass before you commit, then you know that your Gmail connection<br />
would be working, too.<br />
10 And if you don’t have one, sign up! It’s free and will only take a minute.<br />
11 We’d use youraccount@gmail.com as the example here, but we don’t want to bombard the owner of this<br />
actual account with emails!
Real-world email<br />
In this step definition, you need to tell Action Mailer to use SMTP to deliver your<br />
emails rather than capture them. You can define this new step definition in features/<br />
step_definitions/app_email_steps.rb like this:<br />
Given /^Action Mailer delivers via SMTP$/ do<br />
ActionMailer::Base.delivery_method = :smtp<br />
end<br />
Great! Now Action Mailer will set the delivery_method to :smtp before every scenario<br />
in this feature. The side effect of this setting is that it will be set for every scenario that<br />
runs after it, not only scenarios in this feature. This is a problem because you don’t<br />
want every scenario to send email in the real world, only the ones contained in this<br />
feature. To make it revert this setting back to :test after every scenario, you can create<br />
a new file at features/support/after_hook.rb and put this content inside it:<br />
After do<br />
ActionMailer::Base.delivery_method = :test<br />
end<br />
The After method here is provided by Cucumber, and its purpose is to execute any<br />
given block after each scenario has finished running. With this code, the setting will<br />
be reverted back to :test and you’ll only be sending real-world emails in this particular<br />
scenario.<br />
Let’s continue writing your new feature. You need to set up a project that both<br />
alice@ticketee.com and you can see, and create a ticket on that project that is posted<br />
by you. In a short while, you’ll get Alice to sign in and post a comment to this ticket,<br />
which should make an email appear in your inbox. You’ll then check this email using<br />
the mail gem. Set up the project and ticket with these steps:<br />
Given there is a project called "TextMate 2"<br />
And "alice@ticketee.com" can view the "TextMate 2" project<br />
And "youraccount@example.com" can view the "TextMate 2" project<br />
And "youraccount@example.com" has created a ticket for this project:<br />
| title | description |<br />
| Release date | TBA very shortly. |<br />
Here’s another place where youraccount@example.com should be substituted with<br />
your real Gmail account. In these steps, you set up that alice@ticketee.com and your<br />
email both have the “view” permission on the TextMate 2 project. After this, you need<br />
a ticket that you’ve created so that Alice can post a comment to it and you can receive<br />
an email notification informing you of what Alice has posted.<br />
Now you can get to the meat of your feature: the scenario itself. In this scenario,<br />
you want to log in as alice@ticketee.com, visit the “Release date” ticket inside the Text-<br />
Mate 2 project, and post a comment to it. After all that’s said and done, you need to<br />
assert that your youraccount@example.com mailbox has one new message. The code<br />
for the scenario should therefore look like in the following listing.<br />
335
336 CHAPTER 12 Sending email<br />
Listing 12.12 features/gmail.feature<br />
Scenario: Receiving a real-world email<br />
Given I am signed in as "alice@ticketee.com"<br />
Given I am on the homepage<br />
When I follow "TextMate 2"<br />
And I follow "Release date"<br />
And I fill in "Text" with "Posting a comment!"<br />
And I press "Create Comment"<br />
Then I should see "Comment has been created."<br />
When I log into gmail with:<br />
| username | password |<br />
| youraccount@gmail.com | your_password |<br />
Then there should be an email from Ticketee in my inbox<br />
When you run this feature using bin/cucumber features/gmail.feature, you see that<br />
your feature fails when alice@ticketee.com clicks the Create Comment button:<br />
And I press "Create Comment"<br />
Connection refused - connect(2) (Errno::ECONNREFUSED)<br />
.../net/smtp.rb:551:in `initialize'<br />
Remember before how it was mentioned that Action Mailer would (by default) try to<br />
connect to an SMTP server running on localhost? That’s what is happening here,<br />
because when a comment is updated a notification will be sent out. You didn’t see<br />
this previously because it’s only now that you’ve switched delivery_method to :smtp,<br />
You don’t have one running locally 12 so it’s unable to connect. You can tell that it’s<br />
now using SMTP, because the first line of the stacktrace points to net/smtp.rb in<br />
Ruby’s standard library, which is what Action Mailer (by way of Mail) uses to connect<br />
to SMTP servers. Therefore, you must change something in order to make this work<br />
once more.<br />
12.3.2 Configuring Action Mailer<br />
To fix this error, you must tell Action Mailer to connect to your Gmail server so that it<br />
has a way to send out emails. You can create a new file in config/initializers that provides<br />
Action Mailer with the necessary information it needs. But what would this information<br />
be? Well, let’s hop on over to Google’s “Configuring other mail clients” 13 page,<br />
where you’ll see the table from figure 12.9.<br />
You’re trying to send email, so you want to use the Outgoing Mail section, which<br />
tells you to use smtp.gmail.com as the server. You’ll connect to it using TLS, so you’ll<br />
connect on port 587. The account name and password should be the Gmail address<br />
and password for your email address. With these settings, create a config/initializers/<br />
mail.rb file that looks like the following listing.<br />
12 Unless you’ve got it set up from some other place that’s not this book.<br />
13 http://mail.google.com/support/bin/answer.py?hl=en&answer=13287.
Real-world email<br />
Listing 12.13 config/initializers/mail.rb<br />
ActionMailer::Base.smtp_settings = {<br />
:user_name => "youraccount@gmail.com",<br />
:password => "password",<br />
:address => "smtp.gmail.com",<br />
:port => 587,<br />
:tls => true<br />
}<br />
With these settings in this file, you can rerun bin/cucumber features/gmail.feature<br />
to see that it passes now up to the last two steps, which are undefined:<br />
When /^I log into gmail with:$/ do |table|<br />
# table is a Cucumber::Ast::Table<br />
pending # express the regexp above with the code you wish you had<br />
end<br />
Then /^there should be an email from Ticketee in my inbox$/ do<br />
pending # express the regexp above with the code you wish you had<br />
end<br />
With these step definitions, you’ll be able to connect to Gmail using settings specified<br />
in a Cucumber table format and then check for the email, which should be sent by<br />
steps earlier in this feature. You need to define these now.<br />
12.3.3 Connecting to Gmail<br />
You’ve now sent the email to the server, but you don’t have any steps in place to read<br />
these emails from your Gmail account and check that one of the emails is from Ticketee.<br />
As you can almost anticipate, there’s a gem that can help you with this, called<br />
quite simply gmail. This gem will let you connect to a Gmail server using the username<br />
and password you just used to set up an SMTP connection, and also read the<br />
emails for that account. The code it uses looks like this:<br />
Gmail.connect(username, password)<br />
Figure 12.9<br />
Configuring other<br />
mail clients<br />
You’ll also use this gem in the next section, when we look at how you can receive<br />
emails into your application. It’s a pretty neat gem, and it’s got a great README, which<br />
can be seen at http://github.com/nu7hatch/gmail.<br />
337
338 CHAPTER 12 Sending email<br />
To install this gem, you must first add it to the Gemfile by adding this line inside<br />
the group block for development and test, because you only want this gem used in<br />
those environments:<br />
group :test, :development do<br />
gem 'gmail'<br />
...<br />
end<br />
Then you need to run bundle install to install this gem so that you can use it. When<br />
bundle install is finished running, let’s open features/step_definitions/app_email<br />
_steps.rb and add the “When I log into gmail with...” step by using this code:<br />
When /^I log into gmail with:$/ do |table|<br />
details = table.hashes.first<br />
@gmail = Gmail.connect(details["username"], details["password"])<br />
end<br />
In this step definition, you take only the first hash from the table (you’re only going to<br />
be logging into one Gmail account at a time) and then you use the Gmail.connect<br />
method, provided by the gmail gem that you just installed, to start a connection to<br />
Gmail’s servers using your username and password. By assigning this object to @gmail,<br />
you can use this connection in future steps to read emails from your Gmail account.<br />
The second step you need to create will do precisely that, using the @gmail connection<br />
to read all the emails, find the emails that have a subject beginning with<br />
[ticketee] (there should only be one), and then delete the email after you’ve read<br />
it. The method you can use for this is the find_and_delete method, which will find<br />
emails matching a specific criteria, read them, and then delete them:<br />
Then /^there should be an email from Ticketee in my inbox$/ do<br />
@mails = @gmail.inbox.find(:unread,<br />
:from => "ticketee@gmail.com") do |mail|<br />
if mail.subject =~ /^\[ticketee\]/<br />
B Check email subject<br />
mail.delete!<br />
@received_mail = true<br />
end<br />
end<br />
@received_mail.should be_true<br />
end<br />
In this step, you use the @gmail variable defined in the “log into gmail with” step you<br />
just defined. The find method here will find emails using the Gmail connection<br />
you’ve opened and then locate all emails from ticketee@gmail.com. The mail variable<br />
is an instance of the Mail::Message class, as are all messages parsed by the mail gem.<br />
If there is an email with a subject that begins with “[ticketee]” B then you set a<br />
@received_mail variable to true. You use this variable as the final line in this step,<br />
because it would only be set to true if the latest email’s subject was what you were<br />
looking for.
Real-world email<br />
When you run your feature using bin/cucumber features/gmail.feature, it will<br />
now pass:<br />
1 scenario (1 passed)<br />
15 steps (15 passed)<br />
This feature checks that your real-world SMTP settings are valid by connecting to the<br />
real-world SMTP server, sending an email, and then checking that it arrived using<br />
Mail::POP3. Beautiful! If the password for this account were to change, however, then<br />
this feature would break.<br />
Everything should still be working now. You haven’t changed anything that would<br />
have broken your existing features or specs, but it’s still great practice to run them just<br />
to make sure. Let’s do this by running rake cucumber:ok spec. You see the following<br />
output:<br />
63 scenarios (63 passed)<br />
732 steps (732 passed)<br />
# and<br />
40 examples, 0 failures, 20 pending<br />
Indeed, nothing is broken. But if you made a commit now, it would cause potentially<br />
private Gmail account details to be committed to the repository. You probably don’t<br />
want to do this. To prevent this, you should copy config/initializers/mail.rb to config/<br />
initializers/mail.rb.example and change the details in it to be placeholders for real<br />
details. The same thing should be done for the features/sending_emails.feature feature.<br />
After that, you must tell Git to ignore these files. You can do this by placing their<br />
names within a .gitignore file at the root of the Rails application, which is also the<br />
root of the Git repository. Create a new file called .gitignore now, and put these two<br />
lines in it:<br />
config/initializers/mail.rb<br />
features/sending_emails.feature<br />
When you run git add . and then git status, the files with the real values should not<br />
appear in the “Changes to be committed” list. If they don’t, then you can make a commit<br />
and push it:<br />
git commit -m "Set up application to connect to Gmail to send emails"<br />
git push<br />
You’ve now got your application sending out emails in the real world using Gmail as<br />
the server. With these settings, the emails notifying users that tickets have had new<br />
comments posted to them, as well as the confirmation emails sent from Devise for new<br />
user signups, will be sent out through Gmail.<br />
You have the sending emails part of your application done, but what about if you<br />
wanted to let users reply to comments by replying to the email notification they<br />
receive in their inbox? That would be cool. To do this, you’re going to need to figure<br />
out how you can receive emails with Rails.<br />
339
340 CHAPTER 12 Sending email<br />
12.4 Receiving emails<br />
You’d now like to add a feature to Ticketee where users can reply to the email notifications<br />
for a new comment on a ticket, and by replying create a new comment with their<br />
text. Many other applications do this by having an email such as this:<br />
== ADD YOUR REPLY ABOVE THIS LINE ==<br />
Bob has just updated the "Due date" ticket for "TextMate 2"<br />
Text above the “ADD YOUR REPLY ABOVE THIS LINE” will be parsed out and turned<br />
into a new object. In Ticketee, this would be a comment.<br />
In the previous section, you learned how you could connect to a Gmail account to<br />
check to see if there was an email that had a subject beginning with “[ticketee].” You<br />
can use the same method in order to check for replies to your emails too, but you<br />
need to make one small modification.<br />
To determine what ticket and project the reply is directed at, you need to tag the<br />
emails in a certain way. The best way to do this is to add the tags to the email addresses<br />
themselves, so that an email address with a tag looks like ticketee+tag@gmail.com,<br />
where the +tag part of the email is ignored and the email arrives in ticketee<br />
@gmail.com’s mailbox. For your emails, you’ll set a reply-to address such as ticketee<br />
+61+23@gmail.com, where the first number is the project ID and the second number<br />
is the ticket ID.<br />
You’re not going to post comments straight from emails. You need to check to see<br />
if the user has permission to view the project where the ticket is, which means that<br />
they would be able to create a comment for that ticket too. If they’re unable to post a<br />
comment to that ticket, you assume the user is trying to do something malicious and<br />
just ignore their email.<br />
To parse these emails, you’ll be using the receive method in an ActionMailer<br />
class, which takes an email object and allows you to process it.<br />
A quick summary: you’re going to use the gmail gem to check for emails in your<br />
inbox that are replies to comment notifications and then parse them using Action<br />
Mailer into new Comment objects. If a user is restricted from viewing a project, then<br />
you’ll ignore their emails.<br />
First, you want to check that the outgoing email contains the tag on the “from”<br />
address, so that when a user replies to it you know what project and ticket they’re<br />
replying to.<br />
12.4.1 Setting a reply-to address<br />
By having a different “from” address set on the outgoing email, you’ll be able to determine<br />
what project and ticket the user’s reply comment should be created on. To<br />
ensure that all outgoing emails from the comment_updated method in Notifier have<br />
this set, you’re going to write a simple test.<br />
Let’s open spec/mailers/notifier_spec.rb and change this whole file to what’s<br />
shown in the following listing.
Receiving emails<br />
Listing 12.14 app/mailers/notifier_spec.rb<br />
require "spec_helper"<br />
describe Notifier do<br />
it "correctly sets the reply-to" do<br />
comment = Factory(:comment)<br />
mail = ActionMailer::Base.deliveries.last<br />
mail.from.should eql(["youraccount+#{comment.project.id}+" +<br />
"#{comment.ticket.id}@example.com"])<br />
end<br />
end<br />
Here you test that the from for the latest email sent out contains the ids of the project<br />
and ticket related to the comment you create. With this information contained in the<br />
email address, you’ll be able to know what project and ticket to create the comment<br />
for when a user replies to that email.<br />
When you run this spec using bin/rspec spec/mailers/notifier_spec.rb, you<br />
see that you need to define the comment factory:<br />
No such factory: comment (ArgumentError)<br />
Let’s define this new factory in factories/comment_factory.rb like this:<br />
Factory.define :comment do |comment|<br />
comment.text "A plain old boring comment."<br />
comment.ticket { |t| t.association(:ticket) }<br />
comment.user { |u| u.association(:user) }<br />
end<br />
Now when you run bin/rspec spec/mailers/notifier_spec.rb, you see that it fails<br />
with this error:<br />
expected ["ticketee+1+1@gmail.com"]<br />
got ["ticketee@gmail.com"]<br />
Right then! A failing test is a great place to begin, and now you need to fix it. Let’s<br />
open app/mailers/notifier.rb and add a :from option to the mail call inside the<br />
comment_updated method:<br />
:from => "Ticketee "<br />
This will change the “from” address on emails that go out to your users by tagging the<br />
addresses with the project and ticket id. When the user replies to this email, you can<br />
use this tag to find the project and ticket that you need to create a new comment on.<br />
Let’s run bin/rspec spec/mailers/notifier_spec.rb again to see it pass:<br />
1 example, 0 failures<br />
Now you need to work on the actual receiving of replies directed at this tagged<br />
address!<br />
341
342 CHAPTER 12 Sending email<br />
12.4.2 Receiving a reply<br />
With the correct reply-to set, you can implement the feature responsible for creating<br />
new comments from email replies. You create a new class for dealing with incoming<br />
email and call it Receiver, placing it in app/mailers by running this command:<br />
rails g mailer receiver<br />
This will generate the mailer you use for receiving email, as well as the RSpec file that<br />
you can use to write the tests for the class. To test this particular feature, you use a<br />
setup very similar to the spec/notifier_spec.rb test that you just wrote. This test needs<br />
to generate a comment and then a reply to the email you would receive from the comment.<br />
This new reply should have the same body as the original email, but prefixed<br />
with some text. This new text will become the new comment.<br />
At this stage you only want to check that you can parse emails using this new class<br />
and a currently undefined method on it called parse. This method will take a<br />
Mail::Message object and create a new comment on a ticket. You’ll do permission<br />
checking later on, but for now let’s just get the basic functionality down.<br />
You begin with these lines in spec/mailers/receiver_spec.rb:<br />
require 'spec_helper'<br />
describe Receiver do<br />
it "parses a reply from a comment update into a comment" do<br />
comment = Factory(:comment)<br />
This will set up a comment and a ticket by using the factory, which will also cause a<br />
comment_updated notification to be delivered. You can retrieve this notification using<br />
this line:<br />
comment_email = ActionMailer::Base.deliveries.last<br />
This is possible because in the test environment, ActionMailer::Base.delivery<br />
_method is set to :test, which stores the emails that have been sent in Action-<br />
Mailer::Base.deliveries. The last email that’s been sent out will be the notification<br />
for the comment. With this email object, you can build a new Mail::Message reply to<br />
this email using these lines:<br />
mail = Mail.new(:from => "user@ticketee.com",<br />
:subject => "Re: #{comment_email.subject}",<br />
:body => %Q{This is a brand new comment<br />
#{comment_email.body}<br />
},<br />
:to => comment_email.from)<br />
B Quoted string<br />
With these lines, you’re constructing a new reply using the body B from the original<br />
email to generate a multi-lined string with “This is a brand new comment” before the<br />
body of the first email. The first line in this first email will eventually be “== ADD YOUR<br />
REPLY ABOVE THIS LINE ==”, which is how you distinguish what should be the new<br />
content for the comment and what’s just from the old email.
Receiving emails<br />
The final step for this spec is to actually parse the thing using the Receiver class,<br />
and to check that it changes the related ticket’s comment count by 1:<br />
lambda { Receiver.parse(mail) }.should(<br />
change(comment.ticket.comments, :count).by(1)<br />
)<br />
The spec/mailers/receiver_spec.rb should now look like the following listing.<br />
require 'spec_helper'<br />
describe Receiver do<br />
it "parses a reply from a comment update into a comment" do<br />
comment = Factory(:comment)<br />
ticket = comment.ticket<br />
comment_email = ActionMailer::Base.deliveries.last<br />
user = Factory(:user)<br />
mail =<br />
C Create new email<br />
Mail.new(:from => user.email,<br />
:subject => "Re: #{comment_email.subject}",<br />
:body => %Q{This is a brand new comment<br />
#{comment_email.default_part_body}<br />
},<br />
:to => comment_email.from)<br />
end<br />
end<br />
Listing 12.15 spec/mailers/receiver_spec.rb<br />
lambda { Receiver.parse(mail) }.should(<br />
change(ticket.comments, :count).by(1)<br />
)<br />
ticket.comments.last.text.should eql("This is a brand new comment")<br />
In this spec, you build a comment and reference the ticket for it. By creating a comment,<br />
there will be an email going out that you can access using Action-<br />
Mailer::Base.deliveries.last B because ActionMailer::Base.delivery_method<br />
is set to :test. Using this email, you can compile a new email using Mail.new C 14 and<br />
passing in some values using the original email’s methods. One of these values—<br />
:body—is way more important than the others. For this value, you want to take the<br />
original content of the email and then above it put the new comment text. You use<br />
default_part_body D. From this new text, a comment should be created. That’s<br />
exactly what you assert on the final few lines of this example by using RSpec’s change<br />
E method. On these final lines, you only want to make sure that the comments count<br />
has increased by one and that the latest comment has the text “This is a brand new<br />
comment.”<br />
14 This functionality is provided by the mail gem, on which Action Mailer depends.<br />
B Access email<br />
D<br />
343<br />
Insert original<br />
email content<br />
E Add 1 to comment count
344 CHAPTER 12 Sending email<br />
When you run this spec using bin/rspec spec/mailers/receiver_spec.rb, you’ll<br />
be told this:<br />
Failure/Error: lambda { Receiver.parse(mail) }.should(<br />
undefined method `parse' for Receiver:Class<br />
To make this spec parse, you need to define this method. This method should take a<br />
Mail::Message object, read out everything from the body of that object above the line<br />
“ADD YOUR REPLY ABOVE THIS LINE”, and create a comment from it. You can begin<br />
to define this method in app/mailers/receiver.rb like this:<br />
def self.parse(email)<br />
reply_separator = /(.*?)\s?== ADD YOUR REPLY ABOVE THIS LINE ==/m<br />
comment_text = reply_separator.match(email.body.to_s)<br />
Here you match the body of the email with the expected reply separator, getting back<br />
either a MatchData object (indicating the email is a valid reply to a comment) or nil.<br />
If you get back a valid reply then you do this:<br />
if comment_text<br />
to, project_id, ticket_id =<br />
email.to.first.split("@")[0].split("+")<br />
Here you take the list of to addresses for the email, get the first of them, and then<br />
split it on the @ symbol. This separates the username and the domain name in your<br />
email. The username contains the project id and ticket id, which you get by calling<br />
split again, this time separating the individual elements by the + symbol.<br />
Next, you need to find the relative project, ticket, and user for this email, which<br />
you can do using these lines inside the if that you just opened:<br />
project = Project.find(project_id)<br />
ticket = project.tickets.find(ticket_id)<br />
user = User.find_by_email(email.from[0])<br />
Finally, you need to create the comment from the email body (stripping all extra<br />
spaces from it) and close the if, which is done with the following lines:<br />
ticket.comments.create(:text => comment_text[1].strip,<br />
:user => user)<br />
end<br />
end<br />
The [1] here will get the first match for the comment_text, which will be the new comment’s<br />
text, throwing strip on the end in case there are a couple of extra spaces /<br />
lines between the comment text and the separator. That’s the final bit of code you<br />
need in the app/mailers/receiver.rb file. When you run this spec again with bundle<br />
exec rspec spec/mailers/receiver_spec.rb, it will still fail:<br />
Failure/Error: lambda { Receiver.parse(mail) }.should(<br />
count should have been changed by 1, but was changed by 0
Summary<br />
This is because your original comment notification doesn’t have the reply separator,<br />
and therefore the if condition in the parse method you just wrote says “Oh, can’t<br />
find it, so I’ll just ignore this email,” or something to that effect. In order to get this to<br />
work, you must add that line to the comment notification. You can do this by opening<br />
app/views/notifier/comment_updated.text.erb and its HTML compatriot and adding<br />
this line to the beginning of both files:<br />
== ADD YOUR REPLY ABOVE THIS LINE ==<br />
Now when you run your spec once more with bundle exec rspec spec/mailers/<br />
receiver_spec.rb, it will pass because the parse method can find the separator:<br />
1 example, 0 failures<br />
Alright, now that you’ve got that feature passing, does everything else still work? Let’s<br />
find out by running rake cucumber:ok spec:<br />
63 scenarios (63 passed)<br />
732 steps (732 passed)<br />
# and<br />
41 examples, 0 failures, 19 pending<br />
Good! Everything is still going great. Let’s commit the new feature:<br />
git add .<br />
git commit -m "Add Receiver class to receive emails"<br />
git push<br />
Right, this feature isn’t complete quite yet, because it only takes mail objects but<br />
doesn’t actually do any of the fetching itself. You’ll revisit this feature in chapter 15<br />
and complete it there. This is a great start, however.<br />
12.5 Summary<br />
That completes chapter 12! In this chapter, you learned how to send out your own<br />
kind of emails. Before that, however, you added two ways that users can subscribe to a<br />
ticket.<br />
The first of these ways was an automatic subscription that occurred when a user<br />
created a ticket. Here, every time a comment was posted to a ticket, the owner of the<br />
ticket was notified through either a plain-text or HTML email, depending on what that<br />
user’s email client supported.<br />
The second of the two ways was to allow users to choose to subscribe or unsubscribe<br />
to a ticket. By doing this, all users, and not just those who created the ticket, can<br />
choose to receive emails when a ticket has had a comment posted to it. This way, all<br />
users can stay up to date on tickets they may be interested in.<br />
Next, you made sure that you could actually send emails into the real world by connecting<br />
to a real Gmail account using Action Mailer’s SMTP settings. You also ensured<br />
that when you send an email using the STMP setting, you can read it from the server by<br />
using the gmail gem.<br />
345
346 CHAPTER 12 Sending email<br />
By sending emails into the real world, you’re bringing your application one step<br />
closer to being complete. Now you’ll be able to put the application on a server, and it<br />
should work just as it does in your tests. But you’re going to polish your application a<br />
little more before you do that.<br />
The next chapter covers how you can use Rails to present your data to other developers<br />
so that they can create applications or libraries to parse it into new and interesting<br />
formats.
This chapter covers<br />
� Building an API using new Rails 3 features<br />
� Rate-limiting the API<br />
� Versioning APIs<br />
1 http://json.org.<br />
2 http://xml.org.<br />
Designing an API<br />
In the past chapters, you’ve created a great application that allows your users to<br />
manage projects and tickets through a web browser. In this chapter, you are going<br />
to create a way for your users to manage this content through what’s known as an<br />
Application Programming Interface (API). As its name implies, an API is a programming<br />
interface (for your application) that returns either JavaScript Object<br />
Notation 1 (JSON) or XML 2 data for its requests, which are the two most common<br />
formats for modern APIs to return information in. People can then create programs<br />
or libraries (referred to as clients) to read and present this data in any way<br />
they see fit.<br />
347
348 CHAPTER 13 Designing an API<br />
One great example of how an API is used is Twitter. Twitter has had an API for an<br />
exceptionally long time now, and people have written Twitter clients for just about<br />
every operating system out there using this API. The functionality of the site is effectively<br />
the same, but people have come up with interesting ways of displaying and modifying<br />
that information, such as the Twitter for Mac clients.<br />
There are many, many Rails sites out there that already provide an API interface,<br />
such as GitHub 3 and (as previously mentioned) Twitter. 4 Both of these APIs have<br />
exceptionally well-documented examples of how to use them and what can be done<br />
with them, which is a great way to convince people to start using your API. API documentation,<br />
however, is an exercise best left for you after this chapter’s done.<br />
APIs aren’t unique to Rails. There are plenty of other sites out there that have<br />
implemented their own APIs, such as the StackExchange services that run on Microsoft.Net.<br />
Furthermore, APIs created in one language are not for exclusive use of API<br />
clients written in that specific language. For example, if you wanted to parse the data<br />
from the StackExchange API in Ruby, you could do that just fine.<br />
In Rails, however, it’s extremely easy to make a modern API for an application, as<br />
you’ll see in this chapter. Your application will serve in two formats: JSON and XML.<br />
Back to the Twitter and GitHub examples now, and one further thing to note is<br />
both of these APIs are also versioned. The point of this is that an API should be presented<br />
in a “frozen” state and should not be modified once it’s considered stable. This<br />
way, a user is be able to use an API without fear of it changing and potentially breaking<br />
the code that they’re using to parse the data from the API.<br />
Twitter has a URL such as http://api.twitter.com/1/statuses/public_timeline.json<br />
that has the version as the first part of the URL after the site name and then the format<br />
as an extension at the end. Github’s is slightly different, with a URL such as<br />
http://github.com/api/v2/json/repos/show/rails3book/ticketee having the version<br />
prefixed with a v as the second part of the URL, and the format as the part of the<br />
URL directly after. The v prefix here makes the version part of the URL clearer to<br />
those who are reading it, which is a good thing.<br />
You’re going to borrow ideas from both of these API designs, presenting your API<br />
at the base URL of /api/v1 and the format at the end of the URL, like most web<br />
requests. Your URLs will look like /api/v1/projects.json, which will be the URL to<br />
return a list of projects that the user is able to read. The reason for this versioning is so<br />
that you can always provide data that is predictable to your end users. If you wished to<br />
change the format of this data, you would create a new version namespace, which is<br />
the final thing we look at toward the end of this chapter. Really, these new version<br />
numbers can be whatever you wish, with minor versions such as 0.1 being the standard<br />
3 The octopi gem was built to interact with the GitHub API—you can see the source at http://github.com/<br />
fcoury/octopi.<br />
4 The (non-official) twitter gem was built to interact with the API that Twitter provides; you can see the<br />
source of this gem at http://github.com/jnunemaker/twitter.
The projects API<br />
for unstable APIs, and major versions such as 1, v1, or 1.0 being the standard for the<br />
stable, fixed APIs. 5<br />
To check what user is making a request to your API, you’ll use a token-based<br />
authentication system, which is something that the Devise gem can be configured to<br />
provide. You’ll require the token attribute to be passed through in every API request,<br />
because without it you cannot be sure of who is doing what with the API. You can then<br />
restrict things, such as the list of projects, based on the user’s permissions. You can<br />
also use tokens to track the number of requests the user has performed on the API<br />
and then block them if they make more than 100 requests per hour, which is one of<br />
the final things you look at in this chapter. Twitter and GitHub both implement ratelimiting<br />
so that people do not spam the system with too many API requests.<br />
Along the path of developing this API, you’ll learn additional Rails goodies such as<br />
the to_json and to_xml methods, which will convert an object into JSON or XML representations<br />
of that object respectively, as well as the respond_with and respond_to<br />
controller methods, which are responsible for serving data in different formats.<br />
When you’re done with this chapter, you’ll have a nice solid API that other developers<br />
can build upon. Other applications (be it Rails or not) will also be able to read<br />
the data from your application.<br />
13.1 The projects API<br />
To get started with Ticketee’s API, you’re going to write the projects part of it. In this<br />
section, you make extensive use of the respond_with and respond_to methods,<br />
which are new in Rails 3.<br />
Before you go about implementing the first building blocks for your API, you’ll<br />
learn about a module called Rack::Test::Methods, provided by the rack-test gem,<br />
which will allow you to easily test your API.<br />
After that, you’ll begin writing the API by creating the index action, which will be<br />
responsible for displaying all the projects in a JSON format. Next, you’ll implement<br />
token-based authentication so you can know who’s who when they access the API.<br />
This will allow you to restrict the list of projects shown in the index action to only<br />
those that the user should see. Later on, you’ll get this action to return XML as well<br />
as the JSON output.<br />
With an API, you don’t need to provide a new and edit actions, because this functionality<br />
should be provided by the client that is accessing the API. Instead, you’ll only<br />
write the action 6 parts of your API: the create, show, update, and destroy actions.<br />
Along the way, you’ll be restricting the create, update, and destroy actions to administrators<br />
of the application.<br />
When learning about these actions, you’ll see a lot of reference to HTTP status<br />
codes, which are the standard for all pages of the web. These status codes play a<br />
5 Although logical (incremental) versioning is recommended to stave off questions such as, “What were they<br />
thinking?!” and “Are they crazy?” This is often referred to as Semantic Versioning, http://semver.org/.<br />
6 An absolutely terrible pun. Forgive us.<br />
349
350 CHAPTER 13 Designing an API<br />
critical role in an API, providing key information such as if the request was successful<br />
(the 200 status code) or if the user is unauthorized (the 401 status code) to perform<br />
the request. These are standardized ways of quickly informing people of the result of<br />
their requests.<br />
TIP There’s a handy gem called cheat that provides cheat sheets for a<br />
number of things, including one for HTTP status codes. You can install<br />
this gem using the gem install cheat command and then bring up the<br />
cheat sheet for status codes using cheat status_codes.<br />
But if you’re on Windows, this won’t work because Cheat requires a<br />
function not found on your system. Instead, go to http://cheat<br />
.errtheblog .com/b where you can view the list of all the cheat sheets.<br />
To begin writing this API, you’ll need to define the routes to it. Without routes, making<br />
requests to /api/v1/projects.json will forever be fruitless. If you recall from this chapter’s<br />
introduction, the API URL that you’ll be using looks like /api/v1/projects.json. Previously,<br />
when you wanted URLs to be prefixed with a name (such as back in chapter 7),<br />
you used a namespace method for them. You’re going to do the same thing here,<br />
except you’ll use a namespace within another namespace. Let’s open config/routes.rb<br />
and add the code from the following listing to the top of the routes definition.<br />
Listing 13.1 config/routes.rb<br />
Ticketee::Application.routes.draw do<br />
namespace :api do<br />
namespace :v1 do<br />
resources :projects<br />
end<br />
end<br />
...<br />
This new route defines routes and routing helpers for the projects resources, such as<br />
/api/v1/projects, and api_v1_projects_path respectively. You’re going to need to<br />
be serving content from this route, namely a list of projects. This list will be served in<br />
one of two forms: XML or JSON. Before you actually implement the code that makes<br />
these responses get served, you’re going to write a new RSpec test that makes sure<br />
these routes return the right data. To help you along, you’ll be using a feature provided<br />
by one of the dependencies of Rails: the rack-test gem.<br />
This gem provides a module called Rack::Test::Methods, which contains methods<br />
such as get, post, put, and delete. Look familiar? They should. They’re the four<br />
basic HTTP methods that you use when making requests. The methods from<br />
Rack::Test::Methods take a path on which to make a request and then return a Rack<br />
response (an Array) that consists of three parts: the HTTP status code, the HTTP headers<br />
(in Hash form), and the body. The simplest Rack response would look something<br />
like this:<br />
[200, {}, "Hello World!"]
The projects API<br />
The first element of this result is the HTTP status code, and in this case it indicates<br />
that your fictional response was 200, or in human-terms: OK. The second element contains<br />
no special HTTP headers, but you’ll see these as you progress in the next section.<br />
Finally, the third element contains a string, which represents the body of this request,<br />
returning the string “Hello World!”<br />
Using Rack::Test::Methods, you can initiate requests to your application’s API<br />
that then return these Rack responses, and you can then use these responses to check<br />
that your API is responding in the correct way. You’re purposely not using the standard<br />
RSpec controller tests here to make sure that the precise URLs are responding in the<br />
correct manner, instead of only testing that the actions are doing what you tell them.<br />
Let’s get into writing this initial test for your API.<br />
13.1.1 Your first API<br />
You’re going to continue on the running theme of “test everything” with your API, and<br />
with the rack-test gem you’ve got the necessary tools to test what your API’s URLs are<br />
doing. Rather than testing this in Cucumber, you’re instead going to use RSpec, which<br />
provides a nicer DSL for testing your APIs. To begin with, you’re going to create a new<br />
folder structure at spec/apis/v1. You should name the apis directory as a plural for two<br />
reasons: first, it matches the consistency of the other directories in the spec directory;<br />
and second, it may one day contain more than one API version. Then you’ll create a<br />
new file called spec/apis/v1/projects_spec.rb and begin to fill it with the following:<br />
require "spec_helper"<br />
describe "/api/v1/projects", :type => :api<br />
do<br />
end<br />
There’s much more code to come after this short snippet, but it’s a pretty good start.<br />
In the describe block here you pass through an option of :type => :api. What<br />
does this do? Well, you can use it to modify the behavior of this describe block in<br />
many ways, such as including modules. The Rack::Test::Methods module you’re<br />
going to use needs to be included into each test. Rather than doing this manually, you<br />
can use this :type option to do the include for you, as well as some additional behavior.<br />
Let’s open a new file at spec/support/api/helper.rb and put the content from the<br />
following listing inside.<br />
Listing 13.2 spec/support/api/helper.rb<br />
module ApiHelper<br />
include Rack::Test::Methods<br />
def app<br />
Rails.application<br />
end<br />
end<br />
351
352 CHAPTER 13 Designing an API<br />
RSpec.configure do |c|<br />
c.include ApiHelper, :type => :api<br />
end<br />
Here you define a module called ApiHelper, which you include into any test marked<br />
as an API test with the :type option. Inside the module, you use the<br />
Rack::Test::Methods module, which provides useful methods that you’ll see<br />
throughout this chapter for making requests to your application, such as the get<br />
method (not yet shown). You define the app method here so that the<br />
Rack::Test::Methods knows which application to act on. With this done, let’s go<br />
back to your test.<br />
Inside the describe block underneath this new method you’re going to want to<br />
create a new user (an admin one at that, because later on you’ll need it for the create<br />
and other actions) whom you’ll use to make this request to the API. You can create this<br />
admin by adding a let inside spec/v1/api/projects_spec.rb:<br />
let(:user) { create_user! }<br />
You’ll need to set up Devise to include the token_authenticatable module so that<br />
you can authenticate API requests from users by using a token they provide with each<br />
request. This is so that you will know what projects to show to your users, as well as any<br />
other authorization criteria that you need to apply to this user’s request. For example,<br />
only users with permission to create projects in the application should be able to do so<br />
through the API.<br />
To implement the change that you need, go into the User model (app/models/<br />
user.rb) and change the devise call to be this:<br />
devise :database_authenticatable, :registerable, :confirmable,<br />
:recoverable, :rememberable, :trackable, :validatable,<br />
:token_authenticatable<br />
Next, generate a migration to add a field called authentication_token to the users<br />
table, which will be used to store this token. You’ll need to add this migration to both<br />
the development and test environments. To do this, run these three commands:<br />
rails g migration add_authentication_token_to_users<br />
➥authentication_token:string<br />
rake db:migrate<br />
rake db:test:prepare<br />
The migration generator is smart here and will know to add the<br />
authentication_token to the users table based on the name you’re passing through.<br />
The additional argument on the end tells Rails what type of field you’d like this to be.<br />
With the migration created and run, you still need to add a callback to your User<br />
model, so that tokens are generated for users when they’re created, or for when users<br />
are updated but don’t have a token. 7 To do this, you’ll put this line in your User model:<br />
before_save :ensure_authentication_token<br />
7 A situation that is unlikely to happen (as you’ve got no serious users currently), but could potentially happen.
The projects API<br />
The before_save method here is run on a record whenever it is created or updated,<br />
as opposed to the before_create callback that you saw back in chapter 10, which only<br />
calls the specified method upon record creation.<br />
With the callback to create the token in place, let’s jump back to your spec and<br />
write a test to make a request with this token. Directly underneath the let(:user) in<br />
spec/api/v1/projects_spec.rb, you’ll put the code from the following listing.<br />
let(:token) { user.authentication_token }<br />
before do<br />
@project = Factory(:project)<br />
user.permissions.create!(:action => "view", :thing => @project)<br />
end<br />
context "projects viewable by this user" do<br />
let(:url) { "/api/v1/projects" }<br />
it "json" do<br />
get "#{url}.json"<br />
projects_json = Project.for(user).all.to_json<br />
last_response.body.should eql(projects_json)<br />
last_response.status.should eql(200)<br />
projects = JSON.parse(last_response.body)<br />
projects.any? do |p|<br />
p["project"]["name"] == "Ticketee"<br />
end.should be_true<br />
end<br />
end<br />
You’re using another let to define a token method that, when called, will return the<br />
authentication_token for the current user. You’ll use this later for authenticating<br />
requests for your API. The get method B you use here is provided by<br />
Rack::Test::Methods and simply makes a GET request with the provided URL. You<br />
put the URL in a let because you don’t want to repeat the URL too many times if you<br />
have multiple tests, and the let stops you from repeating yourself in your code.<br />
After the request is done in the test, you ensure that the last_response.status<br />
returns 200, which is the HTTP status code for OK and means the request was successful.<br />
The rest of this spec tests that the data contained within last_response.body contains<br />
the appropriate data. This to_json method will take the attributes for each<br />
project returned and turn them into JSON, resulting in an output such as<br />
[<br />
Listing 13.3 spec/api/v1/projects_spec.rb<br />
{"project":<br />
{<br />
"created_at":"[timestamp]",<br />
"id":1,<br />
"name":"Ticketee",<br />
"updated_at":"[timestamp]"<br />
}<br />
B GET request<br />
353
354 CHAPTER 13 Designing an API<br />
]<br />
}<br />
This output can then be read with a JSON parser by the receiving user, which is what<br />
you do on the line directly after this by using the JSON.parse method that is provided<br />
by the json gem. This method takes the JSON string and converts it into a Ruby Array<br />
or Hash. On the final line of your spec, you check that there’s anything in this array—<br />
anything at all—which returns true for p["project"]["name"] == "Ticketee", to<br />
make sure that the project you’ve created really shows up. You need the first key,<br />
project, because this is how elements are returned in JSON response so that their<br />
types can easily be identified. If something does match for the any? method, then<br />
your test passes.<br />
Let’s see what happens when you run bin/rspec spec/api/v1/projects_spec.rb<br />
now:<br />
Failures:<br />
1) /api/v1/projects projects viewable by this user index JSON<br />
Failure/Error: get "#{url}.json", :token => token<br />
uninitialized constant Api::V1::ProjectsController<br />
You haven’t yet defined any controllers for your API, and so this test is going to quite<br />
obviously fail. To make it pass, you’ll need to define the constant it requires,<br />
Api::V1::ProjectsController. This controller will be responsible for serving all the<br />
requests for your projects API.<br />
13.1.2 Serving an API<br />
To begin to define controllers for your namespace-within-a-namespace, you’ll create a<br />
new file at app/controllers/api/v1/base_controller.rb. This file will serve as a base for<br />
all controllers within version 1 of your API, providing functionality (eventually) for<br />
authenticating and authorizing users, much like the ApplicationController currently<br />
does. In app/controllers/api/v1/base_controller.rb, you’ll define the following:<br />
class Api::V1::BaseController < ActionController::Base<br />
respond_to :json<br />
end<br />
Eventually you’ll put in the token authentication code into this, but for now you’re<br />
only trying to get the example to pass. The respond_to method here sets up any<br />
inheriting controller to respond to JSON requests, such as the ProjectsController<br />
that you’re about to create. To make your test pass, you need to return JSON data from<br />
this action, which is much easier than it sounds. You can get the functionality you<br />
need from this controller by creating a new file at app/controllers/api/v1/<br />
projects_controller.rb and filling it with this content:<br />
class Api::V1::ProjectsController < Api::V1::BaseController<br />
def index<br />
respond_with(Project.all)<br />
end<br />
end
The projects API<br />
The respond_with method here will return the JSON representation of Project.all<br />
when you make a JSON request to this path by calling to_json on the object. Rails<br />
knows to return JSON data back from any request with the format (that’s the bit after<br />
the dot in api/v1/projects.json) of JSON. Rails handles all of this internally for you,<br />
which is nice of it to do. Let’s find out if this new controller and its only action make<br />
the spec pass with bin/rspec spec/api/v1/projects_spec.rb:<br />
1 example, 0 failures<br />
There you have it, your first API route and action are serving up data! Now you’re<br />
going to need to restrict what this action returns to only the projects that the user can<br />
read, but you’ll need to first authenticate a user based on their token, which is made<br />
easy with Devise.<br />
13.1.3 API authentication<br />
Your next task is authenticating the user who’s making the request in your API. The<br />
first step is to do something with the token parameter that gets passed through with<br />
your request. A sensible place to check this token would be in Api::V1::Base-<br />
Controller, because you want to authenticate for all controllers in the API (although<br />
there’s only one, for now). For this authentication, you’ll find if there’s a user with the<br />
token passed in by using a before_filter like this in app/controllers/api/v1/base<br />
_controller.rb:<br />
before_filter :authenticate_user<br />
private<br />
def authenticate_user<br />
@current_user = User.find_by_authentication_token(params[:token])<br />
end<br />
def current_user<br />
@current_user<br />
end<br />
To check and see if this is working, you’ll alter your test in spec/api/v1/<br />
projects_spec.rb to generate another project, give the user read access to only that<br />
project, and check that the response from the API only contains that project. To do<br />
this, you’ll add a new before to the “projects viewable by this user” context inside the<br />
spec, using the code from the following listing.<br />
Listing 13.4 spec/api/v1/projects_spec.rb<br />
context "projects viewable by this user" do<br />
before do<br />
Factory(:project, :name => "Access Denied")<br />
end<br />
...<br />
end<br />
355
356 CHAPTER 13 Designing an API<br />
In the before block you create one project that the user should not have access to<br />
read. Inside the test itself, you’re still using the for scope on the Project class to get<br />
only the projects that the specified user has access to. Let’s add a couple more lines to<br />
your example now to check that this user cannot see the Access Denied project:<br />
projects.any? do |p|<br />
p["project"]["name"] == "Access Denied"<br />
end.should be_false<br />
When you run this spec with bin/rspec spec/api/v1/projects_spec.rb you’ll see<br />
that the JSON returned from your controller still contains both projects:<br />
expected "[[Ticketee hash]]"<br />
got "[[Ticketee hash], [Access Denied hash]]"<br />
To make this test pass, you’re going to need to stop returning all the projects in the<br />
index action of Api::V1::ProjectsController and only return the projects that this<br />
user should be able to see. Let’s now open app/controllers/api/v1/projects<br />
_controller.rb and change the index action to use the for method and pass in the<br />
current_user, rather than the all method:<br />
def index<br />
respond_with(Project.for(current_user))<br />
end<br />
This will now return only the list of projects that the user should be able to see, which<br />
should be enough to get this test passing. You can find out with another quick run of<br />
bin/rspec spec/api/v1/projects_spec.rb:<br />
1 example, 0 failures<br />
Great, now you’ve got your API finding a user based on the token that you’ve gathered<br />
in your spec. One thing you haven’t tested for yet is: what happens when an invalid (or<br />
no) token is given? Well, you should return an error when that happens. This is the<br />
final change you’ll be making before you make a commit, because it’s been a little too<br />
long since you’ve last done that. 8<br />
13.1.4 Error reporting<br />
Something will inevitably go wrong in your application, and when that happens you’re<br />
going to want to provide useful error messages to your users. One of the things that<br />
could go wrong in your API is that the user uses an invalid token to authenticate<br />
against your API. When a user makes a request with an invalid token, you should<br />
inform them of their mistake, which you can do by returning JSON that looks like this:<br />
{ error: "Token is invalid." }<br />
To test this behavior, you’re going to make a request without a token and then fix up<br />
your projects_spec.rb test to pass in a token. You’ll write your first test now in a new<br />
8 As a reminder: you should commit after every safe point so that if you stuff something up (it happens!) you<br />
won’t have to roll back as much.
The projects API<br />
file at spec/api/v1/authentication_spec.rb, which will be filled with the content from<br />
the following listing.<br />
require "spec_helper"<br />
describe "API errors", :type => :api do<br />
end<br />
Listing 13.5 spec/api/v1/authentication_spec.rb<br />
it "making a request with no token" do<br />
get "/api/v1/projects.json", :token => ""<br />
error = { :error => "Token is invalid." }<br />
last_response.body.should eql(error.to_json)<br />
end<br />
You’re using Rack::Test::Methods in the spec again, and you’ve set up the token to<br />
be a blank string so get will pass this through as the token. Let’s run this spec to make<br />
sure it’s failing first with bin/rspec spec/api/v1/authentication_spec.rb:<br />
Failures:<br />
1) API errors making a request with no token<br />
Failure/Error: get "/api/v1/projects.json", :token => ""<br />
NoMethodError:<br />
undefined method `admin?' for nil:NilClass<br />
# ./app/models/project.rb:13:in `for'<br />
# ./app/controllers/api/v1/projects_controller.rb:3:in `index'<br />
# ./spec/api/v1/<br />
authentication_spec.rb:6:in `block (2 levels) in '<br />
1 example, 1 failure<br />
Yup, definitely looks like it’s failing. Line 13 of app/models/project.rb attempts to call<br />
admin? on the User object passed in to the for method. If you attempt to make a<br />
request without a valid token, the call to User.find_by_authentication_token will<br />
return nil, resulting in the error you see here. You should check if the user has been<br />
found, and if not then you’ll show the error. To make your authenticate_user<br />
method do this in app/controllers/api/v1/base_controller.rb, you’ll change it to what<br />
is shown in the following listing.<br />
Listing 13.6 app/controllers/api/v1/base_controller.rb<br />
def authenticate_user<br />
@current_user = User.find_by_authentication_token(params[:token])<br />
unless @current_user<br />
respond_with({:error => "Token is invalid." })<br />
end<br />
end<br />
If the @current_user variable is nil here, you set the response’s body to be the JSONform<br />
of { :error => "Token is invalid" } and respond_with that object. Does this<br />
work? Let’s find out with bin/rspec spec/api/v1/authentication_spec.rb:<br />
1 example, 0 failures<br />
357
358 CHAPTER 13 Designing an API<br />
Booyah, it works! How about bin/rspec spec/api/v1/projects_spec.rb too?<br />
1 example, 0 failures<br />
All green there too, and so it’s definitely time to do a commit now. You should run the<br />
customary checks before you commit by running rake cucumber:ok spec:<br />
63 scenarios (63 passed)<br />
732 steps (732 passed)<br />
# and<br />
43 examples, 0 failures, 19 pending<br />
Great! Everything’s still green. From now on you will only run the spec tests, because<br />
all you are going to be changing is the API, which will not impact anything that the features<br />
test. At the end of the chapter, you’ll run it again to make sure that nothing is<br />
broken. Commit and push the changes that you’ve made:<br />
git add .<br />
git commit -m "Implemented token-based authentication API base"<br />
git push<br />
You’ve begun to implement the API now, and you’ve got the /api/v1/projects URL<br />
returning a list of the projects that a user can see. To check what user this is, you’ve<br />
implemented a basic token authentication using functionality built in to Devise.<br />
There’s still a little way to go before you’re done with the API. For starters, this API<br />
only serves JSON requests, and some people who use it may wish for the data to be<br />
returned in XML. You’ve also only got the one action in your controller, and you need<br />
to implement a way for people to create, update, and delete projects through the API.<br />
Before you do that, you’ll add in support for XML. This is incredibly easy to implement,<br />
as you’ll soon see.<br />
13.1.5 Serving XML<br />
So far, you’ve been using the respond_with and respond_to methods to serve JSON<br />
responses. You can serve XML using these same methods while continuing to serve<br />
JSON. It’s very, very easy. First of all, you’re going to want to create a test to make sure<br />
that your new XML data is being returned correctly. You’ll place this test in the index<br />
context for “projects viewable by this user” in spec/api/v1/projects_spec.rb using the<br />
code from the following listing.<br />
Listing 13.7 spec/api/v1/projects_spec.rb<br />
it "XML" do<br />
get "#{url}.xml", :token => token<br />
last_response.body.should eql(Project.readable_by(user).to_xml)<br />
projects = Nokogiri::XML(last_response.body)<br />
projects.css("project name").text.should eql("Ticketee")<br />
end<br />
In this spec you use the nokogiri gem to parse the XML (in chapter 6, you used it to<br />
parse HTML). Then you use the css method to find an element called name inside
The projects API<br />
another called project, and then check to see if its text is equal to the name of your<br />
project, which it should be if everything works out fine. When you run bin/rspec<br />
spec/api/v1/projects_spec.rb, this spec will fail:<br />
Diff:<br />
@@ -1,10 +1,2 @@<br />
-<br />
-<br />
- <br />
- [timestamp]<br />
- 1<br />
- Ticketee<br />
- [timestamp]<br />
- <br />
-<br />
+<br />
...<br />
2 examples, 1 failure<br />
The diff here shows that the expected XML is nowhere to be found in the response,<br />
and instead you’re getting back a final line of absolutely nothing. This is because your<br />
Api::V1::BaseController doesn’t yet respond to XML requests. So now with a failing<br />
test you can go right ahead and change this controller to fix it. To make your API serve<br />
XML requests, you’ll change this line in app/controllers/api/v1/base_controller.rb<br />
respond_to :json<br />
to this:<br />
respond_to :json, :xml<br />
This simple little change will now make your spec pass, which you can see by running<br />
bin/rspec spec/api/v1/projects_spec.rb:<br />
2 examples, 0 failures<br />
Apologies if something harder was expected, but it really is this simple in Rails. You’ve<br />
only changed the API controller and spec, and it’s all contained in itself, but even so<br />
it’s still a good habit to run all the features and specs to make sure everything is fine:<br />
61 scenarios (61 passed)<br />
726 steps (726 passed)<br />
# and<br />
36 examples, 0 failures, 12 pending<br />
Green is good. Commit this change:<br />
git add .<br />
git commit -m "Support XML & JSON with /api/v1/projects"<br />
git push<br />
Now that you’ve got your first action of your API responding to both XML and JSON,<br />
why don’t you make some more actions, like the create action for creating projects in<br />
Ticketee?<br />
359
360 CHAPTER 13 Designing an API<br />
13.1.6 Creating projects<br />
In this section, you’re going to implement a new API action that will allow you to create<br />
projects. The route for this action was provided by this code in config/routes.rb:<br />
namespace :api do<br />
namespace :v1 do<br />
resources :projects<br />
end<br />
end<br />
You only need to implement the create action in your controller, which makes it all<br />
quite simple. When you make a request to this action and it passes validations, you will<br />
return the XML or JSON representation of the project that was created, along with a<br />
201 Created HTTP status code, which indicates that a new resource has been created. 9<br />
If the creation of the project fails any validation, then Rails will return a 422 Unprocessable<br />
Entity HTTP Status Code, 10 which will indicate that there are errors with the<br />
request. The body returned by this failing will contain those errors and look something<br />
like this:<br />
{"name":"can't be blank"}<br />
It’s then up to the people receiving the status back from the API to choose how to display<br />
this information.<br />
To make this request to the create action, you need to make a POST request to the<br />
/api/v1/projects path, and to do this there’s the post method provided by Rack<br />
::Test::Methods that you can use. You’ll open spec/api/v1/projects_spec.rb now and<br />
add in another context block under the first for checking that creating a project<br />
through JSON works, as shown in the following listing.<br />
Listing 13.8 spec/api/v1/projects_spec.rb<br />
context "creating a project" do<br />
let(:url) { "/api/v1/projects" }<br />
it "successful JSON" do<br />
post "#{url}.json", :token => token,<br />
:project => {<br />
:name => "Inspector"<br />
}<br />
project = Project.find_by_name("Inspector")<br />
route = "/api/v1/projects/#{project.id}"<br />
last_response.status.should eql(201)<br />
last_response.headers["Location"].should eql(route)<br />
last_response.body.should eql(project.to_json)<br />
end<br />
end<br />
B Check API route<br />
9 This isn’t unique to Rails, but is rather part of RFC 2616: http://tools.ietf.org/html/rfc2616#section-10.2.2.<br />
10 As described in RFC 4918, Section 11.2: http://tools.ietf.org/html/rfc4918#section-11.2.
The projects API<br />
In the normal create action for the normal ProjectsController in your application,<br />
you’re restricting creation of projects to admin users. You’ll do this for this API action<br />
in a bit—you’re only trying to get the most basic example going first. Here you again set<br />
up the url in a let so that you can re-use it for the other tests you’ll implement later.<br />
You begin your test by making a POST request using post (provided by the<br />
Rack::Test::Methods module, just like get), passing through the parameters of a<br />
project as the second argument in this method. Then you check that the status of the<br />
last_response is set to 201, which is the correct reply if the resource was created successfully.<br />
Next, check that the Location B in the header is set to the correct API<br />
route, which would be something such as http://example.com/api/v1/projects.<br />
You’ll find out why when you go to implement this action. On the final line of the<br />
spec, check that the last_response.body contains the JSON representation of the<br />
project that should have been created.<br />
When you run bin/rspec spec/api/v1/projects_spec.rb this test will fail,<br />
because you’ve yet to implement the create action for its controller:<br />
Failure/Error: post "#{url}.json", :token = token,<br />
The action 'create' could not be found for Api::V1::ProjectsController<br />
You’ll need to implement this action to make the spec pass. Let’s open app/<br />
controllers/api/v1/projects_controller.rb and add this action underneath your index<br />
action, using the code shown in the following listing.<br />
Listing 13.9 app/controllers/projects_controller.rb<br />
def create<br />
project = Project.create(params[:project])<br />
if project.valid?<br />
respond_with(project, :location => api_v1_project_path(project))<br />
else<br />
Set Location key<br />
respond_with(project)<br />
end<br />
end<br />
By using the create method of Project, Rails will attempt to create a new record. If<br />
this succeeds, then the status that will be returned will be 201 and you’ll get back the<br />
proper representation (either JSON or XML) of the new project. On the final line of<br />
this action, you manually set the Location key in the headers by passing through the<br />
:location option B so that it points to the correct URL of something such as http:/<br />
/example.com/api/v1/projects/1, rather than the Rails default of http://<br />
example.com/projects/1. People who are using your API can then store this location<br />
and reference it later on when they wish to retrieve information about the project.<br />
The URL that Rails defaults to goes to the user-facing version of this resource (/projects/1.json),<br />
which is incorrect.<br />
If the project isn’t valid (that is, if the save method returns false), then you simply<br />
let Rails return a response that will contain the errors of the project, without having<br />
a custom location set.<br />
B<br />
361
362 CHAPTER 13 Designing an API<br />
This should be all that you need in order to get your spec to pass, so let’s see what<br />
happens when you run bin/rspec spec/api/v1/projects_spec.rb:<br />
3 examples, 0 failures<br />
Great! Now you need to write a test to check that when you attempt to pass through a<br />
project with no name you’re given a 422 status code and an error along with it, indicating<br />
that the project wasn’t created due to those errors. Directly underneath the<br />
previous test in spec/api/v1/projects_spec.rb, you’ll add this test shown in the following<br />
listing.<br />
Listing 13.10 spec/api/v1/projects_spec.rb<br />
it "unsuccessful JSON" do<br />
post "#{url}.json", :token => token,<br />
:project => {}<br />
last_response.status.should eql(422)<br />
errors = {"name" => ["can't be blank"]}.to_json<br />
last_response.body.should eql(errors)<br />
end<br />
Naughty you, writing the test after the code is already there, but you can get away with<br />
it once. Let’s run the spec and see how it goes now:<br />
4 examples, 0 failures<br />
Great success! With this URL working for valid and non-valid projects appropriately,<br />
you are now providing a way for your users to create a project through the API, and so<br />
it’s time to make a commit:<br />
git add .<br />
git commit -m "Added API to create projects"<br />
git push<br />
Your next task is to restrict this action to only the admins of your application, as in the<br />
real ProjectsController controller. You want to limit the number of people who can<br />
change the projects to a select few who know what they’re doing.<br />
13.1.7 Restricting access to only admins<br />
In app/controllers/projects_controller.rb you’ve got this line, which restricts some<br />
actions to only admins:<br />
before_filter :authorize_admin!, :except => [:index, :show]<br />
As it says on the line, every action other than index or show has this filter run before<br />
it. This filter is defined in app/controllers/application_controller.rb like this:<br />
def authorize_admin!<br />
authenticate_user!<br />
unless current_user.admin?<br />
flash[:alert] = "You must be an admin to do that."<br />
redirect_to root_path<br />
end<br />
end
The projects API<br />
You’re not going to be able to use this same before_filter for your API because the<br />
API doesn’t return flash messages. You have to return errors in a lovely little JSON or<br />
XML format. This particular error, for example, is “You must be an admin.” Also, redirection<br />
doesn’t make sense here, because it wouldn’t tell users why they were redirected.<br />
Therefore, you’ll implement a different authorize_admin! method in your<br />
Api::V1::BaseController instead. You’ll take the time, however, to write a test to<br />
check for this error occurring. Let’s open a new file at spec/api/v1/project<br />
_errors_spec.rb and add a test that if you attempt to make a POST request to api/v1/<br />
projects using a token for a user who’s not an admin, you get an error. Use the code<br />
from the following listing.<br />
Listing 13.11 spec/api/v1/project_errors_spec.rb<br />
require "spec_helper"<br />
describe "Project API errors", :type => :api do<br />
context "standard users" do<br />
let(:user) { create_user! }<br />
it "cannot create projects" do<br />
post "/api/v1/projects.json",<br />
:token => user.authentication_token,<br />
:project => {<br />
:name => "Ticketee"<br />
}<br />
error = { :error => "You must be an admin to do that." }<br />
last_response.body.should eql(error.to_json)<br />
last_response.code.should eql(401)<br />
Project.find_by_name("Ticketee").should be_nil<br />
end<br />
end<br />
end<br />
With this spec, you test that a normal user who’s using a valid authenticity token cannot<br />
create a project through the API because they’re not an admin. Instead, the API<br />
should return a response of “You must be an admin to do that.” This response should<br />
have a code of 401, indicating an Unauthorized response. When you run this spec<br />
using bin/rspec spec/api/v1/project_errors_spec.rb, it will not return the error<br />
as you expect:<br />
expected "{\"error\":\"You must be an admin to do that.\"}"<br />
got "{[project hash]}"<br />
To make this error happen, you’ll go into app/controllers/api/v1/base_controller.rb<br />
and underneath your authenticate_user method add the authorize_admin!<br />
method shown in the following listing.<br />
Listing 13.12 app/controllers/api/v1/base_controller.rb<br />
def authorize_admin!<br />
if !@current_user.admin?<br />
if !@current_user.admin?<br />
363
364 CHAPTER 13 Designing an API<br />
error = { :error => "You must be an admin to do that." }<br />
warden.custom_failure!<br />
render params[:format].to_sym => error<br />
, :status => 401<br />
end<br />
end<br />
end<br />
Here you use warden.custom_failure! to inform Warden (the Rack backend to<br />
Devise) that you’re going to raise a custom 401 response. Without this, Devise would<br />
instead take over from this 401 response, showing a “You must be signed in to continue”<br />
error message.<br />
You also use the render method in a unique manner here. You call it and pass in a<br />
hash with the key being a symbolized version of the format (in this case, json) and the<br />
value being the hash that contains the error. By calling render in this way, Rails will<br />
convert the hash to JSON, or if it were an XML request, to XML. The reason for doing<br />
it this way rather than using respond_with is because respond_with will attempt to do<br />
some weird behavior and doesn’t work for POST requests, so you must work around<br />
that little issue.<br />
By specifying the status option to the render here, your response’s status code<br />
will be set to that particular status, which will let the code used to connect to the API<br />
know that the user is unauthorized to perform the specific request.<br />
Now all you need to do is add this as a before_filter into app/controllers/api/<br />
v1/projects_controller.rb using this line:<br />
before_filter :authorize_admin!, :except => [:index, :show]<br />
With this line in the ProjectsController, any request to any action that’s not the<br />
index or show action will have the admin check run before it. If a user doesn’t meet<br />
this criteria, then you will return the “You must be an admin to do that” error. These<br />
pieces of code should be enough to get your test running, so let’s find out with bin/<br />
rspec spec/api/v1/project_errors_spec.rb:<br />
1 example, 0 failures<br />
Now when people who aren’t admins try to create a project, they will see the “You<br />
must be an admin to do that” error message returned from the API. Because this is the<br />
case, you’ll need to set up the user in the projects API examples to be an admin when<br />
they attempt to create a project, which you can do by putting this before after the<br />
beginning of the “creating a project” context block:<br />
before do<br />
user.admin = true<br />
user.save<br />
end<br />
When you run bin/rspec spec/api/v1/projects_spec.rb, all the examples will be<br />
passing:<br />
4 examples, 0 failures
The projects API<br />
With this new authorization added you will make a commit, but before that you’ll run<br />
a customary check to make sure everything is still alright by running rake spec,<br />
because all you’ve edited in this section is the API. You should see this output:<br />
47 examples, 0 failures, 19 pending<br />
Great, so let’s go ahead and commit this then:<br />
git add .<br />
git commit -m "Only admins are able to create projects through API"<br />
git push<br />
In the response for your create action, the headers point to a location (you customized)<br />
of a project, something such as http://example.com/api/v1/projects/1. Currently,<br />
this URL doesn’t go anywhere because it needs the show action to exist. You<br />
should probably get on to that.<br />
13.1.8 A single project<br />
You’ve got a link (http://example.com/api/v1/projects/1) provided by your create<br />
action that doesn’t go anywhere if people try to access it. Soon this URL will show a<br />
particular project’s attributes through the show action in your Api::V1::Projects-<br />
Controller. Within those attributes, you’ll also show a last_ticket element, which<br />
will contain the attributes for the most recently updated ticket. To do this, you use<br />
another option of respond_with, the :methods option. Using this option will change<br />
the output of each project resource in your JSON API to something like this:<br />
{<br />
}<br />
"project": {<br />
"created_at": "[timestamp]",<br />
"id": 1,<br />
"name": "Ticketee",<br />
"updated_at": "[timestamp]",<br />
"last_ticket": {<br />
"ticket": {<br />
"asset_updated_at": null,<br />
"created_at": "[timestamp]",<br />
"description": "A ticket, nothing more.",<br />
"id": 1,<br />
"project_id": 1,<br />
"state_id": null,<br />
"title": "A ticket, nothing more.",<br />
"updated_at": "[timestamp]",<br />
"user_id": 2<br />
}<br />
}<br />
}<br />
Using the last_ticket method, people using the API will be able to discover when<br />
the last activity was on the project. You could add other fields such as the comments<br />
too if you wished, but this example is kept simple for quality and training purposes.<br />
365
366 CHAPTER 13 Designing an API<br />
To get started with this show action, you’ll write a test in spec/api/v1/<br />
projects_spec.rb for it inside the “projects viewable by this user” context block, as<br />
shown in the following listing.<br />
Listing 13.13 spec/api/v1/projects_spec.rb<br />
context "show" do<br />
let(:url) { "/api/v1/projects/#{@project.id}"}<br />
before do<br />
Factory(:ticket, :project => @project)<br />
end<br />
it "JSON" do<br />
get "#{url}.json", :token => token<br />
project = @project.to_json(:methods => "last_ticket")<br />
last_response.body.should eql(project)<br />
last_response.status.should eql(200)<br />
project_response = JSON.parse(last_response.body)["project"]<br />
ticket_title = project_response["last_ticket"]["ticket"]["title"]<br />
ticket_title.should_not be_blank<br />
end<br />
end<br />
You’re using the project method that was set up by the “projects viewable by this<br />
user” context block earlier to generate the URL to a Project resource, as well as using<br />
it to create a new ticket for this project so that last_ticket returns something of<br />
value. You take this URL and do a JSON request on it, and you expect to get back a<br />
JSON representation of the object with the last_ticket method being called and also<br />
returning data. Then you check that the response’s status should be 200, indicating a<br />
good request, and finally you check that the last ticket title isn’t blank.<br />
To make this test pass, open app/controllers/api/v1/projects_controller.rb and add<br />
in the show action, as shown in the following listing.<br />
Listing 13.14 app/controllers/api/v1/projects_controller.rb<br />
def show<br />
@project = Project.find(params[:id])<br />
respond_with(@project, :methods => "last_ticket")<br />
end<br />
In this action, you find the Project based on the params[:id] value and then<br />
respond_with this object, asking it to call the last_ticket method. If this method is<br />
undefined (as it is right now), then the method will not be called at all. When you run<br />
this test with bin/rspec spec/api/v1/projects_spec.rb, you’ll see this error:<br />
Failure/Error: ticket_title = last_response ...<br />
You have a nil object when you didn't expect it!<br />
You might have expected an instance of Array.<br />
The error occurred while evaluating nil.[]
The projects API<br />
The error occurs because you’re attempting to call the [] method on something that<br />
is nil, and it’s really likely that the something is the last_ticket key, which doesn’t<br />
exist yet because the method is not defined. To define this method, open app/<br />
models/project.rb and add this method inside the class:<br />
def last_ticket<br />
tickets.last<br />
end<br />
Why are you doing it this way? Well, respond_with doesn’t let you chain methods, and<br />
so you’ll work around this by defining a method that calls the chain in your model.<br />
When you run bin/rspec spec/api/v1/projects_spec.rb, this test will pass because<br />
the last_ticket method is now defined:<br />
1 example, 0 failures<br />
Great! Now the show action is responding with data similar to this:<br />
{<br />
}<br />
"project": {<br />
"created_at": "[timestamp]",<br />
"id": 1,<br />
"name": "Ticketee",<br />
"updated_at": "[timestamp]",<br />
"last_ticket": {<br />
"ticket": {<br />
"asset_updated_at": null,<br />
"created_at": "[timestamp]",<br />
"description": "A ticket, nothing more.",<br />
"id": 1,<br />
"project_id": 1,<br />
"state_id": null,<br />
"title": "A ticket, nothing more.",<br />
"updated_at": "[timestamp]",<br />
"user_id": 2<br />
}<br />
}<br />
}<br />
How goes the rest of your API? Let’s find out with a quick run of rake spec:<br />
40 examples, 0 failures, 19 pending<br />
Ok, that’s good to see, time to make a commit:<br />
git add .<br />
git commit -m "Added API action for a single project with last ticket"<br />
git push<br />
Back in the main part of the application, you’ve got permissions on users that restrict<br />
which projects they can see. Currently in the API there is no such restriction, and so<br />
you need to add one to bring it in line with how the application behaves.<br />
367
368 CHAPTER 13 Designing an API<br />
13.1.9 No project for you!<br />
Currently, any user can see the details of any project through the API. The main application<br />
enforces the rule that users without permission to view a project are not able to<br />
do so. To enforce this rule in your API as well, you use the find_project method:<br />
def find_project<br />
@project = Project.for(current_user).find(params[:id])<br />
rescue ActiveRecord::RecordNotFound<br />
flash[:alert] = "The project you were looking for could not be found."<br />
redirect_to projects_path<br />
end<br />
Here you use the for method, which will return a scope for all projects viewable by the<br />
current user. By calling find on this scope, if the user doesn’t have access to the project<br />
then an ActiveRecord::RecordNotFound exception will be raised. You then<br />
rescue this exception and lie to the user, telling them the project is mysteriously<br />
gone. 11 Much like the authorize_admin! method you ported over before, you can’t<br />
set the flash notice or redirect here. Instead, you’re going to have to present an API<br />
error as you did earlier. 12<br />
To test this new before_filter :authorize_user, write a new test in spec/api/v1/<br />
project_errors_spec.rb where a user without permission on a project attempts to view<br />
it, only to be rebuked by the server with an error. This test should be placed inside the<br />
“standard users” context block and is shown in the following listing.<br />
Listing 13.15 spec/api/v1/project_errors_spec.rb<br />
it "cannot view projects they do not have access to" do<br />
project = Factory(:project)<br />
get "/api/v1/projects/#{project.id}.json",<br />
:token => user.authentication_token<br />
error = { :error => "The project you were looking for" +<br />
" could not be found." }<br />
last_response.status.should eql(404)<br />
last_response.body.should eql(error.to_json)<br />
end<br />
When the user attempts to go to the show page, they should receive the error informing<br />
them that the project has run away (or doesn’t exist). The status code for this<br />
response should be 404, indicating the resource the user was looking for is not found.<br />
To make this work, you’ll remove this line from the show action in app/controllers/<br />
api/v1/projects_controller.rb:<br />
project = Project.find(params[:id])<br />
11 It’s not really.<br />
12 Although this may seem like repetition (which it is), it’s part of the project’s API and will help you understand<br />
the concepts better. Practice, practice, practice! It makes perfect prefects.
The projects API<br />
Then you’ll put this line under the authorize_admin! filter inside this controller’s<br />
class:<br />
before_filter :find_project, :only => [:show]<br />
Next, you need to add the find_project after the show action as a private method, as<br />
shown in the following listing.<br />
Listing 13.16 app/controllers/api/v1/projects_controller.rb<br />
private<br />
def find_project<br />
@project = Project.for(current_user).find(params[:id])<br />
rescue ActiveRecord::RecordNotFound<br />
error = { :error => "The project you were looking for " +<br />
"could not be found."}<br />
respond_with(error, :status => 404)<br />
end<br />
Here you respond with the error message and set the status to 404 to tell the user that<br />
the project doesn’t exist. When you run bin/rspec spec/api/v1/project_errors<br />
_spec.rb, your spec will pass:<br />
2 examples, 0 failures<br />
You’re now restricting the projects that a user can access to only the ones they have<br />
permission to view. If the API user doesn’t have the permission, you’ll deny all knowledge<br />
of the project and return a 404 status code. It’s quite grand how this is possible in<br />
such few lines of easy-to-understand code.<br />
You’ll run all the specs now to make sure everything’s rosy with rake spec. You<br />
should see that it’s all green:<br />
40 examples, 0 failures, 12 pending<br />
A nice round number this time. A commit you shall make:<br />
git add .<br />
git commit -m "Restricting projects API show to only users who have<br />
➥permission to view a project"<br />
git push<br />
Currently you’ve got the index, show, and create actions implemented for your controller.<br />
What’s missing? Well, you could say the new, edit, update, and destroy actions<br />
are, but you don’t need the new and edit actions, because this should be handled on<br />
the client side of the API, not the server. It is the client’s duty to present the new and<br />
edit dialogs to the user. Therefore, you only need to implement the update and<br />
destroy methods and then you’re done with this API. So close!<br />
369
370 CHAPTER 13 Designing an API<br />
13.1.10 Updating a project<br />
To update a project in the API, people will need to make a POST request to the /api/<br />
v1/projects/:id URL with the project’s new information contained in a params[:project]<br />
hash. Simple, really.<br />
To test that this action works correctly, you’ll add yet another spec to spec/api/v1/<br />
projects_spec.rb using the code from the following listing.<br />
Listing 13.17 spec/api/v1/projects_spec.rb<br />
context "updating a project" do<br />
before do<br />
user.admin = true<br />
user.save<br />
end<br />
let(:url) { "/api/v1/projects/#{@project.id}" }<br />
it "successful JSON" do<br />
@project.name.should eql("Ticketee")<br />
put "#{url}.json", :token => token,<br />
:project => {<br />
:name => "Not Ticketee"<br />
}<br />
last_response.status.should eql(200)<br />
@project.reload<br />
@project.name.should eql("Not Ticketee")<br />
last_response.body.should eql("{}")<br />
end<br />
end<br />
At the top of this new context block, you’ve defined that the user is an admin again.<br />
You could wrap the create and update tests within another context that sets this flag<br />
too, but you’ll do it this way for now.<br />
You need to make a put request to this action for Rails to accept it, and you can do<br />
that by using the put method B. Along with this request, you send the token and<br />
project parameters. The project parameter contains a new name for this project.<br />
Because it’s a valid (non-blank) name, the response’s status code will be 200, but the<br />
response will be an empty hash indicating no errors. This doesn’t return an updated<br />
object, because what’s the point? The client should be aware of the updates that have<br />
occurred, given it triggered them!<br />
At the end of this spec, you use the reload method to find this object again from<br />
the database. This is because the object that the spec is working with will be a completely<br />
different Ruby object from the one in the update action in the controller. By<br />
calling reload, Rails will fetch the data for this object again from the database and<br />
update the object in the process.<br />
To begin writing this action in Api::V1::ProjectsController, you’re going to<br />
need to first modify the before_filter :find_project line to include the update<br />
action, changing it from this<br />
before_filter :find_project, :only => [:show]<br />
B put request
to this:<br />
The projects API<br />
before_filter :find_project, :only => [:show, :update]<br />
Now in the update action you’ll have a project that you can work with because this<br />
before_filter will find it for you. Next, you’ll write this action into the controller<br />
using the code from the following listing.<br />
Listing 13.18 app/controllers/api/v1/projects_controller.rb<br />
def update<br />
@project.update_attributes(params[:project])<br />
respond_with(@project)<br />
end<br />
Well isn’t this quite a difference from your standard update actions? You only need to<br />
call update_attributes here, which will save the object and return a valid object in<br />
the format that you’ve asked for. If this object fails validation, the status code returned<br />
by respond_with will be 422, which represents an Unprocessable Entity, and the body<br />
will contain only the validation errors that occurred. If the object is valid,<br />
respond_with will return a 200 status code, but an empty response. This is because<br />
the client should be aware of what changes it has made to the object, and so there’s no<br />
need to send back the object.<br />
So which is it? Does the update action work and return the 200 status code you<br />
want, or does it break? It’s easy to find out by running bin/rspec spec/api/v1/<br />
projects_spec.rb:<br />
5 examples, 0 failures<br />
All working, good stuff. You’ve now got a check that the update action responds correctly<br />
when a valid object is given, but what if invalid parameters are given instead?<br />
Well, the action should return that 422 response mentioned earlier. Although this is<br />
testing the already extensively tested 13 Rails behavior, you’re making sure that this<br />
action always does what you think it should. No misbehaving allowed! You’ll quickly<br />
whip up a spec for this, placing it right underneath the previous example, “successful<br />
JSON” that you wrote in spec/api/v1/projects_spec.rb. The code for it is shown in the<br />
following listing.<br />
Listing 13.19 spec/api/v1/projects_spec.rb<br />
it "unsuccessful JSON" do<br />
@project.name.should eql("Ticketee")<br />
put "#{url}.json", :token => token,<br />
:project => {<br />
:name => ""<br />
}<br />
last_response.status.should eql(422)<br />
13 It’s tested within Rails itself.<br />
371
372 CHAPTER 13 Designing an API<br />
@project.reload<br />
@project.name.should eql("Ticketee")<br />
errors = { :name => ["can't be blank"]}<br />
last_response.body.should eql(errors.to_json)<br />
end<br />
In this example, you attempt to set the project’s name to a blank string, which should<br />
result in the 422 error you want to see. After you reload the project, the name should<br />
be the same. You should then get the 422 error as the response.<br />
A quick run of bin/rspec spec/api/v1/projects_spec.rb should let you know if<br />
this is working:<br />
7 examples, 0 failures<br />
Indeed it is! Is everything else working? A run of rake spec will let you know:<br />
51 examples, 0 failures, 19 pending<br />
“51 examples, 0 failures” is exactly what you like to see. That means that your update<br />
action is all wrapped up, and now it’s time for a commit:<br />
git add .<br />
git commit -m "Implement update action for projects API"<br />
git push<br />
You’ve now got three fourths of the CRUD of this API. You’re able to create, read, and<br />
update project resources. With updating, clients authorized with an admin’s token<br />
can send through updates to the project resource, which will update the information<br />
in the application. The one remaining action you’ve got to implement is the destroy<br />
action, for making projects go bye-bye. You’re almost home!<br />
13.1.11 Exterminate!<br />
You need to create the destroy action, which allows admins of Ticketee to delete projects<br />
through the API. To do this, API clients need to make a DELETE request to /api/<br />
v1/projects/1.json or /api/v1/projects/1.xml. Upon making this request, the specified<br />
project will be deleted—gone forever, exterminated!<br />
You’ll write the final example in the spec/v1/api/projects_spec.rb to make sure<br />
that people are able to delete projects using this route. You’ll use the code from the<br />
following listing to do this.<br />
Listing 13.20 spec/v1/api/projects_spec.rb<br />
context "deleting a project" do<br />
before do<br />
user.admin = true<br />
user.save<br />
end<br />
let(:url) { "/api/v1/projects/#{@project.id}" }<br />
it "JSON" do<br />
delete "#{url}.json", :token => token
The projects API<br />
last_response.status.should eql(200)<br />
end<br />
end<br />
When you run bin/rspec spec/v1/api/projects_spec.rb, this spec will fail because<br />
the destroy action doesn’t exist:<br />
1) /api/v1/projects deleting a project JSON<br />
Failure/Error: delete "#{url}.json", :token => token<br />
The action 'destroy' could not be found for Api::V1::ProjectsController<br />
You need to add the destroy action to the Api::V1::ProjectsController, which you<br />
can do with this code:<br />
def destroy<br />
@project.destroy<br />
respond_with(@project)<br />
end<br />
The respond_with here will respond with a 200 status code and an empty JSON or<br />
XML response, which indicates the object was successfully destroyed. But where does<br />
@project come from? Your before_filter should set this up, but it doesn’t right now.<br />
Let’s fix it by changing it from this<br />
before_filter :find_project, :only => [:show,<br />
:update]<br />
to this:<br />
before_filter :find_project, :only => [:show,<br />
:update,<br />
:destroy]<br />
When you run bin/rspec spec/api/v1/projects_spec.rb, does it pass?<br />
8 examples, 0 failures<br />
It does, because you’re great at what you do! That’s the final piece of the projects API,<br />
and now people are able to create, read, update, and delete projects through it. The<br />
rest of your specs probably pass because you didn’t change anything outside the<br />
scope, but it’s still good to do a check. For old time’s sake, you’ll also run the features<br />
to make sure everything’s ok there too. The full command that you’ll now run is rake<br />
cucumber:ok spec. For this command, you should see this output:<br />
63 scenarios (63 passed)<br />
732 steps (732 passed)<br />
# and<br />
52 examples, 0 failures, 19 pending<br />
All systems are go, so let’s make a commit at this lovely point in time where everything<br />
is beautiful:<br />
git add .<br />
git commit -m "Projects can now be deleted through the API"<br />
373
374 CHAPTER 13 Designing an API<br />
The entire projects API is now complete. What you’ve got at the moment is a solid<br />
base for version 1 of Ticketee’s projects API. You’ll now see how you can begin creating<br />
the nested API for tickets on a project.<br />
13.2 Beginning the tickets API<br />
In this section you’ll begin to create an API for tickets on a project. You’re only going<br />
to be creating the part of the API to list tickets for now, because the remaining parts<br />
are similar in style to what you saw with the projects API. This section will give you a<br />
taste of how to work with nested resources within the context of an API.<br />
The first part you’re going to need for this API is two tests: one to make sure you<br />
can get XML results back from this API and another for JSON results. Put these new<br />
tests in a new file at spec/api/v1/tickets_spec.rb, beginning with the setup required for<br />
both of these tests shown in the following listing.<br />
Listing 13.21 spec/api/v1/tickets_spec.rb<br />
require 'spec_helper'<br />
describe "/api/v1/tickets", :type => :api do<br />
let(:project) { Factory(:project, :name => "Ticketee") }<br />
before do<br />
@user = create_user!<br />
@user.update_attribute(:admin, true)<br />
@user.permissions.create!(:action => "view",<br />
:thing => project)<br />
end<br />
let(:token) { @user.authentication_token }<br />
In this spec you use a before block to set up your user, rather than using a let as you<br />
did in spec/api/v1/projects_spec.rb. The reason for this is when a let is referenced,<br />
the block is re-run. If you were to create five tickets and reference a user object set up<br />
with let, it would create five users. This problem becomes way more pronounced<br />
when you create 100 objects, each referencing the let.<br />
With this setup, you can begin the context for your index action and then in a<br />
before block, create 20 tickets for the project by using these lines after the<br />
let(:project) line:<br />
context "index" do<br />
before do<br />
5.times do<br />
Factory(:ticket, :project => project, :user => @user)<br />
end<br />
end<br />
Finally, you can write the XML and JSON tests by placing the code shown in the following<br />
listing inside the context block you have written.
Beginning the tickets API<br />
Listing 13.22 spec/api/v1/projects_spec.rb<br />
context "index" do<br />
...<br />
let(:url) { "/api/v1/projects/#{project.id}/tickets" }<br />
it "XML" do<br />
get "#{url}.xml", :token => token<br />
last_response.body.should eql(project.tickets.to_xml)<br />
end<br />
it "JSON" do<br />
get "#{url}.json", :token => token<br />
last_response.body.should eql(project.tickets.to_json)<br />
end<br />
end<br />
You’ve defined the let(:url) here to point to the nested route for tickets of a given<br />
project. This URL is currently undefined and so when you run this test with bin/rspec<br />
spec/api/v1/tickets_spec.rb, you’re told that the route you’re requesting doesn’t<br />
exist:<br />
Failure/Error: get "#{url}.json", :token => token<br />
ActionController::RoutingError:<br />
No route matches [GET] "/api/v1/projects/1/tickets.json"<br />
You can define this route easily inside config/routes.rb by changing these lines<br />
namespace :api do<br />
namespace :v1 do<br />
resources :projects<br />
end<br />
end<br />
to this:<br />
namespace :api do<br />
namespace :v1 do<br />
resources :projects do<br />
resources :tickets<br />
end<br />
end<br />
end<br />
Now you’ve got the tickets resource nested within projects for your API again. When<br />
you re-run this spec you’ll be told this:<br />
uninitialized constant Api::V1::TicketsController<br />
You can create this controller by creating a new file at app/controllers/api/v1/<br />
tickets_controller.rb. This controller needs to first of all respond to both JSON and<br />
XML, and find the project for each request using a before_filter. You can begin to<br />
define this controller using the code from the following listing.<br />
375
376 CHAPTER 13 Designing an API<br />
Listing 13.23 app/controllers/api/v1/tickets_controller.rb<br />
class Api::V1::TicketsController < Api::V1::BaseController<br />
before_filter :find_project<br />
private<br />
def find_project<br />
@project = Project.for(current_user).find(params[:project_id])<br />
rescue ActiveRecord::RecordNotFound<br />
error = { :error => "The project you were looking for" +<br />
" could not be found."}<br />
respond_with(error, :status => 404)<br />
end<br />
end<br />
In the beginning, you set up the controller to inherit from Api::V1::BaseController<br />
so that it inherits the basic behavior of your API. Then you tell it that this controller<br />
responds to both JSON and XML. Finally, you define a before_filter :find_project<br />
that will find a project, providing that the user is able to access it. If the user cannot<br />
access it, then you respond_with a 404 error.<br />
Underneath the before_filter in this controller, you need to define the index<br />
action to return a list of tickets for your project. You can do that with the code shown<br />
in the following listing.<br />
Listing 13.24 app/controllers/api/v1/tickets_controller.rb<br />
def index<br />
respond_with(@project.tickets)<br />
end<br />
That feels like you’re getting too much for free, doesn’t it? Rails is handling a lot of the<br />
actions here for you. When you run bin/rspec spec/api/v1/tickets_spec.rb specs<br />
again, your tests will now pass because you’ve got the controller defined correctly:<br />
2 examples, 0 failures<br />
This is a great start to generating a tickets API, and now with the skills you’ve learned<br />
a little earlier in this chapter you should be able to bash out the rest with little effort.<br />
Rather than covering that old ground again, it’ll be left as an exercise for you.<br />
Let’s run all the tests with rake spec to make sure you didn’t break anything:<br />
54 examples, 0 failures, 19 pending<br />
Nope, nothing broken there, which is awesome to see. Time for a commit:<br />
git add .<br />
git commit -m "Added beginnings of the V1 Tickets API"<br />
git push<br />
You should probably limit the number of tickets that are sent back through the API or,<br />
even better, cache the result. You’ll see ways to do both of these things in chapter 15,<br />
and then you can apply them to the API when you feel it’s right. For now, it would be
Rate limiting<br />
fine for a project with a small amount of tickets, but if a project grew to something say,<br />
the size of the Rails project, 14 then it would be problematic because Rails would have<br />
to instantiate thousands of new Ticket objects per-request. That’s no good.<br />
Now that you’re versed in the Ways of the API, you can tackle potential problems<br />
with it. One of the potential problems with this API is that you’ll have too many users<br />
accessing it all at once, which may cause performance problems with the application.<br />
To prevent this, you’ll implement the rate of requests people can make to your server.<br />
13.3 Rate limiting<br />
When a server receives too many requests, it can seem unresponsive. This is simply<br />
because it is too busy serving existing requests to serve the hoard of incoming<br />
requests. This can happen when an application provides an API to which many clients<br />
are connecting. To prevent this, you’ll implement rate-limiting on the API side of<br />
things, limiting users to only 100 API requests per hour.<br />
The way you’re going to do this is to add a new field to the users table that stores a<br />
count of how many requests the user has made per hour. To reset the user’s count<br />
back to zero, you’ll create a method that finds only the users who’ve made requests in<br />
the last hour and reset their counts.<br />
13.3.1 One request, two request, three request, four<br />
Currently in app/controllers/api/v1/base_controller.rb you’ve got code that only<br />
checks if the token specified is correct, and if so, assigns a user to the @current_user<br />
variable:<br />
def authenticate_user<br />
@current_user = User.find_by_authentication_token(params[:token])<br />
unless @current_user<br />
respond_with({ :error => "Token is invalid." })<br />
end<br />
end<br />
You’ll now be able to do whatever you wish to this user object in an API request. First,<br />
you’re going to make sure that it’s incrementing the request count for a user whenever<br />
they make an API request. For this, you need a field in the database to keep a<br />
track of user API requests. You’ll generate a migration using this command<br />
rails g migration add_request_count_to_users request_count:integer<br />
This migration will do exactly what you say it should do: add a field called<br />
request_count to the users table. You’ll need to modify this migration slightly so that<br />
the field defaults to 0, which you can do by replacing this line in the new migration:<br />
add_column :users, :request_count, :integer<br />
with this:<br />
add_column :users, :request_count, :integer, :default => 0<br />
14 6000 tickets, as of this writing.<br />
377
378 CHAPTER 13 Designing an API<br />
You can run these two commands to run this migration, and then you’ll be on your<br />
way:<br />
rake db:migrate<br />
rake db:test:prepare<br />
You can now write a test to make sure that the request count is going to be incremented<br />
with each request. You’ll open a new file at spec/v1/api/rate_limit_spec.rb so that you<br />
can separate these tests from the others, because they are not part of the projects API<br />
or the errors from it. Into this file you’ll put the code from the following listing.<br />
Listing 13.25 spec/v1/api/rate_limit_spec.rb<br />
require 'spec_helper'<br />
describe "rate limiting", :type => :api do<br />
let(:user) { create_user! }<br />
it "counts the user's requests" do<br />
user.request_count.should eql(0)<br />
get '/api/v1/projects.json', :token => user.authentication_token<br />
user.reload<br />
user.request_count.should eql(1)<br />
end<br />
end<br />
When you run this spec now with bin/rspec spec/v1/api/rate_limit_spec.rb, it’s<br />
going to fail on the final line because the request count hasn’t been incremented:<br />
Failure/Error: user.request_count.should eql(1)<br />
expected 1<br />
got 0<br />
(compared using eql?)<br />
Alright, now that you’ve got a failing test, you can make it work! Open app/<br />
controllers/api/v1/base_controller.rb and add in a new method called check_rate<br />
_limit right underneath the current_user method, using this code:<br />
def check_rate_limit<br />
@current_user.increment!(:request_count)<br />
end<br />
By calling the increment! method on the user object, the field specified will be incremented<br />
once. To call this method, you’ll put it as another before_filter underneath<br />
the authenticate_user one at the top of this controller:<br />
before_filter :check_rate_limit<br />
That’s all there is to it, and so it will pass when you run bin/rspec spec/api/v1/<br />
rate_limit_spec.rb:<br />
1 example, 0 failures<br />
This is splendid. Before you run any more specs or make any commits, you’ll do what<br />
you came here to do: limit some rates.
13.3.2 No more, thanks!<br />
Rate limiting<br />
You’ve got the method called check_rate_limit, but it’s not actually doing any checking<br />
right now, it’s only incrementing. You should do something about this.<br />
You’ll begin by writing a test to check that people who reach the rate limit (of 100)<br />
receive a warning that tells them simply “Rate limit exceeded.” You’ll put this new test<br />
underneath the previous test you wrote in spec/v1/api/rate_limit_spec.rb using the<br />
code from the following listing.<br />
Listing 13.26 spec/v1/api/rate_limit_spec.rb<br />
it "stops a user if they have exceeded the limit" do<br />
user.update_attribute(:request_count, 200)<br />
get '/api/v1/projects.json', :token => user.authentication_token<br />
error = { :error => "Rate limit exceeded." }<br />
last_response.code.should eql(403)<br />
last_response.body.should eql(error.to_json)<br />
end<br />
In this spec, you set the request count to be over the 100 limit. If the user makes<br />
another request, they should see the “Rate limit exceeded” error. For the status in this<br />
spec, you’re expecting the error to be set to a 403, which would indicate a forbidden<br />
request that is perfectly in line with the no, we’re not going to let you make any more requests<br />
theme you’ve got going on.<br />
To make this work, change the check_rate_limit method in app/controllers/api/<br />
v1/base_controller.rb to what is shown in the following listing.<br />
Listing 13.27 api/controllers/v1/base_controller.rb<br />
def check_rate_limit<br />
if @current_user.request_count > 100<br />
error = { :error => "Rate limit exceeded." }<br />
respond_with(error, :status => 403)<br />
else<br />
@current_user.increment!(:request_count)<br />
end<br />
end<br />
In this method, if the user’s current request_count is greater than 100, then you<br />
respond with the “Rate limit exceeded” error and set the status code of the response<br />
to 403. If it’s less than 100, then you’ll increment their request count. This should be<br />
enough to make your spec pass now, so let’s run bin/rspec spec/api/v1/rate<br />
_limit_spec.rb and find out if this is working:<br />
2 examples, 0 failures<br />
Your API is now limiting requests to 100 per user, but that’s for all time right now,<br />
which isn’t fun. You need a method that will reset the request count for all users<br />
who’ve made requests. It’s the final step you need to complete the rate limiting part of<br />
your API.<br />
379
380 CHAPTER 13 Designing an API<br />
13.3.3 Back to zero<br />
15 Not really.<br />
You need to reset the request_count of each user who’s made a request to your API.<br />
This will be a method on the User model, and so you’ll put its test in a new file as<br />
spec/models/user_spec.rb file, inside the describe User block, using the code from<br />
the following listing.<br />
Listing 13.28 spec/models/user_spec.rb<br />
require 'spec_helper'<br />
describe User do<br />
it "resets user request count" do<br />
user = Factory(:user)<br />
user.update_attribute(:request_count, 42)<br />
User.reset_request_count!<br />
user.reload<br />
user.request_count.should eql(0)<br />
end<br />
end<br />
With this spec, you set a new user’s request count to something other than 0; 42 is a<br />
random number, 15 and you’re quite fortunate for it to exist so that you can use it. The<br />
reset_request_count! method isn’t defined, but as the remainder of the test implies,<br />
the user’s request count should be 0. This test, unsurprisingly, will not pass when it<br />
runs, and so you should write the method to make it pass.<br />
As the reset_request_count! method is called on User, you define this method in<br />
app/models/user.rb using the following code above the to_s method:<br />
def self.reset_request_count!<br />
update_all("request_count = 0", "request_count > 0")<br />
end<br />
You’re placing this code right above the to_s method because it is best practice to<br />
place class methods (such as reset_request_count!) above instance methods in a<br />
model, as some instance methods may refer to class methods. Also, if everybody puts<br />
their code in logical places, then you won’t be confused when you look at it, which is<br />
what Rails is all about.<br />
The update_all method here will set the request_count on all user records (the<br />
first argument) that have a request_count > 0 (the second argument), or a request<br />
_count greater than zero. No point resetting counts that are zero back to zero.<br />
Now that the reset_request_count! method is defined, does it work as your test<br />
says it should? Well, let’s run bin/rspec spec/models/user_spec.rb:<br />
1 example, 0 failures<br />
Cool, so now you’ve got the request count being reset for all users whenever this<br />
method is called. You’ll take a look at calling this method automatically when we look<br />
at background jobs in chapter 15.
Versioning an API<br />
That completes everything you need to do for rate limiting in your API. Before you<br />
make a commit, run all the specs with the rake spec to see if the API is still working:<br />
56 examples, 0 failures, 18 pending<br />
All good! You can commit this now:<br />
git add .<br />
git commit -m "Added rate limiting to the V1 API"<br />
git push<br />
You’ve implemented a way to stop people from making too many requests to your API,<br />
which will possibly stop your application from being overloaded due to excessive API<br />
requests. Next, we look at how you can implement versioning in your API.<br />
13.4 Versioning an API<br />
At the beginning of this chapter, we discussed how all your API routes would be under<br />
the /api/v1/ namespace. This was because you wanted to provide a predictable outcome<br />
of the requests to the URLs. If you go changing URLs to provide extra data or to<br />
take away data, some API clients may malfunction. So when you want to make changes<br />
to your API, you group them all up into logical versions.<br />
With this separation, you can provide a link, such as /api/v1/projects.json, which<br />
will return the attributes you’re already familiar with, as well as another path for the<br />
next version. This second version’s path will be /api/v2/projects.json, and the difference<br />
between the two is that you’ll change the name field to be called title instead.<br />
Although this is potentially a trivial example, 16 it’s a great case to show off how to<br />
make two API versions different.<br />
13.4.1 Creating a new version<br />
To begin the versioning process, copy these routes from config/routes.rb in your<br />
application:<br />
namespace :api do<br />
namespace :v1 do<br />
resources :projects<br />
end<br />
end<br />
And place them beneath, renaming v1 to v2:<br />
namespace :api do<br />
namespace :v2 do<br />
resources :projects<br />
end<br />
end<br />
Now you’ll need to create a new app/controllers/api/v2 directory, which you can do<br />
by copying app/controllers/api/v1 into that location. You’ve now got version 2 of<br />
16 Also a tiny fraction slower than v1, given you’ll be calling a method from within another method rather<br />
renaming it.<br />
381
382 CHAPTER 13 Designing an API<br />
your API. You’ll need to open these controllers and replace the multiple occurrences<br />
of Api::V1 with Api::V2.<br />
Strangely, version 2 of your API is, right now, identical to version 1 of your API.<br />
That’s intentional: a new version of the API should be an improvement, not an entirely<br />
new thing. With this separation, you can modify version 2 of the API as you please,<br />
leaving version 1 alone.<br />
Before deprecating the name field in your project responses, you’ll write a test to<br />
make sure that this is gone. This test will now test version 2 of the API, and so you’ll<br />
copy over the spec/api/v1 directory to spec/api/v2, also replacing occurrences of v1<br />
in these files with v2. The test for the new title field will now go in spec/api/v2/<br />
projects_spec.rb and will test that the projects viewable by this user action returns<br />
projects with title, and not name, using the code from the following listing to replace<br />
the JSON example in the index context.<br />
Listing 13.29 spec/api/v2/projects_spec.rb<br />
context "projects viewable by this user" do<br />
let(:url) { "/api/v2/projects" }<br />
let(:options) { { :except => :name, :methods => :title } }<br />
it "JSON" do<br />
get "#{url}.json", :token => token<br />
body = Project.readable_by(user).to_json(options)<br />
last_response.body.should eql(body)<br />
last_response.status.should eql(200)<br />
projects = JSON.parse(last_response.body)<br />
projects.any? do |p|<br />
p["project"]["title"] == "Ticketee"<br />
end.should be_true<br />
projects.all? do |p|<br />
p["project"]["name"].blank?<br />
end.should be_true<br />
end<br />
end<br />
At the beginning of this test, you need to pass the same options to to_json B as you<br />
pass to respond_with, because the respond_with method generates the same output<br />
as to_json.<br />
In the final lines of this test, you’re checking that it’s now title and not name that<br />
returns the correct project title, and that the name key on all projects is blank. You’ll<br />
also need to change the XML test of this method to the code shown in the following<br />
listing.<br />
Listing 13.30 spec/api/v2/projects_spec.rb<br />
it "XML" do<br />
get "#{url}.xml", :token => token<br />
body = Project.readable_by(user).to_xml(options)<br />
B<br />
Pass<br />
options to<br />
to_json
Versioning an API<br />
last_response.body.should eql(body)<br />
projects = Nokogiri::XML(last_response.body)<br />
projects.css("project title").text.should eql("Ticketee")<br />
projects.css("project name").text.should eql("")<br />
end<br />
When you run this test using bin/rspec spec/api/v2/projects_spec.rb, it’s broken:<br />
Failure/Error: last_response.body.should eql(body)<br />
expected "[{[ticket hash without name key]}]"<br />
got "[{[ticket hash with name key]}]"<br />
This is because the name field is still being returned by your API. To exclude this field<br />
from your API, you can use the :except option to respond_with calls. In app/<br />
controllers/api/v2/projects_controller.rb the index method can now be altered to this:<br />
def index<br />
projects = Project.readable_by(current_user)<br />
respond_with(projects, :except => :name, :methods => :title)<br />
end<br />
The :except option here will exclude the name field from the responses provided by<br />
this API, and the methods option will call the title method (you’ll define it in a<br />
moment), providing that in your API response. You still need to have the name field in<br />
your database because it’s used in quite a few places in your application. You could<br />
change it all now, but this example is purely to show off the :except option and API<br />
versioning. A change like that would be recommended over this example, however it’s<br />
best left as another exercise for you.<br />
To make your API respond with the title method, you need to define it in app/<br />
models/project.rb inside the Project class like this:<br />
def title<br />
name<br />
end<br />
Now when you run bin/rspec spec/api/v2/projects_spec.rb, the tests that you<br />
edited will pass:<br />
8 examples, 0 failures<br />
You’ve seen how you can generate a new version of your API and alter the output of it,<br />
and the text says that your original API (v1) shouldn’t be effected, but was it? A great<br />
way to check is a quick run of bin/rspec spec/api/v1:<br />
15 examples, 0 failures<br />
Great, that’s all working! A quick run of rake spec will confirm your suspicions that<br />
nothing is broken:<br />
71 examples, 0 failures, 18 pending<br />
Awesome stuff. Let’s make a new commit:<br />
git add .<br />
git commit -m "Implement v2 of the API,<br />
383
384 CHAPTER 13 Designing an API<br />
git push<br />
renaming name to title for projects"<br />
Alright, so now you’ve got two versions of your API. Generally, there’s much more than<br />
a single change in a new API version, but this is a good start. When you announce this<br />
API to the people who use your application, they can switch their libraries over to<br />
using it immediately, or, ideally, remain using the old version. After a while, you may<br />
elect to turn off the first version of the API, and you would do that by giving your users<br />
considerable notice such as a month, and then un-defining the routes and deleting<br />
the controllers and tests associated with that version. Out with the old and in with the<br />
new, as they say.<br />
You’ve now seen how you can serve data from your application using an API, but<br />
how do you read it? The answer to that lies in a part of Rails called Active Resource.<br />
13.5 Summary<br />
You’ve seen in this chapter how you can use the Rack::Test::Methods module, given<br />
to you for free by the rack-test gem, to test that requests to URLs provided by your<br />
application return valid API responses in JSON and XML formats. Users will then be<br />
able to make these same requests for their own applications or libraries to get at the<br />
data in your system. What they come up with is up to their imagination. In this chapter,<br />
we only covered one aspect (projects) for your API, but with the knowledge found in<br />
this chapter you could easily create the other aspects for tickets, users, states, or tags.<br />
In the second section of this chapter you saw how you can limit the request rate to<br />
your API on a per-user basis. Users can make up to 100 requests to your system, and<br />
when they attempt to make their 101st the application denies them the request and<br />
provides a relevant error message. This is to deter people from excessively using the<br />
API, as you do not want your server to become overloaded immediately.<br />
Last, you saw how you can generate a new version of your API so that you can introduce<br />
a change, or changes, so as to not break the previous version of the API. Once an<br />
API has been released to the public, its output shouldn’t be modified, as this may<br />
affect the libraries referring to it. The easiest way to introduce these modifications is<br />
through a new version, which is what you did. Eventually, you may choose to deprecate<br />
the old API, or you may not. It’s really a matter of personal choice.<br />
Your application’s at a pretty great point now and is ready for prime time! To show<br />
it off to the masses, it’s best that you put the code on a computer dedicated to serving<br />
the application, rather than running it on some local hardware. In chapter 14, you’ll<br />
deploy your application to an Ubuntu 10.10 box, learning about the core components<br />
to a deployment software stack as you go.
This chapter covers<br />
� Deploying a Rails app to an Ubuntu server<br />
� Using RVM and Ruby in a server environment<br />
� Hosting a Rails app using the Passenger gem<br />
385<br />
Deployment<br />
In this chapter you’ll deploy your Ticketee application to a new Ubuntu install.<br />
Ubuntu is the preferred operating system for deploying Rails applications, mainly<br />
due to its simplicity of use and easy package management. You don’t need to install<br />
another operating system on your computer; you’ll be using a product called Oracle<br />
VM VirtualBox.<br />
You’ll set up this machine manually so that you can see how all the pieces fit<br />
together. There are automatic tools such Puppet, 1 Chef, 2 Babushka, 3 and Git<br />
Pusshuten 4 that can do most, if not all, of this setup for you. To cover them all adequately<br />
in this chapter would turn the chapter into a book. Deployment is an enormous<br />
subject and different people have very different opinions of how it should be<br />
1 http://puppetlabs.com.<br />
2 http://opscode.com/chef/.<br />
3 http://babushka.me.<br />
4 http://gitpusshuten.com/.
386 CHAPTER 14 Deployment<br />
done. This chapter will give you an adequate taste of what parts are involved in setting<br />
up a server, but shouldn’t be considered as the be all and end all of deployment.<br />
There are countless ways to skin this cat.<br />
This chapter covers the following processes:<br />
� Setting up a server<br />
� Installing RVM and Ruby<br />
� Creating a user account<br />
� Deploying an application using Capistrano<br />
� Setting up a database server using PostgreSQL<br />
� Running the application using Nginx and Passenger<br />
� Securing the server<br />
While this isn’t an exhaustive list of everything that needs to be done for deployment,<br />
it is a great start. When you’re done, you’re going to have a server that’s able to<br />
receive requests and return responses from your application like a normal web server.<br />
Let’s get into it.<br />
14.1 Server setup<br />
Your first step is to set up the Oracle VirtualBox software on your machine. This software<br />
is free, works on all of the main operating system variants, and provides a virtual<br />
box (or environment) that you can run another operating system in while running<br />
your current operating system.<br />
As an alternative to VirtualBox you could get a VPS with a paid service such as Linode,<br />
5 Slicehost, 6 or Amazon EC2, 7 which allows you to set up a box with Ubuntu (or<br />
any one of a few other operating systems) pre-installed. You could also use Heroku, 8<br />
which provides free hosting that has read-only access to the file system. 9 Each of these<br />
services have in-depth guides, which should be used as a primary reference if you’re<br />
going to take this path.<br />
Either direction is fine. If the latter path is taken, jump straight to section 14.2.<br />
14.1.1 Setting up a server using VirtualBox<br />
Oracle VirtualBox 10 is software that allows you to run another operating system inside<br />
your main operating system. Coupled with Vagrant 11 —a gem used for setting up<br />
VirtualBox servers—this is a perfect combination for getting an experimental server<br />
5 http://linode.com.<br />
6 http://slicehost.org.<br />
7 http://aws.amazon.com/ec2/.<br />
8 http://heroku.com.<br />
9 This would cause the file upload part of Ticketee to fail because it requires write-access. To fix this, you would<br />
upload images to Amazon S3. Amazon S3 and Paperclip have good enough documentation that this should<br />
be easily figured out.<br />
10 http://virtualbox.org.<br />
11 http://vagrantup.com.
Server setup<br />
up and running. Vagrant will allow you to download an operating system image and<br />
then set up VirtualBox in an exceptionally easy fashion.<br />
To install VirtualBox, you must first download it from http://virtualbox.org and<br />
install it like a normal program. 12 After that, you need to install the vagrant gem,<br />
which you can do by running this command:<br />
gem install vagrant<br />
Now that you’ve got VirtualBox and Vagrant, you can install Ubuntu using Vagrant.<br />
This is the operating system that you’ll use to run your server. This file is pretty large<br />
(over 500MB) and may not be good for some connections. As an alternative, we would<br />
recommend using a VPS, as suggested earlier. This command will download Ubuntu<br />
Lucid Lynx (10.04) which you can use as a perfectly fine base to set up your server:<br />
vagrant box add base http://files.vagrantup.com/lucid32.box<br />
To start up this server, you need to create a new folder called ubuntu (the name isn’t<br />
important and could be anything), where the configuration of your server will be<br />
stored. You can then run vagrant up and vagrant ssh to boot it and connect to it<br />
through SSH. Altogether:<br />
mkdir ubuntu<br />
cd ubuntu<br />
vagrant init<br />
vagrant up<br />
vagrant ssh<br />
The up command will take a couple of minutes to run, but the ssh command should<br />
be instantaneous after that.<br />
NOTE If at any point you wish to shut down your server, you can use the<br />
vagrant halt command.<br />
This is how you connect to servers in the real world, except you would use a command<br />
such as this:<br />
ssh username@some-server.somewhere.com<br />
The vagrant ssh is a good-enough analogy to that. By running vagrant ssh you connect<br />
to your server as the user vagrant. This user has administrative (or more commonly<br />
referred to as root) access on this box, and so you’re able to install the<br />
packages that you need.<br />
If you’re using a non-Vagrant machine, you’ll first need to set up a user for yourself<br />
rather than operating as the root user, as this can be dangerous. 13 To do this, use this<br />
command (replacing user with a username such as ryan):<br />
12 If you’re on Windows XP you may encounter issues where it claims to have not been verified correctly. This<br />
is a known problem. If you skip the errors, it will still work.<br />
13 For example, if you were running a script as the root user and that script attempted to delete the /usr directory,<br />
the command would execute. By executing commands as non-root, you save yourself some potential<br />
damage from malevolent scripts. This is because the user will only have access to some directories, rather than<br />
root, which has access to everything.<br />
387
388 CHAPTER 14 Deployment<br />
useradd -d /home/user -m -s /bin/bash -G admin user<br />
This command will create a directory at /home/user and set this user’s home path to<br />
that directory. This is done with the -m and -d options, respectively. Next, the command<br />
sets the user’s shell to /bin/bash—which is the default shell of UNIX operating<br />
systems—using the -s option. Near the end of this command, the -G option specifies<br />
that this user will be a part of the admin group, which will let the user execute commands<br />
using sudo, a kind of super-user command. This part is important because<br />
you’ll need these permissions to set up your server. At the end of the command, specify<br />
the username of this new user.<br />
Next, you need to set a password for this user, which you can do with this<br />
command:<br />
passwd user<br />
You need to enter the new password for this user twice, and then you’re done. You<br />
mustn’t forget the password, otherwise you’ll have to reset it as the root user.<br />
With that done, let’s switch into this user by using this command:<br />
su user<br />
Now you’re all set up to go about installing the different software packages you’ll need<br />
to get your server up and running.<br />
14.1.2 Installing the base<br />
The majority of software packages are installed on Ubuntu using a system called Aptitude.<br />
You can install packages from their source code too, if you wish (with the help of<br />
a package called build_essential, which contains the build tools you need). These<br />
Aptitude packages are downloaded from a package repository and then installed for<br />
you. To ensure that the list of these packages are up-to-date, run this command:<br />
sudo aptitude update<br />
This command goes through the list of sources, connecting to each of them and<br />
downloading a package list that is then cached by Ubuntu. When you go to install a<br />
package (your next step), Ubuntu will reference these lists to find the packages and<br />
the necessary dependencies for them.<br />
Once this command is complete, continue the set up by configuring RVM and creating<br />
a deploy user.<br />
RVM is short for Ruby Version Manager and provides a simple way to install and<br />
maintain versions of Ruby on your system. You’re going to be using it today to install a<br />
single Ruby version on your system, but it’s good to learn it.<br />
To get started, you’re going to need to install some packages that will provide the<br />
necessary tools to use RVM. These packages are build-essential, git-core, and<br />
curl. RVM uses these packages to build the Ruby version for your server. The gitcore<br />
provides the base Git functionality that RVM uses to stay up to date, and is also
RVM and Ruby<br />
used to deploy your application because you’re hosting it on GitHub. Finally, curl<br />
allows you to connect to a URL and download its content. You’ll use this last package<br />
to install RVM.<br />
To install these packages, run this command:<br />
sudo aptitude -y install build-essential git-core curl<br />
The sudo part of this command tells Ubuntu to run a command as a super-user (root).<br />
14.2 RVM and Ruby<br />
You could install Ruby by downloading the package manually, extracting it, and then<br />
running the necessary commands yourself, but that’s boring. You could also install it<br />
using the package manager that comes with Ubuntu, but the Ruby that it provides is<br />
old and has been known to be broken.<br />
Wouldn’t it be nice if there was a tool that would install Ruby for you? There is! It’s<br />
called RVM!<br />
14.2.1 Installing RVM<br />
RVM provides several benefits over a standard Ruby compile, such as the ability to easily<br />
install and upgrade your Ruby install using commands like rvm install 1.9.2 to<br />
install Ruby 1.9.2. No digging for links on the http://ruby-lang.org site for you, no<br />
siree.<br />
There are a couple of ways you can install RVM. The first is a user-based install,<br />
installing it in an .rvm directory within the user’s own directory. But you’re going to<br />
want to access gems at a system-level later on in this chapter, so it’s best to install RVM<br />
at a system level. 14 To do this, run this command:<br />
sudo bash <
390 CHAPTER 14 Deployment<br />
rvm group, which is a group created by the installation of RVM. To add your current<br />
user to this group, run this command:<br />
sudo usermod -a -G rvm user<br />
The -a option here tells the command to append some groups to the list of groups<br />
that the user is in, and the -G option (like you saw before with useradd) specifies the<br />
group. You specify your username on the end of this command, telling it who you<br />
want this new group applied to.<br />
To make the rvm command effective for all users, add a line to /etc/profile. Whenever<br />
new terminal sessions are launched, this file is read and run. Put a line in it using<br />
these commands:<br />
sudo su<br />
echo 'source "/usr/local/rvm/scripts/rvm"' >> /etc/profile<br />
exit<br />
The source command here will load the/usr/local/rvm/scripts/rvm file for each user<br />
whenever they start a new session. To make this change effective for the current session,<br />
exit out of your terminal and log back in. Once back in, you should be able to<br />
run rvm and have it output the help information.<br />
If that’s the case, then you are now ready to install Ruby.<br />
14.2.2 Installing Ruby<br />
Ruby 1.9.2 is considered the latest stable version of Ruby (at least, as of this writing).<br />
By installing it, you’re on your way to being able to run your Rails application on this<br />
server. To install this version of Ruby, run this command:<br />
rvm install 1.9.2<br />
This command will take some time to run as it needs to download, compile, and then<br />
install Ruby. To switch to using this Ruby, use this command:<br />
rvm use 1.9.2<br />
When you type ruby -v into the terminal, you should see something like this:<br />
ruby 1.9.2p180 (2011-02-18 revision 30909) [i686-linux]<br />
The value may be different, but as long as it begins with ruby 1.9.2, you know that<br />
you’ve got the right Ruby version installed. To make this the default version of Ruby<br />
for your user, run the rvm use command again, but pass in an option:<br />
rvm use --default 1.9.2<br />
Now every time that you log in to this server you’ll be using this version of Ruby. While<br />
you’re doing Ruby things, let’s install the Bundler gem, which you’ll need for your<br />
application to install its gems on the server and rake for running Rake tasks:<br />
gem install bundler rake
Creating a user for the app<br />
So now you’ve got the beginnings of a pretty good environment set up for your application,<br />
but you don’t have your application on the server yet. To do this, you need to<br />
undertake a process referred to as deployment. Through this process you’ll put your<br />
application’s code on the server and be one step closer to letting people use the<br />
application.<br />
When you deploy, you’ll use a user without root privileges to run the application,<br />
just in case. Call this user the same as your (imaginary) domain: ticketeeapp.com.<br />
14.3 Creating a user for the app<br />
You’re calling this user ticketeeapp.com because if you wanted to deploy more than<br />
one application to your server, there will be no confusion as to which user is responsible<br />
for what. When you set up a database later on, this username will be the same as<br />
your database name. This is for convenience’s sake, but also because the database will<br />
be owned by a user with the same name, allowing this account and none other (bar<br />
the database super user) to access it. It’s all quite neat.<br />
To begin to set up this user, run these commands:<br />
sudo useradd ticketeeapp.com -s /bin/bash -m -d /home/ticketeeapp.com<br />
sudo chown -R ticketeeapp.com /home/ticketeeapp.com<br />
sudo passwd ticketeeapp.com<br />
You’ve used a couple of options to the useradd command. The -s option sets the shell<br />
for the user to /bin/bash (the standard shell found in most UNIX-based operating systems)<br />
and the -d option sets their home directory to /home/ticketeeapp.com, while<br />
the -m option makes sure that the user’s home directory exists. The second command,<br />
chown (short for change owner), changes the owner of the /home/ticketeeapp.com<br />
directory to be the ticketeeapp.com user. The final command, passwd, prompts you to<br />
set a password for this user, which you should set to something complex (that you’ll be<br />
able to remember) to stop people hacking your ticketeeapp.com user. 15<br />
To make this account even more secure, you can switch to key-based authentication.<br />
14.3.1 Key-based authentication<br />
In this next step, you’ll set up a key that will allow you to log in as your user and<br />
deploy on your server without a password. This is called key-based authentication and<br />
requires two files: a private key and a public key. The private key goes on the developer’s<br />
computer and should be kept private, as the name implies, because it is the key<br />
to gain access to the server. The public key file can be shared with anybody and is used<br />
by a server to authenticate a user’s private key.<br />
You’ll use a key-based authentication for your server because it is incredibly secure<br />
versus a password authentication scheme. To quote the official Ubuntu instructions<br />
on this 16 :<br />
15 Even though this won’t matter in a short while (when you turn off password authentication and switch to the<br />
more secure key-based authentication), it’s still good practice to always secure any user account on any system<br />
with a strong password.<br />
16 https://help.ubuntu.com/community/SSH/OpenSSH/Configuring.<br />
391
392 CHAPTER 14 Deployment<br />
To be as hard to guess as a normal SSH key, a password would have to contain 634<br />
random letters and numbers.<br />
—OpenSSH Configuring<br />
Not many people today would be willing to use a password containing 634 random letters<br />
and numbers! Considering the average password length is 8 characters, this a vast<br />
improvement over password-based authentication.<br />
You’re going to enable this key-based authentication for both your current user<br />
and your ticketeeapp.com. For now, use the same key generated for use with GitHub;<br />
however, it’s recommended that a different key be used for the server.<br />
Public keys are stored at a file called .ssh/authorized_keys located in the user’s<br />
home directory, the user being the user you will connect as through SSH. When the<br />
user attempts to connect to the server, the private and public keys are used to confirm<br />
the user’s identity. 17 Because the chances against two users having the same public and<br />
private key are so astronomically high, it is generally accepted as a secure means of<br />
authentication.<br />
In this instance, you’ll create two of these ~/.ssh/authorized_keys files: one for each<br />
user. In each case, create the ~/.ssh directory before creating authorized_keys. Begin<br />
with the user you’re currently logged in as.<br />
Let’s create the ~/.ssh directory now using this command:<br />
mkdir ~/.ssh<br />
Now you need to copy over the public key from your local computer to the ~/.ssh directory<br />
on the server, which you can do by running this command on your local system:<br />
# NOTE: Run this on your *local* machine, not the server!<br />
scp ~/.ssh/id_rsa.pub user@your-server:~/.ssh/[your_name]_key.pub<br />
If you’re using Vagrant…<br />
Vagrant already has a ~/.ssh/authorized_keys file, so there’s no need to re-create<br />
it. Overwriting this file may cause vagrant ssh to no longer work.<br />
You will also need to forward the SSH port from the virtual machine launched by<br />
Vagrant to a local port in order to connect without using Vagrant. While you’re here,<br />
forward the HTTP port (80) as well so that you can access it from the outside. Go into<br />
the Ubuntu directory that you created at the beginning of this chapter, open Vagrant-<br />
File, and add this inside the Vagrant::Config.run block:<br />
config.vm.forward_port "ssh", 22, 2200<br />
config.vm.forward_port "http", 80, 4567<br />
To connect to this server, use port 2200 for SSH and port 4567 for HTTP. When you<br />
use the scp command, the port can be specified using the -P (capital p) option and<br />
ssh using -p (lowercase p), with the port number specified directly after this option.<br />
In places where these commands are used, substitute your-server with localhost<br />
and user with vagrant.<br />
17 For a good explanation of how this process works, check this page: http://unixwiz.net/techtips/ssh-agentforwarding.html#agent.
Creating a user for the app<br />
At this stage, you’ll be prompted for a password, which is the complex one you set up<br />
a little earlier. Enter it here and the file will be copied over to the server.<br />
Add this key to the ~/.ssh/authorized_keys file on the server by using this:<br />
cat ~/.ssh/[your_name]_key.pub >> ~/.ssh/authorized_keys<br />
This command will append the key to ~/.ssh/authorized_keys if that file already exists,<br />
or create the file and then fill it with the content if it doesn’t. Either way, you’re going<br />
to have a ~/.ssh/authorized_keys file, which means that you’ll be able to SSH to this<br />
server without using your complex password. If you disconnect from the server and<br />
then reconnect, you shouldn’t be prompted for your password. This means that the<br />
authentication is working.<br />
Finally, change the permissions on this ~/.ssh/authorized_keys file so that only the<br />
user it belongs to can read it:<br />
chmod 600 ~/.ssh/authorized_keys<br />
With that set, change into the application’s user account by running sudo su<br />
ticketeeapp.com and run the same steps, beginning with mkdir ~/.ssh and ending<br />
with disconnecting and reconnecting without password prompt. Remember to<br />
change user in the scp command to be the ticketeeapp.com user this time around.<br />
If both of these accounts are working without password authentication, then you<br />
may as well turn it off!<br />
14.3.2 Disabling password authentication<br />
You’ve just implemented key-based authentication on your system for both the<br />
accounts you have, thus removing the need for any kind of password authentication.<br />
To secure your server against possible password attacks, it’s a good idea to turn off<br />
password authentication altogether.<br />
To do this, open /etc/ssh/sshd_config using sudo nano /etc/ssh/sshd_config 18<br />
and add PasswordAuthentication no where it would otherwise say #Password-<br />
Authentication yes (the # symbol indicates a commented line, just like Ruby). You<br />
can find this line by pressing Ctrl+W, typing in PasswordAuth, and pressing Enter.<br />
This configures your SSH server to not accept password authentication.<br />
Towards the top of this file there’s a line that says PermitRootLogin yes. Change<br />
this line to read PermitRootLogin no instead, so that it blocks all SSH connections for<br />
the root user, increasing the security further.<br />
NOTE There is also /etc/ssh/ssh_config, which is a little confusing... two<br />
files with nearly identical names. The file you just edited is the file for the<br />
SSH server (or daemon, hence the d at the end), while the ssh_config file is<br />
for the SSH client. Make sure you’re editing the right one.<br />
Last, quit nano by pressing Ctrl+X and then Y to confirm that you do want to quit and<br />
save. Next, you need to restart the SSH daemon by using this command:<br />
18 nano is the basic editor that comes with Ubuntu.<br />
393
394 CHAPTER 14 Deployment<br />
service ssh restart<br />
The server is now set up with key-based authentication, which completes the user<br />
setup part of this chapter.<br />
The next step is to install a sturdy database server where you can keep the data for<br />
your application when it’s deployed. At the moment (on your local machine) you’re<br />
using the SQLite database for this. That’s great for light development, but you probably<br />
want something more robust for your application, just in case it gets popular overnight.<br />
19 That robust something is a database server called PostgreSQL.<br />
14.4 The database server<br />
PostgreSQL is the relational database 20 preferred by the majority of Rails developers.<br />
It will work perfectly with the Ticketee application because there’s no SQLite3-specific<br />
code within the Ticketee application at the moment. 21<br />
To install, use the aptitude command again:<br />
sudo aptitude install postgresql-8.4<br />
This will install the necessary software and commands for the database server, such as<br />
psql (used for interacting with the database server in a console), createuser (for creating<br />
a user in the system), and createdb (for creating databases on the server). 22<br />
You’ll be using these commands to create a user and a database for your application.<br />
14.4.1 Creating a database and user<br />
To begin this, switch to the postgres user, which is another account that this postgresql-8.4<br />
install has set up. To switch into this user, use this command:<br />
sudo su postgres<br />
This user account is the super user for the database and can perform commands such<br />
as creating databases and users, precisely what you want! Creating the database is easy<br />
enough; you only need to run createdb like this:<br />
createdb ticketeeapp.com<br />
Creating a user in PostgreSQL is a little more difficult, but (thankfully) isn’t rocket science.<br />
Using the createuser command, answer no to all the questions provided:<br />
$ createuser ticketeeapp.com<br />
Shall the new role be a superuser? (y/n) n<br />
Shall the new role be allowed to create databases? (y/n) n<br />
Shall the new role be allowed to create more new roles? (y/n) n<br />
19 Chances are low, but this is more to demonstrate how to set it up with a different database server.<br />
20 http://en.wikipedia.org/wiki/Relational_database. Contrasts the NoSQL term: http://en.wikipedia.org/<br />
wiki/NoSQL.<br />
21 Some Rails applications are developed on specific database systems and may contain code that depends on<br />
that system being used. Be wary.<br />
22 For more information about how to configure PostgreSQL, read about the pg_hba.conf file: http://www<br />
.postgresql.org/docs/9.0/static/auth-pg-hba-conf.html.
Deploy away!<br />
Create the database and the user in PostgreSQL with the same name so that when the<br />
system user account of ticketeeapp.com attempts to connect to this database they are<br />
automatically granted access. There is no need to configure this at all, which is most<br />
excellent. This process is referred to as ident authentication.<br />
14.4.2 Ident authentication<br />
Ident authentication works by determining if the user connecting has an account with<br />
an identical name on the database server. Your system’s user account is named<br />
ticketeeapp.com and the PostgreSQL user you created is also named ticketeeapp.com.<br />
You can attempt to connect using the psql command from the ticketeeapp.com user,<br />
after first exiting from the postgres user’s session:<br />
exit<br />
sudo su ticketeeapp.com<br />
psql<br />
If everything goes well, you should see this prompt:<br />
psql (8.4.8)<br />
Type "help" for help.<br />
ticketeeapp.com=><br />
This means that you’re connected to the ticketeeapp.com database successfully. You<br />
can now execute SQL queries here if you wish. Exit out of this prompt by typing \q<br />
and pressing Enter.<br />
That’s all you need to do for your database for now. You’ve got a fully functioning<br />
server, ready to accept your tables and data for your application. Now you need to give<br />
it what it needs! You can do this by putting the application on the server and running<br />
the rake db:migrate command, which will create the tables, and then rake db:seed,<br />
which will insert the basic data found inside db/seeds.rb.<br />
We’re not going to make you manually copy over this application, as this can get<br />
repetitive and boring. As programmers, we don’t like repetitive and boring. One of<br />
your kind is called Jamis Buck, and he created a little tool called Capistrano to help<br />
automate the process of deploying your application.<br />
14.5 Deploy away!<br />
Capistrano is a gem originally created by Jamis Buck that is now maintained by Lee<br />
Hambley and additional volunteers, as well as the growing community that use it. It<br />
was initially designed for easy application deployment for Rails applications, but can<br />
now be used for other applications as well. Capistrano provides an easy way to configure<br />
and deploy versions of an application to one or many servers.<br />
You’ll use Capistrano to put your application’s code on the server, automatically<br />
run the migrations, and restart the server after this has been completed. This action is<br />
referred to as a deploy.<br />
Before you leap into that however, you’re going to set up a deploy key for your repository<br />
on GitHub.<br />
395
396 CHAPTER 14 Deployment<br />
14.5.1 Deploy keys<br />
If your repository was private on GitHub, you would clone it with the URL of<br />
git@github.com:our_username/ticketee.git and would need to authenticate with a<br />
private key. You shouldn’t copy your private key to the server because if a malicious<br />
person gains access to the server they will also then have your private key, which may<br />
be used for other things.<br />
To solve this particular conundrum, generate another private/public key pair just<br />
for the server itself and put the public key on GitHub to be a deploy key for this repository.<br />
This will allow the server to clone the repository.<br />
To do this, run the following command as the ticketeeapp.com user on your<br />
server:<br />
ssh-keygen -t rsa<br />
Press Enter to put the key at the default ~/.ssh/id_rsa.pub location. You can enter a<br />
password for it, but if you do this you will be prompted for it on every deploy. It’s really<br />
personal preference whether or not to do this.<br />
This command will generate two new files: a public and private key. The private<br />
key should remain secret on the server and shouldn’t be shared with any external parties.<br />
The public key, however, can be given to anybody. You’re going to put this key on<br />
GitHub now.<br />
Run the cat command to get the contents of the public key file, like this:<br />
cat ~/.ssh/id_rsa.pub<br />
ssh-rsa AAAAB3NzaC1yc2EAA...<br />
You should copy the output of this command into your clipboard. Your next step is to<br />
go to the repository on GitHub and click the Admin link in the bar in the view for the<br />
repository, shown in figure 14.1.<br />
From here, press the Deploy Keys link and then paste the key into the box, calling it<br />
ticketeeapp.com to keep up with your current naming scheme, as shown in figure 14.2.<br />
When you’re done here, click the Add Key button, which will add the key you’ve<br />
specified to the list of deploy keys on GitHub. You should then be able to run a git<br />
clone command on the server using the private URL to clone your repository:<br />
git clone git@github.com:our_username/ticketee.git ~/ticketee<br />
Figure 14.1 Admin button
Deploy away!<br />
Figure 14.2 Paste in the key, and add a title.<br />
If there is a ticketee directory at the current location of the server that contains the<br />
directories your application should contain, then this works. You can delete this<br />
directory now; you’ll be putting the code on the server at another location using<br />
Capistrano.<br />
Before that happens, you’ll need to configure Capistrano.<br />
14.5.2 Configuring Capistrano<br />
To begin with, add the capistrano gem to your application’s Gemfile using this code:<br />
group :development do<br />
gem 'capistrano'<br />
end<br />
To install this gem, you (and other developers of your application) are able to run<br />
bundle install, which will keep those other developers up-to-date with all gems. Running<br />
gem install capistrano would only update them with Capistrano, and even<br />
then it may be a version that is incompatible with the one that you’ve developed.<br />
When the gem is installed, you can set it up inside a Rails application by running<br />
this command from the root of the application:<br />
capify .<br />
This will create two files: Capfile and config/deploy.rb. The Capfile is a file containing<br />
setup for Capistrano in the application and the following default code that will be<br />
used to load your Capistrano configuration:<br />
load 'deploy' if respond_to?(:namespace) # cap2 differentiator<br />
Dir['vendor/plugins/*/recipes/*.rb'].each { |plugin| load(plugin) }<br />
load 'config/deploy' # remove this line to skip loading any ...<br />
397
398 CHAPTER 14 Deployment<br />
The final line of this file is the most important, as it loads the config/deploy.rb file.<br />
This file contains the configuration for deploying your application. Everything in this<br />
file dictates how your application is deployed. We’ll go through it with you line by line,<br />
beginning with these two lines:<br />
set :application, "set your application name here"<br />
set :repository, "set your repository location here"<br />
When you call set in Capistrano, it sets a variable you (or Capistrano itself) can reference<br />
later. The application variable here should be the name of your application<br />
and the repository variable should be the path to your application. Change these<br />
lines to this:<br />
set :application, "ticketee"<br />
set :repository, "git://github.com/rails3book/ticketee.git"<br />
Deploying a branch<br />
When you deploy your application to the server, it will read from the master branch.<br />
If you’d like to change this, set the branch using this line in your configuration:<br />
set :branch, "production"<br />
You would also need to create this new branch in the GitHub repository called production<br />
with the git checkout -b production and git push origin production<br />
commands.<br />
For a good branching model, check out this post: http://nvie.com/posts/<br />
a-successful-git-branching-model/.<br />
On the next line of config/deploy.rb there’s the scm setting:<br />
set :scm, :subversion<br />
You’re going to use Git and not Subversion in this case, so change the line to this:<br />
set :scm, :git<br />
On the next few lines there are a couple of roles defined. These roles point to<br />
� web—The server or servers responsible for serving requests for your application<br />
� app—The server or servers where the application’s code is hosted<br />
� db—The server or servers where the database for the application is hosted<br />
Right now we won’t worry about multiple-server setups, focusing only on having everything<br />
on the one box. Your web, app, and db roles are all the same server in this<br />
instance. Therefore, you can replace those three lines with this:<br />
role :web, "[your-server]"<br />
role :app, "[your-server]"<br />
role :db, "[your-server]", :primary => true
Deploy away!<br />
Here you replace [your-server] with the address of the server, which is the same one<br />
that you’ve been SSH’ing to. If you’re using Vagrant, this address is simply localhost<br />
and you’ll need to add another line to specify the port:<br />
set :port, 2200<br />
Now that you’ve covered all the default options in config/deply.rb, you’ll add some<br />
others to provide more information to Capistrano so that it can set up your application<br />
correctly.<br />
The first two settings that you’ll need to set up are the user and the path to which<br />
you’ll deploy your application. Capistrano (unfortunately) can’t guess what these are,<br />
and so you have to be explicit. The user will be the ticketeeapp.com user and the path<br />
will be /home/ticketeeapp.com/apps. Use the application name as the name of a subfolder<br />
of that application so the application will be deployed into /home/ticketeeapp<br />
.com/apps/ticketee. Underneath the set :scm line, put these settings:<br />
set :user, "ticketeeapp.com"<br />
set :deploy_to, "/home/ticketeeapp.com/apps/#{application}"<br />
The ticketeeapp.com user doesn’t have sudo privileges, so tell Capistrano not to use<br />
the sudo command by using this line:<br />
set :use_sudo, false<br />
When you deploy your application, you don’t want to keep every single release that<br />
you’ve ever deployed on the server. To get rid of the old deploys (referred to as<br />
releases), put this in config/deploy.rb:<br />
set :keep_releases, 5<br />
This will keep the last five releases that you have deployed, deleting any releases that<br />
are older than that.<br />
Last, at the bottom of the file there are a couple of lines for defining<br />
deploy:start, deploy:stop, and deploy:restart tasks for Passenger, which are commented<br />
out. Remove the comment hash from the beginning of these lines, transforming<br />
them to this:<br />
namespace :deploy do<br />
task :start do ; end<br />
task :stop do ; end<br />
task :restart, :roles => :app, :except => { :no_release => true } do<br />
run "#{try_sudo} touch #{File.join(current_path,'tmp','restart.txt')}"<br />
end<br />
end<br />
This defines a blank start and stop task and a full restart task for your app role.<br />
This task will run the touch /home/ticketeapp.com/apps/ticketee/tmp/restart.txt<br />
command, which will tell your server (not yet set up) to restart the application, causing<br />
your newly deployed code to be started up upon the next request.<br />
399
400 CHAPTER 14 Deployment<br />
With the Capistrano configuration done, you can run the cap command, passing<br />
in the name of a task to set up your application, such as deploy:setup. This task is<br />
one of a group of tasks that are provided by default with Capistrano. To see a list of<br />
these tasks, use the cap -T command.<br />
14.5.3 Setting up the deploy environment<br />
You’ll now use the deploy:setup task, which will set up the folder where your application<br />
is deployed, /home/ticketeeapp.com/apps/ticketee, with some basic folders:<br />
cap deploy:setup<br />
This command is in the same vein as the rails new command you’ve used previously<br />
because it sets up an identical, standard scaffold for every Capistrano. When this command<br />
runs, you’ll see a large chunk of output that we’ll now break down, one line at a<br />
time:<br />
* executing `deploy:setup'<br />
Capistrano tells you the name of the currently executing task, deploy:setup. The<br />
next line tells you what command it is about to execute.<br />
* executing "mkdir -p /home/ticketeeapp.com/apps/ticketee<br />
/home/ticketeeapp.com/apps/ticketee/releases<br />
/home/ticketeeapp.com/apps/ticketee/shared<br />
/home/ticketeeapp.com/apps/ticketee/shared/system<br />
/home/ticketeeapp.com/apps/ticketee/shared/log<br />
/home/ticketeeapp.com/apps/ticketee/shared/pids<br />
These are the basic directories required for Capistrano. The first directory acts as a<br />
base for your application, containing several different subdirectories, the first of<br />
which is releases. Whenever you deploy using Capistrano, a new release is created in<br />
the releases directory, timestamped to the current time using the same time format as<br />
migrations within Rails (such as 20110205225746, or the full year followed by two digits<br />
each for the month, day, minute, hour, and second, or YYYYMMDDHHmmSS). The latest<br />
release would be the final one in this directory.<br />
The shared directory is the directory where files can be shared across releases,<br />
such as uploads from Paperclip, that would usually go in the public/system directory,<br />
which would now be placed in shared/system.<br />
The shared/log directory is symbolically linked 23 to the current release’s log directory<br />
when you run a deploy. This is so all logs are kept in the shared/log directory<br />
(rather than in each release) so that, if you choose to, you can go back over them and<br />
read them.<br />
The shared/pids directory is symbolically linked to the current release’s tmp/pids<br />
up on deploy. This folder is used for process ids of any other parts of your application.<br />
At the moment, you don’t have any of these and so this directory is of no major<br />
concern.<br />
23 http://en.wikipedia.org/wiki/Symbolic_link.
Deploy away!<br />
The next line after this makes these folders group writable with the chmod<br />
command:<br />
chmod g+w /home/ticketeeapp.com/apps/ticketee<br />
/home/ticketeeapp.com/apps/ticketee/releases<br />
/home/ticketeeapp.com/apps/ticketee/shared<br />
/home/ticketeeapp.com/apps/ticketee/shared/system<br />
/home/ticketeeapp.com/apps/ticketee/shared/log<br />
/home/ticketeeapp.com/apps/ticketee/shared/pids<br />
At the bottom of this command’s output you can see what servers it will be executed<br />
on, with only your one server listed for now. It also tells you that the command is being<br />
executed and, faster than you can blink, that the command has finished. chmod isn’t<br />
an intensive operation:<br />
servers: ["your-server"]<br />
[your-server] executing command<br />
command finished<br />
Once the deploy:setup Capistrano task has finished, you are returned to a console<br />
prompt. Now you can put the application on the server by deploying it!<br />
14.5.4 Deploying the application<br />
Capistrano has now been configured to deploy the Ticketee application and you’ve<br />
set up your server using the cap deploy:setup command, leaving it up to you now to<br />
deploy your code. Capistrano’s deploy task will let you do this, and you can run this<br />
task with this command:<br />
cap deploy<br />
This command outputs an even larger output to cap deploy:setup, but again we’ll go<br />
through it line by line. It’s not all that intimidating when it’s broken down into little<br />
chunks, really! The first output you’ll see from a deploy is<br />
* executing `deploy'<br />
* executing `deploy:update'<br />
** transaction: start<br />
* executing `deploy:update_code'<br />
These first three lines tell you the tasks which are being executed. The deploy task is<br />
going to be executed because you asked Capistrano to do that. This task depends on<br />
the deploy:update task, and so it will run that first.<br />
The deploy:update task begins a transaction (the third line in the output), which<br />
is exceptionally helpful. If anything goes wrong in your deploy, Capistrano will roll<br />
back everything to the beginning of this transaction, deleting any code it’s deployed.<br />
This transaction is a failsafe for your deploy.<br />
The final part of the output is the deploy:update_code task, which is responsible<br />
for updating the application’s code in your deployment environment. This task is<br />
responsible for the next chunk of output you see:<br />
401
402 CHAPTER 14 Deployment<br />
executing locally: "git ls-remote [git_path] HEAD"<br />
* executing "git clone -q [git_path] [release_path] &&<br />
cd [release_path] &&<br />
git checkout -q -b deploy [SHA1 hash] &&<br />
(echo [SHA1 hash] > [release_path]/REVISION)"<br />
servers: ["your-server"]<br />
This task first runs git ls-remote, a lesser-known Git command, locally (not on the<br />
server), which will get the current SHA for HEAD, the latest commit to the master<br />
branch, unless you set a branch in Capistrano’s configuration.<br />
The next thing Capistrano does is put the current revision in a file called<br />
REVISION. If you like, you can alter the layout of your application to read the value<br />
from this file and put it in your application’s layout as a HTML comment so that when<br />
you do a deploy to the server, you can check this hash to see if it is the latest code.<br />
The next couple of lines output from cap deploy are from the beginning of the<br />
deploy:finalize_update task:<br />
* executing "chmod -R g+w [release_path]"<br />
servers: ["localhost"]<br />
[localhost] executing command<br />
command finished<br />
With this chmod command, Capistrano ensures that your new release’s directory is<br />
group writable (g+w), allowing the user/group to make any modifications to this<br />
directory they like, barring all others.<br />
Finally, the deploy:finalize_update then removes the log, public/system, and<br />
tmp/pids directories and symbolically links the shared/log, shared/system, and<br />
shared/pids directories (in your application’s deployed path) to these paths respectively.<br />
It does that in this little series of commands:<br />
* executing "rm -rf [release_path]/log<br />
[release_path]/public/system<br />
[release_path]/tmp/pids &&<br />
mkdir -p [release_path]/public &&<br />
mkdir -p [release_path]/tmp &&<br />
ln -s [shared_path]/log [release_path]/log &&<br />
ln -s [shared_path]/system [release_path]/public/system &&<br />
ln -s [shared_path]/pids [release_path]/tmp/pids<br />
servers: ["your-server"]<br />
[your-server] executing command<br />
command finished<br />
Next, Capistrano will use the find command to touch every file in the public/images,<br />
public/stylesheets, and public/javascripts to update their last modified time. This is so<br />
that when a user visits your site they get the latest image, stylesheet, or JavaScript file<br />
rather than a cached file. It does this with this part of the output:<br />
* executing "find [release_path]/public/images<br />
[release_path]/public/stylesheets<br />
[release_path]/public/javascripts<br />
-exec touch -t [timestamp] {} ';'; true"
servers: ["your-server"]<br />
[your-server] executing command<br />
command finished<br />
Deploy away!<br />
The second-to-last step for the deploy:update task is to run the deploy:symlink task,<br />
which symbolically links the new release directory to the current folder within your<br />
deploy path (in this example, /home/ticketeeapp.com/apps/ticketee/current):<br />
* executing `deploy:symlink'<br />
* executing "rm -f [current_path] &&<br />
ln -s [release_path] [current_path]<br />
servers: ["your-server"]<br />
[your-server] executing command<br />
command finished<br />
The last action of the deploy:update task is to commit the transaction that began at<br />
the start, meaning your deploy was successful:<br />
** transaction: commit<br />
The absolutely final thing the deploy task does is call deploy:restart, which will touch<br />
the tmp/restart file in your new application directory (/home/ticketeeapp.com/<br />
apps/ticketee/current), which would restart the server if you had one running:<br />
* executing `deploy:restart'<br />
* executing "touch [current_path]/tmp/restart.txt"<br />
servers: ["your-server"]<br />
[your-server] executing command<br />
command finished<br />
And that’s it! Your application is deployed for the first time; however, it’s not quite<br />
ready for prime-time usage. For starters, the application’s gems are not installed! On<br />
your development box you will do this by running the bundle install task, but you’re<br />
no longer in Kansas 24 or on your own development box for that matter. Bundler has<br />
some pretty slick integration with Capistrano, which will run bundle install when<br />
you deploy. This functionality is provided to you by a file that comes with the gem.<br />
14.5.5 Bundling gems<br />
You can trigger the bundle install task to happen (in a slightly different fashion<br />
than usual) when you do a deploy by requiring the bundler/capistrano file in the config/deploy.rb<br />
of your application, right at the top:<br />
require 'bundler/capistrano'<br />
You’ll also need to require RVM’s capistrano configuration so that when you do a<br />
deploy it can locate the bundle command (provided by a gem that was installed using<br />
an RVM-provided Ruby install), which it will need to run bundle install. At the top<br />
of config/deploy.rb, put these lines:<br />
$:.unshift(File.expand_path('./lib', ENV['rvm_path']))<br />
require 'rvm/capistrano'<br />
24 Apologies for any Kansas-based readers out there. Let me assure you, you are still (most likely) in Kansas.<br />
403
404 CHAPTER 14 Deployment<br />
The first line here adds the lib directory of RVM to the load path (represented in Ruby<br />
by $:). This is required so that this file knows where to find rvm/capistrano. Without<br />
it, it may fail.<br />
Now that you’re requiring rvm/capistrano when you run cap deploy again, you’ll<br />
see this additional output just after the stylesheets, javascripts, and images touching:<br />
* executing `bundle:install'<br />
* executing "ls -x /home/ticketeeapp.com/apps/ticketee/releases"<br />
servers: ["your-server"]<br />
[your-server] executing command<br />
command finished<br />
* executing "bundle install --gemfile [release_path]/Gemfile<br />
--path [shared_path]/bundle<br />
--deployment<br />
--quiet<br />
--without development test"<br />
servers: ["your-server"]<br />
[your-server] executing command<br />
command finished<br />
Bundler’s added a bundle:install task to your Capistrano configuration which runs<br />
after deploy:finalize_update. This task runs ls -x command at the beginning to<br />
get the last release’s directory (20110207202618, in this case), which it then uses to<br />
specify the location of the Gemfile using the --gemfile flag passed to bundle<br />
install. Rather than installing the gems to a system location which may not be writable<br />
by this user, 25 Bundler elects to install this to the /home/ticketeeapp.com/apps/<br />
ticketee/shared/bundler directory instead, specified by the --path flag.<br />
The --deployment flag specifies that the repository must contain a Gemfile.lock<br />
file (meaning the gem versions are locked) and that the Gemfile.lock file is up-to-date<br />
according to the Gemfile. This is to ensure that you’re running an identical set of<br />
gems on your server and local machines.<br />
Last, the --without flag tells Bundler what groups to ignore. The development<br />
and test groups are ignored in this case, meaning gems specified in these two groups<br />
will not be installed at all.<br />
With your application’s gems installed, you’re getting even closer to having an<br />
application running. When you deploy changes to your application, these changes<br />
may include new migrations, which will need to be run on the server after you do a<br />
deploy. You can deploy your code and migrate by running this lovely command:<br />
cap deploy:migrations<br />
After your code deploys, Capistrano will run the rake db:migrate task, which is of<br />
great use, because it sets up your database tables. You’ll see output like this:<br />
** [out :: [server]] (in [path_to_application])<br />
** [out :: [server]] == CreateProjects: migrating ===<br />
25 This directory would be located within /usr/local/rvm, which is only writable by members of the rvm group.<br />
This member is not a part of this group and thus is unable to install any gems at a system-wide level.
Deploy away!<br />
** [out :: [server]] -- create_table(:projects)<br />
** [out :: [server]] -> 0.0012s<br />
...<br />
This indicates that the migrations have happened successfully. Unfortunately, this is in<br />
the wrong database! You spent all that time setting up a PostgreSQL server and it’s<br />
gone ahead and instead used SQLite3. The nerve!<br />
14.5.6 Choosing a database<br />
To fix this, you can make a little change to your application’s Gemfile. Rather than<br />
having sqlite3 out there in the open and not in a group, switch it to only be used in<br />
development and test by moving it down into the group :development, :test block<br />
just underneath. 26 Beneath all of the content in the file currently, define a new group<br />
like this:<br />
group :production do<br />
gem 'pg'<br />
end<br />
The pg gem provides the PostgreSQL adapter that you need to connect to your Postgre-<br />
SQL database server on your server. If you run bundle install now it will install this<br />
gem for you. Now you can make a commit for this small change and push your changes:<br />
git add Gemfile*<br />
git commit -m "Added pg gem for PostgreSQL on the server"<br />
git push<br />
You haven’t yet configured your production application to connect to PostgreSQL,<br />
which is somewhat of a problem. You would usually do this by editing the config/database<br />
.yml file in your application, but in this case you want to keep your development and production<br />
environments separate. Therefore, you’ll set this up on the server.<br />
Put this file in the shared directory of your application’s deploy, so that all releases<br />
can just symlink it to config/database.yml inside the application itself. Connect to the<br />
server now with your user and then switch over to ticketeeapp.com using sudo su<br />
ticketeeapp.com so that you can add this file. Go into this shared directory now and<br />
open a new file for editing by running these commands:<br />
cd /home/ticketeapp.com/apps/ticketee/shared<br />
mkdir config<br />
cd config<br />
nano database.yml<br />
Inside this file, put the database settings for the production environment of your<br />
application. These are as follows:<br />
production:<br />
adapter: postgresql<br />
database: ticketeeapp.com<br />
min_messages: warning<br />
26 Generally, this is a bad idea. You should always develop on the same database system that you deploy on so<br />
that you don’t run into any unexpected production issues. We’re being lazy here because it’s easier.<br />
405
406 CHAPTER 14 Deployment<br />
You can exit out of nano by using Ctrl+X and then press Y to confirm your changes.<br />
Your next step is to get this file to replace the config/database.yml that your application<br />
contains upon deployment. For this, define a new task at the bottom of config/<br />
deploy.rb in your application:<br />
task :symlink_database_yml do<br />
run "rm #{release_path}/config/database.yml"<br />
run "ln -sfn #{shared_path}/config/database.yml<br />
#{release_path}/config/database.yml"<br />
end<br />
after "bundle:install", "symlink_database_yml"<br />
This task will remove the current config/database.yml located at the release_path<br />
and will then link the one from shared_path’s config/database.yml into that spot. The<br />
final line that you have added tells Capistrano to run this task after the bundle<br />
:install task has been completed, meaning it will happen before anything else.<br />
Now when you run cap deploy:migrations again, you’ll see this additional<br />
output:<br />
* executing `symlink_database_yml'<br />
* executing "rm [release_path]/config/database.yml"<br />
servers: ["your-server"]<br />
[localhost] executing command<br />
command finished<br />
* executing "ln -s [shared_path]/config/database.yml<br />
[release_path]/config/database.yml"<br />
servers: ["your-server"]<br />
[localhost] executing command<br />
command finished<br />
It looks like your command is working! Another clue indicating this is the migration<br />
output just beneath. Check that the command is truly working by going onto the<br />
server as the ticketeeapp.com user and then going into the /home/ticketeeapp<br />
.com/apps/ticketee/current folder and running rake RAILS_ENV=production<br />
db:seed to load the default data into the production database. Then launch a Postgre-<br />
SQL console by running the psql command. Inside this console, run SELECT * FROM<br />
projects;. You should see output like this:<br />
ticketeeapp.com=> SELECT * FROM projects;<br />
id | name | created_at | ...<br />
----+---------------+----------------------------+ ...<br />
1 | Ticketee Beta | 2011-03-05 12:05:55.447643 | ...<br />
(1 row)<br />
This output shows the data in the projects table that comes from db/seeds.rb, which<br />
means that your database configuration has been copied over and your database has<br />
been set up correctly.<br />
Capistrano allows you to put the code on your server in a simple fashion. Once you<br />
make a change to your application, you can make sure that the tests are still passing,<br />
make a commit out of that, and push the changes to GitHub. When you’re happy with
Serving requests<br />
the changes, you can deploy them to your server using the simple cap deploy<br />
:migrations command. This will update the code on your application, run bundle<br />
install, and then run any new migrations you may have added.<br />
There’s much more to Capistrano than this, and you can get to know more of it by<br />
reading the Capistrano Handbook 27 or by asking questions on the Capistrano Google<br />
Group at http://groups.google.com/group/capistrano.<br />
To run this application and make it serve requests, you could use rails server like<br />
in development, but there are a couple of problems with this approach. For starters, it<br />
requires you to always be running a terminal session with it running, which is just<br />
hackish. Secondly, this process is only single-threaded, meaning it can only serve a single<br />
request at a time.<br />
There’s got to be a better way!<br />
14.6 Serving requests<br />
Rather than taking this approach, we’re going to show you how to use the Passenger<br />
gem along with the nginx web server to host your application. The benefit of this is<br />
that when a request comes into your server, it’s handled by nginx and an nginx module<br />
provided by the Passenger gem, as shown in figure 14.3.<br />
When the client sends a request to the server on port 80, nginx will receive it.<br />
nginx then looks up what is supposed to be serving that request and sees that Passenger<br />
is configured to do that, and so passes the request to Passenger.<br />
Passenger manages a set of Rails<br />
instances (referred to as a pool) for<br />
you. If Passenger hasn’t received a<br />
request in the last five minutes, Passenger<br />
will start a new instance, 28<br />
passing the request to that instance,<br />
with each instance serving one<br />
request at a time. The more instances<br />
you have, the more (theoretical) 29<br />
requests you can do. If there has been<br />
a request within that timeframe, then<br />
the request is passed to one of the<br />
instances in the pool already<br />
launched by a previous request. 30<br />
web browser<br />
nginx<br />
passenger<br />
instance #1<br />
instance #2<br />
Figure 14.3 Nginx request path<br />
27 https://github.com/leehambley/capistrano-handbook/blob/master/index.markdown.<br />
28 The passenger_pool_idle_time configuration option is responsible for this: http://www.modrails.com/<br />
documentation/Users%20guide%20Nginx.html#PassengerPoolIdleTime.<br />
29 There’s a hardware limit (when you run out of CPU and RAM) that will be reached if too many instances are<br />
started up. Things can get slow then.<br />
30 Passenger will scale up instances depending on the speed of requests coming to the application. The maximum<br />
number of application instances running at any one time by default is six, and can be configured by the<br />
passenger_max_pool_size setting: http://www.modrails.com/documentation/Users%20guide%20Nginx<br />
.html#PassengerMaxPoolSize.<br />
407
408 CHAPTER 14 Deployment<br />
Once Rails has done its thing, it sends the request<br />
back up the chain, going through Passenger to nginx and<br />
then finally back to the client as the response—most commonly<br />
HTML but it could be anything, really.<br />
When you launch rails server, the process looks like<br />
figure 14.4.<br />
In this example, there’s only one instance of your<br />
application serving requests and so it’s going to be slower<br />
than having the Passenger pool of them serving it. Additionally,<br />
nginx is super quick at serving files (like your CSS<br />
and JavaScript ones) and handles these requests itself,<br />
without Rails knowing about it. When you run rails server, it serves every request,<br />
and is definitely not web scale. nginx and Passenger are designed for speed and reliability,<br />
and so you should feel pretty confident in using them.<br />
Enough talk, let’s get into this! You’re going to install the passenger gem now, and<br />
it’s nice enough to set up nginx for you too!<br />
14.6.1 Installing Passenger<br />
To install Passenger, as your user on the box (vagrant ssh, if Vagrant) you can run the<br />
same gem install you’ve been running all this time:<br />
gem install passenger<br />
Once this gem is installed, install nginx and the Passenger module by running this<br />
lovely command. The -i option “simulates initial login,” meaning that the RVM script<br />
will run before this command, making it available:<br />
sudo -i passenger-install-nginx-module<br />
At the prompt, press 1 for the install process to download and compile nginx automatically.<br />
When prompted for a directory (/opt/nginx), press Enter. This’ll be the directory<br />
your server runs from. After this, nginx will be compiled and installed. This<br />
process takes a minute or two, so go grab something to eat or drink, or stretch.<br />
Once it’s done, you’re told that Passenger inserted some configuration for you;<br />
wasn’t that nice of it?<br />
The Nginx configuration file (/opt/nginx/conf/nginx.conf)<br />
must contain the correct configuration options in order for Phusion Passenger<br />
to function correctly.<br />
This installer has already modified the configuration file for you! The<br />
following configuration snippet was inserted:<br />
http {<br />
...<br />
passenger_root /usr/local/rvm/gems/ruby-1.9.2-p180/gems/passenger-<br />
3.0.4;<br />
passenger_ruby /usr/local/rvm/wrappers/ruby-1.9.2-p180/ruby;<br />
...<br />
}<br />
client<br />
server<br />
Figure 12.4 Simplified<br />
client-server relationship
Serving requests<br />
After you start Nginx, you are ready to deploy any number of Ruby on Rails<br />
applications on Nginx.<br />
When you upgrade Passenger you’ll need to edit the passenger_root line to point to<br />
the new version, and if you ever upgrade Ruby then you’ll need to change the<br />
passenger_ruby line. Press Enter now to see the next bit of output, where you’re told<br />
how to deploy a Rails application:<br />
server {<br />
listen 80;<br />
server_name www.yourhost.com;<br />
root /somewhere/public; #
410 CHAPTER 14 Deployment<br />
This means your web server is now working seamlessly with your application and<br />
everything’s almost ready. If the operating system of the server restarts, however, this<br />
nginx process will not. To fix this small problem, you need to create an init script.<br />
14.6.2 An init script<br />
An init script is a script that is run on startup (init) of the operating system and is usually<br />
used for launching applications or running commands. In Ubuntu, they reside in<br />
the /etc/init.d directory. Here, you’re going to use one to start nginx. This script has<br />
already been prepared for you, and you can download it using this command:<br />
sudo wget http://bit.ly/nginx-init-script -O /etc/init.d/nginx<br />
This command will download the nginx init script and place it at /etc/init.d/nginx.<br />
This file won’t automatically run on boot unless you tell Ubuntu it should, which you<br />
can do with these following commands:<br />
sudo chmod +x /etc/init.d/nginx<br />
sudo /usr/sbin/update-rc.d -f nginx defaults<br />
If you were to reboot your operating system right now, nginx would start automatically<br />
along with it. You don’t need to do it now, but it’s good to know that it’ll start nginx<br />
when the server boots.<br />
There you have it: the application is deployed onto your Ubuntu server using Capistrano<br />
and is running through the power of nginx and Passenger.<br />
14.7 Summary<br />
In this chapter we covered one of the many different permutations you can use to<br />
deploy a Rails application to a server. This chapter covered the most commonly used<br />
software packages such as RVM, Capistrano, PostgreSQL, nginx, and Passenger, and<br />
therefore it should be a great starting ground for anybody learning about deployment.<br />
There are plenty of other tools out there such as Puppet, 31 Chef, 32 Babushka, 33<br />
and Git Pusshuten. 34 Different people prefer different ways of doing similar things,<br />
and so there’s a wide variety of choice. To cover everything within one chapter is just<br />
not possible.<br />
You set up your server with Ruby 1.9.2 running your Rails 3.0.5 application. You<br />
began by installing the essential packages you needed, then installing RVM, followed<br />
by Ruby.<br />
Afterwards, you set up a user with the same name as your application. This was<br />
shortly followed by the locking down of SSH access on the machine: now nobody is<br />
able to access it with a password, because they need to have the private key instead.<br />
Disabling root access is just generally good practice. Nobody should ever need to use<br />
31 http://puppetlabs.com.<br />
32 http://opscode.com/chef/.<br />
33 http://babushka.me.<br />
34 http://gitpusshuten.com/.
Summary<br />
the root account on this machine, as everything can be managed by your user or the<br />
application’s user.<br />
Then we had you set up a database server using PostgreSQL, one of the most popular<br />
relational datastores today. You discovered that giving your system user the same<br />
name as your database came in handy; PostgreSQL supports a kind of authentication<br />
that automatically grants a system user access to a database with the same name. That<br />
is of course provided a PostgreSQL user and database exist with that name. Very<br />
handy!<br />
Second-to-last, you got down to the meat of the chapter: the first deployment of<br />
your application to your server using Capistrano. You saw that the config/deploy.rb file<br />
comes in handy, allowing you to specify the configuration of your deployment environment<br />
simply. With Capistrano, you distill everything you need to get your application’s<br />
latest code onto the server down to one command: cap deploy:migrations.<br />
Every time you need to deploy, run this command, and Capistrano (along with your<br />
configuration) will take care of the rest.<br />
Finally, you set up nginx and Passenger to serve your application’s requests, as well<br />
as the static assets of your application. Generally, this is the setup preferred by Rails<br />
developers, and so there’s a lot of useful knowledge out there. An alternative to this<br />
setup would be to use the Apache web server instead of nginx. Both work suitably.<br />
That’s your application done, really. From the first time you ran a test all the way<br />
up to deployment, you’ve covered a lot of important things within Rails. There’s still<br />
much more to learn (which is why there are more chapters after this one), but right<br />
now you should have a firm grasp of what the process of developing and deploying a<br />
Rails application is. In the next chapter, we show you how you can let people authenticate<br />
to your application through either Facebook or Twitter.<br />
411
This chapter covers<br />
� Authenticating against external services<br />
using OmniAuth<br />
� Authenticating with Twitter using OAuth<br />
� Authenticating with GitHub using OAuth<br />
412<br />
Alternative<br />
authentication<br />
Now that your application has been deployed to a server somewhere (or at least<br />
you’ve gone through the motions of doing that!), we’re going to look at adding<br />
additional features to your application. One of these is OAuth authentication from<br />
services such as Twitter and GitHub.<br />
When you sign into a website, you can generally use a couple of authentication<br />
methods. The first of these would be a username and password, with the username<br />
being forced to be unique. This method provides a solid way to identify what user<br />
has logged into the website, and from that identification the website can choose to<br />
grant or deny access to specific parts of the site. You have done this with your Ticketee<br />
application, except in place of a username, you’re using an email address. An<br />
email address is an already unique value for users of a website that also allows you
How OAuth works<br />
to have a way of contacting the user if the need arises. On other websites, though, you<br />
may have to choose a username (with Twitter), or you could be able to use both a username<br />
and email to sign in, as with GitHub.<br />
Entering your email address and a password 1 into every website that you use can be<br />
time consuming. Why should you be throwing your email addresses and passwords<br />
into every website?<br />
Then along came OAuth. OAuth allows you to authenticate against an OAuth provider.<br />
Rather than giving your username/email and password to yet another site, you<br />
authenticate against a central provider, which then provides tokens for the different<br />
applications to read and/or write the user’s data on the application.<br />
In this chapter you’re going to be using the OAuth process to let users sign in to<br />
your Ticketee application using Twitter and GitHub. You’ll not only see how easy this<br />
is, but also how you can test to make sure that everything works correctly.<br />
Rather than implementing this process yourself, you can use the OmniAuth gem<br />
in combination with the devise gem that you’re already using. Although this combination<br />
abstracts a lot of the complexity involved with OAuth, it’s still helpful to know<br />
how this process works. Let’s take a look now.<br />
15.1 How OAuth works<br />
OAuth authentication works in a multi-step process. In order to be able to authenticate<br />
against other applications, you must first register your application with them.<br />
After this process is complete, you’re given a unique key to identify your application<br />
and a secret passphrase, which is actually a hash. Neither of these should be shared.<br />
When your application makes a request to an OAuth provider, it will send these two<br />
parameters along as part of the request so the provider knows which application is<br />
connecting. Twitter’s API documentation has a pretty good description of the process<br />
as an image, which you can see as figure 15.1.<br />
First of all (not shown in the figure), a user initiates a request to your application<br />
(the Consumer) to announce their intentions to log in with Twitter (the Service Provider).<br />
Your application then sends that unique identifier and that secret key (given to<br />
you by Twitter when you register your application), and begins the authentication process<br />
by requesting a token (A). This token will be used as an identifier for this particular<br />
authentication request cycle.<br />
The provider (Twitter) then grants you this token and sends it back to your application.<br />
Your application then redirects the user to the provider (B) in order to gain<br />
the user’s permission for this application to access its data. When signing in with Twitter,<br />
your users would see something like figure 15.2.<br />
The user can then choose to Sign In or Cancel on this screen. If they choose Sign<br />
In, the application then has access to their data, which authorizes the request token<br />
1 Ideally, a unique password per site is best for added security. If one site is breached, you do not want your<br />
password to be the same across multiple sites, because the attackers would gain access to everything.<br />
413
414 CHAPTER 15 Alternative authentication<br />
Figure 15.2 Twitter authorization<br />
Figure 15.1 Twitter OAuth
Twitter authentication<br />
you were given at the beginning. If they click Cancel, it redirects the user back to the<br />
application without giving it access to the data.<br />
In this case, you’ll assume the user has clicked Sign In. The user is then redirected<br />
back to your application from the provider, with two parameters: an oauth_token and<br />
a oauth_verifier. The oauth_token is the request token you were granted at the<br />
beginning, and the oauth_verifier is a verifier of that token. OmniAuth then uses<br />
these two pieces of information to gain an access token, which will allow your application<br />
to access this user’s data. There’s also additional data, such as the user’s attributes, that<br />
gets sent back here. The provider determines the extent of this additional data.<br />
This is just a basic overview of how the process works. All of this is covered in more<br />
extensive detail in Section 6 of the OAuth 1.0 spec, which can be found at http://<br />
oauth.net/core/1.0/.<br />
In the case of your application, you’re going to be letting users go through this<br />
process with the intention of using their authorization with Twitter to sign them in<br />
whenever they wish. After this process has been completed the first time, a user will<br />
not be re-prompted to authorize your application (unless they have removed it from<br />
their authorized applications list), meaning the authorization process will be seamless<br />
for the user.<br />
Let’s see how you can use the OmniAuth gem to set up authentication with Twitter<br />
in your application.<br />
15.2 Twitter authentication<br />
You’re going to be using OmniAuth to let people sign in using Twitter and GitHub as<br />
OAuth providers. We’ll begin with Twitter authentication and then move on to<br />
GitHub.<br />
15.2.1 Setting up OmniAuth<br />
OmniAuth not only supports OAuth providers, but also supports OpenID, CAS, and<br />
LDAP. You’re only going to be using the OAuth part, which you can install in your<br />
application by putting this line in your Gemfile:<br />
gem "oa-oauth", :require => "omniauth/oauth"<br />
The different parts of OmniAuth are separated out into different gems by an oa- prefix<br />
so that you can use some parts without including all the code for the other parts. In<br />
your Gemfile you’re loading the oa-oauth gem, which will provide the OAuth functionality<br />
you need. The file to load this gem does not have the same name as the gem,<br />
so you need to use the :require option here and tell the correct file, omniauth/<br />
oauth, to load.<br />
Next, you need to tell Devise that your User model is going to be using OmniAuth.<br />
You can do this by putting the :omniauthable symbol at the end of the devise list in<br />
your app/models/user.rb so that it now becomes this:<br />
415
416 CHAPTER 15 Alternative authentication<br />
devise :database_authenticatable, :registerable, :confirmable,<br />
:recoverable, :rememberable, :trackable, :validatable,<br />
:token_authenticatable, :omniauthable<br />
With OmniAuth set up, you can now configure your application to provide a way for<br />
your users to sign in using Twitter. Twitter first requires you to register your application<br />
on its site.<br />
15.2.2 Registering an application with Twitter<br />
You need to register your application with Twitter before your users can use it to log in<br />
to your application. The registration process gives you a unique identifier and secret<br />
code for your application (called a consumer key and consumer secret, respectively),<br />
which is how Twitter will know what application is requesting a user’s permission.<br />
The process works by a user clicking a small Twitter icon on your application,<br />
which will then redirect them to Twitter. If they aren’t signed in on Twitter, they will<br />
first need to do so. Once they are signed in, they will then be presented with the<br />
authorization confirmation screen that you saw earlier, shown again in figure 15.3.<br />
On this screen you can see that Twitter knows what application is requesting permission<br />
for this user, and that the user can either choose to Allow or Deny. By clicking<br />
Allow, the user will be redirected back to your application and then signed in using<br />
code that you’ll write after you’ve registered your application.<br />
To register your application with Twitter, you need to go to http://dev.twitter.com<br />
and click the Create an App link.<br />
Figure 15.3 Twitter authorization request
Twitter authentication<br />
On this new page you need to fill in the name, description, and URL fields. The name<br />
should be [Your name]’s Ticketee because it needs to be unique; the description can<br />
be anything, and the URL can be http://manning.com/katz. When you click Create on<br />
this application, you’ll see the consumer key and secret that you’ll be using shortly, as<br />
shown in figure 15.4.<br />
Although this screen isn’t exactly the prettiest thing around, it does offer you the<br />
two key pieces of information that you need: the consumer key and the consumer<br />
secret. The other values on this page aren’t important for you to know, as OmniAuth<br />
will take care of them for you.<br />
You now need to set up your application to use this consumer key and consumer<br />
secret when authenticating with Twitter. You can do this in Devise’s configuration file<br />
in your application, which is located at config/initializers/devise.rb. In this file, you’ll<br />
see the following commented-out OmniAuth configuration:<br />
# ==> OmniAuth<br />
# Add a new OmniAuth provider. Check the wiki for more information on setting<br />
# up on your models and hooks.<br />
# config.omniauth :github, 'APP_ID', 'APP_SECRET', :scope =><br />
➥'user,public_repo'<br />
This shows you how to add a new OmniAuth provider, using GitHub as an example. In<br />
this example, the APP_ID and APP_SECRET values would be the consumer key and consumer<br />
secret given to you by the provider. Set up a new provider for Twitter by putting<br />
these lines underneath the commented-out section:<br />
config.omniauth :twitter,<br />
'[consumer key]',<br />
'[consumer secret]'<br />
This will configure Devise to provide OmniAuth-based authentication for Twitter, but<br />
you’re not done yet. You need some way for a user to be able to initiate the sign-in process<br />
with Twitter.<br />
15.2.3 Setting up an OmniAuth testing environment<br />
Figure 15.4 A brand-new application!<br />
To provide a user with a way to sign in with Twitter, you’ll add a small addition to your<br />
menu bar that lets people sign up and sign in using Twitter, as shown in figure 15.5.<br />
417
418 CHAPTER 15 Alternative authentication<br />
When a user clicks this button, your application will begin<br />
the OAuth process by requesting a request token from Twitter,<br />
and then using that token to redirect to Twitter. From here, the<br />
user will authorize your application to have access to their data<br />
on Twitter, and then they’ll be redirected back to your application.<br />
It’s the user being redirected back to your application that<br />
is the most important part. Twitter will send back the oauth_token and oauth<br />
_verifier, and then your application makes the request for the access token to Twitter.<br />
Twitter will then send back this access token and any additional parameters it sees<br />
fit, and you’ll be able to access this information in a Hash format. For example, Twitter<br />
sends back the user’s information in the response like this:<br />
{<br />
}<br />
...<br />
"extra" => {<br />
...<br />
"user_hash" => {<br />
"id" => "14506011"<br />
"screen_name" => "ryanbigg"<br />
"name" => "Ryan Bigg",<br />
...<br />
}<br />
}<br />
This is quite a stripped-down version of the response you’ll be getting back from Twitter,<br />
but it contains three very important values. The first is the unique Twitterprovided<br />
id of the user, the second is their Twitter username, and the third is their<br />
display name. Currently in Ticketee, you’ve been using the user’s email to display who<br />
you’re logged in as. Because Twitter doesn’t send back an email address, you’ll have to<br />
change where you’d usually display an email address to instead display the user’s display<br />
name or screen name if they’ve chosen to sign in with Twitter.<br />
First things first though: you need to have a link that a user can click to begin this<br />
process, and to make sure that the link is working you’re going to need to write a feature.<br />
With this feature, you shouldn’t always rely on being able to connect to your<br />
OAuth providers like Twitter. Instead, you should create fake responses (referred to as<br />
mocks) for the requests you’d normally do. By doing this you can substantially speed<br />
up the rate at which your tests run, as well as not depend on something like connectivity,<br />
which is out of your control.<br />
OmniAuth provides a configuration option for setting whether or not you’re in a<br />
test mode, which will mock a response rather than making a call to an external service.<br />
This option is conveniently called test_mode. You can set this option at the bottom<br />
of your config/environments/test.rb like this:<br />
OmniAuth.config.test_mode = true<br />
Figure 15.5<br />
Sign in with Twitter<br />
With your test environment now set up correctly, you can write a feature to make sure<br />
that users can sign in with Twitter.
15.2.4 Testing Twitter sign-in<br />
Twitter authentication<br />
Next, you can begin to write your feature to test Twitter authentication in a new file at<br />
features/twitter_auth.feature as shown in the following listing.<br />
Listing 15.1 features/twitter_auth.feature<br />
Feature: Twitter auth<br />
In order to sign in using Twitter<br />
As a Twitter user<br />
I want to click an icon and be signed in<br />
Background:<br />
Given we are mocking a successful Twitter response<br />
Scenario: Signing in with Twitter<br />
Given I am on the homepage<br />
When I follow "sign_in_with_twitter"<br />
Then I should see "Signed in with Twitter successfully."<br />
And I should see "Signed in as A Twit (@twit)"<br />
This is a simple little feature with a short, three-line scenario. The step in your Background<br />
will mock out a successful response from Twitter, which will be used by Omni-<br />
Auth because you declared that you’re in test mode in config/environments/test.rb.<br />
Let’s run this feature now with bin/cucumber features/twitter_auth.feature so<br />
that you can get the step definition for this new step:<br />
Given /^I have mocked a successful Twitter response$/ do<br />
pending # express the regexp above with the code you wish you had<br />
end<br />
Put this step definition in a new file at features/step_definitions/oauth_steps.rb and<br />
define it as shown in the following listing.<br />
Listing 15.2 features/step_definitions/oauth_steps.rb<br />
Given /^we are mocking a successful Twitter response$/ do<br />
OmniAuth.config.mock_auth[:twitter] = {<br />
"extra" => {<br />
"user_hash" => {<br />
"id" => '12345',<br />
"screen_name" => 'twit',<br />
"display_name" => "A Twit"<br />
}<br />
}<br />
}<br />
end<br />
To generate a fake response for OmniAuth, you need to use set up a key OmniAuth<br />
.config.mock_auth hash that has the same name as the authentication provider, which<br />
in this case is :twitter. This mock response needs to contain the same kind of layout<br />
as the normal response would get back, including having each of the keys of the hashes<br />
be strings, because this is how your response will be accessed. Twitter’s response hash,<br />
as stated earlier, contains an extra key that contains information about a user, which is<br />
419
420 CHAPTER 15 Alternative authentication<br />
what you’ll use to track who has signed into your system using Twitter. You’ll store these<br />
three attributes in new fields in your database when a user signs up using Twitter.<br />
Run bin/cucumber features/twitter.feature again. This time you’ll see that<br />
you’re missing your link:<br />
Scenario: Signing in with Twitter<br />
Given I am on the homepage<br />
And I follow "sign_in_with_twitter"<br />
no link with title, id or text 'sign_in_with_twitter' found ...<br />
Rather than have a link that reads sign_in_with_twitter, you’ll actually be giving the<br />
link an id attribute of sign_in_with_twitter and Capybara will still be able to find<br />
this link. The link itself is going to be a small button that you can get from https://<br />
github.com/intridea/authbuttons. You should download these images (just the<br />
32 x 32px versions) and put them in the app/assets/images/icons directory of your<br />
application. Leave them named as they are.<br />
To create this new link, open app/views/layouts/application.html.erb. This file contains<br />
the layout for your application and is responsible for displaying the Sign Up and<br />
Sign In links for your application if the user isn’t signed in already. It’s underneath<br />
these links that you want to display your little twitter icon, which you can do by making<br />
this small change to this file:<br />
<br />
<br />
<br />
Or use "sign_in_with_twitter" %><br />
With this link you use the downloaded icon as the first argument of link_to by using<br />
image_tag. The second argument to link_to is the routing helper method user<br />
_omniauth_authorize_path with the :twitter argument. This method is provided by<br />
Devise because you’ve told it your User model is omniauthable. This routing helper<br />
will go to a controller that is internal to Devise, because it will deal with the hand-off to<br />
Twitter.<br />
When you run this feature again, the second step of your scenario will still fail, but<br />
this time with a different error:<br />
And I follow "sign_in_with_twitter"<br />
The action 'twitter' could not be found<br />
for Devise::OmniauthCallbacksController<br />
By default, Devise handles the callbacks from external services using the<br />
Devise::OmniAuthCallbacksController. Because different people will want this controller<br />
to perform differently, Devise provides a set of common functionality in this<br />
controller and expects you to subclass it to define the actions (like your twitter<br />
action) yourself. To do this, create a new controller for these callbacks by running this<br />
command:<br />
rails g controller users/omniauth_callbacks
Twitter authentication<br />
This command will generate a new controller at app/controllers/users/<br />
omniauth_callbacks_controller.rb, but it’s not quite what you want. You want this controller<br />
to inherit from Devise::OmniauthCallbacksController, and you also want it<br />
to have a twitter action. Before you do that, though, tell Devise to use this new controller<br />
for its callbacks. You can do this by changing these lines in your config/<br />
routes.rb file<br />
devise_for :users, :controllers => {<br />
:registrations => "registrations",<br />
}<br />
into this:<br />
devise_for :users, :controllers => {<br />
:registrations => "registrations",<br />
:omniauth_callbacks => "users/omniauth_callbacks"<br />
}<br />
This will tell Devise to use your newly generated users/omniauth_callbacks controller<br />
rather than its own Devise::OmniauthCallbacksController, which you’ll use as<br />
the superclass of your new controller. This Devise::OmniauthCallbacksController<br />
contains some code that will be used in case something goes wrong with the authentication<br />
process.<br />
Now you need to define the twitter action in this new controller. This action is<br />
going to be called when Twitter sends a user back from having authorized your application<br />
to have access. Define this controller using the code from the following listing.<br />
Listing 15.3 app/controllers/users/omniauth_callbacks_controller.rb<br />
class Users::OmniauthCallbacksController <<br />
➥Devise::OmniauthCallbacksController<br />
def twitter<br />
@user = User.find_or_create_for_twitter(env["omniauth.auth"])<br />
flash[:notice] = "Signed in with Twitter successfully."<br />
sign_in_and_redirect @user, :event => :authentication<br />
end<br />
end<br />
When a request is made to this action, the details for the user are accessible in the<br />
env["omniauth.auth"]key, with env being the Rack environment of this request,<br />
which contains other helpful things such as the path of the request. 2<br />
You then pass these details to a currently undefined method called<br />
find_or_create_for_twitter, which will deal with finding a User record for this<br />
information from Twitter, or creating one if it doesn’t already exist. You then set a<br />
flash[:notice] telling the user they’ve signed in and use the Devise-provided<br />
sign_in_and_redirect method to redirect your user to the root_path of your application,<br />
which will show the ProjectsController’s index action.<br />
2 Covered in much more detail in chapter 17.<br />
421
422 CHAPTER 15 Alternative authentication<br />
To make this action work, you’re going to need to define find_or_create_for<br />
_twitter in your User model, which you can do using the code from the following<br />
listing.<br />
Listing 15.4 app/models/user.rb<br />
def self.find_or_create_for_twitter(response)<br />
data = response['extra']['user_hash']<br />
if user = User.find_by_twitter_id(data["id"]) B Find user<br />
user<br />
else # Create a user with a stub password.<br />
user = User.new(:email => "twitter+#{data["id"]}@example.com",<br />
:password => Devise.friendly_token[0,20])<br />
user.twitter_id = data["id"]<br />
user.twitter_screen_name = data["screen_name"]<br />
D<br />
user.twitter_display_name = data["display_name"]<br />
user.confirm!<br />
user<br />
end<br />
end<br />
You’ve defined this class method to take one argument, which is the response you get<br />
back from Twitter. In this response, there’s going to be the access token that you get<br />
back from Twitter that you don’t care so much about, and also the extra key and its<br />
value that you do really care about. It’s with these that the application then attempts<br />
to find a user based on the id key B within the response["extra"]["user_hash"]<br />
(here as data to make it easier to type). If it can find this user, it’ll return that object.<br />
If it can’t find a user with that twitter_id attribute, then you need to create one!<br />
Because Twitter doesn’t pass back an email, you make one up C, as well as a password,<br />
D using Devise’s very helpful friendly_token method, which generates a secure<br />
phrase like QfVRz8RxHx4Xkqe6uIqL. The user won’t be using these to sign in; Devise<br />
needs them so it can validate the user record successfully.<br />
You have to do this the long way, because the twitter_ prefixed parameters aren’t<br />
mass-assignable due to your attr_accessible call earlier on in this model, so you<br />
must assign them manually one at a time. Store the id of the user so you can find it<br />
again if you need to re-authenticate this user, the twitter_screen_name, and the<br />
twitter_display_name. Then you need to confirm and save the object, which you can<br />
do with the confirm! method, and finally you need to return the object as the final<br />
line in this else block.<br />
These fields are not yet fields in your database, so you’ll need to add them in. You<br />
can do this by creating a new migration using this command:<br />
rails g migration add_twitter_fields_to_users<br />
Email C<br />
Password<br />
In this migration you want to add the fields to your table, which you can do by adding<br />
them to your migration, as shown in the following listing.
Twitter authentication<br />
Listing 15.5 db/migrate/[timestamp]_add_twitter_fields_to_users.rb<br />
class AddTwitterFieldsToUsers < ActiveRecord::Migration<br />
def change<br />
add_column :users, :twitter_id, :string<br />
add_column :users, :twitter_screen_name, :string<br />
add_column :users, :twitter_display_name, :string<br />
end<br />
end<br />
With this migration set up, you can run it on your development and test databases<br />
with rake db:migrate and rake db:test:prepare respectively. Now when you run<br />
your feature again with bin/cucumber features/twitter_auth.feature, you’ll see<br />
that your new User object is being created and that you can see the “Signed in with<br />
Twitter successfully.” message:<br />
Scenario: Signing in with Twitter<br />
Given I am on the homepage<br />
And I follow "sign_in_with_twitter"<br />
Then I should see "Signed in with Twitter successfully."<br />
Then I should see "Signed in as A twit"<br />
Failed assertion, no message given. (MiniTest::Assertion)<br />
The final step of your feature is now failing, but this is a pretty easy one to fix. You<br />
need to change where it would normally display a user’s email to display something<br />
like “A Twit (@twit)” if the twitter_id attribute is set. To do this, define a new<br />
method in your User model above the to_s method, using the code from the following<br />
listing.<br />
Listing 15.6 app/models/user.rb<br />
def display_name<br />
if twitter_id<br />
"#{twitter_display_name} (@#{twitter_screen_name})"<br />
else<br />
email<br />
end<br />
end<br />
If the twitter_id attribute is set in this method, then you assume the<br />
twitter_display_name and twitter_screen_name attributes are set also and use<br />
those to display the twitter name. If it isn’t set, then you’ll fall back to using the email<br />
field. You’ll be able to use this method later on to check if the github_id field is set<br />
and use the values for that instead. 3<br />
Now you need to change the occurrences of where user.email is referenced to<br />
use the display_name method. The first occurrence of this is in app/models/user.rb<br />
in your to_s method, which should now become<br />
3 Alternatively, you could add a feature to let the user pick which one they would like to display.<br />
423
424 CHAPTER 15 Alternative authentication<br />
def to_s<br />
"#{display_name} (#{admin? ? "Admin" : "User"})"<br />
end<br />
The rest of the occurrences are found in a handful of views throughout your application,<br />
and you’ll need to fix these up now. The first of these is the first line of app/<br />
views/admin/permissions/index.html.erb, which should now become this:<br />
Permissions for <br />
Next, there’s one in the application layout at app/views/layouts/application.html.erb:<br />
Signed in as <br />
This needs to become simply<br />
Signed in as <br />
By placing an object like this in the view, the to_s method will be called on it automatically,<br />
which is of course the to_s method in the User model.<br />
Finally, you’ll need to update the app/views/tickets/show.html.erb page in the<br />
same manner, changing this<br />
<br />
to this:<br />
<br />
That’s it! That’s all the occurrences of calls to the email attribute in places where it’s<br />
shown to users has been changed to display_name instead. So does this mean that<br />
your feature will now run? Find out with a quick run of bin/cucumber features/<br />
twitter_auth.feature:<br />
1 scenario (1 passed)<br />
5 steps (5 passed)<br />
All green, all good. Now users are able to sign up and sign in by clicking the Twitter<br />
icon in your application rather than providing you with their email and password. The<br />
first time a user clicks this icon, they’ll be redirected off to Twitter, which will ask them<br />
to authorize your application to access their data. If they choose Allow, they will be<br />
redirected back to your application. With the parameters sent back from the final<br />
request, you’ll attempt to find a User record matching their Twitter ID or, if there isn’t<br />
one, create one instead. Then you’ll sign them in.<br />
After that, when the user attempts to sign in using the Twitter icon, they’ll still be<br />
redirected back to Twitter, but this time Twitter won’t ask them for authorization<br />
again. Instead, Twitter will instantly redirect them back to your application; the whole<br />
process will seem pretty smooth, albeit with the delay that can normally be expected<br />
from doing two HTTP requests.<br />
Go ahead, try launching rails server now and accessing the application at<br />
http://localhost:3000 by clicking the small Twitter icon on the sign-in page. You’ll be
GitHub authentication<br />
redirected off to Twitter, which deals with the authentication process before sending<br />
you back to the application.<br />
Did you break anything? Let’s see by running rake cucumber:ok spec:<br />
63 scenarios (63 passed)<br />
737 steps (737 passed)<br />
# and<br />
72 examples, 0 failures, 19 pending<br />
Nope, it seems like everything is functioning correctly. Let’s make a commit:<br />
git add .<br />
git commit -m "Added OmniAuth-driven support for signing in with Twitter"<br />
With the work you’ve done in this section, users will now be able to easily sign into<br />
your application using Twitter. You can see this for yourself by starting a server using<br />
rails s and clicking the Twitter icon if you’ve got a Twitter account.<br />
If your users don’t have a Twitter account, then their only other choice at the<br />
moment is to provide you with their email address and a password, and that’s not<br />
really useful to anyone who has a GitHub but not a Twitter account. So let’s see how<br />
you can authenticate people using GitHub’s OAuth next, while recycling some of the<br />
Twitter-centric code in the process.<br />
15.3 GitHub authentication<br />
We’ve shown how you can let people authenticate using Twitter’s OAuth. GitHub also<br />
provides this service, and the OmniAuth gem you’re using can be used to connect to<br />
that too, in much the same way as you did with Twitter. Rather than re-doing everything<br />
that you did in the previous section again and changing occurrences of “twitter”<br />
to “github,” you’ll be seeing how you can make the code that<br />
you’ve written so far support both Twitter and GitHub in a<br />
clean fashion. When you’re done, you’re going to have a little<br />
GitHub icon next to your Twitter one so that people can<br />
use GitHub, Twitter, or email to sign in, making your sign in<br />
/sign up area look like figure 15.6.<br />
As was the case with Twitter, your first step will be regis- Figure 15.6 GitHub login<br />
tering an application with GitHub.<br />
15.3.1 Registering and testing GitHub auth<br />
To register an application with GitHub, you must first be signed in. Then you can visit<br />
https://github.com/account/applications/new and fill in the form that it provides.<br />
After that, you’ll need to copy the Client ID and Client Secret values and put them in<br />
your config/initializers/devise.rb file under your Twitter details, like this:<br />
config.omniauth :github, "[Client ID]", "[Client Secret]"<br />
With GitHub now set up in your application, you can write the feature to ensure that<br />
its authentication is working. To begin testing your application’s ability to<br />
425
426 CHAPTER 15 Alternative authentication<br />
authenticate users from GitHub, you’re going to write a new feature at features/<br />
github_auth.feature and fill it with the content from the following listing.<br />
Listing 15.7 features/github_auth.feature<br />
Feature: GitHub auth<br />
In order to sign in using GitHub<br />
As a GitHub user<br />
I want to click an icon and be signed in<br />
Background:<br />
Given I have mocked a successful GitHub response<br />
Scenario: Signing in with GitHub<br />
Given I am on the homepage<br />
And I follow "sign_in_with_github"<br />
Then I should see "Signed in with Github successfully."<br />
Then I should see "Signed in as A GitHubber"<br />
Although it may look like all you’ve done here is replace all the references to Twitter<br />
with GitHub... actually, that’s precisely what you’ve done! This is because there should<br />
be little difference in how the user interacts with your site to sign in with Twitter or<br />
GitHub. The differences should only be behind the scenes, as this is how a user would<br />
expect an application to behave. 4<br />
When you run this new feature with bin/cucumber features/github_auth<br />
.feature, you’ll see that you’ve got an undefined step:<br />
Given /^I have mocked a successful GitHub response$/ do<br />
pending # express the regexp above with the code you wish you had<br />
end<br />
Define this step in features/step_definitions/oauth_steps.rb underneath the one for<br />
Twitter. It goes like this:<br />
Given /^I have mocked a successful GitHub response$/ do<br />
OmniAuth.config.mock_auth[:github] = {<br />
"extra" => {<br />
"user_hash" => {<br />
"id" => '12345',<br />
"email" => 'githubber@example.com',<br />
"login" => "githubber",<br />
"name" => "A GitHubber"<br />
}<br />
}<br />
}<br />
end<br />
GitHub returns a similar hash to that of Twitter, containing an extra key with a<br />
user_hash key nested inside. Within this nested hash you’ve got the three parameters<br />
that you’ll be storing on your end: the id, the login, and a name.<br />
4 Also known as Principle of least surprise (POLS) or more colloquially, “keep it simple, stupid!” (KISS).
GitHub authentication<br />
When you run your feature again, you’ll be through this undefined step and now<br />
up to the next failing step:<br />
And I follow "sign_in_with_github"<br />
no link with title, id or text 'sign_in_with_github' found<br />
This means that your sign_in_with_github link doesn’t exist yet, so you’re going to<br />
need to create it like you did with your sign_in_with_twitter link. You could do this<br />
by copying and pasting the Twitter link code underneath itself in app/views/layouts/<br />
application.html.erb, ending up with something like this:<br />
Or use "sign_in_with_twitter" %><br />
"sign_in_with_github" %><br />
This code in your application layout is going to get ugly as you add providers, and it’s<br />
quite a lot of duplication! What would be more sensible is moving this code into a<br />
helper method in a new file such as app/helpers/oauth_helper.rb, defining it as shown<br />
in the following listing.<br />
Listing 15.8 app/helpers/oauth_helper.rb<br />
module OauthHelper<br />
def auth_provider(name)<br />
link_to image_tag("icons/#{name}_32.png"),<br />
user_omniauth_authorize_path(name),<br />
:id => "sign_in_with_#{name}"<br />
end<br />
end<br />
Then in place of the ugly code in your application layout, you’d put this instead:<br />
Or use <br />
How’s that for simplicity? Well, you could make it even cleaner by accepting any number<br />
of arguments to your method, by turning it into this:<br />
def auth_providers(*names)<br />
names.each do |name|<br />
concat(link_to(image_tag("icons/#{name}_32.png"),<br />
user_omniauth_authorize_path(name),<br />
:id => "sign_in_with_#{name}"))<br />
end<br />
nil<br />
end<br />
This helper uses the concat method to output the links to your view. If you didn’t use<br />
this, it wouldn’t render them at all. You could then write this in your application layout:<br />
Or use <br />
427
428 CHAPTER 15 Alternative authentication<br />
Now isn’t that way nicer? If at any time you want to add or remove one of the links, you<br />
only have to add or remove arguments to this method.<br />
When you run this feature again with bin/cucumber features/github_auth<br />
.feature, you’ll see that you’re on to the next error:<br />
The action 'github' could not be found for Users::OmniauthCallbacksController<br />
As you did with Twitter, you’re going to need to define a github action in the<br />
Users::OmniauthCallbacksController. This action will find or create a user based<br />
on the details sent back from GitHub, using a class method you’ll define after in your<br />
User model. Sound familiar? You can duplicate the twitter action in this controller<br />
and create a new github action from it like this:<br />
def github<br />
@user = User.find_or_create_for_github(env["omniauth.auth"])<br />
flash[:notice] = "Signed in with GitHub successfully."<br />
sign_in_and_redirect @user, :event => :authentication<br />
end<br />
But like the provider links in your application layout, this is not very clean and gets<br />
exceptionally more complex the more providers you have. Rather than doing it this<br />
way, you’ll define a class method for your controller that will dynamically define these<br />
methods for you. Define this method in app/controllers/users/omniauth_callbacks<br />
_controller.rb by using the code from the following listing.<br />
Listing 15.9 app/controllers/users/omniauth_callbacks_controller.rb<br />
def self.provides_callback_for(*providers)<br />
providers.each do |provider|<br />
class_eval %Q{<br />
B Evaluate code<br />
def #{provider}<br />
@user = User.find_or_create_for_#{provider}(env["omniauth.auth"])<br />
flash[:notice] = "Signed in with #{provider.to_s.titleize}<br />
➥successfully."<br />
sign_in_and_redirect @user, :event => :authentication<br />
end<br />
}<br />
end<br />
end<br />
As with your auth_providers method in OauthHelper, you can call this method in<br />
your controller (after removing the twitter and github methods already in it):<br />
provides_callback_for :twitter, :github<br />
The provides_callback_for method will iterate through each of the arguments<br />
passed in, defining a new method dynamically using class_eval B, which will evaluate<br />
the code you pass in within the context of the current class. The %Q{} encapsulation<br />
will provide a String object that you can put double quotes and single quotes in<br />
without having to escape them.
GitHub authentication<br />
You then need to replace any occurrences that you previously had of either “twitter”<br />
or “github” with the provider variable from the current iteration, using interpolation<br />
to put it into the quoted string. The provides_callback_for method will then<br />
define a new action in your controller for the specified providers. This has greatly<br />
decreased the repetition in your controller’s code, at the expense of a small easy-tounderstand<br />
bit of class_eval “magic.”<br />
When you run your feature again with bin/cucumber features/github.feature,<br />
you’ll see that it’s now hitting your new github action, because it can’t find a method<br />
that you use in it:<br />
undefined method `find_or_create_for_github' for ...<br />
(eval):3:in `github'<br />
In this error output you’re seeing that Rails is unable to find a find_or_create<br />
_for_github method on a class, which is the User class. You created one of these for<br />
Twitter, and unlike the provider links and the callback actions, you’re not able to easily<br />
create a bit of smart code for your model. But you can separate out the concerns of<br />
the model into separate files, which would make it easier to manage. Rather than filling<br />
your User model with methods for each of your providers, you’ll separate this<br />
code out into another module and then extend your class with it.<br />
You can do this by creating a new directory at app/models/user and placing a file<br />
called app/models/user/omniauth_callbacks.rb inside it. You should put the content<br />
from the following listing inside this file.<br />
Listing 15.10 app/models/user/omniauth_callbacks.rb<br />
class User < ActiveRecord::Base<br />
module OmniauthCallbacks<br />
def find_or_create_for_twitter(response)<br />
data = response['extra']['user_hash']<br />
if user = User.find_by_twitter_id(data["id"])<br />
user<br />
else # Create a user with a stub password.<br />
user = User.new(:email => "twitter+#{data["id"]}@example.com",<br />
:password => Devise.friendly_token[0,20])<br />
user.twitter_id = data["id"]<br />
user.twitter_screen_name = data["screen_name"]<br />
user.twitter_display_name = data["display_name"]<br />
user.confirm!<br />
user<br />
end<br />
end<br />
end<br />
end<br />
In this file you define an OmniauthCallbacks module inside your User class. Inside<br />
this module, you’ve put the find_or_create_for_twitter method straight from your<br />
User model, except you’ve removed the self prefix to the method name. You can<br />
429
430 CHAPTER 15 Alternative authentication<br />
now go ahead and remove this method from the User model, making it temporarily<br />
unavailable.<br />
By separating out the concerns of your model into separate modules, you can<br />
decrease the size of the individual model file and compartmentalize the different concerns<br />
of a model when it becomes complicated, like your User model has.<br />
To make this method once again available, you need to extend your model with<br />
this module. You can do this by making the first two lines of your model into<br />
class User < ActiveRecord::Base<br />
extend OmniauthCallbacks<br />
The extend method here will make the methods available for the module on the class<br />
itself as class methods.<br />
TIP It’s generally a good idea to put any extend or include calls at the<br />
beginning of a class definition so that anybody else reading it will know if<br />
the class has been modified in any way. If an extend is buried deep within<br />
a model, then it can be difficult to track down where its methods are coming<br />
from.<br />
By adopting a convention of putting things that can potentially seriously<br />
modify your class at the top of the class definition, you’re giving a<br />
clear signal to anyone (including your future self who may have forgotten<br />
this code upon revisiting) that there’s more code for this model in other<br />
places.<br />
You can now define your find_or_create_by_github method in the User::Omniauth-<br />
Callbacks module by using the code from the following listing.<br />
Listing 15.11 app/models/user/omniauth_callbacks.rb<br />
def find_or_create_for_github(response)<br />
data = response['extra']['user_hash']<br />
if user = User.find_by_github_id(data["id"])<br />
user<br />
else # Create a user with a stub password.<br />
user = User.new(:email => data["email"],<br />
:password => Devise.friendly_token[0,20])<br />
user.github_id = data["id"]<br />
user.github_user_name = data["login"]<br />
user.github_display_name = data["name"]<br />
user.confirm!<br />
user<br />
end<br />
end<br />
B Create user<br />
You’re lucky this time around, as the form of the data you get back from GitHub isn’t<br />
too different to Twitter, coming back in the response['extra']['user_hash'] key. In<br />
the case of other providers, you may not be so lucky. The form of the data sent back is<br />
not standardized, and so providers will choose however they like to send back the data.
GitHub authentication<br />
Included in the data you get back from GitHub is the user’s email address, which<br />
you can use B to create the new user, unlike with the find_or_create_for_twitter<br />
method where you had to generate a fake email. The added bonus of this is that if a<br />
user wishes to sign in using either GitHub or their email, they would be able to do so<br />
after resetting their password.<br />
The final lines of this method should be familiar; you’re setting the github_id,<br />
github_user_name and github_display_name fields to store some of the important<br />
data sent back from GitHub. You’re able to re-sign-in people who visit a second time<br />
from GitHub based on the github_id field you save. Finally, you confirm the user so<br />
that you’re able to sign in as them.<br />
With the find_or_create_for_github method defined, has your feature progressed?<br />
Find out with a run of bin/cucumber features/github_auth.feature:<br />
And I follow "sign_in_with_github"<br />
undefined method `find_by_github_id' for ...<br />
Ah, it would appear that you’re not quite done! You need to define the github fields<br />
in your users table so that your newly added method can reference them. Go ahead<br />
and create a migration to do this now by running this command:<br />
rails g migration add_github_fields_to_users<br />
You can then alter this migration to add the fields you need by using the code from<br />
the following listing.<br />
Listing 15.12 db/migrate/[timestamp]_add_github_fields_to_users.rb<br />
class AddGithubFieldsToUsers < ActiveRecord::Migration<br />
def change<br />
add_column :users, :github_id, :integer<br />
add_column :users, :github_user_name, :string<br />
add_column :users, :github_display_name, :string<br />
end<br />
end<br />
Alright, you can now run this migration using rake db:migrate and rake<br />
db:test:prepare to add these fields to your users table. Now you can run your feature<br />
again with bin/cucumber features/github_auth.feature to see this output:<br />
Scenario: Signing in with GitHub<br />
Given I am on the homepage<br />
And I follow "sign_in_with_github"<br />
Then I should see "Signed in with Github successfully."<br />
Then I should see "Signed in as A GitHubber (githubber)"<br />
expected there to be content "Signed in as A Githubber"<br />
The third step of your scenario is now passing, but the fourth is failing because you’re<br />
not displaying the GitHub-provided name as the “Sign in as …” line in your application.<br />
You can easily rectify this by changing the display_name method in app/<br />
431
432 CHAPTER 15 Alternative authentication<br />
models/user.rb to detect if the github_id field is set like it does already with the<br />
twitter_id field.<br />
Underneath the display name output for the if twitter_id case in app/models/<br />
user.rb, add these two lines:<br />
elsif github_id<br />
"#{github_display_name} (#{github_user_name})"<br />
The entire method is transformed into this:<br />
def display_name<br />
if twitter_id<br />
"#{twitter_display_name} (@#{twitter_screen_name})"<br />
elsif github_id<br />
"#{github_display_name} (#{github_user_name})"<br />
else<br />
email<br />
end<br />
end<br />
When you run bin/cucumber features/github_auth.feature again, you should see<br />
that it’s all passing:<br />
1 scenario (1 passed)<br />
5 steps (5 passed)<br />
Now users are able to use GitHub to sign in to your site, as well as Twitter or their<br />
email address if they please. Make a commit for the changes that you’ve done, but first<br />
make sure everything’s running with a quick run of rake cucumber:ok spec:<br />
64 scenarios (64 passed)<br />
746 steps (746 passed)<br />
# and<br />
56 examples, 0 failures<br />
All systems green! Time to commit:<br />
git add .<br />
git commit -m "Add GitHub authentication support"<br />
git push<br />
You’ve seen how you can support another authentication provider, GitHub, along with<br />
supporting Twitter and email-based authentication too. To add another provider<br />
you’d only need to follow these six easy steps:<br />
1 Create a new client on the provider’s website, which differs from provider to<br />
provider.<br />
2 Add the new client’s information to config/initializers/devise.rb as a new<br />
provider.<br />
3 Write a test for your new provider to make sure that people can always use it to<br />
sign in.
Summary<br />
4 Add the provider icon to your listed providers in app/views/layouts/application<br />
.html.erb by passing another argument to the auth_providers helper method<br />
that you defined in OauthHelper.<br />
5 Add a callback to the Users::OmniauthCallbacksController by using the<br />
provides method. Again, passing another argument to this method is all you<br />
need.<br />
6 Define the find_or_create_for_[provider] method in the User::Omniauth-<br />
Callbacks module.<br />
Due to the flexibility offered by Devise and OmniAuth, there’s no provider-specific<br />
configuration you need to do: it all works beautifully. For a full list of providers, check<br />
out the omniauth project on GitHub: https://github.com/intridea/omniauth.<br />
See for yourself if GitHub’s authentication is working by launching rails server<br />
again and going to http://localhost:3000 and clicking the GitHub icon.<br />
15.4 Summary<br />
In this chapter you’ve seen how easy it is to implement authentication using two<br />
OAuth providers: Twitter and GitHub. You did this using the OmniAuth integration,<br />
which is available in Devise versions after 1.2.<br />
For the Twitter section, you implemented the complete flow in a very simple manner<br />
using the features given to you by Devise, such as the routing helper, which initially<br />
sends a request off to the provider. Before OmniAuth came along, this process<br />
was incredibly tedious. It’s truly amazing what OmniAuth offers you in terms of integrating<br />
with these providers.<br />
When you got to the GitHub section, rather than copying and pasting the code<br />
you created for Twitter, you saw how you could reduce repetition in your code by<br />
using methods that iterate through a list of providers to display the icons or to provide<br />
callbacks.<br />
Now that you’ve got multiple ways to allow people to sign in to your application,<br />
the barrier of entry is lowered because people can choose to sign in with a single click<br />
(after they’ve authorized the application on the relevant provider), rather than filling<br />
in the sign-in form each time. You’ve also got a great framework in place if you want to<br />
add any more providers.<br />
Your application is at a pretty good state now, but you’ve not yet made sure that it<br />
can perform as efficiently as possible. If thousands of users flock to your application,<br />
how can you code it in such a way as to reduce the impact on your servers? In the next<br />
chapter, we look at how you can implement some basic performance enhancements<br />
to make your application serve requests faster, or even create a way by which a request<br />
skips the application altogether.<br />
433
This chapter covers<br />
� Implementing pagination for resources with the<br />
Kaminari gem<br />
� Improving database query speeds with Active Record<br />
features<br />
� Caching pages and fragments of pages<br />
� Using the Delayed Job gem with background workers<br />
Basic performance<br />
enhancements<br />
When an application is written, it may be done in such a way that it will not perform<br />
ideally. A common situation is that an application with a small database will perform<br />
quickly because there is less data to retrieve, but starts to slow as the database<br />
grows larger. This problem can be fixed in many different ways.<br />
The first way is to limit the amount of data retrieved in any one call to a fixed<br />
limit, a process known as pagination. At the moment, for example, you’re not limiting<br />
the number of tickets shown in the show action of the ProjectsController. The<br />
more tickets that get added to a project, the slower the page that shows this data is<br />
going to perform because it will have to retrieve more data from the database and<br />
render it out to the page. By breaking the data down into a set of pages, you can<br />
434
Pagination<br />
show 50 tickets per page. This will lessen the load on your database, but not completely<br />
eliminate it. That would only be possible if you were to run no queries at all. You could<br />
do exactly that if you cached the output of the page, or even just the part of the page<br />
that showed the list of tickets.<br />
The first process involves saving a copy of the page in the public directory, which<br />
would then be used to serve this page. Any action on tickets, such as creating one,<br />
adding a comment, or changing a state would then wipe this cache and start afresh.<br />
The second process is slightly different. Rather than storing the fragment as a file<br />
on the system, you will store it in memory and then access it through a key.<br />
Finally, by adding indexes to key columns in your tables, such as foreign keys, you<br />
can greatly speed up the queries it runs too. If you had 10,000 tickets in your system<br />
and you wanted to find all the tickets which had project_id set to 123, an index<br />
would help speed up this process.<br />
We’ll show you examples of all of these approaches in this chapter, beginning with<br />
pagination.<br />
16.1 Pagination<br />
We’ll discuss two different kinds of pagination here. The first kind paginates the interface<br />
that users can see, as shown in figure 16.1.<br />
If this project had a thousand tickets, it wouldn’t make sense to show all 1,000 at a<br />
time. It would also be terribly slow, because the database would have to retrieve 1,000<br />
records. Rails would then have to instantiate 1,000 Ticket objects, render 1,000 tickets<br />
to the page, and send back that massive chunk of HTML.<br />
The second kind of pagination has to do with your API. Back in chapter 13 you<br />
wrote the beginnings of the ticket API, and we promised you we’d revisit it in this<br />
chapter. Inside the Api::V1::TicketsController’s index action you have this<br />
innocuous-looking line:<br />
respond_with(@project.tickets)<br />
Again, if the database’s tickets table contains 1,000 records for this project, it will<br />
have to send all of them to Rails. Rails will then have to instantiate 1,000 objects, parsing<br />
them all to JSON or XML before sending them off<br />
to the user. All of this would happen with each<br />
request, and if you were getting a lot of requests it<br />
would bring your application to its knees.<br />
By paginating the result sets in both of these situations,<br />
you can change your application to return<br />
only 50 tickets at a time, which would theoretically<br />
make your application respond 20 times faster than<br />
if it were returning 1,000 tickets. Let’s begin by<br />
installing a gem called Kaminari that will help you<br />
with pagination. Figure 16.1 Tickets for a project<br />
435
436 CHAPTER 16 Basic performance enhancements<br />
16.1.1 Introducing Kaminari<br />
The Kaminari gem 1 is a new breed of pagination gem written by Akira Matsuda, and is<br />
considered the Rails 3 successor to the will_paginate gem, 2 which was the favorite<br />
for a long time. 3<br />
After you install this gem, you’re given an interface on the models of your application,<br />
which allows you to make calls like this:<br />
@project.tickets.page(2).per(50)<br />
This call would ask for the second page of tickets, with each page containing 50 tickets.<br />
It’s a very clean API. Those familiar with will_paginate will be used to a syntax like this:<br />
@project.tickets.paginate(:per_page => 50, :page => 2)<br />
The syntax is a little longer, but it’s a little clearer what it’s doing to those who are<br />
familiar with it. You’ll use Kaminari here just for something different. In your views,<br />
you can use the same paginate method, which is made available by both gems:<br />
<br />
This little helper generates the output shown in figure 16.2.<br />
To install this gem, add this line to your Gemfile underneath the searcher gem:<br />
gem 'kaminari'<br />
You’ll then run the bundle install command to install the gem. With the gem<br />
installed, you can now begin to write a Cucumber feature to test that when you’re on<br />
Figure 16.2 Pagination helper<br />
1 http://github.com/amatsuda/kaminari.<br />
2 http://github.com/mislav/will_paginate.<br />
3 Since this original writing, will_paginate has been updated to be Rails 3 compatible.
Pagination<br />
the tickets page with more than 50 tickets in the system, you will see a pagination link<br />
somewhere on that page. You should be able to click Next and then see the next 50<br />
tickets.<br />
16.1.2 Paginating an interface<br />
You’re going to now implement paging for your tickets listing, showing 50 tickets at a<br />
time. Users will be able to navigate between pages by clicking the Next and Prev links.<br />
These two links will be provided by a helper from the kaminari gem.<br />
TESTING PAGINATION<br />
To test this, you’ll write a new scenario at features/paginating_tickets.feature, shown in<br />
the following listing. If you create 100 tickets in this feature, you’ll see the pagination<br />
links and can then make sure they’re working.<br />
Listing 16.1 features/paginating_tickets.feature<br />
Feature: Paginating tickets<br />
In order to ease the load on the server<br />
As the system<br />
I want paginate ticket results<br />
Background:<br />
Given there is a project called "Internet Explorer"<br />
Given there are the following users:<br />
| email | password |<br />
| user@ticketee.com | password |<br />
And "user@ticketee.com" can view the "Internet Explorer" project<br />
And I am signed in as them<br />
And there are 100 tickets for this project B Create tickets<br />
When I am on the homepage<br />
And I follow "Internet Explorer"<br />
Scenario: Viewing the second page<br />
Then I should see 2 pages of pagination<br />
When I follow "Next" within ".pagination .next"<br />
Then I see page 2 of tickets for this project<br />
In this feature you use the “Given there is a project” step you’ve used many times<br />
before to create a project, and then a new step B, which will create a given number of<br />
tickets for the project. This is required so that the pagination links will appear on your<br />
tickets. If you didn’t have enough tickets in your project to warrant pagination, then<br />
the links would not appear at all.<br />
You then go through the motions of creating a user, giving them access to that<br />
project so that they can see into it, signing in as them, and then navigating to that<br />
project. On that project’s page you should see the pagination links displaying two<br />
pages’ worth of pagination. When you click the Next link within the pagination element,<br />
you should be on the second page.<br />
You’ve got three undefined steps within this feature, and you can get the step definitions<br />
for these steps by running this feature using the bin/cucumber features/<br />
paginating_tickets.feature:<br />
437
438 CHAPTER 16 Basic performance enhancements<br />
Given /^there are (\d+) tickets for this project$/ do |arg1|<br />
pending # express the regexp above with the code you wish you had<br />
end<br />
Then /^I should see (\d+) pages of pagination$/ do |arg1|<br />
pending # express the regexp above with the code you wish you had<br />
end<br />
Then /^I see page (\d+) of tickets for this project$/ do<br />
pending # express the regexp above with the code you wish you had<br />
end<br />
The first step definition here has to do with tickets, and so you’ll put it in features/<br />
step_definitions/ticket_steps.rb using the code shown in the following listing.<br />
Listing 16.2 features/step_definitions/ticket_steps.rb<br />
Given /^there are (\d+) tickets for this project$/ do |number|<br />
number.to_i.times do |i|<br />
@project.tickets.create!(:title => "Test",<br />
:description => "Placeholder ticket.",<br />
:user => @user)<br />
end<br />
end<br />
This small piece of code will create as many tickets as you’ve specified for the<br />
@project object set up by the “Given there is a project” step, using the @user variable<br />
set up by the “Given there are the following users” step. It’s not important what the<br />
title and description attributes are for these tickets, just that you have enough of them<br />
to trigger the pagination links to appear.<br />
The next two undefined steps can go into a new file called features/step<br />
_definitions/pagination_steps.rb, as they’re about the pagination more than any other<br />
resource in your application.<br />
The Kaminari paginate method you’ll use in your view shortly will output a nav<br />
element with the class of pagination. Inside this nav element there are a couple of<br />
other elements. The first is a span element with the class of prev, which would contain<br />
a Previous button if you’re a page or two in with pagination. After that, there are a<br />
couple more span elements, all with the class of page. The span tag representing the<br />
current page has an additional class name of current, which we’ll discuss a little later.<br />
You can count these span.page elements easily, using the css method to find them<br />
using a CSS selector and then using count on what that returns to count the number<br />
of pages shown in pagination.<br />
By gathering up these page elements and counting them, you easily assert that<br />
there’s pagination on this page. You can define the next step like this in features/<br />
step_definitions/pagination_steps.rb:<br />
Then /^I should see (\d+) pages of pagination$/ do |number|<br />
pages = all(".pagination .page")<br />
pages.count.should eql(number.to_i)<br />
end
Pagination<br />
Here you use Capybara’s all method, which will find all the elements matching the<br />
CSS selector specified and return them as an Array object. Then it’s a simple matter of<br />
calling count on that Array and making sure it contains as many as you say it should.<br />
You final undefined step asserts that you’re on a specific page of the pagination.<br />
Write this step like this:<br />
Then /^I see page (\d+) of tickets for this project$/ do |number|<br />
current_page = find(".pagination .current").text.strip<br />
current_page.should eql(number)<br />
end<br />
You use the find method rather than the all method because there is only going to<br />
be one current page element. This method will only return a single element, which<br />
matches the specified CSS selector. Calling text on this element will return the number<br />
inside it, and you can strip it (as it contains spaces) and then compare that to the<br />
number passed in for your step. If the two numbers are equal, then this step will pass.<br />
With the last of your undefined steps now actually defined, let’s see what happens<br />
when you run bin/cucumber features/pagination.feature:<br />
Then I should see 2 pages of pagination<br />
expected 2<br />
got 0<br />
IMPLEMENTING PAGINATION HELPERS<br />
Your step that checks for two pages of pagination wasn’t able to see any at all, most<br />
likely because you aren’t showing any right now! To fix this, you’ll have to display the<br />
pagination link in app/views/projects/show.html.erb by putting this line above the ul<br />
that displays tickets:<br />
<br />
This line will display the pagination links that your failing step currently requires.<br />
You’re going to need to set up the @tickets variable for pagination in your controller<br />
so that these pagination links know what page you’re on and that there are only 50<br />
tickets displayed. You’ll replace this line in the show action of app/controllers/<br />
projects_controller.rb<br />
@tickets = @project.tickets<br />
with this line:<br />
@tickets = @project.tickets.page(params[:page]).per(50)<br />
This page method will set @tickets to display only the tickets for the current page<br />
number, available in the params[:page] variable. The per method after it will retrieve<br />
50 ticket objects rather than Kaminari’s default 25. Your tickets don’t take up much<br />
room on your page so you can bump this up.<br />
When you run your feature again with bin/cucumber features/paginating<br />
_tickets.feature, it will pass because you’ve now got your pagination links showing:<br />
439
440 CHAPTER 16 Basic performance enhancements<br />
1 scenario (1 passed)<br />
10 steps (10 passed)<br />
That’s all there is to paginating a resource. You can also call the page and per methods<br />
on models themselves rather than associations; it was just in this case that you<br />
were calling it on an association.<br />
Before you make a commit for this change, quickly make sure that everything’s<br />
working by running rake cucumber:ok spec:<br />
Failing Scenarios:<br />
cucumber features/searching.feature:23<br />
cucumber features/searching.feature:29<br />
cucumber features/searching.feature:35<br />
62 scenarios (3 failed, 59 passed)<br />
736 steps (3 failed, 6 skipped, 727 passed)<br />
Oh dear, it appears the feature in features/searching.feature has been broken by your<br />
changes! Good thing that you’ve got a feature to catch these kinds of things.<br />
FIXING BROKEN SCENARIOS<br />
All three scenarios in this feature failed with the same error:<br />
undefined method 'current_page' for ...<br />
This looks to be associated with the feature you just implemented, as it’s trying to call<br />
a method called current_page. If you look a couple of lines down in the output, you’ll<br />
see that there’s a line in the stack trace that shows that this is from Kaminari:<br />
...kaminari/helpers/action_view_extension.rb:21:in 'paginate'<br />
Okay, so it looks to be a problem coming from Kaminari, but why? Well, if you look<br />
even further down in the stacktrace for this error somewhere in your application,<br />
probably from the app folder, you’ll come across this line:<br />
./app/controllers/tickets_controller.rb:60:in 'search'<br />
What’s so great about this line? Well, this line renders the projects/show view:<br />
render "projects/show"<br />
Above that, however, is the real culprit:<br />
@tickets = @project.tickets.search(params[:search])<br />
You’re not calling either page or per on your search results, and so it’s not going to be<br />
paginating them. You’re going to call the same methods you called back in the<br />
ProjectsController’s show action here so that you get paginated search results:<br />
@tickets = @project.tickets.search(params[:search])<br />
@tickets = @tickets.page(params[:page]).per(50)<br />
With paginated search results, the feature in features/searching.feature will no longer<br />
complain when you run it with bin/cucumber features/searching.feature:<br />
3 scenarios (3 passed)<br />
39 steps (39 passed)
Pagination<br />
Alright, so that one’s passing. Let’s see what happens when you run rake cucumber:ok<br />
spec again:<br />
66 scenarios (66 passed)<br />
756 steps (756 passed)<br />
# and<br />
72 examples, 0 failures, 19 pending<br />
All areas where you need pagination are working. You’ve called the per method twice,<br />
once in the show action of the ProjectsController and again in the search method<br />
of TicketsController. If you wish to change the number of elements returned for a<br />
list of tickets, you’d need to change both of these locations. Instead, you’ll move the<br />
setting for the number of ticket objects returned on each page into the model.<br />
CLEANING UP AFTER YOURSELF<br />
Let’s take the per(50) call out of this line in the show action of ProjectsController<br />
@tickets = @project.tickets.page(params[:page]).per(50)<br />
turning it into this:<br />
@tickets = @project.tickets.page(params[:page])<br />
Next, you’ll do the same thing for the line that uses per in the search action of the<br />
TicketsController<br />
@tickets = @tickets.page(params[:page]).per(50)<br />
changing it into this:<br />
@tickets = @tickets.page(params[:page])<br />
To make 50 objects the default for this model, you can put this line directly under the<br />
searcher block in your Ticket model:<br />
paginates_per 50<br />
Now when your application is asked for a list of paginated tickets, you’ll be given 50<br />
tickets per page. You can make sure this is the case by rerunning your “Paginating tickets”<br />
feature by running bin/cucumber features/paginating_tickets.feature:<br />
1 scenario (1 passed)<br />
10 steps (10 passed)<br />
Alright, that’s still working, so that’s good! Are your features and specs still working<br />
too? Another quick run of rake cucumber:ok spec will tell you:<br />
66 scenarios (66 passed)<br />
752 steps (752 passed)<br />
# and<br />
72 examples, 0 failures, 19 pending<br />
Great, time to make a commit with this new feature:<br />
git add .<br />
git commit -m "Added pagination for tickets"<br />
git push<br />
441
442 CHAPTER 16 Basic performance enhancements<br />
SEEING PAGINATION FOR YOURSELF<br />
Here you’ve seen an easy way to add pagination links to resources in your application<br />
by using the Kaminari gem. You could have used the will_paginate gem and that<br />
would have worked just as easily. It’s really up to personal preference. Pagination<br />
allows you to ease the load on the database server by returning only limited amounts<br />
of records per page, and also doesn’t overwhelm the user with choices.<br />
Let’s see how this works in a browser before you continue. First, you’ll need to create<br />
100 tickets for a project so that you can get two pages of pagination. To do that,<br />
launch rails console and put in this code:<br />
project = Project.first<br />
100.times do |i|<br />
project.tickets.create!(<br />
:title => "Fake ticket",<br />
:description => "Fake description",<br />
:user => User.first<br />
)<br />
end<br />
Next, type exit and press Enter to exit out of the console, and then launch your application<br />
with rails server. You can log in using the email and password you’ve set up<br />
in db/seeds.rb, which are admin@ticketee.com and password, respectively. You can<br />
then click the Ticketee Beta page and you should see a page like figure 16.3.<br />
The pagination here shows that you’re on the first page and that there’s a second<br />
page you can go to, by clicking either the 2 link or the Next link. By clicking this link,<br />
the page switches to the second page of tickets and the URL now becomes http://localhost:3000/projects/1?page=2.<br />
This page parameter is passed to the controller as<br />
params[:page] and then passed to the page method provided by Kaminari.<br />
Figure 16.3 Paginated tickets
Pagination<br />
If you click the 1 link or the Prev link, you’ll be taken back to the first page. All of<br />
that functionality was given to you by the paginate method in your views and the page<br />
call in your controller. You didn’t have to code any of this yourself, which is great.<br />
Next, we’ll look at how you can add this same kind of pagination to the tickets API.<br />
16.1.3 Paginating an API<br />
You’ve easily set up pagination for your tickets on the interface that a user sees, to ease<br />
the load on the database. However, for your tickets API you’re still returning all the<br />
tickets for a project when they’re requested, and therefore you’ll run into the same<br />
problems you solved in the previous section.<br />
Your API is different though. You can’t provide a pagination link for the tickets<br />
returned by an API. Instead, you’ll have to rely on people passing in a page number,<br />
which you’ll then use to return that page of tickets.<br />
To test this, you’re going to go into your API spec file for tickets at spec/api/v2/<br />
tickets_spec.rb and add another test. This one should assert that when you pass in a<br />
page parameter to your requests, you receive that page of tickets, rather than all of the<br />
tickets or a different page.<br />
In your API you’ll limit requests to 50 per response, but you may choose to set this<br />
a little higher. 4 Therefore, you’ll create 100 tickets, which should give you enough<br />
tickets to test that you can get the first and second pages of your API.<br />
You’ll add another context to spec/api/v2/tickets_spec.rb to test pagination, using<br />
the code shown in the following listing.<br />
Listing 16.3 spec/api/v2/tickets_spec.rb<br />
context "pagination" do<br />
before do<br />
100.times do<br />
Factory(:ticket, :project => project, :user => @user)<br />
end<br />
end<br />
it "gets the first page" do<br />
get "/api/v2/projects/#{project.id}/tickets.json",<br />
:token => token,<br />
:page => 1<br />
last_response.body.should eql(project.tickets.page(1).per(50).to_json)<br />
end<br />
it "gets the second page" do<br />
get "/api/v2/projects/#{project.id}/tickets.json?page=2",<br />
:token => token,<br />
:page => 2<br />
last_response.body.should eql(project.tickets.page(2).per(50).to_json)<br />
end<br />
end<br />
4 200 seems to be a common number to use for API return objects per request.<br />
443
444 CHAPTER 16 Basic performance enhancements<br />
In this new context, you’ll create 100 tickets using the ticket factory, referencing the<br />
@user variable set up in the spec’s before block and also pointing it at the project<br />
object set up near the top of this file. Your first test makes sure that you’re getting<br />
back the first 50 tickets for the project, and the second test checks for the second 50.<br />
When you run this test using bin/rspec spec/api/v2/tickets_spec.rb:36, it<br />
won’t pass because you’ve not got the pagination in place yet:<br />
expected [small array of JSON'ified tickets]<br />
got [larger array of JSON'ified tickets]<br />
You can easily fix this by changing this line in the index action of app/controllers/api/<br />
v2/tickets_controller.rb<br />
respond_with(@project.tickets)<br />
to this:<br />
respond_with(@project.tickets.page(params[:page]))<br />
When you rerun the pagination context with bin/rspec spec/api/v2/tickets_spec<br />
.rb:35, both tests will pass:<br />
2 examples, 0 failures<br />
Now users can go to /api/v2/projects/:project_id/tickets.json to get the first<br />
page of 50 tickets, or specify the page parameter by putting it on the end of the URL as<br />
a query parameter (that is, /api/v2/projects/:project_id/tickets.json?page=2)<br />
to get to the second page of tickets.<br />
You can now run rake cucumber:ok spec to check for any breakage:<br />
62 scenarios (62 passed)<br />
736 steps (736 passed)<br />
# and<br />
66 examples, 0 failures, 12 pending<br />
By paginating the number of tickets shown both on the interface and in the API, you<br />
can ease the load on the server and provide a better interface to your users at the<br />
same time.<br />
Sometimes when you’re coding your application you may inadvertently call queries<br />
that aren’t that performant. This could happen in a view if you were wanting to display<br />
all tags for each ticket as you iterated through them. In the next section, we take<br />
a look at how you can cause this problem to happen and at two ways to fix it.<br />
16.2 Database query enhancements<br />
What would you do without database queries? Well, you’d have a boring application,<br />
that’s for sure! But it’s database queries that can be the biggest bottleneck for your<br />
application once it grows to a larger size. Having a page that—in the beginning—only<br />
ran 5 queries and is now running 100 on each request will just not be webscale.<br />
The most common place where performance degradation can occur in a Rails<br />
application is when an operation called N+1 selects takes place. Let’s use your application<br />
as an example of this. Imagine that you have 50 tickets and want to display them
Database query enhancements<br />
all on the same page, but also along with these tickets you wanted to display all the<br />
tags for these tickets. Before you render this page, you know all the tickets but don’t<br />
yet know what the tags are for the tickets. Therefore, you’d need to retrieve the tags as<br />
you are iterating over each of the tickets, generating another query to retrieve all the<br />
tags for each ticket.<br />
This is the N+1 selects problem. You have an initial query for all of your tickets,<br />
but then N queries more, depending on the amount of tickets you’re showing. This<br />
problem is not so much of a big deal now that you’ve got pagination, but it still can<br />
crop up.<br />
16.2.1 Eager loading<br />
In your app/views/projects/show.html.erb you can perform N+1 selects, asking for<br />
each ticket’s tags just like in the example, by putting this line within the block where<br />
you iterate over each ticket:<br />
<br />
When you start your server using rails server and navigate to your first project’s<br />
page, Rails will diligently run through each ticket in the @tickets array, performing a<br />
query for each one to find its tags. If you switch back over to the console, you’ll see<br />
queries like this:<br />
SELECT * FROM "tags"<br />
INNER JOIN "tags_tickets" ON "tags".id = "tags_tickets".tag_id<br />
WHERE ("tags_tickets".ticket_id = 1 )<br />
There should be 50 of these little queries, and 50 adds up to a big number 5 when it<br />
comes to lots of requests hitting this page and running these queries. Fifty requests to<br />
this page would result in over 2,500 queries. Oh, your poor database server! 6 It would<br />
be much better if you didn’t have to run so many queries.<br />
Thankfully, there’s yet another thing in Rails that helps us be better programmers<br />
and better friends with our databases. This wonderful invention is known as eager loading<br />
and will allow you to run two queries to get all the tickets and all the tags, rather<br />
than one query for the ticket and N queries for all the tags for all the tickets.<br />
There are two ways of doing this: you can use the joins or includes method when<br />
you attempt to grab all the tags for the tickets in app/controllers/projects<br />
_controller.rb. You’re currently grabbing and paginating all the tickets for the current<br />
project using this line in the show action in ProjectsController:<br />
@tickets = @project.tickets.page(params[:page])<br />
The @project.tickets part of this line generates a query, 7 but doesn’t eager-load the<br />
tags yet. To make it do this, you could use the joins method like this:<br />
@tickets = @project.tickets.joins(:tags).page(params[:page])<br />
5 When used in a function that uses squares, or even worse, cubes.<br />
6 Yes, they’re made for this kind of thing, but that’s not the point!<br />
7 But doesn’t run it! When it gets to the view and you call each on it, then it runs.<br />
445
446 CHAPTER 16 Basic performance enhancements<br />
This line would generate an SQL query like this:<br />
SELECT "tickets".* FROM "tickets"<br />
INNER JOIN "tags_tickets" ON "tags_tickets"."ticket_id" = "tickets"."id"<br />
INNER JOIN "tags" ON "tags"."id" = "tags_tickets"."tag_id"<br />
WHERE ("tickets".project_id = 1)<br />
The INNER JOIN parts of the query here mean that it will find all records in the<br />
tickets table that have tags only. It will also return a ticket record for every tag that it<br />
has, so if one ticket has three tags it will return three tickets. This is somewhat of a<br />
problem, given that you’re going to want to display all tickets regardless of if they are<br />
tagged or not, and you definitely don’t want three of them appearing when only one<br />
should.<br />
To fix this, use join’s brother includes, switching the line in the show action to<br />
this:<br />
@tickets = @project.tickets.includes(:tags).page(params[:page])<br />
When you refresh the page, Rails will generate two queries this time around:<br />
SELECT "tickets".* FROM "tickets"<br />
WHERE ("tickets".project_id = 1)<br />
LIMIT 50<br />
OFFSET 0<br />
SELECT "tags".*, t0.ticket_id as the_parent_record_id FROM "tags"<br />
INNER JOIN "tags_tickets" t0 ON "tags".id = t0.tag_id<br />
WHERE (t0.ticket_id IN (1,2,[...],49,50))<br />
Rails has run the query to find all the tickets first, then another query to gather all the<br />
tags for all the selected tickets as the second query. This query doesn’t care if tickets<br />
have tags or not, it will still fetch them.<br />
Here you’ve seen a way to cause an N+1 query and how to stop it from happening.<br />
You can remove the from app/views/projects/show.html.erb now,<br />
because you’re done with this experiment.<br />
This is just one way your database can be slow. Another is more insidious. It creeps<br />
in slowly over months of the application seemingly running fine and makes it progressively<br />
slower and slower. The problem is a lack of database indexes, and it affects many<br />
Rails applications even today.<br />
16.2.2 Database indexes<br />
Database indexes aren’t a Rails feature, they’re a feature of your own database that<br />
can greatly improve its performance when used correctly. The absence of database<br />
indexes may not seem like a problem immediately, but when you’re dealing with<br />
larger datasets it becomes more and more of a problem. Take for example if you had<br />
10,000 tickets with 2,300 of them belonging to Project A. To find all the tickets for<br />
Project A, your database sans indexes would have to do a full table scan, searching<br />
through each ticket and determining if it belonged to Project A or not. That’s a problem,<br />
because the more records you have, the longer this scan is going to take.
Database query enhancements<br />
Indexing the data in your databases allows you to perform fast lookups and avoid<br />
full table scans. Imagine that your database is a phonebook and that the names are in<br />
no particular order. In this situation, it would be difficult to find all people with a<br />
name such as John Smith-McGee, because you’d have to scan the entire phone book<br />
to find out who has this name.<br />
An index sorts this data into a logical order and allows for a much faster lookup.<br />
Ever seen how a phonebook that has the letter and the first name at upper left, and<br />
maybe the same or a different letter at upper right, with another name? That’s an<br />
index. That allows you to easily find names because you know that the letter A comes<br />
before B, and C after B, and so on.<br />
Indexes allow you to run much faster queries because you tell your database how<br />
to index the data. Although it may seem like premature optimization at this point,<br />
you’re going to put an index on your tickets table to speed up finding collections of<br />
tickets for a project. It’s common sense to have these from the beginning: adding<br />
them onto large datasets will take a long time, because you’ll need to work out how to<br />
index each record.<br />
To add this index, create a new migration with this command:<br />
rails g migration add_project_id_index_to_tickets<br />
This will generate a file at db/migrate that ends with the name you’ve given it. You’re<br />
going to need to open this file now and add in the index, because Rails cannot (yet)<br />
read your mind. You’ll add this index inside the self.up part of the migration using<br />
add_index and remove it in the self.down method using remove_index, like this:<br />
def change<br />
add_index :tickets, :project_id<br />
end<br />
Run this migration using rake db:migrate db:test:prepare to run it on the development<br />
and test environment databases. You’ll see this line in the output:<br />
-- add_index(:tickets, :project_id)<br />
-> 0.0015s<br />
Just to reinforce the message: it’s better to add the indexes when the database is first<br />
being designed rather than at a later point because this 0.0015 seconds could easily<br />
become whole seconds on a larger dataset. This index will now group your tickets into<br />
groups of project_id columns, allowing for much faster lookups to find what tickets<br />
belong to a specific project.<br />
You want the absolute best performance you can get out of your database because<br />
it’s a key point in your requests. Indexes and eager loading are the two most basic ways<br />
you can get better performance out of your database.<br />
If your database is performing optimally and your pages still aren’t loading fast<br />
enough, you’ll need to look for alternative methods of speeding them up. Two of<br />
these methods are page and action caching, which allow you to store the output of a<br />
page to serve it up rather than re-processing the code and hitting the database again.<br />
447
448 CHAPTER 16 Basic performance enhancements<br />
16.3 Page and action caching<br />
Rails has several methods of caching pages. The first of these methods serves a request<br />
and then stores the output of that page in the public folder of your application so that<br />
it can be served without going through the Rails stack by the web server. This is known<br />
as page caching<br />
You’d cache a page if that page took a long time to process, or if there were a lot of<br />
requests to it. If either of these situations happens, the performance of the web server<br />
can be degraded and requests can end up piling up.<br />
By caching a page, you take the responsibility of processing and serving it off your<br />
Rails stack and put it on the (usually) more-than-capable web server. 8<br />
The first time a page is requested, you store it as a file in your application. The<br />
next time the request is made, that static page will be served rather than having the<br />
action processed again.<br />
This first type of caching is great for pages that don’t require authentication. For<br />
pages that do require authentication you’ll need to use a different kind of caching<br />
called action caching. This type of caching runs the before filters on a request before it<br />
serves the cached page, and you’ll see a great example of this in this section.<br />
Let’s take a look at the first kind of caching, plain ol’ page caching.<br />
16.3.1 Caching a page<br />
You’re going to cache the page that’s rendered when a user looks at Projects-<br />
Controller’s show action. By caching this particular page, Rails will serve the first<br />
request to this file and then save the output of the request to a new file at public/<br />
projects/:id.html. This public/projects directory will be created by Rails automatically.<br />
This process is shown in figure 16.4.<br />
On the next request, due to how the web server is configured, it will serve the file<br />
rather than hit the Rails stack, as shown in figure 16.5. This is absolutely a faster<br />
request, regardless of how little goes on in an action in Rails. If a request doesn’t have<br />
to go down that extra level in the stack it’s going to save a great deal of time, and<br />
again: modern web servers are built to serve these static files.<br />
One of the downsides of this is that it will not cache the GET parameter on the<br />
request, like your page numbers. Earlier, when you used rails server to use your<br />
pagination, the URL became http://localhost:3000/projects/1?page=2. The page that’s<br />
cached doesn’t have this parameter at the end, and so it will always display the first<br />
page, because that’s what will be stored at public/projects/:id.html.<br />
Regardless of this, you’ll at least see how this method works. In your Projects-<br />
Controller, underneath the before_filter lines, you can put this method to tell<br />
Rails to cache the page for the show action:<br />
caches_page :show<br />
8 Such as Apache or nginx, or any other HTTP server. Not WEBrick. There are some things that Ruby’s made<br />
for, and being a fast/stable HTTP server ain’t one.
2. Very quick check for<br />
/public/projects/1.html<br />
3. Not found...<br />
Go to the application!<br />
4. Application routes<br />
request to controller<br />
Page and action caching<br />
In development mode, caching is turned off by default. Obviously, in development<br />
mode you don’t care so much about caching, as all requests are going to be local and<br />
not on a heavy-load server. You can turn caching on by going into config/environments/<br />
development.rb and changing this line<br />
config.action_controller.perform_caching = false<br />
to this:<br />
1. Request comes in for<br />
GET /projects/1<br />
Browser<br />
Web Server<br />
/public/projects/1.html<br />
Application<br />
config.action_controller.perform_caching = true<br />
Without this option, you can still have caches_page in your controllers, it just won’t<br />
do anything. With it turned on, your pages will be cached upon their first request.<br />
Launch rails server again and this time go to http://localhost:3000/projects/1.<br />
In the server output, you’ll see an additional line:<br />
Write page /.../ticketee/public/projects/1.html (0.3ms)<br />
2. Very quick check for<br />
/public/projects/1.html<br />
1. Request comes in for<br />
GET/projects/1<br />
Controller<br />
Browser<br />
Web Server<br />
/public/projects/1.html<br />
6. Request sent back to browser<br />
5. Controller creates<br />
/public/projects/1.html<br />
4. Page sent back to browser<br />
449<br />
Figure 16.4 First request, no cached page<br />
3. Found! It's dangerous<br />
to go alone, take this<br />
Figure 16.5 Subsequent<br />
requests, cached page
450 CHAPTER 16 Basic performance enhancements<br />
This time, rather than simply processing your action and sending the response body<br />
back to the server, Rails will save the body in a new file in your application at public/<br />
projects/1.html. The next time this route is requested, because the public/projects/<br />
1.html page exists, it will be served by your web server, rather than Rails. A side-effect<br />
of this means that your request will not show up in the Rails console, but at least it will<br />
be served faster.<br />
Let’s reload the page now; it should be a little faster because it’s serving that static<br />
page. If you click the Next link on your pagination, you’ll still be shown the first page.<br />
This is because the GET parameter was ignored, and the first page for this project’s<br />
tickets was what was cached.<br />
There’s another problem too: this result is cached for all users of your application.<br />
At the top of the page, you’ll be able to see the message that says “Signed in as<br />
admin@ticketee.com,” as shown in figure 16.6.<br />
To see this little issue in action, sign up as another user by first clicking the Sign<br />
Out link in the application to sign out, then the Sign Up link to be presented with a<br />
form to sign up. In this form, enter user@ticketee.com for the email and password<br />
for both the password and password confirmation fields. When you click the Sign Up<br />
button, this will create your new user account.<br />
You currently require users to confirm their account through an email they<br />
receive, but because you’re in development mode there will be no emails sent. To confirm<br />
this user, launch rails console now and run these commands:<br />
user = User.find_by_email("user@ticketee.com")<br />
user.confirm!<br />
You’ll also need to give this user access to the first project in your system, so that they<br />
can view the tickets too. To do this, run these couple of commands:<br />
project = Project.first<br />
user.permissions.create!(:action => "view", :thing => project)<br />
Alright, now that your user is confirmed and has access to this project, let’s see what<br />
happens when you sign in with the email and password you used to sign up,<br />
user@ticketee.com and password. At the top of the page you’ll see that you’re signed<br />
in as the new user, as seen in figure 16.7.<br />
Figure 16.6 Signed in as admin Figure 16.7 Signed in as a user
Page and action caching<br />
However, when you click the Ticketee Beta link to go to your first project, the page<br />
will change to saying that you’re signed in as the admin@ticketee.com user again, as<br />
shown in figure 16.8.<br />
You know better; you’re actually signed in as the user! This is happening because<br />
Rails has cached the entire page, rather than just the tickets list. This page also<br />
ignores any kind of authorization you’ve set up in your controllers, making it available<br />
for every single person who wishes to access it, which is just a Very Bad Thing.<br />
So it looks like caches_page isn’t going to work in this situation. This method is<br />
better for pages that don’t have dynamic elements on them, such as the place at the<br />
top that displays the currently logged-in user or the list of tickets.<br />
This method has a brother called caches_action that will help you fix both the<br />
issue of the currently logged-in user display message, as well as the issue of it only<br />
showing the first page of pagination.<br />
16.3.2 Caching an action<br />
Caching an entire page is helpful when you don’t have authentication, but if you have<br />
authentication then it’s better to cache the response of the action on a per-user basis.<br />
Caching an action involves caching the response for a particular session, so that when<br />
that user requests it again they’ll be shown it again.<br />
Caching a page is great for a page that’s accessible by anybody, as the body would<br />
be served as a static file from the public folder by the web server. Caching an action is<br />
best used for actions that take a long time to process (you don’t have any at the<br />
moment) and that require some interaction with the Rails stack, such as a<br />
before_filter that authenticates your user.<br />
There’s a third way of caching, and that’s fragment caching, where you’d cache just a<br />
bit of a page at a time, rather than the entire result. Before you get on to using that,<br />
let’s see what caches_action provides you.<br />
NOTE Before you do anything, you’ll want to remove the old file that has<br />
been cached. To do this, delete the public/projects directory. Next time<br />
this page is requested, the cache will be re-created.<br />
Let’s replace this line in your ProjectsController<br />
caches_page :show<br />
Figure 16.8 Still signed in<br />
as admin@ticketee.com?<br />
451
452 CHAPTER 16 Basic performance enhancements<br />
with this line:<br />
caches_action :show<br />
For this change to take effect, you only need to refresh the page at http://localhost<br />
:3000/projects/1 or actually visit it again if you’ve closed the browser since the last<br />
time. If you switch over to the terminal where your server is running, you won’t see the<br />
line that says this:<br />
Write page /.../ticketee/public/projects/1.html (0.3ms)<br />
Rather, you’ll see this line instead:<br />
Write fragment views/localhost:3000/projects/1 (40.3ms)<br />
This time, Rails has written a fragment rather than writing a page. In this case, the fragment<br />
is actually the entire page, but it is the page available only for this user. When<br />
you request this page again, you’ll see this line in the server’s output:<br />
Read fragment views/localhost:3000/projects/1 (0.3ms)<br />
Upon the second request here, Rails has found the fragment pertaining to this<br />
request and served that instead. Rather than saving these files into the public directory,<br />
Rails instead saves them to the tmp/cache directory. Files that are in the public<br />
directory are automatically served by your web server without hitting the Rails stack,<br />
but cached responses in tmp/cache are served by the Rails stack itself. This may seem<br />
counterintuitive at first, but it’s really helpful if you want to alter what cache fragments<br />
are served to what user.<br />
Currently, the fragment is written to a file such as tmp/cache/CC6/080/<br />
views%2Flocalhost%3A3000%2Fprojects%2F1. This location is simply a location in the<br />
tmp/cache folder with a hashed path, followed by the escaped name of views/<br />
localhost:3000/projects/1. It’s with this name that Rails can retrieve this fragment and<br />
show it again.<br />
But you’re still going to have the problem that both of your users are going to see<br />
the same page. Sign out of your current user, and sign in as the other one. Once you<br />
visit this page again, you’ll see you’re still signed in as the first user! It’s doing the<br />
same darn thing as caches_page!<br />
As stated before, caches_action is different. It runs the before_filters of your<br />
controller and has one more special benefit: you can change the path of where this<br />
file is cached by using the cache_path option passed to caches_action. You can then<br />
set this option to be a Proc object, which means it will be evaluated before every<br />
request made to the action (or actions) you are caching. In this Proc object you’ll<br />
have access to the current controller instance, meaning you’ll have access to<br />
current_user. With this access, you’ll be able to customize the path where the cache<br />
is kept so that you can cache the same page for different users.<br />
To do this, change your caches_action line in your controller to these lines:
Page and action caching<br />
caches_action :show, :cache_path => (proc do<br />
project_path(params[:id], :user_id => current_user.id)<br />
end)<br />
Here, you’ve passed the cache_path option to caches_action. This is a proc object,<br />
and you need to wrap the value for this option in brackets or Ruby will think the block<br />
is for the caches_action call.<br />
This Proc object is evaluated within the context of an instance of this controller,<br />
and therefore you’ll have access to the params and current_user methods usually<br />
available within an action or a before_filter. With these, you’re building a string by<br />
combining the URL of the current project (provided to you by the helper<br />
project_path) and the id of current_user.<br />
When you access this page again in the browser, Rails will re-process this action<br />
because the cache path has changed and then save the page in a new location. In<br />
the output for the server you’ll see this new fragment has been written, indicated by<br />
this line:<br />
Write fragment views/localhost:3000/projects/1/1 (4.4ms)<br />
This time, the path to the file and the file itself have changed because you’ve changed<br />
the URL of the page; it’s now the cached version of this page currently for this user.<br />
When you sign out as your current user and sign in as the other user and navigate to<br />
this project’s page, you’ll see that the “Signed in” message at the top of the page is<br />
now the correct one, as shown in figure 16.9.<br />
This means that you’ve now fixed the problem where the same cached page was<br />
shown for all users, meaning that each of your users will see a slightly different version<br />
of this page. This is almost right, but not quite. When you click the Next link for pagination,<br />
you’ll still only be shown the first page. This is because much like<br />
caches_page, your caches_action also ignores the page parameter.<br />
You can fix this, however, by changing the path generated for the cached page to<br />
contain the current page number. To do this, change this line in caches_action’s<br />
cache_path option in ProjectsController<br />
project_path(params[:id]) + "/#{current_user.id}"<br />
Figure 16.9 Signed in as<br />
admin for a cached page<br />
453
454 CHAPTER 16 Basic performance enhancements<br />
to this:<br />
project_path(params[:id]) + "/#{current_user.id}/#{params[:page] || 1}"<br />
The next time you request this page, it will again save a new version of it, this time outputting<br />
a line like this:<br />
Write fragment views/localhost:3000/projects/1/1/1<br />
The first 1 here represents the project’s id, the second represents the user’s, and the<br />
third represents the page number. This file is saved to a path such as tmp/cache/E62/<br />
3E0/views%2Flocalhost%3A3000%2Fprojects%2F1%2F1%2F1.<br />
So in this section you’ve fixed the problem where all people would see that they<br />
were signed in as the first person who requested the page, as well as the case where<br />
only one page of your tickets was available. Now what happens when you update this<br />
page and the tickets change? These pages will still be cached, and your new tickets or<br />
updates to them will not be shown!<br />
You’re going to need a way to clear this cache, to expire the fragments that are created<br />
when these events happen. Right now, the number-one situation where that’s<br />
going to happen is when you create a new ticket for a project. You can trigger this<br />
event to clear your cache by using a feature in Rails known as cache sweepers.<br />
16.3.3 Cache sweepers<br />
Cache sweepers are much like the observers you used back in chapter 12. In fact, the<br />
ActionController::Caching::Sweeper class inherits from ActiveRecord::Observer,<br />
effectively making them the same thing. The difference here is that you refer to the<br />
sweeper in the controller, telling it to run after certain actions have completed. 9<br />
In this case, whenever a ticket is created, updated, or destroyed in a project, you’ll<br />
want your application to clear out the cached pages because they would be out of date<br />
at that point. This is precisely what you can use a sweeper for. To call this sweeper, put<br />
this line underneath the before_filter calls in TicketsController:<br />
cache_sweeper :tickets_sweeper, :only => [:create, :update, :destroy]<br />
You put this line in your TicketsController because you want it to run after the<br />
create, update, and destroy actions.<br />
Now when you go to a project in your application and attempt to create a new<br />
ticket on it, you’ll get this error:<br />
uninitialized constant TicketsSweeper<br />
Rails is looking for the TicketsSweeeper constant, which is supposed to define the<br />
cache sweeping behavior for your TicketsController, but can’t find it because you<br />
haven’t defined it yet. To define this, create a new folder at app/sweepers for this<br />
9 It uses after_filter to do this, which can also be used to run other actions after a controller’s action has<br />
been processed, just like a before_filter can be used to run actions before a controller’s action runs.
Page and action caching<br />
Alternatively, pass a constant<br />
Rather than passing the symbolized version of the name along to the cache_sweeper<br />
method, you can also alternatively pass along a class:<br />
cache_sweeper TicketsSweeeper<br />
This doesn’t perform any differently than passing in a symbol, but is really helpful if<br />
your sweeper was modularized:<br />
cache_sweeper Ticketee::TicketsSweeper<br />
You can’t pass a modularized sweeper name as a symbol, and so the<br />
cache_sweeper method supports passing both a symbol and a constant reference<br />
as well.<br />
sweeper and its brethren to live. 10 In this directory you’ll create a new file called app/<br />
sweepers/tickets_sweeper.rb and fill it with this content:<br />
class TicketsSweeper < ActionController::Caching::Sweeper<br />
observe Ticket<br />
def after_create(ticket)<br />
# expire fragment code goes here<br />
end<br />
end<br />
You’ll get around to adding the expire fragment code in just a bit, but first a bit of<br />
explanation is needed. A sweeper looks and acts much the same as an observer. By<br />
calling the observe method at the top of the TicketsSweeper, you tell this sweeper to<br />
watch the Ticket class for changes. The after_create method here will be called<br />
after creation of a new Ticket object, but because you’re in a sweeper, you’ll have<br />
access to the controller’s parameters also. With them, you can use what’s usually available<br />
in the controller to expire the cached fragments.<br />
To do this, you can call the expire_fragment method, passing it a regular expression.<br />
This regular expression will match all cached fragments for the ticket’s project<br />
for all users, effectively wiping clean the slate for this project in terms of cached pages.<br />
Inside your after_create method you’ll put this:<br />
expire_fragment(/projects\/#{ticket.project.id}\/.*?/)<br />
Now when you create a new ticket for a project, this expire_fragment method will be<br />
called. Let’s try this out now, creating a new ticket by clicking the New Ticket link on a<br />
project’s page and filling out the form. Once you’ve clicked the Create Ticket button<br />
on the form, you’ll see this in the console:<br />
Expire fragment (?-mix:projects\/1\/.*?) (327.3ms)<br />
Rails has gone through and expired all the fragments associated with this ticket’s project.<br />
If you now go into tmp/cache and into any one of the directories there looking<br />
10 Because it doesn’t really belong in the controllers, helpers, models, observers, or views directory, but is still a<br />
vital part of your application.<br />
455
456 CHAPTER 16 Basic performance enhancements<br />
for a file, you shouldn’t see any. The directories (with names like E62 and 3E0) will<br />
still exist, but there aren’t any files. This means that Rails has successfully cleared its<br />
cache of fragments for the project.<br />
Let’s get your sweeper to perform this same action when tickets are updated and<br />
destroyed. Move the expire_fragment call into another method and then call it in the<br />
after_create, after_update, and after_destroy methods in TicketsSweeper using<br />
the code shown in the following listing.<br />
class TicketsSweeper < ActionController::Caching::Sweeper<br />
observe Ticket<br />
def after_create(ticket)<br />
expire_fragments_for_project(ticket.project)<br />
end<br />
end<br />
Listing 16.4 app/sweepers/tickets_sweeper.rb<br />
def after_update(ticket)<br />
expire_fragments_for_project(ticket.project)<br />
end<br />
def after_destroy(ticket)<br />
expire_fragments_for_project(ticket.project)<br />
end<br />
private<br />
def expire_fragments_for_project(project)<br />
expire_fragment(/projects\/#{project.id}\/.*?/)<br />
end<br />
Now you have Rails caching the pages of tickets for all projects in your application and<br />
clearing that cache when tickets are updated. This is a great demonstration of caching<br />
on a per-user basis, even if your project page isn’t that intensive. If you had a system<br />
resource (CPU/memory) intensive action in your application that required user customization<br />
like this, you could use this same method to cache that action to stop it<br />
from being hit so often, which would reduce the strain on your server.<br />
Expiring pages<br />
If you were still using caches_page, you wouldn’t use expire_fragment to expire<br />
the cache files that were generated. Instead, you’d use expire_page, which can take<br />
a hash like this:<br />
expire_page(:controller => "projects",<br />
:action => "show",<br />
:id => 1)<br />
Or, better still would be to pass it the URL helper:<br />
expire_page(project_path(1))<br />
Even though you’re not caching pages any more, it’s still handy to know how to clear<br />
cached pages and fragments.
Let’s make a commit now for this:<br />
Page and action caching<br />
git add .<br />
git commit -m "Add fragment caching to ticket listings on a project"<br />
Another way to ease the load on the server side is to use the browser (client) side caching<br />
by sending back a 304 Not Modified status from your Rails application. In the next<br />
section, we’ll look at a Rails controller method that’ll help you with this.<br />
16.3.4 Client-side caching<br />
There’s one more method in the controller you’re going to see in this section, and<br />
that’s the fresh_when method. This method will send an ETag 11 header back with the<br />
initial request to a client, and then the client’s browser will cache that page with that<br />
ETag on the client’s machine. 12 The ETag is the unique identifier for this page, or<br />
entity, at the current point in time.<br />
In this situation, you’ll use this type of caching for the show action on a ticket in a<br />
project, meaning the URL will be something like /projects/1/tickets/2. The first<br />
request to this action after you’re done will follow the steps shown in figure 16.10.<br />
The next time the page is requested, the browser will send a request with the ETag<br />
it received on the first request to the server, this time in a If-None-Match header. The<br />
server then regenerates the ETag for the page that’s been requested and compares it<br />
against the If-None-Match incoming header. If these two match, then the server will<br />
send back a 304 Not Modified header, telling the browser to use its cached copy. This<br />
means that, rather than having the server re-render the view and its pieces, the client<br />
does all the hard work of just re-showing the initial page. This whole process is shown<br />
in figure 16.11.<br />
1. Request comes in for<br />
GET /projects/1/tickets/2<br />
2. Trickles down...<br />
3. ... to the controller<br />
Browser<br />
Web Server<br />
Application<br />
Controller<br />
6. Request sent back to browser<br />
with ETag "ef2"<br />
5. Bubbles up<br />
through the stack<br />
4. Controller responds,<br />
also sends back an ETag<br />
called "ef2"<br />
11 The E stands for entity. More information is available on the Wikipedia page for this:<br />
http://en.wikipedia.org/wiki/HTTP_ETag.<br />
12 If Private Browsing is turned on in the browser, this wouldn’t happen.<br />
Figure 16.10 ETag caching<br />
457
458 CHAPTER 16 Basic performance enhancements<br />
1. Request comes in for<br />
GET /projects/1/tickets/2<br />
with If-None-Match header set to "ef2"<br />
2. Trickles down...<br />
3. ... to the controller<br />
Browser<br />
Web Server<br />
Application<br />
Controller<br />
Even though this goes through the same series of events both times, what happens in<br />
the controller is the clincher: by returning a 304 Not Modified, you can respond with<br />
a lightweight response and get the user’s browser to render the page, rather than having<br />
your application do it again.<br />
For your ticket page, you’re going to want your application to send back this status<br />
only when your ticket hasn’t been updated. When a ticket’s information such as the<br />
title or description is updated, or when a comment is posted to the ticket, you’d want<br />
to send back a proper response rather than the 304 Not Modified header. It’s this<br />
timestamp that you’re going to be using to determine if a page is either fresh or stale.<br />
A fresh page is one that’s been recently updated, with a stale page being one that<br />
hasn’t been.<br />
You’ve got a column in your tickets table that you can use to determine if a<br />
ticket’s been updated: the updated_at column. Each time a ticket’s updated through<br />
your application, this field will be set to the timestamp automatically. But, when a<br />
comment is posted to the ticket, the updated_at field for the ticket will remain the<br />
same.<br />
To fix this problem, you can configure the Comment model to touch the ticket<br />
object it’s related to, which will update its updated_at timestamp. The way you do this<br />
is with an option on the belongs_to association in Comment called touch. Let’s change<br />
the belongs_to :ticket line currently in app/models/comment.rb to this:<br />
belongs_to :ticket, :touch => true<br />
6. Browser knows to<br />
use its local cache<br />
5. Bubbles up<br />
through the stack<br />
4. Controller recognizes ETag,<br />
sends back a<br />
ed status<br />
Figure 16.11<br />
304 Not Modified<br />
response<br />
Whenever a comment is updated, created, or even destroyed, the related ticket’s<br />
updated_at attribute will be updated. With the touch option, you can now confidently<br />
use this attribute to provide a reliable timestamp for your new form of caching. This<br />
particular form of caching uses a new method in your controllers called fresh_when.
Page and action caching<br />
To make the show action in TicketsController conditionally send back the 304<br />
Not Modified, put this at the bottom of the show method in app/controllers/<br />
tickets_controller.rb:<br />
fresh_when :last_modified => @ticket.updated_at,<br />
:etag => @ticket.to_s + current_user.id.to_s<br />
The last_modified option here sends back another header to the client: the Last-<br />
Modified header. This header is used by a browser to detect when the page was last<br />
updated, which provides a near-identical purpose to an ETag. A browser sends an If-<br />
Modified-Since header that contains the last Last-Modified time. If the server sees<br />
that the Last-Modified time is later than the If-Modified-Since, it will send a new<br />
copy of the page. Otherwise, it will send a 304 Not Modified header.<br />
The :etag option tells fresh_when to generate a new ETag for the resource. Until<br />
this resource changes, the ETag generated will be the same for each user. This<br />
wouldn’t be the case if you didn’t pass through the current_user.id.to_s to the<br />
ETag, but only for two user accounts accessed on the same computer. By using the<br />
current_user’s id attribute to seed the etag option, the tag will be different between<br />
users. How this ETag is generated differs from implementation to implementation; in<br />
Rails it’s an MD5 hash, which is guaranteed uniqueness.<br />
Even though these two options are nearly identical, some browsers may support<br />
one or the other. It’s more of a way to cover your bases to pass through both headers,<br />
and it’s a worthwhile thing to cover.<br />
You can see this in action now if you attempt to visit a ticket’s page. Your first<br />
request will have a final line that says something like this:<br />
Completed 200 OK in 486ms (Views: 200.4ms | ActiveRecord: 5.6ms)<br />
In this instance, the views have been rendered and the entire procedure has taken<br />
486ms. Rather than refreshing the page (because in some browsers, this triggers them<br />
to not send the If-Modified-Since or If-None-Match headers), you’ll go back to the<br />
project’s page and then click back on the same ticket again. This time in the server<br />
output you’ll see this output:<br />
Completed 304 Not Modified in 267ms<br />
The server has sent back a 304 Not Modified response in a slightly quicker time than<br />
your original request, mainly because it didn’t have to re-render the views for the<br />
application and send back all that HTML.<br />
This is another way to ease the load on your server, by getting the browser to deal<br />
with the page caching and serving, rather than the server.<br />
That wraps up this section. You’ve made a small change here you should probably<br />
commit. You can do that by typing these commands into the terminal:<br />
git add .<br />
git commit -m "Add ETag and Last-Modified<br />
support to ticket show page"<br />
459
460 CHAPTER 16 Basic performance enhancements<br />
You’ve now seen many different flavors of controller caching, ranging from caching<br />
pages and caching actions (actually, fragments), to getting the browser to take care of<br />
the hard part of the caching process (storing a file and expiring it). All of these caching<br />
methods deal with caching entire pages, so what’s a Railer supposed to do if they<br />
want to cache only a bit of a page at a time? For that, you can tell Rails to cache just<br />
these parts using an aptly named method: cache.<br />
16.3.5 Caching page fragments<br />
If part of a page takes a long time to render, then that’s a problem. To fix this kind of<br />
problem, you can use fragment caching, which allows you to cache fragments of pages<br />
using the cache method in your views where appropriate. This method takes a block,<br />
like this:<br />
<br />
# some horribly long and complex thing<br />
<br />
This way, when Rails attempts to load the page and comes across your cache call, it will<br />
check to see if there’s an available fragment for it. Otherwise it will perform the code<br />
inside the block and then store it in tmp/cache, just like caches_action does for an<br />
entire page.<br />
You don’t have an actual use-case for this in your application at the moment, but<br />
you’ll still use it just to see what it does. You’re going to be using it back on the app/<br />
views/projects/show.html.erb view, meaning you’re going to want to temporarily disable<br />
caches_action in ProjectsController for this action so that it doesn’t cache<br />
the page before cache has a chance to run. You can do this by simply removing the<br />
lines in ProjectsController:<br />
# caches_action :show, :cache_path => (proc do<br />
# project_path(params[:id]) + "/#{current_user.id}/#{params[:page] || 1}"<br />
# end)<br />
In the app/views/projects/show.html.erb, the primary content that’s going to be<br />
changing is the list of tickets, and so you’ll want to cache that and leave out the rest.<br />
To do this, you’ll wrap the whole list of tickets, including the pagination link above it,<br />
in a cache block, as shown in the following listing.<br />
Listing 16.5 app/views/projects/show.html.erb<br />
<br />
<br />
<br />
<br />
<br />
<br />
# - <br />
<br />
<br />
<br />
Page and action caching<br />
The next time you reload this page in your browser, you’ll see this line in your server’s<br />
output:<br />
Write fragment views/localhost:3000/projects/1 (3.0ms)<br />
Look familiar? It’s exactly the same output generated by caches_action. The cache<br />
method that you just used assumes that it’s only being used once per page and so will<br />
save it with the same path (more commonly referred to as the cache key). You had a<br />
problem with this initially, didn’t you?<br />
Yes, you did. It was saving the page name just fine, but it didn’t care if you were on<br />
your first page of pagination or the last, it was always showing the first cached page. If<br />
you click the Next link on your pagination, you’ll find that you’ve regressed this<br />
behavior accidentally. Not to worry, this is easy to fix. You need to tell your cache<br />
method that there’s more than one type of this page. You can do that by passing a<br />
string containing the page number to the method to give it a unique name, or key. By<br />
making this key unique for each page, Rails will cache a list of tickets for each page<br />
rather than one for all.<br />
To fix this, change the cache call in your app/views/projects/show.html.erb file to<br />
this:<br />
<br />
When you refresh this page and switch back into the terminal where your server is<br />
running, you’ll see this line of output:<br />
Write fragment views/projects/1/1 (3.3ms)<br />
You’ve specified the key that the cache now uses to store the fragment, and so you’ll<br />
see that it’s saved it as views/projects/1/1 now, with the first 1 being the ID of your<br />
project and the second one being the page number. If you create, update, or delete a<br />
ticket, you’ll see that this fragment gets cleared away.<br />
Expire fragment (?-mix:projects\/1\/.*?) (1.9ms)<br />
The next time you revisit the project’s page, you’ll see that it rewrites the fragment<br />
again:<br />
Write fragment views/projects/1/1 (1.5ms)<br />
In this section, you’ve seen that fragment caching is useful not only for caching<br />
dynamic actions with caches_action, but also for caching small chunks of pages by<br />
using the cache method. The latter allowed you to cache a small fragment of the page<br />
rather than the entire page, which is great if you have a small chunk of the page that<br />
takes a long time to render. You didn’t, but it’s always good to know what tools are<br />
available if you come up against this particular beast.<br />
With the cache method in the view, you don’t have to set the cache_path for the<br />
user because you’re only caching the part of the page that is user-agnostic. Everything<br />
else in either the layout or elsewhere in this view would be processed each time the<br />
page is requested, but the part you have cached will be retrieved from that cache and<br />
461
462 CHAPTER 16 Basic performance enhancements<br />
added to the output, rather than re-processed. All in all, this solution is more elegant<br />
than caches_action. Another commit is in order!<br />
git add .<br />
git commit -m "Implement tidier caching for the tickets<br />
➥list on the projects page"<br />
That covers all the major methods for basic caching in controllers and views. You’ve<br />
seen ways to cache entire pages and parts of pages as cached files on the filesystem. In<br />
a Rails application there may be a lot of reading and writing to the filesystem, which<br />
can cause degradation of performance, so storing these files on the filesystem may not<br />
be the best idea. A speedier way of doing this would be to store these files in memory<br />
by switching the cache store that Rails uses. You can do this by putting this line in one<br />
of your config/environments files, probably production.rb:<br />
config.action_controller.cache_store = :memory_store<br />
Rather than storing the fragments on the file system, Rails will now store them in memory<br />
along with the code for the application. The retrieval time is faster here, but comes<br />
at the cost losing the cache if the server was ever stopped. If you want something more<br />
persistent, you may choose to use either Memcached (http://memcached.org) or<br />
Redis (http://redis.io). We won’t go into these in this chapter, as they exceed the<br />
boundaries of what would be considered basic performance enhancements.<br />
In this section you’ve learned how to use fragment caching to store parts of the<br />
view that may take a long time to process. This type of caching would store these fragments<br />
in the tmp/cache directory; they can be retrieved later on.<br />
16.4 Background workers<br />
There are other situations where requests can be slow for your application too. One of<br />
these cases would be if a ticket had a large number of watchers, and a comment was<br />
posted to that ticket. The reason for this slowdown would be because Rails would have<br />
to iterate through all the watchers and send out the update notification email to each<br />
of them individually, using the feature that you developed in chapter 12.<br />
Rather than having a user make the request to create a comment in the application,<br />
having the server process the email notifications, and then send a response back,<br />
you can take the long-running task of sending these emails and move it into a job that<br />
runs in a background.<br />
This will work by having your CommentObserver add the task of sending these<br />
emails to a job queue that runs in the background. You’ll then have a background process<br />
separate from your application that will run these jobs as it receives them. This<br />
way, the hard work is done behind the scenes and the user receives the request back<br />
almost as if nothing of consequence happened.<br />
To make this happen, you’ll use a gem called delayed_job. This gem will allow you<br />
to create a table in your database where the jobs that the background worker needs to<br />
work off will be stored. The gem will also provide you with the ability to start a worker<br />
process. To add this to your application you’ll put this line in your Gemfile:
gem 'delayed_job'<br />
Background workers<br />
Then you’ll need to run bundle install to install it. Once you’re done there, you can<br />
run this command, which will generate a migration to create the delayed_job table:<br />
rails g delayed_job<br />
You can now run this migration with rake db:migrate db:test:prepare. That’s all<br />
that’s needed to set up the gem itself.<br />
Your next task is to create a job. A job is any object that responds to perform. This<br />
method needs to perform the action of sending out the email to all the watchers of<br />
the ticket, which is currently the responsibility of the after_create method in<br />
CommentObserver, which uses this code:<br />
watchers = comment.ticket.watchers - [comment.user]<br />
watchers.each do |user|<br />
Notifier.comment_updated(comment, user).deliver<br />
end<br />
You’ll take this code out of the after_create method and replace it with code to<br />
enqueue your job to be performed, using a method given to you by the delayed_job<br />
gem:<br />
Delayed::Job.enqueue CommentNotifierJob.new(comment.id)<br />
The CommentNotifierJob class here will actually be a Struct object. You can create<br />
the code by first creating a new directory called app/jobs and then a new file in it<br />
called comment_notifier_job.rb, using the code you stole from the after_create<br />
method as shown in the following listing.<br />
Listing 16.6 app/jobs/comment_notifier_job.rb<br />
class CommentNotifierJob < Struct.new(:comment_id)<br />
def perform<br />
comment = Comment.find(comment_id)<br />
watchers = comment.ticket.watchers - [comment.user]<br />
watchers.each do |user|<br />
Notifier.comment_updated(comment, user).deliver<br />
end<br />
end<br />
end<br />
In the perform method here, you find the comment based on the comment_id and<br />
then iterate through all the watchers of the comment’s ticket who are not the commenter<br />
themselves, sending them each an email that the ticket has been updated with<br />
a new comment.<br />
By enqueueing this job using the Delayed::Job.enqueue method, the<br />
delayed_job gem will store a marshalled format (actually a YAML string) of this object<br />
in the table, such as this:<br />
--- !ruby/struct:CommentNotifierJob \ncomment_id: 1\n<br />
463
464 CHAPTER 16 Basic performance enhancements<br />
When a worker reads this row, it will convert this marshalled object back into a real<br />
object and then call the perform method on it. The reason for making another class<br />
and using a Struct over using one such as the Comment is that a Struct object will<br />
always be lighter than a full-on class that inherits from ActiveRecord::Base. If you<br />
enqueued a Comment object instead, the result would be this:<br />
"--- !ruby/<br />
ActiveRecord:Comment \nattributes: \n text: This is a comment\n ticket<br />
_id: 1\n user_id: 2\n created_at: &id001 2011-04-<br />
21 09:35:20.497749 Z\n updated_at: *id001\n state_id: \n previous_sta<br />
te_id: \n id: 1\n"<br />
This contains a lot of useless information that you don’t care about when you’re<br />
enqueueing the job, and so you should not use it. When enqueueing jobs, you should<br />
always try for the lightest possible solution so that the job is queued quickly.<br />
Now when a comment is created, a job will be enqueued to notify the watchers of<br />
the relevant ticket. This job is actually a record in a table called delayed_jobs that the<br />
worker reads from, running each job one at a time and working them off the queue.<br />
When there are no more jobs, it will simply wait.<br />
To make sure that this is working, you’re going to write a test for it. The test should<br />
check that a job is enqueued when a comment is created and that the watchers of the<br />
comment’s ticket are notified by email when the job is run. Primarily, this test will<br />
check the perform method in the Comment model, and so you’ll put it in spec/models/<br />
comment_spec.rb, using the code shown in the following listing.<br />
Listing 16.7 spec/models/comment_spec.rb<br />
require 'spec_helper'<br />
describe Comment do<br />
let(:user) { Factory(:user) }<br />
before do<br />
@ticket = Factory(:ticket)<br />
@ticket.watchers "This is a comment",<br />
:user => ticket.user)<br />
Delayed::Job.count.should eql(1)<br />
Delayed::Worker.new.work_off!<br />
Delayed::Job.count.should eql(0)<br />
email = ActionMailer::Base.deliveries.last<br />
email.to.should eql(user.email)<br />
end<br />
end<br />
At the beginning of the describe Comment block, you set up a user who will be the<br />
one to watch the ticket that you set up in the before block.
Background workers<br />
In the test itself you make reference to a Delayed::Job class, which is actually a<br />
model provided by the delayed_job gem which connects to the delayed_jobs table.<br />
You call count first up and make sure that’s 0 because you don’t want any jobs in the<br />
table before comments exist.<br />
Next, you create a comment for the ticket, making it originate from the creator of<br />
the ticket (ticket.user). This way, you can be sure that the user you set up with the<br />
let block will receive the notification. After the comment has been created, there<br />
should be exactly one job in the table.<br />
You then call Delayed::Worker.new.work_off(1) to create a new Delayed<br />
::Worker instance that will work off a single job on the queue and then finish. 13 When<br />
it’s done, there will be no more jobs in the queue.<br />
Finally, you check that the last email sent out (by referencing Action-<br />
Mailer::Base.deliveries, which stores the emails that have been sent but only in<br />
the test environment) has gone to the user who should have been notified, indicating<br />
that the job has run successfully.<br />
This test should pass automatically because you’ve already implemented the feature.<br />
You can see this by running bin/rspec spec/model/comment_spec.rb:<br />
1 example, 0 failures<br />
Great! Now when a comment is created it should be created at the same speed, independent<br />
of the number of watchers on a ticket. Although the number of watchers on<br />
a ticket would have to reach a high number before a problem like this would arise, it<br />
is still a perfect example of how you can use delayed_job to queue jobs in the<br />
background.<br />
One final thing. You’ve seen how you can enqueue the jobs and work them off<br />
using the Delayed::Worker#work_off method, but that isn’t quite the way you’d do it<br />
in the real world or in a production environment. There, you’d run a command like<br />
this:<br />
script/delayed_job start<br />
This command will start a single delayed job worker, 14 which will check the database<br />
every five seconds for jobs and work them off as they come in. However, there is no<br />
monitoring in place for this, and so it is advisable that a tool such as Monit or God is<br />
used to monitor this process and restart it if it happens to go down.<br />
You can stop this job runner by using this command:<br />
script/delayed_job stop<br />
13 The default of this method is 100 jobs.<br />
14 Watch out: this loads the entire Rails environment again. On a low-memory system, a large number of Rails<br />
instances and job workers can suck up all the RAM of the system. It is advised to take care when deciding how<br />
many of each process are running on a machine. If this is outside the bounds of the system, then perhaps it<br />
is time to upgrade.<br />
465
466 CHAPTER 16 Basic performance enhancements<br />
If you’re using delayed_job extensively, you may wish to start more than one worker,<br />
which you can do by passing in the -n option to the command, like this:<br />
script/delayed_job -n 2 start<br />
This particular example will start two workers rather than one. For more examples on<br />
how to use this gem, check out the README on https://github.com/collectiveidea/<br />
delayed_job.<br />
That does it for background jobs. You’ve learned how to take things that could<br />
potentially slow down a request and move them into the background, allowing the<br />
Rails application to continue serving the request.<br />
Let’s make a commit for these changes:<br />
git add .<br />
git commit -m "Ticket notifications are now a background job"<br />
git push<br />
Now you’re done!<br />
16.5 Summary<br />
In this chapter you learned how to implement small, easy changes that help your<br />
application perform faster, beginning with pagination and ending with view-fragment<br />
caching and delayed jobs.<br />
By using pagination, you’re able to lighten the load on the database by retrieving<br />
smaller sets of records at a time. This is the easiest way to lessen the load on your application’s<br />
infrastructure.<br />
Database queries are often the bottleneck in the application because they may<br />
inadvertently be performed in excessive amounts, or they may not be indexed in the<br />
correct manner. You saw in the beginning how to implement eager loading for your<br />
queries so that rather than doing more requests than necessary, Rails will load all the<br />
necessary objects in a second, separate query.<br />
The second way to improve database performance is to use an index similar to the<br />
page titles in a phonebook, but for a database. If you had a large number of records in<br />
your database, the index would allow for speed increases in the lookups for records<br />
for that index.<br />
If your database speed can’t be enhanced any further, then the next stop is caching<br />
the resulting pages from your actions. You first attempted to use caches_page but<br />
found that it came with a couple of problems: the page was available to all users<br />
regardless of their authorization, showing “Signed in as x” where “x” was the first user<br />
who requested the page, and it completely ignored your page parameter. So you<br />
moved on to the caches_action method, which allowed you to pass an option called<br />
cache_path to define where your file was saved.<br />
Then you learned that you can cache specific parts of a view using the simply<br />
named cache method in them. This saves fragments of a view into the tmp/cache
Summary<br />
directory, allowing you to store the result of potentially computationally expensive<br />
parts of your view.<br />
These are the basic concepts for enhancing the performance of your application.<br />
There is more you can do, like integrating with tools such as Memcached (http://<br />
memcached.org) and Redis (http://redis.io), and interacting with the Rails.cache<br />
variable which gives you fine-grained control over the cache that Rails uses to store<br />
fragments and can be used to store other pieces of information.<br />
467
This chapter covers<br />
� The importance of engines for Rails 3<br />
� Building a new engine and exploring the base<br />
� Using behavior-driven development to develop an engine<br />
� Releasing the engine as a gem<br />
� Integrating an engine with an app<br />
468<br />
Engines<br />
Engines are a new feature for Rails 3. 1 They are effectively miniature applications<br />
that provide additional functionality to an application, and they function in much<br />
the same way as an application.<br />
Back in chapter 6, you used the Devise gem, which itself is an engine. Other<br />
engines include the RailsAdmin 2 and forem 3 engines.<br />
An engine allows you to share common functionality across applications in the<br />
form of a gem or a plugin. 4 This functionality could be an authentication system such<br />
1 Although in previous versions they were supported by a plugin written by the community: https://<br />
github.com/lazyatom/engines.<br />
2 http://github.com/sferik/rails_admin.<br />
3 http://github.com/radar/forem.<br />
4 In Rails 3, these two are basically interchangeable. One lives in vendor/plugins, the other is installed<br />
using gem. For all intents and purposes, they work in a near-identical manner. Developers should try to use<br />
gems where possible, as they are versioned and easy to upgrade to specific versions, where plugins are not.
A brief history of engines<br />
as Devise, a commenting engine, or even a forum engine. If there’s ever been a need to<br />
have the same features across an application, this is what engines were made for.<br />
By installing an engine as a gem or plugin and then mounting it at a specific route<br />
in the config/routes.rb file of your application, you gain access to its features. Each<br />
engine will be different, so be sure to consult the README or other documentation<br />
that comes with it in order to figure out exactly how it works.<br />
We’ll begin by discussing the history of engines and why they’re now a major part<br />
of the core ecosystem, as it’s helpful to know the reasons why they weren’t available in<br />
releases earlier than 2.3.<br />
In this chapter we’ll go through a little bit of the history of engines, why engines<br />
are useful, and how they work, and then you’ll develop one of your own. At the end of<br />
the chapter, you’ll integrate the engine with the Ticketee application you have developed<br />
earlier in the book.<br />
17.1 A brief history of engines<br />
On November 1, 2005, James Adam begun work on what would become the engines<br />
plugin. 5 Starting off crudely, engines eventually evolved into something much more<br />
useful, serving as the inspiration for the functionality within the Rails core today.<br />
There was a lot of controversy surrounding engines, 6 and James spent a lot of his time<br />
defending the decision to develop them. Since then, however, the community has<br />
grown to accept the idea of engines.<br />
One of the major problems of having this engines plugin live outside of the core<br />
framework was that there wasn’t a clearly defined place where it could hook into Rails<br />
code. Rails could potentially change and break the engines plugin, which would prevent<br />
people from upgrading to the latest version of Rails until the engines plugin was<br />
updated.<br />
It was decided during the development process of Rails 3 that engines should be a<br />
core feature, and so a large chunk of work has gone into getting them right. By having<br />
them in core, it means that there is a clearly defined public API for engines and when<br />
newer versions of Rails come out, there’s an almost-zero 7 possibility of things breaking.<br />
Part of this work was added to Rails 2.3, and very basic engines were possible back<br />
then, 8 but things such as copying migrations and assets were not supported. Additionally,<br />
there was no way of running the Rails generator and so files had to be generated<br />
in a real application and then copied over.<br />
Since then, engines have been dramatically improved. Rather than having to copy<br />
over migrations manually, there’s a specific Rake task to do that. There is no need to<br />
5 http://github.com/lazyatom/engines.<br />
6 http://glu.ttono.us/articles/2006/08/30/guide-things-you-shouldnt-be-doing-in-rails and http://article<br />
.gmane.org/gmane.comp.lang.ruby.rails/29166 to name two such criticisms.<br />
7 In programming, the chances of things breaking over time approaches zero, but never truly reaches it.<br />
8 A good demonstration of engines in Rails 2.3 can be seen on Railscast #149: http://railscasts.com/episodes/<br />
149-rails-engines.<br />
469
470 CHAPTER 17 Engines<br />
copy over assets from an engine into a Rails application any more either; they are<br />
served through the functionality of the Sprockets gem.<br />
Finally, this ancient engine implementation didn’t enforce namespacing of the<br />
controllers or models. This could potentially lead to conflicts between engines and<br />
the application code, where the application code would override an engine’s code. If<br />
the application has a model called Forum at app/models/forum.rb, and the engine has<br />
the same model at the same location (relative to its root), the application’s model will<br />
take precedence. Namespacing is something that you’ll see has almost a zealot level of<br />
impact in the work that is done with engines today. It’s absolutely important to keep<br />
the application and engine’s code separate so that they do not conflict.<br />
So today, we’ve now got engines as a core part of Rails 3.1, and they’re better, and<br />
they’re here to stay. Let’s see why they’re useful.<br />
17.2 Why engines are useful<br />
Engines allow Rails programmers to share common code between applications in an<br />
extremely easy fashion. It’s entirely possible to use more than one engine in an application,<br />
and many people do. Engines are generally provided as gems, and so they are<br />
managed like every other gem your application uses: by using Bundler.<br />
In previous (before 3.0) versions of Rails, we have seen that people had to use the<br />
engines plugin. 9 This was sometimes problematic, because whenever a new Rails version<br />
was released it could potentially break the compatibility of the plugin. By having<br />
this feature within Rails itself, this issue is fixed.<br />
Alternatively, people could use generators. These would often generate controllers,<br />
models, and views in the application itself, which would allow people to change<br />
the code exceptionally easily. When new versions of these generators were released<br />
with changes to the previously generated code, however, there was no clean way to<br />
keep the changes.<br />
One final, very hacky way, would be to copy over the controllers, models, or views<br />
into the application manually from a directory, which runs into the same problems as<br />
described, as well as making it difficult to know if you got it right or not.<br />
With an engine, all the code is kept separate from the application and must be<br />
explicitly overridden in the application if that’s what is needed. When a new version of<br />
an engine is released, it will only alter the code of the engine and not the application,<br />
making the upgrade process as easy as changing a version number in a Gemfile.<br />
Even the routes for an engine are kept separate, being placed in the engine’s<br />
config/routes.rb file rather than the application’s. This allows you to namespace the<br />
engine’s routes so that they don’t conflict with the application.<br />
The whole point of engines is to separate out chunks of functionality, and to be<br />
able to share it without it crashing into the code that already exists.<br />
Let’s generate your own engine and have a look at its parts.<br />
9 http://github.com/lazyatom/engines.
17.3 Brand-new engine<br />
Brand-new engine<br />
The layout of an engine is nearly identical to that of<br />
a Rails application, with the notable exception that<br />
all code that usually goes straight into the app directory<br />
now goes into a namespace. Let’s take a look at<br />
the layout of the forem engine 10 at an early stage of<br />
its development, shown in figure 17.1.<br />
You’re going duplicate a little chunk of this code<br />
using the same practices that were used to develop<br />
forem. It’s a good an example as any. 11<br />
17.3.1 Creating an engine<br />
Here you’ll create your engine using a generator<br />
built-in to Rails.<br />
WARNING You’re going to need to use<br />
at least the Rails 3.1 version for this,<br />
which is what you should have installed<br />
from earlier chapters in this book.<br />
You can run this executable file to generate the layout<br />
of your engine using this command at the root<br />
of the Ticketee application you created earlier:<br />
cd ..<br />
rails plugin new forem --mountable<br />
The --mountable option here is the magic incantation:<br />
it tells the plugin generator that you want to<br />
generate a mountable plugin, more commonly known as an engine. The output of this<br />
command is very similar to that of an application, containing an app directory and a<br />
config/routes.rb file. But that’s what an engine is essentially: a miniature application!<br />
This command even runs bundle install automatically for you on this new engine,<br />
like the rails new command does when you generate a new application.<br />
Before you go any further, run bundle --binstubs in this new directory so that<br />
you can use bin/rspec to run your tests, rather than bin/rspec.<br />
Before you get too involved here, you’re going to set this project up as a Git repository<br />
and create a base commit that you can revert back to if anything goes wrong.<br />
You’ll first need to change back into the forem directory, then set up the git repository:<br />
git init<br />
git add .<br />
git commit -m "Initial base for the forem engine"<br />
10 http://github.com/radar/forem.<br />
11 It also helps that one of the authors of this book has done extensive work on it.<br />
Figure 17.1 The forem engine,<br />
directory structure<br />
471
472 CHAPTER 17 Engines<br />
With that safety net in place, let’s go through the major parts of what this has<br />
generated.<br />
17.3.2 The layout of an engine<br />
You’ve now got the basic scaffold of your engine in the same directory of your application,<br />
and you can go back to that directory by using cd ../forem from within the<br />
application. Let’s go through the important parts of this engine.<br />
FOREM.GEMSPEC<br />
Each plugin that is generated using the new Rails plugin generator now comes with a<br />
gemspec, which allows it to be used as a gem. 12 This file allows you to specify information<br />
for your gem such as its name, a helpful description, and most important the<br />
other gems it depends on as either runtime dependencies using add_dependency, or<br />
as development dependencies using add_development_dependency. You can specify<br />
this information by lines like this in the Gem::Specification definition in this file:<br />
s.add_dependency 'rails'<br />
s.add_development_dependency 'rspec-rails'<br />
GEMFILE<br />
This file contains the rails and sqlite3 gems, which provide the basis for your application.<br />
When, however, people install your engine using gem install forem, they’ll<br />
not receive these dependencies. To fix this, you need to place them.<br />
You need to tell your Gemfile to reference the forem.gemspec file too, as you specify<br />
gem dependencies in this rather than the Gemfile for engines. The Gemfile is not<br />
referenced at all when you install a gem, but the forem.gemspec file is. Therefore, you<br />
must put all dependencies in the forem.gemspec file and tell your Gemfile to reference<br />
it for all its dependencies. To do this, change the Gemfile to be this:<br />
source :rubygems<br />
gemspec<br />
And add these lines to your forem.gemspec inside the Gem::Specification block:<br />
s.add_dependency "rails", "3.1.0"<br />
s.add_development_dependency "sqlite3"<br />
When you run bundle install, it will install the Rails version specified in your Gemfile<br />
and any gem dependencies declared in forem.gemspec.<br />
APP<br />
This folder serves the same purpose as an application: to house the assets, controllers,<br />
helpers, models, views, mailers, observers, and whatever else is particular to your<br />
application.<br />
Rails is automatically told about the app/assets directory contained within an<br />
engine, based on the class definition within a file you’ll see a little later on, lib/forem/<br />
12 A great guide to developing a gem can be found here: http://github.com/radar/guides/blob/master/gem-<br />
development.md.
Brand-new engine<br />
engine.rb. This folder works in the same way that it does in an application, providing a<br />
home for the images, JavaScript files, and stylesheets that are served by the sprockets<br />
gem. Providing that either the host application or the engine 13 specifies a dependency<br />
on CoffeeScript or Sass, you can use these as well.<br />
Inside the app directory lies the app/controllers directory, which serves the same<br />
purpose as the app/controllers directory in a Rails application. This directory has a<br />
key difference though: the controllers should be placed into a forem namespace so<br />
that they do not clash with identically named controllers in the application. If you<br />
moved these controllers out of the namespace, they’d clash with controllers of the<br />
same name in the application, or in other engines that aren’t using namespacing. By<br />
namespacing them, you prevent this error from happening. This also explains why the<br />
helpers in app/helpers are also separate.<br />
Your Forem::ApplicationController currently inherits from ActionController<br />
::Base, but in the case of your engine you’ll want it to inherit from Application-<br />
Controller instead. Therefore, you’ll change app/controllers/forem/application<br />
_controller.rb from this<br />
module Forem<br />
class ApplicationController<br />
into this:<br />
module Forem<br />
class ApplicationController<br />
You must use the :: prefix on the super ApplicationController so that it goes to the<br />
top-level ApplicationController, not the one inside the Forem model that you’re<br />
defining! By inheriting from the ApplicationController, your engine will use the<br />
same layout as the application it’s hosted within.<br />
Within the app directory, you can define models which also go under a<br />
namespace. If you had a Forum model, it would live at app/models/forem/forum.rb<br />
and would be called Forem::Forum. By doing this, you separate the model class from<br />
any identically named class in the application or other engines. The default table<br />
name for this model would be forums if it weren’t for some additional configuration<br />
in lib/forem/engine.rb that you’ll see later.<br />
With models also come migrations. When you create migrations in an engine,<br />
these are stored (again, like an application) in db/migrate. When you (or others)<br />
install the engine into an application, there’s a rake forem:install:migrations task<br />
that will copy across these migrations, adding the migrations to the current list of<br />
migrations in the application’s db/migrate folder. If a new version of the engine is<br />
released, the user can re-run rake forem:install:migrations and it will only copy<br />
across the newer migrations.<br />
13 It’s best to specify this dependency in the engine if you wish to use either of these.<br />
473
474 CHAPTER 17 Engines<br />
Obviously, you shouldn’t alter the migrations at all after releasing the engine to the<br />
general public, as there is no clean way of copying the changes. If you wish to make an<br />
alteration to a migration after the fact, you should leave the ones already released<br />
alone and create new ones.<br />
Finally, in the app directory you’ve got a app/views/layouts/forem/application<br />
.html.erb file. This file defines a basic layout for your engine, but you’re going to want<br />
to use your application’s layout, not this engine’s, so you can delete it right away.<br />
CONFIG/ROUTES.RB<br />
This file defines the routes for your engine. You can use exactly the same helpers<br />
you’d use in an application’s routing file, as you’ll see later on this chapter when you<br />
develop a feature. We won’t go into detail for the routing right now: we’ll do that after<br />
we’ve gone through the directory structure.<br />
LIB/FOREM.RB<br />
This file is automatically required by Bundler when you’re loading your engine as a<br />
gem, or by Rails if you’re loading it as a plugin. This is the main entry point for everything<br />
your application does. This file is very simple:<br />
require "forem/engine"<br />
module Forem<br />
end<br />
By requiring the forem/engine (which is actually the lib/forem/engine.rb file in the<br />
engine), it triggers the process that loads your engine.<br />
The module defined at the bottom of this file is there so that you can define any<br />
global behavior you wish. Right now, you don’t need any.<br />
LIB/FOREM/ENGINE.RB<br />
This file is the heart and soul of the engine and defines the all-important Forem<br />
::Engine. By inheriting from Rails::Engine, it sets in motion a chain of events to<br />
notify the Rails stack that an engine exists, providing a path to the assets within the<br />
engine. This file is pretty short:<br />
module Forem<br />
class Engine<br />
By using the isolate_namespace method, you isolate this engine’s routes from the<br />
application, as well as defining that models within the Forem module are to have a<br />
table prefix of forem_.<br />
By isolating the routes, you allow a host application to have a forums_path routing<br />
method defined for the application, as well as for the engine itself. When you use<br />
forums_path within the application, it will point to the application’s forums_path. If<br />
you use it in an engine, it will point to the engine’s forums_path.<br />
If you ever wanted to reference an engine’s route from within your application,<br />
there’s a helper defined for that too:<br />
link_to "Forums", forem.forums_path
Brand-new engine<br />
Calling the routing helper on the forem method automatically provided by this<br />
engine will generate the engine’s forums_path rather than the application’s. Note<br />
here that you’re using a period (.) rather than an underscore (_). You’re calling the<br />
forem method and then calling the forums_path method on that. If you wanted to reference<br />
the application’s route from within the engine, you’d use main_app instead of<br />
forem.<br />
Inside the Forem::Engine file you have access to the same config that an application<br />
would have. This is because the class that your application inherits from,<br />
Rails::Application, actually inherits from Rails::Engine as well. Applications and<br />
engines share much the same base functionality. This means that you’ll be able to configure<br />
your engine to use RSpec as the testing framework by putting these two lines in<br />
the Forem::Engine definition:<br />
config.generators.integration_tool :rspec<br />
config.generators.test_framework :rspec<br />
RAKEFILE<br />
This file loads the Rake tasks for your engine and any engine tasks Rails wishes to<br />
define. It also has one additional benefit: it loads your dummy application’s Rake tasks<br />
too. But rather than loading them straight into the Rake global namespace and polluting<br />
it, it namespaces the application’s tasks into the app namespace, so any defined<br />
task called email would become app:email.<br />
The engine’s tasks are much like an application; you can call rake db:migrate to<br />
run the migrations of the engine on your dummy application, and rake db:seed to<br />
load the seed data from the engine’s db/seeds.rb directory.<br />
SCRIPT/RAILS<br />
When you run rails commands, it goes looking for the script/rails file. This is how<br />
rails knows if it’s inside an application or not, based solely on the presence of one of<br />
these files. In your engine, its presence allows you to use the same generators you normally<br />
would in an application to generate your controllers, models, and whatever else<br />
you need.<br />
TEST<br />
No proper engine would be complete without tests, and it is, by default, the test directory<br />
where these would abide. You’re going to be using RSpec because you’re familiar<br />
with it. When tests in this directory run, they load the test/test_helper.rb file, which<br />
contains this code:<br />
# Configure Rails Environment<br />
ENV["RAILS_ENV"] = "test"<br />
require File.expand_path("../dummy/config/environment.rb",<br />
__FILE__)<br />
require "rails/test_help"<br />
Rails.backtrace_cleaner.remove_silencers!<br />
# Load support files<br />
Dir["#{File.dirname(__FILE__)}/support/**/*.rb"].each { |f| require f }<br />
475
476 CHAPTER 17 Engines<br />
This file’s second line of real code here requires the test/dummy/config/environment<br />
.rb file, which loads the application in test/dummy.<br />
TEST/DUMMY<br />
The application contained within this directory is purely for testing purposes, but you<br />
can set it up to act like a real application by creating controllers, helpers, models,<br />
views, and routes if you wish. When the tests run, this application is initialized like a<br />
real Rails application.<br />
Your tests then run against this application, which has your engine mounted inside<br />
the test/dummy/config/routes.rb file with this line:<br />
mount Forem::Engine => "/forem"<br />
This line mounts the routes of your engine (not yet defined) at the /forem path of<br />
your application. This means that whenever you want to access this engine, you must<br />
prefix the route with /forem. If you are in code, you can use the forem. prefix for the<br />
routing helpers, as seen earlier with forem.forums_path or forem.root_path within<br />
the dummy application.<br />
Even though there are a lot of files that are generated for engines—like there are<br />
when you generate an application—they all play a crucial role in your engine. Without<br />
this lovely scaffold, you’d have to create it all yourself, which would be no fun.<br />
This routing may be a little confusing at first, but it’s quite simple. Let’s look into<br />
how this process works, and then you’ll get into developing your first feature for this<br />
engine.<br />
17.3.3 Engine routing<br />
In an application, you need to define routes to an<br />
engine when you’re using it. You can do that with this<br />
line in config/routes.rb:<br />
mount Forem::Engine, :at => "/forem"<br />
To understand how engines are routed, you must understand<br />
the concept of middleware within a Rails application.<br />
14 Middleware is the term used for code that sits<br />
between the receiving server and the application; middleware<br />
can do a number of things, such as serve static<br />
assets and set flash messages. Rails 3 applications run on<br />
Rack, which uses a stack-based architecture to accomplish<br />
a request. A basic stack is shown in figure 17.2.<br />
In this picture, a basic request cycle for a Rails application<br />
is shown. A request comes from a client and hits<br />
Rack first, which then goes through all of the middleware.<br />
If a middleware returns a 404 (“Not Found”)<br />
14 Additional information about middleware can be found in chapter 18.<br />
Middleware #1<br />
404<br />
Middleware #1<br />
404<br />
Client<br />
Rack<br />
Application<br />
Figure 17.2<br />
A simple middleware stack<br />
200
Brand-new engine<br />
HTTP status code, then Rack moves on to the next one, going all the way through<br />
each part of the stack, moving on to the next every time the current part returns a 404<br />
until it hits the application. The application is the final stop of this request, and so<br />
whatever it returns goes. In this case, the application returns a 200 (“OK”) request,<br />
which is then passed back to the client through Rack.<br />
If a non-404 response was ever returned from a middleware object, then the digging<br />
would stop there, and the response would climb back to the surface.<br />
In a Rails application, the routing is actually a piece of the middleware stack. As<br />
the request goes through the chain, it eventually comes to the routes, which then<br />
determine where the request should head. When routing requests to an application,<br />
the sequence looks like figure 17.3.<br />
In this example, Rack still receives the request and goes through the middleware<br />
stack, with each middleware passing the buck until it comes up to the routes. This then<br />
handles the request, routing the request to (usually) a controller, which then executes<br />
the necessary code to get the job done and passes the result back up to the client.<br />
An engine is served in much the same way; you mount it at a specific path in your<br />
application’s config/routes.rb line with this line:<br />
mount Forem::Engine, :at => "/forem"<br />
Any request to the /forem path will not be passed to the application, but instead<br />
passed to the engine. The engine then decides how to route that request and returns<br />
a response exactly like an application. This process is shown in figure 17.4.<br />
2. Goes through middleware<br />
stack until...<br />
1. Request comes in for<br />
GET /projects<br />
Middleware #1<br />
Middleware #n<br />
3. Routes receive request<br />
Browser<br />
Server<br />
... Application Engine<br />
Routes<br />
7. Response goes out<br />
6. Application responds<br />
5. That route goes to<br />
the application!<br />
477<br />
4. What route is it?<br />
GET /projects Figure 17.3 Application route cycle
478 CHAPTER 17 Engines<br />
2. Goes through middleware<br />
stack until...<br />
It’s the same cycle, except this time the routing code has determined this request<br />
should be handled by the engine, rather than the application.<br />
We’ve talked long enough about the theory of an engine, and you’ve learned some<br />
key concepts. An engine is a miniature application that provides some functionality,<br />
and it’s routed like a normal application would be, providing you’ve mounted it in<br />
your application’s config/routes.rb file.<br />
It’s time to put all this theory into practice.<br />
17.4 Setting up a testing environment<br />
Before you can get down to writing any tests, you’re going to need to set up the environment<br />
to do that. For a change, you’re not going to be writing tests for your engine<br />
using Cucumber. Instead, you’re going to be using RSpec and Capybara. It’s always<br />
good to get a different perspective on testing, as not everyone agrees on the One True<br />
Way TM of doing things. The syntax for this RSpec and Capybara is still easy going, however,<br />
as shown by this example:<br />
require 'spec_helper'<br />
1. Request comes in for<br />
GET /forem/forums<br />
Middleware #1<br />
Middleware #n<br />
3. Routes receive request<br />
Browser<br />
Server<br />
... Application Engine<br />
Routes<br />
4. What route is it?<br />
GET /forem/forums<br />
7. Response goes out<br />
describe "topics" do<br />
it "creating a new one" do<br />
visit topics_path<br />
click_link "New Topic"<br />
fill_in "Subject", :with => "First topic!"<br />
6. Engine responds<br />
5. That route goes to<br />
the engine!<br />
Figure 17.4<br />
Routing cycle of an engine
end<br />
Setting up a testing environment<br />
fill_in "Text", :with => "First post!"<br />
click_button "Create Topic"<br />
within "#flash_notice" do<br />
page.should have_content("Topic has been created!")<br />
end<br />
within ".forem_topic #posts .forem_post" do<br />
page.should have_content("First post!")<br />
end<br />
end<br />
An obvious downside for writing this is that it’s not as human-friendly as a Cucumber<br />
test is, but it’s close enough. Anybody with an extremely basic understanding of Ruby<br />
should be able to understand everything here apart from the CSS selectors, which are<br />
another class of their own. 15<br />
There are a couple of benefits to using Capybara directly over using it in conjunction<br />
Cucumber. First, it’s going to be faster because there’s no parsing of the steps as<br />
there is in Cucumber—it’s straight method calls to the very same methods that Cucumber<br />
uses. Second (and related), all the code for the feature is kept within one file.<br />
You’re going to need to make some changes to your engine to install RSpec and<br />
Capybara first.<br />
17.4.1 Removing Test::Unit<br />
At the moment in your application, you’ve got a test directory that uses Test::Unit for<br />
testing. We’ve avoided this throughout the book, and this chapter’s not going to be<br />
any exception to that rule. 16 You’re going to switch this over to using RSpec.<br />
Inside this test directory, there is the test/test_helper.rb file that contains this<br />
content:<br />
# Configure Rails Environment<br />
ENV["RAILS_ENV"] = "test"<br />
require File.expand_path("../dummy/config/environment.rb", __FILE__)<br />
require "rails/test_help"<br />
Rails.backtrace_cleaner.remove_silencers!<br />
# Load support files<br />
Dir["#{File.dirname(__FILE__)}/support/**/*.rb"].each { |f| require f }<br />
15 You could create a helper method here to help clarify what these mean, such as this assert_seen method<br />
from the real forem engine:<br />
https://github.com/radar/forem/blob/87092925e8f7092723e07e0adbae44ad96a45d01/spec<br />
/integration/posts_spec.rb#L28<br />
16 For two reasons. First, the authors prefer RSpec. Second, RSpec is preferred by the majority of people in the<br />
community. There are still pockets of resistance though.<br />
479
480 CHAPTER 17 Engines<br />
This is really helpful for Test::Unit, but you can also cannibalize it for your RSpec.<br />
Let’s create a spec directory and put in it a spec /spec_helper.rb, which contains similar<br />
content to the test/test_helper.rb file:<br />
# Configure Rails Environment<br />
ENV["RAILS_ENV"] = "test"<br />
require File.expand_path("../dummy/config/environment.rb",<br />
require 'rspec/rails'<br />
__FILE__)<br />
Rails.backtrace_cleaner.remove_silencers! B Remove backtrace cleaner<br />
# Load support files<br />
Dir["#{File.dirname(__FILE__)}/support/**/*.rb"].each { |f| require f }<br />
It’s about identical, except you’ve replaced the require to rails/test_help with<br />
rspec/rails. This spec/spec_helper.rb file will be loaded by RSpec when you run<br />
your tests.<br />
One thing to note is the line Rails.backtrace_cleaner.remove_silencers! B.<br />
Rails has an automated backtrace cleaner, which it uses to shorten the resulting backtrace<br />
from errors so that it’s easier to track down. You don’t need this silencing going<br />
on in your tests, and so you can remove it using remove_silencers!.<br />
You need to add one more thing to the end of spec/spec_helper.rb, which will reset<br />
your database back to a clean slate once all of your tests have finished running. It will<br />
do this by running the test’s database queries inside a transaction, which is then rolled<br />
back at the end of the test. That would be this little configuration option:<br />
RSpec.configure do |config|<br />
config.use_transactional_fixtures = true<br />
end<br />
Without this, test data would accumulate in your database, leading to undesired<br />
results.<br />
Your next step in replacing Test::Unit with RSpec is to move the test/dummy directory<br />
to spec/dummy. This folder is the dummy application for your engine and contains<br />
the all-important config/environment.rb file, which is required in spec/<br />
spec_helper.rb.<br />
With all this code moved over, you can remove the test directory completely,<br />
because you don’t need it any more. The test/dummy directory itself is still referenced<br />
in the engine in a couple of places, and you’ll need to replace these references with<br />
the new spec/dummy location.<br />
The first of these locations is the Rakefile file at the root of the engine. This file is<br />
loaded when any rake task is executed and is responsible for loading those tasks. You<br />
need to replace this line in Rakefile<br />
APP_RAKEFILE = File.expand_path("../test/dummy/Rakefile", __FILE__)<br />
with this:<br />
APP_RAKEFILE = File.expand_path("../spec/dummy/Rakefile", __FILE__)
Setting up a testing environment<br />
This will now point to the correct location for your dummy application’s Rakefile. If<br />
you had defined a custom task within this dummy application called email_everyone,<br />
it would be available in your engine as app:email_everyone. This is designed to stop<br />
the conflicts between the application and the engine.<br />
Also in Rakefile, you need to replace the use of Rake::TestTask with the equivalent<br />
for RSpec. Let’s remove these lines from Rakefile now:<br />
require 'rake/testtask'<br />
Rake::TestTask.new(:test) do |t|<br />
t.libs :spec<br />
On the final line here you tell Rake to default to the spec task if there is no task specified.<br />
This means that, rather than running rake spec to run the tests, you can run rake.<br />
The second and final location you need to change the test/dummy reference is in<br />
script/rails at the root of your engine. This contains this line:<br />
load File.expand_path('../../test/dummy/script/rails', __FILE__)<br />
This file would normally load the test/dummy/script/rails file directory, if you hadn’t<br />
already moved it. This file is responsible for loading the subcommands for the rails<br />
command. You need to change this line to make it work again:<br />
load File.expand_path('../../spec/dummy/script/rails', __FILE__)<br />
With these changes complete, your move away from Test::Unit is also complete. Your<br />
next step is going to be installing the RSpec and Capybara gems and setting them up.<br />
With those done, then you can get down to writing some tests.<br />
17.4.2 Installing RSpec and Capybara<br />
To install these gems, you’re not going to add them to your Gemfile, but instead to<br />
forem.gemspec. The established best practice for developing gems is to put the dependencies<br />
inside the gemspec. That way, when people install this engine as a gem using<br />
gem install forem, they’ll get all the normal dependencies installed, and if they install<br />
it using gem install forem --dev, they’ll get all the development dependencies as well.<br />
Directly before the end of the Gem::Specification.new block, you’ll put these two<br />
lines to declare that RSpec and Capybara are development dependencies of your<br />
application:<br />
481
482 CHAPTER 17 Engines<br />
s.add_development_dependency "rspec-rails", "~> 2.5"<br />
s.add_development_dependency "capybara"<br />
You can run bundle install to install these two gems as dependencies because you’ve<br />
got the gemspec method call in Gemfile. Once that command is done, then you’ve got<br />
what you need in terms of gems.<br />
Your next move is to set up Capybara to be used with RSpec. In spec/spec_helper<br />
.rb there’s this line:<br />
Dir["#{File.dirname(__FILE__)}/support/**/*.rb"].each { |f| require f }<br />
This line will require all the files with a .rb extension within the spec/support directory<br />
or its subdirectories. You can use this to load Capybara for your tests by creating the<br />
spec/support folder and putting a file called spec/support/capybara.rb inside of it with<br />
this content:<br />
require 'capybara/rails'<br />
require 'capybara/dsl'<br />
RSpec.configure do |c|<br />
c.include Capybara, :example_group => {<br />
:file_path => /\bspec\/integration\//<br />
}<br />
end<br />
The capybara/rails sets up Capybara to be used for your dummy application (which<br />
loads your engine), while the capybara/dsl gives you all the helpful Capybara methods<br />
that you’re going to need in your tests.<br />
The final chunk of code here includes the Capybara module within all tests that<br />
are within the spec/integration directory. This should provide a pretty big clue as to<br />
where your integration tests are going for your engine!<br />
That’s all that you’ve got to do for setting up Capybara and RSpec. Let’s make a<br />
commit for this:<br />
git add .<br />
git commit -m "Remove Test::Unit, replace with RSpec + Capybara"<br />
Now why don’t we get into some real coding?<br />
17.5 Writing your first engine feature<br />
When they first start writing a Rails application, many people will attempt to create a<br />
forum system. 17 This is a great place to start, as a lot of people have used forum systems<br />
18 and therefore they understand the basic concepts of how they work.<br />
Generally, on the home page there’s a list of forums that have topics inside of them<br />
and then posts inside of those topics. Each topic and post are created by a user, and<br />
there’s a wide gamut of conversation (and, on larger forums, a great deal of trolling)<br />
that goes on in them.<br />
17 One of the authors attempted such a project and it grew into rboard: http://github.com/radar/rboard.<br />
18 Such as PHPbb and VBulletin.
Writing your first engine feature<br />
Your engine is going to be a stripped-down version of this, showing only topics and<br />
posts. It’s a great example of how you can implement engine functionality, and it’s<br />
short enough to fit neatly into a chapter. You’re going to be using the User model<br />
from the host application (Ticketee) for all of your authentication needs too, which is<br />
kind of neat.<br />
Your first port-of-call is adding the ability to create a topic and the first post for that<br />
topic at the same time. This topic will then be displayed at the top of a topics listing,<br />
which will be the next feature you’ll work on.<br />
17.5.1 Your first Capybara test<br />
You’re going to need to generate a file to put your test in, and that particular file’s<br />
going to be called spec/integration/topics_spec.rb. You need to place it inside the<br />
spec/integration directory so that you have access to the Capybara helpers that you set<br />
up earlier.<br />
In this test, you want to navigate to the listing of all topics, then click the New<br />
Topic link, fill in your topic’s details, and see that you’ve got a topic. You’ll do this one<br />
step at a time, beginning with the code in the following listing.<br />
require 'spec_helper'<br />
describe "topics" do<br />
it "creating a new one" do<br />
visit topics_path<br />
click_link "New Topic"<br />
fill_in "Subject", :with => "First topic!"<br />
fill_in "Text", :with => "First post!"<br />
click_button "Create Topic"<br />
end<br />
Listing 17.1 spec/integration/topics_spec.rb<br />
within "#flash_notice" do<br />
page.should have_content("Topic has been created!")<br />
end<br />
within ".forem_topic #posts .forem_post" do<br />
page.should have_content("First post!")<br />
end<br />
end<br />
Here you’ve defined a test like you would in an application. The test requires<br />
spec_helper (spec/spec_helper.rb), which sets up the environment for your test and<br />
then launches right into defining the test itself.<br />
Inside the test, you use a Capybara method called visit that will navigate to the<br />
specified path in the application, which in this case is topics_path. This will take you<br />
to the index action on the TopicsController. You’ll put the code that defines this<br />
method in your engine’s config/routes.rb in a short while.<br />
483
484 CHAPTER 17 Engines<br />
The click_link method here will do exactly that: it will click a link called New<br />
Topic, taking you to the new action in TopicsController. On this page, there will be a<br />
form with two fields, one called Subject and another called Text. You fill these fields in<br />
using the fill_in method, and when you click Create Topic with click_button, the<br />
form will post to the create action of TopicsController. This action sets a flash notice<br />
that you’ll see within an element with its id attribute set to flash_notice. Finally, you<br />
should see the content of your post also within another element on the page. You use<br />
the within methods provided by Capybara for both of these.<br />
When you run this spec with bin/rspec spec/integration/topics_spec.rb,<br />
you’ll be told this:<br />
1) topics creating a new one<br />
Failure/Error: visit topics_path<br />
NameError:<br />
undefined local variable or method `topics_path' for ...<br />
This is missing the resources call for topics in config/routes.rb, which you must add<br />
now.<br />
17.5.2 Setting up routes<br />
You’ve not yet defined the route for this resource in your engine’s config/routes.rb,<br />
and so you should do that now, transforming the file into this:<br />
Forem::Engine.routes.draw do<br />
resources :topics<br />
end<br />
You’ll also make it so the index action of the controller for this route (Topics-<br />
Controller) serves as the root page for this engine by putting this line within the<br />
draw block:<br />
root :to => "topics#index"<br />
When you run your spec again, you’ll still be given the same error:<br />
1) topics creating a new one<br />
Failure/Error: visit topics_path<br />
NameError:<br />
undefined local variable or method `topics_path' for ...<br />
Even though you’ve defined the routes correctly in config/routes.rb, the routing helpers<br />
are not made available to your specs automatically like they are in a Rails application.<br />
This is an easy-to-fix problem though: you’ll include them much like you did<br />
with the Capybara module earlier.<br />
The routing helpers for a Rails application are actually available in a dynamic module<br />
that is accessible through the Rails.application.routes.url_helpers. Like an<br />
application, your engine’s URL helpers will be available through Forem::Engine<br />
.routes.url_helpers. Let’s include this module for all spec/integration tests by<br />
creating a new file in spec/support called spec/support/load_routes.rb, which contains<br />
the content from the following listing.
Writing your first engine feature<br />
Listing 17.2 spec/support/load_routes.rb<br />
RSpec.configure do |c|<br />
c.include Forem::Engine.routes.url_helpers,<br />
:example_group => {<br />
:file_path => /\bspec\/integration\//<br />
}<br />
end<br />
This will load the URL helpers, such as topics_path, that you need for your test.<br />
One interesting thing to note here is that your topics_path method doesn’t generate<br />
the normal /topics URL as would be expected. Instead, it generates the correct<br />
/forem/topics path. This is because your engine is mounted in spec/dummy/config/<br />
routes.rb under the forem path. When you visit topics_path, you’re actually going<br />
to visit the correct path of this route, like you would in a real application.<br />
The next time you run your spec, you’ll see this error:<br />
ActionController::RoutingError:<br />
uninitialized constant Forem::TopicsController<br />
Now your topics_path helper is working and generating a route to the index action<br />
inside Forem::TopicsController, which you attempt to visit by using the visit<br />
method. This controller doesn’t exist right now, and therefore you get this error. So<br />
let’s generate this controller to proceed.<br />
17.5.3 The topics controller<br />
You’ve come to the stage where you need the first controller for your application,<br />
Forem::TopicsController. To generate this controller, you can run this command:<br />
rails g controller forem/topics<br />
You have to namespace your controller by putting forem before it so that Rails creates<br />
it correctly. This command will generate the normal controller stuff for your engine,<br />
such as the controller itself, a helper, and the app/views/forem/topics directory.<br />
What’s your spec tell you next? Let’s find out with bin/rspec spec/integration/<br />
topics_spec.rb:<br />
AbstractController::ActionNotFound:<br />
The action 'index' could not be found for Forem::TopicsController<br />
You now need to create the index action in Forem::TopicsController.<br />
17.5.4 The index action<br />
Let’s open app/controllers/forem/topics_controller.rb now. Inside this controller,<br />
you’ll see this:<br />
module Forem<br />
class TopicsController < ApplicationController<br />
end<br />
end<br />
485
486 CHAPTER 17 Engines<br />
This code has defined a Forem::TopicsController, which inherits seemingly from<br />
ApplicationController. This is actually Forem::ApplicationController because<br />
the class is being defined in the Forem module. The Forem::ApplicationController<br />
will be where you put all your engine’s common controller things later on.<br />
Right now, you need to define this missing index action. This action needs to<br />
retrieve a list of all topics and then show them in the view. You’ll define this action by<br />
changing your Forem::TopicsController to what’s shown in the following listing.<br />
Listing 17.3 app/controllers/forem/topics_controller.rb<br />
module Forem<br />
class TopicsController < ApplicationController<br />
def index<br />
@topics = Forem::Topic.all<br />
end<br />
end<br />
end<br />
You’re namespacing your reference to the Forem::Topic model because it’s actually<br />
Ruby that will be loading this class. If you referenced it without the Forem:: prefix,<br />
then it would go looking for a normal Topic model that may belong to your application<br />
or another engine. 19 At this point, you’re not going to have the Forem::Topic<br />
model defined, and so you’ll need to generate that too. It will need to have a subject<br />
attribute, as well has having a user_id attribute, which you’ll fill out later:<br />
rails g model topic subject:text user_id:integer<br />
As when you generated the topics controller, this model will also be namespaced. The<br />
migration it generates is called create_forem_topics and will create a table called<br />
forem_topics. This means the migration, model, and table will not clash with any similarly<br />
named migration, model, or table in the main application.<br />
To run this migration, run rake db:migrate as you would in an application. In an<br />
engine, this will run the migration against the dummy application’s development database.<br />
There’s no rake db:test:prepare in engines at the moment, and so you’ll have<br />
to work around this by changing the dummy application’s config/database.yml file to<br />
make the development and test databases the same. You’ll do this by using the code in<br />
the following listing.<br />
Listing 17.4 spec/dummy/config/database.yml<br />
shared: &shared<br />
adapter: sqlite3<br />
database: db/development.sqlite3<br />
pool: 5<br />
timeout: 5000<br />
development:<br />
test:<br />
488 CHAPTER 17 Engines<br />
You’re missing the new action in your Forem::TopicsController. This action will provide<br />
the form that users can use to create a new topic.<br />
17.5.5 The new action<br />
You need to define the new action in the controller. This action and its related view will<br />
provide the form for creating a topic and its first post. In this brand new action, you can<br />
initialize a new topic and post with the following code underneath the index action:<br />
def new<br />
@topic = Forem::Topic.new<br />
@topic.posts.build<br />
end<br />
There’s no association definition or even a model for the posts association yet, and so<br />
you should create the model and then the correct associations. You can do this by running<br />
this command:<br />
rails g model post topic_id:integer text:text user_id:integer<br />
You can then run rake db:migrate to create the forem_posts table. Next, you need to<br />
set up both ends of this association, beginning with the Forem::Post model, which<br />
needs to have this line inserted:<br />
belongs_to :topic<br />
Here you don’t need to tell Rails that the class of this association is Forem::Topic,<br />
Rails will figure that out itself. In the Forem::Topic model, you need to set up the<br />
other end of this association and accept nested attributes for it:<br />
has_many :posts, :order => "created_at ASC"<br />
accepts_nested_attributes_for :posts<br />
You’re putting the accepts_nested_attributes_for in the Forem::Topic model<br />
because when you submit the form for this action, you’ll be passing through the attributes<br />
for the topic as well as nested attributes for the post. With the association now<br />
defined in your Forem::Topic model, your new action will work.<br />
The next step here is defining the view for this action, which you can do by putting<br />
this code at app/views/forem/topics/new.html.erb:<br />
New Topic<br />
<br />
This view will render the partial at app/views/forem/topics/_form.html.erb, which you<br />
need to define using the code in the following listing.<br />
Listing 17.6 app/views/forem/topics/_form.html.erb<br />
<br />
<br />
<br />
<br />
Writing your first engine feature<br />
<br />
"forem/posts/form", :locals =><br />
➥{ :post => post} %><br />
<br />
<br />
<br />
Alright now, with the action, the view, and the form partial defined, you’re almost<br />
there. In this partial though, you reference another partial called forem/posts/<br />
form B, passing through the local variable of the post form builder object as f to it<br />
by using the :locals option. You’re using the long form here, as Rails cannot infer<br />
the name of it any other way.<br />
This new partial will provide the text field that you’ll use for posts. You’re placing it<br />
into a partial because you may use it later on if you ever create a form for creating new<br />
posts, like a reply feature for a topic.<br />
Let’s create the file for this partial now at app/views/forem/posts/_form.html.erb<br />
and put these lines in it:<br />
<br />
<br />
<br />
<br />
Even though this is an extremely short partial, it’s good to separate it out so that it can<br />
be shared across the topic and posts forms, and also in case you ever decide to add any<br />
additional information to a post.<br />
Your test should get a little further when you run bin/rspec spec/integration/<br />
topics_spec.rb again:<br />
AbstractController::ActionNotFound:<br />
The action 'create' could not be found for Forem::TopicsController<br />
Now you need to define the create action, the second to last action along this chain,<br />
with the show action being the last.<br />
17.5.6 The create action<br />
The create action will take the parameters passed from the form provided by the new<br />
action and create a new Topic object with a nested Post object. This action should set<br />
the flash[:notice] variable to inform the user that the topic could be created and<br />
then redirect to the show action.<br />
This action needs to be defined using the code shown in the following listing, placing<br />
it under the new action.<br />
Listing 17.7 app/controllers/forem/topics_controller.rb<br />
def create<br />
@topic = Forem::Topic.create(params[:topic])<br />
flash[:notice] = "Topic has been created!"<br />
redirect_to @topic<br />
end<br />
B<br />
Reference<br />
partial<br />
489
490 CHAPTER 17 Engines<br />
NOTE We’re purposely not including validations in this action. This is<br />
mainly to keep the chapter short, but it’s also a good exercise to be left to<br />
you. Remember to write tests that the validations work before implementing<br />
the code!<br />
When you run your spec again using bin/rspec spec/integration/topics_spec.rb,<br />
you’ll get this error:<br />
AbstractController::ActionNotFound:<br />
The action 'show' could not be found for Forem::TopicsController<br />
You’re getting closer to having your spec pass! When it clicks the Create Topic button,<br />
it’s now going through the create action successfully and is then redirecting to the<br />
show action, which you need to define now.<br />
17.5.7 The show action<br />
The show action in Forem::TopicsController will be responsible for displaying a<br />
topic and its posts. Your first step will be defining this action, which you can do by putting<br />
this code inside app/controllers/forem/topics_controller.rb underneath the<br />
create action:<br />
def show<br />
@topic = Forem::Topic.find(params[:id])<br />
end<br />
You’re then going to need to create the view for this action, which goes at app/views/<br />
forem/topics/show.html.erb and contains the short bit of code in the following listing.<br />
Listing 17.8 app/views/forem/topics/show.html.erb<br />
<br />
<br />
<br />
"forem/posts/post", :collection => @topic.posts %><br />
<br />
<br />
You’re using a long form of render here again to render the app/views/forem/posts/<br />
_post.html.erb partial for each of the posts. The shorter version goes like this:<br />
<br />
Unfortunately, due to the namespacing on your model, Rails will attempt to render<br />
the app/views/forem/forem/posts/_post.html.erb (double “forem”) partial instead.<br />
You therefore have to be explicit. A short note: the long form’s syntax was how it used<br />
to be done in earlier versions of Rails.<br />
The partial that it renders hasn’t been created yet, and so this will be your next<br />
step. Let’s create a new file at app/views/forem/posts/_post.html.erb and fill it with<br />
this content:<br />
<br />
Written at
<br />
Writing your first engine feature<br />
In this view you see the reappearance of the div_for method (last seen in chapter<br />
10), which will create a new div HTML element with the id attribute set to<br />
post_[post.id] and a class attribute set to post. This is so you can easily style the element<br />
containing the post text if you wish. You’re also using the simple_format<br />
method here too (also last seen in chapter 10), which converts line breaks in the text<br />
of the post to HTML br tags.<br />
You’re close to having your spec pass. Go to the new action, fill in the form, click<br />
the button, and then you’re on the show page. But something’s missing. Let’s run<br />
bundle exec rspec spec/integration/topics_spec.rb to see what this is:<br />
Capybara::ElementNotFound:<br />
Unable to find '#flash_notice'<br />
Your spec is unable to find the element with the id attribute set to flash_notice, but<br />
why? This is because you haven’t defined a way of displaying it in your engine’s<br />
dummy application’s app/views/layout/application.html.erb yet. You can do this by<br />
using this code inside spec/dummy/app/views/layout/application.html.erb, directly<br />
underneath the start tag:<br />
<br />
<br />
<br />
This code will iterate through the flash hash, setting the keys to the key variable and<br />
the value to the message variable. For each message contained within flash, a new<br />
div element will be put on the page, outputting something like this:<br />
Topic has been created!<br />
Your spec should now see this element with the id attribute set to flash_notice and<br />
pass. Run bin/rspec spec/integration/topics_spec.rb and see for yourself:<br />
1 example, 0 failures<br />
Good! The test passes. This engine now sports the ability to create a brand-new topic,<br />
and that’s a good start. Given that it’s the only test in the engine at this point in time,<br />
you don’t need to run all the tests at the moment. Let’s make a commit:<br />
git add .<br />
git commit -m "Added the ability to create a new topic"<br />
You’ve seen here that the basics of developing an engine’s feature are very similar, if<br />
not identical, to developing a feature under a namespace in a normal application.<br />
Before we move on to your next feature, you’ll fix up the two placeholders that you<br />
left in app/views/forem/topics/index.html.erb. They were these two lines:<br />
0 posts<br />
last post was at TIME by USER<br />
You’re probably going to want to replace these two lines with actual data, right? Absolutely!<br />
Let’s start with the posts count.<br />
491
492 CHAPTER 17 Engines<br />
17.5.8 Showing an association count<br />
You’re going to want to replace the “0 posts” in app/views/forem/topics/<br />
index.html.erb with something actually useful. You can do this very easily. You’ve got a<br />
has_many association for posts in your Topic model, which gives you, among other<br />
things, a lovely method called count on the association that you can use. Let’s replace<br />
this line in the view<br />
0 posts<br />
with this:<br />
<br />
This line will execute an SQL count query for all the posts with the topic id set to<br />
topic.id, a query like this:<br />
SELECT COUNT(*) FROM posts WHERE topic_id = 1<br />
This is great, but doing an extra query for every single topic on the page would be<br />
extremely hard on performance. If there were 100 topics, then there would be 100<br />
extra queries.<br />
Enter counter caching. Counter caching will allow you to store the number of<br />
posts on the topics table, and then you can use this cache to show the number of<br />
posts. It works like a normal attribute on a model, except that it’s updated by Rails.<br />
This attribute’s name is [association_name]_count, and so in this case it would be<br />
posts_count. To get started with this, you’re going to need to add this attribute to<br />
the forem_topics table, which you can do by running this command to generate a<br />
migration:<br />
rails g migration add_posts_count_to_forem_topics posts_count:integer<br />
You need to open this migration and set the field to default to 0; otherwise the counter<br />
cache won’t know where to start counting! You’ll change this line in the brand-new<br />
migration<br />
add_column :forem_topics, :posts_count, :integer<br />
to this:<br />
add_column :forem_topics, :posts_count, :integer, :default => 0<br />
Next, you can run this migration using rake db:migrate. To let Rails know that you’ve<br />
now got a counter cache column on your table, you need to open up the app/models/<br />
forem/post.rb and change this line<br />
belongs_to :topic<br />
to this:<br />
belongs_to :topic, :counter_cache => true<br />
It may seem counterintuitive to define the field on the table for the Forem::Topic<br />
model, but then have the counter_cache option in the Forem::Post model, but it’s
Adding more posts to topics<br />
really simple. When a post is created, Rails will check for any associations with the<br />
counter_cache option set to true. It then gets the current count for this association,<br />
adds 1 to it, and saves the associated object. When a post is deleted, it will do the same<br />
thing, except instead of adding 1, it will subtract 1. This way, you’re always going to<br />
have an accurate count of the number of posts each topic has.<br />
In the app/views/forem/topics/index.html.erb file now, you’ll change this line<br />
<br />
to this:<br />
<br />
Rather than inefficiently calling posts.count for each topic, Rails will now reference<br />
the posts_count attribute for the Forem::Topic object instead, saving you many queries<br />
for the index action when you have many topics. This also means that you’ll have<br />
an accurate count of posts for your topics!<br />
You’ll commit this change now:<br />
git add .<br />
git commit -m "Add posts counter cache to topics"<br />
You’ve fixed up one of the placeholder lines in the app/views/topics/index.html.erb<br />
view now, and when you get around to adding users to your engine, you’ll fix up the<br />
second placeholder line.<br />
In this section, you’ve created an interface for creating topics and their first post,<br />
which is the first feature of your engine and a well-tested one at that. You’ve seen how<br />
to use fields_for to yet again create nested resources. You first saw that back in chapter<br />
8. You’ve also seen the :counter_cache option for belongs_to that you can use to<br />
cache the count of an association, so that you don’t have to perform another query to<br />
get that number. That’s a potential lifesaver if you’re displaying a lot of objects at once<br />
and want to know an association’s count on all of them, like in your topics view.<br />
In the next section, you’re going to add the ability to add posts to a topic, because<br />
what are topics without posts?<br />
17.6 Adding more posts to topics<br />
A forum system without a way for users to reply to topics is nearly useless. The whole<br />
point of having topics is so that users can reply to them and keep the topic of conversation<br />
going for as long as they wish!<br />
The feature that you’re about to develop will let people add these replies to existing<br />
topics. They’ll click a New Reply link on a topic, fill in the post text, and click the<br />
submit button. They should then see their post within the list of posts in the topic.<br />
Simple, really!<br />
You’ll also see here more examples of integration testing with Capybara; you’ll<br />
repeat some of the concepts, but it’s a good way of learning.<br />
You’ll start out with a new spec file called spec/integration/posts_spec.rb and begin<br />
to fill it with the content from the following listing.<br />
493
494 CHAPTER 17 Engines<br />
Listing 17.9 spec/integration/posts_spec.rb<br />
require 'spec_helper'<br />
describe "posts" do<br />
before do<br />
@topic = Forem::Topic.new(:subject => "First topic!")<br />
@topic.posts.build(:text => "First post!")<br />
@topic.save!<br />
end<br />
end<br />
In order to reply to a topic, you’re going to need to create one. You initialize a new<br />
Forem::Topic object by using Forem::Topic.new and then build a post for it. This<br />
means that when you navigate to the topic’s page, then you’ll see a post that will have<br />
a Reply link for you to click. You’ll put the test underneath the before by using the<br />
code in the following listing.<br />
Listing 17.10 spec/integration/posts_spec.rb<br />
it "reply to a topic" do<br />
visit topics_path<br />
click_link "First topic!"<br />
within ".forem_topic #posts .forem_post" do<br />
click_link "Reply"<br />
end<br />
fill_in "Text", :with => "First reply!"<br />
click_button "Create Post"<br />
within "#flash_notice" do<br />
page.should have_content("Post has been created!")<br />
end<br />
within ".forem_topic #posts .forem_post:last" do<br />
page.should have_content("First reply!")<br />
end<br />
end<br />
In this test, you go to topics_path and click the First Topic! link. Then within a post,<br />
you click the Reply link, which will take you to the form to create a new reply to this<br />
topic. On this new page, you fill in the text with a short message and click the Create<br />
Post button to create a new post. Once this is done, you’ll be taken to the create<br />
action in Forem::PostsController, which will set the flash[:notice] to be “Post has<br />
been created!” and then redirect you back to the topic’s page, where you should see<br />
First Reply! within a post.<br />
You’ve used a slightly obscure selector syntax here; you’re looking for the<br />
#forem_topic element, which contains a #posts element, which itself contains many<br />
.forem_post elements, of which you want the last one B. This will indicate to you<br />
that on the page, the post that has been created is now at the bottom of the posts listing<br />
for this topic, right where it should be.<br />
B<br />
Find last<br />
.forem_post element
Adding more posts to topics<br />
Let’s start with running this test using bin/rspec spec/integration/<br />
posts_spec.rb. It will get through the first two steps, but fail because it cannot find a<br />
Reply link:<br />
Capybara::ElementNotFound:<br />
no link with title, id or text 'Reply' found<br />
This link needs to go in the app/views/forem/posts/_post.html.erb, and you can do<br />
that by using this text and placing it inside the div_for in the file, as that’s where your<br />
test is expecting the link to be:<br />
<br />
This Reply link will go to the new action within the Forem::PostsController. The<br />
nested route helper that you use, new_topic_post_path, will again reference only the<br />
engine’s new_topic_post_path because the engine is isolated. To define this route<br />
helper and the relevant routes for it, you’ll open config/routes.rb and alter this line<br />
resources :topics<br />
to now be these lines:<br />
resources :topics do<br />
resources :posts<br />
end<br />
When you re-run your spec, you get this error:<br />
ActionController::RoutingError:<br />
uninitialized constant Forem::PostsController<br />
You need to generate this controller, which you can do by running this command:<br />
rails g controller posts<br />
Again, this will generate a namespaced controller because you’ve isolated your<br />
engine. In this controller, you’re going to need to define a new action, as well as a<br />
before_filter to load the topic. You’ll change your Forem::PostsController into<br />
what’s shown in the following listing.<br />
Listing 17.11 app/controllers/forem/posts_controller.rb<br />
module Forem<br />
class PostsController < ApplicationController<br />
before_filter :find_topic<br />
def new<br />
@post = @topic.posts.build<br />
end<br />
private<br />
def find_topic<br />
@topic = Forem::Topic.find(params[:topic_id])<br />
end<br />
end<br />
end<br />
495
496 CHAPTER 17 Engines<br />
Note that the params[:topic_id] here doesn’t need to be namespaced yet again<br />
because you’re isolated. This feature is really saving you a lot of useless typing! Now,<br />
with the action defined in the controller, you’re going to need a view too. You’ll<br />
define it with a couple of lines in a new file at app/views/forem/posts/new.html.erb:<br />
New Post<br />
<br />
"form", :locals => { :post => post } %><br />
<br />
<br />
Always specify options when using locals<br />
If, in this example, you used this line to render the partial<br />
{ :post => post } %><br />
the :locals option would be ignored by render. You must always use the :partial<br />
option in conjunction with the :locals option; otherwise it will not work.<br />
With the code in the controller for the before_filter, the new action defined, and<br />
the view written, when you run your spec again with bin/rspec spec/integration/<br />
posts_spec.rb, you’ll be shown this error:<br />
AbstractController::ActionNotFound:<br />
The action 'create' could not be found for Forem::PostsController<br />
You now need to define the create action within your Forem::PostsController:<br />
def create<br />
@post = @topic.posts.create(params[:post])<br />
flash[:notice] = "Post has been created!"<br />
redirect_to topic_path(@topic)<br />
end<br />
This action will create a new post for the topic with the non-namespaced parameters<br />
that have been passed in, set the flash[:notice], and send the user back to the<br />
topic_path(@topic) path. Hey, that’s about all that your test needs, isn’t it? Let’s find<br />
out with another run of bin/rspec spec/integration/posts_spec.rb:<br />
1 example, 0 failures<br />
Awesome! That was easy, wasn’t it? You’ve now got a way for users to post replies to<br />
topics for your engine in a couple of steps. You repeated a couple of the steps you performed<br />
in the last section, but it’s good to have this kind of repetition to enforce the<br />
concepts. Additionally, having topics without posts would be kind of silly.<br />
Before you run your specs, RSpec has generated controller tests incorrectly for<br />
your application, calling the classes inside the files at spec/controllers/forem/topics<br />
_controller_spec.rb and spec/controllers/forem/posts_controller_spec.rb Topics-<br />
Controller and PostsController, respectively. You will need to change these to
Classes outside your control<br />
Forem::TopicsController and Forem::PostsController so that RSpec doesn’t barf<br />
when you run your tests. There are also the helpers in spec/helpers and the models in<br />
spec/models, which need to undergo similar changes.<br />
Did you break anything? Let’s find out with bin/rspec spec:<br />
2 examples, 0 failures<br />
It doesn’t look like it, and that’s a good thing! Let’s commit this change to provide<br />
yourself with a nice little checkpoint:<br />
git add .<br />
git commit -m "Added the ability to reply to posts"<br />
Users of your engine are now able to add replies to topics created by themselves or<br />
other users.<br />
You’ve got a nice couple of features going for your engine, but they’re very inclusive.<br />
You haven’t yet seen how to use the application’s User model to add authorship<br />
to your topics and posts, nor any way of integrating this engine with your Ticketee<br />
application. But never fear! That’s what the next two sections are for.<br />
17.7 Classes outside your control<br />
When creating an engine such as this one, you may want to rely on classes from the<br />
application. To relate posts and topics to users within the application, you could do<br />
this in the models:<br />
belongs_to :user<br />
But what if the concept of users in the application isn’t kept within a User model at<br />
all? Then this would break. You could store a couple of common model names, such<br />
as User, Person, or Account and check for those, but that’s prone to breakage as well.<br />
Here we’ll cover the theory behind configuration options, which you can use to let<br />
your engine know the application’s User model.<br />
17.7.1 Engine configuration<br />
Within this engine you’re going to want to reference the User model from your application<br />
so that you are able to attribute posts and topics to whomever has created<br />
them. However, there’s a catch: within the application, the model that refers to the<br />
user in the system may not be called User! Therefore, you’re going to need to create a<br />
way to inform the engine of what this class is called from within the application.<br />
The best way to inform the engine about the User model would be to have a file<br />
called config/initializers/forem.rb which will run when the application loads like all<br />
other initializers. This file would contain a single line, which would tell the engine<br />
what class represents users within this application, like this:<br />
Forem::Engine.user_class = User<br />
This configuration setting will then be maintained by your engine across requests, and<br />
you’ll be able to reference Forem::Engine.user_class wherever you need it within<br />
497
498 CHAPTER 17 Engines<br />
your application. To add this setting to the engine, you can use a class-level<br />
attr_accessor call within the Forem::Engine class, inside lib/forem/engine.rb:<br />
class
Classes outside your control<br />
Once you set this configuration option to the User class and attempt to reference<br />
Forem::Engine.user_class again, you assert that it should not raise that<br />
exception C.<br />
When you run this test using bin/rspec spec/configuration_spec.rb, it will fail<br />
with this error:<br />
uninitialized constant Forem::ConfigurationNotSet<br />
This is because your spec is attempting to reference the exception class before you’ve<br />
even defined it! No problem though, you can define this very easily within the lib/<br />
forem.rb file by using this code:<br />
class ConfigurationNotSet < StandardError<br />
end<br />
The StandardError class is used for custom errors within Ruby and serves as a great<br />
base for this exception. If you run bin/rspec spec/configuration_spec.rb, you’ll<br />
see this:<br />
expected Forem::ConfigurationNotSet with<br />
"[error]" but nothing was raised<br />
When you attempt to grab the user_class setting in your test, it’s not raising this<br />
exception when it should. To fix this, you’ll need to redefine the user_class method<br />
on the Forem::Engine class by putting this code underneath the attr_accessor line<br />
in lib/forem/engine.rb:<br />
def self.user_class<br />
error = "Please define Forem::Engine.user_class" +<br />
" in config/initializers/forem.rb"<br />
@user || raise(ConfigurationNotFound, error)<br />
end<br />
Previously, the user_class method would have returned the @user variable whether<br />
or not it was set. In this method, you now define the message that will be shown if this<br />
class variable is not set. After that, if the class variable is set then it will be returned by<br />
this method, and if not then the ConfigurationNotFound exception will be raised,<br />
which seems to be all the criteria needed for your test to pass. Let’s find out by running<br />
bin/rspec spec/configuration_spec.rb now:<br />
1 example, 0 failures<br />
Great! That’s all passing. You’ve now got a class-level user_class method that you can<br />
set up in any applications that use this engine, so that you can notify the engine of the<br />
class that represents users within the application. If this setting is not set by the application<br />
by the time the engine gets around to referencing it, then the Configuration-<br />
NotFound exception will be raised, informing the owner of the application that they<br />
need to set this variable up in config/initializers/forem.rb.<br />
Let’s now set up the User model within your dummy application so that you can<br />
use this setting.<br />
499
500 CHAPTER 17 Engines<br />
17.7.2 A fake User model<br />
Your engine has been deliberately designed to have no concept of authentication.<br />
This is so it can be used with any application, independent of whatever authentication<br />
system the application uses, be it Devise (which is what your main application uses) or<br />
something else. In this section and the ones following, you’re going to be associating<br />
topics and posts to users so that you know who’s been posting what. In order to this,<br />
you’re going to need to generate a dummy User model.<br />
When you have this model correctly set up, you’ll use it to restrict access to the new<br />
topic and new post actions to only logged-in users, as well as using it to assign ownership<br />
to posts and topics. You’ll be able to do this using the current_user made available<br />
by the host application. It will be accessible in your engine’s controllers, as<br />
Forem::ApplicationController inherits from ApplicationController.<br />
To generate this new User model, you’re going to have to run the generator from<br />
within the spec/dummy directory. This is so the generator will place the model code<br />
within the dummy application and not your engine. You don’t need anything on this<br />
User model besides a login field, which you’ll be using as the display value a little<br />
later on by defining a to_s method inside this class. Within the spec/dummy directory,<br />
run this command:<br />
rails g model user login:string<br />
To run the migration for this model, run rake db:migrate inside the spec/dummy<br />
directory as well.<br />
In this fake model, you’re going to need to define the to_s method your engine<br />
will use to display the user’s name. Right now your users table only has a login field,<br />
and so you’ll return that:<br />
class User < ActiveRecord::Base<br />
def to_s<br />
login<br />
end<br />
end<br />
With the fake model generated and the to_s method defined in it correctly, the only<br />
thing left to do is to set up the initializer in your dummy application. Create a new file<br />
at spec/dummy/config/initializers/forem.rb with this simple line:<br />
Forem::Engine.user_class = User<br />
That is all the preparation you need to do to notify your engine of this class. To make<br />
your engine use this class, you’ll put this line in both the class definitions of app/<br />
models/forem/post.rb and app/models/forem/topic.rb:<br />
belongs_to :user, :class_name => Forem::Engine.user_class.to_s<br />
This line will now reference the setting that’s configured by config/initializers/<br />
forem.rb, thereby relating your posts and topics from your engine to the User class<br />
within the application, forming a lovely bridge between the two.
Classes outside your control<br />
Next, you’ll apply what you’ve done here to associate the users who are signed in<br />
with the topics they post. This is so people will be able to see who posted what.<br />
17.7.3 Authenticating topics<br />
By having a belongs_to :user association on the Forem::Post and Forem::Topic<br />
models, you’ll be able to assign users to topics and posts when they create them so that<br />
other users can know who’s been posting what.<br />
You’ve got, on purpose, no authentication in your dummy application at the<br />
moment, and so you’ll have to take a shortcut around this. Usually an application<br />
would provide a current_user method that returns a User object, but your dummy<br />
application doesn’t do this right now. You need this method to sometimes return a user<br />
object (like with actions that require authentication), and to sometimes return nil.<br />
A cool way to do this would be to dynamically redefine the current_user method<br />
yourself. A way to do this is to have two methods that you can call in your tests—a<br />
sign_in! method and a sign_out! method—which will redefine the current_user<br />
method in ApplicationController to either return the user object or nil, respectively.<br />
You’ll also make this method a helper method by using the helper_method<br />
method, which is available in all controllers. This will mean that your fake<br />
current_user method can then be referenced by the controllers and views of your<br />
engine without any problems.<br />
Define these two new methods in a new file at spec/support/dummy_login.rb using<br />
the code shown in the following listing.<br />
Listing 17.13 spec/support/dummy_login.rb<br />
def sign_out!<br />
ApplicationController.class_eval
502 CHAPTER 17 Engines<br />
forem_user; if it can’t do that, it will create one instead. This will then be the object that<br />
is returned when you reference current_user in your application.<br />
The next function you’re going to add to your engine is one that will redirect users<br />
who aren’t logged in when they attempt to access the new action in Forem::Topics-<br />
Controller. Your test will also test that an unauthenticated user can’t see the New<br />
Topic link on theForem::TopicsController’s index action. You’ll add this spec in<br />
spec/integration/topics_spec.rb by using the code in the following listing.<br />
Listing 17.14 spec/integration/topics_spec.rb<br />
context "unauthenticated users" do<br />
before do<br />
sign_out!<br />
end<br />
it "cannot see the 'New Topic' link" do<br />
visit topics_path<br />
page.should_not have_content("New Topic")<br />
end<br />
it "cannot begin to create a new topic" do<br />
visit new_topic_path<br />
page.current_url.should eql(sign_in_url)<br />
end<br />
end<br />
In the before block of this new context, you call the sign_out! method, which will<br />
set up the crucial current_user method that this test depends on. If it wasn’t defined,<br />
then you’d get an undefined method when current_user attempted to access it.<br />
In this spec, you use page.current_url B to read what the current URL is; it should<br />
match whatever main_app.sign_in_path’s method points at. Remember: this is the<br />
sign_in_path method, which is made available in the application by a definition in its<br />
config/routes.rb file. This is not currently set up, and so you’ll do that later.<br />
First, let’s see what the output has to say about your first test when you run bin/<br />
rspec spec/integration/topics_spec.rb:25:<br />
Failure/Error: page.should_not have_content("New Topic")<br />
expected #has_content?("New Topic") to return false, got true<br />
You’re asserting in your test that an unauthenticated user cannot see the New Topic<br />
link, but they do. You can go into app/views/forem/topics/index.html.erb and change<br />
this line<br />
<br />
to these lines:<br />
<br />
<br />
<br />
B Read current URL
Classes outside your control<br />
When you run this example again with bin/rspec spec/integration/topics_spec<br />
.rb:25, you’ll see that it now passes:<br />
1 example, 0 failures<br />
One down, two to go. Let’s run the next spec down in this file with bin/rspec spec/<br />
integration/topics_spec.rb:30. When you do, you’ll see this output:<br />
NoMethodError:<br />
undefined local variable or method `sign_in_url' for ...<br />
Your test currently can’t find the sign_in_path helper for your dummy application.<br />
You can define the helper by putting this line in spec/dummy/config/routes.rb:<br />
match "/sign_in", :to => "fake#sign_in", :as => "sign_in"<br />
When you run your test again with bin/rspec spec/integration/topics_spec<br />
.rb:30, you’ll be shown this:<br />
expected "http://www.example.com/login"<br />
got "http://www.example.com/forem/topics/new"<br />
The page expected to be on /login, but was actually on /forem/topics/new! That’s<br />
because you’re not yet authenticating users when they go to the new action in<br />
Forem::TopicsController. You can add a before_filter to the class definition in<br />
app/controllers/forem/topics_controller.rb using this code:<br />
before_filter :authenticate_forem_user!, :only => [:new, :create]<br />
You’ll put this authenticate_forem_user! method definition inside Forem<br />
::ApplicationController so that you can use it for all the controllers of your engine.<br />
It’ll go like this:<br />
private<br />
def authenticate_forem_user!<br />
if !current_user<br />
flash[:notice] = "You must be authenticated before you can do that."<br />
redirect_to main_app.sign_in_url<br />
end<br />
B Go to login path<br />
end<br />
Now when you visit your new or create actions in Forem::TopicsController, you’ll<br />
be sent away to the login path for your application, which you can access by calling<br />
sign_in_path on the main_app helper B. You must use main_app here so that you<br />
point to the application’s routes rather than the engine’s. The engine itself has no<br />
concept of sign_in_path.<br />
When you run your spec again with bin/rspec spec/integration/topics_spec<br />
.rb:30, you’ll see that this test is now failing because your application is missing the<br />
FakeController that your sign_in_path route uses:<br />
ActionController::RoutingError:<br />
uninitialized constant FakeController<br />
503
504 CHAPTER 17 Engines<br />
You don’t need this controller to do much more than sit there and look pretty. Oh,<br />
and it needs to have a login action that responds in an OK fashion too. Let’s define<br />
this controller in your dummy application by creating a new file at spec/dummy/app/<br />
controllers/fake_controller.rb and putting this content inside it:<br />
class FakeController < ApplicationController<br />
def sign_in<br />
render :text => "Placeholder login page."<br />
end<br />
end<br />
This action will now render the text “Placeholder login page,” thereby returning that<br />
OK status you’re after, as well as some helpful text to indicate where you’re at. When<br />
you run bin/rspec spec/integration/topics_spec.rb, you’ll see that it passes:<br />
1 example, 0 failures<br />
This means now that any user attempting to access the new action in the<br />
Forem::TopicsController will be redirected to the login page. What happens when<br />
you run the whole spec file? Let’s find out with bin/rspec spec/integration/<br />
topics_spec.rb:<br />
ActionView::Template::Error:<br />
undefined method `current_user' for #<br />
...<br />
# ./spec/integration/topics_spec.rb:21:in ...<br />
3 examples, 1 failure<br />
Your final spec in this file is failing with an undefined method current_user, because<br />
you’re not calling sign_in! before it. Move this code into its own context with a<br />
before like the other two tests have, using the code shown in the following listing.<br />
Listing 17.15 spec/integration/topics_spec.rb<br />
context "authenticated users" do<br />
before do<br />
sign_in!<br />
end<br />
it "creating a new one" do<br />
visit topics_path<br />
click_link "New Topic"<br />
fill_in "Subject", :with => "First topic!"<br />
fill_in "Text", :with => "First post!"<br />
click_button "Create Topic"<br />
within "#flash_notice" do<br />
page.should have_content("Topic has been created!")<br />
end<br />
within ".forem_topic #posts .forem_post" do<br />
page.should have_content("First post!")<br />
end<br />
end<br />
end
Classes outside your control<br />
When you run the whole spec with bin/rspec spec/integration/topics _spec.rb<br />
one more time, all three examples should pass:<br />
3 examples, 0 failures<br />
You’ve now got your engine using the concept of a current user from the application<br />
so that it can authorize users to perform certain actions when they’re logged in. Are<br />
all the tests working still? A quick bin/rspec spec will tell you:<br />
ActionView::Template::Error:<br />
undefined method `current_user' for #<br />
./spec/integration/posts_spec.rb:11:...<br />
Finished in 1.16 seconds<br />
6 examples, 1 failure<br />
It would appear your spec/integration/posts_spec.rb test is failing because<br />
current_user isn’t defined. You can fix this very quickly by throwing a sign_in! call<br />
in the before, turning it from this<br />
before do<br />
@topic = Forem::Topic.new(:subject => "First topic!")<br />
@topic.posts.build(:text => "First post!")<br />
@topic.save!<br />
end<br />
into this:<br />
before do<br />
@topic = Forem::Topic.new(:subject => "First topic!")<br />
@topic.posts.build(:text => "First post!")<br />
@topic.save!<br />
sign_in!<br />
end<br />
When you run your specs again, they’ll all pass:<br />
4 examples, 0 failures<br />
Great success! Now it’s time to commit:<br />
git add .<br />
git commit -m "Use application authentication to block<br />
unauthenticated users from creating topics"<br />
Now that you’ve got an easy way to restrict access to the creation of new topics to only<br />
authenticated users, you can be sure you’re always going to have a current_user<br />
object that you can use to associate users with topics. With this in mind, you’re going<br />
to set the topic’s and its first post’s user when you create a topic.<br />
17.7.4 Adding authorship to topics<br />
You’ll now associate topics and users. To make sure that this will work, add these lines<br />
to the example within the authenticated context in spec/integration/topics_spec.rb:<br />
within ".forem_topic #posts .forem_post .user" do<br />
page.should have_content("forem_user")<br />
end<br />
505
506 CHAPTER 17 Engines<br />
This is the element in which you’ll be displaying the user on the page, with the content<br />
being the name of the user that you set up in the sign_in! method. This user<br />
association is actually going to be set both on the topic and its first post. Right now this<br />
element doesn’t exist, and so if you were to run this test it would fail.<br />
Your first step is to associate the topic to a user when you create the topic in<br />
Forem::TopicsController. You can do this by changing this line of the create action<br />
@topic = Forem::Topic.create(params[:topic])<br />
to these two lines:<br />
params[:topic].merge!(:user => current_user)<br />
@topic = Forem::Topic.create(params[:topic])<br />
This will set up the user association for the topic, passing it through with the other<br />
parameters inside params[:topic]. This will not set up the first post for this topic to<br />
have this user associated, which is what you need in order to make your test pass. To<br />
do this, create a before_save callback in the Forem::Topic by using the code from<br />
the following listing, placing it under the accepts_nested_attributes_for :post<br />
line in the model.<br />
Listing 17.16 app/models/forem/topic.rb<br />
before_save :set_post_user<br />
private<br />
def set_post_user<br />
self.posts.first.user = self.user<br />
end<br />
With the user association now set for a topic’s first post, you can display the user’s<br />
name along with the post by putting this line under the small tag already in app/<br />
views/forem/posts/_post.html.erb:<br />
By <br />
Here you use Forem::Engine.user_name, which is the method that you use to display<br />
the user’s name. In this case, it would display the login attribute. When you run bin/<br />
rspec spec/integration/topics_spec.rb, all your tests will pass:<br />
3 examples, 0 failures<br />
That was easy! When a topic is created, the topic and its first post will now belong to<br />
the user who created it. Remember: your User model is in another castle, or rather, it<br />
is in your application, and so this is very cool.<br />
Now you’ll need to check that users are logged in before they create posts too, and<br />
then associate the posts to the users upon creation.<br />
17.7.5 Post authentication<br />
You’ve got the authenticate_forem_user! method defined in the Forem<br />
::ApplicationController, and so it’s available for all controllers that inherit from it.
Classes outside your control<br />
This includes Forem::TopicsController, where you just used it, and Forem::Posts-<br />
Controller, where you are about to use it to ensure that users are signed in before<br />
being able to create new posts.<br />
Before you use this method, you’ll add a test to the spec/integration/posts_spec.rb<br />
to check that a user cannot access the new action if they aren’t signed in, and it will fail<br />
because you’re not using it yet.<br />
You’re going to have two context blocks in your spec, one for unauthenticated<br />
users and the other for authenticated users. You can share the before block between<br />
these two contexts if you take the sign_in! method out and turn your spec into what’s<br />
shown in the following listing.<br />
Listing 17.17 spec/integration/posts_spec.rb<br />
require 'spec_helper'<br />
describe "posts" do<br />
before do<br />
@topic = Forem::Topic.new(:subject => "First topic!")<br />
@topic.posts.build(:text => "First post!")<br />
@topic.save!<br />
end<br />
context "unauthenticated users" do<br />
before do<br />
sign_out!<br />
end<br />
end<br />
context "authenticated users" do<br />
before do<br />
sign_in!<br />
end<br />
it "reply to a topic" do<br />
...<br />
end<br />
end<br />
end<br />
With the before block now run before both of your contexts, you’ll have the @topic<br />
object available in both of them. In the “unauthenticated users” context block, you’ll<br />
write your test for the unauthenticated new action access under the before block,<br />
using the code from the following listing.<br />
Listing 17.18 spec/integration/posts_spec.rb<br />
it "cannot access the new action" do<br />
visit new_topic_post_path(@topic)<br />
page.current_url.should eql(sign_in_url)<br />
end<br />
507
508 CHAPTER 17 Engines<br />
Because you don’t have the before_filter :authenticate_forem_user! line in<br />
Forem::PostsController when you run this spec using bin/rspec spec/integration/<br />
posts_spec.rb:15, you’ll get this:<br />
expected "http://www.example.com/login"<br />
got "http://www.example.com/forem/topics/[id]/posts/new"<br />
With your test in place, you can add the before_filter line at the top of your class<br />
definition in app/controllers/forem/posts_controller.rb:<br />
before_filter :authenticate_forem_user!, :only => [:new, :create]<br />
When you run your example again with bin/rspec spec/integration/posts_spec<br />
.rb:15, this time it’ll pass:<br />
1 example, 0 failures<br />
What happens when you run bin/rspec spec/integration/posts_spec.rb though?<br />
2 examples, 0 failures<br />
This is passing also, which is great to see! Right now though, posts do not belong to<br />
users when they are created, and so when you go to display a user’s name for a reply<br />
post, nothing will appear. In order to fix this, you’ll copy over the final couple of lines<br />
you put in spec/integration/topics_spec.rb and put them at the bottom of the “reply to<br />
topic” example you have in spec/integration/posts_spec.rb:<br />
within ".forem_topic #posts .forem_post:last .user" do<br />
page.should have_content("forem_user")<br />
end<br />
Like last time, you’re asserting that you can see the user’s name within the final post<br />
on the page, which you can find using the within method. When you run this test<br />
using bin/rspec spec/integration/posts_spec.rb, it will fail because it cannot see<br />
the user’s name on the page:<br />
Failure/Error: page.should have_content("forem_user")<br />
expected #has_content?("forem_user") to return true, got fals<br />
Now that you have a test ensuring that this behavior is indeed not yet implemented,<br />
let’s fix it up. First, you’re going to need to change the before block in your test to set<br />
up a user for the first post that it creates, changing it into this:<br />
before do<br />
@user = User.create!(:login => "some_guy")<br />
@topic = Forem::Topic.new(:subject => "First topic!", :user => @user)<br />
@topic.posts.build(:text => "First post!")<br />
@topic.save!<br />
end<br />
That will solve it for the first post on this page, but you also care about the new post<br />
that you’re creating. You can fix this one by changing this line in the create action in<br />
app/controllers/forem/posts_controller.rb<br />
@post = @topic.posts.create(params[:post])
to these lines:<br />
Classes outside your control<br />
params[:post].merge!(:user => current_user)<br />
@post = @topic.posts.create(params[:post])<br />
We’re putting this on separate lines to make the second line a little shorter for readability.<br />
When you run bin/rspec spec/integration/posts_spec.rb again, you’ll see<br />
that it all passes:<br />
2 examples, 0 failures<br />
Now you’re authenticating users before they can create new posts, and then assigning<br />
them as the user when they’re authenticated. That means you’re done here and<br />
should run all the specs to make sure everything works with a quick run of bin/rspec<br />
spec. You should see this:<br />
7 examples, 0 failures<br />
Good to see! Let’s make a commit:<br />
git add .<br />
git commit -m "Authenticate users and link them to posts"<br />
You’ve now got a pretty good starting feature set for your engine. Users are able to create<br />
topics and posts, but only if they’re authenticated in the parent application, and<br />
that’s a good start. You could generate further features, such as editing topics and<br />
posts, but that’s an exercise best left to you. 20<br />
One thing you’ve still got left to do is fix up the second placeholder in app/views/<br />
topics/index.html.erb, which shows the last post for a topic. You’ll do this now; it’ll<br />
only take a moment.<br />
17.7.6 Showing the last post<br />
Currently in app/views/topics/index.html.erb you have this line:<br />
last post was at TIME by USER<br />
It would be extremely helpful to your users if this returned useful information rather<br />
than a placeholder. You’ve finished linking posts and users, and so now is a great time<br />
to fix this placeholder up.<br />
To begin with, you’re going to add a test to spec/integration/posts_spec.rb to<br />
ensure that you do indeed see the last post’s information. It’s the same function displayed<br />
to unauthenticated users as it is authenticated users, but you’re going to need<br />
current_user set by either sign_out! or sign_in!. Therefore, you’ll put this test<br />
inside the context "unauthenticated users" block to make things easy. The code for<br />
this test is shown in the following listing.<br />
20 Additionally, this is a long enough chapter already!<br />
509
510 CHAPTER 17 Engines<br />
Listing 17.19 spec/integration/posts_spec.rb<br />
it "should see the post count and last post details" do<br />
visit topics_path<br />
within "#topics tbody td#posts_count" do<br />
page.should have_content("1")<br />
end<br />
within "#topics tbody td#last_post" do<br />
page.should have_content("last post was less than a minute ago<br />
➥by some_guy")<br />
end<br />
end<br />
This test ensures that the post count is showing the correct number of posts and that<br />
the last post details are displayed correctly. When you run this spec, it will pass the first<br />
assertion because of the posts count you set up a little earlier, 21 but it fails on the last<br />
assertion because it cannot find the content you’ve specified:<br />
Failure/Error: page.should have_content("[content]")<br />
expected #has_content?("[content]") to return true, got false<br />
The first part of your content is “last post was less than a minute ago.” Let’s focus on<br />
getting this working. There’s a helper within Rails that can help you display this “less<br />
than a minute ago” text called time_ago_in_words. Let’s assume that you’ve got a<br />
method called last_post that returns the last post for now. You’ll define it later. You<br />
can use the time_ago_in_words helper within the last post table cell in app/views/<br />
forem/topics/index.html.erb:<br />
<br />
last post was ago<br />
<br />
This time_ago_in_words helper will display a humanized version of how long ago the<br />
post was. When you first create the post, the text would read “less than a minute ago,”<br />
as this is the smallest granularity that this helper provides.<br />
Before your test will pass, you’re going to need the other half of this line. At the<br />
end of the %> on the line you just wrote, add this:<br />
by <br />
This first uses a new method that you’ll define shortly on the Forem::Topic model<br />
called last_post, which will return the last post for this topic. Then, you’ll display<br />
who posted that post by calling user on that object.<br />
When you run your test again, this time it will fail because the last_post method<br />
on topic is only defined in your imagination:<br />
ActionView::Template::Error:<br />
undefined method `last_post' for #<br />
21 Naughty of us not to write tests back then, but sometimes this happens.
Classes outside your control<br />
It’s time this method moved out of your imagination and into your engine. This<br />
method needs to return the last post for your topic, and because the topic_id lives on<br />
the posts table and you’re wanting only one of these posts, this is a great opportunity<br />
to use a has_one association.<br />
This association needs to find the chronological last post for your topics; you can<br />
do this by defining this association in app/models/forem/topic.rb like this:<br />
has_one :last_post, :class_name => "Forem::Post",<br />
:order => "created_at DESC"<br />
The class_name option you’ve used before; it tells Rails that objects of this association<br />
are of that class, rather than the inferred class, which is a constantized version of the<br />
association name. In this case, that would be LastPost. The :order option, however,<br />
will order the posts by the created_at field in reverse chronological order. The<br />
has_one method will then execute this query and limit the results to one, returning<br />
only the first post.<br />
With the association defined, you can re-run your test and see it passing:<br />
1 example, 0 failures<br />
You’ve now got a test that covers that a user can see the posts counter and the last post<br />
information on the topics page for a topic, which proves that this feature is working.<br />
Let’s run all the RSpec tests to make sure that everything’s working with bin/rspec<br />
spec:<br />
6 examples, 0 failures<br />
Great, everything’s good. Time for a commit:<br />
git add .<br />
git commit -m "Add last post information to topics index"<br />
This has been quite a long section and we’ve covered a lot of ground. The purpose of<br />
this section was to demonstrate how you could reference classes outside your control,<br />
such as those in the application or found in other engines. We opted for configuration<br />
options for some of the options, and a module for others.<br />
You then asked users to authenticate before they could create new topics and<br />
posts, and after that you linked your engine’s classes’ objects to the objects from an<br />
application’s class. This is kind of a big deal, as it shows that an engine is able to interact<br />
with an application without extravagant modification of the application’s code.<br />
Finally, you fixed up your topics index view to display information from these<br />
linked-in classes.<br />
This has been only the beginning of linking your application and engine. In the<br />
final sections of this chapter, you’ll see how you can release your engine as a gem and<br />
how you can integrate it into your application so that the users of Ticketee have a<br />
forum system they can use.<br />
511
512 CHAPTER 17 Engines<br />
17.8 Releasing as a gem<br />
By releasing your engine as a gem, you’ll make it publicly available for anybody to<br />
download from http://rubygems.org. This will also allow you to share this engine<br />
across multiple applications. If people wish to use your engine, they would be able to<br />
put this line in their Gemfile of their application:<br />
gem 'forem'<br />
Then they would need to go about configuring the application to have a config/initializers/<br />
forem.rb file with the proper configuration options (only Forem::Engine.user_class for<br />
now, but possibly others). You’d usually put these steps in a README file at the root of<br />
the engine. 22<br />
To release your engine as a gem, you can use Bundler. Bundler provides some<br />
gem-management tasks in the form of Rake tasks that allow you to build your gem<br />
(basically, zip it up into a .gem file), 23 install the gem locally, and release it.<br />
To make these tasks available for your engine, you can put this line at the bottom<br />
of your Rakefile:<br />
Bundler::GemHelper.install_tasks<br />
When you run rake -T, you’ll see that you’ve got a few tasks for your engine, some of<br />
which you’ve already used. This line that you’ve put in the Rakefile will add the build,<br />
install, and release rake tasks.<br />
Before you can release your gem, you must give it a unique name. To do this, you’ll<br />
go into your application and rename forem.gemspec to your-name-forem.gemspec 24 to<br />
make it unique. Then inside this file, you’ll need to change this line<br />
s.name = "forem"<br />
to have the same name as the gemspec:<br />
s.name = "your-name-forem"<br />
Now you’re ready to release your gem. Let’s run the rake build task first and see what<br />
does:<br />
(in /Users/ryanbigg/Sites/book/forem)<br />
your-name-forem 0.0.1 built to pkg/your-name-forem-0.0.1.gem<br />
This command has built your gem and put it in a new directory called pkg. This new<br />
gem can be installed using gem install pkg/your-name-forem-0.0.1 if you wish, but<br />
there’s a problem: this gem doesn’t contain all your files.<br />
At the moment, the gem only contains the files specified by this line in your-nameforem.gemspec:<br />
22 This is so when you put it in GitHub, people will have a clear way of seeing what this engine’s good for and<br />
how they can use it.<br />
23 Yup, .gem files are actually .zip files.<br />
24 A wise decision here would be to use your GitHub username, as that’s bound to be unique, compared to your<br />
first name which is most likely not.
Integrating with an application<br />
s.files = Dir["lib/**/*"] + ["MIT-LICENSE", "Rakefile", "README.rdoc"]<br />
This line will only include files from the lib directory, as well as the MIT-LICENSE, Rakefile,<br />
and README.rdoc files. But you’ve got much more than that in your application,<br />
such as the app folder for starters! To fix this little problem, you’ll replace that line<br />
with this one:<br />
s.files = `git ls-files`.split("\n")<br />
This will add all the files that have been added to your Git repository to the gem.<br />
When you run rake build again, it will create your gem with all the files.<br />
You’ll also need to set up some authors for your gem, which you can do by putting<br />
this line underneath s.version in the forem.gemspec:<br />
s.authors = ["youremail@example.com"]<br />
The next task you can run is rake install. This can be run without having rake<br />
build first, as it will run the build code first, then install. This will actually install the<br />
gem onto your system so that you can use it. That’s all well and good, but you want to<br />
show off your stuff to the world!<br />
That’s what rake release is for. This command will create a git tag for your current<br />
commit, then call git push to push your changes online. Next, it will call gem<br />
push, which will publish your gem to http://rubygems.org. You may have to set up an<br />
account on RubyGems.org first, though.<br />
Once this is done, your gem is released out into the world as version 0.0.1. To<br />
bump the version, you need only to alter this line in your-name-forem.gemspec:<br />
s.version = "0.0.1"<br />
It’s sensible to increment the last part of this number for minor corrections, such as<br />
typos or bug fixes, the middle part for minor breaking changes and additional feature<br />
releases, and the major version for major breaking changes or to represent the solidifying<br />
of the API.<br />
With your gem now live and out there, you can use it in your application. Exciting<br />
times!<br />
17.9 Integrating with an application<br />
Now you get to the best part of this chapter: linking Ticketee, your Rails application<br />
that you’ve built throughout the earlier chapters of this book, to the engine that you<br />
have just written, forem. This is a pretty easy process.<br />
The first thing you’re going to need is to add forem to your application’s Gemfile<br />
with this line:<br />
gem 'your-name-forem', :require => "forem"<br />
Then you’ll need to run bundle install to install the gem. To install the migrations<br />
for this gem, you’ll need to run this command:<br />
rake forem:install:migrations<br />
513
514 CHAPTER 17 Engines<br />
This task actually copies across the engines migration into the application’s db/<br />
migrate directory, with the first migration having a timestamp of the current second,<br />
the next migration having it one second in the future, and so on. This is so the<br />
engine’s migrations are inserted after the current application’s migrations and maintain<br />
the same order that they have in the engine. If you update the engine later on,<br />
you’ll have to run this task again. To install these migrations, you’ll run this:<br />
rake db:migrate<br />
After this, you’ll need to mount the engine in your application’s config/routes.rb,<br />
which you can do with this:<br />
mount Forem::Engine, :at => "/forem"<br />
You saw this line in your spec/dummy/config/routes.rb file earlier. Mounting your<br />
engine will make its routes available to the specified path. If you launch rails server<br />
now and go to http://localhost:3000, you’ll be shown this error:<br />
Please define Forem::Engine.user_class in config/initializers/forem.rb<br />
You should follow the advice for this error and define Forem::Engine.user_class<br />
within the application’s config/initializers/forem.rb, as you need to tell the engine<br />
what the user class is:<br />
Forem::Engine.user_class = User<br />
Because you’ve created a new initializer, you’ll need to restart the rails server that is<br />
currently running so that Rails re-evaluates the files in the config/intializers directory.<br />
When you do this and refresh the page, you’ll see this error:<br />
undefined local variable or method `admin_root_path' ...<br />
This is happening because your engine is using the application’s layout and is trying<br />
to reference admin_root_path method from inside the engine, rather than the one<br />
that’s defined in the application. To fix this, you’ll need to first call main_app for these<br />
routing helpers and then call the helpers on that. You need to change the root_path,<br />
admin_root_path, destroy_user_session_path, new_user_registration_path, and<br />
new_user_session_path helpers in the app/views/layouts/application.html.erb file to<br />
all have the main_app. prefix on them.<br />
These are all the changes you need to make in order to integrate your engine with<br />
your application. Click around a bit and try it out!<br />
17.10 Summary<br />
In this very long chapter we’ve covered quite the gamut! We’ve gone through the theory<br />
first of all, the history of engines, and why they’re useful. After that, you saw the<br />
layout of one and how the routing for an engine works.<br />
You then spent the rest of the chapter creating your own engine called forem,<br />
which provides the basic functionality of a forum: topics and posts.
Summary<br />
We got into the nitty-gritty of adding configuration options to your engine, as well<br />
as a module called Forem::UserExtensions, which configured the two models in your<br />
engine with new associations. This module is exceptionally interesting, as it allows you<br />
to configure the engine’s behavior regardless of the class that it’s included into.<br />
We then covered releasing your engine as a gem, which is the best way to get it out<br />
into the world.<br />
In the final chapter, we look at how you can write lightweight applications using<br />
Rack and Sinatra, and hook them into your Rails application. In Rails 3, that’s become<br />
easier than ever to do.<br />
515
This chapter covers<br />
� Building a basic Rack application<br />
� Tying together Rack applications<br />
� Mounting a Rack app within a Rails app<br />
Rack-based applications<br />
� Using Rack middleware to alter server response<br />
So far, this book has primarily focused on how to work with pieces of the Rails<br />
framework, such as application and engines. In this chapter, we’ll look at how you<br />
can use Rack-based applications to respond more quickly than what you’d otherwise<br />
be capable of with your main application.<br />
Rack is the underlying web server framework that powers the underlying<br />
request/response cycle found in Rails, but it isn’t a part of Rails itself. It’s completely<br />
separate, with Rails requiring the parts of Rack it needs. When your application<br />
is running, it’s running through a web server. When your web server receives a<br />
request, it will pass it off to Rack, as shown in figure 18.1.<br />
Rack then determines where to route this request, and in this case it has chosen<br />
to route to a specific application stack. The request passes through a series of<br />
pieces called middleware (covered in the final section of this chapter) before arriving<br />
at the application itself. The application will then generate a response and pass<br />
516
Building Rack applications<br />
it back up through the stack to Rack, and then Rack will pass<br />
it back to the server, which will finally pass it back to the<br />
browser. All of this happens in a lightning quick fashion.<br />
Separating Rack from Rails not only reduces bloat in the<br />
framework, but also provides a common interface that other<br />
frameworks can use. By standardizing the request/response<br />
cycle, applications that are built on top of Rack can interact<br />
with one another. In this chapter, you’ll see how you can do<br />
this by making your Rails application work with applications<br />
built using Rack, but not Rails.<br />
You’ll build some Rack applications in this chapter that<br />
aren’t Rails applications but will work just as seamlessly.<br />
You’ll learn how Rack provides the request/response cycle<br />
underneath Rails and other Ruby frameworks, and learn how<br />
to build your own small, lightweight Rack-based applications.<br />
With these lightweight applications crafted, you’ll then<br />
create one more application that will re-implement the tickets<br />
API functionality you first created in chapter 13, using<br />
another Rack-based web framework called Sinatra. You’ll<br />
then mount this Sinatra application inside your Rails appli-<br />
cation using methods that Rails provides. This will provide an apt example of how<br />
you’re able to interact with classes from your Rails application from within a mounted<br />
Rack application.<br />
Finally, we’ll take a look at middleware within both the Rack and Rails stacks, and<br />
you’ll learn how to use it to your advantage to manipulate requests coming into your<br />
application.<br />
All Rack-based applications work the same way. You request a URL from the application,<br />
and it sends back a response. But it’s what goes on between that request and<br />
the response that’s the most interesting part. Let’s create a basic Rack application now<br />
so that you can understand the basics.<br />
18.1 Building Rack applications<br />
Browser<br />
Web Server<br />
Rack standardizes the way an application receives requests across all the Ruby frameworks.<br />
With this standardization, you know that any application purporting to be a<br />
Rack application is going to have a standard way for you to send requests to it and a<br />
standard way of receiving responses.<br />
You’re going to build a basic Rack application so that you can learn about the<br />
underlying architecture for requests and responses found in Rails and other Ruby<br />
frameworks. With this knowledge, you’ll be able to build lightweight Rack applications<br />
that you can hook into your Rails stack, or even Rack middleware.<br />
When you’re content with the first application, you’ll create another and then<br />
make them work together as one big application. First things first, though.<br />
Rack<br />
Application Stack<br />
Middleware<br />
...<br />
Middleware<br />
Application<br />
517<br />
Figure 18.1 Application<br />
request through the stack
518 CHAPTER 18 Rack-based applications<br />
18.1.1 A basic Rack application<br />
To build a basic Rack application, you only need to have an object in Ruby that<br />
responds to the call method. That call method needs to take one argument (the<br />
request) and also needs to return a three-element Array object. This array represents<br />
the response that will be given back to Rack, and looks something like this:<br />
[200, { "Content-Type" => "text/plain"}, ["Hello World"]]<br />
The first element in this response array is the status code for your response. In this<br />
case, it’s 200, which represents a successful response. You had a bit of a play with status<br />
codes back in chapter 13 when you were building your API, so these should be no mystery<br />
at this point.<br />
The second element in this array are the headers that will be sent back. These<br />
headers are used by the browser to determine how to deal with the response. In this<br />
case, the response will be rendered as-is to the page because the Content-Type header<br />
is text/plain, indicating normal text with no formatting applied. Usually your Rack<br />
application would set this to text/html to indicate an HTML response.<br />
Finally, the third element represents the response body, which is sent back along<br />
with the status code and headers to Rack. Rack then compiles it all into an HTTP<br />
response, which is sent back to where the request came from.<br />
Let’s see this in action now. You’re going to create a light Rack application that<br />
responds with “Hello World” whenever it receives a request. This kind of application is<br />
often used to check and see if a server is still up and responding to HTTP calls. You’ll<br />
create a new file inside your Ticketee’s application’s lib called lib/heartbeat.ru (you’re<br />
checking the “heartbeat” of the server) and fill it with this content:<br />
run lambda { |env| [200, {'Content-Type' => 'text/plain'}, ['OK']] }<br />
The .ru extension for this file represents a Rack configuration file, also known as a<br />
Rackup file. In it, you call the run method, which needs an object that responds to<br />
You already have a Rackup file<br />
Your Rails application also has one of these .ru files, called config.ru, which is used<br />
by Rack-based servers to run your application. You can see this in action by running<br />
the rackup config.ru command, which will start up your application using the<br />
config.ru file’s configuration.<br />
If you look in this file, you’ll see these lines:<br />
# This file is used by Rack-based servers to start the application.<br />
require ::File.expand_path('../config/environment', __FILE__)<br />
run Ticketee::Application<br />
The first line requires config/environment.rb for the application, which is responsible<br />
for setting up the environment of the application. Then it uses the run method—just<br />
as you are—except it’s passing Ticketee::Application, which actually responds<br />
to call.<br />
Cool stuff.
Building Rack applications<br />
call. When Rack receives a request to this application it will call the call method on<br />
the object passed to run, which will then generate and return a response back to the<br />
server. The object in this case is a lambda (or Proc) object, which automatically<br />
responds to call.<br />
When the call method is called on this lambda, it will respond with the threeelement<br />
array inside it, completely ignoring the env object that is passed through.<br />
Inside this array, you have the three elements Rack needs: the HTTP status, the headers<br />
for the response, and the body to return.<br />
To see your lib/heartbeat.ru in action, you can launch a Rack server by using the<br />
command you saw in the sidebar:<br />
rackup lib/heartbeat.ru<br />
This is now running a server on 9292 (the standard port for Rack) using the built-into-Ruby<br />
WEBrick HTTP server, as indicated by the server output you’ll see:<br />
[timestamp] INFO WEBrick 1.3.1<br />
...<br />
[timestamp] INFO WEBrick::HTTPServer#start: pid=... port=9292<br />
You can now go to your browser and open http://localhost:9292 to make a request to<br />
this application. You’ll get back “Hello World,” and that’s okay. You can also make a<br />
request to any path at the http://localhost:9292 application and it will respond in the<br />
same way, such as http://localhost:9292/status.<br />
What you’ve done here is write one of the simplest Rack applications possible. This<br />
application receives a response to any path using any method, and always responds<br />
with OK. This application will respond very quickly because it hasn’t loaded anything,<br />
but at the cost of being a one-trick pony.<br />
You can make this little application respond differently in a number of ways. The<br />
easiest (and most fun!) would be to program it to change its response depending on<br />
the path it’s given, like a Rails application does. For this, you’ll use the env object. First<br />
up, let’s see what this env object gives you by changing your script to do this:<br />
require 'yaml'<br />
run lambda { |env| [200,<br />
{'Content-Type' => 'text/plain'},<br />
["#{env.to_yaml}"]]<br />
}<br />
The to_yaml method provided by the yaml standard library file will transform your<br />
env object (spoilers: it’s a Hash) into a human-readable YAML output (like that found<br />
in config/database.yml in a Rails application).<br />
To make this new change apply, you can’t refresh the page like you would in a Rails<br />
application; you have to stop the server and start it again. You can press Ctrl+C to stop<br />
it, and rerun that command. This time when you go to your server, you’ll see output<br />
that looks like this:<br />
---<br />
GATEWAY_INTERFACE: CGI/1.1<br />
519
520 CHAPTER 18 Rack-based applications<br />
PATH_INFO: /<br />
QUERY_STRING: ""<br />
REMOTE_ADDR: 127.0.0.1<br />
REQUEST_METHOD: GET<br />
REQUEST_URI: http://localhost:9292/<br />
...<br />
This output is the YAML-ized version of the env hash, which comes from Rack itself.<br />
Rack parses the incoming request and provides this env hash so that you can determine<br />
how you’d like to respond to the request. You can alter the behavior of the<br />
request using any one of the keys in this hash, 1 but in this case you’ll keep it simple<br />
and use the PATH_INFO key.<br />
A lambda is great for one-liners, but now your Rack application is going to become<br />
more complex, and so you’ve probably outgrown the usefulness of a lambda. You<br />
don’t have to use a lambda though, you only need to pass run an object that has a call<br />
method that responds with that three-element array. Your new code will be a couple of<br />
lines long, and so it’s probably best to define it as a method (called call) on an<br />
object, and what better object to define it on than a class?<br />
A class object would allow you to define other methods, and can be used to<br />
abstract chunks of the call method as well. For good measure, let’s call this class<br />
Application and put it inside a module called Heartbeat, as shown in the following<br />
listing:<br />
Listing 18.1 lib/heartbeat.ru<br />
module Heartbeat<br />
class Application<br />
def self.call(env)<br />
[200, {'Content-Type' => 'text/plain'}, ["Hello World"]<br />
end<br />
end<br />
end<br />
run Heartbeat::Application<br />
Here you’ve defined the Heartbeat::Application to have a call method, which once<br />
again returns OK for any request. On the final line, call run and pass in Heartbeat<br />
::Application, which will work like your first example because Heartbeat<br />
::Application has a call method defined on it. If this looks familiar, it’s because<br />
there’s a similar looking line in your application’s config.ru file that you saw earlier:<br />
run Ticketee::Application<br />
Your Rails application is actually a Rack-based application! Of course, there’s a little<br />
bit more that goes on behind the scenes in your Rails application than in your Rack<br />
application at the moment, but the two are used identically. They both respond in<br />
nearly identical ways with the three-element response array. Your Rack application is<br />
nearly the simplest form you can have.<br />
1 Yes, even the HTTP_USER_AGENT key to send users of a certain browser elsewhere.
Building Rack applications<br />
Let’s change your Heartbeat application now to respond differently to different<br />
request paths by referencing the PATH_INFO key within env. You’ll replace the code<br />
inside your call method with this:<br />
def self.call(env)<br />
default_headers = { "Content-Type" => "text/plain"}<br />
if env["PATH_INFO"] =~ /200/<br />
body = "Success!"<br />
status = 200<br />
else<br />
body = "Failure!"<br />
status = 500<br />
end<br />
[status, default_headers, ["#{env["PATH_INFO"]} == #{body}"]]<br />
end<br />
The env["PATH_INFO"] B here returns the path that has been requested. If you made<br />
a request like http://localhost:9292/books to your Rack application, this variable<br />
would return /books. You compare this string to a regular expression using the =~<br />
operator, and if it contains 200, you’ll return “Success” in the body along with an<br />
HTTP status of 200. For everything else, it’s “Failure” with an HTTP status of 500.<br />
Let’s restart the server once again and then make a new request to http://<br />
localhost:9292. You’ll see this output:<br />
/ == Failure!<br />
This is because for any request to this server that doesn’t have 200 in it, you’re returning<br />
this message. If you make a request to http://localhost:9292/200 or even http://<br />
localhost:9292/this/is/a/200/page, you’ll see the success message instead:<br />
/this/is/a/200/page == Success!<br />
B Return requested path<br />
Also, if you look in the console you can see a single line for each request that’s been<br />
served:<br />
127.0.0.1 - - [[timestamp]] "GET / HTTP/1.1" 500 - 0.0004<br />
127.0.0.1 - - [[timestamp]] "GET /200 HTTP/1.1" 200 - 0.0004<br />
127.0.0.1 - - [[timestamp]] "GET /this/is/a/200/page HTTP/1.1" 200 - 0.0004<br />
This output shows the IP where the request came from, the local time the request<br />
happened, the request itself, the HTTP status contained within the response, and<br />
finally how long the page took to run. For the first request, it returned a 500 HTTP<br />
status, and for the other two requests that contained 200 in their paths, it returned a<br />
200 HTTP status.<br />
What you’ve done here is implement a basic router for your Rack application. If<br />
the route for a request contains 200, then you give back a successful response. Otherwise,<br />
you give back a 500 status, indicating an error. Rails implements a much more<br />
complex routing system than this, extracting the complexity away and leaving you<br />
with methods such as root and resources that you use in config/routes.rb. The<br />
underlying theory is the same though.<br />
521
522 CHAPTER 18 Rack-based applications<br />
You’ve learned the basics of how a Rack application works and gained an understanding<br />
that your Rails application is a bigger version of this little application you’ve<br />
written. There’s much more to Rack than providing this abstraction for the underlying<br />
request/response cycle. For example, you can build more complex apps with logic<br />
for one part of the application in one class and additional logic in another.<br />
One other feature of Rack is the ability to build applications by combining smaller<br />
applications into a larger one. You saw this with Rails when you used the mount<br />
method in your application’s config/routes.rb to mount the engine you developed in<br />
chapter 17. Let’s see how you can do this with Rack.<br />
18.2 Building bigger Rack applications<br />
Your basic Rack application quickly outgrew the lambda shell you placed it in, and so<br />
you moved the logic in it into a class and added some more. With the class, you’re able<br />
to define a call method on it, which then returns the response that Rack needs. The<br />
class allows you to cleanly write a more complex Rack application than a lambda would.<br />
So what happens now if you outgrow a class? Well, you can abstract the function of<br />
your application into multiple classes and build a Rack application using those classes.<br />
The structure is not unlike the controller structure you have in a Rails application,<br />
because it will have separate classes that are responsible for different things.<br />
In your new Rack application, you’ll have two classes that perform separate tasks,<br />
but are still running on the same instance of the server. The first class is going to be<br />
your Heartbeat::Application class, and the second one will provide two forms, each<br />
with one button: one for success and one for failure. These forms will then submit to<br />
the actions provided within the Heartbeat::Application class, which will demonstrate<br />
how you can get your classes to talk to each other.<br />
18.2.1 You’re breaking up<br />
Now that your Rack application is getting more complex, you’re going to break it out<br />
into three files. The first file will be the Heartbeat::Application class, the second<br />
will be a new class called Heartbeat::TestApplication, and the third will be the<br />
Rackup file that will be responsible for combining these two classes into one glorious<br />
application.<br />
Let’s begin by separating out your application and the Rackup file into two separate<br />
files. In a new directory at lib/heartbeat.rb, add the code shown in the following<br />
listing to lib/heartbeat/application.rb.<br />
Listing 18.2 lib/heartbeat/application.rb<br />
module Heartbeat<br />
class Application<br />
def self.call(env)<br />
default_headers = { "Content-Type" => "text/plain"}<br />
if env["PATH_INFO"] =~ /200/<br />
body = "Success!"
status = 200<br />
else<br />
body = "Failure!"<br />
status = 500<br />
end<br />
Building bigger Rack applications<br />
[status, default_headers, ["#{env["PATH_INFO"]} == #{body}"]]<br />
end<br />
end<br />
end<br />
Next, in lib/heartbeat/config.ru, add the code shown in the following listing.<br />
Listing 18.3 lib/heartbeat/config.ru<br />
heartbeat_root = File.expand_path(File.dirname(__FILE__))<br />
require heartbeat_root + '/application'<br />
run Heartbeat::Application<br />
This new lib/heartbeat/config.ru sets up a heartbeat_root variable so that you can<br />
require files relative to the root of the heartbeat directory without having to specify<br />
direct paths to them. At the moment, this file still contains the run line from the old<br />
heartbeat.ru, but you’ll be changing this shortly.<br />
Before that change though, you’re going to add your second application class,<br />
Heartbeat::TestApplication, to a new file at lib/heartbeat/test_application.rb by<br />
using the content shown in the following listing.<br />
Listing 18.4 lib/heartbeat/test_application.rb<br />
module Heartbeat<br />
class TestApplication<br />
def self.call(env)<br />
default_headers = { "Content-Type" => "text/html"}<br />
body = %Q{<br />
Success or FAILURE?!<br />
<br />
<br />
<br />
}<br />
<br />
<br />
<br />
[200, default_headers, [body]]<br />
end<br />
end<br />
end<br />
This file follows the same style as the file that defines Heartbeat::Application, but in<br />
this class the body returned as part of the Rack response consists of two forms, each<br />
with its own button. The first form goes to /test/200, which should give you the<br />
response of “Success!”, and /test/500, which should give you a “Failure!” response<br />
because the path doesn’t include the number 200.<br />
523
524 CHAPTER 18 Rack-based applications<br />
A keen eye may have noticed that you’ve nested the paths to the heartbeat responses<br />
underneath a path called test. This is because when you build your combined class<br />
application, you’ll make your Heartbeat::Application sit under the /test route.<br />
When do you do this? Right now!<br />
18.2.2 Running a combined Rack application<br />
You’re now going to change the lib/heartbeat/config.ru file to now create a Rack application<br />
that uses both of your classes for different functionality. For this, you’re going to<br />
use the Rack::Builder class, which lets you build Rack applications from different<br />
parts. Let’s fill lib/heartbeat/config.ru with the content shown in the following listing.<br />
Listing 18.5 lib/heartbeat/config.ru<br />
heartbeat_root = File.expand_path(File.dirname(__FILE__))<br />
require heartbeat_root + '/application'<br />
require heartbeat_root + '/test_application'<br />
app = Rack::Builder.app do<br />
map '/test' do<br />
run Heartbeat::Application<br />
end<br />
map '/' do<br />
run Heartbeat::TestApplication<br />
end<br />
end<br />
run app<br />
Rather than calling run Heartbeat::Application here, you’re compiling a multifaceted<br />
Rack application using Rack::Builder.app. The run method you’ve been<br />
using all this time is defined inside the Rack::Builder class, actually. A *.ru file is usually<br />
evaluated within the instance of a Rack::Builder object by the code the rackup<br />
command uses, and so you are able to use the run method without having to call<br />
Rack::Builder.new before it or wrapping .ru code in a Rack::Builder.app block.<br />
This time, you’re being implicit and building a new Rack::Builder instance using<br />
Rack::Builder.app. Inside this instance, you’ll declare two routes using the map<br />
method. Within a block given to each of your map calls, you’re calling the run method<br />
again, passing it one of your two application classes.<br />
When a request comes into this application beginning with the path /test, it will be<br />
served by the Heartbeat::Application class. All other requests will be served by the<br />
Heartbeat::TestApplication class. This is not unlike the way certain requests in<br />
your Rails application beginning with /tickets are routed to the TicketsController<br />
and others beginning with /projects go to ProjectsController. 2<br />
Let’s start this application and see what it can do by running this command:<br />
rackup lib/heartbeat/config.ru<br />
2 In fact, the similarities are astounding.
Mounting a Rack application with Rails<br />
Now remember, to make requests to the<br />
Heartbeat::Application class you must<br />
prefix them with /test; otherwise they’ll be<br />
served by Heartbeat::TestApplication.<br />
Keeping that in mind, let’s make a request<br />
to http://localhost:9292/test/200. You’ll see<br />
something unusual: the path displayed on Figure 18.2 Success or FAILURE?!<br />
the page isn’t /test/200 as you may expect,<br />
but rather it’s /200. The env["PATH_INFO"]key doesn’t need to contain the path<br />
where your application is mounted, as that’s not important for routing requests within<br />
the application itself.<br />
If you make a request to another path not beginning with the /test prefix (such as<br />
http://localhost:9292/foo/bar), you’ll see the two buttons in forms provided by the<br />
Heartbeat::TestApplication, as shown in figure 18.2.<br />
When you click the Success! button, you’ll send a request to the/test/200 path,<br />
which will be served by the Heartbeat::Application class and will respond with a<br />
body that says /200 == Success!. When you click the back button in your browser<br />
and click the Failure! button, you’ll see the /500 == Failure!.<br />
This is the basic foundation for Rack applications and a lightweight demonstration<br />
of how routing in Rack applications works. When you began, you were able to write<br />
run Heartbeat::Application to run a single class as your Rack application, but as it’s<br />
grown more complex you’ve split different pieces of the functionality out into different<br />
classes. To combine these classes into one super-application you used the<br />
Rack::Builder.app method.<br />
Now you should have a basic understanding of how you can build Rack applications<br />
to have a lightweight way of creating dynamic responses. So how does all of this<br />
apply to Rails? Well, in Rails you’re able to mount a Rack application so that it can<br />
serve requests on a path (like you did with Rack::Builder), rather than having the<br />
request go through the entire Rails stack.<br />
18.3 Mounting a Rack application with Rails<br />
Sometimes, you’ll want to serve requests in a lightning-fast fashion. Rails is great for<br />
serving super-dynamic requests quickly, but occasionally you’ll want to forego the<br />
heaviness of the Rails controller stack and have a piece of code that receives a request<br />
and quickly responds.<br />
Previously, your Rack application had done just that. However, when you mount<br />
your Rack application inside of a Rails application, you’re able to use the classes (that<br />
is, models) from within the Rails application. With these models, you can do any number<br />
of things. For example, you can build a re-implementation of your tickets API,<br />
which will allow you to see an alternate way to craft the API you created in chapter 13.<br />
So let’s do this.<br />
525
526 CHAPTER 18 Rack-based applications<br />
This new API will be version 3 of your API (things move fast in this app!). It will be<br />
accessible at /api/v3/json/projects/:project_id/tickets 3 and—as with your original API—<br />
will require a token parameter to be passed through to your application. If the token<br />
matches to a user and that user has access to the requested project, you can send back<br />
a list of tickets in a JSON format. If the token sent through doesn’t match to a user, then<br />
you’ll send back a helpful error message explaining that; if the project requested isn’t<br />
accessible by the authenticated user, you’ll deny all knowledge of its existence by sending<br />
back a 404 response.<br />
18.3.1 Mounting Heartbeat<br />
Before you get into any of that though, you should probably look at how mounting<br />
works within Rails by using one of your basic applications first! Mounting a Rack application<br />
involves defining a route in your Rails application that basically says, “I want to<br />
put this application at this path.” Back when you were doing a pure Rack application,<br />
you did this in the lib/heartbeat/config.ru file like this:<br />
map '/heartbeat' do<br />
run Heartbeat::Application<br />
end<br />
Rails has a better place than that for routes: config/routes.rb. This location provides<br />
you with some lovely helpers for mounting your Rack applications. In your Rails application,<br />
to do the same thing as you did in your Rack application, you’d need to first<br />
require the application by placing this line at the top of config/routes.rb:<br />
require 'heartbeat/application'<br />
Then inside the routes block of config/routes.rb you’d put this line:<br />
mount Heartbeat::Application, :at => "/heartbeat"<br />
The mount method accepts an object to mount and an options hash containing an at<br />
option to declare where this should be mounted. Alternatively, you could use the<br />
match method in routes:<br />
match '/heartbeat' => Heartbeat::Application<br />
Both lines are identical in function. So let’s make these changes to your config/<br />
routes.rb file and boot up your Rails server with this command:<br />
rails s<br />
You should now be able to go to http://localhost:3000/heartbeat/200 and see the<br />
friendly /200 == Success! message. This means that your Heartbeat::Application<br />
is responding as you’d like it to.<br />
Rails has been told to forward requests that go to /heartbeat to this Rack application<br />
and it has done so diligently. Rather than initializing a new instance of a controller<br />
3 This URL closely resembles the URL that GitHub uses for v2 of its API, but the similarities are purely<br />
coincidental.
Mounting a Rack application with Rails<br />
(which is what normally happens in a standard Rails request), a Rack class is much<br />
lighter and is perfect for serving high-intensity requests that don’t require views, like<br />
the response from your Heartbeat::Application and the responses from your API.<br />
So now that you’ve learned how you can mount your Heartbeat::Application,<br />
let’s build this slightly more complex Rack application that will serve JSON API<br />
requests for tickets. To make sure everything works, you’ll be writing tests using the<br />
same Rack::Test::Methods helpers that you used back in chapter 13. These helpers<br />
are designed for Rack applications, but they worked with your Rails application<br />
because... well, it’s a Rack app too.<br />
Rather than writing this application as a standard Rack app, let’s branch out and<br />
use another Ruby web framework called Sinatra.<br />
18.3.2 Introducing Sinatra<br />
Sinatra is an exceptionally lightweight Ruby web framework that’s perfect for building<br />
small applications, such as those that serve an API. Like Rails, it’s built on top of Rack<br />
and so you’ll have no worries about using them together. You’ll use it here to create<br />
version 3 of your API. Building you app this way not only demonstrates the power of<br />
Sinatra, but also shows that there’s more than one way to skin this particular cat. 4<br />
To install the sinatra gem, run this command:<br />
gem install sinatra<br />
You can make a small Sinatra script now by creating a file called sin.rb, as shown in the<br />
following listing.<br />
Listing 18.6 sin.rb<br />
require 'sinatra'<br />
get '/' do<br />
"Hello World"<br />
end<br />
This is the smallest Sinatra application that you can write. On the first line you require<br />
the Sinatra file, which gives you some methods you can use to define your application,<br />
such as the get method you use on the next line. This get method is used to define a<br />
root route for your application, which returns the string “Hello World” for GET<br />
requests to /. You could also make it into a class, which is what you’ll need to do for it<br />
to be mountable in your application:<br />
require 'sinatra'<br />
class Tickets < Sinatra::Base<br />
get '/' do<br />
"Hello World"<br />
end<br />
end<br />
4 Although why anybody would skin a cat these days is unknown to the authors.<br />
527
528 CHAPTER 18 Rack-based applications<br />
By making it a class, you’ll be able to mount it in your application using the mount<br />
method in config/routes.rb. By mounting this Sinatra application, it will have access to<br />
all the classes from your Rails application, such as your models, which is precisely what<br />
you’re going to need for this new version of your API. You won’t use this code example<br />
right now; it’s handy to know that you can do this.<br />
To use Sinatra with your application, you’ll need to add it to the Gemfile with this<br />
line:<br />
gem 'sinatra'<br />
Then you’ll need to run bundle install to install it. So let’s go ahead now and start<br />
building this API using Sinatra. 5<br />
18.3.3 The API, by Sinatra<br />
Let’s create a new file to test your experimental new API at spec/api/v3/json/<br />
tickets_spec.rb. In this file you want to set up a project that has at least one ticket, as<br />
well as a user that you can use to make requests to your API. After that, you want to<br />
make a request to /api/v3/json/tickets and check that you get back a proper response<br />
of tickets. With this in mind, let’s write a spec that looks like the code shown in the following<br />
listing.<br />
Listing 18.7 spec/api/v3/json/tickets_spec.rb<br />
require 'spec_helper'<br />
describe Api::V3::JSON::Tickets, :type => :api do<br />
let(:project) { Factory(:project) }<br />
let(:user) { Factory(:user) }<br />
let(:token) { user.authentication_token }<br />
before do<br />
Factory(:ticket, :project => project)<br />
user.permissions.create!(:thing => project, :action => "view")<br />
end<br />
let(:url) { "/api/v3/json/projects/#{project.id}/tickets" }<br />
context "successful requests" do<br />
it "can get a list of tickets" do<br />
get url, :token => token<br />
last_response.body.should eql(project.tickets.to_json)<br />
end<br />
end<br />
end<br />
This test looks remarkably like the one in spec/api/v2/tickets_spec.rb, except this time<br />
you’re only testing for JSON responses and you’ve changed the URL that you’re<br />
requesting to api/:version/:format/:path. When you run this spec with bin/rspec<br />
spec/api/v3/json/tickets_spec.rb you’ll see that it’s giving you this error:<br />
... uninitialized constant Api::V3<br />
5 You can learn more about Sinatra at https://github.com/sinatra/sinatra/.
Mounting a Rack application with Rails<br />
This is because you haven’t yet defined the module for the Api::V3 namespace. Let’s<br />
create a new file at app/controllers/api/v3/json/tickets.rb that defines this module, as<br />
shown in the following listing.<br />
Listing 18.8 app/controllers/api/v3/json/tickets.rb<br />
require 'sinatra'<br />
module Api<br />
module V3<br />
module JSON<br />
class Tickets < Sinatra::Base<br />
before do<br />
headers "Content-Type" => "text/json"<br />
end<br />
get '/' do<br />
[]<br />
end<br />
end<br />
end<br />
end<br />
end<br />
Within this file you define the Api::V3::JSON::Tickets class that is described at the<br />
top of your spec, which will now make your spec run. This class inherits from Sinatra::Base<br />
so that you’ll get the helpful methods that Sinatra provides, such as the<br />
before B and get methods that you use here. You’ve already seen what get can do,<br />
but before is new. This method is similar to a before_filter in Rails and will execute<br />
the block before each request. In this block, you set the headers for the request, using<br />
Sinatra’s headers method, so that your API identifies as sending back a text/json<br />
response.<br />
Let’s rerun it using bin/rspec spec/api/v3/json/tickets_spec.rb:<br />
Failure/Error: get url, :token => token<br />
ActionController::RoutingError:<br />
No route matches [GET] "/api/v3/json/projects/1/tickets"<br />
This is a better start: now your test is running and failing as it should because you<br />
haven’t defined the route for it yet. Your test is expecting to be able to do a GET<br />
request to /api/v3/json/projects/1/tickets but cannot.<br />
This route can be interpreted as /api/v3/json/projects/:project_id/tickets, and you<br />
can use the api namespace already in config/routes.rb to act as a home for this route.<br />
Let’s put some code for v3 of your API inside this namespace now:<br />
namespace :v3 do<br />
namespace :json do<br />
mount Api::V3::JSON::Tickets,<br />
:at => "/projects/:project_id/tickets"<br />
end<br />
end<br />
B Before method<br />
529
530 CHAPTER 18 Rack-based applications<br />
By placing this mount call inside the namespaces, the Rack application will be<br />
mounted at /api/v3/json/projects/:project_id/tickets rather than the /tickets URI if<br />
you didn’t have it nested. Additionally, you’ve specified a dynamic parameter in the<br />
form of :project_id. With this, you’ll be able to access the requested project id from<br />
inside your Rack application using a method very similar to how you’d usually access<br />
parameters in a controller.<br />
If you attempted to run your spec again it would bomb out with another new error:<br />
expected "[tickets array]"<br />
got ""<br />
This means that requests are able to get to your Rack app and that the response you’ve<br />
declared is being served successfully. Now you need to fill this response with meaningful<br />
data. To do this, find the project that’s being referenced in the URL by using the<br />
parameters passed through found with the params method. Unfortunately, Sinatra<br />
doesn’t load the parameters from your Rails application and so params[:project_id]<br />
is not going to be set. You can see this if you change your root route in your Sinatra<br />
application to this:<br />
get '/' do<br />
p params<br />
end<br />
Then if you run your test, you’ll see only the token parameter is available:<br />
{"token"=>"6E06zoj01Pf5texLXVNb"}<br />
Luckily, you can still get to this through one of the keys in the environment hash,<br />
which is accessible through the env method in your Sinatra actions, like it was available<br />
when you built your Rack applications. You saw this environment hash earlier<br />
when you were developing your first Rack application, but this time it’s going to have<br />
a little more to it because it’s gone through the Rails request stack. Let’s change your<br />
root route to this:<br />
get '/' do<br />
p env.keys<br />
end<br />
When you rerun your test, you’ll see all the available keys output at the top, with one of<br />
the keys being action_dispatch.request.path_parameters. This key stores the<br />
parameters discovered by Rails routing, and your project_id parameter should fall<br />
neatly into this category. Let’s find out by changing the p env.keys line in your root<br />
route to p env["action_dispatch.request.path_parameters"] and then re-running<br />
your test. You should see this:<br />
{:project_id=>"3"}<br />
Okay, so you can access two parameter hashes, but you’ll need to merge them<br />
together if you are to do anything useful with them. You can merge them into a super
Mounting a Rack application with Rails<br />
params method by redefining the params method as a private method in your app.<br />
Underneath the get you’ll put this:<br />
def params<br />
hash = env["action_dispatch.request.path_parameters"].merge!(super)<br />
HashWithIndifferentAccess.new(hash)<br />
end<br />
By calling the super method here, you’ll reference the params method in the superclass,<br />
Sinatra::Base. You want to access the keys in this hash using either symbols or<br />
strings like you can do in your Rails application, so you create a new HashWith-<br />
IndifferentAccess object, which is returned by this method. This lets you access<br />
your token with either params[:token] or params["token"]. This hash is quite indifferent<br />
to its access methods.<br />
Let’s switch your root route back to calling p params. When you run your test<br />
again, you should see that you finally have both parameters inside the one hash:<br />
{:project_id=>"3", "token"=>"ZVSREe1aQjNZ2SrB9e8I"}<br />
With these parameters you’ll now be able to find the user based on their token, get a<br />
list of projects they have access to, and then attempt to find the project with the id<br />
specified. You can do this by putting two calls, a find_user and find_project<br />
method, in the before block you already have, using this code:<br />
before do<br />
headers "Content-Type" => "text/json"<br />
find_user<br />
find_project<br />
end<br />
The find_user and find_project methods can be defined underneath the private<br />
keyword using this code:<br />
private<br />
def find_user<br />
@user = User.find_by_authentication_token(params[:token])<br />
end<br />
def find_project<br />
@project = Project.for(@user).find(params[:project_id])<br />
end<br />
This code should look fairly familiar: it’s basically identical to the code found in the<br />
Api::V1::TicketsController and Api::V1::BaseController classes inside your<br />
Rack application. First you find the user based on their token and then generate a<br />
scope for all projects that the user is able to view with the Project.for method. With<br />
this scope, you can then find the project matching the id passed in through<br />
params[:project_id]. You are referencing the models from your Rails application<br />
inside your Sinatra application, and there’s nothing special you have to configure to<br />
allow this.<br />
531
532 CHAPTER 18 Rack-based applications<br />
Because you’re not too concerned with what happens if an invalid<br />
params[:project_id] or user token is passed through at the moment, you’ll fix those<br />
up after you’ve got this first test passing. With the project now found, you should be<br />
able to display a list of tickets in JSON form in your call method. Let’s change your<br />
root route to return a list of JSON-ified tickets for this project:<br />
get '/' do<br />
@project.tickets.to_json<br />
end<br />
Now your root route should respond with the list of tickets required to have your test<br />
pass. Let’s see if this is the case by running bin/rspec spec/api/v3/json/<br />
tickets_spec.rb:<br />
1 example, 0 failures<br />
Great, this spec is now passing, which means that your Rack application is now serving<br />
a base for version 3 of your API. By making this a Rack application, you can serve<br />
requests in a more lightweight fashion than you could within Rails.<br />
But you don’t have basic error checking in place yet if a user isn’t found matching<br />
a token or if a person can’t find a project. So before you move on, let’s quickly add<br />
tests for these two issues.<br />
18.3.4 Basic error checking<br />
You’ll open spec/api/v3/json/tickets_spec.rb and add two tests inside the describe<br />
block in a new context block, as shown in the following listing.<br />
Listing 18.9 spec/api/v3/json/tickets_spec.rb<br />
context "unsuccessful requests" do<br />
it "doesn't pass through a token" do<br />
get url<br />
last_response.status.should eql(401)<br />
last_response.body.should eql("Token is invalid.")<br />
end<br />
it "cannot access a project that they don't have permission to" do<br />
user.permissions.delete_all<br />
get url, :token => token<br />
last_response.status.should eql(404)<br />
end<br />
end<br />
In the first test you make a request without passing through a token, which should<br />
result in a 401 (unauthorized) status and a message telling you the “Token is invalid.”<br />
In the second test, you use the delete_all association method to remove all permissions<br />
for the user and then attempt to request tickets in a project that the user no longer<br />
has access to. This should result in the response being a 404 response, which<br />
means your API will deny all knowledge of that project and its tickets.
Middleware<br />
To make your first test pass you’ll need to check that your find_user method actually<br />
returns a valid user; otherwise you’ll return this 404 response. The best place to do<br />
this would be inside the find_user method itself, turning it into this:<br />
def find_user<br />
@user = User.find_by_authentication_token(params[:token])<br />
halt 401, "Token is invalid." unless @user<br />
end<br />
The halt method here will stop a request dead in its tracks. In this case, it will return<br />
a 401 status code with the body being the string specified. When you run your tests<br />
again the first two should be passing, with the third one still failing:<br />
3 examples, 1 failure<br />
Alright, so now if an invalid token is passed, you’re throwing exactly the same error as<br />
the last two iterations of your API did—good progress! Finally, you’ll need to send a<br />
404 response when a project cannot be found within the scope for the current user.<br />
To do this, change the find_project method in your app to this:<br />
def find_project<br />
@project = Project.for(@user).find(params[:project_id])<br />
rescue ActiveRecord::RecordNotFound<br />
halt 404, "The project you were looking for could not be found."<br />
end<br />
When you run your tests for a final time with bundle exec rspec spec/api/v3/<br />
tickets_spec.rb, they should all pass:<br />
3 examples, 0 failures<br />
Awesome! This should give you a clear idea of how you could implement an API similar<br />
to the one you created back in chapter 13 by using the lightweight framework of<br />
Sinatra. All of this is possible because Rails provides an easy way to mount Rack-based<br />
applications inside your Rails applications. You could go further with this API, but this<br />
is probably another exercise for you later on if you wish to undertake it.<br />
You’ve learned how you can use Rack applications to serve as endpoints of<br />
requests, but you can also create pieces that hook into the middle of the request cycle<br />
called middleware. Rails has a few of these already, and you saw the effects of one of<br />
them when you were able to access the env["action_dispatch.request.path<br />
_parameters"] key inside your Sinatra application. Without the middleware of the<br />
Rails stack, this parameter would be unavailable. In the next section, we look at the<br />
middleware examples in the real world, including some found in the Rails stack, as<br />
well as how you can build and use your own.<br />
18.4 Middleware<br />
When a request comes into a Rack application, it doesn’t go straight to a single place<br />
that serves the request. Instead, it goes through a series of pieces known as middleware,<br />
which may process the request before it gets to the end of the stack (your application)<br />
or modify it and pass it onward, as shown in figure 18.3.<br />
533
534 CHAPTER 18 Rack-based applications<br />
You can run the rake middleware command within your Rails<br />
application’s directory to see the list of middleware currently in<br />
use by your Rails application:<br />
use ActionDispatch::Static<br />
use Rack::Lock<br />
use ActiveSupport::Cache::Strategy::LocalCache<br />
use Rack::Runtime<br />
...<br />
use ActionDispatch::BestStandardsSupport<br />
use Warden::Manager<br />
run Ticketee::Application.routes<br />
Each of these middleware pieces performs its own individual function.<br />
For instance, the first middleware ActionDispatch::Static<br />
intercepts requests for static files such as images, JavaScript files,<br />
or stylesheets found in public and serves them immediately, without<br />
the request to them falling through to the rest of the stack. It’s<br />
important to note that this middleware is only active in the development<br />
environment, as in production your web server (such as<br />
nginx) is better suited for serving static assets.<br />
Other middleware, such as ActionDispatch::BestStandards-<br />
Support, sets additional headers on your request. This particular piece of middleware<br />
sets the X-UA-Compatible header to IE=Edge,chrome=1, which tells Microsoft Internet<br />
Explorer to “display content in the highest mode available” that is “equivalent to IE9<br />
mode,” meaning your pages should render in a “best standards” fashion. 6 The<br />
chrome=1 part of this header is for the Google Chrome Frame, which again will support<br />
“best standards” rendering on a page.<br />
Let’s look at both of these middleware pieces now.<br />
18.4.1 Middleware in Rails<br />
Browser<br />
Web Server<br />
In the case of the ActionDispatch::Static middleware, a response is returned when<br />
it finds a file to serve, and the request stops there. In the case of Action-<br />
Dispatch::BestStandardsSupport, the request is modified and allowed to continued<br />
down the chain of middleware until it hits Ticketee::Application.routes, which<br />
will serve the request using the routes and code in your application. The process of<br />
ActionDispatch::Static can be seen in figure 18.4.<br />
When a request is made to /images/rails.png, the middleware checks to see if the<br />
public/images/rails.png file exists. If it does, then it is returned as the response of<br />
this request. This middleware will also check for cached pages. If you make a request<br />
to /projects, Rails (by default) will first check to see if a public/projects.html file<br />
exists before sending the request to the rest of the stack. This type of request is<br />
shown in figure 18.5.<br />
6 For more information about IE=Edge and the X-UA-Compatible header, see http://msdn.microsoft.com/<br />
en-us/library/cc288325(v=vs.85).aspx.<br />
Rack<br />
Application Stack<br />
Middleware<br />
...<br />
Middleware<br />
Application<br />
Figure 18.3 Full<br />
request stack, redux
1. GET /images/rails.png<br />
2. Does<br />
/public/images/rails.pngg<br />
exist?<br />
Filesystem<br />
Browser<br />
Middleware<br />
ActionDispatch::Static<br />
Figure 18.4<br />
ActionDispatch::Static request<br />
1. GET /projects<br />
2. Does<br />
/public/projects.html<br />
exist? 3. Nope!<br />
Filesystem<br />
Browser<br />
ActionDispatch::Static<br />
4. Serves static asset<br />
3. Yes!<br />
Ok, reading...<br />
ActionDispatch::BestStandardsSupport<br />
ProjectsController<br />
(other middleware)<br />
(more middleware)<br />
Ticketee::Application.routes<br />
Middleware Stack<br />
Application<br />
6. Is shown the page for /projects<br />
4. Sets XX-UA-Compatible UA<br />
header<br />
5. Serves the request as usual<br />
535<br />
Figure 18.5<br />
ActionDispatch::BestStandardsSupport<br />
request
536 CHAPTER 18 Rack-based applications<br />
In this request, the ActionDispatch::Static middleware first checks for the presence<br />
of public/projects.html, which would be there if you had cached the page.<br />
Because it’s not there, the request goes through the rest of the middleware stack<br />
being passed along. When it gets to ActionDispatch::Best::StandardsSupport, this<br />
middleware sets the X-UA-Compatible header and passes along the request to the<br />
application, which then serves the request like normal.<br />
Let’s dive into exactly how ActionDispatch::Static works.<br />
18.4.2 Investigating ActionDispatch::Static<br />
The ActionDispatch::Static class is responsible for serving static requests in the<br />
development environment for your application. The code for this piece of middleware<br />
can be found in the actionpack gem, which you can view by opening the path provided<br />
by the command bundle show actionpack in your editor. The file that defines the<br />
ActionDispatch::Static middleware can be found at lib/action_dispatch/<br />
middleware/static.rb. The first 10 lines in this file are shown inthe following listing.<br />
Listing 18.10 Listing 18.10 lib/action_dispatch/middleware/static.rb<br />
require 'rack/utils'<br />
module ActionDispatch<br />
class Static<br />
FILE_METHODS = %w(GET HEAD).freeze<br />
def initialize(app, root)<br />
@app = app<br />
@file_server = ::Rack::File.new(root)<br />
end<br />
The first line requires the rack/utilsfile, which contains the Rack::Utils module this<br />
file references a little later on. The next three lines define the ActionDispatch<br />
::Static class and a constant called FILE_METHODS. Finally, this middleware defines<br />
the initialize method, which takes two arguments, an app and a root. This method<br />
then assigns the app argument to the @app variable so that it can be accessed in methods<br />
called after this point. The root variable is passed to a call to ::Rack::File.new 7<br />
which is then assigned to the @file_server variable. The Rack::File class is actually<br />
a Rack application too, as you’ll see later.<br />
So why does this middleware begin in this particular way, and what is app? Well, app<br />
is the next piece of middleware in the stack that you can pass requests to if you wish.<br />
You’ll see this app variable used later. The instance of your middleware is then cached<br />
by the Rails server so it can call the call method on it when a request comes into the<br />
stack. The call method in this middleware begins with this:<br />
7 Not-well-known Ruby fact: the double colon (::) of ::Rack::File represents a top-level class, meaning that<br />
Ruby will get the Rack::File class defined at the top level of your application, rather than one (potentially)<br />
within the current class or module.
Middleware<br />
def call(env)<br />
path = env['PATH_INFO'].chomp('/')<br />
method = env['REQUEST_METHOD']<br />
if FILE_METHODS.include?(method)<br />
The env variable here is the same sort of style as the env variable that you used back in<br />
your Rack application. Rack middleware and Rack applications are actually designed<br />
almost identically. You saw the env["PATH_INFO"] key before—that’s the one that contains<br />
the path of the request, something such as /images/rails.png. By calling chomp<br />
on this, it strips off any trailing forward-slashes on the end of this URL.<br />
The env["REQUEST_METHOD"] key contains the HTTP request method used in this<br />
request. If this method is either GET or HEAD, then the code inside the if runs here.<br />
The next line after this one checks for the presence of a file:<br />
if file_exist?(path)<br />
This method is defined further down in this file, like this:<br />
def file_exist?(path)<br />
full_path = File.join(@file_server.root, ::Rack::Utils.unescape(path))<br />
File.file?(full_path) && File.readable?(full_path)<br />
end<br />
This method uses the root method, which returns the fill path to the public directory<br />
of your application. This method then uses File.join to join the path to the public<br />
directory and the unescaped name of the file that’s being requested. Finally, this<br />
method uses the File.file? and File.readable? methods to determine if the path<br />
specified is actually a file and if that file is readable. If it is indeed a file and is indeed<br />
readable, then this line is executed:<br />
return @file_server.call(env)<br />
This calls the call method on the Rack::File instance, which then (after some additional<br />
processing) serves the file.<br />
So far, this has been the process this piece of middleware uses for an existing file. If<br />
the file doesn’t exist, then it goes into the else for the if File.exists? line, which<br />
results in the following code being run:<br />
cached_path = directory_exist?(path) ? "#{path}/index" : path<br />
cached_path += ::ActionController::Base.page_cache_extension<br />
if file_exist?(cached_path)<br />
env['PATH_INFO'] = cached_path<br />
return @file_server.call(env)<br />
end<br />
The first line here checks for a directory with the same name as the path you’ve<br />
requested. Imagine your request is now /projects and you have a public/projects directory.<br />
This directory_exists? method would then return true because this directory<br />
exists. The directory_exists? method is defined like this:<br />
537
538 CHAPTER 18 Rack-based applications<br />
def directory_exist?(path)<br />
full_path = File.join(@file_server.root, ::Rack::Utils.unescape(path))<br />
File.directory?(full_path) && File.readable?(full_path)<br />
end<br />
It performs basically the same function as the file_exist? method, except that it uses<br />
File.directory? to check for the directory rather than File.file?. If this directory<br />
does exist, then the cached_path variable is set to /projects/index in your case. The<br />
second line in this else references the ::ActionController::Base.page_cache<br />
_extension, which is a string that defaults to .html and makes your cached_path variable<br />
now projects/index.html, the alternate path where the page for /projects may be<br />
cached.<br />
If this file exists, then the middleware sets env["PATH_INFO"] to be this path so<br />
that the Rack::File instance knows what’s being requested, and then it makes a call<br />
to the @fileserver.call method and returns the response it gives back.<br />
If everything fails and there’s no file at the path you’ve requested, the middleware<br />
gives up and passes the request to the next piece of middleware by using this line:<br />
@app.call(env)<br />
The request then continues on down the chain of middleware until it hits a middleware<br />
that serves that request or the Ticketee::Application.routes endpoint. Either<br />
way, the browser (or whatever makes the request) is basically guaranteed to get a<br />
response from a piece of middleware or the application itself. For the first situation, a<br />
middleware can return a response itself:<br />
return [200, { "Content-Type" => "text/html" }, ["Oh happy day!"]]<br />
Or it can pass the buck to the next piece with the call method, passing through the<br />
(possibly modified) env variable representing this request’s environment:<br />
@app.call(env)<br />
Now that you’ve got a nice grasp of how one piece of middleware works, let’s build<br />
your own!<br />
18.4.3 Crafting middleware<br />
Soon you’ll have your own piece of middleware that you can put into the middleware<br />
stack of a Rails or Rack application. This middleware will allow the request to run all<br />
the way down the chain to the application and then will modify the body, replacing<br />
specific letters in the text for links with other, equally specific letters. Create a new file<br />
for your middleware at lib/link_jumbler.rb and fill it with the content shown in the following<br />
listing.<br />
Listing 18.11 lib/link_jumbler.rb<br />
require 'nokogiri'<br />
class LinkJumbler<br />
def initialize(app, letters)
@app = app<br />
@letters = letters<br />
end<br />
Middleware<br />
def call(env)<br />
status, headers, response = @app.call(env)<br />
body = Nokogiri::HTML(response.body)<br />
body.css("a").each do |a|<br />
@letters.each do |find, replace|<br />
a.content = a.content.gsub(find.to_s, replace.to_s)<br />
end<br />
end<br />
[status, headers, body.to_s]<br />
end<br />
end<br />
In this file you’ve defined the LinkJumbler class, which contains an initialize and<br />
a call method. The initialize method sets the stage, setting up the @app and<br />
@letters variables you’ll use in your call method.<br />
In the call method, you make a call down the middleware stack in order to set up<br />
your status, headers, and body values. You can do this because the @app.call(env)<br />
call will always return a three-element array. Each element of this array will be<br />
assigned to its respective variable. In a Rails application’s middleware stack, the third<br />
element isn’t an array but rather an instance of ActionDispatch::Response. To get to<br />
the good part of this response you can use the body method, like you do on the second<br />
line of your call method.<br />
With this body you use the Nokogiri::HTML method (provided by the require<br />
'nokogiri' line at the top of this file) to parse the body returned by the application<br />
into a Nokogiri::HTML::Document object. This will allow you to parse the page more<br />
easily than if you used regular expressions. With this object, you call the css method<br />
and pass it the "a" argument, which finds all a tags in the response body. You then<br />
iterate through each of these tags and go through all of your letters from @letters,<br />
using the keys of the hash as the find argument and the values as the replace argument.<br />
You then set the content of each of the a tags to be the substituted result.<br />
Finally, you return a three-element array using your new body, resulting in links<br />
being jumbled. To see this middleware in action, you’ll need to add it to the middleware<br />
stack in your application. To do that, put these two lines inside the Ticketee<br />
::Application class definition in config/application.rb:<br />
require 'link_jumbler'<br />
config.middleware.use LinkJumbler, { "e" => "a" }<br />
The config.middleware.use method will add your middleware to the end of the<br />
middleware stack, making it the last piece of middleware to be processed before a<br />
request hits your application. 8 Any additional arguments passed to the use method<br />
8 For more methods for config.middleware look at the “Configuring Middleware” section of the Configuring<br />
official guide: http://guides.rubyonrails.org/configuring.html#configuring-middleware.<br />
539
540 CHAPTER 18 Rack-based applications<br />
will be passed as arguments to the initialize<br />
method for this middleware, and<br />
so this hash you’ve passed here will be the<br />
letters argument in your middleware.<br />
This means your LinkJumbler middleware<br />
will replace the letter e with a anytime it<br />
finds it in an a tag.<br />
To see this middleware in action, let’s<br />
fire up a server by running rails s in a ter-<br />
Figure 18.6 What’s a Tickataa?!<br />
minal. When you go to http://localhost:3000 you should notice something’s changed,<br />
as shown in figure 18.6.<br />
As you can see in this figure, your links have had their e’s replaced with a’s and any<br />
other occurrence, such as the user’s email address, has been left untouched.<br />
This is one example of how you can use middleware to affect the outcome of a<br />
request within Rails; you could have modified anything or even sent a response back<br />
from the middleware itself. The opportunities are endless. This time though, you’ve<br />
made a piece of middleware that finds all the a tags and jumbles up the letters based<br />
on what you tell it to.<br />
18.5 Summary<br />
You’ve now seen a lot of what Rack, one of the core components of the Rails stack, can<br />
offer you. In the beginning of this chapter you built a small Rack application that<br />
responded with OK. You then fleshed this application out to respond differently based<br />
on the provided request. Then you built another Rack application that called this first<br />
Rack application, running both of these within the same instance by using the<br />
Rack::Builder class.<br />
Next you saw how you could use these applications within the Rails stack by first<br />
mounting your initial Rack application and then branching out into something a little<br />
more complex, with a Sinatra-based application serving what could possibly be the<br />
beginnings of version 3 of Ticketee’s API. Sinatra is a lightweight framework offering<br />
the same basic features as Rails.<br />
Finally, you saw two pieces of middleware, the ActionDispatch::Static piece and<br />
the ActionDispatch::BestStandardsSupport. You dissected the first of these, figuring<br />
out how it worked so that you could use that knowledge to build your own middleware,<br />
a neat little piece that jumbles up the text on the link based on the options<br />
passed to it.
541<br />
appendix A<br />
Why Rails?<br />
A common question in the Ruby on Rails community from newcomers is, “Why<br />
Ruby?” or “Why Rails?” In this appendix, this question will be answered with a couple<br />
of key points about why people should be using Ruby on Rails over other frameworks,<br />
covering such things as the culture and community standards.<br />
Ruby is an exceptionally powerful language that can be used for short scripts up<br />
to full-featured web applications, such as those built with Ruby on Rails. Its clean<br />
syntax and its focus on making programmers happy are two of the many major<br />
points that have generated a large community of people who use it. There are hobbyists<br />
who use it just for the sake of it right up to hardcore people who swear by it.<br />
However, Ruby (and by extension, Rails) should not be used as “golden hammers”.<br />
Not all problems are solvable by Ruby or Rails, but the chance of running into one<br />
of these situations is extremely low. People who have used other languages before<br />
they have come to Ruby suggest that “Ruby just makes more sense.” 1<br />
The speed at which that you can develop applications using Ruby on Rails is<br />
demonstrably faster than other languages. An application that has taken four<br />
months to build in Java could be done in three weeks in Rails, for example. This<br />
has been proven again and again. Rails even claims up front on http://<br />
rubyonrails.org that “Ruby on Rails is optimized for programmer happiness and<br />
sustainable productivity.”<br />
The Ruby and Rails communities have a consistent focus on self-improvement.<br />
Over the last couple of years we’ve seen developments such as the improvements<br />
from Rails 2 to Rails 3, Passenger (covered in chapter 14), and Bundler. All of these<br />
have vastly improved the ease of development that comes naturally to Ruby. Other<br />
developments have focused on other areas, such as the RSpec, Capybara, and<br />
Cucumber 2 gems (featured prominently in this book), which focus on making testing<br />
exceptionally easier for Ruby developers. By consistently improving, things are<br />
becoming easier and easier for Ruby developers every year.<br />
Along the same vein of self-improvement is an almost zealot-like focus on testing,<br />
which is code that tests other code. Although this may seem silly to begin with,<br />
1 Quote attributed to Sam Shaw from Railsconf 2011.<br />
2 A quick nod to the aruba gem: http://github.com/aslakhellesoy/aruba, which is used extensively to test<br />
RSpec’s and Cucumber’s command-line interfaces (CLI), but can also be used to test other CLIs.
542 APPENDIX A Why Rails?<br />
it helps you make less silly mistakes and provides the groundwork for you to test the<br />
fixes for any bugs that come up in your system. Ruby, just like every other language, is<br />
no good at preventing buggy code. That’s a human trait that is unavoidable.<br />
The shift away from SVN to the wonderful world of distributed version control was<br />
also a major milestone, with GitHub (a Rails application!) being created in early 2008.<br />
Services such GitHub have made it easier than ever for Ruby developers to collaborate<br />
on code across cultures. As an example of this, you only need to look at the authors of<br />
commits on the Rails project to see the wide gamut of people.<br />
Don’t just take it from us. Here’s a direct quote from somebody who had only been<br />
using Rails for a few days:<br />
When I am programming with Ruby I think I’m making magic.<br />
—New person<br />
Although Ruby isn’t quite the magic of fairy tales, you’ll find young and old, experienced<br />
and not-so-experienced people all claiming that it’s just a brilliant language to<br />
work with. As Yukihiro Matsumuto (the creator of the language) says: Ruby is<br />
designed to make programmers happy. Along the same lines, the Rails claim you saw<br />
earlier, “optimized for programmer happiness and sustainable productivity,” is not<br />
smoke and mirrors either. You can be extremely happy and productive while using<br />
Rails, compared with other frameworks.<br />
Let’s dive a little deeper into the reasons why Rails (the framework) and Ruby (the<br />
language) are so great.<br />
A.1 Reason #1: the sense of community<br />
The Rails community is like no other on the planet. There is a large sense of togetherness<br />
in the community with people freely sharing ideas and code through services<br />
such as GitHub and RubyGems (see Reason #2). An example of this is the vibrant<br />
community on the Freenode IRC network (irc.freenode.net) where the main #rubyonrails<br />
channel is primarily used for asking questions about Rails. Anybody can come<br />
into the channel and ask a question and receive a response promptly from one of the<br />
other people who visit the channel. There’s no central support authority: it’s a group<br />
of volunteers who are voluntarily volunteering 3 their time to help strangers with problems,<br />
without asking for money or expecting anything else in return.<br />
There’s also a large support community focused around Stack Overflow (http://<br />
stackoverflow.com) and other locations such as the Ruby on Rails Talk mailing list<br />
(http://groups.google.com/group/rubyonrails-talk) and Rails Forum (http://<br />
railsforum.com). Not to mention, there’s also the RailsBridge (http://railsbridge<br />
.org) organization, which aims to bridge the gap between newbies and experienced<br />
developers.<br />
All of these different areas of the internet share a common goal: be nice to the<br />
people who are asking for help. One mantra in the Ruby community is, “Matz is nice<br />
3 Too much “volunteer” usage, perhaps. It was voluntary.
Reason #3: RubyGems<br />
always, so we are nice,” often abbreviated to MINASWAN. People in the Ruby and Rails<br />
communities are incredibly nice to everyone.<br />
Another example of the excellent community around Ruby on Rails is the number<br />
of conferences and gatherings held worldwide. The smallest of them are the intimate<br />
hack sessions where people work together on applications and share ideas in a room.<br />
Slightly bigger and more organized than that are the events such as Railscamps<br />
(http://railscamps.org) which have about 150 people attend and run from Friday–<br />
Monday, with interesting talks given on the Saturdays and Sundays. The largest however<br />
is Railsconf, which has about 2,000 people in attendance.<br />
There are hundreds of thousands, if not millions of people using Ruby on Rails<br />
today, building great web applications with it and building the best web framework<br />
community on the planet.<br />
A.2 Reason #2: the speed and ease of development<br />
The speed of how quickly you are able to develop a Ruby on Rails application is definitely<br />
one of the main reasons that people gravitate toward (and stick with) the framework.<br />
One documented case of this is that of a team that had developed an application<br />
using a Java-based framework, which took four months. When that application<br />
became difficult to maintain, alternative languages and frameworks were sought, with<br />
Ruby and Ruby on Rails found to fit the bill adequately. The team re-implemented all<br />
the features of the original Java-based application within three weeks, with less code<br />
and more beautiful code.<br />
Ruby on Rails follows a paradigm known as convention over configuration. This paradigm<br />
is adopted not only by Rails, but also by other modern web frameworks. Rails is<br />
designed in such a way that it takes care of the normal configuration that you may<br />
have to do with other frameworks, leaving it up to you to get down to coding real features<br />
for your application.<br />
One example of this convention over configuration is the mapping between classes<br />
designed to interact with the database and the tables related to these classes. If the<br />
class is called Project then it can be assumed by Rails (and the people coding the<br />
application) that the related table is going to be called projects. But this can be configured<br />
using a setting in the class if that table name is not desired.<br />
A.3 Reason #3: RubyGems<br />
This third point is more about a general boon to the community of Ruby, but it plays a<br />
key role in developing Rails applications.<br />
As we stated before, the culture of the Rails community is one of self-improvement.<br />
There are people who are consistently thinking of new ways to make other people’s<br />
lives better. One of these ways is the RubyGems system, which allows people to share<br />
libraries in a common format. By installing a gem, a user is able to use its code along<br />
543
544 APPENDIX A Why Rails?<br />
with their own code. There are gems such as the json gem, which is used for parsing<br />
JSON data, nokogiri for parsing XML, and of course the Rails suite of gems.<br />
Previously, gems were hosted on a system known as RubyForge which was unstable<br />
at times. In July 2009, Nick Quaranto, a prominent Rubyist, created the RubyGems<br />
site we know today: http://rubygems.org. This is now the primary nexus for hosting<br />
and downloading gems for the Ruby community, with RubyForge playing second fiddle.<br />
The site Nick created provides an easy way for people to host gems that other people<br />
can use, freely. Now isn’t that just awesome?<br />
Working with gems on a project used to be tough. To find out what gems a project<br />
used they had to be listed somewhere, and there were often times when the tools used<br />
to install these gems would not work, either installing the wrong gems or simply refusing<br />
to work at all. Then along came Bundler. The Bundler gem provides a standardized<br />
way across all Ruby projects for managing gem dependencies. It’s a gem to<br />
manage the gems that projects use. You can list the gems you want your project to use<br />
in a special file known as the Gemfile. Bundler can interpret (when bundle install is<br />
run) the special syntax in this file to figure out what gems (and the dependencies, and<br />
their dependencies’ dependencies) need installing and then goes about doing it.<br />
Bundler solves the gem dependency hell previously witnessed in the Ruby and Rails<br />
communities in a simple fashion.<br />
In addition to this, having different Ruby versions running on the same machine<br />
used to be difficult and involve a lot of hacking around. Then another prominent<br />
Rubyist, Wayne E. Seguin, created a gem called Ruby Version Manager (RVM) that<br />
allows for simplistic management of the different<br />
All in all, RubyGems and its ecosystem is very well thought-out and sustainable. It<br />
provides an accessible way for people to share their code in a free manner and serves<br />
as one of the foundations of the Ruby language. All of this work has been done by the<br />
exceedingly great community which is made up of many different kinds of people,<br />
perhaps one day even including people who are reading this appendix.<br />
A.4 Reason #4: emphasis on testing<br />
Within the Ruby and Rails community there’s a huge focus on writing great, maintainable<br />
code. To help with this process, there’s also a big focus on test-driven development<br />
along with a mantra of “red/green/refactor.” This mantra describes the process<br />
of test-driven development: you write tests that are then failing (usually indicated by<br />
the color red), write the code to make those tests pass (indicated by green), and then<br />
clean up (refactor) the code in order to make it easier for people to know what it’s<br />
doing. We covered this process in chapter 2.<br />
Because Ruby is interpreted rather than compiled like other languages, you cannot<br />
rely on compilers to pick up errors in your code. Instead, you write tests that<br />
describe functionality before it’s implemented. Those tests will fail initially, but as you<br />
write that functionality those tests will pass. In some situations (such as tests written<br />
using the Cucumber gem), these tests can be read by people who requested a feature
Reason #4: emphasis on testing<br />
of your application and can be used as a set of instructions explaining exactly how this<br />
feature works. This is a great way to verify that the feature is precisely what was<br />
requested.<br />
As you write these tests for the application, you provide a safety net for if things go<br />
wrong. This collection of tests is referred to as a test suite. When you develop a new feature,<br />
you have the tests that you wrote before the feature to prove that it’s working as<br />
you originally thought it should. If you want to make sure that the code is working at<br />
some point in the future, then you have the test suite to fall back on.<br />
If something does go wrong and it’s not tested, you’ve got that base to build<br />
upon. You can write a test for an unrealized situation—a process known as regression<br />
testing—and always have that test in the future to ensure that the problem does not<br />
crop up again.<br />
545
546<br />
appendix B<br />
Tidbits<br />
This appendix contains a collection of tidbits that we just couldn’t fit into the rest<br />
of the book. They are designed to be read by themselves, although you are welcome<br />
(and encouraged!) to read as many of them at once as you wish.<br />
B.1 Prettying URLs<br />
In your application you’ve got a URL such as /projects/1/tickets/2, which really<br />
isn’t that pretty. Let’s take a look at how you can make the ticket’s ID part of these<br />
URLs a little prettier, turning them into something like /projects/1/tickets/2-makeit-shiny.<br />
Having URLs such as /projects/1/tickets/2-make-it-shiny will allow your users to<br />
easily identify what that URL links to without having to visit the page. 1 Rails allows<br />
you to very easily do this by overriding a method called to_param in the model<br />
where you want to have pretty URLs. This method is defined like this within<br />
ActiveRecord::Base, and so all your models inherit it:<br />
def to_param<br />
id<br />
end<br />
This method is used to construct the URLs generated by the link helpers in your<br />
application such as project_ticket_path, if you use them like this:<br />
project_ticket_path(project, ticket)<br />
Rails does not care what the classes of the objects that are passed in here are; it just<br />
assumes you know what you’re doing. What it does care about though is the output<br />
of the to_param method, which must not contain any slashes. To get the pretty URL<br />
you always wanted you can use the parameterize method on any String, which<br />
works like this:<br />
"Make it shiny!".parameterize<br />
= "make-it-shiny"<br />
It does this by substituting any character that isn’t a through z, the digits 0 through<br />
9, a hyphen (-), or an underscore (_) into the - character. If the string ends in one<br />
1 It’s also supposedly good for search engine optimization (SEO).
Prettying URLs<br />
of these invalid characters then it will be removed completely. By doing this, it makes<br />
the name safe to be used as a parameter in the URL, hence the name parameterize.<br />
Before you actually make this change, you’re going to write a test for it to make<br />
sure that this feature of your code isn’t accidentally changed or removed. Because this<br />
change is going to be for your Ticket model, you’re going to put the test for it in<br />
spec/models/ticket_spec.rb, using the code from the following listing:<br />
Listing B.1 spec/models/ticket_spec.rb<br />
require 'spec_helper'<br />
describe Ticket do<br />
it "has pretty URLs" do<br />
ticket = Factory(:ticket, :title = "Make it shiny!")<br />
ticket.to_param.should eql("#{ticket.id}-make-it-shiny")<br />
end<br />
end<br />
This code will use the factory you created in chapter 7 to create a new ticket with the<br />
title “Make it shiny!” Then you call to_param on that ticket, and you expect to see it<br />
output the ticket’s id followed by the parameterized version of “Make it shiny”: makeit-shiny.<br />
When you run this test with bin/rspec spec/models/ticket_spec.rb, you’ll see<br />
the following output:<br />
expected "1-make-it-shiny"<br />
got "1"<br />
This is happening because you haven’t yet overridden the to_param method in your<br />
Ticket model and it is defaulting to just providing the id. To fix this, you can open<br />
the app/models/ticket.rb and add in the new method:<br />
def to_param<br />
"#{id}-#{title.parameterize}"<br />
end<br />
When you run our test again, it will now be green:<br />
1 example, 0 failures<br />
You don’t have to change anything else because Rails is still so incredibly darn smart!<br />
For instance, you can pass this “1-make-it-shiny” string to the find method, and Rails<br />
will still know what to do. Go ahead, try this:<br />
Ticket.find("1-make-it-shiny")<br />
If you have a record in the tickets table with an id value of 1, Rails will find this. This<br />
is because Rails will automatically call to_i on string arguments passed to find. To see<br />
this in action, you can do this in an irb session:<br />
"1-make-it-shiny".to_i<br />
547
548 APPENDIX B Tidbits<br />
You should get back the number 1 from this. If you didn’t have the id prefix in your<br />
routes and instead had something like make-it-shiny, you would need to save this<br />
string to a field in the table called something obvious like permalink by using a<br />
before_create method; then rather than using find in places where you are searching<br />
for an object, you would instead use find_by_permalink.<br />
B.2 Attribute change tracking<br />
When working with Active Record, you have the ability to check if a field has changed<br />
since the last time you made reference to this record. Let’s try this now with a Project<br />
object in the ticketee project by first launching rails console.<br />
Within this console, let’s create a new Project object:<br />
>> project = Project.new<br />
On any ActiveRecord::Base descendant, you can call the changed? method to determine<br />
if it has changed since it was created or found. Let’s call it:<br />
>> project.changed?<br />
=> false<br />
In this case, the project hasn’t changed from when it was created and so the changed?<br />
method returns false. If you set any attribute on this object, the changed? method<br />
will return true:<br />
>> project.name = "Ticketee"<br />
=> "Ticketee"<br />
>> project.changed?<br />
=> true<br />
Now if you want to know what fields have caused this change, you can just drop off the<br />
question mark at the end of changed?, like this:<br />
>> project.changed<br />
=> ["name"]<br />
As you can see here, this method returns an array containing the attributes which<br />
have changed on this object. If you changed another attribute on this project, such as<br />
created_at, it would also appear in this list:<br />
>> project.created_at = Time.now<br />
=> [current time]<br />
>> project.changed<br />
=> ["name", "created_at"]<br />
If you wanted to know only if a single attribute has changed, there’s the *_changed?<br />
methods for all attributes on the model. For instance, if you wanted to know if the<br />
name attribute has changed, then you would call name_changed?:<br />
>> project.name_changed?<br />
=> true
Attribute change tracking<br />
Of course this method will return true, because you changed your name attribute previously.<br />
In addition to this, you’re even able to see what the value was before the<br />
change using the *_was method:<br />
>> project.name_was<br />
=> nil<br />
This time, name was nil before you set it and so nil is returned. If it had a value<br />
before you created this object, it would return that instead. Finally, you can even get<br />
back an array containing the before and after values of the attribute by using the<br />
*_change method:<br />
>> project.name_change<br />
=> [nil, "Ticketee"]<br />
Now, what would these methods be used for? Well, any number of things, really. You<br />
could use it for only running a certain callback if a specific field had been changed, or<br />
you could use the *_change methods to log the changes to attributes in another table<br />
if you wish.<br />
549
Special characters<br />
and numbers<br />
$ function, 238<br />
@fileserver.call method, 538<br />
@javascript tag, 232<br />
@purchase.errors.any? method, 11<br />
@ticket variable, 110<br />
304 Not Modified status, 457–459<br />
A<br />
abilities, 189–190<br />
Ability class, 189, 201<br />
accepts_nested_attributes_for method, 223, 225<br />
access control, 136–163.<br />
See also authentication; authorization<br />
admins<br />
adding admin field to users table, 138<br />
restricting access to, 362–365<br />
restricting actions to, 138–147<br />
restricting project creation to, 137–138<br />
namespace-based CRUD, 151–155<br />
create action, 154–155<br />
index action, 152–153<br />
namespace root, 151–152<br />
new action, 153–154<br />
namespace routing, 148–151<br />
users<br />
admin, 155–157<br />
deleting, 161–163<br />
editing, 157–163<br />
Account class, 40<br />
Action Mailer classes, 312, 318–320, 334<br />
configuring, 336–337<br />
templates for, 320–322<br />
ActionController::Caching::Sweeper class, 454<br />
551<br />
index<br />
ActionDispatch::Static class, 536–538<br />
ActionDispatch::Static middleware, 534<br />
actionpack gem, 536<br />
actions<br />
caching, 451–454<br />
restricting to admins, 138–147<br />
fixing broken scenarios, 143–144<br />
hiding links, 144–147<br />
ActiveRecord::Base association method, 222<br />
ActiveRecord::Migration class, 8<br />
ActiveRecord::RecordInvalid exception, 80<br />
ActiveRecord::RecordNotFound exception, 74,<br />
94, 184, 368<br />
Adam, James, 469<br />
add_column method, 264<br />
addresses, reply-to, setting, 340–341<br />
admin attribute, 137<br />
admin field, adding to users table, 138<br />
admin users, 155–157<br />
admin_root_path method, 514<br />
admins<br />
adding admin field to users table, 138<br />
restricting access to, 362–365<br />
restricting actions to, 138–147<br />
fixing broken scenarios, 143–144<br />
hiding links, 144–147<br />
restricting project creation to, 137–138<br />
admins method, 170<br />
admins_only method, 146–147, 151<br />
Admin::StatesController controller, 270<br />
admin_states_path method, 271<br />
Admin::UsersController show action, 198<br />
after _inactive_sign_up_path_for method,<br />
179–180<br />
After method, 335<br />
after_create method, 257–258, 316, 321, 326,<br />
455, 463
552 INDEX<br />
after_destroy method, 456<br />
after_update method, 456<br />
Agile software, 44<br />
all method, 87, 253, 439<br />
And keyword, 37<br />
any? method, 354<br />
ApiHelper module, 352<br />
APIs (application programming interfaces),<br />
347–384<br />
paginating, 443–444<br />
projects, 349–374<br />
API authentication, 355–356<br />
destroy action, 372–374<br />
error reporting, 356–358<br />
restricting access to, 362–365, 368–369<br />
serving, 354–355, 358–359<br />
single, 365–367<br />
updating, 370–372<br />
rate limiting, 377–384<br />
Rate limit exceeded error, 379<br />
request_count field, 377–378<br />
by Sinatra framework, 528–532<br />
tickets, 374–377<br />
versioning, 381–384<br />
Api::V1::BaseController class, 531<br />
Api::V1::TicketsController class, 531<br />
Api::V3::JSON::Tickets class, 529<br />
app folder, 472–474<br />
app method, 352<br />
app role, 398–399<br />
Application class, 520<br />
application programming interfaces. See APIs<br />
ApplicationController class, 141<br />
applications, 44–82<br />
committing changes, 72<br />
deployment of, 401–403<br />
developing, 5–22<br />
deleting, 20–22<br />
generating applications, 6<br />
installing Ruby on Rails, 5–6<br />
migrations, 8–9<br />
purchases, 9–13<br />
routing, 15–16<br />
scaffolding, 7–8<br />
show action, 14–15<br />
starting applications, 6–7<br />
updating, 16–20<br />
validations, 13–14<br />
integrating engines with, 513–515<br />
projects, 55–60<br />
Rack framework, 517–522<br />
breaking up, 522–524<br />
mounting with Rails framework, 525–533<br />
running combined, 524–525<br />
registering with Twitter authentication, 416–417<br />
RESTful routing, 60–72<br />
setting page title, 72–76<br />
setting up, 45–82<br />
application story, 45–46<br />
applying stylesheet, 54–55<br />
database configuration, 53–54<br />
Gemfile file and generators, 50–53<br />
version control, 47–50<br />
users for, authentication, 391–394<br />
validations, 76–82<br />
aptitude command, 394<br />
Aptitude system, 388<br />
as option, 171<br />
assert method, 26, 28, 216<br />
asset_file_name method, 217–218<br />
assets<br />
privatizing, 230–231<br />
public, 230<br />
show action, 228–230<br />
assets method, 222–224<br />
assets_attributes= method, 225<br />
Assigning Permissions feature, 206, 280<br />
association count, showing, 492–493<br />
association method, 184<br />
associations<br />
tags, defining, 289<br />
watchers, defining, 316–318<br />
asynchronous requests, 234<br />
responding to, 235–237<br />
sending parameters for, 237–241<br />
learning CoffeeScript language, 237–240<br />
passing through number, 240–242<br />
Attach the File step, 215<br />
attr_accessible method, 120<br />
attr_accessor method, 34, 498–499<br />
attribute accessor, 498<br />
attribute mass-assignment, 120<br />
attributes<br />
change tracking for, 548–549<br />
nested, 224–226<br />
attributes hash, 127<br />
authenticate_forem_user! method, 503, 506<br />
authenticate_user method, 129, 142, 169, 178,<br />
188, 357, 363<br />
authenticating<br />
posts, 506–509<br />
topics, 501–505<br />
authentication, 117–135, 412–433. See also access<br />
control<br />
API, 355–356<br />
Devise gem, 118–120<br />
disabling password, 393–394<br />
GitHub, 425–433<br />
ident, 395<br />
key-based, 391–393
authentication (continued)<br />
OAuth, 413–415<br />
Twitter, 415–425<br />
OmniAuth gem, 415–418<br />
registering application with, 416–417<br />
testing sign-in, 419–425<br />
users<br />
confirmation link sign-in, 122–126<br />
form sign-in, 126–128<br />
linking tickets to, 128–135<br />
signup feature, 121–122<br />
Authentication process, 136<br />
authorization, 164–212. See also access control;<br />
authentication<br />
assigning permissions, 198–212<br />
tickets, 206–207<br />
viewing projects, 198–206<br />
blocking access to tickets, 183–185<br />
fixing failing features, 172–182<br />
editing projects, 173<br />
scenario to test that links are hidden, 176–<br />
178<br />
Signing Up, 178–182<br />
restricting<br />
delete access, 193–198<br />
read access, 165–168<br />
by scope, 168–172<br />
update access, 190–193<br />
write access, 185–190<br />
seed data, 209–212<br />
authorize_admin! method, 150, 363<br />
authorize_create! method, 188<br />
authorized? method, 195, 197, 207, 279<br />
authorize_delete! method, 194<br />
authorizing, editing, 192–193<br />
authorship, adding to topics, 505–506<br />
auth_providers method, 428, 431<br />
automatic escaping, 267–268<br />
B<br />
background workers, 462–467<br />
Bacon class, 27, 30–31<br />
bacon_test.rb file, 27–28<br />
Baker, Steven R., 29<br />
balance method, 41<br />
base functionality, installing, 388–389<br />
Basecamp, 2<br />
bash migrate alias, 130<br />
Bates, Ryan, 188<br />
BDD (behavior-driven development), 28–43, 45–<br />
46<br />
Cucumber tool, 35–43<br />
RSpec tool, 29–35<br />
INDEX<br />
553<br />
before method, 149, 505, 529<br />
before_create method, 264, 315, 353, 548<br />
before_filter method, 96, 129, 141, 192, 355, 373,<br />
496<br />
before_save method, 506<br />
behavior-driven development. See BDD<br />
belongs_to method, 129–130, 167, 248, 255, 265,<br />
458, 493<br />
bin/cucumber command, 84, 88<br />
blacklist authorization, 164–165<br />
Buck, Jamis, 395<br />
build-essential package, 388–389<br />
build method, 102–103, 248, 283<br />
bundle install command, 6, 53, 403–404<br />
--deployment flag, 404<br />
--gemfile flag, 404<br />
--without flag, 404<br />
Bundler gem, 49, 470, 512, 544<br />
--binstubs option, 52<br />
bundling gems, 403–405<br />
button_to method, 331<br />
C<br />
cache method, 460–461<br />
cache sweepers, 454–457<br />
cache_path option, 452–453<br />
caches_action method, 451–453<br />
caches_page method, 451, 456<br />
cache_sweeper method, 455<br />
caching<br />
actions, 451–454<br />
client-side, 457–460<br />
page fragments, 460–462<br />
pages, 448–451<br />
call method, 518–519, 521–522, 536–537, 539<br />
callbacks, 257–258, 264–265<br />
can? method, 188, 195, 278, 295<br />
CanCan gem, 188–189<br />
CanCan::Ability module, 189<br />
cannot? method, 188–189<br />
cannot_create_tickets! method, 187<br />
cannot_update_tickets! method, 191<br />
cap command, 400<br />
deploy:migrations task, 407<br />
deploy:setup task, 401<br />
-T option, 400<br />
Capfile, 397<br />
Capistrano gem, configuring, 397–400<br />
Capistrano tool, 395, 400–404, 406<br />
deploy:restart task, 403<br />
deploy:setup task, 400<br />
deploy:symlink task, 403<br />
deploy:update task, 401, 403<br />
deploy:update_code task, 401
554 INDEX<br />
capture group, 40, 73<br />
Capybara browser simulator, 51, 232, 478–479<br />
Capybara gem<br />
RSpec gem and, installing, 481–482<br />
testing, 483–484<br />
Cascading Style Sheets. See CSS<br />
cat command, 396<br />
change method, 64, 264<br />
change tracking, for attributes, 548–549<br />
changed? method, 548–549<br />
changes<br />
committing, 72<br />
tracking, 263–269<br />
automatic escaping, 267–268<br />
callback, 264–265<br />
displaying, 265–266<br />
styling states, 268–269<br />
Then show me the page step, 266–267<br />
cheat gem, 350<br />
check_rate_limit method, 378–379<br />
Chelimsky, David, 29<br />
child_index option, 237<br />
chmod command, 401–402<br />
class method, 251<br />
classes, outside control, 497–511<br />
engine configuration, 497–500<br />
fake User model, 500–501<br />
topics, 501–511<br />
class_eval method, 428<br />
class_name option, 265, 317, 321, 511<br />
cleaning up, after paginating interfaces, 441–442<br />
clear method, 205<br />
click function, 238<br />
click_link method, 484<br />
client-side caching, 457–460<br />
coffee-rails gem, 51<br />
CoffeeScript language, 237–240<br />
collection block, 305<br />
collection method, 304<br />
combined applications, 524–525<br />
Comment class, 251, 255<br />
CommentNotifierJob class, 463<br />
CommentObserver class, 315–316, 318, 321<br />
comments, 244–252<br />
adding more tags through, 292–293<br />
controller, 249–252<br />
form, 247<br />
locating ticket, 245–246<br />
model, 247–249<br />
testing subscription, 325–327<br />
CommentsController spec, fixing, 294–295<br />
comment_updated method, 316, 319–321, 340–<br />
341<br />
commits, of changes, 72<br />
community, sense of with Rails framework, 542–<br />
543<br />
concat method, 427<br />
config/routes.rb file<br />
application, 15<br />
engine, 474<br />
config.middleware.use method, 539<br />
ConfigurationNotFound exception, 499<br />
configure method, 140<br />
confirm! method, 422<br />
confirm option, See link_to<br />
confirmable module, 120, 122<br />
confirmation links<br />
confirming, 123–126<br />
user sign-in with, 122–126<br />
confirming confirmation, 123–126<br />
testing email, 122–123<br />
confirmation_sent_at attribute, 124<br />
confirmation_token attribute, 124<br />
confirmed_at attribute, 124<br />
confirm_users_path method, 180<br />
content_for method, 75–76<br />
controllers, 58<br />
permissions, 200–201<br />
serving files through, 226–231<br />
assets, 228–231<br />
protecting files, 227–228<br />
tickets, 101–102<br />
topics, 485<br />
controllers option, 180<br />
coordinated universal time. See UTC<br />
counter_cache option, 492–493<br />
create action, 154–155, 249, 360, 489–490, 508<br />
create method, 67, 79–80, 85, 124, 299<br />
create, read, update, delete interface. See CRUD<br />
interface<br />
create_table, id false option, 290<br />
createuser command, 394<br />
create_user! method, 149<br />
Creating Comments scenario, fixing, 261–263<br />
creating tags feature, 287–288<br />
Creating Tickets feature, 173, 190, 221, 232<br />
creator_watches_me method, 317<br />
cross-site request forgery attacks. See CSRF attacks<br />
CRUD (create, read, update, delete) interface, 55,<br />
82–98<br />
namespace-based, 151–155<br />
create action, 154–155<br />
index action, 152–153<br />
namespace root, 151–152<br />
new action, 153–154<br />
projects<br />
deleting, 91–98<br />
editing, 88–91<br />
viewing, 83–87
CSRF (cross-site request forgery) attacks, 71<br />
csrf_meta_tags method, 71<br />
CSS (Cascading Style Sheets), 4, 70, 109, 145, 439<br />
Cucumber gem, 51<br />
Cucumber tests, 86<br />
Cucumber tool, 24, 35–43, 53, 298, 436, 478<br />
curl package, 388<br />
current_ability method, 189<br />
current_email method, 323<br />
current_page method, 440<br />
current_user method, 125, 169, 453, 501–502,<br />
505, 509<br />
D<br />
database indexes, 446–447<br />
database queries, 444–447<br />
eager loading, 445–446<br />
database servers, 394–395<br />
database and user, 394–395<br />
ident authentication, 395<br />
database_authenticatable module, 119<br />
database_cleaner gem, 52<br />
databases<br />
choosing, 405–407<br />
configuring, 53–54<br />
and user, 394–395<br />
db role, 398<br />
default method, 276, 318<br />
default option, 138<br />
default_test method, 26–27<br />
Delayed::Job class, 465<br />
delayed_job gem, 462–463, 465<br />
Delayed::Job.enqueue method, 463<br />
Delayed::Worker#work_off method, 465<br />
delegates method, 258<br />
delete access, 193–198<br />
enforcing destroy protection, 193–194<br />
hiding links based on permission, 194–198<br />
delete link, edit link and, 146–147<br />
delete method, 92<br />
delete method, 181, 299–300, 308<br />
DELETE request, 301<br />
delete_all method, 532<br />
deleting, 20–22<br />
Deleting Tickets feature, 134–135, 174, 193<br />
dependent option, 111–112<br />
deploy environment, setting up, 400–401<br />
deploy keys, 396–397<br />
deploy:finalize_update task, 402<br />
deployment, 385–411<br />
of application, 401–403<br />
bundling gems, 403–405<br />
choosing database, 405–407<br />
INDEX<br />
configuring Capistrano gem, 397–400<br />
database server, 394–395<br />
database and user, 394–395<br />
ident authentication, 395<br />
deploy keys, 396–397<br />
RVM, and Ruby language, 389–391<br />
servers, setup, 386–389<br />
serving requests, 407–411<br />
init script, 410–411<br />
installing Passenger gem, 408–410<br />
setting up deploy environment, 400–401<br />
user for app, 391–394<br />
destroy action, 92–93, 161–162, 372–374<br />
destroy protection, enforcing, 193–194<br />
destroy_user_session_path method, 206<br />
developing, speed and ease of with Rails<br />
framework, 543<br />
development environment, 52<br />
Devise gem, 118–120, 417, 420<br />
devise method, 119<br />
Devise::TestHelpers module, 140<br />
directory_exists? method, 537–538<br />
display_name method, 423, 431<br />
div_for method, 251, 491<br />
domain logic, 4<br />
domain-specific language. See DSL<br />
Don’t Repeat Yourself!. See DRY<br />
down method, 8<br />
DRY (Don’t Repeat Yourself!), 77, 170<br />
DSL (domain-specific language), 28, 351<br />
dynamic_form gem, 81<br />
E<br />
each method, 110, 203<br />
eager loading, 445–446<br />
edible? method, 31<br />
edit action, 88–89, 113–114, 159–161, 272<br />
edit link, and delete link, 146–147<br />
edit_admin_state_path method, 275<br />
editing<br />
authorizing, 192–193<br />
projects, fixing, 173<br />
Editing Tickets feature, 133–134, 174<br />
edit_project_path method, 88<br />
edit_project_ticket_path method, 113<br />
edit_purchase_path method, 15<br />
email, 312–346<br />
real-world, 333–339<br />
configuring Action Mailer classes, 336–337<br />
connecting to Gmail server, 337–339<br />
testing, 334–336<br />
receiving, 340–346<br />
replies, 342–346<br />
setting reply-to address, 340–341<br />
555
556 INDEX<br />
email (continued)<br />
sending ticket notifications, 313–325<br />
Action Mailer classes, 318–320<br />
automatically watching ticket, 314–315<br />
defining watchers association, 316–318<br />
delivering HTML emails, 322–325<br />
observers, 315–316<br />
subscribing to updates, 325–333<br />
automatically adding user to watchlist, 327–<br />
328<br />
testing comment subscription, 325–327<br />
unsubscribing from ticket notifications, 328–<br />
333<br />
testing, 122–123<br />
email method, 125, 131, 140<br />
email_spec gem, 122–124, 312, 314–315<br />
Embedded Ruby. See ERB<br />
encryptable module, 120<br />
engine configuration, 497–500<br />
engine layouts, 472–476<br />
app folder, 472–474<br />
config/routes.rb file, 474<br />
forem.gemspec file, 472<br />
gemfile file, 472<br />
lib/forem/engine.rb file, 474–475<br />
lib/forem.rb file, 474<br />
Rakefile file, 475<br />
script/rails file, 475<br />
test directory, 475–476<br />
test/dummy directory, 476<br />
engines, 468–515<br />
adding posts to topics, 493–497<br />
benefits of, 470<br />
brief history of, 469–470<br />
classes outside control, 497–511<br />
engine configuration, 497–500<br />
fake User model, 500–501<br />
topics, 501–511<br />
developing new, 471–478<br />
engine layouts, 472–476<br />
engine routing, 476–478<br />
integrating with application, 513–515<br />
releasing as gem, 512–513<br />
setting up testing environment, 478–482<br />
installing RSpec and Capybara gems, 481–<br />
482<br />
removing Test::Unit framework, 479–481<br />
writing features of, 482–493<br />
setting up routes, 484–485<br />
showing association count, 492–493<br />
testing Capybara gem, 483–484<br />
topics controller, 485<br />
env object, 519<br />
ERB (Embedded Ruby), 4, 58, 60, 267<br />
erb part, 59<br />
error checking, 532–533<br />
error_messages method, 81<br />
errors<br />
Rate limit exceeded, 379<br />
reporting, 356–358<br />
escaping, automatic, 267–268<br />
ETag header, 457<br />
etag option, 459<br />
except option, 96, 383<br />
exceptions, caused by deletions, 93–98<br />
exists? method, 218, 222, 250–251, 332<br />
expired! method, 32–33, 35<br />
expire_fragment method, 455–456<br />
extend call, 430<br />
Extensible Markup Language, serving. See XML,<br />
serving<br />
extra key, 419, 426<br />
F<br />
Factory Girl gem, 85–86, 139<br />
Factory method, 85<br />
failed tests, 131–132<br />
features<br />
featuring files, 214–216<br />
fixing failing, 172–182<br />
editing projects, 173<br />
scenario to test that links are hidden, 176–<br />
178<br />
Signing Up feature, 178–182<br />
rewriting, 185–187<br />
writing<br />
for deleting projects, 92<br />
for viewing projects, 84–85<br />
field option, 306<br />
fields_for method, 222–223, 234–235<br />
File class, 224<br />
file? method, 537–538<br />
readable? method, 537<br />
file_exist? method, 538<br />
file_field method, 223<br />
files, uploading, 213–242<br />
attaching files, 214–226<br />
JavaScript language, 231–242<br />
serving files through controller, 226–231<br />
fill_in method, 484<br />
find command, 402<br />
find method, 15, 19, 278, 368, 439, 547<br />
find_and_delete method, 338<br />
find_by_default method, 276<br />
find_by_name method, 74<br />
find_or_create_by_github method, 430–431<br />
find_or_create_for_github method, 429
find_or_create_for_twitter method, 421–422, 429,<br />
431<br />
find_project method, 105, 171, 175–176, 191, 369,<br />
531<br />
find_ticket method, 113, 191<br />
find_user method, 531, 533<br />
flash message, 12<br />
flash method, 68–69<br />
float method, 9<br />
for method, 176–177, 184, 357, 368<br />
forem method, 475<br />
Forem::ApplicationController.class_eval method,<br />
502<br />
Forem::Engine class, 499<br />
forem.gemspec file, 472<br />
form_for method, 11, 66, 104, 154, 247<br />
forms<br />
hacking, 282–283<br />
user sign-in with, 126–128<br />
form_tag method, 304<br />
forums_path method, 474–475<br />
fragment caching, 451<br />
frameworks<br />
jQuery framework, 233–234<br />
Prototype framework, 214, 233<br />
Rack framework, 516–540<br />
applications, 517–522<br />
middleware, 533–540<br />
mounting with Rails framework, 525–533<br />
Rails framework<br />
middleware in, 534–536<br />
mounting Rack framework applications with,<br />
525–533<br />
reasons to use, 541–545<br />
Ruby on Rails framework, 1–22<br />
description of, 2–5<br />
developing applications, 5–22<br />
Sinatra framework<br />
API by, 528–532<br />
overview, 527–528<br />
Test::Unit framework, removing, 479–481<br />
Freenode IRC network, 542<br />
fresh_when method, 457, 459<br />
friendly_token method, 422<br />
full table scan, 446<br />
G<br />
cheat command, 350<br />
Gemfile, 50–53, 472, 512–513, 528<br />
gems<br />
actionpack gem, 536<br />
Bundler gem, 49, 470, 512, 544<br />
bundling, 403–405<br />
INDEX<br />
CanCan gem, 188–189<br />
Capistrano gem, configuring, 397–400<br />
Capybara gem<br />
RSpec gem and, installing, 481–482<br />
testing, 483–484<br />
cheat gem, 350<br />
coffee-rails gem, 51<br />
Cucumber gem, 51<br />
database_cleaner gem, 52<br />
delayed_job gem, 462–463, 465<br />
Devise gem, 118–120, 417, 420<br />
dynamic_form gem, 81<br />
email_spec gem, 122–124, 312, 314–315<br />
Factory Girl gem, 85–86, 139<br />
Forem.Gemspec file, 472<br />
gem install cheat command, 350<br />
Gemfile, 50–53, 472, 512–513, 528<br />
gmail gem, 313, 340<br />
jquery-rails gem, 234<br />
json gem, 354<br />
Kaminari gem, 436–437<br />
launchy gem, 245–246<br />
mail gem, 334–335<br />
nokogiri gem, 358<br />
OmniAuth gem, setting up<br />
overview, 415–416<br />
testing environment, 417–418<br />
Paperclip gem, 214, 216–220<br />
Passenger gem, 407–410<br />
pg gem, 405<br />
rack-test gem, 349–351<br />
rails gem, 472<br />
releasing engine as, 512–513<br />
RSpec gem, 29, 51, 58, 74, 481–482<br />
rspec-rails gem, 51, 95<br />
RubyGems, 2, 543–544<br />
sass-rails gem, 50<br />
Searcher gem, 287, 305–307, 436<br />
Sprockets gem, 70–71, 234, 239<br />
sqlite3 gem, 50, 472<br />
turn gem, 51<br />
will_paginate gem, 436<br />
get method, 238, 353, 529<br />
GET requests, 95, 240, 353, 527<br />
getter method, 41<br />
Gherkin language, 29<br />
Git application, 46–81, 219–220, 398<br />
git, 48<br />
checkout -b production command, 398<br />
push command, 72, 398<br />
stash command, 72<br />
git-core package, 388–389<br />
github action, 428–429<br />
GitHub authentication, registering and testing,<br />
425–433<br />
557
558 INDEX<br />
GitHub service, 5, 47–81, 348–349, 396, 413, 542<br />
Given keyword, 36, 39<br />
gmail gem, 313, 340<br />
Gmail server, 313, 333–334, 336–339<br />
Gmail.connect method, 338<br />
H<br />
hacking, forms, 282–283<br />
halt method, 533<br />
Hambley, Lee, 395<br />
Hansson, David H., 2<br />
has_and_belongs_to_many association, 286–287,<br />
289, 317, 321<br />
has_attached_file method, 216, 220, 226, 230<br />
has_content? method, 70<br />
hashes method, 109<br />
HashWithIndifferentAccess method, 68, 129<br />
has_many association, defining, 103<br />
has_many method, 103, 111, 190, 223<br />
has_one association, 511<br />
have_css method, 145, 279<br />
headers method, 529<br />
Heartbeat application, 521, 526–527<br />
Heartbeat module, 520<br />
Heartbeat::Application class, 522, 525–527<br />
Heartbeat::TestApplication class, 522–524<br />
Hellesoy, Aslak, 36<br />
--help option, 46<br />
helper methods, defining, 203–206<br />
helper_method method, 501<br />
helpers<br />
nested routing, 100–101<br />
for paginating interfaces, implementing, 439–<br />
440<br />
Heroku, 386<br />
Hidden Links feature, 178<br />
HTML (Hypertext Markup Language) emails,<br />
delivering, 322–325<br />
html method, 11<br />
html option, 300<br />
html part, 59<br />
html_safe method, 267<br />
HTTP (Hypertext Transfer Protocol) status<br />
codes, 349–351, 353, 521<br />
HTTP methods, 61<br />
Hypertext Markup Language emails, delivering.<br />
See HTML emails, delivering<br />
Hypertext Transfer Protocol status codes. See<br />
HTTP status codes<br />
I<br />
ident authentication, 395<br />
If-Modified-Since header, 459<br />
If-None-Match header, 457, 459<br />
include call, 430<br />
includes method, 445–446<br />
increment! method, 378<br />
index action, 83, 152–153, 485–488<br />
index method, 62<br />
index part, 59<br />
indexes, database, 446–447<br />
init script, 410–411<br />
initialize method, 189, 536, 539–540<br />
integration testing process, 37<br />
interfaces, pagination of, 437–443<br />
APIs, 443–444<br />
cleaning up, 441–442<br />
fixing broken scenarios, 440–441<br />
implementing helpers for, 439–440<br />
testing, 437–439<br />
viewing, 442–443<br />
Internet Explorer project, 175–176<br />
isolate_namespace method, 474<br />
its method, 33<br />
J<br />
JavaScript language, 231–242<br />
adding more files with, 234–235<br />
asynchronous request<br />
responding to, 235–237<br />
sending parameters for, 237–241<br />
jQuery framework, 233–234<br />
testing, 232–233<br />
JavaScript Object Notation. See JSON<br />
javascript_include_tag method, 71<br />
joins method, 445–446<br />
join_table option, 317, 321<br />
jQuery framework, 233–234<br />
jquery-rails gem, 234<br />
json gem, 354<br />
JSON (JavaScript Object Notation), 347, 349, 354,<br />
356<br />
JSON.parse method, 354<br />
K<br />
Kaminari gem, 436–437<br />
Katz, Yehuda, 2<br />
key-based authentication, 391–393<br />
keys, deploy, 396–397<br />
L<br />
label method, 306<br />
last_modified option, 459
last_post method, 510<br />
last_ticket method, 365–367<br />
launchy gem, 245–246<br />
let method, 139, 227<br />
li tag, 269<br />
lib/forem/engine.rb file, 474–475<br />
lib/forem.rb file, 474<br />
LinkJumbler class, 539–540<br />
links<br />
adding to project, 86–87<br />
confirmation, user sign-in with, 122–126<br />
for deleting tags, 299–302<br />
hidden, scenario to test, 176–178<br />
hiding<br />
edit and delete links, 146–147<br />
New Project link, 144–146<br />
hiding based on permission, 194–198<br />
link_to method, 10, 18, 60, 113, 219, 241, 310<br />
confirm option, 92<br />
listing tickets, 110–111<br />
load method, 209<br />
locals option, 236, 489, 496<br />
lockable module, 120<br />
locking down, states, 278–285<br />
bestowing changing state permissions, 280–281<br />
hacking form, 282–283<br />
hiding select box, 278–280<br />
ignoring parameter, 283–285<br />
login action, 504<br />
ls -x command, 404<br />
-m option, 388, 391<br />
M<br />
mail gem, 334–335<br />
mail method, 319<br />
make_default action, 275<br />
make_default_admin_state_path method, 275<br />
Matsumuto, Yukihiro, 2, 542<br />
Matz is nice always, so we are nice. See<br />
MINASWAN<br />
Matz Ruby Interpreter. See MRI<br />
member method, 304<br />
merge! method, 129<br />
metaclass, 498<br />
method option, 92, 115<br />
method_missing method, 73<br />
methods option, 365, 383<br />
middleware, 533–540<br />
ActionDispatch::Static class, 536–538<br />
application route cycle, 477<br />
in Rails framework, 534–536<br />
routing cycle of engine, 478<br />
simple middleware stack, 476<br />
INDEX<br />
559<br />
migrations, 8–9<br />
MINASWAN (Matz is nice always, so we are nice),<br />
543<br />
Model-View-Controller paradigm. See MVC<br />
paradigm<br />
mount method, 522, 530<br />
--mountable option, 471<br />
MRI (Matz Ruby Interpreter), 389<br />
msysGit application, 47<br />
MVC (Model-View-Controller) paradigm, 3–4<br />
MySQL database server, 54<br />
N<br />
n+1 selects operation, 444–445<br />
name method, 260<br />
namespace-based CRUD, 151–155<br />
create action, 154–155<br />
index action, 152–153<br />
namespace root, 151–152<br />
new action, 153–154<br />
namespace method, 350<br />
namespace root, 151–152<br />
namespace routing, 148–151<br />
nested attributes, 224–226<br />
nested resources, tickets, 99–116<br />
controller, 101–102<br />
defining has_many association, 103<br />
deleting, 115–116<br />
editing, 112–115<br />
finding within scope of project, 105–106<br />
nested routing helpers, 100–101<br />
within project, 104–105<br />
validations, 106–108<br />
viewing, 108–112<br />
nested routing helpers, 100–101<br />
new action, 153–154, 236, 272, 488–489<br />
new command, 46<br />
new method, 62<br />
New Project link, 144–146<br />
new_file_path method, 235<br />
new_project_path method, 60<br />
new_topic_post_path method, 495<br />
nginx, 407–408<br />
nokogiri gem, 358<br />
Nokogiri::HTML method, 539<br />
notice method, 15<br />
notifications, ticket, 313–325<br />
Action Mailer classes, 318–320<br />
automatically watching ticket, 314–315<br />
defining watchers association, 316–318<br />
delivering HTML emails, 322–325<br />
observers, 315–316<br />
unsubscribing from, 328–333
560 INDEX<br />
Notifier class, 318–319, 321, 340<br />
number variable, 237<br />
numbers, passing through, 240–242<br />
number_to_human_size Action View helper, 219<br />
O<br />
OAuth authentication, 412–415<br />
oauth_token parameter, 415, 418<br />
oauth_verifier parameter, 415, 418<br />
observe method, 455<br />
observers, 315–316<br />
OmniAuth gem, setting up<br />
OmniAuth gem testing environment, 417–418<br />
overview, 415–416<br />
omniauthable module, 120<br />
omniauthable symbol, 415<br />
OmniauthCallbacks module, 429<br />
only option, 96<br />
Oracle VirtualBox software, 385–388<br />
order option, 511<br />
P<br />
page fragments, caching, 460–462<br />
page method, 439–440, 442<br />
pages<br />
caching, 448–451<br />
removing tag from, 302–303<br />
setting title of, 72–76<br />
Then show me the page step, 266–267<br />
paginate method, 436, 438, 443<br />
pagination<br />
of interfaces, 435–444<br />
cleaning up, 441–442<br />
fixing broken scenarios, 440–441<br />
implementing pagination helpers, 439–440<br />
paginating APIs, 443–444<br />
testing pagination, 437–439<br />
viewing pagination, 442–443<br />
Kaminari gem, 436–437<br />
pagination process, 434<br />
Paperclip gem, 214, 216–220<br />
paperclip generator, 217<br />
parameterize method, 256, 546<br />
parameters<br />
ignoring, 283–285<br />
sending for asynchronous requests, 237–241<br />
learning CoffeeScript language, 237–240<br />
passing through number, 240–242<br />
params hash, 68<br />
params method, 453, 530–531<br />
parse method, 342, 345<br />
partial option, 236, 496<br />
Passenger gem, 407–410<br />
passing, through numbers, 240–242<br />
passwd command, 391<br />
password authentication, disabling, 393–394<br />
path option, 230<br />
PATH_INFO key, 520–521<br />
path_to method, 56<br />
per method, 439–441<br />
perform method, 463–464<br />
performance enhancements, 434–467<br />
background workers, 462–467<br />
cache sweepers, 454–457<br />
caching<br />
actions, 451–454<br />
client-side, 457–460<br />
page fragments, 460–462<br />
pages, 448–451<br />
database query, 444–447<br />
database indexes, 446–447<br />
eager loading, 445–446<br />
pagination, 435–444<br />
of interfaces, 437–443<br />
Kaminari gem, 436–437<br />
Permission class, 190<br />
Permission model, 164<br />
permissions<br />
assigning, 198–-212<br />
tickets, 206–207<br />
viewing projects, 198–-206<br />
changing state, 280–281<br />
hiding links based on, 194–198<br />
permissions controller, 200–201<br />
permissions method, 202–203, 280–281<br />
permissions screen, 201–203<br />
persisted? method, 66, 251<br />
pg gem, 405<br />
Pivotal Tracker system, 45<br />
polymorphic association, 166<br />
position option, 234<br />
post method, 181, 284, 294, 360–361<br />
POST request, 360<br />
PostgreSQL database server, 54, 394–395, 405–<br />
406<br />
posts<br />
adding to topics, 493–497<br />
authentication of, 506–509<br />
showing last, 509–511<br />
PreviousState class, 265<br />
previous_state= method, 265<br />
private method, 96<br />
privatizing assets, 230–231<br />
production environment, 52, 239, 405<br />
Project class, 79, 86, 356, 543<br />
project method, 184, 258, 366<br />
project parameter, 370
Project.for method, 531<br />
projects, 55–60<br />
deleting, 91–98<br />
destroy action, 92–93<br />
exceptions, 93–98<br />
writing feature for, 92<br />
editing, 88–91<br />
edit action, 88–89<br />
fixing, 173<br />
update action, 90–91<br />
finding tickets within scope of, 105–106<br />
restricting creation to admins, 137–138<br />
tickets within, 104–105<br />
viewing, 83–87, 198–-206<br />
adding link to project, 86–87<br />
defining helper method, 203–206<br />
Factory Girl gem, 85–86<br />
permissions controller, 200–201<br />
permissions screen, 201–203<br />
writing feature for, 84–85<br />
projects API, 349–374<br />
authentication, 355–356<br />
destroy action, 372–374<br />
error reporting, 356–358<br />
restricting access, 362–365, 368–369<br />
serving<br />
overview, 354–355<br />
XML, 358–359<br />
single project, 365–367<br />
updating, 370–372<br />
projects method, 101<br />
ProjectsController class, 59–60<br />
project_tickets_path method, 249, 546<br />
protecting files, 227–228<br />
Prototype framework, 214, 233<br />
provides_callback_for method, 428–429<br />
psql command, 395, 406<br />
public assets, 230<br />
purchases, 9–13<br />
purchases_url method, 20<br />
put method, 181, 203, 370<br />
Q<br />
QA (quality assurance) testing, 36<br />
Quaranto, Nick, 544<br />
queries, database, 444–447<br />
database indexes, 446–447<br />
eager loading, 445–446<br />
R<br />
Rack framework, 516–540<br />
applications, 517–522<br />
breaking up, 522–524<br />
INDEX<br />
mounting with Rails framework, 525–533<br />
running combined, 524–525<br />
middleware, 533–540<br />
ActionDispatch::Static class, 536–538<br />
in Rails framework, 534–536<br />
mounting with Rails framework, 525–533<br />
error checking, 532–533<br />
Heartbeat application, 526–527<br />
Sinatra framework, 527–528<br />
rack-test gem, 349–351<br />
Rack::Builder class, 524<br />
Rack::Builder.app method, 525<br />
Rack::File class, 536<br />
Rack::Test::Methods module, 350–352, 357, 527<br />
rackup config.ru command, 518<br />
Rack::Utils module, 536<br />
rails command, 6–7, 46<br />
generate command, 118<br />
Rails Forum, 542<br />
Rails framework<br />
middleware in, 534–536<br />
mounting Rack framework applications with,<br />
525–533<br />
error checking, 532–533<br />
Heartbeat application, 526–527<br />
Sinatra framework, 527–528<br />
reasons to use, 541–545<br />
emphasis on testing, 544–545<br />
RubyGems system, 543–544<br />
sense of community, 542–543<br />
speed and ease of development, 543<br />
rails gem, 472<br />
rails generate cucumber:install command, 56<br />
Rails Installer program, 5<br />
Rails Rumble event, 2<br />
RailsBridge organization, 542<br />
Railscamps, 543<br />
RAILS_ENV environment variable, 94<br />
rails server, -e production option, 94<br />
Railties, 3<br />
rake<br />
build task, 512<br />
cucumber:ok task, 56–57, 59, 63, 67, 84, 97<br />
db:migrate task, 65, 395<br />
db:migrate task, 103, 404<br />
db:schema:load task, 9, 103<br />
db:seedtask, 395<br />
db:test:prepare task, 103<br />
forem:install:migrations task, 473<br />
install task, 513<br />
release task, 513<br />
routes task, 62<br />
spec task, 97<br />
Rakefile, 475, 480<br />
Rate limit exceeded error, 379<br />
561
562 INDEX<br />
rate limiting, 377–384<br />
Rate limit exceeded error, 379<br />
request_count field<br />
overview, 377–378<br />
resetting, 380–381<br />
read access, restricting, 165–168<br />
readable_by method, 169<br />
readable_by scope, 173<br />
Receiver class, 343<br />
receiving replies, 342–346<br />
recoverable module, 119<br />
red-green-refactor process, 24, 544<br />
redirect_to method, 12, 68–69, 104, 250<br />
registerable module, 119<br />
registering<br />
applications, with Twitter authentication, 416–<br />
417<br />
and testing, GitHub authentication, 425–433<br />
regression testing, 25, 283<br />
releasing, engine as gem, 512–513<br />
reload method, 284, 370<br />
rememberable module, 119<br />
remote option, 241, 300<br />
remove action, 301–302<br />
remove() function, 302<br />
render method, 10, 12, 67, 250–251, 291, 364<br />
replies, to email<br />
receiving, 342–346<br />
setting reply-to address, 340–341<br />
Representational State Transfer. See REST<br />
request_count field, 377–378<br />
resetting, 380–381<br />
requests<br />
asynchronous, responding to, 235–237<br />
serving, 407–411<br />
init script, 410–411<br />
installing Passenger gem, 408–410<br />
require option, 415<br />
reset_request_count! method, 380<br />
resources method, 15, 61, 521<br />
resources, nested. See nested resources, tickets<br />
respond_to method, 11, 349, 354<br />
respond_with method, 349, 355, 365, 371, 373,<br />
382–383<br />
REST (Representational State Transfer), 4, 60–72<br />
root method, 521, 537<br />
root_path method, 111<br />
roots, namespace, 151–152<br />
routing<br />
engine<br />
overview, 476–478<br />
setting up, 484–485<br />
helpers, nested, 100–101<br />
namespace, 148–151<br />
overview, 15–16<br />
RESTful, 60–72<br />
RSpec gem, 29, 51, 58, 74, 481–482<br />
rspec-rails gem, 51, 95<br />
RSpec tests, 86, 95<br />
Ruby language, RVM and, 389–391<br />
installing, 389–390<br />
installing Ruby language, 390–391<br />
Ruby on Rails framework, 1–22<br />
description of, 2–5<br />
benefits, 2–3<br />
common terms, 3–4<br />
in the wild, 4–5<br />
developing applications, 5–22<br />
deleting, 20–22<br />
generating, 6<br />
installing Ruby on Rails, 5–6<br />
migrations, 8–9<br />
routing, 15–16<br />
scaffolding, 7–8<br />
show action, 14–15<br />
starting, 6–7<br />
updating, 16–20<br />
validations, 13–14<br />
Ruby on Rails Talk mailing list, 542<br />
Ruby Version Manager. See RVM<br />
RubyForge system, 544<br />
RubyGems, 2, 543–544<br />
run method, 518–520, 524<br />
rvm command, 390<br />
RVM (Ruby Version Manager)<br />
overview, 388<br />
and Ruby language, 389–391<br />
installing, 390–391<br />
overview, 389–390<br />
Seguin, Wayne E., 544<br />
rvm use command, 390<br />
S<br />
Sass language, 70<br />
sass-rails gem, 50<br />
save method, 80<br />
saved? method, 28<br />
scaffolding, 7–8<br />
scenarios<br />
adding files to, 221–223<br />
ensuring users cannot delete selves, 162–163<br />
fixing broken, 143–144, 440–441<br />
to test that links are hidden, 176–178<br />
scope, restricting by, 168–172<br />
scp command, 393<br />
script/rails file, 475<br />
search action, 305, 307, 441<br />
search method, 303, 306<br />
Searcher gem, 287, 305–307, 436<br />
from option, 306, 341
searching<br />
by state, 305–309<br />
testing, 303–305<br />
without the search, 309–311<br />
search_project_tickets_path method, 304, 310<br />
secure shell key. See SSH key<br />
seed data, 209–212<br />
seeding states, 259–261<br />
Seguin, Wayne E., 544<br />
select box, hiding, 278–280<br />
select method, 255<br />
selected option, 255–256<br />
self.down method, 9, 64, 447<br />
self.edible? method, 31<br />
self.up method, 64<br />
send method, 142<br />
send_file method, 229<br />
servers<br />
database, 394–395<br />
database and user, 394–395<br />
ident authentication, 395<br />
setup, 386–389<br />
installing base functionality, 388–389<br />
Oracle VirtualBox software, 386–388<br />
serving<br />
APIs, 354–355<br />
files, through controllers, 226–231<br />
requests, 407–411<br />
init script, 410–411<br />
installing Passenger gem, 408–410<br />
XML, 358–359<br />
set_admin method, 160<br />
set_previous_state method, 265<br />
setter methods, 40–41<br />
set_ticket_state method, 265<br />
should method, 145<br />
should_not method, 145<br />
show action, 14–15, 158, 228–230, 490–491<br />
sign-in, user<br />
with confirmation links, 122–126<br />
with forms, 126–128<br />
sign_in method, 140, 501–502, 505–507, 509<br />
sign_in_and_redirect method, 421<br />
Signing Up feature, 178–182<br />
sign_in_path method, 502–503<br />
sign_out! method, 501–502, 509<br />
signup feature, for users, 121–122<br />
Simple Mail Transfer Protocol. See SMTP<br />
simple_format method, 106, 491<br />
Sinatra framework<br />
API by, 528–532<br />
overview, 527–528<br />
Sinatra::Base class, 531<br />
single projects, 365–367<br />
SMTP (Simple Mail Transfer Protocol), 333, 335<br />
INDEX<br />
563<br />
source command, 390<br />
span element, 438<br />
split method, 290<br />
Sprockets gem, 70–71, 234, 239<br />
SQLite3 database server, 53<br />
sqlite3 gem, 50, 472<br />
SSH (secure shell) key, 47, 49, 387, 392–393<br />
Stack Overflow community, 542<br />
StackExchange services, 348<br />
State class, 253<br />
state method, 255, 257<br />
State model, 253–255<br />
state_id parameter, 283–285<br />
states<br />
locking down, 278–285<br />
bestowing changing state permissions, 280–<br />
281<br />
hacking form, 282–283<br />
hiding select box, 278–280<br />
ignoring parameter, 283–285<br />
managing, 269–277<br />
adding states, 270–273<br />
defining default state, 273–277<br />
searching by, 305–309<br />
seeding, 259–261<br />
selecting, 255–257<br />
styling, 268–269<br />
of ticket, changing, 252–263<br />
tracking. See tracking<br />
status option, 364<br />
steps method, 134<br />
stories, for applications, 45–46<br />
string method, 9<br />
style tag, 268<br />
stylesheet_link_tag method, 70<br />
stylesheets, applying, 54–55<br />
styling states, 268–269<br />
submit method, 12, 66, 272<br />
subscribing, to updates, 325–333<br />
automatically adding user to watchlist, 327–328<br />
testing comment subscription, 325–327<br />
unsubscribing from ticket notifications, 328–333<br />
sudo, -i option, 408<br />
Symbol-to-Proc method, 251<br />
T<br />
tables, adding admin field to, 138<br />
tag! method, 290–291, 294, 299<br />
Tag model, 289–290<br />
tagging, 286–311<br />
adding more tags, 292–295<br />
fixing CommentsController spec, 294–295<br />
through comment, 292–293
564 INDEX<br />
tagging (continued)<br />
creating tags feature, 287–288<br />
defining tags association, 289<br />
deleting tag, 297–311<br />
adding link for, 299–302<br />
removing tag from page, 302–303<br />
testing, 298–299<br />
displaying ticket’s tags, 290–291<br />
finding tags, 303–311<br />
restriction of, 295–303<br />
allowing tags for certain users, 296–297<br />
testing, 295–296<br />
showing tags, 288–289<br />
Tag model, 289–290<br />
text_field_tag tag, 288<br />
tags association, defining, 289<br />
tags method, 289<br />
Talbott, Nathaniel, 25<br />
TDD (test-driven development), 24–28<br />
bacon_test.rb file, 27–28<br />
and BDD, 24<br />
reasons for testing, 25<br />
writing tests, 25–27<br />
template option, 250<br />
templates, for Action Mailer classes, 320–322<br />
test directory, 475–476<br />
test-driven development. See TDD<br />
test/dummy directory, 476<br />
test environment, 52<br />
test method, 26<br />
testing, 23–43<br />
BDD, 28–43<br />
Cucumber tool, 35–43<br />
RSpec tool, 29–35<br />
comment subscription, 325–327<br />
email, 122–123, 334–336<br />
environments<br />
OmniAuth gem, 417–418<br />
setting up, 478–482<br />
JavaScript language, 232–233<br />
pagination, 437–439<br />
Rails framework emphasis on, 544–545<br />
registering and, GitHub authentication, 425–<br />
433<br />
searching, 303–305<br />
sign-in, 419–425<br />
tag deletion, 298–299<br />
tag restriction, 295–296<br />
TDD, 24–28<br />
bacon_test.rb file, 27–28<br />
and BDD, 24<br />
reasons for testing, 25<br />
writing tests, 25–27<br />
that links are hidden, 176–178<br />
test_mode option, 418<br />
tests, failed, 131–132<br />
Test::Unit framework, removing, 479–481<br />
Test::Unit tool, 24–28<br />
Test::Unit::TestCase class, 26<br />
text/html part, 322<br />
text/plain part, 322<br />
text_field_tag tag, 288<br />
Then keyword, 36<br />
Then show me the page step, 266–267<br />
Ticket class, 103<br />
ticket_comments_path method, 247<br />
tickets, 99–108, 206–207<br />
API, 374–377<br />
blocking access to, 183–185<br />
blocking creation of, 187–188<br />
changing state of, 252–263<br />
callbacks, 257–258<br />
fixing Creating Comments scenario, 261–263<br />
seeding states, 259–261<br />
selecting states, 255–257<br />
State model, 253–255<br />
controller, 101–102<br />
defining has_many association, 103<br />
deleting, 115–116<br />
displaying tags, 290–291<br />
editing, 112–115<br />
edit action, 113–114<br />
update action, 114–115<br />
finding within scope of project, 105–106<br />
linking to users, 128–135<br />
attributing tickets to users, 129–131<br />
failed tests, 131–132<br />
fixing features, 132–135<br />
locating, 245–246<br />
nested routing helpers, 100–101<br />
notifications, unsubscribing from, 328–333<br />
within project, 104–105<br />
sending notifications, 313–325<br />
Action Mailer classes, 318–320<br />
automatically watching ticket, 314–315<br />
defining watchers association, 316–318<br />
delivering HTML emails, 322–325<br />
observers, 315–316<br />
updating and deleting at same time, 207–209<br />
validations, 106–108<br />
viewing, 108–112<br />
culling tickets, 111–112<br />
listing tickets, 110–111<br />
tickets method, 102–103, 110<br />
TicketsController class, 113–114<br />
time_ago_in_words helper, 510<br />
timeoutable module, 120<br />
timestamps method, 9, 65<br />
timestamps option, 289<br />
title method, 75, 383<br />
titles of pages, setting, 72–76
toggle_watching_button method, 330<br />
to_i method, 240, 323<br />
to_json method, 349, 353, 355, 382<br />
token method, 353<br />
token_authenticatable module, 120, 352<br />
to_param method, 546–547<br />
topics<br />
adding authorship to, 505–506<br />
adding posts to, 493–497<br />
authenticating, 501–505<br />
controller, 485<br />
topics_path method, 485<br />
to_s method, 156, 260–261, 423–424, 500<br />
touch option, 458<br />
to_xml method, 349<br />
to_yaml method, 519<br />
trackable module, 120<br />
tracking<br />
changes, for attributes, 548–549<br />
state, 243–285<br />
changing for ticket, 252–263<br />
leaving comment, 244–252<br />
locking down, 278–285<br />
managing, 269–277<br />
tracking changes, 263–269<br />
try method, 146, 196<br />
turn gem, 51<br />
Twitter, 348–349, 413<br />
twitter action, 421, 428<br />
twitter argument, 420<br />
Twitter authentication, 415–425<br />
OmniAuth gem, setting up, 415–418<br />
registering application with, 416–417<br />
testing sign-in, 419–425<br />
type option, 351–352<br />
U<br />
-u option, git push 49<br />
Ubuntu, 52, 385–389, 391<br />
UCS Transformation Format–8-bit. See UTF-8<br />
Uniform Resource Locators. See URLs<br />
unsubscribing, from ticket notifications, 328–333<br />
up command, 387<br />
up method, 8<br />
update access, 190–193<br />
update action, 90–91, 114–115, 159–161<br />
update option, 234<br />
update_all method, 380<br />
update_attribute method, 137<br />
update_attributes method, 19, 90, 371<br />
updates, subscribing to, 325–333<br />
automatically adding user to watchlist, 327–328<br />
testing comment subscription, 325–327<br />
unsubscribing from ticket notifications, 328–333<br />
INDEX<br />
updating, 16–20<br />
uploading files. See files, uploading<br />
url method, 219<br />
url option, 300<br />
URLs (Uniform Resource Locators), 546–548<br />
User class, 429<br />
user method, 184<br />
User models, fake, 500–501<br />
user_omniauth_authorize_path method, 420<br />
useradd command, 391<br />
user_class method, 499<br />
user_hash key, 426<br />
usermod<br />
-a option, 390<br />
-d option, 388, 391<br />
-G option, 388, 390<br />
-s option, 388, 391<br />
User::Omniauth- Callbacks module, 430, 433<br />
users<br />
admin, 155–157<br />
allowing tags for certain, 296–297<br />
for app, 391–394<br />
automatically adding to watchlist, 327–328<br />
confirmation link sign-in, 122–126<br />
confirming, 123–126<br />
testing email, 122–123<br />
and database, 394–395<br />
deleting, 161–163<br />
editing, 157–163<br />
edit and update actions, 159–161<br />
show action, 158<br />
form sign-in, 126–128<br />
linking tickets to, 128–135<br />
attributing tickets to users, 129–131<br />
failed tests, 131–132<br />
fixing features, 132–135<br />
signup feature, 121–122<br />
table, adding admin field to, 138<br />
user_signed_in? method, 125<br />
UTC (coordinated universal time), 65<br />
UTF-8 (UCS Transformation Format–8-bit), 54<br />
V<br />
Vagrant, 386–387, 392<br />
vagrant halt command, 387<br />
vagrant ssh command, 387<br />
validatable module, 120<br />
validates method, 78<br />
validates_numericality_of method, 13<br />
validates_presence_of method, 13, 78<br />
validates_uniqueness_of method, 78<br />
validations, 13–14<br />
app/controllers/projects_controller.rb, 80<br />
app/models/project.rb, 78<br />
565
566 INDEX<br />
validations (continued)<br />
features/creating_projects.feature, 77<br />
overview, 76<br />
ticket, 106–108<br />
version control, 47–50<br />
versioning, 381–384<br />
viewing<br />
pagination, 442–443<br />
projects, restricting, 368–369<br />
Viewing Tickets feature, 132–133, 175<br />
VirtualBox software, Oracle. See Oracle<br />
VirtualBox software<br />
visit method, 56, 483, 485<br />
W<br />
watch action, 331–332<br />
Watcher class, 317<br />
watchers association, defining, 316–318<br />
watchers method, 321<br />
watchlists, automatically adding users to, 327–328<br />
web role, 398<br />
WebDriver software, 214, 232<br />
Webrat gem, 52<br />
WEBrick library web server, 6, 519<br />
Welcome aboard page, 6<br />
When keyword, 36<br />
whitelist authorization, 164<br />
will_paginate gem, 436<br />
with option, 237<br />
within method, 484, 508<br />
write access, 185–190<br />
abilities, 189–190<br />
blocking ticket creation, 187–188<br />
CanCan gem, 188–189<br />
rewriting feature, 185–187<br />
X<br />
X-UA-Compatible header, 534, 536<br />
XML (Extensible Markup Language), serving,<br />
358–359<br />
xml method, 11
WEB DEVELOPMENT/RUBY<br />
R ails<br />
Rails 3 IN ACTION<br />
Ryan Bigg Yehuda Katz<br />
3 is a full stack, open source web framework powered<br />
by Ruby and this book is an introduction to it. Whether<br />
you’re just starting or you have a few cycles under your<br />
belt, you’ll appreciate the book’s guru’s-eye-view of idiomatic<br />
Rails programming.<br />
You’ll master Rails 3.1 by developing a ticket tracking application<br />
that includes RESTful routing, authentication and authorization,<br />
state maintenance, fi le uploads, email, and more.<br />
You’ll also explore powerful features like designing your own<br />
APIs and building a Rails engine. You will see Test Driven<br />
Development and Behavior Driven Development in action<br />
throughout the book, just like you would in a top Rails shop.<br />
What’s Inside<br />
Covers Rails 3.1 from the ground up<br />
Testing and BDD using RSpec and Cucumber<br />
Working with Rack<br />
It is helpful for readers to have a background in Ruby, but no<br />
prior Rails experience is needed.<br />
Ryan Bigg is a Rails developer in Syndey, recognized for his<br />
prolifi c and accurate answers on IRC and StackOverfl ow.<br />
Yehuda Katz is a lead developer on SproutCore, known for his<br />
contributions to Rails 3, jQuery, Bundler, and Merb.<br />
For access to the book’s forum and a free ebook for owners of this<br />
book, go to manning.com/Rails3inAction<br />
MANNING<br />
$49.99 / Can $52.99 [INCLUDING eBOOK]<br />
SEE INSERT<br />
“ Takes you on an excellent<br />
Rails 3 adventure!<br />
—Anthony J. Topper”<br />
Penn State Harrisburg<br />
“ Conversational and current. A<br />
wellspring of information.<br />
—Jason Rogers, Dell Inc. ”<br />
“ An essential roadmap for the<br />
newest features in Rails 3.<br />
—Greg Vaughn ”<br />
Improving Enterprises<br />
“ Essential, eff ective Rails<br />
techniques and habits for<br />
the modern Rubyist.<br />
—Th omas Athanas ”<br />
Athanas Empire, Inc.<br />
“ A holistic book for a holistic<br />
framework.<br />
—Josh Cronemeyer ”<br />
Th oughtWorks Studios