VFTT54 (420 Kb) - View From The Trenches
VFTT54 (420 Kb) - View From The Trenches
VFTT54 (420 Kb) - View From The Trenches

Create successful ePaper yourself
Turn your PDF publications into a flip-book with our unique Google optimized e-Paper software.
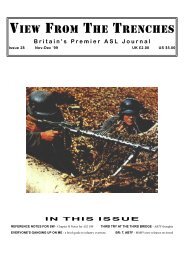
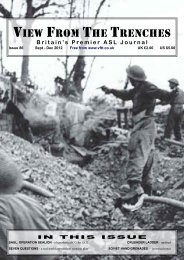
VIEW FROM THE TRENCHES<br />
Britain's Premier ASL Journal<br />
Issue 54 Mar - Apr 2004 UK £2.00 US $5.00<br />
IN THIS ISSUE<br />
THE SCENARIOS OF IF03 - rounding up the look at the scenarios of IF03 NIGHT ACTIONS MATRIX - enter the night<br />
THE ESSENTIAL ASOP - the most important steps of the SOP THE WINTER WAR - book review
IN THIS ISSUE<br />
PREP FIRE 2<br />
INCOMING 3<br />
FKAC ERRATA 4<br />
THE SCENARIOS OF INTENSIVE FIRE 2003 5<br />
LEADERSHIP AMONGST THE SCENARIOS 14<br />
THE WINTER WAR 15<br />
THE ESSENTIAL ASOP 16<br />
NIGHT ACTIONS MATRIX 17<br />
“THIS IS THE CALL TO<br />
INTERNATIONALE ARMS!” 18<br />
ON THE CONVENTION TRAIL 19<br />
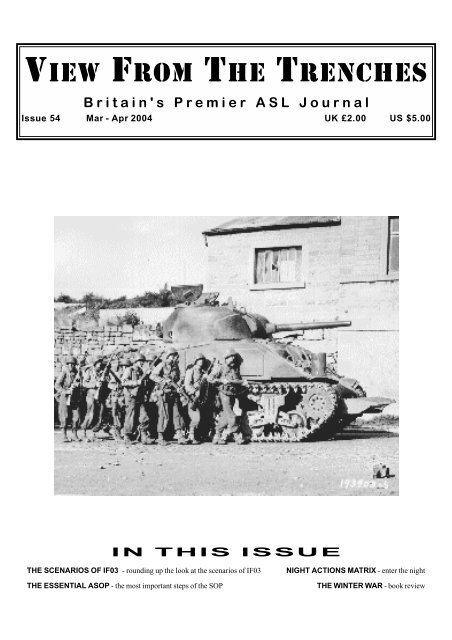
COVER: American troops armoured assault with a Sherman.<br />
THE ASL MAILING LIST<br />
<strong>The</strong> ASL Mailing List is devoted to discussion of Advanced Squad Leader, and is<br />
run by Paul Ferraro via a listserv program at the University of Pittsburgh. To subscribe<br />
send email to majordomo@multimanpublishing.com with the body of the<br />
message reading:<br />
subscribe advanced-sl<br />
You MUST use lower case letters!<br />
You will get a message from Majordomo in reply asking for confirmation.<br />
To subscribe to the digest version send the following in the body of a message:<br />
subscribe advanced-sl-digest<br />
<strong>The</strong> digest is mailed out whenever it has queued 100,000 characters of mailings.<br />
You may receive more (or less) than one mailing every 24 hour period. <strong>The</strong> digest<br />
is NOT sent at a certain time each day.<br />
EMOTICONS<br />
With the growth of the InterNet, emoticons have originated to allow<br />
people to show expressions in text. I find these very useful for the printed<br />
word in general, so you'll see plenty of them in <strong>View</strong> <strong>From</strong> the <strong>Trenches</strong>.<br />
An emoticon is created with keyboard characters and read with the head<br />
tilted to the left. Some typical emoticons are:<br />
:-) humour or smiley<br />
;-) winking<br />
:-> devious smile<br />
grin<br />
:-( sad<br />
:-o shocked or surprised<br />
#-( hung-over<br />
PREP FIRE<br />
Welcome to yet another <strong>View</strong> <strong>From</strong> <strong>The</strong> <strong>Trenches</strong>. A little later<br />
than planned but I spent the latter weeks of February and early<br />
March working away from home in Penrith – and staying in a village<br />
pub :-) Talk about hard work!! In fact with working away from<br />
home so much nowadays VFTT is likely to have a slightly erratic<br />
schedule for some time.<br />
See you all at HEROES in a couple of weeks. Til then roll low<br />
and prosper.<br />
Double 1. My last, best hope for victory.<br />
VIEW FROM THE TRENCHES is the bi-monthly British<br />
ASL journal. All comments are welcome. Even better, contribute.<br />
Write an article. Design a scenario. Share your ASL experiences<br />
with others. VFTT allows you to communicate with other<br />
ASLers. Don't be a silent voice.<br />
Issue 55 should be out at the beginning of May 2004.<br />
VFTT costs £2.00 per issue (overseas £3.00), with a year's<br />
subscription costing £10.00 (overseas £15.00). Payment should<br />
be in pounds sterling, with cheques made out to PETE PHILLIPPS.<br />
Readers are reminded to check their address label to see when<br />
their subscription ends.<br />
Back issue are now out of print but can be downloaded for<br />
free from:<br />
http://www.vftt.co.uk/vfttpdf.htm<br />
VIEW FROM THE TRENCHES<br />
24 Huggett Close<br />
Leicester<br />
LE4 7PY<br />
Telephone:<br />
(0116) 210 1798<br />
E-mail:<br />
pete@vftt.co.uk<br />
World Wide Web Home Page:<br />
http://www.vftt.co.uk<br />
Pete Phillipps<br />
COPYRIGHT AND TRADEMARK NOTICE<br />
Most products are trademarks of the companies publishing them. Use of a product name without mention of the trademark status should not be construed as a challenge<br />
to such status.<br />
Advanced Squad Leader, Beyond Valour, Paratrooper, Yanks, Partisan, West of Alamein, <strong>The</strong> Last Hurrah, Hollow Legions, Code of Bushido, Gung Ho!, Croix<br />
de Guerre, Doomed Battalions, Streets of Fire, Hedgerow Hell, Red Barricades, Kampfgruppe Peiper I, Kampfgrupper Peiper II, Pegasus Bridge, A Bridge Too<br />
Far, Blood Reef: Tarawa, Solitaire ASL, ASL Annual, and ASL Journal are trademarks of Hasbro, Inc.<br />
Copyright for all material printed within VFTT remains with its author, who can be contacted via VFTT if you would like to reprint his/her material.<br />
2 VIEW FROM
INCOMING<br />
INCOMING<br />
MMP AIM AT NEWBIES<br />
In shops any time now should be ASL<br />
Starter Kit 1. ASLSK1 is aimed at new players,<br />
with a liberally illustrated 12 page rulebook<br />
written in a conversational style introducing<br />
the basics concepts of the infantry<br />
and terrain rules.. ASLSK1 is totally selfcontained,<br />
with two geomorphic 8"x22"<br />
“ASL style” geomorphic mapboards on a<br />
heavy cardstock base and six scenarios using<br />
just the maps and counters provided in the<br />
module. <strong>The</strong> retail price will be $24.00.<br />
<strong>The</strong> rulebook is being reprinted now<br />
and should be available soon, with Armies of<br />
Oblivion due to be printed soon.<br />
CRITICAL HIT<br />
Shipping in April from Critical Hit is<br />
CH Magazine Volume 7, No. 2, a 10 th anniversary<br />
compendium edition containing the<br />
best articles from previous issues and a dozen<br />
scenarios. <strong>The</strong> US price is $19.95.<br />
Also due to be shipped in April are<br />
several new scenario packs. TIGERS TO<br />
THE FRONT!—Army Group North 1944 is<br />
a scenario pack covering the battles of Army<br />
Group North in Russia in the summer of<br />
1944. It includes 10 new scenarios, a set of<br />
rules and a 22" x 34" map covering the Panther<br />
Line. BATTLE OF THE BRACCHI<br />
HILLS—On the Road to Rome 1944 focuses<br />
on the battle for the Mount Brtacchi Triangle<br />
during the battle for Rome. 10 scenarios<br />
are included, along with new rules and a 22"<br />
x 34" map of the Bracchi Hills region. Both<br />
will cost $24.95.<br />
BERLIN—Fall of the 3rd Reich is a<br />
detailed new historical module covering the<br />
battle for Berlin through 12 new scenarios.<br />
As well as two large linked mapsheets, the<br />
module includes two countersheets containing<br />
all the SMC, MMC, AFV and Gun<br />
counters needed for play, a total of 592<br />
counters. As well as versions of the standard<br />
ASL counters there are also new counters for<br />
Red Banner squads, fanatic Hitler Youth, and<br />
Volksturm units. Also included is a rules<br />
booklet and Play Aid Card. <strong>The</strong> module will<br />
cost $49.95.<br />
Coming soon is Finland at War Volume<br />
1: JATKOSOTA which contains 12 new<br />
scenarios depicting actions from the Continuation<br />
War offensive of 1941 through to<br />
the end of the war when Finland fought to<br />
eject German troops from their soil. Also<br />
included are two mounted 8" x 11"<br />
geomorphic maps which are geomorphic on<br />
THE TRENCHES<br />
three sides so they can be used together in<br />
numerous combinations for half-board scenarios<br />
or combined to form one complete 8"<br />
x 22" geomorphic board, a sheet of 106 color<br />
die-cut counters, providing AFVs, guns,<br />
SMC, MMC (including new 5-5-8 squads)<br />
and Finnish T-H Hero counters, and a special<br />
rules booklet. <strong>The</strong> pack should cost<br />
$29.95.<br />
HOB BATTLE BOCAGE<br />
Beyond the Beachhead is new<br />
scenario pack designed by Chas Smith<br />
featuring eight new scenarios set in<br />
Normandy. Also included are two new<br />
geomorphic mapboards depicting Normandy<br />
terrain, and two geomorphic<br />
overlays which will fit on either mapboard.<br />
<strong>The</strong> maps also feature new artwork for<br />
bocage making it possible to have hedges<br />
and Bocage on the same mapboard. No<br />
retail price has been announced yet.<br />
LATEST BUNKER OUT<br />
Dispatches <strong>From</strong> <strong>The</strong> Bunker 18 has<br />
begun shipping, following its release at the<br />
recent Nor’Easter Tournament. As well as<br />
an analysis of Hill 621 by Jim Torkelson,<br />
Carl Nogueira’s Tactical Tips, and the usual<br />
features there are three new scenarios. ‘Taking<br />
a Stand at Rosario’, the latest in the Early<br />
Philippines Series, sees a large Japanese combined<br />
arms attack on a mixed Philippines<br />
defence including elite Philippine Scouts and<br />
Coastal Defence elements on Boards 46 &<br />
49). ‘Riding the Coattails’ is a tournament<br />
sized scenario which sees a Slovak infantry<br />
company attacking a Polish Border Defence<br />
unit in the ’39 Polish Campaign. <strong>The</strong> final<br />
scenario, ‘<strong>The</strong> Killing Ground’, is part of<br />
the Tunisian series and sees a German combined<br />
arms Kampfgruppe attacking dug in<br />
American infantry at El Guettar.<br />
Four issue subscriptions are<br />
available for $13.00 ($15.00 outside the<br />
USA). Issue one is available free with a<br />
subscription or an SAE, while other back<br />
issues are $3.50 ($4.00 outside the USA).<br />
Payments should be payable to Vic<br />
Provost and sent to Dispatches from the<br />
Bunker, P.O. Box 1025, Hinsdale MA<br />
01235. You can email them at<br />
aslbunker@aol.com.<br />
Ω<br />
THIRD PARTY PRODUCERS<br />
UK AVAILABILITY<br />
As well as editing VFTT I also help to<br />
distribute those third party products not<br />
generally available in the shops over here.<br />
<strong>The</strong> prices are as follows, and are effective<br />
until the next issue of VFTT:<br />
Leibstandarte Pack 1 £9.00<br />
Wacht Am Rhein £14.00<br />
Canadians In Italy 1 £9.00<br />
Canada At War 2 £6.00<br />
Melee Pack 1 £10.00<br />
Add 50p per item for postage and send<br />
your payment made out to PETE<br />
PHILLIPPS to 24 Huggett Close, Leicester,<br />
England, LE4 7PY.<br />
For the latest on stock availability<br />
telephone me (as usual evenings when Man<br />
United are not playing are your best bet!),<br />
or email me at pete@vftt.co.uk.<br />
UK RETAILER STOCKISTS OF<br />
THIRD PARTY PRODUCTS<br />
To purchase other third party products<br />
such as Critical Hit, Schwerpunkt or<br />
Heat of Battle contact any of the following<br />
shops.<br />
LEISURE GAMES, 100 Ballards Lane,<br />
Finchley, London, N3 2DN. Telephone<br />
(020) 8346 2327 or e-mail them at<br />
shop@leisuregames.com.<br />
SECOND CHANCE GAMES, 182 Borough<br />
Road, Seacombe, <strong>The</strong> Wirral, L44 6NJ.<br />
Telephone (0151) 638 3535 or e-mail<br />
them at<br />
sales@secondchancegames.com.<br />
PLAN 9, 9 Rosemount Viaduct, Aberdeen,<br />
AB25 1NE. Telephone (01224) 624 467<br />
or e-mail them at PLAN9@IFB.CO.UK.<br />
If you know of other shops stocking<br />
third party ASL products let me know so I<br />
can include them here in future issues.<br />
3
FKaC Scenario Errata<br />
(Scenarios are listed by their old ID with the new ID in parentheses)<br />
<strong>The</strong> following Scenarios are being updated and re-released in For King and Country with new scenario numbers. This errata to the previous incarnation<br />
of the scenarios incorporates previous errata and new update changes, but does not include some minor word-smithing. <strong>The</strong> new scenario<br />
number is listed after the scenario title.<br />
A1 Tavronitis Bridge (93)<br />
Add a 4-6-8 and a glider to the German OB.<br />
A2 Bofors Bashing (94)<br />
Add a 4-6-8 and a glider to the German OB.<br />
A3 Descent Into Hell (95)<br />
Add a 4-6-8 and a glider to the initial Turn 1 force and also to the Turn 4 reinforcements.<br />
A15 Stand Fast the Guards (92)<br />
In SSR 2 delete and one AT Gun (and its crew) .<br />
In SSR 4, change dr to DR.<br />
Replace British balance with SSR 4 and 5 are NA. .<br />
Replace German Balance with In SSR 3 replace DR with dr .<br />
A22 <strong>The</strong> Crux of Calais (96)<br />
Add a 4-5-7 and a LMG and 6 ? to the British OB.<br />
Replace the British balance with Add a 4-5-7 and an ATR to the British OB. .<br />
In German balance replace three 4-6-7s with two 4-6-7s .<br />
A24 Regalbuto Ridge (100)<br />
Shorten Game Length to 7 turns.<br />
Replace the Victory Conditions with the following: <strong>The</strong> Germans win at game end if they have more Good Order squad-equivalents than the<br />
British on hill hexes of board 2. Good Order MMC on Level 3 hexes count double.<br />
Replace SSR 4 with the following: One German 8-0 possessing the radio must set up HIP to direct the fire of a single offboard 75* leIG 18 INF<br />
Gun (German Ordnance Note 15). Radio Contact must be gained/maintained normally, but Battery access is NA. <strong>The</strong> 8-0 serves as a spotter<br />
(C9.3) and all principles of spotted indirect fire (C9.3-.31) apply [EXC: Gun Malfunction is NA], including ROF decrease (C3.33) and target<br />
acquisition. For TH# determination purposes, range is counted from hex 3A5. .<br />
In the British balance replace 7 Turns with 6 Turns .<br />
A35 Guards Attack (108)<br />
Add a 2-4-8 to the German OB.<br />
A38 North Bank (110)<br />
Add 8 ? to the British OB.<br />
Add the following SSR: 5. Prior to play the British player may secretly record which units possess PIATs. <strong>The</strong> presence of a PIAT will be<br />
revealed when the possessing unit fires/transfers/drops the PIAT in LOS and within 16 hexes of an unbroken enemy unit, or is no longer Good<br />
Order. .<br />
Replace the British balance with Add one 3-3-8 to the British OB. .<br />
Replace the German balance with Delete the 8 ? from the British OB. .<br />
A40 Ad Hoc at Beaurains (91)<br />
In Victory Conditions replace 35 VP with 30 VP .<br />
A43 Probing Layforce (99)<br />
In Victory Conditions replace 20 VP with 17 VP .<br />
Reduce British OB by one 6-4-8.<br />
Replace German balance with Delete a 9-1 from the British OB. .<br />
A102 On Silent Wings (98)<br />
Add a 5-4-8, a LMG, and a glider to the German OB.<br />
G22 A Day By the Shore (103)<br />
In the VC add assembled after Good Order .<br />
In German Turn 3 reinforcements replace enter on Turn 3 with enter on/after Turn 3 .<br />
In German balance replace on Turn 2 with on/after Turn 2 .<br />
G43 Kangaroo Hop (106)<br />
In SSR 6 replace 150+mm OBA with 100+mm OBA .<br />
Replace British balance with In German setup, delete using HIP (regardless of terrain) and delete SSR 5. .<br />
4 VIEW FROM
THE TRENCHES<br />
<strong>The</strong> Scenarios of Intensive Fire 2003<br />
Part 3 – <strong>The</strong> Rest Of <strong>The</strong> Ones I Didn’t Play<br />
Michael Davies<br />
Before INTENSIVE FIRE, I jotted<br />
down some thoughts about the scenarios on<br />
offer and possible strategies for both sides.<br />
Although losing most of my games I did<br />
manage to play five of the scenarios on offer<br />
so am able to add an after the action postscript<br />
to some of these.<br />
A104 In front of the Storm<br />
This scenario is from the ASL Annual<br />
1996 which features a number of scenarios<br />
to use the French infantry counters and board<br />
40 from Croix De Guerre, plus board 42<br />
from Action Pack 1. Essentially the scenario<br />
is a point defence for the Germans and an<br />
armoured assault for the French. <strong>The</strong>re are a<br />
few bells and whistles that add to the fun for<br />
both sides: mines, tanks, civilian interrogation,<br />
elite French colonial infantry and a<br />
bridge.<br />
<strong>The</strong> board alignment is a little unusual<br />
resulting in some half hex woods, takes a<br />
little getting used to but only affects four<br />
hexes.<br />
A104 German Set Up<br />
At the game start you control the scenario’s<br />
objective the 40I2/I3 bridge and the<br />
hexes immediately adjacent I1 and I4. Keep<br />
in view if you control a single one of those<br />
hexes you win. It is a remote possibility the<br />
French to misunderstand the Victory conditions<br />
bag the bridge and neglect to advance<br />
into 40I4. That cannot happen very often.<br />
In most games I’d remind the French of the<br />
need to occupy the hex on turn seven. That<br />
said would subsequently fight hard to stop<br />
that happening! So far so good, the mission<br />
becomes trickier when you consider the size<br />
and strength of the French forces.<br />
<strong>The</strong> Spahis were recruited in North<br />
Africa. In the First World War they served<br />
valiantly in the <strong>Trenches</strong>. Now there sons<br />
and grandsons face the Germans again. <strong>The</strong><br />
enemy starts with twelve squads six Elite,<br />
and Six first line. An ELR of three is a good<br />
start for the French. Special rule 4 increases<br />
the broken side morale of French MMC. This<br />
has an impact on play. Firstly French troops<br />
will be easier to rally, and secondly broken<br />
units will be harder to kill by fire combat.<br />
<strong>The</strong> Spahis do fairly well for support weapons<br />
three LMGs’ and a pair of MMGs’<br />
brings a lot of firepower to the party. Leadership<br />
is nothing special three Leaders, two<br />
8-1s and a lone 7-0. Elite French squads has<br />
an inherent smoke exponent of 1 , the prevailing<br />
wind generally hinders enemy smoke<br />
placement.<br />
Smoke is very helpful when crossing<br />
open ground, particularly for the assault on<br />
the bridge. Fortunately the only smoke the<br />
enemy tanks can place is from crews or burning<br />
wrecks. <strong>The</strong> H35 is a reasonable tank for<br />
the period. It qualifies as a small target, with<br />
hull armour of 4 factors, turret armour rises<br />
to six, certainly resistant to 37L or ATR fire.<br />
A 37* gun is an asset in a close range fire<br />
fight, very useful against static targets. Although<br />
the best armour on the field by virtue<br />
of being the only tanks around, the H35 has<br />
some weaknesses. <strong>The</strong> coaxial MG is limited<br />
to a basic 2 IFT. <strong>The</strong> vehicles are subject<br />
to one man turret restrictions making the turret<br />
slower to turn and prohibiting use of the<br />
main armament when crew exposed. This<br />
helps as the tanks will almost always be<br />
buttoned up. At under six hexes range the<br />
basic to hit of the 37* vs an Infantry target is<br />
8, this immediately falls to 7 for being buttoned<br />
up, and will drop lower for TEM and<br />
any hindrances. For example a concealed<br />
squad in a building can only be hit by snakes.<br />
<strong>The</strong>re is better news, these tanks are slow.<br />
Ten movement factors is a handicap, made<br />
worse by effective loss of the main armament<br />
when crew exposed. If the French place<br />
a premium on speed and expose the crews to<br />
exploit the roads, you may have the chance<br />
to destroy a tank in close combat. Unless<br />
the CMG has been relocated to fire as an AA<br />
MG a H35 with exposed crew is without a<br />
manned functioning weapon. Against an unarmed<br />
tank you can move into the hex it<br />
occupies in the movement phase or without<br />
the requirement to take a PAATC. As the<br />
French would not have a functioning MG<br />
the attack would gain a -1 modifier, and another<br />
-1 for CE status giving a basic to kill of<br />
seven, or better if you ambushed or qualify<br />
or street fighting.<br />
Worth noting the French movement<br />
factor is red, so subject to mechanical reliability.<br />
Every time the tank attempt to move<br />
it must perform a TC. An original 12 immobilises<br />
the vehicle. It is important you insist<br />
this is done as an immobile tanks is less of a<br />
threat to you. Being radioless also hampers<br />
the French, agreed a NTC with a morale of 8<br />
is likely to be passed, but very useful when<br />
it isn’t, stopping a French unit that clearly<br />
wanted to move. If the French opt for platoon<br />
movement this is generally slower and<br />
will bunch the units together. Very important<br />
the lack of radios’ force the H35s to<br />
enter as a single platoon.<br />
To counter the French tanks you have<br />
a 37L anti tank gun, Anti tank rifle, Infantry<br />
and some Anti tanks mines. Your weakest<br />
tank killer is the ATR, a basic to kill of five,<br />
rises to seven at one hex range, just enough<br />
to penetrate the Hull, immobilise, cause<br />
shock or possible shock. I’d be very please<br />
to bag an H35, and would even settle for an<br />
immobilisation result. Deliberate immobilisation<br />
attempts are an option, but with small<br />
target size you will be looking for a very low<br />
number at most six, more often less than<br />
four, and remember it has to be a hull hit!<br />
Part of the units role is to cause fear. A nervous<br />
Frenchman might decide the ATR is a<br />
real threat and take measures to avoid it, exploit<br />
this if it happens.<br />
<strong>The</strong> 37L gun is deadlier, a basic to kill<br />
of nine, rate of fire of three and a bore sighted<br />
location all help. Firing from an emplaced<br />
position it may take a few shots to kill an<br />
H35, you could get lucky with the first hit,<br />
chances are the French will try to prevent<br />
further shots, moving away is a good defence,<br />
hitting you with Infantry even better.<br />
If you kill a tank early in the game great,<br />
remember the gun can be moved, perhaps it<br />
should be if French infantry are massing for<br />
an attack. Against squads the 37L can do<br />
some damage, attempt this if all three tanks<br />
are out of the Battle, the gun is very close to<br />
the Infantry or it is part of a bright idea.<br />
Chances are your Infantry will not<br />
encounter any crew exposed tanks. <strong>The</strong>y<br />
may have chances for close combat attacks<br />
or CC reaction fire. When to attempt this<br />
requires careful judgement. If tanks are<br />
5
closely supported by Infantry it might not<br />
be the best idea, when you have modifier in<br />
your favour, and no prospect of retribution<br />
in the near future it is open season for H35.<br />
If you happen to capture a H35 or<br />
crew an abandoned one, its gun is not terribly<br />
effective against amour, but you may as<br />
well try it! Even if you gain little from the<br />
attempt its a story to amaze folk afterwards.<br />
Other Anti tank weapons are more<br />
obstacles that targeted weapons systems,<br />
mines and the road block. <strong>The</strong> road block<br />
cannot destroy a tanks but sure can restrict<br />
movement. It can be used as a brick wall, and<br />
if you have a cunning plan for this that is a<br />
scenario winner go for it. If not place it to<br />
restrict enemy tank movement. At the start<br />
of the game you know the French can enter<br />
on or between 42A6 and 42Q10, and are<br />
heading for 40I1. Most tank drivers are reluctant<br />
to go through woods, and buildings,<br />
avoid ponds streams and marsh. With mines<br />
about movement may be restricted to road<br />
hexes. To restrict access to the bridge you<br />
might consider road hexes from 42H2 to 40I3.<br />
40I1 takes some beating but think carefully<br />
before you decide. It is possible to remove<br />
roadblocks, doing this under fire though can<br />
be tricky.<br />
At the game start you have eight factors<br />
of AP mines, four of Anti tank mines.<br />
You can exchange you anti personnel mines<br />
for another two Anti Tank mines which<br />
should be a nasty surprise for the H35s. <strong>The</strong><br />
best place to spot mines is underneath tank<br />
tracks. One factor fields are workable, they<br />
have less chance of activation, but do the job<br />
if triggered and once known worry the enemy.<br />
As you cannot site mines in road hexes,<br />
your options are slightly limited but not too<br />
greatly. Either side of a road block is good, or<br />
behind the walls in E2, F2, favour locations<br />
you can cover with fire. A mixed mine field is<br />
nasty. <strong>The</strong> four spots I’d consider for mines<br />
are 40K1, G3, E2 and F2. Many alternatives<br />
are worth considering, the Orchard around<br />
C2 for instance of any open ground closer to<br />
the Bridge.<br />
Anti personnel mines can effect vehicles,<br />
for an 8 factor field double one will<br />
blow the tracks off, anything else just reveals<br />
the presence of mines. If the tank continues<br />
to move forward it will be attacked<br />
again. AFV movement creates a trail break<br />
that may be used to avoid mines, conceivably<br />
the enemy could stop and reverse out.<br />
Not a bad result as it slows up the French<br />
plans for at least a turn. Given tanks may be<br />
moving in platoons this can be very disruptive.<br />
Against Infantry an unmodified eight<br />
IFT attack is a nasty surprise. It is a hefty<br />
attack and the Spahis will avoid the side if at<br />
all possible. Part of the value of mines is<br />
uncertainty, as there position becomes known<br />
they become less powerful weapons. Don’t<br />
expect too much from mines, a broken squad<br />
and a KO’d tank would be sweet, but<br />
roadbound French Tanks and nervous Infantry<br />
also help your cause.<br />
I’ve mentioned the ATR and the use<br />
of Infantry against tanks. <strong>The</strong>se are important<br />
elements of your defence, perhaps more<br />
important is how your Infantry compare to<br />
the attackers in quality and numbers. Four<br />
Elite squads and another four first line squads<br />
is not bad compared to the twelve the French<br />
field. A higher ELR of four and three Leaders<br />
helps as does the two LMGs, and bore<br />
sighted MMG you receive in addition to the<br />
ATR. Superficially the French have a 50%<br />
advantage in raw firepower over your troops<br />
in a stand up fight they would be expected<br />
to wear you down in a fire fight then march<br />
to the bridge within the seven turns available.<br />
<strong>The</strong> fire power disparity becomes very<br />
serious when you appreciate only part of<br />
your forces will be engaged by the French in<br />
any particular sector.<br />
To win, you need seek the advantages<br />
terrain and concealment provide, and make<br />
some intelligent guesses as to the attack the<br />
French will develop. If you can it is helpful<br />
to units in Stone buildings with concealment,<br />
or at least in foxholes. Advancing French<br />
troops will likely be in or behind Orchards<br />
or brush, sometimes in buildings later in the<br />
game, or using armoured assault. In most<br />
cases the enemy will benefit from a 0 or 1<br />
TEM, and be subject to FFNAM, this gives<br />
your shots a net 0 or -1 , effectively moving<br />
the strength of your attacks one column to<br />
the right. In effect a four IFT attack with a -<br />
1 DRM bites about as hard as a six. Significantly<br />
the chances of a kill are raised. Most<br />
of the time KIA/K results are tripled, the<br />
chance of a morale check goes up about one<br />
in six. That is pretty good. French return fire<br />
is facing a +2 or +3 TEM, and reduced for<br />
advancing fire. A lone French squad has little<br />
chance of a result, massed firepower is more<br />
threatening. In the Final fire phase German<br />
concealed units out of LOS of French troops<br />
take shots at broken units without losing<br />
concealment. In the following prep fire phase<br />
you can bug out if losing, stand and fight if<br />
facing broken squads and a few half squads.<br />
That is sort of how, and a very rosy how at<br />
that, what’s is missing is where, a much<br />
trickier problem.<br />
<strong>The</strong>re are significant risks associated<br />
with moving tanks through woods. <strong>The</strong>re is<br />
a serious risk of bog, and the MP penalties<br />
to consider. I would be happy to predict no<br />
French tanks will enter woods hexes to enter<br />
play. I would expect either all tanks to enter<br />
at A5/A6, or I10. Armoured Assault movement<br />
is practical and might be used. Your<br />
first decision is should you oppose move-<br />
ment along these axis.<br />
To contest the A5/A6 entry area a platoon<br />
sized force organised around F3 could<br />
work, for example a squad in building F3,<br />
and others in E4 and D3. <strong>The</strong> Unit in D3<br />
might appreciate a fox hole. A LMG in E4<br />
can set up a fire lane to A6 as soon as any<br />
unit enters. A squad or half squad in the A4<br />
woods should wait for units entering on A5<br />
or fire in the Final fire phase. This platoon<br />
needs a Leader, maybe the 8-1, maybe the 8-<br />
0 with an Anti tank Rifle in F3 to create a<br />
stack that looks an awful lot like a MMG<br />
position. Adding the 37L to this sector is a<br />
gamble, it will look pretty silly if the tanks<br />
arrive elsewhere and will be vulnerable to<br />
close range attack by the Spahis. you can<br />
opt for a smaller force, a single unit in A4<br />
might be enough, one in E4 as good. What<br />
you decide on is a matter of choice. <strong>The</strong>se<br />
units are mobile, they can fall back to the<br />
bridge, shift to another sector or even stay in<br />
place and direct fire on the French. F3 is a<br />
good spot to delay troops entering on I10,<br />
but don’t stick around if being hit by 37mm<br />
HE, and increasingly powerful musketry.<br />
<strong>The</strong> second platoon position is around<br />
the J2 woods. Stone buildings in I3 and J3<br />
are garrisoned with a squad each. <strong>From</strong> I3<br />
Fire towards I10 hampered by Orchard. Bore<br />
sighting can offset this a little. If the 9-2<br />
leader and the MMG are used a six or eight<br />
IFT attack at -2 is possible. Even using a<br />
LMG and squad you shoot a six IFT attack.<br />
fairly scary. Bore sighting should only be<br />
good for a few shots, but enjoy it if the French<br />
are determined to occupy the hex. Building<br />
J3 is nearly as good, bore sight H7 and expect<br />
a target soon. A third squad in J2 will<br />
not get a shot on turn one but can change<br />
places with another squad to offer a concealed<br />
target to the Frenchies.<br />
That accounts for roughly six or seven<br />
of your squads. Leaving about a squad or<br />
two, the 37L gun, a LMG or MMG and<br />
another Leader. <strong>The</strong> gun has a lot of choices.<br />
It could set up to provide close support for<br />
either platoon, in ambush almost anywhere<br />
on the board or way back on board 40 taking<br />
long range shots at the French. Ambush gains<br />
a limited amount in this scenario. <strong>The</strong> side<br />
and rear armour of an H35 is the same! being<br />
close gives a +1 or +2 to kills, with a greater<br />
vulnerability to counter measures. By starting<br />
on Hill 520 on board 40, your to kill<br />
numbers drop by just one compared to shots<br />
at two or less hexes range. To hit numbers<br />
against a H35 at 13-18 hexes range fall to 7,<br />
due to small target size, and small gun size<br />
being cancelled out by your long barrel.<br />
Against a moving target this will drop to 5,<br />
but pick up if you gain acquisition or the<br />
tank stops. Return fire is limited. CMG will<br />
be halved, to hit numbers start very low start-<br />
6 VIEW FROM
ing with improbable, rising to three with acquisition!<br />
Woods hex 40I7 is definitely worth<br />
considering, K7, L7 nearly as good. A gun<br />
duel with the tanks must surely delay their<br />
forward movement whilst making the Spahis<br />
infantry attack harder. Take your time selecting<br />
a gun position it is important. Nearly<br />
forgot, the French may group their machine<br />
guns and use them against the Gun crew at<br />
long range. If it happens consider using HE,<br />
and give thought to skulking.<br />
Starting a MMG on board 40 is handicapped<br />
by range. Otherwise 40I7, K7 or L7<br />
would be ideal location for a foxhole squad<br />
or half squad, MMG and Leader. Range restrictions<br />
half fire, and you cannot bore sight<br />
a location out of range or line of sight. With<br />
shorter range a forward position is tempting.<br />
Building F3 has an appeal, J3, I3 are also<br />
good. When bore sighting give thought to<br />
buildings’, D5 and H5 will attract visitors’.<br />
Hitting these with a +1 attack instead of +3<br />
makes a big difference.<br />
Definitely a gamble starting a squad<br />
or half squad with an LMG in a foxhole in<br />
40I3 ready to spit death down the 40I1-42I2<br />
road. Maybe this reduces your firepower<br />
frontally too much. If you are sold on the<br />
idea, use the guys to dig more foxholes ready<br />
to receive any retreating units later in the<br />
game or the gun crew if it disables the gun.<br />
A couple of loose ends, Kindling is an<br />
option. On the upside burning terrain is inaccessible,<br />
the cons are the effort involved<br />
and smoke may provide cover for the enemy.<br />
Interrogation can only happen when a<br />
unit is captured. It creates a chance of mines<br />
or concealed/hidden units being revealed but<br />
by the time it happens not too much will be<br />
concealed. Revealing the mines is irksome,<br />
particularly if everything is in the same place<br />
but not a match winning event.<br />
<strong>The</strong> idea of wiping out hordes of attackers<br />
with superlative gunnery, and machine<br />
gun fire has an appeal. It is just about<br />
possible to win by greatly reducing the<br />
French forces, more likely they will not reach<br />
the Bridge in the time available.<br />
More loose ends. If you need to fall<br />
back a foxhole in I1 in front of a roadblock<br />
helps you but doesn’t give the French much.<br />
<strong>The</strong> woods hexes in 40G1, H0 and H1 are<br />
pencilled in for a last stand on the West<br />
Bank, use any foxhole you have spare there.<br />
Don’t be surprised by French Infantry moving<br />
through the woods on the Southern flank,<br />
running down the paths to avoid a direct<br />
approach. You can relocate some of your<br />
forces ahead of him, and gain from the delay<br />
extra movement causes him.<br />
I’ve a nagging doubt about the size of<br />
the force on Hill 520, maybe more should<br />
start there, perhaps as much as two or three<br />
squads. Certainly with the balance I’d put<br />
THE TRENCHES<br />
another half squad there as sniper bait, and<br />
Ad Hoc gun crew. Something to consider is<br />
placing the 9-2 Leader with a squad and<br />
MMC in the same hex as the hidden gun. At<br />
the risk of presenting a concentrated target<br />
the gun crew benefit from the Leadership for<br />
morale checks and rallying. Not everyone’s<br />
cup of tea but worth a thought.<br />
This scenario can be a lot of fun, if the<br />
French arrive using armoured assault using<br />
the routes you predicted and proceed to dawdle<br />
you deserve to win. Watch out for a fast<br />
paced attack that deviates ever so slightly<br />
from what you are expecting the French can<br />
give you a kicking if they develop fire bases<br />
and shoot you out of position, before rounding<br />
up prisoners at the Rivers edge, forcing<br />
your men to remove the road block and driving<br />
H35s’ over the bridge to claim victory.<br />
Finally, remember your mission is to<br />
defend the bridge, your own casualties do<br />
not matter so long as the bridge or its immediate<br />
approaches are under your control.<br />
Draw some inspiration from the scenario<br />
aftermath, with only a half squad and Leader<br />
surviving.<br />
A104 French set up and attack<br />
<strong>The</strong> Victory conditions are simple you<br />
win by controlling hexes 40I1, I2, I3, and I4.<br />
<strong>The</strong>se are a single lane Stone Bridge in I2 and<br />
I3, and the hexes immediately adjacent to<br />
them. Good news is there is no casualty cap.<br />
With no enemy forces present you<br />
could run or drive down the A5/A6 or I10<br />
roads for a win in just two turns. With enemy<br />
forces present the mission is more difficult.<br />
Eight enemy squads are split equally<br />
between 1st Line and Elite. An ELR of four<br />
is annoying as most failed morale checks will<br />
not be accompanied by ELR replacement.<br />
<strong>The</strong> Elite squads are 5-4-8s’ slightly harder<br />
to beat in close combat due to the extra factor.<br />
<strong>The</strong>y also qualify for the assault fire<br />
bonus which can be used when falling back.<br />
German Leadership is very good, three Leaders,<br />
including a 9-2. <strong>The</strong> Krauts do fairly<br />
well for support weapons a MMG, two<br />
LMGs and even an ATR. All of these can<br />
just about be used to take on your H35 tanks,<br />
at short range an MG can manage a Stun, a<br />
rear shot can eliminate on a two DR. Nearly<br />
forgot a Stun result against a one man turret<br />
results in a recall. More often the support<br />
weapons will be used against Infantry targets.<br />
At normal ranges an elite squad teamed<br />
with an LMG can choose between a combined<br />
8 IFT attack, combined spraying fire<br />
to cover two hexes with 4 IFT attacks, a<br />
split 4 IFT and 2 IFT attack which can also<br />
be used for spraying fire. Potentially single<br />
unit can deliver some firepower to between<br />
one and four hexes, using first fire or prep<br />
fire. If final fire results then even more dam-<br />
age is possible. Admittedly these are weak<br />
attacks, if you are in hard cover they will not<br />
be effective but this is worth considering<br />
during any planned advance. <strong>The</strong> ATR will<br />
most likely be used against Armour, it can be<br />
used for long range fire and to move the elite<br />
squads firepower up to the 6 IFT column.<br />
More factors to consider, the MMG can bore<br />
sight giving a -2 DRM for attacks, a good<br />
argument against stacking, factoring in the 9-<br />
2 Leader to that attack is a nightmare. Plenty<br />
to consider, time for some calming thoughts.<br />
Enemy SAN is just 2, limiting the potential<br />
for sniper attacks, your SAN of 3 triples the<br />
chances of your sniper being activated. Don’t<br />
forget cowering, Leaderless attacks will<br />
cower on doubles evaporating low IFT attacks<br />
and taking the sting out of others.<br />
Fortifications are key to the Germans<br />
defences. <strong>The</strong> first to consider is the mines<br />
factors allocated. <strong>The</strong> 8 factors of AP mines<br />
can be used as a single field or exchanged for<br />
two more AT mine factors. An 8 Factor field<br />
can just about blow the tracks off a H35, vs<br />
Infantry expect a morale check or the odd<br />
KIA/K result. Sooner or later you will find<br />
the mines, by all means search if you want,<br />
offsetting this against time pressures. <strong>The</strong><br />
AT mines are more deadly, if you activate an<br />
AT mine you will lose a tank on a DR of six<br />
or less, any other result is an immobilisation.<br />
you can totally eliminate this risk by<br />
sticking to road hexes or Terrain West of the<br />
42A6, Q4 road. This would be less of a restriction<br />
without the road block. <strong>The</strong> road<br />
block limits tank movement options. Early<br />
in the game it will not have much impact,<br />
later as you approach the bridge half expect<br />
to find it blocking the road and tempting you<br />
to go around it.<br />
Most enemy units begin play concealed.<br />
<strong>The</strong> mines and road block are hidden<br />
as is the 37L gun. Although the ATR can<br />
immobilise an H35, and might even kill one,<br />
the 37L gun is a more effective anti tank<br />
weapon the must be respected. your Hull<br />
armour is four, and turret armour six, against<br />
this the 37L has a basic to kill of nine modified<br />
to three or five. Those are very credible<br />
to kill numbers. <strong>The</strong> 37L begins the game<br />
hidden and really could be anywhere in the<br />
German set up area. <strong>The</strong> first time it fires<br />
will probably be your first indication of<br />
where it is. If you lose a tank finding out this<br />
is a bit upsetting. Try to counter the threat<br />
by line of sight, moving out of the 37Ls sight<br />
is the strongest possible defence. A slugging<br />
match between the H35s and the gun deserves<br />
to go the Germans way, it is better to<br />
destroy the gun with IFT attacks from your<br />
Infantry or MMGs. <strong>The</strong> gun really can be<br />
anywhere, guarding a single flank, in a building<br />
by the crossroads, even on board 40 say<br />
on hill 520, bore sighted and waiting for a<br />
7
shot. You can get lucky, the gun can malfunction<br />
on the first shot, it can be poorly<br />
placed not sighted to your units or a long<br />
shot counter measure gets lucky, for example<br />
a bounding fire shot from a 37* tank gun<br />
does the improbable and ices the gun and<br />
crew. More often Infantry fire must do the<br />
job. If the Gun is on board 40 might be a job<br />
for the sniper, relocate on a 2 DR and hope<br />
for the best, if it is the only unit over there it<br />
will be the only eligible target, a PIN result is<br />
not massively helpful but a break definitely<br />
creates opportunities.<br />
If the entire enemy OB began the game<br />
hidden I don’t think your troops would be<br />
strong enough to win comfortably or easily.<br />
Fortunately only part of the German OB is<br />
hidden and you can make some reasonable<br />
estimates as to the strength and dispositions<br />
of the Infantry forces. This requires a bit of<br />
guess work but can be surprisingly accurate.<br />
<strong>The</strong> first thing to look for is negative evidence.<br />
Any empty hex clearly doesn’t contain<br />
Infantry! So you’ll know if there are<br />
any German units on the Eastern bank of the<br />
River of Hill 520, or covering the Southern<br />
Flank. Accepted the 37mm Gun could be<br />
there, but until it fires or you find it keep it<br />
in view but don’t let it dominate this stage of<br />
planning. Almost certainly some units will<br />
be in or around building 40J3 and I3, another<br />
little group around building 40F3, and maybe<br />
some troops close to the woods in 40A4 and<br />
B4. Beginning play with eight squads the<br />
Germans are free to deploy one squad. By<br />
counting counters you can tell if he has done<br />
this, the key word is can, and if you don’t<br />
want to you do not have to! Next look for<br />
clusters of units. Any grouping should contain<br />
a Leader. If it does not well it messes up<br />
your estimation of the enemy’s position but<br />
will be easier to deal with later when the<br />
Germans are trying to self rally under fire.<br />
Looking at a group you can probably guess<br />
if a Leader, MG and squad or half squad is<br />
one of the stacks. Anything like a Death star<br />
of three squads, all three MGs and the 9-2<br />
will be rather obvious. <strong>The</strong> Krauts can pull a<br />
few tricks. <strong>The</strong> ATR looks like a MG, a<br />
Leader on it’s own looks like a squad, two<br />
half squads look like a squad and MG. With<br />
effort the enemy can deliberate confuse you,<br />
in some games it will happen, in most set up<br />
will be to exploit crucial defensive characteristics.<br />
Some things are certain. A single counter<br />
will not have a MMG and Mr 9-2 with<br />
it, the MGs and ATR need MMC to fire<br />
them, more than nine stacks suggest a Leader<br />
alone in a hex. Initial reconnaissance should<br />
be fairly accurate, build on this assessment<br />
as play progresses. Learn where the MMG<br />
is, the 9-2 Leader and even squad types as<br />
they are revealed. This all helps to plan how<br />
to develop your attack.<br />
When planning your attack it helps to<br />
understand the strengths and composition<br />
of your own forces. Begin by reading the<br />
Chapter H notes for the H35s. <strong>The</strong>se three<br />
tanks are lightly armoured, but invulnerable<br />
to small arms fire beyond an extremely lucky<br />
MG shot. <strong>The</strong>y need to be wary of the 37L<br />
gun, mines, prolonged MG or ATR fire and<br />
close assaulting Infantry. <strong>The</strong>re main role is<br />
to provide cover for assaulting troops, and<br />
to winkle out stubborn defenders by short<br />
range 37* fire. As a consequence of a one<br />
man turret the CMG and 37* is not usable<br />
when crew exposed, any MA shots will always<br />
attract a +1 modifier. Against troops<br />
in a building at six hexes to three hexes range<br />
your to hit roll will be eight, less one for<br />
being buttoned up and three for TEM giving<br />
a to hit of four or less. Once you acquire<br />
acquisition this improves to a six or less forcing<br />
the German to consider a retreat. This is<br />
great if it drives him out of say J3, I3 or F3<br />
giving you leverage to move forwards and<br />
hit the next line of defence. Obviously this is<br />
not going to work if the 37L takes the tank<br />
out so be careful moving into a fire position<br />
defend yourself by line of sight if you can.<br />
<strong>The</strong> H35s do have weaknesses. Mechanical<br />
reliability should not be a big worry. Every<br />
time you expend a start move you run the<br />
risk of immediate immobilisation on a natural<br />
12 DR. If moving as a platoon the risk is<br />
split between the other vehicles, with a finite<br />
chance of all three vehicles synchronising<br />
immobilisation. not certain but the<br />
chances of two vehicle breaking down are<br />
one in six for two tanks, slightly more than<br />
that for three out of two, and all three hovers<br />
around one in thirty six. Bear in mind a DR<br />
of twelve is needed to trigger the possibilities.<br />
to put your mind at rest the chance of<br />
all three tanks moving as a platoon being<br />
immobilised simultaneously is around one<br />
in one thousand two hundred and ninety six<br />
or there abouts. Statistically that is very<br />
unlikely. For the really nervous this will not<br />
happen on turn one, and is not an issue if<br />
you stay in motion. Being radio-less requires<br />
a TC for independently moving H35. With<br />
an elite squad morale of eight, this TC should<br />
be passed most of the time. Platoon movement<br />
is generally more reliable. <strong>The</strong> most<br />
effective range for your tanks is two hexes.<br />
At one hex range Infantry can hit back harder<br />
and it is a risk to be positioned so close to<br />
the enemy. Overruns are an option. It is a<br />
quick way to get into a building and effective<br />
against broken units. H35 overrun strength<br />
is not impressive, I calculate it to be 6 IFT<br />
with modifiers for TEM and target status.<br />
Possibly there is a way to exploit AP10<br />
ammunition. AT rounds are very effective<br />
against Guns, and even work against Infantry.<br />
He rounds attack on the 4 IFT column,<br />
AT isn’t that far away with a 2 IFT attack.<br />
worth doing if the to hit is exactly 10 against<br />
any target, or generally against a gun.<br />
If the 37* rolls doubles any hits become<br />
multiple hits pick the roll that best<br />
suits. Kill results are favourite, think it<br />
through first though. If you take enough shots<br />
you will malfunction a gun. A gacked repair<br />
roll makes a tank subject to recall, each attempted<br />
repair has a one in six chance of<br />
doing this. Think carefully, is a tank with a<br />
malfunctioned gun more useful than a recalled<br />
one? If already immobilised, a disabled main<br />
armament forces you to bail out. adding a<br />
vehicle crew to the fight. If you lose a tank<br />
try to bail out, with a CS of two this is difficult<br />
so be pleased if you make it. Use the<br />
Tank as cover, burning wrecks are very useful<br />
in this respect, with a mild breeze the<br />
smoke will drift and may be between you<br />
and the enemy giving you some useful cover.<br />
<strong>The</strong> three tanks are useful and important<br />
units. In addition you start with twelve<br />
Infantry squads and three Leaders. Leadership<br />
is nothing too special two 8-1s and a<br />
single 7-0. Nothing special but good enough<br />
for the job. <strong>The</strong> squads are evenly split between<br />
first line and Elite. Note broken side<br />
morale is raised by one which really helps<br />
rallying and defence against IFT attacks on<br />
broken units. <strong>The</strong> Infantry bring two MMGs<br />
and a further three LMGs on board. <strong>The</strong>ir<br />
weaknesses are ELR and low smoke exponents.<br />
<strong>The</strong>ir strengths well certainly numbers,<br />
and probably raw firepower. On turn<br />
one the Spahis outnumber the Germans<br />
twelve to eight in squads, 62 to 47 in terms<br />
of raw firepower. If the French can gain better<br />
terrain to fight an even fire fight they<br />
should win.<br />
<strong>The</strong> map alignment is a bit unusual,<br />
creating a few unusual half hex woods, this<br />
should not have a big impact on play though.<br />
My first mistakes preparing for play were<br />
confusion about single lane bridges and<br />
grainfields. <strong>The</strong> ASLRB has the answers,<br />
grain is not in season, at present the MF<br />
penalty applies as the fields are ploughed<br />
and planted with crops but not high enough<br />
to provide a hindrance. For the German some<br />
concealment terrain is lost. For the French<br />
movement is slowed and some promising<br />
avenues of approach become death traps!<br />
Entering through the 40D6 grainfield becomes<br />
less attractive, and a move along the<br />
Southern edge of the board trickier. For me<br />
the most annoying bit of grain is in I6 a month<br />
later with grain in season it would provide a<br />
hindrance to fire from I3 to I9/I8. <strong>The</strong> single<br />
lane bridge I’d imagined being a big problem<br />
for movement, fortunately it isn’t but with a<br />
road block you might not ever get to cross it<br />
with a Tank! Late in the game the bridge is a<br />
problem. without armoured support Infan-<br />
8 VIEW FROM
try are very exposed on the bridge to fire<br />
from the Eastern Bank. Fire lanes are particularly<br />
painful. A squad in a foxhole with<br />
an LMG at ground level in I3 can place a fire<br />
lane along the bridge making it very difficult<br />
to cross with the prospect of PBF in I4. If<br />
the Germans have held back the MMG entry<br />
become easier but crossing the bridge very<br />
difficult. An MG in I6 or I7 can see more on<br />
board 42, offset against less ability to place<br />
a fire lane. If the German has plans to allow<br />
entry but contest the bridge crossing he may<br />
start the scenario with significant forces on<br />
board 40. A second option could be to retreat<br />
from I3/J3 buildings on turn one running<br />
back over the bridge. I’m not sure this is<br />
the way for the Germans to win. If the West<br />
Bank is overrun quickly with little loss, the<br />
problem of crossing the bridge might be<br />
solved by removing the roadblock and assault<br />
movement. Once a tank is able to cross<br />
the bridge your winning chances grow.<br />
So, how to attack. <strong>The</strong> basic plan is to<br />
move onboard, overcome blocking forces then<br />
drive/assault across the bridge. Being radioless<br />
the H35s’ must enter as a single platoon.<br />
<strong>The</strong>re are two feasible entry points for<br />
Armour which allow fast movement. <strong>The</strong><br />
A5/A6 road, and the I10 road . If you accept<br />
delay caused by moving through brush,<br />
ploughed fields or over hedges there are other<br />
routes. Not too bad an alternative the Orchards<br />
in F9, G10. <strong>The</strong> A5/A6 road can be<br />
interdicted. If enemy infantry are in the A4/<br />
B4 woods sending tanks’ in is a risk. If the<br />
ATG is also there you could lose a tank very<br />
quickly. As the gun is hidden a precaution<br />
you could take is to deploy a squad and enter<br />
a half squad on A5, move into A4 looking<br />
for the gun, then CX to B4 hoping you do<br />
not find a minefield! If the gun is present in<br />
either woods hex it will be occupied by the<br />
crew, and swamped by any other infantry<br />
you commit to that flank. If you find nothing<br />
move forwards swiftly with any accompanying<br />
Infantry. Ok the gun can appear in<br />
C4 or a number of other places and take a<br />
credible shot but if the tank goes it is in a<br />
more useful spot than the board edge. If enemy<br />
counters are plentiful on the Northern<br />
sector a direct armoured approach may be<br />
reckless. Instead assault using Infantry occupying<br />
woods, buildings and brush then<br />
shooting in successive turns. If you can break<br />
or destroy a couple of squads a turn the<br />
German defences will collapse.<br />
Plan B is to enter the tanks on I10.<br />
<strong>The</strong>y can reach D5 and engage enemy forward<br />
positions. If the ATG opens up and<br />
retains ROF, the best defence is line of sight.<br />
<strong>The</strong> Spahis have many choices for<br />
entry. Coming in through the Southern woodlands<br />
is the least attractive option. <strong>The</strong><br />
Northern and Western Broad edges are more<br />
THE TRENCHES<br />
suitable. If the A5/A6 road is covered by<br />
concealed units, bring a force on to engage<br />
them with fire or at least hold them in place<br />
is valuable. Maybe three squads and a Leader,<br />
plus a LMG or MMG. <strong>The</strong>re are no dummy<br />
stacks, and the worst that could happen is<br />
you engage a pair of half squads. <strong>The</strong> rest of<br />
your troops can arrive along the I10 road, or<br />
move through the broken terrain North of<br />
the road. Avoid moving in stacks, think before<br />
you CX, and be careful with your Leaders.<br />
Although it would be nice to get into<br />
position on turn one and start blazing away<br />
at the enemy, I suspect your first attacking<br />
positions will take two turns to reach. enjoy<br />
any action that occurs before then but don’t<br />
feel the turn is wasted if you do not shoot<br />
much.<br />
In the second and third turns you will<br />
attack the enemies front line and should break<br />
through fairly quickly. If you are causing<br />
some casualties you are winning. An average<br />
of just over half a squad per turn will reduce<br />
the Germans to a very small force late in the<br />
game. If you can trade your own units off<br />
for this at a favourable rate expect to win.<br />
A few loose ends. Gain ground when<br />
you can. Use inherent smoke or at least try<br />
for it when it is useful. Take prisoners. Interrogation<br />
is in effect, it might reveal mines<br />
or strip units of concealment, very helpful<br />
to your cause. I’d recommend giving quarter.<br />
Prisoners will supply information and might<br />
be taken in sufficient numbers to remove the<br />
roadblock. I’ve a suspicion this contravenes<br />
the Geneva convention and might prove a<br />
mistake if subject to enemy fire. <strong>The</strong> idea of<br />
encircling enemy units appeals, without the<br />
mines and ATG tanks could achieve this.<br />
Keep the idea in reserve it really helps when<br />
you can pull it off.<br />
<strong>The</strong> fight for the Western bank should<br />
be exciting. It will not always go the way<br />
you want it, but weight of numbers and armoured<br />
support will tell. <strong>The</strong> next objective<br />
is to cross the bridge. If the enemy cannot<br />
oppose your move this may just be a case of<br />
CXing a unit on turn seven. If enemy units<br />
are still active this will not be so easy. Given<br />
a choice you do not want to spend turn seven<br />
running through four hexes of residual fire<br />
and/or fire lanes to be robbed of Victory by<br />
bad luck. any remaining tanks are superb for<br />
the job. If they make it great, if they fail their<br />
loss will create a wreck and might provide<br />
smoke to cover any further moves. A turn<br />
seven scramble is kind of exciting, less flamboyant<br />
but perhaps more skill full being<br />
closer to a win in turns five or six. Watch out<br />
for some enemy units moving on to the Bridge<br />
or into I4 late in the game to win you must<br />
dislodge them, just being in CC or Melee is<br />
not quite enough.<br />
This can be a tough game. <strong>The</strong> enemy<br />
mines, 9-2, and 37L are all worrying, but<br />
numbers, high morale and a well paced attack<br />
should earn a win.<br />
A104 Conclusion<br />
I’ve a nagging doubt the Germans can<br />
win by massing on board 40, happily digging<br />
foxholes and covering the bridge and its<br />
immediate approaches with fire power. Even<br />
a compromise of a platoon on the Western<br />
Bank could give the French a bad time. That<br />
said suspect there is more fun to be had trying<br />
to defend the Western bank with a serious<br />
force, and if there is any justice a greater<br />
chance of a win.<br />
<strong>The</strong> attacker has a harder job to do,<br />
breaking through a serious force and gaining<br />
the far bank in the face of strong opposition.<br />
This becomes extremely difficult for the<br />
French if all the tanks are destroyed, extremely<br />
difficult for the German if none are!<br />
Perhaps the key to this scenario is terrain,<br />
not so much line of sight as manoeuvre<br />
to place yourself in higher TEM terrain than<br />
your opponent to give the best chance of<br />
winning a fire fight.<br />
This is not a bad choice for Saturday<br />
afternoon, and is the only one that doesn’t<br />
include Air support.<br />
A104 After <strong>The</strong> Action<br />
Quite a few people played this scenario<br />
at the Tournament with a fair few German<br />
defenders opting for setting up some<br />
forces on the Western bank. If the French<br />
attack was fast paced and driven forward<br />
with vigour they would win. Most games I<br />
heard of where pretty close with exciting<br />
finales.<br />
Again another balanced scenario popular<br />
with the Tournament players credit to<br />
the organisers.<br />
J9 A Stiff Fight<br />
This scenario appeared in the first ASL<br />
Journal, alongside some blinding articles on<br />
Smoke, (or rather SMOKE), tin can tanks<br />
and jungle fighting. <strong>The</strong> jungle article is worth<br />
a read before playing “A Stiff Fight”, as are<br />
parts of Chapter G and of course the chap-<br />
9
ter H notes for the CHI-HA.<br />
As the Japanese are on the offensive<br />
this isn’t a hard core PTO battle with masses<br />
of hidden units and fortifications’. Here we<br />
have a delaying action fighting against an armour<br />
supported probe. Part of the attraction<br />
is the British OB consists of Ghurkhas’,<br />
troops with an international reputation which<br />
is well deserved.<br />
J9 British Set Up<br />
For the Ghurkhas’ to win they must<br />
have an unbroken squad or half squad on or<br />
adjacent to a road hex between T5 and CC6.<br />
Take note of Special rule 2 which explains<br />
the Y10 to X6 road depiction is a path. <strong>The</strong><br />
good news is this is a wide strip of territory<br />
that is not easy for the Japanese to defend.<br />
<strong>The</strong> Victory conditions also leave some scope<br />
for you to claim victory if a unit in melee or<br />
close combat, or even a berserk unit occupies<br />
a road. If the Japs take a Ghurkha prisoner<br />
in close combat (why?), try claiming<br />
Victory if the MMC ends up on or adjacent<br />
to the road.<br />
Ghurkhas’ are excellent troops. As<br />
British Elite troops they do not cower which<br />
is an underrated strength. Cowering occurs<br />
for troops firing without Leadership on doubles,<br />
that is for every sixth attack. This degrades<br />
the attack made, and some of the time<br />
stops subsequent first fire. Not cowering<br />
raises the strength of a British force. An ELR<br />
or five, plus Elite morale build on a good<br />
start, a smoke exponent of two are not bad.<br />
Better yet the Ghurkhas’ excel at close combat.<br />
If they are the ATTACKER or ambush<br />
the Japs they may declare close combat and<br />
are entitled to a -1 modifier for this. As commandos<br />
the Ghurkhas’ are stealthy always<br />
useful in Jungle terrain. Legendary fighters<br />
the Ghurkhas’ rarely surrender even if encircled<br />
or surrounded, instead they will either<br />
low crawl or be eliminated. In “A stiff fight”<br />
you start with three 6-4-8 squads and another<br />
four 4-5-8s’. <strong>The</strong> former have a fire<br />
power advantage the latter are longer ranged,<br />
both are good troops. Leadership is not too<br />
bad an 8-0 and 7-0 Leaders nothing too special,<br />
but the good news is you do get two<br />
Leaders which is of course better than just<br />
one. <strong>The</strong> support weapons allocation is good,<br />
four bren guns and a pair of Boys Anti Tank<br />
rifles. <strong>The</strong> Bren was a well respected weapon<br />
in the British Army, with a full magazine it<br />
was a heavy weapon but could and occasionally<br />
was fired single handed, that is using<br />
just one hand. It attacks with a fire power<br />
of two and rate. This early in the war a Bren<br />
can serve as an Anti Tank weapon. Not a<br />
good idea when Infantry targets abound, but<br />
if suddenly adjacent to a tank, a shot has a<br />
good chance of a hit and will pit a to kill of<br />
four increased to five or six by range against<br />
armour factors or four or less. <strong>The</strong> Boys<br />
Anti Tank rifle is remembered by everyone<br />
who fired it! Weighing 36lbs compared to<br />
about 22lbs for a Bren it was a difficult<br />
weapon to shoot. It remained in service long<br />
after the war, and my Dad fired one on a rifle<br />
range during his National Service in the<br />
1950s, in part to improve marksmanship but<br />
it also served to make the Bren seem lighter<br />
and Lee Enfield rifle easier to shoot. During<br />
WW2 it served as an early war anti tank<br />
weapon. A basic to kill of six requires some<br />
optimism against the frontal armour of a<br />
CHI-HA which will be three or four AF.<br />
Range helps but barring a critical hit your to<br />
kill roll will be five at best, with a possible<br />
shock roll on a six. Every second or third<br />
shot should be effective, so to take out all<br />
three tanks you need at least three shots but<br />
probably something more like eight or nine<br />
hits. <strong>The</strong> Boys can be used against Infantry,<br />
it was not designed for target shooting but<br />
any hit would disable a man, and near misses<br />
tended to demoralise anyone targeted.<br />
Aside from Infantry, Leaders and support<br />
weapons, you start the game with four<br />
wire counters. A restriction under scenario<br />
rule three limits the placement of wire<br />
counters on roads to two. This is a bit inconvenient<br />
as the wire not only slows Infantry<br />
it can bog tanks. <strong>The</strong> CHI-HA is awarded<br />
low ground pressure in the game so a DR or<br />
ten or more will result in bog. A chain of four<br />
Wire hexes could be expected to slow or disrupt<br />
tank movement, but you are restricted<br />
to two hexes or wire on roads. Even so the<br />
wire you do receive is very useful. As PTO<br />
is in effect wire is not always revealed until<br />
its hex is entered or you expend extra movement<br />
points to enter or leave a wire hex. You<br />
have the option of recording wire using HIP<br />
but only in Jungle Kunai or Bamboo hexes.<br />
This can be helpful for slowing an enemies<br />
attack.<br />
<strong>The</strong> enemy does need slowing! Eighth<br />
enemy squads are attacking split equally<br />
between Elite and 1st Line troops. <strong>The</strong>y are<br />
Stealthy and can use smoke grenades when<br />
full strength. Unfortunately Elite squads have<br />
a slim chance of WP which is very useful for<br />
stripping concealment and occasionally<br />
breaking or pinning units. In support the Japs<br />
have three LMGs, all B11 weapons but effective.<br />
<strong>The</strong> enemy has a single 50mm Mortar,<br />
an asset in Jungle fighting. <strong>The</strong> Mortar<br />
has Smoke and WP ammunition, and its HE<br />
rounds are effective airbursting against troops<br />
in Jungle or Bamboo. Remind your opponent<br />
he cannot fire the Mortar in Dense Jungle<br />
or Jungle road hexes. More support comes<br />
from a pair of MMG, complete with crews.<br />
<strong>The</strong> MMGs are not ideal on the offensive in<br />
Jungle, but your opponent will find uses for<br />
them. Probably more worrying are the Jap<br />
Leaders, a 9-1 and 9-0. With Leaders Japanese<br />
troops can move faster, and can be more<br />
resistant to fire combat. With no casualty<br />
cap in place the enemy will be unconcerned<br />
with the fate of any of his units. watch out<br />
for Banzai attacks. Even a Jap SMC can<br />
launch one. In Jungle terrain you should expect<br />
some attacks, very effective when you<br />
are pinned, or covered in smoke as it almost<br />
guarantees hand to hand combat.<br />
<strong>The</strong> remaining Japanese units are<br />
M97A or CHI-HAs. A very reasonable early<br />
war tank. It is fast with 14 movement points,<br />
reasonable armour, a smoke discharger and a<br />
decent gun for Infantry support which benefits<br />
from rate. A slight problem is the slow<br />
turret, a real handicap in more open terrain,<br />
less of an issue in this scenario. <strong>The</strong> lack of a<br />
radio is serious and has a big impact on play.<br />
CHI-HA tanks must enter as a platoon, and<br />
if wishing to move independently in subsequent<br />
turns must pass an NTC with a morale<br />
of 8. <strong>The</strong> BMG armament is not expected<br />
to do much damage, the 57mm Gun<br />
is a deal more dangerous. At short range with<br />
acquisition it can wipe out your units very<br />
quickly. Against the AFVs you do have the<br />
ATRs and perhaps the Brens, if you have to<br />
close combat can do the job. Ideally you do<br />
not want to lose units taking out the tanks if<br />
you can possibly avoid it.<br />
With overcast conditions in play it<br />
might start to rain. Good news as it restricts<br />
the use of Infantry smoke or the CHI-HAs<br />
smoke dischargers. With heavy rain a +1 LV<br />
hindrance applies to short range fire attacks<br />
which generally hinders defence.<br />
<strong>The</strong>re is a lot of PTO terrain present,<br />
swamp, Kunai, Bamboo and Jungle, with a<br />
single road, a few paths, ponds, and open<br />
ground. <strong>The</strong> Jungle is dense which confers a<br />
+2 TEM except vs. the Mortar where air<br />
burst applies. In Jungle road hexes normal<br />
stacking limits apply but without a road<br />
stacking is limited down to two squads. Even<br />
during daylight you can stray in interior Jungle<br />
hexes. For stealthy troops the chances<br />
are slim, perhaps worth remembering if Japanese<br />
second line or conscript units appear.<br />
<strong>The</strong>re is a rule G.3 that restricts fire groups<br />
in Jungle, Kunai, Swamp or Bamboo. Pretty<br />
much units in the restricted terrain can’t form<br />
Fire groups with other troops in restricted<br />
terrain. This can be a big problem when you<br />
are trying to take out troops in high TEM<br />
terrain but not a massive inconvenience for a<br />
short range fire fight. One rule that does hurt<br />
Dense Jungle is inherent terrain so hexsides<br />
have the potential to restrict line of sight.<br />
This can be very annoying and you must be<br />
careful when checking line of sight.<br />
Kunai also imposes fire group restrictions.<br />
It is a lot like grain, but always in<br />
season and with a greater effect on move-<br />
10 VIEW FROM
ment. Other than the small chance of straying<br />
it is as quick to move through Kunai than<br />
Jungle. Other considerations are it doesn’t<br />
cause air burst, and has a TEM of zero. <strong>The</strong><br />
interesting Kunai on the map is mostly North<br />
or Row Y. <strong>The</strong>re is a patch in O6, O7 that<br />
assists Japanese entry and two other swathes<br />
further South in U9, V9 and W3, W4, X2.<br />
Both of these areas can be exploited to catch<br />
the Japanese in low TEM cover as they<br />
move south.<br />
Bamboo is more difficult to enter. It<br />
can cause vehicles to bog and can only be<br />
entered by minimum move, low crawl of<br />
advance vs Difficult terrain. Against IFT attacks<br />
it offers a +1 TEM, but the tank gun<br />
will benefit from a -1 TEM due to the effects<br />
of explosives on bamboo. Mortar fire<br />
will qualify for airbursts but are still resolved<br />
with a -1 TEM. Bamboo is subject to a two<br />
squad stacking limit, and cannot form multi<br />
hex firegroups with other restricted terrain<br />
types. Most of the interesting Bamboo is<br />
north of row Y. <strong>The</strong>re is a Patch in S8 that<br />
cannot be overrun by tanks or easily advanced<br />
into on turn one. Further East in U3<br />
is another clump, perhaps less useful for a<br />
defensive position but serves to slow enemy<br />
movement. A very interesting cluster of<br />
Bamboo covers Y3, Y4 and Z3 with paths<br />
through Y3 and Z3. As long as a Tank Gun<br />
or Mortar do not start plastering the area<br />
with HE this can be a touch position to capture.<br />
Chances are the Japs would seek to use<br />
firepower to achieve that.<br />
Swamp is a lot like Marsh with big<br />
trees stuck in it. Again there are restrictions<br />
on firegroups. <strong>The</strong> CHI-HAs are prohibited<br />
entry and must check for bog if moving adjacent.<br />
Infantry can move through swamp.<br />
This is slow but very effective if it gets you<br />
somewhere important that the enemy has<br />
not defended.<br />
<strong>The</strong>re are a number of small ponds<br />
dotted around. Obstacles to movement they<br />
do create some line of sight opportunities<br />
but not many! Palm trees are a lot like in<br />
season Orchards, inherent terrain and neither<br />
good nor bad. <strong>The</strong>y do allow easy movement<br />
for tanks and Infantry can flit through<br />
them with some protection from FFMO at<br />
least.<br />
Swamp, bog hexes adjacent to swamp,<br />
jungle, bamboo and ponds channel the enemy<br />
tanks. <strong>The</strong> enemy enters along the northern<br />
edge, but cannot drive through the pond<br />
in P2. Entry east of P3 is frustrated by jungle<br />
and swamp. It can be done but units will<br />
have to move towards P4 to have any real<br />
impact on the game unless driving through<br />
jungle is a big part of the Jap plan. Further<br />
west, well lots of good spots to enter, very<br />
few lead south. Swamp in G10 and the surrounding<br />
marsh threaten bog checks. Sooner<br />
THE TRENCHES<br />
or later any tank planning on moving south<br />
will likely pass through R5. If it doesn’t well<br />
there is a prospect of a tank becoming bogged<br />
or even immobilised moving past swamp or<br />
through jungle or bamboo. Most tanks will<br />
be driven down the P5 to GG6 road. Does<br />
this help a lot? Well perhaps not. <strong>The</strong> ATR<br />
are not able to bore sight and will not hit<br />
harder just because the route of the tanks is<br />
strongly suspected. A bigger worry is hordes<br />
of Japanese Infantry quite like their tanks<br />
and may push south ahead of them pushing<br />
you back further into the jungle.<br />
Terrain is pretty important in this scenario.<br />
A good look at Chapter G before and<br />
during play will help. You are on your way<br />
to better performance if you get interested<br />
in the Map. Start with the obvious stuff like<br />
where the road is. <strong>The</strong>n look for areas impassable<br />
to tanks or difficult for tanks. Next<br />
try to find a series of defensive positions to<br />
oppose Japanese entry, and the IJAs subsequent<br />
advance. After that you need fighting<br />
positions to complete the middle part of the<br />
game and for a finale spots from which to<br />
contest road control.<br />
None of the above is easy to do, a<br />
certain amount depends on your opponents<br />
planned advance and a bit of luck will play a<br />
part. In organising your defence I think there<br />
is a strong case for establishing a front line<br />
on turn one and seeking to oppose Japanese<br />
entry. OK maybe I’m wrong and keeping<br />
some troops back to dig foxholes is a better<br />
bet but I can’t see it.<br />
You can start on or South of row T.<br />
Useful locations are Jungle hexes T5, T6, T8<br />
and T9 that confer concealment and give +2<br />
TEM protection. T5 is a bit vulnerable to<br />
overrun but not excessively. Palm tree in T3<br />
and T4 are not ideal but worth a look if you<br />
want to spread across the board a bit. <strong>The</strong>re<br />
is a chance of Jap Infantry heading for the<br />
S1,S2,T1 marsh a squad in U2 makes this<br />
less attractive but weakens your opposition<br />
to Turn one entry elsewhere. You can use<br />
wire to pad out the defences. A wire counter<br />
in T5, and/or T9 with your troops under it,<br />
stop the Japanese gaining use of the Path or<br />
road they contain and might just bog a tank<br />
or frustrate a Banzaing Jap. Unfortunately<br />
once place wire cannot be moved and you<br />
are limited to placement in two road hexes<br />
maximum.<br />
My best guess is the Japs will attack<br />
with the armour supported by most of the<br />
Infantry down the P5 road. A secondary attack<br />
may be launched towards T8,T9 but I<br />
could be wrong! Try to meet tanks with the<br />
ATRs, Infantry with hefty attacks catching<br />
the Japs in stacks and benefiting from low<br />
TEM or hindrances. You might bag a tank<br />
and maybe step reduce a few Infantry for<br />
little or no loss yourself. Not a bad start.<br />
Next turn is harder. Stay and fight or<br />
fall back or a bit of both. If you fight decide<br />
pick your targets carefully. Hit the tanks if<br />
you can and consider moving units that have<br />
been acquired or face massed IFT attacks.<br />
Even holding the front line you can manoeuvre<br />
to exploit lines of sight and limit the<br />
number of enemy troops you fight.<br />
Making use of skulking is part of the<br />
game system. A bit difficult, well maybe not<br />
possible in wire hexes but elsewhere practical.<br />
A full blooded withdrawal may be in order<br />
if you have been unlucky in a fire fight or<br />
it suits your style of play. Again you have<br />
options falling back as far as you can or just<br />
enough to force the Japs to use CX to catch<br />
you. When falling back try to exploit the<br />
Kunai patches seeking to catch the enemy<br />
moving through them at speed and unconcealed<br />
or a first and subsequent fire attack at<br />
-1 for FFNAM. <strong>The</strong> road is jolly important.<br />
If the Japs control it they can split your<br />
remaining troops in two and concentrate<br />
against either flank in turn to wipe out your<br />
small force. Try to discourage movement<br />
down the road, stop or discourage tanks with<br />
the ATR, Infantry with 6-4-8 squads.<br />
Which all sounds very easy. Main<br />
problem is your force is small just Seven<br />
squads. Deploying can help a bit later in the<br />
game but maybe not first thing. If your front<br />
becomes extended gaps will appear and there<br />
are enough Japs about to make a small gap<br />
bigger.<br />
Don’t be too afraid of melee, if you<br />
are likely to ambush you have an advantage<br />
and if you ice a couple of squads early in the<br />
game suddenly your numerical problems are<br />
alleviated.<br />
<strong>The</strong> opening turn should be fun. the<br />
next couple of turns will go your way some<br />
of the time. As you enter the closing stages<br />
of the game the fight is harder. <strong>The</strong> wire will<br />
have been found. You will have suffered casualties<br />
and the Japanese will be right in the<br />
ruddy way of anything you want to do!<br />
If you are going to win it must happen<br />
on turn six. Gaining control of one or more<br />
road or adjacent to road hexes then holding<br />
on like grim death for longer than your opponent<br />
want you to! Here the motto of the<br />
Brigade of Gurkhas can help; “Kaphar hunnu<br />
bhanda marnu ramro” which is Nepalese<br />
for “It is better to die than live a coward. It<br />
could all come down to a final turn of close<br />
combat. If you are held in melee and have a<br />
squad on or adjacent to the road you win. If<br />
you lose, well it must have been close shake<br />
hands and give your opponent an opportunity<br />
to agree.<br />
J9 Japanese Set up and Attack<br />
<strong>The</strong>re are two ways to win. <strong>The</strong> first<br />
is to control the T5 to CC6 road and all hexes<br />
11
adjacent to it at the game end. An alternative<br />
is to eliminate all the Gurkha forces. Worth<br />
noting to claim victory the enemy need only<br />
be unbroken, so a berserk squad can earn a<br />
victory as can one in melee.<br />
<strong>The</strong> first factor to consider is the enemy<br />
forces. Gurkhas are bad news. Against<br />
most troops when your troops advance into<br />
combat in ambush terrain they have the advantage<br />
of being stealthy, leading to an ambush<br />
and often hand to hand with the additional<br />
-1 modifier Japanese troops attract.<br />
With Hand to Hand being so lethal you’re<br />
likely to ice an enemy unit for no loss.<br />
Against Gurkhas the picture changes, they<br />
are also stealthy, less prone to ambush, and<br />
if they turn the tables able to attack in Hand<br />
to Hand with their own -1 modifier. With<br />
high Gurkha fire power a kill is highly probable<br />
and your return fire by no means certain<br />
to kill. Close combat and hand to hand remain<br />
part of the plan but can not be used as<br />
your primary tactics.<br />
British forces are almost equal in numbers<br />
to your own. Seven Elite squads, four<br />
4-5-8s’, and three very tough 6-4-8 squads.<br />
<strong>The</strong>y are elite, stealthy, possess smoke, and<br />
have an underlined ELR of five. Further they<br />
do not disrupt, almost never surrender and<br />
just love Hand to Hand combat. Like all British<br />
Elite and 1st line troops they do not<br />
cower. In support weapons, well they do<br />
rather well. Four LMGs and a pair of ATR.<br />
Against your tanks the LMG is ineffective<br />
at battle ranges. <strong>The</strong> ATR can just about kill<br />
a tank, with ridiculous luck it could even<br />
burn! Leading the Gurkhas’ are a pair of Leaders,<br />
nothing special just an 8-0 and a 7-0.<br />
Both Leaders can happily man ATRs . <strong>The</strong><br />
rest of the British OB is comprised of four<br />
Wire Counters. <strong>The</strong>se slow Infantry, with a<br />
marginal impact on tanks.<br />
<strong>The</strong> enemy force has plenty of<br />
strengths, powerful in a fire fight, very tough<br />
in Hand to Hand or close combat. It does<br />
have two weaknesses though. For openers it<br />
is a small force, seven squads enough to open<br />
the game but spread painfully thin when<br />
casualties begin to mount. <strong>The</strong> second weakness<br />
might dissipate as soon as you enter<br />
the board, but you do start the game with<br />
the initiative.<br />
As you set up you will get some clues<br />
as to the enemies dispositions. Most players<br />
will start some units close to the treeline<br />
ready to contest your entry on turn one. In<br />
PTO the wire can be hidden in certain terrain<br />
until you find it by searching or enter the<br />
hex. Your opponent might gift you with the<br />
knowledge by setting up the wire on board.<br />
Make use of this if it happens, but tell the<br />
guy after the game that the option to hide<br />
the wire existed. <strong>The</strong> rest of the British OB<br />
will be concealed. Look for single counter<br />
stacks covered with in one concealment counter<br />
these cannot contain either an ATR or<br />
LMG. Count stacks to determine if the enemy<br />
has deployed a squad and try to figure<br />
roughly what is where. This is very difficult<br />
as the Brits start with six support weapons<br />
one for each squad with no real way of you<br />
knowing whats an ATR or LMG. That said<br />
you can see if the enemy has concentrated in<br />
one area, is spread across the board, or is<br />
patiently waiting for you to move into the<br />
Jungle.<br />
Your own troops are a mix of Infantry<br />
and Armour. Four Elite and four 1st Line<br />
squads have a slight numerical edge over the<br />
Gurkhas’. Alright it’s just a squad, and if<br />
you are being critical British raw firepower<br />
is 2 factor stronger. An ELR of four is good<br />
enough, though obviously not as good as the<br />
Brits. In a stand up fight the Infantry forces<br />
of both sides are not quiet equal, the Gurkhas<br />
probably have an edge. Japanese combat<br />
power is boosted by a pair of Leaders,<br />
three LMG, and A 50mm Mortar. More<br />
firepower comes from two MMG and Infantry<br />
crews. <strong>The</strong> 50mm Mortar is extremely<br />
useful. If the rain stays off you can place<br />
both White Phosphorous and Smoke rounds<br />
crucial for a swift advance. In Jungle actions<br />
50mm Mortars are idea for pushing troops<br />
back behind the treeline for fear of air bursts<br />
and a steady string of hits. Its a judgement<br />
call whether to place the 9-1 Leader with the<br />
MMGs or Mortar. Remember your full<br />
strength squads have inherent smoke exponents.<br />
<strong>The</strong> Elite squads can even roll for WP<br />
helpful when it arrives.<br />
On their own the Infantry would<br />
struggle. Fortunately you are commanding<br />
three CHI-HA Medium tanks. Compared to<br />
later war armour the tanks are undergunned,<br />
slow and poorly protected, they have no<br />
radios and have slow turrets. All these points<br />
are valid but the CHI-HAs are the best tanks<br />
on the board, by virtue of being the only<br />
ones in play. <strong>The</strong> gun has some whack against<br />
Infantry. Any regular hits attack on the 6<br />
IFT Table with zero TEM, a critical bites<br />
harder with reverse TEM but the chances<br />
are slim until you gain acquisition. Any Gun<br />
with rate can pull a few surprises, the 57mm<br />
Gun has ROF 1 so expect the odd second<br />
shot if you have several tanks firing for a<br />
couple of turns. <strong>The</strong> CHI-HA has two MGs<br />
the rear turret gun might not be used at all,<br />
but the bow MG may be. It can fire at a<br />
different target to the gun. A 2 IFT attack is<br />
way down the table, TEM or hindrances can<br />
reduce effectiveness. Against a broken unit<br />
keeping them subject to desperation morale<br />
is a result worth a burst.<br />
<strong>The</strong> Tank can fight at point blank range<br />
or overrun. This is very tempting and if successful<br />
would reduce the enemy forces by a<br />
squad or half squad. In small games this is a<br />
result. I would happily exchange a CHI-HA<br />
for a 6-4-8 or 4-5-8 Gurkha squad. Especially<br />
if it open a gap for my troops to exploit<br />
and I was still left with one or two<br />
other tanks.<br />
<strong>The</strong>re might be a use for vehicular<br />
smoke dischargers. With SD5 a DR of five<br />
or less is needed for placement. This drops<br />
to four if buttoned up. <strong>The</strong> ASLRB gives<br />
good coverage, key things to remember it<br />
must be the first weapon you fire, can be<br />
triggered or placed in response to enemy<br />
movement and doesn’t work in rain! A valuable<br />
use for smoke could be when moving<br />
over wire. If the wire is cleared by the first<br />
tank to move onto it fine, but if you are<br />
bogged smoke can work defensively. Later it<br />
may help you advance Infantry through the<br />
hex with better protection, smoke and say<br />
dense Jungle really adds serious TEM. With<br />
14 MP even using platoon movement trying<br />
for Smoke is not going to slow you down<br />
too much.<br />
<strong>The</strong> Tanks can do overruns. A pretty<br />
basic 6 IFT is not devastating or particularly<br />
bright vs an unbroken squad with an ATR.<br />
Picking off a lone Leader or broken MMC is<br />
a better target.<br />
<strong>The</strong> tanks are useful. Remember there<br />
is no casualty cap so take some chances with<br />
them. If you can exchange each tank for a<br />
squad, that would leave you outnumbering<br />
the Gurkhas two to one.<br />
I’ve gone into some detail about the<br />
terrain present and features of board 37 in<br />
the Gurkhas scenario analysis above. Chapter<br />
G is essential reading and I’ll only mention<br />
key details here. Dense Jungle, Bamboo,<br />
and Palm Trees are inherent terrain, this<br />
has a tremendous effect on line of sight. At<br />
times it will help, at times it will not. Everyone<br />
makes mistakes occasionally so don’t<br />
dwell on yours. That said look for hexsides<br />
that block enemy LOS when you are moving.<br />
A fire attack blocked by hexside doesn’t<br />
even leave residual fire and is effectively lost.<br />
Exploit it when it happens but don’t make a<br />
big thing of it.<br />
<strong>The</strong> ultimate aim is to kill or break all<br />
the Gurkhas or at least keep them out of the<br />
Victory Area. First you must move onto the<br />
board, engage the enemy, before chasing down<br />
his units to earn Victory. enemy set up has<br />
some influence on how you can do this. in<br />
most games concealed enemy units will oppose<br />
you from the treeline on row T. Very<br />
rarely they won’t, and your first move will<br />
be a steady move forwards. Moving as stacks<br />
may be beneficial with the aim of getting as<br />
far down the road as is safe to do so. This is<br />
a good start to the game, and has strong prospects<br />
for a win if you keep up the pace of<br />
the attack.<br />
12 VIEW FROM
Nearly as good are a series of small<br />
isolated positions. Tackle one or two at a<br />
time and before long you will have destroyed<br />
a sizeable chunk of the enemy forces for<br />
small loss to yourself. If done expertly small<br />
defensive positions can lead to a Gurkha win,<br />
although some delay or bad luck on your<br />
part is needed.<br />
Another unlikely defence comprises a<br />
hedgehog around BB3 or there abouts. Will<br />
work fine for the first two or three turns not<br />
so well thereafter!<br />
My own view is the enemies best defence<br />
is to oppose your entry through open<br />
ground, Kunai or Palm Grove whilst benefiting<br />
from Dense Jungle cover. To overcome<br />
such a defence you need to concentrate<br />
against part of the line and drive through.<br />
Depending on specific enemy set up the best<br />
spot to assault is likely to be around T5. By<br />
moving down the road you can get pretty<br />
close with the armour and mass infantry in<br />
support. Expect some pain as you enter, return<br />
the favour if he stays to oppose you.<br />
Once he retreats you are both in Dense<br />
Jungle, both receiving +2 TEM for IFT attacks<br />
but you have the edge with Tanks,<br />
MMGs’ and the Mortar. By applying steady<br />
pressure you can drive the enemy back,<br />
breaking or killing units as you go. As long as<br />
your fight is supported by armour and massed<br />
support weapons you will be degrading the<br />
enemy faster than he is attriting you. This<br />
can go on for a while, but suddenly becomes<br />
a bit one sided when your slower losses lead<br />
to the Gurkhas being worn down to two or<br />
three squad equivalents fighting bravely and<br />
either struggling under the weight of support<br />
weapons or struggling to recover them.<br />
Close combat has its place, against pinned<br />
or otherwise disadvantaged units, but don’t<br />
rush in to it if you are already winning a fire<br />
fight.<br />
As the game approaches its finale most<br />
if not all of your tanks will be disabled, destroyed<br />
or recalled, your force will be much<br />
smaller, one or both Leaders dead or at least<br />
wounded. enemy forces will have given the<br />
stiff fight that gives the scenario its name<br />
but become much reduced in the process.<br />
You still have more to do. A lone<br />
MMC in the Victory area earns the Gurkhas<br />
a win. You must seek out and neutralise any<br />
troops still in the game. Sometimes you’ll<br />
do a blinding job and not have too much to<br />
chase down. If the attack has been flawed or<br />
unlucky the closing turns will be more<br />
fraught.<br />
A few loose ends. Some nasty things<br />
will happen. Advancing onto hidden barbed<br />
wire can be fatal. A bogged tank stuck in<br />
Jungle, adjacent to a Swamp or with wire<br />
wrapped round its tracks slows down platoon<br />
movement and is bypassed if subse-<br />
THE TRENCHES<br />
quently immobilised. Crews can and do bail<br />
out use them to man the mortar or LMGs,<br />
look for wire, or draw enemy fire, scrounge a<br />
LMG if appropriate, little ploys like that<br />
can add up to a win in a close game. Keep the<br />
sniper busy, on turn five a broken squad is<br />
more useful than a dead Leader. Prioritise<br />
your targets with a thought to the mission.<br />
Use captured weapons, limit the time you<br />
spend trying to find them though! Occasionally<br />
Banzai is the way to go, not often, and<br />
not all the time. It can work well in conjunction<br />
with smoke if you get a chance.<br />
Not really a loose end more of an important<br />
tactic. Encircle and infiltrate. If you<br />
can flank a position enemy units can become<br />
encircled. As Gurkhas they will not surrender,<br />
they will still suffer movement and morale<br />
penalties and be eliminated if unable to<br />
rout. Infiltration is similar, seeking to prevent<br />
rout and Leading to encirclement if used<br />
for fire attacks.<br />
I’ve not mentioned platoons or how<br />
to split the forces yet. Japs are a bit like<br />
Finns able to function tolerably well without<br />
Leadership. <strong>The</strong> two MMGs work well<br />
as a team in the same hex or close together<br />
but protected by other units, say a tank or<br />
squad. <strong>The</strong> Leaders are there to speed up<br />
movement, rally troops when broken half<br />
squads appear and in the case of the 9-1<br />
direct fire combat.<br />
<strong>The</strong> tanks are important for a win.<br />
Not so much for their fighting qualities so<br />
much as to address your shortage of Infantry!<br />
<strong>The</strong> CHI-HAs’ MG and 57mm gun are<br />
effective, the armour is resistant to enemy<br />
attacks, but if you were picking a force from<br />
scratch more infantry would be preferable<br />
to tanks in this very close terrain. That said<br />
you must work effectively with what you<br />
have got.<br />
Expect a tough fight. <strong>The</strong> Gurkhas are<br />
excellent troops and here they are reasonably<br />
well equipped. If you can co-ordinate<br />
the tanks Infantry and heavy weapons teams<br />
you deserve a win. If you attack with units<br />
in isolation you will need more luck to do<br />
the job.<br />
J9 Conclusion<br />
Gurkhas make this scenario much more<br />
interesting. <strong>The</strong>ir close combat abilities and<br />
stealth argue against Japanese players’ gleefully<br />
entering close combat whilst high<br />
firepower and immunity to cowering may<br />
argue otherwise. <strong>The</strong> Japanese will need to<br />
exploit their armour to create winning<br />
chances. This can mean trading a tank for a<br />
squad, flattening wire or simply persuading<br />
Gurkhas’ to move back a hex.<br />
In any scenario luck plays a part. A<br />
few good rolls could disable or destroy two<br />
or even three tanks very quickly. With simi-<br />
lar luck though Japanese troops would be<br />
shooting Gurkha stacks to bits or coming<br />
out on top in close combat. If you roll low<br />
enough, often enough you will either win or<br />
in my case stay in the game longer against<br />
much better opposition! To get the best out<br />
of “A Stiff Fight” you need to exploit good<br />
luck when it happens, and not be too discouraged<br />
if to comes your way.<br />
I think this scenario is a good choice<br />
for round three, it has a high fun quotient<br />
and might be the quickest playing of the<br />
three scenarios on offer. Both sides have<br />
winning chances. I’m drawn to the Gurkhas<br />
in part for their odds of winning, in part<br />
because I think they are excellent troops.<br />
J9 After the Action.<br />
Tried to avoid this scenario as it can<br />
end up a bit cluttered along the road. Several<br />
folk played it though and didn’t hear any<br />
grumbling.<br />
ASL FOR SALE<br />
Item Price<br />
Yanks *** £15<br />
Partisan *** £10<br />
<strong>The</strong> last Hurrah ** £10<br />
Gung Ho * £35<br />
KGP 2 * £29<br />
ASL annual 92 * £10<br />
ASL Rulebook *** £10<br />
Guerra Civil * £29<br />
Operation Compass/Wavells 30,000* £25<br />
Carnage at Cassino * £18<br />
Arnhem the 3 rd Bridge * £20<br />
Ruweisat Ridge * £20<br />
Squad Leader *** £15<br />
GI: Anvil Of Victory *** £15<br />
* Mint counter sheets intact and all maps overlays<br />
in perfect condition.<br />
** Good condition.<br />
*** Used.<br />
Prices do not include postage.<br />
Contact Paul Jacobs, 14, rue de Delemont, Saint<br />
Louis, 68300, France. Tel 0033.389.67.98.94<br />
or email pauljacobs@wanadoo.fr.<br />
Ω<br />
13
LEADERSHIP LEADERSHIP AMONGST AMONGST THE THE SCENARIOS<br />
SCENARIOS<br />
As any Squad that’s ever had to fight<br />
for me will tell you, I have a great Leadership<br />
style – follow me all the way into the<br />
casualty pool! So this article isn’t about glorious<br />
tactics and inspired small unit leadership<br />
to help you win scenarios. Sorry. More<br />
mundane stuff here chaps about relative distribution<br />
of Leaders in our scenarios. Who’s<br />
ready to go over the top with some statistics?<br />
This list was developed in order to<br />
convert non-ASL (ie ATS) scenarios into an<br />
ASL format, and is actually a much bigger<br />
spreadsheet than what is presented here. I<br />
wanted to be able, for a given number of<br />
leaders in a scenario, to define the quality of<br />
leaders that would be present. I also wanted<br />
to be able to make some distinction between<br />
nationalities.<br />
This could have been achieved by using<br />
the LG# within the ASL DYO system,<br />
but it was clear from a quick scan of scenarios<br />
that force leadership didn’t match too<br />
well that model. <strong>The</strong>refore what I did was<br />
take all the official scenarios (ie with modules,<br />
General, Journal etc) and record the distribution<br />
of leaders amongst those scenarios.<br />
At this point I stopped and saw whether I<br />
had a reasonable output, or whether I needed<br />
to carry on into 3rd party products, but decided<br />
that it was OK.<br />
<strong>The</strong> results were quite interesting in<br />
how varied they were - for example there are<br />
17 different examples of ways in which just<br />
two leaders were provided (7-0 and 8-0, two<br />
8-0s, 8-0 and 8-1, 7-0 and 9-2 etc).<br />
I then screened the output in each<br />
group to provide a small number of more<br />
common leadership pairings, and then assessed<br />
each of the major nationalities against<br />
these. One of the outputs was a “Nationality<br />
Start Point”. This represents the most<br />
common leadership group for that nationality,<br />
and thus the start point for determining<br />
quality. <strong>The</strong>n, if you want a better force, go<br />
down the table one or two rows. Similarly, if<br />
you want a worse force, go up one or two<br />
rows.<br />
2 Leaders<br />
Leaders Nationality Start Point<br />
7-0, 8-1<br />
8-0, 8-1 Sov<br />
8-0, 9-1 Ger, US, Br<br />
8-1, 9-1<br />
8-1, 9-2<br />
<strong>The</strong> 5 groups shown account for 68% of all<br />
Chris Riches<br />
2-leader groupings, of a total of 17 different<br />
types.<br />
3 Leaders<br />
Leaders Nationality Start Point<br />
7-0, 8-0, 8-1<br />
7-0, 8-0, 9-1<br />
7-0, 8-1, 9-1 Sov, US<br />
8-0, 8-1, 9-1 Ger, Br<br />
8-0, 8-1, 9-2<br />
8-0, 9-1, 9-2<br />
<strong>The</strong> 6 groups shown account for 64% of all<br />
3-leader groupings, of a total of 31 different<br />
types.<br />
4 Leaders<br />
Leaders Nationality Start Point<br />
7-0, 8-0, 8-0, 9-1<br />
7-0, 8-0, 8-1, 9-1 Sov<br />
8-0, 8-0, 8-1, 9-1 Br<br />
7-0, 8-0, 8-1, 9-2 Ger, US<br />
8-0, 8-1, 9-1, 10-2<br />
<strong>The</strong> 5 groups shown account for 56% of all<br />
4-leader groupings, of a total of 34 different<br />
types.<br />
5 Leaders<br />
Leaders Nationality Start Point<br />
7-0, 8-0, 8-0, 8-1, 9-1<br />
7-0, 8-0, 8-0, 8-1, 9-2 Sov, US<br />
8-0, 8-0, 8-1, 8-1, 9-1 Ger<br />
8-0, 8-0, 8-1, 9-1, 9-2 Br<br />
8-0, 8-1, 8-1, 9-1, 9-2<br />
<strong>The</strong> 5 groups shown account for 55% of all<br />
5-leader groupings, of a total of 23 different<br />
types. <strong>The</strong> 5 leader data set was the one, not<br />
surprisingly, with fewest number of entries<br />
and the flattest distribution.<br />
General Notes<br />
<strong>The</strong> data is of course dependent on<br />
the type of scenario analysed, and so with<br />
the British represented by Pegasus Bridge<br />
and A BridgeToo Far, their quality might<br />
possibly be higher than “normal”.<br />
Other comments<br />
Commissars were replaced by their<br />
non-Commissar equivalent.<br />
6+1 Leaders were very few, and have<br />
been treated as 7-0.<br />
10-3 Leaders again are rare and have<br />
been combined with 10-2.<br />
A few scenarios had 3 of same type of<br />
Leader, and these were screened out as abnormal<br />
distributions.<br />
For the 1 Leader category, pick whatever!<br />
Typically, 8-0, 8-1 and 9-1 have been<br />
used.<br />
<strong>The</strong>re were too few scenarios with 6<br />
or more leaders to make an assessment worthwhile.<br />
Again, too few to make French, Italians<br />
and others valid.<br />
Separate groups in a scenario are done<br />
separately (eg a group of 3 and a group of 2<br />
are treated separately, not as one group of<br />
5).<br />
<strong>The</strong> other piece of information I logged<br />
whilst I was about it, was the ratio of Leaders<br />
to Squads for the main nationalities, which<br />
came out as follows:<br />
Ger Sov US Br<br />
Ratio: 0.3357 0.2356 0.2962 0.306<br />
This can then be used to work out the<br />
typical number of Leaders for a nation’s force<br />
of various sizes:<br />
# Squads Ger Sov US Br<br />
1 0 0 0 0<br />
2 1 0 1 1<br />
3 1 1 1 1<br />
4 1 1 1 1<br />
5 2 1 1 2<br />
6 2 1 2 2<br />
7 2 2 2 2<br />
8 3 2 2 2<br />
9 3 2 3 3<br />
10 3 2 3 3<br />
11 4 3 3 3<br />
12 4 3 4 4<br />
13 4 3 4 4<br />
14 5 3 4 4<br />
15 5 4 4 5<br />
So there you have it. Not too painful<br />
and hopefully of some use to someone. And<br />
why should I write an article on Leadership?<br />
Maybe in response to my appraisal one year<br />
from my line manager who said “we don’t<br />
know why people like working for you”.<br />
Enough said.<br />
14 VIEW FROM<br />
Ω
I suspect that I am like the majority of<br />
readers in that the ‘Winter War’ was almost<br />
unknown to me until I purchased the ASL<br />
Annuals. I knew nothing of the causes of<br />
this conflict and little of its outcome, except<br />
that, alone of the ‘new’ Baltic states set up<br />
in the aftermath of World War I, Finland preserved<br />
its separate existence. This title rectified<br />
a gap in my knowledge.<br />
After chapters discussing<br />
the emergence of independent Finland<br />
and the life of Baron Carl<br />
Gustav Mannerheim, the cause of<br />
the war is explained. It was recognised<br />
that Leningrad was in an exposed<br />
position in the event of an<br />
invasion. Stalin therefore demanded<br />
that Finland surrender<br />
some offshore islands in the Baltic,<br />
some territory in Karelia and<br />
permit the stationing of Russian<br />
troops on Finnish land. After debate,<br />
the demands were rejected;<br />
some politicians thought it was a<br />
bluff. Angered by the rebuff, Stalin<br />
sent in the Red Army.<br />
Neither side was prepared<br />
for war. Finland had not mobilised,<br />
and the Red Army, suffering from<br />
the purge of its officers, simply<br />
was not trained for the fighting to<br />
come. One senior officer ordered<br />
ammunition and fire support for a<br />
campaign of no more than twelve<br />
days; hostilities lasted for three and<br />
a half months! Despite initially<br />
being forced back by the Red Army’s<br />
overwhelming strength and<br />
hampered by a lack of heavy weapons<br />
(for instance, they had to use<br />
heavy Maxim machine guns in place of light<br />
artillery), the Finns soon showed that they<br />
were not push-overs. Equipped with winter<br />
camouflage and warm clothing not available<br />
to the enemy, they conducted hit-and-run<br />
attacks on the Russians, who largely stayed<br />
on the available roads through the forests.<br />
Two Russian divisions were almost<br />
completely destroyed at Suomussalmi.<br />
Moving along the road in column, the first<br />
division was hit by ski troops who punched<br />
gaps hundreds of yards wide throughout its<br />
THE TRENCHES<br />
THE WINTER WAR<br />
<strong>The</strong> Russo-Finnish War of 1939 – 40<br />
(William R Trotter, Aurum Press Ltd, £18.99. ISBN: 1 85410 881 6)<br />
John Barton<br />
length. <strong>The</strong> Finns fortified their sides of the<br />
breach and repulsed Russian attempts to<br />
break out. <strong>The</strong>y then snuffed out each Russian<br />
group in turn. (<strong>The</strong> ASL scenario “On<br />
the Raate Road” depicts just one of myriad<br />
encounters in this area). <strong>The</strong> second, supporting,<br />
division came under the same treatment<br />
and suffered the same fate. This column<br />
commander eventually ordered a gen-<br />
eral retreat. <strong>The</strong> two Russian generals suffered<br />
different fates. One died in the fighting,<br />
the other escaped to his own lines, where<br />
he was court-martialled and shot.<br />
In January 1940, even as the slaughter<br />
at Suomussalmi was reaching its climax, leaving<br />
over 27,000 Russians dead, Stalin appointed<br />
Timoshenko to command the invasion,<br />
with Zhukov as his Chief-of-Staff. <strong>The</strong><br />
soldiers were properly trained in new tactics,<br />
and the second attempt began with a<br />
ferocious bombardment on 1 February. <strong>The</strong><br />
Russians broke through the Mannerheim Line<br />
on 11 February, despite desperate resistance.<br />
<strong>The</strong> Finns lack of heavy equipment told<br />
against them, and the next day the cabinet<br />
authorised the government to seek terms. In<br />
early March the Finns went to Russia and<br />
were presented with terms on a ‘take them<br />
or fight’ basis. <strong>The</strong> treaty was signed on 12<br />
March, to come into effect the following day.<br />
With only fifteen minutes to go, the<br />
Russians began a furious bombardment<br />
in the region of Viipuri, out of simple<br />
bloody-minded spite, which killed hundreds.<br />
With the fighting ended, Finland lost<br />
some 16,000 square miles of territory.<br />
In human terms, she suffered almost<br />
25,000 dead and another 43,500<br />
wounded. Mr Trotter says that Finnish<br />
historians now believe that the Russians<br />
may have lost between 230,000<br />
and 270,000 dead, with perhaps that<br />
many again wounded. It is also suggested<br />
that 5,000 Soviet soldiers who<br />
had been captured by the Finns disappeared<br />
into camps run by the NKVD<br />
following repatriation, where they<br />
were interrogated and shot.<br />
In June 1941, the Finns went to war<br />
with Russia as Germany’s allies in<br />
Operation Barbarossa, in what became<br />
known as the “Continuation War”. For<br />
the most part, Marshal Mannerheim<br />
was content to take back only those<br />
lands lost the previous year, although<br />
the Finns also took East Karelia. Stalin’s<br />
resettlement policy had changed<br />
the ethic make-up of the area, however,<br />
and the Finns found they were<br />
not welcomed with open arms. In the<br />
aftermath of Operation Bagration and the<br />
destruction of German Army Group Centre,<br />
the Finns found that the pendulum had<br />
swung the other way again and once more<br />
sued for terms. <strong>The</strong>y were forced to relinquish<br />
all their gains of 1941 and to eject German<br />
troops from their country. This led to<br />
more death and destruction, as the Germans<br />
destroyed everything of value in Lapland<br />
when they retreated to Norway.<br />
Ω<br />
15
<strong>The</strong> Essential ASOP<br />
Jim McLeod<br />
I really do have too much time on my hands this evening ...<br />
Here is what I consider to be the “Essential ASOP”, stuff I hold little/no wiggle room on for myself or my opponent.<br />
Announce each action in order of appearance and you are set to go without committing any huge ASOP violations. Items left off are<br />
intentional (unless I missed some huge must do ones!) and are items I would be lenient on, especially anything involving Panjis, Convoys,<br />
Columns and/or Pack animals of any species.<br />
In cases where there are Para-Drops, Gliders etc, I will read the pertinent rules before play and as a reminder, make notes on when to<br />
do stuff.<br />
Newbies, let the following be your mantra. I shall make it mine. :)<br />
1. RALLY PHASE<br />
1.11A: Setup Off-Board units<br />
1.12A: Wind Change DR<br />
1.13B: Recombine GO HS’s<br />
1.14B: Attempt to Recover SW/Guns<br />
1.21A: Deploy<br />
1.22B: Repair and Transfer SW/Guns<br />
1.23B: Rally (Don’t forget first MMC self Rally)<br />
1.31B: Roll for Shock/UK<br />
1.32B: May claim Wall Advantage (Attacker first)<br />
2. PREP FIRE PHASE<br />
2.11A: Remove Dispersed Smoke<br />
2.12A: Fire Ornance Smoke<br />
2.13A: Attempt Radio Contact<br />
2.21A: Become TI and Mop Up and Entrench<br />
2.22A: Fire eligible units, Declare Opportunity Firers<br />
2.31A: Change CA of Guns eligible to do so<br />
3. MOVEMENT PHASE<br />
3.21A: Move Berserkers able to do so<br />
3.22A: Drop possession of SW/Guns<br />
3.31A: Move units that are allowed to Move<br />
4. DEFENSIVE FIRE PHASE<br />
4.11D: Fire ordnance smoke (dispersed)<br />
4.12D: Attempt Radio Contact<br />
4.21D: Make Defensive Fire attacks as are allowed<br />
4.31D: Change CA of Guns eligible to do so<br />
5. ADVANCING FIRE PHASE<br />
5.11B: During Mild Breeze, place drifting smoke<br />
5.12A: Fire ordnance WP (dispersed)<br />
5.13A: During Gusts, remove dispersed smoke and flip smoke<br />
counters to<br />
dispersed<br />
5.22A: Fire units that are allowed to fire<br />
5.31B/5.32B: Resolve Fire stuff<br />
6. ROUT PHASE<br />
6.11B: Voluntary break units<br />
6.12B: Disrupters Surrender as applicable<br />
-6.21B: Rout units<br />
7. ADVANCE PHASE<br />
7.11A: Transfer SW/Guns/Prisoners<br />
7.21A: Advance units eligle to do so<br />
8. CLOSE COMBAT PHASE<br />
8.11B Place onboard under “?”, all HIP units if any are in CC<br />
Location. Reveal unit strength factor of concealed units, eliminate<br />
Dummies<br />
8.12B: Resolve Ambush if applicable<br />
8.15B: Declare Intention to Withdrawl from “Melee” (Attacker<br />
first)<br />
8.21B: Declare CC attacks (Attacker First)<br />
8.24B: Resolve CC Attacks<br />
8.42B: Resolve non-Flame Clearance Attempts<br />
8.44A: Conceal units eligible to Conceal<br />
Now, thats not so hard ... is it. :)<br />
16 VIEW FROM<br />
Ω
PFPh Attacker places FFE<br />
I J L and Gunflashes in<br />
FFE hexes.<br />
MC / PTC: D<br />
MPh Attacker moves into LOS<br />
of Defender:<br />
F (if known) I<br />
MPh/<br />
DFPh<br />
Attacker uses non-Assault<br />
movement in Illum loc:<br />
A F I<br />
Defender places FFE<br />
I J and Gunflashes in FFE<br />
hexes.<br />
MC / PTC: A F<br />
AFPh Attacker fires at Enemy: A<br />
E F I J L and Gunflash.<br />
MC / PTC: D<br />
RtPh Rout in enemy LOS:<br />
Attacker: F I<br />
Defender I<br />
APh Attacker moves into LOS<br />
of Defender:<br />
F (if known) I<br />
CCPh Ambush by attacker:<br />
Def not all elim: A E<br />
THE TRENCHES<br />
NIGHT ACTIONS MATRIX<br />
Chris Riches<br />
Attacker fires at Enemy: A<br />
E F I J L and Gunflash.<br />
MC / PTC: D<br />
Attacker moves into nondummy<br />
Minefield:<br />
Break/KIA/K: A F I J &<br />
Gunflash<br />
MC/PTC: A F<br />
Unopposed vehicle moves<br />
within 16 hexes:<br />
I<br />
Defender Fires at En:<br />
D I J Gunflash<br />
MC/PTC: A F<br />
Attacker moves into nondummy<br />
Minefield:<br />
Break/KIA/K: A F I J &<br />
Gunflash<br />
MC/PTC: A F<br />
Ambush by defender:<br />
Att all elim: E<br />
Att not all elim: D E F<br />
Attacker Fires Illum (if<br />
allowed - I occurred):<br />
SR F K<br />
Mtr A F J K Gunflash<br />
S'Shell F K (firer stays<br />
concealed)<br />
Attacker moves into Trip<br />
Flare location:<br />
Set off: A F I K<br />
Jitter Fire (if allowed - J<br />
occurred):<br />
By Def: D I Gunflash<br />
By Att: A F I Gunflash<br />
Defender fires Illum (if<br />
allowed - I occurred):<br />
SR: F K<br />
Mtr: D F J K Gunflash<br />
S'Shell F K<br />
Attacker moves into Trip<br />
Flare location:<br />
Set off: A F I K<br />
Normal CC attack:<br />
A D E F L<br />
Sniper attack:<br />
Vs Att: A<br />
Vs Def: D L<br />
Best GO Leader rolls for<br />
Freedom of Movement. dr<br />
< ELR (if allowed - L<br />
occurred):<br />
Success: G<br />
(Def turn only)<br />
Attacker enters loc of<br />
HIP/concealed unit:<br />
A<br />
Gun Duel:<br />
A D E F I J L<br />
Gunflash<br />
Units held in Melee:<br />
A D E F I J L and<br />
Gunflash<br />
Code Outcome<br />
A Attacker loses Cloaking/concealment.<br />
Retain concealment if non-illuminated and beyond NVR of all GO enemy (unless Breaks).<br />
D Defender loses Concealment / HIP.<br />
Retain concealment if non-illuminated and beyond NVR of all GO enemy (unless Breaks).<br />
E "No Move" removed from attacked unit. (N/A if Sniper / OBA)<br />
F "No Move" removed from all units which can see a known Attacker (ie within normal NVR, or illuminated).<br />
G "No Move" removed from Leader and units he is stacked with.<br />
Code Outcome Pre-condition Status<br />
I Unit with IR/Starshell capability can fire a Starshell.<br />
If doesn't do so, need to incur condition again. If does<br />
fire IR/Starshell, then they may be fired subsequently<br />
by either side.<br />
Trip flare counts as Starshell having been fired.<br />
J Jitter fire possible<br />
K Bore sighted Fire Lane can be used without target in<br />
LOS.<br />
L Best Defender leader able to roll for freedom from No<br />
Move.<br />
Unit with IR/Starshell capability has:<br />
- Unopposed vehicle moving within 16 hexes.<br />
- LOS to enemy unit.<br />
Enemy FFE<br />
Enemy Gunflash<br />
Trip flare activates.<br />
FFE<br />
Gunflash<br />
Illuminant fired<br />
Trip Flare activates<br />
Attacker attack other than successful Ambush<br />
17
“THIS “THIS IS IS THE THE CALL CALL TO TO INTERNATIONALE INTERNATIONALE ARMS!”<br />
ARMS!”<br />
This is the latest edition of the overseas (IE non Britain or North American) ASL Players Directory.<br />
It is broken down by country. Within the country, players are listed according to their ZIP/Postal Code.<br />
AUSTRALIA<br />
R. Cornwell, PO Box 252, A-2533 Kiama MW<br />
N. Hickman, 12 Blampied Street, Wynn Vale, SA 5127<br />
Mark McGilchrist, 7 Smith Street, Bexley, Sydney, NSW 2207<br />
Austria<br />
Jeff Crowder, Erdbergstrasse 74/17, 1030 Vienna<br />
M. Holub, Peter-Neuschmidt Str. 10, A-6363 Westendorf<br />
Ronald Novicky, Hoffingergasse 12-14/9/13, A-1120 Vienna<br />
F. Schonbauer, Institut fur Softwaretechnik,, Resselgasse 3/188, A-<br />
1040 Wien<br />
Fritz Tichy, Hoernesgasse 20/16, 1030 Vienna<br />
Belgium<br />
J Baines, 2A Vijverlaan , B-2020, B-2020 Antwerp<br />
Y Barette, 52, Rue du Chateau d’eau , B-1180, Bruxelles<br />
T Bauwin, 23, Avenue du Cerf-volant , B-1170, Bruxelles<br />
Serge Bettencourt, 11, Rue Fontaine d’Amour, B-1030, Bruxelles<br />
D. Boileau, 15, Avenue Rene Stevens, B-1160, Bruxelles<br />
Mr. Bosmans, Koningin Astridlaan 180, , B-2800, B-2800<br />
Mechelen<br />
J.P Buchkremer, 20A, Rue du College , B-5530, B-5530 Godinne<br />
T. Cavelier, 22, Rue O. Maesschalek, B-1080, Bruxelles<br />
F Colard, 46, Rue de l’Abbaye, B-7801, B-7801 Ath<br />
J.P Dasseville, Reginalaan 3E , B-8670, B-8670 Oostduinkerke<br />
R De Sadeleer, 1, Quai des Peniches, B-1210, Bruxelles<br />
F. Delstanche, 107, Av G. Latinis, B-1030, Bruxelles<br />
J.M. Dricot, 7, Avenue des Grenadiers, B-1050, Bruxelles<br />
P Dutrieux, 38, Polderstraat , B-9500, B-9500 Geraardsber<br />
A. Gottcheiner, 11, Avenue Feuillien, B-1080, Bruxelles<br />
P. Henderyckx, 11, Sint-Johannastraat, B-2160, B-2160<br />
Wommelgem<br />
H Heyman, 91 B, Klapperbeekstraat, B-9100, B-9100 Sl-Niklaas<br />
J Himschoot, 36,Truyensstraat , B-2930, B-2930 Brasschaat<br />
Vincent Kamer, 275, Albert Ier , B-1332, B-1332 Genval<br />
D Kronfeld, 70, Avenue Houzeau , B-1180, Bruxelles<br />
P. Lanote, 91, Avenue Gevaert , B-1332, B-1332 Genval<br />
A Lens, Saulcoir, 1A, B-7380, B-7380 Quievrain<br />
O Leo, 37, Rue des Glaieuls , B-1180, Bruxelles<br />
P. Lesage, 184, Avenue du Roi, B-1060, Bruxelles<br />
R. Letawe, 181, Av. des Croix de Feu, B-1020, Bruxelles<br />
V. Libert, 43, Rue de la Vignette, B-1160, Bruxelles<br />
J.P Mahieu, 9A, Rue des Hirondelles , B-519, B-519 Spy<br />
J.L Maistriaux, 13 Rue du Maieu Carlot , B-7387, B-7387 Honnelles<br />
H Mielants, 43, St Lievenslaan , B-9000, B-9000 Gent<br />
X Mols, 7, Rue des Champs , B-5030, B-5030 Gembloux<br />
J.L Morelle, 15, Rue Famenne , B-5590, B-5590 Ciney<br />
B Postiau, 52, St-Antoniuslaan , B-1700, B-1700 Dilbeek<br />
P. Ramis, 18, Rue Leanne , B-5000, B-5000 Namur<br />
Pedro Ramis, 18 Rue Leanne, B -5000, Namur<br />
Luc Schonkeren, Borsbeekstraat 43, B-2140, Borgerhout,<br />
Antwerpen<br />
C Scref, 109A, Avenue Jupiter , B-1180, Bruxelles<br />
M Steenwege, 74, Rijshenvelsstraat , B-2600, B-2600 Berchem<br />
Bruno Tielemans, Smoutmolen 7, 1640 Sint-Genesius-Rode<br />
Yves Tielemans, Stationsstraat 154, 1640 Sint-Genesius-Rode<br />
M Valkenaers, 1207 Chaussee de Wavre , B-1160, Bruxelles<br />
B Van Wassenhove, 12, Avenue Isidore Gerard , B-01160, Bruxelles<br />
G Verdonck, 28, Morselveldenlaan , B-2640, B-2640 Mortsel<br />
Jan Verreth, Trompetvogelstraat 29, 2170 Antwerpen<br />
J Vrijdaghs, 46 Dennenstraat, B-2800, B-2800 Mechelen<br />
Denmark<br />
Michael Hastrup-Leth, Favrholmvanget 15, 3400 Hillerod<br />
Lars Klysner, Egilsgade 2, 2. t.h., 2300 Copenhagen S<br />
Peter Lageri, Tolderlundsvej 86, ltv, 5000 Odense C.<br />
Eire<br />
J. Marrinan, 63, Mc Kee Park, Blackhorse Avenue, Dublin 7<br />
Finland<br />
V. Hilden, 12A5 Huuilakatu, Fn-00150 Helsinski<br />
Tuomo Lukkari, Haukilahdenkuja 7A8, 00550 Helsinki<br />
Eero Vihersaari, Itäinen Pitkäkatu 50 A1, 20700 Turku<br />
France<br />
M. Adda, 7. Rue Claude Guy, F-9<strong>420</strong>0 Ivry-sur-Seine<br />
D. Angeli, Valrose Quai des Plateries, F-?7920 Samois<br />
P. Anselin, 96, Avenue Corniche Fleurie, F-06200 Nice<br />
Jean-Luc Baas, 5, Rue Robert Lavergne, F-92600 Asniere<br />
J. Baudoux, 17 Rue de Bapeaume, F-59000 Lille<br />
F. Berry, 104, Rue de Gossicourt, F-78200 Mantes la Jolie<br />
A. Bert, 3. Square Montpensier, F-91380 Chilly-Mazarin<br />
Francois Boudrenghien, 195 rue de la liberte, F-59650 Villeneuve<br />
d’Ascq<br />
Michel Boulekfouf, 3 Chemin De Liemery, F-08170 Haybes<br />
D. Bous, 2/20 Rue J-B Clement, F-59000 Lille<br />
Philippe Briaux, 51 rue Dareau, 75014 Paris<br />
A. Bureau, lO,Rue de Nassivet, F-4<strong>420</strong>0 Nantes<br />
J. Charroin, 120, Grand Rue, F-45110 Chateauneuf<br />
Laurent Closier, Le Franc Tireur, 6, rue Consell, Appt 5, 29200<br />
Brest<br />
P.F. Daniau, 28 Rue du Docteur Legay, F-59110 La Madelaine<br />
L. David, 1, Rue des Millepertuis, Appt 32, F-33700 Merignal<br />
Y. Dejoncke, 42, Grande Rue, F-91620 La Ville Du Bois<br />
J. Depotte, 19, Rue Darnel, F-62100 Calais<br />
Jean Devaux, 16. Bld Barbes, F-75018 Paris<br />
O. Dietsch, 4, Route de Colmar, F-67600 Selestat<br />
Philippe Duchon, 35 rue Neuve, 33000 Bordeaux<br />
P. Franque, 21. Bld Paixhans, F-72000 Le Mans<br />
G. Gardeur, 25, Rue Maurice de Broglie, F-51000 Chalons<br />
E. Gaubert, 2. Chemin des Pres, F-78430 Louveciennes<br />
C. Ghesquier, 57. Rue des Sports, F-59280 Armentieres<br />
S. Graciet, 136, Bvd Magenta, F-75010 Paris<br />
P. Guet, 11. Rue Edouard Herriot, F-74300 Cluses<br />
R. Guettier, 16bis, Rue de l’Abbe Gregoire, F-92130 Issy les-<br />
Moulinx-<br />
E. Guilloux, 11, Rue Victor Basch, F-78210 St Cyr L’Ecole<br />
S. Hadjaje, 5, Place de l’Eglise, F-78113 Bourdonne<br />
Olivier Irisson, 43 rue du Caire, 75002 Paris<br />
L. Jassaud, 27, Av. Malaussena, F-06000 Nice<br />
N. Ketelers, 23, Allee de la Cerise, F-59700 Marcq enBaroeul<br />
R. Lagache, 13, Blvd Vauban, Appt 3, F-59000 Lille<br />
J.C. Lahalle, 6, Rue de la Brogue, F-67000 Strasbourg<br />
J. Lasnier, 1161, Les Palombes-Le Hamois, F-51300 Vitry<br />
David Lindelhof, 17, Le Prieure, F-01280 Prevessin<br />
F. Loyer, 18, Rue Barbarin, F-17700 Surgeres<br />
Mallet, 117, Rue du Bief, F-74210 Favergeffe<br />
F. Marchal, 5, Allee des Besanconnes, F-78430 Louveciennes<br />
P. Martin, 3C, Rue du General Leclerc, F-91230 Montgeron<br />
Alex McCusker, Route de la Telecabine, F-01170 Crozet<br />
O. Merlier, 34bis, Avenue du Colisee, F-59130 Lambersart<br />
C. Millet, 108, Rue Juive, Le Buisson Perron, F-49400 Villebernier-<br />
Saumur<br />
A. Mltenne, 8. Allee de la Belle-Feuille, F-91370 Verriere<br />
T. Monnier, 20. rue de Buci, F-75006 Paris<br />
F. Morice, 6. Rue des Alouettes, F-89300 Joigny<br />
Bruno Nitrosso, 227, Boulevard Voltaire, F-75011, Paris<br />
Gehres Patrick, 72, Avenue de la Resistance, 91260 Juvisy sur Orge<br />
A. Plait, Jasna-Le Coin, F-72220 Marigne<br />
Franck Reinquin, Division Moyens Informatiques et Services, CNES<br />
- Agence Francaise de l’Espace, 18 av. E. Belin,<br />
B. Rey, 53, rue du Gal de Gaulle, F-22730 Tregastel<br />
J, Rey, Chemin des Carrieres, F-84700 Sorgues<br />
J. Robson, 139, Rue du Gord, F-28630 Le Coudray<br />
Philippe Rohmer, 12, rue d’Alsace, 95130 Franconville<br />
A. Seydoux, 7, Rue de la Chaise, F-75007 Paris<br />
M. Tulet, 53, Rue du Marechal Lyautey Bat C4, Appt. 262, F-<br />
59370 Mons-en-Bar<br />
P. Vaillant, 2, Rue Victor Hugo, F-591589 Marcoing<br />
P. Valent, 99, Rue du Florival, F-68530 Buhl<br />
O. Vallois, 11, guai de la Citadelle, F-59240 Dunkirk<br />
C. Vandenbosch, 74, rue du Chene Houpline, F-59200 Tourcoing<br />
Xavier Vitry, Les Ombrages - Bat C, F-83300 Draguignan<br />
C. Wurtgenstein, 46, Rue des Charmilles, F-67400 Illkirch<br />
Germany<br />
K. Angermund, 4. Lembkestrasse, D-4330 Muelheim/Ruhr 1<br />
Rolf-Udo Bliersbach, Altenberger-Dom-Str. 154a, D0-51467<br />
Bergisch Gladbach<br />
P. Bohm, 112, Landshutter Allee, D-80637 Munchen 19<br />
Markus Braun, Gartenstr. 24, D-73117 Wangen - Oberwaelden<br />
Matt Brennan, Kunnenkampf Allee, 173, D-2800 Bremen<br />
Adrian Carter, Pfarrer-Heberer-Strasse 34, 55411 Bingen<br />
Jens Droese, Lornsenplatz 9, 22767 Hamburg<br />
I. Elliot, Schinkelstrasse, 36, D-80805 Munchen<br />
Klaus Fischer, Lindenstr. 22, 69502 Hemsbach<br />
Rudi Großholdermann, Rundstr. 25, 47475 Kamp-Lintfort<br />
Matthias Hardel, Begasstr. 2, 12157 Berlin<br />
Mike Hurn, Herforder Strasse 206, 32120 Hiddenhausen<br />
Stefan Jacobi, Leipzigerstrasse 29, 66113 Saarbrucken<br />
Christian Koppmeyer, Hagebuttenweg 9, 41564 Kaarst<br />
R. Korzend~Rfer, Westerburgstrasse. 4, D-63450 Hanau<br />
A. Kraft, Niederhofheimer Strasse, 9, D-65719 Hofheim<br />
Ralf Krusat, Claudiusstrasse 15, 10557 Berlin<br />
C. Ludwig, 17, Flozstrasse, D-44799 Bochum 1<br />
Lutz Pietschker, c/o Margaret Laiser, Glockenblumenweg 55, D-<br />
12357 Berlin<br />
L. Schultz, HQ US European Command, ECJ3-00-0 Peter Barracks,<br />
D-7000 Stuttgart 80<br />
D. Somnitz, 16, Ernst Reuter Strasse, D-4350 Recklinghausen<br />
Lars Thuring, Fehrsstrasse 7, 24576 Bad Bramstedt<br />
Frank Tinschert, Demburgstr., 27, 14057 Berlin<br />
D. Whiteley, am Gillenbusch, 30, D-5503 Konz<br />
Holland<br />
Dirk Beijaard, Enschedepad 78, 1324 GK Almere<br />
N. De Lang, 87, Professor Telderslaan, N-2628VX Delf<br />
R. De Waard, 3, Driehoek, N-3328KG Doordrecht<br />
A. Dekker, 34, Zetveld, N-1182JZ Amstelveen<br />
John den Olden, Beukenlaan 12, 1505 GS Zaandam<br />
H. Hidding, 66, Schipbeekstraat, N-3313AR Doordrecht<br />
Peter Hofland, Schoolmeesterstraat 25, 2523 XE Den Haag<br />
T. Kok, Pres. Roosveltlaan. 20, N-5707GE Helmond<br />
Hennie van der Salm, Merkelbackstraat 12, 3822 EP Amersfoort<br />
B. Van Schalkwijk, 242, Uilenstede, N-1183AR Amsterdam<br />
M.J. Vandenborn, 22, Heikantsestraat, N-4841EH Prinsenbeek<br />
Israel<br />
Daniel Kalman, Rehov Hava Lutski 11b/1, 76251 Rehovot<br />
Ran Shiloah, 17 Shmuel Hanagid Street, Jerusalem, 94592<br />
18 VIEW FROMΩ<br />
Italy<br />
Paulo Alessi, Via Verona 32/2, 10098 Rivoli (TO)<br />
L. Balestreri, Via Pionieri dell’aria no 1 1, I-33080 Roveredo<br />
S. Cuccurullo, 19, Vittorio Emanuele III, I-04016 Sabaudia (LT)<br />
R. De Leo, 8A, Via Todde, I-09128 Cagliari<br />
V. De Pascali, 18 Via Emilia Ponente, I-40133 Bologna<br />
G. Di Egidio, Via Emanuele Filiberto, 19, I-04016 Sabaudia (LT)<br />
F. Doria, 3, Via Cappello, I-34124 Trieste<br />
A. Fantozzi, 26/20 Viale Samnione, I-20020 Arese (Mi)<br />
Alex Ganna, Via Cavour 37, 21100 Varese<br />
Edo Giaroni, Via Don Maesani, 12, I-21046 Malnate (VA)<br />
Michele Lupoi, Via Cesare Battisti 33, 40123 Bologna<br />
G. Manaresi, Via Fratelli Cervi 40, I-40064 Ozzano (BO)<br />
A. Matteuzzi, 8, Via Savena, I-40065 Pian Di Macina,<br />
F. Mazzucchelli, 46, Via 4 Novembre, I-21044 Cavaria NA)<br />
R. Niccoli, Via Cesare Del Piano, I-04016 Sabaudia (LT)<br />
S. Rapana, Via Cesare Del Piano, I-04016 Sabaudia (LT)<br />
P. Selva, Via Val d’Ossola 14, I-00141 Roma<br />
A. Tropiano, Via Urbinati 15, I-36010 Palazzolo (SR)<br />
Japan<br />
Hidetaka Hayashi, 6-1-308, Nakazato-Cho, Shinjuku-ku, Tokyo,<br />
162-0804<br />
Mexico<br />
S. Mrozek, Avenida Ticoman 240, Lindavista D.F.<br />
Norway<br />
Ole Boe, Paulus Plass 1, 0554 Oslo<br />
Johan Flatseth, Sigurd Iversens Vei 39d, 0281 Oslo<br />
Olav Heie, Arneborgveien 9, N-1430 As<br />
Joakim Ruud, Chr. Michelsensgt. 4, 0568 Oslo<br />
R. Vetne, Helgen, N-3745 Ulefoss<br />
Portugal<br />
Luis Calcada, Rua Dr. Mario Ouina 10, 2765 Estoril<br />
South Africa<br />
Kevin Pietersen, PO Box 102585, Meerensee, Richards Bay<br />
Spain<br />
Jesus David Argaiz Martinez, Avenida de España 16 2-A, 26003-<br />
Logroña<br />
Fernando J. Garcia-Maniega, Plaza Europa 6, 34003-Palencia<br />
Paul Silles McLaney, c/ Don Ramiro, 5A, 2ºF,<br />
Sweden<br />
Pers Anderson, Gryningsv. 79, S461 59 Trollhattan<br />
Jonas Cederlind, Spelmansvägen 17, 696 31 Askersund<br />
Steve Cocks, c/o EHPT, Vastberga Alle 9, S126 25 Stockholm<br />
Styrborn Glen, Brotorp, Asa, S-661 93 Saffle<br />
Andreas Hinz, Steglitsv. 3c, 22732 Lund<br />
Per-Olaf Jonsson, Untravagen 1, S-115 43 Stockholm<br />
Klaus Malmstrom, Klinkendalsv. 6 Brokind, S590 41 Rimforsa<br />
Patrik Manlig, Semanders v. 1:<strong>420</strong>, S752 61 Uppsala<br />
Nils-Gunner Nilsson, Oluff Nilssonns v.8, S433 36 Partille<br />
B. Ribom, Falkenbergsgatan 13A, S-41265 Goteborg<br />
Bernt Ribom, Falkenberg sg. 13A, 41265 Gothenburg<br />
P. Rogneholt, 25. Lidnersgatan, S-75442 Uppsala<br />
Asad Rustum, Kungshamra 21/014, 170 70 Solna<br />
Switzerland<br />
I~ Goni.Ai.E L, 4, Chemin du Lussex, CH-1008 Jouxlens-Mezeri<br />
P Wahl, 23, Checnin des Merles, CH-1213 Onex/Geneva<br />
If there are any mistakes, please let<br />
me know so I can correct them for the next<br />
edition.
THE TRENCHES<br />
ON THE CONVENTION TRAIL<br />
<strong>The</strong>re are more and more ASL tournaments cropping up all over the world. In fact, it is possible to be involved in an ASL tournament at least once<br />
a month, often more, if you were so inclined (and had the financial means to live such a life - I wish!).<br />
If you plan on holding an ASL tournament, please let me know and I’ll include the details here, space permitting.<br />
If you contact anyone regarding these tournaments, please tell them that I sent you!<br />
APRIL<br />
ANZACON 2000<br />
When: 24 – 25 April.<br />
Where: Ashburton library, High St, Ashburton, Australia.<br />
Fee: $20.00 Australian.<br />
Format: Two games are to be played each day. <strong>The</strong> times are Saturday 9am-6pm, Sunday<br />
9am-5pm. Gaming is also available on the Friday night.<br />
Contact: Andrew Rogers on (03) 8661-5789 or Neil Andrews on (03) 9801-1412.<br />
MAY<br />
MONTREAL ASL FESTIVAL<br />
When: 22 – 24 May.<br />
Where: Downtown Days Inn, 1005 Guy Street, Montréal, Québec, Canada H3H 2K4. Phone<br />
1-800-567-0880 toll free, or (514) 938-4611 for rates and reservations. Most rooms have 2 double<br />
beds. All rooms have air conditioning and colour television. <strong>The</strong> hotel has its own restaurant and is<br />
near a variety of restaurants, as well as shops and night clubs. Indoor and outdoor parking available<br />
(charges apply).<br />
Fee: $30.00 CDN (£15.00 CDN for a single day)..<br />
Format: <strong>The</strong> main tournament will be as many rounds as necessary, probably four or five<br />
rounds, to have one undefeated player. That player becomes “Mr. 10-3”. <strong>The</strong> only time to remember<br />
is the 9am start time each day. Registration begins at 8:30 a.m. Saturday morning. Each round<br />
will have a choice of five scenarios. Players can choose scenarios from previous rounds by mutual<br />
agreement. At least one choice will require knowledge of only chapters A to D. Each player secretly<br />
chooses and ranks three scenarios, and then the players compare choices to arrive at the scenario<br />
they will play.<br />
<strong>The</strong>re will be several mini tournaments for players who can join us for only one day, or for<br />
players who choose to leave the Mr. 10-3 tournament after they can no longer win. Saturday evening<br />
will see the first round of a “Fog of War” mini which will use historical scenarios designed by Ian<br />
Daglish. Sunday evening will see the second and final round of the “Fog of War” mini. Monday will<br />
feature a VP mini. All participants play the same scenario. <strong>The</strong>re are two winners: best Allied player<br />
and best Axis player.<br />
During all three days, players may choose to engage in open gaming instead of participating<br />
in a tournament.<br />
Contact: Email blarcheveque@aircanada.ca or diane-mike@sympatico.ca. Send registration<br />
fee (cheque or postal money order, payable to Bruno L’Archevêque) to Bruno L’Archevêque,<br />
2294 Fauteux, Laval, Quebec, Canada H7T 2S6.<br />
NASHCON<br />
When: 28 – 30 May.<br />
Where: <strong>The</strong> Franklin Marriott Hotel & Cool Springs Conference Center , Franklin, TN. Special<br />
room rate of just $89 per night. To get this special deal, call (615) 261-2600 and tell the hotel you are<br />
with NashCon.<br />
Fee: $18.00 for HMGS members ($20.00 after May 15). Non-Members add $5.00. Under 12<br />
free w/adult.<br />
Format: <strong>The</strong> ASL tourney format will depend on how many folks show up. It will either be<br />
single elimination or a 4 round Swiss system. Prizes to be determined. <strong>The</strong> scenario list will be<br />
announced shortly.<br />
Contact: <strong>The</strong> HMGS Mid-South historical miniatures wargaming association runs NASHCON<br />
Contact Chris Edmondson at POB 44, Rockvale, TN 37153, 615/867-0229 or email him at<br />
echris66@comcast.net.<br />
SEPTEMBER<br />
A BRIDGE TOO FAR 2004 ARNHEM ASL TOURNA-<br />
MENT<br />
When: 17 – 19 September.<br />
Where: Stayokay Hostel, Diepenbrocklaan 27, Arnhem, Holland. Next to an excellent gaming<br />
room, the hostel offers its own restaurant, bar and various amenities. 20 beds have been pre-booked<br />
at the Hostel, which will be offered on a first-come first-serve basis. For those who prefer to stay in<br />
a nearby B&B or those not served on this basis the organisers will be happy help in finding alternative<br />
accommodation near the venue.<br />
Fee: £7.00.<br />
Format: Five-Round Swiss style tournament, which has attracted an international audience. In<br />
each Round, the players will choose from three selected scenarios. After each round the players will<br />
face opponents with similar win-loss records, until a winner can be announced after round five.<br />
Players also receive points for opponent win/losses, which will be used to determine final rankings<br />
in case of an equal overall record. <strong>The</strong> Scenario List will be announced in early July.<br />
Notes: <strong>The</strong>re will be an Operation Veritable Battlefield Tour on the Thursday with a visit to the<br />
Goch-Kalkar area of Germany. This will be followed by a visit to the Dutch War Museum in Overloon,<br />
Netherlands.<br />
Contact: For more details contact Pete Struijf by email at pastruijf@hotmail.com or visit the<br />
website at http://www.xs4all.nl/~hennies/.<br />
OCTOBER<br />
INTENSIVE FIRE 2004<br />
When: 28 – 31 October.<br />
Where: <strong>The</strong> Kiwi Hotel, West Hill Road, Bournemouth, England, BH2 5EG. Telephone (01202)<br />
555 889 or fax (01202) 789 567 to arrange accommodation. Single rooms are £33.00 per night, double<br />
rooms £29.00 per night per person if booked prior to 1 October – thereafter normal rates apply.<br />
Remember to mention INTENSIVE FIRE when reserving to qualify for the special rates. You can<br />
also book online at www.kiwihotel.co.uk.<br />
Fee: £7.00 (entry is free for those only able to attend for one day). Players pre-registering will<br />
receive a tournament program in September.<br />
Format: Three round Fire Team tournament (two rounds on Saturday, one on Sunday). <strong>The</strong>re<br />
will also be some single day mini-tournaments on the Friday. Open gaming is available for those who<br />
do not wish to take part in the tournament.<br />
Notes: Prizes are awarded to winning players and the Convention Champion, who is the player<br />
judged to have had the most successful tournament with all games played over the weekend being<br />
taken into consideration.<br />
Contact: For more details or to register contact Pete Phillipps, 24 Huggett Close, Leicester, LE4<br />
7PY. Phone (0116) 266 6894 (evenings only) or email if@vftt.co.uk.<br />
ASL Word Search<br />
Here’s a little ASL word search puzzle to keep you occupied.<br />
K N C G T B A X K T F I S E A<br />
I E Y L A U N D P L A J R V S<br />
D K T E O Q O R L Z P I V B S<br />
D O G M T S E R N I F Y T W A<br />
S R Q X E P E A U E T J E B U<br />
U B W S F L B C V E S A H T L<br />
G H L I S J E I O I B K M I T<br />
C J R Y W M S E I M W S A G F<br />
T E Z Z Y N Y I N P B M M E I<br />
L Q K R E S R E B B W A O R R<br />
L I N T Q V L B H C G T T J E<br />
S D N L C P T T F V P M S N B<br />
G I A R M O R E D C U P O L A<br />
C K O T C L N A P A L M T J P<br />
V Y Z N B K F G B H F O K O Q<br />
ARMOREDCUPOLA<br />
ASSAULTFIRE<br />
BANZAI<br />
BERSERK<br />
BROKEN<br />
CLOSECOMBAT<br />
INTENSIVEFIRE<br />
JSIII<br />
LLTC<br />
MATILDA<br />
MELEE<br />
NAPALM<br />
PREPFIRE<br />
PTO<br />
ROUT<br />
TIGER<br />
VFTT<br />
Ω<br />
19
2004<br />
INTENSIVE NTENSIVE FIRE IRE 2004<br />
29 29 – – 31 31 October October 2004<br />
2004<br />
INTENSIVE FIRE is the UK’s longest running tournament dedicated to the play of Advanced Squad Leader.<br />
2004 is our tenth anniversary and players of all standards are invited to attend.<br />
Format<br />
Format<br />
<strong>The</strong> well-established Fire Team Tournament is the main event and offers the chance for competitive play on the<br />
Saturday and Sunday. In addition, the Friday mini-tourneys offer the chance for glory in more specialised<br />
fields of warfare. <strong>The</strong>re will also be a Training Camp for inexperienced players.<br />
For those not interested in tournament play, or not able to make it for the whole weekend, there is always room<br />
for pick-up games and friendly play.<br />
Venue enue<br />
<strong>The</strong> Kiwi Hotel, centrally located in Bournemouth, offers both excellent gaming facilities and reduced accommodation<br />
rates (£35 per night for a single room or £30 for a double room). Players wishing to stay on Thursday<br />
evening should book early as there is Soroptimists conference close by on the same weekend and and rooms may<br />
be let out to them. <strong>The</strong> hotel is within a short taxi-ride of Bournemouth rail station and ample parking is available.<br />
To book contact the hotel on (01202) 555 889 (+44 1202 555 889 from outside the UK). You can also<br />
book online at www.kiwihotel.co.uk.<br />
For foreign visitors, lifts can often be pre-arranged to and from major airports. For those contemplating an<br />
extended stay, Bournemouth offers an excellent base for the military historian, being within easy reach of<br />
important military museums at Bovington Camp, Winchester, Portsmouth and Aldershot.<br />
Cost<br />
Cost<br />
Weekend registration for the tournament costs just £7. <strong>The</strong> tournament program listing the weekend’s scenarios<br />
and events is available from late September to anyone registering in advance.<br />
Further Further Further Details Details Details / / / Registration<br />
Registration<br />
Registration<br />
Contact Pete Phillipps, 24 Huggett Close, Leicester, England, LE4 7PY. Telephone (0116) 210 1798 (+44 116 210<br />
1798 from outside the UK) or email if@vftt.co.uk.