Novitool® Aero™ Splice Press Safety and Operating Manual - Flexco
Novitool® Aero™ Splice Press Safety and Operating Manual - Flexco
Novitool® Aero™ Splice Press Safety and Operating Manual - Flexco

You also want an ePaper? Increase the reach of your titles
YUMPU automatically turns print PDFs into web optimized ePapers that Google loves.
Novitool ® Aero <strong>Splice</strong> <strong>Press</strong><br />
<strong>Safety</strong> <strong>and</strong> <strong>Operating</strong> <strong>Manual</strong><br />
IMPROPER OR UNSAFE use of this splice press can result in damage to the press<br />
<strong>and</strong>/or physical harm. is manual contains important information about product<br />
function <strong>and</strong> safety. Please read <strong>and</strong> underst<strong>and</strong> this manual BEFORE operating the press.<br />
Please keep this manual available for other users <strong>and</strong> owners before they use the Aero<br />
press. A copy of the Aero <strong>Press</strong> Owner’s <strong>Manual</strong> can be accessed on www.exco.com.<br />
<br />
WARNING
—2—
Novitool ® Aero <strong>Press</strong> <strong>Safety</strong> <strong>and</strong> <strong>Operating</strong> <strong>Manual</strong><br />
Table of Contents<br />
Main Components ...................................................................................pg. 4<br />
Tool Specications ....................................................................................pg.5<br />
Introduction to the Aero <strong>Splice</strong> <strong>Press</strong> ............................................. pg. 6-7<br />
Flight Case ................................................................................................pg. 8<br />
General <strong>Safety</strong> Rules ................................................................................pg. 8<br />
Safe Operation of Aero <strong>Press</strong> .........................................................pg. 9-15<br />
Technical Assistance ..............................................................................pg.16<br />
Electrical Diagram of the Power Supply Cables ..........................pg. 16-17<br />
Electrical Schematics ......................................................................pg. 18-21<br />
Maintenance ...........................................................................................pg. 22<br />
Logbook ..................................................................................................pg. 23<br />
EC Declaration of Conformity ............................................................pg. 24<br />
—3—
Novitool ® Aero <strong>Press</strong> <strong>Safety</strong> <strong>and</strong> <strong>Operating</strong> <strong>Manual</strong><br />
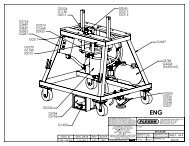
Main Components<br />
<br />
—4—
Novitool ® Aero <strong>Press</strong> <strong>Safety</strong> <strong>and</strong> <strong>Operating</strong> <strong>Manual</strong><br />
Tool Specication<br />
Aero Tool Specifications<br />
Specifications Aero 300 Aero 600 Aero 900 Aero 1200 Aero 1500<br />
Effective splice length 305 mm / 12 ” 610 mm / 24 ” 914 mm / 36 ” 1219 mm / 48 ” 1524 mm / 60 ”<br />
Effective splice width 120 mm / 4.7 ” 120 mm / 4.7 ” 120 mm / 4.7 ” 120 mm / 4.7 ” 120 mm / 4.7 ”<br />
Weight lower part 10 kg / 22 lbs 15 kg / 33 lbs 20 kg / 44 lbs 25 kg / 55 lbs 30 kg / 66 lbs<br />
Weight upper part 11 kg / 24 lbs 15 kg / 33 lbs 18 kg / 40 lbs 22 kg / 48 lbs 26 kg / 57 lbs<br />
Total weight 21 kg / 46 lbs 30 kg / 66 lbs 38 kg / 84 lbs 47 kg / 104 lbs 56 kg / 123 lbs<br />
Length 505 mm / 19.9 ” 805 mm / 31.7 ” 1105 mm / 43.5 ” 1405 mm / 55.3 ” 1705 mm / 67.1 ”<br />
Overall Height 220 mm / 8.5 ” 220 mm / 8.5 ” 220 mm / 8.5 ” 220 mm / 8.5 ” 220 mm / 8.5 ”<br />
Max. pressure 2 Bar / 28 PSI 2 Bar / 28 PSI 2 Bar / 28 PSI 2 Bar / 28 PSI 2 Bar / 28 PSI<br />
Max. temperature 200 ˚C / 390 ˚F 200 ˚C / 390 ˚F 200 ˚C / 390 ˚F 200 ˚C / 390 ˚F 200 ˚C / 390 ˚F<br />
Dimensions for transport (L x W x H)<br />
140 mm - 5.5"<br />
40 mm - 5.5"<br />
770 x 370 x 310 mm<br />
(30 x 15 x 12 ”)<br />
1070 x 370 x 310 mm<br />
(42 x 15 x 12 ”)<br />
250 mm - 9.8"<br />
250 mm - 9.8"<br />
250 mm - 9.8"<br />
—5—<br />
1370 x 370 x 310 mm<br />
(54 x 15 x 12 ”)<br />
135 mm - 5.3"<br />
- 3.3"<br />
1726 x 370 x 310 mm<br />
(68 x 15 x 12 ”)<br />
135 mm - 5.3"<br />
83 mm - 3.3"<br />
1926 x 370 x 310 mm<br />
(76 x 146 x 122 ”)<br />
Weight for transport 26 kg / 57 lbs 35 kg / 77 lbs 43 kg / 95 lbs 53 kg / 117 lbs 61 kg / 134 lbs<br />
Power requirements<br />
1 phase 230 Vac 8.8 A 14 A 16 A U.S. only 30 A U.S. only 30 A<br />
3 phase 230 Vac 4.4 A 7 A 8 A 12 A 15 A<br />
3 phase 400 Vac+0 4.4 A 7 A 8 A 12 A 15 A<br />
3 phase 460 Vac 4.4 A 7 A 8 A 12 A 15 A
Novitool ® Aero <strong>Press</strong> <strong>Safety</strong> <strong>and</strong> <strong>Operating</strong> <strong>Manual</strong><br />
Introduction to the Aero <strong>Splice</strong> <strong>Press</strong><br />
e Aero splice press is an all-in-one solution for splicing thermoplastic conveyor belts (e.g. PVC, polyurethane).<br />
No external control box, air pump, or water cooling tank are required.<br />
e Aero presses are provided with electric heating <strong>and</strong> built in air cooling. e splice process runs fully automated.<br />
temperature<br />
Settings:<br />
splice temperature<br />
(graph of the basic process, program level 1)<br />
<br />
<br />
<br />
<br />
<br />
<br />
<br />
dwell time<br />
cool down temperature<br />
(fans turn off)<br />
—6—<br />
time
Novitool ® Aero <strong>Press</strong> <strong>Safety</strong> <strong>and</strong> <strong>Operating</strong> <strong>Manual</strong><br />
Introduction to the Aero <strong>Splice</strong> <strong>Press</strong><br />
* If the belt is relatively thick a problem might occur where the outside of the belt is at the splicing temperature too long, waiting for the<br />
inside to reach the required temperature. Melted material might ow away or discolor <strong>and</strong> fabrics might shrink. To avoid this problem,<br />
<br />
Aer the preheat stage, the inside splice temperature can be reached much quicker, minimizing the risk for unwanted ow of material,<br />
discoloring or fabric shrinkage.<br />
temperature<br />
Settings:<br />
pre-heat<br />
temperature<br />
splice temperature<br />
pre-heat<br />
dwell time<br />
(graph of a procss with prehating, program level 2)<br />
dwell time<br />
cool down temperature<br />
(fans turn off)<br />
** e reading of the display relates to the top temperature of the press. If more or less heat is required at the bottom of the belt, the<br />
“bottom heat factor” can be used. Please note that this factor relates to a plus or minus amount of heat (%), not to a specic temperature.<br />
—7—<br />
time
Novitool ® Aero <strong>Press</strong> <strong>Safety</strong> <strong>and</strong> <strong>Operating</strong> <strong>Manual</strong><br />
Flight Case<br />
1. Aero presses are supplied with a ight case for<br />
both storage purposes <strong>and</strong> also for easy transport to<br />
<br />
2. Place press in the ight case so the end with the<br />
power receptacles is facing the storage compartment.<br />
is will protect the receptacles from damage when<br />
transporting.<br />
3. <br />
<br />
wheels <strong>and</strong> an extension h<strong>and</strong>le.<br />
4. Flight cases can be stacked on top of each other, but<br />
need to be secured during transportation.<br />
5. <br />
h<strong>and</strong>le for ease <strong>and</strong> convenience in transport. Click<br />
in the grip of the ight case to release the h<strong>and</strong>le.<br />
General <strong>Safety</strong> Rules<br />
–Save ese Instructions–<br />
Signal words:<br />
“DANGER” indicates an imminently hazardous<br />
situation which, if not avoided, will result in<br />
<br />
limited to the most extreme situations.<br />
“WARNING” indicates a potentially hazardous<br />
situation which, if not avoided, could result in<br />
<br />
“CAUTION” indicates a potentially hazardous<br />
situation which, if not avoided, may result in<br />
<br />
to alert against unsafe practices.<br />
<strong>Safety</strong> Symbol<br />
!<br />
is international safety symbol is used to<br />
identify <strong>and</strong> call attention to specic safety<br />
matters.<br />
<strong>Safety</strong> Information<br />
<br />
Damage, read carefully <strong>and</strong> underst<strong>and</strong> the<br />
following <strong>Safety</strong> Precautions.<br />
<br />
—8—<br />
<strong>Press</strong> End with<br />
Power Receptacles<br />
Storage<br />
Compartment<br />
OVERALL SAFETY RULES<br />
! DANGER<br />
<br />
Damage, read carefully <strong>and</strong> underst<strong>and</strong> the<br />
following <strong>Safety</strong> Precautions.<br />
! DANGER<br />
Terminate electrical hazards by removing power<br />
cord from wall receptacle or machine base inlet.<br />
! WARNING<br />
Terminate pressure related hazards by pressing<br />
the red pressure relief button.<br />
! CAUTION<br />
<strong>Press</strong> platens develop over 5 tons of clamping force.<br />
When operating the press keep the four press<br />
connector bolts in place by h<strong>and</strong> tightening.<br />
! CAUTION<br />
Avoid temperature related hazards by<br />
h<strong>and</strong>ling press components <strong>and</strong> belt once<br />
safely cooled.<br />
Extended h<strong>and</strong>le
Novitool ® Aero <strong>Press</strong> <strong>Safety</strong> <strong>and</strong> <strong>Operating</strong> <strong>Manual</strong><br />
Safe Operation of Aero <strong>Press</strong><br />
1. Locate a position in facility where<br />
appropriate voltage <strong>and</strong> power receptacles<br />
are available to operate the Aero press.<br />
! WARNING<br />
<strong>Operating</strong> the press on incorrect voltage can cause serious damage<br />
<strong>and</strong> potential hazards. e following Aero power cords are<br />
available:<br />
<br />
<br />
<br />
<br />
2.<br />
Visually inspect power cord:<br />
! DANGER<br />
a. Inspect cord for damage. Do not use power cord in a damaged<br />
state. Either replace cord or have an electrician remove<br />
damaged section <strong>and</strong> reattach plug. Electrician must refer to<br />
electrical diagram on pages 16 <strong>and</strong> 17 for proper attachment.<br />
b. Conrm compatibility between plug end <strong>and</strong> power receptacle.<br />
If incorrect, nd alternate power source or have electrician<br />
apply correct plug, referring to electrical diagram on pages 16<br />
<strong>and</strong> 17.<br />
! DANGER<br />
c. DO NOT plug power cord into wall receptacle at this time.<br />
Later in the operation, when ready to connect power follow<br />
these safe <strong>and</strong> proper operating procedures:<br />
i. First, plug power cord into machine base power inlet.<br />
—9—<br />
ii. Second, insert plug end into wall receptacle.<br />
! DANGER<br />
iii. NEVER leave power cord plugged into wall while detached<br />
from unit as this could lead to a serious electrical danger if it<br />
comes in contact with uids, such as water.<br />
! DANGER<br />
d. All press power inlets <strong>and</strong> cable connectors have been supplied<br />
with keyed (patterned) guide pins <strong>and</strong> bushings. is keying<br />
will prevent incorrect connection. Do NOT alter or remove<br />
guide pins or bushings.<br />
3.<br />
Remove press from ight case.<br />
! HEAVY OBJECT<br />
<br />
for assistance for removal from ight case if press is heavier than<br />
you are comfortable h<strong>and</strong>ling by yourself.<br />
4.<br />
Visually inspect press for damage.<br />
! WARNING<br />
Broken or missing components can cause an unsafe working<br />
environment <strong>and</strong> will likely cause additional damage to press <strong>and</strong>
Novitool ® Aero <strong>Press</strong> <strong>Safety</strong> <strong>and</strong> <strong>Operating</strong> <strong>Manual</strong><br />
Safe Operation of Aero <strong>Press</strong><br />
! DANGER<br />
a. Ensure all four press connector bolts are in good condition. Do<br />
NOT attempt to operate the press if a bolt is broken or missing.<br />
b. Inspect platens for potential damage.<br />
c. Ensure platens are free of dirt/debris. If dirty, follow these<br />
cleaning instructions:<br />
i. Use ammonia based cleaners with clean towel to gently<br />
remove dirt/debris.<br />
! WARNING<br />
ii. Do NOT clean platens with a ammable solution.<br />
! CAUTION<br />
iii. Do NOT use water to hose down the Aero press. If press<br />
needs to be cleaned, use ammonia based solvent applied to a<br />
cloth <strong>and</strong> wipe down press. Dry press with clean dry cloth.<br />
d. Inspect all cables to ensure they are in good condition. If they<br />
are damaged, do NOT use press until they are replaced.<br />
5.<br />
Visually inspect silicone pads.<br />
Visually inspect silicone pads. Pads should be free of dirt/debris<br />
in order to obtain a quality nished splice. Pads can also be<br />
cleaned using ammonia based cleaning solution that is NON-<br />
FLAMMABLE <strong>and</strong> will not cause an adverse reaction with the<br />
splice.<br />
6.<br />
Remove top beam:<br />
a. Loosen all four press connector bolts.<br />
b. Using top beam h<strong>and</strong>les located on end caps, remove top beam<br />
from press.<br />
! HEAVY OBJECT<br />
Depending upon width <strong>and</strong> weight of the press you have, you may<br />
require assistance from another person.<br />
c. Place beam on side, do not place the beam with the platen<br />
facing down. It is important to keep platens in good working<br />
condition. Resting the beam on the side will protect the<br />
platens from scratching or from getting dirty. Beams have<br />
rubber stripping along the length of the press to protect from<br />
scratching (see photo).<br />
<br />
—10—<br />
7. Insert prepared belt ends into the press:<br />
a. Lay clean silicone pad over clean bottom platen. Use care to<br />
<br />
nished appearance of the splice. Silicone pads are used to<br />
prevent belt material from sticking to the platens of the press.<br />
b. Lay prepared belt ends on the bottom platen.<br />
<br />
<br />
cool zones. Be sure splice area is centered properly. ere is<br />
some ‘heat loss’ on the outside areas of the heated zone, which<br />
is dependent upon the belt type. Typically the ‘melt zone’ is<br />
<br />
separation must be within the ‘melt zone’, as material outside of<br />
the melt zone will not become molten.<br />
c. Ensure prepared belt ends are tight together. If installing a<br />
nger splice, make sure that the nger tips are fully meshed<br />
<br />
in place if needed.<br />
<br />
e. It is important to use ‘bumpers’. Bumpers prevent the melted<br />
material from owing outside of the belt width <strong>and</strong> also provide<br />
stability in the press.<br />
! CAUTION<br />
e bumpers must be to a width that will ll the balance of the<br />
press to ensure even pressure <strong>and</strong> prevent damage to the press.<br />
f. Install clamp bars, ensuring that ngers remain tightly meshed.<br />
g. Lay clean silicone pad over the prepared splice, using care to<br />
avoid wrinkles in the silicone pad.
Novitool ® Aero <strong>Press</strong> <strong>Safety</strong> <strong>and</strong> <strong>Operating</strong> <strong>Manual</strong><br />
Safe Operation of Aero <strong>Press</strong><br />
8. Install top beam:<br />
<br />
avoid disrupting prepared belt ends <strong>and</strong> possibly<br />
separating the ngers.<br />
! HEAVY OBJECT<br />
If weight <strong>and</strong> length of top beam is dicult to h<strong>and</strong>le by<br />
yourself, enlist assistance of another person.<br />
<br />
sliding top beam in place if access to position beam is dicult.<br />
Install xture in slots of end caps. Slide top beam the length of<br />
the tool. Li end to remove xitive.<br />
! DANGER<br />
b. With the top beam properly centered, rotate all four press<br />
connector bolts up <strong>and</strong> h<strong>and</strong> tighten, ensuring bolts are seated<br />
properly in spherical recess on top beam.<br />
! CAUTION<br />
i. Do not allow users to get ngers caught in<br />
potential pinch points.<br />
—11—<br />
! DANGER<br />
<br />
<br />
bolt as this can cause serious physical harm <strong>and</strong>/or damage to<br />
press. If a bolt is missing or broken, replace with authorized<br />
factory parts only.<br />
! WARNING<br />
iii. To ensure proper thread engagement, the prepared belt<br />
<br />
is does not necessarily relate to the press’ heating capability.<br />
Exceeding this thickness will not allow sucient thread<br />
engagement of the Connecting Bolts to ensure safe clamping of<br />
the press, <strong>and</strong> can result in damage to the press <strong>and</strong> personal<br />
danger.<br />
9.<br />
Remove belt clamps aer top beam<br />
is secured:<br />
Failure to remove clamps may result in incomplete melt zone at<br />
ends of splices that are full press width.<br />
10.<br />
Connect umbilical power cable from top<br />
beam to bottom beam:<br />
a. Insert umbilical power cable connector into machine base<br />
umbilical cable connector.<br />
b. Engage latch to lock plug in place. Forgetting to latch plug can<br />
result in intermittent power supply to press base controls.
Novitool ® Aero <strong>Press</strong> <strong>Safety</strong> <strong>and</strong> <strong>Operating</strong> <strong>Manual</strong><br />
Safe Operation of Aero <strong>Press</strong><br />
11.<br />
Connect power cord to press:<br />
! WARNING<br />
It is extremely important that the power cord is attached to<br />
the press first <strong>and</strong> then to the wall receptacle. Reversing these<br />
procedures can put personnel at risk of electrocution <strong>and</strong> may<br />
cause a damaging electrical arc.<br />
a. Insert power cable connector to the machine base<br />
power outlet.<br />
b. Engage latch to lock plug in place. Forgetting to lock plug can<br />
result in intermittent power supply to the press.<br />
! DANGER<br />
c. Double check to ensure the voltage <strong>and</strong> receptacle is appropriate<br />
for the power cable you are using. Incorrect, excessive power<br />
voltage can cause serious damage to press <strong>and</strong> also present<br />
<br />
could cause a short circuit <strong>and</strong>/or re).<br />
<br />
Note cable<br />
voltage<br />
requirement<br />
—12—<br />
d. Next, insert power cable plug into the appropriate<br />
wall receptacle.<br />
! DANGER<br />
e. User wiring of electrical plug to bare power cable end or hard<br />
<br />
‘Electrical Diagram of Power Supply Cable’ on pages 16 <strong>and</strong><br />
17. Ensure proper cable diagram is used for cable being wired.<br />
Ensure the correct plug is used. Only qualied personnel should<br />
perform this activity.<br />
e Aero press has 2 controllers:<br />
1. e temperature controller located on the top beam has two<br />
levels of programming:<br />
a. Level 1 Programming: <strong>Splice</strong> temperature<br />
<br />
temperature.<br />
b. Level 2 Programming: Preheat temperature, preheat<br />
dwell time, bottom heat factor (lower or higher<br />
than top platen heating), cool down temperature, <strong>and</strong> units<br />
(Centigrade or Fahrenheit).<br />
2. e pressure controller is located on the bottom beam <strong>and</strong><br />
controls the pressure up to 2 bars/28 psi.<br />
12.<br />
Setting <strong>Splice</strong> Parameters:<br />
Connect the Aero press to the power supply. e following<br />
parameters can be set:<br />
a. Controller on top part of the Aero<br />
i. Input level 1<br />
<br />
<br />
<br />
ii. Input level 2<br />
<br />
<br />
<br />
<br />
<br />
<br />
b. Controller on bottom part of the Aero
Novitool ® Aero <strong>Press</strong> <strong>Safety</strong> <strong>and</strong> <strong>Operating</strong> <strong>Manual</strong><br />
Safe Operation of Aero <strong>Press</strong><br />
e Eurotherm controller defaults at start up to Level 1<br />
programming. All settings are presented as an abbreviation, e.g.<br />
“SPL.T”. If you wait a moment a readable text is shown, e.g. “<strong>Splice</strong><br />
Temperature”.<br />
Level 1 Input:<br />
a. Setting Basic Temperature <strong>and</strong> Dwell Time Inputs.<br />
i. Setting of the splice temperature<br />
. e rst value shown is splice<br />
temperature (SPLT).<br />
or<br />
DOWN button.<br />
<br />
conrm that it is set.<br />
<br />
ii. Setting splice temperature dwell time<br />
until display shows “SPLDT”.<br />
or DOWN<br />
<br />
conrm that it is set.<br />
iii. Setting cool down temperature (when cooling fans will<br />
turn o).<br />
until display shows “CLD.T”.<br />
or DOWN<br />
temperature.<br />
<br />
conrm that it is set.<br />
again.<br />
<strong>Splice</strong> <strong>Press</strong>ure (bottom controller)<br />
b. Setting splice pressure<br />
S (display shows set value).<br />
S BUTTON or otherwise the<br />
! parameter menu will open.<br />
or DOWN<br />
pressure.<br />
<br />
<br />
button S again.<br />
<br />
—13—<br />
Additional temperature <strong>and</strong> dwell time settings:<br />
Changing to Level 2 programming:<br />
Setting of the splice temperature<br />
until display shows<br />
“LEv1”.<br />
button once <strong>and</strong> display shows “LEv2”.<br />
<br />
<br />
. e rst value which is shown on the<br />
<br />
or<br />
DOWN button.<br />
<br />
conrm that it is set.<br />
<br />
<br />
<br />
<br />
or DOWN <br />
dwell time.<br />
<br />
conrm that it is set.<br />
Note: <strong>Splice</strong> temperature, splice dwell time, <strong>and</strong><br />
cool down temperature will remain in eect from<br />
Level 1 programming..<br />
Setting splice temperature, splice dwell time, <strong>and</strong> cool down<br />
temperature.<br />
Setting of the bottom platen at a lower temperature (default<br />
<br />
<br />
or DOWN <br />
percentage of power that is desired for bottom platen<br />
<br />
<br />
<br />
Note: Actual bottom heat temperature cannot be input.<br />
<br />
conrm that it is set.<br />
Changing from degrees Centigrade to Fahrenheit <strong>and</strong> reverse<br />
until display shows “UNITS”<br />
or DOWN <br />
<br />
<br />
conrm that it is set.<br />
again.<br />
ATTENTION: If the Aero is disconnected from the power supply,<br />
or the top part is disconnected from the bottom part, all extra<br />
settings of level 2 return to their default value. Only the basic
Novitool ® Aero <strong>Press</strong> <strong>Safety</strong> <strong>and</strong> <strong>Operating</strong> <strong>Manual</strong><br />
Safe Operation of Aero <strong>Press</strong><br />
13.<br />
Start Splicing Operation:<br />
! DANGER<br />
Before initiating splicing cycle, conrm all four press connector<br />
bolts are engaged with top of press <strong>and</strong> are h<strong>and</strong>-tight. Depress<br />
green ‘Start’ button. Air compressor will start <strong>and</strong> you will be<br />
able to view status of splicing cycle by watching digital display<br />
on control panel. Air pressure will continue to build aer the<br />
compressor stops.<br />
Start button<br />
Note: It is common for the air pressure to continue to rise beyond<br />
input value. is is due to the eect of the heat generated by press<br />
causing additional expansion in air bladder.<br />
Although press remains fairly cool during entire splice cycle, it<br />
is wise to avoid touching press during heating <strong>and</strong> cooling down<br />
process.<br />
Note: e Aero has been optimized for process speed, portability<br />
<strong>and</strong> ease of use. A resulting aect of the designed portability of<br />
the press is that the structure will deect as internal air pressure<br />
is increasing during the splicing process. e length of the press<br />
will determine how much deection will occur at any specic<br />
pressure. Beam extrusions were designed with strength to return to<br />
<br />
permanent.<br />
! WARNING<br />
<br />
! CAUTION<br />
e Aero press does not have an ‘Emergency Stop’ button. If there<br />
is a need to stop the press mid-cycle, then disconnect the press<br />
from power source <strong>and</strong> allow press to cool.<br />
NOTE: Temperature cycle may be aborted by simultaneously<br />
pressing <strong>and</strong> holding the <strong>and</strong> buttons.<br />
<br />
—14—<br />
14.<br />
Splicing Cycle:<br />
During the splicing cycle you will be able to monitor progress by<br />
viewing the display output. Fans will start up at the end of the cook<br />
cycle to assist with fast cooling of the splice. If the fans do not start,<br />
contact <strong>Flexco</strong> for assistance.<br />
15.<br />
Release <strong>Press</strong>ure:<br />
Aer splicing cycle is complete, depress the red pressure relief valve<br />
button until the pressure is fully relieved.<br />
! WARNING<br />
<br />
beams have temporarily deected during the splicing cycle, as they<br />
will return to their normal state when pressure is relieved.<br />
16.<br />
Disconnect main power cable:<br />
! DANGER<br />
a. It is critical to remove the power cord from the wall<br />
receptacle rst.
Novitool ® Aero <strong>Press</strong> <strong>Safety</strong> <strong>and</strong> <strong>Operating</strong> <strong>Manual</strong><br />
Safe Operation of Aero <strong>Press</strong><br />
b. Next, unlatch the cable connector from the machine base power<br />
inlet <strong>and</strong> gently disconnect.<br />
Following this sequence is critical for operator <strong>and</strong> byst<strong>and</strong>er safety.<br />
Removing plug from the wall receptacle rst eliminates any current<br />
from owing through the cable. If this procedure is not performed<br />
rst <strong>and</strong> the cable connector is removed initially, the power cable<br />
remains energized <strong>and</strong> could cause serious <strong>and</strong> fatal shock if<br />
exposed to water or other uids.<br />
17.<br />
Disconnect umbilical power cord from<br />
top beam:<br />
a. Unlatch cable connector.<br />
b. Gently disconnect.<br />
18.<br />
Remove Top Beam:<br />
a. Loosen all four press connector bolts.<br />
<br />
with platens facing downward in contact with a surface.<br />
! CAUTION<br />
Platen surfaces may be hot.<br />
c. Remove top silicone pad <strong>and</strong> inspect splice. Elements of a<br />
properly installed endless splice include:<br />
i. Limited but consistent ow of PVC/Urethane material<br />
through the splice.<br />
ii. Proper bonding, especially at the tips of the ngers. ‘Pin<br />
<br />
<br />
separation at the nger edges.<br />
iv. No scorching of the belt cover or bottom ply should<br />
be evident.<br />
—15—<br />
19.<br />
Packing <strong>Press</strong> in Flight Case:<br />
a. Reassemble top beam onto press, tighten all four press<br />
connector bolts, <strong>and</strong> install clamp bars on press.<br />
b. Carefully place press in ight case. Note: <strong>Press</strong> must be placed<br />
in case with power receptacles facing the storage area. is will<br />
protect receptacles from getting damaged during transportation.<br />
<strong>Press</strong> End with<br />
Power Receptacles<br />
Storage<br />
Compartment<br />
c. Place power cords in storage compartment.<br />
d. Close case <strong>and</strong> engage the locking latches.
Novitool ® Aero <strong>Press</strong> <strong>Safety</strong> <strong>and</strong> <strong>Operating</strong> <strong>Manual</strong><br />
Electrical Diagram of the Power Supply Cables<br />
Technical Assistance<br />
Contact <strong>Flexco</strong>’s Customer Service if technical assistance or repair parts are needed.:<br />
www.exco.com<br />
<br />
—16—
Novitool ® Aero <strong>Press</strong> <strong>Safety</strong> <strong>and</strong> <strong>Operating</strong> <strong>Manual</strong><br />
Electrical Diagram of the Power Supply Cables<br />
Three phase cables<br />
—17—
Novitool ® Aero <strong>Press</strong> <strong>Safety</strong> <strong>and</strong> <strong>Operating</strong> <strong>Manual</strong><br />
Electrical Schematics<br />
2<br />
3<br />
4<br />
5<br />
6<br />
7<br />
8<br />
9<br />
10<br />
230V<br />
BLACK 1.5mm2<br />
P2<br />
PINS<br />
1<br />
WHITE 1.5mm2<br />
BLACK 1.5mm2<br />
1 2<br />
SOLID STATE<br />
RELAY<br />
3+ 4-<br />
BLACK 1.5mm2<br />
BLACK 1.5mm2<br />
RED/WHITE<br />
BLACK 1.5mm2<br />
BLACK 1.5mm2<br />
BLACK 1.5mm2<br />
BLACK 1.5mm2<br />
BLACK 1.5mm2<br />
BLACK 1.5mm2<br />
YELLOW/GREEN 1.5mm2<br />
YELLOW/GREEN 1.5mm2<br />
WHITE<br />
<br />
RED/WHITE<br />
BLACK 1.5mm2<br />
RED .75mm2<br />
1A<br />
AA<br />
WHITE .75mm2<br />
1B<br />
AB<br />
WHITE .75mm2<br />
RED .75mm2<br />
2A 24V+<br />
RED .75mm2<br />
RED/WHITE .75mm2<br />
BLACK<br />
HEATER PAD<br />
RED<br />
RED/WHITE .75mm2<br />
—18—<br />
WHITE<br />
WHITE<br />
TEMPERATURE REGULATOR<br />
2B-<br />
V+<br />
V-<br />
START S1<br />
24V-<br />
C<br />
LA<br />
14<br />
13<br />
WHITE .75mm2<br />
YELLOW/GREEN 1.5mm2<br />
REAR<br />
PLATE<br />
RED/WHITE .75mm2<br />
WHITE .75mm2<br />
WHITE .75mm2<br />
YELLOW/<br />
GREEN<br />
2.5mm2<br />
YELLO
Novitool ® Aero <strong>Press</strong> <strong>Safety</strong> <strong>and</strong> <strong>Operating</strong> <strong>Manual</strong><br />
W/GREEN 1.5mm2<br />
RED .75mm2<br />
WHITE .75mm2<br />
24<br />
23<br />
START S1<br />
A1<br />
A2<br />
YELLOW/GREEN 1.5mm2<br />
YELLOW/GREEN 1.5mm2<br />
YELLOW/GREEN 1.5mm2<br />
RED .75mm2<br />
R1<br />
RELAY<br />
3<br />
4<br />
FRAME<br />
SPLICE PLATE<br />
GRID PLATE<br />
—19—<br />
RED .75mm2<br />
1<br />
2<br />
3<br />
FANS<br />
WHITE .75mm2
Novitool ® Aero <strong>Press</strong> <strong>Safety</strong> <strong>and</strong> <strong>Operating</strong> <strong>Manual</strong><br />
Electrical Schematics<br />
TB1<br />
P1<br />
1 2 3 4 5 6 7 8 9 10<br />
1 2 3 4 5 6 7 8 9 10<br />
PINS<br />
+ +<br />
24V24V<br />
POWER SUPPLY<br />
0V 0V<br />
- -<br />
POWER SUPPLY<br />
L2<br />
WHITE 1.5mm2<br />
<br />
BLACK 1.5mm2<br />
L1<br />
PE<br />
YELLOW/GREEN<br />
1.5mm2<br />
WHITE .75mm2<br />
BLACK 1.5mm2<br />
BLACK 1.5mm2<br />
WHITE .75mm2<br />
BLACK 1.5mm2<br />
YELLOW/GREEN<br />
1.5mm2<br />
YELLOW/GREEN<br />
2.5mm2<br />
YELLOW/GREEN<br />
1.5mm2<br />
YELLOW/GREEN<br />
1.5mm2<br />
FRAME SPLICE<br />
PLATE<br />
—20—<br />
RED .75mm2<br />
RED .75mm2<br />
BLACK 1.5mm2<br />
BLACK 1.5mm2<br />
YELLOW/GREEN<br />
1.5mm2<br />
BLACK 1.5mm2<br />
BLACK 1.5mm2<br />
BLACK 1.5mm2<br />
BLACK 1.5mm2<br />
BLACK 1.5mm2<br />
RED 1.5mm2<br />
BLACK 1.5mm2<br />
BLUE 1.5mm2<br />
BLACK 1.5mm2<br />
BRIDGE<br />
CELL<br />
BLACK 1.5mm2<br />
+<br />
-<br />
HEATER PAD<br />
BLACK 1.5mm2<br />
WHITE 1.5mm2<br />
BLACK 1.5mm2<br />
BLACK 1.5mm2<br />
1<br />
3+<br />
RED .75mm2<br />
SOLID STATE<br />
RELAY<br />
YELLOW/GREEN 1.5mm2<br />
YELLOW/GREEN 1.5mm2<br />
WHITE .75mm2
2<br />
Novitool ® Aero <strong>Press</strong> <strong>Safety</strong> <strong>and</strong> <strong>Operating</strong> <strong>Manual</strong><br />
3<br />
4- 4<br />
BLACK 1.5mm2<br />
RED .75mm2<br />
WHITE .75mm2<br />
WHITE .75mm2<br />
WHITE .75mm2<br />
R1 RELAY<br />
WHITE .75mm2<br />
RED .75mm2<br />
WHITE .75mm2<br />
WHITE .75mm2<br />
A1<br />
A2<br />
RED/WHITE .75mm2<br />
BLACK 1.5mm2<br />
TB1<br />
13<br />
14<br />
1<br />
10<br />
3<br />
9<br />
11<br />
12<br />
BLACK .25mm2<br />
WHITE<br />
BLUE .25mm2<br />
BROWN .25mm2<br />
PRESSURE<br />
REGULATOR<br />
MAX: 2 BAR<br />
1<br />
3<br />
5<br />
2<br />
4<br />
6<br />
7<br />
9<br />
P2<br />
8<br />
10<br />
—21—<br />
BROWN .25mm2<br />
RED .75mm2<br />
SOCKET<br />
BLUE .25mm2<br />
WHITE .75mm2<br />
RED .75mm2<br />
WHITE .75mm2<br />
COMPRESSOR<br />
FAN 1<br />
FAN 2<br />
RED .75mm2
Novitool ® Aero <strong>Press</strong> <strong>Safety</strong> <strong>and</strong> <strong>Operating</strong> <strong>Manual</strong><br />
Maintnenance<br />
Settings of the pressure controller:<br />
Resetting of the parameters to their original settings:<br />
S button to get into the function<br />
<br />
S <br />
(unit conversion menu)<br />
–e display should show “Uni” <strong>and</strong> “bAr” (bar)<br />
or “Psi” (psi) now. Setting can be done by pushing<br />
the UP or DOWN button<br />
S button to return to the function menu (display<br />
<br />
button to get to “F1”<br />
–(push S<br />
–(push S) “lot” should be set to “I-n”<br />
–(push S<br />
–(push S<br />
–(push S) “Col” should be set to “Sor”<br />
<br />
<br />
<br />
<br />
<br />
<br />
<br />
<br />
<br />
–If in the copy mode, push the <strong>and</strong> buttons<br />
simultaneously for some seconds to return<br />
<br />
<br />
S button to return to the operation<br />
mode<br />
<br />
—22—<br />
Calibration of the pressure controller<br />
<br />
released<br />
<br />
as follows:<br />
–Push both the UP <strong>and</strong> DOWN button<br />
simultaneously <strong>and</strong> hold them for a while<br />
<br />
<br />
Reset of the 24 VDC fuse<br />
<br />
24 VDC fuse
Novitool ® Aero <strong>Press</strong> <strong>Safety</strong> <strong>and</strong> <strong>Operating</strong> <strong>Manual</strong><br />
Logbook<br />
DATE NOTES DATE NOTES<br />
—23—
EC Declaration of Conformity<br />
<strong>Flexco</strong> Netherl<strong>and</strong>s<br />
<br />
<br />
e Netherl<strong>and</strong>s<br />
www.novitool.com<br />
<br />
for splicing thermoplastic conveyor belt material, comply with the following EC Directives:<br />
<br />
<br />
<br />
e Netherl<strong>and</strong>s,<br />
Velsen-Noord,<br />
<br />
J.S. van’t Schip<br />
<br />
www.flexco.com<br />
<br />
<br />
®