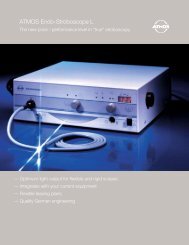
Atmos MedDoc 2.6 User Manual - Videostroboscopy.com
Atmos MedDoc 2.6 User Manual - Videostroboscopy.com
Atmos MedDoc 2.6 User Manual - Videostroboscopy.com

You also want an ePaper? Increase the reach of your titles
YUMPU automatically turns print PDFs into web optimized ePapers that Google loves.
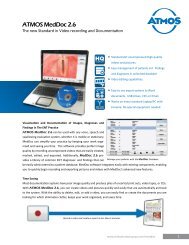
<strong>Atmos</strong> <strong>MedDoc</strong> <strong>2.6</strong><br />
<strong>User</strong> <strong>Manual</strong>
Table of Contents<br />
1.0 Getting Started 3<br />
1.1 Logging In 3<br />
1.2 Adjusting the Settings 4<br />
2.0 Detecting Devices 5<br />
2.1 Detecting Video Device 5<br />
2.2 Detecting Audio Device 6<br />
2.3 Detecting Foot Switch 6<br />
3.0 Creating a New Patient/Video 7<br />
3.1 Adding New Patient to the Database 8<br />
4.0 Recording New Video 8<br />
5.0 Watching the Video 9<br />
5.1 Recording Another Video 9<br />
6.0 Editing the Video 10<br />
7.0 Comparing Two Videos 11<br />
8.0 Marking and Labeling Pictures and Video frames 12<br />
9.0 Adding Comments to Videos 13<br />
9.1 Using the Database 13<br />
9.2 Adding to the Database 14<br />
10.0 Taking a Snapshot 15<br />
11. Opening Pictures 15<br />
11.1 Viewing 16<br />
11.2 Adjusting the Pictures 17<br />
12.0 Exporting Videos 18<br />
12.1 Exporting out of <strong>MedDoc</strong> 18<br />
12.2 Exporting to a DVD 19<br />
13.0 Exporting Pictures 21<br />
13.1 Exporting out of <strong>MedDoc</strong> 21<br />
13.2 Exporting to Word Document 22<br />
13.3 Exporting to DICOM 23<br />
2
Please note: * Words circled in red require an action.<br />
* Words circled in green are for information only.<br />
* For additional information click on help.<br />
1.0 Getting started<br />
A) Double click on <strong>Atmos</strong> <strong>MedDoc</strong> <strong>2.6</strong> on your desktop<br />
Note: <strong>MedDoc</strong> <strong>2.6</strong> is touch screen <strong>com</strong>patible. If you have a touch screen<br />
laptop then you can either use your finger, touch pen or a mouse. If you do<br />
not have this feature on your laptop then you must use the mouse.<br />
1.1 Login<br />
A) Enter login name and password and click on OK<br />
Note: For the demo version, Start with “Supervisor” and with no password<br />
B) Click on OK<br />
3
1.2 Adjusting the Settings<br />
Note: The camera is an NTSC Camera , therefore <strong>MedDoc</strong> should also be<br />
set to NTSC to ensure better image quality.<br />
A) From the Start Menu, Click System<br />
B) Click Settings<br />
C) From the Settings menu Click Video<br />
D) Go to Video Format, Click on the Drop down menu and make sure NTSC<br />
is selected<br />
E) Click Save<br />
4
2.0 Detecting Devices when Receiving message „Device not Foud“<br />
Note: If you are getting the message Device Not Found! Or Footswitch<br />
not Found, then you need to make sure that the fire wire cable is<br />
connected to the laptop, the Strobo 21 and the Cam DV are turned on<br />
and the foot switch is connected to the USB.<br />
A) Click OK<br />
B) From the Start menu, Click on System<br />
C) From the System menu Click on Device<br />
This only has to be done one time<br />
2.1 Detecting the Video Source<br />
Note: Make sure the fire wire cable is plugged in and both systems are turned<br />
on.<br />
A) From the Device Menu, Click on Video In<br />
B) Select and Click Save<br />
5
3.1 New patient<br />
A) Fill in patient data<br />
Note: ID must be different to other existing patients.<br />
B) Click on Accept in Edit menu<br />
4.0 Record a video<br />
Note: After you have created a new patient or selected<br />
one you are in the Recorder menu.<br />
A) Click on Record to start the video<br />
B) Click on Stop to stop the video (It appears when you click on Play-Button)<br />
6
2.1 Detecting Audio Device<br />
A) From the device menu select Audio In<br />
B) Select AVC Compatible DV Device then Click Save<br />
3.3 Detecting the Foot Switch<br />
A) From the Device menu, select Foot Switch<br />
B) You can either be in Auto Scan or <strong>Manual</strong>. If it does not detect the foot<br />
switch in Auto, try clicking on <strong>Manual</strong>, and press the foot switch several<br />
times<br />
7
3.0 Create a new patient and/or new video<br />
A) Click on New in Start menu<br />
B) Click on New in Patient menu to create a new patient or<br />
C) Highlight existing patient and click on Select to start a new video for that<br />
patient<br />
Note: You can sort the patients by name or number<br />
8
5.0 Watch the video after recording or display picture<br />
A) After recording the video, Click on Play and it will bring you to the<br />
Player Menu<br />
B) It will bring you to the Player menu<br />
C) Use the Play, Stop, Fast Forward and Rewind Buttons to watch the<br />
video. You can also scroll with the arrow to watch it frame by frame<br />
5.1 Recording additional videos after watching the current video<br />
If you are not happy with your current video, you can record another one<br />
A) From the Player menu Click Record<br />
B) Answer Yes or No when it asks if you want to add this new video to the<br />
old session. You will be brought back the to the Recorder menu<br />
9
6.0 Editing the Video<br />
A) From the Player menu, Click Back, then you will be brought to the<br />
Session menu<br />
B) Select the session, then Click Select, and you will be brought to the Data<br />
Set menu<br />
C) Select the Data Set then Click Edit<br />
D) In the Edit Select Menu, Click Video<br />
Note: You can use the editing feature to remove unimportant parts of the<br />
video, or to select a particular section<br />
E) Find the desired starting point for the clip using the Player buttons then<br />
Click the Start Button. Click the End Button to end the clip<br />
F) To preview the clip Click Preview, then you can re-edit if necessary<br />
G) Click Execute when you are finished and it will save your Clip<br />
10
7.0 Comparing Videos<br />
Note: You can <strong>com</strong>pare a video with another video from the patient, or<br />
from another patient<br />
A) From the Player menu, Click Split<br />
B) From the Split Menu, Click Add<br />
It will bring you back to the Patient menu<br />
C) Select the patient you want to <strong>com</strong>pare to, then Click Select. Then find<br />
the session and data set you want to <strong>com</strong>pare to and Click Select<br />
It will bring you to a screen in the Player menu <strong>com</strong>paring two videos.<br />
D) Select each video to play it<br />
E) If you want to add more videos Click Split and repeat<br />
11
8.0 Marking Pictures and Video Frames<br />
You have the option of marking particular frames from your video to point<br />
out important areas<br />
A) From the Player menu, Click on the word button and the Picture menu<br />
appears<br />
B) Click on Marker and the Marker menu appears<br />
C) To circle something click on the Circle Button, then drag the + sign to the<br />
area to be marked. Click again and you can type a notation<br />
D) To point to a spot select the Arrow<br />
E) To free draw select the Free Draw button<br />
F) Click Back<br />
D C E<br />
12
9.0 Add Findings/Diagnosis<br />
Note: You can choose findings and diagnosis from the existing ENT<br />
database or you can create your own<br />
A) To create your own: After you find the frame from the player menu, Click<br />
on the Word Button and it will bring you to the Picture menu<br />
B) Click Comment<br />
C) Type in your findings and diagnosis then Click Accept<br />
9.1 Using the Database<br />
Note: You have 2 databases: One for findings and one for diagnosis<br />
A) Click on Database from the Edit menu then highlight your desired finding<br />
or diagnosis<br />
Note: You can search for your findings by sorting them by ABC or 123<br />
B) Click on Select, then Accept<br />
C) Answer either yes or no when it asks if you want the <strong>com</strong>ments for all<br />
the data sets in session<br />
D) Repeat for diagnosis<br />
If you wish to export your <strong>com</strong>mented video frame into a report at this time,<br />
skip to section 13.2: Exporting to a word document<br />
13
9.2 Adding to the Database<br />
A) From the Diagnosis menu, select New<br />
B) Enter a code number and the name of the diagnosis you would like to add<br />
C) Click Accept<br />
D) Click on Back until you <strong>com</strong>e to the Data Set menu again,<br />
E) Click on Edit, then Comment and do the same for new findings<br />
14
10.0 Take a Snapshot picture<br />
Instead of recording a video, you can take a quick snapshot<br />
A) In the Recorder menu, Click on the Camera button<br />
It will be saved in the patient’s session with a camera logo next to it<br />
11.0 Opening Pictures<br />
A) Click on Archive and you will be in the Session menu<br />
B) Select your current session and Click on Select and it will bring you to<br />
the Data Set menu<br />
C) Select the picture, which will be mark with a camera logo, and click<br />
Select<br />
15
11.1 Adjusting the Pictures<br />
You will be in the picture menu<br />
A) To zoom into a certain part of the picture, Click the Select Button<br />
B) To slide the picture around to see different parts, Click the hand button<br />
C) To add black frames on both sides of the picture click the vertical arrows<br />
D) To add black frames to top and bottom of the picture, select the<br />
horizontal arrows<br />
E) To see the full image click on the 1:1 button<br />
F) To zoom in, Click Zoom<br />
Note: You can also mark, <strong>com</strong>ment or <strong>com</strong>pare from here<br />
A<br />
A B C D<br />
16<br />
E F<br />
C D E F
12.0 Exporting Videos<br />
Note: To export the videos or picture data you must first go to the Session<br />
menu.<br />
A) Click Archive directly after recording video OR go back to the Start<br />
menu and Click Archive, select the patient, then click Select<br />
B) In the Session menu, chose the session and Click Select<br />
C) You will be in the Data Set menu, select the video and Click Export<br />
17
12.1 Exporting Videos out of <strong>MedDoc</strong><br />
Note: You are in the Export Select Menu, and have the option of saving<br />
videos to another location on your <strong>com</strong>puter, a USB drive, an external hard<br />
drive, DICOM, or burning it to a CD/DVD<br />
A) Select your video and Click Files<br />
B) Select the type of file you would like to save it as<br />
C) Chose a storage location on you <strong>com</strong>puter and Click Save<br />
18
12.2 Exporting videos to a CD/DVD<br />
A) Click on Video Disc<br />
B) You will be in the Video Collection menu, you can add more videos by<br />
Clicking Back and selecting any other video from any patient<br />
C) To delete videos, select the video and Click on Remove<br />
D) To clear all items, Click Clear<br />
E) Click on Overlay to define which information should be included in the<br />
video<br />
F) You will be in the Edit Menu. Check or Uncheck the desired fields or<br />
make further <strong>com</strong>ments<br />
G) Click Accept<br />
19
H) You will be in the Export Menu, Click on Execute and the program will<br />
convert the video to an mpeg-file<br />
I) Click on Yes when it asks if you would like to burn a CD<br />
J) Insert a blank CD to the disk drive and Click Yes<br />
K) Click OK after successful burning<br />
20
13.0 Exporting Pictures<br />
Note: to export the videos or picture data you must first go to the Session<br />
menu.<br />
A) Go back to the Start menu and Click Archive, select the patient, then<br />
click Select<br />
B) In the Session menu, chose the session and Click Select<br />
C) In the Data Set menu, select your picture then Click Export<br />
13.1 Exporting Pictures out of <strong>MedDoc</strong><br />
A) From the Export Select Menu, Select the picture, then Click File<br />
B) Select the file type, choose a location and Click Save<br />
21
13. 2 Exporting pictures into a word document<br />
Note: You can export either a snapshot or a picture from a video into a word<br />
document<br />
A) From the Export Select Menu, Click on Document<br />
B) In the document menu, Click on Template<br />
B) Select ATMOSINC 1 or another desired template and Click Open OR<br />
C) To include all pictures from Gallery select Gallery from the Choose<br />
Template Menu and Click Open<br />
D) Click Execute and a word document will appear in the menu bar on your<br />
E) Using the File menu in word, Print or Save the document as desired<br />
22
13.3 Export Picture to DICOM file (Digital Imaging and Communication)<br />
A) From the Export Menu, Click on DICOM<br />
B) If the picture has no <strong>com</strong>ments, it will ask if you want to export anyway.<br />
Click Yes<br />
C) A Save As Menu will pop up, Choose a location and name your file as desired,<br />
then Click Save<br />
23