

USB 2.0 Video & Audio Grabber - ARP
USB 2.0 Video & Audio Grabber - ARP
USB 2.0 Video & Audio Grabber - ARP

Create successful ePaper yourself
Turn your PDF publications into a flip-book with our unique Google optimized e-Paper software.
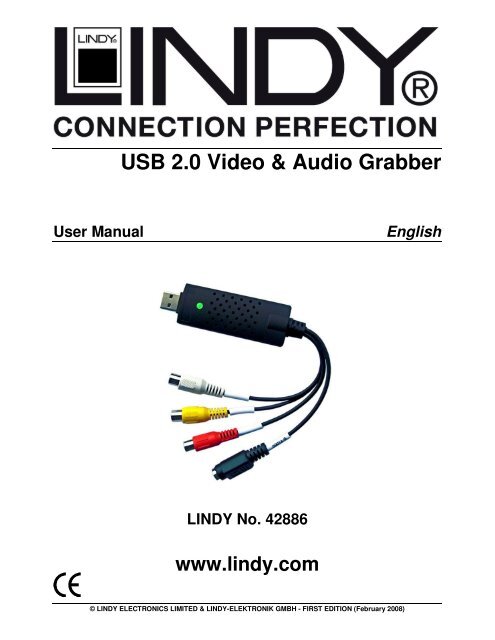
<strong>USB</strong> <strong>2.0</strong> <strong>Video</strong> & <strong>Audio</strong> <strong>Grabber</strong><br />
User Manual English<br />
LINDY No. 42886<br />
www.lindy.com<br />
© LINDY ELECTRONICS LIMITED & LINDY-ELEKTRONIK GMBH - FIRST EDITION (February 2008)
Introduction<br />
Thank you for purchasing the LINDY <strong>USB</strong> <strong>2.0</strong> <strong>Video</strong> & <strong>Audio</strong> <strong>Grabber</strong>. The <strong>USB</strong> <strong>2.0</strong> <strong>Video</strong> &<br />
<strong>Audio</strong> <strong>Grabber</strong> allows you to connect your camcorder or VCR to your computer to transfer audio<br />
and full motion video for storage, backup, copying and editing. With the supplied Ulead<br />
<strong>Video</strong>Studio 10 application you’ll be able to create professional looking results which you can<br />
copy to CD or DVD, or e-mail to family and friends.<br />
Features<br />
• High speed <strong>USB</strong> <strong>2.0</strong> support for superior performance<br />
• Easy Plug & Play installation<br />
• Snapshot image capture function<br />
• Powered by the <strong>USB</strong> bus – no external power supply required<br />
• Motion capture: up to 25fps @ 720 x 576 (PAL), 30fps@ 720 x 480 (NTSC)<br />
• Supports MPEG 1, MPEG 2 and MPEG 4 encoding formats<br />
• Left & Right RCA audio input<br />
• Composite video & S-<strong>Video</strong> inputs<br />
• NTSC & PAL support<br />
• Overall length: 260mm (approx.)<br />
Minimum System Requirements<br />
• <strong>USB</strong> <strong>2.0</strong> equipped computer<br />
• Pentium III CPU (or equivalent), 800 MHz or above<br />
• 256MB RAM<br />
• Windows Vista, Windows XP (SP1) or Windows 2000 (SP3)<br />
• CD or DVD drive<br />
Package Contents<br />
• LINDY <strong>USB</strong> <strong>2.0</strong> <strong>Video</strong> & <strong>Audio</strong> <strong>Grabber</strong><br />
• Driver and Ulead software application CD<br />
• This manual<br />
Product Information<br />
<strong>USB</strong> <strong>2.0</strong> connector: Connects directly to a <strong>USB</strong> <strong>2.0</strong> port on your computer. This product is not<br />
designed for use with the <strong>USB</strong> 1.1 interface nor should you connect it to a non-powered <strong>USB</strong><br />
<strong>2.0</strong> hub<br />
<strong>Audio</strong> inputs: Connects to the left & right audio outputs from your external device (e.g. VCR)<br />
Composite video input: Connects to the Composite video output from your device<br />
S-<strong>Video</strong> input: Connects to the S-<strong>Video</strong> output from your external device
Device Installation<br />
Note: You must install the driver software BEFORE connecting the <strong>Video</strong> & <strong>Audio</strong><br />
<strong>Grabber</strong> to your PC!<br />
1. Insert the Installation CD into your CD/DVD drive. If the Autorun screen does not show,<br />
launch the following setup program:<br />
E:\Setup.exe<br />
(Assuming ‘E’ is your CD/DVD drive)<br />
2. The InstallShield Wizard will launch. Follow<br />
the on-screen instructions to install the driver.<br />
When the driver installation is complete you<br />
will be asked to restart your computer.<br />
Select: Yes, I want to restart my computer<br />
now, and then click OK.<br />
3. After the computer has restarted and booted into Windows, you can plug the <strong>Video</strong> & <strong>Audio</strong><br />
<strong>Grabber</strong> into one of your computer’s <strong>USB</strong> <strong>2.0</strong> ports. Windows will automatically detect and<br />
set up the device.<br />
4. You can confirm the correct installation by launching Windows Device Manager:<br />
Go to: Start > Settings > Control Panel > System > Hardware > Device Manager<br />
Check for the outlined entries –
Installation Troubleshooting<br />
The <strong>Video</strong> <strong>Grabber</strong> is not detected by my PC!<br />
• Ensure any <strong>USB</strong> <strong>2.0</strong> settings are enabled in your PC’s BIOS<br />
• Make sure your system has the latest <strong>USB</strong> <strong>2.0</strong> host drivers installed<br />
• For Windows XP, please upgrade to SP1 or above; for Windows 2000, upgrade to SP3<br />
or above<br />
There is no display in the preview window!<br />
• Check that the device connected to the <strong>USB</strong> grabber is correctly switched on; ensure<br />
that the cable connections are correctly seated<br />
• Depending on the connected device, check that the <strong>Video</strong> Input option is correctly set to<br />
either Composite or S-<strong>Video</strong><br />
• Make sure your system has the latest <strong>USB</strong> <strong>2.0</strong> host drivers installed<br />
• For Windows XP, please upgrade to SP1 or above; for Windows 2000, upgrade to SP3<br />
or above<br />
Why is the display resolution always 320 x 240 in preview mode?<br />
• Check that the video grabber is not plugged into a <strong>USB</strong> 1.1 port<br />
• Make sure your system has the latest <strong>USB</strong> <strong>2.0</strong> host drivers installed<br />
The system shows: ‘High speed device plugged into Full speed <strong>USB</strong> port’!<br />
• Check that the video grabber is not plugged into a <strong>USB</strong> 1.1 port<br />
• Make sure your system has the latest <strong>USB</strong> <strong>2.0</strong> host drivers installed<br />
Why do I get unstable video during preview and recording?<br />
• If you are using an Ultra DMA hard disk, please update the IDE ATA/ATAPI controller<br />
driver to the latest version<br />
How can I get a minimum number of dropped frames during video capture?<br />
The best recording performance depends on the specification of your PC, but you can also try<br />
some of the steps below to improve performance...<br />
• Try lowering the resolution format you record<br />
• Enable hard disk drive DMA; go to: My Computer > Control Panel > System ><br />
Hardware > Device Manager > Disk Drives to setup<br />
• Keep a larger amount of free space on the hard disk<br />
• Use a hard drive with a rotation speed higher than 7200rpm<br />
• Disable power management settings in the PC’s BIOS<br />
• Avoid running other applications at the same time as using the video grabber<br />
• Defrag your hard disk<br />
I can preview video but when recording, the system hangs or crashes!<br />
• Please install DirectX 9.0 or above<br />
• Your display driver may be incompatible with direct draw; please update the VGA driver<br />
• Try shutting down any unnecessary programs<br />
• Lower the hardware acceleration, go to: My Computer > Control Panel > Display ><br />
Settings > Advanced > Performance to adjust
Ulead Software Quick Guide<br />
For a full instruction manual on how to use this software, please refer to the Installation<br />
and Application CD included with this product.<br />
Ulead® <strong>Video</strong>Studio® 10 SE is a video editing and DVD authoring software that lets anyone do<br />
more with video. Use wizards to create exciting slideshows and videos automatically or choose<br />
from a complete array of easy-to-use tools to take your videos further. Share your movies<br />
everywhere, from iPods to the latest high-definition home theatre systems.<br />
System Requirements<br />
• Microsoft® Windows® 2000, Vista, XP Home Edition, Professional, Media Centre Edition<br />
and Professional x64 Edition<br />
• Intel® Pentium® 4 or higher<br />
• 256MB of RAM (512MB or above for editing)<br />
• 1 GB or more of available hard drive space for program installation<br />
• Windows-compatible display with at least 1024x768 resolution<br />
• VGA display card setting: 24-Bit true color or above is recommended<br />
• Windows compatible sound card<br />
• CD-ROM, CD-R/RW or DVD-R/RW<br />
Real-time features perform best with at least:<br />
• Pentium 4, <strong>2.0</strong> GHz CPU<br />
• 512MB of RAM<br />
• 7200 rpm IDE hard drive<br />
In the DV-to-DVD Wizard, if you plan to capture and burn an hour of DV tape, it is<br />
recommended that you have at least 20GB of available hard drive space<br />
Installing Ulead <strong>Video</strong>Studio and drivers<br />
To install Ulead <strong>Video</strong>Studio and the necessary drivers, insert the CD in your CD-ROM drive<br />
and simply follow the on-screen installation instructions.<br />
What are these drivers?<br />
• QuickTime 7.03: The video format from Apple for creating and playing back movie files<br />
such as MOV and QT file formats. You should install QuickTime 7.03 or above to be able<br />
to use the Auto Music function (i.e., SmartSound QuickTracks®) in Ulead <strong>Video</strong>Studio.<br />
• SmartSound Quicktracks: This is a plug-in from SmartSound® that is integrated into<br />
Ulead <strong>Video</strong>Studio. It gives you a library of quality soundtracks that you can add as<br />
background music to your movie projects.<br />
• RealPlayer 10.5: This is a software player from RealNetworks for playing Real <strong>Video</strong> and<br />
Real <strong>Audio</strong> files from the Internet. It is recommended that you install this driver unless<br />
you have a later version.<br />
• Intel Indeo 5.2: This is the codec for creating or playing .AVI files in QuickTime. You<br />
should install Intel Indeo 5.2 or above to be able to use the style templates in the Ulead<br />
<strong>Video</strong>Studio Movie Wizard.<br />
• Acrobat Reader 7.07: This is Adobe's Acrobat Reader and is used for viewing the Ulead<br />
<strong>Video</strong>Studio's electronic manual. It is recommended that you install it unless you have a<br />
later version.<br />
• Microsoft DirectX: A driver from Microsoft that improves playback performance of video<br />
files. You should install this driver. It will be installed automatically when you are installing<br />
Ulead <strong>Video</strong>Studio.
• Microsoft Windows Media Format: A set of drivers from Microsoft that allows you to<br />
create WMV and other streaming media files. They will be installed automatically when<br />
you are installing Ulead <strong>Video</strong>Studio.<br />
• Macromedia Flash Player 7: This is a software player that allows you to play back flash<br />
animation files (SWF). <strong>Video</strong>Studio comes with plenty of flash animation files that you<br />
can use for your video.<br />
Note: If you have a previous version of Ulead <strong>Video</strong>Studio installed in your system, it is<br />
recommended that you uninstall it only after installing Ulead <strong>Video</strong>Studio SE. During<br />
installation, the Setup Wizard will auto-detect your capture device plug-in and specially<br />
supported codecs (such as MPEG-4, 3GP, DivX) from the previous <strong>Video</strong>Studio version and<br />
integrate it onto <strong>Video</strong>Studio SE.<br />
However, if you installed Ulead <strong>Video</strong>Studio 10 then you uninstalled the older version, program<br />
files and fonts that are used by both versions will also be deleted. To install them back to<br />
<strong>Video</strong>Studio 10, double-click Add or Remove Programs in the Control Panel, select Ulead<br />
<strong>Video</strong>Studio SE, click Change/Remove, then click Repair.<br />
Registering your copy of Ulead <strong>Video</strong>Studio<br />
Do not forget to register your copy of Ulead <strong>Video</strong>Studio. You can do this in the registration<br />
window when you launch the program or by simply filling out the registration card and mailing it<br />
in. It is important to register your copy as it allows you to receive technical support and<br />
important product update information. You will also be getting the opportunity to win prizes as<br />
well as taking advantage of special promotions and discounts on other Ulead Systems'<br />
software.<br />
Program-related information<br />
• Capture board requirements:<br />
When acquiring video from an analogue source, make sure that the analogue capture<br />
card you are using supports RGB or YUV capture.<br />
• Startup Screen:<br />
When rendering title text against a pure background colour clip, the text may appear<br />
blurry. This is due to certain types of compression. For better results, try using the<br />
<strong>Video</strong>1, RLE, or no compression options.<br />
• DV-to-DVD Wizard:<br />
a. If you plan to capture and burn an hour of DV tape, select all the scenes before you go<br />
to the next step and make sure that you have 20GB of available hard drive space. The<br />
whole process will take approximately 5 hours to complete.<br />
b. When scanning the DV tape using maximum speed, the detected scenes will vary<br />
every time you scan the tape. The scenes that are detected will depend on the type of<br />
DV camcorder used.<br />
• Capture Step:<br />
To check MPEG capture settings, click the Options button in the Options Panel and<br />
select <strong>Video</strong> and <strong>Audio</strong> Capture Property Settings. In the dialog box that opens, click the<br />
Capture tab. To view more MPEG settings, click Advanced.<br />
• Effect Step:<br />
Before applying the Album Flip transition effect to your clips, make sure that your system<br />
is updated with the latest display card driver.<br />
• Title Step:<br />
1GB RAM is required if you want to insert more than 500 subtitles.<br />
• <strong>Audio</strong> Step:<br />
Some VST audio plug-ins when applied to audio clips will make the clip silent. This
happens in multithreaded applications such as <strong>Video</strong>Studio. Please contact the VST<br />
plug-in vendor to inquire about this problem.<br />
• Share Step:<br />
a. To create an MPEG video file or DVD/VCD/SVCD-ready MPEG file:<br />
• Click the Create <strong>Video</strong> File button and select one of the movie templates from<br />
the pop-up menu, or select Same as Project Settings or Same as First <strong>Video</strong><br />
Clip to output an MPEG file according to the project settings or the properties<br />
of the first clip in the <strong>Video</strong> Track.<br />
Or,<br />
• Click the Create <strong>Video</strong> File button and select Custom. Select MPEG files from<br />
the Save as type box, then click the Options button to specify the properties for<br />
the video file.<br />
b. The Movie Screen Saver option in Export only supports the WMV file format.<br />
Software Troubleshooting<br />
• If you experience difficulty getting started with Ulead <strong>Video</strong>Studio, use the online help or<br />
check the manual for information.<br />
• When rendering a title text against a pure background colour clip, the text may appear<br />
blurry. This is due to certain types of compression. For better results, try using the<br />
<strong>Video</strong>1, RLE, or no compression options.<br />
• The <strong>Video</strong> Greeting Card does not support QuickTime files.<br />
• If you want to share and play your video on other machines, make sure you use a<br />
common codec, such as Cinepak, Indeo or MPEG. If you use a hardware codec, such as<br />
MJPEG, you may be unable to view the video unless the other machine has the same<br />
card on board.<br />
• You may experience some problems when playing QuickTime files. Such as, the<br />
playback may not be smooth or the Stop button in the Navigator bar cannot switch back<br />
to the Start button after playing. In such cases, please change to safe mode in the<br />
QuickTime <strong>Video</strong> Settings. (You can do this by clicking the Control Panel: QuickTime<br />
icon.)<br />
• Some camcorders (specifically some Panasonic models) have a small problem that<br />
prevents them from recording movies from your computer. If this is a problem,<br />
<strong>Video</strong>Studio can be made to pause for a short time before transmitting the video to the<br />
camcorder. Find the msdevctl.ini file in the main program folder (in All Users.WINNT),<br />
open this file in Notepad and modify the following line where 1 second = 1000: [MainSec]<br />
RecordDelay=1000.<br />
• Frame sizes supported by the Hitachi DVD Camcorder include:<br />
352 x 480 (NTSC) 704 x 480 (NTSC)<br />
352 x 576 (PAL) 704 x 576 (PAL)<br />
• To avoid the problem of having not enough hard drive space when you capture or burn a<br />
disc, make sure that the folders that are assigned as the working folders for capturing<br />
and burning have plenty of free space. You can check this in the Preferences in the<br />
<strong>Video</strong> Editor and in the Advanced Settings dialog box in the DV-to-DVD Wizard.<br />
• In DV-to-DVD Wizard, If you have more than one burner installed in your computer or the<br />
default drive is not a burner, specify the burner you want to use in the Advanced Settings<br />
dialog box.
CE Certification<br />
This equipment complies with the requirements relating to electromagnetic compatibility, EN55022/EN55024 class B for<br />
IEC/EN61000-4-2/3 the essential protection requirement of Council Directive 89/336/EEC on the approximation of the laws of<br />
the Member States relating to electromagnetic compatibility.<br />
WEEE (Waste of Electrical and Electronic Equipment),<br />
Recycling of Electronic Products<br />
United Kingdom<br />
In 2006 the European Union introduced regulations (WEEE) for the collection and recycling of all waste electrical and electronic<br />
equipment. It is no longer allowable to simply throw away electrical and electronic equipment. Instead, these products must<br />
enter the recycling process.<br />
Each individual EU member state has implemented the WEEE regulations into national law in slightly different ways. Please<br />
follow your national law when you want to dispose of any electrical or electronic products. More details can be obtained from<br />
your national WEEE recycling agency.<br />
Germany<br />
Die Europäische Union hat mit der WEEE Direktive umfassende Regelungen für die Verschrottung und das Recycling von<br />
Elektro- und Elektronikprodukten geschaffen. Diese wurden von der Bundesregierung im Elektro- und Elektronikgerätegesetz –<br />
ElektroG in deutsches Recht umgesetzt. Dieses Gesetz verbietet vom 24.März 2006 an das Entsorgen von entsprechenden,<br />
auch alten, Elektro- und Elektronikgeräten über die Hausmülltonne! Diese Geräte müssen den lokalen Sammelsystemen bzw.<br />
örtlichen Sammelstellen zugeführt werden! Dort werden sie kostenlos entgegen genommen. Die Kosten für den weiteren<br />
Recyclingprozess übernimmt die Gesamtheit der Gerätehersteller.<br />
France<br />
En 2006, l'union Européenne a introduit la nouvelle réglementation (DEEE) pour le recyclage de tout équipement électrique et<br />
électronique.<br />
Chaque Etat membre de l’ Union Européenne a mis en application la nouvelle réglementation DEEE de manières légèrement<br />
différentes. Veuillez suivre le décret d’application correspondant à l’élimination des déchets électriques ou électroniques de<br />
votre pays.<br />
Italy<br />
Nel 2006 l’unione europea ha introdotto regolamentazioni (WEEE) per la raccolta e il riciclo di apparecchi elettrici ed elettronici.<br />
Non è più consentito semplicemente gettare queste apparecchiature, devono essere riciclate. Ogni stato membro dell’ EU ha<br />
tramutato le direttive WEEE in leggi statali in varie misure. Fare riferimento alle leggi del proprio Stato quando si dispone di un<br />
apparecchio elettrico o elettronico.<br />
Per ulteriori dettagli fare riferimento alla direttiva WEEE sul riciclaggio del proprio Stato.<br />
LINDY No 42886<br />
1 st Edition, February 2008<br />
www.lindy.com