User's Manual - VTech
User's Manual - VTech
User's Manual - VTech

You also want an ePaper? Increase the reach of your titles
YUMPU automatically turns print PDFs into web optimized ePapers that Google loves.
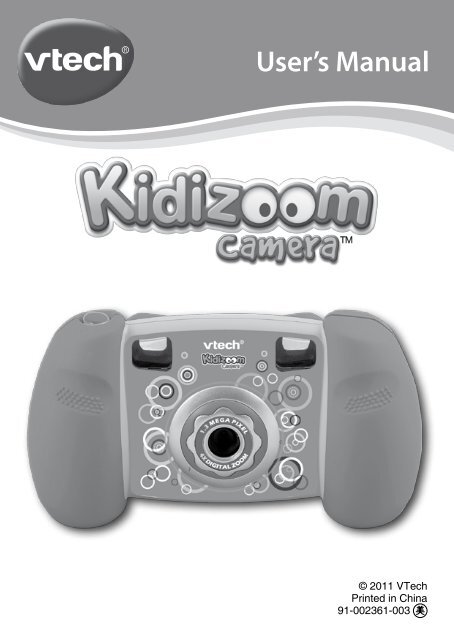
User’s <strong>Manual</strong><br />
© 2011 <strong>VTech</strong><br />
Printed in China<br />
91-002361-003
INTRODUCTION<br />
Kidizoom Camera is a fun and durable digital camera that allows kids<br />
to take photos, shoot movies, and play games!<br />
Kidizoom Camera has 128MB of built-in memory (shared with program<br />
data), and it includes a USB port to connect the camera to a computer so<br />
you can save and view your photos and movies.<br />
FEATURES<br />
PRODUCT LAYOUT AND BUTTONS<br />
Shutter Button<br />
4-Directional<br />
Cursor Buttons<br />
Mode<br />
Button<br />
USB Port for<br />
Computer<br />
Connection<br />
Lens<br />
Zoom In Button<br />
Zoom Out<br />
Button<br />
OK Button<br />
Delete<br />
Button<br />
ON/OFF Button<br />
Introduction / Features<br />
3
ON/OFF Button<br />
Press this button to turn the camera ON or OFF.<br />
USB Port<br />
Use this USB port to connect the camera to your computer.<br />
Mode Button<br />
Press this button to go to the main menu or to go back to the previous<br />
submenu.<br />
4-Directional Cursor Buttons<br />
Press these buttons to move the cursor and make selections.<br />
OK Button<br />
Press this button to confirm a choice or action.<br />
Tips: The OK Button can also be used to take a photo.<br />
Delete Button<br />
Press this button to delete the selected file.<br />
Shutter Button<br />
Press this button to take a photo.<br />
Zoom In Button<br />
Press this button to zoom in.<br />
Zoom Out Button<br />
Press this button to zoom out.<br />
Tips: The zoom buttons can also be used to set sound volume when<br />
zoom function is not available.<br />
INCLUDED IN THIS PACKAGE<br />
• 1 <strong>VTech</strong> ® Kidizoom Camera<br />
• 1 wrist strap<br />
• 1 user’s manual<br />
Note: USB cable is not included.<br />
WARNING: All packing materials such as tape, plastic sheets, wire<br />
ties, and tags are not part of this toy, and should be discarded for<br />
your child’s safety.<br />
PRODUCT SPECIFICATIONS<br />
Display 1.45” TFT color LCD<br />
Photo Resolution 1.3 MP (1280 x 960) or 0.3 MP (640 x 480)<br />
Movie Resolution 160 x 120<br />
Movie Length Limit Maximum 2 minutes per each recording file<br />
Features<br />
4
Digital Zoom 4X<br />
Focus Range 1.5 feet - ∞<br />
Internal Memory 128 MB built in memory (shared with program<br />
data, approximately 92 MB available)<br />
File Format Movies: AVI (Motion JPEG) (recorded with<br />
Kidizoom Camera)<br />
Photos: Standard Baseline JPEG (taken by<br />
Kidizoom Camera)<br />
Connectivity Built-in USB port (Mini-USB) for computer<br />
connection<br />
Batteries 4X “AA” (LR6) alkaline batteries<br />
Operating<br />
Temperature<br />
0 - 40°C<br />
STORAGE CAPACITY FOR REFERENCE<br />
1.3 MP photos 0.3 MP photos Video in 160 X 120 (minutes)<br />
~300 ~1600 ~10<br />
Note: The above amounts are approximations, the actual capacity<br />
depends on the shooting environments. The video length limit is 2<br />
minutes per file.<br />
GETTING STARTED<br />
BATTERY INSTALLATION<br />
Note: Adult assembly is required for battery installation.<br />
• Make sure the camera is turned OFF.<br />
• Locate the battery covers on the bottom of the camera. Open the<br />
battery covers by separately pressing each trigger inward.<br />
• Install 4 new “AA” batteries (2 on each side) as shown in the illustration<br />
below (the use of new alkaline batteries is recommended for maximum<br />
performance).<br />
• Replace each battery cover (they will<br />
both fit either side) with the arrow on the<br />
trigger pointing inward. Push down until<br />
the battery covers click into position.<br />
Getting Started<br />
5
BATTERY NOTICE<br />
• The use of new alkaline batteries is recommended for maximum<br />
performance.<br />
• Non-rechargeable batteries are not to be recharged.<br />
• Rechargeable batteries are to be removed from the toy before being<br />
charged (if removable).<br />
• Rechargeable batteries are only to be charged under adult supervision<br />
(if removable).<br />
• Do not mix old and new batteries.<br />
• Do not mix batteries of different types: alkaline, standard (carbon-zinc)<br />
or rechargeable (nickel-cadmium).<br />
• Only batteries of the same or equivalent type as recommended are to<br />
be used.<br />
• Batteries are to be inserted with the correct polarity.<br />
• Exhausted batteries are to be removed from the toy.<br />
• The supply terminals are not to be short-circuited.<br />
• The toy is not to be connected to more than the recommended number<br />
of power supplies.<br />
• Do not use fire to dispose of batteries.<br />
TO BEGIN USING KIDIzOOm CAmERA<br />
• Press the ON/OFF Button to turn on the camera.<br />
• If it is the first time that you are turning on the Kidizoom Camera, the<br />
Try-me demo movie will start playing. Press the OK Button during the<br />
movie to exit the Try-me demo mode. The Try-me demo will be disabled<br />
and will not play again on start-up. After the camera exits demo mode, the<br />
language selection screen will appear. Press the Up or Down Cursor<br />
Button to select a language, and then press the OK Button to<br />
confirm. After you select a language, you will see an option to select the<br />
date and time. Press the Up or Down Cursor Button to select the<br />
correct day, month, year, hour, and minutes. Press the Left or Right<br />
Cursor Button to jump to the previous or the next setting item. Finally,<br />
press the OK button to confirm the setting. If you wish to change the<br />
language or date & time later, please go to Settings.<br />
• After the Try-me demo mode has been disabled, when Kidizoom<br />
Camera is turned on, it will go directly into camera mode and you can<br />
start taking photos.<br />
• To switch to other activities, press the Mode Button to go to the<br />
Main Menu. From the Main Menu, you can select the following activities:<br />
To Begin Using Kidizoom Camera<br />
6
Camera , Movies , Playback , Photo Editor , Games<br />
, and Settings .<br />
• To connect to a computer, follow the instructions in the Connecting to<br />
a Computer section below.<br />
• Press the ON/OFF Button again to turn the unit off.<br />
BATTERY STATUS<br />
When the screen shows a Low Battery icon , we recommend backing<br />
up all data in the internal memory of Kidizoom Camera by uploading<br />
all data to a computer. Once you have saved your data, change the<br />
batteries in Kidizoom Camera.<br />
When the unit shows the Batteries Exhausted icon , the unit will not<br />
work properly. New batteries should be inserted before further use.<br />
Note: We recommend that you save the data stored in the internal<br />
memory of the Kidizoom Camera to a computer regularly to avoid<br />
data loss.<br />
AUTOmATIC SHUT-OFF<br />
To preserve battery life, Kidizoom Camera will automatically turn off<br />
after 3 minutes without input. The camera can be turned on again by<br />
pressing the ON/OFF Button .<br />
CONNECTING TO A COmPUTER<br />
You can connect Kidizoom Camera to a PC or Mac computer using<br />
a standard mini B USB cable (not included). Once connected, you can<br />
transfer files between the camera and computer; please follow below<br />
steps to make the connection.<br />
• Turn Kidizoom Camera OFF before connecting to a computer.<br />
• Pull up the rubber cover of the USB port at the bottom of your<br />
camera.<br />
• Insert the USB cable (small end) into the USB port on the camera.<br />
• Insert the larger end of the USB cable into a USB port on the computer.<br />
A USB port is usually marked with this symbol .<br />
• A removable drive called “<strong>VTech</strong> 1227” will appear.<br />
To back up photo or video files taken by the camera:<br />
• Locate and open the “DCIM” folder in the removable drive.<br />
• Your photos or video files will be placed in the subfolders, such as<br />
“100VTECH”. Drag and drop the files to a location in your computer for<br />
back up.<br />
Connecting to a computer<br />
7
To transfer photo or video files to the camera:<br />
• Select the photo or video files you would like to upload from your<br />
computer first.<br />
• Locate and open the “DOWNLOAD” folder in the removable drive,<br />
drag and drop the photo files into the “PHOTO” subfolder, or “VIDEO”<br />
subfolder for video files.<br />
Note: Do not transfer photo or video files created by other camera models<br />
to the main unit, these file formats may not be supported.<br />
SYSTEM REQUIREMENTS FOR COMPUTER CONNECTION:<br />
Microsoft ® Windows ® XP, Windows Vista ® or Windows ® 7 Operating System<br />
or Macintosh Computer with Mac OS X version 10.5 or 10.6<br />
Note: Once the camera is connected to your computer, do not disconnect<br />
the camera while files are uploading or downloading. After you have<br />
finished, remove the camera by following the steps to safely remove<br />
hardware from your computer. Then you can physically unplug the unit<br />
from the computer.<br />
To avoid any potential damage to your Kidizoom® Camera:<br />
When the USB cable is not connected to the unit, ensure the USB<br />
rubber cover is fully covering the USB port.<br />
ACTIVITIES<br />
1. CAMERA<br />
• In Camera mode, you can either look through the viewfinders or look<br />
at the LCD screen to see the capture subject.<br />
• While holding the camera steady, press the Shutter Button on the<br />
top of the camera or press the OK Button to take a picture.<br />
• Press the Zoom Buttons to use the digital zoom feature.<br />
• To add a photo frame, stamp, or special effect to the photo, press the<br />
Left or Right Cursor Button to scroll through the options. Then<br />
take a photo as usual and the selected frame, stamp, or effect will be<br />
part of the photo.<br />
• To view the photos you’ve taken, press the Up or Down Cursor<br />
Button once to enter the Playback mode.<br />
2. MOVIES<br />
In Movies mode, you can take digital movies. Press the Shutter Button<br />
or the OK Button to start movie recording; press the button again to<br />
stop the recording. When the movie recording is stopped, press the OK<br />
Button to play the movie you have just recorded:<br />
Activities<br />
8
• To add animation frame, press the Left or Right Cursor Button<br />
to scroll through the options before starting the recording.<br />
Note: You cannot change the selected animation frame during recording.<br />
• Press the Zoom Buttons to use the digital zoom feature.<br />
• To view the movies you’ve taken, press the Up or Down Cursor<br />
Button once to enter the Playback mode.<br />
3. PLAYBACK<br />
In Playback mode, you can view the captured movies or photos. Press<br />
the Up or Down Cursor Button to view the previous or next file.<br />
Viewing a Movie File<br />
• Press the OK Button to play the movie. While playing the movie,<br />
press the Left or Right Cursor Button once to use the fast rewind<br />
or fast forward at 2X speed; press this button again to change the<br />
speed to 4X. Press the Cursor Button or the OK Button<br />
1X normal playing speed.<br />
to return to<br />
• While playing the movie, press the Zoom In<br />
to increase or decrease the volume.<br />
Viewing a Photo File<br />
or Zoom Out Button<br />
• While viewing a photo, press the Zoom In Button to have a closer<br />
view of the photo. Press the Cursor Buttons at this time to pan the<br />
photo to a different position. Operate the Zoom Out Button to return<br />
to smaller magnification or press the OK button<br />
normal viewing size.<br />
to return to the<br />
4. PhOTO EDITOR<br />
In Photo Editor, you can add photo frames, stamps, funny faces, and<br />
special effects to a photo. Press the Up or Down Cursor Button to<br />
view photos, and then press the OK Button<br />
start editing.<br />
to confirm selection and<br />
An editing menu will appear. Press the Left or Right Cursor Button<br />
to choose one of the below functions; press the OK Button to begin.<br />
A. Photo Frames : Choose this icon to add a photo frame to your<br />
photo. Press the Left or Right Cursor Button to select a frame,<br />
and then press the OK Button to confirm your selection.<br />
B. Stamps : Choose this icon to add a stamp to your photo. Press<br />
the Left or Right Cursor Button to choose a stamp. Press the<br />
Up or Down Cursor Button to enlarge or shrink the size of the<br />
stamp. Press the OK Button to confirm the selection. Then, press<br />
the cursor buttons to move the stamp to where you want to apply it.<br />
Finally, press the OK Button to add the stamp to the photo.<br />
Activities<br />
9
C. Special Effects : Choose this icon to add a funny face or special<br />
effect to your photo. Press the Left or Right Cursor Button to<br />
choose an effect. Use the Up and Down Cursor Buttons to<br />
change the size of the area the effect will be applied to. Press the OK<br />
Button to confirm your selection. Press the cursor buttons to move<br />
the effect to where you want to apply it, and then press the OK Button<br />
to add it to the photo.<br />
Note: Generating a special effect on your camera may take more than<br />
1 minute.<br />
D. Undo : Choose this icon to undo the last editing operation.<br />
E. Save As : Choose this icon to save the photo that you just edited as<br />
another file.<br />
Note: The process of saving an edited photo with a distortion effect may<br />
take more than 1 minute.<br />
5. GAMES<br />
Three games are built into Kidizoom Camera. After entering the Game<br />
Menu, press the Left or Right Cursor Button to choose a game, and<br />
then press the OK Button to start playing the selected game.<br />
A. PhOTO SWIRL<br />
Press the Left or Right Cursor Button to rotate the<br />
scrambled picture piece to its correct position; press<br />
the OK Button to confirm. Fix as many pictures as<br />
possible within the time limit. Your photos will be used<br />
in the game, so take more photos to make the game<br />
extra fun!<br />
B. PENGUIN PATh<br />
Help the penguin mama find the path to the fish!<br />
Memorize the sequence of the arrows, and then guide<br />
the penguin mama by repeating the sequence using<br />
the Cursor Buttons . After each correct answer, the<br />
sequence will become longer and harder to memorize.<br />
C. PUPPET ShOW<br />
The Puppet Show is ready to start! Select a face or take<br />
a picture to make the puppet character; press the OK<br />
Button to start the game. Once the music starts to<br />
play, arrows will start to appear on the screen. Press<br />
the Cursor Buttons to make the puppet dance in<br />
each direction before the arrows disappear.<br />
Tips: Press the Zoom In Button or Zoom Out Button to adjust the<br />
volume while playing a game.<br />
Activities<br />
10
ADJUSTING SETTINGS IN<br />
KIDIzOOm CAmERA<br />
You can choose to adjust various settings in your Kidizoom Camera.<br />
To change the camera’s settings, choose the Settings icon in the<br />
Main Menu. Scroll through the Settings Menu by pressing the Right<br />
or Left Cursor Button . In the menu, press the Up or Down Cursor<br />
Button to change selection, and press the OK Button to confirm<br />
the selection.<br />
• Volume<br />
After choosing Settings in the Main Menu, the Volume setting menu will<br />
be the first menu to appear. Press the Up or Down Cursor Button<br />
to adjust the volume up or down.<br />
• Memory<br />
This menu allows you to review the status of the camera’s internal<br />
memory setting. To format the memory, press the OK Button . You will<br />
see a warning message.<br />
Note: Formatting the memory will erase all data in Kidizoom Camera.<br />
Note: When the internal memory of the Kidizoom Camera is getting<br />
full, or when the file indexes are used up, you should back up all the files<br />
from the camera’s internal memory to your computer. Then, delete the<br />
files in the camera’s internal memory to free up space.<br />
• Photo Resolution<br />
For the best picture quality, please select 1.3 megapixel. To save<br />
memory, choose the 0.3 megapixel option. This option will allow you to<br />
save more pictures.<br />
• Indoor Light Frequency<br />
The default value for the US is 60 Hz (or Auto if it is available). Please<br />
leave your camera set to the default value unless you are traveling<br />
outside of the US.<br />
• Date & Time<br />
This menu shows the current Date & Time. If you want to change the<br />
setting, press the OK Button , make the change in the Set Date & Time<br />
menu, and press the OK Button again to confirm.<br />
• Language<br />
You may change the language shown in Kidizoom Camera. Choose<br />
from English, Spanish, or French.<br />
Adjusting settings in Kidizoom camera<br />
11
KIDIzOOm ® PHOTO EDITOR SOFTWARE<br />
The <strong>VTech</strong> ® Kidizoom ® Photo Editor software package, available for both<br />
PC and Mac systems, allows you to edit your photos with a computer.<br />
Visit the following website to download the software:<br />
http://www.vtechkids.com/download<br />
After you download and install this Photo Editor on your computer, you<br />
can add additional fun photo frames and stamps to your photos. You will<br />
also be able to add distortion effects and view animations of your photos.<br />
Please see the Help sections of the installed <strong>VTech</strong> ® Kidizoom ® Photo<br />
Editor for more details and user instructions.<br />
SYSTEM REQUIREMENTS<br />
For PC Users:<br />
Pentium ® 4 CPU, 1 GHz or above<br />
256 MB RAM (512 MB recommended)<br />
Graphic card with 1024 x 768 at 16 or 32 bit color<br />
Monitor Resolution: 1024 x 768<br />
300MB Hard disk space<br />
Windows ® compatible sound card and speakers<br />
Microsoft ® Windows ® XP, Windows Vista ® , or Windows ® 7 Operating<br />
System<br />
For Macintosh Users:<br />
Macintosh Computer with an Intel (1GHz or faster) processor<br />
256 MB RAM (512 MB recommended)<br />
300MB Hard disk space<br />
Mac OS X version 10.5 or 10.6<br />
Internet Connection is required for software download.<br />
CARE & mAINTENANCE<br />
1. Keep the camera clean by wiping it with a slightly damp cloth.<br />
2. Keep the camera out of direct sunlight and away from any direct heat<br />
source.<br />
3. Remove the batteries when the camera is not in use for an extended<br />
period of time.<br />
4. Do not drop the camera on a hard surface and do not expose it to<br />
moisture or immerse it in water.<br />
WARNING<br />
A very small percentage of the public, due to an existing condition, may<br />
experience epileptic seizures or momentary loss of consciousness when<br />
viewing certain types of flashing colors or patterns.<br />
Kidizoom ® photo editor software/Care & maintenance<br />
12
While Kidizoom Camera does not contribute to any additional risks,<br />
we do recommend that parents supervise their children while they play<br />
games. If your child experiences dizziness, altered vision, disorientation,<br />
or convulsions, discontinue use immediately and consult your physician.<br />
Please note that focusing on the Kidizoom Camera screen at a close<br />
range and handling the Kidizoom Camera as a game controller<br />
for a prolonged period of time, may cause fatigue or discomfort. We<br />
recommend that children take a 15-minute break for every hour of play.<br />
TROUBLESHOOTING<br />
Go through this section if you experience difficulty in operating<br />
Kidizoom Camera.<br />
Problem Solution<br />
Program stops<br />
working<br />
Image taken is not<br />
clear<br />
Cannot connect to<br />
computer<br />
1. Let the camera sit for a few minutes without<br />
batteries, then replace the batteries.<br />
2. Turn the unit ON. The unit should now be<br />
ready to play again.<br />
3. If the unit does not work, replace the batteries<br />
with an entire set of new batteries.<br />
1. Check if the camera is being held steadily.<br />
2. Make sure the lighting condition of the shooting<br />
environment is good.<br />
3. Check to see if the camera lens protection<br />
window is clean.<br />
Check the connections on the USB cable<br />
between the camera and the computer, and<br />
review the appropriate connection procedure in<br />
this manual.<br />
Cannot save files When the internal memory of the camera is<br />
getting full, or when the file indexes are used up,<br />
you should back up all the files from the camera’s<br />
internal memory to your computer, and then<br />
delete the files in the camera’s internal memory<br />
to free up space.<br />
Cannot view the<br />
downloaded movie<br />
files<br />
1. Kidizoom Camera does not support movie<br />
files created by other models. Make sure<br />
your downloaded movie files are created by<br />
Kidizoom Camera.<br />
Troubleshooting<br />
13
If you have a problem that cannot be solved by using this manual, we<br />
encourage you to visit us online or contact our Customer Services<br />
Department with any problems and/or suggestions that you might have.<br />
Our support representative will be happy to assist you.<br />
Before requesting support, please be ready to provide or include the<br />
information below:<br />
• The name of your product or model number (the model number is<br />
typically located on the back or bottom of your product).<br />
• The specific problem you are experiencing.<br />
• The actions you took right before the problem occurred.<br />
Internet: www.vtechkids.com, or www.vtechcanada.com<br />
Phone: 1-800-521-2010 in the U.S., or 1-877-352-8697 in Canada.<br />
DISCLAImER AND LImITATION OF<br />
LIABILITY<br />
<strong>VTech</strong> ® Electronics North America, L.L.C. and its suppliers assume<br />
no responsibility for any damage or loss resulting from the use of this<br />
handbook. <strong>VTech</strong> ® Electronics North America, L.L.C. and its suppliers<br />
assume no responsibility for any loss or claims by third parties that may<br />
arise through the use of this product. <strong>VTech</strong> ® Electronics North America,<br />
L.L.C. and its suppliers assume no responsibility for any damage or loss<br />
caused by deletion of data as a result of malfunction, dead battery, or<br />
repairs.<br />
Company: <strong>VTech</strong> ® Electronics North America, L.L.C.<br />
Address: 1155 West Dundee Road, Suite 130, Arlington Heights, IL,<br />
60004 USA<br />
Phone: 1-800-521-2010 in the U.S., or 1-877-352-8697 in Canada.<br />
IMPORTANT NOTE:<br />
Creating and developing Preschool Learning products is accompanied<br />
by a responsibility that we at <strong>VTech</strong> ® take very seriously. We make every<br />
effort to ensure the accuracy of the information which forms the value of<br />
our products. However, errors sometimes can occur. It is important for you<br />
to know that we stand behind our products and encourage you to call our<br />
Consumer Services Department at 1-800-521-2010 in the U.S., or 1-877-<br />
352-8697 in Canada with any problems and/or suggestions that you might<br />
have. A service representative will be happy to help you.<br />
Disclaimer And Limitation Of Liability<br />
14
Note:<br />
This equipment has been tested and found to comply with the limits for<br />
a Class B digital device, pursuant to Part 15 of the FCC Rules. These<br />
limits are designed to provide reasonable protection against harmful<br />
interference in a residential installation. This equipment generates, uses<br />
and can radiate radio frequency energy and, if not installed and used in<br />
accordance with the instructions, may cause harmful interference to radio<br />
communications. However, there is no guarantee that interference will<br />
not occur in a particular installation. If this equipment does cause harmful<br />
interference to radio or television reception, which can be determined by<br />
turning the equipment off and on, the user is encouraged to try to correct<br />
the interference by one or more of the following measures:<br />
• Reorient or relocate the receiving antenna.<br />
• Increase the separation between the equipment and receiver.<br />
• Connect the equipment into an outlet on a circuit different from that to<br />
which the receiver is connected.<br />
• Consult the dealer or an experienced radio/TV technician for help.<br />
Caution: Changes or modifications not expressly approved by the party<br />
responsible for compliance could void the user’s authority to operate the<br />
equipment.<br />
And Limitation Of Liability<br />
THIS DEVICE COMPLIES WITH PART 15 OF THE FCC RULES.<br />
OPERATION IS SUBJECT TO THE FOLLOWING TWO CONDITIONS:<br />
(1) THIS DEVICE MAY NOT CAUSE HARMFUL INTERFERENCE, AND<br />
(2) THIS DEVICE MUST ACCEPT ANY INTERFERENCE RECEIVED,<br />
INCLUDING INTERFERENCE THAT MAY CAUSE UNDESIRED<br />
OPERATION.<br />
THIS CLASS B DIGITAL APPARATUS COMPLIES WITH CANADIAN<br />
ICES-003.<br />
CET APPAREIL NUMÉRIQUE DE LA CLASSE B EST CONFORME À<br />
LA NORME NMB-003 DU CANADA. Disclaimer<br />
15
HOW TO TAKE A GOOD PHOTO<br />
Are you ready to have fun taking some photos? <strong>VTech</strong> is here to help you<br />
learn how to take great photos using your new Kidizoom digital camera.<br />
Check out our tips to help you get started.<br />
Step One<br />
First, slide the wrist strap over your hand to help you hold your new<br />
Kidizoom properly.<br />
Step Two<br />
There are 2 ways to look at your photo before you take it. You can either<br />
use the color LCD screen on the back of your Kidizoom, or the dual<br />
viewfinders above the screen.<br />
Step Three<br />
Now you are ready to take some photos! Make sure you hold your<br />
Kidizoom as still as you can with both hands.<br />
Step Four<br />
Get close to the object you are taking a photo of. Be careful not to get too<br />
close or your photo will be blurry. This can take some extra practice so<br />
don’t worry if you don’t get your photo right the first time.<br />
Step Five<br />
Be mindful of the lighting when you are taking photos. If you are taking<br />
outdoor photos on a sunny day, stand with the sun behind you. If you are<br />
taking indoor photos in dark lighting, hold the camera very still to avoid<br />
blurry photos.<br />
Step Six<br />
Listen for the “click” your Kidizoom makes when you have taken a photo.<br />
Once you hear the clicking sound, you can take another photo!<br />
have fun!<br />
How to Take a Good Photo<br />
16
KIDIzOOm CAmERA FREqUENTLY<br />
ASKED qUESTIONS<br />
Question 1:<br />
I have bought a Vtech Kidizoom Camera, but it will not work with<br />
my PC; my PC is looking for a driver. I have searched the Internet and<br />
cannot find a <strong>VTech</strong> ® camera driver. What can I do?<br />
Answer:<br />
There is no separate driver needed for the Kidizoom Camera. It uses a<br />
standard USB mass storage device driver. Such a driver comes standard<br />
on all Windows ® operating systems starting with Windows ® 2000 Service<br />
Pack 3 (including Windows ® XP and Vista) and Mac OS ® 9.0 or above.<br />
If your computer meets these OS requirements and is still looking for a<br />
driver, please contact your PC manufacturer for further assistance. For<br />
earlier operating systems that do not support mass storage, a system<br />
upgrade or mass storage device driver may be available. Again, please<br />
check with your PC manufacturer.<br />
Question 2:<br />
The pictures I take aren’t matching what I see when I look through the<br />
viewfinder. The actual captured image covers a greater area than what<br />
the viewfinder shows.<br />
Answer:<br />
The actual image and digital saved image may vary due to the refraction<br />
of light through the viewfinder lens. Light bends through the lenses at<br />
different angles based on a variety of factors including the distance<br />
between the lens and your eyes, the angle at which you are viewing the<br />
lenses, and even the distance between your eyes. Generally speaking,<br />
when the lenses are placed close to the eyes the way they are intended<br />
to be, light will refract through the lenses in such a way that it focuses in<br />
a tighter and closer area, making the image and the viewing area appear<br />
smaller than what is digitally captured.<br />
Question 3:<br />
What is the ISO value (light sensitivity) of the Kidizoom Camera?<br />
Answer:<br />
The Kidizoom Camera uses an auto-ISO value. It auto adjusts<br />
the exposure time and light sensitivity depending on the lighting<br />
environment.<br />
Kidizoom Camera Frequently Asked questions<br />
17
Question 4:<br />
My camera turns on then immediately shuts off.<br />
Answer:<br />
Please make sure you are using new batteries. If there is no bad contact<br />
due to dirt on the contact spring/plate or deformation of the contact spring<br />
or plate, the power should be able to turn on. If the problem persists after<br />
normal battery installation, then you might have a defective unit. Please<br />
contact customer service as outlined in the Troubleshooting section of<br />
this manual.<br />
Question 5:<br />
Why are my pictures sometimes grainy and fuzzy? Is there anything I can<br />
do to improve the picture quality?<br />
Answer:<br />
In a poorly lit environment, the frame rate (shutter speed) drops to allow<br />
for a longer exposure time. The downside of this is that any movement<br />
in the frame, or of the hand holding the camera, can result in greater<br />
blur. Furthermore, the camera sensor will soften the edges in low light<br />
to counteract the darkness by reducing the image noise. This too can<br />
sometimes result in a blurred picture. Try to improve the lighting to get<br />
better results.<br />
The sensitivity of the photo sensor in low lighting conditions and the<br />
vulnerability of the image to shaking hands have been improved in the<br />
most recent models of the Kidizoom Camera.<br />
Question 6:<br />
Can you delete a group of pictures at one time, or do they have to be<br />
deleted one at a time on the camera?<br />
Answer:<br />
If you connect the Kidizoom Camera to your computer and access<br />
it as an external drive (labeled <strong>VTech</strong> 1227), you can select multiple<br />
pictures to delete at any one time.<br />
Question 7:<br />
If you accidentally delete the pictures by reformatting, is there any way<br />
to get them back?<br />
Answer:<br />
If you delete the pictures by formatting the internal storage memory,<br />
there’s no way to retrieve them. There is third party software that can<br />
Kidizoom Camera Frequently Asked questions<br />
18
help recover “deleted” data from storage, but we do not recommend<br />
using this.<br />
Question 8:<br />
Will changing batteries erase the unit’s internal memory?<br />
Answer:<br />
Battery replacement under normal operation as detailed in the user’s<br />
manual should not cause data corruption or data loss in the built-in<br />
memory.<br />
Question 9:<br />
When connecting the camera to the USB port, I get the message “USB<br />
device not recognized. One of the USB devices attached to this computer<br />
has malfunctioned and Windows ® does not recognize it.” I am running<br />
Windows ® XP.<br />
Answer:<br />
This is most likely a hardware or OS issue. A number of consumers have<br />
reported this problem with their computers not recognizing mass storage<br />
devices of all kinds. Please contact your PC manufacturer for support.<br />
Microsoft ® , Windows ® , and Windows Vista ® are either registered trademarks<br />
or trademarks of Microsoft Corporation in the United States and/or other<br />
countries. Intel ® , Pentium ® are trademarks of Intel Corporation in the United<br />
States and other countries. Macintosh, Mac, and Mac OS are trademarks<br />
of Apple Inc., registered in the United States and other countries. All other<br />
trademarks are the property of their respective owners.<br />
Kidizoom Camera Frequently Asked questions<br />
19