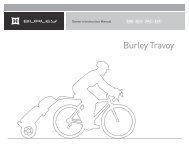
2009-2013 Burley Nomad and Flatbed Owner's Instruction
2009-2013 Burley Nomad and Flatbed Owner's Instruction
2009-2013 Burley Nomad and Flatbed Owner's Instruction

You also want an ePaper? Increase the reach of your titles
YUMPU automatically turns print PDFs into web optimized ePapers that Google loves.
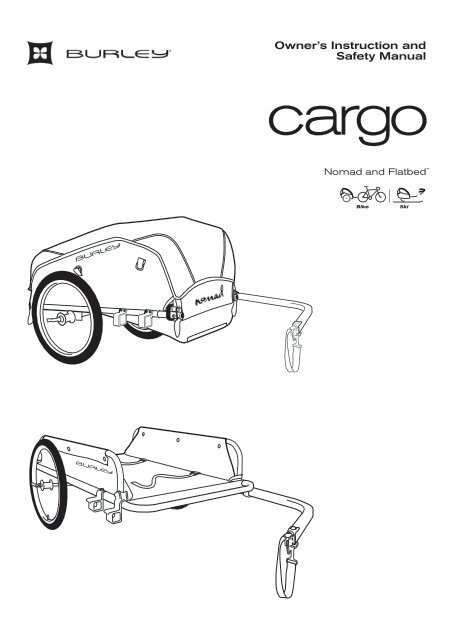
Owner’s <strong>Instruction</strong> <strong>and</strong><br />
Safety Manual<br />
cargo<br />
<strong>Nomad</strong> <strong>and</strong> <strong>Flatbed</strong> <br />
Stroll Bike Ski Jog
Owner’s <strong>Instruction</strong><br />
<strong>and</strong> Safety Manual<br />
<strong>Burley</strong> <strong>Nomad</strong><br />
<strong>and</strong> <strong>Flatbed</strong> <br />
Contents<br />
3 Introduction<br />
3 Safety Guidelines<br />
3 Tool List<br />
4 Attaching Wheels<br />
4 Installing Side Rails<br />
5 Mounting Reflectors<br />
6 Installing Tailgate <strong>and</strong> Splash Guard<br />
6 Installing Roll Bar <strong>and</strong> Cover<br />
6 Installing Tow Bar<br />
7 Installing Safety Flag (<strong>Nomad</strong> Only)<br />
7 Hitching Trailer to Your Bicycle<br />
8 Safety Checklist<br />
8 Maintenance <strong>and</strong> Storage<br />
9 <strong>Nomad</strong> Replacement Parts <strong>and</strong> Diagram<br />
10 <strong>Flatbed</strong> Replacement Parts <strong>and</strong> Diagram<br />
12 Warranty
Congratulations!<br />
Your <strong>Burley</strong> ® trailer is the leading choice of refined bicycle<br />
trailer owners worldwide. Every effort has been made to<br />
ensure your purchase is of top quality <strong>and</strong> proven design,<br />
ready to provide you with many years <strong>and</strong> miles of happy,<br />
safe trailering.<br />
Please go to www.burley.com or contact us at<br />
burley@burley.com to register your warranty information.<br />
IMPORTANT<br />
IT IS VERY IMPORTANT FOR YOU TO FAMILIARIZE YOURSELF<br />
WITH YOUR BURLEY BY READING THIS ENTIRE MANUAL<br />
BEFORE USE. IF YOU HAVE ANY QUESTIONS, PLEASE CONTACT<br />
YOUR AUTHORIZED BURLEY DEALER.<br />
Introduction<br />
Once you’ve done the initial assembly <strong>and</strong> read the safety<br />
guidelines, you’re ready to go! Before trailering, be sure you<br />
have the tow bar, trailer wheels <strong>and</strong> hitch securely attached.<br />
Note: Any reference to left or right is made in direction<br />
of travel, as if you were st<strong>and</strong>ing behind the trailer,<br />
looking forward.<br />
Safety Guidelines<br />
WARNING<br />
BICYCLING WITH A TRAILER, AND BICYCLING IN GENERAL, CAN<br />
BE HAZARDOUS. FAILURE TO OBSERVE ANY OF THE SAFETY<br />
GUIDELINES IN THIS MANUAL COULD RESULT IN AN ACCIDENT<br />
AND SERIOUS INJURY OR DEATH.<br />
1. Inspect <strong>and</strong> maintain your bicycle <strong>and</strong> trailer regularly.<br />
See “Safety Checklists”.<br />
2. Because of the trailer’s additional weight, a bicycle<br />
pulling a trailer is heavier <strong>and</strong> less responsive. Avoid<br />
sudden swerving, rocks <strong>and</strong> curbs. Experiment with the<br />
loaded trailer in an uncongested area until you become<br />
familiar with it.<br />
3. The total weight limit for the trailer <strong>and</strong> cargo is 100 lbs<br />
(40 kg in Europe). Load cargo securely in the center,<br />
forward of the axle <strong>and</strong> as low as possible.<br />
4. Observe recommended speed limits: a maximum of<br />
15 mph (24 km/h) on smooth, straight roads <strong>and</strong><br />
5 mph (8 km/h) or less when turning or on<br />
uneven roads.<br />
5. Never pull your trailer with a motorized vehicle.<br />
6. The cyclist must wear a helmet.<br />
7. Only use factory-supplied wheels, with the tires inflated<br />
to the pressure recommended on the tire side wall.<br />
Check pressure before each use.<br />
8. Clamp the hitch securely to the bicycle frame, <strong>and</strong> check<br />
for a tight attachment before each use.<br />
9. Use the safety flag. (<strong>Nomad</strong> Only)<br />
10. Do not make alterations to the trailer. Contact your<br />
Authorized <strong>Burley</strong> Dealer or go to www.burley.com for<br />
replacement of any damaged, worn-out or missing parts.<br />
11. Do not use your trailer on icy roads or when inclement<br />
weather makes cycling hazardous.<br />
12. The use of a mirror on your bicycle is recommended.<br />
13. For emergencies, breakdowns or flat tires, pull<br />
completely off the road <strong>and</strong> move to a safe area before<br />
doing repairs.<br />
Parts Bag Contents:<br />
<strong>Nomad</strong>: (2) Roll bar knobs<br />
(1) Hitch<br />
(1) <strong>Burley</strong> Owner’s <strong>Instruction</strong> <strong>and</strong> Safety Manual<br />
<strong>Flatbed</strong>: (4) Retaining pins<br />
(2) Pair tie-down straps<br />
(2) Clear reflectors with brackets/screws<br />
(2) Red reflectors with brackets/screws<br />
(1) Hitch<br />
(1) <strong>Burley</strong> Owner’s <strong>Instruction</strong> <strong>and</strong> Safety Manual<br />
Tools Required: Phillips Screwdriver<br />
BURLEY NOMAD AND FLATBED OWNER’S INSTRUCTION AND SAFETY MANUAL 3
WARNING<br />
TRAILERS CAN TIP OVER, CAUSING DAMAGE TO TRAILER AND<br />
SERIOUS INJURY TO CYCLIST. AVOID CAUSES OF TIP OVER,<br />
ESPECIALLY:<br />
• HITTING POTHOLES, CURBS, OTHER ROAD OBSTRUCTIONS<br />
• TAKING TURNS TOO FAST<br />
• SUDDEN SWERVING<br />
• IMPROPER WHEEL INSTALLATION OR TIRE INFLATION<br />
Attaching Wheels<br />
1. Insert wheel axle assembly completely into trailer<br />
axle. FIGURE 1<br />
2. Close quick release lever, with lever aimed at trailer rear.<br />
A properly adjusted quick release lever should leave an<br />
imprint on your palm when the lever is rotated to the<br />
closed position. FIGURE 2<br />
3. Verify that tires are inflated to pressure marked on tire<br />
side wall.<br />
4. To remove wheel from trailer axle, open quick<br />
release lever.<br />
WARNING<br />
MAKE SURE WHEELS ARE HELD SECURELY, WITH WHEEL<br />
SHAFT FULLY INSERTED INTO HOLLOW AXLE. YOU SHOULD NOT<br />
BE ABLE TO ROCK OR SHIFT WHEELS. IMPROPERLY INSTALLED<br />
WHEELS CAN FALL OFF, CAUSING AN ACCIDENT OR<br />
SERIOUS INJURY.<br />
Installing Side Rails<br />
<strong>Nomad</strong>:<br />
1. On trailer sides, flip the four C-shaped side panel<br />
hold-downs to outside of trailer frame. PHOTO 1<br />
2. Slide vertical side rails down over side rail guides on<br />
trailer sides, with narrower end of side panels to the rear<br />
<strong>and</strong> “<strong>Burley</strong>” logo facing outward. PHOTOS 1 & 3<br />
3. Snap all four side panel hold-downs over side panel<br />
tubing. PHOTO 4<br />
4 BURLEY NOMAD AND FLATBED OWNER’S INSTRUCTION AND SAFETY MANUAL<br />
FIGURE 1: Quick release lever in unlocked<br />
“open” position (Top View)<br />
Side Rail<br />
Side Rail Guide<br />
PHOTO 1<br />
C-Shaped Hold-down<br />
PHOTO 2: Hold-down locked over side panel tubing<br />
Trailer<br />
Rear<br />
FIGURE 2: Quick release lever in locked<br />
“closed” position (Top View)
WARNING<br />
IF ALL HOLD-DOWNS ARE NOT SNAPPED IN PLACE BEFORE<br />
USING THE TRAILER, THE SIDE RAILS CAN SHIFT OR COLLAPSE,<br />
RESULTING IN THE LOSS OF CARGO.<br />
<strong>Flatbed</strong>:<br />
1. Slide ends of side panel rail into front <strong>and</strong> rear receivers<br />
on side of frame, matching holes in plastic tubing ends<br />
with holes in receivers. PHOTO 4<br />
2. Insert retaining pins through holes on all four corners,<br />
<strong>and</strong> lock retaining hoops securely. PHOTO 4<br />
Mounting Reflectors<br />
<strong>Flatbed</strong>:<br />
1. Screw reflectors <strong>and</strong> brackets together.<br />
2. Mount clear reflectors/brackets horizontally on front<br />
corners of side panel rail tubes. PHOTO 5<br />
3. Mount red reflectors/brackets horizontally on rear<br />
corners of side panel rail tubes. PHOTO 6<br />
Trailer Rear<br />
PHOTO 3: NOMAD SIDE PANEL ORIENTATION<br />
Side Panel Rail<br />
Retaining Pin<br />
Front<br />
Receiver<br />
Front Tow<br />
Bar Mount<br />
PHOTO 4: FLATBED SIDE PANEL ATTACHMENT<br />
Clear<br />
Reflector<br />
Reflector<br />
Bracket<br />
Narrow End<br />
of Side Panel<br />
Trailer Front<br />
Side Panel<br />
Rail Tube Trailer Front<br />
PHOTO 5: FLATBED CLEAR REFLECTOR/BRACKET MOUNTED ON FRONT CORNER OF<br />
SIDE PANEL RAIL TUBE<br />
Trailer<br />
Rear<br />
Side Panel<br />
Rail Tube<br />
Bracket<br />
Red<br />
Reflector<br />
PHOTO 6: FLATBED RED REFLECTOR/BRACKET MOUNTED ON REAR CORNER OF<br />
SIDE PANEL RAIL TUBE<br />
BURLEY NOMAD AND FLATBED OWNER’S INSTRUCTION AND SAFETY MANUAL 5
Installing Tailgate <strong>and</strong> Splashguard<br />
<strong>Nomad</strong>:<br />
1. Loop tie-down straps over corners of side panels <strong>and</strong><br />
join male buckle sections on straps to female buckle<br />
sections inside trailer. FIGURE 3 & PHOTO 7<br />
2. To accommodate different sizes of cargo, tighten or<br />
loosen the webbing straps as needed. PHOTO 7<br />
Installing Roll Bar <strong>and</strong> Cover<br />
<strong>Nomad</strong>:<br />
1. Place cover over side panels, with “<strong>Nomad</strong>” logo at trailer<br />
front. FIGURE 3<br />
2. Slip one roll bar knob through a grommet on<br />
cover. FIGURE 3<br />
3. Slide roll bar through casing in divider, <strong>and</strong> match roll bar<br />
end with its corresponding hole on side rail.<br />
4. Thread roll bar knob through side rail, <strong>and</strong> tighten.<br />
5. Repeat for knob on other side.<br />
6. Loop O-rings on cover over trailer frame tube ends.<br />
Make sure cover extends over top of side panels.<br />
Installing Tow Bar<br />
1. Slide tow bar through both tow bar mounts on left side.<br />
2. Match rear tow bar hole with rear mount hole.<br />
3. Insert the retaining pin through both holes, <strong>and</strong> lock<br />
retaining hoop securely. PHOTO 8 & PHOTO 9<br />
6 BURLEY NOMAD AND FLATBED OWNER’S INSTRUCTION AND SAFETY MANUAL<br />
PHOTO 7<br />
Trailer<br />
Rear<br />
Tailgate<br />
Trailer Frame<br />
FIGURE 3: NOMAD<br />
Tow Bar Mounts<br />
PHOTO 8: NOMAD TOW BAR INSTALLATION<br />
Cover Grommet<br />
Roll Bar Knob<br />
Retaining Pin<br />
Buckle<br />
Side Rail<br />
O-Ring<br />
Webbing Strap<br />
Splashguard<br />
Webbing Strap<br />
Roll Bar<br />
Trailer Front
WARNING<br />
NEVER OPERATE TRAILER WITHOUT RETAINING PIN LOCKED<br />
IN PLACE. AN UNLOCKED TOW BAR CAN LOOSEN OR DETACH,<br />
CAUSING ACCIDENT RESULTING IN SERIOUS INJURY.<br />
Installing Safety Flag<br />
<strong>Nomad</strong>:<br />
Join flag pole sections together <strong>and</strong> insert end into flag pocket on<br />
outside of left side panel.<br />
WARNING<br />
DO NOT USE TRAILER WITHOUT SAFETY FLAG.<br />
Hitching Trailer to Your Bicycle<br />
1. Remove rear quick release lever assembly from bike.<br />
2. Match hole on flat side of hitch upper arm to left (nonchain<br />
ring side) rear dropout hole.<br />
3. Loosely reassemble quick release assembly through<br />
hitch, dropout <strong>and</strong> wheel. FIGURE 4<br />
4. Slide flex connector between hitch side arms, <strong>and</strong> match<br />
holes. Racks, bags, or fittings should not interfere with<br />
hitch.<br />
5. Open retaining pin <strong>and</strong> insert through hitch <strong>and</strong> flex<br />
connector holes. Rotate <strong>and</strong> close retaining hoop.<br />
6. Tighten <strong>and</strong> close quick release lever, with lever pointing<br />
to rear of bike. A properly adjusted quick release lever<br />
should leave an imprint on your palm when the lever is<br />
rotated to the closed position.<br />
7. Wrap safety strap twice around inside of chain stay.<br />
Fasten hook to D-ring on underside of tow bar<br />
end. FIGURE 5<br />
8. To remove trailer from bicycle, unfasten clip from D-ring<br />
<strong>and</strong> remove retaining pin.<br />
WARNING<br />
QUICK RELEASE LEVER MUST BE IN CLOSED POSITION AND<br />
HITCH SAFETY STRAP PROPERLY INSTALLED. HITCH MUST NOT<br />
INTERFERE WITH RACKS, BAGS OR FITTINGS. INSPECT HITCH<br />
AND TOW BAR FREQUENTLY FOR DAMAGE OR LOOSE FASTEN-<br />
ERS. DAMAGED, IMPROPERLY INSTALLED OR INTERFERING<br />
PARTS CAN CAUSE ACCIDENTS RESULTING IN SERIOUS INJURY.<br />
Tow Bar Mounts<br />
PHOTO 9: FLATBED TOW BAR INSTALLATION<br />
FIGURE 4<br />
Quick<br />
Release<br />
Safety strap<br />
wrapped twice<br />
around chainstay<br />
FIGURE 5<br />
Flex<br />
Connector<br />
Hitch<br />
Retaining Pin<br />
Retaining Pin<br />
Hitch<br />
Trailer Front<br />
Quick<br />
Release<br />
Lever<br />
BURLEY NOMAD AND FLATBED OWNER’S INSTRUCTION AND SAFETY MANUAL 7<br />
Nut<br />
Hook fastened to<br />
D-ring under tow bar
Safety Checklists<br />
Check Before Each Ride:<br />
✓ Wheels tightly attached, with quick release levers securely locked<br />
✓ Tires inflated to recommended pressure on tire side wall<br />
✓ Hitch properly secured with safety strap in place<br />
✓ Locked retaining pin for tow bar<br />
✓ Maximum load 100 lbs (40 kg in Europe)<br />
✓ Bicycle safety check, especially brakes <strong>and</strong> tires<br />
✓ Helmet for cyclist<br />
✓ Safety flag in place (<strong>Nomad</strong> Only)<br />
✓ Cargo loaded <strong>and</strong> secured correctly<br />
Monthly Checklist<br />
✓ Inspect tow bar, hitch, frame tubing, flex connector <strong>and</strong> hardware for damage<br />
✓ Inspect tires for wear <strong>and</strong> cracks<br />
✓ Inspect wheels for trueness <strong>and</strong> cracks<br />
✓ Inspect wheel bearings for wear<br />
✓ Inspect fabric parts for rips, abrasion, or missing or damaged hardware<br />
✓ Contact your Authorized <strong>Burley</strong> Dealer for replacement of any damaged or worn-out parts<br />
Maintenance <strong>and</strong> Storage<br />
Hitch <strong>and</strong> Tow Bar Maintenance<br />
Store trailer indoors if possible. Do not use or store trailer at temperatures below 32˚F (0°C), as the hitch flex connector can<br />
become brittle <strong>and</strong> possibly break, causing an accident resulting in serious injury.<br />
Fabric Care<br />
H<strong>and</strong> wash fabric parts with mild soap or detergent <strong>and</strong> warm water. For heavy soiling, use a nylon bristle brush. Do not use<br />
bleach. Polyester fabric will eventually fade, especially when exposed to direct sunlight. Wipe dry (to help avoid mildew) <strong>and</strong><br />
store out of direct sunlight in a dry, well ventilated area, or use a <strong>Burley</strong> Trailer Storage Cover to protect your trailer. Replace<br />
any damaged parts.<br />
8 BURLEY NOMAD AND FLATBED OWNER’S INSTRUCTION AND SAFETY MANUAL
<strong>2009</strong> <strong>Nomad</strong> Replacement Parts <strong>and</strong> Diagram<br />
Diagram # Part # Description<br />
1 960041 Forged St<strong>and</strong>ard Hitch<br />
2 960009 Safety Flag<br />
3 4325401 Tonneau Cover<br />
4 4326502 Bag<br />
5 950022 Left Side Panel on Frame<br />
6 950023 Right Side Panel on Frame<br />
7 250122 Tow Bar Assembly<br />
8 160021 Wheel (SOLD INDIVIDUALLY)<br />
9 950019 Tow Arm Guide Kit<br />
10 950026 Side Rail Posts (set of 2)<br />
11 950027 Snap Coupling Kit (Set of 4)<br />
12 4310007M Rollbar with Knobs<br />
13 950072 <strong>Nomad</strong> Frame Kit<br />
14 950029 Axle Tube Assembly<br />
15 950038 Flex Connector for Square Tow Bar w/ Safety Strap<br />
Please go to www.burley.com for updated product parts list <strong>and</strong> diagrams<br />
BURLEY NOMAD AND FLATBED OWNER’S INSTRUCTION AND SAFETY MANUAL 9
<strong>2009</strong> <strong>Flatbed</strong> Replacement Parts <strong>and</strong> Diagram<br />
Diagram # Part # Description<br />
1 960041 Forged St<strong>and</strong>ard Hitch<br />
950096 Fabric Floor (NOT SHOWN)<br />
2 250122 Tow Bar Assembly for Square Tow Bar<br />
3 160021 Wheel (SOLD INDIVIDUALLY)<br />
950005 Tow Bar Receiver Kit (NOT SHOWN)<br />
4 950073 Side Rails (set of 2)<br />
5 4130010 Hold Down Straps (set of 2)<br />
6 950074 <strong>Flatbed</strong> Frame Kit<br />
7 950097 Axle Assembly<br />
8 950038 Flex Connector for Square Tow Bar w/ Safety Strap<br />
Please go to www.burley.com for updated product parts list <strong>and</strong> diagrams<br />
10 BURLEY NOMAD AND FLATBED OWNER’S INSTRUCTION AND SAFETY MANUAL
Notes:<br />
BURLEY NOMAD AND FLATBED OWNER’S INSTRUCTION AND SAFETY MANUAL 11
<strong>Burley</strong> Limited Warranty:<br />
This <strong>Burley</strong> trailer is warranted from the date of purchase against defects in materials <strong>and</strong> workmanship as follows: fabric parts for one year, frame <strong>and</strong> plastic<br />
parts for three years. Your original dated sales or delivery receipt showing the date of purchase is your proof of purchase.<br />
If a defect in materials or workmanship is discovered during the Limited Warranty period, we will, at our sole option, repair or replace your product at no cost to<br />
you. This warranty is only valid in the country in which the product was purchased.<br />
The Limited Warranty extends only to the original retail purchaser of this product <strong>and</strong> is not transferable to anyone who obtains ownership of the product from the<br />
original purchaser.<br />
The Limited Warranty does not cover claims resulting from misuse, failure to follow the instructions, installation, improper maintenance <strong>and</strong> use, abuse alteration,<br />
involvement in an accident, <strong>and</strong> normal wear <strong>and</strong> tear. The Limited Warranty does not cover products which are used in rental operations <strong>and</strong> <strong>Burley</strong> will not be<br />
liable for any incidental or commercial damages relating to such use.<br />
TO THE GREATEST EXTENT PERMITTED BY LAW, THIS LIMITED WARRANTY IS EXCLUSIVE AND IN LIEU OF ANY OTHER WARRANTY, WRITTEN OR ORAL,<br />
INCLUDING BUT NOT LIMITED TO ANY EXPRESS OR IMPLIED WARRANTY OF MERCHANTABILITY OR FITNESS FOR A PARTICULAR PURPOSE.<br />
The duration of any implied warranties, including any implied warranty of merchantability or fitness for a particular purpose that may exist during the express<br />
warranty period is expressly limited to the limited warranty period.<br />
Some states <strong>and</strong> countries do not allow limitations on how long an implied limited warranty lasts; therefore, the above limitation <strong>and</strong> exclusions may not apply to<br />
you.<br />
THE CUSTOMER’S EXCLUSIVE REMEDY FOR BREACH OF THIS LIMITED WARRANTY OR OF ANY IMPLIED WARRANTY OR OF ANY OTHER OBLIGATION ARISING<br />
BY OPERATION OF LAW OR OTHERWISE SHALL BE LIMITED AS SPECIFIED HEREIN TO REPAIR OR REPLACEMENT, AT OUR SOLE OPTION. IN ANY EVENT,<br />
RESPONSIBILITY FOR SPECIAL, INCIDENTAL AND CONSEQUENTIAL DAMAGES IS EXPRESSLY EXCLUDED.<br />
Some states do not allow the exclusion of limitation of incidental or consequential damages, so the above limitation of exclusion may not apply to you.<br />
This Limited Warranty gives you specific legal rights, <strong>and</strong> you may have other rights that vary from state to state or country.<br />
For warranty service or replacement part information for the USA or Canada, please contact <strong>Burley</strong> directly by calling 800-311-5294 or emailing<br />
burley@burley.com. For warranty service or replacement part information outside of the USA <strong>and</strong> Canada please contact the place of purchase for<br />
warranty service. Please be prepared to provide the product model, serial number <strong>and</strong> a description of the warranty issue.<br />
Some replacement parts may be available for purchase after this limited warranty expires. Please visit us at www.burley.com or call us at 541-687-1644 for more<br />
information.<br />
BURLEY DESIGN<br />
1500 Westec Drive<br />
Eugene, OR 97402 USA<br />
P. 541.687.1644 or 800.423.8445 F. 541.687.0435<br />
burley@burley.com burley.com<br />
©2008 <strong>Burley</strong> Design LLC<br />
“<strong>Burley</strong>” is a registered trademark of <strong>Burley</strong> Design LLC<br />
170099 <strong>Nomad</strong> <strong>Flatbed</strong> Rev 4