

AFS 1100 Manual - Grain Burning Stoves by Prairie Fire Grain Energy
AFS 1100 Manual - Grain Burning Stoves by Prairie Fire Grain Energy
AFS 1100 Manual - Grain Burning Stoves by Prairie Fire Grain Energy

Create successful ePaper yourself
Turn your PDF publications into a flip-book with our unique Google optimized e-Paper software.
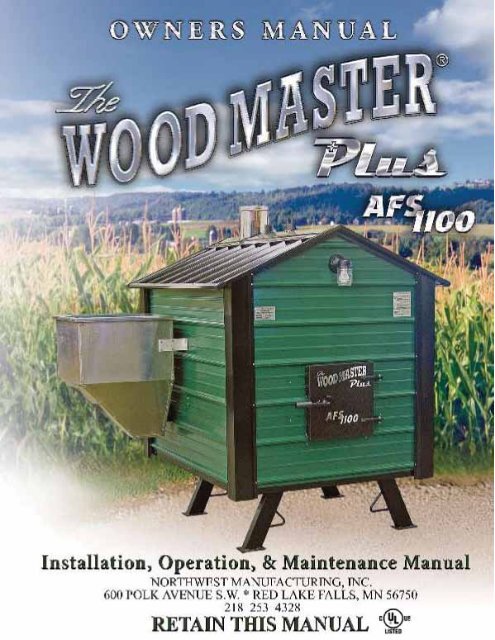
Dear Customer,<br />
We at Northwest Mfg., Inc. would like to thank you for purchasing the<br />
WoodMaster Plus heating system.<br />
It is our goal to build the highest quality product at a competitive price,<br />
and maintain total customer satisfaction.<br />
This manual is a guide for installing, operating, and maintaining your<br />
new WoodMaster Plus.<br />
Follow and observe all safety and warning instructions.<br />
The Staff ,<br />
WoodMaster Furnaces
Contents<br />
TABLE OF CONTENTS<br />
Contents . . . . . . . . . . . . . . . . . . . . . . . . . . . . . . . . . . . . . . . . . . . . 3<br />
Safety . . . . . . . . . . . . . . . . . . . . . . . . . . . . . . . . . . . . . . . . . . . . . . . . 4<br />
Features . . . . . . . . . . . . . . . . . . . . . . . . . . . . . . . . . . . . . . . . . . . . . 5<br />
Installation . . . . . . . . . . . . . . . . . . . . . . . . . . . . . . . . . . . . . . . . . . . 6<br />
The Furnace . . . . . . . . . . . . . . . . . . . . . . . . . . . . . . . . . . . . . . 6<br />
Chimney Specifications . . . . . . . . . . . . . . . . . . . . . . 6<br />
Block or Pad Supports . . . . . . . . . . . . . . . . . . . . . . . . . 6<br />
Trench . . . . . . . . . . . . . . . . . . . . . . . . . . . . . . . . . . . . . . 6<br />
Mounting the Pump. . . . . . . . . . . . . . . . . . . . . . . . . . . . 7<br />
Hooking Up Water Lines . . . . . . . . . . . . . . . . . . . . . . . 7<br />
Wiring the Pump . . . . . . . . . . . . . . . . . . . . . . . . . . . . . . 7<br />
The Home . . . . . . . . . . . . . . . . . . . . . . . . . . . . . . . . . . . . . . . . 8<br />
Domestic Hot Water . . . . . . . . . . . . . . . . . . . . . . . . . 8<br />
Existing Forced Air . . . . . . . . . . . . . . . . . . . . . . . . . . 8<br />
Existing Hot Water Heat . . . . . . . . . . . . . . . . . . . . . . . 9<br />
Inline Filter and Fill Valve . . . . . . . . . . . . . . . . . . . . . . 9<br />
Operation . . . . . . . . . . . . . . . . . . . . . . . . . . . . . . . . . . . . . . . . . . . . 10<br />
Filling with Water . . . . . . . . . . . . . . . . . . . . . . . . . . . . . . . . . . 10<br />
Bleeding the System . . . . . . . . . . . . . . . . . . . . . . . . . . . . . . . 10<br />
<strong>AFS</strong> <strong>1100</strong> Startup Procedure . . . . . . . . . . . . . . . . . . . . . . . 10<br />
Timer Dial Identification. . . . . . . . . . . . . . . . . . . . . . . . . . . 10<br />
BTU Per Hour -- Timer Settings . . . . . . . . . . . . . . . . . . . . 11<br />
WoodMaster Plus Digital Aqua Stat Settings . . . . . . . . 11<br />
Boiler Treatment . . . . . . . . . . . . . . . . . . . . . . . . . . . . . . . . . . 11<br />
Maintenance Schedule . . . . . . . . . . . . . . . . . . . . . . . . . . . . 11<br />
Reference . . . . . . . . . . . . . . . . . . . . . . . . . . . . . . . . . . . . . . . . . . . . 12<br />
Trouble Shooting . . . . . . . . . . . . . . . . . . . . . . . . . . . . . . . . . . 12<br />
<strong>AFS</strong> <strong>1100</strong> Electronic Temperature Control (ETC) . . . . . 13<br />
ETC System Specifications . . . . . . . . . . . . . . . . . . . . . . . . 14<br />
Wiring Diagrams . . . . . . . . . . . . . . . . . . . . . . . . . . . . . . . . . . . 16<br />
Warranty & Owner’s Registration Cards (tearouts) . . . . . . 19<br />
Page 3
Pre-Installation Precautions<br />
Page 4<br />
IMPORTANT SAFETY<br />
INSTRUCTIONS<br />
READ ALL INSTRUCTIONS<br />
BEFORE INSTALLATION<br />
CAUTION All installation and operations must follow STATE and LOCAL CODES for<br />
wiring, plumbing, and fi ring of this unit. These CODES may diff er from this<br />
manual. Installation must be performed <strong>by</strong> a Qualifi ed Installer.<br />
CAUTION<br />
Read and follow these directions carefully. Retain this manual for as long as<br />
you own your WoodMaster Plus.<br />
CAUTION All WoodMaster Plus models operate at atmospheric pressure. DO NOT<br />
obstruct, block, or plug in any way the overfl ow vent pipe which is located<br />
directly behind the chimney on top of the furnace.<br />
CAUTION<br />
Safety<br />
The WoodMaster Plus is designed for outdoor use. We do not recommend<br />
installing in a building.<br />
CAUTION Manufacturer recommends a minimum 25 foot clearance from buildings<br />
or fi re hazards. If placed near a fi re hazard area an approved spark arrester<br />
should be used.<br />
CAUTION<br />
Only responsible adults should operate your furnace. If furnace is not fi red<br />
properly damage could result and the warranty be voided.<br />
CAUTION Never allow small children to play near or tamper with furnace. Always<br />
keep the area around, and in front of fuel door clean and free from combustible<br />
materials.<br />
CAUTION<br />
CAUTION<br />
Do not connect this unit to a chimney fl ue serving another appliance.<br />
Pump must run continuously whenever the WoodMaster Plus is being used.<br />
In case of a runaway or chimney fi re, shut fan switch off , make sure doors are closed, allow<br />
CAUTION<br />
to burn out.
Twin Augers<br />
Inside Front<br />
Swirley<br />
Return Line<br />
Feed Auger Motor<br />
Snap Disc<br />
Feed Line<br />
Twin Auger & Ash<br />
Removal Motor<br />
Rear Door Insulation<br />
Feed Auger<br />
<strong>Fire</strong> Pot<br />
Face Plate<br />
Ash Removal<br />
Auger<br />
Chimney Box<br />
FRONT VIEW<br />
BACK PANEL<br />
Features<br />
6” Chimney<br />
Heat Transfer Tubes<br />
Chimney Box<br />
Insulation<br />
Chimney Box<br />
Door Latch<br />
Fan Switch<br />
Water Level<br />
Light<br />
Light Switch<br />
Primary<br />
Timers<br />
Chimney Box<br />
Return Line<br />
Twin Augers<br />
Feed Auger<br />
Feed Line<br />
Combustion Fan<br />
Ash Pan<br />
Digital<br />
Aquastat<br />
Secondary<br />
Timers<br />
ETC Control<br />
(on right side)<br />
Page 5
Page 6<br />
Installation<br />
THE FURNACE<br />
Chimney Specifi cations<br />
To insure proper insulation, use only Chimney and Chimney Adapter from your local WoodMaster Plus Dealer or Northwest<br />
Mfg., Inc. (Chimney type Class A Insulated).<br />
Block or Pad Supports<br />
Under normal conditions four cement blocks are all that is required to support the furnace. Blocks should be at least 6 inches<br />
wide, 10 inches long, and 3 inches thick. Under very soft conditions a concrete pad may be needed. For Model <strong>AFS</strong> <strong>1100</strong> the<br />
pad should be no less than 5 feet wide, 6 feet long, and 4 to 6 inches thick. Always use a non-combustible base.<br />
CAUTION: Call before you dig.<br />
Trench<br />
The trench must be 24 inches deep and 6 to 12 inches wide. It can be dug with a shovel or a backhoe. Place all the dirt to one<br />
side of the trench to allow room for working on the other side.<br />
Wiring<br />
Place electrical supply in bottom of trench and cover with 6 inches of dirt. Electrical wire rated for underground use (12-2<br />
+ground) can be buried in the same trench as the water lines but must maintain a minimum 24 inch depth. Always follow<br />
state and local codes.<br />
Water Lines<br />
The remaining 18 inches of open trench is where the water lines are placed. Use a one inch water line with a minimum rating<br />
of 100 PSI at 180 degrees and insure that your water line insulation has a minimum R-value of eight in order to maintain<br />
adequate heating effi ciency.<br />
NOTE: If lines travel under a driveway or where heavy equipment travels, the line should be buried two to three feet deep. If<br />
lines travel through a low or wet area, they should be insulated and installed in a water tight piping, (PVC).<br />
NOTE: Leave a minimum of three feet of water line exposed above ground at the furnace to insure adequate length for connection.<br />
NOTE: Before insulating and burying the water lines, label the hot water supply line at both ends. Once the lines are covered<br />
you will be able to easily determine which line is connected to the pump.<br />
NOTE: Use only approved water line insulation sold through your WoodMaster Plus Dealer. Poor insulation will cause major<br />
heat loss.
Mounting the Pump<br />
Attach the 1” x 2” Black Nipple (BN001) and one<br />
half of the Flanges from the 1” Cast Iron Pump<br />
Flange Kit (PF001) to one of the Hot Water Supply<br />
Valves on back of furnace.<br />
Locate one of the Black Rubber Gaskets, and<br />
placing it between the pump and the mounted<br />
fl ange, bolt the pump to the fl ange. Make<br />
sure the arrow on the pump indicating direction<br />
of water fl ow points down.<br />
Bolt the remaining fl ange and gasket to the<br />
bottom of the pump.<br />
Pump<br />
1” Cast Iron Pump Flange<br />
Hooking Up Water Lines<br />
Hot Water Supply<br />
Attach the 1” Pex x 1” MIP (DP002) fi tting to fl ange on bottom<br />
of pump. Then attach the hot water supply 1” Pex Water Line<br />
(DP001) to the fi tting using 1” Pex Crimp Ring (DP007).<br />
Installation<br />
THE FURNACE<br />
Cold Water Return<br />
Attach the 1” Pex x 1” MIP (DP002) fi tting to the Cold Water Return<br />
Valve on the same side of the stove on which the pump was<br />
attached. Then attach the cold water return 1” Pex Water Line<br />
(DP001) to the fi tting using 1” Pex Crimp Ring (DP007).<br />
Wiring The Pump<br />
Remove the cover on the pump. Then using an approved wire, connect the<br />
ground wire to the green ground screw on the pump. Connect the black wire<br />
to the yellow wire on the pump. Finally, connect the remaining two white<br />
wires together and replace the pump cover.<br />
Locate junction box on back of stove and remove the cover. Connect the running<br />
end of the approved wire coming from the pump to the junction.<br />
NOTE: The wires from the pump will have to connect with the main power<br />
wires in the junction box along with the power wires from the ETC System.<br />
1” Pex Crimp x 1” MIP<br />
(DP002)<br />
Hot Water Supply<br />
(On back of furnace)<br />
1” x 2” Black Nipple<br />
1” Cast Iron Pump Flange<br />
Black Rubber Gasket<br />
(Supplied with pump)<br />
Direction of Flow<br />
Indicator Arrow<br />
Black Rubber Gasket<br />
(Supplied with pump)<br />
1” Pex Water Line<br />
(DP001)<br />
Hot Water Supply Valve<br />
Bottom Pump<br />
Flange or Cold Water<br />
Return Valve<br />
1” Pex Crimp Ring<br />
(DP007)<br />
CAUTION: Pump must run<br />
continuously whenever the WoodMaster<br />
Plus is in use, cannot be wired to<br />
thermostats that only runs pump when<br />
building calls for heat.<br />
CAUTION: Disconnect power before<br />
servicing any electrical components.<br />
Page 7
Page 8<br />
Installation<br />
Domestic Hot Water<br />
The Dometsic Hot Water/Flatplate Kit consists of a Water<br />
to Water Heat Transfer unit and the fi ttings needed to<br />
hook it up. The unit goes on top of the domestic hot<br />
water heater and is connected as shown below.<br />
THE HOME<br />
Entering the building with water lines can be done underground or over the sill plate. Once inside the building the typical<br />
hookup would run fi rst to the Domestic Hot Water Supply and next to an existing heating system such as a forced air furnace<br />
or a hot water heating system. Finally before leaving the building a fi ll valve must be installed near enough to a water supply<br />
for fi lling and fl ushing the boiler in the WoodMaster Plus Furnace.<br />
WoodMaster<br />
water out<br />
WoodMaster<br />
water in<br />
Domestic Cold Water In<br />
Out to Domestic<br />
Hot Water Heater<br />
Existing Forced Air<br />
A water to air heat exchanger is inserted in the existing plenum. In most cases<br />
the heat exchanger is placed in a horizontal position, keeping all four sides<br />
level. The air must be forced through the fi nned area of the heat exchanger<br />
evenly. The hot water line coming from the hot-water tube enters the bottom<br />
fi tting of the heat exchanger and exits the top fi tting, which returns to the<br />
furnace. If the plenum is too large or too small, it must be altered to fi t the heat<br />
exchanger properly.<br />
NOTE: The WoodMaster Plus Water to Air Heat Exchanger must be installed<br />
below any existing Off -Peak electric coils already in the plenum.<br />
After installation of the WoodMaster Plus add-on water to air exchanger, the<br />
air fl ow must be increased to fuel furnaces, electric furnaces, and electric/gas<br />
furnaces. Methods of doing this are:<br />
Belt Drive System<br />
Blower pulleys and motor pulleys may be changed but the electric current<br />
fl owing through the motor shall not exceed the nameplate rating. (A blower<br />
motor or larger power may be used.)<br />
Direct Drive System<br />
The motor shall not be changed, however the speed of the motor may be<br />
increased.<br />
CAUTION: When installing heat exchangers DO NOT tamper<br />
with existing controls. Wiring to existing blower can be done<br />
with a line voltage or low voltage thermostat. NOTE: All wiring<br />
must follow state and local codes and should be done <strong>by</strong> a<br />
qualifi ed electrician. Wire thermostats according to directions<br />
provided <strong>by</strong> the manufacturer.<br />
Cold Water Return to<br />
WoodMaster Plus<br />
Hot Water Supply from WoodMaster Plus<br />
(Always put supply in lower port.)<br />
The heat exchanger works on the same principal<br />
as your car heater. Air blows through<br />
the heat exchanger taking the heat from<br />
the water and blowing it into your existing<br />
ductwork.
Installation<br />
Existing Hot Water Heat<br />
A Water to Water Heat Transfer Unit (FP520) is used to connect to an existing hot water boiler system.<br />
Hot Water Supply from<br />
WoodMaster Plus<br />
Cold Water Return to<br />
WoodMaster Plus<br />
Existing Heat<br />
Zone Return<br />
Inline Filter and Fill Valve Assembly<br />
NOTE: Any changes to an existing boiler<br />
should be done <strong>by</strong> a qualifi ed plumber and<br />
follow state and local codes.<br />
The Inline Filter and Fill Valve Assembly (FK001) must be installed in the Cold Water Return<br />
Line before the line exits the building. It should be placed so that a washing machine<br />
hose can be connected between a domestic water supply and the Fill Valve.<br />
Cold Water Return from<br />
Heat Exchanger<br />
WoodMaster Plus Water<br />
to Water Heat Transfer<br />
Unit<br />
Circulating Pump<br />
for Existing Hot<br />
Water Heating<br />
System<br />
Existing Hot<br />
Water Boiler<br />
Cold Water<br />
Return to<br />
WoodMaster Plus<br />
Domestic Water<br />
Supply for fi lling<br />
boiler<br />
Page 9
Filling With Water<br />
Connect washing machine hose between a domestic water supply and the furnace fi ll valve (FK001) which was installed in<br />
the cold water return line at a point just prior to its exiting the building. Make sure that valves not being used on the furnace<br />
are closed and the valves that are being used are open. Begin fi lling and inspect for leaks on all fi ttings. Repair any leaks that<br />
are found.<br />
While fi lling the boiler, close the cold water return valve on the furnace for two or three minutes, and then open the valve.<br />
This will force trapped air out of the hot water supply line. Repeat this process with the hot water supply valve on the furnace<br />
to force air out of the cold water return line. Once both lines have been “bled” continue fi lling until the system is full and<br />
water comes out of the vent pipe.<br />
Page 10<br />
Operation<br />
CAUTION: Feed and return valves that are not being used must<br />
be insulated or removed to prevent freezing and breaking.<br />
CAUTION: Air in the water lines can cause damage to the pump.<br />
Bleeding The System<br />
Routinely pay attention to the water level light. If light is not lit, this indicates water level is low and furnace may need to have<br />
water added. Add water until it over fl ows the vent pipe. Occasionally (monthly) manually inspect the water level in the over<br />
fl ow pipe to be sure that the water level light is working properly.<br />
<strong>AFS</strong> <strong>1100</strong> Startup Procedure<br />
Step 1: Fill hopper with corn.<br />
IMPORTANT NOTE: In case of<br />
Step 2: Turn T1 knob to 10 sec.<br />
extended power outage it is possible to<br />
Step 3: Turn T2 knob to 0 sec.<br />
operate your furnace with a generator.<br />
Step 4: Turn T3 to 30 sec.<br />
Step 5: Turn T4 to 35 min.<br />
Step 6: Turn fan switch on.<br />
Step 7: Press Set button on Wood Master digital aqua stat.<br />
Step 8: Let stove run for about 6 minutes or until a small pile of corn accumulates in fi re pot.<br />
Step 9: Turn T2 to 45 sec.<br />
Step 10: Light corn in fi repot with Matchlight charcoal or large propane torch.<br />
After the corn is burning well, the stove should provide 20,000 BTUH with these settings. For diff erent BTUH output setting,<br />
see below.<br />
Timer Dial Identifi cation<br />
T1 — Heating mode on time setting in seconds.<br />
T2 — Heating mode off time setting in seconds.<br />
T3 — Idle mode on time setting in seconds.<br />
T4 — Idle mode off time setting in minutes.
BTU Per Hour — Timer Settings<br />
Corn Timer — Heat Mode Timer — Idle Mode<br />
Stove Output T1 T2 T3 T4<br />
BTUH Seconds Seconds Seconds Minutes<br />
20,000 10 45 30 35<br />
60,000 15 45 30 35<br />
100,000 20 45 30 35<br />
150,000 20 30 30 35<br />
WoodMaster Plus Digital Aqua Stat Settings<br />
Set Point (SP) 170° F<br />
Spread (HY) 5° F<br />
Low Alarm (ALL) 120° F<br />
Operation<br />
Boiler Treatment<br />
Allow system to burn for 2 hours and then add boiler treatment as follows. Before adding boiler treatment, be sure that the<br />
water temperature is at least 100 degrees or higher. Add the boiler treatment that came with your stove to the vent pipe located<br />
directly behind the chimney. Treatment should be added on an annual basis. If you are interested in testing your boiler<br />
water, contact your local dealer for details.<br />
Maintenance Schedule for the WoodMaster Plus<br />
CLEANING THE FURNACE:<br />
1. Every furnace comes with an ash pan. This should be dumped daily or as needed. It is important to not let it overfi ll,<br />
because it could plug the ash auger and cause problems.<br />
2. On a weekly basis you should scrape down the fi re drum and clean out the chimney box in the back of the furnace. To<br />
do this turn fan switch off , open the chimney box door and remove the swirly’s from the heat transfer tubes. Caution:<br />
These will be hot. Run the steel brush in and out of each tube several times. When this is done, clean out all ash that<br />
is left in the chimney box, put swirly’s back in the heat transfer tubes, and close the door. Be sure the door is latched<br />
properly. Try to keep fan and motors as clean as possible. Refer to page 5 for part locations and names.<br />
3. Annual maintenance should be done in the spring when you shut down the furnace. It is very important to drain and<br />
fl ush your furnace each spring. Refer to Boiler Treatment Procedure section below. You will also need to clean all ash<br />
from the chimney box, heat transfer tubes, fi re box, and fi re pot. A Shop Vac works well for this. To clean the fi re pot,<br />
remove 4 bolts in the front face plate, use your Shop Vac to clean the fl y ash out of the air chamber. Dump your ash box<br />
and blow any visible dust off of the motors, pumps, fans, etc. Apply a light fi lm of oil to all chains. Make sure to cover<br />
the chimney to prevent water from getting into your furnace during the summer.<br />
CAUTION: Warranty does not cover ash corrosion. Neglect to clean your furnace<br />
or cover the chimney when not in use, could void the warranty.<br />
BOILER TREATMENT PROCEDURE: To drain furnace -- open drain valve and let stove empty completely. To fl ush -- leave drain<br />
valve open and close pump valve. Add water to furnace through the return lines. Let fl ush for several minutes. Close drain<br />
valve and open pump valve. Refi ll stove and treat water right away.<br />
Leaving your stove empty exposes the water jacket to oxygen which will shorten the life of your stove. If your system has<br />
anti-freeze, you do not need to drain it. However you should then test your water annually. For water sampling contact your<br />
dealer or the factory. If you have any questions -- please call 1-800-932-3629.<br />
Page 11
If furnace is not heating<br />
Page 12<br />
Reference<br />
TROUBLESHOOTING<br />
1. Make sure back door is closed. When open, the safety switch will not allow the system to run.<br />
2. Check pump. If pump is not running, shut off power supply to pump and inspect.<br />
3. Check water level. If water is low, inspect for leaks in the system.<br />
4. Check chimney for fl y ash build-up. If opening is reduced fi re cannot burn properly.<br />
5. Check Fan Draft and Draft Flapper. Make sure they are operating properly.<br />
6. Check Fan Switch on ETC to be sure it is ON. Fan Switch should only be off while cleaning or<br />
making repairs.<br />
7. If water temperature is reading 119° or lower, push Reset Switch on ETC System to restart Heating<br />
Mode.<br />
8. If the fi re goes out and there is a lot of unburned corn in the <strong>Fire</strong> Pot, you are running the furnace<br />
to hard for the weather conditions.<br />
9. If the fi re goes out and the <strong>Fire</strong> Pot is empty, either the Feed Auger is plugged or the Feed System<br />
is empty (out of fuel).<br />
10. Feed System plugged.<br />
Possible Causes:<br />
1. Ash pan too full (plugged).<br />
2. Chain Drive System failure.<br />
3. Feed Intake plugged or blocked.<br />
` 4. Faulty motor in system.<br />
If none of these suggestions appear to solve<br />
your problem, contact your dealer.
<strong>AFS</strong> <strong>1100</strong> Electronic Temperature Control (ETC)<br />
Function: (Factory Settings below)<br />
• The ETC monitors and controls the <strong>AFS</strong> <strong>1100</strong> water temperature <strong>by</strong> controlling the draft, draft fan, and corn supplied.<br />
• During normal operation (adequate corn supply) the controller will go into idle mode when the water reaches 170° F (Set)<br />
and will go into heating mode when the water falls to 165° F (Set - Hy).<br />
• During shut down (no corn supply) or when the water falls to 120° F (ALL) the controller will go into shut down mode. At<br />
this time the <strong>AFS</strong> <strong>1100</strong> hopper will need to be fi lled with corn and the ETC will need to be reset (see Startup).<br />
Heating Mode: During heating mode the controller will open the draft and run the draft fan continuously. The controller will<br />
also turn on the heating mode timer that controls the amount of corn added to the fi re pot. Heating mode timer setting T1<br />
will control the amount of time corn is added to the fi re pot. Heating mode timer setting T2 will determine the amount of<br />
time until corn is added again.<br />
Idle Mode: During idle mode, the controller will turn on the idle mode timer. Idle mode timer will momentarily open the<br />
draft, turn on the draft fan, and add corn all at the same time. Idle mode timer setting T3 will control the time these will be on<br />
and T4 will determine the amount of time until they are turned on again.<br />
Startup / Reset: (See also <strong>AFS</strong> <strong>1100</strong> Startup Procedure).<br />
• The fi rst time the <strong>AFS</strong> <strong>1100</strong> is powered up or when it has shut down, the controller display will fl ash “LA” (Low Alarm) two<br />
times and then display the water temperature for two seconds and then start over. This is normal and indicates the<br />
system has shut down because the water is at or below 120° F.<br />
• To start up (or reset) your <strong>AFS</strong> <strong>1100</strong>, press the set button one time. The display will indicate “rSt” (reset) and after 1 to 2<br />
seconds the <strong>AFS</strong> <strong>1100</strong> will go into heating mode. The display will continue to fl ash “LA” and the water temperature until<br />
the water temperature reaches 140° F (ALL + 20). After water temperature reaches 140° F, only the water temperature will<br />
be displayed until the water temperature falls to 120° F.<br />
• Note: The fan switch must be in the on position.<br />
• Note: Fan Switch can be shut off when loading or servicing the <strong>AFS</strong> <strong>1100</strong>.<br />
Parameter Description and Factory Settings:<br />
• Set (Set Point) — 170° F<br />
• Hy (Diff erential) — 5°F<br />
• ALL (Low Alarm) — 120° F<br />
Reference<br />
How To:<br />
• View Set Point — Push and immediately release the set<br />
key, display will indicate set point and will return to<br />
water temperature after 5 seconds.<br />
• Change the Set Point — Push and hold the set key until<br />
the set point is displayed, change the value using the up and down arrows, and press the set key. The set point value will<br />
fl ash a few times and then the display will return to water temperature.<br />
• Change Hy or ALL — Push and hold the set and down arrow keys at the same time until HY is displayed. Using the up<br />
and down arrows, select the parameter to be changed (Hy or ALL), push the set key once (value of parameter should be<br />
displayed), use arrows to change value, and push the set key (value should fl ash a few times). After 10-15 seconds the<br />
display will change back to water temperature.<br />
Note: When changing parameters, make sure Set-Hy is at least 20° F above ALL.<br />
Green Float Light: Green light on: Water level O.K.<br />
Green light off : Water level low, add water through vent pipe.<br />
Light Switch: Operates light.<br />
Fan Switch: The fan switch must be on during normal operation, but may be turned off for maintenance.<br />
Page 13
Page 14<br />
Reference<br />
ETC SYSTEM SPECIFICATIONS
Reference<br />
Page 15
Page 16<br />
Reference
Reference<br />
Page 17
Page 18<br />
Reference
WoodMaster Warranty<br />
NORTHWEST MANUFACTURING, INC.<br />
600 Polk Ave. - Red Lake Falls, MN 56750<br />
Toll free (800) 932-3629 or (218) 253-4328<br />
Five Year Warranty on <strong>Fire</strong> Drum and Water Jacket<br />
Northwest Manufacturing, Inc. of Red Lake Falls, MN warrants material and labor on any defects in workmanship on<br />
the <strong>Fire</strong>drum and Water Jacket for a period of 5 years from the purchase date to the original owner only. If there is a leak in your<br />
properly delivered and installed WoodMaster Plus furnace in the fi rst year, WoodMaster will replace the furnace at no cost to<br />
the original owner. (Leak means; a leak in the fi re box or water jacket.) Northwest Manufacturing, Inc. will not be responsible<br />
for environmental conditions we cannot control.<br />
This warranty is limited to defective parts - repair and/or replacement only, and excludes any incidental and consequential<br />
damages connected therewith. Northwest Manufacturing, Inc. is not responsible for replacement of water, water treatment,<br />
antifreeze, costs of transportation, or shipping charges. On sight service work will be off ered to you. Please call Northwest<br />
Manufacturing, Inc. for current non-warranty rates.<br />
Original Manufacturer’s Warranty on Electrical Components - Parts Only<br />
Any electrical components in the stove that are defective during normal usage will be warranted to the original owner<br />
only <strong>by</strong> Northwest Manufacturing, Inc., in compliance with the original manufacturer’s warranty. Parts will be replaced on an<br />
even exchange, excluding labor & freight.<br />
These warranties apply only if the device is installed and operated as defi ned in the Owner’s <strong>Manual</strong>.<br />
Outdoor wood furnaces are not intended to be the only source of heat, therefore a backup system should be in place<br />
to prevent any damage caused <strong>by</strong> lack of heat.<br />
Additional Components Warranty Guidelines<br />
Northwest Manufacturing, Inc. will warranty for a period of one (1) year, any factory defects or breakage of the twin<br />
high temp augers, located in the fi re pot of the furnace itself. These items are a consumable item and in the case of normal<br />
wear are the responsibility of the owner to replace as is necessary.<br />
Northwest Manufacturing, Inc. will warranty all bearings, chains, and sprockets on the WoodMaster Plus for a period<br />
of one (1) year. Parts will be exchanged on an even exchange, excluding labor & freight.<br />
Northwest Manufacturing, Inc. will warranty the fi re pot of the WoodMaster Plus for a period of two (2) years.<br />
WARNING: Northwest Manufacturing will not warranty the inside of fi re drum due to ash corrosion. Rotation of ashes<br />
must be taken care of as displayed on the maintenance list, located on the side of the furnace. The fi re drum must be completely<br />
cleaned of all ashes and creosote a minimum of two (2) times per year, preferably half way through the heating season and<br />
immediately after the heating season. The chimney must be covered when stove is not in use. If antifreeze is not being used,<br />
the water jacket must be drained and fl ushed yearly after each heating season. After the furnace has been drained, immediately<br />
refi ll completely and treat with new boiler treatment.<br />
Damage caused <strong>by</strong> abuse, accidents, improper installation, overheating, corrosion, freezing or negligence will not be<br />
covered under warranty. Damage caused <strong>by</strong> burning fl ammable materials (such as petroleum products) will not be covered<br />
under warranty.<br />
Antifreeze - Only a nontoxic antifreeze is acceptable. Antifreeze will break down over a period of time and therefore should<br />
be tested annually. Always dispose of antifreeze <strong>by</strong> state and local codes. Loss of antifreeze under any condition will not be<br />
covered.<br />
How to fi le a claim - ANY CLAIM UNDER THIS WARRANTY SHOULD BE MADE TO YOUR DEALER.<br />
Customer’s Name ________________________________ Dealer’s Name _____________________________<br />
Customer’s Signature _____________________________ Dealer’s Signature __________________________
Name _________________________________________<br />
Address _______________________________________<br />
_______________________________________________<br />
Phone ________________________________________<br />
Date of Purchase ________________________________<br />
Model No. ______________________________________<br />
Serial No. ______________________________________<br />
(Model and serial numbers are located on the decal on front of stove.)<br />
Dealer’s Name __________________________________<br />
Northwest Manufacturing Inc.<br />
600 Polk Ave. SW<br />
Red Lake Falls, MN 56750<br />
OWNER’S REGISTRATION CARD<br />
Warranty<br />
Installed <strong>by</strong>: Dealer Customer<br />
If customer, was installation explained to you?<br />
Type of Installation:<br />
Purchased:<br />
Northwest Manufacturing Inc.<br />
600 Polk Ave. SW<br />
Red Lake Falls, MN 56750<br />
Yes No<br />
House/Garage Shop/Shed<br />
Greenhouse Kiln<br />
Other ____________________________<br />
With Auger Without Auger<br />
PLACE<br />
POSTAGE<br />
HERE
WoodMaster Warranty<br />
NORTHWEST MANUFACTURING, INC.<br />
600 Polk Ave. - Red Lake Falls, MN 56750<br />
Toll free (800) 932-3629 or (218) 253-4328<br />
Five Year Warranty on <strong>Fire</strong> Drum and Water Jacket<br />
Northwest Manufacturing, Inc. of Red Lake Falls, MN warrants material and labor on any defects in workmanship on<br />
the <strong>Fire</strong>drum and Water Jacket for a period of 5 years from the purchase date to the original owner only. If there is a leak in your<br />
properly delivered and installed WoodMaster Plus furnace in the fi rst year, WoodMaster will replace the furnace at no cost to<br />
the original owner. (Leak means; a leak in the fi re box or water jacket.) Northwest Manufacturing, Inc. will not be responsible<br />
for environmental conditions we cannot control.<br />
This warranty is limited to defective parts - repair and/or replacement only, and excludes any incidental and consequential<br />
damages connected therewith. Northwest Manufacturing, Inc. is not responsible for replacement of water, water treatment,<br />
antifreeze, costs of transportation, or shipping charges. On sight service work will be off ered to you. Please call Northwest<br />
Manufacturing, Inc. for current non-warranty rates.<br />
Original Manufacturer’s Warranty on Electrical Components - Parts Only<br />
Any electrical components in the stove that are defective during normal usage will be warranted to the original owner<br />
only <strong>by</strong> Northwest Manufacturing, Inc., in compliance with the original manufacturer’s warranty. Parts will be replaced on an<br />
even exchange, excluding labor & freight.<br />
These warranties apply only if the device is installed and operated as defi ned in the Owner’s <strong>Manual</strong>.<br />
Outdoor wood furnaces are not intended to be the only source of heat, therefore a backup system should be in place<br />
to prevent any damage caused <strong>by</strong> lack of heat.<br />
Additional Components Warranty Guidelines<br />
Northwest Manufacturing, Inc. will warranty for a period of one (1) year, any factory defects or breakage of the twin<br />
high temp augers, located in the fi re pot of the furnace itself. These items are a consumable item and in the case of normal<br />
wear are the responsibility of the owner to replace as is necessary.<br />
Northwest Manufacturing, Inc. will warranty all bearings, chains, and sprockets on the WoodMaster Plus for a period<br />
of one (1) year. Parts will be exchanged on an even exchange, excluding labor & freight.<br />
Northwest Manufacturing, Inc. will warranty the fi re pot of the WoodMaster Plus for a period of two (2) years.<br />
WARNING: Northwest Manufacturing will not warranty the inside of fi re drum due to ash corrosion. Rotation of ashes<br />
must be taken care of as displayed on the maintenance list, located on the side of the furnace. The fi re drum must be completely<br />
cleaned of all ashes and creosote a minimum of two (2) times per year, preferably half way through the heating season and<br />
immediately after the heating season. The chimney must be covered when stove is not in use. If antifreeze is not being used,<br />
the water jacket must be drained and fl ushed yearly after each heating season. After the furnace has been drained, immediately<br />
refi ll completely and treat with new boiler treatment.<br />
Damage caused <strong>by</strong> abuse, accidents, improper installation, overheating, corrosion, freezing or negligence will not be<br />
covered under warranty. Damage caused <strong>by</strong> burning fl ammable materials (such as petroleum products) will not be covered<br />
under warranty.<br />
Antifreeze - Only a nontoxic antifreeze is acceptable. Antifreeze will break down over a period of time and therefore should<br />
be tested annually. Always dispose of antifreeze <strong>by</strong> state and local codes. Loss of antifreeze under any condition will not be<br />
covered.<br />
How to fi le a claim - ANY CLAIM UNDER THIS WARRANTY SHOULD BE MADE TO YOUR DEALER.<br />
Customer’s Name ________________________________ Dealer’s Name _____________________________<br />
Customer’s Signature _____________________________ Dealer’s Signature __________________________
Warranty<br />
OWNER’S REGISTRATION CARD<br />
Name _________________________________________<br />
Installed <strong>by</strong>: Dealer Customer<br />
Address _______________________________________<br />
If customer, was installation explained to you?<br />
_______________________________________________<br />
Yes No<br />
Phone ________________________________________<br />
Type of Installation:<br />
Date of Purchase ________________________________<br />
Model No. ______________________________________<br />
Serial No. ______________________________________<br />
(Model and serial numbers are located on the decal on front of stove.)<br />
Dealer’s Name __________________________________<br />
Northwest Manufacturing Inc.<br />
600 Polk Ave. SW<br />
Red Lake Falls, MN 56750<br />
Purchased:<br />
Northwest Manufacturing Inc.<br />
600 Polk Ave. SW<br />
Red Lake Falls, MN 56750<br />
House/Garage Shop/Shed<br />
Greenhouse Kiln<br />
Other ____________________________<br />
With Auger Without Auger<br />
PLACE<br />
POSTAGE<br />
HERE
Warranty<br />
WoodMaster Warranty<br />
NORTHWEST MANUFACTURING, INC.<br />
600 Polk Ave. - Red Lake Falls, MN 56750<br />
Toll free (800) 932-3629 or (218) 253-4328<br />
Five Year Warranty on <strong>Fire</strong> Drum and Water Jacket<br />
Northwest Manufacturing, Inc. of Red Lake Falls, MN warrants material and labor on any defects in workmanship on<br />
the <strong>Fire</strong>drum and Water Jacket for a period of 5 years from the purchase date to the original owner only. If there is a leak in your<br />
properly delivered and installed WoodMaster Plus furnace in the fi rst year, WoodMaster will replace the furnace at no cost to<br />
the original owner. (Leak means; a leak in the fi re box or water jacket.) Northwest Manufacturing, Inc. will not be responsible<br />
for environmental conditions we cannot control.<br />
This warranty is limited to defective parts - repair and/or replacement only, and excludes any incidental and consequential<br />
damages connected therewith. Northwest Manufacturing, Inc. is not responsible for replacement of water, water treatment,<br />
antifreeze, costs of transportation, or shipping charges. On sight service work will be off ered to you. Please call Northwest<br />
Manufacturing, Inc. for current non-warranty rates.<br />
Original Manufacturer’s Warranty on Electrical Components - Parts Only<br />
Any electrical components in the stove that are defective during normal usage will be warranted to the original owner<br />
only <strong>by</strong> Northwest Manufacturing, Inc., in compliance with the original manufacturer’s warranty. Parts will be replaced on an<br />
even exchange, excluding labor & freight.<br />
These warranties apply only if the device is installed and operated as defi ned in the Owner’s <strong>Manual</strong>.<br />
Outdoor wood furnaces are not intended to be the only source of heat, therefore a backup system should be in place<br />
to prevent any damage caused <strong>by</strong> lack of heat.<br />
Additional Components Warranty Guidelines<br />
Northwest Manufacturing, Inc. will warranty for a period of one (1) year, any factory defects or breakage of the twin<br />
high temp augers, located in the fi re pot of the furnace itself. These items are a consumable item and in the case of normal<br />
wear are the responsibility of the owner to replace as is necessary.<br />
Northwest Manufacturing, Inc. will warranty all bearings, chains, and sprockets on the WoodMaster Plus for a period<br />
of one (1) year. Parts will be exchanged on an even exchange, excluding labor & freight.<br />
Northwest Manufacturing, Inc. will warranty the fi re pot of the WoodMaster Plus for a period of two (2) years.<br />
WARNING: Northwest Manufacturing will not warranty the inside of fi re drum due to ash corrosion. Rotation of ashes<br />
must be taken care of as displayed on the maintenance list, located on the side of the furnace. The fi re drum must be completely<br />
cleaned of all ashes and creosote a minimum of two (2) times per year, preferably half way through the heating season and<br />
immediately after the heating season. The chimney must be covered when stove is not in use. If antifreeze is not being used,<br />
the water jacket must be drained and fl ushed yearly after each heating season. After the furnace has been drained, immediately<br />
refi ll completely and treat with new boiler treatment.<br />
Damage caused <strong>by</strong> abuse, accidents, improper installation, overheating, corrosion, freezing or negligence will not be<br />
covered under warranty. Damage caused <strong>by</strong> burning fl ammable materials (such as petroleum products) will not be covered<br />
under warranty.<br />
Antifreeze - Only a nontoxic antifreeze is acceptable. Antifreeze will break down over a period of time and therefore should<br />
be tested annually. Always dispose of antifreeze <strong>by</strong> state and local codes. Loss of antifreeze under any condition will not be<br />
covered.<br />
How to fi le a claim - ANY CLAIM UNDER THIS WARRANTY SHOULD BE MADE TO YOUR DEALER.<br />
Customer’s Name ________________________________ Dealer’s Name _____________________________<br />
Customer’s Signature _____________________________ Dealer’s Signature __________________________<br />
Page 23