

Volcano Plus manual (english) Modified.pdf - Supreme Fireplaces
Volcano Plus manual (english) Modified.pdf - Supreme Fireplaces
Volcano Plus manual (english) Modified.pdf - Supreme Fireplaces

You also want an ePaper? Increase the reach of your titles
YUMPU automatically turns print PDFs into web optimized ePapers that Google loves.
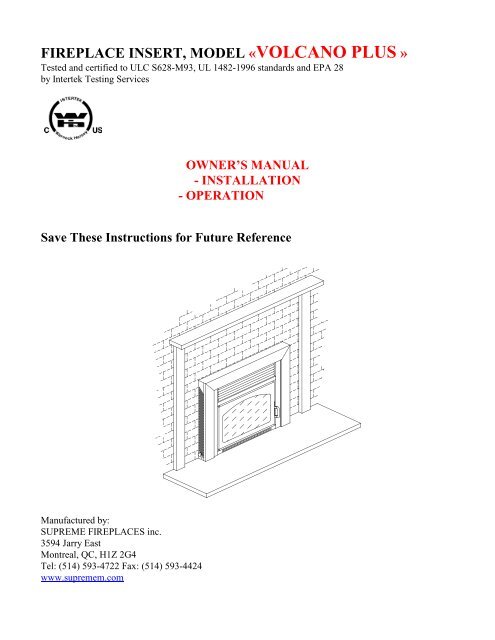
FIREPLACE INSERT, MODEL «VOLCANO PLUS »<br />
Tested and certified to ULC S628-M93, UL 1482-1996 standards and EPA 28<br />
by Intertek Testing Services<br />
OWNER’S MANUAL<br />
- INSTALLATION<br />
- OPERATION<br />
Save These Instructions for Future Reference<br />
Manufactured by:<br />
SUPREME FIREPLACES inc.<br />
3594 Jarry East<br />
Montreal, QC, H1Z 2G4<br />
Tel: (514) 593-4722 Fax: (514) 593-4424<br />
www.supremem.com
<strong>Volcano</strong> <strong>Plus</strong> Revised August 2008<br />
SUPREME FIREPLACES INC. warrants its factory-built fireplaces will be free from defects in material and workmanship,<br />
under normal use and service, for a period of twenty-five (25) years from the date of purchase.<br />
This warranty is only intended for the original retail purchaser, given that the product was purchased from SUPREME<br />
FIREPLACES INC. or one of its distributors. This warranty is conditional upon correct installation and intended use of our<br />
products and does not cover damages caused by misuse of the products. This warranty shall be void if the fireplace is not<br />
installed by an authorized qualified technician in accordance with the installation instructions in the <strong>manual</strong> provided with this<br />
product. The installation must meet local and national building codes.<br />
WARRANTY LIMITATIONS:<br />
1. During the first two years of the Limited Warranty, SUPREME FIREPLACES INC. will provide replacement parts at<br />
no charge and will also pay for reasonable labor costs for repair work, except for the parts listed below.<br />
EXCLUSIONS<br />
SUPREME FIREPLACES INC. shall not be responsible for any labor cost for the following parts.<br />
The following parts are guaranteed for two years: blowers, painted or plated parts, secondary air burning system.<br />
The following parts are guaranteed for one year: door gasketing.<br />
The following parts are guaranteed for 90 days: ceramic glass (Thermal Breakage only).<br />
2. During the third through the fifth year of the limited warranty, SUPREME FIREPLACES INC. will provide<br />
replacement parts (if available) at no charge, except for the parts mentioned above. <strong>Supreme</strong> <strong>Fireplaces</strong> Inc. shall not<br />
be responsible for any labor costs.<br />
3. From the sixth through the twenty-fifth year of the limited lifetime warranty, SUPREME FIREPLACES INC. will<br />
provide replacement parts (if available) at 50 % of the retail price, except for the parts mentioned above in exclusions.<br />
SUPREME FIREPLACES INC. shall not be responsible for any labor costs.<br />
Transportation and other related costs or expenses arising from the replacement or repair of defective parts will not be covered<br />
by this warranty, nor will SUPREME FIREPLACES INC. assume responsibility for them.<br />
This warranty applies to normal residential use only. Damages caused by misuse, abuse, improper installation, over<br />
firing, abrasives, chemical cleaners, processed wood, ecological logs, negligence are not covered by this warranty.<br />
SUPREME FIREPLACES INC will not be responsible for environmental conditions such as inadequate vents or<br />
ventilation, excessive venting configurations or negative air pressures which may or may not be caused by mechanical<br />
systems such as exhaust fans, furnaces, clothes dryers, etc.<br />
The manufacturer at its discretion may decide to repair or replace any part or unit after inspection and investigation of the<br />
defect. The manufacturer may, at its discretion, fully discharge all obligations with respect to this warranty by refunding the<br />
wholesale price of the defective part(s).<br />
The manufacturer shall in no event be responsible for any consequential damages of any nature, which are in excess of the<br />
original purchase price of the product.<br />
Any complete fireplace, or part thereof, that is replaced or serviced under this warranty will be warranted for a period not<br />
exceeding the remaining term of the original warranty.<br />
This limited Lifetime Warranty is effective on all appliances sold after February 1 st , 2008 and supersedes any and all<br />
warranties currently in existence.<br />
2
<strong>Volcano</strong> <strong>Plus</strong> Revised August 2008<br />
FOYER SUPREME, MODEL "VOLCANO PLUS"<br />
IMPORTANT<br />
Read all instructions carefully before installing and operating your fireplace insert and keep these instructions<br />
for future reference. Failing to follow these instructions could cause serious harm and property damage.<br />
Contact your local building or fire officials for restrictions and installation inspection requirements in your<br />
area.<br />
Modifications brought to any part of the fireplace insert could seriously damage the fireplace insert, alter its<br />
efficiency, and predispose the user to hazardous risk.<br />
CAUTIONS:<br />
1. Never burn garbage, gasoline, gasoline-type lantern fuel, kerosene, charcoal, lighter fluid or similar liquids to<br />
start or "freshen-up" the fire.<br />
2. Never overheat your fireplace insert. Overheating may result in a chimney fire if there is an excessive creosote<br />
accumulation. However, you may add wood every hour or so to maintain a good fire. This will reduce the<br />
creosote accumulation in your chimney.<br />
3. Dry wood burns longer and creates less creosote. Whereas, green moist wood is harder to ignite, gives less heat<br />
and builds creosote in your chimney.<br />
4. Keep your fireplace insert door closed at all times except when you are adding wood. Operating your fireplace<br />
insert with the door open will result in an uncontrolled fire, which may be hazardous to your property.<br />
5. Do not place fuel or any combustible material within the minimum clearances surrounding the fireplace insert.<br />
6. Keep all inflammable liquids away from the fireplace while it is burning.<br />
7. Never touch the metal surface or the glass when the fireplace insert is burning.<br />
8. Worn parts should always be replaced by new parts supplied by the manufacturer.<br />
9. The flue pipe and the chimney should be inspected periodically and cleaned if necessary.<br />
WARNING:<br />
• DO NOT CONNECT THIS UNIT TO A CHIMNEY FLUE SERVING ANOTHER APPLIANCE.<br />
3
<strong>Volcano</strong> <strong>Plus</strong> Revised August 2008<br />
MINIMUM CLEARANCES TO COMBUSTIBLES<br />
36 1/2<br />
COMBUSTIBLE MANTLE<br />
COMBUSTIBLE SIDE FACING<br />
18<br />
4<br />
8 MAX.<br />
T = 2 MAX. 9 (NOTE)<br />
FIREPLACE INSERT INSTALLATION<br />
NOTE: If T is bigger than 2 in., then 9 in. becomes 10 1/2 in.<br />
NON-COMBUSTIBLE<br />
FLOOR PROTECTOR<br />
General Notes:<br />
Read these instructions carefully before commencing the installation.<br />
Failure to follow instructions may result in property damage, body injuries, or even death.<br />
Be sure that the fireplace and chimney are clean and in good condition. Seal all cracks using stove cement. Seal permanently<br />
any openings between the masonry of the fireplace and the facing masonry.<br />
Eliminate the existing damper from the fireplace.<br />
FIGURE 1<br />
Minimum distances to combustibles<br />
If there is an accumulation of creosote in the chimney or flue, it must be thoroughly cleaned.<br />
When installing, operating and maintaining a solid fuel heater, respect basic standards for fire safety.<br />
The insert is intended only for masonry fireplaces constructed in accordance with the standards for fireplaces, chimneys, vents<br />
and solid fuel burning appliances NFPA 211 in the USA, CSA B365 in Canada and all National and Local Building code<br />
standards.<br />
WARNING: Do not remove bricks or mortar from the fireplace.<br />
This fireplace insert must be installed with a continuous chimney liner of 6 in. diameter extending from the fireplace insert to<br />
the top of the chimney. The chimney liner must conform to the Class 3 requirements of CAN/ULC-S635, Standard for Lining<br />
Systems for Existing Masonry or Factory-Built Chimneys and Vents or CAN/ULC-S640, Standard for Lining Systems for New<br />
Masonry Chimneys.
<strong>Volcano</strong> <strong>Plus</strong> Revised August 2008<br />
PIECES REQUIRED<br />
VERIFICATION<br />
1 Firebox<br />
2 Fixing plate<br />
3 Side support<br />
4 Rear support<br />
5 Flexible liner 6 in. dia. or a combination of<br />
flexible and rigid liner 6 in. dia.<br />
6 Flue collar<br />
7 Flue collar flange<br />
8 Face<br />
FIGURE 2<br />
Pieces required<br />
1- SUPPORT INSTALLATION<br />
Determine and cut supports to the proper size.<br />
Note: The supports can overlap at the rear.<br />
2- FIXING PLATE INSTALLATION<br />
To cut the fixing plate to the appropriate<br />
dimensions:<br />
a) Measure the widths of the front and rear at the<br />
top of the fireplace.<br />
b) Measure the depth at the top of the fireplace.<br />
c) Place the fixing plate on a flat surface. To determine the depth of<br />
the fixing plate extend the measuring tape so that the 10 ½ in.<br />
mark of the tape is at the beginning of the hole and extend the<br />
Minimum size of the fireplace must be:<br />
Depth 20 in.<br />
Width 30 in.<br />
Height 23 in.<br />
COMBUSTION AIR<br />
CONTROL HANDLE<br />
20 5/16 ''<br />
[516mm]<br />
5<br />
8<br />
10 1/2 ''<br />
[267mm]<br />
3<br />
2<br />
7<br />
1<br />
6<br />
4<br />
FIGURE 3<br />
Installation<br />
5
<strong>Volcano</strong> <strong>Plus</strong> Revised August 2008<br />
measuring tape from that point on to the measured value of the fireplace<br />
depth. Cut the fixing plate accordingly.<br />
d) Install the liner starting from the top of the chimney.<br />
e) Extend the liner up to approximately<br />
23 in. from the hearth of the<br />
fireplace.<br />
f) Pass the flexible liner through the<br />
fixing plate opening.<br />
g) Press the fixing plate against the<br />
support brackets. Assure that the<br />
distance between the face of the<br />
fireplace and the liner is 10 1/2’’<br />
(267 mm) (FIGURE 3).<br />
h) Screw the fixing plate to the support<br />
brackets.<br />
i) Install the flue collar assembly at the<br />
end of the liner and secure it with<br />
three screws.<br />
3- METAL TAG INSTALLATION<br />
Fix the metal tag warning with screws or nails on the fireplace hearth. The tag must be readily visible should the fireplace<br />
insert be removed.<br />
Note: The fireplace must be inspected by a qualified person prior to re-use as a conventional fireplace.<br />
4- FIREBOX INSTALLATION<br />
Note: To facilitate installation, remove the door from the firebox. To remove the door, start by pulling out the lower pin end<br />
until it is removed from its hole. Then, lower the door until the upper door pin end is removed from its hole.<br />
a) Slide the firebox in the fireplace.<br />
b) Adjust the firebox height and level by screwing/unscrewing the three bolts of the firebox bottom.<br />
c) Insert the flue collar in the firebox top.<br />
d) Align the flue collar flange with the three studs and fasten with nuts.<br />
e) Install the face and fix it with four self-tapping screws, two on either side of the face.<br />
f) Install the door.<br />
g) Inspect the installation and level if necessary using the adjustable legs.<br />
Note: The adjustable legs are accessible from the inside of the firebox and can be adjusted with a flat screw driver.<br />
OPERATION INSTRUCTIONS<br />
Important note: This fireplace insert has been designed to only burn with the door closed.<br />
WOOD<br />
The VOLCANO PLUS fireplace insert is designed to burn good quality, dry cordwood. The suggested length of a log is 18 in.<br />
and should preferably be in halves or quarters. Excessive moisture content in firewood causes excessive creosote deposits in the<br />
chimney, which could lead to a chimney fire. Cordwood should be split and left to dry one year prior to use.<br />
DO NOT burn coal, construction lumber, plastics, garbage or other foreign materials in your fireplace.<br />
Never use gasoline, gasoline type lantern fuel, kerosene, charcoal lighter fluid, or similar fluids to start or "freshen up" a fire.<br />
Keep all such liquids well away from the fireplace insert while it is in use.<br />
CREOSOTE FORMATION AND THE NEED FOR REMOVAL<br />
6
<strong>Volcano</strong> <strong>Plus</strong> Revised August 2008<br />
When wood is being burned slowly, tar and other organic vapors are produced. When combined with expelled moisture,<br />
creosote is formed. The creosote vapors condense in the relatively cool chimney flue of a slow burning fire. As a result,<br />
creosote residue accumulates on the flue lining. When ignited, this creosote makes an extremely hot fire. The chimney<br />
connector and chimney should be inspected at least once every two months during the season it is being heated in order to<br />
determine if a creosote build-up has occurred. If the creosote build-up exceeds 3 mm (1/8 inch) it should be removed to<br />
minimize the risk of a chimney fire.<br />
TO SWEEP THE CHIMNEY<br />
1) Open your fireplace door.<br />
2) Push the chimney sweep cap upwards and place it on<br />
the side. The chimney sweep cap is located on top of<br />
the tow stainless steel combustion pipes.<br />
3) Close the fireplace door.<br />
4) Sweep the chimney.<br />
5) Open the door of the fireplace and empty out all the<br />
residues.<br />
6) Place back the chimney sweep cap.<br />
Note: The chimney sweep cap is sealed with silicon for<br />
transport. After the first fire, the silicon will burn and you<br />
will be able to move the cap.<br />
7<br />
SWEEP CAP<br />
COMBUSTION CONTROL<br />
The burn rate and the heat output are related to the amount of combustion air. The control handle rotates from the right<br />
(maximum) to the left (minimum) position (Figure 12). It can also be pushed inwards to allow additional air in for start-up or<br />
when a new charge of wood is being loaded.<br />
OPERATION OF THE COMBUSTION AIR CONTROL MECHANISM<br />
When starting the fire or when adding a new charge of wood, the fireplace needs<br />
additional air in order to establish a good fire. When the wood starts to burn<br />
properly, the amount of air can be reduced depending on the heating<br />
requirements.<br />
The control mechanism provides automatic means to gradually reduce the<br />
combustion air to the preset amount.<br />
The preset amount will be established by the operator, depending on his heating<br />
requirements, the type and condition of the wood being used.<br />
To determine the preset amount, the user will have to use the fireplace for several<br />
days, placing the control handle at different positions between minimum and<br />
maximum.<br />
After establishing a position for the control, push the control handle fully<br />
inwards and then pull it back when starting a fire in order to maximize the<br />
combustion air. The combustion air will gradually reduce to the pre-set position<br />
when the wood will start to burn properly.<br />
Note: Once the control handle has been pushed inwards, it is not possible to<br />
Figure 12<br />
The control can rotate from minimum to<br />
maximum. It can also be pushed in and<br />
pulled out.<br />
reduce the combustion air by rotating the control handle. The fireplace must burn at a good rate and for a given period of time<br />
in order to allow the control to gradually reduce the amount of combustion air to the preset amount.<br />
WARNING: READ THE OWNER’S MANUAL CAREFULLY. Also read the following brief instructions before using<br />
your fireplace.<br />
Note: It is important to assure that a flame is maintained. If the flame is not maintained, reestablish it by cracking the door open<br />
again. Do not leave the fireplace with the door unlocked without supervision.<br />
Caution: The wood should be placed away from the door to avoid damage to the glass.
<strong>Volcano</strong> <strong>Plus</strong> Revised August 2008<br />
WARNINGS: Over firing the unit may result in overheating and can damage the fireplace and/or result in fire hazards.<br />
The maximum firewood load must not exceed 5 medium sized logs (approximately 30 pounds). Open the door to reload<br />
only when the wood has been reduced to charcoal, otherwise there is a risk of smoke infiltration into the house.<br />
• This fireplace has been designed to burn with the door closed. When the fireplace is being used, the door should only be<br />
opened when adding more wood.<br />
STARTING THE FIRE<br />
Assure that all the safety precautions mentioned in the owner’s <strong>manual</strong> are being<br />
respected.<br />
1. Place two logs in the firebox. The logs should sit directly on the hearth. Do not<br />
use a fireplace grate.<br />
2. Add a fire starter on top of the two logs.<br />
3. Place a log on either side of the fire starter and on top of the first set of wood.<br />
4. Place one last log directly above the firestarter, but with a clearance of 1-3<br />
inches.<br />
5. Push the automatic air control handle inwards and pull it back outwards.<br />
6. Light the fire starter.<br />
7. Keep the door open until the fire starter is well lit. Do not leave the door open<br />
for more than 2 minutes.<br />
8. Close the door.<br />
Summary of Operation of the Automatic Air Control:<br />
1. Select the burning rate for the season.<br />
2. Push and retract the control handle when starting the fire or when<br />
adding wood.<br />
ADDING A NEW CHARGE OF WOOD<br />
When the wood has been reduced to embers, you may add a new load.<br />
1. Bring the wood near the fireplace.<br />
2. Reactivate the automatic air control.<br />
3. Unlock the door for 2-3 minutes to activate the remaining charcoal.<br />
4. Open the door slowly and add 2-3 logs.<br />
5. Push the door closed without locking it. Hold the door closed until you<br />
establish a flame.<br />
6. When a solid flame has been established, lock the door.<br />
Please visit us online at www.supremem.com to watch the video on how to start a fire.<br />
8
<strong>Volcano</strong> <strong>Plus</strong> Revised August 2008<br />
CLEARANCE OF THE FRONT OF THE FIREPLACE<br />
The minimum distance between the front of the fireplace and any combustible material such as firewood, furniture, drapes, etc,<br />
is 5 feet (152 cm). Do not place such materials within this minimum distance to minimize the risk of fire hazards.<br />
DISPOSAL OF ASHES<br />
Ashes should be removed from the insert after every few days of use or when ashes pile from 2 to 3 inches in height. Ashes<br />
should be placed in a metal container with a tight lid, taken outside and placed on a non-combustible floor or on the ground,<br />
well away from all combustible materials, pending final disposal. If the ashes are disposed in the soil or locally dispersed, they<br />
should be retained in a closed container until all cinders have been cooled.<br />
CAUTIONS:<br />
• Ashes could still contain hot embers two days after having used the fireplace.<br />
• The ash container can become very hot: wear gloves to prevent injury.<br />
CHIMNEY FIRES<br />
If you have a chimney fire, follow these steps:<br />
1) Close the door of your fireplace.<br />
2) Insert the handle extension in the combustion control handle and move it to its furthest clockwise position.<br />
3) If you require assistance, call your local fire department.<br />
4) Use a dry chemical fire extinguisher, baking soda or sand to control the fire.<br />
DO NOT USE WATER to extinguish the fire. It may cause a dangerous steam explosion.<br />
DO NOT USE YOUR FIREPLACE again until the chimney has been inspected by a qualified chimney sweeper or by a fire<br />
department.<br />
FRESH AIR<br />
Adequate replacement air is necessary for proper fireplace operation. Air is required for combustion and to maintain a draft.<br />
If the house is airtight, combustion equipment may not function properly. If the combustion equipment, which includes the<br />
fireplace, is starved of the air necessary to function, it will be necessary to provide a source of fresh air into the dwelling. This<br />
may be done by using heat exchanger units or simply by opening a window slightly.<br />
GLASS DOOR<br />
The glass door of your VOLCANO PLUS must be treated with care. Do not<br />
slam the doors shut or build the fire too close to the glass. Do not overfire.<br />
Excessive temperatures or impacts may lead to the breaking of the glass<br />
door.<br />
The glass panel of your VOLCANO PLUS is cut from heat-resistant ceramic<br />
type "ROBAX" glass, 5 mm (nominal) thick. The panels are factory-cut and<br />
edge polished to remove residual micro cracks.<br />
If your glass door cracks or breaks, replace the panel immediately. Do not<br />
use the VOLCANO PLUS with a cracked or broken glass door: overheating<br />
and fire hazards may result.<br />
To repair a broken glass door, follow the steps indicated below:<br />
9<br />
FIGURE 5<br />
Door assembly:<br />
1. Door frame<br />
2. Glass 13 5/8’’ x 24 1/4’’<br />
3. Glass gasket<br />
4. Glass supports<br />
5. Door gasket<br />
1. Order a pre-cut replacement panel, a door gasket and a glass gasket from your dealer. Use<br />
only ceramic glass of 5 mm minimum thickness, 13 5/8’’ x 24 1/4’’.<br />
2. Remove the door; open the door and raise it enough to get outside of its hole the door lower rod, then pull slightly the<br />
lower part of the door and lower the door until the upper rod goes out of its hole.<br />
3<br />
1<br />
4<br />
2<br />
5
<strong>Volcano</strong> <strong>Plus</strong> Revised August 2008<br />
3. Take out the door gasket in order to get access to the nuts fixing the glass supports to the door frame.<br />
4. Remove the nuts, the glass supports and the glass gasket.<br />
5. Take off the broken pieces from the door frame using pliers. Watch for cuts. Clean the frame carefully to insure that it is<br />
free of small fragments.<br />
6. Insert the new glass into the door frame: it must be centered in such a way to avoid contact between the glass and the<br />
supports.<br />
7. Apply a bead (width between 1/8” and 5/32”) of high temperature silicone on the glass while following its outline and fix<br />
on it the new glass gasket.<br />
8. Fix the glass supports to the door frame. Do not over tighten the nuts.<br />
9. Clean the slot embedding the door gasket and apply on the bottom of the slot a bead (width between 5/32” and 3/16”) of<br />
high temperature silicone.<br />
10. Install the new door gasket in the slot.<br />
WARNINGS:<br />
• Never operate the VOLCANO PLUS without a gasket or with a damaged one.<br />
• Do not use substitute materials.<br />
GLASS CLEANING<br />
The glass door should be cleaned with a soft cloth, using a non-abrasive solution such as soap and water, if necessary.<br />
Abrasive cleaners will produce surface scratches and reduce panel transparency and resistance to impacts. Commercial glass<br />
cleaners such as KEL KEM give better results.<br />
The glass should be cleaned when the fireplace is not in use. Do not clean glass when it is hot.<br />
FANS<br />
The VOLCANO PLUS fireplace insert is equipped with two factory installed fans thermostatically controlled.<br />
Plug the power cord into the nearest 115 Volts outlet.<br />
REMOVAL OF THE FIREPLACE INSERT<br />
For the purpose of inspecting the fireplace insert and the fireplace, it is possible to remove the insert.<br />
WARNING: To avoid possible burns, make sure the fireplace insert is cold before its removal.<br />
1. Remove the ashes from the firebox.<br />
2. Unplug the blowers’ power cord.<br />
3. Remove the door and unscrew the four screws (two on each vertical mount of the face), which fix the face to the firebox.<br />
4. Remove the face.<br />
5. Make marks to facilitate the reinstallation of the firebox.<br />
6. Unscrew the three nuts fixing the flue collar to the firebox top.<br />
7. Push up the flue collar until it goes out of the firebox top.<br />
8. Slide the firebox out of the fireplace.<br />
10
<strong>Volcano</strong> <strong>Plus</strong> Revised August 2008<br />
REPLACEMENT PARTS<br />
CODE DESCRIPTION ITEM<br />
PASP1000 Primary Air control<br />
CPSP0140<br />
CPSP0150<br />
CPSP0160<br />
Secondary air pipes<br />
DOSP2051 Glass Ceramic 5mm 13.63 x 24.25 in<br />
WP32 Door handle<br />
LR59458 SY Fan<br />
KBMC-13BV Fan speed control<br />
T-O-D36T22 Thermo disk<br />
DOSP2071 Door Gasket rope 5/8 in x 7 feet<br />
DOSP2061 Glass Gasket rope 3/8 in x 7 feet<br />
VOLP1070 Firebox Pipes Support Panel<br />
VOLP1060 Firebox Secondary Air Panel<br />
VOLP1080 Firebox Rear Panel<br />
11