

Photographic_Standards
Photographic_Standards
Photographic_Standards

Create successful ePaper yourself
Turn your PDF publications into a flip-book with our unique Google optimized e-Paper software.
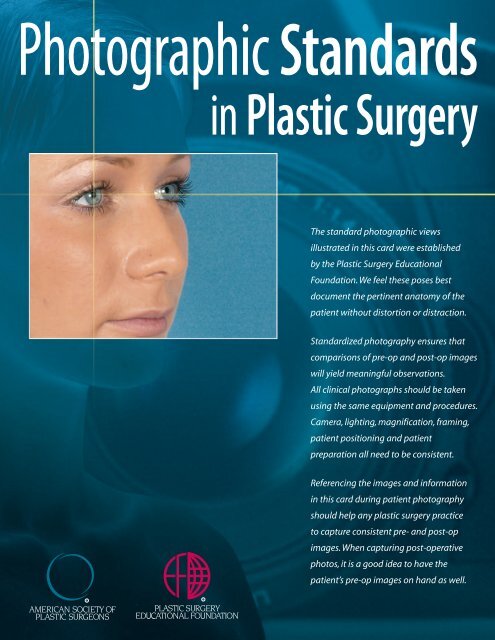
<strong>Photographic</strong> <strong>Standards</strong><br />
in Plastic Surgery<br />
The standard photographic views<br />
illustrated in this card were established<br />
by the Plastic Surgery Educational<br />
Foundation. We feel these poses best<br />
document the pertinent anatomy of the<br />
patient without distortion or distraction.<br />
Standardized photography ensures that<br />
comparisons of pre-op and post-op images<br />
will yield meaningful observations.<br />
All clinical photographs should be taken<br />
using the same equipment and procedures.<br />
Camera, lighting, magnification, framing,<br />
patient positioning and patient<br />
preparation all need to be consistent.<br />
Referencing the images and information<br />
in this card during patient photography<br />
should help any plastic surgery practice<br />
to capture consistent pre- and post-op<br />
images. When capturing post-operative<br />
photos, it is a good idea to have the<br />
patient’s pre-op images on hand as well.
using this photographic standards chart<br />
camera-to-patient distance<br />
One of the goals of standardized photography is to<br />
maintain consistent magnification from photo to photo.<br />
For a given camera system, this may be achieved by controlling<br />
the distance from camera to patient. However,<br />
the distance required for a particular magnification is<br />
not the same for all camera systems—it is affected by<br />
the size of the imaging sensor and the focal length of<br />
the lens.<br />
Each series of images in this chart lists a target area<br />
size and a 35mm reproduction ratio. The camera-topatient<br />
distance will need to be filled in for the imaging<br />
system being used. This may be accomplished as<br />
follows:<br />
color coding<br />
framing<br />
1 On a wall or other flat, stationary surface, place<br />
tape marks that describe the target area. To calibrate<br />
for a 1:10 reproduction ratio, for example,<br />
tape a box that is 36cm x 24cm.<br />
2 Make sure the correct lens is mounted to the camera.<br />
If a zoom lens is being used, make sure it is set<br />
to the proper focal length. (Note: Always use the<br />
same focal length for a particular view.)<br />
3 Holding the camera at the same height as the<br />
tape marks and looking through the camera’s<br />
viewfinder, determine the distance from the wall<br />
at which the tape marks are in sharp focus and<br />
positioned at the edges of the image area.<br />
4 Measure the distance from the camera to the wall<br />
and record it in the appropriate location on this<br />
chart.<br />
5 If you are using an indexable manual-focus lens,<br />
mark the setting on the focus ring.<br />
Each target area listed in this chart is marked with a corresponding color. Using these same colors for indexing the<br />
camera lens and marking camera-to-patient distances on the floor will greatly simplify standardized photography.<br />
The images in this chart are marked with gridlines to<br />
assist in proper framing. These gridlines correspond to<br />
the descriptive text found under the “Framing” section<br />
for each photo series.The proper use of these guides will<br />
allow for consistent framing and magnification across<br />
patients of varying sizes.<br />
Wherever a yellow line appears at one edge of an<br />
image, the photo should be framed by placing the<br />
edge-oriented framing<br />
reference edge (yellow border)<br />
Align appropriate anatomical<br />
landmarks with this edge.<br />
free edge (no yellow)<br />
Landmarks at this edge may vary<br />
from patient to patient.<br />
appropriate anatomical landmark against that edge.<br />
Since magnification is kept constant for all patients, the<br />
landmarks found at the opposite edge of the frame<br />
may vary.<br />
When an image is meant to be framed by positioning<br />
an anatomical landmark in the center of the frame<br />
(or one-quarter of the way from the edge), this is indicated<br />
by a dotted white line on the image.<br />
center-oriented framing<br />
Dotted white lines mark the<br />
vertical and/or horizontal<br />
center of the frame.This<br />
indicates that appropriate<br />
anatomical landmarks should<br />
be centered in the image.<br />
(In a full-face photo, for<br />
example, the ears are centered<br />
vertically and the whole head<br />
is centered horizontally.)
aspect ratios<br />
The images in this photo standard all have an aspect<br />
ratio of 2-by-3 (i.e., they are two-thirds as wide as they<br />
are long).This is the aspect ratio of 35mm film and many<br />
digital cameras. In addition, each image is captured in<br />
either a vertical or a horizontal orientation in order to<br />
maximize the subject area relative to the background.<br />
Depending on the specifics of the imaging system<br />
that is used, the aspect ratio may differ from that shown<br />
here. For example, video cameras and some digital cameras<br />
capture images in a 4-by-3 aspect ratio. Also, it is<br />
sometimes impractical and/or undesirable to capture<br />
images in both vertical and horizontal orientations.<br />
For an aspect ratio other than 2-by-3, it is necessary<br />
to determine new target areas that capture the same<br />
positioning the patient and camera<br />
If clinical photos are to provide an accurate record of<br />
pre- and post-operative patient appearances, the relative<br />
positions of patient and camera must be kept constant.<br />
This is best accomplished through the use of<br />
strategically placed tape marks on the floor and walls of<br />
the photo studio or exam room.<br />
The diagram below shows an overhead view of a<br />
suitable tape mark pattern. A 30cm octagon with radiating<br />
lines is used for positioning the patient. One line<br />
is extended out along the camera axis and marked at<br />
appropriate distances.<br />
For body photographs, the patient stands with the<br />
outsides of the feet along opposite edges of the octa-<br />
patient<br />
(stationary)<br />
1:4 (15 x 10cm)<br />
close-up face,<br />
close-up ears,<br />
mouth, finger<br />
1:10 (24 x 36cm)<br />
full face, ears,<br />
hand<br />
camera<br />
(mobile)<br />
1:12 (45 x 30cm)<br />
breasts,<br />
abdomen,<br />
forearm<br />
2-by-3 vertical 4-by-3 horizontal<br />
information. Once this is done, the framing notes and<br />
gridlines may be used in the normal manner. For example,<br />
the 2-by-3 target area for hips/thighs is 42cm x 63cm<br />
(vertical). For a video camera (4-by-3 horizontal aspect<br />
ratio), an appropriate target area would be 84cm x 63cm.<br />
This captures the same clinical information (63cm from<br />
the knees up) but extends the background on either side.<br />
gon. (The spacing of the feet helps create separation<br />
between the inner thighs.)<br />
For facial photos, the patient sits on an adjustable<br />
height stool (with no back) placed over the center mark.<br />
With the stool adjusted to a comfortable height, the<br />
patient sits up straight with feet on either side of the<br />
appropriate radiating line. For a front view, the patient<br />
looks directly into the camera lens. For lateral or oblique<br />
views, the patient looks at a tape mark placed on the<br />
wall.<br />
Holding the camera, the photographer sits, stands or<br />
kneels at one of the positions marked along the camera<br />
axis. For greater stability, the camera may be mounted<br />
to a tripod placed over the appropriate<br />
1:18 (42 x 63cm)<br />
TRAM,<br />
hips/thighs,<br />
calves/feet<br />
tape mark. Camera height is adjusted<br />
to match the height of the target area,<br />
with the lens barrel always parallel to<br />
the floor. It is important not to tilt the<br />
camera up or down when framing an<br />
image.<br />
Camera stands are available that<br />
allow the camera to be moved up and<br />
down, forward and back, or left and<br />
right without tilting or swiveling. Such<br />
a stand greatly simplifies proper camera<br />
positioning.
close-up face<br />
Target Area: 15x10cm (horizontal)<br />
Reproduction Ratio: 1:4<br />
Camera-to-Patient Distance: _________<br />
Patient Preparation: Pull hair off face and behind ears (use black<br />
headband or small clips that hold hair without pulling), remove<br />
jewelry and eyeglasses, remove heavy makeup, cover shirt collar<br />
with black drape.<br />
Patient Positioning: Seat patient on a stool adjusted to a<br />
comfortable height and placed at the center of a tape mark<br />
pattern. Patient should sit up straight with feet on either side of<br />
the appropriate tape mark. When turning for oblique and lateral<br />
views, patient should rotate entire body (shoulders and feet).<br />
Framing: Place eyebrows (or proximal eyebrow) at top of frame.<br />
Center nose horizontally in all views.<br />
Special Notes: For basal view, tip of nose should be aligned with<br />
upper eyelid crease.<br />
full face<br />
Target Area: 24x36cm (vertical)<br />
Reproduction Ratio: 1:10<br />
Camera-to-Patient Distance: _________<br />
Patient Preparation: Same as close-up face (see above)<br />
Patient Positioning: Same as close-up face (see above)<br />
Framing: Center ears vertically in all views. For frontal and<br />
oblique views, center entire head horizontally. For lateral views,<br />
place front of face 1/4 frame from edge.<br />
ears<br />
Target Area: 24x36cm (vertical) / 10x15cm (vertical)<br />
Reproduction Ratio: 1:10 / 1:4<br />
Camera-to-Patient Distance: _________<br />
Patient Preparation: Same as close-up face (see above)<br />
Patient Positioning: Same as close-up face (see above)<br />
Framing: Anterior and posterior views same as full face (see<br />
above). For close-up, center ear in frame.<br />
Special Notes: Make sure hair is off of ears in all views.
mouth<br />
Target Area: 15x10cm (horizontal)<br />
Reproduction Ratio: 1:4<br />
Camera-to-Patient Distance: _________<br />
Patient Preparation: Pull hair off face and behind ears, remove<br />
lipstick and other makeup, remove any distracting jewelry, cover shirt<br />
collar with black drape.<br />
Patient Positioning: Seat patient on a stool adjusted to a<br />
comfortable height and placed at the center of a tape mark pattern.<br />
Patient should sit up straight with feet on either side of the<br />
appropriate tape mark. When turning for oblique and lateral views,<br />
patient should rotate entire body (shoulders and feet).<br />
Framing: Center mouth vertically in all views. In anterior views,<br />
center mouth horizontally. In oblique and lateral views, position lips<br />
1/4 frame from edge.<br />
Special Notes: For intraoral photographs, use flash heads<br />
positioned close to end of lens.<br />
tram<br />
Target Area: 42x63cm (vertical)<br />
Reproduction Ratio: 1:18<br />
Camera-to-Patient Distance: _________<br />
Patient Preparation: Remove any visible jewelry. Remove gown<br />
completely. Patient should wear a photo garment.<br />
Patient Positioning: Patient standing comfortably erect with arms<br />
at sides. Feet should be aligned with appropriate tape marks on<br />
floor. For oblique views, distal arm should be moved back slightly.<br />
Framing: Position clavicles at top of frame. For frontal and oblique<br />
views, center torso horizontally. For lateral views, center mass of<br />
proximal breast horizontally.<br />
Special Notes: Distal breast should not be visible in lateral views.<br />
breasts<br />
Target Area: 45x30cm (horizontal)<br />
Reproduction Ratio: 1:12<br />
Camera-to-Patient Distance: _________<br />
Patient Preparation: Patient disrobed above the waist. Remove any<br />
visible jewelry.<br />
Patient Positioning: Same as TRAM (see above).<br />
Framing: Position clavicles at top of frame. For frontal and oblique<br />
views, center torso horizontally. For lateral views, center mass of<br />
proximal breast horizontally.<br />
Special Notes: Distal breast should not be visible in lateral views.
abdomen<br />
Target Area: 45x30cm (horizontal)<br />
Reproduction Ratio: 1:12<br />
Camera-to-Patient Distance: _________<br />
Patient Preparation: Remove gown completely. Patient should<br />
wear a photo garment.<br />
Patient Positioning: Patient standing comfortably erect with arms<br />
folded above breasts. Feet should be aligned with appropriate tape<br />
marks on floor.<br />
Framing: Position inframammary fold at top of frame. Center torso<br />
horizontally.<br />
hips/thighs<br />
Target Area: 42x63cm (vertical)<br />
Reproduction Ratio: 1:18<br />
Camera-to-Patient Distance: _________<br />
Patient Preparation: Remove gown completely. Patient should<br />
wear a photo garment.<br />
Patient Positioning: Patient standing comfortably erect with arms<br />
folded above breasts. Feet should be at approximately shoulder<br />
width, aligned with appropriate tape marks on floor. (For larger<br />
patients, a wider stance may be required.)<br />
Framing: Position knees at bottom of frame. Center hips<br />
horizontally.<br />
Special Notes: Distal leg should not be visible in lateral views.<br />
calves/feet<br />
Target Area: 42x63cm (vertical)<br />
Reproduction Ratio: 1:18<br />
Camera-to-Patient Distance: _________<br />
Patient Preparation: Patient disrobed below the waist. Remove any<br />
jewelry from ankles or toes. Remove nail polish.<br />
Patient Positioning: Patient should stand on a step stage with feet<br />
at approximately shoulder width.<br />
Framing: Position toes at bottom of frame. Center feet horizontally.<br />
Special Notes: Distal leg should not be visible in lateral views.
forearm<br />
Target Area: 45x30cm (horizontal)<br />
Reproduction Ratio: 1:12<br />
Camera-to-Patient Distance: _________<br />
Patient Preparation: Remove any jewelry from wrist or fingers.<br />
Remove nail polish.<br />
Patient Positioning: Seat patient on a stool adjusted to a<br />
comfortable height and placed next to a tape mark pattern.<br />
Patient should extend hand horizontally above tape marks that<br />
are perpendicular to camera axis (i.e., tape marks for lateral views).<br />
Framing: Place elbow at edge of frame and center forearm<br />
vertically.<br />
hand<br />
Target Area: 36x24cm (horizontal)<br />
Reproduction Ratio: 1:10<br />
Camera-to-Patient Distance: _________<br />
Patient Preparation: Remove any jewelry from wrist or fingers.<br />
Remove nail polish.<br />
Patient Positioning: Seat patient on a stool adjusted to a<br />
comfortable height and placed next to a tape mark pattern. Patient<br />
should extend hand horizontally above tape marks that are<br />
perpendicular to camera axis (i.e., tape marks for lateral views).<br />
Framing: Center hand in frame.<br />
finger<br />
Target Area: 15x10cm (horizontal)<br />
Reproduction Ratio: 1:4<br />
Camera-to-Patient Distance: _________<br />
Patient Preparation: Remove any jewelry from wrist or fingers.<br />
Remove nail polish.<br />
Patient Positioning: Same as hand (see above).<br />
Framing: Place metacarpophalangeal joint at edge of frame.<br />
Center finger vertically.
quick tips for clinical photography<br />
Taking a clinical photograph<br />
is not the same as taking a<br />
snapshot.<br />
A good clinical photograph<br />
should provide a maximum<br />
amount of pertinent medical<br />
information and a minimum<br />
of distraction.<br />
To improve the quality of your<br />
patient photos, remember<br />
these simple rules:<br />
✓ use an appropriate backdrop<br />
Photograph patients against a solid-colored background. Light to medium<br />
blue is a good choice because it contrasts well with skin tones. Medium gray<br />
may also work well. Use a fabric drape or other non-reflective material.<br />
✓ remove distractions<br />
Jewelry and clothing create an unnecessary distraction in patient photos.<br />
They should be removed from the area of interest prior to photography. For<br />
body photos, it is advisable to use special modesty garments (available from<br />
medical supply dealers) instead of the patient’s underwear.<br />
✓ use controlled lighting<br />
Patients should be photographed using a flash system or studio strobes<br />
(available room lighting is not appropriate). Balanced cross-lighting (i.e., two<br />
strobes positioned symmetrically on either side of the camera) brings out<br />
surface texture without creating shadows that are overly harsh.<br />
✓ reduce cast shadows<br />
The use of balanced lighting with diffusers can soften the shadows cast<br />
by the patient.To completely eliminate cast shadows, one or two additional<br />
lights may be aimed directly at the backdrop.<br />
✓ record settings<br />
As much as possible, the same camera settings should be used for every<br />
patient. For settings that must be adjusted from patient to patient (such<br />
as exposure compensation), all values should be recorded, stored with the<br />
photos and referenced during post-op photography.<br />
The Plastic Surgery Educational Foundation® is the educational arm of the American Society of Plastic Surgeons, Inc.®<br />
The Foundation is proud to display the symbol of excellence of ASPS® signifying the professional expertise of plastic<br />
surgeons certified by the The American Board of Plastic Surgery, Inc.® or its Canadian equivalent.<br />
The mission of the Plastic Surgery Educational Foundation is to<br />
develop and support the domestic and international education,<br />
research and public service activities of plastic surgeons.<br />
©2006 Plastic Surgery Educational Foundation<br />
Printing of these standards made possible by a generous grant from<br />
0603-25