excerPt from Weber’s charcoal GrillinG: the art of cookinG With live fire
excerPt from Weber’s charcoal GrillinG: the art of cookinG With live fire
excerPt from Weber’s charcoal GrillinG: the art of cookinG With live fire

Create successful ePaper yourself
Turn your PDF publications into a flip-book with our unique Google optimized e-Paper software.
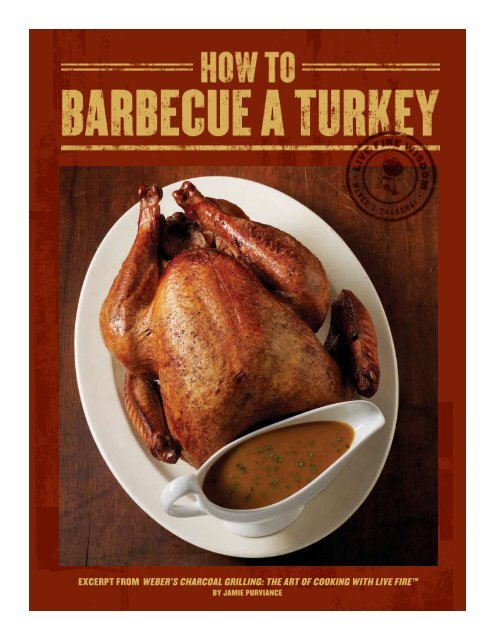
<strong>excerPt</strong> <strong>from</strong> <strong>Weber’s</strong> <strong>charcoal</strong> <strong>GrillinG</strong>: <strong>the</strong> <strong>art</strong> <strong>of</strong> <strong>cookinG</strong> <strong>With</strong> <strong>live</strong> <strong>fire</strong> tm<br />
by Jamie Purviance
The Day Before<br />
1. The wing tips have almost no meat and<br />
<strong>the</strong>y tend to burn, so remove <strong>the</strong>m at<br />
<strong>the</strong> joint with a sharp knife or poultry<br />
shears. Also remove <strong>the</strong> neck and giblets<br />
<strong>from</strong> both ends <strong>of</strong> <strong>the</strong> turkey. Reserve<br />
all <strong>of</strong> <strong>the</strong>se turkey p<strong>art</strong>s for <strong>the</strong> gravy.<br />
How to BARBECUE A tURkEy<br />
Several years ago, I converted <strong>from</strong> tasteless turkeys roasted in an oven to<br />
lightly smoked turkeys done on <strong>the</strong> grill. At first my method on <strong>the</strong> grill closely<br />
resembled what I had always done with <strong>the</strong> oven—325˚F for about 15 minutes<br />
per pound. The results were pretty good, because <strong>of</strong> <strong>the</strong> woodsy aromas, but I still<br />
struggled with <strong>the</strong> fact that <strong>the</strong> breast meat was overcooked before <strong>the</strong> leg meat<br />
was done. Then I discovered brines, flavorful saltwater solutions that soak into<br />
<strong>the</strong> turkey and add enough moisture that you can cook <strong>the</strong> breast meat to higher<br />
temperatures than usual before it turns dry.<br />
My next step in <strong>the</strong> right direction was to cook <strong>the</strong> breast meat more slowly than<br />
<strong>the</strong> leg meat. How? I st<strong>art</strong> by cooking <strong>the</strong> turkey with <strong>the</strong> breast meat facing down<br />
in a pan <strong>of</strong> liquid. This way, <strong>the</strong> leg meat gets a head st<strong>art</strong>, while <strong>the</strong> breast meat<br />
is shielded <strong>from</strong> <strong>the</strong> heat by <strong>the</strong> pan and <strong>the</strong> liquid. After an hour or so, I turn <strong>the</strong><br />
turkey over to let <strong>the</strong> breast meat and leg meat finish toge<strong>the</strong>r—both beautifully<br />
smoked and succulent. Oh, and by <strong>the</strong> way, <strong>the</strong> liquid that protects <strong>the</strong> breast<br />
meat makes outstanding gravy.<br />
2. To brine <strong>the</strong> turkey, arrange it,<br />
breast side down, in a sturdy plastic<br />
bag. Put <strong>the</strong> bag in a cooler lined<br />
with ice. Then pour <strong>the</strong> brine over<br />
<strong>the</strong> turkey.<br />
1<br />
By arranging <strong>the</strong> <strong>charcoal</strong> in a halfcircle<br />
on one side <strong>of</strong> <strong>the</strong> <strong>charcoal</strong> grate,<br />
you will create higher temperatures<br />
on that side. A drip pan filled with<br />
warm water will help you maintain <strong>the</strong><br />
temperature <strong>of</strong> <strong>the</strong> <strong>fire</strong>, which ideally<br />
should be 300°F to 350°F.<br />
3. Pull up <strong>the</strong> sides <strong>of</strong> <strong>the</strong> bag against<br />
<strong>the</strong> turkey so <strong>the</strong> brine almost<br />
completely covers <strong>the</strong> turkey. It is<br />
important that <strong>the</strong> breast is submerged.<br />
If p<strong>art</strong> <strong>of</strong> <strong>the</strong> back is not, that’s okay.<br />
No one eats <strong>the</strong> back, right?
Barbecuing <strong>the</strong> Turkey<br />
1. In a heavy-duty roasting pan,<br />
combine good-quality chicken stock<br />
with aromatic vegetables and <strong>the</strong><br />
reserved turkey p<strong>art</strong>s. Place <strong>the</strong> brined<br />
turkey, breast side down, in <strong>the</strong> liquid.<br />
Place <strong>the</strong> pan over indirect low heat<br />
and add wood chips to <strong>the</strong> lit <strong>charcoal</strong><br />
for a lightly smoked flavor.<br />
Preparing <strong>the</strong> Gravy<br />
1. After removing <strong>the</strong> turkey, strain<br />
<strong>the</strong> liquid in <strong>the</strong> pan. Then cook a roux,<br />
a mixture <strong>of</strong> flour and butter, until it<br />
turns <strong>the</strong> color <strong>of</strong> peanut butter. As you<br />
pour <strong>the</strong> strained liquid over <strong>the</strong> roux,<br />
whisk vigorously to break up any lumps.<br />
How to BARBECUE A tURkEy<br />
2. After <strong>the</strong> first hour <strong>of</strong> cooking, <strong>the</strong><br />
turkey legs, wings, and back will be<br />
golden brown, but <strong>the</strong> breast will have<br />
barely begun to cook. Turn <strong>the</strong> turkey<br />
over and finish cooking it with <strong>the</strong><br />
breast side facing up.<br />
2. The gravy will not thicken fully<br />
until it comes to a boil. Continue to<br />
whisk <strong>the</strong> gravy until it boils.<br />
2<br />
3. If any p<strong>art</strong>s <strong>of</strong> <strong>the</strong> turkey turn dark,<br />
cover <strong>the</strong>m with foil. Remove <strong>the</strong> turkey<br />
<strong>from</strong> <strong>the</strong> grill when <strong>the</strong> internal<br />
temperature reaches 175˚F in <strong>the</strong><br />
thickest p<strong>art</strong> <strong>of</strong> a thigh (not touching<br />
<strong>the</strong> bone). Or check for doneness by<br />
cutting into <strong>the</strong> joint between <strong>the</strong> leg<br />
and body. If you see any pink meat, <strong>the</strong><br />
turkey is not done.<br />
3. Then lower <strong>the</strong> heat and let <strong>the</strong> gravy<br />
simmer until it reaches <strong>the</strong> consistency<br />
you like. Taste <strong>the</strong> gravy at this point<br />
and adjust <strong>the</strong> seasonings if necessary.
Brined and Barbecued Turkey with Pan Gravy<br />
Prep time: 30 minutes<br />
Brining time: 18 to 24 hours<br />
Grilling time: 2½ to 3½ hours<br />
Brine<br />
2 qu<strong>art</strong>s apple juice<br />
1 cup kosher salt<br />
2 tablespoons dried rosemary<br />
2 tablespoons dried thyme<br />
1 tablespoon dried sage<br />
1 teaspoon coarsely ground black pepper<br />
1 turkey, 10 to 12 pounds, fresh or defrosted<br />
½ cup melted unsalted butter, divided<br />
1 teaspoon freshly ground black pepper<br />
6 cups reduced-sodium chicken stock<br />
1 large yellow onion, roughly chopped<br />
2 large carrots, roughly chopped<br />
2 celery stalks, roughly chopped<br />
4 small chunks apple wood or 4 small handfuls apple<br />
wood chips, soaked in water for at least 30 minutes<br />
Gravy<br />
Reserved pan liquid plus enough chicken stock to<br />
make 4 cups <strong>of</strong> liquid<br />
¼ cup unsalted butter, cut into 4 equal pieces<br />
¼ cup all-purpose flour<br />
⅓ cup dry white wine<br />
2 tablespoons finely chopped fresh Italian parsley<br />
Kosher salt<br />
Freshly ground black pepper<br />
How to BARBECUE A tURkEy<br />
3
Instructions<br />
1. In a large pot combine <strong>the</strong> brine ingredients. Stir<br />
vigorously until <strong>the</strong> salt has dissolved.<br />
2. Remove <strong>the</strong> neck and giblets <strong>from</strong> both ends <strong>of</strong> <strong>the</strong><br />
turkey and reserve in <strong>the</strong> refrigerator for <strong>the</strong> gravy. Cut <strong>of</strong>f<br />
and reserve <strong>the</strong> wing tips for <strong>the</strong> gravy, too. If your turkey<br />
has a trussing clamp, leave it in place. Do not truss <strong>the</strong><br />
turkey. Rinse <strong>the</strong> turkey inside and out with cold water.<br />
3. P<strong>art</strong>ially fill a cooler with ice. Open a large, sturdy plastic<br />
bag in <strong>the</strong> cooler. Place <strong>the</strong> turkey, breast side down, in <strong>the</strong><br />
bag. Carefully pour <strong>the</strong> brine over <strong>the</strong> turkey and <strong>the</strong>n add<br />
3 qu<strong>art</strong>s <strong>of</strong> cold water. Press <strong>the</strong> air out <strong>of</strong> <strong>the</strong> bag, seal <strong>the</strong><br />
bag tightly, close <strong>the</strong> lid <strong>of</strong> <strong>the</strong> cooler, and set aside for 18<br />
to 24 hours.<br />
4. If you are using a <strong>charcoal</strong> grill, fill a Weber® RapidFire®<br />
chimney st<strong>art</strong>er to <strong>the</strong> rim with <strong>charcoal</strong> and burn <strong>the</strong><br />
coals until <strong>the</strong>y are lightly covered with ash. Spread <strong>the</strong><br />
coals in a half circle or crescent-shaped <strong>fire</strong> on one side<br />
<strong>of</strong> <strong>the</strong> <strong>charcoal</strong> grate. Carefully place a large, disposable<br />
drip pan in <strong>the</strong> center <strong>of</strong> <strong>the</strong> <strong>charcoal</strong> grate and fill it about<br />
halfway with warm water. This will help to maintain <strong>the</strong><br />
temperature <strong>of</strong> <strong>the</strong> <strong>fire</strong>. Put <strong>the</strong> cooking grate in place,<br />
close <strong>the</strong> lid, and let <strong>the</strong> coals burn down to low heat. Keep<br />
all <strong>the</strong> vents open.<br />
If you are using a gas grill, preheat <strong>the</strong> grill on high until<br />
<strong>the</strong> temperature reaches 500°F. Then turn <strong>the</strong> burners<br />
down to indirect low heat (300°F to 350°F).<br />
5. Remove <strong>the</strong> turkey <strong>from</strong> <strong>the</strong> bag and rinse it, inside and<br />
out, with cold water. Pat dry with paper towels. Discard<br />
<strong>the</strong> brine. Lightly coat <strong>the</strong> turkey with some <strong>of</strong> <strong>the</strong> melted<br />
butter. Season with <strong>the</strong> pepper.<br />
6. Pour <strong>the</strong> chicken stock into a sturdy 9 x 13-inch roasting<br />
pan. Add <strong>the</strong> onion, carrots, and celery. Add <strong>the</strong> reserved<br />
turkey neck, giblets, and wing tips. Place <strong>the</strong> turkey, breast<br />
side down, in <strong>the</strong> roasting pan.<br />
7. Place <strong>the</strong> roasting pan in <strong>the</strong> center <strong>of</strong> <strong>the</strong> cooking<br />
grate. If you are using a <strong>charcoal</strong> grill, position <strong>the</strong> pan so<br />
<strong>the</strong> turkey legs face <strong>the</strong> <strong>charcoal</strong>. Drain, <strong>the</strong>n add 2 wood<br />
chunks or 2 handfuls <strong>of</strong> wood chips to <strong>the</strong> <strong>charcoal</strong> or<br />
How to BARBECUE A tURkEy<br />
4<br />
put <strong>the</strong> chunks or chips in <strong>the</strong> smoker box <strong>of</strong> a gas grill,<br />
following <strong>the</strong> manufacturer’s instructions. Cook <strong>the</strong> turkey<br />
over indirect low heat with <strong>the</strong> lid closed for 1 hour.<br />
8. After 1 hour, to maintain <strong>the</strong> temperature <strong>of</strong> your<br />
<strong>charcoal</strong> grill, add 10 to 12 unlit <strong>charcoal</strong> briquettes to<br />
<strong>the</strong> lit <strong>charcoal</strong>, using long-handled tongs to tuck <strong>the</strong><br />
unlit <strong>charcoal</strong> between <strong>the</strong> lit <strong>charcoal</strong>. Drain and add <strong>the</strong><br />
remaining wood chunks or chips to <strong>the</strong> <strong>charcoal</strong> or smoker<br />
box. Carefully turn <strong>the</strong> turkey over in <strong>the</strong> pan so <strong>the</strong> breast<br />
faces up. Continue to cook <strong>the</strong> turkey over indirect low<br />
heat, with <strong>the</strong> lid closed, for a second hour.<br />
9. At <strong>the</strong> end <strong>of</strong> <strong>the</strong> second hour, baste <strong>the</strong> turkey all over<br />
with <strong>the</strong> remaining butter. If any p<strong>art</strong>s are getting too<br />
dark, tightly wrap <strong>the</strong>m with aluminum foil. Once again,<br />
add 10 to 12 unlit <strong>charcoal</strong> briquettes to <strong>the</strong> lit <strong>charcoal</strong><br />
to maintain <strong>the</strong> heat <strong>of</strong> your <strong>charcoal</strong> grill. Continue to<br />
cook <strong>the</strong> turkey over indirect low heat. The total cooking<br />
time will be 2½ to 3½ hours. The turkey is done when <strong>the</strong><br />
internal temperature reaches 175°F in <strong>the</strong> thickest p<strong>art</strong> <strong>of</strong><br />
<strong>the</strong> thigh (not touching <strong>the</strong> bone) and 165°F in <strong>the</strong> breast.<br />
Note: The internal temperature will rise 5°F to 10°F during<br />
resting.<br />
10. Transfer <strong>the</strong> turkey to a cutting board, loosely cover<br />
with foil, and let rest for 20 to 30 minutes before carving.<br />
Meanwhile, make <strong>the</strong> gravy.<br />
11. Strain <strong>the</strong> pan liquid through a sieve into a large fat<br />
separator and discard all <strong>the</strong> solids. Add enough chicken<br />
stock to equal 4 cups <strong>of</strong> liquid. Place <strong>the</strong> roasting pan over<br />
a stovetop burner set to medium heat. Add <strong>the</strong> butter and<br />
flour. As <strong>the</strong> butter melts, stir with a wooden spoon and<br />
cook until <strong>the</strong> mixture turns <strong>the</strong> color <strong>of</strong> peanut butter,<br />
about 5 minutes, stirring frequently. Add 4 cups <strong>of</strong> <strong>the</strong><br />
reserved pan liquid (but not <strong>the</strong> fat) plus <strong>the</strong> wine. Bring<br />
<strong>the</strong> gravy to a boil, whisking frequently to dissolve <strong>the</strong><br />
lumps. Lower <strong>the</strong> heat and simmer <strong>the</strong> gravy for a few<br />
minutes or until it reaches <strong>the</strong> consistency you like. If <strong>the</strong><br />
gravy gets too thick, add more chicken stock a little at a<br />
time and simmer until it reaches <strong>the</strong> right thickness. Turn<br />
<strong>of</strong>f <strong>the</strong> heat. Add <strong>the</strong> parsley. Add salt and pepper to taste.