

UBBINK SOLAR IN-ROOF SYSTEM Installation guide
UBBINK SOLAR IN-ROOF SYSTEM Installation guide
UBBINK SOLAR IN-ROOF SYSTEM Installation guide

You also want an ePaper? Increase the reach of your titles
YUMPU automatically turns print PDFs into web optimized ePapers that Google loves.
12 Flat tiles and slates<br />
■ The merge roll should finish just<br />
short of the top batten, free to bend<br />
into position under tile or slate.<br />
■ The outer lip on side flashing should<br />
be turned in and flattened, allowing<br />
tile to butt onto flashing.<br />
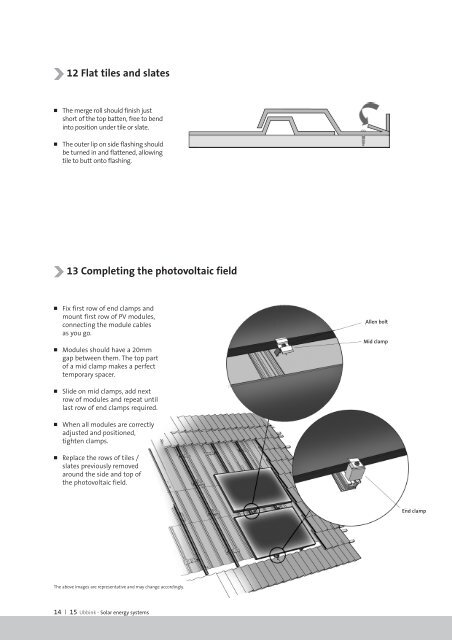
13 Completing the photovoltaic field<br />
■ Fix first row of end clamps and<br />
mount first row of PV modules,<br />
connecting the module cables<br />
as you go.<br />
■ Modules should have a 20mm<br />
gap between them. The top part<br />
of a mid clamp makes a perfect<br />
temporary spacer.<br />
■ Slide on mid clamps, add next<br />
row of modules and repeat until<br />
last row of end clamps required.<br />
■ When all modules are correctly<br />
adjusted and positioned,<br />
tighten clamps.<br />
■ Replace the rows of tiles /<br />
slates previously removed<br />
around the side and top of<br />
the photovoltaic field.<br />
The above images are representative and may change accordingly.<br />
14 I 15 Ubbink - Solar energy systems<br />
Allen bolt<br />
Mid clamp<br />
End clamp