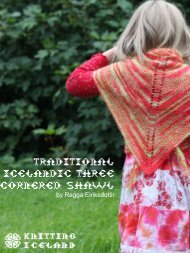
Download the Freyja pattern – free! - Knitting Iceland
Download the Freyja pattern – free! - Knitting Iceland
Download the Freyja pattern – free! - Knitting Iceland

Create successful ePaper yourself
Turn your PDF publications into a flip-book with our unique Google optimized e-Paper software.
About <strong>the</strong> <strong>pattern</strong><br />
The cardigan is knit in <strong>the</strong> round, starting from <strong>the</strong> bottom. All stitches are knit, except for<br />
one purled stitch in <strong>the</strong> middle front. This is <strong>the</strong> steek stitch.<br />
A slight shaping of <strong>the</strong> waist is incorporated and a few short rows are used to increase<br />
<strong>the</strong> length of <strong>the</strong> back piece and <strong>the</strong> height of <strong>the</strong> back of <strong>the</strong> neck for a more flattering<br />
look.<br />
When <strong>the</strong> body is knit up to <strong>the</strong> underarms it is set aside and <strong>the</strong> sleeves knit separately.<br />
The three pieces are <strong>the</strong>n joined toge<strong>the</strong>r on a circular needle except for a few stitches<br />
for grafting under <strong>the</strong> sleeves. Then it’s time to knit <strong>the</strong> yoke and incorporate <strong>the</strong> yoke<br />
<strong>pattern</strong> using stranded color work technique. All <strong>the</strong> while continuing with <strong>the</strong> single<br />
purled stitch in <strong>the</strong> middle. In this sweater <strong>the</strong>re are only 2 colors so <strong>the</strong> <strong>pattern</strong> knitting is<br />
very doable.<br />
After casting off at <strong>the</strong> neckline, <strong>the</strong> underarm stitches are grafted toge<strong>the</strong>r using <strong>the</strong><br />
Kitchener stitch.<br />
Then it’s time for steeking. A sewing machine is used to make two double seams in <strong>the</strong><br />
front on each side of <strong>the</strong> purled stitch. Keep <strong>the</strong> stitch straight and short. Don’t ever use<br />
zig-zag for this... disaster could happen! When <strong>the</strong> seams are in place, find a sharp pair<br />
of scissors and cut along <strong>the</strong> purled stitches in between <strong>the</strong> seams. Be brave... this is<br />
Lopi so it’s ok. Voila! You have a cardigan.<br />
The last step is to crochet 2-3 rows of edging all around <strong>the</strong> opening. Consider adding a<br />
strand of kid-mohair or some o<strong>the</strong>r strong and fuzzy (or even glittery) type of yarn for this.<br />
The buttonholes are made in <strong>the</strong> crochet edging <strong>–</strong> so after this <strong>the</strong>re’s nothing left but<br />
sewing on some cute buttons and donning <strong>the</strong> nice cardi.<br />
Notes on techniques used<br />
When joining in <strong>the</strong> round, make sure <strong>the</strong> stitches are not twisted along <strong>the</strong> circular<br />
needle.<br />
Don’t be hard on <strong>the</strong> unspun Lopi... it breaks easily so knit in a relaxed and gentle way.<br />
If however it happens, don’t panic, just pull out <strong>the</strong> ends and lay <strong>the</strong>m gently toge<strong>the</strong>r or<br />
rub <strong>the</strong>m a little bit between your palms. Knit on!<br />
Decreases and increases for <strong>the</strong> waist shaping are symmetrical pairs but <strong>the</strong> yoke<br />
decreases are all made by simply knitting 2 stitches toge<strong>the</strong>r.<br />
The short rows made to shape <strong>the</strong> back of <strong>the</strong> cardi are made as follows: knit to <strong>the</strong><br />
turning point indicated, turn your work. Now <strong>the</strong> wrong side is facing you. Make a yarn<br />
over, purl to <strong>the</strong> next turning point. Turn your work, make a yarn over and continue<br />
knitting in <strong>the</strong> round. When you get to your first wrap, treat <strong>the</strong> wrap as a normal stitch<br />
and knit it toge<strong>the</strong>r with <strong>the</strong> stitch to <strong>the</strong> left. When you come all <strong>the</strong> way around to <strong>the</strong><br />
stitch before <strong>the</strong> second wrap, do an improved SSK (as Elizabeth Zimmermann and Meg<br />
Swansen have described it): slip <strong>the</strong> stitch knit wise, slip <strong>the</strong> wrap purl wise and knit <strong>the</strong>m<br />
toge<strong>the</strong>r through <strong>the</strong> back loops. Continue working in <strong>the</strong> round as if nothing happened!<br />
When using two colors at <strong>the</strong> same time in <strong>the</strong> <strong>pattern</strong>, remember to carry <strong>the</strong> strands<br />
loosely along <strong>the</strong> backside of your work. Always hold <strong>the</strong> <strong>pattern</strong> color closer to your<br />
work.<br />
When crocheting <strong>the</strong> edge, please use your fantasy (and stash) to create a nice<br />
combination of colors and/ or textures. You can use almost any type of yarn and any size<br />
of crochet hook for this. Don’t be afraid to experiment <strong>–</strong> <strong>the</strong> edge can easily be pulled out<br />
if it doesn’t look good.<br />
Increases for <strong>the</strong> waist shaping are made as follows: M1R: lift <strong>the</strong> top strand between<br />
your needles by bringing <strong>the</strong> left needle under <strong>the</strong> strand from behind. Knit into <strong>the</strong> front<br />
of <strong>the</strong> resulting loop. M1L: lift <strong>the</strong> top strand between your needles by bringing <strong>the</strong> left<br />
needle under <strong>the</strong> strand from <strong>the</strong> front. Knit into <strong>the</strong> back of <strong>the</strong> loop. This way you make<br />
neat symmetrical increases without leaving any holes.<br />
This <strong>pattern</strong> is protected by copyright law. It’s for personal and non-profit use only.<br />
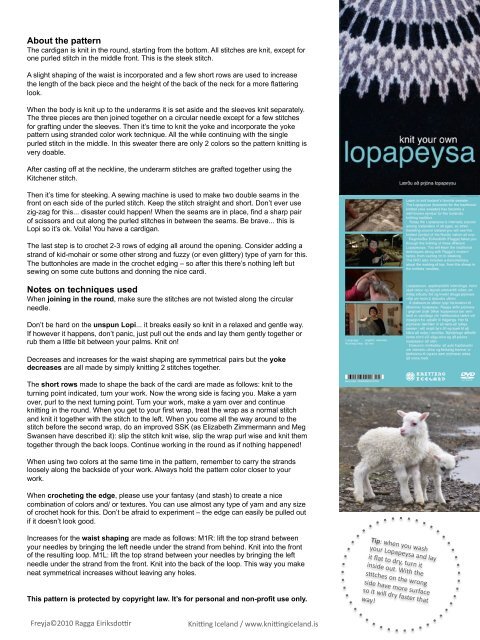
<strong>Freyja</strong>©2010 Ragga Eiriksdo4r<br />
Kni4ng <strong>Iceland</strong> / www.kni4ngiceland.is<br />
Tip: when you wash<br />
your Lopapeysa and lay<br />
it flat to dry, turn it<br />
inside out. With <strong>the</strong><br />
sFtches on <strong>the</strong> wrong<br />
side have more surface<br />
so it will dry faster that<br />
way!