SVL-1 SVL-1 - Niles Audio
SVL-1 SVL-1 - Niles Audio
SVL-1 SVL-1 - Niles Audio

Create successful ePaper yourself
Turn your PDF publications into a flip-book with our unique Google optimized e-Paper software.
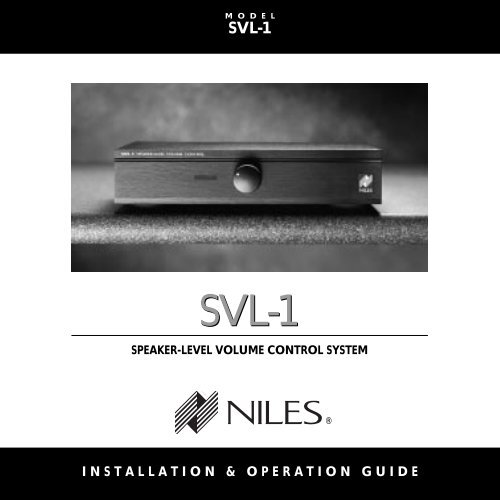
M O D E L<br />
<strong>SVL</strong>-1<br />
<strong>SVL</strong>-1<br />
SPEAKER-LEVEL VOLUME CONTROL SYSTEM<br />
NILES ®<br />
INSTALLATION & OPERATION GUIDE
<strong>SVL</strong>-1<br />
Speaker Level<br />
Volume Control<br />
TABLE OF CONTENTS<br />
Introduction 1<br />
Features and 2<br />
Benefits<br />
Installation 4<br />
Considerations<br />
Installation 7<br />
Operation 9<br />
Specifications 10<br />
1<br />
S P E A K E R - L E V E L V O L U M E C O N T R O L<br />
®<br />
Introduction<br />
The <strong>SVL</strong>-1 is a table top volume control for speakers. It connects<br />
between the speaker-level output of an amplifier,<br />
speaker selector, etc. and a pair of speakers.<br />
A perfect application for the <strong>SVL</strong>-1 is adjusting the volume of<br />
remotely located speakers. The <strong>SVL</strong>-1 adjusts the volume of<br />
speakers connected to it by attenuating the amplifier signal.<br />
<strong>Niles</strong> volume controls use autoformers instead of L-pads for the<br />
volume controlling element. This assures minimal internal power<br />
dissipation with virtually no power wasted as heat.
S P E A K E R - L E V E L V O L U M E C O N T R O L<br />
Features and Benefits<br />
The <strong>SVL</strong>-1 offers a number of improvements over other<br />
volume controls:<br />
● The <strong>SVL</strong>-1 uses a 12 position control, which is superior to<br />
10 position designs. You get a broader range of<br />
adjustment—there are 10 steps of attenuation instead of<br />
8. Steps 11 - 6 attenuate -3 dB per step; steps 5-2 are -6<br />
dB per step. Step 12 is "full-on" and step 1 is "full-off".<br />
● Greater dynamic range—you get 42 dB of total attenuation<br />
instead of the typical 20 or 30 dB.<br />
● POP-FREE switching between all steps.<br />
● 100% tested, electronically and acoustically, for frequency<br />
response, distortion and power handling.<br />
● Pre-printed Room Labels are included for easy identification<br />
of the <strong>SVL</strong>-1's volume control.<br />
● Spring-loaded push terminal connectors accommodate<br />
up to 14 gauge wire or "pins", making the <strong>SVL</strong>-1 compatible<br />
with most “high definition” speaker cables.<br />
● Only 8 1/2" wide. Matches the width of 17" components<br />
when combined with another <strong>Niles</strong> 1/2-width product.<br />
TECH<br />
SUPPORT<br />
HOTLINE<br />
If you have<br />
questions regarding<br />
the operation of the<br />
<strong>Niles</strong> <strong>SVL</strong>-1, contact<br />
your local <strong>Niles</strong><br />
dealer or <strong>Niles</strong><br />
Customer Service at<br />
1-800-289-4434.<br />
2
3<br />
S P E A K E R - L E V E L V O L U M E C O N T R O L<br />
● Printed circuit board design assures high reliability.<br />
● Isolated left and right channel grounds make it safe for use<br />
with any amplifier.<br />
● May be used with 4, 6, or 8-ohm speaker systems.<br />
● Ideal for both home and commercial sound installations.<br />
● Only a wire stripper is required for installation.<br />
● Power handling: 60 watts/channel continuous music<br />
power.<br />
● Frequency response: 20 Hz to 20 kHz ±1.2 dB.<br />
● Ten year parts and labor warranty.<br />
● Proudly made in the USA.
Installation Considerations<br />
<strong>SVL</strong>-1 Power Handling<br />
The <strong>SVL</strong>-1 is designed for use with a receiver or amplifier having<br />
a maximum power output of 100 watts per channel at 8<br />
ohms. Damage caused by the use of a higher-power receiver<br />
or amplifier will void the warranty. Consult your <strong>Niles</strong> dealer,<br />
or receiver/amplifier manufacturer, if you are uncertain about<br />
the power rating of your receiver or amplifier.<br />
IMPORTANT: DO NOT USE THE <strong>SVL</strong>-1 WITH AMPS OR<br />
RECEIVERS RATED AT MORE THAN 100 WATTS PER CHANNEL<br />
RMS AT 8 OHMS.<br />
Type of Speaker Wire<br />
S P E A K E R - L E V E L V O L U M E C O N T R O L<br />
For most applications, we recommend you use 16 or 18<br />
gauge, stranded copper speaker wire for the <strong>SVL</strong>-1 connections.<br />
For wiring runs longer than 80 feet, 14 gauge wire is<br />
recommended. Using speaker wire larger than 14 gauge for<br />
the <strong>SVL</strong>-1 connections is not recommended—the wire may<br />
not fit into the connectors. Never use solid-core, aluminum,<br />
or "Romex" type wire with the <strong>SVL</strong>-1. When running speaker<br />
wires inside walls, most states and municipalities in the U.S.<br />
specify that you must use a special type of speaker wire .<br />
Usually, the requirement is that the wire has a specific "CL"<br />
fire rating, such as "CL-2" or "CL-3". Consult your <strong>Niles</strong> deal-<br />
TOOLS<br />
REQUIRED<br />
• Wire Stripper<br />
IMPORTANT<br />
DO NOT use the<br />
<strong>SVL</strong>-1 with amps<br />
or receivers rated<br />
at more than 100<br />
watts per channel<br />
RMS at 8 ohms.<br />
4
"TECH TIP"<br />
Wire size is<br />
expressed by it's<br />
AWG (American<br />
Wire Gauge)<br />
number. The lower<br />
the AWG number,<br />
the larger the wire,<br />
i.e., 12 AWG wire is<br />
physically larger<br />
than 14 AWG.<br />
5<br />
S P E A K E R - L E V E L V O L U M E C O N T R O L<br />
er, building contractor, or local building and inspection<br />
department if unsure about which type of wire is best for<br />
your application.<br />
Avoiding Interference<br />
Speaker wires can act as an "antenna" for electrical noise.<br />
Locating speaker wires too close to a light dimmer or switch<br />
may cause a "buzzing" or "popping" sound to be heard<br />
through the speakers. If you must locate the <strong>SVL</strong>-1 wiring<br />
near electrical devices, route the speaker wires several feet<br />
away from the electrical wiring.<br />
<strong>SVL</strong>-1 Mounting Location<br />
Convenient mounting locations for the <strong>SVL</strong>-1 are:<br />
● With other stereo components<br />
● Near a desk<br />
● At your bedside<br />
● Close to a telephone
Recessed<br />
area for<br />
custom<br />
room labels.<br />
Attractive<br />
low-profile<br />
design.<br />
S P E A K E R - L E V E L V O L U M E C O N T R O L<br />
<strong>SVL</strong>-1 SPEAKER-LEVEL VOLUME CONTROL<br />
N I L E S<br />
<strong>Niles</strong> <strong>Audio</strong><br />
Corporation, Inc.<br />
Miami, Florida USA<br />
AMPLIFIER<br />
+ +<br />
- -<br />
L R<br />
12 position volume control<br />
provides greater attenuation<br />
than conventional 10 position<br />
designs.<br />
SPEAKER<br />
+ +<br />
- -<br />
Spring<br />
loaded push<br />
connectors.<br />
L R<br />
N I L E S<br />
6
7<br />
S P E A K E R - L E V E L V O L U M E C O N T R O L<br />
N I L E S<br />
<strong>Niles</strong> <strong>Audio</strong><br />
Corporation, Inc.<br />
Miami, Florida USA<br />
Installation<br />
1. Select a convenient location for the <strong>SVL</strong>-1.<br />
2. Run all the necessary wiring to the <strong>SVL</strong>-1. Label the wires<br />
for future reference. See (Figure 1).<br />
Receiver<br />
TUNER 94.9<br />
15<br />
AMPLIFIER<br />
+ +<br />
- -<br />
L R<br />
<strong>Niles</strong> <strong>SVL</strong>-1<br />
SPEAKER<br />
+ +<br />
- -<br />
L R<br />
Speaker Pair<br />
Figure 1<br />
Wiring Diagram
S P E A K E R - L E V E L V O L U M E C O N T R O L<br />
3. Make the connections to the <strong>SVL</strong>-1. Strip 3/8" of insulation<br />
from the end of each wire. Tightly twist the end of each wire<br />
until there are no frayed ends. Insert each wire into the<br />
appropriate hole on the spring-loaded connector terminals.<br />
Be certain that proper phasing is observed—connect the<br />
positive terminals on the <strong>SVL</strong>-1 to the positive terminals on<br />
the amplifier and speakers and the negative terminals on the<br />
<strong>SVL</strong>-1 to the negative terminals on the amplifier and speakers.<br />
See (Figure 2).<br />
Figure 2<br />
Connecting the<br />
Wires<br />
8
9<br />
S P E A K E R - L E V E L V O L U M E C O N T R O L<br />
The inputs of the <strong>SVL</strong>-1 are the connector terminals labeled<br />
"AMPLIFIER". The outputs are the connector<br />
terminals labeled "SPEAKERS". Be sure not to reverse these<br />
connections or the <strong>SVL</strong>-1 will not function properly.<br />
4. Locate the pre-printed Room Labels. Affix the appropriate<br />
label to the recessed area next to the knob on the <strong>SVL</strong>-1.<br />
Operation<br />
1. Make sure the amplifier or receiver power is OFF and set<br />
the volume to minimum.<br />
2. Set the <strong>SVL</strong>-1 volume to maximum (fully clockwise).<br />
3. If you are using a <strong>Niles</strong> speaker selection system, locate the<br />
ON/OFF button which corresponds to the speaker pair you<br />
wish to play. Set it to the ON position.<br />
4. Turn on the amplifier or receiver and select a source, such<br />
as the tuner or CD player.<br />
5. Slowly turn up the amplifier or receiver volume and set it<br />
to a comfortable (not maximum) listening level. Be careful<br />
not to overdrive or "clip" your amplifier. If the sound<br />
becomes muddy or distorted, you have reached the limit of<br />
your amplifier's volume capability and should quickly reduce<br />
the volume to avoid damaging your speakers.
S P E A K E R - L E V E L V O L U M E C O N T R O L<br />
6. Using the knob on the front of the <strong>SVL</strong>-1, adjust the volume<br />
of the speakers to the desired listening level.<br />
7. You can turn off the speakers by turning the knob on the<br />
<strong>SVL</strong>-1 fully counter-clockwise, or by pressing the ON/OFF<br />
button on your speaker selector.<br />
Balancing Speaker Volume<br />
The volume control on your receiver or amplifier serves as<br />
the "master" volume for all speaker pairs connected.<br />
The volume level of the speakers may vary from room to<br />
room. This is caused by several factors. Two lesser factors are<br />
the size of the speaker and its efficiency. The largest factor is<br />
the physical size of the room.<br />
The best way to balance speaker volume is to equip each of<br />
the speaker pairs in your system with a <strong>Niles</strong> volume control.<br />
The controls allow you to adjust the volume of each speaker<br />
pair individually. If all the speaker pairs in your system are<br />
equipped with <strong>Niles</strong> volume controls, you can leave the<br />
amplifier or receiver volume set at one position and use the<br />
<strong>Niles</strong> controls exclusively.<br />
SPECIFICATIONS<br />
<strong>Audio</strong> Power Handling<br />
60 Watts/channel<br />
continuous music<br />
power<br />
Mounting<br />
Table-top component<br />
Wiring Requirements<br />
Individual runs of<br />
2-conductor speaker<br />
wire. Connectors<br />
accommodate wire<br />
sizes 14-22 gauge<br />
(16 gauge<br />
recommended)<br />
Overall Dimensions<br />
8 1/2" wide x 2" high<br />
x 7 1/4" deep<br />
Weight<br />
2 1/4 lbs.<br />
10
NILES ®<br />
<strong>Niles</strong> <strong>Audio</strong><br />
Corporation<br />
www.nilesaudio.com<br />
12331 S.W. 130 Street<br />
Miami, Florida 33186<br />
Tel: (305) 238-4373<br />
Fax: (305) 238-0185<br />
© 1999 <strong>Niles</strong> <strong>Audio</strong> Corporation. All rights reserved. Because <strong>Niles</strong> constantly strives to improve the<br />
quality of its products, <strong>Niles</strong> reserves the right to change product specifications without notice. <strong>Niles</strong><br />
and the <strong>Niles</strong> logo are registered trademarks of <strong>Niles</strong> <strong>Audio</strong> Corporation. Printed in USA 4/96<br />
DS00093A