Table Top Glassfront Merchandiser - Vending Machines Parts and ...
Table Top Glassfront Merchandiser - Vending Machines Parts and ...
Table Top Glassfront Merchandiser - Vending Machines Parts and ...

You also want an ePaper? Increase the reach of your titles
YUMPU automatically turns print PDFs into web optimized ePapers that Google loves.
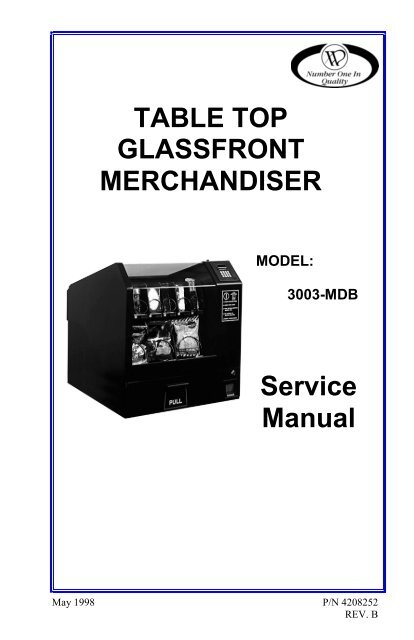
TABLE TOP<br />
GLASSFRONT<br />
MERCHANDISER<br />
MODEL:<br />
3003-MDB<br />
Service<br />
Manual<br />
May 1998 P/N 4208252<br />
REV. B
<strong>Table</strong> of Contents<br />
SPECIFICATIONS............................................................ 1<br />
Physical Dimensions.................................................. 1<br />
Electrical .................................................................... 1<br />
Capacity..................................................................... 1<br />
Coinage ..................................................................... 1<br />
INTRODUCTION .............................................................. 2<br />
Features <strong>and</strong> Options ................................................ 2<br />
UNPACKING .................................................................... 3<br />
INSTALLATION INSTRUCTIONS.................................... 4<br />
Grounding & Electrical ............................................... 4<br />
120 Volt Vendors, ............................................... 4<br />
220/230/240 Volt Vendors .................................. 5<br />
INSTALLATION CHECK LIST ......................................... 6<br />
SET UP............................................................................. 6<br />
COMPONENTS & FUNCTIONS....................................... 8<br />
Coin Return Button .................................................... 8<br />
Keypad ...................................................................... 8<br />
Vend Motors .............................................................. 8<br />
Delivery Drawer ......................................................... 8<br />
Coin Return Cup, Cash Box & Keyed Lock ............... 8<br />
Display....................................................................... 9<br />
Transformer ............................................................... 9<br />
Circuit Breaker........................................................... 9<br />
Coin Mechanism........................................................ 9<br />
Filling The Coin Tubes........................................ 9<br />
Main Product Trays.................................................. 10<br />
Removal Of Product Trays ............................... 10<br />
To remove the top tray:..................................... 11<br />
To re-install the top tray:................................... 11<br />
To remove the bottom tray:............................... 11<br />
To re-install the bottom tray: ............................. 11<br />
Tray Configurations ................................................. 11<br />
To change two small helixes to one large helix: 11<br />
Changing one large helix to two small helixes: . 12<br />
Adjustable Shelves ........................................... 13<br />
Product Ejectors ............................................... 13<br />
LOADING INSTRUCTIONS............................................ 14<br />
Loading <strong>Top</strong> Tray..................................................... 14<br />
Loading Bottom Tray ............................................... 14<br />
To Close Vendor After Loading ........................ 15<br />
i
ii<br />
CONTROLLER FUNCTIONS ......................................... 16<br />
Sales Mode.............................................................. 16<br />
Vend Cycle ....................................................... 16<br />
LEDs................................................................. 17<br />
Jammed Motor Condition ................................. 17<br />
Vend <strong>and</strong> Cash Counters ................................. 17<br />
Resettable Vend <strong>and</strong> Cash Counters ............... 17<br />
Service Mode........................................................... 18<br />
Entering the Service Mode ............................... 18<br />
Exiting the Service Mode.................................. 18<br />
Service Modes.................................................. 18<br />
Motor Count ................................................. 19<br />
Coin Dispensing........................................... 19<br />
Total Sales (Vend Count)............................. 20<br />
Cash Count.................................................. 20<br />
Resettable Total Sales (Vend Count) .......... 21<br />
Resettable Cash Count................................ 21<br />
Clear Resettable Values .............................. 22<br />
Price Setting ................................................ 22<br />
Single Motor Test......................................... 22<br />
All Motor Test............................................... 22<br />
Force Vend .................................................. 23<br />
Multi-Vend.................................................... 23<br />
No Cheat...................................................... 23<br />
Note (Bill) Escrow ........................................ 23<br />
CARE AND CLEANING SCHEDULE FOR PREVENTIVE<br />
MAINTENANCE ............................................................. 24<br />
Once a Month .......................................................... 24<br />
Clean Cabinet Interior:...................................... 24<br />
Clean Cabinet Exterior: .................................... 24<br />
BEFORE CALLING FOR SERVICE............................... 24<br />
PARTS ORDERING PROCEDURE................................ 25<br />
TROUBLESHOOTING GUIDE ....................................... 26<br />
SCHEMATIC................................................................... 29<br />
Record the Model Number <strong>and</strong> Serial Number of your machine below.<br />
The Model <strong>and</strong> Serial numbers are needed for you to obtain quick service <strong>and</strong><br />
parts information for your machine. The numbers are given on the identification<br />
plate located on the back side of the cabinet of the machine.<br />
MODEL NUMBER: ______________________________________________<br />
SERIAL NUMBER: ______________________________________________
SPECIFICATIONS<br />
SPECIFICATIONS<br />
Physical Dimensions<br />
Electrical<br />
INCHES CM<br />
Height: 23 58<br />
Width: 22 56<br />
Depth: 24-1/4 62<br />
POUNDS KG<br />
Weight: 70 26<br />
Power: 120 VAC, 60 Hz (Domestic)<br />
220/230/240 VAC, 50/60 Hz (Int’l)<br />
Transformer: 110VAC: 60Hz<br />
220/230/240 VAC: 50/60Hz<br />
24VAC, 75 VA<br />
Operating Current .9 Amps<br />
Capacity<br />
St<strong>and</strong>ard Configuration:<br />
Two (2) trays<br />
Three (3) to six (6) selections per tray<br />
Both trays are configurable from c<strong>and</strong>y to snack <strong>and</strong> vice versa.<br />
Additional helix sizes available through VendNet <strong>Parts</strong> Department, see the<br />
Introduction section of this manual.<br />
Coinage<br />
MDB version - any MDB peripheral device<br />
INTERNATIONAL DOMESTIC<br />
Global Mars TRC-6010<br />
Coinco L-Plus Coinco 9302L<br />
1
INTRODUCTION<br />
INTRODUCTION<br />
This manual contains service <strong>and</strong> installation guidelines <strong>and</strong> instructions<br />
pertaining to the <strong>Table</strong> <strong>Top</strong> <strong>Glassfront</strong> <strong>Merch<strong>and</strong>iser</strong> - Model 3003-MDB.<br />
Also included are various options, features <strong>and</strong> accessories that are offered.<br />
Features <strong>and</strong> Options<br />
• Multi Drop Bus (MDB) coin h<strong>and</strong>ling mechanism<br />
• DEX/UCS for MIS data transfer using the <strong>Vending</strong> Industry Data<br />
Transfer St<strong>and</strong>ard<br />
• Self-diagnostics <strong>and</strong> cash accountability<br />
• Force Vend, Multi Vend features<br />
• Motorized delivery, electronically controlled<br />
2<br />
CAUTION:<br />
This vendor utilizes DC motors. Do not attempt to turn augers by<br />
h<strong>and</strong>. Motor damage could occur.<br />
• Audible feedback indicates when a product has been vended<br />
or when an error condition exists.<br />
• No change or loss of program/memory because a power failure<br />
• Cash accountability records Total Cash transactions <strong>and</strong> Total Vend<br />
cycles performed by the vendor. Information for individual selections,<br />
complete range (rows) or total machine can be compiled <strong>and</strong> used for<br />
inventory <strong>and</strong> ordering records.<br />
The vending sequence of the <strong>Table</strong> <strong>Top</strong> <strong>Glassfront</strong> is “First-in, first-out”,<br />
eliminating the need for stock rotation. The product drawer features “Vend<br />
The Item You See”, therefore, a display item is not necessary.<br />
The basic tray configurations can be changed by ordering additional parts, for<br />
a maximum of six selections per tray. The trays are equipped with individual<br />
24 volt DC motors <strong>and</strong> helixes for each selection. Each tray is equipped with a<br />
complete wiring harness for different drawer configurations. The top drawer<br />
may be filled in its normal vend position then raised <strong>and</strong> locked in the up<br />
position to fill the lower drawer. The selection capacity <strong>and</strong> product size may<br />
be varied by adding or deleting motors <strong>and</strong> helixes in each drawer.<br />
Each machine is identified by a model number <strong>and</strong> a serial number. These<br />
numbers appear on the Identification Plate attached to the rear of the vendor.<br />
Record these numbers for your records (space provided after <strong>Table</strong> of<br />
Contents). All inquires <strong>and</strong> correspondence pertaining to this vendor should<br />
reference the model <strong>and</strong> serial numbers.
It is recommended that this manual be read thoroughly to familiarize the<br />
service person with the functions of all components, along with the features<br />
that are available. The initial setup of a vending machine is a very important<br />
step of insuring that the equipment operates in a trouble-free manner. By<br />
following the instructions at the initial installation of the machine, service<br />
problems can be avoided <strong>and</strong> setup time will be minimized.<br />
Should you have any questions pertaining to the information in the manual,<br />
replacement parts or the operation of the vendor you should contact your local<br />
distributor, or:<br />
UNPACKING<br />
UNPACKING<br />
VendNet<br />
165 North 10th Street<br />
Waukee, Iowa 50263 - USA<br />
Phone: 515-274-3641<br />
<strong>Parts</strong> Fax: 515-987-4447<br />
Sales Fax: 515-274-0390<br />
E-Mail: VendNet@Ecity.net<br />
To minimize installation time <strong>and</strong> to avoid service problems due to improper<br />
installation, follow the instructions outlined in this manual.<br />
This machine has been thoroughly inspected before leaving the factory <strong>and</strong> the<br />
delivering carrier has accepted this vendor as their responsibility. Any damage<br />
or irregularities should be noted at the time of delivery <strong>and</strong> reported to the<br />
carrier. Request a written inspection report from the claims inspector to file<br />
any claim for damage. File the claim with the carrier (not the manufacturer)<br />
within 15 days after receipt of the machine.<br />
Carefully remove the outside packaging material in a manner not to damage<br />
the finish or exterior of the machine. Inspect the machine for concealed<br />
shipping damage. Report any damage hidden by the packaging material<br />
directly to the delivering carrier on a hidden damage report.<br />
Open the outer door <strong>and</strong> remove all internal packing material. The keys to the<br />
vendor are located in the bag taped to the coin up assembly.<br />
Consult local, state <strong>and</strong> country codes <strong>and</strong> regulations before installation of<br />
the vendor.<br />
3
INSTALLATION INSTALLATION INSTRUCTIONS<br />
INSTRUCTIONS<br />
The vendor can be mounted to a tabletop surface. The service package<br />
includes two #10 wood screws to fasten up through holes in a table surface<br />
into bosses molded into the vendor’s base. The bosses are located on the<br />
bottom of the vendor <strong>and</strong> are 11 inches apart (front to back).<br />
Grounding & Electrical<br />
4<br />
WARNING:<br />
<strong>Table</strong> 1: Service Package Contents<br />
DESCRIPTION QUANTITY<br />
Service Manual 1<br />
#10 Wood Screws 2<br />
Minors Forbidden Label 1<br />
Product Ejectors 6<br />
Price Sheet .25-.60 1<br />
Price Sheet .65-1.00 1<br />
Price Sheet 1.05-1.40 1<br />
Safety Manual 1<br />
Extension cords can cause problems.<br />
DO NOT USE EXTENSION CORDS.<br />
Prior to connecting the equipment, the integrity of the main electrical supply<br />
must be checked for correct polarity, presence of ground <strong>and</strong> correct voltage.<br />
It is recommended that these checks be repeated at 6-month intervals with the<br />
routine safety electrical testing of the equipment itself.<br />
To correct negative voltage, amperage, polarity, or ground checks, consult a<br />
licensed electrician.<br />
120 Volt Vendors,<br />
See Figure 1<br />
Power source must be 120 VAC (±10%) 60 Cycle (Hz).<br />
1. Voltage Check: Connect the AC multimeter probes to the hot <strong>and</strong> neutral<br />
terminals. It should indicate 108 to 132 volts AC.<br />
2. Polarity <strong>and</strong> Ground Check: When the AC multimeter probes are<br />
connected to the hot <strong>and</strong> ground terminals, it should indicate 108 to 132<br />
volts AC<br />
3. Amperage Check: At the fuse box or circuit breaker panel, locate the<br />
proper circuit, <strong>and</strong> ensure that the fuse or breaker protecting that circuit is<br />
rated at 5 amps or greater.
A10116<br />
Figure 1. 120 Volt Outlet<br />
NOTE:<br />
The hot side of the outlet should always be<br />
counter-clockwise from the ground terminal. The<br />
neutral terminal will be clockwise from the<br />
ground terminal.<br />
220/230/240 Volt Vendors<br />
See Figure 2.<br />
Power source must be 220/230/240 VAC (±10%) 50/60 Cycle (Hz).<br />
1. Voltage Check: When the AC multimeter probes are connected to the hot<br />
<strong>and</strong> neutral terminals, it should indicate 207 to 253 volts AC<br />
2. Polarity <strong>and</strong> Ground Check: When the AC multimeter probes are<br />
connected to the hot <strong>and</strong> ground terminals, it should indicate 207 to 253<br />
volts AC<br />
3. Amperage Check: At the fuse box or circuit breaker panel, locate the<br />
proper circuit, <strong>and</strong> ensure that the fuse or breaker protecting that circuit is<br />
rated at 3 amps or greater.<br />
NOTE:<br />
If the receptacle is not properly grounded or<br />
polarized, contact a licensed electrician to<br />
correctly polarize <strong>and</strong>/or ground the receptacle<br />
to ensure safe operation.<br />
5
6<br />
A10100<br />
Figure 2. Two Types of 230 Volt Outlets<br />
INSTALLATION INSTALLATION CHECK CHECK LIST<br />
LIST<br />
1. All external <strong>and</strong> internal packaging removed.<br />
2. Recorded model <strong>and</strong> serial numbers from Identification Plate on back of<br />
cabinet (space provided at end of <strong>Table</strong> of Contents).<br />
3. Consulted local, state <strong>and</strong> country codes <strong>and</strong> regulations before<br />
installation of the vendor.<br />
4. Tested for proper grounding <strong>and</strong> ratings of outlet to be used by vendor.<br />
5. Refer to Setup for continuation of installation.<br />
SET SET UP<br />
UP<br />
The <strong>Table</strong> <strong>Top</strong> <strong>Glassfront</strong> <strong>Merch<strong>and</strong>iser</strong> control system must be set up for use<br />
prior to placing the vendor in operation. The control system controls the<br />
pricing, motor control, accounting information, <strong>and</strong> vend options within the<br />
machine. It also monitors errors or failures that may occur <strong>and</strong> relays that<br />
information through the display.<br />
After the machine is set up to vend, it must be properly loaded to assure<br />
proper vending of product. The proper loading of product is essential to a<br />
proper vend <strong>and</strong> satisfaction of the buying customer.
A10125<br />
Figure 3. <strong>Table</strong>top Components<br />
7
COMPONENTS COMPONENTS & & FUNCTIONS<br />
FUNCTIONS<br />
See Figure 3.<br />
Coin Return Button<br />
When depressed, the coin return button located on the top cover activates the<br />
coin acceptor to scavenge or clear the acceptor of any damaged or stuck coins.<br />
By pressing the coin return button with credit displayed (if Force Vend is off),<br />
the controller will signal the coin mechanism to return the held credit. The<br />
coins will be channeled through the coin mechanism to the coin return cup<br />
located in the base of the vendor.<br />
Keypad<br />
The keypad, located on the top cover, is a self enclosed membrane switch<br />
panel. This eliminates the need for individual switches <strong>and</strong> wiring. The keypad<br />
is used to activate the vend circuit when making a selection <strong>and</strong> in the Service<br />
Mode to modify controller functions.<br />
Vend Motors<br />
The <strong>Table</strong> <strong>Top</strong> <strong>Glassfront</strong> incorporates the use of current limited DC Motors.<br />
8<br />
CAUTION:<br />
Do not try to turn motors by h<strong>and</strong>, damage to the motor may<br />
result.<br />
The vend motors are held in place by a “T” shaped section that slides up <strong>and</strong><br />
down in the back portion of the trays. The motors are identical <strong>and</strong> can be<br />
changed with any other motor in the unit.<br />
Delivery Drawer<br />
The delivery drawer, located in the front of the main cabinet, is pulled forward<br />
or out after products are vended. When the drawer is pulled out an Anti-Theft<br />
guard comes forward, covering the drawer to prevent access to the other items<br />
in the vendor. The linkage for the Anti-Theft guard is under the bottom tray.<br />
Coin Return Cup, Cash Box & Keyed Lock<br />
The coin return cup <strong>and</strong> the cash box is a one-piece, two-compartment slide-in<br />
assembly. The front portion is the coin return cup <strong>and</strong> the back portion is the<br />
cash box area. Incorporated in the front of the assembly is a keyed lock for the<br />
drawer <strong>and</strong> lid assemblies. In the closed or locked position the keyed lock will<br />
secure the coin return <strong>and</strong> cash box assembly <strong>and</strong> activate the locking<br />
assembly for the lid of the vendor. The keys for this lock will be shipped taped<br />
inside the coin return cup.
Display<br />
The display is a four-digit, seven-segment display that is integral to the<br />
controller <strong>and</strong> cannot be replaced without replacing the entire controller. The<br />
display is used as the informational center for the controller to convey<br />
information in both Sale <strong>and</strong> Service Modes.<br />
Transformer<br />
The transformer is located in the base of the cabinet on the right side. It can be<br />
accessed from the back of the cabinet by first unplugging the machine then<br />
removing four screws on the vented back screen displaying the underside of<br />
the transformer.<br />
Circuit Breaker<br />
The 3-amp circuit breaker, located on the transformer cover inside the cabinet<br />
cavity, protects the controller board <strong>and</strong> the coin mechanism.<br />
Coin Mechanism<br />
The coin mechanism is either a CoinCo 9302-GX MDB 24 volt coin<br />
mechanism or equivalent. The coin mechanism is shipped installed, however<br />
the coin mechanism packaging is used as additional packaging material within<br />
the main carton.<br />
Filling The Coin Tubes<br />
1. Unlock the top lid <strong>and</strong> raise the lid to full open position, <strong>and</strong> the lid<br />
support engages.<br />
2. Fill nickels (approximately 68) in coin mechanism nickel tube.<br />
3. Fill dimes (approximately 98) in coin mechanism dime tube.<br />
4. Fill quarters (approximately 66) in coin mechanism quarter tube.<br />
5. Correct change light will go out.<br />
6. Disengage lid support <strong>and</strong> close lid.<br />
CAUTION:<br />
Never disconnect the coin mechanism or any electrical<br />
connection with the machine plugged in. Damage to the coin<br />
mechanism or controller may result.<br />
9
Main Product Trays<br />
There are two (2) main product trays per machine, each capable of containing<br />
a maximum of 6 selection, depending on the configuration of the trays. Each<br />
selection has its own vend motor mounted to the back of the tray. Each tray<br />
has its own wiring harness <strong>and</strong> plug for connecting to the remainder of the<br />
circuit through the cabinet. The motors are the same on all trays. It is possible<br />
to change configuration in each tray by adding or removing motors <strong>and</strong><br />
helixes.<br />
NOTE:<br />
10<br />
When changing configuration of the trays you will have to reprogram<br />
the machine for the prices <strong>and</strong> selections altered.<br />
Removal Of Product Trays<br />
The two (2) product trays are held in place on mounting pins on each side of<br />
the tray. See Figure 4.<br />
A10126<br />
A10127<br />
Figure 4. Tray Mounting Pins
To remove the top tray:<br />
1. Open the lid <strong>and</strong> engage the lid support.<br />
2. Disconnect the plug connection for the top tray.<br />
3. Pull forward on the release lever <strong>and</strong> hold forward.<br />
4. Lift up on tray <strong>and</strong> pull out to remove.<br />
To re-install the top tray:<br />
1. Place tray in position on mounting pins.<br />
2. Re-connect harness plug to tray.<br />
To remove the bottom tray:<br />
1. Remove the top tray as described in preceding section.<br />
2. Disconnect harness plug from bottom tray.<br />
3. Lift up on tray <strong>and</strong> pull tray forward out of cabinet.<br />
To re-install the bottom tray:<br />
1. Place bottom tray in position on mounting pins.<br />
2. Re-connect plug to wiring harness.<br />
Tray Configurations<br />
The selection helixes <strong>and</strong> motors may be changed to accommodate different<br />
sizes <strong>and</strong> shapes of products. One large helix may be replaced with two (2)<br />
small helixes or two (2) small helixes may be replaced by one (1) large helix.<br />
To change two small helixes to one large helix:<br />
1. Remove tray.<br />
2. Remove the two small helixes to be changed.<br />
3. Remove center divider by lifting up <strong>and</strong> removing from tray.<br />
4. Remove the two adjustable shelves.<br />
5. Remove the vend motor to the right by disconnecting the wires <strong>and</strong> lifting<br />
out of the slot.<br />
6. Move existing vend motor from the left slot to the center slot. Leave<br />
wiring connected.<br />
7. Install wide adjustable shelf.<br />
8. Install large helix.<br />
11
9. Reinstall tray.<br />
10. Set vend price.<br />
11. Test vend the selection.<br />
12<br />
NOTE:<br />
For some narrow snack selections it will be<br />
necessary to rotate helixes to different starting<br />
positions. The spline on the helix shaft allows for<br />
the helix to be indexed every 20 degrees of<br />
rotation.<br />
Changing one large helix to two small helixes:<br />
1. Remove tray.<br />
2. Remove the large helix to be changed by pulling forward on the hub of<br />
the helix.<br />
3. Remove the wide adjustable shelf.<br />
4. Move the vend motor from the center slot to the left slot <strong>and</strong> leave wires<br />
connected.<br />
5. Install new vend motor in the right h<strong>and</strong> slot <strong>and</strong> connect existing harness<br />
wires to the proper terminals.<br />
CAUTION:<br />
Make sure when connecting the wires to the new motor that the<br />
wires are connected to the proper terminals. Improper wiring<br />
could damage motor <strong>and</strong> the controller board.(See the Schematic<br />
at the back of this manual.)<br />
6. Install new narrow adjustable shelves.<br />
7. Install new small helixes by inserting into motor <strong>and</strong> pressing helix spline<br />
inward towards motor.<br />
NOTE:<br />
For some narrow c<strong>and</strong>y selections it will be<br />
necessary to index helixes to different starting<br />
positions. The spline on the helix shaft allows for<br />
the helix to be indexed every 20 degrees of<br />
rotation.<br />
8. Re-install tray.<br />
9. Set the vend price for the new selections.<br />
10. Test vend selections.
Adjustable Shelves<br />
Under each selection helix is an adjustable aluminum shelf.<br />
Proper positioning of each adjustable shelf is critical to assuring successful<br />
vends. The shelf should be adjusted out far enough to prevent the product<br />
from dropping off the front of the tray unintentionally, but back far enough to<br />
assure the product will drop free of the tray front when vended.<br />
Each shelf can be moved in <strong>and</strong> out to assure proper vending. The shelf is held<br />
to the back of the product tray by a screw <strong>and</strong> a rubber bushing. If the shelf is<br />
difficult to move, loosen the screw with a Phillips screwdriver, adjust, <strong>and</strong> retighten.<br />
Product Ejectors<br />
Product ejectors are used to provide additional push for products that may still<br />
hang on the front of the trays even after the adjustable shelves have been<br />
adjusted.<br />
Six (6) product ejectors are included in the service package. The product<br />
ejectors are half-moon shaped black plastic rhat snap fit onto the ends of the<br />
helixes. The curvature of the ejectors matches that of the helixes for easy<br />
assembly. The attachment of the ejector can be timed (by placing at different<br />
clock positions, such as 3:00), to push the product from the tray earlier than a<br />
normal rotation would.<br />
By adjusting the product shelves, helix timing <strong>and</strong> adding product ejectors,<br />
virtually any product can be vended if it fits in the helix spaces. If a product is<br />
“jammed” into the helix space, it is too big <strong>and</strong> will probably have vend<br />
failures.<br />
Figure 5. Product Ejectors<br />
13
LOADING LOADING INSTRUCTIONS<br />
INSTRUCTIONS<br />
The small diameter selection helixes will hold 11, 14, or 16 items between the<br />
loops or spaces, depending on which helix is installed. The large diameter<br />
selection helix will hold eight (8) items between the loops <strong>and</strong> spaces.<br />
When loading products into the helixes, start at the last space or loop <strong>and</strong><br />
place the products toward the front making sure to place a product into each<br />
“space” of the helix.<br />
Loading <strong>Top</strong> Tray<br />
With the lid in a full open position <strong>and</strong> the lid support engaged, the top tray<br />
may be loaded with the product. Fill the product in the selection helix starting<br />
at the back <strong>and</strong> filling forward, making sure to place an item in every loop or<br />
space of the helix.<br />
Loading Bottom Tray<br />
With the lid in a full open position <strong>and</strong> the lid support engaged, tilt the top tray<br />
up <strong>and</strong> lock it in position with the locking lever. See Figure 7. Pull the bottom<br />
tray forward in the vendor to reach the back of the selection helix loops (or<br />
spaces) for ease of filling items into the helixes.<br />
14<br />
A10122<br />
Figure 6. Locking Lever
To Close Vendor After Loading<br />
1. Push bottom tray back into the vend position in the cabinet.<br />
2. Raise up on the top tray <strong>and</strong> push down on the locking lever.<br />
See Figure 7.<br />
3. Lower top tray to the vend position, resting on the support pins.<br />
4. Push up on lid <strong>and</strong> release the lid support by pulling forward on the<br />
support. Carefully lower the lid to the closed position.<br />
5. Secure the lid <strong>and</strong> lock in place by using keyed lock in the coin return <strong>and</strong><br />
cash box assembly.<br />
A10123<br />
Figure 7. Locking Lever<br />
NOTE:<br />
Product must not be forced into the helix<br />
spaces. All product should fit freely. The width of<br />
the product must be greater than the diameter of<br />
the snack helix. If the product is smaller it may<br />
fall through the helix when the product is in the<br />
front vend position.<br />
15
CONTROLLER CONTROLLER FUNCTIONS<br />
FUNCTIONS<br />
There are two modes of operation.<br />
Sales Mode: The vendor accepts deposits, pays out change, <strong>and</strong> dispenses<br />
product to the customer. The digital display <strong>and</strong> the LEDs are used to<br />
communicate with the operator <strong>and</strong> the customer.<br />
Service Mode: Used by the operator to program <strong>and</strong> service the machine. The<br />
digital display is used to communicate with the operator.<br />
Sales Mode<br />
.00 displays. The decimal point position is determined by the coin mechanism<br />
attached.<br />
When no credit has been established <strong>and</strong> a key is pressed, the price for that<br />
selection displays for approximately three seconds.<br />
When credit is deposited the amount displays. Four digits are available. The<br />
credit value displays until either a vend or a coin return comm<strong>and</strong> occurs.<br />
Vend Cycle<br />
After a selection is made, the controller will determine if sufficient credit is<br />
available <strong>and</strong> the status of the selection. If the accumulated credit is greater<br />
than or equal to the price of the selection a vend attempt will be shown on the<br />
display. If credit is less than the selection price, the price will be flashed for 3<br />
seconds or until a new selection key is pressed.<br />
After a successful vend, the amount of change to be returned will be displayed<br />
until all coinage is paid back.<br />
If the motor is flagged as bad, the MAKE ALTERNATE SELECTION LED<br />
flashes for 3 seconds or until a new selection key is pressed.<br />
If a selection is made <strong>and</strong> a vend cannot take place, (assuming that sufficient<br />
credit <strong>and</strong> change are available) the MAKE ALTERNATE SELECTION LED<br />
flashes.<br />
16
LEDs<br />
If the payout tubes in the coin mechanism are below the low-level sensors, the<br />
USE CORRECT CHANGE LED will light continuously unless the No Cheat<br />
Mode is enabled. See No Cheat Mode in this Options section.<br />
If no motors have been assigned or if the motor has been recorded as faulty,<br />
the MAKE ALTERNATE SELECTION LED flashes for 3-seconds or until a<br />
new selection is made.<br />
Jammed Motor Condition<br />
The controller will not run motors that have been flagged as “jammed” or that<br />
have not been assigned. A motor jam is detected when power is applied to a<br />
motor <strong>and</strong> the motor fails to return to the home position within about nine (9)<br />
seconds.<br />
Motors flagged as jammed must be successfully run in the Service Mode to be<br />
reset. Follow the instructions outlined in Test Vend Selections section of this<br />
manual.<br />
Vend <strong>and</strong> Cash Counters<br />
Following a successful vend, the vend counter will be incremented by one (1)<br />
<strong>and</strong> the cash counter will be incremented by the price of the selection vended.<br />
The counter rollovers occur at 99,999,999 <strong>and</strong> $999,999.95 respectively.<br />
NOTE<br />
Test vends are not included in the counter<br />
totals.<br />
Resettable Vend <strong>and</strong> Cash Counters<br />
The resettable counters track Total Vends dispensed <strong>and</strong> Total Cash collected<br />
since last reset. The vend count <strong>and</strong> cash totals will be available by: individual<br />
selections, range (rows) <strong>and</strong> entire machine.<br />
Following a successful vend, the resettable vend counter will be incremented<br />
by one (1) <strong>and</strong> the resettable cash counter will be incremented by the price of<br />
the selection vended. The counter rollovers occur at 99,999,999 <strong>and</strong><br />
$999,999.95 respectively.<br />
NOTE<br />
Test vends are not included in the resettable<br />
counter totals.<br />
17
Service Mode<br />
Entering the Service Mode<br />
To change any settings or programs in the vendor, the controller must be<br />
placed in the Service Mode. To enter the Service Mode push the service mode<br />
button once. The controller is located on the inside of the cabinet top directly<br />
behind the front display area. The service mode button is located on the top<br />
left corner of the controller. See Figure 8.<br />
Exiting the Service Mode<br />
To exit the Service Mode, push the service mode button.<br />
The controller will automatically exit the Service Mode if no key is pressed for<br />
approximately twenty five (25) seconds.<br />
18<br />
Figure 8. Service Mode Button Location<br />
Service Modes<br />
Push the service mode button once to enter the base menu of the Service<br />
Mode. Cnt displays, to access the other modes (See <strong>Table</strong> 3) press [ ∧ ] <strong>and</strong><br />
the [ ∨ ] (up <strong>and</strong> down arrows) to scroll through the available modes. See<br />
Figure 9 for the keypad layout.<br />
Figure 9. Keypad Layout
MOTOR COUNT<br />
<strong>Table</strong> 3. Service Modes Functions<br />
DISPLAY<br />
SHOWS 1<br />
FUNCTION<br />
Cnt Motor Count<br />
Coin Coin Dispensing<br />
SALE Total Sales (Vend Count)<br />
CASH Cash Count<br />
rSLE Resettable Total Sales(Vend Count)<br />
rCSH Resettable Cash Count<br />
Clr Clear Resettable Values<br />
PrC Price Setting<br />
SLCt Single Motor Test<br />
tESt All Motor Test<br />
FC x Force Vend<br />
UL x Multi Vend<br />
CH x No Cheat<br />
ES x Note (Bill) Escrow (Not available)<br />
1. X is the current status of the function (y = enabled, n = disabled)<br />
The total number of functional motors will be displayed when Cnt is<br />
displayed <strong>and</strong> any key except the [ ∧ ] or [ ∨ ] is pressed. Any new motors<br />
located during the motor count will be added to the current configuration. The<br />
controller will test each motor in the configuration. To access the other service<br />
mode functions, press [ ∧ ] to scroll up or [ ∨ ] to scroll down.<br />
COIN DISPENSING<br />
With Coin showing in the display coins can be dispensed from the coin<br />
mechanism inventory tubes. See <strong>Table</strong> 4.<br />
<strong>Table</strong> 4. Coin Dispensing<br />
PRESS KEY TO DISPENSE<br />
[ 1 ] lowest value coin<br />
[ 2 ] next lowest value coin<br />
[ 3 ] next greatest value coin<br />
[ 4 ]<br />
greatest value coin<br />
(if four coin tubes)<br />
Coins can also be dispensed from the coin mechanism with optional payout<br />
switches.<br />
To access the other service modes, press [ ∧ ] to scroll up or [ ∨ ] to scroll<br />
down.<br />
19
TOTAL SALES (VEND COUNT)<br />
When SALE shows in the display, enter one of the following:<br />
• Single selection ([ A ] [ 1 ] for example).<br />
• Entire range (row), press the alpha key of that range (row) two<br />
times ([ B ] [ B ] for example).<br />
• Entire Machine, enter [ A ] [ D ].<br />
The values of the vend <strong>and</strong> cash counters will be displayed as eight digit<br />
numbers, with the first four digits of each counter displayed first for a period<br />
of 2 seconds <strong>and</strong> then the last four digits displaying for 2 seconds. The<br />
controller will then wait for another selection. See example.<br />
20<br />
EXAMPLE<br />
Choose selection to display<br />
0000 displays for 2 seconds 0<br />
8735 displays for 2 seconds 8,735<br />
Indicates total vend count of 8,735<br />
CASH COUNT<br />
When CASH shows in the display, enter one of the following:<br />
• Single selection ([ A ] [ 1 ] for example).<br />
• Entire range (row), press the alpha key of that range (row) two<br />
times ([ B ] [ B ] for example).<br />
• Entire Machine, enter [ A ] [ D ].<br />
The values of the vend <strong>and</strong> cash counters will be displayed as eight digit<br />
numbers, with the first four digits of each counter displayed first for a period<br />
of 2 seconds <strong>and</strong> then the last four digits displaying for 2 seconds. The<br />
controller will then wait for another selection. See example.<br />
EXAMPLE<br />
Choose selection to display<br />
0093 displays for 2 seconds 9,300.00<br />
65.20 displays for 2 seconds 65.20<br />
Indicates total cash sales of 9,365.20
RESETTABLE TOTAL SALES (VEND COUNT)<br />
When rSLE shows in the display, enter one of the following:<br />
• Single selection ([ A ] [ 1 ] for example).<br />
• Entire range (row), press the alpha key of that range (row) two<br />
times ([ B ] [ B ] for example).<br />
• Entire Machine, enter [ A ] [ D ].<br />
The values of the vend <strong>and</strong> cash counters will be displayed as eight digit<br />
numbers, with the first four digits of each counter displayed first for a period<br />
of 2 seconds <strong>and</strong> then the last four digits displaying for 2 seconds. The<br />
controller will then wait for another selection. See example.<br />
EXAMPLE<br />
Choose selection to display<br />
0000 displays for 2 seconds 0<br />
0217 displays for 2 seconds 217<br />
Indicates total vent count of 217<br />
RESETTABLE CASH COUNT<br />
When rCSH shows in the display, enter one of the following:<br />
• Single selection ([ A ] [ 1 ] for example).<br />
• Entire range (row), press the alpha key of that range (row) two<br />
times ([ A ] [ A ] for example).<br />
• Entire Machine, enter [ A ] [ D ].<br />
The values of the vend <strong>and</strong> cash counters will be displayed as eight digit<br />
numbers, with the first four digits of each counter displayed first for a period<br />
of 2 seconds <strong>and</strong> then the last four digits displaying for 2 seconds. The<br />
controller will then wait for another selection. See example.<br />
EXAMPLE<br />
Choose selection to display<br />
0001 displays for 2 seconds 100.00<br />
62.50 displays for 2 seconds 62.50<br />
Indicates total cash sales of 162.50<br />
21
CLEAR RESETTABLE VALUES<br />
When CLr shows in the display, Press any key except the [ ∧ ] or [ ∨ ] to<br />
clear the resettable values. To access the other service mode functions, press<br />
[ ∧ ] to scroll up or [ ∨ ] to scroll down.<br />
PRICE SETTING<br />
With PrC showing in the display, enter the desired selection. The current price<br />
will be displayed. Press [ ∧ ] to scroll the price up or [ ∨ ] to scroll the price<br />
down, then press [ A ] to save the price.<br />
Once the price has been saved the display will show PrC again <strong>and</strong> wait for<br />
another selection. To access the other Service Modes, press [ ∧ ] to scroll up<br />
or [ ∨ ] to scroll down. To exit the Service Mode press the Service Mode<br />
Button.<br />
Vend prices can be verified in the Sales Mode. With no credit established,<br />
enter a selection to display the corresponding price. If the selection has no<br />
motors assigned, the MAKE ALTERNATE SELECTION LED will light.<br />
SINGLE MOTOR TEST<br />
With SLCt showing in the display, test a single selection by pressing the<br />
corresponding selection keys (A1 for example). Pressing either the [ ∧ ] or<br />
[ ∨ ] keys jumps the controller up (or down) to the next service mode<br />
function.<br />
If during a test vend a selection motor fails, the display will flash FAil for two<br />
(2) seconds. Note any selection motors that fail <strong>and</strong> refer to the<br />
Troubleshooting section of the manual to diagnose vend failure(s).<br />
ALL MOTOR TEST<br />
With tESt showing in the display, press any key other than the [ ∧ ] or [ ∨ ]<br />
keys to test vend all selections starting with A1.<br />
If during a test vend a selection motor fails, the display will flash FAil for<br />
Two (2) seconds, then continue on with the test sequence. Note any selection<br />
motors that fail <strong>and</strong> refer to the Troubleshooting section of the manual to<br />
diagnose vend failure(s).<br />
22
FORCE VEND<br />
This mode forces the customer to select a product if the accumulated credit is<br />
greater than or equal to the lowest programmed vend price in the machine.<br />
If the customer’s initial selection fails during the vend cycle, then the<br />
controller will allow the credit to be returned via the manual escrow return<br />
request. The Coin Return Button must be pushed.<br />
When in the Force Vend Option, the display will show FC X. Press any key<br />
other than the [ ∧ ] or [ ∨ ] keys to toggle the status of the option (y =<br />
enabled, n = disabled). Pressing either the [ ∧ ] or [ ∨ ] keys saves the<br />
currently displayed status of the function <strong>and</strong> jumps the controller up (or<br />
down) to the next service mode function.<br />
MULTI-VEND<br />
This feature, when on, enables multiple purchases to be made as long as<br />
adequate credit is available. Instead of immediately returning the over-deposit<br />
after a vend, the credit displays. To receive change on an over-deposit the<br />
Coin Return button must be pushed.<br />
When in the Multi-Vend Option, the display will show UL X. Press any key<br />
other than the [ ∧ ] or [ ∨ ] keys to toggle the status of the option (y =<br />
enabled, n = disabled). Pressing either the [ ∧ ] or [ ∨ ] keys saves the<br />
currently displayed status of the function <strong>and</strong> jumps the controller up (or<br />
down) to the next service mode function.<br />
NO CHEAT<br />
When a vend is attempted <strong>and</strong> there is not enough change in the coin<br />
mechanism to return exact change, the controller is said to be in exact change<br />
status. Whenever this condition occurs, a customer is at risk of not receiving<br />
exact change after a vend is made. To signal the customer of a potential loss,<br />
the USE EXACT CHANGE LED will be on.<br />
When the controller is in exact change status <strong>and</strong> the No Cheat Option is<br />
enabled, <strong>and</strong> if a customer selects an item for which exact change can not be<br />
returned, the controller will return the accumulated credit <strong>and</strong> the selection<br />
will not be vended. The USE EXACT CHANGE LED will flash to signal the<br />
customer to use exact change for the desired selection.<br />
When in the No Cheat Option, the display will show CH X. Press any key<br />
other than the [ ∧ ] or [ ∨ ] keys to toggle the status of the option (y =<br />
enabled, n = disabled). Pressing either the [ ∧ ] or [ ∨ ] keys saves the<br />
currently displayed status of the function <strong>and</strong> jumps the controller up (or<br />
down) to the next service mode function.<br />
NOTE (BILL) ESCROW<br />
Note (Bill) Escrow is not available<br />
23
CARE CARE AND AND CLEANING CLEANING SCHEDULE SCHEDULE FOR<br />
FOR<br />
PREVENTIVE PREVENTIVE MAINTENANCE<br />
MAINTENANCE<br />
Once a Month<br />
CAUTION:<br />
24<br />
Always disconnect power source BEFORE cleaning or servicing.<br />
Clean Cabinet Interior:<br />
Wash with a mild detergent <strong>and</strong> water, rinse <strong>and</strong> dry thoroughly. Odors may<br />
be eliminated by including baking soda or ammonia in the cleaning solution.<br />
Plastic parts may be cleaned with a quality plastic cleaner.<br />
The vend mechanisms must be kept clean. Any build-up can cause the<br />
mechanisms to malfunction.<br />
Do not get the cleaning solution on electrical components.<br />
To insure proper vending keep delivery area free of dirt <strong>and</strong> sticky substances.<br />
Clean Cabinet Exterior:<br />
Wash with a mild detergent <strong>and</strong> water, rinse <strong>and</strong> dry thoroughly. Clean<br />
occasionally with a quality car wax. Plastic exterior parts may be cleaned with<br />
a quality plastic cleaner.<br />
BEFORE BEFORE CALLING CALLING FOR FOR SERVICE<br />
SERVICE<br />
Please check the following:<br />
• If the power is turned on at the fuse box, is the machine the only thing that<br />
doesn’t work?<br />
• Is the machine plugged directly into the outlet?<br />
WARNING:<br />
Extension cords can cause problems.<br />
DO NOT USE EXTENSION CORDS.<br />
• Is the circuit breaker at the fuse box reset?<br />
• Refer to the troubleshooting section.
PARTS PARTS PARTS ORDERING ORDERING PROCEDURE<br />
PROCEDURE<br />
When ordering parts, include the following:<br />
1. Shipping address.<br />
2. Address where the invoice should be sent.<br />
3. The number of parts required.<br />
4. The model number <strong>and</strong> serial number of the machines.<br />
5. Any special shipping instructions.<br />
6. Carrier desired: air or air special, truck, parcel post, or rail.<br />
7. Signature <strong>and</strong> date.<br />
8. If a purchase order number is used, be sure that it is legible <strong>and</strong> visible.<br />
9. Correct part number <strong>and</strong> description from the pertinent part <strong>and</strong>/or parts<br />
manual.<br />
NOTE<br />
When “Right” <strong>and</strong> “Left” are used with a part<br />
name, it is taken to mean that the person is<br />
facing the machine with the door closed.<br />
10. Mail your order to VendNet<br />
165 North 10th Street<br />
Waukee, Iowa 50263 - USA<br />
Phone: 515-274-3641<br />
<strong>Parts</strong> Fax: 515-987-4447<br />
Sales Fax: 515-274-0390<br />
E-Mail: VendNet@Ecity.net<br />
All orders are carefully packed <strong>and</strong> inspected prior to shipment. Damage<br />
incurred during shipment should be reported at once <strong>and</strong> a claim filed with the<br />
terminating carrier.<br />
If you do not have the right parts manual, contact the above address.<br />
VendNet will provide a copy for you, if available.<br />
Do not wait to order until you receive the parts manual; instead use the most<br />
accurate description you can. Include the model number <strong>and</strong> serial number of<br />
the machine, the name of the assembly in which the part is used, <strong>and</strong> if<br />
practical, a sample part. Furnish any information to enable our <strong>Parts</strong><br />
Department to pinpoint the exact part needed.<br />
25
TROUBLESHOOTING TROUBLESHOOTING GUIDE<br />
GUIDE<br />
26<br />
PROBLEM CAUSE CORRECTIVE ACTION<br />
Vendor<br />
rejects all<br />
coins<br />
Machine not plugged into<br />
outlet<br />
Circuit breaker tripped at<br />
supply<br />
Damaged or defective<br />
power cord<br />
Circuit breaker tripped in<br />
machine<br />
Two pin connector off of<br />
controller or loose<br />
Broken or disconnected<br />
white/orange or orange<br />
wires from transformer to<br />
controller<br />
Dirt or foreign material in<br />
coin acceptor<br />
Six pin connector on<br />
controller to coin<br />
mechanism unplugged or<br />
bad contact or miss<br />
aligned with pins on the<br />
controller<br />
Coin mechanism is not<br />
plugged into receptacle or<br />
loose connection<br />
Plug machine into wall outlet<br />
Reset circuit breaker<br />
Repair or replace power cord<br />
Repair short causing the breaker to trip<br />
<strong>and</strong> reset breaker<br />
Connect two pin connector<br />
Repair broken wire or reconnect wire<br />
Clean the coin acceptor<br />
Check six pin connector for continuity<br />
<strong>and</strong> bad connection to board<br />
Check coin mechanism plug or tighten<br />
connections<br />
Bad coin mechanism Replace coin mechanism<br />
Bad transformer Replace transformer<br />
Bad controller Check for burnt components or<br />
cracked controller
PROBLEM CAUSE CORRECTIVE ACTION<br />
Vendor<br />
accepts<br />
coins, will not<br />
vend<br />
Vends<br />
properly but<br />
does not<br />
return proper<br />
change<br />
amount<br />
Vend motors<br />
stopped<br />
during cycle<br />
Connection to keypad<br />
loose or broken<br />
Harness from the controller<br />
to trays disconnected,<br />
loose connection or broken<br />
wire<br />
Shelf harness<br />
disconnected, loose or<br />
broken<br />
Connect harness to the controller,<br />
check for loose or broken wire or<br />
connector<br />
Connect harness to controller. Check<br />
for loose or broken wire<br />
Check connections or wire breaks in<br />
harness<br />
Jammed vend motor Check on product being too large or<br />
helix hub improperly aligned<br />
Wire connections to motor<br />
loose or disconnected<br />
Check vend motor connections <strong>and</strong> for<br />
loose or broken wire(s)<br />
Selection price set wrong Check selection for proper pricing<br />
Bad controller Replace controller<br />
Selection price not set<br />
properly<br />
Coin mechanism payout<br />
tubes jammed<br />
Check selection price <strong>and</strong> price label<br />
Check for bent coins in the payout<br />
tubes of the coin mechanism<br />
Coin mechanism bad Replace coin mechanism<br />
Bad controller Replace controller<br />
Bad keypad Replace keypad<br />
Product jammed in helix Product too thick, need different helix<br />
or product<br />
Bad vend motor Test vend motor in Service Mode (See<br />
“Single Motor Test” section)<br />
CAUTION: Do not attempt to turn motors by h<strong>and</strong>. Damage to the<br />
motor may result.<br />
Vend motor switch or Check the switch for continuity <strong>and</strong><br />
wiring loose or broken harnessing for loose or broken wires<br />
27
28<br />
PROBLEM CAUSE CORRECTIVE ACTION<br />
Product does<br />
not vend<br />
properly,<br />
hangs on<br />
front of shelf<br />
Product<br />
hangs up<br />
under helix at<br />
tray front<br />
Helix came<br />
out of vend<br />
motor during<br />
vend cycle<br />
Product<br />
delivery<br />
drawer<br />
binding<br />
Product too large for helix Change product or helix<br />
Product catches on helix<br />
front<br />
Product catches on helix<br />
front<br />
Product catches on helix<br />
front<br />
Adjust timing of helix to properly get<br />
product off of shelf<br />
Install product pusher to helix end<br />
Adjust sliding shelf liner to release<br />
product properly<br />
Product loaded improperly See Loading Instructions<br />
End cap missing from hub<br />
shaft behind motor<br />
Foreign material in drawer<br />
tracks<br />
Replace end cap<br />
Check tracks <strong>and</strong> clean<br />
Linkage broke or loose Check linkage under bottom tray for<br />
breakage <strong>and</strong> missing or loose<br />
fasteners<br />
Drawer return spring not<br />
connected or broke<br />
Anti-theft binding in track<br />
or not in track properly<br />
Check spring connection <strong>and</strong> replace if<br />
broken<br />
Clean track if dirty, check for proper<br />
positioning of alignment pins in side<br />
tracks
SCHEMATIC<br />
SCHEMATIC<br />
30