ACL Reconstruction with TightRope® DB - Arthrex
ACL Reconstruction with TightRope® DB - Arthrex
ACL Reconstruction with TightRope® DB - Arthrex

You also want an ePaper? Increase the reach of your titles
YUMPU automatically turns print PDFs into web optimized ePapers that Google loves.
<strong>ACL</strong> <strong>Reconstruction</strong> <strong>with</strong> TightRope ® <strong>DB</strong><br />
Surgical Technique<br />
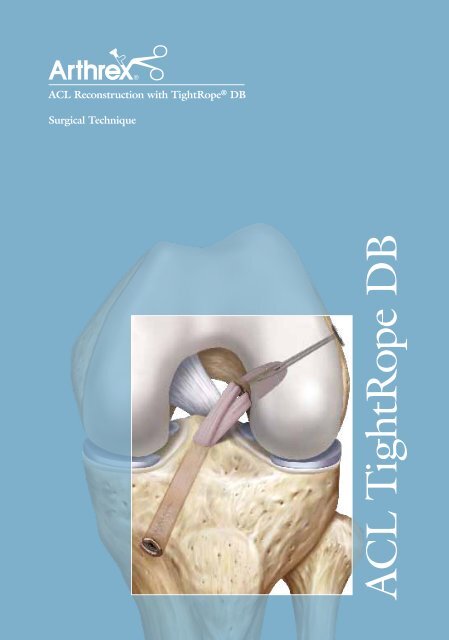
<strong>ACL</strong> TightRope <strong>DB</strong>
The TightRope <strong>DB</strong> offers the simplicity and strength of the <strong>ACL</strong> TightRope, <strong>with</strong> the addition of aperture graft compression<br />
and greater coverage of <strong>ACL</strong> footprint. The <strong>ACL</strong> TightRope <strong>DB</strong> comes <strong>with</strong> a disposable driver to facilitate graft<br />
advancement and orientation.<br />
Titanium Button:<br />
• Allows consistent cortical fixation<br />
• Passes through small guide pin hole, preserving bone<br />
and decreasing surgical steps<br />
Adjustable <strong>ACL</strong> TightRope technology:<br />
• Eliminates need for multiple sizes<br />
• Facilitates complete filling of femoral socket <strong>with</strong> graft<br />
• Locks securely and resists slippage due to four-point knotless fixation<br />
PEEK Spacer/Wedge:<br />
• Provides aperture compression of the graft<br />
• Is positioned concentrically as to not interfere <strong>with</strong> graft tunnel contact<br />
• Comes in two sizes for multiple graft widths
GRAFT PREPARATION and IMPLANT ATTACHMENT<br />
Select the <strong>ACL</strong> TightRope wedge according to graft size. Grafts 7-8 mm should use a 7 mm wedge.<br />
Grafts 9-11 mm should use a 9 mm wedge.<br />
1 2 3<br />
Pass a #2 FiberLoop ® through<br />
one or both of the open holes in<br />
the TightRope wedge.The distal<br />
hole should be used primarily.<br />
Place the midpoint of the<br />
graft over the wedge and<br />
place each end of the graft<br />
through the FiberLoop on<br />
either side of the graft.<br />
Prepare the tibial ends of the graft <strong>with</strong> #2 FiberLoop and/or #2 TigerLoop.<br />
(Note: If femoral side of the graft is to be passed through the medial portal, the tibial ends of the graft must be tapered for<br />
retrograde passing into the tibial tunnel. Size the tibial end of the graft.)<br />
IMPORTANT: Remeasure the femoral end of the graft using the Graft Sizing Block for overall diameter.<br />
Mark the <strong>ACL</strong> TightRope at a distance equal to<br />
the intraosseous length from the button.<br />
If using the driver, pass the white shortening strands through the cannulation <strong>with</strong> the<br />
Suture Passing Wire provided in the kit. Assemble the wedge to the driver tip so the collar is<br />
in line <strong>with</strong> the width of the wedge.<br />
Place the sutures from the ends of the graft into the cleats on the handle to hold graft in position.<br />
Warning: Do not add additional suture to the button, as this may impede passage through the femur.<br />
Cut the FiberLoop suture near the<br />
needle and discard needle. Cinch the<br />
FiberLoop down onto the graft and tie<br />
the cut ends of the FiberLoop together.<br />
Cut the tails off the knot. Mark the<br />
graft at 25 mm from the femoral end.
BONE TUNNEL PREPARATION<br />
Transtibial Medial Portal FlipCutter<br />
Use the RetroButton ® Pin II, Low Profile Reamers, and <strong>ACL</strong> guides for transtibial and transportal preparation.<br />
A FlipCutter ® may also be used for femoral socket creation. Note the intraosseous length of the femur.<br />
Drill the femoral socket at least 25 mm deep and equal to the final diameter of the graft/wedge construct.<br />
NOTE: Alternatively, the socket may be drilled to a diameter equal to the first 1/2 of the wedge <strong>with</strong> the graft loaded.<br />
The aperture is notched, as shown in the following step on the next page.
GRAFT PASSING AND FIXATION<br />
1 2<br />
A RetroScrew ® Tunnel Notcher may be used<br />
to create large notches, the length of the tunnel<br />
for the graft bundles in the anteromedial and<br />
posterolateral bundle location.<br />
If passing the tibial end of the graft retrograde<br />
through the tunnel, drill the tibial tunnel to<br />
a diameter 1 mm greater than the measured<br />
diameter of the graft. A graft passing suture must<br />
also be placed through the tibial tunnel and out<br />
the medial portal for later passing.<br />
If passing the graft transtibially, drill the tibial<br />
tunnel 1 mm greater than the diameter of the<br />
femoral graft/wedge construct.<br />
Pull the button through the femur. When the mark on the implant enters the tunnel, the button has exited the cortex. Push<br />
the graft and wedge into the joint and socket in the proper orientation, while pulling suture slack distally out the handle. Pull<br />
on the shortening strands one at a time to facilitate advancement. Once the mark on the graft (red arrow) is at the femoral<br />
aperture and the wedge is completely inside the tunnel, the graft is seated.<br />
NOTE: When the graft/wedge construct reaches the desired position in the femoral socket and graft stability is verified by<br />
pulling distally on the graft, no additional force on the shortening strands is required. Excessive force may break the shortening<br />
strands.
3 4<br />
Remove driver and pull on each limb of the shortening strands individually for final seating.<br />
If the medial portal is being used, make a loop in the tibial passing suture and place the graft sutures into the loop. Pull<br />
distally on the passing suture and retrieve the suture tails out the distal tibia. Pull on graft sutures to seat the tibial side of<br />
the graft. Graft tails can be placed in the anatomic AM and PL positions to correspond <strong>with</strong> femoral limbs and fixed <strong>with</strong> a<br />
GraftBolt (a) or interference screw.<br />
ALL-INSIDE RECONSTRUCTION <strong>with</strong> <strong>ACL</strong> TIGHTROPE <strong>DB</strong><br />
Combining the <strong>ACL</strong> TightRope <strong>DB</strong> <strong>with</strong> the all-inside <strong>ACL</strong> technique provides the ultimate in anatomic, minimally invasive<br />
<strong>ACL</strong> reconstruction.<br />
a
Ordering Information<br />
Implants:<br />
<strong>ACL</strong> TightRope <strong>DB</strong>, 7 mm wedge AR-1588T<strong>DB</strong>-7<br />
<strong>ACL</strong> TightRope <strong>DB</strong>, 9 mm wedge AR-1588T<strong>DB</strong>-9<br />
GraftBolt w/Screw, 7 mm AR-5100-07<br />
GraftBolt w/Screw, 8 mm AR-5100-08<br />
GraftBolt w/Screw, 9 mm AR-5100-09<br />
GraftBolt w/Screw, 10 mm AR-5100-10<br />
Instruments:<br />
For FlipCutter Technique:<br />
RetroConstruction Drill Guide Set AR-1510S<br />
FlipCutter, 6 mm AR-1204F-60<br />
FlipCutter, 6.5 mm AR-1204F-65<br />
FlipCutter, 7 mm AR-1204F-70<br />
FlipCutter, 7.5 mm AR-1204F-75<br />
FlipCutter, 8 mm AR-1204F-80<br />
FlipCutter, 8.5 mm AR-1204F-85<br />
FlipCutter, 9 mm AR-1204F-90<br />
FlipCutter, 9.5 mm AR-1204F-95<br />
FlipCutter, 10 mm AR-1204F-100<br />
FlipCutter, 10.5 mm AR-1204F-105<br />
FlipCutter, 11 mm AR-1204F-110<br />
FlipCutter, 11.5 mm AR-1204F-115<br />
FlipCutter, 12 mm AR-1204F-120<br />
FlipCutter, 13 mm AR-1204F-130<br />
For Medial Portal Technique:<br />
Transportal <strong>ACL</strong> Guide (TPG), 4 mm AR-1800-04<br />
Transportal <strong>ACL</strong> Guide (TPG), 5 mm AR-1800-05<br />
Transportal <strong>ACL</strong> Guide (TPG), 6 mm AR-1800-06<br />
Transportal <strong>ACL</strong> Guide (TPG), 7 mm AR-1800-07<br />
Transportal <strong>ACL</strong> Guide (TPG), 8 mm AR-1800-08<br />
Low Profile Reamer, 5 mm AR-1405LP<br />
Low Profile Reamer, 6 mm AR-1406LP<br />
Low Profile Reamer, 7 mm AR-1407LP<br />
Low Profile Reamer, 7.5 mm AR-1407LP-50<br />
Low Profile Reamer, 8 mm AR-1408LP<br />
Low Profile Reamer, 8.5 mm AR-1408LP-50<br />
Low Profile Reamer, 9 mm AR-1409LP<br />
Low Profile Reamer, 9.5 mm AR-1409LP-50<br />
Low Profile Reamer, 10 mm AR-1410LP<br />
Low Profile Reamer, 10.5 mm AR-1410LP-50<br />
Low Profile Reamer, 11 mm AR-1411LP<br />
Drill Pin, <strong>ACL</strong> TightRope, open eyelet, 4 mm AR-1595T<br />
Accessories:<br />
Suture Retriever AR-12540<br />
FiberWire Cutter AR-12250<br />
Graft Sizing Block AR-1886<br />
#2 FiberLoop AR-7234<br />
#2 TigerLoop AR-7234T
This description of technique is provided as an educational tool and clinical aid to assist properly licensed medical professionals<br />
in the usage of specific <strong>Arthrex</strong> products. As part of this professional usage, the medical professional must use<br />
their professional judgment in making any final determinations in product usage and technique.<br />
In doing so, the medical professional should rely on their own training and experience and should conduct<br />
a thorough review of pertinent medical literature and the product’s Directions For Use.<br />
U.S. PATENT NOS. 5,320,626; D378,780; 6,716,234; 7,029,490 and PATENTS PENDING<br />
©2011, <strong>Arthrex</strong> Inc. All rights reserved. LT0178B