Mini TightRope® For Hallux Valgus Correction and Lisfranc ...
Mini TightRope® For Hallux Valgus Correction and Lisfranc ...
Mini TightRope® For Hallux Valgus Correction and Lisfranc ...

You also want an ePaper? Increase the reach of your titles
YUMPU automatically turns print PDFs into web optimized ePapers that Google loves.
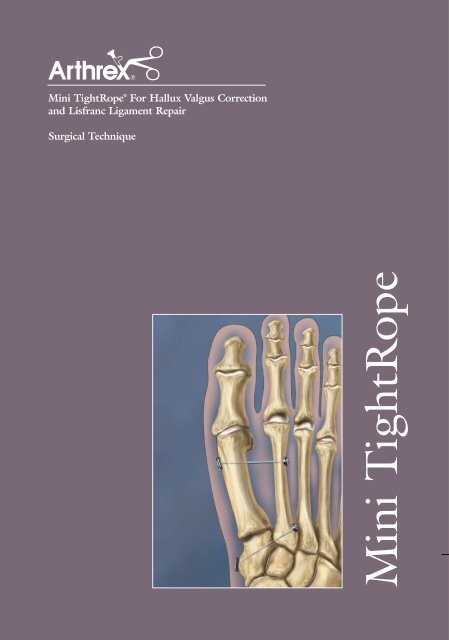
<strong>Mini</strong> TightRope ® <strong>For</strong> <strong>Hallux</strong> <strong>Valgus</strong> <strong>Correction</strong><br />
<strong>and</strong> <strong>Lisfranc</strong> Ligament Repair<br />
Surgical Technique<br />
<strong>Mini</strong> TightRope
a<br />
1<br />
To realign the fibular sesamoid, detach the adductor tendon<br />
from the base of the proximal phalanx <strong>and</strong> fibular sesamoid.<br />
Release the deep intermetatarsal ligament. If needed, free<br />
any sesamoid adhesions to the intermetatarsal ligament.<br />
Manually test the angular deformity following the release of<br />
the adductor tendon, release of the lateral capsule of the first<br />
metatarsophalangeal joint <strong>and</strong> release of the intermetatarsal<br />
ligament between the 1st <strong>and</strong> 2nd metatarsals.<br />
<strong>For</strong> the distal approach, the incision is made between 1st<br />
<strong>and</strong> 2nd metatarsals <strong>and</strong> inner space release is performed (a).<br />
3 4<br />
Remove the medial eminence preserving the sesamoid groove<br />
on the plantar aspect of the 1st metatarsal, avoiding excessive<br />
resection of the medial eminence.<br />
Fig. 4 - Using the C-Arm for guidance, insert the 1.2 mm<br />
Guidewire across the 1st metatarsal <strong>and</strong> through the 2nd<br />
metatarsal. Start the Guidewire pilot hole just proximal to the<br />
excised medial eminence. An adjustment in plantar-to-dorsal<br />
direction may assist in the accurate placement of pin allowing<br />
the pin to engage the 2nd metatarsal in the midpoint between<br />
its dorsal <strong>and</strong> plantar borders. The entry point on the 2nd<br />
<strong>Mini</strong> TightRope<br />
<strong>For</strong> <strong>Hallux</strong> <strong>Valgus</strong> <strong>Correction</strong> <strong>and</strong> <strong>Lisfranc</strong> Ligament Repair<br />
2<br />
Make a longitudinal incision over the medial aspect of the<br />
1st metatarsophalangeal joint, exposing the entire medial<br />
eminence.<br />
b<br />
The optional <strong>Mini</strong> TightRope Drill<br />
Guide (AR-8911G) can be used to<br />
facilitate accurate Guidewire <strong>and</strong><br />
drill placement.<br />
metatarsal should be about 2-5 mm proximal to the neck of the<br />
2nd metatarsal head (b). Note: Place Guidewire while visualizing<br />
1st - 2nd metatarsal web space. A Freer elevator can direct<br />
Guidewire penetration at 2nd metatarsal midpoint.<br />
Alternatively, the 1.2 mm Guidewire can be placed from the 2nd<br />
metatarsal across <strong>and</strong> through the 1st metatarsal. This enhances<br />
the ease of accurately bisecting the 2nd metatarsal with reference<br />
to the dorsal <strong>and</strong> plantar aspects of the metatarsal. Using the<br />
2.7 mm Cannulated Drill Bit, drill the tunnel for the <strong>Mini</strong><br />
TightRope over the Guidewire in a medial to lateral direction.<br />
Confirm proper placement with the C-Arm.
c<br />
d<br />
5 6<br />
Pass the 1.6 mm guide pin with pull-through suture (attached<br />
to the <strong>Mini</strong> TightRope) from lateral (2nd metatarsal) to medial<br />
(1st metatarsal) <strong>and</strong> stop before the button enters the drill hole.<br />
Inset (c) shows a small incision for passage of needle <strong>and</strong><br />
TightRope construct.<br />
Inset (d) shows the proper orientation of the needle <strong>and</strong><br />
drill hole.<br />
7 8<br />
The Oblong Button is flipped upon exiting the medial side of<br />
the first metatarsal cortex. Apply lateral tension on the blue<br />
suture. This will help seat the Oblong Button against the bone.<br />
e<br />
Surgical Technique<br />
The pull-through suture can now be advanced while the guide<br />
pin is pulled medially. At the same time, apply lateral tension<br />
on the blue suture just behind the oblong button. This will<br />
help the oblong button to lie sideways, <strong>and</strong> pass easily through<br />
both bone tunnels.<br />
Suture Passing Option (e):<br />
The guide pin can be removed, leaving just the white pull-<br />
through suture. A straight Micro SutureLasso can then be<br />
used to pass the suture through both bone tunnels.<br />
The white pull-through suture is cut <strong>and</strong> removed. The surgeon<br />
should manually push the 1st metatarsal <strong>and</strong> the 2nd metatarsal<br />
together to correct the intermetatarsal angular deformity. Once<br />
fluoroscopy confirms proper positioning, the trailing Round<br />
Button is tightened down by applying gradual tension on the<br />
remaining two str<strong>and</strong>s of blue suture. Tie 2-3 half hitches <strong>and</strong><br />
cut the suture. Any previously placed sutures incorporating<br />
the lateral capsule of the 1st metatarsal, the adductor tendon<br />
<strong>and</strong> the medial capsule of the 2nd metatarsal are now tied thus<br />
completing the repair.
9<br />
Alternative technique using proximal placement<br />
Proximal Placement Option:<br />
Place the device using the Guidewire <strong>and</strong> drill steps starting<br />
between 2.5 cm <strong>and</strong> 3.5 cm distal to metatarsal-cuneiform<br />
joint on first metatarsal just below midline. Angle the direction<br />
of the Guidewire <strong>and</strong> drill into the superior 2nd metatarsal<br />
metaphyseal bone. Observe under the C-arm. Plantarflexion<br />
of the 3rd metatarsal will allow passage of the 1.6 mm guide<br />
pin. The fixation is now completed by the tightening of the<br />
FiberWire ® <strong>and</strong> button construct.<br />
The <strong>Lisfranc</strong> joint(s) are<br />
approached through a<br />
dorsal longitudinal<br />
incision. Anatomic<br />
reduction is achieved<br />
after thorough debridement<br />
of the interposing<br />
soft tissue or debris.<br />
Reduction of the 2nd<br />
metatarsal can be maintained<br />
by use of the<br />
<strong>Mini</strong> TightRope. The<br />
Guidewire is directed<br />
from the medial aspect<br />
of the first or medial<br />
cuneiform obliquely<br />
toward the base of the<br />
2nd metatarsal. The<br />
Round Button is placed<br />
at the base of the 2nd<br />
metatarsal, while the<br />
Oblong Button is seated<br />
over the medial aspect of the first cuneiform. Using the<br />
same line of approach, the Round Button can be placed<br />
against the first cuneiform with the Oblong Button<br />
seated over the lateral aspect of the base of the 2nd<br />
metatarsal (distal to the articulation between the 2nd<br />
<strong>and</strong> 3rd metatarsals).<br />
Alternate reduction orientations include:<br />
• 1st metatarsal to 2nd metatarsal<br />
• Cuneiforms (1st, 2nd <strong>and</strong> 3rd)<br />
• 2nd metatarsal to 2nd cuneiform<br />
<strong>Mini</strong> TightRope Repair Kit, sterile, single use AR-8911DS<br />
Kit Contents:<br />
1 - Cannulated Drill Bit<br />
1 - Round Button, 5.5 mm<br />
1 - Oblong Button, 2.6 mm<br />
1 - TightRope Guide Pin, 1.6 mm<br />
1 - Guidewire<br />
Ordering Information<br />
Accessories:<br />
1 - Micro SutureLasso, straight AR-8703<br />
1 - Drill Guide, reusable AR-8911G
Introduction<br />
The treatment of hallux valgus deformity includes<br />
the assessment of the hallux valgus angle, the<br />
intermetatarsal angle <strong>and</strong> the contribution of an<br />
interphalageus deformity. Additionally, there must<br />
be an assessment of the presence or absence of arthritic<br />
involvement of both the first metatarsocuneiform<br />
joint <strong>and</strong> the first metatarsophalangeal joint. Other<br />
considerations are the orientation of the distal<br />
metatarsal articular angle <strong>and</strong> the orientation <strong>and</strong><br />
stability of the first metatarsocuneiform joint.<br />
Various methods have been described to correct<br />
the intermetatarsal angle. Soft tissue correction can<br />
be achieved by suturing the lateral capsule of the<br />
first metatarsal to the medial capsule of the second<br />
metatarsal, incorporating the intervening, previously<br />
released adductor tendon. A loss of reduction can<br />
occur due to the forces that oppose the suture repair<br />
as well as the possibility that poor tissue quality can<br />
contribute to a loss of reduction.<br />
Pre-Op<br />
(weight-bearing)<br />
Post-Op Instructions<br />
In the presence of more rigid deformities the<br />
intermetatarsal angle is reduced by using a distal<br />
or proximal osteotomy of the first metatarsal.<br />
Such osteotomies can be tec hnically challenging.<br />
A rather daunting list of consequences <strong>and</strong><br />
potential complications include delayed union,<br />
malunion, nonunion, excessive shortening of<br />
the first metatarsal, avascular necrosis, hardware<br />
failure <strong>and</strong> prolonged protected ambulation.<br />
The <strong>Mini</strong> TightRope is useful as an alternative<br />
<strong>and</strong> adjunct method for reduction of the intermetatarsal<br />
angle. A FiberWire® <strong>and</strong> button<br />
construct is placed across (distally or proximally)<br />
the first <strong>and</strong> second metatarsals. As the FiberWire<br />
is tightened, the intermetatarsal angle is reduced<br />
to a normal angle (less than 9-11°) The suture<br />
tied over the lateral button maintains a secure<br />
reduction of the intermetatarsal angle. Used<br />
alone or in conjunction with the distal soft<br />
tissue intermetatarsal repair, this technique<br />
affords a greater degree of strength <strong>and</strong> security<br />
than can be achieved with the soft tissue repair<br />
alone. Additionally, the <strong>Mini</strong> TightRope System<br />
provides a more technically straightforward<br />
method of reducing <strong>and</strong> maintaining the<br />
intermetatarsal angle than with conventional<br />
osteotomies while avoiding the complications<br />
associated with osteotomies.<br />
One Month Post-Op<br />
(nonweight-bearing)<br />
Following bunion correction using the <strong>Mini</strong> TightRope, the patient is placed in a soft dressing <strong>and</strong> is allowed to bear weight<br />
with a walking boot or a postoperative stiff soled shoe. Change the dressing weekly with suture removal at week two or three,<br />
pending the status of the incisions. Most patients are allowed to wear a comfortable shoe with a wide toebox about<br />
4-5 weeks post-op. Postoperative instructions may vary for patients undergoing other procedures (i.e. hammertoe repair).<br />
In contrast, patients undergoing distal or proximal osteotomies generally require protected weight-bearing with<br />
a post-op shoe or boot for a period of 8-12 weeks, depending on the rate of bony healing following the osteotomy.<br />
Therefore, the TightRope can dramatically reduce the post-op morbidity with respect to footwear for patients.
This description of technique is provided as an educational tool <strong>and</strong> clinical aid to assist properly licensed<br />
medical professionals in the usage of specific Arthrex products. As part of this professional usage, the medical<br />
professional must use their professional judgment in making any final determinations in product usage <strong>and</strong><br />
technique. In doing so, the medical professional should rely on their own training <strong>and</strong> experience <strong>and</strong> should<br />
conduct a thorough review of pertinent medical literature <strong>and</strong> the product’s directions for use.<br />
©Copyright Arthrex Inc., 2008. All rights reserved.<br />
U.S. PATENT NO. 6,716,234; 6,991,636 <strong>and</strong> PATENT PENDING . LT0438C