


Create successful ePaper yourself
Turn your PDF publications into a flip-book with our unique Google optimized e-Paper software.
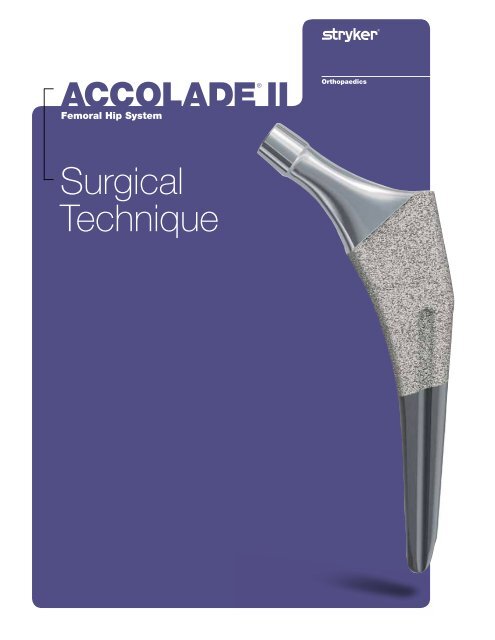
ACCOLADE®<br />
Femoral Hip System<br />
<strong>Surgical</strong><br />
Technique<br />
<strong>II</strong><br />
Orthopaedics
InDICAtIOnS<br />
The indications for use of the total hip replacement prostheses include:<br />
• Noninflammatory degenerative joint disease, including osteoarthritis and avascular<br />
necrosis;<br />
• Rheumatoid arthritis;<br />
• Correction of functional deformity;<br />
• Revision procedures where other treatments or devices have failed; and,<br />
• Nonunions, femoral neck fractures, and trochanteric fractures of the proximal femur<br />
with head involvement that are unmanageable using other techniques.<br />
Additional indication specific to use of ACCOLADE <strong>II</strong> Femoral Stems with compatible<br />
Howmedica Osteonics Constrained Liners:<br />
• When the stem is to be used with compatible Howmedica Osteonics Constrained<br />
Liners, the device is intended for use in primary or revision patients at high risk of<br />
hip dislocation due to a history of prior dislocation, bone loss, soft tissue laxity,<br />
neuromuscular disease, or intra-operative instability.<br />
ACCOLADE <strong>II</strong> Femoral Stems are intended for cementless use only and are intended for<br />
total and hemiarthroplasty procedures.<br />
COntrAInDICAtIOnS<br />
• Active infection or suspected latent infection in or about the hip joint;<br />
• Bone stock that is inadequate for support or fixation of the prosthesis;<br />
• Skeletal immaturity;<br />
• Any mental or neuromuscular disorder that would create an unacceptable risk of<br />
prosthesis instability, prosthesis fixation failure, or complications in post-operative<br />
care; and<br />
• Obesity. An overweight or obese patient can produce loads on the device that can<br />
lead to failure of the fixation of the device or to failure of the device itself.<br />
WArnIngS AnD PrECAutIOnS<br />
See package insert for warnings, precautions, adverse effects and other essential<br />
product information.<br />
Before using ACCOLADE <strong>II</strong> instrumentation, verify:<br />
• Instruments have been properly disassembled prior to cleaning and sterilization;<br />
• Instruments have been properly assembled post-sterilization;<br />
• Instruments have maintained design integrity; and,<br />
• Proper size configurations are available.<br />
tAbLE OF COntEntS<br />
Pre-operative Planning .................................................2<br />
Femoral Neck Resection ................................................3<br />
Preparing the Femoral Canal .......................................... 4-5<br />
Broaching ......................................................... 6-7<br />
Trial Reduction ..................................................... 8-9<br />
Implanting the Stem ............................................... 10-11<br />
Final Reduction ......................................................12<br />
Implant Information ...................................................13<br />
Instrumentation ................................................... 14-17<br />
For cleaning and sterilization instructions of surgical instruments, refer to the instrument package insert.<br />
ACCOLADE <strong>II</strong><br />
Femoral Hip System<br />
The ACCOLADE <strong>II</strong> Femoral Hip System is a femoral stem that is<br />
intended for cementless, press-fit application. The proximal region of<br />
the stem is coated with PureFix HA over a commercially pure titanium<br />
plasma spray substrate. The Morphometric Wedge — an evolution of the<br />
tapered wedge — is characterized by its variable, size-specific medial curvature.<br />
The ACCOLADE <strong>II</strong> Femoral Hip System is suitable for various surgical approaches,<br />
including direct anterior.<br />
The total system includes:<br />
• 12 body sizes ranging from size 0 to size 11<br />
• Two anatomic offset options for each size<br />
The stem is designed for use with Stryker V40 femoral heads and their compatible<br />
acetabular components.<br />
The ACCOLADE <strong>II</strong> Hip System includes a broach-only instrumentation platform<br />
that accommodates all surgical approaches and has been streamlined for surgical<br />
efficiency.<br />
<strong>Surgical</strong> technique<br />
Stryker Orthopaedics wishes to thank the following orthopaedic surgeons for their<br />
expertise in the development of the ACCOLADE <strong>II</strong> System <strong>Surgical</strong> Technique:<br />
Dr. Richard Rothman<br />
Dr. Dermot Collopy<br />
Dr. David Jacofsky<br />
Dr. Frank Kolisek<br />
Dr. Art Malkani<br />
This publication sets forth detailed recommended procedures for using Stryker Orthopaedics devices and instruments. It offers guidance that<br />
you should heed, but, as with any such technical guide, each surgeon must consider the particular needs of each patient and make appropriate<br />
adjustments when and as required.
StEP 1<br />
PrE-OPErAtIvE PLAnnIng<br />
Figure 1 Figure 2 Figure 3<br />
Pre-operative planning aids in<br />
the determination of probable<br />
implant style and size. The preoperative<br />
planning process should<br />
take qualitative and quantitative<br />
factors (including patient bone<br />
quality, density, and morphology)<br />
into consideration in order to<br />
evaluate and select the appropriate<br />
instrument/implant system for the<br />
patient.<br />
Place an acetabulum template over<br />
the area on the x-ray (Figure 1).<br />
Be sure that the cup is well centered<br />
within the acetabulum and the size<br />
fills between the tear drop and the<br />
superior rim. After templating the<br />
acetabulum for size, mark the center<br />
of rotation (represented by the blue<br />
dot).<br />
tip<br />
richard rothman, m.D.<br />
templating is an important aspect of<br />
pre-operative planning, but it should<br />
only serve as a guide. Final decision<br />
making concerning fit, size, and<br />
soft-tissue tensioning occurs in the<br />
operating room.<br />
The ACCOLADE <strong>II</strong> has two offset<br />
options: the standard offset 132°<br />
neck angle and the high offset 127°<br />
neck angle. Choose the ACCOLADE<br />
<strong>II</strong> template for which the stem size<br />
achieves medio-lateral cortical<br />
engagement at the proximal twothirds<br />
of the stem and recreate the<br />
desired leg length and offset (Figure<br />
2). For both the 132° and 127°<br />
offset options, the template has<br />
markings that indicate the center of<br />
the femoral head for a range of head<br />
offset options.<br />
The predicted change in leg length<br />
and offset is determined by the<br />
relative positioning of the center of<br />
rotation markings on the femoral<br />
and acetabular components.<br />
For example, if a given femoral<br />
component center of rotation<br />
marking is superior to the center of<br />
rotation marking of the acetabular<br />
component, leg lengthening is<br />
predicted. The desired change in<br />
leg length is determined by the<br />
radiographic leg length inequality<br />
that was previously determined. If<br />
8mm of leg lengthening is required<br />
in order to equalize the leg lengths,<br />
the center of rotation marking of the<br />
femoral component should be<br />
positioned 8mm superior to the<br />
center of rotation marking of the<br />
acetabular component. The stem<br />
size and head offset that most<br />
closely meets this goal is chosen.<br />
The predicted change in offset is<br />
also considered by comparing the<br />
relative medial/ lateral position of<br />
the center of rotation markings<br />
of the femoral and acetabular<br />
components. The templates<br />
should be used to estimate the<br />
final components that most closely<br />
restore the normal offset of the<br />
patient’s hip.<br />
Once the final estimated stem size<br />
and position is determined, the neck<br />
resection level should be noted<br />
(Figure 3). This will be used as a<br />
reference during intra-operative neck<br />
resection.<br />
tip<br />
David Jacofsky, m.D.<br />
the templated stem size and neck<br />
resection level may have to be<br />
adjusted if leg length cannot be<br />
managed solely by changing the<br />
head offset or neck angle.<br />
templates<br />
ACCOLADE <strong>II</strong><br />
Acetate templates<br />
Lit# LtEm105<br />
Acetate templates include 20% magnification.<br />
StEP 2<br />
FEmOrAL nECk rESECtIOn<br />
A proper neck resection level directly affects the final placement and fit of<br />
the femoral stem. By using the anatomic landmarks referenced during<br />
pre-operative x-ray templating, the pre-planned neck resection is made<br />
with an oscillating saw and with the aid of the Neck Resection <strong>Guide</strong>.<br />
The guide helps the surgeon to determine the correct stem orientation<br />
and placement. After careful pre-operative templating, the guide is placed<br />
on the anterior/posterior aspect of the exposed proximal femur and the<br />
planned femoral neck cut is marked using a marking instrument of choice.<br />
Care should be taken to align the body of the guide with the axis of the<br />
femoral canal (Figure 4).<br />
2 ACCOLADE <strong>II</strong> SurgICAL tECHnIquE 3<br />
Figure 4<br />
Instrument<br />
neck resection guide<br />
1020-1100
StEP 3<br />
PrEPArIng tHE FEmOrAL CAnAL<br />
To help ensure proper final orientation<br />
of the stem, lateral bias during<br />
implant preparation is preferred.<br />
Retraction of the gluteus medius and<br />
removal of the lateral cortical bone at<br />
the piriformis insertion will permit true<br />
axial introduction of the instruments<br />
and implant. The Modular Box<br />
Osteotome or a rongeur can be used<br />
to remove bone from this area (Figure 5).<br />
Instruments<br />
modular box Osteotome<br />
1601-1210<br />
Figure 5<br />
Orthonomic modular Handle<br />
1020-2900<br />
mallet<br />
1120-1000<br />
tip<br />
Art malkani, m.D.<br />
remove the lateral cortical bone<br />
at the piriformis fossa to obtain<br />
ideal proximal fit and to minimize<br />
the risk of undersizing and/or<br />
varus placement of the femoral<br />
component.<br />
Axial Starter reamer<br />
1020-1200<br />
Orthonomic t-Handle<br />
1101-2200<br />
The ACCOLADE <strong>II</strong> Hip System is a broach<br />
only system. While use of an axial starter<br />
reamer is needed, use of cylindrical reamers<br />
is not necessary to prepare the femoral<br />
canal. The Axial Starter Reamer is used with<br />
the T-Handle to open the femoral canal and<br />
to aid in determining the orientation of the<br />
femoral axis. The tapered design allows for<br />
access to the canal and is graduated along<br />
the flutes, which helps provide a reference<br />
during insertion into the canal. Advance the<br />
Axial Starter Reamer into the femoral canal<br />
to a depth at which the first graduation mark<br />
is aligned with the medial aspect of the neck<br />
resection (Figure 6).<br />
Slight lateral pressure on the reamer during<br />
operation will aid in preparing the femoral<br />
canal in the neutral orientation of the implant.<br />
4 ACCOLADE <strong>II</strong> SurgICAL tECHnIquE 5<br />
Figure 6<br />
note<br />
Care should be taken not to sink the starter<br />
reamer below the first graduation mark to<br />
allow for proper press fit of the implant.
StEP 4<br />
brOACHIng<br />
Figure 7<br />
Broaching is then performed<br />
beginning with the size 0 broach.<br />
The broach should be oriented to<br />
the long axis of the oblong shape<br />
created by the neck resection<br />
(Figure 7).<br />
Instruments<br />
Offset broach Handle<br />
1020-1460<br />
note<br />
ACCOLADE <strong>II</strong> broaches can be properly<br />
identified in several ways.<br />
1) the broach size is engraved into a<br />
square pocket on both the anterior<br />
and posterior sides of the broach.<br />
2) the size is marked on the top of the<br />
broach post.<br />
3) the distal lateral tip of the broach<br />
is polished.<br />
4) 1020-52xx part number<br />
note<br />
<strong>Accolade</strong> and ACCOLADE <strong>II</strong> broaches<br />
cannot be used interchangeably.<br />
tip<br />
Art malkani, m.D.<br />
During broaching, place lateral bias<br />
on the broach to fill the proximal<br />
femur and minimize undersizing the<br />
implant.<br />
ACCOLADE <strong>II</strong> broach<br />
Size 0-11<br />
1020-52xx<br />
Sequentially broach upward in size<br />
until the proper size is achieved. The<br />
surgeon’s clues to a firm fit and final<br />
size include 1.) changing pitch of<br />
sound that results from mallet blows<br />
to the broach handle; 2.) increased<br />
resistance to forward advancement;<br />
3.) lack of further motion.<br />
Two grooves on the anterior and<br />
posterior surfaces of the broach<br />
act as a point of reference to help<br />
the surgeon visualize the broach<br />
advancing into the femur (Figure 8).<br />
mallet<br />
1120-1000<br />
Relying only on the neck resection<br />
height alone for final seating height<br />
may lead to improper sizing and<br />
inadequate component fixation.<br />
The final broach should seat firmly<br />
against medial and lateral cortical<br />
bone (Figure 9).<br />
Art malkani, m.D.<br />
rotational stability should be assessed<br />
at this time by applying torsional<br />
stress to the broach handle. If there is<br />
rotational motion, the broach should<br />
be further seated or the next larger<br />
broach size should be chosen.<br />
Figure 8 Figure 9<br />
Frank kolisek, m.D.<br />
If the broach and/or stem stops above<br />
or below the original neck resection,<br />
leg length and soft-tissue tensioning<br />
must be re-assessed during intraoperative<br />
trialing. Do not force the<br />
broach and/or stem to the resection<br />
level. this will increase the risk of<br />
proximal femur fracture.<br />
Generally, if a broach sinks below the<br />
level of the neck resection, advance<br />
to the next larger broach. If the neck<br />
resection is deemed higher than<br />
desired, remove the broach and<br />
perform a new neck resection at a<br />
lower level.<br />
Calcar Planer - Standard<br />
1020-1111<br />
Frank kolisek, m.D.<br />
Pre-operative templating serves<br />
as a guide. Don’t keep hitting the<br />
broach harder just because you<br />
have not reached the size that was<br />
templated.<br />
6 ACCOLADE <strong>II</strong> SurgICAL tECHnIquE 7<br />
tip<br />
tip<br />
For good fixation of the implant,<br />
it is important that axial alignment<br />
of the broach is maintained at all<br />
times in the canal. Generally, the<br />
broach rotation is self-aligning.<br />
Upon reaching the final size and<br />
depth of the broach, detach the<br />
broach handle from the broach,<br />
leaving the broach fully seated in<br />
the femoral canal.<br />
tip<br />
OPtIOnAL StEP<br />
Figure 10A<br />
Assemble the Calcar Planer to the<br />
reamer power adaptor. <strong>Guide</strong> the<br />
Calcar Planer over the broach post<br />
ensuring the Calcar Planer is axially<br />
aligned with the post and is stable.<br />
Initiate power prior to contacting<br />
the femur and slowly advance the<br />
Calcar Planer toward the broach<br />
using continuous power until the<br />
positive stop on the Calcar Planer<br />
contacts the broach face and the<br />
bone is removed (Figure 10A).<br />
Failure to operate the Calcar Planer<br />
in accordance with these<br />
instructions may result<br />
in damage to the femur.<br />
Figure 10B<br />
In the event that the Calcar Planer<br />
cannot fully engage the broach post<br />
(Figure 10B), remove the broach<br />
and perform a new neck resection<br />
at a lower level. Alternatively, a<br />
larger broach size should also be<br />
considered.
StEP 5<br />
trIAL rEDuCtIOn<br />
richard rothman, m.D.<br />
Start with a standard offset (132°)<br />
neck trial. If the leg lengths are equal,<br />
but soft tissues are lax, move to a<br />
127° degree neck trial.<br />
Figure 11<br />
tIP<br />
132° neck trial<br />
1020-32xx<br />
Instruments<br />
8 ACCOLADE <strong>II</strong> SurgICAL tECHnIquE<br />
127° neck trial<br />
1020-27xx<br />
Select a Neck Trial which has the same base neck<br />
length and angle as the planned implant size. This can<br />
be determined in two ways.<br />
1. Match the color indicator located on top of the<br />
Neck Trial taper to the color indicator on top of the<br />
broach (Figure 11).<br />
2. The table below indicates the correct neck length<br />
for each size stem and the corresponding color<br />
code. The size of the broach directly corresponds<br />
to the size of the implant.<br />
StEm SIzE nECk trIAL LEngtH/COLOr<br />
0, 1 27mm/Yellow<br />
2, 3 30mm/Blue<br />
4, 5, 6 35mm/Green<br />
7, 8, 9 37mm/Black<br />
10, 11 40mm/Red<br />
ACCOLADE <strong>II</strong> broach Size<br />
0-11<br />
1020-52xx<br />
Figure 12<br />
Assemble the Neck Trial onto the<br />
broach. Next, assemble a V40 Head<br />
Trial onto the Neck Trial (Figure 12).<br />
Femoral heads come in multiple<br />
offsets and are different for each<br />
femoral head implant material (see<br />
table at right.) For this reason, final<br />
head material should be chosen<br />
prior to trial reduction. Offsets add or<br />
subtract from the base neck length of<br />
the implant and help to achieve the<br />
desired leg length and offset.<br />
Perform a trial reduction of the hip.<br />
Upon confirmation of the selected<br />
components, remove the trial head<br />
and trial neck, and reassemble the<br />
broach handle to the broach. Remove<br />
the broach from the femoral canal.<br />
The final broach size determines the<br />
correct implant size.<br />
note<br />
Head trials with an “r” suffix are<br />
made from a radiopaque material,<br />
making them visible on an x-ray.<br />
v40 Head trial<br />
6264-x-xxxr<br />
tip<br />
richard rothman, m.D.<br />
remember, pre-operative templating<br />
serves as only a guide. Final<br />
sizing, leg length, and offset are<br />
determined intra-operatively.<br />
tip<br />
Dermot Collopy, m.D.<br />
After trial reduction and prior to<br />
removing the broach, tap on the<br />
broach a few more times to see if<br />
it will advance. Due to the viscoelastic<br />
properties of the bone, the<br />
bone could relax during the trialing<br />
process. If the broach does advance,<br />
retrial and make adjustments<br />
accordingly.<br />
HEAD HEAD SIzE HEAD OFFSEtS<br />
CoCr V40<br />
Alumina V40<br />
Alumina C-Taper<br />
(when used with C-Taper<br />
Adaptor Sleeve-catalog<br />
#17-0000E)<br />
delta BIOLOX V40<br />
delta BIOLOX C-Taper<br />
(when used with C-Taper<br />
Sleeve - catalog #17-000E)<br />
delta BIOLOX Universal Taper<br />
(when used with<br />
Universal Taper Sleeve -<br />
catalog #6519-T-XXX)<br />
22 +0, +3, +8<br />
26 -3, +0, +4, +8, +12<br />
28 -4, +0, +4, +8, +12<br />
32 -4, +0, +4, +8, +12<br />
36 -5, +0, +5, +10<br />
40 -4, +0, +4, +8, +12<br />
44 -4, +0, +4, +8, +12<br />
28 -2.7, +0, +4<br />
32 -4, +0, +4<br />
36 -5, +0, +5<br />
28 -2.5, +0, +5<br />
32 -2.5, +0, +5<br />
36 -5, +0, +5<br />
28 -4, -2.7, +0, +4<br />
32 -4, +0, +4<br />
36 -5, -2.5, +0, +2.5, +5, +7.5<br />
28 -2.5, +0, +2.5, +5<br />
32 -2.5, +0, +2.5, +5<br />
36 -5, -2.5, +0, +2.5, +5, +7.5<br />
28 -2.5, +0, +4<br />
32 -2.5, +0, +4<br />
36 -2.5, +0, +4<br />
40 -2.5, +0, +4<br />
44 -2.5, +0, +4<br />
9
StEP 6<br />
ImPLAntIng tHE StEm<br />
OPtIOn 1<br />
Thread the Modular Threaded<br />
Stem Inserter into the drive hole<br />
on the proximal face of the stem<br />
(Figure 13). The inserter should be<br />
fully threaded and secured to the<br />
stem prior to impaction to prevent<br />
damage to the threads on the<br />
implant or the instrument. Using<br />
the inserter, the stem should be<br />
inserted into the femoral canal until<br />
it stops.<br />
tip<br />
Dermot Collopy, m.D.<br />
If the stem hangs up due to<br />
impingement of the modular<br />
threaded Stem Inserter against<br />
the overhanging tip of the greater<br />
trochanter, remove the threaded<br />
stem inserter leaving the stem in<br />
place and use the modular Stem<br />
Impactor to fully seat the stem.<br />
Instruments<br />
modular threaded Stem Inserter<br />
1020-1800<br />
10 ACCOLADE <strong>II</strong> SurgICAL tECHnIquE<br />
Figure 13<br />
modular Offset quick Connect<br />
Stem Inserter<br />
1020-1860<br />
OPtIOn 2<br />
The ACCOLADE <strong>II</strong> Femoral Stem can<br />
also be inserted using the Modular<br />
Offset Quick Connect Stem Inserter.<br />
Place tip of the inserter into the drive<br />
hole of the stem taking care to align<br />
the version tab on the inserter with the<br />
slot in the stem (Figure 14). The quick<br />
connect design provides the inserter<br />
with a stable spring connection, but<br />
it does not provide a mechanical<br />
lock. Therefore, this assembly should<br />
be handled with care, as excessive<br />
shaking or motion may result in the<br />
stem disassociating from the inserter.<br />
note: The Modular Offset Quick Connect<br />
Stem Inserter cannot be used with the Size 0<br />
and Size 1 ACCOLADE <strong>II</strong>. Misuse could lead to<br />
instrument failure.<br />
OPtIOn 3<br />
The ACCOLADE <strong>II</strong> Femoral Stem can<br />
also be inserted by hand and then<br />
impacted into the bone using the<br />
Modular Stem Impactor. The Modular<br />
Stem Impactor has a spherical tip,<br />
which is placed onto the drive hole of<br />
the stem. This instrument allows for<br />
off-axis impaction of the stem. The<br />
Modular Stem Impactor does not<br />
connect to the stem, and, therefore,<br />
can only be used for final impaction<br />
of the stem.<br />
modular Stem Impactor<br />
1020-1870<br />
Figure 14<br />
Orthonomic modular Handle<br />
1020-2900<br />
Figure 15<br />
mallet<br />
1120-1000<br />
* Fung, Y.C, (1993). Biomechanics: Mechanical Properties of Living Tissues (2nd ed.). pp.500-519<br />
A Mallet is then used to seat the<br />
stem into the canal (Figure 15).<br />
The surgeon should NOT attempt<br />
to continue impacting the femoral<br />
component if visual and auditory<br />
clues indicate that the stem is firmly<br />
seated in the canal. These clues,<br />
rather than the broach seating level,<br />
should be used to determine the<br />
final seating height of the implant.<br />
Continued aggressive impaction<br />
could lead to femoral fracture.<br />
In the event that dense bone is<br />
encountered intra-operatively and<br />
compounding anatomical factors<br />
are present, the seating of the<br />
implant may not be consistent<br />
with the level of the broach due<br />
to the viscoelastic nature of the<br />
femoral bone.* If the final seating<br />
height is undesirable, the implant<br />
can be removed and additional<br />
broaching can be performed. If<br />
the stem inserter is contacting the<br />
greater trochanter during insertion,<br />
continued impaction could lead to a<br />
fracture.<br />
tip<br />
Frank kolisek, m.D.<br />
Prior to any impaction using the<br />
mallet, the implant should always<br />
be inserted into the femoral<br />
canal until it stops. this aids in<br />
positioning the implant in the same<br />
orientation that was broached,<br />
preventing the stem from being<br />
forced into a different position.<br />
11
StEP 7<br />
FInAL rEDuCtIOn<br />
Figure 16<br />
Prior to final head assembly, neck<br />
length / head offset selection may<br />
be re-evaluated using a V40 Head<br />
Trial. Place the Head Trial onto the<br />
stem neck taper and reduce the hip.<br />
Leg length equality and proper soft<br />
tissue tension are evaluated. Remove<br />
the Head Trial and dry the implant<br />
trunnion with a laparatomy sponge or<br />
sterile towel.<br />
Select the appropriate corresponding<br />
V40 Femoral Head (CoCr, Alumina<br />
Ceramic, BIOLOX delta Ceramic)<br />
or sleeve and place it onto the dry<br />
trunnion of the femoral stem with<br />
a slight twist. Impact the head with<br />
two moderate impactions using the<br />
Modular Head Impactor (Figure 16).<br />
v40 Head trial<br />
6264-x-xxxr<br />
Instrument<br />
Verify the head is secure on the<br />
trunnion after head impaction by<br />
applying traction to the head and<br />
confirming stability on the trunnion.<br />
If necessary, the head can be<br />
removed utilizing the head<br />
disassembly instrument.*<br />
Relocate the femoral head into the<br />
acetabular cup and re-check the hip<br />
biomechanics. The surgical site is<br />
then closed according to surgeon<br />
preference.<br />
* If a ceramic head is placed on the trunnion<br />
and then removed, it must be replaced with<br />
a V40 cobalt chrome head or a V40 Titanium<br />
Adapter Sleeve (17-0000E) and a C-Taper<br />
ceramic head.<br />
If the stem must be removed, utilize the<br />
Modular Threaded Stem Inserter.<br />
modular Head Impactor<br />
1601-1700<br />
OPtIOnAL StEP<br />
When selecting a BIOLOX delta<br />
Universal Taper Ceramic Femoral<br />
Head (6519-1-0xx) for implantation,<br />
use of a Universal Adaptor Sleeve is<br />
necessary.<br />
Catalog No. Offset (mm) Taper<br />
6519-T-025 -2.5 V40<br />
6519-T-100 +0 V40<br />
6519-T-204 +4 V40<br />
After completing the trialing process,<br />
intra-operatively assemble the<br />
adaptor sleeve to the femoral stem<br />
manually. The Universal Adaptor<br />
Sleeve must be fully seated on<br />
the stem taper before the head is<br />
assembled.<br />
note<br />
In no instance should any attempt<br />
be made to pre-assemble the<br />
adaptor sleeve inside the bIOLOX<br />
delta universal Ceramic Head.<br />
Intra-operatively assemble the<br />
bIOLOX delta universal taper<br />
Ceramic Head onto the sleeved<br />
femoral stem and set with two<br />
moderate strikes using the Head<br />
Impactor (6626-0-140). Care<br />
must be taken to avoid excessive<br />
impact forces when assembling<br />
the Ceramic Head to the sleeved<br />
femoral component.<br />
Orthonomic modular Handle<br />
1020-2900<br />
ACCOLADE <strong>II</strong><br />
ImPLAnt InFOrmAtIOn<br />
ACCOLADE <strong>II</strong> Stem Information<br />
A B C D<br />
PArt numbEr SIzE nECk AngLE nECk LEngtH StEm LEngtH OFFSEt taper<br />
6720-0027 0<br />
27mm 93mm 28mm<br />
6720-0127 1 27mm 96mm 29mm<br />
6720-0230 2 30mm 99mm 33mm<br />
6720-0330 3 30mm 102mm 35mm<br />
6720-0435 4 35mm 105mm 38mm<br />
6720-0535 5<br />
132°<br />
35mm 108mm 40mm<br />
6720-0635 6 35mm 111mm 41mm<br />
6720-0737 7 37mm 114mm 46mm<br />
6720-0837 8 37mm 117mm 47mm<br />
6720-0937 9 37mm 120mm 49mm<br />
6720-1040 10 40mm 123mm 51mm<br />
6720-1140 11 40mm 126mm 53mm<br />
6721-0027 0<br />
27mm 93mm 32mm<br />
6721-0127 1 27mm 96mm 34mm<br />
6721-0230 2 30mm 99mm 37mm<br />
6721-0330 3 30mm 102mm 38mm<br />
6721-0435 4 35mm 105mm 42mm<br />
6721-0535 5 127°<br />
35mm 108mm 44mm<br />
6721-0635 6 35mm 111mm 45mm<br />
6721-0737 7 37mm 114mm 50mm<br />
6721-0837 8 37mm 117mm 51mm<br />
6721-0937 9 37mm 120mm 53mm<br />
6721-1040 10 40mm 123mm 57mm<br />
6721-1140 11 40mm 126mm 58mm<br />
12 ACCOLADE <strong>II</strong> SurgICAL tECHnIquE 13<br />
B<br />
A<br />
D<br />
V40 TM<br />
V40 TM<br />
C
ACCOLADE <strong>II</strong><br />
InStrumEntAtIOn<br />
1020-9001 basic tray<br />
1020-9000 Single Tray Case<br />
1101-2200<br />
Orthonomic T-Handle<br />
1120-1000<br />
Mallet<br />
Optional<br />
1020-1112<br />
Calcar Planer - Large<br />
1020-2727<br />
127°, 27mm Neck Trial<br />
1020-3227<br />
132°, 27mm Neck Trial<br />
1020-1111<br />
Calcar Planer - Standard<br />
1020-2730<br />
127°, 30mm Neck Trial<br />
1020-3230<br />
132°, 30mm Neck Trial<br />
1020-1100<br />
Neck Resection <strong>Guide</strong><br />
1020-2735<br />
127°, 35mm Neck Trial<br />
1020-3235<br />
132°, 35mm Neck Trial<br />
1020-1460<br />
2 x Offset Broach Handle<br />
Optional<br />
1440-1460<br />
2 x Straight Broach Handle<br />
1020-2737<br />
127°, 37mm Neck Trial<br />
1020-3237<br />
132°, 37mm Neck Trial<br />
1601-1700<br />
Modular Head Impactor<br />
1020-2740<br />
127°, 40mm Neck Trial<br />
1020-3240<br />
132°, 40mm Neck Trial<br />
1601-1210<br />
Modular Box Osteotome<br />
6264-8-028R<br />
28mm -4mm V40 Head Trial<br />
6264-8-928R<br />
28mm -2.7mm V40 Head Trial<br />
6264-8-128R<br />
28mm +0mm V40 Head Trial<br />
6264-8-228R<br />
28mm +4mm V40 Head Trial<br />
6264-8-328R<br />
28mm +8mm V40 Head Trial<br />
6264-8-428R<br />
28mm +12mm V40 Head Trial<br />
6264-8-032R<br />
32mm -4mm V40 Head Trial<br />
6264-8-632R<br />
32mm -2.5mm V40 Head Trial<br />
6264-8-132R<br />
32mm +0mm V40 Head Trial<br />
6264-8-232R<br />
32mm +4mm V40 Head Trial<br />
6264-8-332R<br />
32mm +8mm V40 Head Trial<br />
6264-8-432R<br />
32mm +12mm V40 Head Trial<br />
6264-8-036R<br />
36mm -5mm V40 Head Trial<br />
6264-8-436R<br />
36mm -2.5mm V40 Head Trial<br />
6264-8-136R<br />
36mm +0mm V40 Head Trial<br />
6264-8-536R<br />
36mm +2.5mm V40 Head Trial<br />
6264-3-236R<br />
36mm +4mm V40 Head Trial<br />
6264-8-236R<br />
36mm +5mm V40 Head Trial<br />
6264-8-736R<br />
36mm +7.5mm V40 Head Trial<br />
6264-8-336R<br />
36mm +10mm V40 Head Trial<br />
14 ACCOLADE <strong>II</strong> SurgICAL tECHnIquE 15
ACCOLADE <strong>II</strong><br />
InStrumEntAtIOn<br />
1020-9002 ACCOLADE <strong>II</strong> broach tray<br />
1020-9000 Single Tray Case<br />
1020-2900<br />
Orthonomic Modular Handle<br />
1020-1800<br />
Modular Threaded Stem Inserter<br />
1020-1860<br />
Modular Offset Quick Connect<br />
Stem Inserter<br />
1020-1870<br />
Modular Stem Impactor<br />
1020-1200<br />
Axial Starter Reamer<br />
1020-5200<br />
Size 0 ACCOLADE <strong>II</strong> Broach<br />
1020-5201<br />
Size 1 ACCOLADE <strong>II</strong> Broach<br />
1020-5202<br />
Size 2 ACCOLADE <strong>II</strong> Broach<br />
1020-5203<br />
Size 3 ACCOLADE <strong>II</strong> Broach<br />
1020-5204<br />
Size 4 ACCOLADE <strong>II</strong> Broach<br />
1020-5205<br />
Size 5 ACCOLADE <strong>II</strong> Broach<br />
1020-5206<br />
Size 6 ACCOLADE <strong>II</strong> Broach<br />
1020-5207<br />
Size 7 ACCOLADE <strong>II</strong> Broach<br />
1020-5208<br />
Size 8 ACCOLADE <strong>II</strong> Broach<br />
1020-5209<br />
Size 9 ACCOLADE <strong>II</strong> Broach<br />
1020-5210<br />
Size 10 ACCOLADE <strong>II</strong> Broach<br />
1020-5211<br />
Size 11 ACCOLADE <strong>II</strong> Broach<br />
16 ACCOLADE <strong>II</strong> SurgICAL tECHnIquE 17
A surgeon must always rely on his or her own professional clinical judgment when deciding whether to use a particular<br />
product when treating a particular patient. Stryker does not dispense medical advice and recommends that surgeons be<br />
trained in the use of any particular product before using it in surgery.<br />
The information presented is intended to demonstrate the breadth of Stryker product offerings. A surgeon must always refer<br />
to the package insert, product label and/or instructions for use before using any Stryker product. Products may not be<br />
available in all markets because product availability is subject to the regulatory and/or medical practices in individual markets.<br />
Please contact your Stryker representative if you have questions about the availability of Stryker products in your area.<br />
Stryker Corporation or its divisions or other corporate affiliated entities own, use or have applied for the following trademarks<br />
or service marks: <strong>Accolade</strong>, Howmedica, Osteonics, PureFix, SOMA, Stryker, V40. All other trademarks are trademarks of<br />
their respective owners or holders.<br />
BIOLOX delta is a registered trademark of Ceramtec Ag.<br />
Literature Number: LSP76 Rev. 2<br />
Copyright © 2012 Stryker<br />
Printed in USA<br />
325 Corporate Drive<br />
Mahwah, New Jersey 07430<br />
t: 201 831 5000<br />
www.stryker.com