Easyguide Family Vax:Easyguide Family Vax - Vax Appliances
Easyguide Family Vax:Easyguide Family Vax - Vax Appliances
Easyguide Family Vax:Easyguide Family Vax - Vax Appliances

Create successful ePaper yourself
Turn your PDF publications into a flip-book with our unique Google optimized e-Paper software.
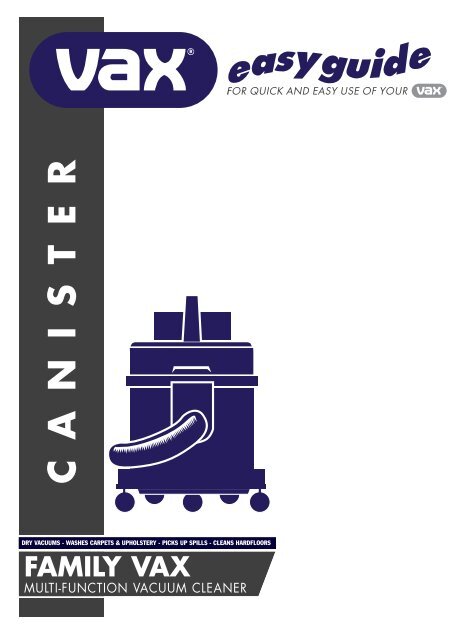
C A N I S T E R<br />
DRY VACUUMS - WASHES CARPETS & UPHOLSTERY - PICKS UP SPILLS - CLEANS HARDFLOORS<br />
FAMILY VAX<br />
MULTI-FUNCTION VACUUM CLEANER
Important safety information<br />
THIS ‘EASY GUIDE’ SHOULD BE READ<br />
COMPLETELY AND REFERRED TO AT ALL<br />
TIMES BEFORE USING YOUR VAX.<br />
This ‘easy guide’ should be retained with your VAX for future<br />
reference.<br />
If your VAX is sold or transferred to a new owner, this guide<br />
should be passed on so that the new owner can become<br />
acquainted with the machine and this information. The<br />
following information is provided in the interest of safety.<br />
Please read it before using your VAX.<br />
DO’S<br />
● Use only genuine <strong>Vax</strong> parts.<br />
● Ensure the mains cable is fully unwound and straightened<br />
before use.<br />
● If the supply cord is damaged, it must be replaced by the<br />
manufacturer or its service agent or a similarly qualified<br />
person in order to avoid a hazard.<br />
● Ensure the mains cable is kept well away from the<br />
revolving brushes (where fitted) of your VAX, when it is<br />
turned on and running.<br />
● Keep the mains cable away from heat, oil, sharp edges<br />
and rough surfaces and avoid damage in any other way.<br />
● Exercise extreme care when cleaning stair carpets. Ensure<br />
that your VAX is in a stable position at either the top or<br />
bottom of the stairs without over- stretching the hose or<br />
cable. When cleaning the stair treads, always keep a hand<br />
firmly on your VAX. You may prefer to remove the castors.<br />
● Follow the instructions in this user guide when fitting<br />
accessories or tools.<br />
● Remove the plug from the wall socket before carrying out<br />
any maintenance specified in this guide.<br />
● Change dust bag and filters at regular intervals as<br />
specified on page 10 and 11 of this guide.<br />
● Store your VAX in a dry place.<br />
● Have your VAX serviced by an authorised VAX Service<br />
Agent only using genuine VAX spare parts.<br />
DONT’S<br />
● This appliance is not intended for use by young or infirm<br />
persons unless they have been adequately supervised by<br />
a responsible person to ensure that they can use the<br />
appliance safely.<br />
Young children should be supervised to ensure that they<br />
do not play with the appliance.<br />
● Use of non <strong>Vax</strong> fluids, filters and accessories may damage<br />
your machine and void your warranty.<br />
● Never drag your VAX by the mains cable.<br />
2<br />
● Never tug at the mains cable to remove the plug from the<br />
wall socket.<br />
● Never allow the complete coiled mains cable to drop on<br />
the floor as this may result in kinks or knots occurring in<br />
the cable, causing premature failure.<br />
● Don’t let anyone touch the rotating brush bar (where fitted)<br />
unless your VAX is disconnected from the mains.<br />
● Never use your VAX in the presence of flammable gases.<br />
● Avoid sucking up hot items, hazardous liquids or any other<br />
material which could damage your VAX.<br />
● Never leave your VAX running unattended.<br />
● Never use your VAX without a dust bag.<br />
● If your VAX fails to operate, never attempt to repair it<br />
yourself as repairs carried out by an unauthorised or<br />
inexperienced person may cause injury to you or damage<br />
to your VAX.<br />
● Never alter the specification or modify your VAX in any way.<br />
EXTENSION CABLE<br />
If using an extension cable always ensure that the insulation<br />
sheath is in good condition and is not damaged in any way.<br />
Make sure that the plug and socket are fitted to the extension<br />
cable correctly. If in doubt have it checked by a qualified<br />
electrician.<br />
Always use the extension cable in accordance with the<br />
manufacturer’s instructions.<br />
IMPORTANT: When carrying out any maintenance or cleaning<br />
operations on this product, it is essential that the plug is<br />
removed from the wall socket.<br />
In the interests of product improvement, the<br />
Company reserves the right to introduce<br />
modifications or alterations without notice.<br />
IMPORTANT<br />
“<strong>Vax</strong>ing” is a term used to describe the washing of carpets<br />
using the unique <strong>Vax</strong> Cleaning system. Not many people<br />
realise just how dirty carpets can become, even when regular<br />
maintenance is carried out by owners or professional<br />
cleaners. No matter how powerful a vacuum cleaner, dry<br />
vacuuming of carpets will only remove surface dirt.<br />
When <strong>Vax</strong>ing for the first time, many owners are astounded at<br />
the amount of dirt and grime this washing system releases<br />
from their carpets. Depending on many factors such as age of<br />
carpet, neighbourhood conditions (ie. dry, dusty, muddy,<br />
sandy) etc., in some instances the release of dirt particles<br />
can be so extensive that the carpet becomes discoloured.<br />
This is due to the efficiency of the <strong>Vax</strong> system and is not a<br />
malfunction of the unit. With subsequent <strong>Vax</strong>ing treatments,<br />
the discolouration will diminish. For heavily soiled carpets it<br />
may take a number of treatments.
Parts checklist<br />
Before using your VAX, please read ‘Important safety information’ on page 2.<br />
Motor unit<br />
Recovery bucket<br />
Hardfloor Tool<br />
Flexible Suction Hose and Hand grip<br />
Ultra Rapide<br />
Washing Tool<br />
Crevice tool<br />
Combination tool<br />
Hepa filter unit<br />
Turbo brush<br />
Dual purpose dusting brush<br />
& upholstery tool<br />
Dust bags VAX<br />
Carpet<br />
Cleaner<br />
Liquid Control Assembly<br />
Water reservoir<br />
Stainless Steel Extendible Wand<br />
Upholstery<br />
washing tool<br />
VAX<br />
Defoamer<br />
3
4<br />
7 steps for easy<br />
vacuuming<br />
1 Fit a dust bag by pushing it firmly into the<br />
recovery bucket before connecting hose<br />
2 Push the connector on the end of the hose into<br />
the recovery bucket. Turn it clockwise to lock<br />
3 Fit the filter unit and motor unit<br />
Ensure the two retaining clips are secured. You may<br />
have to push down hard on the edges of the motor<br />
unit above the clips. They are a tight fit.<br />
4 Fit the extendible wand to the hose hand grip<br />
Adjust to suit by pressing button in direction of<br />
arrow which will allow an extension or reduction in<br />
wand length.<br />
5 Choose suction power<br />
Vacuum carpets on high power.<br />
Vacuum fabrics and upholstery on low power.<br />
Make sure that the cable is fully unwound.<br />
Put the plug into a wall socket.<br />
6 Choose the right tool for the job<br />
The smaller tools can be fitted to the back of your<br />
VAX when not in use.<br />
7 Switch ON<br />
Push the button on the handle marked for on, push<br />
again for off.<br />
Tip<br />
✪ As your VAX is very powerful, you may find that the<br />
dust bag fills up quickly the first time you use it.<br />
✪ Should a blockage occur in the suction hose/ hand<br />
grip it can usually be “unblocked” by reversing the<br />
hose and running the machine for a few seconds or<br />
so. It may be necessary to bind the hand grip end<br />
of the hose with a cloth or rag to form a temporary<br />
seal between the hand grip and the connector<br />
socket on the recovery bucket.<br />
TURBO BRUSH -<br />
High speed<br />
rotation dislodges<br />
trapped dust or hair<br />
from carpets. Automatic air<br />
adjustment drives the brush bar<br />
for effective cleaning on light or<br />
heavy pile carpets.<br />
DUAL<br />
PURPOSE<br />
DUSTING<br />
BRUSH &<br />
UPHOLSTERY<br />
TOOL<br />
CREVICE TOOL<br />
For cleaning in<br />
narrow gaps.<br />
HARDFLOOR TOOL<br />
Thoroughly cleans<br />
all hardfloor<br />
surfaces.<br />
COMBINATION<br />
TOOL<br />
Use with lever<br />
in this position<br />
for vacuuming<br />
hard floors.<br />
COMBINATION<br />
TOOL<br />
Use with lever<br />
in this position<br />
for vacuuming<br />
carpets.
Getting ready to wash<br />
1 Vacuum the area you intend to wash<br />
2 Remove the motor unit, filter unit, hose, dust<br />
bag and vacuuming tool<br />
Be careful with the dust bag so as not to spill the<br />
contents over your floor<br />
3 When dustbag is removed, re-fit the hose. Push<br />
and turn clockwise<br />
4 Fill the water reservoir with warm water (not<br />
hot), to the level marked on it. Fit the water<br />
reservoir into the recovery bucket<br />
5 Add VAX Carpet cleaner to the clean water. Refer<br />
to the instructions on the carpet cleaner bottle.<br />
Add VAX Defoamer if required<br />
Refer to the Tip on the bottom of this page.<br />
6 Slide the trigger onto the hose handle<br />
Adjust the extendible wand to suit<br />
Clip the solution tube to the extendible wand<br />
7 Fit the washing tool and push the solution tube<br />
into it<br />
8 Clip the remaining section of solution tube to the<br />
suction hose<br />
9 Unclip the transparent tube on the bottom of the<br />
motor unit. Place it in the bottom of the washing<br />
solution<br />
10 Fit the motor unit (make sure the transparent<br />
tube is not trapped when you do this)<br />
Secure both side clips.<br />
11 Locate the tube valve, push in firmly and turn<br />
clockwise<br />
YOU ARE NOW READY<br />
TO START WASHING<br />
Tip<br />
✪ You should pour VAX Defoamer into the recovery<br />
bucket (through the central hole in the clean water<br />
reservoir) if your carpet has been previously<br />
washed with a high foaming shampoo.<br />
VAX Defoamer is available through your VAX Stockist<br />
5
2 Metres (6 feet)<br />
6<br />
How to wash carpets<br />
1 Set up your VAX as described on page 5<br />
2 Switch ON<br />
3 Switch on the power washing button<br />
4 Turn the suction power to the wash setting or<br />
higher, depending on the carpet pile<br />
5 Pull the orange trigger to the ON position<br />
6 When you see water swirling in the washing tool<br />
you are ready to start washing<br />
7 Keep the bottom of the washing tool flat against<br />
the carpet. Push it backwards and forwards. You<br />
are now washing the carpet<br />
8 Cover an area of 2 x 2 metres (6 x 6ft)<br />
9 Turn the pump washing button off and push the<br />
orange trigger to the OFF position and turn the<br />
suction power to maximum<br />
Go back over the area you have just washed. You<br />
are now removing excess moisture from the carpet.<br />
10 Move to the next area and repeat steps 3 to 9<br />
11 When no more water reaches the wash tool the<br />
pump will make a ‘sound’ due to sucking air<br />
Refill the water reservoir with water and VAX Carpet<br />
cleaner. Empty the recovery bucket when you refill<br />
the water reservoir. The ‘sound’ your VAX makes<br />
will change and the suction will drop if the recovery<br />
bucket is over-full. Time to empty it!<br />
Tip<br />
✪ ALWAYS TEST FOR COLOUR FASTNESS WITH SOME<br />
UNDILUTED CARPET CLEANER ON A HIDDEN AREA<br />
FIRST.<br />
✪ Start from the corner of a room and work backwards<br />
towards the door.<br />
✪ If you are washing very dirty carpets, you may have to<br />
wash them several times over a period of time to bring<br />
all the dirt to the surface.<br />
✪ When washing stairs, place your VAX above the area<br />
you are washing. ALWAYS ENSURE YOUR VAX IS<br />
STABLE. The castors on your VAX will pull off, giving it<br />
extra stability on stairs or slopes. DO NOT PULL<br />
EXCESSIVELY ON THE BLACK SUCTION HOSE.<br />
✪ Metal or wooden furniture legs may mark a wet carpet.<br />
Wait until the carpet is dry or place aluminium foil<br />
under the feet of furniture.<br />
✪ When washing deep pile carpets, move the washing<br />
tool in the same direction as the pile lays.<br />
✪ Don’t allow children or animals onto the carpet until it<br />
is dry.
How to wash upholstery<br />
1 Set up your VAX as described on page 5, BUT<br />
don’t use the extendible metal wand<br />
2 Connect the upholstery washing tool to the short<br />
metal wand and wind the solution tube around<br />
the metal portion of the hand grip and fit the<br />
tube into the upholstery washing tool<br />
3 Switch power button ON<br />
4 Switch on the pump washing button<br />
5 Turn the suction power to the wash setting<br />
6 Start the washing solution flowing<br />
The solution flow is regulated by leaving the orange<br />
trigger in the OFF position and depressing the black<br />
manual lever to commence flow.<br />
7 When you see water swirling in the washing tool<br />
you are ready to start washing<br />
8 Pull the washing tool backwards<br />
You are now washing the upholstery. Cover a small<br />
area at a time. Don’t push the tool backwards and<br />
forwards as this may stretch the fabric.<br />
9 Stop the washing solution flowing<br />
To stop the flow release the black manual lever. Go<br />
back over the area you have just washed. You are<br />
now removing excess moisture from the upholstery.<br />
10 Move to next area and repeat steps 6 to 9<br />
11 When no more water reaches the wash tool the<br />
pump will make a ‘sound’ due to sucking air<br />
Refill the water reservoir with water and VAX Carpet<br />
cleaner. Empty the recovery bucket when you refill<br />
the water reservoir. The ‘sound’ your VAX makes<br />
will change and the suction will drop if the recovery<br />
bucket is full. Time to empty it!<br />
Tip<br />
✪ Use the upholstery tool for spot cleaning small dirt<br />
patches on either carpet or upholstery.<br />
7
8<br />
How to Suck up spills<br />
If your washing machine floods or the deep freeze<br />
has been defrosted, leaving pools of water about,<br />
your VAX can help<br />
1 Set up for washing, but don’t connect the<br />
solution tube or put water or cleaning solution in<br />
the water reservoir<br />
If the spill is soapy, VAX Defoamer will be required<br />
in the recovery bucket. Refer to instructions on<br />
Defoamer bottle. You should pour VAX Defoamer in<br />
the central hole in the clean water reservoir.<br />
2 Use the extendible wand or connect the washing<br />
tool directly to the metal tube on the hand grip.<br />
3 Turn the suction power to maximum and<br />
switch on<br />
4 Suck up the spill<br />
The ‘sound’ your VAX makes will change and the<br />
suction will drop when the recovery bucket is full.<br />
Time to empty it!<br />
How to Unblock sinks<br />
1 Set up for washing, but don’t connect the<br />
solution tube or put water or cleaning solution in<br />
the water reservoir.<br />
If the water in your sink is soapy, VAX Defoamer will<br />
be required in the recovery bucket. Refer to<br />
instructions on Defoamer bottle. Pour Defoamer<br />
into recovery bucket through the central hole in the<br />
clean water reservoir.<br />
2 Use the metal tube connected to the hand grip.<br />
Wrap a cloth around the tube to create a seal<br />
between the tube and the plug hole.<br />
3 Turn the suction power to maximum and switch<br />
on.<br />
The ‘sound’ your VAX makes will change and the<br />
suction will drop when the recovery bucket is full.<br />
Time to empty it!
If you have washing<br />
difficulties<br />
IF YOU HAVE WASHING DIFFICULTIES,<br />
CHECK…<br />
1 The pump washing button is switched<br />
on<br />
2 The tube valve is properly connected<br />
3 The weight on the end of the solution tube is at<br />
the bottom of the water reservoir and not<br />
trapped between motor unit and water reservoir<br />
4 The trigger is switched to on<br />
5 The washing tool is flat on the surface being<br />
washed<br />
6 That the power control is correctly adjusted<br />
within the washing range. Turn higher than<br />
minimum wash setting for uneven or higher pile<br />
if required<br />
7 There are no kinks in the solution tube<br />
Remove kinks by rubbing the tube between finger &<br />
thumb<br />
8 That the recovery bucket is not full, causing the<br />
automatic cut off valve to stop the suction<br />
What to do after washing<br />
AFTER WASHING - ALWAYS…<br />
Clean your VAX thoroughly<br />
Keep your VAX assembled. Clean the washing tool,<br />
stainless steal wands and hose, by sucking up some<br />
clean warm water. After sucking up the water, leave<br />
your VAX switched on. Air flowing through the hose<br />
will help dry it out.<br />
AFTER WASHING - REGULARLY…<br />
Clean out the Ultra Rapide carpet washing tool<br />
9
10<br />
Carpet Cleaner<br />
Tough on germs<br />
Kills odour causing bacteria<br />
Excellent disinfecting and<br />
stain removing properties<br />
Fabric Softener<br />
Deodoriser<br />
Multi Surface<br />
Hardfloor Cleaner<br />
Biodegradable<br />
Deodorising cleaner<br />
Stain removing agents<br />
Suitable for tiles, vinyl and<br />
slate<br />
Looking after your VAX<br />
Items below are available from your VAX Retailer or<br />
from VAX direct.<br />
Paper dust bag (double walled).<br />
Available in packs of 5.<br />
Cloth dust bag.<br />
For heavy duty use. These bags can be washed up to 5<br />
times<br />
HEPA Filter<br />
Please refer to separate instructions on page 11 for<br />
important information on HEPA Filter use and<br />
maintenance.<br />
Clean the Bondini (blue) filter.<br />
Available with a cone filter and exhaust filter in a 3 filter<br />
pack. The Bondini filter is on the bottom of the motor<br />
unit. Wash filter in warm water. Squeeze it dry and<br />
replace it. Your VAX will work more efficiently if the<br />
Bondini filter is replaced with a new one occasionally.<br />
Clean the exhaust filter.<br />
Available with a cone filter and bondini filter in a 3 filter<br />
pack. Wash filter in warm water. Squeeze it dry and<br />
replace it.<br />
Your VAX will work more efficiently if the black exhaust<br />
filter is replaced with a new one occasionally.<br />
VAX Cleaning Solutions<br />
Carpet Spot & Stain<br />
Remover<br />
Contains disinfecting and<br />
stain removing agents<br />
Fabric Softener<br />
Deodoriser<br />
Hardfloor Wipe<br />
Biodegradable<br />
Deodorising cleaner<br />
Stain removing agents<br />
Streak free<br />
Defoamer<br />
Reduces<br />
excessive foaming<br />
For use in all<br />
3 and 1 machines<br />
Allerite<br />
Effective in the<br />
reduction and<br />
control of dust mite<br />
allergen which<br />
simply cannot be<br />
removed by normal<br />
vacuuming.
VAX Anniversary Looking after Model your Specifications<br />
HEPA Filter<br />
1 HEPA filter - HEPA is an abbreviation for “High Efficiency Particle<br />
Arrester”. Your HEPA filter is manufactured from pleated glass<br />
paper, the efficiency for which is specified under International<br />
Standards.<br />
2 To remove the HEPA Filter turn anticlockwise to disengage the four<br />
locating lugs. When replacing ensure all four lugs are secured in<br />
position. The HEPA Filter is encased in a pre-HEPA Sock Filter.<br />
While the pre-HEPA Sock Filter acts as a major barrier to dust<br />
penetration, over a period of time smaller particles will penetrate<br />
the sock and reduce the overall performance of the HEPA Filter.<br />
With the sock removed, the HEPA Filter can be cleaned by gently<br />
tapping on a hard surface. The HEPA Filter should never be<br />
washed or exposed to water.<br />
We would recommend that the HEPA Filter be replaced at 12<br />
monthly intervals to maintain peak performance.<br />
3 Pre-HEPA filter (sock filter) - The SMS (grey) Sock Filter acts as<br />
a pre-filter to the HEPA and protects it from the majority of dust.<br />
To clean the Sock Filter gently peel it back from the HEPA Filter.<br />
After shaking to remove the excess dirt, the Sock Filter can be<br />
safely hand washed at normal temperature and left to dry. Do not<br />
machine wash or tumble dry. Do not replace the sock when it is<br />
still damp or wet.<br />
When replacing the Sock Filter on the HEPA ensure that the sock<br />
is pulled down completely all round.<br />
The Sock Filter can be cleaned up to 5 times in this way and<br />
should then be replaced.<br />
4 Cone filter - The bonus Cone Filter (supplied at no extra cost with<br />
the pack of 5 paper bags) is not necessary with the HEPA<br />
Filtration system.<br />
Fitting the Cone Filter underneath the HEPA Filter will compromise<br />
the integrity of the HEPA Filter seal and reduce filtration<br />
performance.<br />
5 Dust bags - If you find your disposable paper bag becomes<br />
perforated as a result of overfilling, or sucking up a sharp or<br />
heavy object, dust may pass through the sock filter to the HEPA<br />
Filter. If this happens, both the sock and HEPA Filters should be<br />
cleaned as recommended (see above).<br />
HEPA Filter<br />
and SMS<br />
Filter Cover<br />
HEPA Filter<br />
P/N 90500<br />
Disposable<br />
Paper Bags<br />
Pack of 5<br />
P/N 90600<br />
Replacement<br />
3 Filter Pack<br />
P/N 90630<br />
Replacement<br />
Cloth Bag<br />
Pack<br />
P/N 90620<br />
11
Part No. 68410 – May 2006<br />
FAMILY VAX Specifications<br />
Weight........................... Net 8.0kg<br />
Size............................... Height 54cms x 34cms diameter<br />
Motor............................. Heavy duty 1200 watts max./450 watts min. variable<br />
power. 2 stage bypass motor completely insulated and<br />
sealed against water contamination.<br />
Structure........................Moulded high-impact resistant ABS – a higher grade<br />
material than the average car bumper.<br />
Dust Bags (Paper)..........11 litre capacity supplied with machine.<br />
Clean Water Reservoir.... 4 litres of clean water.<br />
Hose.............................. 1.8m long, crush resistant hose with 360 (degree)<br />
swivels at each end for tangle free cleaning and<br />
maximum access.<br />
Recovery Bucket............ 8 litre capacity.<br />
Part No. ........................68000<br />
IMPORTANT<br />
To ensure the performance and design function of any VAX appliance is maintained, the use<br />
of Genuine VAX Consumables such as paper dust bags and filters are essential.<br />
Genuine VAX Consumables are tested, approved and fully backed by VAX.<br />
Should a VAX appliance suffer damage due to the use of generic/non-genuine bags, filters,<br />
parts etc., the VAX warranty may become void.<br />
Always look for these VAX logos...<br />
Please register your warranty. Send in your completed Warranty Card.<br />
If you require any further assistance or advice about your VAX please call<br />
VAXCARE on 1300 36 4040 (Australia – cost of a local call)<br />
or 0800 800 900 (NZ)<br />
VAX <strong>Appliances</strong> (Australia) PTY LTD<br />
A.B.N. 84 009 099 736<br />
296 Victoria Road Malaga Western Australia 6090.<br />
Telephone: (08) 9247 8100 Fax: (08) 9247 8192<br />
Email: vax@vax.com.au<br />
Website: www.vax.com.au<br />
<strong>Vax</strong> <strong>Appliances</strong> New Zealand<br />
27 Clemow Drive<br />
Mt. Wellington Auckland NZ<br />
Telephone: (09) 573 6220 Fax: (09) 573 6224<br />
Email: vaxnz@vax.co.nz