1. INTRODUCTION TO CLOTHING - Text Books Online
1. INTRODUCTION TO CLOTHING - Text Books Online
1. INTRODUCTION TO CLOTHING - Text Books Online

You also want an ePaper? Increase the reach of your titles
YUMPU automatically turns print PDFs into web optimized ePapers that Google loves.
<strong>1.</strong> <strong>INTRODUCTION</strong> <strong>TO</strong> <strong>CLOTHING</strong><br />
The record’s of man’s use of <strong>Text</strong>iles, dates back thousands of years before the birth<br />
of Christ. Our knowledge of the early development in textiles is very meagre as they are<br />
not evident through proper records. <strong>Text</strong>iles were first developed as a means for carrying<br />
food and as mats in shelter. Only in later stages it is used as clothing.<br />
<strong>1.</strong>1 <strong>INTRODUCTION</strong>:<br />
When early people realised they needed more than their own hair and skin to protect<br />
them from the weather, they looked around to see what was available. People lived in a<br />
cold climate, saw animals with skins that kept them warm. They hunted these animals for<br />
food and used the fur to cover their body.<br />
<strong>1.</strong>2 EARLY DEVELOPMENT OF SEWING AND FABRIC:<br />
Once they started to hunt they used the skin of animals as clothes. This skin when<br />
continuously used becomes harder and made difficult for them to hunt. For this purpose he<br />
started to treat the skin to preserve its softness. Later the bones of animals were used as<br />
needle and nerves were used as thread to stitch the hides.<br />
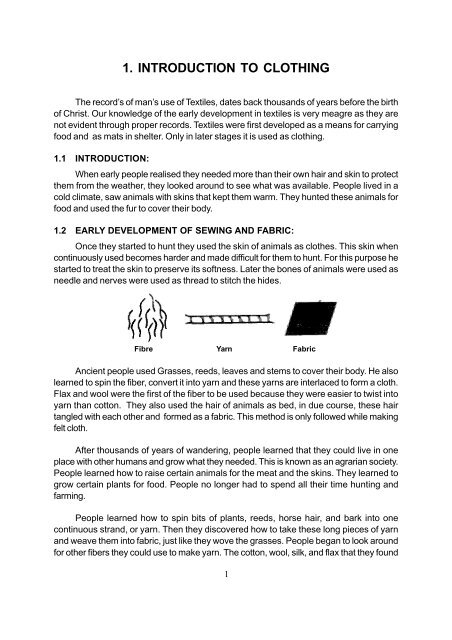
Fibre Yarn Fabric<br />
Ancient people used Grasses, reeds, leaves and stems to cover their body. He also<br />
learned to spin the fiber, convert it into yarn and these yarns are interlaced to form a cloth.<br />
Flax and wool were the first of the fiber to be used because they were easier to twist into<br />
yarn than cotton. They also used the hair of animals as bed, in due course, these hair<br />
tangled with each other and formed as a fabric. This method is only followed while making<br />
felt cloth.<br />
After thousands of years of wandering, people learned that they could live in one<br />
place with other humans and grow what they needed. This is known as an agrarian society.<br />
People learned how to raise certain animals for the meat and the skins. They learned to<br />
grow certain plants for food. People no longer had to spend all their time hunting and<br />
farming.<br />
People learned how to spin bits of plants, reeds, horse hair, and bark into one<br />
continuous strand, or yarn. Then they discovered how to take these long pieces of yarn<br />
and weave them into fabric, just like they wove the grasses. People began to look around<br />
for other fibers they could use to make yarn. The cotton, wool, silk, and flax that they found<br />
1
are still the most common natural fibers today. Other fibers, such as alpaca from llamas<br />
and angora from rabbits, were discovered, but, even today, these fibers are too scarce<br />
and expensive to be widely used.<br />
For thousands of years the four natural fibers used by men are flax, wool, silk and<br />
cotton. Man made fibers were introduced only at the beginning of the 20 th century. From<br />
ancient times to the middle of the 18 th century. Spinning and weaving were-done by hand.<br />
Cellulose is the basic scaffolding of<br />
all plants. It is formed through<br />
photosynthesis<br />
SOURCES OF TEXTILE FIBERS<br />
Cotton Cellulosic man-made fibers Synthetic man-made fibers<br />
Flax Wool Silk<br />
The food taken in by animals is<br />
transformed into fiber forming<br />
proteins<br />
Fiber<br />
Spinning<br />
Yarn<br />
Woven/Knitted<br />
Fabric<br />
Progress in this area culminated in the industrial revolution, which was the start of the<br />
factory system and mars production. From Ancient times colours have been used in fabrics.<br />
Dyestuff from plants and insects were used until the synthetic dyes were discovered.<br />
2<br />
Solar energy<br />
is the basis<br />
of life<br />
Source material is<br />
cellulose extracted<br />
from wood<br />
Raw material is petroleum<br />
derived from sea plankton
<strong>1.</strong>3 PURPOSE OF <strong>CLOTHING</strong>:<br />
Clothing is used to cover the body, to make you feel more attractive, and to<br />
communicate with others. People wear clothes for many different reasons. Some of these<br />
reasons are physical. You wear clothes for comfort and protection. Others are for<br />
psychological and social reasons. Clothes give you self-confidence and express your<br />
personality. Clothes also help you identify with other people.<br />
All people have basic human needs. Meeting these needs provides satisfaction and<br />
enjoyment in life. Clothing helps to meet some of these needs. Knowing something about<br />
the role of clothing helps you to understand yourself and others better. Clothing is a complex<br />
but fascinating part of everyone’s life. Therefore clothes are worn for:<br />
<strong>1.</strong> Protection:<br />
Our skin is uncovered and exposed. We can be<br />
easily affected by the elements-rain, snow, wind, cold,<br />
and heat. We can be harmed or injured on the job or<br />
while participating in sports. In some cases, we need<br />
to protect us with our clothing. Clothing aids to your<br />
comfort. It absorbs perspiration, prevents sudden chills,<br />
and acts as a buffer between your body and accidental<br />
burns, scratches, and rough surfaces. The right<br />
garments can insulate your body against extremely hot<br />
or extremely cold temperatures.<br />
People who live in severely cold climates, such<br />
as the Eskimos, keep warm by wearing pants and<br />
parkas with fur linings. The fur traps the warm air from<br />
their bodies and creates a life-saving insulating layer of<br />
Protection<br />
warmth. Desert nomads keep the harmful hot sun from<br />
dehydrating their bodies by covering up with long flowing robes and headdresses. Their<br />
clothing actually keeps them cooler.<br />
2. Safety:<br />
Clothing also serves to protect your skin from harm or<br />
injury. Some sports and occupations require protective<br />
clothing for safety reasons. Football players wear helmets<br />
and protective padding to help prevent injury during rough<br />
play.Some people’s work requires them to be in dangerous<br />
or hazardous conditions. Clothing can offer protection. Some<br />
items are even labeled with the term “safety” to identify them<br />
from regular day-to-day clothes and accessories.<br />
3<br />
Safety
Fire-fighters wear asbestos clothing in hazardous situations. Police officers wear<br />
bulletproof vests. Road workers wear florescent orange vests so that drivers can see them<br />
easily and prevent accidents.<br />
3. Sanitation:<br />
Special clothing and accessories are often worn for<br />
sanitation reasons. People who work in factories that<br />
produce food and medical products wear sanitary<br />
clothing, face masks, and hair covering. This precaution<br />
prevents contamination of the products by germs. In<br />
operating rooms, doctors and nurses wear special<br />
disposable sanitary uniforms, gloves, and face masks.<br />
4. Modesty:<br />
Modesty refers to what people feel is the proper way for clothing<br />
to cover the body. Different groups of people may have different<br />
standards of modesty. For example Clothes that a woman might wear to<br />
a fancy party would probably be unacceptable at work the next.<br />
5. Identification:<br />
Clothing can also identify people as members of a group. Certain<br />
types of clothing, colors, and accessories have become representative<br />
of certain groups, activities, and occupations. Or by simply dressing alike,<br />
people can show that they belong to the same group. Eg. Air Crews, Air<br />
hostess, Doctors, Pilots, etc.<br />
6. Uniforms:<br />
A uniform is one of the easiest ways to identify<br />
group members. Uniforms can provide instant<br />
recognition or create a special image for the group.<br />
Members of the police force, fire department, and<br />
military wear uniforms so that they can be recognized<br />
quickly and easily for public safety. Athletic teams<br />
wear different colors to identify their team and to tell<br />
them apart from their opponents.<br />
People who work in service occupations, such<br />
as restaurant workers, airline personnel, and hotel<br />
staff also wear special uniform. These uniforms help<br />
to identify the worker to their customers, as well as<br />
create an image for the company.<br />
4<br />
Sanitation<br />
Uniforms<br />
Identification
7. Styles and Colors:<br />
Some occupations require a unique style of dress. Judges wear the traditional black<br />
robe. Ministers, priests, and other clergy members may wear special clothing for conducting<br />
religious services. The style of the clothing often dates back many centuries to show visually<br />
that what they are doing is linked to the past. Many people wear special styles and colors<br />
of clothing for special occasions in their lives. Graduates may wear ling robes and<br />
mortarboard hats with tassels.<br />
8. Insignias:<br />
Insignias are badges or emblems that show membership in a<br />
group. Patches or emblems can be worn on jackets or blazer pockets.<br />
A school letter with a sports pin can be worn on a jacket or sweater to<br />
indicate participation in athletics.<br />
9. Status:<br />
Kings and queens wear crowns to set them apart from the rest of their subjects. Their<br />
crowns indicate their status, or position or rank within a group. Clothes and other<br />
accessories are used by people to show their level of importance. They may also be used<br />
to give the wearer a sense of feeling important. Status symbols are clothes or other items<br />
that offer a sense of status for the ordinary person. Usually<br />
these items are more expensive or the latest in design.<br />
For some people, status symbols can be fur coats,<br />
expensive jewelry, or designer clothes.<br />
10. Decoration:<br />
People decorate themselves to enhance their<br />
appearance. They wear clothes, jewelry, and cosmetics in<br />
hopes of improving their looks and attracting favorable<br />
attention. Adornment, or decoration, also helps people to<br />
express their uniqueness and creativity. Clothing and<br />
accessories can be used to improve appearance in different<br />
ways. Clothing can also be decorated to make it special<br />
and unique.<br />
<strong>1.</strong>4 CLASSIFICATION OF FIBERS:<br />
Insignias<br />
Cave men painted over their<br />
bodies<br />
Fibres are the fundamental units used in fabrication<br />
of textile yarns and fabrics. It is an individual, fine, hair like substance. Fibers usually are<br />
grouped and Twisted together into a continuous stand called yarns. Fibers may be from<br />
natural sources or they may be man-made. The details of these fibers are discussed in<br />
the following chapters.<br />
5
FIBER CLASSIFICATION<br />
Fibers<br />
Natural Fibers Man-made Fibers<br />
Man-made<br />
Minerals<br />
Man-made<br />
Non<br />
Cellulosic<br />
Mineral Fibers Natural<br />
Rubber<br />
Cellulosic/Plant Fibers Animal<br />
Fibers<br />
Man-made<br />
Modified<br />
Cellulosic<br />
Man-made<br />
Cellulosic<br />
6<br />
Nut<br />
Husk<br />
Leaf<br />
Fiber<br />
Bast<br />
Hair<br />
Seed<br />
Hair<br />
Asbestos<br />
Nylon &<br />
Polyester<br />
Rayon<br />
Rubber<br />
Glass<br />
Acetate<br />
Cotton Flax Pineapple Coir<br />
Animal<br />
Secretion<br />
Animal<br />
Hair<br />
Wool Silk
Questions:<br />
Objective questions:<br />
PART – I<br />
<strong>1.</strong> Clothes are mainly used to<br />
(a) cover the body (b) attractive<br />
(c) comfort and protection (d) identity<br />
2. Eskimos use<br />
(a) helmets (b) bullet proofs<br />
(c) robes (d) fur<br />
3. Insignias means<br />
(a) decoration (b) badges<br />
(c) uniforms (d) fur<br />
4. Football players wear<br />
(a) asbestos clothing (b) fur<br />
(c) protective padding (d) robes<br />
5. Uniforms are worn by<br />
(a) Athletic teams (b) Kings<br />
(c) Queens (d) Eskimos<br />
Answer in one or two words:<br />
<strong>1.</strong> Define “Clothing”.<br />
2. Give the clothing of Eskimos.<br />
3. How does nomades dress?<br />
4. Define “Safety in clothing”.<br />
5. Define “Insignias”.<br />
6. Give a note on the dresses of ancient people.<br />
7. What are the fibres used by ancient people?<br />
8. How do early people dyed their fabric?<br />
9. What is agrarian society?<br />
7
Answer in a paragraph:<br />
PART – II<br />
<strong>1.</strong> How will you justify the use of clothing as protection?<br />
2. Give short notes on styles and colors in clothing?<br />
3. Why clothes are decorated?<br />
4. How clothes help in identification?<br />
5. Give short notes on modesty in clothing?<br />
Answer in a page:<br />
PART – III<br />
<strong>1.</strong> Brief out on safety in clothing.<br />
2. Explain how clothing helps in protection.<br />
3. Brief out on uniforms.<br />
4. Explain ancient clothing.<br />
5. How sewing was developed?<br />
Answer in a page:<br />
PART – IV<br />
<strong>1.</strong> Define and classify fibers.<br />
2. Explain in detail on purpose of clothing.<br />
Answers for objective questions:<br />
<strong>1.</strong> (a) 2. (d) 3. (b) 4. (c) 5. (a)<br />
8
2. FIBER PRODUCTION—NATURAL FIBERS<br />
2.1 <strong>INTRODUCTION</strong>:<br />
The source of Natural fibers are from plants, animals and mineral. Since these are<br />
available naturally, it is called as natural fibers.<br />
2.2 PLANT FIBERS:<br />
Plant fibers are composed of cellulose and therefore are classified as natural cellulosic<br />
fibers. The important raw material to produce fabrics are fibers especially cotton and silk.<br />
First let us see the preparation of cotton fibers.<br />
2.2.1 Cotton:<br />
The word cotton is derived from the Arabic word qoton or qutun, which means a plant<br />
found in conquered land. Cotton is fiber that grows from the surrounding surface of seeds<br />
in the pods, or balls of a bushy mallow plant. It is composed basically of a substance called<br />
cellulose.<br />
Principal Origin : Natural Chemical Type : Cellulosic<br />
Generic Name : Seed hair Common Name : Cotton<br />
a. History:<br />
Cotton is still the fiber used mostly in the world.People around the world mostly use<br />
cotton as the main fiber. They prefer garment made from cotton than any other fibers. More<br />
over cotton is one of the best fiber suitable for our climate. The main raw material used for<br />
ccotton fabric is cotton pod. Ancient records shows that garments made out of cotton were<br />
used by Indians also.<br />
Greek Philosophers refers that Indians were best in growing, spinning and weaving<br />
pure cotton fabric between 3000 BC-1500AD. Marco Polo on his voyage to our country<br />
states that the world’s finest cotton fabrics were made from India. Cotton fabrics from<br />
India, are fine and of outstanding quality. Archeological findings at Mohenja-Daro suggest<br />
that the cotton plant was already domesticated and being used for making textiles over<br />
5000 years ago.<br />
b. Growth and Production:<br />
Cotton is a member of the Mallow family. Its height ranges from 25 cm to over 2 m,<br />
depending upon variety, climate and agronomy. It is normally grown as an annual shrub.<br />
(1) Preparation of Land:<br />
The cleared land is ploughed and harrowed to breakup large lumps and remove<br />
ridges. Small furrows are opened and at the same time, the seeds are dropped in one at<br />
9
a time, generally with fertilizer being put in the furrow at the same time. Generally cotton is<br />
planted in February in the more southerly regions but it may be as late as June in the<br />
northernmost sections of the cotton belt. When the plants have grown to a height of 5 to 7<br />
inches, they are generally thinned out so that there are not more than 2 or 3 plants per hill,<br />
or so that the plants are about 9 to 14” apart in rows. This is usually done by hand. Within<br />
a few weeks after the plant has emerged, the first buds appear. This consists of three<br />
triangular strapped leaflets or bracts, and the flower buds. It is at this stage when the plant<br />
is about to bear its blossom and seed, that it is most susceptible to insect damage. The<br />
principal enemy to cotton is the ball weevil. Other parts are aphids, worms, spider, mites<br />
and a number of other small insects.<br />
(2) Maturing of the Ball:<br />
About 21 days after the buds are first seen, the cotton blossom appears. This is at<br />
first a creamy white to a deep yellow color. Later it becomes pink and eventually dark red.<br />
It lasts about 3 days, after which the petals fall off and the ovary ripens to form a pod which<br />
we know as the cotton ball.<br />
Next fibers push out from the coating of the seed, causing the ball to expand until it is<br />
nearly one inch in diameter and half again as long. Different varieties of cotton matures at<br />
Sowing Seed<br />
Within few weeks<br />
Buds<br />
21 days<br />
Cotton Blossom white to deep yellow colour<br />
Petals fall off<br />
Ovary ripens<br />
Expansion of cotton ball<br />
Growth of cotton<br />
different rates; usually it takes between 45 and 65 days from blossom to the open ball. The<br />
growing season, fertilizer, degree of cultivation and amount of moisture - all these factors<br />
may affect the maturing of cotton crops.<br />
10
(3) Harvesting:<br />
With the first frost, the cotton plant normally sheds its leaves, but the balls have matured<br />
and are opened often several weeks before the first frost. When the cotton crop is defoliated<br />
all the balls are more readily exposed to the sun, and the maturity is much more uniform.<br />
Harvesting is either by hand or by picking machines.<br />
(4) Ginning:<br />
If the newly harvested seed cotton is wet, then it may have to be dried, using warm<br />
air, before it can be stored in large piles to await ginning. In many countries, drying is an<br />
integral part of the ginning process. “Ginning” is the separation of fibers from the seeds. It<br />
is done by special machines. The separated fibers called lint, have a staple length of<br />
between 15 and 50 mm depending on the variety. On many types of seed, there are some<br />
very short fibers, called linters. They are made of cellulose and they find many uses, including<br />
the production of man-made fibers. The seeds can also be utilised for the production of<br />
edible oil.<br />
100 kg of clean seed-cotton yields : 35 kg of fiber 62 kg seed 3 kg of waste<br />
The lint passes on the conveyor belt to a bailing press, where it is compressed and<br />
packaged into the standard bales of 500 pounds in weight.<br />
(5) Utilisation:<br />
Cotton fibers are made into staple fiber yarns either by ring spinning or rotor spinning.<br />
c. Properties of Cotton:<br />
Lustre : Low<br />
Tenacity / Strength : Medium<br />
Elastic Recovery : Low<br />
Elongation : 7%<br />
Resiliency : low<br />
Harvesting<br />
11
Density : <strong>1.</strong>54 g/cm3 Moisture absorption : 8.5%<br />
Dimensional Stability : Good.<br />
Acids : Damages, Weakens fiber<br />
Alkalies : Resistant (mercerization)<br />
Effect of sunlight : Weakens fiber slowly.<br />
Insects : Silverfish damages fiber.<br />
To flame : Burns readily.<br />
Shape : Fairly uniform in width, 12 - 20 μ, length varies from ½ to 2½<br />
inches.<br />
d. International Cotton Emblem:<br />
This emblem serves clearly to identify textiles made from pure cotton<br />
and implies good quality. It may not be applied to fiber blends.<br />
Cotton Emblem<br />
2.2.2 Flax (Linen):<br />
The word flax is derived from Old English “flax”. Linen is the term<br />
applied to the yarn spun from flax fibres and to the cloth or fabric woven<br />
from this yarn, flax fibers are held together under the stem’s bark principally<br />
by a gummy substance (pectin) from the body of flax plant. It is composed<br />
basically of substance cellulose. It is a natural, cellulosic, bast, multicellular<br />
fiber.<br />
Principal Origin : Natural Chemical Type : Cellulosic<br />
Generic Name : Bast fiber Common Name : Flax.<br />
a. History:<br />
Linen has been known in civilised societies for thousands<br />
of years. Flax was already being cultivated systematically by<br />
ancient Egyptians, Babylonians and other civilisation. The rich<br />
people of Greece used only linen material. The priests used<br />
linen material for their dress while performing holy and custom<br />
deeds.<br />
Linen was specially popular in middle ages. A common<br />
fabric of that period was a combination of linen and wool, called<br />
“linsey-woolsey”.<br />
In India from the time of Buddha Linen material was<br />
considered to be expensive. Before 2500 BC, the carving in<br />
the graveyard, show the preparation of Linen fibre from the flax<br />
12<br />
Flax Plant<br />
Flax Plant
plant was pictographically depicted and it was found in the year 1887 by archeological<br />
expects.<br />
Fine quality linens still retain the reputation of luxuriousness and expensiveness.<br />
Manufacture of fiber into fabric requires unusual care throughout each process to retain<br />
the strength and beauty of the fiber.<br />
b. Growth and Production:<br />
<strong>1.</strong> Cultivation:<br />
The flax plant requires deep, rich, well plowed soil and a cool, damp climate.<br />
Prematurely warm weather affects the growth and the quality of the fiber. As soil in which<br />
flax is grown must be enriched for six years before it will yield a good harvest, only one<br />
crop in seven years can be raised on specified portion of land. The flax seeds are sown by<br />
hand in April or May. In three months the plants become straight, slender stalks from 2 to 4<br />
feet in height, with tapering leaves with small blue, purple or white flowers. The plant with<br />
the blue flower yields the fine fiber. The others produce coarse but strong fiber. After flowering<br />
mature plant develops seed capsules in the size of peas. The seeds are about 2 mm long<br />
and are very rich in oil.<br />
2. Harvesting:<br />
By the end of August, the flax turns a brownish color, which indicates that the plant is<br />
about to mature, it is ready for harvesting. There must be no delay at this stage; otherwise<br />
the fiber will lose its prized luster and soft texture. The plants are pulled out of the ground<br />
either by hand or efficiently by machine. If the stalk is cut, the sap is lost; this loss affects<br />
the quality of the fiber, the stalk must be kept intact and the tapered ends of the fiber must<br />
be preserved so that a smooth yarn may be spun. The stalks are tied in bundles, called<br />
beets in preparation for extraction of the fiber.<br />
3. Preparation of fiber:<br />
(a) Rippling:<br />
The seeds and the leaves are removed from the stems of the flax plant by passing<br />
the stalk through coarse combs. This process is called “Rippling”.<br />
(b) Retting:<br />
The bundles of plants are then steeped in water so that the tissue or woody bark<br />
surrounding the hairlike flax fiber will decompose, thus loosening the gum that binds the<br />
fiber to the stem. The decomposition is called retting.<br />
Retting only loosens the woody bark. If flax is not retted enough, the removal of the<br />
stalk without injury to the delicate fiber is difficult. If flax is over-retted the fiber is weakened.<br />
The retting operation, as well as other processes for producing linen fabric, therefore,<br />
requires great care. Retting can be done via different methods.<br />
13
<strong>1.</strong> Dew retting:<br />
The flax straw is spread on the grass and is exposed to the atmosphere for 3 to 4<br />
weeks. This method produces strong dark flax gray in color.<br />
2. Pool or damp retting:<br />
It takes less time than dew retting (10-15 days). As stagnant pools of water are used<br />
this method sometimes causes over-retting, which is responsible for brittle and weak flax<br />
fibers. Pool retting darkens the flax giving it a bluish grey colour.<br />
3. Stream retting:<br />
This method for producing high quality flax fiber was used before but now is outmoded.<br />
4. Tank or VAT retting:<br />
The flax is immersed in wooden vats of warm water at temperature. Ranging from<br />
25-30°c which hastens the decomposition of the woody bark. The flax is removed from the<br />
vats and passed between rollers to crush the decomposed bark as clean water flushes<br />
away the pectin or gum and other impurities. Linen produced by this method is more<br />
susceptible to mildew.<br />
5. Chemical retting:<br />
Chemical retting can shorten the retting process but chemicals will affect the strength<br />
and color of the flax fiber. Soda ash, oxalic acid are the chemicals used.<br />
(c) Drying:<br />
These fibers (flax stalks) are then dried by means of warm air ovens.<br />
(d) Breaking:<br />
The stalk becomes partially separated from the fiber when the wet plants are placed<br />
in the fields to dry. When the decomposed woody tissue is dry, it is crushed by being<br />
passed through fluted iron rollers. This breaking operation reduces the stalk to small pieces<br />
of bark called sheaves.<br />
(e) Scutching:<br />
The removal of woody parts from fibers is scutching. The scutching machine removes<br />
the broken sheaves by means of rotating wooden paddles, thus finally releasing the flax<br />
fiber from the stalk.<br />
(f) Hackling (combing):<br />
The simple combing process known as hackling straightens the flax fibers, separates<br />
tows from lines and arrange lines in parallel form.<br />
14
(g) Processing:<br />
The line tow is spun into yarns using the linen process.<br />
c. Properties of Linen:<br />
Shape : Width varies. Diameter is varies from a few inches to 22 inches<br />
or more; average length after processing is 10 to 15 inches<br />
Luster : Medium to high<br />
Elastic Recovery : Low elongation<br />
Resiliency : Poor<br />
Density : <strong>1.</strong>5<br />
Moisture absorption : Good<br />
Dimensional Stability : Good<br />
Acids : Good to cool, dilute. acids; low or poor to hot dilute. Poor to<br />
concentrated either hot or cold<br />
Alkalies : High resistance.<br />
Sunlight : Good<br />
Insects : Good<br />
To Flame : Burns readily<br />
2.3 ANIMAL FIBERS:<br />
Natural protein fibers are obtained from animal sources like hair and other secretion,<br />
fibers include covering from such animals as sheep, mohair goat, cashmere goat and<br />
camel. Secretions are obtained from the larva, or worm stage, of the silkworm, which<br />
spins the cocoon from which silk fibers are obtained and from the spider which spins fine<br />
fibers in making its web. There are some properties of hair fibers and secretions which<br />
are quite similar and on the other hand there are properties which are totally different.<br />
2.3.1 Silk:<br />
In old English, silk was sioloc. The name is thought to have originated from the Greek<br />
“Seres”, meaning the people from Eastern Asia, namely the Chinese.<br />
Silk is very fine strand of fiber that is a solidified protein secretion produced by certain<br />
caterpillars to encase themselves in the form of cocoon.<br />
Principal Origin : Natural Chemical Type : Proteinaceous<br />
Generic Name : Secretion of caterpillar Common Name : Silk<br />
a. History:<br />
The possibility of making cloth from the filament that the silkworm spins into a cocoon<br />
was first discovered in China about 2600 B.C. Legends tells us that a cocoon accidently<br />
15
dropped into a cup of tea that a Chinese Princess was having in her garden. The hot liquid<br />
softened and loosened the fiber, which the princess pulled and drew away from the cocoon<br />
as a continuous strand. Another story cites Empress Si-ling-chi as the first producer of silk<br />
fiber, from which she made a silk robe for her husband. From antiquity until the more recent<br />
establishment of the Chinese Republic, she was venerated as the Goddess of the Silkworm.<br />
The Chinese who first cultivated the silkworm and developed a silk industry<br />
endeavored to keep the source of the raw material secret. Their silk fabrics were highly<br />
priced. Caravans carried silk into the Near East where they were traded for hundreds of<br />
years. About three thousand years after its original discovery the secret was stolen out of<br />
China.<br />
b. Sericulture (Growth and Production):<br />
Sericulture, the production of the worms, their development and the spinning of cocoon<br />
is largely a home industry. In the modern scientific industry the tiny eggs or seeds are<br />
deposited by the carefully bred female moth on cards or strips of cloth.The cards are<br />
stored in racks in a cool dry place until the incubation of a new crop of silkworms is desired.<br />
The cards are distributed to the peasants and the eggs are incubated by wild warmth: the<br />
Butterfly<br />
Cocoon Moth<br />
eggs may be covered with blanket, or the cards may be worn under the clothing and the<br />
tiny ants or silkworms or hatches. The young ants are provided with shredded, fresh, tender<br />
mulberry leaves (morus alba). The leaves to which the worms cling are lifted to the feeding<br />
16<br />
Silk worm
trays. The weak worms are discarded. The worms are kept in a room at a uniform<br />
temperature, they are fed five or six times a day, the trays are kept clean.<br />
The ants are initially about 3 mm long. During this growth the worms sheds its skin<br />
four times at about 5-days intervals and after the fourth shedding it develops for about 10<br />
days more. The fully grown worm is 8 to 9 cm in length and has increased its weight by<br />
1000 fold to 5 gms.<br />
The fully developed worm has a total life period of approximately one month. It first<br />
learns to eat and begin to seek something on which to spin its cocoon. This worm is then<br />
transferred to a wooden frame containing twigs or straws, on which the cocoon is spun. To<br />
spin this cocoon the worm spins a net and then forms a shell around his body. The worm<br />
swings its head in a figure formation and expels fluid from two sacs in its body. The two<br />
strands are excreted from minute openings or spinnerets, close together in the lower jaw.<br />
The fluid solidifies when in contact with the air. The two filaments known as fibroin are<br />
cemented together by a glue known as sericin. The sericin is excreted from two glands.<br />
The worm makes more than one movement of its head each second and be heard at work<br />
even after the cocoon has become so thick that the worm cannot be seen. It takes two or<br />
three days to complete a cocoon. The worm then changes into the ‘Pupa’ or ‘Chrysalis’.<br />
The tangle of loose silk with which the silk worm is originally secured its position in the<br />
straw, is called ‘Floss’ or ‘Blaze’.<br />
In about two weeks, the moth will develop if the chrysalis is permitted to live. The<br />
moth escapes through the bottom of the cocoon and breaks the silk strands in the several<br />
layers in making its escape. An alkaline solution secreted by the moth allows it to break<br />
the strands more easily. It is customary to permit the development of only enough moths for<br />
breeding and egg-laying, because the broken cocoons are of less value than those having<br />
long, unbroken filaments. Life cycle is terminated at this point by process known as ‘Stoving’<br />
or ‘Stifling’.<br />
c. Processing of Silk:<br />
In order to produce unpierced cocoon the chrysalis is killed by heat in dry air, more<br />
rarely by hot water or steam. The cocoons are weighed; the female moths being heavier,<br />
can thus be selected and allowed to escape. The moths live only a few days, during which<br />
they mate and lay eggs. It is estimated that nearly 3000 cocoons are required to make a<br />
yard of silk fabric. Silkworms are subject to many diseases. The most important of these is<br />
‘pebrine’. The worms are damaged by changes in room temperature and by moisture in<br />
their food. These factors influence the quality of silk produced. Wild silk is that produced<br />
from other types of moths, which have not lent themselves to domestication. These cocoons<br />
must be sought in the trees and many of them have already been pierced when found. Wild<br />
silk is less uniform but is coarser and somewhat stronger than the cultivated variety. The<br />
most common wild silk is that from the tussah or tussar silkworm of Asia. This worm feeds<br />
on mulberry, oak and other trees. The term is generally applied to all wild silks, but strictly<br />
speaking tussah is an Indian silkworm.<br />
17
<strong>1.</strong> Softening the sericin:<br />
After the cocoons have been sorted, they are put through a series of hot and cold<br />
immersions, as the sericin must be softened to permit the unwinding of the filament as one<br />
continuous thread. Raw silk consists of about 80% fibroin and 20% sericin. At this time,<br />
only about 1% of the sericin is removed, because this silk gum is a needed protection<br />
during the further handling of delicate filament.<br />
Softening of silk<br />
2. Reeling the Filament:<br />
The process of unwinding the filament from the cocoon is called reeling. The care<br />
and skill used in reeling operation prevents defects in the raw silk. As the filament of a<br />
single cocoon is too fine for commercial use, 3 to 10 strands are usually reeled at a time to<br />
produce the desired diameter of raw silk thread. The cocoons float in H O, bobbing up<br />
2<br />
and down, as the filaments are drawn upward through porcelain eyelets and are rapidly<br />
wound on wheels or drums while the operator watches to detect flaws. The sericin acts as<br />
Reeling of silk<br />
an adhesive. It aids in holding several filaments together while they are combined to form<br />
the single thread. The remaining part of filament is used as valuable raw material for the<br />
18
manufacture of spun silk. The silk filaments are reeled into skeins, which are packed in<br />
small bundles called books.<br />
3. Throwing:<br />
“Reeled silk is” a term applied to the raw silk strand that is formed by combining<br />
several filaments from separate cocoons. Reeled silk is transformed into silk yarns - also<br />
called silk thread-by a process known as “throwing”. The raw silk skeins are sorted<br />
according to size, color, and length or quantity, then soaked in warm water with soap or oil.<br />
This softening of the sericin aids in handling the thread. After mechanical drying, the skeins<br />
are placed on light reels from which the silk is wound on bobbins. During this winding<br />
operation, single strands may be given any desired amount of twist. If two or more yarns<br />
are to be doubled, they are twisted again in the same direction or in a reverse direction<br />
depending on the kind of thread to be made.<br />
4. Degumming:<br />
Thrown silk yarns still contain some sericin that must be removed in another soap<br />
bath to bring out the natural luster and the soft feel of the silk. As much as 25% of the weight<br />
is lost by the degumming process. When gum has been removed, the silk fiber or fabric is<br />
a creamy white color, beautifully lustrous and luxuriantly soft. It takes place after throwing<br />
for preparing yarn for dyeing. A small amount of sericin is sometimes left in the yarn or in<br />
the fabric to give the finished product added strength or a dull finish.<br />
5. Weighing:<br />
The amount of weight that silk loses in the degumming process is an appreciable<br />
factor in manufacturing costs because the manufacturer buys silk by weight. The weighing<br />
of silk fabric with metallic substances to make up for the weight lost by degumming is an<br />
accepted practice in the silk industry. Weighted silk, however loses the natural elasticity of<br />
the silk fiber and is subject to deterioration when exposed to sunlight, perspiration and dry<br />
cleaning.<br />
6. Noil Silk:<br />
The shorter waste fibers in the form of comber noils from spun silk processing are<br />
spun into coarser, irregular, neppy yarns using the woollen spinning system. Also known as<br />
Bourette Silk.<br />
Degummed Cultivated Silk Weighted Cultivated Silk Wild Silk<br />
Wrinkles little, fine lustre Full, heavy, wrinklesless, Coarser, heavier than<br />
fine and smooth<br />
Types: spun silk, noil silk<br />
durable and has strong lustre cultivated silk, darker<br />
19
c. Properties of silk:<br />
Shape : The fiber is long from 1,000 to 1,300 years.<br />
Luster : High<br />
Elastic recovery : Good<br />
Elongation : Good<br />
Resiliency : Medium<br />
Density : <strong>1.</strong>25 - <strong>1.</strong>34 g/cm3 .<br />
Moisture absorption : Good<br />
Dimensional stability : Good<br />
Acids : Damage<br />
Alkalies : Strong alkalies damage fiber;<br />
Sunlight : Prolonged exposure causes fiber breakdown<br />
Insects : Destroyed by carpet beetles<br />
To flame : Burns with a sputtering flame.<br />
2.3.2 Wool:<br />
The word wool was wull in old English. Wool is the fiber from the fleece of domesticated<br />
sheep.<br />
Principal Origin : Natural Chemical type : Proteinaceous<br />
Generic name : Animal hair Common name : Wool<br />
a. History:<br />
When wild sheep were killed by primitive people for food they used the pelts as body<br />
coverings. It is believed that ancient shepherd in the first century A.D. discovered that<br />
Merino sheep could be bred to improve the fleece. Soft wool is developed by breeding<br />
different species of animals. It provides warmth and physical comfort. These quality<br />
combined with soft resiliency make wool desirable for apparel as well as for such household<br />
uses as rugs and blankets. The quality of wool fiber is determined by the breeding, climate,<br />
food, general care and health of sheep. Cold weather produces a hardier and heavier<br />
fiber. Excessive moisture dries out natural grease. Insufficient or poor food retards growth.<br />
b. Processing:<br />
To produce good quality of wool, sheep are prevented against disease by chemicals<br />
and are fed nutritional diets. Wool can be sheared from the living animal or pulled from the<br />
hide after the animal has been slaughtered for its meat or it is dead due to some disease<br />
or something. The sheared wool is called fleece or clip wool. Fibers taken from the<br />
slaughtered animal hide are called pulled wool. It is not as good as clipped wool. The<br />
shearing of clipped wool can be done manually or chemically. In chemical shearing the<br />
animal is fed a special chemical, which causes the wool to become loose from the skin, or<br />
20
fall away and it can then be brushed together and removed without mechanical shearing.<br />
Pulled wool can be removed by treating with a depilatory that loosens the fibers and permits<br />
them to be pulled away from skin without damaging the hide or it can be loosened by the<br />
action of bacteria on the root end of the fiber. Pulled wool when used is usually mixed with<br />
fleece wool before processing into yarns and fabrics.<br />
c. Classification for wool:<br />
There are about 40 breeds of sheep and more than 200 which are crossbred. Wool<br />
producing sheep may be classified into four groupings according to the Wool Quality.<br />
<strong>1.</strong> Merino wool:<br />
Merino sheep produces best wool. It is found in Spain. The staple is relatively short.<br />
Ranging from 1 to 5 inches but the fiber is strong, fine and elastic and has good working<br />
properties. It has greatest amount of crimp and has maximum number of scales. Used for<br />
best wool clothing.<br />
2. Class-two wools:<br />
This variety is not less than a very good quality wool. Its fiber is 2 to 8 inches in<br />
length, has a large number of scales per inch and has good crimp. The fibers are strong,<br />
fine and elastic and have good working properties. Found in England, Scotland and Ireland.<br />
3. Class-three wools:<br />
The fibers are from 4 to 18 inches long and are coarsened have few scales and less<br />
crimp than merino and class-two wool. Smoother and more lustrous. Good enough for<br />
clothing. Originated in U.K.<br />
4. Class-four wools:<br />
Different types of wool from various animals<br />
This class refers to half-breeds. Fiber length ranges from 1 to 16 inches, coarse,<br />
hairlike have relatively few scales and little crimp and are smooth and lustrous. Mainly<br />
used for carpets, rugs and inexpensive low-grade clothing.<br />
21
d. Classification by Fleece:<br />
Wool shorn from young lambs differs in quality from<br />
that of older sheep. Also, fleece differ according to whether<br />
they come from live or dead sheep, which necessitates<br />
standards for the classification of fleece.<br />
<strong>1.</strong> Lamb’s wool:<br />
The first Fleece sheared from a lamb about six to<br />
eight months old is known as lamb’s wool and or fleece<br />
or first clip wool. This wool is of very-very fine quality. The<br />
fibers are extremely soft.<br />
2. Hogget Wool:<br />
Wool from 12 to 14 month old sheep for the first time. The fiber is fine, soft, resilient<br />
and mature. Good strength and is used for warps.<br />
3. Pulled Wool:<br />
Wool from slaughtered animal and is of inferior quality as quality of wool is not as<br />
good and roots of fibers are generally damaged.<br />
4. Dead Wool:<br />
Wool from dead animal which is inferior in grade.<br />
Fleecing of wool<br />
5. Taglocks:<br />
The tom, ragged or discolored parts of a fleece are known as taglocks.<br />
6. Recycled wool:<br />
Old woolen stuff is broken to make woolen fibers and shred them to yarns again.<br />
e. Manufacturing Process:<br />
Long and short fleece are separated. Superior wool comes from the sides and<br />
shoulders, where it grows longer, finer and softer, and is treated as one fleece; wool from<br />
the head, chest, belly and shanks is treated as second fleece. The wool is packed in bags<br />
or bales. The raw wool is called grease wool because it has natural oils of sheep. It is<br />
washed and the grease is used in the pharmaceutical industries. Wool is then sorted<br />
which is the process of breaking up an individual fleece into its different qualities. Recycled<br />
wool fibers are obtained by separately reducing the unused and used material to a fibrous<br />
mass by a picking and shredding process called garneting. This is then treated with acids<br />
and the process is called carbonizing and the process is called scouring. The wool is then<br />
dried leaving 12 to 16% of the moisture. As the wool is unmanageable after scouring, the<br />
fiber is usually treated with various oils, including animal, vegetable, and mineral or a blend<br />
of these to keep it from becoming brittle and to lubricate it for spinning. The wool is then<br />
dyed if required and blended.<br />
22
f. Properties of wool:<br />
Shape : Length varies from 1½” to 15" has scales on its surface.<br />
Luster : Medium<br />
Elongation : Good<br />
Resiliency : Excellent<br />
Density : <strong>1.</strong>30 – <strong>1.</strong>32 g/ccm<br />
Moisture absorption : Good<br />
Dimensional stability : Subject to felting and relaxation shrinkage.<br />
Resistance to acids : Good<br />
Resistance to alkalies : Low; many alkalies destroy the fiber.<br />
Sunlight : Prolonged exposure deteriorates fiber<br />
Insects : Damaged by moths and carpet Beetles.<br />
To flame<br />
Questions:<br />
: Burns slowly when in direct flame, is considered to be self<br />
extinguishing.<br />
Objective questions:<br />
PART – I<br />
<strong>1.</strong> Cotton is stronger when it is wet. This is because of<br />
(a) crystalline fiber (b) hydrophilic in nature<br />
(c) cellulose layer (d) all the above<br />
2. Cotton plant is<br />
(a) lengthy (b) shallow (c) bushy (d) hard<br />
3. Cotton buds blossoms in days.<br />
(a) 21 days. (b) 23 days. (c) 20 days. (d) 24 days.<br />
4. The elasticiy of cotton is<br />
(a) 8% (b) 9% (c) 7% (d) 6%<br />
5. This firbre is strong and lustrous.<br />
(a) cotton (b) silk (c) linen (d) wool<br />
6. The silk fiber is invented by<br />
(a) Egyptian (b) Japanese (c) Indian (d) Chinese<br />
Answer in one or two words:<br />
<strong>1.</strong> Which is the fundamental item for making textiles?<br />
2. Name any two natural fiber.<br />
23
3. What do you call the method of removing seeds from dried cotton?<br />
4. What is the temperature needed for the cotton plantation?<br />
5. To which plant variety does linen belong to?<br />
6. What do you call the fabric made from the combination of linen and cotton?<br />
7. Name the process by which the leaves and seeds are removed from the flax plant<br />
8. In which type of soil cotton is cultivated.<br />
PART – II<br />
Answer in a paragraph:<br />
<strong>1.</strong> Explain retting process of linen.<br />
2. Explain sorting of silk.<br />
3. What is degumming?<br />
4. Classify and explain hair fibres.<br />
5. Write about the properties of wool.<br />
6. Write about the physical properties of silk.<br />
7. Explain the process of silk reeling.<br />
PART – III<br />
Answer in one page:<br />
<strong>1.</strong> Explain the invention of silk fiber.<br />
2. Explain the properties of cotton.<br />
3. Write about the properties of silk.<br />
4. Write on processing of wool.<br />
5. Write about the properties of wool.<br />
Answer in detail:<br />
<strong>1.</strong> Explain about cotton.<br />
2. Explain about linen.<br />
3. Explain about silk.<br />
4. Explain about wool.<br />
Answers for objective questions:<br />
<strong>1.</strong> (d) 2. (c) 3. (a) 4. (c) 5. (b) 6. (d)<br />
PART – IV<br />
24
3. FIBER PRODUCTION—MAN-MADE FIBERS<br />
3.1 <strong>INTRODUCTION</strong>:<br />
A scientist named Hooke in seventeenth century suggested that if proper liquid were<br />
squirted through a small aperture and allowed to congeal a fiber can be produced.<br />
3.2 RAYON:<br />
Rayon was the first fiber to be produced commercially. By the passage of time<br />
increasing number of new fibers came into existence. A generic name is the name of a<br />
family of fibers all having similar chemical composition. All man-made fiber spinning<br />
processes are based on three general steps.<br />
<strong>1.</strong> Preparing a viscous solution or syrup dope.<br />
2. Extruding this solution through spinneret to form a fiber.<br />
3. Solidifying the fiber by coagulation, evaporation or cooling.<br />
Spruce logs shredded<br />
The sheets are shredded<br />
and mixed with carbon<br />
disulphide<br />
The mix is tipped into a<br />
caustic soda bath,<br />
forming viscose<br />
cooked with<br />
caustic soda<br />
Manufacturing process of rayon<br />
The raw material can be made by mixing or dissolving natural fibers with some<br />
chemicals where they are called “regenerated fibers” or just with the mixing of the chemicals.<br />
This solution is referred to as the spinning solution or dope. ‘Extrusion’ is the forcing or<br />
pumping of spinning solution through spinneret holes. A spinneret is a small thimble like<br />
nozzle. Each hole in the spinneret forms one fiber. Filament fibers are fibers extruded from<br />
spinnerets which together make filament yarn. Filament Tow is an untwisted rope of<br />
thousands of fibers.<br />
25<br />
made into shets of wood-pulp<br />
(alkali cellulose)<br />
fibers or filaments<br />
acid-bath<br />
spinneret<br />
Spool of<br />
rayon yarn
3.2 .1 Spinning methods:<br />
Spinning is done by three different methods in case of man-made fibers.<br />
<strong>1.</strong> Wet Spinning:<br />
Examples: Acrylic, Rayon, Spandex.<br />
2. Dry Spinning:<br />
Examples: Acetate, Acrylic, Mod-acrylic, spandex, triacetate, vinyon.<br />
3. Melt Spinning:<br />
Examples: Nylon, Olefin, Polyester, Saran.<br />
Wet Spinning<br />
Dry Spinning Melt Spinning<br />
After the filaments have been extruded and solidified, they are drawn out between<br />
rollers having different speeds. Drawing can also be a separate process. Spinneret size,<br />
plus spinning and drawing conditions, determine the final filament diameter. The filaments<br />
can be combined into a tow and then chopped into staple fibers. Man-made fibers may be<br />
spun into yarns, either alone or as blends with other fibers.<br />
3.2 .2 Rayon-Regenerated cellulosic fiber:<br />
Rayon is a man-made cellulosic fiber in which the starting material is wood pulp or<br />
cotton linters which is physically changed. During the early history of man-made fibers, the<br />
term rayon was used to indicate any type of manufactured fiber that was based on cellulose,<br />
but now it is called man-made cellulosic fiber. Rayon received its name in 1925, before<br />
that it had been called artificial silk but because of its cellulosic content, it greatly resembles<br />
cotton in its chemical properties. Also known as viscose / polynosic.<br />
3.2 .3 Manufacturing Process:<br />
By using different chemicals and manufacturing techniques, two basic types of rayon<br />
were developed. They were viscose rayon and cuprammonium rayon. Viscose rayon can<br />
have more names like standard viscose, regular viscose and high wet modulus rayon,<br />
26
depending on the changes made to get different qualities. Schweitzer in 1857 dissolved<br />
in an alkaline copper solution. In 1890, Despeisse developed a method to make a filament.<br />
The method was frequently modified until now it is capable of producing the finest diameter<br />
of any of the rayons.<br />
<strong>1.</strong> Cotton linters afford the greatest purity and are the preferred source cellulose. These<br />
fibers are cleansed by cooking in a mild caustic alkali and bleached with chlorine.<br />
2. The purified alpha-cellulose is washed, dried and treated with basic copper sulphate<br />
and ammonia.<br />
3. The viscose solution is forced through spinnerets into water, which removes much of<br />
the copper and ammonia.<br />
4. The filaments are passed through a mild sulfuric acid bath to coagulate them and to<br />
remove the copper.<br />
5. The skeins are washed and rinsed.<br />
6. The yarns are sorted according to denier.<br />
3.2 .4 Properties of Rayon: :<br />
Shape : Controlled by manufacturer. Diameter varies from 12 to 40<br />
microns.<br />
Luster : Vary from dull to bright.<br />
Strength : 2.4-3.0<br />
Elongation : 19-24%<br />
Elasticity : 82%<br />
Density : <strong>1.</strong>5 for all types of rayon.<br />
Moisture : 10.7 to 16%<br />
Dimensional stability : Poor for all types of Rayon.<br />
Resistance to acids : Generally not good but under some conditions it is acceptable<br />
Alkalies : Generally not good but under some conditions it is acceptable.<br />
Sunlight : Average<br />
Insects : Silverfish damage all types of cellulosic fibers.<br />
To heat : Extended exposure will eventually degrade the fiber.<br />
3.3 ACETATE AND TRIACETATE:<br />
Acetate, which is properly called cellulose acetate (chemically di-acetate or secondary<br />
acetate) was first made by Paul Schutzenberger in 1869. The first use of this substance<br />
27
was as a coating on cotton fabric or as a film similar to cellophane or plastic wrap. As a<br />
coating the substance was applied to fabric used in early aeroplanes. Triacetate fibers<br />
were developed along with regular acetate. However, manufacture of triacetate into fiber<br />
form was delayed until safe solvents became available in sufficient quantity to make<br />
production economically profitable. Both Acetate and triacetate continue to be respected<br />
fibers for selected types of fabrics however their use has continued to decline over the<br />
years.<br />
3.3.1 Manufacturing Process:<br />
Acetate<br />
<strong>1.</strong> Purified cellulose from<br />
Triacetate<br />
wood pulp or cotton linters. <strong>1.</strong> Same as acetate.<br />
2. Mixed with glacial acetic acid, acetic<br />
anhydride and a catalyst.<br />
2. Same as acetate.<br />
3. Aged 20 hours-partial hydrolysis 3. No aging. Solution is ripened. No<br />
occurs. hydrolysis.<br />
4. Precipitated as acid resin flakes. 4. Same as acetate.<br />
5. Flakes dissolved in acetone. 5. Flakes dissolved in methylene<br />
chloride.<br />
6. Solution is filtered. 6. Same as acetate.<br />
7. Spinning solution extruded in column<br />
of warm air solvent recovered<br />
7. Same as acerate.<br />
8. Filaments are stretched a bit and<br />
wound onto beams, cones, or<br />
bobbins ready for use.<br />
8. Same as acerate.<br />
The manufacturing processes are listed in the accompanying chart, which indicates<br />
the two major differences in production. Triacetate is produced in both processes, but to<br />
make acetate, the solution is hydrolyzed (treated with water and aged) which causes<br />
some hydroxyl groups to reform. Triacetate is dissolved in a different solvent and acetate<br />
in a different solution.<br />
3.3.2 Properties of Acetate and Triacetate:<br />
Shape : Shape can be controlled by the manufacturer-therefore uniform<br />
in observed appearance.<br />
Luster : Vary from dull to bright.<br />
Elastic Recovery : Good<br />
28
Resiliency : Low (acetate) Good (Triacetate)<br />
Dimensional stability : Good (for both)<br />
Resistance to Acids : Both fibers have fair resistance to dilute acids and poor to<br />
concentrated acids.<br />
Alkalis : Good to dilute and both are destroyed in concentrated alkalis.<br />
To flame : Both fibers burn easily and quickly.<br />
3.4 NYLON:<br />
Nylon was the first synthetic fiber. In 1928 the Dupont company decided to establish<br />
Adipic<br />
acid<br />
Water<br />
Evaoprator<br />
Water<br />
Meter and Pump<br />
Air cooled<br />
Individual filaments<br />
brought together as<br />
yarn<br />
Twisting and<br />
Transferring yarn<br />
depending upon<br />
end use<br />
Hexamethylene diamine<br />
Manufacturing of Nylon<br />
Auto<br />
clave<br />
Water<br />
Washer<br />
Spinning Continuous<br />
Filament<br />
Spinning<br />
Soution<br />
Chipper<br />
a fundamental research program. If anything was discovered it would be good for the<br />
company - a means of diversification. It was noticed that when a glass rod was taken out<br />
29<br />
Spinning<br />
solution<br />
Undrawn<br />
'Tow'<br />
Drawing<br />
Rolls<br />
Crimping<br />
Rolls<br />
Heat<br />
Cut to Desired<br />
Length<br />
Baled<br />
400 to 500 lb. Packages<br />
Spinning<br />
Staple
of one of the polyester stills the solution adhering to it stretched out into a solid filament.<br />
The filament could be stretched ever further and it did not go back to its original length.<br />
This stimulated the group to concentrate on textile fibers. The term nylon was chosen for<br />
the fiber and it was called the miracle fiber for several years. The first nylon was referred<br />
to as type 6,6. The numbers derive from the fact that each of the two chemicals used in<br />
making this type of nylon has six carbon atoms. Nylon type 6, 10 was developed at the<br />
same time and it is composed of one chemical with six carbon atoms per molecule and<br />
ten carbon atoms per molecule for the second chemical. Nylon 6, 6 was considered<br />
desirable for apparel and selected home furnishings; nylon 6, 10 was used in making<br />
brushes, and similar items. In many countries nylon is identified by term “Polyamide”.<br />
3.4.1 Manufacturing:<br />
Nylon 6, 6 is a linear condensation polymer made from hexamethylene diamine and<br />
adipic acid. Specific amounts of the two chemicals are combined in solution to form nylon<br />
salt. This salt is purified, polymerized, extruded in ribbon form, and chipped into small<br />
flakes or pellets. These flakes or pellets are melted and extruded through a spinneret into<br />
cool air and the nylon filaments are formed.<br />
The polymer chips are melted by heat in an autoclave and pumped to the spinneret.<br />
The hot syrupy solution is pumped through the spinneret. It emerges in strands which can<br />
be stretched like warm taffy. The size of the fiber is determined by the size of the holes and<br />
the speed with which the fiber is withdrawn from the spinneret. The fibers are cooled by air<br />
blown across them. By the drawing process either filament or staple fibers are prepared.<br />
3.4.2 Properties of Nylon:<br />
Shape : Shape is controlled by the manufacturer, filaments are uniform<br />
and long.<br />
Luster : Bright to Dull<br />
Elastic Recovery : 100%<br />
Elongation : Good<br />
Resiliency : Good<br />
Density : <strong>1.</strong>1 g / ccm<br />
Moisture absorption : 8%<br />
Dimensional stability : Excellent<br />
Acids : resistance is poor<br />
Alkalies : Good resistance<br />
Sun light : Generally affects<br />
Insects : Normally damages<br />
To flame : Self extinguishing<br />
30
3.5 POLYESTER:<br />
Polyester is sometimes referred to as the “workhorse” fiber of the industry. The filament<br />
form of the fiber has been said to be the most versatile fiber and the staple form has been<br />
called the “big mixer” because it can be blended with so many other fibers, contributing its<br />
good properties to the blend without destroying the desirable properties of the other fiber.<br />
Its versatility in blending is one of the unique advantage of polyester. The polyester have<br />
probably undergone more research and development work than any other fiber. One of the<br />
important physical changes has been that of changing from the standard round shape to a<br />
trilobal cross-section that gives the fiber silk-like properties. A chemical modification,<br />
high tenacity staple, was developed for use in durable press fabrics. The strength of the<br />
polyester reinforces the cotton fibers, which are weakened by the finishing process.<br />
3.5.1 Manufacturing:<br />
Polyesters are made by reacting a dihydric alcohol with a dicarboxylic acid. The<br />
generic definition was modified in 1973 so that no specific acid is identified; thus the<br />
definition can cover a variety of polyesters. As the acid and alcohol are polymerized, they<br />
are extruded from the polymerizing vessel in the form of a ribbon. This ribbon is cut into<br />
small chips; the chips are diced and conveyed to a hopper from which they are fed to the<br />
melt spinning tank. The hot solution is forced through spinnerets, and solidifies into fiber<br />
form on contact with cool air. It is stretched while hot, the stretching contributes strength to<br />
the fiber and controls elongation characteristics. The greater the amount of molecular<br />
orientation obtained during this strengthening step, the stronger the fiber and the lower the<br />
elongation.<br />
31
3.5.2 Properties of Polyester:<br />
Shape : Controlled by Manufacturers.<br />
Luster : Controlled from semibright to dull.<br />
Elastic Recovery : Varies<br />
Elongation : Varies by type<br />
Resiliency : excellent<br />
Density : <strong>1.</strong>38 g/cm<br />
Moisture absorption : very low<br />
Dimensional stability : Excellent<br />
Resistance to acids : Strong acids destroy fiber, weak acids have little or no effect.<br />
Alkalies : moderate<br />
Sunlight : resistance is excellent<br />
Insects : Excellent<br />
To flame : will burn, but slowly and melting fibers tend to drop off,<br />
preventing further burning.<br />
Questions:<br />
Objective questions:<br />
PART – I<br />
<strong>1.</strong> Synthetic yarns are introduced in this century.<br />
(a) 10th (b) 20th (c) 16th (d) 19th<br />
2. Artificial silk is<br />
(a) rayon (b) polyester (c) acrylic (d) acetate<br />
3. Nylon is a fabric whose filaments are prepared from<br />
(a) melt spinning (b) dry spinning (c) wet spinning (d) blow spinning<br />
4. The main difference between acetate and triacetate is<br />
(a) ageing (b) acetone/methyline chloride<br />
(c) hydrolysis (d) all of these<br />
5. Polyester is referred as<br />
(a) dupont (b) work horse (c) cellulose acetate (d) acrylic<br />
32
Answer in one or two words:<br />
<strong>1.</strong> Name any two synthetic fibers.<br />
2. What are the reagents that react to form polyester?<br />
3. Name the process by which nylon is manufactured.<br />
4. How Acetate is properly called?<br />
5. Name the three different methods by which spinning is done.<br />
Answer in a paragraph:<br />
PART – II<br />
<strong>1.</strong> Give the properties of nylon.<br />
2. How will you manufacture acetate?<br />
3. Explain man-made fibers.<br />
4. Give the properties of polyester.<br />
5. Give the flow diagram of manufacturing process of nylon 6,6.<br />
Answer in one page:<br />
PART – III<br />
<strong>1.</strong> Explain the manufacturing of rayon.<br />
2. How is tri acetate manufactured?<br />
3. Draw the manufacturing process of polyester.<br />
Answer in detail:<br />
<strong>1.</strong> Discuss on man-made fibers.<br />
2. Explain about wool.<br />
3. Explain on manufacturing of nylon.<br />
4. Explain on manufacturing of polyester.<br />
PART – IV<br />
Answer for objective type questions:<br />
<strong>1.</strong> (b) 2. (a) 3. (a) 4. (d) 5. (b)<br />
33
4. YARN PRODUCTION<br />
4.1 <strong>INTRODUCTION</strong>:<br />
To convert textile fibers into fabrics some type of fiber arrangement is required.<br />
Probably the most common method is to convert fibers into yarns, which are then<br />
constructed into fabrics. Yarns are essential for knitted, woven or knotted structures and<br />
for many braided ones.<br />
‘Yarn’ is defined by the American Society for Testing and Materials (ASTM) as “A<br />
generic term for a continuous strand of textile fiber, filament, or material suitable for knitting,<br />
weaving to form a textile fabric. Yarn occurs in the following forms.<br />
4.<strong>1.</strong>1 Yarn forms:<br />
(a) A number of fibers twisted together.<br />
(b) A number of filaments laid together without twist.<br />
(c) A number of filaments laid together with more or less twist.<br />
(d) A single mono filament. e.g. Silk<br />
4.2 TYPES OF YARNS:<br />
Yarns can be made either from short staple length fibers or from filament fibers.<br />
There are two types of yarns, i.e., spun yarns and filamentous yarns.<br />
Spun Yarns<br />
Types of Yarns<br />
34<br />
Filament Yarns<br />
If filaments are used to make yarns they may be either multifilament or monofilament .<br />
Monofilament<br />
Filamentous Yarns<br />
Multifilament<br />
Twisted<br />
Mono filaments are filament yarns Multi filaments are composed of many<br />
composed of one single filament. filaments.<br />
Flat
Characteristics of Spun Yarns and Filament Yarns<br />
Spun Yarn Filament Yarn<br />
<strong>1.</strong> Yarns made from short length fibers <strong>1.</strong> Yarns made from long length filament<br />
and the fabrics are like cotton and fibers and fabrics are like silk.<br />
wool.<br />
2. Short fibers twisted into continuous 2. Long continuous, smooth, closely<br />
strand, has protruding ends packed strand.<br />
<strong>1.</strong> Dull, fuzzy look <strong>1.</strong> Smooth, lustrous<br />
2. Lint 2. Don not lint<br />
3. Subject to pilling 3. Do not pill readily<br />
4. Soil readily 4. Shed soil<br />
5. Warm (not slippery) 5. Cool, slick<br />
6. Loft and bulk depend on size<br />
and twist<br />
6. Little loft or bulk<br />
7. Do not snag readily 7. Snagging depends on fabric<br />
construction<br />
8. Stretch depends on amount<br />
of twist.<br />
8. Stretch depends on amount of twist<br />
3. Are absorbent 3. Absorbency depends on fiber content<br />
4. Size often expressed in yarn number 4. Size in denier<br />
5. Various amount of twist used 5. Usually very low or very high twist<br />
6. Most complex manufacturing process 6. Least complicated manufacturing<br />
process<br />
a. Balanced Yarns:<br />
Smooth fabrics are made from balanced yarns.<br />
b. Unbalanced Yarns:<br />
Crepe and textured surface may be created from unbalanced yarns.<br />
4.3 DIRECTION OF TWIST:<br />
In addition to the amount of twist in a yarn, the direction of the twist<br />
is also designated. There are two types of yarn twist S and Z.<br />
35<br />
Balanced & Unbalanced Yarns<br />
Direction of twist
Single, Ply and Cord Yarns<br />
Single Yarn Ply Yarn Cord Yarn<br />
A single yarn is made A ply yarn is made by Cord yarns are<br />
directly from fibers. second twisting operation composed of two or more<br />
which combines two or more ply yarns combined for<br />
singles. Each part of the yarn is simple cord yarns, the<br />
called a ply. The twist is singles used to make the<br />
inserted by a machine called ply yarns and the ply yarns<br />
“twister. The ply yarn is also used to make the cord are<br />
known as folded yarn. simple yarns.<br />
4.4 Yarn Numbering System:<br />
Yarn numbering systems are therefore used to express a relationship between a<br />
unit length and weight of yarns. There are two main numbering system in use.<br />
Numbering system<br />
Direct Indirect<br />
Denier Tex<br />
900 m=1 gms=1 Denier 1tex=1gm/km 840 yds=1lbs=1S 50/1=50 single yarns<br />
36<br />
Matric No. English No.
4.5 YARN MANUFACTURING SYSTEM:<br />
The twisting process by which fibers are formed into a yarn is referred to as spinning.<br />
Spinning includes all the processes required to prepare and clean the fibers from the<br />
opening of the bale to the twisting of the yarn in its preparation for the textile loom.<br />
<strong>1.</strong> Opening and Picking:<br />
In order to produce a uniform product, the fibers from numerous bales be blended, or<br />
thoroughly mixed together, and from this composite, the final yarns will be produced . The<br />
masses of fibres from these numerous bales will be fed into a machine called a blending<br />
feeder. As these masses of fiber are loosened and thoroughly mixed, some remaining<br />
heavy impurities such as dirt, remnants of seeds, leaves or stems, are removed by a line<br />
of machine known respectively as pickers, breakers, intermediates and finishers each in<br />
succession being a somewhat more refined cleaner of the raw fibres. From these machines,<br />
the fabric emerges as a lap, a loose, formless roll.<br />
2. Carding:<br />
The lap is unrolled and drawn onto a revolving cylinder covered with fine hooks or<br />
wide bristles. These wide bristles pull the fibers in one direction, separate those which are<br />
individually tangled together and form them into a thin film. This process is known as carding.<br />
The thin film is drawn into a funnel shaped opening which molds it into a round rope like<br />
strand approximately an inch in diameter; this is called the sliver.<br />
3. Combing:<br />
The comber is a refining device by which the paralleling and straightening of the<br />
individual fibers is carried to a more exact degree. The longer fibers are again formed into<br />
a sliver, known as the comb sliver.<br />
4. Drawing:<br />
In the drawing operation, further blending is accomplished by working together several<br />
slivers and drawing or pulling them out in the drawing frame without twisting but reducing<br />
the several slivers to a single one about the same diameter as each of the components.<br />
5. Roving:<br />
The combined or condensed combed sliver is taken to the slubber of a series of<br />
machines called roving frames.<br />
6. Spinning:<br />
Spinning is a continuation of the roving and on the spinning frame many spools<br />
containing the roving pass through the ring spinning mechanism which further draws and<br />
twists to a yarn of the required size and twist and winds it on bobbins preparatory to the<br />
weaving operation.<br />
37
Yarn Manufacturing<br />
38<br />
Lap formation<br />
Sliver formation<br />
Roving<br />
Spinning
Spinning Systems for Different Types of Fibers<br />
Group Fiber Type Spinning System Fiber length<br />
Short Cotton Cotton system 10-25 mm<br />
staple Man-made fibers (ring spinning)<br />
system (cotton type) Rotor spinning 20-50 mm<br />
Mainly cotton Condenser spinning 10-100 mm<br />
(similar to woollen system)<br />
Long Wool 18-60 mm<br />
staple Man-made fibers Woollen system 60-120 mm<br />
system (wool type)<br />
Bast Flax Flax system<br />
fiber Hemp Hemp system Upto 1000 mm<br />
systems Jute Jute system<br />
Silk Silk Spun silk (schappe) upto 250 mm<br />
systems Noil silk (bourette) upto 60 mm<br />
Man-made Man-made Converter Continuous<br />
fiber systems fibers Direct spinning<br />
4.6 TYPES OF YARNS:<br />
<strong>1.</strong> <strong>Text</strong>ured Yarns:<br />
“<strong>Text</strong>ured” is a general term for any continuous<br />
filament yarn whose smooth straight fibers have been<br />
displaced from their closely packed, parallel position<br />
by the introduction of some form of crimp, curl, loop or<br />
coil.<br />
<strong>Text</strong>ured yarns can be made from either filament<br />
fibers or staple fibers cut from filaments that have been<br />
given a textured configuration of some type. The<br />
majority of textured yarns are made from filament fibers.<br />
<strong>Text</strong>urizing occurs following the spinning of the fiber<br />
material through the spinneret. It may be done<br />
immediately following fiber formation and be a part of<br />
a continuous operation or it may be done some time<br />
after the filaments have been made. There are three<br />
types of textured yarns. <strong>1.</strong> Bulk textured yarns 2. Stretch textured yarns 3. ‘Set-modified<br />
stretch textured yarns.<br />
39
2. Novelty Yarns:<br />
Novelty yarns are made primarily for their<br />
appearance. They differ from simple yarns that their<br />
structure is characterized by irregularities. ASTM<br />
defines a fancy yarn as a yarn that differs significantly<br />
from the normal appearance of single or plied yarns<br />
due to the presence of irregularities deliberately<br />
produced during its formation.<br />
In single yarn the irregularities may be due to<br />
the inclusion of knots, loops, curls, slubs and the like.<br />
In plied yarns the irregularities may be due to a variable<br />
delivery of one or more of its components or to twisting<br />
together dissimilar single yarns.<br />
The term fancy, complex and novelty are considered synonymous. As noted from the<br />
definition most fancy yarns are either single or plied. There can be endless variety of novelty<br />
yarns. A typical novelty yarn has three basic parts: <strong>1.</strong>The ground or foundation or core. 2.<br />
The fancy or effect 3. The binder.<br />
a. Facts about novelty yarns:<br />
<strong>1.</strong> Novelty yarns are usually ply yarns, but they are not used to add strength to the fabric.<br />
2. If novelty yarns are used in one direction only, they are usually in the filling direction.<br />
They “go further” and are subject to less strain and are easy to vary for design purpose.<br />
3. Novelty yarns add interest to plain weave fabrics at lower cost. Novelty yarn effects<br />
are permanent.<br />
4. Novelty yarns that are loose and bulky give crease resistance to a fabric but they<br />
make the fabric spongy and hard to sew.<br />
5. The durability of novelty yarn fabrics is dependent on the size of the novelty effect,<br />
how well the novelty effect is held in the yarn and on the firmness of the weave on the<br />
fabric. Generally speaking, the smaller the novelty effect, the more durable the fabric<br />
is, since the yarns are less affected by abrasion and do not tend to catch and pull out<br />
so readily.<br />
b. Different types of Novelty Yarns:<br />
<strong>1.</strong> Slub yarns 2. Flock yarns 3. Spiral yarns 4. Ratine yarn 5. Boucle yarn 6. Nub/spot/<br />
knot or knob yarns 7. Seed or splash yarn 8. Chenille yarn 9. Metallic yarns<br />
40
4.7 PROPERTIES OF SEWING THREADS:<br />
The performance of textile fabrics and clothing is strongly influenced by the properties<br />
of the yarns from which they are made. Sewing threads require certain yarn properties.<br />
Regularity Smooth fabrics should be sewn only with very regular yarns.<br />
In spun yarns, this is achieved by repeated doubling<br />
and drafting, and by combing out the short fibers.<br />
Strength Yarn strength depends on the quality of the fibres, the<br />
yarn regularity and the twist. Folding increases the<br />
strength.<br />
Hardness/Twist The twist density affects the hardness of a yarn and hence<br />
the handle and the appearance of textiles.<br />
Extensibility/ Extensibility and elasticity are very important during<br />
Elasticity yarn processing and utilisation. They are determined<br />
mainly by the fibre type and the spinning system.<br />
Characteristics of Sewing threads<br />
Yarn type Characteristics Applications<br />
Cotton Usually high quality, combed, ring spun, Almost any sewings<br />
bleached, dyed, singed, on cotton fabrics.<br />
mercerized and lubricated. Typically<br />
7.4–84 tex<br />
Silk Doubled and folded silk filament Fancy button holes<br />
yarns; dyed and lubricated.14–80 tex.<br />
Polyester Spun polyester folded yarns; Sewings on almost<br />
heat set, dyed and lubricated. 7–33 tex. any fabric.<br />
<strong>Text</strong>ured yarns <strong>Text</strong>ured multifilament yarns; dyed and Covering seams and<br />
lubricated. 18–80 tex cut fabric edges.<br />
Questions:<br />
PART – I<br />
Objective questions:<br />
<strong>1.</strong> Spun yarns are<br />
(a) smooth (b) lustrous (c) dull (d) cool<br />
2. Filamentous yarns are<br />
(a) smooth (b) dull (c) soft (d) short<br />
41
3. <strong>Text</strong>ured yarns are<br />
(a) straight (b) warm (c) continuous (d) spun<br />
4. Novelty yarns are usually<br />
(a) Boucle yarn (b) <strong>Text</strong>ured yarn (c) Ply yarn (d) Card yarn<br />
5. Spinning of yarn means<br />
(a) Denier (b) Twisting (c) Tex (d) Pulling<br />
Answer in one or two words:<br />
<strong>1.</strong> Define yarn.<br />
2. What are the types of yarns?<br />
3. What are the types of yarn twist?<br />
4. Define balanced and unbalanced yarn.<br />
5. For what purposes yarns are used?<br />
PART – II<br />
Answer in a paragraph:<br />
<strong>1.</strong> Classify filamentous yarns.<br />
2. Bring out on yarn numbering system.<br />
3. What are textured yarns?<br />
4. Explain blends and mixtures.<br />
5. Give facts about novelty yarns.<br />
Answer in a page:<br />
PART – III<br />
<strong>1.</strong> Differentiate spun and filamentous yarn.<br />
2. Brief out on single, ply and card yarns.<br />
3. Explain the yarns properties.<br />
PART – IV<br />
Answer in detail:<br />
<strong>1.</strong> Explain the yarn manufacturing system.<br />
Answers for objective questions:<br />
<strong>1.</strong> ( c) 2. (a) 3. (c) 4. (c) 5. (b)<br />
42
5. FABRIC PRODUCTION<br />
5.1 <strong>INTRODUCTION</strong>:<br />
Weaving is the name given to the interlacing of two sets of yarns, warp and weft at<br />
right angles and the fabric thus formed is woven fabric.The warp yarns are those yarns<br />
which lie in the length direction of a fabric while it is being woven.<br />
The weft or filling yarns are those which, during weaving are introduced between the<br />
warp yarns, across the width direction of the fabric. The warp are also known as ends and<br />
wefts as picks. The lengthwise edge of the fabric is called selvage (Self + Edge) Grain<br />
indicates a direction parallel to either the warp or filling yarn. The direction not parallel to<br />
either of these yarns is called off grain. Woven fabric will elongate most in a direction that<br />
is 45° to both sets of yarns and this direction is called Bias.<br />
Difference Between Warp and Weft<br />
Warp Weft<br />
<strong>1.</strong> Most Garments are cut in lengthwise <strong>1.</strong> Some garment details such as collars<br />
direction. are cut in this grain for decoration<br />
2. These are parallel to the selvedge 2. Weft are perpendicular to selvedge<br />
3. Yarns are finer in warp-wise direction 3. Yarns may be thicker or finer with<br />
as they have higher twist as warps have<br />
to go through lots of processing.<br />
medium twist<br />
4. Filamentous yarns are preferred as warps 4. Spun yarns are used<br />
5. Yarns are stronger 5. Weaker yarns can also be used<br />
6. Twist is more and yarns per inch is also<br />
more<br />
6. Twist and yarns per inch is less.<br />
7. Ply are preffered for warps. 7. Singles can be used.<br />
8. Stretchability is low 8. Stretchability is high<br />
9. Plain yarns are more preferred. 9. Novelty yarns and textured yarns<br />
can be used.<br />
5.2 WEAVING:<br />
<strong>1.</strong> Basic Weaving Operation:<br />
The machine used for weaving fabrics is a loom. Before weaving yarns intended for<br />
warp must pass through such operations as spooling, wraping and slashing to prepare<br />
them to withstand the strain of weaving process. These processes do not improve quality<br />
of yarns.<br />
43
a. Spooling:<br />
Yarn is wound on large spools, or cones which are placed on a rack called a creel<br />
from this yarns are wound on warp beam, which is similar to huge spool.<br />
b. Starching:<br />
These yarns are unwound to be put through a slashing or sizing bath. The slasher<br />
machine covers every yarn with a coating to prevent breaking during weaving process.<br />
c. Wrapping:<br />
The sized yarns are then wound on a final warp beam and are ready for the loom.The<br />
warp beam prepared now is then mounted on looms.<br />
Before the invention of conventional loom, back strap loom was in existence. Later<br />
on, the conventional loom replaced the back strap loom which is now-a-days not in use.<br />
The above given preparatory procedures were not followed in the back strap loom since<br />
the fabric was prepared manually. On conventional loom, the warp beam is mounted at the<br />
back and warp yarns are conveyed to a cylinder called cloth roll, which is at the front of the<br />
loom and on which fabric is rolled as it is<br />
constructed.<br />
The warp beam holds the length-wise<br />
yarns and is located at the back of the<br />
loom. This beam is controlled so that it<br />
releases yarn to the loom as it is<br />
needed.The Heddles are wires or metal<br />
strips with an eye located in the center<br />
through which the warp ends are<br />
threaded. The harness is the frame that<br />
holds the Heddles in position. Each loom<br />
has atleast two harnessess. A majority<br />
of looms for regular fabrics have four to<br />
twelve harnessess and some looms may<br />
have as many as thirty-two. Harnessess<br />
can be raised or lowered to produce the<br />
shed through which the filling yarn is<br />
passed and thus controls the pattern of<br />
Back Strap Loom<br />
weave.The shuttle move back and forth<br />
in the shed created, passing the filling<br />
yarns between the warp yarns. The reed is a comb like device that helps to pack the filling<br />
yarns into position in the woven fabric.<br />
The opening in the reed through which the warp yarns are threaded are called Dents.<br />
This maintain the warp yarns in a systematic relation and prevents yarns from tangling<br />
44
during weaving process.The cloth beam is located at the front of the loom and holds the<br />
completed fabric. So we can say a basic loom consists of: <strong>1.</strong> Warp beam 2. Heddles<br />
and harness 3. Shuttle 4. Reed 5. Cloth beam<br />
Now-a-days highly sophisticated looms are available which may have devices other<br />
than these but all the looms no matter how specialized they are, have some basic operations<br />
which are fundamental and are performed in sequence and are constantly repeated.<br />
2. Basic Loom Operations:<br />
a. Shedding:<br />
It is raising and lowering of warp yarns by the harnessess to make an opening for the<br />
weft yarns to pass through.<br />
Basic loom operations<br />
b. Picking:<br />
It is the actual process of placing the weft yarns in the shed. This is done using a<br />
device known as ‘shuttle’. It has a metal strip in which bobbin or pin is inserted.<br />
c. Beating:<br />
Sometimes called beating in or beating up, consists of evenly packing the filling<br />
yarns into position in the fabric. It gives a compact construction to the fabric.<br />
45
d. Taking up and letting off:<br />
It involves taking up the newly manufactured fabric onto the cloth beam and letting off<br />
or releasing yarn from the warp beam. The operation maintains uniform distance and<br />
tension from warp beam to harness to completed cloth.<br />
Weaving is a major method of fabric construction. The technique probably became<br />
known before spinning. Spinning developed when people discovered that the raw material<br />
could be improved before they were woven. In the course of time, rude looms were made,<br />
which were simple and hand-operated, fabrics produced on such looms are also known<br />
as hand loom fabrics where every thing is done by hands. The modern power loom used in<br />
the textile industry today essentially performs the same operation as the simple hand<br />
operated loom. The fabric produced on power looms is made comparitively faster and<br />
has few defects in comparison to hand looms.<br />
Based on the picking operations looms are divided into various categories. The two<br />
major ones are based upon the method of filling insertion. Looms that uses shuttle are<br />
called conventional shuttle or fly shuttle looms. Shuttle looms have very compact selvedge.<br />
It is the oldest and versatile method of weaving so most different kinds of fabrics can be<br />
obtained. Very large wooden shuttle is used and every time it passes through warp yarns<br />
it causes abrasion and the productivity may go down because of the low strength of yarns.<br />
The broken yarns show fabric defects. Shuttle looms are very noisy and PPM (Picks Per<br />
Minute—How many wefts laid in one minute) is 110 to 225.<br />
On the other hand looms that uses other devices to bring the filling yarn through the<br />
shed are called shuttleless looms. The source of the yarn for shuttleless looms are cones<br />
placed at the sides of the loom. Shuttle-less looms gives very high productivity at the same<br />
time they are less noisy when compared to shuttle-looms. They also have high productivity<br />
and fewer fabric faults.<br />
There are different types of looms other than conventional looms such as:<br />
<strong>1.</strong> Single Projectile on Missile Loom 2. Multiple Projectile System<br />
3. Rapier Loom 4. Jet Looms<br />
3. Selvedges:<br />
A selvedge is defined as length-wise edge of the fabric. Found on both ends of the<br />
fabric usually ¼ to ½ inches broad.<br />
Main purpose of selvedge is to hold warps and wefts together. It prevents fabric from<br />
ravelling. In machine loom a separate operation is required to finish the edges. Selvedge<br />
is usually much more compact than rest of the fabric. There are more warp yarns in the<br />
area of selvedge. <strong>1.</strong> Mostly ply is used for selvedge. 2. Twist is more in selvedge. 3.Suppose<br />
body fabric is in a weak weave then the selvedge is stronger than the rest of the fabric.<br />
4.Selvedge will depend on end use of fabric secondly on economy of production.<br />
46
Different types of selvedges:<br />
<strong>1.</strong> Plain selvedge 2. Tape selvedge 3. Split selvedge<br />
4. Fringe selvedge 5. Fused selvedge 6. Adhesive finished selvedge<br />
4. Thread Count:<br />
Thread count or fabric count is determined by counting the number of warp (Ends)<br />
and wefts (picks) per square inch of fabric. Higher the thread count more compact will the<br />
fabric be; so it will be more strong and durable. A fabric with high thread count will be more<br />
costly. It is denoted by X × Y, eg., 50 ×30. Compact fabric shrinks less. Based on thread<br />
count there exists balanced and unbalanced constructions. When number of warp yarns<br />
are equal or nearly equal to the number of weft yarns, the construction is balanced and<br />
when the difference between the number of warp and weft yarns will be very large than that<br />
construction will be an unbalanced construction.<br />
Durability of fabric depends on the following factors:<br />
<strong>1.</strong> Natural fibers or man-made fibers.<br />
2. Kind and quality (staple or filament)<br />
3. Strength and twist of yarn<br />
4. Single, ply, cord, decorative or uniform yarns.<br />
5. Compactness of construction or thread count.<br />
6. Kind of weave.<br />
5. Basic Weave Structures:<br />
The manner in which groups of warp yarns are raised by the harness to permit the<br />
insertion of the filling yarn determines the pattern of the weave, and in large measure the<br />
kind of fabric produced. Weave patterns can create varying degrees of durability in fabrics,<br />
adding to their usefulness and also to their appearnance.<br />
There are three basic weaves. They are plain weave, twill weave and satin weave. All<br />
other weaves are a variation or a combination<br />
of these weaves. Basket weave and Rib weave<br />
are two variations of plain weave. In the same<br />
manner twill weave can also have number of<br />
variations, e.g., warp faced twill, weft faced twill,<br />
even twill, uneven twill, pointed twill, herring bone<br />
twill, gabardine, corkscrew and so on.<br />
Graph paper (or pointed paper) is used<br />
Representation of Plain Weave<br />
to show the weaves or the order in which the<br />
yarns interlace in a fabric. It is used by textile designers to portray their designs or to<br />
analyse fabric weaves. Each vertical row of squares represents a warp yarn and each<br />
horizontal row of squares represents a filling yarn. A warp yarn crossing over a fillings<br />
47
usually shown by marking in the square called a ‘raiser’. A blank square over the warp<br />
called ‘sinker’.<br />
The weave diagram does not show the number of yarns per inch between warp and<br />
filling. The yarn size and type are also not indicated. The completed design shows the<br />
interlacing from the face side of the cloth. Most weaves are analysed from the face side.<br />
a. Plain weave:<br />
A plain weave is a weave where each filling passes alternately<br />
over and under each warp in a square pattern. The interlacing is<br />
opposite in neighbouring cells. The repeat is over two ends and two<br />
picks.<br />
Properties of Plain weave:<br />
Plain Weave<br />
<strong>1.</strong> Both sides are reversible until fabric is painted or printed from right side.<br />
2. Fabrics have high abrasion resistance.<br />
3. No yarn slippage.<br />
4. There is no distinct design unless yarns have contrasting colors or thickness.<br />
5. Easily produced; maximum yardage; inexpensive. Medium to dull lusture.<br />
6. Adaptable for printing and other finishing process.<br />
7. More durable. No floats. Medium drapability to very good drapability.<br />
8. In old notation method, denoted by ‘P’. Examples: Batiste, Cheese cloth, Cretonne,<br />
Percale, voile.<br />
b. Satin weave:<br />
A satin weave is a weave where four (or more) shaft with warp floats in interrupted<br />
diagonal. Interlacings are never adjacent to one another. Satin repeat over altest 5 ends<br />
and 5 picks but the warp ends interlace only once per repeat.<br />
Properties of Satin weave:<br />
<strong>1.</strong> Right and wrong sides look quite different.<br />
2. Very low abrasion resistance.<br />
3. It has interrupted diagonal discernible with magnifying glass.<br />
4. It is more expensive. Excellent lusture.<br />
5. Less durable.<br />
6. Excellent Drapability.<br />
7. Denoted by ‘S’. Examples: Satin, Slipper satin, Creepe back satin.<br />
48<br />
Plain Weave
c. Twill weave:<br />
A weave characterized by diagonal lines on the face of the<br />
fabric. The weft or warp yarns interlace with more than one warp<br />
yarn but never more than 4 warp yarns. On each successive line<br />
weft moves the design one step to the right or the left forming the<br />
diagonal. Whatever the direction of the diagonal on the face of the<br />
fabric the direction is opposite on reverse. The diagonal can vary<br />
from a low 14° angle called reclining twill to a 75° angle called a<br />
Twill Weave<br />
step twill. The most common is 45° and is regular or medium<br />
twill,steeper the twill stronger the fabric is likely to be. A 2 x 1 twill weave will be one where<br />
warp will go over 2 warp and under 1 weft. Suppose you have 4/2 weave, then it means<br />
that you will have 4 +2 =6 harnesses, (i.e) the repeat will have 6 boxes horizontaly and 6<br />
boxes vertically.<br />
Properties of Twill weave:<br />
<strong>1.</strong> Twill weave is one of the strongest weave.<br />
2. It has fairly good drape.<br />
3. More tightly woven.<br />
4. A twill weave does not get dirt easily but once it gets dirt it becomes really difficult<br />
to clean them.<br />
5. It has good wrinkle resistance.<br />
6. Finer yarns with high twist are used in constructionof twill weaves.<br />
7. Denim is an uneven warp faced twill weave fabrics. Wefts are in white and warps are<br />
in blue so denim is blue on one side and white from the other side.<br />
8. Other variations of twill weave include: Pointed twill, Herring bone, Gabardine,<br />
Corkscrew twill and so on.<br />
6. Surface figured weaves:<br />
Many decorative and patterned fabrics can be made by inserting extra warp and/or<br />
filling yarns during the fabric construction process. When extra warp yarns are used, they<br />
are wound on to an additional warp beam and threaded into separate heddles so that they<br />
can be controlled-depending on the complexity of the pattern, either by the dobby or the<br />
Jacquard attachment. Looms used for such constructions must have numerous harnesses<br />
or individual yarn control, in order to have sufficient warp control for the design to be formed.<br />
Controls for such fabrics permit great design flexibility, the use of several colors in the<br />
filling direction as well as the warp which may be strung with several different colors of yarn<br />
etc and the use of various types of yarns provides methods for producingfigure weaves in<br />
selected or spot areas of a fabric. The main types of fabric made through the use of<br />
additional yarns are lappet, swivel and spot.<br />
a. Lappet weave:<br />
Lappet is a fabric in which figure is achieved by introducing extra warp threads into a<br />
base fabric that is normally plain.<br />
49
. Swivel weave:<br />
A fabric in which figure is achieved by the introduction of additional weft threads into<br />
a base fabric to produce spot effects.<br />
c. Spot weave:<br />
Spot designs can be made with either warp or extra filling yarns. The yarns are<br />
inserted the entire length or width of the fabric in predetermined areas.<br />
d. Leno weave:<br />
The leno weave may be called the doup weave or the gauze weave.<br />
e. Pile weave:<br />
The word pile comes from the Latin word for hair or fur. To obtain the hairlike or furlike<br />
surface, woven pile fabrics are made with three sets of yarns-a regular set of warp yarns<br />
(called warp ground yarns), a regular set of filling yarns (called filling ground yarns) and an<br />
extra set of either warp or filling yarns to form the pile surface (called pile yarns).<br />
f. Double-cloth weave:<br />
Double weaves are those in which atleast two sets of filling yarns and two sets of<br />
warp yarns are interlaced so that the interlacing moves between the sets at various points.<br />
g. Dobby weave:<br />
Dobby weave is a patterned weave used to construct designs that cannot be produced<br />
by the plain, twill or satin weaves.<br />
Dobby fabrics have small figures, such as dots, Geometric designs and small floral<br />
patterns, woven into the fabric. These decorative weaves are made with small patterns<br />
that repeat frequently.<br />
h. Jacquard attachment:<br />
Jacquard fabrics, frequently called Jacquard weaves, are large figured designs that<br />
depend on considerable flexibility in the control of the warp yarns to form sheds for placing<br />
filling yarns in the fabric.<br />
5.3 KNITTING:<br />
Knitting is the second most important method used in fabric construction. In 1589,<br />
Rever and William Lee, English men invented the first knitting machine. Today the modern<br />
machine is based onthe same general principles estabilished by William Lee.<br />
Knitting is the construction of the fabric by forming the yarn into loops which hang<br />
upon the other. This fabric may be constructed by a single yarn or by a group of yarns<br />
running lengthwise. Another definition of knitting is as follows-Knitting is a cloth of interlocking<br />
50
loops from one or more yarns or from a series of yarns. The construction of a knitted fabric<br />
is evaluated by the number of stitches or loops that can be counted in any square inch.<br />
This vertical rows of loops stitches in the knit fabric are known as wales and the horizontal<br />
rows of loops are known as courses. Knitted loops are usually referred to as stitches when<br />
they are pulled through another loop. The number of stitches in warp and weft direction, in<br />
a square inch of knitted fabric is referred to as count. The fineness of the fabric given by<br />
the number of stitches/needles per unit width on the machine is Gauge. The higher the<br />
gauge number the finer the fabric willl be. The number of slots or grooves per inch in any<br />
given knitting machine is fixed; different machines have different quantities of slots. This<br />
number is called the cut of the machine.<br />
The size of the loop and the fineness of the yarn determine the density of course and<br />
wales. The number of wales determine the width of the fabric, the number of courses<br />
determine its length; their product determines the weight.<br />
5.3.1 Machine knitting:<br />
Machine knitting consists of forming loops of yarn with the aid of the thin pointed<br />
needles or shafts. As new loops are formed they are drawn through those previously<br />
shaped. This interlooping produces knit fabric. Knitting requires four basic components;<br />
(a) Yarn source, (b) Knitting elements, (c) Fabric take down and (d) Fabric collection.<br />
a. Yarn source:<br />
The yarn source for weft knitting may be located above the knitting area or on large<br />
creels at the side. If at the sides, the yarns are carried to the top of the knitting machine and<br />
then fed down to the knitting area.<br />
b. Knitting elements:<br />
Actual knitting elements include needles, the sinkers, needle bed or frame and the<br />
yarn carriers.<br />
c. Fabric take down:<br />
It is a device to pull the formed fabric towards the base of the machine.<br />
d. Fabric collection:<br />
A roll of some kind on which the completed fabric is collected.<br />
5.3.2 Knitting Needles:<br />
Ever since the invention of the machanical knitting loom, knitting needles have been<br />
at the heart of the process.<br />
5.4 NON-WOVEN:<br />
Non-wovens are defined as fabric structures produced directly from fibers by bonding<br />
or entangling the fibers or filaments by mechanical, thermal or chemical means. Use of<br />
51
adhesive heat, fusion or entanglement of the fiber may be carried out. The input material<br />
for non-wovens are <strong>1.</strong> Any fibers 2. Some kinds of Bonding Agent. 3. Any Auxiliary agent<br />
(added for special effects, e.g., surface texture, etc.)<br />
Non-wovens may be categorized into <strong>1.</strong> Durables2. Non-durables or Disposables 3.<br />
Semi-Durables.<br />
Durables are those which are manufactured for intention of longer use, e.g., furnishing,<br />
carpets (Numdhas), carpet backing. Mostly nylon, polyester and rayon, etc., are used.<br />
Disposables are those that are intended to use only for a limited application. Throw<br />
away after use. It should not be very expensive. Cost of manufacture and material in this<br />
case should not be too high, e.g., Diapers, Tissue paper, surgeons gloves, gowns, filters,<br />
etc. Rayon is the fiber which is most commonly used. Semi Durables are used to make<br />
products as table mats. Can be used more than one time.<br />
Non-wovens Wovens<br />
<strong>1.</strong> Made directly from fibers Yarn are made out of fibers which are then<br />
interwoven to form the fabric<br />
2. Variation can be made by using Variations can be made by using plain, novelty<br />
different ways of bonding fibers or textured yarns and may be by weaving them<br />
together. in different ways.<br />
3. They show good to excellent Normal resilience<br />
resilience.<br />
4. Good shock absorbers. They are not until the woven structure is quite<br />
thick.<br />
5. Easy to shape Not easy to shape<br />
6. Will not ravel Ravel most in case of man-mades<br />
7. Edges need not finish Edges needs to be finished<br />
8. Sound absorbent Are not sound absorbent<br />
9. Have good insulation properties Only in few cases as worsteds<br />
with resultant warmth<br />
10. Will not tear Will tear<br />
1<strong>1.</strong> Breaking load is low Breaking load is high as compared with some<br />
general thickness and weight<br />
12. Holes cannot be mended very Can be mended<br />
satisfactorily<br />
13. There is little or no elastic They have fair to good elastic recovery and<br />
recovery nor elongation in elongation<br />
felt fabrics<br />
14. Should be laundered carefully. Depends on what kind of fiber, yarn and<br />
Should not be subjected to weave used for the construction<br />
pulling or twisting.<br />
52
2. Application of Non-wovens:<br />
Non-woven fabrics appear in a wide variety of products for apparel, home-furnishings,<br />
business, industry and specialized applications such as aerospace. The list of products<br />
made from non-woven fabrics is long and growing each year. Some typical end-use items<br />
include diapers, handkerchiefs, shirts, dresses, apparel interfacings, bandages, curtains,<br />
decontamination clothing, garment bags, industrial apparel, lampshades, map backing,<br />
napkins, place mats, ribbons, upholstery backing, window shades, hospital gowns, hospital<br />
sheets and many more.<br />
Durable non-wovens have wide applications. these include apparel, such as for caps,<br />
interlinnings and interfacings home furnishings, such as for draperies furniture, upholstery,<br />
mattress padding, and carpet backing, industrial uses, such as filters, insulation and<br />
roadbed stablization sheetings.<br />
Disposable non-wovens are essentially made for one time use; such as dust cloths,<br />
may be laundered and reused a few times. General applications include diapers, sanitary<br />
napkins, surgical and industrial masks, bandages and towels.<br />
3. Types of Non-wovens:<br />
There are many types of non-woven but basically two types of non-wovens are very<br />
common: (a) Felts (b) Bonded fabrics<br />
a. Felts:<br />
Felts as defined by ASTM are: “A structure build up by the interlocking of fibers by a<br />
suitable combination of mechanical work, chemical action, moisture and heat without<br />
spinning, weaving or knitting.” They may consist of one or more classes of fibers (main<br />
fiber type is wool).<br />
b. Bonded fabrics:<br />
Bonded fabrics constitue a larger area of non-wovens and this word is used as a<br />
constituent of non-wovens.<br />
Questions:<br />
PART – I<br />
Objective questions:<br />
<strong>1.</strong> Warp yarns are<br />
(a) weaker (b) stronger (c) single yarn (d) textured yarns<br />
2. Weft yarns are<br />
(a) parallel to selvedge (b) stronger<br />
(c) perpendicular to selvedge (d) plain yarns<br />
53
3. Basic loom consists of<br />
(a) shuttle (b) comb (c) spools (d) cones<br />
4. Satin weave fabrics are<br />
(a) durable (b) cheap (c) dull (d) expensive<br />
5. Non-woven fabrics are<br />
(a) easy to shape (b) can be mended (c) tear easily (d) edges ravel<br />
Answer in one or two words:<br />
<strong>1.</strong> Define warp.<br />
2. Define weft.<br />
3. What are selvedges?<br />
4. Define knitting.<br />
5. Define non-woven.<br />
PART – II<br />
Answer in a paragraph:<br />
<strong>1.</strong> Differentiate warp and weft.<br />
2. Explain weaving.<br />
3. What are the basic weaving operations?<br />
4. Explain thread count.<br />
5. Give short notes on selvedges.<br />
PART – III<br />
Answer in a page:<br />
<strong>1.</strong> Explain the basic loom operations.<br />
2. Brief out on looms and its types.<br />
3. Explain Dobby and Jacquard attachments.<br />
4. Explain Machine Knitting.<br />
5. What are the different types of non-woven fabrics?<br />
PART – IV<br />
Answer in detail:<br />
<strong>1.</strong> Explain plain, satin, twill and its properties.<br />
2. Differentiate wovens and non-wovens.<br />
Answers for objective questions:<br />
<strong>1.</strong> (b) 2. (c) 3. (a) 4. (d) 5. (a)<br />
54
6. <strong>TO</strong>OLS FOR <strong>CLOTHING</strong> CONSTRUCTION<br />
6.1 <strong>INTRODUCTION</strong>:<br />
Well selected sewing equipments are essential for making a garment of good<br />
appearance. These are usually available at each and every home, as these tools are helpful<br />
for women in Garment making. Tools for clothing construction can be classified as<br />
<strong>1.</strong> Measuring tool 2. Drafting tool 3. Marking tool<br />
4. Cutting tool 5. Stitching tool 6. Pressing tool<br />
6.2 MEASURING <strong>TO</strong>OL:<br />
Measuring tools are needed for taking body measurements and transferring it into<br />
paper patterns. Some of the measuring tools are<br />
<strong>1.</strong> Measuring Tape 2. Meter scale 3. Ruler<br />
<strong>1.</strong> Measuring Tape:<br />
Measuring Tape is one of the important tool for sewing. This is commercially available<br />
in different models. With the use of this one can take their own body measurement or<br />
measure from a garment for stitching a new garment and to check the measurement of the<br />
garment to be sewing in between stitching. Wrinkles must be removed when measuring<br />
from a stitched garment. Note that the tape must not get twisted while measuring. The<br />
model or person to be measured must not bend while taking measurement. Select a firm,<br />
good quality tape which will not stretch after use. It is usually about ½” wide and 60” long.<br />
Some of the measuring tapes have centimeter markings along one edge. Properly<br />
measured garment usually fits better.<br />
2. Meter scale:<br />
Meter scale are made of wooden, plastic or metal. They are useful for checking<br />
fabric width when fixing pattern pieces on material and for drawing long seam lines on<br />
fabric or paper.<br />
3. Ruler:<br />
Meter Scale<br />
Measuring Tape Ruler<br />
A ruler is useful for measuring small distances as tucks, hems, facing, etc. on patterns,<br />
for drawings lines and marking dots.<br />
55
6.3 DRAFTING <strong>TO</strong>OL:<br />
These tools are helpful to fix the pattern, draw, draft and cut the pattern as well as<br />
fabric. The following tools will be of use. Some of the drafting tools are <strong>1.</strong> Wooden Table<br />
2. Brown sheet 3. Dress Model 4. Bell pin 5. Pin Cushions.<br />
<strong>1.</strong> Wooden Table:<br />
This should be of convenient height and size for drafting<br />
and cutting fabric. 3 feet width and 5 feet length is a desirable<br />
size of the table and the height can be about 2.5 feet.<br />
2. Brown Sheet:<br />
It is better to draft paper pattern on a Brown sheet with correct body measurement<br />
than drafting and cutting directly on the fabric. The pattern is pinned over the fabric, marked<br />
and then stitched after cutting, which will prevent wastage of fabric. Hence for drafting<br />
such pattern brown sheet is necessary.<br />
3. Dress Model:<br />
The measurement of the Model Dress must be same as the measurement of the<br />
wearer for whom the dress should be made. Instead of taking measurement from the model<br />
or person, the dress which suits well and fits correctly can be used as a aid for<br />
measurements.<br />
4. Bell pin:<br />
Use of pins for basting and fixing of pattern pieces to the fabric<br />
makes work easier, quicker and more accurate. Select sharp thin<br />
medium lengthy pins that will not leave pin marks, on all types of fabrics.<br />
For silk, satin and other flimsy, slippery fabrics patterns must be pinned<br />
to the fabric before cutting.<br />
5. Pin cushions:<br />
These are available in many different styles; some have an elastic<br />
or plastic band so they can be worn around one’s wrist. Always use a<br />
pin cushion to hold the pins while work. This will prevent the frustration<br />
of spilling a whole box of pins on the table or floor, and the possibility<br />
of swallowing a pin.<br />
6.4 MARKING <strong>TO</strong>OL:<br />
Marking tools helps to mark the details of patterns such as seam lines, cut lines,<br />
darts, pleats etc. Marking tools are<br />
<strong>1.</strong> Color Pencil (Red & Blue) 2. Marking chalk 3. Tracing Wheel<br />
56<br />
Wooden<br />
Table<br />
Bell Pins &<br />
Pin Cushion
<strong>1.</strong> Color Pencil (Red & Blue):<br />
While drafting pattern on a newspaper, Red & Blue Pencil is necessary. The stitching<br />
line is marked using blue pencil and cutting line is marked using Red Pencil.<br />
2. Marking chalk:<br />
This is also called as Tailor’s Chalk. As color pencil, this is also used for marking<br />
seam lines and other pattern details on fabrics as an aid in stitching. This is available in<br />
assorted colors in rectangular and triangular shapes. This can be selected according to<br />
the fabric color. The edges can be sharpened for drawing straight and curved lines easily.<br />
Red Blue<br />
Color Pencil Marking chalk Tracing Wheel<br />
3. Tracing Wheel:<br />
This is a sharp toothed wheel used with dress maker’s carbon to transfer pattern<br />
markings from pattern to cloth. Select a wheel with firm sharp points. Test it to make sure<br />
that it does not bend. While cutting garment of similar pattern, place one over the other and<br />
mark all the patterns at a time using tracing wheel. This can be used when bulk orders are<br />
taken.<br />
6.5 CUTTING <strong>TO</strong>OLS:<br />
These tools are helpful to cut out the pattern from paper, to cut the fabrics and thread.<br />
The cutting tool which are commonly used are.<br />
<strong>1.</strong> Scissors 2. Shears 3. Pinking shears<br />
4. Seam Ripper 5. Thread Clipper 6. Embroidery scissors<br />
<strong>1.</strong> Scissors:<br />
These have round handles and the blades are usually 6” or less than 6 inches. They<br />
are designed mainly for snipping threads and trimming seams. However, scissors with 5<br />
inch blade can be used by beginners for cutting fabric as well.<br />
2. Shears:<br />
For cutting fabric, shears are more satisfactory than scissors. Shears differ from<br />
scissors, in which shears have one small ring handle for the thumb and a large ring handle<br />
for the second, third and fourth fingers. They also have longer blades (8” to 12”). It is better<br />
to select bent handled shears made of high quality steel and having blades joined with a<br />
bolt or screw rather than a rivet. Take good care of your shears and use them only for<br />
cutting fabric. Do not drop them or leave them out to rust or cut any other item.<br />
57
3. Pinking Shears:<br />
Select a light weight pinking shear. These are useful for finishing the edges of seams<br />
and other raw edges of fabric. They produce a notched (zigzag) cutting line which prevents<br />
raveling of woven fabrics. Pinking gives a neat appearance to the inside of garments.<br />
Scissors<br />
4. Seam Ripper:<br />
This is penshaped gadget with a small blade at<br />
one end for removing stitches. Use the blade to lift the<br />
thread away from the fabric before cutting. Be careful<br />
not to cut the fabric.<br />
5. Thread Clipper: This has spring-action blades to<br />
clip thread ends or stitching.<br />
Seam Thread Embroidery<br />
6. Embroidery scissors:<br />
ripper clipper scissors<br />
These are small scissors, only 3” to 4” (7.5-10 cm) long, with very pointed blades.<br />
Use embroidery scissors for detail work such as cutting buttonholes and ripping stitches.<br />
6.6 STITCHING <strong>TO</strong>OLS:<br />
Stitching tools are those which are used for hand sewing and machine Sewing. The<br />
most commonly used sewing tools are.<br />
<strong>1.</strong> Fabric 2. Needles 3. Thread 4. Thimble<br />
5. Needle threader 6. Bodkin 7. Loop turner<br />
<strong>1.</strong> Fabric:<br />
While choosing Fabric, select a good quality fabric, which will be easy to stitch.<br />
Knowledge of various types of fabric, their cost & width of fabric, is necessary for good<br />
sewing.<br />
58<br />
Shears<br />
Pinking Shears
2. Needles:<br />
The best quality needles are always essential for good sewing. Points must be sharp,<br />
smooth and well polished for quick sewing. Select needle according to type of stitches.<br />
Usually there are 3 types of needle. They are:<br />
<strong>1.</strong> Long needles used for darning. Size no.6 or no.7.<br />
2. Ordinary needle used for stitching normal stitches and for tacking. Size no.8 or no.9.<br />
3. Embroidery Needle with a long and oval hole. The points may be sharp or blunt<br />
depending upon the stitch. Store the needles carefully in a rust proof paper to prevent<br />
from rust .<br />
3. Thread:<br />
For sewing, select thread from spool or<br />
reel of good quality from a reliable brand,<br />
matching to fabric in color and size. Various<br />
types of threads like cotton, silk, Terylene and<br />
nylon threads are available in the market.<br />
4. Thimble:<br />
This is worn on the middle finger to<br />
protect the finger from pricking and to aid in<br />
doing hand sewing quickly. These are made<br />
Needle Thread Thimble<br />
out of plastic and metal. Select a non-rust, light weight thimble.<br />
5. Needle threader:<br />
This is a small device with a thin metal wire that helps you thread a<br />
needle<br />
6. Bodkin:<br />
This gadget resembles a large, blunt needle and<br />
is used to pull cord, elastic, tape, or ribbon through<br />
castings.<br />
7. Loop turner:<br />
This tool is a long metal rod with a hook at<br />
one end used to turn bias tubing right side out.<br />
6.7 PRESSING <strong>TO</strong>OLS:<br />
Pressing is essential for neat sewing and also for enhancing the appearance of<br />
finished garment. Some of the pressing tools are.<br />
<strong>1.</strong> Iron box 2. Ironing board 3. Press cloth 4. Sleeve board 5. Seam roll<br />
59<br />
Bodkin<br />
Loop Turner<br />
Needle<br />
Threader
<strong>1.</strong> Iron box:<br />
Iron box made of steel with Teflon coating along with adjustable regulators are usually<br />
best. Fabric should be free from creases while cutting. Pressing helps to remove creases,<br />
if present. Keep an automatic handy iron box for pressing fabric before cutting, during<br />
construction and after the garment is completed.<br />
Ironing Board Iron Box<br />
2. Ironing board:<br />
This should be of convenient height and should be well padded. One may use an<br />
ordinary table covered with sheet and blanket for this purpose. Ironing board are<br />
commercially available in various models.<br />
3. Press Cloth:<br />
Fabrics used as press cloth should be color fast and should be washed or boiled to<br />
remove starch.<br />
4. Sleeve board:<br />
This item is a small ironing board about 20” (.5 m) long<br />
used to press narrow areas, such as sleeves, which cannot fit<br />
over the end of a regular ironing board.<br />
5. Seam roll:<br />
This item is a long, firm tubular cushion used to press long<br />
seams and small curved areas. A seamline can be pressed<br />
without having the imprint of the seam allowances showing<br />
through on the right side of the fabric.<br />
A bag with compartments for keeping the things is essential. Arrange the contents<br />
in such a way that there is a place for everything.<br />
60<br />
Sleeve board<br />
Seam roll
Questions:<br />
Objective questions:<br />
PART – I<br />
<strong>1.</strong> The important tool in taking body measurement.<br />
(a) Scale (b) Measuring Tape (c) Tracing wheel (d) Thread<br />
2. While drawing patterns, the tool which helps to draw long lines is<br />
(a) Metre scale (b) Needle (c) Scissor (d) All the above<br />
3. A length of measuring tape is.<br />
(a) 40” (b) 120” (c) 90” (d) 60”<br />
4. The tool which helps to keep the fabric and pattern together in place without slipping<br />
while marking is<br />
(a) Machine Needle (b) Bell Pin (c) Hand Needle (d) Pin Cushion<br />
5. To prevent the fingers from needle pricking we must use this tool.<br />
(a) Needle (b) Scissor (c) Thimble (d) Thread<br />
6. The red colour pencil helps to mark.<br />
(a) Stitching line (b) Cutting line (c) Darts (d) All the above<br />
7. Tracing wheel, if used along with this tool, makes the marking more prominent.<br />
(a) Carbon Sheet (b) Tailors Chalk (c) Pins (d) Pin Cushion<br />
8. Shear is used for cutting.<br />
(a) Paper (b) Thread (c) Both paper and Thread (d) Fabric alone<br />
9. Tools can be, stored in this.<br />
(a) Pin cushion (b) Thimble (c) Storage Box (d) All the above<br />
10. The size of the drafting table must be.<br />
(a) 3’ x 2’ (b) 1 meter x 2 metre (c) 5’ x 3’ (d) 30” x 40”<br />
Answer in one or two words:<br />
<strong>1.</strong> Name the tools used for marking.<br />
2. What is pinking shear?<br />
3. What is Scissor?<br />
4. Write few words on Iron box.<br />
5. Write the uses of color pencil.<br />
61
Answer in a paragraph:<br />
PART – II<br />
<strong>1.</strong> Explain the tools used for measuring.<br />
2. Write a note on marking chalk and tracing wheel.<br />
3. While choosing needle and thread how will you select it. Explain its types.<br />
4. Write the difference between shear and scissor.<br />
5. Explain on pressing tool.<br />
Answer in one page:<br />
PART – III<br />
<strong>1.</strong> Write notes on drafting tool with diagram.<br />
2. Explain on cutting tool with diagram.<br />
3. Explain on stitching tool with diagram<br />
4. Write notes on marking tools with diagram.<br />
5. Write notes on measuring tools with diagram.<br />
Answer in detail:<br />
PART – IV<br />
<strong>1.</strong> Explain in detail on different types of tools used for sewing with diagram.<br />
Answers for objective questions:<br />
<strong>1.</strong> (b) 2. (a) 3. (d) 4. (b) 5. (c) 6. (b) 7. (a) 8. (d) 9. (c) 10. (a)<br />
62
7.<strong>1.</strong> <strong>INTRODUCTION</strong>:<br />
7. BASIC STITCHES<br />
A knowledge of various types of stitches is necessary for the beginners before<br />
starting to sew on the original garment. It is better to practice these stitches on a small<br />
piece of fabric prior to stitching on the original garment. Keep the hands clean before<br />
stitching, so that the new clothes will not spoil. Sit in a comfortable position while sewing<br />
and make a note that the light falls from the left side of the person during day time and at<br />
night, the light falls from the top. Basic stitches are divided into constructive & decorative<br />
stitches. Constructive stitches are further divided into Temporary & permanent stitches.<br />
7.2. TEMPORARY STITCHES:<br />
Tacking or basting is a temporary stitch used for holding two or more layers of<br />
fabric together before a permanent stitch in made. Usually the stitch is worked from right<br />
to left, starting with a knot in a contrasting color thread, so that it can be easily removed.<br />
There are several types of tacking stitches, four of them are <strong>1.</strong> Even tacking 2. Uneven<br />
tacking 3. Diagonal tacking 4. Tailor’s tacking<br />
<strong>1.</strong> Even Tacking :<br />
Use a thin needle and start the stitch with a knot. The<br />
stitches are of equal length about ¼” on both sides of the<br />
material. Many number of longer stitches can be done at a<br />
time. This is used for tacking seams & other details which<br />
must be held securely.<br />
2. Uneven Tacking:<br />
In this, the stitches on the upper side is ½” or at least<br />
twice that on the under side (¼ ”). This stitches can be used for<br />
longer folds & seams. This is comparatively stronger than even<br />
tacking. Use this type of tacking as a guideline or where there is<br />
little or no strain.<br />
3. Diagonal Tacking:<br />
While attaching two or more layer of fabrics this type of<br />
stitch is made about ¼ ” apart before making machine stitch.<br />
Work stitches through the material at right angles to the fabric<br />
edge so that a diagonal or slanting stitch in made on the upper<br />
side and a vertical stitch is made on the under side.<br />
63<br />
Even Tacking<br />
Uneven Tacking<br />
Diagonal Tacking
4. Tailor’s Tacking:<br />
Start tacking using double thread of contrasting color, so that they can be easily<br />
seen. Tack through double layer of fabric along the seam lines using even stitches of ½”<br />
length apart, leave them as loop without pulling it tight. After completing, raise the upper<br />
layer of fabric slightly and clip the thread between the layers. So that the thread tuft, will<br />
remain on both the layers of fabric and remain as a guide line. This is especially used for<br />
marking details between patterns such as dart markings and pleat markings.<br />
7.3. PERMANENT STITCHES:<br />
These stitches are made permanent on the fabric and need not be removed later<br />
like Temporary stitches. Some of permanent stitches are <strong>1.</strong> Running stitch 2.Back stitch<br />
3. Run and back stitch 4. Hemming stitch 5. Whipping stitch.<br />
<strong>1.</strong> Running Stitch:<br />
This is the simplest form of hand stitch which is used for<br />
permanent sewing stitched using same color thread. Hand<br />
made seams, darning, gathering and finishing edges can be done<br />
with this stitch. It is similar to even basting, but the stitches are<br />
much smaller, straight, fine and evenly spaced. It is comparatively<br />
easy and can be worked fast.<br />
2. Back stitch:<br />
Tailor Tacking<br />
The back stitch is strong and sometimes substituted<br />
for machine stitch. It takes much time. Care must be taken<br />
while stitching, since stitching is done on the right side of<br />
the fabric. On the wrong side of the fabric the stitch is similar<br />
to stem stitch. Stitches should be about 1/8” long on the<br />
Back Stitch<br />
right side. To make the back stitch, push needle up through<br />
the material at a point on the stitching line about 1/8” from its right end. Take a stitch<br />
inserting the needle 1/8” back of the thread at the beginning of the stitching line and bringing<br />
it out an equal distance in the front of the thread. Repeat this way, keeping stitches uniform<br />
in size and fairly firm.<br />
3. Run and back or Combination stitch:<br />
This stitch is similar to back stitch. This is used<br />
whose back stitch is not compulsory. A back stitch and<br />
64<br />
Tailor Tacking over pattern<br />
Running Stitch<br />
Combination Stitch
two running stitches are combined and used for working plain seam done by hand. This<br />
stitch is faster than back stitch and stronger than the running stitch.<br />
4. Hemming stitch:<br />
This is used to finish the raw edge of the garment usually referred as the hem.<br />
Hemming must be fine, evenly spaced and must be inconspicuous from the right side of<br />
the garment. Start the hem with a tiny knot and finish with the same. Hemming must be as<br />
invisible as possible on the right side. Of the garment do slanting stitch on wrong side,<br />
close enough to hold the hem securely, picking one or two yarns of the fabric. Usually this<br />
stitch is seen in all types of garments. Improperly hemmed garment may show problem as:<br />
. . . . . . . . . . . . .<br />
Hemming stitch<br />
<strong>1.</strong> Stitches straightly formed 4. Knot prominently shown on right side<br />
2. Puckered hem 5. Attached thread shown on right side<br />
3. Stitches not evenly spaced<br />
This stitch is used for finishing sleeve edges, handkerchief, skirt, hemline, neckline<br />
edges, piping, pillow covers and other edges also.<br />
5. Whipping stitch:<br />
This stitch is used to finish raw edges of fabrics and also in sleeves, collar of kid’s<br />
wear. The other name for this stitch is overcasing and rolled hem. Whipping produces<br />
slanting stitches taking stitches over the rolled fabric edge with needle in a straight position.<br />
Do stitching from right hand side of the fabric till the left end. After completing, start from<br />
the left end, inserting the needle on the same point where the stitch is already formed.<br />
Continue the same way from the left to right end. The finished fabric gives continuous ‘X’<br />
shape stitches. On both the sides stitches appear similar in shape.<br />
7.4. DECORATIVE STITCHES:<br />
Whipping Stitch<br />
Embroidery is one of the decorative stitches. Embroidery is the art of working<br />
ornamental designs on cloth, leathers, etc., with decorative stitches. There are different<br />
kinds of embroidery which are known by special names such as cut work, drawn thread<br />
65
work, appliqué, smocking etc. For successful embroidery work, it is essential to learn the<br />
basic stitches, acquire the ability to choose the right type of stitches, designs, color<br />
combinations suited to the type of fabric, the purpose and use the garment or article on<br />
which the embroidery is to be made.<br />
<strong>1.</strong> Stem Stitch:<br />
This is a line stitch used for outlining designs, especially stems and leaves. It can<br />
also be used for filling small designs by working several<br />
lines side by side. Work should be done from the bottom<br />
upwards each time taking a stitch almost vertically down,<br />
but with a slight slant. While working the stitches thread<br />
Stem Stitch<br />
should be held down with your thumb away from the<br />
stitching line.<br />
2. Cable Stitch:<br />
This stitch is worked from left to right. Bring the thread through on the line of the<br />
design. Insert the needle a little to the line and bring the<br />
needle out to the left midway between the length of the<br />
stitch, with the thread below the needle. Work the next<br />
stitch in the same way but with the thread above the<br />
needle. Continue in this way, alternating the position of<br />
the thread. This stitch may also be worked on evenweave<br />
Cable Stitch<br />
fabric.<br />
3. Chain Stitch:<br />
This is done side by side to fill large shapes or can be used to work single lines.<br />
Work the stitches towards you starting from the top of the<br />
line. Bring the thread out to the right side of fabric. Insert<br />
needle in fabric at the same point, holding the thread down<br />
with your left thumb. Bring the needle point out a short<br />
distance ahead and pull it through, keeping the working<br />
Chain Stitch<br />
thread under the needle. The result is a loop. In starting the next stitch remember to insert<br />
the needle just inside the loop.<br />
4. Lazy daisy stitch:<br />
This is an elongated chain stitch used to work<br />
petals of small flowers and small leaves. Bring the thread<br />
out on the right side near the base of one petal. Take a<br />
Lazy Daisy Stitch<br />
long stitch of the length of the petal and pull the needle<br />
through fabric, looping the threads under the needle. To hold the end of the loop in place<br />
insert the needle down over the thread which forms the loop. Bring out the needle again<br />
near the base of the next petal and repeat the same procedure as given above.<br />
66
5. Magic chain stitch:<br />
This stitch is worked in the same way as chain stitch, but having two<br />
constrasting threads in the needle at the same time. When making the loops,<br />
pass one color under the needle point and let the other color lie on top. Pull<br />
through both threads. Work the next loop with the other color under the<br />
needle.<br />
6. Straight stitch: This is a single spaced stitches worked either<br />
in a regular or irregular manner. Sometimes the stitches are of<br />
varying size. The stitches should be neither too loose nor too long.<br />
This stitch may also be worked on even weave fabric. This is also<br />
called as single satin stitch.<br />
7. Blanket stitch:<br />
This stitch is used as an edging for blanket and other articles or as part of a design<br />
for which the blanket stitch makes the border. It is also<br />
used in cut work and applique work. It is worked between a<br />
pair of lines (usually parallel). The work should be done from<br />
left to right, stitching towards you. Bring thread out on the<br />
lower line, insert needle in position on upper line and take a<br />
downward stitch with the thread under the needle point. Draw<br />
out the thread. Stitches may be of the same size at regular distances apart or grouped<br />
and spaced according to the effect desired. To make scalloped edge using blanket stitches,<br />
outline two rows of scallops with running stitch and work blanket stitches between the two<br />
rows. Trim fabric away close to scallops after the work is completed.<br />
8. Fly stitch:<br />
Bring the thread through at the top left, hold it down with the left thumb, insert the<br />
needle to the right on the same level, a little distance from<br />
where the thread first emerged and take a small stitch<br />
downwards to the centre with the thread below the needle.<br />
Pull through and insert the needle again below the stitch at<br />
the centre and bring it through in position for the next stitch.<br />
This stitch may be worked in single or in horizontal rows or<br />
vertically in two rows.<br />
Fly Stitch<br />
9. Feather stitch:<br />
The working of this stitch is similar to that of the blanket<br />
stitch, but the stitches slant towards a centre line from either<br />
side. First mark a line lightly to indicate the centre line.<br />
Working from top to bottom, bring needle out at the beginning<br />
of the marked line. Hold the thread down along the centre<br />
line. Starting from the right of the line take a stitch with the<br />
needle slanting downwards, and bring it out on or near the<br />
67<br />
Blanket Stitch<br />
Feather Stitch<br />
Magic Chain<br />
Straight Stitch
centre line with a thread held under. Pull the needle through, and take the next stitch from<br />
the left of the line with the needle slanting down and to the right. Continue working stitches<br />
alternately on the right and left, keeping them evenly spaced and of equal length and slant.<br />
Make double or triple feather stitch by making two or three slanting stitches on one side<br />
and then a similar number on the other side.<br />
10. Chevron stitch:<br />
This stitch is worked between double line. Bring the thread through on the lower line<br />
at the left side, insert the needle a little to the right on the same line and take a small stitch<br />
to the left emerging half-way between the stitch being made.<br />
Next, insert the needle on the upper line a little to the right and<br />
A<br />
take a small stitch to the left. Insert the needle again on the<br />
same line a little to the right and take a small stitch to the left,<br />
emerging at centre as at B. Work in this way alternately on the<br />
upper and lower lines. This stitch may also be worked on<br />
evenweave fabric.<br />
Chevron<br />
1<strong>1.</strong> Seed stitch:<br />
This simple filling stitch is composed of small straight stitches of<br />
equal length placed at random over the surface. This stitch is used to fill<br />
small spaces.<br />
12. Couching:<br />
Lay a thread along the line of the design and with another thread,<br />
tie it down at even intervals with a small stitch into the fabric. The tying<br />
stitch can be of contrasting color to the laid thread if desired.<br />
13. Fish bone stitch:<br />
This stitch is useful for filling small shapes. Bring the thread through<br />
A and mark a small stright stitch along the centre line of the shape. Bring<br />
the thread through again at B and make a sloping stitch across the central<br />
line at the base of first stitch. Bring the thread through at C and make a<br />
similar sloping stitch to overlap the previous stitch. Continue working<br />
alternately on each side until the shape is filled.<br />
14. Herringbone stitch:<br />
Seed Stitch<br />
Couching<br />
Fishbone Stitch<br />
This is used as a decorative stitch as well as for finishing<br />
hems and raw edges of seams. Stitches are worked from left to<br />
right along two parallel lines. Bring out the thread at the bottom<br />
left hand corner of the work. Insert the needle on the top line at a<br />
Herringbone Stitch<br />
point farther to the right and take a short stitch through fabric<br />
from right to left so as to get a slanting stitch. Now take a short stitch through fabric from<br />
right to left on lower line to get another slanting stitch crossing the first one at point little<br />
68
elow the top line. Take care to make stitches of even length at regular distances apart.<br />
On the wrong side two rows of running stitches are seen. When worked closely this stitch<br />
can be used to do shadow work.<br />
15. French Knot:<br />
This resembles a knot and is usually applied to the centre of a flower. Bring out the<br />
thread to the right side at the point where the knot is to be worked. Hold the thread tight<br />
with left thumb and wind three to four times around the<br />
needle. Now holding the thread firm, insert needle in<br />
fabric close to where it first emerged. Pull thread to wrong<br />
side and bring out the needle to the point where the next<br />
knot is to be worked.<br />
French knot<br />
16. Bullion stitch:<br />
Bring the thread out on the surface of the cloth and insert the needle a short distance<br />
away from that point according to the length of stitch required.<br />
Bring the needle up through the first point and wind the thread<br />
round the needle for a distance equal to the length of the stitch.<br />
Hold left thumb on the coiled thread and pull out the needle<br />
through it. Now insert the needle at the end of the knot. This is<br />
mainly used for embroidering roses.<br />
Bullion knot<br />
17. Satin stitch:<br />
This is a filling stitch used to cover regular or irregular shaped spaces. Bring the<br />
needle out at the starting point on the right side and take a stitch<br />
carrying the thread across the design and bringing the needle<br />
back very close to the starting point. Continue in this manner<br />
keeping the stitches even and very close together. When a<br />
raised effect is desired pad the space to be covered with small<br />
running stitches worked perpendicular to the direction in which<br />
the satin stitches are to be applied.<br />
Satin Stitch<br />
18. Cross Stitch:<br />
This stitch is also called as counted thread<br />
embroidery work because this embroidery is done over<br />
a counted thread fabric (fabric made out of basket weave,<br />
also called as matty cloth). Make a row of slanting stitch<br />
through the holes seen in the fabric. Complete this way<br />
the whole design and work on the opposite direction by<br />
stitching over the already made stitch. Various<br />
Cross Stitch<br />
geometrical designs can be done through this<br />
embroidery. Six strand of thread should be used for this stitch. Satin stitch can also be<br />
used for this.<br />
69
19. Hem stitching:<br />
This is a simple stitch used in drawn thread work. It is worked from left to right on<br />
the wrong side of the fabric usually above a hem. First, draw out the required number of<br />
threads above the hem marking and tack the hem close to the first pulled-out thread. Bring<br />
needle out through the hem at the left edge. Then pick up the desired number of threads on<br />
needle, passing needle from right to left under the threads and bringing it up. Insert the<br />
needle under the hem just to the right of the threads you have encircled and bring it up. Pull<br />
the sewing thread tight around the drawn threads. Again pick up another group of threads<br />
and continue stitching until the row of hem stitching is completed. This is a single hem<br />
Hem Stitch and its variations<br />
stitching. To do double hem stitching turn the work around and repeat hem stitching along<br />
the other edge, grouping together the same threads as before. Variations of the hem stitch<br />
can be made by grouping threads in different ways.<br />
20. Smocking:<br />
This is an attractive method of distributing fullness at necklines, yoke lines and<br />
sleeves of children’s dresses. The amount of material required for smocking is two to<br />
three times the width of the finished article. To do smocking, the first step is to mark on the<br />
fabric several rows of evenly spaced dots about ¼”. The dots in the different rows should<br />
come directly under each other. This can be done by the use of transfers with dots available<br />
in shops or by using a home-made cardboard gauge pricked with small holes at the intervals<br />
required. The card can be moved along on the fabric until all the dots are marked by<br />
inserting a pencil point through the holes.<br />
To gather or pleat the material, work basting stitches picking up a few threads of<br />
the fabrics under each dot. On finishing the basting of each row cut the thread, leaving a<br />
loose end. On dotted or checked materials, this basting stitch can be worked without<br />
70
marking dots. The threads are pulled up to gather the material into evenly spaced pleats.<br />
The decorative smocking stitches are then worked on the right side of the fabric on top of<br />
Smocking and its variations<br />
the pleats. Gathering threads are removed after smocking is done. The commonly used<br />
smocking stitches are : Out-line stitch, cable stitch, wave stitch, diamond or chevron stitch<br />
and honey-comb stitch.<br />
7.5 TRADITIONAL EMBROIDERY:<br />
Indians are world famous for their magnificient workmanship and produce the most<br />
beautiful handspun and handwoven textiles, yet preserved and exhibited in many of the<br />
known Indian as well as Western museums. Many visitors, poets, travellers, tourists<br />
appreciated the textile and embroidery of India to the core.<br />
It is observed from the ancient time, even the primitive man did decorate himself<br />
through bodily decoration and ornamenting his attire. Primitive man worshipped ‘Nature’<br />
and it was one of the sources of inspiration from which he picked up motifs of floral, bird<br />
and aimal kingdom available geographically.<br />
Each State in the country is unique by itself as far as textiles and its variegated<br />
designs are concerened. The traditional embroidery of each state has the influence of not<br />
only the foreign countries like Persia, China, Iran etc., but also the neighbouring state too.<br />
Though, this being the fact, the Statewise embroideries are unique and not a duplication<br />
of others. This is mainly because of the difference in the mode of people, the availability of<br />
indigenously manufactured textile material, ground fabric, influence of eocology, custom,<br />
festival, deity, occupation, skill, likes and flare for various motifs, technique of stitchery,<br />
threads and so on. However, it can be said that the local people are totally responsible and<br />
are the pioneeers of their unique embroidery.<br />
Traditional embroideries of some of the States are Kasuti of Karnataka Kantha of<br />
Bengal, Chikankari of Lucknow, Kashida of Kashmir, Chamba rumal of Himachal Pradesh,<br />
Pulkari of Punjab. The detailed explanation of the Kasuti, Kantha and Chikankarai are<br />
given below.<br />
71
<strong>1.</strong> Kasuti of Karnataka:<br />
Kasuti is a world famous embroidery of Karnataka. ‘Kai’ means hand, and ‘suti’<br />
means cotton thread. Hence Kasuti means hand work made of cotton thread.<br />
History:<br />
The women expressed their artistic urge by embroidering delicate piece of colourful<br />
art, the Kasuti. This art was passed from person to person and generation to generation.<br />
During leisure time the grandmothers used to teach Kasuti to their grandchildren, daughterin-law<br />
and neighbours.<br />
In oldern days it was a custom that the bride had to possess a black silk sari called<br />
‘chandra kali sari’ with Kasuti work on it. As a matter of fact traditionally this embroidery is<br />
done on saris and blouses. The blouse (choli) on which Kasuti with match color motifs and<br />
borders worn with this sari is known as “Khan”. The border of sari will be with Negi and<br />
Murgi stitches.<br />
Thread:<br />
Silk thread is used in olden days. Now instead of silk yarns, mercerised cotton<br />
threads with guaranteed color fastness are used. Two to four strands are used for fine and<br />
coarse work respectively. This may vary according to the type of material motif and stitch<br />
employed.<br />
Motifs:<br />
The motifs used in Kasuti are taken from mythological stories, architectural motifs<br />
like gopuras, shiva linga, nandi palanquine etc. are used. Apart from these various types<br />
of creepers, foliages, flowers, animals and birds are used.<br />
72
Stitches:<br />
Stitches are always worked in vertical, horizontal and diagonal manner. The common<br />
four types of stitches used in Kasuti are Gavanti, murgi, negi and menthi.<br />
Speciality of Kasuti stitches:<br />
<strong>1.</strong> The designs are never traced.<br />
2. Embroidery starts without knitting threads, but with a tiny back stitch.<br />
Types of stitches:<br />
a. Gavanthi:<br />
This is a simple more common stitch derived from the Kannada word–Gantu means<br />
‘knot’. It is a double running stitch, in which the first running stitch is filled by the second<br />
running stitch on the same line. The second one worked exactly opposite to the first one.<br />
Gavanthi may be worked in horizontal, vertical or diagonal directions.<br />
b. Murgi:<br />
This is a zigzag runnings stitch which appears like staircase. It is same as Gavanti<br />
stitch but works in a stepwise manner. The work in both Gavanti and Murgi stitches is neat<br />
and tidy, where the design appears same on right and wrong side of the material. However,<br />
the stitches should be of uniform size. Designs are produced by grouping the tiny designs<br />
on regular intervals and sequences.<br />
Gavanthi<br />
Negi<br />
c. Negi:<br />
This is another stitch in Kasuti. Negi in Kannada means ‘to weave’ i.e. Negi design<br />
has an overall effect of a woven design. Negi is nothing but ordinary running or darning<br />
stitch. It is worked in long and short straight lines or floats and therefore the design does<br />
not appear identical on either sides of the cloth.<br />
73<br />
Murgi<br />
Menthi
d. Menthi:<br />
This stitch is an ordinary cross stitch. Menthi in Kannada means ‘Fenugreek Seed’.<br />
This cross stitch usually appears heavy as it is used for filling purpose. This stitch requires<br />
more length of thread than the other three stitches. Similar to Negi, even this stitch does<br />
not give same appearance on either sides of the cloth. It can be seen in Ikat sarees.<br />
2. Chikankari of Lucknow:<br />
Chikan work is otherwise called as ‘shadow work’, white work or white embroidery.<br />
The charm of this type of embroidery is very attractive and delicate style enhanced through<br />
the use of single color with simplicity miniature pattern and unbelievable eveness. This<br />
embroidery is basically down with white thread muslin background. Hence the name ‘white<br />
embroidery’. On narrow strips of cloth, this embroidery gives fine and delicate lacy effect.<br />
Material:<br />
Chikankari though done on the white muslin background now is done on fine cotton<br />
material like voile, two x two, cambray, mulmul, organdie, chiffon, georgettes, nets and<br />
other similar sheer fabrics.<br />
Motifs:<br />
The motifs used are mostly flowers, foliages, creepers and birds.<br />
Chikankari motifs<br />
Stitches:<br />
Stitches like satin, back, stem, buttonhole and herringbone stitches are used.<br />
a. Bukhia:<br />
‘Bukhia’ is nothing but satin stitch, which is done on the wrong side of the material<br />
and the design is delicately outlined with tiny running stitches from the right side. This sort<br />
of embroidery gives an opaque effect. The effect of fine muslin background produces a<br />
shadow appearance.<br />
b. Simplified Bukhia:<br />
Herringbone is used in the place of sation. The stitches that appear on the back of<br />
the cloth is of herringbone style. It gives a shadow effect on the right side. This is easier<br />
and simpler than Bukhia.<br />
74
c. Murri:<br />
‘Murri’ is a knotted style of chikankari, worked in the centre of flowers, giving an<br />
embossed effect. It is nothing but French knot, which resemble the rice grain in shape.<br />
d. Tepchi:<br />
Tepchi is a simple running (darning) stitch, used to fill the straight or curved lines in<br />
the floral design. It is mainly used to give the outlines for the design. It is a flat style.<br />
e. Button hole stitch:<br />
this.<br />
f. Khatawa:<br />
g. Jali Work:<br />
This is used to cover small floral motifs. Closed blanket stitch is usually used for<br />
This is used in the place of Bukhia which is a minute applique work.<br />
‘Jali work’ gives an effect of open mesh or net like appearance. Sometimes it looks<br />
like drawn thread work or lace like. This effect is produced by pushing apart the warp and<br />
weft yarns with the help of needle, forming into tiny holes and are later tightened to give the<br />
cloth firmness and appearance of a net.<br />
Uses of chikan work:<br />
Chikan work was done on sari borders, pallu with tiny buttas in the body of the sari,<br />
blouses, kurtas, cuffs, collars, jubbas, handkerchiefs, caps, table mats, cushions, curtains<br />
and other household linen.<br />
3. The Kantha of Bengal:<br />
The traditional folk art of Bengal is famous as Kantha, which means ‘Patched Cloth’<br />
and ‘quilting’. The Dacca muslin saris of gray, black or white coloured are used for thin<br />
embroidering. The old discarded cotton saris or dhotis are piled up on the top of each<br />
other quilted and embroidered.<br />
The size of thickness of Kantha varied according to its type. The layers of pieces<br />
are sewn together by simple darning stitch in white thread, drawn from the old sari borders.<br />
The design is first traced and the filling is done by coloured thread, taken from the coloured<br />
borders of saris. Lotus is the most common and important motif widely used in Kantha.<br />
Method of stitching:<br />
Usually satin with tacking is used for this kind of embroidery. Tacking is done to<br />
attach layers of fabric together. Work tacking stitch from centre to edge or vice versa.<br />
75
Motif:<br />
100 petal lotus is the most common motifs used for kantha. Other than this scenes<br />
from day to day life, folk stories, mythological stories are used.<br />
Speciality:<br />
In original kantha both the sides will be identical.<br />
Items with Kantha embroidery:<br />
There are different kinds of kanthas named according to its utility. There are seven<br />
types of kanthas used as wrappers in winter, for book, valuables, mirrors, combs, wallets,<br />
pillows and bedspreads.<br />
a. Bayton:<br />
Bayton, a three feet square piece serves as a wrap for books and other similar<br />
valuables. It has a central motif, usually the lotus with hundred petals called ‘Satadala<br />
100 Petal Lotus<br />
Padma’. The core has Satadala Padma with two or three borders on the sides. The other<br />
motifs commonly seen are water pots conch shells, kalkas, trees, foliages, flowers, birds,<br />
elephants, chariot, human figures etc.<br />
b. Arshilata:<br />
Arshilata is used as cover or wrap for mirror, comb and other such toilet articles. It<br />
is a narrow rectangular piece of 6” x 12” length. It has a wide border and the central motif<br />
is taken from the scenes of Krishna leela. The lotus, trees, creepers, spirals, inverted<br />
triangles, zig-zag lines, scrolls are also some of the commonly used motifs.<br />
c. Durjani:<br />
It is a square piece Kantha of 16” x 16” covers the wallet, has a central lotus motif<br />
with an elaborated border. The three corners of this piece are drawn together inward to<br />
make the tips to touch at the centre and are sewn together like an envelop. It will have<br />
76
another flap to which a string, tussle or a decorated thread is either stitched or mechanically<br />
fixed, which can be wound and tied up when rolled. The other motifs used are various<br />
types of foliages, snakes and other objects from the natural surroundings.<br />
d. Lep Kantha:<br />
It is relatively a thick quilted wrap of 6½ feet x 4½ feet by more number of sari<br />
layers, placed on top of each other to provide warmth during winter season. Simple<br />
geometrical designs are worked with running stitch using coloured threads. The entire lep<br />
piece is been given a way rippled appearance by working simple embroideries.<br />
e. Oar Kantha:<br />
Oar (ooar) kantha serves as a pillow cover. It is a rectangular piece whose size is<br />
about 2’ by 1½’. Usually simple designs like trees, foliages creepers, birds or a liner design<br />
with longitudinal border constitutes the ground base and decorative border is stitched<br />
around its four sides.<br />
f. Rumal:<br />
Rumal is nothing but a hand kerchief and is the smallest among all the kanthas. A<br />
square piece having a size about one square foot. Lotus is the core and other motifs<br />
embroidered around it. Sometimes plant and animal motifs are also embroidered but<br />
invariably has a well decorated border.<br />
Embroidery Designs<br />
77
Questions:<br />
PART – I<br />
Objective questions:<br />
<strong>1.</strong> Which is a temporary stitch?<br />
(a) Back stitch (b) Even tacking (c) Herringbone (d) Whipping stitch<br />
2. Which stitch will be suitable for darning?<br />
(a) Back stitch (b) Loop stitch (c) Chain stitch (d) Running stitch<br />
3. Which stitch is equivalent to machine stitch.<br />
(a) Loop stitch (b) Feather stitch (c) Back stitch (d) Tailor taking<br />
4. This is a permanent stitch.<br />
(a) Back stitch (b) Satin stitch (c) Chain stitch (d) Herringbone stitch<br />
5. This is a flat filling stitch used to cover regular or irregular shaped spaces.<br />
(a) Satin stitch (b) Lazy daisy stitch (c) Cross stitch (d) Blanket stitch<br />
6. This is a simple filling stitch<br />
(a) Couching (b) Chevron (c) Seed stitch (d) Stem stich<br />
7. This stitch is done by laying a thread along the line of the design.<br />
(a) Fish bone (b) Couching (c ) Herring bone (d) Hem stitch<br />
8. Which embroidery is called white embroidery<br />
(a) Kasuti (b) Kantha (c) Chikan work (d) Kashida<br />
9. How is Karnataka’s embroidery called?<br />
(a) Kasuti (b) Murgi (c) Kantha (d) Kashida<br />
10. This running stitch resembles staircase.<br />
(a) Gavanthi (b) Negi (c) Menthi (d) Murgi<br />
Answer in one or two words:<br />
<strong>1.</strong> Name the types of tacking.<br />
2. Name any two permanent stitches.<br />
3. What are the stitches used in combination stitch?<br />
4. Name any two decorative stitches.<br />
5. Which is a drawn thread work?<br />
6. Classify basic stitches.<br />
7. Give the uses of French Knot.<br />
8. Give the other name for Chickan work.<br />
9. Which stitch is worked between double line?<br />
10. Which stitch is used to fill small spaces?<br />
1<strong>1.</strong> Which stitch is otherwise called single satin stitch?<br />
12. Give the meaning of Kasuti.<br />
79
13. What is chandrakali?<br />
14. What is magic chain stitch?<br />
15. Which stitch is used in bridal saree of Karnataka?<br />
16. What is Bukhia?<br />
17. What is negi?<br />
18. What is menthi?<br />
PART – II<br />
Answer in a paragraph:<br />
<strong>1.</strong> Write about Tailor’s tacking with diagram.<br />
2. Give the problems of improperly made Hemming.<br />
3. Write about any one permanent stitch.<br />
4. Write the uses of whipping stitch.<br />
5. What is rumal?<br />
PART – III<br />
Answer in a page:<br />
<strong>1.</strong> Explain about temporary stitches.<br />
2. Write about Hem stitch.<br />
3. Write about any 4 permanent stitches.<br />
4. Write about any four decorative stitches.<br />
5. Brief out on kasuti.<br />
PART – IV<br />
Answer in a page:<br />
<strong>1.</strong> Brief out on decorative stitches. (Any ten)<br />
2. Explain in detail in Chikankari of Lucknow.<br />
3. Explain in detail on Kantha of Bengal.<br />
Answers for objective type questions:<br />
<strong>1.</strong> (b) 2. (d) 3. (c) 4. (a) 5. (a) 6. (c) 7. (b) 8. (c) 9. (a) 10. (d)<br />
80
8.1 <strong>INTRODUCTION</strong>:<br />
8. SEWING MACHINE<br />
Sewing Machine is a useful device when taken proper care it can be used for many<br />
years. It is an expensive device, hence with regular use it should be maintained properly.<br />
Now-a-day, Sewing Machine is considered as one of the useful devices in every home.<br />
Sewing machines are available commercially in different models, such as domestic<br />
model, Tailor model, industrial model, portable and electronic model. These may be<br />
operated by hand, treadle or electric motor. When choosing a sewing machine, select a<br />
model from a well known, reliable manufacturer. Automatic Sewing Machines that make<br />
zig zag stitch in addition to the usual straight stitch are also being manufactured and sold<br />
now.<br />
8.2 INVENTION OF SEWING MACHINE:<br />
The Invention of Sewing machine was the combined ideas and work of many inventors.<br />
In 1790, the first patent was given to Thomas Saint, an Englishman, for a machine that<br />
sewed on leather.<br />
In 1832, Walter Hunt developed a machine in his shop in New York City. He<br />
incorporated two new ideas. These were the eye-pointed needle and a locking stitch.<br />
Many other people contributed to the development of the sewing machine. In 1845, Elias<br />
Howe, an apprentice watchmaker from Boston, made a sewing machine that had a curved<br />
eye-pointed needle and an underthread shuttle. This machine could sew 250 stitches per<br />
minute. That was five times as fast as the fastest hand sewer. In 1846, Isacc M. Singer, an<br />
American, produced a machine that had a straight needle and could sew continuously.<br />
8.3. SELECTION OF A SEWING MACHINE:<br />
<strong>1.</strong> Whether attachments and repair tools are supplied with the machine.<br />
2. Whether spare parts and repair service are readily available.<br />
3. Whether a guarantee is offered on the machine.<br />
4. Whether the wooden supports are well constructed and hinges, drawers, locking<br />
mechanism etc., are sturdy.<br />
5. Whether the machine does reverse stitching and whether there are adjustable lock<br />
positions for forward and reverse stitching.<br />
6. Whether the machine is easy to start and stop.<br />
7. Whether it runs smoothly at all speeds without making holes and vibration.<br />
81
8. Whether the needle and bobbin are easy to thread and bobbin winder easy to use.<br />
Also make sure that the bobbin gets wound evenly and the winding stops<br />
automatically before it is too full.<br />
9. Whether two pieces of fabric stitched together move between the foot and feed dog<br />
evenly at the same rate.<br />
10. Whether the cover plates are easily removable and all parts readily accessible for<br />
oiling and cleaning.<br />
Make sure that you are supplied with an illustrated instruction manual giving<br />
directions for operation and care of the machine.<br />
8.4. PARTS OF SEWING MACHINE:<br />
The basic parts of a sewing<br />
machine are listed below.<br />
<strong>1.</strong> Spool Pin:<br />
Holds the spool of thread in the pin<br />
on the top of the machine.<br />
2. Thread guides:<br />
Hold the thread in position from the spool to the needle.<br />
3. Tension disc:<br />
This is a simple mechanism where two concave discs are put together, with the<br />
convex sides facing each other. The thread passes between the two discs. The tension of<br />
the thread is adjusted by a spring and a nut which increases or decreases the pressure on<br />
the disc.<br />
4. Take-up lever:<br />
At the outside end of this lever, there is a small hole through which the thread passes.<br />
The lever moves down to loosen the top thread while the stitch is being formed, then it<br />
moves up and pulls the loop of thread tight to complete the stitch.<br />
5. Needle bar:<br />
This is a steel rod which holds the needle at one end with the help of a clamp.<br />
6. Bobbin case:<br />
This moves into position to catch the top thread and form the stitch, as the needle is<br />
lowered into the bobbin chamber.<br />
7. Presser foot:<br />
This is attached to the presser bar and it holds the cloth firmly in position when lowered.<br />
82
8. Presser foot lifter:<br />
This is a lever which is attached to the presser bar for raising and lowering the<br />
presser foot.<br />
9. Stitch regulator:<br />
This controls the length of the stitch. Some regulators can be set to stitch in reverse.<br />
10. Bobbin winder:<br />
This facilitates the winding of thread on the bobbin. Some are made to stop<br />
automatically when the bobbin is full.<br />
1<strong>1.</strong> Flywheel:<br />
When this is made to revolves, the machine starts to work.<br />
12. Clutch or thumb screw:<br />
This is in the centre of the flywheel, it engages and disengages the stitching<br />
mechanism.<br />
13. Slide plate:<br />
This is a rectangular plate which can be slid open to remove or put in the bobbin<br />
case.<br />
14. Needle plate or throat plate:<br />
This is a semicircular plate with a hole to allow the needle to pass through it and<br />
collect the bobbin thread.<br />
15. Feed dog:<br />
This consists of a set of teeth fitted below the needle plate. It helps to move the cloth<br />
forward while sewing.<br />
16. Face plate:<br />
This is a cover which when removed gives access to the oiling points on needle bar,<br />
presser bar and thread take-up lever.<br />
17. Pedal:<br />
It is made out of iron. When pressing this with foot, the machine works.<br />
18. Belt:<br />
This is usually made out of leather, but a cloth Tape, Nylon wire or any other strong<br />
rope can also be used.<br />
83
8.5 OPERATING THE MACHINE:<br />
Manufacturer usually supply an instruction manual with each sewing machine they<br />
sell. It is essential to read this book carefully and follow the instructions meticulously. When<br />
you are learning to treadle, run the machine with the presser foot up and the clutch on<br />
flywheel loosened so that the needle does not go up and down. Sit at a comfortable height<br />
in front of the machine and place one foot forward and the other foot sightly back on the<br />
treadle. Start the machine by turning the flywheel towards you. As the treadle begins to<br />
move, start pedaling slowly in such a way so as to continue this motion. Continue evenly,<br />
and gradually increase the speed. To stop the machine, place your hand on the flywheel<br />
and stop the motion of the feet. Practice to run the machine smoothly at correct speeds.<br />
An electric sewing machine is operated by knee or foot control of an electric motor. A<br />
little practice is required to control the pressure needed to operate the machine at any<br />
desired speed with an even, regular rhythm.<br />
<strong>1.</strong> Stitching along lines:<br />
Tighten the clutch or thumb screw and without threading the machine, lower the presser<br />
foot and practice stitching on paper along lines of various shapes (straight lines, curved<br />
lines, broken lines and lines with corners) until you can control the machine reasonably<br />
well. To turn corners, stop with the needle down at the exact corner, raise the presser foot<br />
and turn the paper to the desired position, leaving the needle in, then lower the presser<br />
foot again and stitch.<br />
2. Selection of thread and needle:<br />
A perfect stitch can be obtained only when the thread is selected to suit the material<br />
to be stitched and the needle is of correct size. For stitching on delicate thin fabrics, use<br />
fine thread and fine needle. For heavy fabrics, needles and thread size should be larger.<br />
3. Winding the bobbin:<br />
Stitching along lines<br />
Bobbins wind differently on the various machines, but generally the thread is first<br />
placed on a spool pin located below the flywheel and then drawn through the thread guide<br />
near the spool pin. Now with your hand wind the end of the thread on the bobbin in clockwise<br />
direction and place it on the winder. Turn the bobbin on the winder until the pin like projection<br />
84
on the winder fits into the slot on the bobbin, thus holding bobbin in place. Then press the<br />
winding lever down until the rubber ring touches the hub of the flywheel and is held there.<br />
Loosen the thumb screw and run the machine holding the thread end loosely. Make sure<br />
that the thread winds on the bobbin evenly and that you do not fill the bobbin too full. In most<br />
machines the winding will stop automatically when the bobbin is wound about three-fourth<br />
full.<br />
4. Needle Clamping:<br />
Machine needles have a flat side and round side. On the flat side there is<br />
a short groove (a) are the eye and on the round side there is a long groove (b).<br />
When fixing a new needle in the machine, remember that the long groove must<br />
always face the side from which the machine is to be threaded i.e., the side<br />
facing the last thread guide. Raise the take up lever to its highest point and<br />
loosen the needle clamp screw to remove the old needle. Keeping the take-up<br />
lever in the same position, insert the new needle upward into the needle clamp<br />
as far as it will go and tighten the needle clamp screw. As soon as the needle<br />
becomes blunt it can be changed.<br />
5. Adjusting the tension:<br />
Before regulating the tension disc make sure that the threading of the machine -<br />
upper and under threading is correct. When there is a perfect balance of tensions between<br />
the upper and lower threads the stitches lock or meet together in the middle of the thickness<br />
of the cloth. The stitch will look alike on both sides related to shape and thickness. When<br />
the upper tension is too tight, the spool thread lies straight on the top of the fabric and the<br />
Adjusting the tension<br />
under thread appears like loops on the upper side of the cloth. If the upper tension is too<br />
loose the under thread lies straight on the under side of the fabric and the upper thread<br />
appear like loops on the underside. An easy method of recognizing tension is to stitch<br />
diagonally across a square of fabric folded on true bias as shown and then stretch the<br />
cloth firmly between your fingers until one or both threads break. The broken thread is<br />
always the one with tighter tension. If the tensions are balanced both threads break together<br />
and require more force to break. If adjustments are needed, it is better to adjust the upper<br />
tension. To increase or decrease, upper tension turn the screw on the tension regulator<br />
85
with the presser foot down. In turning the screw remember, that right is tight and left is<br />
loose. Usually there will be numbers written on the tension dial. To increase tension you<br />
should turn toward the higher numbers and to decrease turn toward the lower numbers. Do<br />
not move more than two numbers or a slight turn at a time. Stitch on a sample of fabric to<br />
recheck the tension.<br />
Avoid changing the lower tension unless you are sure that the tension cannot be<br />
corrected completely by adjusting the top one alone. The lower tension is adjusted by<br />
turning the small screw on the bobbin case using a screw driver. Usually the screw is<br />
turned to the right to tighten and the left to loosen. Make a very slight turn only, each time.<br />
6. Under threading:<br />
In each bobbin case there is a slanting slot and a spring. Insert the bobbin into the<br />
bobbin case so that the thread comes around the bobbin and turns back to lie in the slot.<br />
Now guide the thread through the slot and below the spring and pull out a length of thread.<br />
Test the tension of the bobbin thread by pulling the thread end gently. There should be a<br />
slight but noticeable tension and bobbin should stay firmly in place. Leave a thread end 3<br />
or 4 inches long extending from the bobbin case. Now open the slide plate lift the latch on<br />
the bobbin case with your thumb and forefinger and insert the bobbin case into the machine.<br />
Close the slide plate.<br />
7. Top threading:<br />
Raise the take-up lever to its highest point before you start threading. The spool of<br />
thread is first placed on the spool pin on top of the machine head and the thread end is<br />
passed through thread guide to tension mechanism. After drawing the thread between the<br />
tension discs and through the take-up spring, pass the end of the thread through the hole in<br />
the take-up lever from the side nearest the tension disc. Now thread the remaining guide<br />
which leads to the needle and insert the thread into the needle from the side on which the<br />
last guide appears.<br />
8. Sewing on fabrics:<br />
Under threading<br />
Raise the presser foot and turn the flywheel so that the take-up lever is at its highest<br />
point. Pull the upper and under threads straight back under the presser foot to prevent<br />
them from becoming knotted at the beginning of the stitching line. Place the cloth to be<br />
stitched under the presser foot, with the seam allowance to the right of the needle and the<br />
86
est of the material to the left. Now turn the wheel until the needle enters the fabric at the<br />
exact starting point, and then lower the presser foot. Start the machine slowly, guiding the<br />
material gently; with both your hands, and then gradually increase the speed of stitching.<br />
Do not pull the material forward or backward, but hold the two layers slightly taut and firm at<br />
the back and front of presser foot. When you are nearing the end of the stitching line, stitch<br />
slowly with right hand on flywheel and left hand on work. Stop the machine in time so that<br />
you do not sew beyond the cloth. Have the take-up lever at its highest point to avoid<br />
unthreading the needle when beginning to stitch again. Raise the presser foot and pull the<br />
material straight back with threads under the presser foot to avoid needle from bending.<br />
Cut the threads with the thread cutter or with scissors. Leave several inches of thread<br />
extending from the machine to prevent unthreading.<br />
8.6 CARE OF THE MACHINE:<br />
Regular cleaning, oiling and care of the machine ensure satisfactory sewing and a<br />
long life for the machine. When not in use, keep machine covered to prevent dust from<br />
settling on it.<br />
<strong>1.</strong> Cleaning:<br />
Always remove lint deposit, dust and thread bits before oiling any part of the machine.<br />
Use a small dry brush or old tooth brush and a soft cloth to remove dust and lint. Use a<br />
pointed instrument like a needle to pick out bits of thread and lint that cannot be brushed<br />
out. To clean the feed dog, remove the needle plate of the machine and brush off all lint<br />
deposits and dirt sticking to the feed mechanism. To clean the shuttle race remove the two<br />
screws holding the shuttle race assembly to the machine, take out the shuttle race and<br />
wipe its groove free of dirt, fluff and broken bits of thread. Some times loose thread wind<br />
around the pivot of the treadle and make the machine hard to run. Remove thread bits<br />
which are caught in the wheel and all lint and dust sticking to the treadle parts.<br />
2. Oiling:<br />
It is necessary to oil and lubricate the machine periodically. If the machine is used<br />
every day, oil it once a week. If you use it infrequently, then oiling once a month is sufficient.<br />
To oil thoroughly remove the upper thread, needle plate, slide plate, face plate, bobbin<br />
case, needle and presser foot. Read the instructions manual for location of parts that need<br />
application of oil.<br />
Applying machine oil to all oiling holes and joints where one parts rub against another.<br />
One drop of oil is enough for each point. While oiling turn the flywheel back and forth to<br />
help the oil flow to the moving parts. It is essential to oil the shuttle race. After oiling the<br />
points on the head of the machine, tilt the machine head back to oil the parts on the under<br />
side. On a treadle machine, the belt will have to be released before tilting the machine<br />
head back. Do not forget to oil the pivots of the treadle. When the machine has been<br />
thoroughly oiled, wipe away excess oil and run it slowly for several minutes on a waste<br />
piece of material. Place a scrap of fabric under the presser foot and lower the needle<br />
87
efore closing. The fabric will absorb the excess oil that will drain down through the<br />
machine and will prevent formation of oil spots on the fabric.<br />
If the machine becomes gummed with oil, put a drop of kerosene in each oil hole and<br />
at joints and run it rapidly for several minutes. Then wipe off the oil that oozes out with a soft<br />
cloth and reoil the machine. It will need a second oiling within a few hours after this treatment.<br />
The motor of electric sewing machine needs periodic greasing done by a qualified service<br />
agent.<br />
8.7 PROBLEMS AND RECTIFICATION:<br />
Some of the common troubles and their possible cause are listed below. You can<br />
take care of most of these by yourself. In case of major troubles the help of a qualified<br />
mechanic should be obtained.<br />
<strong>1.</strong> Tangles thread at the beginning:<br />
<strong>1.</strong> Bobbin too full 2. Bobbin set in wrong direction 3. Under thread not drawn up<br />
4. Both threads not pulled back under the presser foot 5. Machine not properly oiled and<br />
cleaned.<br />
2. Skipped stitches:<br />
<strong>1.</strong> Needle bent 2. Needle set with long groove turned to wrong side 3. Needle too<br />
high or too low in the needle bar 4. Needle too small 5. Needle threaded from the worng<br />
side 6. Excess oil on shuttle.<br />
3. Upper thread breaking:<br />
<strong>1.</strong> Poor thread 2. Machine incorrectly threaded 3. Needle set on wrong side<br />
4. Needle too fine for thread 5. Needle threaded from the wrong side 6. Upper tension too<br />
tight 7. Sharp edges on needle plate hole or shuttle 8. Thread take-up spring broken.<br />
4. Lower thread breaking:<br />
<strong>1.</strong> Poor thread 2. Lower tension too tight 3. Bobbin case threaded wrongly 4. Sharp<br />
edge on needle plate 5. Bobbin wound too full or uneven 6. Dirt in bobbin case.<br />
5. Fabric puckering:<br />
<strong>1.</strong> One or both tension too tight 2. Stitch too long for material being sewn 3. Blunt<br />
needle.<br />
6. Needle breaking:<br />
<strong>1.</strong> Incorrect size of needle for thread and fabric 2. Needle blunt 3. Pulling of material<br />
while stitching 4. Presser foot incorrectly set 5. Crossing a thick seam using a too small<br />
needle.<br />
88
7. Staggered stitches:<br />
<strong>1.</strong> Too little pressure on presser foot 2. Take-up spring weak, broken or missing.<br />
8. Uneven stitch length:<br />
<strong>1.</strong> Incorrect presser foot pressure 2. Feed dog dirty or worn out.<br />
9. Material not feeding correctly:<br />
<strong>1.</strong> Stitch regulator set too close to ‘0’ point 2. Dirt under needle plate near feed dog<br />
3. incorrect presser foot pressure 4. Bent presser foot.<br />
10. Machine runs heavily:<br />
<strong>1.</strong> Lack of oil 2. Thread wound round wheel or treadle bearing 3. Belt too tight<br />
4. Bobbin winder pressed down 5. Thread jammed in shuttle race 6. Gummed oil or dirt on<br />
bearings.<br />
Questions:<br />
Objective questions:<br />
PART – I<br />
<strong>1.</strong> Name the provision allotted in the sewing machine for winding bobbin.<br />
(a) Spool pin (b) Bobbin (c) Bobbin case (d) Bobbin winder<br />
2. Belt is made out of this.<br />
(a) Ribbon (b) Cord (c) Leather (d) Jute<br />
3. The size of the needle used for hand stitch is.<br />
(a) No.12 (b) No.7 (c) No.9 (d) No.5<br />
4. The size of sewing needle used for thin fabric is.<br />
(a) No.15 (b) No.16 (c) No.14 (d) No.18<br />
5. How much oil would you apply to each oiling point?<br />
(a) 1 drop of oil (b) 2 drops (c) 5 drops (d) Several drops<br />
Answer in one or two words:<br />
6. Write notes on upper threading.<br />
7. Write about fly wheel.<br />
8. What is the use of slide plate?<br />
89
9. What is the use of face plate?<br />
10. Write about tension disc.<br />
Answer in a paragraph:<br />
PART – II<br />
<strong>1.</strong> Write about the importance of sewing machine.<br />
2. What is presser foot and take up lever? Explain.<br />
3. How will you choose a needle and thread?<br />
4. Explain the adjustment of tension disc.<br />
5. What are the common defects of sewing machine?<br />
Answer in one page:<br />
PART – III<br />
<strong>1.</strong> Write about the points to be considered while selecting sewing machine.<br />
2. Explain about any 5 parts of sewing machine.<br />
3. Write about winding of bobbin.<br />
4. How will you clamp the needle?<br />
Answer in detail:<br />
PART – IV<br />
<strong>1.</strong> Explain in detail on parts of sewing machine.<br />
2. What are the defects of sewing machine and how will you rectify it?<br />
3. How will you maintain a sewing machine?<br />
Answers for objective questions:<br />
<strong>1.</strong> (d) 2. (c) 3. (b) 4. (c) 5. (a)<br />
90
9. BODY MEASUREMENT<br />
9.1 <strong>INTRODUCTION</strong>:<br />
Garment fitting is based on taking body measurements. So it is very important for a<br />
dress maker to know how to take accurate measurements. The following points will be<br />
very useful, for this purpose.<br />
9.2 BODY MEASUREMENT:<br />
a. Care to be taken:<br />
<strong>1.</strong> Try to know the customer’s requirements, regarding the fit, style and shape of the<br />
garment (pockets, collar, buttons, seam, finish etc.) before taking measurements. A<br />
preliminary talk with the customer, showing fashion pictures are stitched garment will<br />
help one to understand the design.<br />
2. Observe the figure carefully and if any deviation in proportion is found, do not simply<br />
remember but record it in the order book, in without giving any idea of the deformity<br />
to the customer.<br />
3. The person to be measured should stand erect, but in a natural pose, in front of a<br />
mirror.<br />
4. Measurements should be taken comfortably without pulling the tape too tight or loose.<br />
5. The measurements should be taken in proper order and with a certain sequence.<br />
6. All girth measures should be taken tightly, as ease for movement is included in the<br />
draft.<br />
7. To avoid any mistake, take the measurements twice.<br />
b. Observing Human Body:<br />
For a successful garment cutting, one must know the size and shape of the human<br />
body, for which he has to design. A student should therefore remember the following points<br />
about the anatomy, before he starts to learn cutting.<br />
Eight Head Theory:<br />
A grown up human body is divided into eight equal parts, which are equal in height<br />
to that of the head. So each part is known as the “head”. All these eight divisions or heads<br />
are as follows :<br />
1st head : From hair to chin or nape of neck.<br />
2nd head : From chin to chest or bottom of scye.<br />
3rd head : From bottom of armhole to waist.<br />
4th head : From waist to hip.<br />
91
EIGHT HEAD THEORY<br />
92<br />
1st Head<br />
2nd Head<br />
3rd Head<br />
4th Head<br />
5th Head<br />
6th Head<br />
7th Head<br />
8th Head
5th head : From hip to mid thigh<br />
6th head : From mid-thigh to below knee<br />
7th head : From knee to calf muscle<br />
8th head : From calf to tip of toe.<br />
c. Calculating other measurements using chest circumference:<br />
Measurements Men Women<br />
<strong>1.</strong> Waist Chest - (4 to 5”) Chest - (5” to 7”)<br />
2. Hip Chest + (1 to 2”) Chest + (2 to 4”)<br />
3. Shoulder (Half) ¼ Chest - ½” 1/6 Chest + (1 to 2”)<br />
4. Armscye depth 1/8 Chest + 1” 1/8 Chest + (2” to 2.5”)<br />
5. Neck 1/3 Chest + (2 to 3”) 1/3 Chest + (2 to 2½”)<br />
9.3 TAKING BODY MEASUREMENT:<br />
a. Bodice measurement:<br />
<strong>1.</strong> Bust:<br />
Measure around the fullest part of the bust raising the measuring tape slightly to a<br />
level just below the shoulder blades at the back.<br />
2. Waist:<br />
Measure snugly around the waist keeping the tape parallel to the floor.<br />
3. Neck:<br />
Measure around the the neck, passing the tape just above the collar bone time front<br />
and along the base of the neck at the back.<br />
4. Shoulder:<br />
Measure from the neck joint to the arm joint along the middle of the shoulder (A to B<br />
in fig. a)<br />
5. Front waist length:<br />
Measure down from highest point of shoulder to waist line through the fullest part of<br />
the bust (A to C fig. a)<br />
6. Shoulder to bust:<br />
Measure down from highest point of shoulder to tip of bust (A to D in fig. a)<br />
93
7. Distance between bust points:<br />
Measure in the horizontal direction, the distance between the two bust points (D to E<br />
fig. a)<br />
8. Back width or across back measurement:<br />
Measure across back from armhole to armhole about 3 inches below base of neck<br />
(P to Q in fig b)<br />
9. Back waist length:<br />
Measure from the base of neck at the centre back to waist line (R to S in Fig b).<br />
10. Armscye depth:<br />
Measure from base of neck at centre back to a point directly below it and in level with<br />
the bottom of the arm where it joins the body. (R to T in fig b).<br />
b. Sleeve measurements:<br />
1<strong>1.</strong> Upper arm circumference:<br />
Measure around the fullest part of the arm.<br />
12. Lower arm:<br />
For lower arm, measure around the arm at desired<br />
level corresponding to lower edge of sleeve.<br />
13. Elbow circumference:<br />
Measure around the arm at elbow.<br />
14. Wrist:<br />
Measure around the wrist.<br />
15. Sleeve Length:<br />
For short sleeve length, measure down from tip of shoulder at top of arm to desired<br />
length of sleeve (B to F in a) For elbow length sleeve measure from top arm to elbow point<br />
(B to G in a) For full length bend the elbow slightly and measure down from to of arm to<br />
back of wrist passing the tape over the elbow point (B to H in a).<br />
c. Skirt measurements:<br />
Waist:<br />
Measure snugly around the waist keeping the tape parallel to the floor.<br />
16. Hip:<br />
Measure around the fullest part of the hip horizontally. (7” to 9” from waist approx.)<br />
94
17. Waist to Hip:<br />
Measure down from waist at centre back to fullest part of the hip (S to U in fig.b).<br />
18. Skirt Length:<br />
Measure down the centre back from waist to desired length of skirt (S to V in fig. b)<br />
length from waist to floor can be taken at the same time and te difference between the two<br />
noted. This difference will give the number of inches the skirt is above the floor level. After<br />
taking your measurements compare then with the sample measurements for ladies<br />
garments given table. <strong>1.</strong> Any measurement which appears too small or exaggerated must<br />
be rechecked at once.<br />
Sample measurements for ladies garments<br />
(All measurements are inches)<br />
Bust (cir) 28 30 32 34 36 38 40 42<br />
Waist (cir) 24 24½ 25 26 28 30 32 33<br />
Hip (cir) 30 32 34 36 38 40 42 44<br />
Back width 14 14 14½ 15 15½ 15½ 15¾ 16<br />
Army scye depth 6¾ 7 7¼ 7½ 7¾ 8 8¼ 8½<br />
Lower arm (cir) 9½ 9¾ 10 10¼ 10½ 11 11¼ 11½<br />
Wrist (cir) 6¼ 6½ 6½ 6¾ 6¾ 7 7¼ 7½<br />
Back waist length* 13 to 16<br />
Shoulder to bust * 7½ to 9½<br />
Full sleeve length* 20 to 23<br />
Short sleeve length* 7 to 10<br />
Waist to hip * 7 to 9<br />
Waist to ground * 38 to 44<br />
Choli length * 12 to 14<br />
Pant top length * 18 to 23<br />
Kurta length * 38 to 42<br />
Maxi dress length 52 to 56<br />
Maxi skirt length * 38 to 44<br />
Middy skirt length” 24 to 28<br />
* These measurements depend on the height of the person.<br />
95
Sample measurments for childern’s garments (All measurements are in inches)<br />
Age (in years) 1 2 3 4 5 6 8 10 12 14<br />
Chest 18 19 20 21 22 23 24 25 26 28<br />
Waist 18 19 20 21 22 22 23 23½ 24 24<br />
Hip 19 20 21 22 23 24 26 27 28 30<br />
Back width 8 8½ 9 9½ 10 10½ 11 12 13 14<br />
Back waist length 8 8½ 9 9½ 9¾ 10 10½ 11 12 13<br />
Armscye depth 4½ 4¾ 5 5¼ 5½ 5¾ 6 6¼ 6½ 6¾<br />
Short sleeve length 3½ 4 4½ 5 5½ 5¾ 6 6¾ 7 7½<br />
Lower arm 7 7½ 8 8¼ 8½ 8¾ 9 9¼ 9½ 9½<br />
Full sleeve length 9 11 13 14 15 16 17 19 20 21<br />
Wrist 5 5¼ 5¼ 5½ 5½ 5¾ 6 6 6¼ 6¼<br />
Waist to hip 3 3½ 4 4½ 5 5¼ 5½ 6 6½ 7<br />
Waist to ankle 16 18 20 22 24 26 30 33 36 38<br />
Maxi skirt length 16 18 20 22 24 26 30 34 37 39<br />
Short skirt length 8 9 10 11 12 13 14 16 18 20<br />
Frock length 15 17 18 20 22 23 24 27 30 33<br />
Blouse length 10 10½ 11 11½ 12 13½ 14 15 16 17<br />
These are typical measurements for girls. For ages up to five, the body measurements<br />
(i.e. all except the last four items in the table) apply also to boys.<br />
Sample measurements for boys’ garments (All measurements are in inches)<br />
Age (in years) 2 4 6 8 10 12 14 16<br />
Chest 19 21 23 24 26 28 30 32<br />
Waist 19 21 22 23 24 26 28 30<br />
Hip (seat) 20 22 24¼ 26 28 30 32 34<br />
Neck 10 10½ 11 11½ 12 13 14 16<br />
Back width 8½ 9½ 11 12 12½ 13 14 15<br />
Back waist length 8½ 9½ 10½ 11½ 12½ 13 14 14<br />
Short sleeve length 4 5 5 6 7 8 9 10<br />
Full sleeve length 11 14 17 19 20 21 22 23<br />
Cuff length 6 6½ 7 7¼ 7½ 8 8¼ 8½<br />
Shirt length 13 15 17 18 20 22 25 28<br />
Pant length 20 23 26 29 32 35 38 40<br />
Half pant length 9 10 10½ 11½ 12 12½ 13½ 14½<br />
96
9.4 PATTERN ALTERATION:<br />
Successful pattern alteration demands changing size without changing proportions<br />
and lines. Correct changes are made by tucking or piecing patterns near their center and<br />
without changing the original size. It is not advisable to cut beyond a pattern or turn the<br />
edge of pattern since such alterations change its shape as well as its size.<br />
After deciding where the pattern needs to be altered, draw a straight line as a guide<br />
for cutting the pattern. For most alterations make the line parallel cut along this line as<br />
needed, so that it will spread out flat. If your are lengthening or shortening an entire pattern<br />
piece, you will need to cut the pattern all the way across and increase fullness entirely<br />
through pattern. Before cutting, draw two short lines a few inches apart, at right angles to<br />
and across the cutting line. Then match these lines when you spread and place the pattern,<br />
keep the pieces in correct position.<br />
Spread or place, the cut edges to make the pattern larger or smaller, as needed.<br />
When you spread the sections apart, lay a strip of paper underneath the cut edges. Check<br />
the altered pattern measurements to be sure that they are with the measurements, needed<br />
then paste, pin or use gummed tape to fasten the pattern pieces in place.<br />
Sometimes more than one change is also needed in a pattern piece. The best way<br />
is to take care of each alteration separately. Try not to change the shape of the armholes,<br />
neckline, or shoulders anymore than necessary.<br />
If the alteration is difficult, then make a duplicate pattern made with newspaper, make<br />
all markings and notches on the duplicate, and make the necessary corrections on it. It is<br />
a good idea to try out the altered pattern in muslin or old cloth to be sure of the fit. Then alter<br />
the original pattern in the same way.<br />
Pattern alteration can be best done by a slash and spread method for enlarging a<br />
pattern and fold pleat for reducing it. While altering a pattern it is necessary that all grain<br />
lines must be straight.<br />
Equipment needed for altering patterns, includes a pair of scissors, some light weight<br />
paper, and pins. Heavy paper is not suitable for making alterations, also a ruler and pencil<br />
to redraw construction details that are interrupted by your alterations are necessary.<br />
9.5 ALTERATING PATTERN:<br />
<strong>1.</strong> To lengthen a blouse:<br />
<strong>1.</strong> Cut across the pattern about 2 or 3 inches above the waist line at right angles to the<br />
center line.<br />
2. Spread the pattern to the necessary amount. Pin each edge of pattern to a strip of<br />
new paper.<br />
97
3. Draw new side seam lines keeping them straight from armhole to waistline.<br />
Lengthening a blouse<br />
2. To shorten a blouse:<br />
<strong>1.</strong> Make a pleat of the correct width across the pattern about 2 or 3 inches above<br />
waistline.<br />
Shortening a blouse<br />
2. Keep it at right angles to the center line and pin a piece of paper.<br />
3. Draw side seam lines as shown.<br />
3. To increase the shoulder width of a blouse:<br />
<strong>1.</strong> Slash from the shoulder downward the armhole, then across almost to the side seam.<br />
Increasing the shoulder width<br />
2. Spread the slashed edges to the correct amount and pin to a piece of paper.<br />
3. Draw new shoulder seams making straight lines from the neck line to the armhole.<br />
98
4. To decrease the shoulder width of a blouse:<br />
<strong>1.</strong> Slash as described above, but over lap the edges of the slash the necessary<br />
amount and pin.<br />
2. Draw new shoulder seam lines keeping them straight from neckline to armhole.<br />
5.To Increase the size of a blouse front:<br />
<strong>1.</strong> Make slashes crosswise and lengthwise, cutting through the center of any dart.<br />
When there is no dart at the shoulder, slash almost to the shoulder line.<br />
2. Spread the pattern and pin it to paper, to make the necessary changes in each<br />
direction.<br />
3. Locate new dart points half way between the tops of the separated dart line.<br />
4. Draw lines from these points to the broad end of the original dart.<br />
5. Then, draw new seam lines.<br />
6. To lengthen a sleeve:<br />
<strong>1.</strong> Slash directly across the sleeve above the elbow and again below the elbow.<br />
Separate slash lines and make an insertion with a piece of correct widths.<br />
2. Straighten seam lines, if necessary.<br />
Decreasing the shoulder width<br />
Increasing the size of a blouse front<br />
Lengthening a sleeve<br />
99
7. To shorten a sleeve:<br />
<strong>1.</strong> Fold out pleats above and below the elbow to keep proportions correct.<br />
2. Straighten seam lines, if necessary.<br />
Shortening a sleeve<br />
8. To Increase the width of the skirt (large hip):<br />
<strong>1.</strong> Slash the side piece both front and back between the side seam and the dart position.<br />
2. Make an insertion of even width from waist to hem on both front and back.<br />
Increasing the width of a skirt<br />
3. This alteration increases the size of the waist line but that can be adjusted above the<br />
hip line by taking up darts and seams, preferably for fitting.<br />
9. Lengthen a skirt pattern:<br />
<strong>1.</strong> Cut across the skirt, pattern at right angles to the lengthwise grain of the material, a<br />
few inches above the hemline.<br />
2. Spread the slash the necessary amount and pin to a strip of paper.<br />
Lengthening the skirt<br />
3. Extend the seam lines and the hemline until they meet the necessary measurement.<br />
100
10. Shorten a skirt pattern:<br />
<strong>1.</strong> Fold a pleat of the correct width across each gore a few inches above the hemline.<br />
Fold at right angles to the grain line.<br />
2. Straighten the seam lines by folding back the projecting edges below the crosswise<br />
alteration pleat.<br />
3. Keep each of the folded-back edges even in width.<br />
1<strong>1.</strong> Adding fullness to skirt:<br />
<strong>1.</strong> Slash the skirt pattern to the waist line where ever the flare is needed.<br />
2. Spread for the required extra fullness.<br />
3. This curves the waist line more and causes the flare to fall from the point of the slash.<br />
Questions:<br />
Shortening a skirt<br />
Adding fullness to skirt<br />
PART – I<br />
Objective questions:<br />
<strong>1.</strong> Human body can be divided into<br />
(a) 6 heads (b) 8 heads (c) 9 heads (d) 5 heads<br />
2. Height of Kurtha is<br />
(a) 38” to 42” (b) 40” to 42” (c) 42” to 44” (d) 44” to 46”<br />
101
3. Elbow circumference refers to<br />
(a) Measurement around wrist (b) Measurement around fullest part of arm<br />
(c) Measurement around the elbow (d) Measurement till desired level<br />
4. Height of Middy skirt is<br />
(a) 28” to 30” (b) 24” to 28” (c) 30” to 32” (d) 26” to 28”<br />
Answer in one or two words:<br />
<strong>1.</strong> How will you take the waist measurement?<br />
2. How will you take the neck measurement?<br />
3. Define Pattern.<br />
4. What do you mean by pattern alteration?<br />
5. How will you take the back width measurement?<br />
6. How will you take the lower arm circumference?<br />
PART – II<br />
Answer in a paragraph:<br />
<strong>1.</strong> What is meant by bust measurement?<br />
2. How will you measure the armscye depth.<br />
3. How will you increase and decrease the length of bodice pattern?<br />
4. Draw and explain how you will increase the shoulder width.<br />
PART – III<br />
Answer in one page:<br />
<strong>1.</strong> What are the steps required to be taken while measuring the body?<br />
2. Draw and explain eight head theory.<br />
3. Draw and explain how you will increase the waist measurement,<br />
4. Sketch and explain how you will increase the front bodice measurement.<br />
PART – IV<br />
Answer in detail:<br />
<strong>1.</strong> Discuss on pattern alteration.<br />
2. Elaborate on taking body measurement.<br />
Answers for objective questions:<br />
<strong>1.</strong> (b) 2. (a) 3. (c) 4. (b)<br />
102
10. PATTERNS<br />
10.1 <strong>INTRODUCTION</strong>:<br />
A basic pattern can be prepared by one of two methods either by drafting or by<br />
draping fabric on a model (or person concerned).<br />
Drafting is otherwise called as block pattern method. Drafting may be defined as a<br />
system of drawing patterns on paper with mechanical precision, on the basis of body<br />
measurements. This is an effective and economical method which can be learned easily.<br />
The basic pattern may be modified to develop pattern for varied styles by a technique<br />
called “flat pattern designing”. The basic pattern should have only a minimum number of<br />
darts and it should fit the body comfortably without being tight or loose.<br />
10.2 TYPES OF PAPER PATTERN:<br />
There are different types of paper pattern. They are<br />
<strong>1.</strong> Standardised paper pattern 4. Graded paper pattern<br />
2. Individual paper pattern 5. Commercial paper Pattern.<br />
3. Block paper pattern<br />
<strong>1.</strong> Standardised paper pattern:<br />
Paper pattern prepared using standardised body measurements are standardised<br />
paper patterns. This method is being followed in the training and tailoring schools.<br />
2. Individual Paper pattern:<br />
The measurement of a particular person is taken and pattern is prepared using these<br />
individual measurement. The pattern prepared for a particular person will not suit other<br />
person. These are usually done at home and some tailor shop.<br />
3. Block paper pattern:<br />
Generally these are made with standard sizes with thick cardboards. These are<br />
mostly used in garment industries. The garment made out of these block patterns will fit for<br />
those who have measurements equivalent to that of the standardised body measurement.<br />
In garment industry these type of pattern will be helpful to cut bulk amount of garment in<br />
less time.<br />
4. Graded paper pattern:<br />
Pattern of five consecutive sizes (for eg. 30”, 32”, 34”, 35”, 38” chest size) are marked<br />
in one single pattern. The required size according to the individual body measurement is<br />
traced separately, cut and used.<br />
103
5. Commercial paper pattern:<br />
The paper pattern for different designs are available in readymade forms. These<br />
patterns are called as commercial pattern. These patterns are enclosed in the envelop<br />
along with the instruction sheet. The instruction sheet will provide information about selection<br />
of fabric, preparation of fabric, marking, cutting, and steps for sewing. The front side of<br />
envelope contains front view, side view and back view of garment design along with the<br />
body measurement. While choosing a commercial pattern one must choose according to<br />
the body measurement.<br />
10.3 PRINCIPLES FOR PATTERN DRAFTING:<br />
Drafting can be done on ordinary brown paper which should not however be too thin.<br />
To obtain an accurate draft, use a sharp pencil, and a ruler for, drawing straight lines. To<br />
get the corners at right angles, keep an ‘L’ scale or set squares ready. Before drafting, it is<br />
important to understand the procedures and instructions clearly, and to have practice in<br />
drawing a well balanced pattern with smooth curves and straight lines. You must understand<br />
the following principles before starting to attempt drafting.<br />
<strong>1.</strong> Patterns must be made larger than body measurements to allow for freedom of<br />
movement, ease of action and comfort in wearing. Recommended ease allowance for<br />
various parts of the body are listed below. For bust 3” to 5” (3” for a tight fitting garment<br />
and 5” for loose fitting one); waist ½” ; hip 3” to 5” ; upper arm 3” to 4”; arm hole depth 1”.<br />
For all the garment the ease allowance must always be left before cutting out the pattern.<br />
2. For symmetric designs where the right and left sides are alike, paper pattern for half<br />
front and half back only need to be made. For the bodice, start the drafting with the back<br />
part. For sleeves, full pattern must be drafted.<br />
3. It is better to draft the primary or basic pattern blocks - plain bodice, plain sleeve, plain<br />
skirt without seam allowances. When this is done, be sure to leave seam allowances<br />
while laying out the pattern on the material at the time of cutting. If you do not have much<br />
experience in cutting, and want to avoid the risk of cutting without seam allowance you<br />
may add seam allowances to your paper pattern itself after completing the draft.<br />
4. The following construction detailed information should be recorded and marked clearly.<br />
a. Name of each piece of pattern (bodice front, bodice back, sleeve etc).<br />
b. Number of pieces to be cut with each pattern piece. (For example, for a back<br />
open dress, you have to cut 1 front, 2 backs and sleeves).<br />
c. If seam allowances are not included in the draft, this should be mentioned. If seam<br />
allowances are included, seam lines and cutting lines should be clearly shown.<br />
104
d. Lengthwise or straight grain line should be drawn with a red pencil as shown<br />
(← — →) on all pattern pieces. This line indicates that the pattern should be kept<br />
on the cloth in such a way that the line is parallel to the length of the cloth or the<br />
selvedges, it is usually drawn parallel to the centre front and centre back edges<br />
of the pattern.<br />
e. Provide matching notches or balance marks if necessary along seams to show<br />
which seams are to be joined together.<br />
f. Centre front and centre back line should be marked. It is advantageous to cut<br />
outward notches at centre front and centre back of pattern pieces because at the<br />
time of assembling the garment, notches on collars can be matched to notches on<br />
the neck line of garment etc.<br />
g. Fold lines should be clearly shown. Fold lines appear along centre front or centre<br />
back, edges and sometimes along hems to show where the material is to be<br />
folded. Dart markings, pleat markings etc. should be clearly shown.<br />
ADVANTAGES OF PAPER PATTERN:<br />
<strong>1.</strong> A good pattern of the right size which has been adjusted to suit your individual<br />
requirements will enable you to obtain a good fit.<br />
2. A pattern prepared on thick paper or card board can be preserved for a long time<br />
and can be used over and over again.<br />
3. By manipulating the basic pattern pieces it is possible to produce patterns for<br />
complicated and original designs. (For example, the basic sleeve can be adapted<br />
for a full sleeve or bell sleeve)<br />
4. A paper pattern of a particular size can be used to make new patterns of<br />
proportionately larger or smaller sizes by following a systematic procedure called<br />
grading.<br />
5. Cutting with the help of a paper pattern is quicker and easier than drafting straight<br />
away on the fabric.<br />
6. Use of a paper pattern will enable you to cut the garment with a minimum amount of<br />
fabric because it is possible for you to try out the placement of pattern pieces in<br />
different ways till you have found the most economical way to keep them.<br />
7. If there are any mistakes while drafting, these can be corrected in the pattern itself.<br />
8. Patterns can be modified according to latest fashion.<br />
9. In making one’s own pattern there is a great scope for deriving personal satisfaction<br />
from the freedom to create our own design.<br />
10. By making different patterns, it improves our skills and gives us experience.<br />
105
10.4 COMMERCIAL PATTERN:<br />
Development of Commercial Patterns: Commercial patterns were first made, in U.S.A<br />
in the 1850’s by Ebenezer biter of who was a tailor. In the beginning they were crude<br />
patterns in rough paper, for simple demonstration only. The first pattern was of men’s and<br />
boys clothing Patterns for women and children were also developed later and became,<br />
available commercially. You may have seen fashion magazines like Vogue, McCall’s<br />
Pictorial Simplicity etc. and their pattern books.<br />
Commercial patterns are usually done on tissue Paper. Since tissue paper is not<br />
bulky, it allows many piece of pattern to be packed compactly in an envelope. In commercial<br />
patterns seam allowances are included for safety. Patterns of established companies are<br />
usually printed and marked clearly with straight grain lines. Seam lines, cutting lines, darts,<br />
centre lines and all the necessary construction details. Good patterns are carefully labeled<br />
with the following information; the pattern size, name of each pattern (back, front, sleeve<br />
etc), number of pieces to cut horn each pattern piece etc. In addition some companies<br />
provide instruction sheets explaining the steps involved in using the pattern to cutout the<br />
garment, transferring pattern markings, and constructing the garment.<br />
In India there are very few concerns making paper patterns probably because there<br />
is not much demand for them. Unlike in foreign countries we have the facility to get our<br />
clothes custom tailored at fairly reasonable rates, housewives and woman who know a<br />
little bit of tailoring prefer to make their own patterns rather than buying expensive ready<br />
made patterns. This may be another reason for the lack of demand for commercial patterns.<br />
<strong>1.</strong> Selection of commercial patterns:<br />
Patterns for women’s and children’s garments are usually sized according to bust<br />
measurement. Pants and skirts are sized according to waist, hip and length measurements.<br />
Hence before selecting the pattern, you should take your body measurements accurately<br />
and buy the correct size. The measurements listed on the pattern envelope are the actual<br />
body measurements, (Note: The pattern pieces will be somewhat larger, since a certain<br />
amount of ease allowance is included. The amount of ease will vary with the manufacturer<br />
and the garment design).<br />
2. Merits:<br />
Reputed companies standardize their patterns after doing a lot of research and trying<br />
out the fit on models, if your measurements have the same proportions as for the standard<br />
size figure it would be simple to buy a Commercial pattern than to draft one yourself. So<br />
the Commercial pattern saves you time and of foil. It may even give a better fit than a<br />
home-made pattern if you are inexperienced.<br />
3. Demerits:<br />
Commercial patterns are expensive. Secondly patterns for different types of garments<br />
are not readily available in India, and good patterns are especially hard to get. For people<br />
106
whose measurements don’t have the same proportions as the standard figure. Commercial<br />
patterns do not give fit without some alteration pattern alteration processes are rather<br />
complicated and may prove more laborious in practice than drafting pattern based on<br />
rarely be used more than once unless you copy it on to thick paper for further use.<br />
10.5 DRAPING:<br />
There are three common terms used to describe this technique-draping, toile and<br />
modeling. A fourth term is sometimes used namely moulage. In order that confusion does<br />
not ruin, it should be realized that these four terms refer to one and the same technique.<br />
However the most modern term used is modeling. Although modeling is basically a skill,<br />
artistic acumen is necessary to use the technique to full average for the design of a garment.<br />
There are some fabrics which land themselves more readily to draped styles because<br />
they have a quality which allows the material to hang in unison with a complementary to the<br />
body. In other words they posses “drape” Eg. of such fabric are jersey, chiffon, and moss<br />
crepe.<br />
Draping is the manipulation of fabric on a three dimensional form by a designer to<br />
obtain perfect fit and harmony between the fabrics and design of the garment and the<br />
silhouette of the individual.<br />
Modeling or Draping is the molding of material around a dress stand or human body<br />
for the purpose of designing a garment just like a sculptor Modeling allows the fashion<br />
designer to work in three dimensions.<br />
There are several types of dress form on the market but the most commonly used<br />
dress form is the muslin padded dress form, set on a movable height adjustable stand,<br />
duplicates the human body shape. It is firm, yet resilient and does not resist pins. The right<br />
and left sides are exactly alike.<br />
Other types or dress forms available on the market are made of paper Mache or of<br />
plastic molded to the individual figure. For experimental work a half sized form is satisfactory<br />
because it requires fewer yardages with which to work. A variety of dress forms are available<br />
in standard sizes for junior and missy figures as well as for children’s and men’s figures.<br />
Draped styles are those which accommodate the material achieving the desired effect.<br />
Using the procedures described, we will find that greater freedom of expression in our<br />
design it possible.<br />
A. Adhesive Paper Dress Form:<br />
As because it is difficult for a person to fit herself, and a fitter is not always available<br />
a dress form, the exact duplicate of one’s figure is almost essential. One that is made on<br />
the individual is more satisfactory and less expensive than the commercially made form.<br />
For that reason, the instructions for making a form have been included.<br />
107
Materials needed:<br />
Two shirts of thin knit material such as T-shirt. Thin muslin cut on the bias, and about<br />
5 inches wide, to build up a neckline, or gauze tubing shaped to the figure; or a packaged<br />
dress form kit, which will contain all necessary material. Two rolls of medium weight adhesive<br />
papers, one inch wide.<br />
Eight yards of colored scotch tape, ¼ inch wide stiff, corrugated, large enough to cut<br />
out a base for the largest hip size, and a neck size pieces, other materials; two sponges,<br />
two small basins for water, needle, thread, sharp scissors, surgical scissors if available,<br />
pencil, yardstick, rule, tapeline, sharp razor blade with one cutting edge only, shellac, small<br />
paint brush.<br />
Method of Proceeding:<br />
Four persons are necessary to construct the form quickly; two to moisten strips and<br />
two to paste strips to person, one working on the front and one on the back. Allow one hour<br />
for making the form on the figure, and one hour for finishing it after it is removed from the<br />
figure.<br />
The person should wear a tight fitting garment which gives desirable style lines. She<br />
should stand so that her hands may be placed on the back of a chair or rest on the edge of<br />
a table for support.<br />
To cut the paper, hold the roll with edge extending over a table edge, and cut through<br />
the roll with a razor blade. All strips should be cut before starting to make the form on the<br />
person. Keep separate on table each group of strips is cut from the two rolls of tape to<br />
prevent confusion and to speed up the operation.<br />
a. Diagram showing the depth each group of strips is cut from the two rolls. Each group<br />
should be labeled as it is cut.<br />
<strong>1.</strong> First group of strips is cut ¾ inch from outside of both rolls and are approximately 15<br />
to 12 inches long. These strips are used from shoulder to waist on first layer, and<br />
diagonally from neck down front and back on the second layer.<br />
2. Second group of strips, around 12 to 9 inches is cut ¾ inch from outside of each roll.<br />
These strips are used on the first layer form waist to lower hip edge and on the<br />
second layer down from the neck in front and back.<br />
3. Third group of strips, around 9 to 5 inches, cut ¾ inches, from outside edge of roll.<br />
These strips are used diagonally under the arm. On both first and second layers in<br />
making the form.<br />
4. Cut around 2 fifty, 3 inch strips for finishing edges of form and for joining the two<br />
sections.<br />
108
¾" ¾"<br />
¾"<br />
ADHESIVE PAPER DRESS FORM<br />
a b c d<br />
e f g h<br />
i & j k l m<br />
109
. Put the shirt: or substitute, on the person and sew edges together so that the shirt fits<br />
smoothly and firmly on the figure. It should run up onto the neck to form a neckband,<br />
extend out over appear to form a smooth Armscye, and extend well below the widest<br />
hips. Pull the shirt down smoothly from shoulder, and paste a long strip of moistened<br />
tape closely around the normal waistline, overlapping tape ends to prevent slipping.<br />
Paste another strip of tape closely below the widest hip. Paste stripe curving under<br />
each bust to preserve contour.<br />
c. First layer of strips, 12 to 15 inches. Begin at center front and back, paste moistened<br />
strips on the figure from neck and shoulder edges to taped waistline, over lapping<br />
strips ¾” of the strip width. Let strips curve to body contour as they will, and f too long<br />
tear off excess length. Continue pasting strips to armscye edge, overlapping strips<br />
at top of shoulder. Repeat for second side of front and back. From waist to lower hip<br />
edge, paste 9 to 12 inch strips at right angles to waist, joining tape ends to those<br />
above the waist. Paste 5 to 9 inch strips diagonally from underarm to lower hip edge,<br />
allowing strips to overlap front and back. Repeat for second side.<br />
d. Second layer of tape. Above the waist use 9 to 12” strips. Start just below the neck,<br />
paste ships diagonally across front, alternating strips from right and left side, having<br />
strips overlap at top of shoulder. As you continue downwards, the end of strips should<br />
touch and form the upper Armscye. Continue the crossed ships down the body to<br />
lower hip line edge, using 12 to 15 inch strips below the waistline. this should form a<br />
smooth surface over the entire figure, especially at the waist where joining had<br />
occurred on the first layer. The second layer from underarm to lower hipline is reinforced<br />
with 5 to 9 inch strips the same as in c, the first layer.<br />
e. Reinforce around Armscye to form a good shape, using 3 to 5 inch strips. Some<br />
persons may wish a short sleeve cap. This is formed from 1 to 3 inches beyond<br />
armscye at shoulder tip, using short 3 to 5 inch strips building a smooth upper arm<br />
curve, allowing strips to follow the arm curve when pasting on. (It ids difficult to put on<br />
and remove garments with an extended sleeve cap). Finish the neck with one layer<br />
of 5 to 9 inch strips around the neck to form a good shape until dress form is removed<br />
from person. The neck can be reinforced more sturdily when form is removed.<br />
f. Measure and mark the following from the form before removing—Neck, Bust, Waist,<br />
Widest hip. Measure from floor up to within 2 or 3 inches below the widest hip and<br />
carefully mark for the base of the form.<br />
g. Mark for removing form from person, down center front and back with ruled line,<br />
across front and back at intervals for matching when joining half sectional. To remove<br />
form from the figure, cut with a one-edged razor blade down center front and back<br />
marked lines. Be careful to cut through paper only. Finish cutting through the fabrics<br />
with surgical scissors or sharp pointed shears.<br />
110
Remove the two sections. Either before the form is made or after is the removed<br />
measure the person at the following positions and record in neck, bust, waist, and widest<br />
hip. Compute the difference between the person and the form at neck, bust, waist and hip.<br />
Divide by and remove this difference from the two centre front and two center-back edges<br />
of from. Cut smoothly along marked hipline which is parallel to the floor. Hold each section<br />
up to the light and reinforces on the inside of the form any sport that seam thin.<br />
h. Join the sections, using 3-inch strips: Place front down on the table with edges<br />
and cross markings matching both front and back, and pin a tape securely around<br />
the waist. Paste 3-inch strips across cut edges of front, first on the outside and then<br />
on the inside. These strips should be closely overlapped to hold edges permanently.<br />
Repeat for back.<br />
i. Trim neck and armscye edges smoothly and reinforce with 3-inch strips around cut<br />
edge.<br />
j. Trim bottom of form along marked line until it stands evenly on the table. Place bottom<br />
of form on paper and also mark around the hips, also mark center front and center<br />
back. Repeat the same for the neck. Cut cardboard from paper patterns and cut a<br />
1¼ inch hole in the center of each. Fit the cardboard flush into the inside edges of the<br />
hip and neck and join to the form with 3 inch strips.<br />
k & l. Outer covering. To keep the paper edges from curling, the form should be shellacked<br />
and thoroughly dried. A top shirt is tightly and smoothly fitted over form, sewing where<br />
necessary, and taping at armscye, neck and under the lower edge of the form. Using<br />
¼ inch colored tape, mark the following measurement positions; centre front, center<br />
back, neck, shoulder width, back width, bust waist, Armscye, 3 inch hip, 6 inch hip,<br />
widest hip. (m) standard.<br />
m. A stand is needed in order to use the form successfully. This is made, using two 2” x<br />
4” x 18” pieces of wood for base, and a pole 5 to 5 ½ feet tall and 1¼” in diameter<br />
with nail holes bored up the length to adjust the height. An oral board cut from plywood<br />
should be smaller than the base of the form. Bore a 1½” hole in the center. This oval<br />
is slipped on the pole is rest over a large nail and support the form.<br />
B. Draping on the stand:<br />
One of the main advantages of the technique is that by experimenting in draping<br />
material on to the stand, you can build up a desired effect before cutting in to the fabric.<br />
The illustrative stage of design can be delayed until after the experimental stage, the<br />
illustration in effect, being a record, of the artistry displayed on the stand.<br />
111
Stage 1:<br />
Drape the uncut length of dress fabric over the stand. If the garment is for an individual<br />
client or yourself, first drape the uncut length of your fabric on the figure. This will enable<br />
you to evaluate the coloring and posture of the individual with the fabric and the line of the<br />
drapes.<br />
Drape the fabric on the stand for the overall effect. Observe its natural characteristics,<br />
i.e. the ways it falls, its handle, texture and weight etc. Experimentation can now take place.<br />
Do not cut into the fabric, but pin to hold where necessary. Aim for the overall effect, details,<br />
can be worked later. Note, first of all, the silhouette, since each fabric drapes in a different<br />
way, this in turn alters the silhouette. Drapery is best continuing inline rather than as a<br />
separator piece, although this is not easily achieved. Alternative ideas may develop at this<br />
experimental stage. Evaluate your details. For example, cheeks or stripes placed on various<br />
grains will give different effects. Tucks may look better than gather in certain fabrics. If you<br />
intend to use trimmings, place them onto the fabric to see how well they co-ordinate.<br />
Stage 2:<br />
Substitute dress fabrics; To model the entire garments in the actual fabric is ideal,<br />
but unfortunately it makes experimentation expensive. For this reason, professional<br />
designer may use a fabric with similar properties which has been left over from a previous<br />
collection. Alternatively, the non-draped parts of the garment can be modeled in muslin<br />
with just the draped sections made in the actual fabric. When draped designs for checks<br />
or stripes, mark in the position of the lines on the muslin to get the effect of the fabric and<br />
to match the lines along the seams.<br />
Stage 3:<br />
Tape your stand: centre front, centre back shoulders, seam lines, style line, neck<br />
lines, waist, hip and bust line and position and direction of drapes. (The horizontal and<br />
vertical balance lines help the drapes to hang correctly)<br />
If the fabric is not transparent, we may not be able to see the taped lines, below it,<br />
therefore sink pins along the taped lines, the pin heads below the fabric being your guide.<br />
Stage 4:<br />
Select and prepare the material: Prepare the garment material and since the whole<br />
garment is cut, allow enough material to cover both sides of the stand for each section.<br />
When estimating the amount needed for draped styles, bear in mind the extra fabric will be<br />
requires for the drawing up of folds from the bottom down from they top and the depth of<br />
the fold itself. The draping quality of the warp and weft grain should be the same in order to<br />
match both sides of a drape. Allow plenty of excess material beyond the outer edges of the<br />
stand and mark in the centre vertical line and the warp grain with a contrasting thread.<br />
112
Stage 5:<br />
Place and pin material onto the stand in the following way: A full toile is required, but<br />
you need to model one side only, except for asymmetric designs where both sides must<br />
be modeled. If translating and draped styles from a sketch observe where both sides must<br />
be modeled. If translating and draped styles from a sketch observe where the folds are<br />
coming from and going to and the amount involved at either end.<br />
Line up the vertical central thread with the centre front line of the stand, and pin. To<br />
avoid injury to the fabric, use very fine pins, e.g. silk pins, and keep pinning to a minimum.<br />
Temporarily pin the surplus fabric to the side of the stand you are not modeling. Mould the<br />
fabric around the stand as desired, allowing the excess fabric to fall freely into the area<br />
where you wish the fullness of the drape to be placed. Use drapes in place of darts. The<br />
drapes can be continuing along the out edges of the stand and be allowed to fall forwards<br />
or back wards into a cascade of drapery or be caught up into a seam line etc., use the<br />
grain to experiment for the best effect, numbering that fabric drapes best on the bias. It is<br />
some times necessary to control drapes e.g. on a wide neckline could fall off the shoulder<br />
or in the case of side panel, where billows might occurs. The following methods are used<br />
to control drapes.<br />
a. By mounting the drapes on a fitted section, in this case, the fitting section should be<br />
modeled first:<br />
b. By weights places inside the drapes<br />
c. By taping.<br />
Stage 6:<br />
Indicate all details: All the details should be indicated with pins rather than chalk and<br />
pins should follow the direction of any darts, tucks, seams etc.,<br />
Stage 7:<br />
Remove from stand.<br />
Stage 8:<br />
Press: Do not press over pins as they will leave an impression in the fabric.<br />
Stage 9:<br />
True all lines of check details. The rough design now needs to be trued in order to<br />
establish the correct grain line and to ensure that the armhole, underarm sears and shoulder<br />
are the same length. Both sides although perhaps not the same shape on the left and right<br />
side if the design is asymmetric.<br />
When a symmetric full toile is modeled, the left and right side will not be exactly the<br />
same. Therefore, choose the better side and fold that side over on the centre line on the<br />
double to transfer shape and details. Transfer all markings with thread.<br />
113
Stage 10:<br />
Check seam allowances.<br />
Stage 11:<br />
Make up and press<br />
Stage 12:<br />
Places on stand are model and check for any discrepancies.<br />
Questions:<br />
PART – I<br />
Objective questions:<br />
<strong>1.</strong> How many methods of preparing patterns are there?<br />
(a) Three (b) four (c) one (d) two<br />
2. Drafting can also be called<br />
(a) Block pattern method (b) Draping method<br />
(c) Grading method (d) Layout<br />
3. While transferring right angles in paper patterns, this scale can be used.<br />
(a) Triangular scale (b) L-Shaped scale<br />
(c) Meter scale (d) All the above<br />
4. This type of paper patterns are available in ready made forms.<br />
(a) Graded paper pattern (b) Standardised paper pattern<br />
(c) Commercial paper pattern (d) Individual paper pattern<br />
5. These patterns can be prepared using individual measurements.<br />
(a) Graded paper pattern (b) Standardised paper pattern<br />
(c) Commercial paper pattern (d) Individual paper pattern<br />
6. These lines usually appear on centre front or centre back of pattern.<br />
(a) Seam lines (b) Fold lines<br />
(c) Dart lines (d) Hem lines<br />
7. Commercial patterns were first made in<br />
(a) India (b) Japan (c) USA (d) China<br />
Answer in one or two words:<br />
<strong>1.</strong> What is a commercial pattern?<br />
2. When and who discovered commercial pattern?<br />
114
3. Name the types of paper pattern.<br />
4. What are details that have to be marked in the pattern?<br />
5. Where a pattern with standardized body measurement is used.<br />
6. Why should ease allowance be given in a pattern?<br />
PART – II<br />
Answer in a paragraph:<br />
<strong>1.</strong> What is individual pattern?<br />
2. What is flat pattern technique?<br />
3. What is commercial pattern?<br />
4. How will you select a commercial pattern?<br />
5. Explain the merits and demerits in the commercial pattern.<br />
PART – III<br />
Answer in a page:<br />
<strong>1.</strong> What are the different types of paper pattern?<br />
2. Give the advantages of paper pattern.<br />
3. Explain about commercial pattern. Brief out on its types. How will you select commercial<br />
pattern?<br />
PART – IV<br />
Answer in detail:<br />
<strong>1.</strong> Discuss on the principles of drafting.<br />
2. Explain about the preparation of adhesive paper dress form.<br />
3. Explain the stages in draping the material over dress form.<br />
Answer for objective types questions:<br />
<strong>1.</strong> (a) 2. (a) 3. (d) 4. (c) 5. (d) 6. (b) 7. (c)<br />
115
1<strong>1.</strong> PREPARING FABRIC FOR SEWING<br />
1<strong>1.</strong>1 <strong>INTRODUCTION</strong>:<br />
Fabric of any type must be pre treated before cutting to avoid later alterations or<br />
damage in the finished garment. The untreated fabric may be of correct size on the first<br />
wear, but due to repeated washing it may shrink and be uncomfortable to the wearer.<br />
Grain perfection is another factor which may deform the silhoutte of the garment. These<br />
factors must be given due considersation before cutting.<br />
1<strong>1.</strong>2 IMPORTANCE OF GRAIN:<br />
Grain refers to the direction of yarns in fabric. Woven fabrics are made up of lengthwise<br />
and crosswise yarns interlaced at right angles to each other. The lengthwise or warp yarns<br />
are usually heavier or strong and highly twisted yarns. The lengthwise direction of the cloth<br />
should hang straight down on the figure from the neck to the waist, from the armhole to the<br />
elbow, from the waistline to the bottom of the shirt. Grain is important in the small places as<br />
well as the main pieces of a garment. It is helpful to have a crosswise grain line drawn on<br />
such pattern pieces as sleeves, yokes and collars.<br />
In a well constructed garment, not only should the lengthwise grain run lengthwise on<br />
the body but the crosswise grains should be at right angles to the lengthwise grain or<br />
parallel to the floor at the base of the neck, across the bust, across the fullest part of the<br />
hip, at the base of the sleeve etc. This cannot be achieved if you are using an off grain<br />
fabric for cutting. The result will be an ill fitting garment which will wrinkles, lacks balance<br />
and is uncomfortable to wear. If a dress design should look balanced on the figure, the<br />
right half and left half should be identical in design, shape and grain.<br />
1<strong>1.</strong>3 SHRINKAGE:<br />
All fabrics have tendency to shrink when dipped into water unless they are pre-shrunk.<br />
Excessive shrinkage can ruin the fit of the garment. While stitching, if the cloth has not<br />
been pre shrunk extra allowance for shrinkage should be kept. For various types of fabrics<br />
different shrinkage treatment has to be given.<br />
a. Cotton and Linen:<br />
If the fabric is white cotton it should be allowed for at least 4 hours in hot water to<br />
remove starch. To shrink the cloth uniformly the position of the cloth in vessel should be<br />
changed occasionally. For coloured materials luke warm water should be used and the<br />
same processes followed as for white fabrics given above. Different coloured fabrics should<br />
not be immersed in water together. Each colour should be immersed separately. After the<br />
material has been shrunk it should be allowed to dry in shade and should not be squeezed<br />
to remove water. The stiff materials like canvas or long cloth etc. should also be shrunk<br />
before they are used.<br />
116
. Silk, Rayon and Wool:<br />
As silk and rayon shrunk very little and slowly, it is not necessary to pre-shrunk them<br />
before cutting. Little allowance may be kept while stitching the garment. Woollen materials<br />
can be shrunked in two ways.<br />
<strong>1.</strong> One method is to steam the materials as follows. The cloth to be treated, should be<br />
spread over a table and folded right side facing . Now place a damp Turkish towel<br />
between the two layers. Spread an ordinary piece of cloth on the upper side of the<br />
cloth, then press it with moderately hot iron. This will provide the necessary steaming.<br />
This process should be repeated all over the fabric.<br />
2. The second method is laying a layer of wet muslin or long cloth over the fabric and<br />
rolling the two together and allowing it to remain in this position over night. After this<br />
the muslin or long cloth should be removed and the woollen fabric is spread on the<br />
table with wrong side upwards. The fabric should now be pressed and allowed to dry<br />
naturally.<br />
c. Closely woven starched cotton:<br />
Dip the fabric into mild soap solution for at least four hours. For uniform shrinkage<br />
the position of the cloth should be changed occasionally. It should then be removed and<br />
rinsed with cold water 3 to 4 times, and then allowed to dry without squeezing. The cloth<br />
should be pressed, before it is completely dry.<br />
Note: <strong>1.</strong> In all cases the fabric should be unfolded and then treated for shrinkage.<br />
2. Care should be taken that the bucket or the vessel used is not rusty.<br />
1<strong>1.</strong>4 STRAIGHTENING OF FABRIC:<br />
a. First Method:<br />
Many times fabric needs to be straightened before the garment is cut out. Draw out<br />
a crosswise thread and cut fabric along the thread if the fabric has not been torn from the<br />
roll. Then the garment will fit better and hold its shape longer. To see whether it is straight,<br />
place it on a large table and make a lengthwise fold down the center to meet both selvedge<br />
together smooth out wrinkles. If the two selvedges meet evenly with the side of the table<br />
and the raw edges come together even with the ends of the table, then the fabric is straight.<br />
If the two edges do not come together and are not even with the end of the table, the<br />
material is not straight.<br />
b. Second method:<br />
The second method is by pulling the fabric on the bias. When fabric is pulled on the<br />
bias, it stretches. Always pull the corner of the shortest edge moving the hand over a few<br />
inches each time. The fabric is given a good, firm pull. Sometimes a partner is necessary<br />
to assist straightening the material. Then, each one should pull with a right hand and again<br />
117
with the left hand. Continue pulling first with one hand and the then the other until the material<br />
is straight. Repeat this until the selvedges of the material come together. After this, press<br />
the material if the cloth is wrinkled. Dampen it with a damp cloth, press along the lengthwise<br />
of the fabric but not in the circle. Use a chair to hold the material so that it does not fall on<br />
the floor.<br />
1<strong>1.</strong>5 MARKING AND CUTTING FABRIC:<br />
It is necessary to mark all details from the pattern to the cloth, which will be needed<br />
during the construction of the garment. Mark these details:<br />
<strong>1.</strong> Seam lines.<br />
2. Center front and center back lines.<br />
3. Darts<br />
4. Fold lines<br />
5. Positions for pleats or gathers or Pockets<br />
6. Buttonholes and buttons<br />
7. Any other special markings used to construct the garment<br />
a. Transferring Pattern Marking:<br />
The fastest and most accurate way to transfer construction details from pattern to<br />
cloth is with dressmaker’s tracing paper or carbon use a tracing wheel and have the carbon<br />
mounted on a heavy cardboard to protect table surfaces. Details should be marked on the<br />
wrong side of the cloth where most construction lines are needed. Use white tracing paper<br />
wherever possible because it is safe. If carefully handled its mark lasts longer. The pigment<br />
in coloured tracing paper leaves a more permanent line. It can usually be removed by<br />
scrubbing, but ordinary washing methods and dry cleaning do not always remove it. Test a<br />
scrap of your clothes before marking the garment. Garment sections should have been cut<br />
with the right sides of the cloth together, or when cut from a single thickness, with the right<br />
side up, next to the pattern.<br />
Certain lines, such as those for folds and some kinds of pockets and buttonholes are<br />
needed on the right side of the cloth. Make the longest machine stitch called a bast stitch<br />
along with the traced lines on the underside of the cloth. Stitch through a single layer. The<br />
basting shows the detail on the right side of the cloth.<br />
b. Cutting Fabric:<br />
Keep the ends and sides of the material parallel with table edges at all times so that<br />
the grain never shift. Walk around the table for cutting, instead of pulling the material. Moving<br />
the pattern and material will shift the grain and result in uneven cutting. Do not pick up the<br />
118
cloth from the table or slip the left hand between the cloth and the table. Hold the left hand<br />
down on the pattern close to the cutting edge and cut with long even strokes with right<br />
hand. Keep the cutting blade or shears resting on the table. Have the thumb in the round<br />
handle and the fingers in the long handle, so that shears will not slice at an angle. Cut with<br />
long, smooth strokes with the full length of the shears. Cut exactly even with the cutting<br />
edge as indicated on the pattern. Cut notches outward. Two or three notches may be cut<br />
as one wide notch. Look over the guide sheet or pattern to find out if extra pieces will be<br />
needed in finishing, such as shaped facings, bias binding, striaght bands for cuffs or strips<br />
for piped buttonholes.<br />
1<strong>1.</strong>6 PATTERN LAYOUT:<br />
Laying Pattern Pieces over the fabric in an economical way is called as pattern<br />
layout. This prevents wastage of fabric.<br />
Principles of Pattern Layout:<br />
Some of the principles to be followed while laying patterns:<br />
<strong>1.</strong> Press the fabric as well as the pattern pieces flat before laying the pattern on the<br />
fabric.<br />
2. Use a large table or any hard flat surface for accommodating the work.<br />
3. If an open layout is used, place the fabric right side up on the table. For all other<br />
layouts fold the fabric right sides facing and wrong sides out.<br />
4. Decide on the best way to fold your cloth this will depend on the width of the cloth,<br />
width of your pattern pieces, the type of cloth and design of the garment (whether left<br />
and right haves are identical. Whether many pieces have to be cut on fold the garment<br />
(whether left and right halves are identical, whether many pieces have to be cut on<br />
fold etc.) The common methods of folding the cloth for laying out pattern pieces are<br />
the following.<br />
a. Lengthwise centre fold:<br />
Here the fabric is folded down the middle parallel to the selvedge so that the selvedges<br />
come together. This is the most frequently used fold. The layout for a simple frock on this<br />
type of fold is illustrated in the figure.<br />
b. Off centre lengthwise fold:<br />
This is used when narrow pieces have to be cut on fold. To ensure that the fold is<br />
parallel to the selvedge, mark points measuring the required distance (width of the half<br />
pattern including seam allowance) from the selvedges at regular intervals and fold along<br />
the markings. The layout for a child’s panty on this type of layout is illustrated in the figure.<br />
119
c. Crosswise centre fold:<br />
This is suitable for materials that are too narrow to accommodate the width of pattern<br />
pieces when folded lengthwise.<br />
d. Off centre crosswise fold:<br />
When only a part of the material is required to cut pattern pieces that are too wide for<br />
lengthwise fold layout, this type of fold is used.<br />
e. Combination fold:<br />
Here length wise fold and crosswise fold are combined.<br />
f. Open layout:<br />
Different types of Lay-out<br />
In this type of layout, the fabric is not folded at all. This is used especially for designs<br />
which regain right and left halves to be cut separately.<br />
Make a trial layout by keeping weights or two pins per pattern, to make sure that<br />
cloth will be sufficient. Rules 6 to 9 must be borne in mind while making the trial layout.<br />
5. Straight grain lines on patterns must be kept parallel to the fabric selvedge. To ensure<br />
this, measure and adjust the pattern so that both ends of the straight grain line are the<br />
same distance from the selvedge and pin the pattern to the fabric along the grain line<br />
arrows.<br />
6. Fold lines on the patterns must be kept on folded edges of fabric.<br />
7. Leave enough space between patterns for cutting outward notches and marking seam<br />
allowance (if the patterns do not include seam allowances). Also make sure that<br />
there is enough material left for cutting out belts, facings, etc. for which you may not<br />
have made paper patterns.<br />
120
8. The patterns must be placed on the fabric in the most economical way.<br />
9. Pin patterns to the fabric firmly, after placement of the pattern has been decided, pin<br />
the corners and the long outside edges of the patterns, placing pins close to and<br />
approximately perpendicular to the cutting line. Use just enough pins to keep the<br />
pattern in position. Too many pins will distort the edges. You should start cutting the<br />
fabric only after pinning all the pattern pieces.<br />
10. Take care to use special layouts for asymmetric designs and for fabrics with bold<br />
designs, striped and checked designs, designs going in one direction and fabrics<br />
with nap and pile.<br />
Questions:<br />
Objective questions:<br />
PART – I<br />
<strong>1.</strong> Direction of the selvedge is<br />
(a) Lengthwise grain (b) widthwise grain (c) bias grain (d) None<br />
2. A fabric that does not require pre shrinking is<br />
(a) cotton (b) rayon (c) wool (d) starched cotton<br />
3. Straightening of fabric should be done<br />
(a) before stitching (b) after stitching (c) before cutting (d) after cutting<br />
4. The details necessarily to be marked and cut are<br />
(a) fold lines (b) darts (c) seam lines (d) all the above<br />
5. The fabric is not folded in<br />
(a) combination fold (b) open layout<br />
(c) lengthwise layout (d) None of the above<br />
6. Lengthwise and crosswise fold is performed in<br />
(a) combination fold (b) off centre crosswise fold<br />
(c) lengthwise fold (d) open lay out<br />
7. To prevent wastage of fabric, this method can be used<br />
(a) Draping (b) Grading (c) Lay-out (d) Drafting<br />
Answer in one or two words:<br />
<strong>1.</strong> What is lay-out?<br />
2. Name the garment for which a combination fold is used.<br />
121
3. What is length wise center fold? Where it is used?<br />
4. What is combination fold?<br />
Answer in a paragraph:<br />
PART – III<br />
<strong>1.</strong> What should be done before cutting?<br />
2. How cotton, linen fabrics are shrinked?<br />
3. How a starched cotton fabric is shrinked?<br />
Answer in a page:<br />
PART – III<br />
<strong>1.</strong> Explain on starightening methods in fabrics.<br />
2. Explain how shrinkage is done for Silk, Rayon and wool fabrics.<br />
3. Write about different types of lay-out?<br />
Answer in a page:<br />
PART – IV<br />
<strong>1.</strong> Explain Shrinkage different types of fabrics.<br />
2. What are the principles of pattern layout.<br />
Answers for objective questions:<br />
<strong>1.</strong> (a) 2. (b) 3. (c) 4. (d) 5. (b) 6. (a) 7. (c)<br />
122
12. SEAMS AND SEAM FINISHES<br />
12.1 <strong>INTRODUCTION</strong>:<br />
A seam is a method of joining two or more pieces of material together by a row<br />
stitch. In garment construction, one of the major step is the joining of different section by<br />
seam. This can be done by hand or machine. Seams must be done as flat as possible,<br />
neat and evenly spaced. The type of seam to be used will depend on the type of garment,<br />
texture and durability of the fabric.<br />
12.2 CHOICE OF SEAM:<br />
The type of seam to be used on a garment will depend on various factors. The most<br />
important factors are listed below.<br />
<strong>1.</strong> <strong>Text</strong>ure of the fabric:<br />
When working with a heavy fabric, bulky seams like french seam must be avoided.<br />
2. Design and use of the garment:<br />
When making a boy’s sports shirts, a strong seam like flat fell seam should be used.<br />
3. Place where seam in used:<br />
Seams may be straight or curved depending upon the garment design. When joining<br />
curved edges, plain seam will give a better finish than any other type of seam. Some parts<br />
of the garment which may get stretched during body movement will have to be made with<br />
more durable seams.<br />
4. Current fashion:<br />
The modern trend is to use a simple seam which produces a garment.<br />
12.3 TYPES OF SEAM:<br />
Seams are of different types. They are: <strong>1.</strong> Plain seam 2. Run and Fell seam<br />
3. French Seam 4. Mantua maker seam 5. Piped seam<br />
<strong>1.</strong> Plain seam:<br />
This is the most widely used seam because it is easy to<br />
make, requires less time, is pliable and inconspicuous. It is<br />
used on all types of fabrics except on very transparent kinds, and<br />
is especially suitable for firm fabrics that do not ravel. To make<br />
this seam, place the two pieces of fabrics to be joined together<br />
right side facing, matching the seam lines. Insert pins at right<br />
angles to the seam line and work a line of tacking following the<br />
123<br />
Plain seam
seam line. Remove the pins and stitch the seam exactly on the seam line. Remove tacking<br />
and press the seam open. If the fabric is fine, both the seam allowances can be pressed to<br />
one side. Plain seam is used especially for side seams and armhole seams on skirts,<br />
coats, petticoats, blouses etc.<br />
2. Run and Fell seam:<br />
This is also called flat fell seam, as it is flat durable seam used on men’s sports<br />
shirt, work clothes, children’s clothes and pyjamas. This can be stitched by Hand or machine.<br />
However it is time consuming and difficult to make on curved edges and on bulky fabrics<br />
Run and Fell Seam<br />
but suitable for thin fabric. Place the pieces to be joined right sides facing, and stitch on<br />
the seam line. Press both seam allowances together in the same direction and trim the<br />
under seam allowance to 1/8” and the upper one to 3/8”. Turn under the raw edge of the<br />
wide seam allowance so as to make a smooth fold ¼” wide. Keeping this fold in position<br />
with one hand, tack and fold down flat to the garment. Machine stitch close to the folded<br />
edge on the right side of the garment. The right side of the seam will show one rows of<br />
stitching and wrong side will show two rows of stitching. This is a strong seam.<br />
3. French seam:<br />
This is also called as double seam and is used on transparent and light weight<br />
fabrics, especially on baby clothes and delicate blouses. Such as voile organdy, muslin<br />
French seam<br />
etc. It is a neat and durable finish, as the raw edges are completely enclosed. Do not use<br />
this seam on curves such as armholes and yokes stitched first. Plain seam must be trimmed<br />
and then stitched to prevent wrinkles seen on the right side. The two pieces of materials to<br />
be joined are placed together with wrong sides facing. Work a row of stitching 1/8” outside<br />
the seam line towards the raw edges. After stitching, trim the seam allowances to less<br />
than 1/8”. Press the seam and turn the work so that the right sides are together.<br />
124
Crease the first row of stitching so that it is directly on the edge. Pin or tack and stitch<br />
along the seam line about 1/8” from the fold. In this seam, care should be taken to see that<br />
there are no ravels visible on the right side.<br />
4. Mantua maker’s seam:<br />
This type of seam will not be suitable for bulky fabrics. Keeping right sides facing,<br />
tack the garment on the seam line. Trim one seam edge to ¼” from the tacking line. Make<br />
a ¼” turning on the wide edge so that this edge nearly touches the narrow seam allowance.<br />
Mantua maker’s seam<br />
Now make a second fold to make the folded edge lie along the original tacking line, machine<br />
stitch or hem through all thicknesses and remove tacking.<br />
5. Piped seam:<br />
Sometimes a piping or bias piece is inserted in a plain seam to give a decorative<br />
finish to the garment. This types of seam is very often used in the waistline, Yokeline and<br />
armhole line of the garment. If a cord is enclosed in bias strip, the seam is called corded<br />
seam. Prepare the bias strip, fold it in the middle and tack it to the right side of the pieces<br />
Piped seam<br />
to be seamed in such a way that the bias fold extends 1/8” inside the seam line. To be<br />
more effective the bias material should be of contrast color.<br />
125
12.4 <strong>TO</strong>P STITCHED SEAM:<br />
Top stitching adds strength and decoration to the seam. Five different types of top<br />
stitched seams are: <strong>1.</strong> Single top stitched seam 2. Double top stitched seam 3. Welt<br />
seam 4. Lapped seam 5. Slot seam.<br />
<strong>1.</strong> Single top stitched seam:<br />
Stitch a plain seam, press the seam edge to one side and make a row of machine<br />
stitching, close to the seam line on the right side catching the seam allowances.<br />
Single top stitched seam Double top stitched seam<br />
2. Double top stitched seam:<br />
Stitch a plain seam and two lines of stitching is done on the right side of the garment,<br />
one on either side of the seam line, after the seam allowances are pressed open.<br />
3. Welt seam:<br />
This is similar to single top stitching, but it is used for bulky fabrics such as wool<br />
and coat fabrics. Stitch a plain seam and trim one raw edge to about ¼” width. Press the<br />
two raw edges to one side, with the narrow one closed under the wider one. Now stitch on<br />
the right side, so that the stitching will come just outside the narrow seam edge, but inside<br />
the wider seam edge.<br />
Welt seam Lapped seam Slot seam<br />
4. Lapped seam:<br />
This seam is used with natural or synthetic leather fabrics. Mark seam lines. Lap<br />
one edge over the other with seam lines meeting in the center. Place a row of straight<br />
stitching on either side of seamline or stitch with wide zigzag through center. Trim both<br />
seam allowances close to stitching. Lapped seams are used to eliminate bulk, especially<br />
on interfacing and interlining.<br />
126
5. Slot seam:<br />
This variation of lapped seam is used in skirt, coat and dresses for decoration.<br />
Sometimes it is combined with an inverted pleat. Cut a strip of fabric of the same length as<br />
the seam itself and having a width more than twice the width of the seam allowance. Work<br />
a row of tacking down the centre of the strip. Take the two parts of the garment to be<br />
seamed and fold their seam allowances to the wrong side. Now, with right side up, place<br />
the folded edge over the strip so that the folds fall exactly on the tacked line of the strip.<br />
Tack in position close to the folded edges and top stitch carefully along each side of the<br />
seam about ¼” from the folded line. Finally remove the tacking. The slot fabric is shown ¼”<br />
on the right side of the garment. This may be of contrasting color.<br />
12.5 SEAM FINISH:<br />
A seam finish is any technique used to make a seam edge look neater and/or keep<br />
it from raveling. A seam finish can be selected depending on the type of garment and<br />
texture of the fabric.<br />
<strong>1.</strong> Double stitched seam finish 6. Hem stitched seams finish<br />
2. Pinked finish 7. Edge stitched finish<br />
3. Stitched and pinked finish 8. Zig zag stitched seam finish<br />
4. Overcast finish 9. Bound seam finish<br />
5. Herringbone stitched seam finish 10. Net-bound finish<br />
<strong>1.</strong> Double stitched seam finish:<br />
A double stitched seam is especially good for knits, such as knitted soft jersey<br />
where edges tend to curl. Stitch a plain seam with straight stitch. And then stitch a second<br />
Double stitched seam finish<br />
row 1/8” from the first stitch, using one of the following as straight stitch, zig zag, a blind<br />
stitch or other over edge stitch. Trim seam allowances close to the stitching. Press seam<br />
to one side.<br />
2. Pinked finish:<br />
This is a quick method and is not bulky, but is<br />
not a suitable finish for fabrics that ravel badly such Pinked finish<br />
127
as satin and other similar kind of fabrics. After stitching plain seam trim off about 1/8” of<br />
the seam allowance using the pinking shears. Then press the seam open.<br />
3. Stitched and pinked finish:<br />
After a making a plain seam, turn the fabrics<br />
towards the wrongside, press the seam open and<br />
make both a stitch ¼” from the seamline on both sides.<br />
Trim both the edges with pinking shear.<br />
4. Overcast seam finish:<br />
This is a common finish used for both thick and thin fabrics that frays easily. It is<br />
suitable for narrow seams and also for seams that receives hard wear such as armholes<br />
and waist lines. Make a plain seam and press open. Work overcasting stitches over the<br />
raw edges separately. Avoid tight stitches in order to prevent edges from puckering on<br />
seams of armholes and yokes. Press the seam allowances to one side and overcast both<br />
edges together.<br />
Overcasting stitched seam finish<br />
5. Herringbone stitched seam finish:<br />
This finish neatens the raw edges and also holds down the turning, making the<br />
seam flat, suitable for heavier fabrics. Press seam open and work herringbone stitches<br />
on two raw edges, catching the garment.<br />
6. Hem stitched seam finish:<br />
This finish neatens the raw edges with the help of hem stitch. Press the seam open<br />
Hem stitched seam finish<br />
and work hem stitch holding the fabric. The right side of the fabric shows small dots.<br />
128<br />
Stitched and pinked finish<br />
Herringbone stitched seam finish<br />
. . . . . . . . . . .<br />
. . . . . . . . . . .
7. Edge stitched seam finish:<br />
Plain seam is stitched and pressed open.<br />
Then turn under ¼” on each seam edge and top<br />
stitch close to the fold without catching the<br />
garment. This finish is used on unlined coats and<br />
jackets where a wide seam allowance is<br />
available. This is a bulky finish and is not suitable<br />
for deeply curved seams.<br />
8. Zig zag stitched seam finish:<br />
This type of finish is more suitable for<br />
natural fur and fake fur fabric. Trim seam allowance<br />
to 1/8” and stitch with plain zig zag stitches.<br />
9. Bound seam finish:<br />
Bound binding in especially good for<br />
finishing seams in an unlined jacket or coat. Press<br />
the seam open on the wrong side and wrap a bias<br />
around it, with wider side of tape underneath, stitch<br />
close to edge of top fold, catching underneath fold<br />
in stitching.<br />
10. Net-bound seam finish:<br />
This is an inconspicuous and appropriate<br />
finish for delicate fabric, such as velvet or chiffon.<br />
Cut ½” wide strips of nylon net, fold in half<br />
lengthwise, slightly off center. Wrap net around edge<br />
with wider half underneath. From top, edge stitch<br />
narrow half to binding, catching wider half<br />
underneath in the stitching.<br />
QUESTIONS:<br />
PART–I<br />
Objective questions: 1 Mark<br />
<strong>1.</strong> When making a boy’s sport’s shirts, this type of seam is used.<br />
(a) Plain seam (b) French seam (c) Run and fell seam (d) Piped seam<br />
2. For this type of seam, a single row of stitch is worked close to the seam line on the<br />
right side.<br />
(a) Double top stitched seam (b) Single top stitched seam<br />
(c) Welt seam (d) Lapped seam.<br />
129<br />
Edge stitched seam finish<br />
Zig zag stitched seam finish<br />
Bound seam finish<br />
Net-bound seam finish
3. Bulky fabrics will not be suitable for this seam<br />
(a) Plain seam (b) Mantua maker seam<br />
(c) French seam (d) Single top stitched seam<br />
4. Which stitch adds strength and decoration to the seam?<br />
(a) Top stitch (b) Stem stitch<br />
(c) Chain stitch (d) Cable stitch<br />
5. This type of finish is more suitable for natural and fake fur<br />
(a) Zigzagged finish (b) Pinked finish<br />
(c) Edge stitched finishes (d) Hem stitched seam finish<br />
6. This is appropriate finish for velvet or chiffon fabrics.<br />
(a) Net bound finish (b) Stitched and pinked finish<br />
(c) Pinked finish (d) Zigzag finish<br />
7. This kind of seam is the variation of lapped seam<br />
(a) Lapped seam (b) Slot seam<br />
(c) Run and fell seam (d) French seam<br />
8. This is also called flat fell seam<br />
(a) Run and fell seam (b) French seam<br />
(c) Plain seam (d) Mantua maker seam<br />
9. A neat, durable completely enclosed seam<br />
(a) Mantua maker seam (b) Run and fell seam<br />
(c) Plain seam (d) French seam<br />
10. The seam with cord enclosed in the bias strip is<br />
(a) Welt seam (b) Top stitched seam<br />
(c) Lapped seam (d) Piped seam<br />
Answer in one or two words:<br />
<strong>1.</strong> How will you name the joining of two or more piece of material with a stitch?<br />
2. Which seam is easy to make and requires less time?<br />
3. What is the other name for Run and Fell seam?<br />
4. Which seam is used on transparent and light weight fabric?<br />
5. When working with a heavy fabric, which seam must be avoided?<br />
6. When joining curved edges, which seam will give a better finish than any other type of<br />
seam?<br />
130
7. Name the seam in which bias piece is used for decoration.<br />
8. How many types of top stitch are there?<br />
9. Name any tow Top stitch.<br />
10. Which seam will be suitable for knitted soft Jersey fabrics?<br />
PART–II<br />
Answer in a paragraph: 4 Marks<br />
<strong>1.</strong> Define plain seam with a neat diagram.<br />
2. What is lapped seam? Explain with diagram.<br />
3. Explain stitched and pinked finish with diagram.<br />
4. Write about pinked finish and overcast finish with diagram.<br />
5. Write about single and double stitched seam finish.<br />
PART–III<br />
Answer in one page: 10 Marks<br />
<strong>1.</strong> Write about types of top stitched seam.<br />
2. Explain about Flat fell seam and french seam with diagram.<br />
3. Describe about plain and slot seam with neat diagram.<br />
4. Illustrate and Explain about mantua maker and piped seam.<br />
5. Explain on choice of seam.<br />
6. Write about bound and Net bound finish.<br />
PART–IV<br />
Answer in detail: 20 Marks<br />
<strong>1.</strong> Write in detail on different types of seam with diagram.<br />
2. Describe about different types top stitched seam.<br />
3. Explain on types seam finish.<br />
Answers for objective questions:<br />
<strong>1.</strong> (c) 2. (b) 3. (b) 4. (a) 5. (a) 6. (a) 7. (b) 8. (a) 9. (d) 10. (d)<br />
131
3. Shell or Scalloped tucks:<br />
This is a very decorative tuck made by hand. Make a tuck of ¼” finished width. On<br />
the stitch line mark uniformly spaced dots ½” apart. Do overcasting stitches pull tight on<br />
each dot inserting the needle from the wrong side and bring back the needle to wrong side<br />
after overcasting and reinsert to the next dot the same way. Repeat the same till the dots<br />
end. This is called as shell or scalloped tuck.<br />
Scalloped Tucks Piped Tucks Cross Tucks<br />
4. Piped or corded tucks:<br />
These are made by placing cording on the wrong side of the fabric at centre of tuck<br />
before stitching the tuck. Stitching should be done close to cording.<br />
5. Cross tucks:<br />
When rows of tucks are stitched along the fabric in both horizontal and vertical<br />
direction, the decoration is called as cross tucking. First stitch the vertical tucks and press<br />
this to one side. Then stitch the horizontal tucks.<br />
13.4 PLEATS:<br />
Pleats are introduced usually at the waistline of skirts and dresses to provide fullness<br />
evenly all around. The preparation of pleats is similar to that of tucks, the main difference<br />
being that pleats are wider than tucks. Knife pleats, box pleats or inverted pleats are used<br />
in dresses.<br />
<strong>1.</strong> Knife Pleat:<br />
These are used in the place of gathers. They are usually about ½” - 2” wide and are<br />
turned towards the same direction. The figure shows two knife pleats tacking in position<br />
and marking for two more pleats. To form the third pleat, make a fold along line C and bring<br />
this fold to the right so as to lie over line C . Similarly the fourth pleat will bring D over D .<br />
1 1<br />
The distance CC is twice the width of the finished pleat.<br />
1<br />
2. Box Pleats:<br />
Two knife pleats turned away from each other (one to the left and one to the right)<br />
form a box pleat. This can be used in frocks and skirt waistline.<br />
134
3. Inverted pleat:<br />
It is the opposite of box pleat. It is made up of two knife pleats turned towards each<br />
other so that the folds meet in the middle on the right side of the garment. This is used<br />
mostly in uniforms and skirt.<br />
C C 1 D D 1<br />
Knife Box<br />
Inverted Box Accordion<br />
4. Accordion pleat:<br />
It is a very narrow, straight pleats, equal in width to each other. The folds resembles<br />
the bellows of an accordion, from which the name is derived. The width ranges from 3 to<br />
13 mm. These are close together and depth is equal from waist to hem.<br />
5. Sunray pleat:<br />
Pleats which fan out and graduate from the waist. These pleats are set in the<br />
industries and to sustain pleating, the fabric used should be a synthetic or a blend with<br />
over 50% synthetic fibers. These are usually used on a circular skirts.<br />
6. Kick pleat:<br />
Any type of pleat such as knife pleat, box pleat, or inverted box pleat can be used<br />
to decorate this type of skirt. After pleating, a top, stitch near to the fold if made till the<br />
desired length (should not be made till the hem edge) and decorated.<br />
7. Cartridge pleat:<br />
These are round pleats used for door and window curtains. Firm heavy fabrics will<br />
be more suitable for this type of pleats. Take a strip of material, ½ the time as long as the<br />
section of the curtain material, which is to be trimmed with pleats. (eg. Strip length - 20”;<br />
curtain length - 40”).<br />
135
Make markings of 2” distance in curtain fabric and make marking on strips of 1”<br />
distance in between each marking. Tuck and stitch the curtain to the strip, matching the<br />
marking lines exactly. Do not press.<br />
8. Pinch pleat: `<br />
There are also used on curtains and draperies. These pleats are stitched part way<br />
down and so the markings are made as for tucks. Make three equal small pleats and<br />
baste them together along the top and front edge, press and machine the three pleats<br />
together across the bottom ends.<br />
13.5 GATHERS:<br />
Gathering is an effective and decorative way of distributing<br />
fullness over a given area. In dress making, gathers are often used<br />
at yokes line, waist line, neck line, upper and lower edge of sleeves<br />
for kid’s and ladies garment. The amount of material needed for<br />
gathering will be twice the measurement of waist circumference.<br />
These are more beautiful on thin fabrics. Gathering can be done<br />
through several ways as given below.<br />
<strong>1.</strong> Gathering by hand:<br />
Sunray Kick<br />
Cartridge Pinch<br />
Fasten thread securely and work two rows of tacking<br />
stitches. Draw the ends of thread until the section measures the<br />
desired length and secure the thread by winding round over a bell pin.<br />
136<br />
Gathers
2. Gathering by Machine:<br />
Adjust the machine for long stitch and loosed the upper tension slightly. Now work<br />
two rows of machine stitches ¼” apart. Distribute the fullness evenly by pulling both bobbin<br />
threads together and do a row of machine stitch. Ruffles attachment or gathering foot can<br />
be used to gather large section of fabric.<br />
3. Gathering using elastic:<br />
Gathers can be made by stretching a narrow strip of<br />
elastic and stitching on the part of the garment which is to be<br />
gathered.<br />
13.6 SHIRRING:<br />
Shirring is formed by several rows of gathering. Use<br />
shirring only on soft or lightweight fabrics.<br />
<strong>1.</strong> Shirring made by long machine stitches:<br />
Stitch as many rows of gathering as desired with long<br />
machine stitches and secure each row with a knots in the seam<br />
allowance.<br />
Shirring made by machine<br />
2. Elasticized shirring:<br />
This is made by using elastic thread in the bobbin. Wind elastic thread on the bobbin<br />
by hand, stretching slightly. Use a long stitch, 6 to 8 stitches per inch (3-4 mm in length).<br />
Application of shirring on garments<br />
Stitch on the right side of the fabric, stretching the previously stitched rows as you sew<br />
each new row.<br />
137
Questions:<br />
Objective questions:<br />
PART – I<br />
<strong>1.</strong> To make a pattern to fit the body curves which can be used.<br />
(a) pleats (b) gathers (c) darts (d) tucks<br />
2. What is the other name for half dart?<br />
(a) double pointed dart (b) single pointed dart<br />
(c) decorative dart (d) group dart<br />
3. What is other name for standard dart?<br />
(a) Half dart (b) Full dart (c) French dart (d) Double pointed dart<br />
4. This is a diagonal dart.<br />
(a) Half dart (b) Full dart (c) French dart (d) Single pointed dart<br />
5. To shorten a patterns length this can be used<br />
(a) dart (b) tucks (c) gathers (d) pleats<br />
6. The tucks used for decoration is<br />
(a) pin tuck (b) group tuck (c) scalloped tuck (d) All the above<br />
7. Which pleat is a very narrow, straight, with equal width.<br />
(a) Sunray pleat (b) Accordion (c) Box pleat (d) Inverted box pleat<br />
8. Which is a round pleat.<br />
(a) Accordion (b) Sunray pleat (c) cartridge (d) kick<br />
9. Pleats in which 3 small equal pleats are stitched together.<br />
(a) Kick pleat (b) Sunray pleat (c) Box pleat (d) pinch pleat<br />
10. How several Rows of gathers is called as.<br />
(a) Shirring (b) pleats` (c) Tucks (d) darts<br />
Answer in a one word:<br />
<strong>1.</strong> What is the other name for full dart?<br />
2. What is pin tuck?<br />
3. What is size of pin tuck?<br />
4. In which pleat, two knife pleats are turned towards each other?<br />
5. Where will a bobbin elastic be used?<br />
138
Answer in a paragraph:<br />
PART – II<br />
<strong>1.</strong> What is single dart?<br />
2. What is French dart.<br />
3. Name the types of tucks and write about pin tuck.<br />
4. What is piped tuck?<br />
5. Name the types of pleats.<br />
6. What is knife pleat?<br />
7. What is sunray pleat?<br />
8. What is gathers? Name its types.<br />
9. Write about Gathering by machine.<br />
10. What is shirring?<br />
PART – III<br />
Answer in a page: 10 marks<br />
<strong>1.</strong> Give a brief account or dart types.<br />
2. Write about different types of tucks with diagram.<br />
3. Write in brief on four types of pleats.<br />
4. Write short notes on gathers with diagram.<br />
5. Write about shirring.<br />
PART – IV<br />
Answer in details: 20 marks<br />
<strong>1.</strong> Write in detail of different types of pleats.<br />
2. Write in detail on different types of tucks, gathers and shirring.<br />
Answer for objective type Questions:<br />
<strong>1.</strong> (c) 2. (b) 3. (a) 4. (c) 5. (b) 6. (b) 7. (b) 8. (c) 9. (a) 10. (a)<br />
139
14. PLACKETS AND FASTENER<br />
14.1 <strong>INTRODUCTION</strong>:<br />
Plackets are finished opening constructed in order to make it easy to put on or take<br />
off a garment. When the garment is in use plackets are kept closed (for good fit) with the<br />
aid of fasteners such as zips, buttons and buttonholes, press buttons, hooks and eyes etc.<br />
They are used at waist lines, neck lines, wrists and other snug fitting parts of the garments.<br />
14.2 PLACKETS:<br />
A placket may be made in an opening left in a seam, in slash or cut in a garment.<br />
The placket made in a seam is stronger and gives a better finish when completed. The<br />
following points should be kept in mind while making placket.<br />
<strong>1.</strong> A good placket should be as inconspicuous and flat as possible. It should not be bulky,<br />
puckered or stretched. Fastenings should hold securely and there should be no gapping<br />
edges.<br />
2. Neck openings must admit the head easily, pass over. The position of the placket<br />
should be such that it is easily accessible and convenient to operate.<br />
3. Openings are subjected to certain amount of strain during wear and should be<br />
strengthened at the closed ends, lower end or neck and skirt openings, upper end of<br />
wrist openings etc. For plackets in seams to be durable, the garment seam should be<br />
at least 5/8” wide. Seams should not be trimmed or clipped too close.<br />
4. The type of placket used should be suitable to the kind of garment on which it is used,<br />
its position in the garment, texture of the fabric, age and sex of the wearer and current<br />
fashion must be kept in mind while choosing placket.<br />
14.2.1 Placket types:<br />
<strong>1.</strong> Continuous bound placket:<br />
This is also called one-piece placket and may be made in a seam or slash. It is<br />
Continuous bound placket<br />
suitable for children’s dresses, undergarments like sari petticoat, and for sleeve openings<br />
140
where a cuff or band is used. Do not use this placket on curved seams and on bulky<br />
fabrics.<br />
To make a placket in a slash, cut a strip of fabric on the lengthwise grain. 1¼” to1½”<br />
wide and one inch longer than twice the length of the openings. Keep the centre of a long<br />
edge of the strip to the end of the slash, with right sides of garment and strip facing each<br />
other. Pull back the tip of the slash about ¼” from the edge of the placket strip and pin.<br />
Spread the placket edges apart almost into a straight line and attach to the strip by a line<br />
of tacking worked ¼” from the edge of the strip from the garment side, machine over the<br />
tacking line from one end up to its midpoint. Stop the machine at this point with the needle<br />
in the fabric, raise the pressure foot and move the fullness backward out of the way to<br />
prevent catching a pleat. Make sure that the garment edge is caught in the seam. Lower<br />
the presser foot and stitch to the opposite end of the opening.<br />
Press the seam edges towards the placket strip and fold under the free edge of the<br />
strip ¼” and crease. Then fold the strip over the seam edge and hem it along the stitching<br />
line. Fold the strip under on the overlap section and tack it at the seam. Tacking can be<br />
removed after the fasteners are fixed.<br />
2. Bound-and faced placket or two-piece placket on a seam:<br />
This is used in the left seam of skirts or petticoats and back seam of dresses. The<br />
underlap side of this placket is finished with a binding and the overlap with a facing. For<br />
this two separate strips of fabric are used, one of width 1½” for the overlap and a wider<br />
one (2½”) for the under lap. Both the strips should be 1” longer than the placket opening.<br />
Stitch the narrow strip to the overlap side (front part of the skirt) and the wide strip to the<br />
Bound and faced placket<br />
under lap side of garment (back part of the skirt), right sides facing and seam lines matching.<br />
The seam allowance used for attaching the strips should be the same as that of the seam<br />
on which the placket is to be fixed (about ½”). This is to ensure that the stitching line on the<br />
strip comes on line with the stitching line of the seam. The one inch extra length of the<br />
strips should extend below the placket opening. To finish under lap, crease the strip back<br />
over the seam, bring its free edge to the wrong side of garment, turn under ¼” at the free<br />
edge and hem the fold to the stitching line. This forms the bound side of the placket and<br />
should be ½” to ¾” wide.<br />
141
For finishing overlap section of the placket, make a ¼” or wider fold to the wrong<br />
side of its free edge so that distance from the stitching line to the fold line is the same as<br />
the width of the binding on the under lap. Now turn the strip over completely to the wrong<br />
side of the garment (as for a facing) and hem or slip stitch the fold to the garment. Work a<br />
line of stitches at base of placket catching the under lap and overlap together. This can be<br />
done by hand from the wrong side in such a way that no stitches are visible on the right<br />
side.<br />
3. Miter Placket:<br />
It is also called Tailored Placket. This placket is used for beauty and also to add<br />
strength. This is commonly used on men’s shirts, sleeve opening and on neck openings in<br />
jibbas and children’s garment. When used on children’s and ladies dresses, the strip used<br />
for placket may be of contrasting material for decorative effect.<br />
For the under lap, prepare a straight grain strip 1½” wide and exact length of the silt<br />
(5”). Keeping one end of the strip exactly in line with the end of the slit and with right side<br />
facing. Stitch a ¼” seam joining the edge of the strip to the correct edge of the sleeve<br />
opening. Now fold ¼” under on the free edge along the strip and hem or machine this<br />
folded edge along the stitching line. The under lap strip tacked to the wrong side of garment<br />
and figure shows the finished appearance of the under lap binding.<br />
Construction of Miter Placket<br />
The overlap for this type of placket is usually shaped to a point at the end and is<br />
about 1” wide when finished. For this cut a strip 2¼” wide and 1¼” longer than the slit Trim<br />
off the strip and mark the seam lines (dotted lines) ¼” inside the outer edge as This placket<br />
142
is used for beauty and also to add strength Keep the right sides of the strip facing the<br />
wrong side of garment and tack the short side of the strip to the free side of the placket<br />
opening on the seam line. Machine stitch and bring its overlap strip over to the right side of<br />
the garment. Turn under the seam allowance and adjust the position of the strip so that it<br />
will overlap the under lap binding. Tack in position. Top stitch the strip to the garment upward,<br />
then around the point and downward till sleeve opening. Now stitch across the overlap<br />
twice to hold the under lap in position. Note that the stitching has caught the under lap from<br />
under the presser foot and machine the overlap section alone without catching the garment.<br />
Note : Remember to cut overlap strips as well as under lap strips in pairs (for a pair of<br />
sleeves) from fabric folded with right sides facing.<br />
4. Zipper Placket:<br />
Zippers are usually attached with tapes and available in different sizes. These can<br />
be selected depending upon the size & color of the placket. Garments with zipper are<br />
more attractive & comfortable to the wearer.<br />
Zipper placket<br />
Cut the opening in garment fabric and select the zipper accord to the opening size.<br />
Toward the end of the cut make a short slit ¼” wide diagonally on both the sides. Turn all<br />
the three raw edges to the wrong side and do a row of tacking. Take a square piece of<br />
Tape & Stitch its raw edge. Attach this to the end of the placket opening with the hemming.<br />
Over this, place the Zipper & stitch through the edges holding the fabric edge. Then take<br />
another square piece of Tape and stitch its edge and place it covering zipper edge &<br />
finish it with hemming.<br />
Zipper must be carefully opened and closed, because if the pull tab slips away from<br />
the teeth or rail, it will be difficult for the wearer to operate it. This can be used in skirt, frock,<br />
shirt, handbags, decorative purses and other garments.<br />
5. Faced Placket open:<br />
This is a simple neck finish used on infants, children’s clothes and night dresses.<br />
To make this, slash the opening down from the neck at centre front or centre back and<br />
143
apply fitted facing to the opening. Place facing piece right sides facing the garment, do a<br />
row of stitch catching the garment more. Turn the facing to the wrong side and top stitch.<br />
Construction of faced placket open<br />
Finish the facing by turning the edge and hemming.<br />
14.3 FASTENER:<br />
Fasterners are any item used to close a garment opening.There are different types<br />
of fasteners. While selecting these fasteners they must be free from rust and with laundering<br />
they must not break. Select to suit the color, design and texture of the fabric, the style and<br />
use of the garment and the position of the placket. Also consider the age and sex of the<br />
wearer. Fasteners are decorative and functional. Some are conspicuous while some are<br />
inconspicuous.<br />
Always fasteners should be fixed on to double material for strength. They should<br />
be fixed in such a way that the right side of the garment laps over the left side for women<br />
and the left laps over the right for men. Buttons and buttonholes are generally used for<br />
men’s shirt, trousers etc., just as press buttons, hooks and eyes are used for ladies cholies<br />
and children’s dresses.<br />
14.3.1 Fastener types:<br />
Some of the types of fastener include press button, hook and eye, button and button<br />
hole, zippers, tapes and elastic.<br />
<strong>1.</strong> Press button:<br />
These are used to hold edges that will not have much strain when the garment is<br />
worn. They will open out if used on snug fitted parts. These are available on various sizes<br />
and weights. They are either black or silver. There are two sections in this a stud and a<br />
socket. On the wrong side of the overlap the stud is attached, close to the edge. Take care<br />
that the stitches fastening the press button do not show on the right side of the garment.<br />
After attaching the stud to the overlap press it to the under lap to make impression. Place<br />
the socket over this impression and make four or five buttonholes stitches on each hole of<br />
the socket. Fasten the thread on the wrong side when finished. This fastener is ideal for<br />
sportswear and kidswear.<br />
144
2. Hook and eyes:<br />
These are used on the placket where there is crosswise strain. They form an<br />
inconspicuous closing. The hook should be placed 1/8” inside the finished edge of the<br />
overlap on the wrong side. Work buttonhole stitches or overcasting stitches around the<br />
rings of the hooks and at the centre of the hook. Then slip the needle through the fabric<br />
and bring it out near the hook end. Take several back stitches across and under the loop of<br />
the hook to hold it down firmly. Fasten off with small back stitches, without showing on the<br />
right side.<br />
a. Eyes:<br />
The eyes are curved or straight and are made of metal. These are usually substituted<br />
with thread loops of matching color thread. Usually finished in the same way as hooks.<br />
Fasten the thread on the wrong side when finished. Mostly overcasting, blanket or button<br />
hole stitch is used for stitching eyes.<br />
Press Button<br />
Hook & Eye<br />
Buckle with and without prong Velcro<br />
b. Loops:<br />
There are two types of loop. They are Thread loop and Fabric loop. The thread loop<br />
is an inconspicuous fastening which is most often found at the neck edge. To make a<br />
thread loop, sew four or five strands of matching thread on the under lap in the correct<br />
position, then work buttonhole stitches over these strands.<br />
Fabric loops are made of strips of bias fabric stitched and turned inside out to form<br />
a narrow tube. The fabric used may be of self material. This type of fastening adds a<br />
decorative trim to children’s and women’s garments. Following gives the constructing steps.<br />
Cut a strip of bias fabric about 1” wide fold in half lengthwise, right sides together, and<br />
stitch about 1/8” from the folded edge down the length of the strip. Trim seam allowances<br />
to 1/8”. Attach a strong thread to one end of tube at the seam. Turn the tube inside out by<br />
drawing the thread right through the tubing with a heavy needle. Cut the tube into lengths<br />
equal to the finished length of the loop plus seam allowance. Place these pieces on the<br />
right side of the over lap, shaped as loops turned away from the edge of the opening. Tack<br />
the facing right side down over loop and machine along seam line. Turn facing to wrong<br />
side and tack in position. Loops will be now extending from placket edge. Button, matching<br />
to the fabric loops are fixed on the under lap.<br />
145
3. Buttons and Buttonholes:<br />
These are functional as well as decorative. Contrasting color or self colored buttons<br />
can be used. Buttonholes are slits cut in garments to hold the buttons in place. The raw<br />
edges of the slits are finished with buttonhole stitches.<br />
a. Buttons:<br />
Buttons should be selected to suit the color, design and<br />
texture of the fabric and also the style of the garment. Two typesshank<br />
buttons and buttons with holes are most commonly used.<br />
Button maybe made of self fabrics, bone, glass, metal, plastics<br />
etc. Place overlap over the under lap so that the centre front line<br />
coincides. Insert a pin through the gap of the buttonhole. Now lift<br />
the overlap and mark the position of button on the pin mark.<br />
Sew button using the double thread bringing the needle up and<br />
down through the holes. After working enough stitches bring the<br />
thread to the wrong side of the fabric and insert it into the previous<br />
thread forming a small knot. Buttons with 4 holes may be sewn<br />
in the shape of a cross, two parallel lines, a square or an arrow head.<br />
Stitching of button and button hole<br />
b. Button holes:<br />
Buttonholes should be worked on the overlap before the<br />
buttons are fixed. They may be placed vertically or horizontally on<br />
the garment. Whether the buttonhole is vertical or horizontal,<br />
buttons are placed exactly on the centre front line. The allowance<br />
of the material beyond the center front line should be at least ½”<br />
or half the diameter of button used. The length of the buttonhole<br />
should be the diameter of the button plus 1/8” (or the thickness of<br />
the button).<br />
4. Zippers:<br />
These fasteners are available in a wide variety of colors, lengths and types. Several<br />
type of speciality zippers are available. Three basic types of zipper are conventional,<br />
146<br />
Button<br />
Button Hole
separating and invisible zippers. All zippers consist of either a chain of metal or plastic<br />
teeth or a synthetic coil joined to fabric tapes. Chains and coils are made in many weights<br />
and sizes, spirals of polyester or nylon. Coil zippers are lighter in weight, and usually more<br />
flexible, than chain zippers. Unlike metal, they will not rust, and they are available in more<br />
colors. Metal zippers are less affected by heat.<br />
Zipper tapes are woven, generally of cotton or a blend of cotton and polyester.<br />
Some tapes for coil zippers are stabilized nylon or polyester knit. Zippers are opened and<br />
closed by means of a slider or runner with a handle like tab that moves it up and down the<br />
coil or chain. Top and bottom stops keep the slider from running off the zipper with metal<br />
teeth.<br />
a. Conventional zipper:<br />
These zippers, whether made with exposed teeth (chain) or coil, open at the top<br />
and are held together at the bottom. They come in more different styles than any other<br />
zipper type. Depending upon ;the garment<br />
design, application may be by the centered,<br />
lapped, exposed, or fly method.<br />
b. Separating zipper:<br />
Separating zippers are made to<br />
open at both top and bottom, permitting the<br />
zipper opening to separate completely.<br />
Although used mainly on jackets, they can<br />
really be applied to any garment with a<br />
completely opened front. Also, dual<br />
reversible and two-way zippers that zip<br />
from the top and from the bottom are<br />
aailable for jumpsuits and similar garments.<br />
A centered application is the method<br />
generally used.<br />
c. Invisible zipper:<br />
These zippers are the newest type<br />
of zipper. As the name implies, they are<br />
structured differently from other zippers and<br />
are in a special way so that they disappear<br />
Conventional Separating Invisible<br />
into a seam. When properly applied, neither the stitching nor the zipper teeth or coil is<br />
visible on the outside of the garment. Invisible zippers are used principally in skirts and<br />
dresses but they can go, in general, wherever a conventional zipper might be used, except<br />
in a trousers.<br />
Other types of zipper include two way zipper, trouser zipper and decorative zipper<br />
with large teeth and a pull ring.<br />
147
5. Elastics:<br />
Elastic is available in several different types and widths. The type of elastic to choose<br />
will depend on whether it will be used in a casing or stitched directly to a garment.<br />
a. Braided elastic:<br />
This is recommended only for casing because it narrows when stretched.<br />
b. Woven elastic:<br />
It stays the same width when stretched. Thus it can be stitched directly to a garment<br />
or used in a casing.<br />
c. Elastic thread:<br />
This is very thin covered elastic core used for shirring. Since it is wound in bobbin<br />
for shirring it is called bobbin elastic.<br />
d. Special purpose elastic:<br />
These are available for pyamas, lungies and swim-wear.<br />
Read the label when purchasing any type of elastic to be sure that it will serve the<br />
correct purpose.<br />
6. Tapes and cords:<br />
Tapes and cords can be functional or decorative. They can be used to reinforce a<br />
seam, cover a fabric edge, or create a special design on the outside of a garment. Tapes<br />
and cords are available in variety of types, widths and colors. The Tapes may be made<br />
out of silk, cotton and other synthetic fibers. These may be thin or thick. Some are slightly<br />
stretchable others are not. They may be woven, knitted, braided or made of lace. The<br />
choice of which type of tape or trim to use depends upon how it will be used in a garment.<br />
For areas where you want to prevent stretching, select a firm, non-stretchable tape or<br />
cord. Some of the common tapes and cords are:<br />
a. Seam Tape:<br />
Woven tape or lace used to finish hem and facing edges.<br />
148
. Bias Tape:<br />
This is single or double-fold tape used for binding curved or straight edges and for<br />
casings.<br />
c. Twill Tape:<br />
This is firmly woven tape used for reinforcing seams.<br />
d. Piping:<br />
A narrow, corded bias strip of fabric that is inserted into a seam for a decorative<br />
trim.<br />
e. Hem facing:<br />
Wide bias tape or lace used for facing hems and binding edges.<br />
f. Ribbing Tape:<br />
A stretchable knitted band used to finish a neckline, armhole, sleeve, leg or waistline.<br />
7. Velcro:<br />
These have two tape strips, one with a looped nap surface and the other with a<br />
hooked nap. When pressed together, surfaces grip and remain locked until pulled apart.<br />
These are used on cuffs, plackets, mosquito nets and other such items. This is a good<br />
substitute for other closure in home decorating, as with upholstery. These tapes come in<br />
sew-on, iron-on and stick-on forms. These are usually made of Nylon and are available in<br />
yards or metres.<br />
8. Buckles:<br />
These features are available in a wide variety of shapes, sizes, and materials (Plastic,<br />
Iron, Brass, Steel, etc.). However, there are only two types of buckles—buckles with prongs<br />
and buckles without prongs. For a buckle with a prong, eyelets must be used. Readymade<br />
metal eyelets can be applied with special plier or attaching tool, or eyelets can be<br />
hand sewn using a buttonhole stitch. Buckles can be purchased separately or in kits.<br />
Questions:<br />
Objective questions:<br />
PART – I<br />
<strong>1.</strong> Which placket is used for blouse?<br />
(a) continuous bound placket (b) bound and faced placet<br />
(c) miter placket (d) zipper placket<br />
149
2. What is the other name for two piece placket?<br />
(a)bound and faced placket (b) continuous bound placket<br />
(c) miter placket (d) zipper placket<br />
3. How a miter placket is otherwise called?<br />
(a) zipper placket (b) bound and faced placket<br />
(c) continuous placket (d) tailored placket<br />
4. With which the button hole is used?<br />
(a) press button (b) buckle<br />
(c) buttons (d) hook<br />
5. Name the elastic which is used for shirring.<br />
(a) woven elastic (b) braided elastic<br />
(c) thread elastic (d) special purpose elastic<br />
6. Which elastic is recommended only for casing?<br />
(a) woven elastic (b) braided elastic<br />
(c) elastic thread (d) special purpose elastic<br />
7. Which tape is a stretchable knitted band?<br />
(a) seam tape (b) twill tape<br />
(c) piping (d) ripping tape<br />
8. Which tape is used to reinforce the seam?<br />
(a) seam tape (b) twill tape<br />
(c) piping (d) ribbing tape<br />
9. How many types of buckles are there?<br />
(a) 5 (b) 2<br />
(c) 3 (d) 4<br />
10. Which tape is single or double folded?<br />
(a) bias tape (b) twill tape<br />
(c) piping (d) ripping tape<br />
Answer in one or two words:<br />
<strong>1.</strong> Name the places where plackets can be attached?<br />
2. How a finished placket must look like?<br />
3. What is the other name for continuous bound placket?<br />
4. What is the size of the placket piece for contiuous bound?<br />
5. Name the placket used for strength and decoration.<br />
6. Write the correct lapping for women’s garment.<br />
7. How a cuff must be closed?<br />
8. What is two piece plackets?<br />
150
9. What are the types of fastener used in women’s wear?<br />
10. What are the types of fastener used in men’s wear?<br />
1<strong>1.</strong> What is the stitch used to fasten a press button?<br />
12. What is the stitch used for button hole?<br />
PART – II<br />
Answer in a paragraph:<br />
<strong>1.</strong> What is a placket?<br />
2. How many types of plackets are there ? What are they ?<br />
3. Where can a continuous opening be used?<br />
4. Where a miter placket can be used?<br />
5. What is a two-piece placket?<br />
6. What are the types of fastener used in a garment?<br />
7. How a press button be stitched in a garment?<br />
8. How will you stitch a hook and eye in a garment?<br />
9. Explain about velcro.<br />
10. Write about any one type of zipper with diagram.<br />
PART – III<br />
Answer in a page:<br />
<strong>1.</strong> Explain the types of placket and explain any two with diagram.<br />
2. Write about tailored placket with a neat diagram.<br />
3. Explain about button and button hole.<br />
4. Explain different types of elastic.<br />
5. Explain about velcro and buckle.<br />
PART – IV<br />
Answer in detail:<br />
<strong>1.</strong> Write in detail on continuous bound placket and bound and faced placket with diagram.<br />
2. Explain about different types of zipper, elastic and tapes.<br />
3. How will you fix press button, hook and eye and button, button hole to a garment.<br />
Explain with diagram.<br />
Answers for objective questions:<br />
<strong>1.</strong> (b) 2. (a) 3. (d) 4. (c) 5. (c) 6. (b) 7. (d) 8. (a) 9. (b) 10. (a)<br />
151
15.1 <strong>INTRODUCTION</strong>:<br />
15. DECORATING GARMENTS<br />
Trimmings and details like frills, embroidery, applique, belts, bows, smocking, tucking,<br />
lace, ricrac etc., gives the interesting effects on simple dress designs.<br />
15.2 DECORATING GARMENTS:<br />
<strong>1.</strong> Bias trimmings:<br />
Bias binding in contrasting material or self fabric can be used to finish neck lines,<br />
opening and hems in garments. Bias tubing can be used for making decorative button<br />
loops.<br />
2. Ric rac:<br />
This is available in different colors at very low cost and is very durable. (It should be<br />
tested for color fastness before attaching to garment). Ric rac can be sewn flat on the<br />
garment through the centre or it may be attached around edges or between seams so that<br />
just one edge is show on the right side of the garment. A motif made of ric rac adds further<br />
decoration.<br />
3. Ruffles:<br />
This is also a type of frill. To make a pattern for circular ruffle. Cut a piece of circular<br />
fabric with its inner circle equal to the circumference of the neckline and its outer circle 1”-<br />
2” away from the inner circle. Cut the circular fabric at any one point and attach it the inner<br />
circle to the neckline of the garment. Double ruffle can be attached to the armhole hemline<br />
on either sides. The placement of the double ruffle gives a panelled effect to the front of the<br />
garment.<br />
4. Embroidery:<br />
Simple embroidery designs enhance the appearance of<br />
Attaching sequins and beads<br />
Embroidery<br />
Stitch<br />
children’s garments. In the dress design chain stitch for couching stitch can been worked<br />
152
to small motifs with lazy daisy stitches or bullion stitches are worked within the false yoke<br />
and godet. Instead of embroidery, beads or sequins can be applied.<br />
5. Smocking:<br />
This is done by gathering and embroidering over the gathers. This can be worked<br />
only over a plain cloth. When this is done with practice this looks attractive. After knotting<br />
the thread work running stitches from right to left of equal width. Gather the fabric and wind<br />
it over the pin head. Then work desired stitch over the gathered fabric. This is used to<br />
decorate waistline, sleeve, neckline, Yoke and any other part of the garment. This stitch<br />
looks attractive and liked by many of them.<br />
6. Faggoting:<br />
Smocking and its variations<br />
This trim is used between seams to give a decorative touch or to add the length or<br />
width of garment. To executive the design cut the yoke and the lower section of the blouse<br />
separately, with ½” seam allowances. Also cut the yoke pattern on heavy paper with one<br />
Faggoting<br />
inch allowance. Fold under the allowance on edge of the yoke where faggoting is to be<br />
done and tack the folded edge to the prepared pattern. Now tack also the lower section of<br />
the blouse after folding in the seam allowance Then do the faggoting with zigzag stitches<br />
between foldings.<br />
153
7. Applique:<br />
Applique is a cutout piece of fabric that is stitched to a larger<br />
background for decoration. An applique can be purchased or made<br />
by cutting out a design from one or more fabrics. Fabrics that ravels<br />
easily should not be used. Applique is a very effective trim for<br />
children’s garments. It can be applied on pockets, yokes, above the<br />
hemline etc. The applique work on the right front corner just above<br />
the hemline looks attractive.<br />
8. Lace:<br />
Lace can be used as edging, insertion and banding. Lace<br />
for edging has one straight edge which is to be applied to the fabric.<br />
It is commonly used at the neckline, armhole, sleeve hem, garment<br />
hem, yoke line etc. Lace may be gathered to give a frilled effect.<br />
Lace for insertion has its two edges finished symmetrically. A design<br />
with fine tucks and insertion of lace can be combined and applied in<br />
a horizontal direction. The bias tubing inserted in such lace can be<br />
tied into a bow. The tubing may also be pulled to produce gathers.<br />
An attractive band can be made by placing lace over contrasting or<br />
self colored ribbon or fabric slightly narrower than the lace. The<br />
ribbon is then attached to the garment in the desired portion.<br />
9. Lace motifs:<br />
Lace motifs are very effective when sewn over contrasting fabric. The motifs can<br />
be cut out from a wide lace or bought as such. Cut the outline of the motif in a contrasting<br />
colored lining fabric and tack it to the wrong side of the lace motif. Trim the lining fabric<br />
slightly smaller around the edge. Now, applique the lined motif on the garment in the desired<br />
place.<br />
10. Belts and bow:<br />
These have functional and decorative uses. In children’s garments. fabric belts are<br />
most commonly used. Belts may be made out of contrasting material or the garment material<br />
it self. The belt may be tied with a bow at the back or at one side. Bows may be attached<br />
near the neckline, shoulder, hemline, along the centre front line etc.<br />
1<strong>1.</strong> Decorative fasteners:<br />
Decorative fastenings include fabric buttons and loops eylets and cord, fancy buttons,<br />
fabric buttonholes etc. On a plain dress with contrasting collar or piping, buttons covered<br />
with the collar piping material would be effective. Buttons may be fixed in groups to create<br />
design interest gradually progressing in size from small to big.<br />
154<br />
Applique<br />
Lace
12. Pockets:<br />
Pockets of different shapes, sizes and location with or without decorative details<br />
suited to the design of the garment can enhance the appearance of the garment.<br />
13. Scalloped edging:<br />
Scalloped shapes at garment edges (neckline, hemline openings<br />
etc.) are ordinarily made by cutting in the desired shape and finishing<br />
with bias binding or shaped facing. A similar effect may be produced<br />
however by the use of embroidery stitches. The effect of a scalloped<br />
front opening is obtained by drawing the scallops in uniform shape and<br />
working blanket stitch with contrasting colored thread along the lines<br />
drawn. This can be used in frocks, skirt, kids wear, neckline, sleeve and<br />
in table cloth.<br />
Questions:<br />
Application of scalloped edges on the garments<br />
PART – I<br />
Objective questions: 1 Mark<br />
<strong>1.</strong> With which a decorative button loop can be made.<br />
(a) Bias binding (b) Ric rac (c) Bias tubing (d) Laces<br />
2. This is available in different colors at very low cost and is very durable.<br />
(a) Faggotling (b) Laces (c) Ric rac (d) Belts and bows<br />
3. Embroidering over gathers is called<br />
(a) Faggoting (b) Smocking (c) Lace (d) Applique<br />
4. when the Belt is tied with a cord at the centre, then it is called<br />
(a) Lace (b) Ric rac (c) Faggoting (d) Bow<br />
5. Stitches between folded seam edges are called<br />
(a) Applique (b) Faggoting (c) smocking (d) Ruffles<br />
155<br />
Scallop
Answer in a one word:<br />
<strong>1.</strong> Write the uses of ruffles.<br />
2. Name any two embroidery stitches.<br />
3. Write the uses of scalloped edging.<br />
4. Write the use of lace.<br />
5. Name any two decorative fasteners.<br />
PART – II<br />
Answer in a paragraph: 4 marks<br />
<strong>1.</strong> Write about ruffles.<br />
2. What is Ric rac?<br />
3. Write about bias trimming.<br />
4. What is lace?<br />
5. Write about faggotting.<br />
PART-III<br />
Answer in a page: 10 marks<br />
<strong>1.</strong> Write the uses and application of lace, Lace motif and scallop edging,<br />
2. Briefly describe about faggoting, smocking and ruffles.<br />
PART - IV<br />
Answer in details: 20 marks<br />
<strong>1.</strong> Give a detailed explanation of how to decorate a garment.<br />
Answer for objective type Questions:<br />
<strong>1.</strong> (c) 2. (c) 3. (b) 4. (d) 5. (b)<br />
156
16.1 <strong>INTRODUCTION</strong>:<br />
16. NECKLINES AND COLLARS<br />
Necklines are perhaps the most conspicuous part of any dress design and for that<br />
reason desere careful consideration, both while choosing a design as well as while sewing.<br />
Select a suitable and comfortable neck style and one suited to the fabric. The neckline can<br />
be of various shape and sizes.<br />
16.2 NECKLINE:<br />
Neckline is part of bodice, around the neck. In ladies garments, neckline can be<br />
shaped in different ways and styles to get a decorative effect.<br />
16.2.<strong>1.</strong> Types of Neckline:<br />
Some of the types of necklines are: <strong>1.</strong> Boat neckline 2. Draw slring neck line 3.<br />
Cowl neckline 4. Key hole neck line 5. Haltee neckline 6. Scoop neckline 7. Square<br />
neckline 8. Heart shaped neckline 9. ‘V’-shaped neckline 10. Round neckline 1<strong>1.</strong> ‘U’ shaped<br />
neckline 12. Wedge shaped neckline.<br />
<strong>1.</strong> Boat neckline:<br />
It is a boat shaped neckline, approximately following curve of the collarbone, high in<br />
front and back, wide at sides, and ending in or at shoulder seams. Its front neck depth is<br />
generally kept more than the other neck depths.<br />
2. Draw string neckline:<br />
It is a neckline with cord, threaded through a caseing (i.e folded edge with gap to<br />
insert Tape) to be gathered and adjusted high or low. These are mostly used in Kid’s wear<br />
like, Jabla, Nighty and in ladies skirt top<br />
3. Cowl neckline:<br />
A cowl neckline is developed by adding one or more folds to the neckline cowls<br />
are always cut on the bias and have free and folded effect when worn cloth suitable for<br />
cowls are sheer and light weight type fabrics such as chiffon, silk, crepe, crepe silk, soft<br />
satin, georgette, jersey etc. The Pattern prepared for particular fabric, say satin, cannot be<br />
used for chiffon, as each fabric is having different characteristics.<br />
4. Keyhole neckline:<br />
It is a high round neckline with inverted wedge shaped opening at front. These<br />
necklines looks good when it is finished with fitted facing. The depth of round neckline and<br />
inverted wedge can be changed according to desire.<br />
157
5. Halter neckline:<br />
It consist of a strap, rope, or band around neck, attached to backless bodice (i.e.<br />
back and shoulders bare) It is tied in a bow at back neck. It is geneerally used in kid’s party<br />
wear and frocks.<br />
6. Scoop neckline:<br />
It is a low curved neckline, It is cut deep in front or back or both. The shape of the<br />
neckline, more or less resembles the shape of pot and hence is also called as pot neck.<br />
7. Square neckline:<br />
This neckline shape resembles the square shape and has 4 corners, two in front<br />
and two at the back. This is used for kammez, frock, Tops and other ladies garment.<br />
Draw<br />
String<br />
Cowl<br />
8. Heart shaped neckline:<br />
It is a deeply cut neckline with its front lower edge in heart shaped curve. It is the<br />
variation of square neckline.<br />
9. ‘V’ shaped neckline:<br />
It is shaped in front to a sharp point like the letter ‘V’. On the centre front of the<br />
pattern, mark a point for the depth desired and draw a line to this point from the neck end<br />
of the shoulder line.<br />
10. Round neckline:<br />
Because a round neckline is wider in effect than a ‘V’ shaped neckline, it is usually<br />
cut some what higher, its depth on the pattern being determined as suggested for the<br />
158<br />
Key<br />
hole<br />
Boat<br />
Round U-shaped Square V-shaped<br />
Heart<br />
shaped<br />
Scoop Halter<br />
Wedge<br />
shaped
‘V’ neckline when the depth has been noted, draw a line from the shoulder to this point,<br />
having the line extend downward with a slight slant for about two-thirds of the neckline<br />
depth and then curve abrupthy towards the centre front.<br />
1<strong>1.</strong> ‘U’ shaped neckline:<br />
It is cut in front in the shape of letter ‘U’. It is the modification of round neckline. The<br />
Depth of neckline is more than the normal round neckline.<br />
12. Wedge-shaped Neckline:<br />
This is another variation of neckline where a straight line and curved line is combined<br />
to from a wedge-shaped opening. Mark points to indicate the depth wanted and the width<br />
at lower line, which is wider than the regular square opening, join these points by a straight<br />
line, and then draw the side line in the curved effect joining the straight line.<br />
16.2.2 Prevention of Gapping:<br />
Deeper necklines may be used for party wear or evening wear. If they are very low,<br />
precautions will have to be taken to prevent them from gaping.<br />
If a low curved neckline is used on the garment, this may need to be tightened. To do<br />
this, slash the basic pattern from neckpoint to near waistline and overlap or attach a placket<br />
to the garment.<br />
16.2.3. Size of neckline:<br />
The size of the neckline varies from person to person and pattern to pattern. The<br />
size of a neckline (i.e. the width and depth) of a neckline is to be fixed before drafting<br />
diagram. For a neckline, neck widh and neck depth are required as explained below.<br />
0-1 = Front and back neck width<br />
0-1 = Front neck depth<br />
1-3-2 = Front neckline<br />
0-4 = Back neck depth<br />
1-5-4 = Back neckline<br />
Neck Proportions for ladies garments:<br />
In ladies garments, neck proportions are generally kept as follows.<br />
Neck proportion For girls For women<br />
<strong>1.</strong> Front or back neckwidth 1/12th chest 1/12the chest+1½”<br />
2. Front neck depth 1/12th chest+1/2” 1/8 chest +2”<br />
3. Back neck depth 2”-2½” 2”-5”<br />
159<br />
0<br />
4<br />
2<br />
5<br />
3<br />
1
Note: <strong>1.</strong> The above proportion vary according to fashion and customer’s taste.<br />
2. The neckline width and depth of the under garment should always be kept<br />
below the out wear.<br />
16.3 NECKLINE FINISHING:<br />
The neatness with which the neckline is finished, is of vital importance, for it greatly<br />
effects the final appearance of the garment. Besides the neckline under goes much strain<br />
duing putting on or taking off the dress. Hence the mode of finish must be such that it<br />
allows one to retain the desired shape, pattern and must be durable.<br />
Bias strips are generally used to finish the neckline, because of its stretchability.<br />
Necklines are usually curved and hence tend to stretch duing handiling. A stretched neckline<br />
can spoil the apperance of garment. So great care must be taken in handling and finishing<br />
neckline.<br />
Most necklines are finished in one of three ways-with facings, bindings or with a<br />
collar. Regardless of the type a well-made neck finish should conform to these standards:<br />
<strong>1.</strong> Neck edges must not be stretched out of shape.<br />
2. All seams and edges must be as thin and smooth as they can be made, without<br />
weakening the garment.<br />
3. All edges must have good shape with accurate corners and curves.<br />
4. Facing edges, whether beneath a neckline or collar, must be hidden from view.<br />
5. Body and stiffness of collar must be sufficient for the design.<br />
16.3.1 Bias piece:<br />
True bias which is otherwise called as cross piece or falls on a diagonal line at 45°<br />
to the lengthwise and crosswise grains. It has the maximum elasticity or in other word it<br />
stretches more than any other direction on cloth. True bias is used to finish raw edges. It is<br />
useful especially for finishing curved edges such as neckline, sleeveless armholes and<br />
scallops. A straight piece of material attached to a curve will look bulky and untidy. The<br />
elasticity of bias permits it to stretch or contract and thus takes the shape of any curved<br />
edge giving it a flat smooth finish. Bias strips can be applied as facings and bindings<br />
<strong>1.</strong> Cutting bias strips:<br />
Fold the fabric diagonally so that the lengthwise threads of the folded part fall parallel<br />
to the crosswise threads on the rest of the material. (If the grain lines cannot be clearly<br />
seen, mark the lines with chalk first). Using a gauge or ruler, measure from the fold to<br />
desired width of bias strip (usually 1 to 1½”) and draw parallel lines. Cut strips along the<br />
marked lines and trim off ends along the warp threads.<br />
160
2. Joining of bias strips:<br />
Place the two strips to be joined right sides facing and the edges of the cut ends<br />
coinciding. The strips will now be at right angles to each other. Shift the top strip ¼”<br />
beyond the other so that the sharp points at the ends of the strips project on either side.<br />
Stitch a ¼“ seam joining the points where the sides of the two strips intersect. Press the<br />
seam open and trim the seam projection showing on right side.<br />
Marking, Cutting & Joining of Bias Piece<br />
16.3.2. Facing:<br />
These are used to provide a neat finish to the raw edges in a garment and to support<br />
the shape of neck line, armholes, collars, etc. When the edge to be faced is a straight line,<br />
the facing may be cut in one piece with the garment section. If the shape of the neckline is<br />
a curved one a bias piece can be used. Usually facing are applied separately. The color<br />
of the facing piece must co-ordinate with the colour of the garment fabric.<br />
Bias Facing Decorative Facing<br />
Facing appear on the right side of the garment. The right side of the facing must be<br />
matched to the wrong side of the garment to ensure that it will be right side out when<br />
finished. If this is to be applied to the neck line, shoulder seam of the garment, it should be<br />
reverse just inside the outer finished edge of the facing. This is to prevent raw edges of<br />
161
shoulder seam from showing at the neck line. Decorative facing are usually made with<br />
scallops, points or other designs along the outer edge. Particular care should be taken to<br />
see that the right and left halves are symmetrical in design and shape.<br />
Bias facing can also be applied on the right side of the garment for decorative effects,<br />
but no edge designs are possible with this facing because it cannot be made wide enough.<br />
The decorative effect has to be obtained by the use of material in some harmonizing color<br />
with prints like checks, stripes, dots etc.<br />
16.3.3. Binding:<br />
Bias binding is used to finish and strengthen raw edges and to add a decorative<br />
trim to a garment. It shows both on the right and wrong side. It is used to finish necklines,<br />
armholes, sleeve edges, front closings, collars, cuffs and seams. It can be adapted equally<br />
well to straight, curved gathered and irregular edges (like scallops). When finished, bias<br />
binding should have uniform width (less than ¼”) and should lie flat and smooth without any<br />
stitches showing on the right side of the garment.<br />
There are two kinds of bias binding. Single binding and French binding or piping.<br />
Binding may be prepared or may be bought as commerical bias binding.<br />
<strong>1.</strong> Single bias binding:<br />
Cut a bias strip that is twice the finished width plus two seam allowances. Tack the<br />
strip to the garment right sides facing. Remember that bindings are handled in the opposite<br />
manner to facings at inward and outward curves. For bindings, stretch the bias on inward<br />
curves and ease it on outward curves. Stitch the binding to the garment with a plain seam.<br />
Trim the seam as wide as the finished binding. Turn under 1/8” to ¼” on the outer edge of<br />
the bias and fold it over the seam on the wrong side. Now hem the fold to the line of<br />
stitching using hemming stitches.<br />
Single & Double Bias Binding<br />
2. French Binding or Piping:<br />
French binding or piping is used on sheer fabrics. For this you must cut bias strip<br />
that is six times the desired finished width. Fold the strip in half, wrong sides together and<br />
press. Stitch raw edges of binding to the garment on the right side and hem the folded<br />
edge to stitching line on the wrong side. It is also called double binding.<br />
-<br />
162
16.4 COLLAR:<br />
A collar is added to the neckline of a garment in order to enhance its appearance.<br />
It is also serves to finish the raw edges of the neckline. Collars are made of double layers<br />
of fabric. Since collars form a background for the face, great care has to be taken in<br />
designing collar styles which suit the wearer.<br />
16.4.1 Factors to be considered while designing collar:<br />
<strong>1.</strong> Design of the fabric:<br />
The collar design should harmonize with the fabric design. Fabric with large checks<br />
or stripes are more suitable for making straight line or square shaped collars than collars<br />
with round or curved lines. Similarly you should avoid floral designs and curved designs<br />
when making collars where straight lines are predominant.<br />
2. Color and texture of the fabric:<br />
There should be harmony between the collar fabric and dress fabric with regard to<br />
color and texture. Standing collar like the Chinese collar will look best if made out of firm<br />
material, while rippled collars call for a soft material. Take care to use pleasing color<br />
combinations without too much contrast or too much similarity.<br />
3. Pattern of the garment:<br />
The design of the collar should suit the pattern of the dress. For example, certain<br />
collars like rippled collar, peter pan etc. are suitable for dresses with frilled skirts, while<br />
straight line collars are more becoming on A lined or straight lined styles. The size of the<br />
collar should be proportionate to the size of the dress. The design of the collar should<br />
harmonize with other structural details (pockets sleeves etc.).<br />
4. Purpose and use of the garment:<br />
For school uniforms, casual wear, sports wear etc. select simple collar designs<br />
without decorative details. Flat collars are more comfortable than standing or roll collars<br />
and are therefore advised for garment like casual wear.<br />
5. Sex and age of the wearer:<br />
Certain collars like Peter Pan collar, rippled collars etc, give a feminine touch to the<br />
garment. Straight line collars are masculine in appearance and are more suited to men’s<br />
garment. Sailor collar, cape collar etc., look effective and becoming only on children’s<br />
garments. Older women should avoid collars in unusual shapes and sizes and collars with<br />
decorative details.<br />
6. Appearance of the wearer:<br />
Facial shapes, size of the neck etc., are important factors to be considered while<br />
designing collars. For example a round face will appear rounder in a very round collar, but<br />
163
a very pointed or squares collar also accents the roundness because of the marked contrast<br />
in shape. A medium oval shaped collar will be the best choice for this type of face. For<br />
people with thin long necks select standing collars or collars with slight roll and avoid low<br />
neck lines. Long pointed collars are flattering to men with broad faces and short necks.<br />
Whereas a collar with short points and broad spacing between the points is more suitable<br />
for a long slender face. (The broad spacing gives the impression of width desirable in the<br />
case).<br />
16.4.2 TYPES OF COLLAR:<br />
A collar could be made close to or away from neckline and the collar edge could be<br />
round, curved, square, or pointed (long or short) depending upon design variation.<br />
Collars may be attached to a garment fabric or may be finished seperately. They<br />
can be cut on bias, lengthwise or crosswise grain depinding upon the effect desired<br />
according to the style. There are four main types of collar such as flat, stand, roll and shawl.<br />
All collars take on one of these shapes and needs interfacing to stiffen them, and must fit<br />
accurately to the neckline. Even slight alteration to the neck edge can throw out the fit of the<br />
collar unless these alterations have been allowed for when making up the collar.<br />
Collars need careful trimming and layering so, If they are curved make snipping<br />
otherwise they will neither turn well have a neat, sharp finish. Pressing is also very important.<br />
A collar should be pressed to its shape. eg., roll collar should be pressed in a roll-it should<br />
not be pressed flat. Always press the neck join after attaching and before proceeding to<br />
finish. Some of the types of collars are <strong>1.</strong> Round collar 2. Peterpan collar 3. Scalloped<br />
collar 4. Sailor collar 5. Rolll collar 6. Shirt collar 7. Band collar 8. Shawl collar<br />
<strong>1.</strong> Round Collar or one piece peter pan collar:<br />
This is used for children’s dresses. In front, the collar is continuous and at back, it<br />
is divided with rounded ends. To make the pattern<br />
for this collar, first duplicate the neckline area of the<br />
garment as explained below. Keep the front and back<br />
bodice patterns together on a paper, with neck points<br />
of shoulder lines touching and with the patterns<br />
overlapping ¼” near the shoulder as illustrated in<br />
figure. Trace the outline of the upper part of the<br />
bodies. Label the front neck line as shoulder-S<br />
and back neckline R. Now mark X, Y, Z, 1½” to 2”<br />
away from T, S and R respectively. Join XYZ as shown.<br />
Mark a notch at S, to indicate shoulder points, Label<br />
Round Collar or one piece peter<br />
the collar as shown and cut out the collar pattern. This<br />
pan collar<br />
is a flat collar.<br />
164
2. Peter Pan Collar:<br />
This is similar to Round collar. This is used in children’s<br />
dresses and has rounded ends at back and front. To prepare the<br />
pattern take the pattern of round collar pattern and round off the collar<br />
at the back and front. This is also a flat collar.<br />
3. Scalloped collar:<br />
Draft collar of 2” to 3” width following the same as peterpan.<br />
Modify the shape of the outer edge of collar to scallop. These can<br />
be attached in frocks. This will also come under flat collar.<br />
4. Sailor Collar:<br />
It is rounded, turned-down collar with a rollect<br />
effect at the neckline. This flatcollar is suitable for baby<br />
suits and little girls’s dresses. It has a ‘V’ shape in<br />
front and square shape at the back. First of all modify<br />
the bodice front neckline to ‘V’ shapes by marking X,<br />
3” to 4” below T and connect SX. Now trace on a<br />
sheet of paper the neckline area of back and modified<br />
front bodice patterns after overlapping the shoulder<br />
points near arm hole. Draw the R to Z = 2”, S to O = 2”<br />
Draw a line from O and Z the interesting point is<br />
marked as P. Join all the lines for new patterns.<br />
5. Roll collar:<br />
This type of collar is used mainly on men’s and boy’s shirt. T-<br />
Shirts and sports wear. It can be used on children’s garments and ladies<br />
tops also. Draw a rectangle ABCD, mark BC = width of collar, AB = ½ neck<br />
measurement. BF =1½” Join CF and BF. AF is the outer edge of the<br />
collar and DC is the seam line.<br />
6. Shirt collar:<br />
This collar has two parts the band or stand and the collar patern.<br />
Pattern can be with stand and collar combined. Draw rectangle ABCD<br />
with the following dimension, leaving 2” extension all round AB = ½ neckline<br />
measurement and BC = 3½” to 4”. Mark CE = 1¼” and AG = 1¼”.<br />
7. Band collar:<br />
This is a narrow collar (about 1” wide) that stands up above the neckline of the<br />
garment all around. It is usually applied to front open garment. This is also called as kurta<br />
165<br />
Sailor Collar<br />
Peter pan collar<br />
Scalloped collar<br />
Roll Collar<br />
Shirt Collar
collar. This is used in kurtas, kids wear and kameez. It should always be<br />
interfaced, if it needs a smart appearance of its upright line. Draw a<br />
rectangle ABCF, where AB= ½ neck circumference, BC= collar width<br />
(1”- 4”) curve the top edge by keeping point ½” before B and mark as<br />
‘d’. Join d to c.<br />
8. Shawl collar:<br />
For this type, the collar and reverse are cut all in one, thus forming the<br />
shawl over the shoulders. (eg. a dressing gown, night dress etc. Generally,<br />
the under collar is cut in one with the front garment, being extended at the<br />
neckline to meet at the centre back. There is generally a joint at the centre of<br />
both the under and top collar.<br />
Questions:<br />
Objective questions:<br />
PART – I<br />
<strong>1.</strong> Which is the part of bodice pattern that is around the neck.<br />
(a) Sleeve (b) Neckline (c) Skirts (d) Cuffs<br />
2. Which neckline approximately follows the curve of the collar bone high in front and<br />
back.<br />
(a) Boat neckline (b) Cowl neckline<br />
(c) Keyhole neckline (d) Square neckline<br />
3. This type of neckline is used in Jabla with cord.<br />
(a) Boat neckline (b) Square neckline (c) Draw string neckline (d) Scoop neckline<br />
4. This neckline is otherwise called as pot neck.<br />
(a) Square neckline (b) Scoop neckline<br />
(c) Heart-shaped neckline (d) ‘V’ shaped neckline<br />
5. Which neckline consist of a strap, rope or band around neck, attached to backless<br />
bodice.<br />
(a) Halter neckline (b) Scoop neckline<br />
(c) ‘U’-shaped neckline (d) ‘V’ shaped neckline<br />
6. Which will be the measurement of front neck depth for a girls garment?<br />
(a) 1/12th chest (b) 1/12 chest+½”<br />
(c)1/8 chest+2” (d) 2-2½”<br />
166<br />
Band Collar<br />
Shawl Collar
7. How are necklines mostly finished?<br />
(a) with facing (b) with binding (c) with collar (d) all the three<br />
8. A fabric which falls on a diagonal line at 45° to the lengthwise and cross wise grain is<br />
called<br />
(a) Bias piece (b) Straight piece (c) diagonal piece (d) none of the above<br />
9. Which is added to the neckline of a garment in order to enhance its appearance?<br />
(a) Neckline (b) facing (c) Binding (d) collar<br />
10. Which collar is similar to Round collar?<br />
(a) Sailor collar (b) Band collar (c) Peter pan collar (d) Roll collar<br />
1<strong>1.</strong> This collar is ‘V’ shaped in front and square shape at the back.<br />
(a) peter pan collar(b) Round collar (c) Sailor collar (d) Roll collar<br />
12. Which collar can otherwise be called as Kurta collar?<br />
(a) Band collar (b) Round collar (c) Roll collar (d) Sailor collar<br />
Answer in a one word:<br />
<strong>1.</strong> Name the any two types of neckline.<br />
2. Write the other name for scoop neckline.<br />
3. Which collar has four corners.<br />
4. How will you finish a neckline?<br />
5. Write the use of Bias Strip.<br />
6. Name any two factors to be considered while designing collar.<br />
7. Name any two types of collars.<br />
PART – II<br />
Answer in a paragraph: 4 marks<br />
<strong>1.</strong> Name any eight types of necklines.<br />
2. Write an introduction about neckline and collar.<br />
3. Write about ‘V’ shape and ‘U’ shaped neckline<br />
4. Write about size of neckline.<br />
5. How will you prevent gapping of neckline.<br />
6. What is bias piece? Write its uses.<br />
7. Give an account on cutting and joining of bias piece.<br />
167
8. Write about the standard of well-made neck finish.<br />
9. What is binding? Name its types.<br />
10. Explain any two types of collars with diagram.<br />
PART – III<br />
Answer in a page: 10 marks<br />
<strong>1.</strong> Write about any four types of neckline with diagram.<br />
2. Explain about facing and its types with diagram.<br />
3. Explain about binding and its types with diagram.<br />
4. What are the factors to be considered while designing collar?<br />
5. Write about any five types of collars.<br />
PART – IV<br />
Answer in details: 20 marks<br />
<strong>1.</strong> Write in Detail on different types of neckline with diagram.<br />
2. Describe in detail on different types of collars with diagram.<br />
3. Discuss in detail about any three types of neck finishing with diagram.<br />
Answers for objective questions:<br />
<strong>1.</strong> (b) 2. (a) 3. (c) 4. (b) 5. (a) 6. (b) 7. (d) 8. (a) 9. (d) 10. (c) 1<strong>1.</strong>(c) 12. (a)<br />
168
17.1 <strong>INTRODUCTION</strong>:<br />
17. SLEEVES<br />
These are part of a garment which covers the arm of the body and are usually<br />
attached to armhole of bodice pattern. Today’s garments are designed with a wide variety<br />
of sleeves, which differ greatly in look and in method of construction. It is possible to develop<br />
a variety of sleeve styles from the plain sleeve pattern. By choosing a sleeve style that<br />
suits the figure of wearer, design of the fabric, design of the dress and current fashions,<br />
you can enhance the appearance of the dress. The instructions on making patterns for a<br />
variety of sleeve styles are given below.<br />
17.2 SLEEVE TYPES:<br />
There are different types of sleeve. These can be applied to the garment according<br />
to the taste of the wearer, and design of the garment. Some of the types are <strong>1.</strong> Plain sleeve<br />
2. Sleeve with gathers at top only 3. Sleeves with gather at top and bottom 4. Bell sleeve 5.<br />
Leg-o-mutton 6. Raglan sleeve 7. Kimono Sleeve 8. Magyar sleeve 9. Sleeves till elbow<br />
10. Full Sleeve.<br />
<strong>1.</strong> Plain Sleeve:<br />
This type of sleeve has no fullness at lower edge or top edge and is commonly<br />
used on sari blouses. ELFGH is the pattern for a<br />
short plain sleeve. HG is the lower edge of the<br />
sleeve. EG and FH are side seams. ELF is the<br />
top edge of the sleeve (sleeve cap seam line) which<br />
is attached to the armhole edge of the bodice. This<br />
pattern can be used to develop various sleeve<br />
styles. The vertical lines drawn within the sleeve<br />
pattern are the lines through which the sleeve can<br />
be slashed or cut to develop it into other types of<br />
sleeve styles.<br />
Plain Sleeve<br />
2. Sleeve with gathers at top only:<br />
This type of sleeve is sometimes used in<br />
dresses. The lower edge of this sleeve has no<br />
fullness, but the top edge has fullness in the form of<br />
gathers. To prepare the pattern, take the basic short<br />
sleeve pattern and draw slash lines as explained<br />
earlier. Now slash along these lines from top to<br />
almost near the bottom edge. Keep the slashed<br />
pattern on another sheet of paper and spread open<br />
169<br />
Sleeve gathered at top
the upper edge, the required amount of fullness as shown in figure. You may spread the<br />
sleeve so that E to F is about 17” (i.e. 1” less than half width of dress fabric so that two<br />
sleeves can be cut from one length of sleeve). Increase the length of the sleeve by 1” to 2”<br />
as shown for puffing. Draw the outline of the new sleeve on the new sheet of paper. (The<br />
top edge is shown with dotted line).<br />
3. Sleeve with gathers at top and bottom:<br />
This is the most common type of puff sleeve. The sleeve is finished with a band<br />
and with a frill. To prepare the pattern, draw the<br />
straight line EF and then cut right through all the slash<br />
lines. Spread apart the different sections keeping<br />
the sleeve cap line EF on a straight line. Redraw<br />
adding 1” to 2” extra length at top and bottom as<br />
shown in figure. This pattern can also be used to<br />
make a sleeve with gathers at top edge but with<br />
fullness at lower edge is gathered and finished with Sleeves gathered at top & bottom<br />
band.<br />
4. Bell Sleeve:<br />
This is cut with flare at the lower edge with<br />
extra fullness left as such. To prepare the pattern,<br />
slash from bottom upwards and spread open the<br />
lower edge. The lower edge must not be gathered.<br />
5. Leg- O-mutton Sleeve:<br />
This sleeve is tight fitted at bottom and puffed with gathers. Prepare a sleeve pattern<br />
and draw line XY. Now draw MN through middle of sleeve. Slash along XY and MN and<br />
spread the top edge apart and prepare a new pattern.<br />
Leg-O-Mutton Sleeve<br />
6. Raglan Sleeve:<br />
This is used where shoulder seam and armhole seam are not needed. These<br />
sleeves are more comfortable than other sleeves. These are used in sports wear, kid’s<br />
wear and T-Shirt. On the back bodice pattern, mark D 1” above underarm point. Mark A, to<br />
170<br />
Bell Sleeve
1” away from N. Connect AD and draw a gentle curve line ABD over it. Mark a matching<br />
notch on this curved as shown. Following the same procedure, draw curved line EH on the<br />
front pattern and mark a double notch on this curve. Cut away raglan sections from the<br />
bodice patterns by cutting along ABD and EFH. Trace the sleeve pattern on a large paper<br />
and mark L, mid point of sleeve cap seam line. Keep the cut out raglan sections over the<br />
top of the sleeve with shoulder tips S touching L, and points D and E resting on sleeve cap<br />
line. NSNI forms a large dart. The original sleeve pattern with this extension added will be<br />
the pattern for the raglan sleeve. The finished appearance of a raglan blouse is shown in<br />
the figure. The seam for the seam runs from neckline to armhole line.<br />
7. Kimono Sleeve:<br />
The shoulder seam and armhole seam is<br />
absent in the sleeve runs from side seam of sleeve to<br />
side seam of bodice. This sleeve is used where more<br />
comfortability is needed. This is used in Dance<br />
costumes, sports wear, kids wear skirt top and Ladies<br />
Top. This can be decorated with embroidery stitches<br />
at the edges.<br />
8. Magyar Sleeve:<br />
Take the bodice pattern extend the shoulder line 2” from the<br />
tip of the shoulder. According to lower arm circumference draw the<br />
line perpendicular to bodice pattern and attach the edge to bodice<br />
pattern.<br />
9. Full Sleeve:<br />
Raglan Sleeve<br />
The pattern preparation for this is similar to ¾ th sleeve preparation. But the height<br />
must be extended till wrist and circumference can be changed accordingly. These are<br />
mostly used in Gents shirt, in which the lower edges finished with a cuff.<br />
171<br />
Kimono Sleeve<br />
Magyar Sleeve
10. Sleeve till elbow:<br />
This sleeve are used in Kameez Tops and Kid’s wear. To make this pattern extend<br />
the Hem line of Plain Sleeve according to height and circumference of wearer elbow.<br />
These are sometimes gathered or left as such and finished with or without band.<br />
17.3 Gusset:<br />
Full Sleeve<br />
One piece gusset Two piece gusset<br />
A Gusset is a small fabric piece inserted into a slashed opening, usually under the<br />
arm of a close-fitting Kimono sleeve, to provide case for comfortable fit. Although gusset<br />
shapes vary, there are basically two gusset types, one piece (usually diamond shaped)<br />
and two-piece (usually triangular). The one-piece type is the more difficulty to insert because<br />
the entire gusset must be sewed into an enclosed slashed opening after underarm and<br />
Attaching one piece gusset<br />
side seams have been stitched. In the two piece gusset, each piece is separately inserted<br />
172<br />
Sleeve till elbow
into a slashed opening on each bodice piece underarm, both gusset sectors and side<br />
seams me then stitched in one seam.<br />
Gusset placed in underarm position is called as arm gusset. A gusset placed in<br />
different position is named accordingly as Gusset placed to conceal the placket edge is<br />
called as opening gusset, Gusset placed in knickee or bottom is named as Knickee or<br />
salwar gusset and a gusset placed at the edge seam is called as seam gusset.<br />
17.4 TYPES OF SLEEVE FINISHES:<br />
The finishing of a sleeve edge usually depends on the pattern design. It may be a<br />
simple self-hem or faced finish (shaped or bias) or decorative double binding made from<br />
self or contrasting fabric. The finish is sometimes attached with casing or with cuff. For<br />
successful completion of any sleeve, follow the general guidelines as below.<br />
A self-hemmed edge is a<br />
simple sleeve finish. A facing<br />
can also be used<br />
Attaching two piece gusset<br />
A double binding applied<br />
to a sleeve edge givea a<br />
decorative finish to the sleeve<br />
<strong>1.</strong> Mark hemline to a length becoming to the wearer.<br />
2. Practice good pressing techniques throughout the finishing process.<br />
3. Reduce bulk wherever possible.<br />
17.5 CUFF:<br />
Cuffs are fabric bands at the bottoms of straight, gathered, or pleated sleeve edges.<br />
Although cuff styles vary according to the garment design, any cuff will basically be one of<br />
173<br />
A casing sewed at the<br />
sleeve edge can be selffaced<br />
or it can be<br />
separately applied<br />
A cuff can have a placket<br />
opening or be loose-fitting<br />
with no opening
two general types. The first type cuff without placket can be used on both long and short<br />
sleeves, and is made large enough around for the hand or arm to slip in end out easily<br />
without a cuff-and-placket opening. The second type cuff with placket of cuff is generally<br />
attached to a long sleeve and, different from the first type, requires a cuff-and-placket<br />
opening fastened snugly around wrist.<br />
<strong>1.</strong> Cuffs without plackets:<br />
Because cuffs without plackets have no openings they are cut large so the hand or<br />
arm can slip easily in and out. There are three basic styles of this cuff type. The straight<br />
band cuff, straight turn-back cuff and shaped turnback cuff. The straight band cuff is made<br />
with a seperate cuff attached to the sleeve bottom. The straight turnback cuff is made by<br />
turning up the deep finished hem of a sleeve. Sometimes, instead of the deep self-hem, a<br />
separate extension piece is added to the sleeve bottom to form the turnback cuff. The<br />
shaped turnback cuff is a separately constructed cuff that is a separately constructed cuff<br />
that is attached to the sleeve with a facing.<br />
Band Cuff<br />
2. Cuff with placket:<br />
`The three most popular styles are the lapped cuff, shirt cuff, and french cuff. Each<br />
is constructed and applied to the sleeve after the placket opening is made at the sleeve<br />
edge. The three most commonly used plackets, are the faced placket, continous bound<br />
placket, and Tailored or shirt placket. Note that edges of the faced placket, meet at the<br />
Lapped Cuff<br />
Straight Turnback Cuff<br />
Shirt Cuff<br />
opening, while edges of the other two plackets lap. The continuous bound placket is finished<br />
with a single fabric strip to create a narrow lap; the shirt placket is finished with two seperate<br />
pieces to create a wider lap.<br />
174<br />
Shaped Turnback Cuff<br />
French Cuff
The lapped cuff, with a continous bound placket has one end projecting from placket<br />
edge. The shirt cuff is sewed with its ends aligned to the underlap and overlap edges of<br />
the shirt placket. The french cuff, with a faced placket, is sewed to the placket edges so<br />
cuff ends meet rather than lap, the cuff is cut wide to double back onto itself.<br />
Questions:<br />
Objective questions:<br />
PART – I<br />
<strong>1.</strong> Which part of the garment will covers the arm of the body?<br />
(a) Skirt (b) collars (c) sleeve (d) Yoke<br />
2. Which sleeve dose not have any fullness at both edges?<br />
(a) Plain sleeve (b) Raglan sleeve (c) Bell sleeve (d) Leg-o-mutton sleeve<br />
3. In which sleeve, the flare at the lower edge is left as such.<br />
(a) Plain sleeve (b) Raglan sleeve (c) Bell sleeve (d) Leg-o-mutton sleeve<br />
4. The shoulder seam and armhole seam is absent in this sleeve.<br />
(a) Raglan sleeve (b) Bell sleeve (c) Puff sleeve (d) Full sleeve<br />
5. This type of sleeve has a seam which runs from side seam of sleeve to side seam of<br />
bodice.<br />
(a) Bell sleeve (b) Kimono sleeve (c) full sleeve (d) plain sleeve<br />
6. The height of this sleeve extends till wrist.<br />
(a) Bell sleeve (b) Raglan (c) Full sleeve (d) Plain sleeve<br />
7. This is a small piece of fabric inserted into a slash, under the arm to provide case for<br />
comfortable<br />
(a) Sleeve (b) Gusset (c) Cuff (d) Casing<br />
8. What is the shape of one-piece Gusset.<br />
(a) Rectangle (b) Square (c) Triangle (d) Diamond<br />
9. Gusset place to conceal a placket edge is called as<br />
(a) Armhole gusset (b) opening Gusset (c) Salwar gusset (d) Seam gusset<br />
10. Fabric bands attached the sleeve edge called as<br />
(a) cuff (b) sleeve (c) placket (d) skirt<br />
Answer in a one word<br />
<strong>1.</strong> Which sleeve type in easier to make?<br />
2. In which sleeve the shoulder seam extends the shoulder line beyond two.<br />
175
3. Name the types of gusset.<br />
4. Name any two type of cuffs.<br />
5. Name any two types of sleeve.<br />
Answer in a paragraph:<br />
PART – II<br />
<strong>1.</strong> What is a gusset? Name its types write any one.<br />
2. Write about magyar sleeve with diagram.<br />
3. Name any four types of sleeve. Explain plain sleeve with diagram.<br />
4. Write about any one gathered sleeve.<br />
5. What is kimono sleeve? Explain with diagram.<br />
6. Give a brief note about types of sleeve finish.<br />
7. Write about the general guidelines for successful completion of sleeve.<br />
8. Mention the types of cuffs with placket and write about any one type.<br />
9. Name the placket commonly used for cuffs.<br />
10. Write about cuffs without placket.<br />
PART – III<br />
Answer in a page:<br />
<strong>1.</strong> Write short notes on plain sleeve and gathered sleeve types with diagram.<br />
2. Briefly write about kimono, Raglan and magyar sleeve with diagram.<br />
3. Write about sleeve till elbow and full sleeve.<br />
4. Explain about gusset and its types.<br />
5. Write about cuffs.<br />
PART – IV<br />
Answer in details:<br />
<strong>1.</strong> Write in detail of different types of sleeves with diagram.<br />
2. Write in different types of sleeve finishes with diagram.<br />
Answers for objective type Questions:<br />
<strong>1.</strong> (c) 2. (a) 3. (c) 4. (a) 5. (b) 6. (c) 7. (b) 8. (d) 9. (b) 10. (a)<br />
176
18.1 <strong>INTRODUCTION</strong>:<br />
18. SKIRTS<br />
A skirt is a garment which covers the lower part of a figure from the waist to the<br />
hem, ending at any desired length. A skirt can be decorated with any type of fullness or it<br />
can cling to the body. It is generally simpler to design a skirt pattern than a bodice, because<br />
skirts are less intricately shaped. Skirt outlines and lengths vary tremendously with fashion.<br />
The silhouette can be narrow, flared or bouffant; even straight skirts can vary from extremely<br />
tight and narrow at the hem to slightly A-lined.<br />
The length of a skirt is always important. To a certain extent it depends upon the<br />
wearer’s age and the occasion on which the garment is worn, but the length should always<br />
be in line with current trends.<br />
18.2 SKIRT TYPES:<br />
The skirt can be classified depending upon its length and its design.<br />
a. Skirt types based on length:<br />
<strong>1.</strong> Micro Mini:<br />
2. Mini Skirt:<br />
In this type of skirt the length of skirt extends 10” from the waist above the mid thigh.<br />
If the skirt’s length ends at mid thigh level then it is called mini skirt. (3”-5” below<br />
crotch).<br />
3. Normal Skirt:<br />
The length of the normal skirt is 2-3” just below the knee.<br />
4. Ballerina Skirt:<br />
The skirt which ends at mid calf level is called ballerina skirt.<br />
5. Maxi Skirt:<br />
This type of skirt’s extends till the ankle or floor level. The above proportions vary<br />
slightly, according to fashion and customers taste.<br />
b. Skirt Types based on design:<br />
There are many types of skirt designs as given below:<br />
177
<strong>1.</strong> Basic Skirt:<br />
This skirt will have the darts of equal lengths in the form of fullness at the<br />
waist line in the front and back. The pattern obtained can be used as the base<br />
for any other skirt with a hemline sweep that is equal on the front and back.<br />
Basic Skirt<br />
2. Skirt with minimum flare:<br />
This type of skirt fits the waist tightly with only two darts and has only 1” to 2” ease<br />
allowance on the hipline. About 2” flare is added on the side seam of skirt for freedom of<br />
movement.<br />
Skirt with minimum flare<br />
Instruction of Drafting :<br />
Draw rectangle ABCD, where AB = ¼ hip + 2½” (½” - ease; 2” - flare at hemline) &<br />
BC = skirt length. Mark AG - BF = Waist to hip measurement (usually - 6” to 9”). Join GF .<br />
AE = ¼ waist + 1¼ (1” for dart; ¼” for ease allowance). AA1 =½”. Join A E ;GH - ¼ Seat + ½”<br />
1<br />
for ease allowance. Join EHC Mark CC = 1”. Mark points ½” on either side of O and<br />
1<br />
connect to P.<br />
3. Gathered Skirt:<br />
Skirts with gathers at waistline requires extra width in the pattern frame and at the<br />
side seams. Amount of increase in the width depends upon the amount<br />
of gathers required and the fabric thickness. Bulky fabrics can have limited<br />
fullness as there will be difficulty in stitching it to the waistline. If amount<br />
of gathers are more, light weight fabrics can be used. If amount of gathers<br />
are more, take the length of fabric according to the length of the skirt +2”<br />
(for folding) and width of the skirt must be twice the amount of waist<br />
circumference for gathering. Finish the side seam and do casing and<br />
insert tape or elastic. Finish the hem edge using machine stitch. Take<br />
care to keep the sleeve edge in lengthwise direction.<br />
Gathered Skirt<br />
178
4. Pleated skirt:<br />
A skirt in which extra fullness at the waistline is accommodated in<br />
the pleats. A pleat is a fold in the fabric that releases fullness. Skirt can<br />
have pleat at different positions all over. They may be folded and left<br />
unpressed or pressed, may be grouped or left ungrouped with or without<br />
even spacing. Pleats may be formed in a variety of ways and named<br />
accordingly, for eg. knife pleated skirts, box pleated skirt, inverted pleat<br />
skirt, accordion pleated skirt and sunburst pleated skirt.<br />
5. Gored Skirt:<br />
A gored skirt is one with panels which are narrow at the waistline and wider at the<br />
hemline. It can have any number of gores which<br />
can be equally or unequally spaced as ‘desired’<br />
by the wearer. The gore may be angled, flared,<br />
pleated or may be straight from the hip level.<br />
The common types of gore skirt are usually<br />
6-gore and 4-gore skirt. The instructions for<br />
drafting 6 gore skirt is given below:<br />
Draw a rectangle ABCD, where AD =<br />
Skirt length; AB = 16” (Remove 4” for band along<br />
the width of the fabric and remaining 32” in<br />
folded). AE = CF = 1/8 waist + ½” ease<br />
allowance. Join EF Leave ½” below A, E, C, F.<br />
Draw curved lines on all these points to make a<br />
skirt.<br />
6. Circular skirt:<br />
Select a fabric of maximum width for this type of skirt. This will not have any side<br />
seam. The fabric must be folded lengthwise as well as crosswise of same size square for<br />
this Skirt. To prepare the pattern draw a square ABCD, where = AB = CD = 1/6 waist +<br />
Circular skirt<br />
6-gore skirt<br />
Pleated Skirt<br />
Skirt length AE = AF = 1/6 waist. Join BD Diagonally. Join EF.AE = OP = FC = Skirt length.<br />
Join APC.<br />
179
7. Skirt with extra flared gore:<br />
If extra fullness is required at hem level. eg. sports skirt, or a long<br />
evening dress, it can be added to each gore. This addition is usually made<br />
from the hemline, but on A line skirt it could start from about knee level. A<br />
long 6-gored skirt can be flared out below the knee.<br />
8. Layered Skirt:<br />
These are also called tiered skirts which has rows or layers of fabric attached to<br />
each other at the hemline. The width of each layer may be graduated or of even lengths.<br />
Length as well as width of each tier may vary. The layers of frills can also be attached<br />
separately one below the other over the basic skirt. Frills lay over each other and conceal<br />
stitch line. The hemline of each tier may be trimmed by adding fringes, colored, binding,<br />
ribbons etc.<br />
9. A-line skirt:<br />
This skirt follows the shape of the ‘A’ where the hemline measurement is greater<br />
than the hipline circumference. The waistline measurement remains the same as in plain<br />
skirt but fullness is added to hem so that its circumference increases. For this the basic<br />
pattern is slashed and spread apart a few distance to bring the shape of ‘A’. If more fullness<br />
is added at the waistline then it becomes a flared skirt.<br />
Layered Skirt A-line Skirt Skirt with peplum Pegged Skirt<br />
10. Skirt with peplum:<br />
This is as straight skirt with flounce or short, flared frill, added or attached at the<br />
waistline or waistband. Peplums extend from the waist, down till the hip.<br />
1<strong>1.</strong> Pegged skirt:<br />
It is also known as peg-top or inverted skirt as it has fullness introduced at the<br />
waistline and with no fullness at the hemline. The skirt may be gathered, pleated or cowled<br />
into the waistband.<br />
12. Low waisted and high waisted skirt:<br />
The waistline of the skirt can be altered so that it falls below or raised above the<br />
natural waistline which are actually developed from basic skirt foundation. Low waisted<br />
skirt is 3½” down from the natural waistline and a high waisted skirt has extended waistline<br />
180<br />
Flared gore
at any desired amount. The low waisted hugs the hipline below the waistline whereas the<br />
high waisted skirt extends above the natural waistline.<br />
13. Godet Skirt:<br />
This is a skirt which has godets at the hemline which are generally triangular shaped<br />
wedges of fabric placed between seems, into slits or as a replacement for cutout sections.<br />
Godets provide additional added fullness at the hem or simply be a design feature. Godets<br />
can be equally placed of same or varying widths. They may extend evenly to the hemline or<br />
may be graduated in lengths.<br />
Low waisted Skirt Godet Skirt Wrap around Skirt<br />
High waisted Skirt<br />
14. Wrap around skirt:<br />
The basic skirt can be modified to make the pattern for a wrap around skirt. Trace<br />
the basic pattern kept on the folded edge. Cut of the traced pattern and open it. Determine<br />
the amount of the overlap and mark this, making a curve at the hem line. The edge must be<br />
finished with a facing. So extend the front edge. This facing can be turned to the outside<br />
when making up and machine around the curved edge, then turned to the inside and the<br />
hem completed in the usual way. To complete the pattern for the left side, cut another one<br />
from the original pattern and extend this at least 3” beyond the centre front line.<br />
18.3. FINISHING WAISTLINE:<br />
Waist line may be finished with waistband. Waistband is a mean of finishing raw<br />
edge of a skirt or pants. These are attached to the waistline after all construction details.<br />
(pleats, darts, gathers, plackets, gores etc) are completed. When waistband is completed,<br />
the garment should fit comfortably and look smooth and pressed.<br />
As attached waistband should be larger than the true waistline measurement to<br />
compensate for fabric bulk and thickness of the darts and seam allowances that are stitched<br />
into the band. The amount of ease varies, the general allowance is ½”. Ease is essential<br />
as it helps the waistband, to bear the abdominal stress and also prevents rolling of skirt<br />
just below the band.<br />
181
Questions:<br />
PART – I<br />
Objective questions:<br />
<strong>1.</strong> This garment is mostly worn by women.<br />
(a) Frock (b) Skirt (c) Jabla (d) Pant<br />
2. Layered skirt is otherwise called<br />
(a) gathered skirt (b) gored skirt (c) tier skirt (d) pegged skirt<br />
3. Pegged skirt is also called by this name.<br />
(a) goded skirt (b) a-line skirt (c) inverted skirt (d) plain skirt<br />
4. The height of micro mini skirt from waistline is<br />
(a) 10” (b) 5” (c) 7” (d) 12”<br />
5. The calf length is called by this name<br />
(a) mini skirt (b) ballerina (c) micro mini skirt (d) maxi skirt<br />
Answer in one or two words: `<br />
<strong>1.</strong> What are the measurements needed for the skirt?<br />
2. In which skirt is the fullness absent in the waistline?<br />
3. Name the types of gore skirt.<br />
4. What is peplum?<br />
5. How will you finish the waistline of skirt?<br />
PART – II<br />
Answer in a paragraph:<br />
<strong>1.</strong> Write about layered skirt with diagram.<br />
2. What is gathered skirt with diagram.<br />
3. Write about pegged skirt with diagram.<br />
4. Write about low waisted skirt and high waisted skirt.<br />
5. Write the instructions for drafting skirt with minimum flare.<br />
PART – III<br />
Answer in a page:<br />
<strong>1.</strong> Write about skirt types based on length.<br />
2. Explain about finishing waistline.<br />
PART – IV<br />
Answer in detail:<br />
<strong>1.</strong> Write about any 10 of skirt types based on design.<br />
Answers for objective questions:<br />
<strong>1.</strong> (b) 2. (c) 3. (c) 4. (a) 5. (b)<br />
182
19.1 <strong>INTRODUCTION</strong>:<br />
19. POCKETS<br />
In men’s and boys’ clothes, pockets are used mainly for utilisation purposes rather<br />
than for decoration. The chief purpose of pockets in women’s clothing is to add design<br />
interest. They should be planned in giving considerable attention to the design of the dress<br />
and the figure of the wearer. Children love to have pockets in their dresses. Appearance of<br />
children’s garments can be enhanced to a great extent by designing pocket of varied<br />
shapes, sizes, and locations with decorative details such as bias binding, lace, ruffles,<br />
tucks, pleats, applique, embroider etc. suited to the design and purpose of the dress.<br />
19.2 TYPES OF POCKET:<br />
Pockets may be classified into 3 types. <strong>1.</strong> Patch pocket 2. In seam pocket 3. Set in<br />
pocket.<br />
<strong>1.</strong> Patch pocket:<br />
These are attached to the outside of the garment and may be cut in various shapes.<br />
A patch pocket may be furnished witha a flap which holds it shut or mere appearance of a<br />
flap may be given by trimming the top of the pocket with a shaped band that looks like a<br />
working flap. Sometimes flaps are used without any pocket, purely for decoration.<br />
Patch pocket Inseam pocket Slash pocket<br />
2. In seam pocket:<br />
Any type of pocket in which the opening falls along a seam line of the garment is<br />
referred as ‘pocket set into seam’. This type of pocket is used in pants of men and women,<br />
skirts , trousers, shorts, kids’ wear, kurtas and pyjamas.<br />
183
3. Slash pocket:<br />
This type of pocket is inside the garment with a slash of some type for its opening.<br />
There are three types of slash pockets bound, welt and flap. In the bound pocket each<br />
edge of the slash is finished with binding of even width pocket has one wide end called the<br />
welt extending above the pocket opening. The flap pocket has a flap of extension turned<br />
down over the opening.<br />
Flap<br />
Bound<br />
19.3 SELECTION OF POCKET DESIGN:<br />
Plan pocket designs that harmonize with the design of the fabric as well as the design<br />
of the garment and its components (collar, sleeve, cuff etc.) For the striped dress the<br />
rectangular shaped pockets cut on crosswise grain and finished with bias edging is a<br />
good choice. The scalloped pocket in look becoming because they harmony with the<br />
scalloped collar and heart shaped pocket of the dress.<br />
The sex and age as well as the figure and personality of the wearer should also be<br />
considered while designing pockets. Choose the poscket designs that suit for children’s<br />
dresses. Scalloped and rounded pocket are becoming only for girls dresses. Straight line<br />
pockets are suitable for men’s and boys garments. For older women and short women,<br />
inconspicouous designs such as set-in pocket are advisable. Women with a large bust<br />
line should avoid designs with breast pockets. The pocket designs should be appropriate<br />
fro the type of garment and the purpose and use of the garment. For example, simple<br />
straight line pockets are suitable for school uniforms and casual wear garments, while<br />
conspicuous pocket styles with decoration trimmings (suited to the wearer) may be used<br />
on party wear dresses.<br />
19.4 CREATING VARIETY IN POCKET DESIGN:<br />
<strong>1.</strong> Variety in shape, size, location and number:<br />
Pockets can be of varied shapes—rectangular, triangular, heart shpaed, oval shped,<br />
scalloped, round. They may be placed at different positions in the garment. A pocket design<br />
can be with two breast pockets and two hip pockets, the size of the hip pocket being about<br />
1½ times more than the size of the breast pockets.<br />
184<br />
Welt
2. Variety in material and grain:<br />
Interesting effects can be achieved by planning pockets of material different in color,<br />
design, texture or grain from the garment material. A design with the pocket flap (also the<br />
collar and buttons) can be made out of contrasting coloured material. A design with printed<br />
pockets on a plain garment and vice versa. A striped dress design where the pocket is cut<br />
on crosswise grain and finished with bias edging while the rest of the garment is cut on<br />
lengthwise grain.<br />
3. Variety in decorative details and trimmings used on the pocket:<br />
The outer edge of the pocket may be finished with ruffles, bias binding lace decorative<br />
stitches, applique, tucks, pleats, embroidery, patch work etc.<br />
19.5 CONSTRUCTION OF POCKET:<br />
<strong>1.</strong> Patch Pocket:<br />
Patch pocket may be lined or unlined. A lining is needed for fabrics that stretch or<br />
sag. Fabrics that are firm enough to hold their shape can be used without a lining. The<br />
steps in constructing a patch pocket are as follows.<br />
a. Construction details:<br />
<strong>1.</strong> Turn under top edge of pocket hem ¼” (6mm), press and stitch.<br />
2. Turn the hem to the right side of the pocket along fold line and pin.<br />
3. Stay stitch around the pocket on the seamline, beginning at fold line of the hem. The<br />
stay stitch will act as a guide for turning and pressing the edges and corners.<br />
4. Trim and grade hem seam allowances. Clip upper corners. Turn hem right side out and press.<br />
Construction of patch pocket<br />
5. Fold in seam allowances along stitching and press. Square corners must be mitered;<br />
rounded corners must b e notched.<br />
6. Stitch the edge of the hem to the pocket by hand, or top stitch from right side.<br />
7. Pin the pocket to the garment. Slip stitch around the pocket by hand. Or topstitch edges<br />
in place. Reinforce corners by backstitching or by stitching a small triangle or square.<br />
185
Both the top corners of the pockets must be reinforced properly to add strength. This<br />
can be done by the following methods.<br />
b. Corner reinforcement of patch pocket:<br />
<strong>1.</strong> Small, identical triangles stitched at each top corner: This is the pocket<br />
reinforcement seen most frequently on shirts.<br />
2. A zigzag stitch: This stitch about /8” wide and closely spaced, runs down ½” from the<br />
top of each side. Good for children’s clothes.<br />
3. A backstitch:This is used for ½” on each side of the pocket’s opening edge, with<br />
thread ends tied. This method is often used on kid’s wear.<br />
4. Patched fabric: A patch of fabric or fusible interlacing, placed on the wrong side of<br />
garment under reinforcement stitching, adds strength.<br />
<strong>1.</strong> Identical triangular stitch 2. Zigzag stitch<br />
3. Back stitch<br />
5. Hand reinforcement: Hand reinforcement is done with Whip Stitch, invisibly for ¼” on<br />
each side of top corners.<br />
6. Bar-tacking: Another hand method in bar tacking ¼” long straight stitches diagonally<br />
corners with blanket stitches worked over them.<br />
186<br />
4. Patched fabric<br />
5. Hand reinforcement 6. Bar tacking
2. In-seam pocket:<br />
This is the easiest type of pocket to make. The pocket is attached to the side seam<br />
of the garment. It can be cut as part of the garment front and back. or it can be cut from a<br />
separate pattern piece and stitched to the seam. If the outer fabric is bulky or heavy, cut the<br />
pocket pieces from linging fabric.<br />
a. Construction details:<br />
<strong>1.</strong> Stitch a piece of seam tape or twill tape along the front and back fold line or seamline to<br />
prevent stretching.<br />
2. If the pocet is cut separately, stitch pocket pieces to front and back opening, right sides<br />
together. Press seam allowances toward pocket pieces.<br />
3. Pin the garment fron to garment back, matching markings at seamline and pocket.<br />
4. Stitch directionally along seam and around pocket in one step. Use reinforcement stitches,<br />
15 to 20 stitches per inch at the coreners. Press seam allowances flat.<br />
5. Turn the pocket toward the front of the garment. Clip back seam allowances above and<br />
below pocket so that the seam allowances of the garment can be pressed open. Piping<br />
material would be effective. Buttons may be fixed in groups to create design interest<br />
gradually progressing in size from small to big.<br />
6. Seams can be finished if necessary.<br />
Questions:<br />
Objective questions:<br />
Construction of in-seam pocket<br />
PART – I<br />
<strong>1.</strong> Children like to have this detail in their garment.<br />
(a) pocket (b) cuff (c) collar (d) sleeve<br />
2. Which is attached for decoration without pocket?<br />
(a) patch (b) flap (c) welt (d) pocket<br />
3. Welt pocket belongs to this type.<br />
(a) patch pocket (b) in seam pocket (c) bound pocket<br />
187<br />
(d) slash pocket
4. How many types of slash pocket are there?<br />
(a) Two (b) Three (c) Four (d) Five<br />
5. This pocket will be more suitable for girls’ dressses.<br />
(a) round pocket (b) straight pocket (c) both (d) none<br />
Answer in one or two words:<br />
<strong>1.</strong> What is the use of pockets in women’s wear?<br />
2. What is the use of pockets in men’s wear?<br />
3. What is used to cover the pocket?<br />
4. Name the types of pocket.<br />
5. Name the types of slash pocket.<br />
Answer in a paragraph:<br />
PART – II<br />
<strong>1.</strong> Name types of pocket. Write about any one.<br />
2. Write about creating variety in pocket through decorative details.<br />
3. How will you create variety in pocket by changing shape, size, location and number?<br />
4. What is patch pocket? Explain.<br />
5. How will you create variety by changing material and grain?<br />
Answer in a page:<br />
PART – III<br />
<strong>1.</strong> How will you select a pocket design?<br />
2. Write about creating variety in pocket design.<br />
3. Write about different types of pocket.<br />
PART – IV<br />
Answer in detail:<br />
<strong>1.</strong> Explain in detail on construction of pocket.<br />
2. Explain in detail on construction of patch pocket and corner reinforcement of patch<br />
pocket.<br />
Answers for objective type questions:<br />
<strong>1.</strong> (a) 2. (b) 3. (d) 4. (b) 5. (a)<br />
188
20. YOKES<br />
20.<strong>1.</strong> <strong>INTRODUCTION</strong>:<br />
A yoke is a segment of a garment usually placed at the shoulder, above the waistline<br />
(at midriff) or below the waistline for controlling and supporting fullness needed over the<br />
bust, chest, hips etc. Yokes help to keep the upper area of the waistline of a garment trim<br />
and smooth. Yokes are sometimes designed just for decoration and may not have any<br />
fullness.<br />
Hip yoke Midriff yoke Shoulder yoke<br />
20.2 SELECTION OF YOKE DESIGN:<br />
The yoke design to be used on a garment will depend on various factors, The<br />
important factors are listed below with examples.<br />
<strong>1.</strong> Design of the fabric:<br />
There should be harmony between the shape of the yoke and design of the fabric.<br />
For eg, material with large checks or stripes are not really appropriate for yokes with<br />
round or curved shapes. They are suitable for straight line yokes, Floral designs or curved<br />
line fabric will be more suitable for round or curved yoke.<br />
2. Design of the garment:<br />
The design of the yoke should harmonies with the design of the garment. Yoke can<br />
be designed, which repeats the shape of the design details of the dress. (Such as collar,<br />
cuff, pockets ect.) but with slight variations to avoid monotony. To relieve the mono of curved<br />
lines. Straight line tucks are stitched on the lower section of the garment.<br />
3. Purpose and use of the garment:<br />
Yokes are the best for school uniforms and home wear garments. Select simple<br />
yokes style. For party wear garment, the yoke design can be of noval and decorative<br />
shapes such as scalloped, asymmetrical etc. with contrasting material and decorative<br />
edging of lace, frills etc.<br />
189
4. Sex and Age of the wearer:<br />
Round and curved yokes are more suitable for girls while straight yokes are more<br />
suited to boys. Older women should select simple yoke designs and avoid style which are<br />
too decorative.<br />
5. Figure and personality of the wearer:<br />
Deep narrow yokes with vertical decorations include vertical eye movement giving<br />
an impression of added height and less width, thus making a person look taller and slimmer.<br />
Hence select such yoke designs for a short plump figure. Horizontal lines in yokes make a<br />
person look shorter and fatter and are suitable for thin figures. A yoke wide at the shoulder<br />
and pointed towards the waistline gives the impression of a narrow waist and wide shoulder.<br />
A person with round face should avoid very round yokes as well as straight line yokes<br />
because repetition and contrast both emphasise the roundness.<br />
20.3 CREATING VARIETY IN YOKE DESIGN:<br />
<strong>1.</strong> Variety in shape and size:<br />
A yoke can be designed with various shapes such as square, round straight line,<br />
scalloped, triangular and asymmetrical etc. Sometimes part of a yoke may extend to the<br />
full length of the garment. This type of yoke is referred to as yoke with panel. Sometimes<br />
Yoke with panel Partial yoke<br />
the yoke may extend into the sleeve, or it may extend only part of the way across the<br />
garment as in a partial yoke. A yoke can be deep or shallow, broad or narrow according to<br />
the effect desired.<br />
2. Variety in material and grain:<br />
If the garment is of light colour, the yoke may be made of a contrasting coloured<br />
fabric for a dark coloured garment the yoke may be white or light coloured. A yoke with<br />
prints is attached with the plain garment or vice versa would give a good apperance. With<br />
regard to grain, a design in a design in which the yoke is cut on bias and the garment on<br />
lengthwise grain.<br />
190
3. Designing seamline of yoke:<br />
The yoke can be joined to the body of the garment in a decorative may be insertion<br />
of ruffles, lace, ricrac, faggoting, decorative stitches or top stitches in contrasting colored<br />
thread.<br />
4. Decoration within the yoke:<br />
The yoke can be beaded, guilted, embroidered, shirred, smocked, tucked, pleated.<br />
5. Introducing the yoke at different position:<br />
The yoke may be introduced at the top of the dress (shoulder yoke) above the waist<br />
line (midriff yoke) below the waist line (hip yoke)<br />
6. Designing yokes which release fullness in various forms:<br />
Fullness is released in the form of gathers, pleats, tucks etc. from the edge of the<br />
yoke.<br />
20. 4 PREPARING PATTERNS OF DIFFERENT TYPES OF YOKES:<br />
<strong>1.</strong> Yoke without fullness:<br />
This type of yokes can be of variety with different shapes and size. To prepare the<br />
pattern for this, take the front bodice pattern and draw the yoke line from shoulder to center<br />
x<br />
front as desired. For a curved or ‘V’ shaped yoke, this method must be followed, for a<br />
straight line yoke, draw line from armhole to centre front of bodice pattern. Label both the<br />
section.<br />
2. Yoke with fullness:<br />
For this types of yoke, decorate the fabric with (tucks<br />
pleats, gathers, shirring and embroidery) any fullness must<br />
be finished first place the yoke pattern over the decorated<br />
fabric. Cut the required amount of fabric and stitch tucks<br />
according to the design. Keep the paper pattern on the<br />
tucked fabric and cut in the correct shape including seam<br />
allowance and attach it with the other patterns.<br />
y<br />
Yoke without fullness<br />
191<br />
Yoke with fullness
20.5 Attaching yokes:<br />
A yoke maybe attached to the lower section by either a plain seam or a lapped<br />
seam. Lapped seam cuf the yoke and the skirt including seam allowances, on the fabric.<br />
Gather the skirt making sure that the width of the yoke and skirt are equal after the skirt has<br />
been gathered . Now place the yoke over the skirt right side facing and matching notches.<br />
Straightline yoke<br />
Pin and tack distributing gathers evenly. Machine on the wrong side of the yoke along the<br />
seam line as shown. Finally remove the tacking and turn up yoke on the right side and<br />
press.<br />
Yoke which has curve and straight line as in skirt with panel the seam runs almost at<br />
the right angles to the corner. First of all prepare the lower section of the garment by working<br />
the gathering stitches. Next take the yoke, and work machine stitches just near the seamline<br />
and reinforce the corners, fold the seam allowance to the wrongside and tack with small<br />
stitches close to the fold. To enable the seam to be flat, cuff notches into the seam allowance.<br />
Decorative yoke<br />
Next keep the yoke on top of the lower section, matching seam lines. Tack in position and<br />
top stitch. Close to the folded edge of the yokes. A tucked seam effect can be got, if<br />
desired, by doing the top stitching away from the folded edge of the yoke.<br />
192
Questions:<br />
Objective questions:<br />
PART – I<br />
<strong>1.</strong> Which yoke will be more suitable for school uniforms<br />
(a) simple plain yoke (b) yoke with pin tuck<br />
(c) yoke with shirring (d) ‘V’ shaped yoke<br />
2. Which style of yoke must be used in dresses of old women<br />
(a) simple plain yoke (b) yoke with pin tuck<br />
(c) yoke with shirring (d) ‘V’ shaped yoke<br />
3. To increase the height of wearer which yoke must be used<br />
(a) Deep narrow yoke (b) Broad Deep yoke<br />
(c) Straight line yoke (d) Round yoke<br />
4. Yoke which extend to the full length of the garment<br />
(a) partial yoke (b) yoke with panel<br />
(c) Yoke with fullness (d) Yoke without fullness<br />
5. This yoke which is placed above the waistline is called by this name.<br />
(a) shoulder yoke (b) midriff yoke<br />
(c) hip yoke (d) yoke with fullness<br />
Answer in one or two words:<br />
<strong>1.</strong> Name the yoke suitable for girls dress.<br />
2. Name the yoke suitable for boy’s dresses.<br />
3. Name three types of yoke.<br />
4. Name the seams used to attach yoke.<br />
5. How will you decorate the yoke part.<br />
Answer in a paragraph:<br />
PART – II<br />
<strong>1.</strong> How will you vary the shape and size of the yoke and create variety?<br />
2. Define yokes.<br />
3. What is partial yoke.<br />
193
4. What is panel yoke?<br />
5. How will you choose a yoke depending on purpose and use of the garment?<br />
Answer in one page:<br />
PART – III<br />
<strong>1.</strong> Write Briefly on selection of yokes design.<br />
2. Write about creating variety in yoke design.<br />
3. Describe about preparing patterns for different types of yokes.<br />
4. Explain about attaching yokes with garment.<br />
Answer in detail:<br />
PART – IV<br />
<strong>1.</strong> Describe about selection and creating variety in yoke design.<br />
2. Describe about preparing patterns and attaching yokes with garment.<br />
Answer for objective type Questions:<br />
<strong>1.</strong> (a) 2. (a) 3.(c) 4. (b) 5. (b)<br />
194