
You also want an ePaper? Increase the reach of your titles
YUMPU automatically turns print PDFs into web optimized ePapers that Google loves.
In order to determine which clay is best for<br />
your particular project, it is helpful to<br />
understand the range of different characteristics<br />
a clay might have. It is also good to know ahead<br />
of time whether you intend to use the clay<br />
primarily for modeling and handbuilding or for<br />
pottery and wheel work.<br />
C L AY CHARACTERISTICS<br />
When choosing a clay, you will find that each clay has<br />
its own unique texture and finish. The texture of the<br />
clay you choose generally correlates with the type of<br />
object and size of object you are working with. When<br />
p roducing a smaller or finer-detailed piece, you might<br />
consider a smoother clay with little grit or sand.<br />
While, for larger hand-built pieces where the degree of<br />
detail is less or where you might be adhering varying<br />
thicknesses of the clay to an armature or support, you<br />
might want to use a clay with increased sand or grit<br />
content. This grit is often called grog. For these<br />
reasons, clays are available in a variety of texture<br />
ratios, relative to the size and type of project you are<br />
working with.<br />
How soft or hard a<br />
clay is and what kind of<br />
shrinkage value it has,<br />
also correlates to your<br />
particular project needs.<br />
If you are working with small children, for<br />
instance, you might want a relatively soft<br />
c l a y. On the other hand, if you are working with older<br />
c h i l d ren or adults, they will be better able to handle a<br />
firmer clay, which is also good for fine details.<br />
The shrinkage-value of a clay will also alter the<br />
final size of your piece once dried and fired. While<br />
experienced potters are often able to compensate for<br />
this occurring, if you are unfamiliar with the<br />
shrinkage value of your clay, it might be advisable to<br />
use a clay which has little shrinkage.<br />
The colour of the clay is a matter of personal<br />
p re f e rence. Buff clays are probably the most familiar<br />
colour to most people and are generally finished with<br />
<strong>THE</strong> <strong>BASICS</strong> <strong>OF</strong> <strong>CLAYS</strong><br />
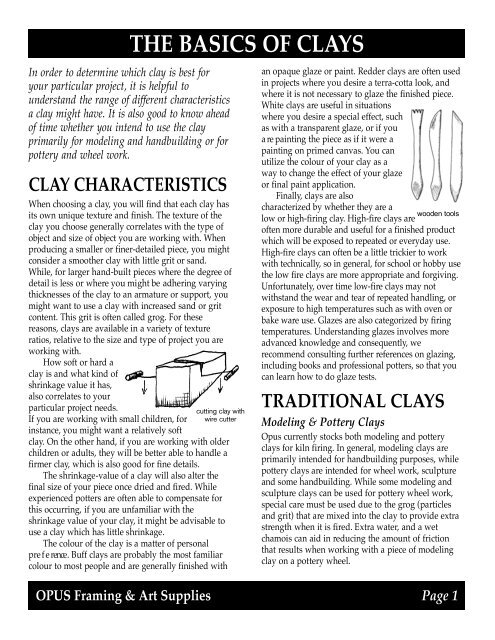
cutting clay with<br />
wire cutter<br />
an opaque glaze or paint. Redder clays are often used<br />
in projects where you desire a terra-cotta look, and<br />
w h e re it is not necessary to glaze the finished piece.<br />
White clays are useful in situations<br />
w h e re you desire a special effect, such<br />
as with a transparent glaze, or if you<br />
a re painting the piece as if it were a<br />
painting on primed canvas. You can<br />
utilize the colour of your clay as a<br />
way to change the effect of your glaze<br />
or final paint application.<br />
Finally, clays are also<br />
characterized by whether they are a<br />
low or high-firing clay. High-fire clays are<br />
often more durable and useful for a finished product<br />
which will be exposed to repeated or everyday use.<br />
High-fire clays can often be a little trickier to work<br />
wooden tools<br />
with technically, so in general, for school or hobby use<br />
the low fire clays are more appropriate and forgiving.<br />
Unfortunately, over time low-fire clays may not<br />
withstand the wear and tear of repeated handling, or<br />
exposure to high temperatures such as with oven or<br />
bake ware use. Glazes are also categorized by firing<br />
temperatures. Understanding glazes involves more<br />
advanced knowledge and consequently, we<br />
recommend consulting further references on glazing,<br />
including books and professional potters, so that you<br />
can learn how to do glaze tests.<br />
T R A D I T I O N A L C L AY S<br />
Modeling & Pottery Clays<br />
<strong>Opus</strong> currently stocks both modeling and pottery<br />
clays for kiln firing. In general, modeling clays are<br />
primarily intended for handbuilding purposes, while<br />
pottery clays are intended for wheel work, sculpture<br />
and some handbuilding. While some modeling and<br />
s c u l p t u re clays can be used for pottery wheel work,<br />
special care must be used due to the grog (particles<br />
and grit) that are mixed into the clay to provide extra<br />
s t rength when it is fired. Extra water, and a wet<br />
chamois can aid in reducing the amount of friction<br />
that results when working with a piece of modeling<br />
clay on a pottery wheel.<br />
OPUS Framing & <strong>Art</strong> <strong>Supplies</strong> Page 1
In our selection of kiln fire clays we curre n t l y<br />
stock AMACO moist pottery in diff e rent colours and<br />
sizes. These clays are multi-use, oriented toward s<br />
p rojects which might entail everything from handbuilding<br />
to wheel-throwing. The texture is mid-range<br />
and shrinkage is moderate. These clays re q u i re kiln<br />
firing and one of their distinct advantages is that they<br />
can be fired at a range of temperature s .<br />
The LAGUNA brand of modeling and sculpture<br />
clays are diff e rentiated by more specific<br />
p roperties, and there f o re, preferable when you<br />
d e s i re increased control over the characteristics<br />
of your clay. For instance, LAGUNA m o d e l i n g<br />
clays are smooth and low-firing. They are well<br />
suited to both hand-building and wheelt<br />
h rowing of smaller pieces. They are also<br />
available in diff e rent sizes and colours.<br />
LAGUNA sculpture clays are medium to<br />
coarse in texture, and are formulated for lowshrinkage.<br />
These clays are useful for larger hand-built<br />
pieces and some wheel-thrown work when appropriate<br />
care is taken. They can be fired at a medium-range<br />
temperature, but are often fired lower for sculptural<br />
work where a range of clay thickness is a factor.<br />
Tip: When working with coarser clays, such as modeling<br />
and sculpture clays, those with a greater amount of gro g<br />
added, be sure to take extra care. This material can be ro u g h<br />
on your hands potentially causing small abrasions. If using<br />
these clays for wheel work, caution is advised. It is best to<br />
e n s u re that adequate moisture is used to reduce friction.<br />
Non-Kiln Fired Clays<br />
<strong>THE</strong> <strong>BASICS</strong> <strong>OF</strong> <strong>CLAYS</strong><br />
Many of you may be aware of the variety of<br />
alternatives available to using traditional pottery,<br />
modeling and sculpture clays. Many of these clays are<br />
useful for schools and for beginning artists where the<br />
use of a kiln might be inconvenient, too complex, or<br />
c o s t l y. These clays are primarily for decorative pro j e c t s<br />
as opposed to kiln fire clays, which are ideal for<br />
functional ware. <strong>Opus</strong> stocks a few diff e rent brands of<br />
non-traditional clays. Ask our staff for which clays we<br />
c u r rently have available.<br />
Oven-bake clays generally look and feel just like<br />
regular kiln fire clays except once dry they are cure d<br />
by baking in a regular household oven. As with all<br />
oven-bake clays including polymer clays, it is<br />
important to pre-test your oven temperature to ensure<br />
accuracy as varying temperatures will pro d u c e<br />
d i ff e rent results and too high a temperature may cause<br />
smoke or discolouration. After baking, your pro j e c t<br />
can be used as is, or finished with acrylic paint. It is<br />
also important to seal the finished piece if you re q u i re<br />
it to be waterpro o f .<br />
We currently stock Ovencraft by LAGUNA. Once<br />
baked, it has a speckled re d d i s h - b row n stoneware<br />
finish. This clay is similar in texture to standard<br />
L A G U N A modeling clays, and is useful for smaller<br />
hand-built or wheel-thrown projects.<br />
A l t e r n a t i v e l y, you can use air-dry clays which cure<br />
and fully harden in the air. There is no need to bake<br />
with these clays. Most of these clays will dry to a<br />
“leather hard” consistency within 24 hours depending<br />
on the thickness and will cure completely in a few<br />
days. They can be painted with regular acrylic paints,<br />
and should also be sealed if they need to be waterproof.<br />
C u r re n t l y, we stock LAGUNA D r y - H a rd, A M A C O<br />
Mexican and AMACO Marblex clays in the air dry<br />
clays. The LAGUNA version is similar in consistency<br />
to standard LAGUNA Modeling clays. The AMACO<br />
clays have a smooth and consistent feel, similar again<br />
to standard modeling clays. They are suitable for<br />
smaller hand-built or wheel-thrown work. Dried pieces<br />
are hard and durable.<br />
Both of these AMACO clays have a high rate of<br />
shrinkage, so be aware that different thicknesses or<br />
pieces built over armatures may crack when drying. To<br />
avoid this occurring, it is important in general, to build<br />
pieces which have an overall consistent thickness, or to<br />
build solid pieces which you can scoop the middle out<br />
of once the clay is at the leather-hard stage. Also, as<br />
with any clay, let the clay dry naturally and do not<br />
attempt to accelerate the process.<br />
Another air-drying clay which <strong>Opus</strong> stocks is<br />
R E E V E S - P O O L E Self-Set Clay. This clay has a smooth<br />
plasticine-like consistency. It is very soft and easy to<br />
manipulate, great for working with younger childre n .<br />
It will air-dry to a bisque finish, and shrinkage is<br />
minimal. It is suited to hand-building techniques. It<br />
a i r-dries to a hard finish overnight, depending on the<br />
OPUS Framing & <strong>Art</strong> <strong>Supplies</strong> Page 2
thickness of the finished piece. Once set, it can be<br />
sanded smooth and painted with acrylics. For added<br />
p e r m a n e n c y, it should also be sealed with a sealant<br />
such as acrylic medium. Like all air-dry clays it is<br />
ideal for decorative pro j e c t s .<br />
One of the considerations to bear in mind when<br />
choosing to work with non-traditional clays, is that<br />
they are generally more expensive than regular clays.<br />
This is off-set by the fact that you do not re q u i re kiln<br />
facilities or extensive knowledge of the glazing<br />
p rocess. As a result, these clays can be a great and<br />
convenient way to introduce yourself to small 3-D<br />
p rojects, because you can focus primarily on the<br />
c reative process. In addition, they can easily be<br />
incorporated into diff e rent types of experimental or<br />
multi-media projects.<br />
BASIC HANDBUILDING<br />
T E C H N I Q U E S<br />
<strong>THE</strong> <strong>BASICS</strong> <strong>OF</strong> <strong>CLAYS</strong><br />
PINCH-POTS: Depending on the desired size of your<br />
pinch-pot, start with a handful of clay to make a small<br />
to medium sized pot. Roll the piece of moist clay<br />
between your hands, until it forms a smooth and even<br />
ball. Using your thumb, create a deep depression in<br />
the ball but do not push your thumb all the way<br />
t h rough the clay form. There should be at least a 1/2"<br />
of clay between the bottom of the depression and the<br />
outside of the ball — this are a<br />
will ultimately form the base<br />
of your pot.<br />
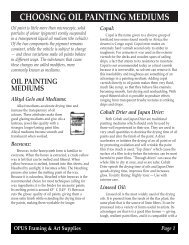
Keeping your thumb inside<br />
the form and your re m a i n i n g<br />
fingers parallel to it on the<br />
e x t e r i o r, begin pinching the<br />
sides and rotating the form at<br />
the same time. This step is<br />
repeated continuously, to shape the walls of the pot,<br />
until the desired thickness and shape is achieved. The<br />
walls and bottom of the pinch pot should not be less<br />
than 1/4" to ensure that the pot retains its form as it<br />
dries. If the rim of the pot cracks, as you pinch and<br />
rotate it, you can add more clay to repair it or smooth<br />
it out with a damp chamois. The bottom of the pot<br />
will form and thin out as you work. Try not<br />
to overwork the clay as it is difficult to add<br />
clay to thicken walls which are already too<br />
thin and could cause the piece to crack. This,<br />
like all hand-building methods becomes<br />
easier with practice.<br />
Once finished, allow the clay to dry until it is<br />
“cheese” or leather hard, i.e. when it is still moist but<br />
firm. This may re q u i re covering it with a damp cloth<br />
or damp paper towels to prevent it from drying too<br />
quickly and then leaving it to sit overnight. Once<br />
leather hard the pinch-pot is strong enough to accept<br />
any final touches such as burnishing or adding small<br />
clay appendages. Appendages can be added at an<br />
earlier stage, however, if the clay is too soft you may<br />
want to wait until it hardens somewhat. When adding<br />
clay features you must score the clay in a cro s s - h a t c h<br />
fashion with a needle tool and moisten the two<br />
surfaces which are to be attached with a wet chamois.<br />
The two pieces should be of a similar hardness. Use a<br />
wooden tool to smooth out the seams of the new join.<br />
C O I L BUILDING: The coils which you pre p a re for<br />
this method should generally be consistent in size,<br />
1/4" to 1/2", but can be varied to accentuate diff e re n t<br />
parts of a vessel form. For example, if you plan to<br />
c reate a vase form you can roll and<br />
form the coils so that they become<br />
i n c reasingly smaller as you near the<br />
neck of the form. Be careful, however,<br />
that they are not thinner than 1/4" as<br />
the form will not be strong enough to<br />
hold its shape.<br />
The coils should be spiraled one<br />
on top of the other and each opposing surface should<br />
be scored and moistened to ensure proper adhesion of<br />
the next layer. You can vary the thickness of the coils<br />
a c c o rding to the desired effect or form.<br />
The coil form can be left to<br />
dry just as it is or when it<br />
becomes leather hard it can be<br />
smoothed further, texurized or<br />
have appendages or clay<br />
decorations attached. If you plan to use the clay form<br />
to hold liquid or small particles, consider smoothing<br />
OPUS Framing & <strong>Art</strong> <strong>Supplies</strong> Page 3
the interior surfaces of the vessel. Also, if you want it<br />
to be fully waterproof further re s e a rch is<br />
recommended to determine the most suitable clay and<br />
glazes to make your piece functional.<br />
SLAB BUILDING: Using a rolling pin, roll out<br />
various size pieces of clay until flat and no less than<br />
1/4" thick. Measure and cut the rolled out pieces into<br />
rectangular or curvilinear forms according to the plan<br />
for your final 3-D form. Let these pieces dry until they<br />
a re leather hard before you begin to assemble the form<br />
otherwise it will be difficult for them to hold their<br />
shape and support the final piece.<br />
When re a d y, score and moisten all edges before<br />
you join them to ensure a proper bond. Once you join<br />
the two surfaces you<br />
should also add some<br />
moist clay to fill the seams<br />
along both lengths of the<br />
joint. Use a wooden tool<br />
to apply the clay and to<br />
remove any excess.<br />
T I P : B e f o re you begin working with your clay you should<br />
knead it to get rid of any air bubbles. Do not knead it as you<br />
would bread dough as this will put air into it instead of<br />
taking it out. Instead, take a manageable size piece of clay<br />
and forcefully drop it onto your working surface several<br />
times, turning it each time to rid it of any air pockets.<br />
O P U S<br />
F raming &<br />
A r t <strong>Supplies</strong><br />
‘where artists prefer to shop’<br />
<strong>THE</strong> <strong>BASICS</strong> <strong>OF</strong> <strong>CLAYS</strong><br />
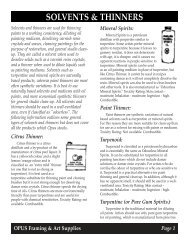
Score both surfaces that<br />
are to be joined.<br />
N O T E S :<br />
OPUS Vancouver OPUS Langley OPUS Victoria<br />
1360 Johnston St 5501 204 St 512 Herald St<br />
604-736-7028 604-533-0601 250-386-8133<br />
OPUS Kelowna OPUS North Vancouver OPUS National<br />
1357 Ellis St 120 Lonsdale Ave Mail Order Service<br />
250-763-3616 604-904-0447 1-800-663-6953<br />
www.opusframing.com<br />
OPUS Framing & <strong>Art</strong> <strong>Supplies</strong> Page 4