8x50 Illuminated Correct Image Finderscope ... - Explore Scientific
8x50 Illuminated Correct Image Finderscope ... - Explore Scientific
8x50 Illuminated Correct Image Finderscope ... - Explore Scientific

Create successful ePaper yourself
Turn your PDF publications into a flip-book with our unique Google optimized e-Paper software.
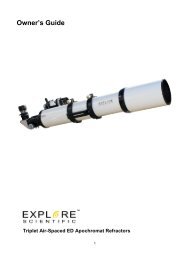
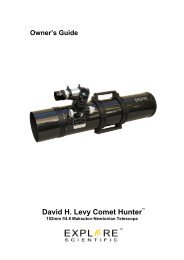
Owner’s Guide<br />
Finder Scope Manual <br />
<strong>8x50</strong> <strong>Illuminated</strong> <strong>Correct</strong> <strong>Image</strong>
SUN WARNING<br />
Do not use this finder scope to look at or near the Sun! Even momentary visual contact with the<br />
Sun’s light rays can cause instant and irreversible damage to your eye(s). Eye damage can be<br />
painless, so there is no warning to the observer that damage has occurred until it is too late.<br />
Take extra care and do not look through the finder scope during the daytime.<br />
Never allow anyone to use the instrument during the daytime without warning them of the hazards<br />
of aiming at or near the Sun. Make sure that they are adequately trained on the use of this<br />
instrument before allowing them to start observations. Children should always have informed and<br />
trained adult supervision while observing.<br />
WARRANTY AND SERVICE<br />
Product Warranty<br />
<strong>Explore</strong> <strong>Scientific</strong> will repair or replace the product, or part thereof, found upon inspection to be defective,<br />
provided the defective part or product is returned to <strong>Explore</strong> <strong>Scientific</strong> USA, freight prepaid, with<br />
confirmation of product registration for a period of five years from the date of original purchase. <strong>Explore</strong><br />
<strong>Scientific</strong> products purchased from the USA outside the United States are included in this extended<br />
warranty, but the owner is responsible for all shipping costs (including customs, taxes, etc.), both inbound<br />
to our USA facilities and outbound to the respective country that the product would be returned to.<br />
<strong>Explore</strong> <strong>Scientific</strong> products purchased in other countries are covered under separate warranties issued by<br />
<strong>Explore</strong> <strong>Scientific</strong> International Distributors.<br />
RMA Number Required<br />
Prior to the return of any product or part, a Return Merchandise Authorization (RMA) number must be<br />
obtained by writing to <strong>Explore</strong> <strong>Scientific</strong>s’ Customer Service Department or by calling1-866-252-3811, and<br />
we will be happy to provide you with return shipping instructions.
A Message from <strong>Explore</strong> <strong>Scientific</strong><br />
We wish to thank you for choosing <strong>Explore</strong> <strong>Scientific</strong>'s finderscope as part of necessaries for your telescope.<br />
We hope that you use your telescope as often as possible and that you seriously consider getting involved in public<br />
outreach in astronomy in your<br />
local community. If you don’t already know, astronomy outreach is a very enriching and rewarding activity where your<br />
knowledge and your telescope help to give people of all walks of life a deeper understanding of our place in the<br />
universe and greater insight into what all humans have in common.<br />
It was Carl Sagan who said. “Earth is a very small stage in a vast cosmic arena.” Just looking up at a star-filled sky<br />
humbles most of us, opens our minds, and just with a little astronomical background knowledge confronts us with a<br />
profound truth that we are somehow interconnected with the cosmos. With your telescope you can share the<br />
experience with friends and family, you’ll find that it will be a truly mind expanding experience for them and for<br />
yourself.<br />
While correcting the finderscope to show others the belts of Jupiter, or the faint glow of a distant galaxy is fun and<br />
interesting, exposing others to astronomy has many other direct benefits. The very act of contemplating the vastness<br />
of the universe lets one experience a feeling of tranquility, and creates some space within to put priorities into<br />
perspective. It can motivate young people to pursue careers in technology, medicine, engineering, and mathematics.<br />
There are few things more gratifying than opening the minds of others, fostering a sense of wonder, providing greater<br />
understanding, and setting them on a never ending journey of learning. Ultimately astronomy can motivate people<br />
around the world to support bold programs of exploration and discovery.<br />
Those who encourage others to join in on the adventure of exploring the sky and the universe are engaged in<br />
astronomy education and public outreach, and we hope that you too become involved. You can start with a free<br />
membership in the <strong>Explore</strong> Alliance and connect with one of the Alliance Partners. You can learn more by going online<br />
to www.explorealliance.org.<br />
Should you have any questions or suggestions for us, please don’t hesitate to contact our Customer Service center at<br />
(866) 252-3811. We will be happy to help you.<br />
The Team at <strong>Explore</strong> <strong>Scientific</strong><br />
www.explorescientific.com
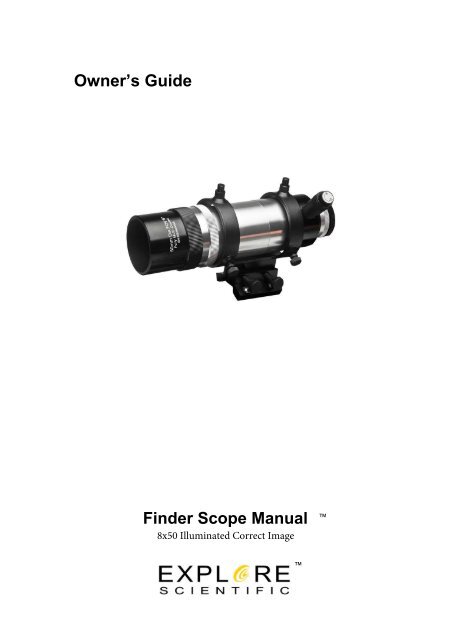
<strong>Finderscope</strong> Manuals<br />
Focusing the Finder Scope<br />
Fig. 2, Eyepiece Focusing<br />
1 2<br />
Fig. 3, Objective Lens Focusing<br />
The 8X50 <strong>Correct</strong> <strong>Image</strong> Finder Scope has focusing adjustments for the objective and the eyepiece. You can make the initial focus<br />
adjustments hand held:<br />
1. Loosen the eyepiece focus adjustment by turning it counterclockwise while firmly holding the eyepiece focus lock ring (1,<br />
Fig. 2). Further separate the eyepiece focuser (2, Fig. 2) and the focuser lock ring to allow a good range of adjustment.<br />
2. Aim the finder scope at a blank wall and concentrate your eye on the crosshairs. Turn the eyepiece focuser (2, Fig. 2) left<br />
or right until you see the finder scope crosshairs perfectly sharp.<br />
3. Once you have found perfect crosshair focus, turn the eyepiece focuser lock ring (1, Fig. 2) against the eyepiece focuser<br />
(2, Fig. 2) until it is snug so that it holds the eyepiece focus position.<br />
4. Loosen the objective lens focus adjustment by turning it counterclockwise while firmly holding the objective lens focus lock<br />
ring (1, Fig. 3). Further separate the objective lens focuser (2, Fig. 3), and the focuser lock ring to allow a good range of<br />
adjustment.<br />
5. Aim the finder scope at a very distant object (the greater the distance the better) and concentrate your eye on the distant<br />
object. Fig. Turn 2 Finder the lens Scope objective Eyepiece focuser Assembly (2, Fig. 3) left or right until you see the distant object and the crosshairs of the<br />
finder scope perfectly sharp.<br />
6. Once you have found perfect focus, turn the objective lens focuser lock ring (1, Fig. 3) against the focuser until it is snug<br />
so that it holds the focus position.<br />
7. Repeat this process on a bright star or the Moon, once you have attached the finder scope on the telescope (see below) to<br />
get perfect focus adjustment for astronomy.<br />
1<br />
1<br />
Fig. 3, Dovetail and Attachment Screws<br />
2<br />
2<br />
2<br />
1<br />
Fig. 4, Finder Scope Adjustment Screws
Mounting and Adjusting the Finder Scope<br />
To align the finder scope, perform steps 1 through 5 during the daytime; perform step 6 at night.<br />
1. Slide the track on the bottom of the finder scope into the slot in the finder scope mounting assembly (1, Fig.3). To secure the<br />
finder scope to the mounting assembly, tighten the two thumbscrews (2, Fig. 3) to a firm feel only.<br />
2. If you have not already done so, insert the 30mm 70° Series eyepiece into the eyepiece holder.<br />
3. Point the telescope at some well-defined and stationary land object at least 200 m distant, such as the top of a telephone pole or<br />
street sign. Center the object in the telescope eyepiece.<br />
4. Look through the finder scope eyepiece and loosen or tighten, as appropriate, one or more of the finder scope collimation screws<br />
(2, Fig. 4) until the finder scope crosshairs are precisely centered on the object you previously centered in the telescope eyepiece.<br />
5. Check this alignment on a celestial object, such as the Moon or a bright star, and make any necessary refinements, using the<br />
method outlined in steps 3 through 5.<br />
NOTE: The two screws on the top of the finder scope (1, Fig. 4) are not adjustment screws. They are spring loaded used to<br />
hold the finder scope.<br />
Using the Finder Scope Illuminator<br />
The finder scope illuminator has a continuously adjustable brightness knob with click on and click off positions. To switch the<br />
illuminator on, turn the adjustment knob clockwise (1, Fig. 5), past the click stop. The illuminator gets brighter as you turn it further<br />
clockwise. For best results for astronomy use the illuminator at the dimmest setting that allows you to comfortably see the<br />
crosshairs (which will glow red).<br />
The batteries will last several hours of continuous illumination (less in cold weather, more in warm conditions). When not using the<br />
finder scope, turn the illuminator off, by turning the knob counter-clockwise past the click stop.<br />
To replace the batteries follow these steps:<br />
1 1<br />
Fig. 5, Finder Scope Illuminator Fig. 6, Illuminator and Batteries<br />
1. Unthread the illuminator from the finder scope by grasping the entire unit and twisting it counterclockwise until it is free.<br />
2. Separate the two halves of the illuminator by grasping the two ends (1 and 2, Fig. 6) and twisting counterclockwise.<br />
Carefully separate the two halves when you feel that the illuminator pieces are free so that the batteries (and the black<br />
plastic sleeve that hold batteries) don’t fall on the ground.<br />
3. Tip the bottom half of the illuminator so that the batteries and the sleeve (3, Fig. 6) drop in your hand.<br />
4. Push the two LR41 (1.5v) batteries out of the plastic sleeve and replace them with fresh batteries so that the positive ends<br />
are in series (not facing each other).<br />
5. Replace the batteries with the sleeve in the bottom half of the assembly so that the negative ends of the batteries are<br />
facing the LED illuminator.<br />
6. Replace the top half of the illuminator by turning the two halves clockwise until firm.<br />
7. Test the illuminator by switching it on past the click stop.<br />
8. If the illuminator tests okay, then attach the illuminator back on to the finder scope.<br />
NOTE: If the illuminator does not turn on, recheck the battery position for the correct polarity position.<br />
If the polarity is correct, test the batteries to make sure that they have a full charge.<br />
If the battery polarity is correct and they have a full charge but still do not work, clean the battery<br />
terminals by rubbing them with a pencil eraser and try again. If you have further trouble please contact Customer Service.<br />
2<br />
3
© 2013 <strong>Explore</strong> <strong>Scientific</strong> - BRESSER®<br />
A JOC Company<br />
621 Madison Street • Springdale AR 72762 • USA<br />
Rev. 1.1<br />
Tel. +1 (866) 252-3811 • Fax +1 (479) 717-2898 • www.explorescientific.com Part No. UG-CH102009