Digital Audio Player - Philips
Digital Audio Player - Philips
Digital Audio Player - Philips
You also want an ePaper? Increase the reach of your titles
YUMPU automatically turns print PDFs into web optimized ePapers that Google loves.
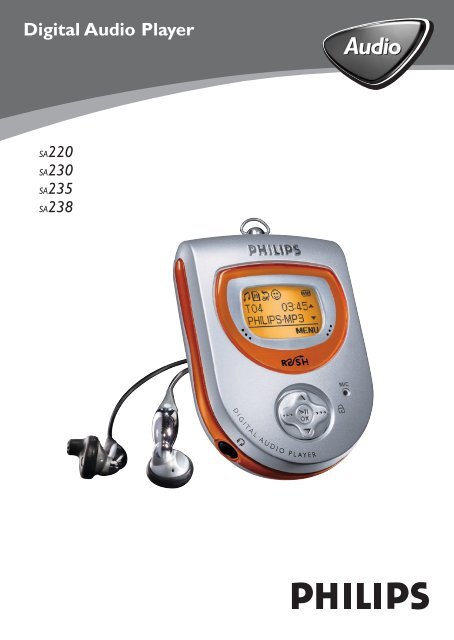
<strong>Digital</strong> <strong>Audio</strong> <strong>Player</strong><br />
SA220<br />
SA230<br />
SA235<br />
SA238<br />
<strong>Audio</strong>
Contents<br />
Controls and Connections ––––––––––––––––––––––––––––––––<br />
General information<br />
4-7<br />
Safety & Maintenance –––––––––––––––––––––––––––––––––––– 8<br />
Copyright information ––––––––––––––––––––––––––––––––––– 8<br />
About RUSH –––––––––––––––––––––––––––––––––––––––––– 9<br />
Supplied accessories ––––––––––––––––––––––––––––––––––––– 9<br />
First time installation ––––––––––––––––––––––––––––––––––––– 10<br />
Minimum computer system requirements––––––––––––––––––––– 10<br />
Software installation ––––––––––––––––––––––––––––––––––––– 11-13<br />
Power supply<br />
Battery–––––––––––––––––––––––––––––––––––––––––––––––– 14<br />
Connecting , disconnecting RUSH ––––––––––––––––––––––––– 15<br />
Transferring MP3,WMA files –––––––––––––––––––––––––––––<br />
Transferring RUSH & VOICE files<br />
16<br />
Uploading ––––––––––––––––––––––––––––––––––––––––––––– 17<br />
Downloading ––––––––––––––––––––––––––––––––––––––––––– 18<br />
Deleting files, upgrading ––––––––––––––––––––––––––––––––––<br />
General operation<br />
19<br />
Switching on/off –––––––––––––––––––––––––––––––––––––––– 20<br />
Power-saving standby mode ––––––––––––––––––––––––––––––– 21<br />
Selecting function–––––––––––––––––––––––––––––––––––––––– 21<br />
Navigating main & submenu options ––––––––––––––––––––––––– 21<br />
Adjusting volume ––––––––––––––––––––––––––––––––––––––– 22<br />
Some display icons –––––––––––––––––––––––––––––––––––––– 22<br />
Interactive backlight ––––––––––––––––––––––––––––––––––––– 23<br />
Button lock ––––––––––––––––––––––––––––––––––––––––– 23<br />
Using the armband & neck strap ––––––––––––––––––––––––––– 23<br />
2
Contents<br />
Playing your tracks (MUSIC & VOICE only)<br />
Play and pause–––––––––––––––––––––––––––––––––––––––––– 24<br />
Selecting a different track ––––––––––––––––––––––––––––––––– 24<br />
Fast searching within a track –––––––––––––––––––––––––––––––<br />
Delete tracks, Playmode (MUSIC & VOICE only)<br />
24<br />
Deleting tracks ––––––––––––––––––––––––––––––––––––––––– 25<br />
Playmode: Different playback modes –––––––––––––––––––––––<br />
Memory (MUSIC & VOICE only)<br />
25<br />
Memory size & selecting memory options ––––––––––––––––––––<br />
Equalizer, Custom, Favorite (MUSIC mode only)<br />
26<br />
Equalizer sound options––––––––––––––––––––––––––––––––––– 27<br />
Custom: adjustable, personal sound options ––––––––––––––––––– 28<br />
Favorite ––––––––––––––––––––––––––––––––––––––––––––––– 28-29<br />
TUNER<br />
Auto tuning ––––––––––––––––––––––––––––––––––––––––––– 30<br />
Manual tuning and station storing ––––––––––––––––––––––––––– 31<br />
Selecting presets ––––––––––––––––––––––––––––––––––––––––<br />
VOICE: Recording & Deleting<br />
31<br />
Preparation for VOICE recording quality ––––––––––––––––––––– 32<br />
Recording ––––––––––––––––––––––––––––––––––––––––––––– 32<br />
Deleting VOICE files ––––––––––––––––––––––––––––––––––––– 33<br />
Troubleshooting ––––––––––––––––––––––––––––––––––––––––– 34-36<br />
Technical data ––––––––––––––––––––––––––––––––––––––––––– 37-38<br />
3
Controls and Connections<br />
A<br />
B<br />
4<br />
Armband<br />
Neck strap<br />
If you would like help or more information on your RUSH product, visit the <strong>Philips</strong><br />
website:<br />
http://www.audio.philips.com/rush<br />
C<br />
A<br />
B
1<br />
2<br />
3<br />
4<br />
Controls and Connections<br />
CARD INSERT<br />
9<br />
10<br />
5<br />
6<br />
7<br />
8<br />
5
Controls and Connections<br />
1 neck strap ring - attach the neck strap here<br />
2 Display - shows status of the device and file details<br />
3 multi-function joy pad - enables 5 different functions<br />
2; OK<br />
– press and hold for ~2 seconds to switch the device on/ off<br />
– starts/ pauses MUSIC and VOICE playback<br />
– confirms a menu setting/ option for selection.<br />
6<br />
••• (right-hand side)<br />
– soft key for MENU to access the main menu SETTING, and submenus in your<br />
selected function<br />
– locks buttons during playback to prevent them from being pressed.<br />
Press for 2 seconds to de/ activate<br />
••• (left-hand side)<br />
– soft key for BACK to exit menu displays<br />
MUSIC: saves a track for Favorites (program list)<br />
TUNER: selects a preset station<br />
VOICE: activates voice recording
Controls and Connections<br />
3, 4<br />
– navigates up/ down to view the submenu options<br />
MUSIC & VOICE modes only:<br />
– skips to the beginning of a current/ previous/ next track<br />
– fast cue/ review within a track<br />
TUNER: tunes to a FM radio station<br />
4 p - 3.5 mm stereo headphone jack<br />
5 MODE - press ~1 second and release to select sound source in MP3 and WMA<br />
MUSIC/ radio TUNER/ VOICE voice recording and playback<br />
6 – VOLUME + adjusts the volume<br />
7 USB connect the supplied USB cable here and to the USB port of your computer.<br />
8 MIC - microphone for voice recording<br />
9 Battery compartment - for one AAA, LR03 or UM4 battery<br />
0 CARD INSERT - insert your SD/ MMC card* here as shown (see page 5)<br />
* If you want to use a memory card, please make sure you use the RUSH formatter<br />
to format your card before using for the first time (see page 26.)<br />
The model and serial numbers are located inside the battery compartment.<br />
7
Safety & Maintenance<br />
To avoid damage or malfunction:<br />
– Do not expose to excessive heat caused by heating equipment or direct sunlight.<br />
– Do not drop the device or allow objects to fall on the device.<br />
– Do not allow the device to be submersed in water. Do not expose earphone jack<br />
or battery compartment to water as water entering the set may cause major<br />
damage.<br />
– Do not pull with excessive force, or hang any objects exceeding 5kg on the RUSH<br />
neck strap and neck strap ring.<br />
– Active mobile phones in the vicinity may cause interference to the device.<br />
Take care when using headphones<br />
Hearing Safety: Listen at a moderate volume. Using headphones at high volume can<br />
impair your hearing.<br />
Traffic Safety: Do not use headphones while driving or cycling as you may cause an<br />
accident.<br />
Copyright information<br />
– Unauthorized duplication and distribution of Internet/ CD recordings violate<br />
copyright law and international treaties. You should use the MUSICMATCH<br />
jukebox software for personal use only.<br />
– In the U.K and certain countries, the copying of material protected by copyright<br />
may require the permission of the copyright holders.<br />
8
General information<br />
About RUSH<br />
RUSH is a solid state, portable digital audio player<br />
– plays MP3, WMA (Windows Media <strong>Audio</strong>) and future digital audio formats<br />
files e.g. digitized and compressed CD tracks, tape tracks, audio books,<br />
newspapers, sound effects, etc., that are encoded into format MP3 or WMA.<br />
– downloads MP3 or WMA without <strong>Digital</strong> Rights Managment.<br />
– only voice recordings created by RUSH in .WAV format will be recognized by the<br />
device for playback. You should also only use Windows Explorer for uploading<br />
and downloading to manage your VOICE files.<br />
– software upgradeable and supports future playback formats.<br />
– can be used to transfer document and other types of files to and from your<br />
computer.<br />
Supplied Accessories<br />
Make sure all items listed are in the package purchased. If any item is missing,<br />
please contact your dealer.<br />
– One USB cable<br />
– One RUSH installation CD-ROM<br />
– One set of in-earphones<br />
– One armband<br />
– One AAA, LR03 or UM4 alkaline battery<br />
– One neck strap<br />
– One Quick Start booklet<br />
– One Safety & Warranty booklet<br />
9
System requirements<br />
IMPORTANT!<br />
First time installation<br />
Before connecting RUSH to your computer for<br />
the 1st time: please insert the supplied CD-<br />
ROM and run the CD-ROM.<br />
The installation process is automatically<br />
launched for first-time application users.<br />
During downloading/ uploading/ formatting:<br />
• DO NOT disconnect RUSH until the device<br />
shows the READY display.<br />
• If you are a flash memory card* user, DO NOT<br />
remove your MMC/SD from the CARD<br />
INSERT slot when you are transferring files<br />
between the device and your computer.<br />
10<br />
* If you want to use a memory card, please make sure you use the RUSH<br />
formatter to format your card before using for the first time (see page 26.)<br />
Minimum computer system requirements<br />
– Pentium MMX 166MHz processor or better<br />
– *USB port with Windows ® 98/ Me/ 2000/ XP<br />
– 96MB RAM<br />
– 50MB RAM drive space<br />
– CD-ROM drive<br />
– video display card<br />
– sound card<br />
– Microsoft Internet Explorer 5.0 or better, Netscape 4.0 or better, and Internet<br />
access.<br />
* Computers that were upgraded from Win 95 may not have USB compatibility!
TIP:<br />
Software installation<br />
IMPORTANT! For Windows2000 users:<br />
Please make sure you have Windows2000 Service Pack 3 (or later) from Microsoft<br />
installed, before you start installation and connect RUSH to your PC. You can download<br />
this service pack from:<br />
http://www.microsoft.com/windows2000/downloads/servicepacks/default.asp<br />
1 Insert the RUSH CD-ROM into your CD-ROM drive.<br />
2 An introduction screen appears. Select the<br />
language that suits you best (English, Français,<br />
Italiano, Deutsch or Español).<br />
3 Select your product.<br />
4 Your PC then starts and completes automatic installation of the required PC<br />
application.<br />
11
Software installation<br />
5 Select and install the MUSICMATCH Jukebox or plug-in which most suits<br />
you. Follow all the screen instructions to complete installation.<br />
12
Software installation<br />
6 For further details and instructions on using MUSICMATCH Jukebox, click<br />
View MUSICMATCH tutorial or, you can also visit www.musicmatch.com<br />
– MUSICMATCH Jukebox software allows you to manage your music collection<br />
on your personal computer. For example:<br />
• convert CD music tracks to MP3 and WMA files<br />
• create & save music playlists<br />
• download MP3 files to RUSH<br />
13
Power supply<br />
Battery<br />
• Insert one battery (preferably alkaline) type AAA,<br />
LR03 or UM4 as indicated by the + and – symbols<br />
inside the battery compartment.<br />
Indication of empty battery<br />
The number of blocks inside the battery symbol<br />
indicates the power level.<br />
E.g. or 3 blocks indicate full power.<br />
BATTERY LOW! is shown when battery power is very low. Any recording activity<br />
stops. The device will switch off automatically.<br />
TIP:<br />
– This device does not have an on board function for rechargeable batteries.<br />
– ALWAYS check the device is loaded with a fresh battery before connecting to your<br />
computer.<br />
Batteries contain chemical substances: dispose with care.<br />
14<br />
CARD INSERT
Connecting, disconnecting RUSH<br />
Connecting RUSH to your PC<br />
1 Always turn on your computer before connecting<br />
RUSH.<br />
2 Connect the supplied USB cable to the computer’s<br />
USB port. Remove the protective rubber seal from<br />
the USB jack on RUSH and insert the other end of<br />
the cable here.<br />
y RUSH device display: READY<br />
Disconnecting RUSH from your PC<br />
1 Click on the Unplug or Eject Hardware removal icon on your PC task<br />
tray.<br />
2 Follow the screen instructions.<br />
3 When you reach the message: The 'USB Mass Storage device' can now be<br />
safely removed from the system, click OK before you unplug RUSH from your<br />
PC.<br />
TIP:<br />
– For Windows98 users, there is no removal icon. Instead, please check<br />
your RUSH shows the READY display, before you unplug RUSH.<br />
– Always replace the protective rubber seal when not connecting RUSH to your<br />
computer.<br />
15
Transferring MP3, WMA files<br />
TIP:<br />
– In Window Explorer, you can simply drag-and-drop<br />
your selected music files to your player (Removable<br />
Disk). Or you can follow steps 1-4 below and use<br />
MUSICMATCH Jukebox to transfer your files.<br />
– During downloading/ uploading/ formatting, DO NOT<br />
disconnect RUSH until the device shows the READY<br />
display.<br />
1 Create/ open a music playlist.<br />
2 Click File y Send to Device y Download Playlist to Mass Storage.<br />
Your songs will automatically appear in the Files to Download window.<br />
3 Select tracks to be downloaded from the list.<br />
4 Click Download.<br />
5 After tracks have been transferred to the device, click Done to exit. Check your<br />
download status from the track progress bar.<br />
16
Transferring RUSH VOICE files<br />
TIP:<br />
– Only voice recordings created by RUSH in .WAV format will be recognized by the<br />
device for playback.<br />
– You should also only use Windows Explorer for uploading and downloading to<br />
manage your VOICE files.<br />
y To make voice recordings , please read VOICE pages 32-33.<br />
Uploading<br />
1 In Windows Explorer, select the files you want to transfer from your RUSH<br />
player.<br />
17
Transferring RUSH VOICE files<br />
2 Drag and drop from the RUSH folder window (right)<br />
to your computer’s folder named VOICE (left-hand<br />
side window).<br />
y RUSH device display: READING during transfer.<br />
Downloading<br />
1 In Windows Explorer, select the RUSH VOICE files you want to transfer from<br />
your computer.<br />
2 Drag and drop from your computer's folder named VOICE (left-hand side window)<br />
to the RUSH folder window (right).<br />
TIP:<br />
– The RUSH voice .WAV files can be played on any .WAV supported computer<br />
playback software.<br />
18
Deleting files, upgrading<br />
Deleting files from RUSH<br />
You can delete files in 3 ways :<br />
• by using Windows Explorer to manage your files.<br />
• directly from the player itself (see page 25, Deleting tracks).<br />
• To clear all tracks from the device memory, click from your PC task bar:<br />
Start yPrograms y <strong>Philips</strong> RUSH <strong>Audio</strong> player y Format.<br />
Upgrading your device<br />
Visit hhtp://www.audio.philips.com/rush for more information and software<br />
upgrades.<br />
19
Switching ON / OFF<br />
Switching On<br />
This device plays from the last function selected before you switched off.<br />
• Press and hold 2; OK for ~2 seconds.<br />
y Display: RUSH splash screen.<br />
y Plays from the last function selected before you switched the device off.<br />
Switching Off<br />
• Press and hold 2; OK until the power down<br />
status bar is complete.<br />
y Display: shows Continue Holding To<br />
Power Off, and the status bar<br />
before switching off.<br />
TIP:<br />
If you have trouble switching off, first make sure:<br />
• the button lock feature is deactivated<br />
• the device is in playback mode (and NOT in any MENU option display)<br />
20<br />
The device starts to play according to the device’s status:<br />
y No files! is shown if no files on RUSH or in the memory card.<br />
y If in MUSIC/ VOICE mode and files are available, playback automatically<br />
starts from the first track/ beginning of the last track played.<br />
y
Selecting function / menus<br />
Power-saving standby mode<br />
The device automatically switches off if no keys are pressed within 60 seconds after<br />
pause is activated.<br />
Selecting function<br />
1 During playback, press and hold MODE for<br />
~1 second.<br />
y Display: changes color and briefly shows the<br />
function screen.<br />
2 Repeat step 1 to select your function.<br />
Navigating main & submenu options<br />
1 During playback, press ••• (right-hand side, MENU soft key).<br />
y Display: shows list of options under the menu.<br />
2 Press 3/4 to scroll and view the list of options.<br />
3 Press 2; OK to select your option.<br />
y Display: shows your selected function<br />
highlighted. E.g. EQ<br />
4 Press 3/4 and 2; OK to scroll and select your<br />
submenu option.<br />
5 Press ••• (left-hand side, BACK soft key) once or more to exit the menu<br />
display. Or allow several seconds for time out to return to the previous playback<br />
display.<br />
21
Volume, display icons<br />
Adjusting volume<br />
• During playback, press – VOLUME + left/ right to<br />
decrease/ increase the volume.<br />
y Display: briefly shows the volume bar and the<br />
volume level.<br />
Some display icons<br />
3/4 More titles/ menu options stored. Scroll through to view the rest.<br />
Music mode<br />
Voice mode<br />
Tuner mode<br />
Playlist active<br />
Rpt 1 repeats the current track/ file continuously<br />
Rpt All repeats all tracks/ files continuously<br />
Shuffle plays tracks in random order<br />
Custom mode to fine tune music mode frequencies<br />
Button lock activated<br />
Insert your headphones. FM tuner mode selected for the first time<br />
Special features<br />
Depending on your function, you can adjust a variety of settings.<br />
Function Adjustable SETTING menus<br />
MUSIC Playmode, EQ, Memory, Favorite, Delete, Backlight<br />
VOICE Playmode, Quality, Memory, Delete, Backlight,<br />
TUNER Preset Stn, Auto tune, Backlight<br />
22
Interactive backlight<br />
The device has 3 different backlight colors for each<br />
function. The backlight lights up briefly when you press<br />
a control. If you like, switch the backlight On/ Off:<br />
green (FM tuner), orange (Music), red (Voice)<br />
1 During playback, use the ••• (right-hand side,<br />
MENU soft key), 3/4 and 2; OK controls to<br />
scroll and select SETTING y BACKLIGHT<br />
y ON/ OFF.<br />
Backlight, , accessories<br />
2 Press ••• (left-hand side, BACK soft key) once or more to exit the menu screen.<br />
Button lock<br />
The button lock prevents controls from being accidentally pressed.<br />
• During playback, press and hold ••• (right-hand side<br />
y Display shows:<br />
) for ~2 seconds.<br />
• To deactivate, press and hold ••• (right-hand side) again until disappears.<br />
Using the armband & neck strap (see page 4)<br />
Armband<br />
Wear RUSH during sport activity by securing it to the supplied armband.<br />
1 Fit the device into the rubber buckle A, with the headphone jack aligned to the<br />
jack hole.<br />
2 Position the armband round your arm. Thread the strap B and fasten up for a<br />
snug fit.<br />
Neck Strap<br />
1 Thread the neck strap A through the ring B.<br />
2 Buckle up C.<br />
23
Play, Pause, Search (MUSIC & VOICE only)<br />
Playing and Pausing Music/ Voice Files<br />
1 During playback, use the MODE button to select<br />
your function.<br />
2 Press 2; OK to pause playback.<br />
y Display: shows the elapsed playtime flashing<br />
and filename stops scrolling.<br />
3 Press 2; OK again to resume playback.<br />
TIP:<br />
To play MP3 files, you need to download MP3 songs to the device first.<br />
First time installation<br />
Make sure the plug-ins are completely installed before you connect the device to your<br />
computer.<br />
Selecting a different track<br />
• To select the previous/ next track: press 3/4 briefly once or more.<br />
Fast searching within a track<br />
• During playback, press and hold 3/4. Watch the track time to find the desired<br />
point in the track and then release.<br />
24
Delete tracks, playmode (MUSIC & VOICE only)<br />
Delete tracks<br />
The Delete option allows you to delete tracks individually.<br />
1 Use 3/4 to scroll through and find the track for deletion.<br />
2 Use the ••• (right-hand side), 3/4 and 2; OK<br />
controls to scroll and select MENU y SETTING<br />
y Delete y Track.<br />
3 Press 2; OK to confirm.<br />
TIP:<br />
If you don’t want to delete, press ••• (left-hand side) to select BACK.<br />
Different playback modes: Playmode<br />
Use the •••/•••, 3/4 and 2; OK controls to scroll and select MENU y<br />
SETTING y Playmode.<br />
y Submenu shows Rpt 1 / Rpt All / Shuffle.<br />
The respective icon is shown when you confirm a<br />
selection:<br />
Rpt 1 repeats current track continuously.<br />
Rpt All repeats all tracks stored in the selected<br />
mode continuously.<br />
Shuffle plays tracks in random order.<br />
TIP:<br />
This device is default to playback MUSIC and VOICE files in repeat all order.<br />
BACK<br />
25
26<br />
Memory (MUSIC & VOICE only)<br />
Memory size<br />
The number of music and voice files depend on the available memory and size of files.<br />
– With short file names more files will be supported.<br />
– This device has a built-in 64 or 128MB (Unit) memory space. Full memory<br />
capacity may not be available as some memory will be reserved for the device.<br />
Use a MMC/ SD external memory card (Card) to expand the memory size.<br />
By default, RUSH plays on a continuous mode: Both mem internal followed<br />
by external memory.<br />
Using and formatting new cards for RUSH<br />
1 Insert your card in the RUSH CARD INSERT slot.<br />
2 Connect RUSH to your PC using the supplied USB cable.<br />
3 Click Start y Program y <strong>Philips</strong> RUSH <strong>Audio</strong> <strong>Player</strong> y Format.<br />
4 Choose the correct drive and click Start.<br />
Selecting memory options<br />
1 To select the Memory menu, use the ••• (righthand<br />
side, MENU soft key), 3/4 and 2; OK<br />
controls to select Info or Mode.<br />
• To view the free memory capacity details (Int Free<br />
= internal memory and Ext Free external memory,)<br />
select Info.<br />
• To select memory playback mode, select either Mode y Both mem (to<br />
operate on internal + memory card ) or Card only (to operate on memory card<br />
only indicated by ).<br />
2 Press ••• (left-hand side, BACK soft key) to exit the menu screen.<br />
TIP:<br />
– No music or voice playback is possible and the display shows No Files! if no card<br />
is available and you have selected Card only. Please select Both mem from<br />
the Memory menu again to enable the device for playback.<br />
– The Musicmatch software will automatically create separate drives for the<br />
respective internal and external memory.
Equalizer sound options<br />
1 During playback, press ••• (right-hand side,<br />
MENU soft key).<br />
y Display: shows SETTING menu and the<br />
submenu options.<br />
2 Press 3/4 to scroll to EQ.<br />
Equalizer (MUSIC & VOICE only)<br />
3 Press 2; OK to confirm and enter the EQ menu.<br />
y Display: shows the current sound icon and setting highlighted. E.g.<br />
Classical<br />
4 Use 3/4 to scroll through the 8 possible options. ◆ Normal, Rock,<br />
Pop, Jazz, Classical, Bass1, Bass 2, Custom,<br />
◆ Normal...<br />
5 Press 2; OK to select the desired sound option.<br />
6 Press ••• (left-hand side, BACK soft key) to exit the menu screen.<br />
7 You can also create your own sound with the Custom option (see next chapter).<br />
TIP:<br />
– An EQ icon is only shown if you have selected the<br />
option in the EQ menu during playback.<br />
– No icon is shown during playback at the top of the<br />
display if you have selected Normal.<br />
Current/ selected setting<br />
27
Custom, Favorite (MUSIC mode only)<br />
Custom: adjustable, personal sound<br />
options<br />
If you have selected Custom, the display shows a set of<br />
4 frequency bars which can be adjusted to provide a<br />
personal setting.<br />
1 Use the ••• (right-hand side, NEXT soft key) and<br />
2; OK controls to scroll and select the frequency:<br />
B (BASS), M (MID), H (HIGH) or T (TREBLE).<br />
2 Use the 3/4 controls to adjust the sound level.<br />
3 Press 2; OK to confirm.<br />
4 Press ••• (left-hand side, BACK soft key) to exit<br />
the menu screen.<br />
Favorite<br />
The Favorite menu option allows you to create up to 10 favorite track/file entries<br />
in the device memory for music playback. You can add tracks, numbered from 01-10,<br />
to Favorite at different times. You can also switch to normal playback (Off) or switch<br />
off the device, without deleting the list.<br />
• Use the ••• (right-hand side), 3/4 and 2; OK controls to scroll and select<br />
MENU y SETTING y Favorite.<br />
y shows 3 submenus On/ Off, View list and Remove list.<br />
Check out the submenu options as follows:<br />
Selecting On<br />
Favorite List activated<br />
This activates playback of the tracks already saved<br />
under the Favorite list only.<br />
• Use the •••(right-hand side), 3/4 and 2; OK<br />
controls to scroll and select Favorite y On/Off<br />
y On.<br />
y appears in top right hand side of the<br />
display, and your track numbers are indicated<br />
by Fxx (Favorite) instead of Txx (Favorite mode switched off).<br />
28
Selecting Off and saving tracks<br />
In the Favorite Off mode, you can save and add further<br />
favorite tracks.<br />
1 During playback, use the ••• (right-hand side),<br />
3/4 and 2; OK controls to scroll and select<br />
Favorite y On/Off y Off.<br />
2 Press ••• (left-hand side) if you want to add the<br />
current track into the Favorite (program) list.<br />
Selecting ‘View list’<br />
This allows you to view your programmed tracks status.<br />
• Use the ••• (right-hand side), 3/4 and 2; OK<br />
controls to scroll and select MENU y<br />
SETTING y Favorite y View list.<br />
y Details of programmed tracks appear. Use<br />
3/4 to scroll through the list.<br />
y No files! appears if no tracks were<br />
previously saved as a favorite.<br />
Favorite (MUSIC mode only)<br />
Favorite switched on:<br />
track saved as a Favorite<br />
Favorite switched off:<br />
track not saved as a<br />
Favorite<br />
‘Remove list’: How to erase FAVORITE<br />
In the Favorite Off mode, Remove list allows you to erase your programmed track<br />
list completely.<br />
1 Use the ••• (right-hand side), 3/4 and 2; OK controls to scroll and select<br />
MENU y SETTING y Favorite y Remove list y REMOVE<br />
LIST?<br />
2 Press 2; OK to confirm erasing.<br />
y Display shows: LIST REMOVED!<br />
TIP:<br />
– Favorite programmed entries cannot be erased by removing the battery from the<br />
device.<br />
– No files! appears if no tracks were previously saved as a Favorite.<br />
– appears if you attempt to select Remove list in Favorite On mode.<br />
29
Tuner<br />
RUSH stores up to 10 FM preset stations. There are 3<br />
menu settings available:<br />
• Preset Stn (see Preset stations chapter,<br />
page 31)<br />
• Auto tune (see Auto tuning chapter)<br />
• Backlight (see Interactive Backlight chapter,<br />
page 23)<br />
Auto tuning<br />
This setting automatically tunes and stores up to 10 FM<br />
tuner stations, depending on the strength of radio<br />
signals in your area.<br />
• Use the •••/••• and 2; OK controls to scroll<br />
and select Auto Tune.<br />
y During automatic tuning, the display shows:<br />
AUTO TUNING... before it shows the<br />
station’s details and location briefly.<br />
y One by one, your presets are stored in this<br />
way in the RUSH memory as preset stations,<br />
P01- P10.<br />
y If a stereo signal is detected, display shows<br />
Stereo.<br />
y The radio automatically plays the first preset<br />
station stored.<br />
TIP:<br />
• If the display shows PLUG IN p, insert your headphones, if you haven’t already<br />
done so! Your headphone cord functions as the FM aerial.<br />
30
Manually tuning and storing presets<br />
1 Press and hold 3/4 for more than 1 second to<br />
auto search from 87.5MHz or 108MHz respectively.<br />
y Display shows: Searching... until a station<br />
signal is detected.<br />
• If necessary, press 3/4 repeatedly and briefly to<br />
fine tune to your desired station.<br />
y If a stereo signal is detected, display shows<br />
STEREO.<br />
2 Use the ••• (right-hand side), 3/4 and 2; OK<br />
controls to scroll and select SETTING y<br />
Preset Stn.<br />
y A preset station number, P01-10 blinks.<br />
3 While the preset blinks, press ••• (right-hand<br />
side, preset station STN soft key) once or more to<br />
select a preset station location, P01-10.<br />
4 Press 2; OK to confirm/ overwrite a current preset.<br />
Selecting presets<br />
• When listening to the radio, press ••• (left-hand<br />
side STN soft key) once or more until you find your<br />
desired preset.<br />
TIP:<br />
If a preset station is empty, your earphones will be<br />
muted.<br />
Tuner<br />
31
VOICE Recording<br />
– Useful for recording lectures and important discussions.<br />
– Maximum Voice recording time: approximately 4 hours if using all the built-in<br />
memory on Low sound quality recording setting.<br />
Preparation for VOICE recording quality<br />
1 In the VOICE mode, use the •••/••• and 2;<br />
OK controls to scroll and select MENU y<br />
SETTING y QUALITY.<br />
2 In the QUALITY menu, use the 3/4 and 2; OK<br />
controls to scroll and select the desired quality:<br />
High, Medium or Low (32K, 16K or 8kHz<br />
sampling rate respectively).<br />
TIP:<br />
– Default setting: Low (8kHz sampling rate) allows maximum recording time.<br />
Adjust the sound quality if you like.<br />
– For extra recording time use a memory card combined with the RUSH built-in<br />
memory.<br />
Recording<br />
Once you have set your desired recording quality, you<br />
can enter the recording mode instantly.<br />
1 In VOICE function, press and hold ••• (lefthand<br />
side REC soft key) to start recording.<br />
y Recording starts immediately and the display<br />
shows the recording details.<br />
32<br />
Medium
Elapsed recording time<br />
◆ flashes during recording,<br />
next to the remaining total<br />
available recording time left<br />
Deleting VOICE files<br />
2 To stop recording, press ••• (left-hand side) STOP soft key.<br />
y RUSH changes to the VOICE function in the pause position. Display shows<br />
the last recorded message.<br />
TIP:<br />
– During pause, if REC is not pressed again within 60s, the recording function<br />
automatically ends.<br />
– Memory full! When memory becomes full during voice recording. Recording will<br />
also stop.<br />
Deleting VOICE files<br />
The Delete option allows you to delete individual voice files.<br />
1 In the VOICE pause position, use the •••<br />
(right-hand side), 3/4 and 2; OK controls to<br />
scroll and select MENU y SETTING y<br />
Delete y Track.<br />
2 Use 3/4 to scroll through and find the track for<br />
deletion.<br />
3 Press 2; OK to confirm.<br />
y Display shows the deleting status: Voice file<br />
details and Deleted!<br />
y If no files available: No files!<br />
Voice track number scrolls during<br />
recording and playback of .WAV file<br />
STOP soft key<br />
BACK<br />
TIP:<br />
If you don’t want to delete, press ••• (left-hand side) to select BACK.<br />
33
Troubleshooting<br />
If a fault occurs, first check the points listed below before taking the set for repair.<br />
If you are unable to remedy a problem by following these hints, consult your dealer or<br />
service center.<br />
For further help, please also check out the RUSH FAQ list at<br />
hhtp://www.audio.philips.com/rush<br />
WARNING: Do not open the set as there is a risk of electric shock! Under no<br />
circumstances should you try to repair the set yourself, as this will<br />
invalidate the warranty.<br />
My RUSH has no power, or nothing is shown in the display.<br />
What's wrong?<br />
– Battery weak/ incorrectly inserted.<br />
• Correctly insert fresh battery.<br />
– Joy pad pressed too quickly.<br />
• Press and hold 2; OK until display turns on.<br />
– Headphones not properly connected.<br />
• Insert headphone plug into jack completely.<br />
– Corrupted file/ track.<br />
• Clear all tracks from the device memory. Click from your PC task bar:<br />
Start y Programs y <strong>Philips</strong> RUSH <strong>Audio</strong> player y Format.<br />
– If there is still no response from the above tips, the Flash memory may have been<br />
corrupted.<br />
• Please check out the following steps to recover your player.<br />
1 Restart your computer.<br />
2 Remove the battery from the battery compartment of RUSH.<br />
3 Connect RUSH to your PC.<br />
4 Press and hold the 2; key while inserting a fresh battery into RUSH.<br />
5 Continue holding 2; for another 5 seconds.<br />
6 RUSH enters recovery mode. On your PC task tray, click Start y Programs<br />
y Start <strong>Philips</strong> RUSH <strong>Audio</strong> <strong>Player</strong>y Recovery.<br />
7 A Recovery screen will pop up. Uncheck the Quick download box. Click Start<br />
to recover the player.<br />
• The recovery application is now correcting your player. Please take care not<br />
to interrupt or unplug RUSH from computer when the recovering is in<br />
progress.<br />
34
Troubleshooting<br />
8 Once the recovery process is complete, click on the Unplug or Eject Hardware<br />
removal icon on your PC task tray. When you reach the message: The 'USB<br />
Mass Storage device' can now be safely removed from the system, click<br />
OK.<br />
• For Windows 98 users, there is no removal icon. Instead, please check your<br />
RUSH shows the READY display, before you unplug RUSH.<br />
9 Unplug and reconnect again. RUSH should now be able to resume operation.<br />
TIP:<br />
– To avoid this problem in future, please avoid unplugging RUSH during installation<br />
and always use a fresh battery when connecting RUSH to your PC.<br />
Malfunction. No reaction to controls and/ or display shows<br />
– Button lock activated.<br />
Switch off .<br />
– Electrostatic discharge.<br />
• Remove battery and replace after several seconds.<br />
Sound skips during playback on RUSH<br />
– MP3 file made at compression level exceeding 320Kbps<br />
• Use a lower compression level to record your file into MP3 format.<br />
USB does not connect/function<br />
– You are using an unsuitable USB cable<br />
• Use the supplied USB cable only.<br />
– Cable connections incorrect/ loose.<br />
• Check all connections are correct and well inserted on the RUSH player and<br />
your computer.<br />
– USB driver not installed.<br />
• see page 10-13, Software Installation.<br />
35
Troubleshooting<br />
Unable to download MP3 file<br />
– Battery low and/ or connection between the set and computer is loose.<br />
• Check battery status and USB cable connection.<br />
– Electrostatic discharge.<br />
• Remove battery and replace after several seconds.<br />
Set skips/ repeats files<br />
– Shuffle or repeat mode is active.<br />
• This device is default to playback VOICE & MUSIC files in repeat all<br />
order<br />
Cannot play FAVORITE program list<br />
– FAVORITE option switched off.<br />
• Use the ••• (right-hand side), 3/4 and 2; OK controls to scroll and<br />
select MENU y SETTING y Favorite y On/Off y On.<br />
Environmental information<br />
All redundant packing material has been omitted. We have done our utmost to make<br />
the packaging easily separable into two materials: cardboard (box) and polyethylene<br />
(bags, protective foam sheet).<br />
Your set consists of materials which can be recycled if disassembled by a<br />
specialized company. Please observe the local regulations regarding the<br />
disposal of packing materials, dead batteries and old equipment.<br />
36
Amplifier system<br />
<strong>Audio</strong> out 2 x 5mW<br />
S/N ratio >80dB<br />
Frequency response 20Hz - 20KHz<br />
Connections<br />
I/O Interface 5 pin mini USB connector.<br />
Memory capacity<br />
built-in (SA220) 64 MB *<br />
built-in (SA230) 128 MB *<br />
* full memory capacity may not be available as some memory will be reserved for the device.<br />
Supported format<br />
mp3 8kbps-320kbps<br />
WMA 5kbps-160kbps<br />
multi-format support yes<br />
codec upgradable yes<br />
Display<br />
2 row icon and 2 row 12 character text display.<br />
Backlight:<br />
green (FM TUNER), orange (MUSIC), red (VOICE)<br />
Technical data<br />
Voice recording system<br />
Mic sensitivity<br />
Max. Voice recording time: up to 4 hours if using all the built-in memory.<br />
For extra recording time use the MMC/ SD combined with the built-in memory.<br />
37
Technical data<br />
MUSIC mode Equalizer<br />
Adjustable: Custom<br />
6 presets: ◆ Normal,<br />
Bass2<br />
Rock, Pop, Jazz, Classical, Bass1,<br />
Power supply<br />
Battery 1 x AAA, LR03 or UM4<br />
General<br />
Dimensions 55mm x 76mm x 21mm<br />
Weight 50g (without battery)<br />
Battery playtime<br />
9 hours using AAA alkaline<br />
Windows and Windows Media <strong>Audio</strong> are registered trademarks of Microsoft Corporation<br />
Pentium is a registered trademark of Intel Corporation.<br />
Acrobat Reader is a registered trademark of Adobe Corporation.<br />
Internet Explorer is a registered trademark of Microsoft Corporation.<br />
Netscape Navigator is a registered trademark of Netscape Corporation.<br />
All rights reserved. All trade names referenced are the service mark, trademark or registered trademarks of their<br />
respective manufacturers.<br />
38
Meet <strong>Philips</strong> at the Internet<br />
http://www.audio.philips.com<br />
WSA220<br />
SA230<br />
SA235<br />
SA238<br />
lkw0326/hk



![03_[DE] - Philips](https://img.yumpu.com/25100096/1/184x260/03-de-philips.jpg?quality=85)
