Auto Bottle Attachment Vaccinator MODEL 08 - NJ Phillips
Auto Bottle Attachment Vaccinator MODEL 08 - NJ Phillips
Auto Bottle Attachment Vaccinator MODEL 08 - NJ Phillips
You also want an ePaper? Increase the reach of your titles
YUMPU automatically turns print PDFs into web optimized ePapers that Google loves.
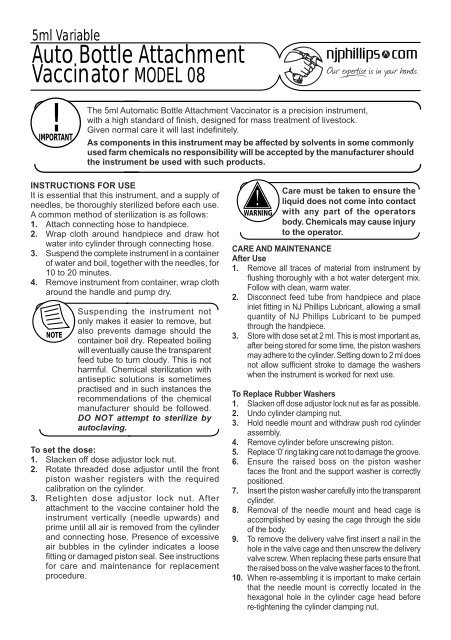
5ml Variable<br />
<strong>Auto</strong> <strong>Bottle</strong> <strong>Attachment</strong><br />
<strong>Vaccinator</strong> <strong>MODEL</strong> <strong>08</strong><br />
! IMPORTANT<br />
INSTRUCTIONS FOR USE<br />
It is essential that this instrument, and a supply of<br />
needles, be thoroughly sterilized before each use.<br />
A common method of sterilization is as follows:<br />
1. Attach connecting hose to handpiece.<br />
2. Wrap cloth around handpiece and draw hot<br />
water into cylinder through connecting hose.<br />
3. Suspend the complete instrument in a container<br />
of water and boil, together with the needles, for<br />
10 to 20 minutes.<br />
4. Remove instrument from container, wrap cloth<br />
around the handle and pump dry.<br />
NOTE<br />
The 5ml <strong>Auto</strong>matic <strong>Bottle</strong> <strong>Attachment</strong> <strong>Vaccinator</strong> is a precision instrument,<br />
with a high standard of fi nish, designed for mass treatment of livestock.<br />
Given normal care it will last indefi nitely.<br />
As components in this instrument may be affected by solvents in some commonly<br />
used farm chemicals no responsibility will be accepted by the manufacturer should<br />
the instrument be used with such products.<br />
Suspending the instrument not<br />
only makes it easier to remove, but<br />
also prevents damage should the<br />
container boil dry. Repeated boiling<br />
will eventually cause the transparent<br />
feed tube to turn cloudy. This is not<br />
harmful. Chemical sterilization with<br />
antiseptic solutions is sometimes<br />
practised and in such instances the<br />
recommendations of the chemical<br />
manufacturer should be followed.<br />
DO NOT attempt to sterilize by<br />
autoclaving.<br />
To set the dose:<br />
1. Slacken off dose adjustor lock nut.<br />
2. Rotate threaded dose adjustor until the front<br />
piston washer registers with the required<br />
calibration on the cylinder.<br />
3. Retighten dose adjustor lock nut. After<br />
attachment to the vaccine container hold the<br />
instrument vertically (needle upwards) and<br />
prime until all air is removed from the cylinder<br />
and connecting hose. Presence of excessive<br />
air bubbles in the cylinder indicates a loose<br />
fi tting or damaged piston seal. See instructions<br />
for care and maintenance for replacement<br />
procedure.<br />
!<br />
WARNING<br />
Care must be taken to ensure the<br />
liquid does not come into contact<br />
with any part of the operators<br />
body. Chemicals may cause injury<br />
to the operator.<br />
CARE AND MAINTENANCE<br />
After Use<br />
1. Remove all traces of material from instrument by<br />
fl ushing thoroughly with a hot water detergent mix.<br />
Follow with clean, warm water.<br />
2. Disconnect feed tube from handpiece and place<br />
inlet fi tting in <strong>NJ</strong> <strong>Phillips</strong> Lubricant, allowing a small<br />
quantity of <strong>NJ</strong> <strong>Phillips</strong> Lubricant to be pumped<br />
through the handpiece.<br />
3. Store with dose set at 2 ml. This is most important as,<br />
after being stored for some time, the piston washers<br />
may adhere to the cylinder. Setting down to 2 ml does<br />
not allow suffi cient stroke to damage the washers<br />
when the instrument is worked for next use.<br />
To Replace Rubber Washers<br />
1. Slacken off dose adjustor lock nut as far as possible.<br />
2. Undo cylinder clamping nut.<br />
3. Hold needle mount and withdraw push rod cylinder<br />
assembly.<br />
4. Remove cylinder before unscrewing piston.<br />
5. Replace ‘0’ ring taking care not to damage the groove.<br />
6. Ensure the raised boss on the piston washer<br />
faces the front and the support washer is correctly<br />
positioned.<br />
7. Insert the piston washer carefully into the transparent<br />
cylinder.<br />
8. Removal of the needle mount and head cage is<br />
accomplished by easing the cage through the side<br />
of the body.<br />
9. To remove the delivery valve fi rst insert a nail in the<br />
hole in the valve cage and then unscrew the delivery<br />
valve screw. When replacing these parts ensure that<br />
the raised boss on the valve washer faces to the front.<br />
10. When re-assembling it is important to make certain<br />
that the needle mount is correctly located in the<br />
hexagonal hole in the cylinder cage head before<br />
re-tightening the cylinder clamping nut.
CARE AND MAINTENANCE continued<br />
Lubricating Instructions<br />
If this instrument becomes sluggish in operation,<br />
lubrication is probably required behind the piston.<br />
1. Unscrew the dose adjustor until it can be pulled<br />
back against the spring and clear of the body.<br />
2. Lubricate the cylinder with four or fi ve drops of<br />
<strong>NJ</strong> <strong>Phillips</strong> Lubricant.<br />
3. Screw back the dose adjustor to the required<br />
dose.<br />
1<br />
29<br />
30<br />
LEGEND:<br />
1. Needle Nut<br />
2. Needle Mount<br />
3. Delivery Valve Spring<br />
4. Valve & Seal Ring<br />
5. Needle Mount Seal Ring<br />
6. Delivery Cage Assembly<br />
7. Inlet Valve Spring<br />
8. Valve & Seal Ring<br />
9. Inlet Adaptor Seal Ring<br />
10. Air Valve<br />
11. Inlet Adaptor<br />
12. <strong>Bottle</strong> Seal Washer<br />
13. Delivery Cage Seal Ring<br />
14. Cylinder Cover<br />
15. Finger Grip<br />
16. Barrel Lock Ring<br />
31<br />
2 3 4 5<br />
32<br />
21<br />
6<br />
22<br />
23<br />
11<br />
9<br />
8<br />
7<br />
13<br />
24<br />
12<br />
10<br />
15<br />
14 16 17 18 19 20<br />
25 26<br />
17. Head Seal Fitting<br />
18. Head Seal Washer<br />
19. Cylinder Seal Ring<br />
20. Cylinder<br />
21. Piston<br />
22. Piston Seal Ring<br />
23. Cylinder Lock Nut<br />
24. Dose Adjustor Lock Nut<br />
PLEASE ORDER BY KIT AND PART NAME.<br />
SPARE PARTS AVAILABLE:<br />
KIT No. PART NAME INCLUDES ILLUSTRATION No.<br />
WX764 Major Service Kit 3,4,5,7,8,9,13,19,20,22,26.<br />
WX1059 Minor Service Kit 3,4,5,7,8,9,13,19,22,26.<br />
WX1402 Conversion Kit 32. (Illustrated but not supplied.)<br />
!<br />
IMPORTANT<br />
<strong>NJ</strong> PHILLIPS PTY LTD ABN 36 000 <strong>08</strong>2 002<br />
ADDRESS: LOCKED BAG 8, GOSFORD, NSW 2250 AUSTRALIA<br />
TELEPHONE: +61 2 4340 2044 FAX: +61 2 4340 1991<br />
EMAIL: njp1@njphillips.com.au MADE IN AUSTRALIA<br />
If this instrument becomes sluggish during<br />
use, lubricate both in front of and behind<br />
the piston with <strong>NJ</strong> <strong>Phillips</strong> Lubricant.<br />
27<br />
28<br />
25. Dose Adjustor<br />
26. Return Spring<br />
27. Spring Cover Plate<br />
28. Push Rod Assembly<br />
29. <strong>Bottle</strong> Locking Seat Fitting<br />
30. <strong>Bottle</strong> Locking Ring<br />
31. Needle protector Cover<br />
32. Conversion Kit<br />
AS OUR POLICY IS ONE OF CONTINUOUS IMPROVEMENT THE MANUFACTURER RESERVES THE RIGHT TO ALTER THESE SPECIFICATIONS AT ANY TIME.<br />
ALL PRODUCTS PRODUCED BY <strong>NJ</strong> PHILLIPS PTY LIMITED, ARE IDENTIFIED BY A UNIQUE BATCH NUMBER. THIS IDENTIFICATION NUMBER IS AFFIXED<br />
TO THE PRODUCT TO ALLOW TRACEABILITY BY THE MANUFACTURER AND MUST NOT BE REMOVED IF PRODUCT INTEGRITY IS TO BE MAINTAINED.<br />
EAS1121 | QL730-R1


