Straka Chuck - Alan Lacer Woodturning
Straka Chuck - Alan Lacer Woodturning
Straka Chuck - Alan Lacer Woodturning

You also want an ePaper? Increase the reach of your titles
YUMPU automatically turns print PDFs into web optimized ePapers that Google loves.
woodturning is your relaxation, your passion, your art,<br />
the American Association of Woodturners is for you.<br />
JOINIf<br />
Spindle Turning • Avoid Catches • Sharpening Demystified • Closed Pen<br />
7 252 74 882 47 2<br />
California<br />
Contours Page 18<br />
14 ><br />
$7.50<br />
Button Up<br />
Page 40<br />
The Journal of the American Association of Woodturners<br />
Winter 2006 Vol. 21, No. 4 woodturner.org<br />
AAW’s<br />
Permanent<br />
Collection<br />
Page 24<br />
Salt & Pepper Shakers • Footed Bowl • Pro Sanding Shortcuts • Turning Pods<br />
Show Your Colors<br />
Page 30<br />
7 252 74 882 47 2<br />
11 ><br />
$7.50<br />
The Journal of the American Association of Woodturners<br />
Spring 2007 Vol. 22, No. 1 woodturner.org<br />
Western<br />
Turn on<br />
Japanese<br />
Bowls<br />
Page 20<br />
Ornamental<br />
Turning<br />
page 40<br />
Stool School • Design Within Limits • Off-Center Platter • Classy Coasters<br />
Small<br />
Treasures<br />
Page 40<br />
Twisted<br />
Possibilities<br />
Page 18<br />
membership benefi ts<br />
american woodturner<br />
offi cial quarterly journal of the aaw<br />
B New one-of-a-kind projects<br />
B Big, beautiful color photos throughout<br />
B Time- and money-saving shop tips and techniques<br />
B Step-by-step instructions with helpful how-to diagrams<br />
B Calendar of events, seminars, and exhibitions<br />
B Inspiration and insider secrets<br />
The Journal of the American Association of Woodturners<br />
Summer 2007 Vol. 22, No. 2 woodturner.org<br />
aaw resource directory<br />
With over 250 pages, the directory is jam-packed with complete contact information<br />
of AAW members, local chapters by state, turning resources, demonstrators, books,<br />
DVDs, videos—everything you need to be a successful turner and have more fun!<br />
savings<br />
Discounts on AAW books, videos, DVDs, and logo merchandise.<br />
expert advice<br />
Turning<br />
Green<br />
Page 1<br />
Looking for expert help in improving your skills? Many of our members<br />
get great advice when they participate in local woodturning chapters.<br />
There are now more than 270 chapters across the United States and<br />
Canada. Most meet on a monthly basis. The members-only portion of<br />
the AAW website provides more helpful information.<br />
insurance<br />
B Free bodily injury liability insurance for all members<br />
involved in AAW activities<br />
B Commercial and personal liability insurance available<br />
for professional woodturners<br />
Check out our official website!<br />
woodturner.org<br />
Click on the link for membership information or call 651-484-9094<br />
Multi-Axis Turning • Squirt Pods • Icicle From the Sea • Twisted Pepper Mill<br />
7 252 74 882 47 2<br />
13 ><br />
$7.50<br />
The Journal of the American Association of Woodturners<br />
Fall 2007 Vol. 22, No. 3 woodturner.org<br />
Portland<br />
Highlights<br />
Page 18<br />
Tribute to<br />
Frank Sudol Page 9<br />
resource<br />
directory<br />
2007<br />
American Association of Woodturners
Reprinted with permission.<br />
American Association of Woodturners<br />
The<br />
<strong>Straka</strong> <strong>Chuck</strong><br />
By <strong>Alan</strong> <strong>Lacer</strong><br />
In <strong>Woodturning</strong>, a little-known<br />
book published in 1970, author<br />
Eldon Rebhorn included a fuzzy<br />
photo of a chucking system used to<br />
complete the bottom of bowls. With<br />
scarce instruction for construction<br />
or the fine points of adjusting and<br />
using this chuck, I doubt if many<br />
turners made use of that system.<br />
The woodturning community has<br />
Jack <strong>Straka</strong> to thank for taking<br />
Rebhorn’s basic idea and developing<br />
it into something far more useful. In<br />
honor of Jack’s development of a<br />
reversing chuck, I wish to refer to it<br />
as the <strong>Straka</strong> chuck.<br />
I first met Jack and his version of<br />
the chuck in the early 1980s. The<br />
chuck Jack had at that time was<br />
constructed of a redwood base and<br />
plywood rings to secure the bowl.<br />
The next time I saw Jack, his chuck<br />
had evolved with a thick aluminum<br />
base, but still with the plywood rings.<br />
This is something all bowl and<br />
vessel turners could use in the shop.<br />
Versatile and proven reverse-chucking<br />
Build the base<br />
The base is the essential foundation<br />
of the chuck and requires some<br />
care and accuracy in constructing. I<br />
prefer to use two pieces of 3/4"-thick<br />
high-quality veneer-core plywood,<br />
such as Baltic birch, glued together<br />
to make one thick piece. The size<br />
should be just slightly less than the<br />
maximum diameter of your lathe.<br />
Plan on dedicating a faceplate to<br />
the chuck, as mounting and<br />
remounting could affect its accuracy.<br />
Using yellow glue, clamp the<br />
two plywood pieces. Once dried,<br />
bandsaw the block roughly to round.<br />
Mount a high-quality faceplate<br />
with a minumum of six holes to the<br />
block using #12 sheet-metal screws<br />
that penetrate at least 1" into the base.<br />
Turn the block to round, working<br />
carefully with a bowl gouge from<br />
both faces to minimize chip-out<br />
(Photo 1). Fill any voids or major<br />
tears on the outside rim. Sand to<br />
220-grit.<br />
Lightly face off the front to create<br />
a flat surface. Using a backup board,<br />
sand the face to 120-grit.<br />
From the outside rim, cut shallow<br />
grooves into the face every 1/2" with<br />
the corner of a parting tool or the<br />
long point of a skew chisel (Photo 2).<br />
Remove the assembly (faceplate and<br />
base) from the lathe.<br />
With the grooved side up, divide<br />
the outer groove into three equal<br />
parts. This does not need to be a<br />
1<br />
Trim the glued up disc gently from both<br />
ends to create a cylinder. Sand it smoothly,<br />
being sure there are no sharp corners.<br />
50 American Woodturner Spring 2008
perfect division, but only an approximation.<br />
You can accomplish this by<br />
calculating the circumference (π ×<br />
radius × 2) and dividing that into<br />
thirds, by trial and error with a pair<br />
of dividers or a compass, or by using<br />
a 60-degree drafting triangle.<br />
Once the three points are identified,<br />
use a ruler to draw a straight<br />
line from each point to the center of<br />
the base. Now move to a drill press<br />
with the table squared to the bit.<br />
With a 21/64" bit (or use a 5/16" bradpoint<br />
bit and enlarge it with the 21/64"<br />
bit), drill through the three points<br />
in the outer grooves. To stabilize the<br />
drilling operation and reduce splitting,<br />
position two boards on either<br />
side of the faceplate (matching the<br />
thickness of the faceplate).<br />
Starting at the outermost holes<br />
and following along the lines to<br />
the center, drill a series of holes in<br />
every other groove. Stop 1" away<br />
from the faceplate.<br />
Identify one of the lines of holes<br />
as the key, to which the rings will<br />
always be oriented. You can indicate<br />
that set of holes with a simple<br />
colored mark at the top or put in a<br />
contrasting plug of wood near the<br />
outer rim (Photo 3). As an alternative,<br />
you can number each set of<br />
holes as “1, 2, and 3” so they will be<br />
positioned the same each time<br />
they’re mounted.<br />
Draw lines about every 1 2<br />
/2". Cut into these<br />
lines lightly with the long point of a skew or<br />
corner of a parting tool. Divide the disc into<br />
three equally spaced sectors.<br />
woodturner.org<br />
Build the rings<br />
These are the “clamps”<br />
of the chuck that hold<br />
the turned piece<br />
against the base. I<br />
use 1/4"- or 3/8"-thick<br />
Baltic birch plywood<br />
or any other good<br />
quality veneer-core<br />
plywood. (The thinner<br />
the plywood, the more<br />
flex you will have when<br />
clamping heavier work.) For larger<br />
diameter or deep bowls/vessels, you<br />
should construct the rings from<br />
1/2"- or 3/4"-thick material.<br />
You will want to cut several rings<br />
with different diameter openings<br />
and with different bolt-hole locations.<br />
For the first run of these rings, plan<br />
on making about six rings with<br />
these differing variables. In time,<br />
you will probably end up with a<br />
dozen or so of the rings to fit the<br />
sizes and styles of bowls you frequently<br />
turn.<br />
Construct a template for drilling<br />
the rings. Bandsaw to round a 1/4"thick<br />
piece of tempered hardboard<br />
or plywood (this need not be the<br />
best quality) the same diameter as<br />
the base (Photo 3). I tap a nail in the<br />
center of this disc to the center of the<br />
base; this will aid in securing the<br />
ring during the drilling step.<br />
Either at the drill press or with a<br />
handheld drill and a 21/64" bit, drill<br />
through the back of the base and<br />
through the template to reproduce<br />
the pattern of holes found on the<br />
base. Be sure to mark on the template<br />
the key set of holes and which<br />
side is out or away from the base.<br />
Cut at least six round discs from<br />
the 1/4"- or 3/8"-thick Baltic birch<br />
plywood. The outside diameter isn’t<br />
critical; center openings of 3", 5", 7",<br />
9", 11", and 13" make a good starter<br />
set of discs for a 16"-swing lathe.<br />
You will develop a variety of outside<br />
Wooden plug as key identifier Out<br />
3<br />
Create a disc from thin plywood or<br />
hardboard to become a drilling template<br />
for the rings and to protect the face of the<br />
base when cutting through the rings.<br />
In praise of<br />
reverse chucking<br />
The days are long past (and should never<br />
have been) when woodturners glued felt<br />
on the bottom of bowls, left screw holes in<br />
the bottom, or filled screw holes. Further,<br />
the holding system should not dictate<br />
diameters or shapes of the lower portion<br />
and base of our bowls/vessels.<br />
So for better craftsmanship and<br />
design you need to do some form of<br />
reverse 4 chucking.<br />
Look at it this way: We cannot turn faster<br />
or cheaper work than the production-made<br />
or cheap imports out there, but we can turn<br />
better work. Sometimes it is just a matter of<br />
attention to good design and details.<br />
The <strong>Straka</strong> chuck offers a number of<br />
advantages as a chucking system:<br />
• Relatively inexpensive to build (mostly<br />
one-time expenses)<br />
• An efficient way to remove all signs<br />
of mounting<br />
• Affords excellent access to the bottom of<br />
a bowl/vessel, which is important for refining<br />
the shape and undercutting or<br />
hollowing 5 a foot or base<br />
• Provides a wide range of design options<br />
for the bottom (foot, rounded bottom, sitting<br />
on details such as a bead, undercut rim<br />
to rest on, etc.)<br />
• Virtually impossible to knock the piece<br />
off the lathe<br />
• A vast improvement over Cole jaws and<br />
other chucks that grip the rim (less worry<br />
about cracking the rim by over-tightening).<br />
51
4 5<br />
6<br />
With a thin-kerf parting tool, cut through<br />
the ring. Remove the ring from the base and<br />
sand by hand any sharp or split edges of the<br />
center opening.<br />
diameters and interior diameters<br />
depending on your bowl or platter<br />
work. For starters, make two discs<br />
with the same outside diameter as the<br />
base, two about 20 percent smaller,<br />
and two about 30 percent smaller.<br />
To make a clamping ring, secure<br />
one of the discs to the template with<br />
a small brad (center to center). Drill<br />
through the template to produce at<br />
least one set of three bolt holes (all the<br />
same diameter), leaving at least 1" to<br />
the outside of the disc for rigidity.<br />
You may need to clamp together<br />
the two pieces to avoid any movement.<br />
As an alternative, once<br />
one hole is drilled, place one bolt<br />
through both pieces to keep your<br />
alignment. Be sure to mark on this<br />
disc which hole (or set of holes)<br />
aligns with the “key” and which is<br />
the outside of the ring. You can place<br />
two or three sets of these holes on a<br />
ring, which gives it more versatility<br />
with different-shaped bowls.<br />
Mount one of the discs to the base<br />
with the drilling template sandwiched<br />
between the disc and base. (The template<br />
protects the face of the base in a<br />
later step.) Use 5/16" bolts, washers, and<br />
wing nuts. The bolts should be just<br />
long enough to accept the wing nut on<br />
the backside of the chuck.<br />
Use a detail gouge or the long<br />
point of a skew to true up the<br />
outside edge of the ring. With a<br />
parting tool (a thin-kerf parting tool<br />
To pad a ring with clear plastic hosing, cut<br />
through the top of the natural curve of the<br />
hose. When cut like this, the natural spring<br />
of the hose will hold it inside the opening.<br />
works especially well), cut through<br />
the ring and into the drilling template<br />
at a determined diameter<br />
(Photo 4). If room allows, position<br />
the tailstock with center against the<br />
center of the plywood, which stops<br />
it from becoming a flying disc when<br />
you punch through. Go slow with<br />
the final cut.<br />
For the first run you may just want<br />
to make the openings in multiples of<br />
1", perhaps starting with a 4" opening.<br />
The size of the chuck and the size of<br />
the bowls you routinely turn will ultimately<br />
be deciding factors.<br />
Be sure and leave at least 1" of<br />
material from the opening to the<br />
drilled bolt holes in the ring. Do the<br />
same with the remaining rings by<br />
varying the hole size.<br />
Remove the ring from the chuck.<br />
Hand-sand the opening and the<br />
outer rim to eliminate sharp edges.<br />
There are several options for a<br />
pad in the inner opening. Two are a<br />
pliable strip of rubber glued at three<br />
points (usually between the bolt<br />
holes) and rubber tubing that is split<br />
open along its length and applied<br />
inside the opening. The strip of<br />
rubber can be anything from inner<br />
tube stock, to rubber gasket material,<br />
to 1/8" router mat material. (Each disc<br />
needs three pieces approximately<br />
1 1/2" wide by 3" in length.) For this<br />
example, I have used 3/8" and 1/2" ID<br />
clear plastic, soft tubing, and 3/8" ID<br />
latex rubber hose. The hose diameter<br />
will be larger if you use thicker<br />
plywood for the rings. The strips<br />
require gluing, while the plastic split<br />
hose usually stays put due to its own<br />
springiness. (I glue the latex hose in<br />
place). If you use plastic, cut along the<br />
top of its natural curve (Photo 5).<br />
Put the chuck to use<br />
With all of the parts constructed,<br />
you are ready to put a bowl into the<br />
chuck. The one big variable left is<br />
the height of your bowl. You will<br />
need to obtain 5/16" bolts in sets of<br />
three and in various lengths. For<br />
really deep bowls or vessels you<br />
can use all-thread rod to create the<br />
required lengths of rods to hold the<br />
piece in the chuck. Although more<br />
difficult to find, carriage bolts 4"<br />
and longer are safer than hexhead<br />
bolts; you are less likely to be injured<br />
if you inadvertently touch the bolt<br />
head. Use wing nuts and washers<br />
to attach the bolts on the back of the<br />
base (with washers under the bolt<br />
head if not using carriage bolts).<br />
With the chuck sitting flat on<br />
a bench, place the bowl with rim<br />
down onto the face of the base.<br />
Center the bowl using the cut<br />
grooves in the face as a guideline.<br />
A precise alignment comes later.<br />
Determine which ring matches the<br />
bowl. Sometimes it is a question of<br />
where you want to grip the bowl as<br />
52 American Woodturner Spring 2008<br />
6<br />
Plastic<br />
tubing<br />
pads<br />
bowl<br />
When the piece is centered and firmly<br />
mounted, turn to desired shape and details.<br />
Complete by sanding the turned areas. Stay<br />
well away from the bolt heads and the ring.
7<br />
To center the piece on the chuck, use a pencil<br />
to find the high point of the bowl. Loosen<br />
the wing nuts, push from the center of the<br />
penciled length, and tighten the nuts.<br />
well as the shape of the bowl, which<br />
may be the real deciding factor. If<br />
you grip the bowl in the midpoint or<br />
even closer to the rim, this gives a lot<br />
of open area to work on the base. Lay<br />
the selected ring over the bowl, being<br />
sure to line up the keys on the base<br />
and ring (Photo 6).<br />
Next, determine what length of bolt<br />
is required. I place a washer below the<br />
head of the bolt (these go through the<br />
ring from the outside) and a washer<br />
on the backside of the base where<br />
the wing nut will draw the bowl<br />
down against the base. Put the bolts,<br />
washers, and wing nuts through the<br />
ring and base, but leave the wing<br />
nuts slightly loose at this time. The<br />
bolts should be just long enough to go<br />
through the chuck holding the bowl,<br />
washers, and wing nuts.<br />
Place the chuck with bowl on the<br />
lathe. How well is the piece centered?<br />
By just turning the lathe by<br />
hand, you’ll quickly see if the piece<br />
is centered. I turn the piece by hand,<br />
use a pencil on the tool rest, and<br />
find the “high spot” (Photo 7). Next,<br />
lightly tap on this spot, then check<br />
again with the pencil to see if the<br />
piece is centered. When centered,<br />
the pencil line goes around the bowl<br />
continuously. The trick is to have<br />
the bowl clamped tightly enough<br />
to hold the bowl in position while<br />
centering, but loose enough to make<br />
small corrections by tapping.<br />
woodturner.org<br />
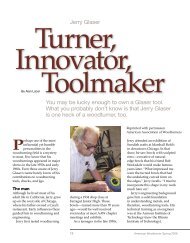
8<br />
At his studio in Hawaii, AAW member Kelly<br />
Dunn details the bottom of a bowl with a<br />
homemade 36"-diameter <strong>Straka</strong> chuck on<br />
his bowl lathe.<br />
When satisfied with the centering,<br />
tighten the wing nuts firmly. Be<br />
careful to not overtighten, especially<br />
with thin-walled pieces.<br />
Turn the base to the desired shape,<br />
details, and diameter, and remove<br />
all screw holes or chuck marks.<br />
Remember, this system is only for<br />
the lower portions and underside<br />
of the bowl or vessel—don’t try to<br />
come up too high on the bowl or too<br />
close to the ring. Sand to complete<br />
this area of your piece.<br />
With a little up-front construction<br />
time, you have created a versatile<br />
reverse-chucking system. It works<br />
well on bowls and vessels of differing<br />
sizes and shapes. Some turners<br />
even use the chuck for closed<br />
hollow forms.<br />
The <strong>Straka</strong> chuck has some limitations<br />
on extremely thin work, pieces<br />
with uneven tops or rims (such as<br />
natural-edged bowls), or delicate<br />
pieces (due to voids or structural<br />
weak spots) that would not take the<br />
clamping action.<br />
Once you learn to use the chuck,<br />
you will find it also mounts quickly<br />
and holds the piece securely with<br />
virtually no chance of pitching the<br />
piece off the lathe.<br />
The size of the chuck can be varied<br />
for different-size lathes or operations.<br />
Hawaiian turner Kelly Dunn<br />
uses a 36"-diameter <strong>Straka</strong> chuck<br />
(Photo 8). For small work, I regularly<br />
Rubber<br />
pads<br />
protect<br />
bowl<br />
The <strong>Straka</strong> chuck can be miniaturized for<br />
small work. The 41 9<br />
/2"-diameter chuck is<br />
used to hollow both ends of a Christmas<br />
tree ornament’s bulb on a mini lathe.<br />
10<br />
By using a short section of thick-walled<br />
Schedule 40 PVC, you can turn the bottom<br />
of natural-edged bowls with the <strong>Straka</strong><br />
chuck. With both ends squared, the pipe<br />
sets about ½" into the base.<br />
use a 4 1/2"-diameter chuck (Photo 9)<br />
at my Klein lathe.<br />
With a little ingenuity and thickwalled<br />
Schedule 40 PVC pipe (cut<br />
square on the ends), you can even<br />
modify the <strong>Straka</strong> chuck to accept<br />
natural-rimmed bowls (Photo 10).<br />
After you cut a recess in the chuck<br />
base to match the outside diameter<br />
of the PVC and pad the PVC, turn a<br />
base or foot as you desire.<br />
Special thanks to Jack <strong>Straka</strong> and Kelly<br />
Dunn for their help with this article.<br />
<strong>Alan</strong> <strong>Lacer</strong> (<strong>Alan</strong><strong>Lacer</strong>.com) is an<br />
American Woodturner contributing editor<br />
who lives near River Falls, WI.<br />
53