You also want an ePaper? Increase the reach of your titles
YUMPU automatically turns print PDFs into web optimized ePapers that Google loves.
SOLUTIONS FOR TODAY’S SAILORS<br />
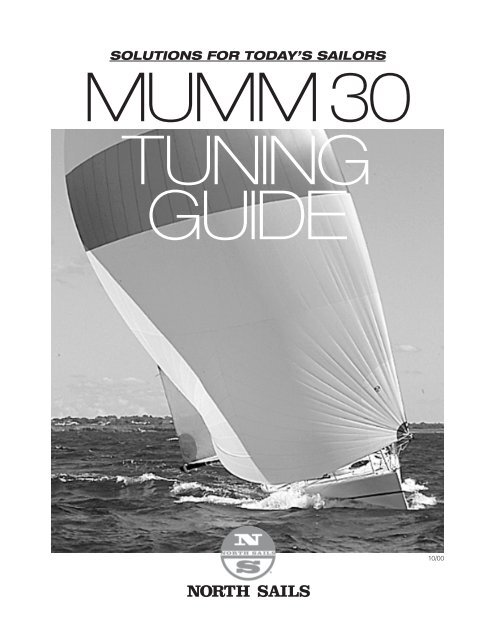
MUMM <strong>30</strong><br />
TUNING<br />
GUIDE<br />
NORTH SAILS<br />
10/00
The <strong>Mumm</strong> <strong>30</strong> follows closely on the heels of the successful <strong>Mumm</strong> <strong>36</strong> class<br />
with the <strong>Mumm</strong> <strong>30</strong> designed as an exciting yet simple boat to sail. The<br />
absence of running backstays and large genoas do a lot to simplify<br />
boathandling. A generous mainsail, asymmetric spinnaker and larger rudder<br />
ensure superb light air performance with complete control as the breeze freshens.<br />
This is further helped by the very high stability designed into the hull. We are very<br />
excited about the potential of the <strong>Mumm</strong> <strong>30</strong> and look ahead to a great, wellorganized<br />
class of owner-driven boats.<br />
The boat can be easily trailed and launched with its optional single point lifting<br />
eye. It’s simple enough for the whole family to rig and sail yet lively enough to thrill<br />
the most seasoned sailor.<br />
Bruce Farr and Associates, Inc. and the respective class builders under the<br />
management of Geoff Stagg of Farr International, have proven their ability to<br />
produce high-quality uniform boats as evidenced by the <strong>Mumm</strong> <strong>36</strong> class, and now<br />
the <strong>Mumm</strong> <strong>30</strong>. The class has established itself firmly in the North American racing<br />
scene.<br />
At North Sails, we’re proud to have been involved with the <strong>Mumm</strong> <strong>36</strong> and <strong>Mumm</strong><br />
<strong>30</strong> from their inception. We have worked hard to develop sails that will deliver the<br />
speed you need to win and the durability you need to keep winning, season after<br />
season. We’ve also worked hard to prepare this <strong>Mumm</strong> <strong>30</strong> <strong>Tuning</strong> <strong>Guide</strong> to help<br />
you get your boat and crew competitive fast. Use it...it works!<br />
Tom Whidden<br />
CEO, North Sails Group<br />
2<br />
UPDATES<br />
North Sails is constantly refining<br />
tuning techniques and rig settings as<br />
we and our customers gain experience<br />
in individual classes. This information<br />
is shared daily among North staff<br />
worldwide via our corporate intranet.<br />
While this <strong>Tuning</strong> <strong>Guide</strong> provides a<br />
giant step toward achieving<br />
competitive speed in your class, be<br />
sure to contact your North<br />
representative about the latest <strong>Mumm</strong><br />
<strong>30</strong> tuning developments.
TABLE OF CONTENTS<br />
<strong>Mumm</strong> <strong>30</strong> <strong>Tuning</strong> <strong>Guide</strong><br />
Deck plan. . . . . . . . . . . . . . . . . . . . . . . . . . . . . . . . . . . . . . . . . . . . . . . . . . . . . . 4<br />
Setting up the Rig . . . . . . . . . . . . . . . . . . . . . . . . . . . . . . . . . . . . . . . . . . . . . . . 5<br />
Mainsail Trim. . . . . . . . . . . . . . . . . . . . . . . . . . . . . . . . . . . . . . . . . . . . . . . . . . . 8<br />
Genoa Trim . . . . . . . . . . . . . . . . . . . . . . . . . . . . . . . . . . . . . . . . . . . . . . . . . . . . 9<br />
Asymmetric Spinnaker Trim . . . . . . . . . . . . . . . . . . . . . . . . . . . . . . . . . . . . . . 10<br />
Symmetric Spinnaker Trim . . . . . . . . . . . . . . . . . . . . . . . . . . . . . . . . . . . . . . . 11<br />
Tacking . . . . . . . . . . . . . . . . . . . . . . . . . . . . . . . . . . . . . . . . . . . . . . . . . . . . . . 12<br />
Gybing the Asymmetric Spinnaker . . . . . . . . . . . . . . . . . . . . . . . . . . . . . . . . . 13<br />
Gybing the Symmetric Spinnaker . . . . . . . . . . . . . . . . . . . . . . . . . . . . . . . . . . 14<br />
Crew Weight in Light Air . . . . . . . . . . . . . . . . . . . . . . . . . . . . . . . . . . . . . . . . . 15<br />
Crew Weight in Medium Air . . . . . . . . . . . . . . . . . . . . . . . . . . . . . . . . . . . . . . 16<br />
Mainsail Shape . . . . . . . . . . . . . . . . . . . . . . . . . . . . . . . . . . . . . . . . . . . . . . . . 17<br />
Light Headsail Shape. . . . . . . . . . . . . . . . . . . . . . . . . . . . . . . . . . . . . . . . . . . . 19<br />
Medium Headsail Shape . . . . . . . . . . . . . . . . . . . . . . . . . . . . . . . . . . . . . . . . . 20<br />
Heavy Headsail Shape. . . . . . . . . . . . . . . . . . . . . . . . . . . . . . . . . . . . . . . . . . . 21<br />
Asymmetric Spinnaker Tips. . . . . . . . . . . . . . . . . . . . . . . . . . . . . . . . . . . . . . . 22<br />
Masthead Spinnaker Tips . . . . . . . . . . . . . . . . . . . . . . . . . . . . . . . . . . . . . . . . 23<br />
Sail Range Chart . . . . . . . . . . . . . . . . . . . . . . . . . . . . . . . . . . . . . . . . . . . . . . . 24<br />
Running Rigging List. . . . . . . . . . . . . . . . . . . . . . . . . . . . . . . . . . . . . . . . . . . . 25<br />
North Sails Lofts and Contacts . . . . . . . . . . . . . . . . . . . . . . . . . . . . . . . . . . . . 26<br />
Tips & Techniques. . . . . . . . . . . . . . . . . . . . . . . . . . . . . . . . . . . . . . . . . . . . . . 27<br />
Dave Hirsch<br />
Andreas Josenhans<br />
Dave Scott Grant “Fuzz” Spanhake<br />
3DL inventors J.P. Baudet<br />
(left) and Luc Dubois<br />
CONTRIBUTORS<br />
David Hirsch, Sail Designer<br />
A leader in sail design for over 20 years, and a<br />
member of Norths Performance Resource Group<br />
(PRG). David designed the sail inventory for the<br />
<strong>Mumm</strong> <strong>30</strong> with special emphasis on developing<br />
REGATTA 3DL sails and Asymmetric spinnakers. A<br />
veteran of seven America’s Cup syndicates and<br />
many grand prix racing programs, David’s<br />
expertise in sail analysis are what make North<br />
sails consistently fast out of the bag.<br />
Andreas Josenhans, Performance Development<br />
Andreas is an expert in developing boat speed<br />
and tuning. Involved in a variety of grand prix<br />
projects, Andreas is a winner of six world<br />
championships in one design and a veteran of<br />
three America’s Cup syndicates. Andreas was the<br />
sail coordinator for Pact ’95 in the recent<br />
America’s Cup. Andreas is a member of the<br />
Canadian Sports Hall of Fame.<br />
Dave Scott, Product Development<br />
Dave’s wide range of experience onboard all types<br />
of racing boats makes de-bugging and speed<br />
development look easy. A sailmaker with North<br />
since 1986, Dave is constantly on the go sailing<br />
with clients from <strong>Mumm</strong> <strong>36</strong>s to SuperYachts<br />
where he has cultivated a reputation for<br />
consistency and diligence. When Dave sails for<br />
fun, he’s a heck of a helmsman, too.<br />
Grant (Fuzz) Spanhake, Product Development<br />
Author- <strong>Mumm</strong> <strong>30</strong> tuning guide. Following the<br />
‘95 America’s Cup where he was a tailer onboard<br />
Young America, Fuzz works as a consultant to<br />
North on special projects. Previous America’s<br />
Cup experience includes Team New Zealand in<br />
‘87-(tailer), and coach for B. Koch’s ‘92 defense.<br />
In the Whitbread, Fuzz raced onboard Lion New<br />
Zealand in ‘84 & in ‘89 on Fisher & Paykel.<br />
Luc DuBois & J.P. Baudet, 3DL Inventors<br />
Swiss natives, sailmaker J.P. Baudet raced<br />
onboard Whitbread winner, UBS Switzerland in<br />
‘84 and was the Sail Coordinator to Merit in ’88.<br />
Teaming up with engineer Luc DuBois, they<br />
introduced 3DL to North Sails in 1989, creating a<br />
sailmaking revolution. J.P. heads 3DL R&D where<br />
new applications of 3DL in one design and club<br />
racers will make sails lighter, faster and more<br />
affordable.<br />
VERSION 5 (10/00)<br />
© North Sails, 2000 All Rights Reserved<br />
3
4<br />
<strong>Mumm</strong> <strong>30</strong> <strong>Tuning</strong> <strong>Guide</strong><br />
DECK LAYOUT<br />
Deck plan drawing supplied courtesy of Bruce<br />
Farr & Associates, Inc. and Farr International<br />
Headsail<br />
Barberhaulers<br />
Headsail Sheet<br />
Spinnaker Sheet<br />
Foreguy<br />
Bobstay<br />
Spinnaker<br />
Tweakers<br />
Backstay<br />
Spinnaker Guy
SETTING UP THE RIG<br />
The challenge and fun of One Design<br />
racing begins with having your boat<br />
optimized for top performance. To get<br />
the best out of your new <strong>Mumm</strong> <strong>30</strong>,<br />
first be sure the rig is in the center of<br />
the boat. Then you can set mast rake,<br />
forestay & backstay length, and set<br />
the tension on the cap shrouds and<br />
diagonals. To center the rig:<br />
• Use a tape measure on the centerline<br />
halyard from the hounds to the<br />
chainplate pin centers.<br />
• Place a mark on the front center of<br />
the mast at the bottom spreader.<br />
• From this point measure to the<br />
chainplate pin centers.<br />
This provides two points to look<br />
through when gauging mast tune.<br />
(c)<br />
<strong>Mumm</strong> <strong>30</strong> <strong>Tuning</strong> <strong>Guide</strong><br />
NOTE: All measurements are taken to the centerline of clevis pins, bolts, etc.<br />
Please refer to diagram1 for specific measurement locations.<br />
a) 3.481m (11’ 5”)<br />
From below decks, measure from the forward bolt of the stemhead fitting to the<br />
forward side of the mast above the mast plate.<br />
b)1.146m (3’ 9”)<br />
Distance from the aft face of the forward bulkhead to center of the mast screw<br />
on the starboard side.<br />
NOTE:Distance to the base of the mast fitting is 50mm - 2”.<br />
c) 2.329m (7’ 7-3/4”)<br />
Distance from the bottom of the mast step to the top of the bottom band (BAS).<br />
d) 3.290m (10’ 9-1/2”) ‘J’ measurement<br />
Taken from the forestay pin to the front edge of the mast, excluding the spinnaker<br />
pole track and above the mast partners.<br />
15.19m (49’ 10”)<br />
Max hoist using the main halyard to the intersection of the hull/transom with no<br />
load on the backstay.<br />
MAST PARTNERS - With the mast at maximum J,<br />
make sure the mast partners are secure. Avoid pointloading<br />
the mast by spreading the load evenly around<br />
the spar.<br />
(b)<br />
(d)<br />
(a)<br />
5
6<br />
<strong>Mumm</strong> <strong>30</strong> <strong>Tuning</strong> <strong>Guide</strong><br />
SETTING UP THE RIG<br />
FORESTAY<br />
There are two methods you can use to<br />
measure the forestay length.<br />
Pin-to-Pin: 12.18m (39’11-1/2”)<br />
• Send a crewmember up the mast with<br />
a (15m) 50’ tape measure.<br />
• Hold the end of the tape measure at<br />
the junction of the mast and T-ball fitting,<br />
measure down to the pin- center<br />
on the stemhead fitting.<br />
A) 1.80m (5’10-7/8”) see diagram<br />
• Take the topping lift halyard and raise<br />
to the BAS (top of the black band) at<br />
the gooseneck.<br />
• Swing an arc between the mast and<br />
the headstay.<br />
• Where the halyard intersects at the<br />
headstay, place a mark on the headfoil<br />
and measure to the center of the<br />
forestay pin at the stemhead fitting.<br />
NOTE: Use a centerline halyard for<br />
the most accurate measurement.<br />
BACKSTAY<br />
Measure the backstay using the mainsail<br />
halyard.<br />
• Attach a tape measure to the main<br />
halyard and raise to the masthead<br />
until two-blocked at the masthead.<br />
• 1<strong>30</strong>0m (42’ 8”)<br />
With no tension on the backstay,<br />
measure down to the eyesplice.<br />
Place a batten (marked at 50mm or<br />
2” intervals) to measure offsets. The<br />
backstay flicker (see diagram above)<br />
should be strong enough to hold the<br />
backstay clear of the mainsail leech<br />
in light air.<br />
Backstay flicker<br />
CAP SHROUDS<br />
Once the mast is centered and you<br />
have measured and adjusted the<br />
forestay and backstay, adjust the cap<br />
shrouds.<br />
• Start with the caps hand tight. Add<br />
16.5 full turns (<strong>36</strong>0 degrees).<br />
• The mast pre-bend (deflection) is<br />
approximately 77mm (3-1/4”)<br />
measured from the boom to the top<br />
of the mast or 1/2 of the mast<br />
section.<br />
• The maximum bend will be<br />
approximately 254mm (10”) at the<br />
dock.<br />
A B<br />
1.80m<br />
(5’10-7/8”)<br />
Black band on<br />
headfoil to<br />
forestay pin.<br />
DIAGONALS<br />
D1<br />
Just like the caps, the diagonals<br />
should start by being hand tight. Add<br />
7 full turns (<strong>36</strong>0 degrees).<br />
4064mm (13’ 4”) Length of the D1<br />
measured from the top of the fitting to<br />
the top of the shroud plate.<br />
D2<br />
Start at hand tight. Add 10 full turns<br />
(<strong>36</strong>0 degrees).<br />
3924mm (12’ 10-1/2”) Length of<br />
the D2 measured from the top of the<br />
fitting to the top of the spreader tip<br />
cup.
SETTING UP THE RIG<br />
Off<br />
<strong>Mumm</strong> <strong>30</strong> <strong>Tuning</strong> <strong>Guide</strong><br />
On 50%<br />
2:1 Backstay<br />
strop attaches to<br />
upper floating<br />
block<br />
length:<br />
2070m<br />
(6’9-1/2”)<br />
On full<br />
4:1 Backstay<br />
strop attaches to<br />
lower floating<br />
block<br />
length: 1780m<br />
(5’10”)<br />
BACKSTAY ADJUSTMENTS<br />
The backstay purchase is the most important adjustment you have on a <strong>Mumm</strong> <strong>30</strong>. In light air (5 knots), a general rule of thumb is<br />
to have the bottom floating block 50mm (2”) below the top lifeline. As the wind increases, more tension is applied to the backstay.<br />
Two things happen; a) the headstay straightens, b) the mast bends which depowers the rig.<br />
For maximum backstay adjust the bottom floating block to 2<strong>30</strong>mm (8”) or two-blocked below the bottom lifeline<br />
(see photo 3). Keep the stern lifelines tight for measuring this distance.<br />
Mark #5<br />
40.5cm-(16”)<br />
Mark #1<br />
22cm-(8”)<br />
SPREADER MARKS<br />
You can adjust headsail trim easily by using spreader marks. Either the mainsheet<br />
trimmer or helmsperson sitting on the weather rail can see the jib leech through the<br />
spreader window in the main. To place accurate spreader marks, use white paint or<br />
tape to mark the lower spreader. Measuring from the inside edge of the cap shroud,<br />
place your marks at the following intervals:<br />
22cm (8”) 28cm (10”) <strong>30</strong>.4cm (12”)<br />
35.5cm (14”) 40.5cm (16”) 45.7cm (18”)<br />
BARBERHAULERS<br />
For accurate barberhauler measurement,<br />
the outside edge of the fairlead<br />
will be 467mm (18-3/8”) (measured<br />
from the aft face of the mast partners).<br />
From the inboard edge of the jib sheet,<br />
through the barberhauler block<br />
• measure in 9cm (3-5/8”)<br />
• mark the line every 3cm (1-1/8”)<br />
until there are 7 marks.<br />
7
8<br />
<strong>Mumm</strong> <strong>30</strong> <strong>Tuning</strong> <strong>Guide</strong><br />
MAINSAIL TRIM<br />
Set-Up Attach the mainsail<br />
onto the boom and place the tack slug<br />
in the mast. Attach the cunningham<br />
and secure the outhaul. The clew is<br />
held securely to the boom with the<br />
velcro webbing strap supplied with<br />
your 3DL mainsail.<br />
Headboard Attach the<br />
halyard to the headboard, using the<br />
forward hole which is 40mm (1.5”)<br />
aft of the front edge of the boltrope. The<br />
headboard hole should be at least<br />
12mm (1/2”) diameter. Set the<br />
backstay with the floating block 50mm<br />
(2”) below the top lifeline wire.<br />
z<br />
Battens supplied with your<br />
3DL mainsail are either Apex or<br />
Bluestreak. Starting at the top, place<br />
the top batten (tapered end forward)<br />
into the mainsail pocket. Use firm<br />
tension on all mainsail battens. As a<br />
reference, the table to the right details<br />
the type, size, length and width of<br />
mainsail battens, helpful for replacing<br />
battens or ordering spare sets.<br />
LIGHT AIR TRIM: If your mainsheet trimmer is strong, you can<br />
remove the fine tune part of the mainsheet and trim off the coarse part only. When<br />
sailing upwind in flat water, the top telltale should be flicking (in and out behind the<br />
leech, vs. trailing. If the telltale is trailing, then the sheet is probably eased too<br />
much.). Don’t be afraid to carry the boom above the centerline with the mainsail<br />
traveler car 228mm (9”) from the side of the cockpit. In choppy water, the top telltale<br />
should be flowing all the time, with the traveler dropped down 150mm (6”).<br />
The outhaul should be eased so there is 100mm (4”) of sag to leeward of the<br />
boom. The cunningham should be off.<br />
MEDIUM AIR TRIM: To maintain speed, play the traveler constantly.<br />
Ease the fine tune of the mainsheet 150mm (6”) in the gusts. The boom<br />
should now be just below center line most of the time. Use moderate boom vang,<br />
remembering to ease the vang at the top mark. The outhaul should be firm so there<br />
is no sag to leeward of the boom. Cunningham should be on 100mm (4”).<br />
HEAVY AIR TRIM: Keep the mainsheet close at hand ready to<br />
ease. The traveler will be eased down to the cockpit wall (coaming), but be sure to<br />
play the traveler in the lulls to maintain pointing. When the mainsail is sheeted to<br />
the max, there is slight boom vang load. The outhaul should be tight, with a crease<br />
along the boom. The cunningham should be set to maximum. Be ready to ease the<br />
boom vang and cunningham when rounding the top mark.<br />
Light Medium Heavy<br />
Boom/Traveler Above center Just below center Ease to<br />
coaming<br />
Vang None Some Max<br />
Outhaul 100mm sag Firm Max<br />
Cunningham None 100mm Max<br />
Batten Type Length Width<br />
Position Apex/Bluestreak (meters & ft.) Apex/Bluestreak<br />
TOP 6T OR 5T (Apex) 1.760m/5’ 9-5/16” 45mm (1-3/4”) / 20mm (3/4”)<br />
Upper Mid TM 5/ OR 2 1.595m/5’ 2-13/16” 45mm (1-3/4”) / 20mm (3/4”)<br />
Lower Mid TM 5/ OR 3 1.595m/5’ 2-13/16” 45mm (1-3/4”) / 20mm (3/4”)<br />
BOTTOM TM 5/ OR 4 1.595m/5’ 2-13/16” 45mm (1-3/4”) / 20mm (3/4”)
GENOA TRIM<br />
Set-Up 3DL headsails are<br />
supplied with a tack clip (snap hook)<br />
which is placed on the bar directly<br />
behind the stemhead fitting. Attach the<br />
sheets by tying very small bowlines or<br />
stopper knots through the clew ring.<br />
(This allows enough adjustment in the barberhaulers.)<br />
Run the sheet through the<br />
barberhaulers, through the aft lead<br />
block under the shockcord guide, then<br />
to the winch. Use the port halyard and<br />
set in the port groove. You’ll be on<br />
starboard tack if you need to set-up a<br />
headsail change.<br />
You’ve already marked the barberhaulers,<br />
(p.6) refer to the table at right<br />
for fast settings in various wind conditions<br />
and sea states.<br />
Battens supplied with your<br />
3DL headsail are Bluestreak. Starting at<br />
the top, place the top batten<br />
(tapered end forward) into the batten<br />
pocket. Use firm tension on all headsail<br />
battens. As a reference, the table to the<br />
right details the type, size, length and<br />
width of headsail battens, helpful for<br />
replacing battens or ordering spare sets.<br />
<strong>Mumm</strong> <strong>30</strong> <strong>Tuning</strong> <strong>Guide</strong><br />
LIGHT AIR TRIM: Barberhauler is required. If the boat feels<br />
stalled, ease the barberhauler and/or sheet so the leech is at the spreader tip. Also,<br />
ease the forestay 25mm (1”) to loosen the headstay. Leave the jib halyard on a<br />
winch for easy adjusting with increasing or decreasing wind pressure.<br />
MEDIUM AIR TRIM: Some barberhauler is required. If the boat<br />
feels stalled, or the headsail is backwinding the mainsail, ease the barberhauler<br />
and/or sheet until the leech is at the second outside spreader mark. Take up the<br />
forestay 25mm (1”) to tighten the headstay. The halyard should be firm with<br />
some wrinkles coming out of the headstay. It’s good to leave the jib halyard on the<br />
winch until it’s time to lead the spinnaker halyard to the same winch at the top<br />
mark.<br />
HEAVY AIR TRIM: No barberhauler required. If the boat is stalled<br />
or the headsail is backwinding the mainsail, ease the barberhauler and/or sheet<br />
until the leech is at the spreader tip. Take up the forestay 50mm (2”) to tighten<br />
the headstay. The halyard should be tight with no wrinkles coming out of the headstay.<br />
Again, it’s good to leave the jib halyard on the winch until its time to lead the<br />
spinnaker halyard and/or sheet to the same winch at the top mark.<br />
Batten Type Length Width<br />
Position Bluestreak (meters & ft.) Bluestreak<br />
TOP WR 2 85cm / 2’ 9-1/2” 15mm (5/8”)<br />
Upper Mid OR 1 80cm / 2’ 7-1/2” 20mm (3/4”)<br />
Lower Mid OR 3 80cm / 2’ 7-1/2” 20mm (3/4”)<br />
BOTTOM OR 3 80cm / 2’ 7-1/2” 20mm (3/4”)<br />
BARBER HAULER SETUP<br />
True Wind Speed 0-5 5-10 10-15 15-20 20-25 25-<strong>30</strong><br />
Adjust Headstay Length Ease 1” Base Tighten 1” Tighten 1 1/2” Tighten 2”<br />
(25mm) (37mm) (50mm)<br />
Barberhauler Mark #1 #2-3 #3-4 #5-OFF OFF OFF<br />
Spreader Mark (Flat Water) #3-4 #3-2 #2 #2-1 #1 50mm (2”)<br />
Inboard #4, Outboard #1* inside spreader end<br />
Spreader Mark (Rough Water) #3 #3 #2 #1 #1 50mm (2”)<br />
Inboard #4, Outboard #1 inside spreader end<br />
*For distance races: Install a padeye outboard, just aft of the chainplates. Attach a snatch block onto the<br />
padeye with the sheet leading to the cabin top winches.<br />
9
10<br />
<strong>Mumm</strong> <strong>30</strong> <strong>Tuning</strong> <strong>Guide</strong><br />
ASYMMETRIC SPINNAKER TRIM<br />
The <strong>Mumm</strong> <strong>30</strong> is a very fast, responsive<br />
boat. We’ve found that small<br />
adjustments in boat handling can<br />
enhance speed and overall performance.<br />
Included is an additional section<br />
covering standard boat handling<br />
techniques such as tacking, gybing, and<br />
coordinating the crew for optimum<br />
weight distribution in varied sailing<br />
conditions.<br />
Our techniques may differ slightly from<br />
the methods that you and your crew use.<br />
Your feedback is welcome, and we<br />
encourage you to practice both ways,<br />
and let us know what works best for you.<br />
SET-UP Before you leave the dock...<br />
• Attach the guy to the headstay.<br />
• Run the guy through the jaw of the spinnaker pole and attach the pole to the<br />
mast.<br />
• Set the spinnaker pole up so it is 460mm (18”) above the deck and sitting<br />
beside the headstay.<br />
• Mark the point (black marker pen works well) where the guy is loaded onto the<br />
cockpit winch.<br />
Photos show the tack set-up.<br />
Diagram below shows sheet and guy leads for the asymmetric spinnaker. When gybing, be careful not to push the spinnaker pole<br />
through the mainsail or between the D1’s and V1’s where the mainsail will gybe onto the exposed end. More information on boat<br />
handling and gybing are explained on page 12 of this guide.
<strong>Mumm</strong> <strong>30</strong> <strong>Tuning</strong> <strong>Guide</strong><br />
SYMMETRIC SPINNAKER TRIM<br />
• Install a piece of shockcord from the<br />
hounds to a small stainless ring that<br />
the spinnaker halyard passes through.<br />
When the spinnaker halyard is castoff,<br />
the ring pulls the halyard to the<br />
mast preventing the halyard from<br />
getting stuck behind the top battens in<br />
the main.<br />
• Prevent spinnaker sheets and guys<br />
from dragging in the water by placing<br />
a cleat on the edge of the cockpit by<br />
the genoa winch.<br />
• In moderate conditions (16 knots), the<br />
spinnaker luff should fly ‘straight’ or<br />
perpendicular to the pole. Use the guy<br />
fore & aft to position the spinnaker for<br />
max. speed.<br />
• Always drop the spinnaker on the side<br />
of the boat where you intend to<br />
rehoist. Set the spinnaker out of the<br />
front hatch unless there is a large<br />
seaway running, preventing the hatch<br />
from opening without risk of flooding.<br />
SHEETS & GUYS<br />
• Run the spinnaker sheets through the barberhaulers (outside the lifelines), back<br />
to the corner spinnaker blocks (outside to inside with the sheet), along the deck<br />
through the deflector blocks and up to the cabin top winches.<br />
• Run the guys aft through the guy blocks outside the lifelines. This provides a<br />
better angle to the pole. The guys then lead under the spinnaker sheets, and<br />
under the headsail sheet on the port side, behind the genoa sheets on the<br />
starboard side to the cleats on the edge of the cockpit coaming below the<br />
winches. The tails go down below through the open window or into the tail bag.<br />
• You have a choice of three downwind sails to choose from in the <strong>Mumm</strong> <strong>30</strong><br />
rules. A sail chart is included on page 24,which shows the overlap of all<br />
the sails in the inventory for various wind speeds and angles. A set of polars are<br />
also provided, courtesy of Bruce Farr and Associates, Inc.<br />
11
TACKING<br />
12<br />
<strong>Mumm</strong> <strong>30</strong> <strong>Tuning</strong> <strong>Guide</strong><br />
PREPARATION<br />
1. Look ahead to be sure you will be sailing in clear air after you tack.<br />
2. Load the weather headsail (new) sheet onto the cockpit winch. Place three turns on the winch and take-up the slack.<br />
3. Be sure the weather sheet (new) is clear of the spinnaker sheets and leads over the pole, around the outside of the mast and<br />
halyards.<br />
4. Be sure the leeward headsail sheet is clear to run.<br />
5. Try and tack in a smooth spot of water.<br />
6. If you have to dip a boat after you tack, make sure the mainsheet is ready to ease.<br />
TACKING<br />
SEQUENCE<br />
STEP 1<br />
Helm<br />
Gives the command to tack<br />
Trimmer<br />
Comes off the rail, crosses cockpit to<br />
leeward side and uncleats the headsail<br />
sheet.<br />
Mainsheet<br />
Eases mainsheet fine tune 75mm (3”)<br />
STEP 2<br />
Helm<br />
Pushes the helm to leeward smoothly,<br />
centering the helm 3/4 through the tack.<br />
Trimmer<br />
As the headsail is luffing, cast off the old<br />
headsail sheet by casting the turns off the<br />
winch, cross the cockpit and grind in the<br />
headsail sheet.<br />
Tailer<br />
Tails in new sheet from the weather side.<br />
Mainsheet<br />
Uncleats old traveler line, picks up the new<br />
traveler line on the other side of the<br />
cockpit.<br />
Bow<br />
Crosses the boat by going under the boom<br />
vang.<br />
TACKING IN<br />
LIGHT AIR<br />
Bow<br />
If sitting to leeward, roll tacks by crossing<br />
to new weather side. If sitting on the<br />
weather side, stays on the rail, and leans<br />
over the rail to roll tack.<br />
Trimmer<br />
Casts off the headsail sheet, tails in the<br />
new side (alone). As the boat speed<br />
climbs, grinds sheet to final trim.<br />
Mainsheet<br />
May have to release the topmast backstay<br />
to clear the mainsail leech.<br />
Helm<br />
Pushes the helm to leeward smoothly, centering<br />
the helm 3/4 through the tack. Also,<br />
may have to flick the topmast backstay to<br />
clear the mainsail leech.<br />
Sail your heart out!<br />
TACKING IN<br />
MODERATE-<br />
HEAVY AIR<br />
Bow<br />
Cross the boat quickly and hike your heart<br />
out!<br />
Trimmer<br />
After final trim, move up to the weather rail<br />
& hike.<br />
Mainsheet<br />
Keeps the mainsheet in hand, uncleated.<br />
Ease after the tack to keep the boat on its<br />
feet.<br />
Helm<br />
Pushes the helm to leeward smoothly, centering<br />
the helm 3/4 through the tack. Try<br />
not to bear off too much creating more<br />
heel, causing the boat to slide to leeward.
<strong>Mumm</strong> <strong>30</strong> <strong>Tuning</strong> <strong>Guide</strong><br />
GYBING THE ASYMMETRIC<br />
PREPARATION<br />
1. Look behind your boat to be sure you will have clear air after you gybe.<br />
2. Load the weather asymmetric sheet onto the cabin top winch. Place two turns on the<br />
winch and take-up the slack.<br />
3. Be sure the weather sheet (new) is around the inside of the asymmetric and sitting<br />
on top of the spinnaker pole, leading around the outside of the forestay, between the<br />
sail and the headstay.<br />
4. The starboard guy is attached to the tack ring of the asymmetric. The bobstay<br />
and port guy are attached to the eye in the starboard guy snap shackle<br />
on the outside of the forestay, clear of the pulpit. This gets cleated.<br />
5. Give the foreguy 600mm (2ft.) of slack so the bowperson can take the spinnaker<br />
pole off the mast.<br />
BASIC GYBING<br />
SEQUENCE<br />
STEP 1<br />
New Trimmer<br />
...is on the guy. Releases the guy quickly<br />
so the weight is taken up on the bobstay.<br />
STEP 2<br />
Bow<br />
1. Releases the spinnaker pole from the<br />
mast.<br />
2. Moves pole aft until the outboard end<br />
jaws are over the deck.<br />
3. Trips guy out of jaws.<br />
STEP 3<br />
Pit<br />
Tails in slack of the new sheet as the<br />
asymmetric comes across the bow,<br />
hands off sheet to new trimmer. You<br />
can’t run the old sheet fast enough once<br />
the bow has passed 180 degrees.<br />
NOTE: Be careful not to push the<br />
spinnaker pole through the mainsail or<br />
between the D1’s and V1’s where the<br />
mainsail will gybe onto the exposed end.<br />
GYBING:<br />
LIGHT AIR<br />
Bow<br />
Watches the sail to be sure sheets run<br />
smoothly.<br />
Pit<br />
Pulls in the bobstay as the boat turns,<br />
until the luff of the asymmetric is tight.<br />
Old trimmer<br />
Blows off asymmetric sheet while still<br />
loaded, allowing the clew to fly away<br />
from the boat (like a flag). Sets up the<br />
guy on the marks around the cockpit<br />
winch once the pole is connected to the<br />
mast and trims the tack to the pole end.<br />
New trimmer<br />
Tails the new asymmetric sheet as fast<br />
as possible.<br />
Helm<br />
The helmsman controls the gybe. Gybes<br />
are easiest when the apparent wind<br />
speed is the highest.<br />
GYBING: LIGHT-<br />
TO-MODERATE<br />
STEP 4<br />
Bow<br />
Once clew is past the headstay on the<br />
new leeward side, connects the new guy<br />
to the spinnaker pole, pushes the pole<br />
out on the weather side of the headstay,<br />
connects to mast.<br />
Pit<br />
Eases the bobstay out following the tack<br />
of the asymmetric to the pole end. Then<br />
readjusts the bobstay once the pole is<br />
back from the headstay.<br />
Old Trimmer<br />
Eases out the asymmetric sheet until the<br />
clew is near the headstay, holds the<br />
sheet until the slack is taken up by the<br />
new sheet, then releases and helps old<br />
sheet to run free. Sets up the guy on the<br />
marks around the cockpit winch once<br />
the pole is connected to the mast and<br />
trims the tack to the pole end.<br />
New trimmer<br />
Trims the sail, easing the sail to follow<br />
out to the pole, paying attention to<br />
increasing speed by working with the<br />
helm for optimum sheeting angle.<br />
STEP 5<br />
Helm<br />
Sails a slightly high course until the<br />
boat speed is optimum, then adjusts<br />
helm to sail to correct wind angle.<br />
TIPS<br />
1. Best times to gybe the asymmetric are:<br />
a) The beginning of a puff<br />
b) Up the back of the wave<br />
c) When the boat is going slow.<br />
2. When dropping the asymmetric always<br />
pull the sail by the luff or the tack area.<br />
13
14<br />
<strong>Mumm</strong> <strong>30</strong> <strong>Tuning</strong> <strong>Guide</strong><br />
GYBING THE SYMMETRIC SPINNAKER<br />
PREPARATION<br />
1. Look behind your boat to be sure you will have clear air after you gybe.<br />
2. Load the weather spinnaker sheet onto the cabin top<br />
winch. Place two turns on the winch and take-up the slack.<br />
3. Be sure the weather sheet (new) is on top of the spinnaker pole, leading around the<br />
outside of the forestay.<br />
4. Make sure the spinnaker barberhaulers are set for the existing wind pressure.<br />
5. The lazy guy should be off & ready to go forward (Bow).<br />
6. Give the foreguy 600mm (2ft.) of slack so the bowperson can take the spinnaker<br />
pole off the mast.<br />
BASIC GYBING<br />
SEQUENCE<br />
STEP 1<br />
Pit<br />
Releases the foreguy as the spinnaker pole<br />
is trimmed aft as the boat turns down.<br />
Guy trimmer<br />
trims the pole aft.<br />
STEP 2<br />
Sheet trimmer<br />
Takes up on the new spinnaker sheet<br />
before the spinnaker pole trip is called.<br />
Eases the old spinnaker sheet out to the<br />
headstay, while tailing in on the new<br />
spinnaker sheet, as the boat is turned.<br />
STEP 3<br />
Bow<br />
1. Has the new (lazy) guy in hand ready to<br />
place into pole.<br />
2. Trips guy out of jaws.<br />
3. Releases pole from mast and connects<br />
lazy spinnaker guy, pushes pole out and<br />
forward underneath spinnaker sheet and<br />
attaches to the mast again.<br />
Pit<br />
Eases foreguy 150mm (6”). Releases<br />
spinnaker tweaker all the way.<br />
GYBING: LIGHT-<br />
MODERATE AIR<br />
Sheet trimmer<br />
Quickly eases the old sheet to the headstay<br />
while trimming the new sheet, then sets the<br />
barberhaulers 1/2 way down, and eases<br />
sheet to the headstay slowly while<br />
trimming in the new sheet.<br />
Guy Trimmer<br />
When the trip is called, quickly releases<br />
the guy from the winch, making sure the<br />
sheet trimmer has taken up the new sheet.<br />
Changes to the new side of the cockpit to<br />
tail new guy with 2 turns around the winch<br />
once the spinnaker pole has been connected<br />
to the mast.<br />
Helm<br />
The helmsman controls the gybe. The<br />
helmsman turns the boat when the clew is<br />
near the headstay. The turn should be<br />
smooth maintaining medium speed<br />
coming out of the optimum VMG angle.<br />
Full rotation of the spinnaker is key to a<br />
light air gybe.<br />
GYBING: LIGHT-<br />
MODERATE AIR<br />
STEP 4<br />
Bow<br />
Moves aft to the new leeward side and collects<br />
the new lazy guy ready for another<br />
gybe.<br />
Pit<br />
Sets the barberhaulers 1/2 way down,<br />
and eases sheet to the headstay slowly<br />
while trimming the new sheet<br />
Sheet trimmer<br />
Trims the sail, paying attention to increasing<br />
speed by working with the helmsman<br />
for optimum sheeting angle.<br />
STEP 5<br />
Helm<br />
Sails a slightly high course until the boat<br />
speed is optimum, then adjusts helm to<br />
sail to correct wind angle.<br />
TIP<br />
The best times to gybe the<br />
spinnaker are:<br />
a) The beginning of a puff.<br />
b) Down the front of a wave<br />
c) When the boat is going fast.
CREW WEIGHT<br />
Crew weight, when used effectively, is a<br />
powerful tool on any boat. In level racing<br />
and one design classes, the optimum<br />
distribution of crew weight can have a<br />
large impact on overall sailing<br />
performance. Besides keeping the boat<br />
on its feet, and reducing heeling angle,<br />
weight distribution can change the<br />
sailing characteristics of the boat. For<br />
the <strong>Mumm</strong> <strong>30</strong>, the optimum heel angle<br />
is 15-20 degrees.<br />
SAILS<br />
When sailing upwind in light air;<br />
• Have the headsails flaked into the<br />
turtle, rolled up and tied.<br />
• Position sails around the base of the<br />
mast.<br />
• Place downwind sails forward on the<br />
bunks.<br />
SAILING TIPS:<br />
• Optimal windspeed for practicing<br />
asymmetric spinnaker gybing for the<br />
first time is 7-10 TWS<br />
• When reaching with either asymmetric<br />
or spinnaker, be sure to ease the<br />
leeward barberhaulers.<br />
• When adjusting sail trim, count the<br />
number of ratchet clicks, this helps to<br />
repeat fast settings.<br />
<strong>Mumm</strong> <strong>30</strong> <strong>Tuning</strong> <strong>Guide</strong><br />
CREW WEIGHT IN LIGHT AIR<br />
UPWIND:<br />
0-7 KNOTS<br />
Position the crew forward<br />
and to leeward to induce<br />
heel or down below if seas<br />
are choppy. In puffy conditions,<br />
nominate one or<br />
two of your most agile<br />
crewmembers to be<br />
‘moveable ballast’. Adjust<br />
their body weight across<br />
the boat to maintain heel.<br />
REACHING:<br />
0-7 KNOTS<br />
Place some of the crew<br />
down below to leeward<br />
and/or the middle of the<br />
floor. The remaining crew<br />
are forward on the rail<br />
or around the<br />
leeward shroud.<br />
In light air, you shouldn’t<br />
sail directly downwind. Use<br />
the asymmetric as a VMG<br />
sail.<br />
15
16<br />
<strong>Mumm</strong> <strong>30</strong> <strong>Tuning</strong> <strong>Guide</strong><br />
CREW WEIGHT IN MEDIUM - HEAVY AIR<br />
SAILS<br />
When sailing upwind in moderate air;<br />
• Have the headsails flaked into their<br />
turtles, rolled up and tied.<br />
• Position sails forward around<br />
the floorboards.<br />
• Place downwind sails on the<br />
middle bunks.<br />
In heavy air;<br />
• Have the sails flaked, rolled in their<br />
turtles and tied.<br />
• Position the sails aft behind the main<br />
hatch on each side of the steps.<br />
TIPS<br />
• When the mainsail flogs upwind, the<br />
center of balance is transferred to the<br />
headsail. Adjust your helming<br />
technique to account for this. Make<br />
sure that you have firm vang on.<br />
• When overpowered upwind, try<br />
easing the mainsheet 150mm (6”) on<br />
the fine tune adjustment.<br />
• If you feel that you are going slow,<br />
drop the traveler down, ease the<br />
backstay and mainsheet.<br />
• When you adjust the jib halyard, three<br />
things change:<br />
1) head depth<br />
2) draft position<br />
3) vertical curvature<br />
• When crewmembers shift their weight<br />
in response to puffs, do four things:<br />
1) adjust outhaul<br />
2) adjust mainsheet<br />
3) adjust backstay and<br />
4) adjust jibsheet.<br />
• When the boat is up to speed and<br />
sailing comfortably, have the mainsheet<br />
trimmer turn around and hike<br />
with legs positioned over the side.<br />
UPWIND<br />
In moderate air, all the<br />
crew will be on the rail.<br />
The first crewmember will<br />
be situated against the<br />
windward stanchion which<br />
is located 60cm (24”) back<br />
from the shroud.<br />
HEAVY AIR<br />
In heavy air (13-22 knots)<br />
the crew should be hiking<br />
as hard as possible, with<br />
one person sitting behind<br />
the helmsman.<br />
Upwind 13-22 knots<br />
REACHING<br />
Consolidate the crew in the<br />
middle of the boat, hiking<br />
as hard as possible. In<br />
heavy air, the crew should<br />
be sitting well aft, and hiking<br />
hard.<br />
Sailing downwind, balance<br />
the crew evenly across the<br />
boat. In heavy air, the crew<br />
should be across the back<br />
of the boat, especially in<br />
steep seas. If sailing deep<br />
angles, place the entire<br />
crew on the leeward rail.<br />
Reaching 7-12 knots
MAINSAIL SHAPE<br />
<strong>Mumm</strong> <strong>30</strong> <strong>Tuning</strong> <strong>Guide</strong><br />
NOTE: In the following sail photos, depth is listed as a<br />
percent of chord length. Draft position is measured as a<br />
percent of chord length from the front of the sail.<br />
True Wind Speed: 5 knots Top: 12.88 of cord length @ 41% draft position MIddle: 13.32 @ 45%<br />
Bottom: 10.27 @ 44% Notes: Set-up for maximum power, more twist is required using the top mast backstay.<br />
True Wind Speed: 15 knots Top: 8.<strong>30</strong> of cord length @ 46% MIddle: 9.50 @ 50% Bottom: 7.90 @ 46%<br />
NOTES: The sail luff is just beginning to lift.<br />
17
18<br />
<strong>Mumm</strong> <strong>30</strong> <strong>Tuning</strong> <strong>Guide</strong><br />
MAINSAIL SHAPE<br />
TWS: 20 knots Top: 5.35 @ 57% MIddle: 6.99 @ 55% Bottom: 6.04 @ 47%<br />
NOTES: Maximum flattening on all adjustments.<br />
TWS: 25 knots Top: 5.16 @ 61% MIddle: 6.90 @ 58% Bottom: 6.42 @ 52%<br />
NOTES: In this photo, we are driving off the lower leech only. It would be best to change to a heavy air jib.
LIGHT HEADSAIL SHAPE<br />
<strong>Mumm</strong> <strong>30</strong> <strong>Tuning</strong> <strong>Guide</strong><br />
TWS: 6 knots Top: 14.89 @ 45% MIddle: 18.23 @ 47% Bottom: 14.64 @ 47%<br />
NOTES: This sail is set up very full and open, looking for power.<br />
TWS: 9 knots Top: 13.64 @ 41% MIddle: 15.52 @ 43% Bottom: 12.67 @ 43%<br />
NOTES: This sail is at the top end of its range, the boat needs the medium headsail.<br />
19
20<br />
<strong>Mumm</strong> <strong>30</strong> <strong>Tuning</strong> <strong>Guide</strong><br />
MEDIUM HEADSAIL SHAPE<br />
TWS 15 knots Top 16.60 @ 39% MIddle 16.00 @ 41% Bottom 12.00 @ 40%<br />
NOTES: Sail is well set-up with the draft forward and the leech open.<br />
TWS 23 knots Top 16.68 @ 35% MIddle 16.03 @ 38% Bottom 13.88 @ 34%<br />
NOTES: The front end of this sail is lifting as the boat is feathered in this windspeed.
<strong>Mumm</strong> <strong>30</strong> <strong>Tuning</strong> <strong>Guide</strong><br />
HEAVY HEADSAIL SHAPE<br />
TWS: 25 knots Top: 8.46 @ 38.5% MIddle: 12.5 @ 33.3% Bottom: 10.3 @ 37%<br />
NOTES: Under high load, this sail fits the rig perfectly.<br />
TWS: <strong>30</strong> knots Top: 9 @ 46.15% MIddle: 13.89 @ 34.7% Bottom: 11.11 @ 34.8%<br />
NOTES: The sail is smooth under extreme load with progressive linear twist.<br />
21
22<br />
<strong>Mumm</strong> <strong>30</strong> <strong>Tuning</strong> <strong>Guide</strong><br />
ASYMMETRIC SPINNAKER TIPS<br />
BROACHING<br />
CONDITIONS<br />
The <strong>Mumm</strong> <strong>30</strong> is fast, responsive and<br />
accelerates quickly, especially on a<br />
reach. Keeping the boat balanced and<br />
maintaining speed is a delicate mix of<br />
knowing when to push the boat, and<br />
when to back-off to prevent a broach.<br />
When sailing in moderate breeze (12-16<br />
knots), if the boat begins to broach, the<br />
first rule is...don’t panic! Each member<br />
of the crew should stay in their position<br />
and follow-through the steps listed<br />
below to keep the boat on its feet and<br />
maintain speed, without surrendering<br />
precious real estate on the race course<br />
spinning out on a broach.<br />
1. Move crew weight aft and out.<br />
2. Ease mainsheet.<br />
3. Ease vang.<br />
4. Ease asymmetric spinnaker.<br />
5. Ease barberhauler.<br />
6. Sail a lower course.<br />
7. Change to a smaller sail.<br />
ASYMMETRIC<br />
SPINNAKER<br />
NOTES<br />
<strong>30</strong>/20 Asymmetric<br />
With 9 vt. the tested cross-over, this<br />
sail was proven before the fleet grew to<br />
34 boats. At a crowded mark, the<br />
asymmetric sail stays in the bag<br />
allowing the tactician time to position<br />
the boat downwind allowing more<br />
gibing options and choice of fast<br />
lanes.<br />
Cloth Weight: .6 Poly TWS: 16 knots AWS: 11.2 knots<br />
TWA: 135° AWA: 97.3°
<strong>Mumm</strong> <strong>30</strong> <strong>Tuning</strong> <strong>Guide</strong><br />
MASTHEAD SPINNAKER TIPS<br />
.75 oz. Spinnaker<br />
(photo not available)<br />
This sail is more of an All Purpose<br />
design than the light spinnaker for<br />
better helm control in a breeze. Using<br />
the .75 oz. in the upper wind ranges is<br />
suggested so you don’t overtax the .5.<br />
SAIL TRIM TIPS<br />
• Have a pair of trained eyes looking<br />
behind for downwind pressure, to<br />
position the boat into the fast lanes.<br />
• Use a snap-in block for the spinnaker<br />
barberhaulers.<br />
• When running with the spinnaker,<br />
make sure both spinnaker barberhaulers<br />
are set between 3/4 and full.<br />
SAIL CARE:<br />
Congratulations on the purchase of your<br />
North Sails inventory. Included are<br />
suggestions to assist in general sail care<br />
and maintenance. Keep a sail repair kit<br />
onboard for ‘fixes on the fly’.<br />
Contents should include:<br />
• Scissors<br />
• 10’ x 3” sticky-back Kevlar<br />
• 20’ x 3” white insignia<br />
• Pre-waxed twine<br />
• 4 hand sewing needles & a palm.<br />
You can purchase a kit through your<br />
nearest North Sails loft, or put one<br />
together on your own.<br />
Spinnakers...On the final spinnaker<br />
set of the day, have one or two people<br />
check over the sail for any small holes<br />
or tears. Any tear over 4” should be<br />
sent to your nearest North loft for<br />
repair. DO NOT place sails into a<br />
swimming pool - chlorine will damage<br />
the sails. When folding an asymmetric<br />
sail on your lawn, stay away from dog<br />
poop. If you have any Dacron sails,<br />
Sail Type: .6 Nylon Runner TWS: 18 knots AWS: 8.7 knots<br />
TWA: 146° AWA: 113° Notes: The spinnaker pole in this photo needs to be<br />
lifted at the inboard end of the pole. The spinnaker barberhauler is set at maximum.<br />
spray Lysol into the bag to prevent<br />
mildew. Taking care of your sails will<br />
extend the life of your sail inventory.<br />
Mainsail... If left on the boom for an<br />
extended period of time, remove the<br />
battens to prevent warping or breaking.<br />
Always ease the outhaul to relieve the<br />
load. If any sponsor logos are placed on<br />
the sail, they should be removed<br />
immediately. The longer they are left on,<br />
the harder they are to remove.Remaining<br />
small sections can be removed with a<br />
blow-dryer set on LOW. Glue can be<br />
removed with an acetone wipe.<br />
Headsails... If the head of the lufftape<br />
splits open, use some ‘Krazy Glue’ or<br />
‘Loctite’ to reseal the trouble areas.<br />
Periodically check the battens for<br />
breakage.<br />
23
TWS – True Wind Speed<br />
24<br />
<strong>Mumm</strong> <strong>30</strong> <strong>Tuning</strong> <strong>Guide</strong><br />
SAIL RANGE CHART<br />
34<br />
33<br />
32<br />
31<br />
<strong>30</strong><br />
29<br />
28<br />
27<br />
26<br />
25<br />
24<br />
23<br />
22<br />
21<br />
20<br />
19<br />
18<br />
17<br />
16<br />
15<br />
14<br />
13<br />
12<br />
11<br />
10<br />
9<br />
8<br />
7<br />
6<br />
5<br />
4<br />
3<br />
2<br />
1<br />
Overlap<br />
Heavy Headsail<br />
60<br />
Overlap<br />
Medium<br />
Headsail<br />
Overlap<br />
70<br />
Light Headsail<br />
Frac.<br />
Asy.<br />
Asymmmetric<br />
or Symmetric<br />
Spinnaker<br />
80 90 100 110<br />
Both Sails<br />
TWA – True Wind Angle<br />
120 1<strong>30</strong> 140 150<br />
Fractional<br />
Spinnaker<br />
.75 Masthead<br />
Spinnaker<br />
Overlap<br />
<strong>30</strong>/20 20/20 Masthead<br />
Spinnaker<br />
No Mans Land<br />
170<br />
160 180<br />
How to use this Chart: Select True Wind Speed (TWS) on the vertical bar and True Wind Angle (TWA) on the horizontal bar.<br />
Where the two intersect will tell you what sail should be used. If this point falls within one of the overlap areas, there will be little<br />
or no speed difference between the two sails.
RUNNING RIGGING LIST<br />
<strong>Mumm</strong> <strong>30</strong> <strong>Tuning</strong> <strong>Guide</strong><br />
Halyards<br />
MAINSAIL Tapered Technora ® with captive D-shackle<br />
GENOA Tapered Technora with snap shackle<br />
SPINNAKER Tapered Spectra ® with snap shackle<br />
Sheets<br />
GENOA 100% Spectra core/Polyester cover with J-Lock Jr. shackle<br />
SPINNAKER Tapered Spectra with snap shackle<br />
ASYMMETRIC CLEW STRAP Eye-to-Eye Spectra<br />
AFTERGUYS Tapered Spectra with snap shackle<br />
• In Spectra and Technora rigging, chafe is your enemy. When the<br />
covers wear, exposing the core, the breaking strength of the halyard or sheet is<br />
greatly reduced.<br />
• After a windy series, double-check all sheets, guys, and halyards for chafe. As a<br />
quick fix, tape over worn areas, and replace as soon as feasible.<br />
• Teflon tape works extremely well, and is available from North Sails Rigging. The<br />
trade-off between performance and weight means the rigging is not ‘overbuilt’ for<br />
the loads onboard the <strong>Mumm</strong> <strong>30</strong>.<br />
• On most boats, the halyards and sheets should be replaced every year. If you<br />
have a busy racing calendar, spare halyards and genoa sheets are<br />
recommended.<br />
25
26<br />
<strong>Mumm</strong> <strong>30</strong> <strong>Tuning</strong> <strong>Guide</strong><br />
TIPS & TECHNIQUES<br />
• Keep a disposable camera onboard. You can build up a library<br />
of fast sail shapes to study later.<br />
• Warmer waters encourage bottom growth, make sure<br />
the bottom is cleaned just before every race.<br />
• Keep a toolkit onboard - it should include an adjustable wrench,<br />
vise grips, screwdriver(s), serrated edged knife, and<br />
rigging tape so you can change the tension on the diagonals<br />
between races.<br />
• Between races, always check that the mast partners<br />
are still in place.<br />
• Use a piece of shockcord to hold down the tack slug on the<br />
gooseneck fitting.<br />
• Add a retainer bracket across the top of the traveler<br />
cleat to hold the traveler line.<br />
• Install a piece of shockcord from the hounds to a small stainless<br />
ring that the spinnaker halyard passes through. When the<br />
spinnaker halyard is cast-off, the ring pulls the halyard to the<br />
mast preventing the halyard from getting stuck behind the top<br />
battens in the main.<br />
• If the jib hits the spreaders in heavy air, use the<br />
forward luff groove.<br />
• Install a spreader window in the main for easy viewing of the jib<br />
leech.<br />
• When you hit a velocity header, let the boat glide to<br />
weather until the new target speed is suited to the<br />
new wind speed.<br />
• If you are forced to sit below in light air, make sure you have a<br />
good newspaper and cookies!<br />
• Back down 6 minutes before the start of the race.<br />
• Use Kevlar or Spectra for jib barberhaulers.<br />
• In moderate air, try cross-sheeting the jib.<br />
• Keeping the crew on the rail is a number one priority.<br />
• Keep the spinnaker within easy reach, attach a sail tie<br />
to the spinnaker bag and duct tape to the main hatch.<br />
• Below 8 knots of wind, don’t be afraid to carry the main boom<br />
above the centerline.<br />
• Prevent spinnaker sheets and guys from dragging in<br />
the water by placing a cleat on the cockpit edge by the<br />
genoa winch.<br />
• Cover the outboard end of the top batten with stickyback. This<br />
helps the backstay clear the mainsail in light air.<br />
• Sight up the back of the mast when sailing upwind to<br />
be sure the mast is straight side-to-side.<br />
Note: These are just a few ideas we’ve thought of. You<br />
may have more. In future versions of the <strong>Mumm</strong> <strong>30</strong><br />
guide, we will update these sailing tips for newer ones.<br />
Send in your suggestions by calling your North<br />
representative for fax us this page with your additions.<br />
(phone listings appear on page 24). We look forward to<br />
hearing from you.
<strong>Mumm</strong> <strong>30</strong> <strong>Tuning</strong> <strong>Guide</strong><br />
1997 PERFORMANCE TARGETS<br />
UPWIND<br />
TWS Boatspeed AWA TWA<br />
4 3.79 23.3 45.3<br />
5 4.50 23.2 44.5<br />
6 5.22 23.0 43.2<br />
7 5.60 22.9 41.7<br />
8 5.96 22.7 40.5<br />
9 6.15 22.7 39.5<br />
10 6.22 22.7 38.4<br />
11 6.<strong>30</strong> 22.9 37.5<br />
12 6.34 23.0 37.1<br />
13 6.39 23.4 <strong>36</strong>.7<br />
14 6.41 23.6 <strong>36</strong>.5<br />
15 6.45 24.0 <strong>36</strong>.5<br />
16 6.48 24.4 <strong>36</strong>.4<br />
17 6.49 25.0 <strong>36</strong>.4<br />
18 6.50 25.4 <strong>36</strong>.5<br />
19 6.52 25.7 <strong>36</strong>.6<br />
20 6.55 26.0 <strong>36</strong>.6<br />
25 6.60 28.3 38.0<br />
<strong>30</strong> 6.61 31.1 40.2<br />
DOWNWIND<br />
TWS Boatspeed AWA TWA<br />
4 3.81 73.7 139.8<br />
5 4.56 77.8 141.6<br />
6 5.32 81.9 143.3<br />
7 5.79 89.9 146.0<br />
8 6.26 97.9 148.7<br />
9 6.55 106.4 151.0<br />
10 6.84 114.9 153.2<br />
11 7.11 120.0 154.3<br />
12 7.38 125.1 155.3<br />
13 7.53 132.9 158.2<br />
14 7.68 140.7 161.1<br />
15 8.61 127.5 154.0<br />
16 9.55 113.8 146.8<br />
17 10.14 114.4 147.1<br />
18 10.73 115.0 147.5<br />
19 11.32 115.5 147.8<br />
20 11.92 116.1 148.1<br />
25 15.23 121.3 152.1<br />
<strong>30</strong> 17.41 131.4 156.7<br />
All targets supplied courtesy of Bruce Farr & Associates, Inc.,Farr International & Grant Spanhake, North Sails PRG
<strong>Mumm</strong> <strong>30</strong> <strong>Tuning</strong> <strong>Guide</strong><br />
WORLDWIDE SALES & SERVICE<br />
At North Sails, we view each sail purchase as the beginning of a long and<br />
rewarding relationship. We base this expectation on a strong service<br />
commitment that includes preventive maintenance, sound advice, education<br />
and expert repairs. Your nearby North loft offers a wide range of services<br />
including...<br />
annual checkover sail tune-up educational<br />
sail washing retrofitting resources<br />
winter storage seminars<br />
North Sails is a network of over 100 lofts in 28 countries around the world.<br />
Each offers knowledgeable, friendly, personal sales and service. Our size and<br />
worldwide reach also means North has the world’s most expansive sailmaking<br />
database. It would be hard to find a sailboat for which we cannot make a fast,<br />
durable and long lasting sail.<br />
North Sails Lofts<br />
United States<br />
Atlanta . . . . . . . . . . . . . . . . . 770-945-2800<br />
Cape Cod . . . . . . . . . . . . . . . 508-778-6550<br />
Carolina . . . . . . . . . . . . . . . . 252-728-7481<br />
Channel Islands . . . . . . . . . . 805-984-8100<br />
Chesapeake. . . . . . . . . . . . . . 410-269-5662<br />
Colorado . . . . . . . . . . . . . . . <strong>30</strong>3-694-2345<br />
Detroit . . . . . . . . . . . . . . . . . 810-776-13<strong>30</strong><br />
East . . . . . . . . . . . . . . . . . . . 203-877-7621<br />
Ft. Lauderdale . . . . . . . . . . . . 954-522-8840<br />
Gulf Coast . . . . . . . . . . . . . . 727-898-1123<br />
Hampton . . . . . . . . . . . . . . . 757-722-4000<br />
Hawaii . . . . . . . . . . . . . . . . . 808-591-9192<br />
Huntington Beach . . . . . . . . . 714-898-1234<br />
Long Island . . . . . . . . . . . . . . 631-673-5700<br />
Marina Del Rey . . . . . . . . . . . 310-827-8888<br />
Midwest . . . . . . . . . . . . . . . . 773-489-1<strong>30</strong>8<br />
New Jersey . . . . . . . . . . . . . . 732-528-8899<br />
New Orleans . . . . . . . . . . . . . 504-831-1775<br />
Newport Beach . . . . . . . . . . . 949-642-7238<br />
Northeast . . . . . . . . . . . . . . . 978-745-1400<br />
One-Design East . . . . . . . . . . 203-877-7627<br />
One-Design Central . . . . . . . 614-418-9410<br />
One-Design Chesapeake . . . . 410-269-5662<br />
One-Design West . . . . . . . . . 619-226-1415<br />
One-Design Zenda. . . . . . . . . 262-275-9728<br />
Oregon . . . . . . . . . . . . . . . . . 503-282-4282<br />
Puerto Rico . . . . . . . . . . . . . . 787-863-3761<br />
Rhode Island . . . . . . . . . . . . . 401-683-7997<br />
San Diego . . . . . . . . . . . . . . . 619-224-2424<br />
San Francisco . . . . . . . . . . . . 510-522-5373<br />
Seattle . . . . . . . . . . . . . . . . . 206-632-5753<br />
South Carolina . . . . . . . . . . . 843-744-7245<br />
Texas. . . . . . . . . . . . . . . . . . . 281-334-7559<br />
Vermilion. . . . . . . . . . . . . . . . 440-967-9576<br />
Canada<br />
Atlantic . . . . . . . . . . . . . . . . 902-634-3343<br />
Toronto . . . . . . . . . . . . . . . . 416-259-9644<br />
Vancouver . . . . . . . . . . . . . . 604-271-2111<br />
Quebec . . . . . . . . . . . . . . . . . 514-748-8<strong>36</strong>8<br />
Europe<br />
Austria . . . . . . . . . . . . . . . . . 43-7666 7997<br />
Benelux . . . . . . . . . . . . . . . 32-3-325 67 20<br />
Denmark . . . . . . . . . . . . . . 45-39-20 40 90<br />
Espana (Pontevedre) . . . . . 34-98-654-8132<br />
Espana (Palma) . . . . . . . . . . 34-71-725-752<br />
Finland . . . . . . . . . . . . . . . 35-82-247 10 00<br />
France . . . . . . . . . . . . . . . . 33-297-53 78 58<br />
France-Mediteranee . . . . . . 33-493-<strong>36</strong> 66 17<br />
Germany . . . . . . . . . . . . . . 49-40-745 77 78<br />
Germany-Bodensee . . . . . . . 49-7543-16 89<br />
Greece . . . . . . . . . . . . . . . . . <strong>30</strong>-1-417-4669<br />
Italy . . . . . . . . . . . . . . . . . . . 39-0185-3526<br />
Norway-West . . . . . . . . . . . 47-66-79 89 14<br />
Norway East One-Design . . . 47-67-53 77 29<br />
Sweden . . . . . . . . . . . . . . . . 46-8-765 15 <strong>30</strong><br />
Sweden-Gothenberg . . . . . . 46-31-29 11 52<br />
Sweden-Kalmar . . . . . . . . 46-480-41 12 99<br />
Sweden-Malmö . . . . . . . . . . 46-4-015 4101<br />
Switzerland . . . . . . . . . . . . . 412-278-23222<br />
Switzerland (Schweitz) . . . . . 417-168-68525<br />
Turkey . . . . . . . . . . . . . . . 90-212-696-99 15<br />
UK . . . . . . . . . . . . . . . . . . 44-2380-453109<br />
UK One-Design . . . . . . . 44-1703-45 52 20<br />
International<br />
Argentina . . . . . . . . . . . 54-1-147-250200<br />
Australia-Melbourne . . . . . . 613-953-40<strong>36</strong>3<br />
Australia-Sydney . . . . . . . . . 612-999-75966<br />
Brazil . . . . . . . . . . . . . . . . 55-12-472-2607<br />
Chile . . . . . . . . . . . . . . . . . 56-32-970-504<br />
Guadeloupe . . . . . . . . . . . . . . 590-908044<br />
Japan (Kanagawa) . . . . . . . 81-45-770-5666<br />
Japan (Kansai) . . . . . . . . . 81-79-826-7771<br />
New Zealand . . . . . . . . . . . . 649-359-5999<br />
South Africa, Capetown . . 27-21-511-2154<br />
South Africa, Durban . . . . . 27-31-332-<strong>36</strong>24<br />
28


