

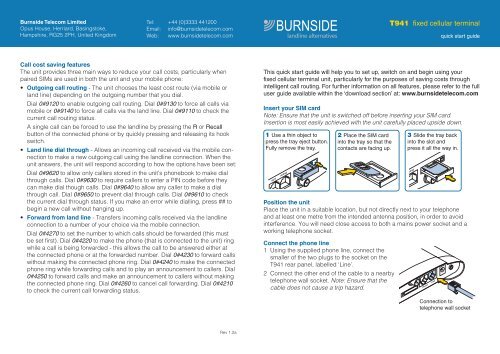
T941 Fixed Cellular Terminal Quick Start Guide - Burnside Telecom
T941 Fixed Cellular Terminal Quick Start Guide - Burnside Telecom
T941 Fixed Cellular Terminal Quick Start Guide - Burnside Telecom

Create successful ePaper yourself
Turn your PDF publications into a flip-book with our unique Google optimized e-Paper software.
BURNSIDE<br />
<strong>T941</strong> fixed cellular terminal<br />
<strong>Burnside</strong> <strong>Telecom</strong> Limited<br />
Tel: +44 (0)3333 441200<br />
Opus House, Herriard, Basingstoke,<br />
Email: info@burnsidetelecom.com<br />
Hampshire, RG25 2PH, United Kingdom Web: www.burnsidetelecom.com<br />
landline alternatives<br />
quick start guide<br />
Call cost saving features<br />
The unit provides three main ways to reduce your call costs, particularly when<br />
paired SIMs are used in both the unit and your mobile phone:<br />
• Outgoing call routing - The unit chooses the least cost route (via mobile or<br />
land line) depending on the outgoing number that you dial.<br />
Dial 0#9120 to enable outgoing call routing. Dial 0#9130 to force all calls via<br />
mobile or 0#9140 to force all calls via the land line. Dial 0#9110 to check the<br />
current call routing status.<br />
A single call can be forced to use the landline by pressing the R or Recall<br />
button of the connected phone or by quickly pressing and releasing its hook<br />
switch.<br />
• Land line dial through - Allows an incoming call received via the mobile connection<br />
to make a new outgoing call using the landline connection. When the<br />
unit answers, the unit will respond according to how the options have been set:<br />
Dial 0#9620 to allow only callers stored in the unit’s phonebook to make dial<br />
through calls. Dial 0#9630 to require callers to enter a PIN code before they<br />
can make dial though calls. Dial 0#9640 to allow any caller to make a dial<br />
through call. Dial 0#9650 to prevent dial through calls. Dial 0#9610 to check<br />
the current dial through status. If you make an error while dialling, press ## to<br />
begin a new call without hanging up.<br />
• Forward from land line - Transfers incoming calls received via the landline<br />
connection to a number of your choice via the mobile connection.<br />
Dial 0#4270 to set the number to which calls should be forwarded (this must<br />
be set first). Dial 0#4220 to make the phone (that is connected to the unit) ring<br />
while a call is being forwarded - this allows the call to be answered either at<br />
the connected phone or at the forwarded number. Dial 0#4230 to forward calls<br />
without making the connected phone ring. Dial 0#4240 to make the connected<br />
phone ring while forwarding calls and to play an announcement to callers. Dial<br />
0#4250 to forward calls and make an announcement to callers without making<br />
the connected phone ring. Dial 0#4260 to cancel call forwarding. Dial 0#4210<br />
to check the current call forwarding status.<br />
Rev 1.2a<br />
This quick start guide will help you to set up, switch on and begin using your<br />
fixed cellular terminal unit, particularly for the purposes of saving costs through<br />
intelligent call routing. For further information on all features, please refer to the full<br />
user guide available within the ‘download section’ at: www.burnsidetelecom.com<br />
Insert your SIM card<br />
Note: Ensure that the unit is switched off before inserting your SIM card.<br />
Insertion is most easily achieved with the unit carefully placed upside down.<br />
1 Use a thin object to<br />
press the tray eject button.<br />
Fully remove the tray.<br />
Phone Line<br />
2 Place the SIM card<br />
into the tray so that the<br />
contacts are facing up.<br />
Position the unit<br />
Place the unit in a suitable location, but not directly next to your telephone<br />
and at least one metre from the intended antenna position, in order to avoid<br />
interference. You will need close access to both a mains power socket and a<br />
working telephone socket.<br />
Connect the phone line<br />
1 Using the supplied phone line, connect the<br />
smaller of the two plugs to the socket on the<br />
<strong>T941</strong> rear panel, labelled ‘Line’.<br />
2 Connect the other end of the cable to a nearby<br />
telephone wall socket. Note: Ensure that the<br />
cable does not cause a trip hazard.<br />
Phone Line<br />
3 Slide the tray back<br />
into the slot and<br />
press it all the way in.<br />
Phone Line<br />
Connection to<br />
telephone wall socket
Connect a telephone<br />
1 Connect the supplied cable<br />
adapter to the socket on the<br />
rear panel, labelled ‘Phone’.<br />
Your phone may have<br />
a connector that fits directly<br />
into the unit’s ‘Phone’<br />
socket, in which case the<br />
adapter is not needed.<br />
2 Connect your standard<br />
telephone to the cable<br />
adapter.<br />
Connect the magnetic mount antenna<br />
1 Assemble the antenna by screwing the<br />
upper section into the base until it is<br />
finger tight.<br />
2 Position the antenna where required, if<br />
possible on a secure metal surface.<br />
Note: Keep the antenna base away<br />
from monitor screens, televisions,<br />
credit cards or any device affected by<br />
magnetism.<br />
3 Feed the antenna cable to the rear of<br />
the unit, insert the connector into the<br />
antenna socket and twist the collar until<br />
finger tight.<br />
Note: Ensure that the cable does not<br />
cause a trip hazard.<br />
Connect power<br />
1 Attach the connector from the<br />
power adapter to the socket on<br />
the far right of the rear panel.<br />
2 Plug the power adapter into a<br />
nearby mains outlet. The unit<br />
will begin operation as soon as<br />
power is applied.<br />
Phone Line<br />
Phone Line<br />
Cable<br />
adapter<br />
Phone Line<br />
Phone<br />
connector<br />
Antenna<br />
connector<br />
Power<br />
adapter<br />
connector<br />
Basic operation<br />
Once connected, powered on and ready to operate, the unit will show the time,<br />
date, the name of the current network and an indication of the signal strength:<br />
Date and time<br />
To alter, pick up the handset,<br />
press 0#550 and follow<br />
the screen instructions<br />
(when prompted, use zero<br />
as a confirmation button).<br />
Signal strength<br />
The height of the<br />
bar in the top right<br />
corner indicates<br />
signal strength.<br />
To make a call, lift the handset and dial the number as usual. The unit will use<br />
either the mobile or landline as specified by the outgoing call settings (see rear<br />
page). To force the use of the land line, press your phone’s R or Recall button or<br />
briefly press and release the handset hook switch (display will show ‘Line<br />
connected’) and dial.<br />
To make international calls, lift the handset and press the zero button until ‘+’ is<br />
displayed, then enter the standard country code.<br />
Using the menu<br />
Lift the handset and press 0# on the keypad to enter the menu. You can then:<br />
• Navigate the menu using these control keys:<br />
to go back/up; to go down/forward; to enter/confirm<br />
• Or enter a code to reach a particular menu item:<br />
1 Phonebook<br />
1 Search<br />
2 Add entry<br />
3 Edit<br />
4 Status<br />
5 Erase<br />
2 Messages<br />
1 Write message<br />
2 Inbox<br />
3 Outbox<br />
4 Message settings<br />
3 Call register (mobile)<br />
1 Missed<br />
2 Received<br />
3 Dialled<br />
4 Erase list<br />
4 Divert & forward<br />
1 Mobile network divert<br />
2 Forward landline<br />
5 Settings<br />
1 <strong>Terminal</strong> settings<br />
2 Phone settings<br />
3 Network settings<br />
4 Input/Output settings<br />
5 Set clock<br />
6 Special function<br />
1 Lock outgoing calls<br />
2 Lock menu functions<br />
3 Monitor inputs<br />
4 Disconnect from network<br />
8 Help<br />
9 Outgoing call routing<br />
1 Calls via mobile networks<br />
2 Prefix of mobile numbers<br />
3 Landline International code<br />
4 Use landline prefix<br />
5 Change landline prefix<br />
6 Dial through control<br />
For full details of<br />
all menu options,<br />
please see the<br />
full user guide.