Operator's Manual - Greek Airsoft
Operator's Manual - Greek Airsoft
Operator's Manual - Greek Airsoft
Create successful ePaper yourself
Turn your PDF publications into a flip-book with our unique Google optimized e-Paper software.
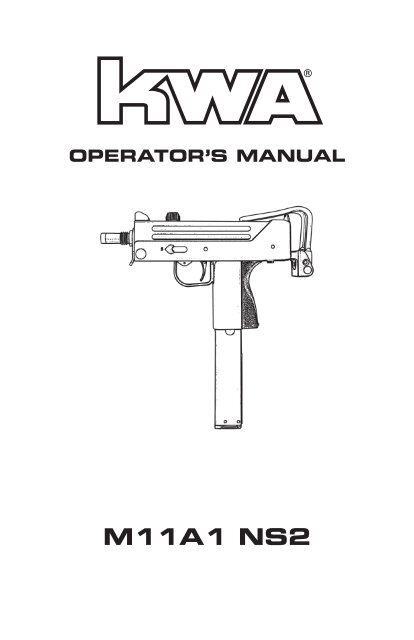
OPERATOR’S MANUAL<br />
®<br />
M11A1 NS2
TABLE OF CONTENTS<br />
Use of this <strong>Manual</strong> ...........................................................................................3<br />
Safety Guidelines ........................................................................................ 3-4<br />
Warranty and Service .................................................................................. 5-6<br />
Specifications ..................................................................................................7<br />
Contents .........................................................................................................8<br />
Functions and Features ..................................................................................8<br />
Charging Gas ..................................................................................................9<br />
Loading BBs ..................................................................................................10<br />
Locking Bolt ..................................................................................................11<br />
Loading Magazine .........................................................................................11<br />
Selector .........................................................................................................12<br />
Safety ............................................................................................................12<br />
Retractable Stock ..........................................................................................13<br />
Shooting ........................................................................................................13<br />
Open Bolt ......................................................................................................14<br />
After Shooting ................................................................................................14<br />
Hop-Up System ............................................................................................15<br />
Adjustment Point ..........................................................................................16<br />
Disassembly ............................................................................................ 17-18<br />
Assembly .......................................................................................................19<br />
Troubleshooting ............................................................................................20<br />
General Maintenance ....................................................................................21<br />
Operating Under Unusual Conditions ............................................................22<br />
Diagrams and Parts Lists ....................................................................... 23-26<br />
2
M11A1 NS2<br />
USE OF THIS MANUAL<br />
Before operating the <strong>Airsoft</strong> gun, read this manual in its entirety. Important safety topics<br />
and tips are discussed throughout all of the chapters. It’s important that the operator know<br />
the principles of gun handling safety and operation prior to firing the <strong>Airsoft</strong> gun.<br />
SAFETY GUIDELINES<br />
3<br />
!<br />
WARNING! Failure to follow safety guidelines may result<br />
in serious injury.<br />
Safety Distance<br />
The effective shooting range is approximately 75 feet. BBs fired from this <strong>Airsoft</strong> gun may<br />
travel further than intended. Make certain that you have an adequate backstop.<br />
Eye Protection<br />
Eye protection should be worn at all times when both shooting and maintaining your <strong>Airsoft</strong><br />
gun. Protect your eyes from silicone spray and BBs under spring pressure while performing<br />
maintenance on your <strong>Airsoft</strong> gun.<br />
Assume Every Gun is Always Loaded<br />
Until you are certain the chamber is empty, treat every gun as if it were loaded. Do not<br />
assume the chamber is empty based on your memory or someone else’s words. Always<br />
remove the magazine and visually check to confirm the chamber is empty.<br />
Beware of Barrel Obstructions<br />
Ensure the <strong>Airsoft</strong> gun barrel is free of obstructions before you fire the gun. Even the<br />
smallest obstruction such as lubrication or a stuck cleaning patch can cause a misfire or<br />
malfunction.<br />
Muzzle Control<br />
Always keep the muzzle of the gun pointed in a safe direction. Never point the muzzle at a<br />
person or object that you do not intend to shoot.<br />
Keep Your Safety On<br />
Keep the gun’s safety on until your sights are aligned on your target and you are ready to<br />
fire.<br />
Keep Your Finger Off The Trigger<br />
Keep your finger off the trigger and out of the trigger guard until your sights are aligned on<br />
your target and you are ready to fire.<br />
!<br />
WARNING! <strong>Airsoft</strong> BBs can be a choking hazard. Keep<br />
them away from children.
SAFETY GUIDELINES<br />
Identify Your Target and Backstop<br />
Before you pull the trigger, make certain of your target and what is beyond it. The <strong>Airsoft</strong><br />
gun should never be fired at surfaces such as rocks, glass, water, or other hard surfaces<br />
where BBs are likely to ricochet in unpredictable directions.<br />
!<br />
WARNING! Adult supervision is required for any person<br />
under the age of 18.<br />
Failure To Fire<br />
If the <strong>Airsoft</strong> gun fails to fire, misfires, or malfunctions, do not look into the gun barrel. BBs<br />
can become lodged into the chamber, and serious eye injury may occur.<br />
Maintain Your Gun Properly<br />
Performing proper maintenance, as outlined in this manual, ensures that your <strong>Airsoft</strong><br />
gun will be safe to shoot and will perform to its designed specifications for many years.<br />
Alterations, modifications or adjustments may damage your <strong>Airsoft</strong> gun, make it unsafe to<br />
shoot, and will void all warranty claims.<br />
Store Your Gun Safely<br />
Always store the <strong>Airsoft</strong> gun in a safe place, and out of the reach of children. Always<br />
transport the <strong>Airsoft</strong> gun in a carrying case. Never display the <strong>Airsoft</strong> gun in a public place.<br />
Keep the safety engaged, and remove the magazine before storing the <strong>Airsoft</strong> gun. Note:<br />
it is your responsibility to take every reasonable precaution to ensure the safe storage and<br />
transportation of your <strong>Airsoft</strong> gun.<br />
Orange Tip<br />
The orange tip on <strong>Airsoft</strong> guns helps Law Enforcement distinguish between the replica<br />
guns from their real firearm counterparts. Altering the coloration or markings required by<br />
state or Federal law so as to make the product look more like a firearm is dangerous and<br />
may be a crime. Operator assumes all risks and responsibility when doing so.<br />
Hazards of Being Mistaken for a Real Firearm<br />
<strong>Airsoft</strong> guns have been mistaken by Police and Law Enforcement as real firearms. A<br />
confrontation with law enforcement while carrying an <strong>Airsoft</strong> gun can result in serious injury<br />
or even death. It is strongly advised to operate the <strong>Airsoft</strong> gun at a safe and legal location.<br />
In the event that you are approached by Law Enforcement personnel, you must comply with<br />
their instructions immediately to avoid an incident.<br />
Alcohol, Medications and Drugs<br />
Do not handle or operate your <strong>Airsoft</strong> gun while under the influence of alcohol, medication<br />
or drugs.<br />
Your Responsibility<br />
Your <strong>Airsoft</strong> gun is well-engineered and manufactured to the highest standards. It was<br />
carefully inspected before it was packaged and shipped from our factory. Its safe use<br />
depends on you alone. You are the ultimate safety device. Like many other devices, your<br />
<strong>Airsoft</strong> gun is safe unless handled in an irresponsible or uneducated manner.<br />
4
M11A1 NS2<br />
WARRANTY AND SERVICE<br />
KWA Performance Industries, Inc. is committed to serve our customers with the finest<br />
quality products, the highest level of service, and customer satisfaction. Because of this,<br />
we offer a 45-day warranty on all KWA products we import and distribute.<br />
What is Covered<br />
Except as specified below, this warranty covers all defects in material and workmanship<br />
in KWA products occurring during the above warranty periods. The following are not<br />
covered by the warranty: (1) Any product which is not imported and distributed in the<br />
U.S.A. by KWA PErfOrMANcE INDUSTrIES, INc. (2) Any products not purchased in<br />
the U.S.A. from an KWA AUTHOrIZED rESELLEr (Note: KWA AUTHOrIZED rESELLEr<br />
can be identified by KWA AUTHORIZED RESELLER sticker displayed in the store. If you<br />
are uncertain as to whether a dealer is a KWA AUTHOrIZED rESELLEr, please contact<br />
KWA PErfOrMANcE INDUSTrIES, INc. as listed above). (3) Damaged deterioration or<br />
malfunction resulting from: a) Accident, act of nature, abuse, misuse, neglect, unauthorized<br />
product repair, opening of or modification or failure to follow instructions supplied with the<br />
product. b) repair or attempted repair by anyone not authorized by KWA PErfOrMANcE<br />
INDUSTrIES, INc. c) removal of the orange safety tip. (4) Use of the product outside the<br />
U.S.A. (5) Damaged batteries or improper use of bullets (BBs), or non approved propellants<br />
(ie. Propane, red Gas, 134a…etc.) (6) Use in industrial, commercial, and/or professional<br />
applications.<br />
What KWA Will Pay For<br />
If during the applicable warranty period from the date of the original purchase your KWA<br />
product is found to be defective by KWA Performance Industries, Inc., KWA Performance<br />
Industries, Inc. will repair, or at its option, replace with new, used, or equivalent model, the<br />
defective product without charge for parts or labor.<br />
How To Obtain Warranty Service<br />
If your product needs service, it may be taken or shipped to KWA Performance Industries,<br />
Inc. The following procedures apply whenever your unit must be transported for warranty<br />
service:<br />
5<br />
• You must go to Help Desk at www.kwausa.com/support to obtain an RMA number.<br />
THE rMA NUMBEr MUST BE cLEArLY MArKED ON THE OUTSIDE Of THE<br />
PAcKAGE. PAcKAGES WITHOUT AN rMA NUMBEr cLEArLY MArKED WILL BE<br />
rEfUSED AND rETUrNED TO THE SENDEr.<br />
• You are responsible for transporting your unit or arranging for its transportation.<br />
• If shipment of your unit is required; you must pay the initial shipping fee, but we will<br />
pay the return shipping charge if the repairs are covered by the warranty.<br />
• WHEN RETURNING YOUR UNIT FOR WARRANTY SERVICE, A COPY OF THE<br />
OrIGINAL SALES rEcEIPT MUST BE ATTAcHED.<br />
• You must include the following: RMA number, your name, address, daytime telephone<br />
number, model and serial number (if applicable) of the product and a description of<br />
the problem.
NOTE: THE rMA NUMBEr MUST BE cLEArLY MArKED ON THE OUTSIDE Of THE<br />
PAcKAGE. PAcKAGES WITHOUT AN rMA NUMBEr cLEArLY MArKED WILL BE<br />
rEfUSED AND rETUrNED TO SENDEr. NO EXcEPTIONS.<br />
This Warranty is Only Valid in the United States<br />
If your product does not require service, but you have questions regarding its operation,<br />
please contact our Technical Services Department as listed below.<br />
THIS WArrANTY IS EXPrESSLY MADE IN LIEU Of ALL OTHEr WArrANTIES,<br />
EXPrESSED Or IMPLIED, INcLUDING WITHOUT LIMITATION, WArrANTIES Of<br />
MErcHANTABILITY AND fITNESS fOr A PArTIcULAr PUrPOSE.<br />
OUr LIABILITY IS LIMITED TO THE rEPAIr Or rEPLAcEMENT, AT OUr OPTION,<br />
OF ANY DEFECTIVE PRODUCT AND SHALL IN NO EVENT INCLUDE INCIDENTAL OR<br />
cONSEQUENTIAL cOMMErcIAL Or PrOPErTY DAMAGES Of ANY KIND. WE ArE<br />
NOT rESPONSIBLE fOr PrODUcTS LOST, STOLEN AND/Or DAMAGED DUrING<br />
SHIPPING.<br />
SOME STATES DO NOT ALLOW LIMITATIONS ON HOW LONG AND IMPLIED WArrANTY<br />
LASTS AND/Or DO NOT ALLOW THE EXcLUSION Of INcIDENTAL Or cONSEQUENTIAL<br />
DAMAGES, THE ABOVE LIMITATIONS AND EXCLUSIONS MAY NOT APPLY TO YOU.<br />
This warranty gives you specific legal rights, but you may also have other rights which vary<br />
from state to state. This Warranty may not be altered other than in writing signed by an<br />
officer of KWA Performance Industries, Inc.<br />
KWA Performance Industries, Inc.<br />
18571 E. Gale Ave.<br />
city of Industry, cA 91748-1339<br />
626-581-1777<br />
www.kwausa.com<br />
6
M11A1 NS2<br />
SPECIFICATIONS<br />
7<br />
• Overall Length [Retracted] = 25.4 cm (10”)<br />
• Overall Length [Extended] = 45.5 cm (17.92”)<br />
• Overall Height = 25 cm (9.84”)<br />
• Inner Barrel Length = 115 mm<br />
• Inner Barrel Diameter = 6.05 mm<br />
• Weight = 1.32 kg<br />
• Caliber = 6 mm<br />
• Magazine Capacity = 48<br />
• Rate of Fire = 20+ RPS<br />
• Velocity = 103-110 MPS (340-360 FPS)<br />
• Energy Output with .20g BB = 1.07 Joules<br />
• Gas System = NS2<br />
Special Features:<br />
• Heavy duty construction with polymer casing<br />
• Functional cocking handle with realistic bolt movements<br />
• Retractable shoulder stock<br />
• Threaded barrel<br />
• Semi and Full Auto selective fire<br />
• Front sling swivel<br />
*Individual test results may vary depending on brand of BBs, type of gas, and<br />
chronograph used.
CONTENTS<br />
Product Package Contents<br />
1 M11A1 NS2 <strong>Airsoft</strong> gun<br />
1 Bottle of Silicon Oil<br />
1 Hi-cap Magazine<br />
1 Sample Bag of <strong>Airsoft</strong> BBs<br />
1 Hop-Up Adjustment Tool<br />
1 Operator’s <strong>Manual</strong><br />
FUNCTIONS AND FEATURES<br />
M11A1 with NS2 gas system<br />
The popular M11A1 guns are equipped with the new KWA NS2 internal gas delivery system,<br />
which increases performance and improves the overall reliability of the gun.<br />
The NS2 gas system is a KWA-patented design that uses an advanced, light-weight<br />
composite gas piston with a two-stage internal expansion chamber that delivers the gas<br />
more efficiently than that of its predecessors. The NS2 design also increases the weapon<br />
cycle rate and provides for a crisp, realistic blow-back action<br />
Other parts of the <strong>Airsoft</strong> gun, including the recoil springs, recoil spring guide assembly,<br />
hop-up chamber, and magazine follower, have been improved, along with a new magazine<br />
that is milled from a solid alloy steel billet. This new construction strengthens the magazine’s<br />
structural integrity and increases pressure carrying capacity. The magazine feed-lip has<br />
also been reinforced.<br />
8
M11A1 NS2<br />
CHARGING GAS<br />
1. release the magazine by pressing the magazine catch.<br />
2. Push the gas canister nozzle into the charging valve. Make sure the canister is in<br />
a vertical position when charging.<br />
3. Charge the magazine until gas overflows from the charging valve.<br />
WARNING: Sudden impact with a hard surface may cause<br />
damage to the magazine.<br />
Note: It is normal to have minor leaking from the charging valve during charging due to<br />
high pressure built up inside the magazine. It is recommended to keep the gas release valve<br />
slightly oiled. room temperature is the ideal temperature for shooting. You may experience<br />
a delayed action if the surrounding temperature drops below 68º f.<br />
Note: Do not expose the magazine to direct sunlight or incinerate the magazine, as this<br />
may cause the magazine to burst. It is strongly recommended to empty the gas from the<br />
magazine after shooting. Be certain that the gas does not make contact with eyes or skin<br />
while being released, as any contact will cause cold burns.<br />
9<br />
Magazine<br />
!<br />
Magazine<br />
Release<br />
Nozzle<br />
Green Gas safety tips:<br />
• Check the canister for any cracks or leaks before using.<br />
• Do not expose the canister to temperature over 104º F.<br />
• Do not leave the canister directly over fire.<br />
• Do not heat the canister.<br />
• Keep the canister away from direct sunlight.<br />
• Do not leave the canister in any type of vehicle.<br />
Charging<br />
Valve
LOADING BBs<br />
1. Pull the magazine follower down until it locks.<br />
2. Insert BBs into the magazine lip.<br />
3. BBs should stack staggered for maximum round capacity: 48 rounds.<br />
4. Make sure to have a 3mm clearance between BBs and the top lip of the<br />
magazine.<br />
5. Push the magazine follower lock to release.<br />
Note: Always use KWA Perfect BBs, size 0.2 or 0.25g. Using only KWA Perfect BBs can<br />
give your <strong>Airsoft</strong> gun its best performance. Using recycled and low grade BBs may damage<br />
the gun.<br />
4<br />
5<br />
!<br />
WARNING: Do not release the magazine follower when the<br />
magazine is empty. Doing so will damage the magazine and<br />
magazine follower.<br />
Check for 3mm<br />
clearance after<br />
loading BBs.<br />
3mm<br />
1<br />
Push to<br />
release<br />
Push<br />
down<br />
to lock<br />
2<br />
Magazine Lip<br />
Magazine Follower<br />
3<br />
10
M11A1 NS2<br />
Locking Bolt<br />
11<br />
!<br />
NOTE: for absolute assurance against accidental discharge due to inadvertent trigger<br />
pull, keep the manual safety engaged during loading or unloading.<br />
!<br />
LOADING MAGAZINE<br />
WARNING: Before loading the magazine, the bolt must be in lock<br />
position. To lock the bolt, pull the bolt handle back to the rear of<br />
the gun.<br />
Bolt<br />
Handle<br />
WARNING: Always keep finger off the trigger until ready to fire.<br />
Make sure the muzzle is pointing in a safe direction.<br />
Note: Do not insert magazine into the gun when the bolt is closed. Doing so will damage<br />
the loading nozzle.<br />
1. Pull the bolt handle back to lock the bolt.<br />
2. Place the magazine back into the<br />
magazine well.<br />
3. Push the magazine up until it clicks into<br />
a locked position.<br />
4. Pull the magazine down to assure that it<br />
has been locked in place.<br />
Pull Back to Lock Bolt<br />
SAFE FIRE<br />
Safety<br />
Button
SELECTOR<br />
The selector is located on the left side of the frame. Select (S) to fire semi-automatic<br />
(single shot) and select (F) to fire full automatic (continuous fire).<br />
S F<br />
Semi-Auto<br />
Full-Auto<br />
SAFETY<br />
The safety button is located in front of the trigger. Safety is engaged when you push<br />
safety button to “SAFE”. Safety is disengaged when you push safety button to “FIRE”.<br />
When the bolt is closed, bolt can be locked for storage by turning the bolt knob 90˚<br />
counterclockwise.<br />
!<br />
SAFE FIRE<br />
ON OFF<br />
WARNING: Make sure safety is on at all times when not in a<br />
shooting position.<br />
12
M11A1 NS2<br />
RETRACTABLE STOCK<br />
13<br />
1. Push the wire handles inward.<br />
2. Swing the wire handles downwards until it locks.<br />
3. Press and hold the stock button while pulling the stock<br />
slightly outward. release the stock button.<br />
4. Pull the retractable stock until the stock locks into<br />
position.<br />
2<br />
NOTE: To remove the retractable stock from the gun, press and hold the stock<br />
button and pull the stock out completely.<br />
SHOOTING<br />
1. Choose shooting mode. Select “S”<br />
for semi-auto or “F” for full-auto.<br />
2. Disengage the safety.<br />
3. Pull the trigger to fire.<br />
!<br />
Swing Downward<br />
SAFE FIRE<br />
4<br />
Pull Backward<br />
Press on<br />
Stock<br />
Button<br />
WARNING: It is recommended eye protection be wore at all times.<br />
BBs may bounce off hard surfaces (ricochet). Always point gun<br />
in a safe direction.<br />
3<br />
1<br />
SAFE FIRE<br />
Push Wire<br />
Handle Inward<br />
SAFE FIRE
OPEN BOLT<br />
After the last shot has been fired and ejected. The bolt will lock halfway and the ejection<br />
port will remain opened.<br />
NOTE: It is important to treat your gun as thought it is loaded, even if the bolt remains<br />
open.<br />
AFTER SHOOTING<br />
Visually inspect the open bolt to check whether the magazine well and chamber are clear of<br />
BBs. When both the magazine well and chamber are clear, ENGAGE SAFETY SWITCH.<br />
NOTE: Keep the chamber piston and seals oiled lightly with 100% silicone oil after<br />
shooting<br />
CHECK<br />
MAKE SURE<br />
CHAMBER<br />
IS CLEAR<br />
SAFE FIRE<br />
SAFE FIRE<br />
14
M11A1 NS2<br />
HOP–UP SYSTEM<br />
The Hop-Up device is one of KWA’s standard features, giving <strong>Airsoft</strong> BBs greater stability,<br />
further travel and increased accuracy. <strong>Airsoft</strong> BBs are light-weight and can be affected by<br />
wind when fired. With the Hop-Up system, the trajectory of the <strong>Airsoft</strong> BBs can be adjusted<br />
according to the shooting environment or surroundings.<br />
HOP-UP ADJUSTMENT<br />
To adjust the Hop-Up, make sure the magazine is loaded and that you have at least 65 feet<br />
of clearance for a test fire before making any adjustments.<br />
15<br />
1. Test fire the gun for 10 to 20 rounds and observe the BB’s traveling pattern.<br />
2. remove the magazine.<br />
3. Open the slide and place adjusting tool into the slotted chamber ring. Turn the<br />
adjusting ring a 1/4-inch at a time.<br />
4. If the BBs are dropping too quickly, move the adjusting ring to the left or<br />
counter-clockwise to give the BB more hop. If the BBs are dropping too slowly,<br />
move the adjusting ring to the right or clock-wise.<br />
5. Test fire and adjust as needed.<br />
SAFE FIRE<br />
More Hop<br />
Less Hop<br />
SAFE FIRE
ADJUSTMENT POINT<br />
HOP UP<br />
EFFECTIVENESS<br />
NOT<br />
EFFECTIVE<br />
SLIGHTLY<br />
PrOPErLY<br />
OVERLY<br />
EXTrEMELY<br />
EFFECTIVE<br />
BB TRAJECTORY PATTERN<br />
BB DrOPS frEELY<br />
BB TRAVELS AT SHORT TRAJECTORY<br />
PATH<br />
BB TRAVELS DISTANCE AT FLAT<br />
TRAJECTORY PATH<br />
BB TRAVELS FLAT IN SHORT DISTANCE,<br />
THEN GOES UP IN CURVE AND DROPS<br />
frEELY<br />
BB TRAVELS AT UNSTABLE SPEED AND<br />
IrrEGULAr PATH<br />
ADJUSTMENTS<br />
TUrN KNOB<br />
TO LEfT<br />
TUrN KNOB<br />
SLIGHTLY TO<br />
LEfT<br />
NO<br />
ADJUSTMENT<br />
MADE<br />
TUrN KNOB<br />
SLIGHTLY TO<br />
rIGHT<br />
TUrN KNOB<br />
TO rIGHT<br />
16
M11A1 NS2<br />
DISASSEMBLY<br />
It is not recommended to disassemble the gun<br />
unless for general maintenance, or to clear<br />
BBs jammed inside the barrel.<br />
17<br />
1. remove the magazine by depressing<br />
the magazine release.<br />
2. remove the stock from the receiver<br />
(see pg13).<br />
3. Pull the bolt handle to lock the bolt.<br />
4. check and clear the chamber from<br />
any BBs.<br />
5. Using your finger tip, or small pen<br />
like tool, press down on the retaining<br />
pin 1, from within retaining pin 2, and<br />
pull it out from opposite end.<br />
6. Pull retaining pin 2 out from the<br />
receiver. The pin is seated tightly in<br />
the receiver, considerable effort may<br />
be needed to pull it out.<br />
7. Pull the upper frame upward and<br />
forward until it stops on bolt handle.<br />
(continue on next page)<br />
7<br />
Retaining<br />
Pin 2<br />
Pull Up and<br />
Forward<br />
SAFE FIRE<br />
6 5<br />
2<br />
Remove Stock<br />
3<br />
Pull Bolt Backward<br />
Retaining<br />
Pin 1
8. Turn the bolt knob 90˚ “clockwise” and pull the knob upward and out. The bolt<br />
handle “cut-out” should be aligned parallel to the slide in order to remove the<br />
bolt handle.<br />
9. remove the upper frame off of the lower frame.<br />
10. After the upper frame is removed, push the bolt backward and then lift the bolt<br />
upward. Make sure the hook underneath the bolt clears the impact block.<br />
Remove<br />
Knob<br />
8<br />
SAFE FIRE<br />
10<br />
9<br />
Remove Upper Frame<br />
Remove Bolt Assembly<br />
SAFE FIRE<br />
Bolt Assembly<br />
18
M11A1 NS2<br />
ASSEMBLY<br />
19<br />
1. Place the recoil spring onto the bolt assembly.<br />
2. Lock the bolt assembly onto the upper frame.<br />
3. Install the upper frame onto the lower frame and align the bolt knob hole. Make<br />
sure the hook underneath the bolt hooks onto the impact block<br />
4. Push the bolt knob into the bolt assembly and push the slide assembly to the<br />
rear.<br />
5. Align the retaining pin holes.<br />
6. Insert the 2pc retaining pins.<br />
7. cycle the bolt to assure proper reassembly before shooting.<br />
Bolt Assembly<br />
Retaining Pin<br />
S<br />
4<br />
6<br />
2<br />
Bolt Knob<br />
S<br />
Retaining Pin<br />
Upper Frame<br />
1<br />
Recoil<br />
Spring<br />
3<br />
Lower Frame
SYMPTOMS<br />
Bolt jams / Will not complete cycle<br />
Double feeds BBs into<br />
chamber / BBs roll out of barrel<br />
BBs will not release from magazine /<br />
bent mag lip/ check BB condition<br />
Leaking release valve & charging valve<br />
Magazine base plate will not lock<br />
Magazine base leaking air<br />
BASIC TROUBLESHOOTING GUIDE FOR SMG<br />
Cylinder will not load BBs into chamber<br />
POSSIBLE CAUSE<br />
Dry internal<br />
Hop-up adjustment too tight<br />
Bended magazine lip<br />
Dry O-ring<br />
Broken base plate lock<br />
Worn out base seal<br />
Broken Cylinder tap<br />
SOLUTIONS<br />
Add silicone to cylinder / main seal/ rails<br />
Release hop-up or replace bucking<br />
Replace magazine lip<br />
Add silicone oil to valves<br />
Replace base plate lock<br />
Replace magazine base seal<br />
Replace cylinder<br />
20
M11A1 NS2<br />
GENERAL MAINTENANCE FOR KWA GAS BLOW BACK<br />
Green gas is a liquid propellant which tends to dry out the seals and o-rings. With lubricating<br />
silicone oil, it will extend the life of the seals and o-rings and prevent gas<br />
leaks.<br />
Use only the recommended 100% silicone oil, available for purchase at the <strong>Airsoft</strong> dealer<br />
where you purchased your KWA products. Any other type of lubricant may damage the<br />
products.<br />
Lightly lubricate the recoil spring, cylinder and moving parts with a few drops of oil.<br />
Lubricating the seals and o-rings are essential. Unload BBs from the magazine. Make sure<br />
the magazine is free of gas before lubricating the magazine’s charging valve and release<br />
valve.<br />
21
OPERATING UNDER UNUSUAL CONDITIONS<br />
Unusual conditions are defined as any condition requiring special maintenance.<br />
Perform maintenance outlined for the climate similar to your operational area<br />
Extreme Cold:<br />
Operating an <strong>Airsoft</strong> gas gun in extremely cold temperatures is not recommended. cold<br />
temperatures will cause the Hop-up Bucking to harden, reducing its effectiveness. Gas<br />
will not expand properly in cold temperatures, so both the cycling rate and power will be<br />
dramatically reduced.<br />
Extreme Heat:<br />
Operating an <strong>Airsoft</strong> gas gun in extremely hot temperatures is also not recommended.<br />
Leaving the gun in direct sunlight for long periods of time, or operating in extremely hot<br />
areas will cause the gas to over-expand, damaging the internal workings of the gun. The<br />
increase in internal pressure from the expanding gas can also damage the seals and cause<br />
leaks in the magazine.<br />
Dust or Sand:<br />
Dust or sand can get into a gas gun and cause malfunctions and/or excessive wear. Keep<br />
the gun covered whenever possible. Use lubricant sparingly, as lube naturally attracts dirt<br />
and other particles. After use in a dusty area, always field strip the gun (refer to Disassembly<br />
Section) and clean any areas you can reach with a soft, lint-free cloth.<br />
22
23<br />
50<br />
21<br />
70<br />
80<br />
48<br />
107<br />
3<br />
1<br />
30<br />
58<br />
57<br />
63<br />
29<br />
88<br />
8<br />
100<br />
11<br />
53<br />
105<br />
69<br />
77<br />
15<br />
60<br />
12<br />
52<br />
73<br />
107<br />
28<br />
81<br />
14<br />
17<br />
82<br />
122<br />
104<br />
44<br />
121<br />
154<br />
76<br />
97<br />
95<br />
96<br />
98<br />
6<br />
2<br />
22<br />
4<br />
129<br />
13<br />
10<br />
46<br />
24<br />
92<br />
50<br />
21<br />
70<br />
80<br />
48<br />
107<br />
3<br />
1<br />
51<br />
30<br />
58<br />
57<br />
63<br />
29<br />
88<br />
8<br />
100<br />
11<br />
53<br />
105<br />
69<br />
77<br />
15<br />
60<br />
12<br />
52<br />
73<br />
107<br />
17<br />
82<br />
122<br />
104<br />
97<br />
95<br />
2<br />
22<br />
13<br />
10<br />
50<br />
21<br />
70<br />
80<br />
48<br />
107<br />
3<br />
1<br />
51<br />
30<br />
58<br />
57<br />
63<br />
29<br />
88<br />
8<br />
100<br />
11<br />
53<br />
105<br />
69<br />
77<br />
15<br />
60<br />
12<br />
52<br />
73<br />
1<br />
17<br />
82<br />
122<br />
104<br />
97<br />
95<br />
22<br />
13<br />
10<br />
DIAGRAM<br />
M11A1 NS2
24<br />
52<br />
73<br />
107<br />
28<br />
87<br />
87<br />
31<br />
89<br />
112<br />
90<br />
81<br />
14<br />
17<br />
82<br />
122<br />
104<br />
44<br />
121<br />
154<br />
153<br />
76<br />
40<br />
103<br />
9<br />
32<br />
111<br />
38<br />
49<br />
104<br />
97<br />
95<br />
96<br />
98<br />
6<br />
5<br />
20<br />
2<br />
67<br />
83<br />
83<br />
22<br />
4<br />
129<br />
126<br />
125<br />
132<br />
128<br />
130<br />
123<br />
18<br />
10<br />
64<br />
71<br />
99<br />
46<br />
65 16<br />
75<br />
74<br />
66<br />
102<br />
24<br />
92<br />
19<br />
2<br />
73<br />
107<br />
28<br />
87<br />
87<br />
31<br />
89<br />
112<br />
90<br />
81<br />
14<br />
17<br />
82<br />
122<br />
104<br />
44<br />
121<br />
154<br />
153<br />
76<br />
40<br />
103<br />
9<br />
32<br />
111<br />
38<br />
49<br />
104<br />
97<br />
96<br />
98<br />
6<br />
5<br />
20<br />
2<br />
67<br />
83<br />
83<br />
22<br />
4<br />
129<br />
126<br />
125<br />
132<br />
128<br />
130<br />
123<br />
18<br />
64<br />
71<br />
99<br />
46<br />
65 16<br />
75<br />
74<br />
66<br />
102<br />
24<br />
92<br />
19<br />
52<br />
73<br />
107<br />
28<br />
87<br />
87<br />
31<br />
89<br />
112<br />
90<br />
81<br />
14<br />
17<br />
82<br />
122<br />
104<br />
44<br />
121<br />
154<br />
153<br />
76<br />
40<br />
103<br />
9<br />
32<br />
111<br />
38<br />
49<br />
104<br />
97<br />
5<br />
96<br />
98<br />
6<br />
5<br />
20<br />
2<br />
67<br />
83<br />
83<br />
22<br />
4<br />
129<br />
126<br />
125<br />
132<br />
128<br />
130<br />
123<br />
18<br />
10<br />
64<br />
71<br />
99<br />
46<br />
65 16<br />
75<br />
74<br />
66<br />
102<br />
24<br />
92<br />
19<br />
12<br />
52<br />
73<br />
107<br />
28<br />
87<br />
87<br />
31<br />
89<br />
112<br />
90<br />
81<br />
14<br />
17<br />
82<br />
122<br />
104<br />
44<br />
121<br />
154<br />
153<br />
76<br />
40<br />
103<br />
9<br />
32<br />
111<br />
38<br />
49<br />
104<br />
97<br />
95<br />
96<br />
98<br />
6<br />
5<br />
20<br />
2<br />
67<br />
83<br />
83<br />
22<br />
4<br />
129<br />
126<br />
125<br />
132<br />
128<br />
130<br />
123<br />
18<br />
10<br />
64<br />
71<br />
99<br />
46<br />
65 16<br />
75<br />
74<br />
66<br />
102<br />
24<br />
92<br />
19
M11A1 NS2<br />
PARTS LIST<br />
Parts # Description<br />
199-0105-1 LOWER FRAME<br />
199-0105-2 UPPER FRAME<br />
199-0105-3 BOLT<br />
199-0105-4 CYLINDER<br />
199-0105-5 FRONT SIGHT<br />
199-0105-6 FRONT SIGHT BASE<br />
199-0105-8 GRIP<br />
199-0105-9<br />
HOP-UP CYLINDER<br />
RETAINING<br />
199-0105-10 INNER FRAME<br />
199-0105-11 WIRE STOCK<br />
199-0105-12 TRIGGER<br />
199-0105-13 INNER BARREL BASE<br />
199-0105-14 BOLT STOP<br />
199-0105-15 SEAR<br />
199-0105-16 IMPACT BLOCK<br />
199-0105-17 SEAR DISCONNECTOR<br />
199-0105-18 SAFETY BASE<br />
199-0105-19 BREACH BASE<br />
199-0105-20 BOLT HANDLE<br />
199-0105-21 OUTER BARREL<br />
199-0105-22 INNER BARREL CLIP<br />
199-0105-24<br />
IMPACT BLOCK RESET<br />
BUTTON<br />
199-0105-28 SAFETY<br />
199-0105-29<br />
MAGAZINE RELEASE<br />
LEVER<br />
199-0105-30 SELECTOR LEVER<br />
199-0105-31 STOCK RELEASE BUTTON<br />
199-0105-32 HOP-UP CYLINDER<br />
199-0105-38 HOP-UP BUCKING<br />
199-0105-40 INNER BARREL<br />
199-0105-44<br />
RECOIL SPRING GUIDE<br />
FOLLOWER<br />
199-0105-46 IMPACT BLOCK PIN<br />
199-0105-48 BOLT HANDLE PLUNGER<br />
199-0105-49 RECOIL SPRING GUIDE<br />
199-0105-50 TAKE DOWN PIN<br />
199-0105-51 TAKE DOWN PIN LOCK<br />
25<br />
Parts # Description<br />
199-0105-52 TRIGGER PIN<br />
199-0105-53 STOCK PIN<br />
199-0105-57 INNER BARREL CLIP PIN<br />
199-0105-58<br />
OUTER BARREL RETAIN-<br />
ING PIN<br />
199-0105-60 SEAR PIN<br />
199-0105-63<br />
MAGAZINE RELEASE<br />
LEVER PIN<br />
199-0105-64<br />
CYLINDER RETURN<br />
SPRING<br />
199-0105-65<br />
IMPACT BLOCK HOUSING<br />
“ LEFT”<br />
199-0105-66<br />
IMPACT BLOCK HOUSING<br />
“ RIGHT”<br />
199-0105-67 INNER SLIDE HOUSING<br />
199-0105-69 FOLDING STOCK<br />
199-0105-70 SWIVEL<br />
199-0105-71<br />
MAIN SEAL BASE SCREW<br />
WASHER<br />
199-0105-73 TRIGGER SPRING<br />
199-0105-74<br />
IMPACT BLOCK HOUSING<br />
SPRING<br />
199-0105-75 IMPACT BLOCK SPRING<br />
199-0105-76 RECOIL SPRING<br />
199-0105-77 SEAR SPRING<br />
199-0105-80<br />
BOLT HANDLE PLUNGER<br />
SPRING<br />
199-0105-81 BOLT STOP SPRING<br />
199-0105-82<br />
SEAR DISCONNECTOR<br />
SPRING<br />
199-0105-83<br />
CYLINDER RETURN<br />
SPRINGS<br />
199-0105-87 STOCK RELEASE BUTTON<br />
199-0105-88<br />
MAGAZINE RELEASE<br />
LEVER SPRING<br />
199-0105-89 SAFETY SPRING<br />
199-0105-90<br />
TRIGGER PIN RETAINING<br />
SPRING<br />
199-0105-92<br />
IMPACT BLOCK RESET<br />
BUTTON<br />
199-0105-95<br />
BREACH BASE SCREW<br />
“SMALL”<br />
199-0105-96<br />
BREACH BASE SCREW<br />
“SMALL”<br />
199-0105-97<br />
BREACH BASE SCREW<br />
“LARGE”<br />
Parts # Description<br />
199-0105-98<br />
FRONT SIGHT BASE<br />
SCREW<br />
199-0105-99 MAIN SEAL BASE SCREW<br />
199-0105-100 GRIP SCREW<br />
199-0105-102<br />
IMPACT BLOCK HOUSING<br />
RETAINER<br />
199-0105-103<br />
HOP-UP CYLINDER<br />
RETAINING RING E-CLIP<br />
199-0105-104<br />
RECOIL SPRING GUIDE<br />
E-CLIPS X2<br />
199-0105-105<br />
FOLDING STOCK PIN<br />
E-CLIP<br />
199-0105-107 SAFETY PIN<br />
199-0105-111 HOP-UP BALL BEARING<br />
199-0105-112<br />
SAFETY SWITCH BALL<br />
BEARING<br />
199-0105-121 BB FEED RAMP<br />
199-0105-122 BB FEED RAMP PIN<br />
199-0105-123 MAIN SEAL BASE<br />
199-0105-125 JET NOZZLE / PLUNGER<br />
199-0105-126 JET NOZZLE SPRING<br />
199-0105-128 MAIN SEAL CAP<br />
199-0105-129 JET NOZZLE PIN<br />
199-0105-130 MAIN SEAL<br />
199-0105-132 MAIN SEAL CAP SCREW<br />
199-0105-153<br />
INNER BARREL SPRING<br />
WASHER<br />
199-0105-154 INNER BARREL SPRING
MAGAZINE DIAGRAM AND PARTS LIST<br />
Parts # Description<br />
199-0105-133 HI CAP MAGAZINE BODY<br />
199-0105-134 MAGAZINE LIP<br />
137<br />
145<br />
199-0105-135 HI CAP MAGAZINE BASE & GAS<br />
199-0105-136 MAGAZINE BASE PLATE LOCK<br />
199-0105-137 MAGAZINE FOLLOWER<br />
199-0105-140 MAGAZINE BASE PINS X2<br />
199-0105-141 MAGAZINE LIP PIN<br />
199-0105-142 MAGAZINE BASE SEAL<br />
199-0105-143 MAGAZINE BASE PLATE<br />
199-0105-145 HI CAP MAGAZINE FOLLOWER SPRING<br />
199-0105-148 MAGAZINE CHARGING VALVE<br />
199-0105-149 MAGAZINE RELEASE VALVE<br />
199-0105-150 MAGAZINE LIP SCREW<br />
199-0105-151 MAGAZINE NOZZLE SEAL<br />
133<br />
151<br />
134<br />
150<br />
141<br />
143<br />
149<br />
140<br />
140<br />
136<br />
142<br />
135<br />
148<br />
26
KWA Performance Industries, Inc.<br />
18571 E. Gale Ave<br />
City of Industry, CA 91748<br />
T: 626.581.1777 • F: 626.581.0777<br />
www.kwausa.com<br />
MMD09_M11A1 V01 R2011.06.29<br />
Copyright © July, 2009 KWA Performance Industries, Inc. All Rights Reserved.


