May 2012 - Wise on How to Set Up - Arrow Trade Magazine!
May 2012 - Wise on How to Set Up - Arrow Trade Magazine!
May 2012 - Wise on How to Set Up - Arrow Trade Magazine!
Create successful ePaper yourself
Turn your PDF publications into a flip-book with our unique Google optimized e-Paper software.
From the day after the bow and<br />
arrow was rst invented archers<br />
have been doing two things;<br />
inventing aiming devices and release<br />
aids. e modern results of this quest<br />
are machined bow sights and mechanical<br />
release aids. I’ve presented lots<br />
about release aids in recent years so it’s<br />
time <strong>to</strong> tend <strong>to</strong> the bow sight.<br />
Most archers use a bow sight of<br />
some kind. It makes aiming easier for<br />
the novice and more accurate for every<strong>on</strong>e.<br />
Even the highly skilled bare-bow<br />
shooters employ some kind of aiming<br />
system <strong>to</strong> improve their accuracy.<br />
at means you, the dealer, have sights<br />
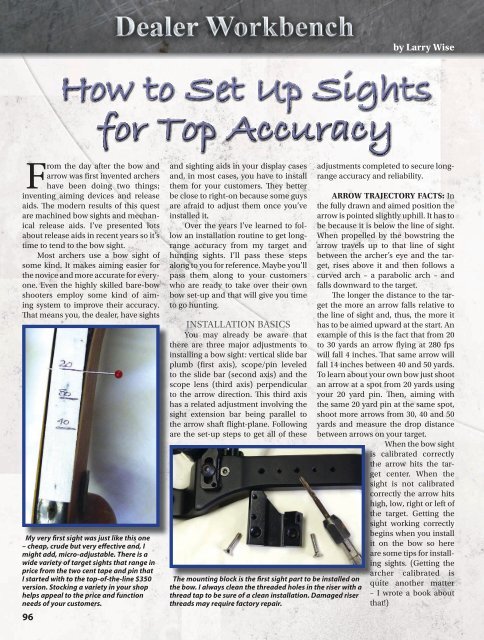
My very rst sight was just like this <strong>on</strong>e<br />
– cheap, crude but very e ective and, I<br />
might add, micro-adjustable. There is a<br />
wide variety of target sights that range in<br />
price from the two cent tape and pin that<br />
I started with <strong>to</strong> the <strong>to</strong>p-of-the-line $350<br />
versi<strong>on</strong>. S<strong>to</strong>cking a variety in your shop<br />
helps appeal <strong>to</strong> the price and functi<strong>on</strong><br />
needs of your cus<strong>to</strong>mers.<br />
96<br />
for Top Accuracy<br />
and sighting aids in your display cases<br />
and, in most cases, you have <strong>to</strong> install<br />
them for your cus<strong>to</strong>mers. ey better<br />
be close <strong>to</strong> right-<strong>on</strong> because some guys<br />
are afraid <strong>to</strong> adjust them <strong>on</strong>ce you’ve<br />
installed it.<br />
Over the years I’ve learned <strong>to</strong> follow<br />
an installati<strong>on</strong> routine <strong>to</strong> get l<strong>on</strong>grange<br />
accuracy from my target and<br />
hunting sights. I’ll pass these steps<br />
al<strong>on</strong>g <strong>to</strong> you for reference. <str<strong>on</strong>g>May</str<strong>on</strong>g>be you’ll<br />
pass them al<strong>on</strong>g <strong>to</strong> your cus<strong>to</strong>mers<br />
who are ready <strong>to</strong> take over their own<br />
bow set-up and that will give you time<br />
<strong>to</strong> go hunting.<br />
INSTALLATION BASICS<br />
You may already be aware that<br />
there are three major adjustments <strong>to</strong><br />
installing a bow sight: vertical slide bar<br />
plumb ( ( rst axis), scope/pin leveled<br />
<strong>to</strong> the slide bar (sec<strong>on</strong>d axis) and the<br />
scope lens (third axis) perpendicular<br />
<strong>to</strong> the arrow directi<strong>on</strong>. is third axis<br />
has a related adjustment involving the<br />
sight extensi<strong>on</strong> bar being parallel <strong>to</strong><br />
the arrow shaft ight-plane. Following<br />
are the set-up steps <strong>to</strong> get all of these<br />
The mounting block is the rst sight part <strong>to</strong> be installed <strong>on</strong><br />
the bow. I always clean the threaded holes in the riser with a<br />
thread tap <strong>to</strong> be sure of a clean installati<strong>on</strong>. Damaged riser<br />
threads may require fac<strong>to</strong>ry repair.<br />
by Larry <str<strong>on</strong>g>Wise</str<strong>on</strong>g><br />
adjustments completed <strong>to</strong> secure l<strong>on</strong>grange<br />
accuracy and reliability.<br />
ARROW TRAJECTORY FACTS: In<br />
the fully drawn and aimed positi<strong>on</strong> the<br />
arrow is pointed slightly uphill. It has <strong>to</strong><br />
be because it is below the line of sight.<br />
When propelled by the bowstring the<br />
arrow travels up <strong>to</strong> that line of sight<br />
between the archer’s eye and the target,<br />
rises above it and then follows a<br />
curved arch – a parabolic arch – and<br />
falls downward <strong>to</strong> the target.<br />
e l<strong>on</strong>ger the distance <strong>to</strong> the target<br />
the more an arrow falls relative <strong>to</strong><br />
the line of sight and, thus, the more it<br />
has <strong>to</strong> be aimed upward at the start. An<br />
example of this is the fact that from 20<br />
<strong>to</strong> 30 yards an arrow ying at 280 fps<br />
will fall 4 inches. at same arrow will<br />
fall 14 inches between 40 and 50 yards.<br />
To learn about your own bow just shoot<br />
an arrow at a spot from 20 yards using<br />
your 20 yard pin. en, aiming with<br />
the same 20 yard pin at the same spot,<br />
shoot more arrows from 30, 40 and 50<br />
yards and measure the drop distance<br />
between arrows <strong>on</strong> your target.<br />
When the bow sight<br />
is calibrated correctly<br />
the arrow hits the target<br />
center. When the<br />
sight is not calibrated<br />
correctly the arrow hits<br />
high, low, right or left of<br />
the target. Getting the<br />
sight working correctly<br />
begins when you install<br />
it <strong>on</strong> the bow so here<br />
are some tips for installing<br />
sights. (Getting the<br />
archer calibrated is<br />
quite another matter<br />
– I wrote a book about<br />
that!)
Most bow sights have attachment screws<br />
that allow you <strong>to</strong> adjust the vertical alignment<br />
of the slide bar. Adjusted properly,<br />
your sight will generate arrows in the<br />
middle of the spot at all distances. When<br />
incorrect, it will miss <strong>to</strong> <strong>on</strong>e side up close<br />
and <strong>to</strong> the opposite side at l<strong>on</strong>g range.<br />
STEP ONE:<br />
INSTALL MOUNT BLOCK<br />
Secure the sight-mounting block<br />
<strong>to</strong> the outside of the sight window<br />
(right side for right-handers). I clean<br />
all threaded holes with a thread tap,<br />
test the screws I intend <strong>to</strong> use and<br />
then attach the mounting block. is<br />
step avoids a potential thread-stripping<br />
problem that can ruin a bow riser.<br />
STEP TWO: INSTALL<br />
HORIZONTAL EXTENSION<br />
Next, install the horiz<strong>on</strong>tal extensi<strong>on</strong><br />
bar. e machined accuracy of<br />
<strong>to</strong>day’s manufacturing should make<br />
the extensi<strong>on</strong> nearly parallel <strong>to</strong> the side<br />
of the riser and <strong>to</strong> the path of the<br />
arrow. If you have a c<strong>on</strong>cern about this<br />
then shim the mount block <strong>to</strong> align the<br />
extensi<strong>on</strong> bar with the vertical plane of<br />
the riser.<br />
STEP THREE:<br />
ADJUST VERTICAL BAR<br />
Adjust the slide-bar so that it is<br />
vertical (plumb). All of the l<strong>on</strong>g range<br />
micro-adjustable target sights I have<br />
seen have an adjustable vertical slide<br />
bar.<br />
I use this table mounted Pro Balancer by<br />
Dead Center Archery Products <strong>to</strong> hold my<br />
bow plumb while adjusting the vertical<br />
slide bar, for setting the scope level and<br />
adjusting the third axis alignment. I used<br />
a 2 foot level <strong>to</strong> assist with these adjustments<br />
for years but the balancer lets me<br />
tilt the bow up and down with ease making<br />
the third axis adjustment quick and<br />
simple.<br />
is is a very important step that<br />
must begin with the bow xed in a vertical<br />
positi<strong>on</strong>. Some shops use a tablemounted<br />
bow vise while some use a<br />
Black & Decker WorkMate vise <strong>to</strong> hold<br />
the bow. Others have a tested plumb<br />
door jamb against which they hold<br />
their bows <strong>to</strong> check the plumb adjustment<br />
of the vertical sight bar. You can<br />
also use a bow mounted leveling <strong>to</strong>ol.<br />
e device I now prefer <strong>to</strong> use is the Pro<br />
Balancer from Dead Center Archery<br />
Products, which lets you set the bow<br />
handle plumb and lock it in place.<br />
This extensi<strong>on</strong> bar has a hinge adjustment that allows you<br />
<strong>to</strong> adjust the third axis of the sight. In other words, you can<br />
set the scope lens perpendicular <strong>to</strong> the arrow path so you<br />
have an accurate level bubble and dead center accuracy<br />
when shooting uphill or down.<br />
The sight block level shown here can be<br />
adjusted using the adjustment screw <strong>on</strong><br />
the <strong>to</strong>p of the block marked “2nd” for<br />
sec<strong>on</strong>d axis. This allows you <strong>to</strong> swivel the<br />
scope up or down a little <strong>to</strong> set its bubble<br />
level <strong>to</strong> match the vertical attitude of the<br />
bow. Double check this setting <strong>to</strong> be sure it<br />
is correct.<br />
Many sight bars have two screws<br />
that attach the bar <strong>to</strong> the horiz<strong>on</strong>tal<br />
extensi<strong>on</strong>. Loosen these screws, hold<br />
a small level <strong>to</strong> the side of the vertical<br />
bar, adjust the vertical bar <strong>to</strong> plumb<br />
and tighten the two attachment screws.<br />
Recheck the bar with the level <strong>to</strong> be<br />
sure it stayed plumb when you tightened<br />
the screws.<br />
STEP FOUR:<br />
INSTALL SLIDE BLOCK<br />
Now its time <strong>to</strong> install the slideblock<br />
<strong>to</strong> the vertical sight bar. If the bow<br />
is vertical and the vertical bar is truly<br />
vertical then the slide block will move<br />
up and down in the desired vertical<br />
plane.<br />
STEP FIVE:<br />
ADJUST SCOPE/BLOCK LEVEL<br />
I’m assuming here that your cus<strong>to</strong>mer<br />
intends <strong>to</strong> use a level <strong>on</strong> his or<br />
her scope scope or pin. You<br />
need <strong>to</strong> adjust that level<br />
at this time. With the<br />
bow held in a vertical<br />
positi<strong>on</strong> and the vertical<br />
sight bar adjusted <strong>to</strong><br />
plumb, loosen the sightblock<br />
level adjustment<br />
screws and adjust the<br />
block so the level reads<br />
true level and retighten<br />
the screws.<br />
STEP SIX:<br />
FINAL CHECK<br />
Recheck the bow<br />
positi<strong>on</strong> <strong>to</strong> make sure<br />
97
it is plumb, that the vertical sight-bar<br />
is vertical and that the sight block level<br />
shows true level. Rechecking these<br />
adjustments will save you from false<br />
and unusual results when sighting-in<br />
later.<br />
STEP SEVEN:<br />
THIRD AXIS ADJUSTMENT<br />
e adjustments you’ve made so<br />
far prepare the sight for shooting <strong>on</strong><br />
level ground. <strong>How</strong>ever, much of 3-D,<br />
eld archery and treestand hunting<br />
involve shooting upward and downward<br />
angles so there’s more <strong>to</strong> do <strong>to</strong><br />
the sight.<br />
e third axis adjustment involves<br />
the plane of the scope level relative<br />
<strong>to</strong> the arrow-trajec<strong>to</strong>ry plane. If the<br />
scope level is not perpendicular <strong>to</strong> the<br />
arrow trajec<strong>to</strong>ry path then it will not<br />
read correctly when the bow is aimed<br />
uphill or downhill. When the scope is<br />
misaligned the uphill aimed bow will<br />
be canted o the vertical. For instance<br />
the <strong>to</strong>p of the bow may be slanted <strong>to</strong><br />
the right, <strong>to</strong> center the incorrect bubble<br />
when you aim uphill. e same bow<br />
would have the <strong>to</strong>p limb canted the<br />
opposite way, <strong>to</strong> the left, <strong>to</strong> center the<br />
bubble when the bow is aimed downhill.<br />
is leads <strong>to</strong> arrows missed <strong>to</strong> the<br />
right <strong>on</strong> uphill shots and arrows missed<br />
<strong>to</strong> the left <strong>on</strong> downhill shots.<br />
You can test this by keeping the<br />
When a scope is misaligned you can adjust the third axis <strong>to</strong><br />
rotate the lens perpendicular <strong>to</strong> the arrow path. On the Axcel<br />
sight the third axis adjustment screw is marked <strong>on</strong> the <strong>to</strong>p of<br />
the scope block and has a reference scale <strong>to</strong> note how far you<br />
have rotated it. When correct the bubble stays in the middle<br />
when the bow is pointed up or down.<br />
98<br />
bow plumb, tilting it uphill and downhill<br />
and noting if the bubble moves out<br />
of its center lines. If the scope is not<br />
perpendicular <strong>to</strong> the arrow path then<br />
the bubble will move <strong>on</strong>e directi<strong>on</strong><br />
when the bow is tilted upward and<br />
the opposite when the bow is tilted<br />
downward. (Example: bubble left when<br />
aimed uphill and bubble right when<br />
aimed down)<br />
e correcti<strong>on</strong> for this is <strong>to</strong> adjust<br />
the plane of the scope as seen from the<br />
<strong>to</strong>p view. If you imagine the bow in the<br />
aiming positi<strong>on</strong>, the scope has <strong>to</strong> be<br />
either rotated slightly <strong>to</strong>ward your eye<br />
or rotated slightly away from your eye.<br />
e pho<strong>to</strong> lower left shows an overhead<br />
view of an exaggerated situati<strong>on</strong><br />
where the scope is rotated <strong>to</strong>o far away<br />
from your eye and is clearly not perpendicular<br />
<strong>to</strong> the arrow trajec<strong>to</strong>ry path.<br />
e correcti<strong>on</strong> is, of course, <strong>to</strong> rotate<br />
the scope so that it is at a right angle <strong>to</strong><br />
the arrow path.<br />
Most sight manufacturers have<br />
designed an adjustment feature in<strong>to</strong><br />
the scope attachment block so you<br />
d<strong>on</strong>’t have <strong>to</strong> bend the scope rod or<br />
sight extensi<strong>on</strong> like I had <strong>to</strong> do back in<br />
the early 1980s. On my dem<strong>on</strong>strati<strong>on</strong><br />
sight you need <strong>to</strong> loosen the <strong>to</strong>p two<br />
screw adjustments,<br />
rotate<br />
the scope a few<br />
degrees and<br />
then retighten the screws.<br />
Reset the level as in Step Five above<br />
and redo the upward and downward<br />
tilt test. Be sure <strong>to</strong> hold the bow plumb<br />
while doing this. C<strong>on</strong>tinue adjusting<br />
the third axis until the bubble stays in<br />
the middle while being tilted upward<br />
and downward. Now, any left or right<br />
missed arrows at uphill or downhill<br />
targets will be due <strong>to</strong> shooter error.<br />
BOW CANTING:<br />
e above steps will get a sight<br />
close <strong>to</strong> perfect and ready for initial<br />
testing. e variable that you can’t c<strong>on</strong>trol<br />
here is the shooter and his/her<br />
shooting form. Poor bow hand positi<strong>on</strong>,<br />
unnecessary bow arm tensi<strong>on</strong>,<br />
some grip designs, as well as a pers<strong>on</strong>’s<br />
ana<strong>to</strong>my may lead <strong>to</strong> left/right errors<br />
even when the sight setup is “perfect”.<br />
A well balanced bow can help minimize<br />
these kinds of errors. Check the<br />
April <str<strong>on</strong>g>2012</str<strong>on</strong>g> issue of <strong>Arrow</strong><strong>Trade</strong> <strong>to</strong> learn<br />
how <strong>to</strong> balance a bow so that it stays<br />
plumb during aiming. Bey<strong>on</strong>d that, the<br />
archer will have <strong>to</strong> learn how <strong>to</strong> manage<br />
the bow in the vertical plane or tilt<br />
the vertical slide bar out of plumb <strong>to</strong><br />
compensate.<br />
The Sure-Loc Level Tool and the Hamskea Leveller attach <strong>to</strong> the vertical<br />
slide bar so you can adjust the scope lens <strong>to</strong> be perpendicular <strong>to</strong> the<br />
arrow path. The Sure-Loc <strong>to</strong>ol has an elastic cord that stretches around<br />
the bowstring and a left/right adjustment <strong>to</strong> set the level directly over<br />
the arrow path. The Hamskea <strong>to</strong>ol uses a l<strong>on</strong>g vertical pin <strong>to</strong> aid you in<br />
setting the level for up and down aiming.
LONG & SHORT RANGE TESTING:<br />
So when is it right for you? It’s<br />
correct when you can shoot arrows in<br />
the middle from l<strong>on</strong>g and short ranges<br />
without having <strong>to</strong> change your windage<br />
adjustment. I test often at 80 yards,<br />
walk up <strong>to</strong> 20 yards and test there. If I<br />
d<strong>on</strong>’t get arrows in the middle at both<br />
ranges then I c<strong>on</strong>tinue adjusting the<br />
third axis and/or the vertical attitude of<br />
the slide bar. I test <strong>on</strong> side hills, uphill<br />
and downhill, <strong>to</strong> be sure I get arrows in<br />
the middle under all c<strong>on</strong>diti<strong>on</strong>s guaranteeing<br />
a correctly installed sight.<br />
THE LEVELING TOOLS<br />
ere are <strong>to</strong>ols <strong>on</strong> the market now<br />
that simplify the leveling process and<br />
get good results in just a few minutes.<br />
I’ve tested two of these that use a level<br />
that attaches <strong>to</strong> the vertical slide bar<br />
just above the arrow. If you then make<br />
a few set screw adjustments your sight<br />
is ready for l<strong>on</strong>g-range testing.<br />
e Sure-Loc Leveling Tool also<br />
helps deal with the cable guard <strong>to</strong>rque<br />
in the handle when the bow is at full<br />
draw. It’s at full draw when the cable<br />
weight load gets high and applies side<br />
<strong>to</strong>rque against the cable guard. is<br />
<strong>to</strong>rque has an e ect <strong>on</strong> where the arrow<br />
shoots through the bow handle and,<br />
c<strong>on</strong>sequently, where the sight lines up<br />
over the arrow shaft and with the target.<br />
Following Step Four, install the<br />
sight-leveling device <strong>to</strong> the bot<strong>to</strong>m of<br />
the vertical slide bar. Slide the level<br />
extensi<strong>on</strong> left or right so the level is<br />
over the arrow and tighten it in place.<br />
Next, pull the elastic cord from the <strong>to</strong>ol<br />
level around the bowstring and fasten<br />
with some tensi<strong>on</strong> <strong>to</strong> the sight bar<br />
<strong>on</strong> the anchor post opposite the <strong>to</strong>ol<br />
level. Prop the bow so that it is pointed<br />
horiz<strong>on</strong>tally and the <strong>to</strong>ol bubble reads<br />
level. With the bow held in this positi<strong>on</strong><br />
adjust the scope bubble <strong>to</strong> read level.<br />
Simulate shooting up and down<br />
hills by tilting the bow up or down<br />
about 30 degrees. Prop it so the <strong>to</strong>ol<br />
bubble reads level and check the scope<br />
bubble. If it is not centered then adjust<br />
the third axis of the scope so that its<br />
bubble reads level.<br />
e Hamskea ird Axis Leveler<br />
device enables you <strong>to</strong> set your third<br />
axis easily. Mount it <strong>to</strong> the bow as per<br />
the directi<strong>on</strong>s and then raise the bow<br />
upward and downward <strong>to</strong> compare<br />
the <strong>to</strong>ol level <strong>to</strong> the scope level. e<br />
l<strong>on</strong>g vertical pin helps you keep your<br />
sight in line with the bow string during<br />
the process. Adjust the lens/scope<br />
angle relative <strong>to</strong> your arrow (from the<br />
<strong>to</strong>p view) until the scope bubble reads<br />
“true level” when the bow is aimed at<br />
an upward angle, downward angle and<br />
when aimed at a level target.<br />
D<strong>on</strong>’t forget <strong>to</strong> test your setup at<br />
both l<strong>on</strong>g and short range <strong>to</strong> be sure<br />
the arrows are hitting the center at both<br />
distances. No matter how the sight is<br />
set up, the nal test is always d<strong>on</strong>e by<br />
shooting l<strong>on</strong>g and short.<br />
BUILDING A FULL SET OF<br />
SIGHT MARKS<br />
A target sight is no good <strong>to</strong> you<br />
until you have a good set of sight marks<br />
<strong>on</strong> it. at process seems <strong>to</strong> be a mystery<br />
<strong>to</strong> some shooters but it is really<br />
quite simple, especially with the aid of<br />
computer programs. I follow a process<br />
99
<strong>to</strong> get a few sight marks for reference<br />
and then use the computer <strong>to</strong> calculate<br />
and print a full sight mark tape <strong>to</strong> place<br />
<strong>on</strong> the vertical slide bar. I never shoot<br />
3-D or eld archery without a printed<br />
sight tape marked in yards <strong>on</strong> my bow<br />
sight.<br />
STEP ONE: <strong>Set</strong> a short range reference<br />
mark by shooting some arrows at<br />
20 yards. Once you’ve adjusted your<br />
sight and shot several arrows in<strong>to</strong> the<br />
spot at 20 yards then record the value<br />
from the slide bar reference scale. e<br />
scale is usually a 24 turn scale that provides<br />
a three digit reference number<br />
similar <strong>to</strong> tenths of a millimeter or hundredths<br />
of an inch. Also place a pencil<br />
mark <strong>on</strong> the sight tape side of the slide<br />
bar as an extra reference.<br />
STEP TWO: Now move <strong>to</strong> a l<strong>on</strong>ger<br />
range <strong>to</strong> determine another reference<br />
mark. If your maximum shooting distance<br />
is 50 yards then sight-in there.<br />
Shoot enough arrows <strong>to</strong> get an accurate<br />
sight mark from the slide bar reference<br />
scale. Once again, place a pencil mark<br />
<strong>on</strong> the sight tape side of the slide bar.<br />
Shooting at a third distance can add<br />
accuracy <strong>to</strong> your sight tape so if the program<br />
you choose directs you <strong>to</strong> do that<br />
then obtain a sight reference number<br />
100<br />
at an intermediate distance<br />
like 40 yards. I<br />
prefer <strong>to</strong> use 20, 40 and<br />
60 yards for my own<br />
pers<strong>on</strong>al reference<br />
points. I always shootin<br />
my 80 yard mark,<br />
establishing and marking<br />
it by actual testing<br />
rather than relying <strong>on</strong><br />
the computer tape.<br />
STEP THREE: e<br />
pair or triplet of three<br />
digit reference numbers<br />
you have recorded<br />
can be used in <strong>on</strong>e of<br />
several computer programs<br />
for establishing<br />
a full length tape of<br />
sight marks. e program<br />
that I’ve used for<br />
years is by Archers’<br />
Advantage and it is<br />
available <strong>on</strong>line at<br />
archersadvantage.<br />
com. Some others also available <strong>on</strong>line<br />
are thearcheryprogram.com and pinwheelsoftware.com.<br />
e programs require you <strong>to</strong> supply<br />
informati<strong>on</strong> about your arrows,<br />
sight extensi<strong>on</strong> and peep height. at<br />
al<strong>on</strong>g with the two or three reference<br />
sight marks you<br />
have obtained<br />
Most sight slide bars have two scales <strong>to</strong> assist you with the sight-in<br />
process. One scale is usually a 24 turn (<strong>to</strong> the inch) scale that is used<br />
<strong>to</strong> match a three digit reference number <strong>to</strong> a given sight-in target distance.<br />
A l<strong>on</strong>g distance reference and a short distance reference can be<br />
plugged in<strong>to</strong> computer programs <strong>to</strong> generate a complete set of sight<br />
marks for all ranges out <strong>to</strong> 100 yards. The opposite side of the slide<br />
bar is where you place the computer printed sight mark scale.<br />
The Archer’s Advantage computer program and others have<br />
a prin<strong>to</strong>ut available of really neat sets of sight marks that can<br />
be cut out and taped <strong>to</strong> the slide bar. Lancaster Archery sells<br />
peel-o preprinted pages of sight marks that can be easily<br />
matched <strong>to</strong> the speed of your bow and taped <strong>to</strong> the slide bar.<br />
Each system requires at least two good sight-in marks for reference.<br />
I slice the sight mark strip from the prin<strong>to</strong>ut, cover it<br />
with clear tape for waterproo ng and attach it <strong>to</strong> the slide bar<br />
using my 20 and 60 yard pencil marks for reference.<br />
will be used <strong>to</strong> develop a mathematical<br />
functi<strong>on</strong> that will calculate sight reference<br />
numbers for every single yard<br />
distance from 10 yards <strong>to</strong> 100 yards.<br />
e most important accessory you<br />
need is the computer prin<strong>to</strong>ut of a<br />
complete sight tape. When you go <strong>to</strong><br />
the eld archery course or the 3-D<br />
range you must have this sight tape<br />
mounted <strong>to</strong> the side of your sight bar<br />
Before computer programs we had <strong>to</strong> use pencil marks for<br />
every yard placed <strong>on</strong> the paper tape. I still do that al<strong>on</strong>g with<br />
using the 24 turn scale reference numbers. I always place a<br />
pencil mark for my 20 yard and 60 yard reference.
fashi<strong>on</strong>ed way - I’ve<br />
d<strong>on</strong>e it many times –<br />
by shooting in a mark<br />
at each 5 or 10 yard<br />
interval. When you are<br />
d<strong>on</strong>e, check the spacing<br />
between marks<br />
<strong>to</strong> be sure that as the<br />
distance from the target<br />
increases so does<br />
the spacing – remember<br />
that as the arrow<br />
ies down range its<br />
velocity decays and<br />
Since I shoot archery all year with a good target sight I like the arrow drops more<br />
my hunting sight <strong>to</strong> have the same adjustment features. and more until it hits<br />
Getting the level correct and the slide bar plumb is really a target or drops <strong>to</strong> the<br />
important when aiming from a treestand. I can understand,<br />
ground. (I’ve tested<br />
however, that most of your cus<strong>to</strong>mers may not want the higher<br />
priced hunting sights.<br />
this between 20 and<br />
50 yards and found the<br />
decay <strong>to</strong> be about 20<br />
fps per sec<strong>on</strong>d over that distance.)<br />
– d<strong>on</strong>’t leave home without it! is<br />
is the <strong>on</strong>ly reference you need while<br />
shooting – disregard the other reference<br />
scale <strong>on</strong> the opposite side of the<br />
sight bar. Install the tape <strong>on</strong> the sight<br />
slide bar matching the pencil marks<br />
you made earlier.<br />
Your sight tape marks can be calculated<br />
mathematically because the<br />
arrow trajec<strong>to</strong>ry is parabolic in shape<br />
due <strong>to</strong> the e ects of gravity. Other<br />
examples of the parabolic arc can be<br />
seen in the path of a thrown baseball,<br />
a shot basketball, a shot bullet or in the<br />
curvature of all of those roof <strong>to</strong>p satellite<br />
receiving dishes.<br />
PREPRINTED SIGHT TAPES: e<br />
two or three pencil marks you have<br />
placed <strong>on</strong> the side of the slide bar<br />
can be matched <strong>to</strong> preprinted sight<br />
marks. ese sight marks are available<br />
at many pro shops and provide a series<br />
of sight tapes of di ering lengths. e<br />
faster bows will need the marks that are<br />
spaced close <strong>to</strong>gether while the slower<br />
bows need wider spaced marks since<br />
slower arrows drop more over a given<br />
distance. By comparing your two or<br />
three pencil marks <strong>to</strong> the same marks<br />
<strong>on</strong> the sight tapes you can select the<br />
<strong>on</strong>e tape that best matches. If you d<strong>on</strong>’t<br />
have a perfect match you can always<br />
micro-adjust the draw weight of your<br />
bow <strong>to</strong> increase or decrease the speed<br />
of your arrow <strong>to</strong> match the sight marks<br />
<strong>on</strong> the tape.<br />
Or, you could sight in the old<br />
STEP FOUR: Lastly, I test my set of<br />
marks by shooting at several distances.<br />
To begin, I shoot at 20 yards and adjust<br />
my sight so that I get arrows in the<br />
middle. I then set the sight indica<strong>to</strong>r<br />
pin <strong>to</strong> match the 20 yard mark <strong>on</strong> the<br />
sight tape.<br />
Next, I move <strong>to</strong> a l<strong>on</strong>ger distance,<br />
set my sight <strong>to</strong> that mark and shoot<br />
some arrows – they should be in the<br />
middle if I make good shots. I c<strong>on</strong>tinue<br />
shooting l<strong>on</strong>ger distances through<br />
80 yards. If my original two reference<br />
marks were correct my good shots<br />
should hit the middle at all other distances.<br />
If they d<strong>on</strong>’t then I may have <strong>to</strong><br />
rebuild those original marks.<br />
SIGHT PIN<br />
AND SHAFT ALIGNMENT:<br />
On most bows you’ll nd that the<br />
arrow shaft and the sight pin d<strong>on</strong>’t<br />
line up as you look down across the<br />
undrawn bowstring and shaft. e pin<br />
is slightly o <strong>to</strong> <strong>on</strong>e side of the string/<br />
shaft line due <strong>to</strong> the <strong>to</strong>rque that develops<br />
<strong>on</strong> the cable guard when the bow<br />
is brought <strong>to</strong> full draw. As the draw<br />
force <strong>on</strong> the bowstring decreases at<br />
full draw the weight force <strong>on</strong> the cables<br />
c<strong>on</strong>tinues <strong>to</strong> increase all through the<br />
draw stroke. at high force against the<br />
cable guard results in <strong>to</strong>rque applied<br />
ARROW BUILDERS ADHESION KIT<br />
ONE KIT... FOUR OUTSTANDING PRODUCTS<br />
With the high-tech composites and polymers used in archery <strong>to</strong>day comes a need for specialized<br />
adhesive comp<strong>on</strong>ents. VaneTec has developed the <strong>Arrow</strong>Smith Adhesi<strong>on</strong> Kit <strong>to</strong> address that need.<br />
V-Tough Insert & Comp<strong>on</strong>ent Adhesive redenes impact<br />
resistance. Produced <strong>to</strong> order, so it’s fresh every time.<br />
VT-2000 Hand Fletching Adhesive the next generati<strong>on</strong><br />
of VaneTec’s acclaimed VT-1000. Superior <strong>to</strong> any<br />
other product tested, VT-2000 brings an impressive list<br />
of benets including; product freshness, rapid drying<br />
time in cool and low humidity c<strong>on</strong>diti<strong>on</strong>s, and<br />
much more.<br />
UnderCoat Primer makes everything in the <strong>Arrow</strong>Smith<br />
kit work better. It cleans and preps any surface <strong>to</strong> be b<strong>on</strong>ded<br />
with cyanoacrylate adhesives and allows for faster, str<strong>on</strong>ger<br />
b<strong>on</strong>ds <strong>on</strong> vanes and inserts.<br />
www.VaneTec.com<br />
HeadLock Anti Vibe Threadlocker Field tips and<br />
broadheads loosen c<strong>on</strong>stantly causing noise and affecting<br />
accuracy. HeadLock freezes comp<strong>on</strong>ents<br />
in place quieting any bolt-<strong>on</strong> comp<strong>on</strong>ent<br />
101
<strong>to</strong> the bow handle. A bow with shootthrough<br />
cables has little <strong>to</strong>rque <strong>on</strong> the<br />
cable guard and its pin, string and shaft<br />
should align closely at brace positi<strong>on</strong>.<br />
Scott Markam displays the Axcel AX 3000 sight with a 3 inch vertical<br />
adjust bar. It also comes in a 2 and 4 inch versi<strong>on</strong> with choice of<br />
6, 9 and 12 inch extensi<strong>on</strong> bars. The sec<strong>on</strong>d and third axis adjustments<br />
feature double locking screws and opti<strong>on</strong>al vibrati<strong>on</strong> dampeners.<br />
The nish is available in black, platinum and satin silver<br />
although the 41mm and 31mm scopes are separate items.<br />
102<br />
MULTIPLE PIN ALIGNMENT:<br />
Many bowhunters use multiple<br />
sight pins, as do those who chose<br />
<strong>to</strong> shoot <strong>to</strong>urnament archery in the<br />
bowhunter pin style. ese archers are,<br />
therefore, naturally c<strong>on</strong>cerned with<br />
their vertical pin alignment and spacing.<br />
Two of Extreme Archery’s sights are shown here by Mark Whitt.<br />
The Rec<strong>on</strong> Dovetail ($150) includes the lens, fac<strong>to</strong>ry mounted<br />
scope and ber optic pin. The Rap<strong>to</strong>r Ranger ($105) also<br />
includes the scope and lens and features a rear mounted slide<br />
adjustment for easy visibility for hunting applicati<strong>on</strong>s as well as<br />
for 3-D target shooting.<br />
The CBE Quad Lite 3-D, Elite 3-D and Tek Target sights are<br />
displayed by Travis Byrd of Scott Archery. The Quad Lite (MSRP<br />
$309) has a fast-pitch elevati<strong>on</strong> adjustment, 1-7/8 inch travel, an<br />
opti<strong>on</strong>al third axis adjustment and comes with a 6 or 8 inch bar.<br />
The 3 inch travel versi<strong>on</strong> has a standard third axis adjustment<br />
(MSRP $319). The Elite has a medium pitch elevati<strong>on</strong> adjustment<br />
screw, engraved reference scale and is also available with the 6<br />
or 8 inch extensi<strong>on</strong>. The TEK sight (#209) has a 6 inch extensi<strong>on</strong>,<br />
third axis adjustment and a 1-7/8 inch vertical bar.
e spacing should match the<br />
spacing of the computer generated or<br />
preprinted tapes already menti<strong>on</strong>ed.<br />
e alignment of the pins should, in<br />
a perfect world, be vertical when the<br />
bow is held vertical (plumb). is is<br />
similar <strong>to</strong> having the slide bar vertical<br />
as described above.<br />
Once again, if you have a cus<strong>to</strong>mer<br />
who cannot hold the bow in a true<br />
vertical positi<strong>on</strong> then his or her pin<br />
alignment will be slightly o vertical.<br />
e pins will be in line but not the same<br />
line as the handle. For instance, the<br />
lower 50 yard pin may extend further <strong>to</strong><br />
the left than the <strong>to</strong>p or 20 yard pin with<br />
the other pins falling in line between<br />
these two. What’s important here is for<br />
the shooter <strong>to</strong> be aiming with the pins<br />
in a vertical line as the bow is slightly<br />
The Sure-Loc Supreme is modeled by <strong>to</strong>p<br />
women’s Pro Erica Anshutz. The Supreme<br />
400 and 550 have been an industry standard<br />
since my l<strong>on</strong>g time friend and inven<strong>to</strong>r<br />
Steve Gibbs introduced them 20 years<br />
ago. They have all the bells and whistles<br />
you need plus colors. Standard features<br />
include adjustments for all three axis,<br />
colored nishes, titanium guide rod, lightweight<br />
design, 4 inch or 5.5 inch slide bar<br />
and .002 inch micro-adjustment (MSRP<br />
$350). The Challenger at $250 features<br />
dependable third axis adjustment, and<br />
solid locking mechanism, in fact everything<br />
you need <strong>to</strong> win any champi<strong>on</strong>ship.<br />
Other sights in the line include the Ic<strong>on</strong>,<br />
the Quest and the Lethal Weap<strong>on</strong> pin<br />
sight.<br />
canted <strong>to</strong> <strong>on</strong>e side or the other.<br />
I’ll remind you here that some center-shot<br />
and/or form aws can cause<br />
pins <strong>to</strong> be misaligned. An arrow rest<br />
set <strong>to</strong>o far <strong>to</strong> the left of bowstring alignment<br />
(right-handers) will cause the<br />
l<strong>on</strong>g distance pins <strong>to</strong> be further <strong>to</strong> the<br />
left than the shorter distance pins. Any<br />
c<strong>on</strong>tact, slight or otherwise, between<br />
the lower bowstring and your body<br />
will cause arrows <strong>to</strong> impact <strong>to</strong> the left<br />
(for right handers). Proper bow hand<br />
technique is also a must if you hope <strong>to</strong><br />
establish good pin alignment.<br />
Another problem for some bowhunters<br />
involves the misuse of their<br />
peep sight. Some get a little sloppy<br />
with their aiming through the large<br />
peep sight hole they’re using. Failing <strong>to</strong><br />
look through the peep center and/or <strong>to</strong><br />
center the sight pin arrangement in the<br />
peep for every shot will result in errant<br />
arrows. is is a skill I have <strong>to</strong> practice<br />
for hunting seas<strong>on</strong> every year as I use<br />
a scope and a small peep hole most of<br />
the year but pins and a large peep for<br />
hunting. Proper head positi<strong>on</strong>, peep<br />
height, practice and having a brightly<br />
colored ring around the pin housing<br />
helps me c<strong>on</strong>sistently center the pin<br />
cluster.<br />
MOVABLE HUNTING SIGHTS:<br />
Some bowhunters prefer the sliding<br />
sight for hunting. It allows them <strong>to</strong><br />
use just <strong>on</strong>e pin, the <strong>on</strong>e color that they<br />
can see the best, so they always know<br />
what pin <strong>to</strong> use when its time <strong>to</strong> make<br />
that hunting shot.<br />
e set-up steps are the same as for<br />
any sliding sight. Mount it <strong>to</strong> the side of<br />
the bow, check <strong>to</strong> be sure that the slide<br />
is vertical when the bow is plumb, set<br />
the level and then shoot test. I nd that<br />
this works well for me but I have <strong>to</strong> do<br />
a good job of holding the bow vertical<br />
for all of my shots, even those out of a<br />
treestand.<br />
RECOMMENDATIONS<br />
Not every<strong>on</strong>e needs a high priced<br />
sight for their target shooting especially<br />
if it is their rst sight. Too many adjustments<br />
may c<strong>on</strong>fuse them or they may<br />
103
<strong>on</strong>ly want <strong>to</strong> shoot in their back yard.<br />
ese archers can make do with the<br />
$99 target sight or a simple pin sight.<br />
104<br />
I know at my own club there’s a<br />
group of young guys and gals that like<br />
<strong>to</strong> shoot in the winter league and need<br />
a mid-range,<br />
$200 sight. A<br />
sight with a four<br />
power scope<br />
and microadjust<br />
windage<br />
and elevati<strong>on</strong><br />
is enough <strong>to</strong><br />
match their skill<br />
level. Several of<br />
these archers<br />
are shooting<br />
295 <strong>to</strong> 300 <strong>on</strong><br />
the Vegas three<br />
spot target. is<br />
caliber of sight<br />
L<strong>on</strong>g-time friend Diane Botjer holds the “Great Pink Jewel” bow <strong>on</strong><br />
display at the Viper booth. It features the Viper Diam<strong>on</strong>d Back Micro<br />
Tune sight ($180) in matching pink with features like the two screw<br />
third axis adjustment, ve ber optic pins and <strong>to</strong>ol-free micro adjust<br />
windage and elevati<strong>on</strong>. The Fixed Plate model is available without<br />
the third axis adjustment for $135.<br />
The Sword Titan (MSRP $320) sight features a dual 1/32 rod scope<br />
mount that is fac<strong>to</strong>ry installed and leveled. It also features sec<strong>on</strong>d<br />
and third axis adjustments with elevati<strong>on</strong> travel at 3.5 inch. Brand<strong>on</strong><br />
Gerk<strong>on</strong> menti<strong>on</strong>ed that it can be ordered in either black or silver nishes<br />
with either a .010 or .019 inch diameter pin. This is a super sturdy<br />
sight; I’ve had <strong>on</strong>e for four years and have put it through rough<br />
use with great success.<br />
works well <strong>on</strong> 3-D as well.<br />
Shooting serious outdoor 3-D and<br />
l<strong>on</strong>g range archery requires the <strong>to</strong>p of<br />
the line $300 <strong>to</strong> $350 sight and a good<br />
scope, <strong>to</strong>o. e third axis adjustment<br />
feature of the best sights is needed if<br />
you plan <strong>to</strong> shoot up and down hill targets<br />
bey<strong>on</strong>d 20 yards. e permanent<br />
reference scale also makes the sight-in<br />
process easy.<br />
ese high quality sights travel<br />
well. e extensi<strong>on</strong> bar can be removed<br />
and the sight block detaches easily but<br />
both can be reattached with accuracy.<br />
Packing your sight and bow in <strong>to</strong>wels<br />
in the bow case keeps them protected<br />
from the “luggage gorillas” during travel.<br />
I have no suggesti<strong>on</strong>s for handling<br />
the extra luggage fee!<br />
Dave Coldwell, the new owner of Tox<strong>on</strong>ics, proudly displays<br />
the new Nail Driver 3-D and the Nail Driver ($369). Sight features<br />
of the Nail Driver include the ten-click knob <strong>to</strong> match<br />
computer generated sight tapes, 9 inch extensi<strong>on</strong>, matched<br />
hand-milled parts, patented locking mechanism and depress<br />
knob for quick vertical adjustments. The 1400 Model ($99)<br />
and the 3575 Model ($179) are also available for those interested<br />
in getting started at a lower price but still wanting<br />
great accuracy.
I met Win & Win representative Jinie Lee at the Lancaster Archery<br />
booth <strong>to</strong> learn about their new SF Premium and Elite sights. These<br />
recurve sights tip the weight scale at just 7.93 ounces but still feature<br />
micro adjustments, carb<strong>on</strong> extensi<strong>on</strong> and ber optic aperture. (MSRP<br />
$120 & $199).<br />
CONCLUSIONS<br />
I nd that many beginning archers<br />
and some who <strong>on</strong>ly shoot <strong>to</strong> prepare<br />
for hunting seas<strong>on</strong> forget how <strong>to</strong> adjust<br />
their sight. ey forget that the sight<br />
is wr<strong>on</strong>g and want <strong>to</strong> adjust as if the<br />
arrows in the target are wr<strong>on</strong>g. Once<br />
they see my point they can do a better<br />
job of moving the sight <strong>to</strong> match the<br />
arrow impact point so their next shot is<br />
closer <strong>to</strong> the middle.<br />
No matter how well you get your<br />
system sighted in you have <strong>to</strong> maintain<br />
it. I do that by c<strong>on</strong>stantly shooting at<br />
a l<strong>on</strong>g distance and then moving <strong>to</strong> a<br />
short distance <strong>to</strong> be sure my sight system<br />
windage is correct and the mark<br />
spacing matches my arrow speed. I also<br />
test up and down hills.<br />
I also develop a sight-setting<br />
routine when I approach any target:<br />
Approach the shooting positi<strong>on</strong>, determine<br />
the distance, set my sight, double<br />
check distance and sight, set my stance<br />
and run my shooting form <strong>to</strong> make the<br />
shot or shots. Here’s where c<strong>on</strong>centrati<strong>on</strong><br />
and focus become all important<br />
so you do what you should be doing<br />
and do it correctly. But that’s another<br />
article.<br />
Keep well, shoot straight.<br />
Larry<br />
EDITOR’S NOTE: Larry <str<strong>on</strong>g>Wise</str<strong>on</strong>g> is<br />
also available <strong>to</strong> c<strong>on</strong>duct <strong>on</strong>e and two<br />
day CoreArchery Academies <strong>on</strong> shooting<br />
form. Reach him by email at larry@<br />
larrywise.com or call him at (717) 436-<br />
9168.<br />
Larry has completed his new DVD<br />
titled Core Archery Back Tensi<strong>on</strong>:<br />
De ned and Dem<strong>on</strong>strated. e DVD<br />
is available at www.larrywise.com for<br />
$19.95.<br />
Check out past articles by Larry <str<strong>on</strong>g>Wise</str<strong>on</strong>g><br />
at the twin web sites of <strong>Arrow</strong><strong>Trade</strong>.<br />
High speed internet users can nd<br />
more than three years of complete back<br />
issues at arrowtrademag.com. If you’re<br />
using a dial-up c<strong>on</strong>necti<strong>on</strong> with slower<br />
speeds, you can still download all of<br />
Larry’s coaching and tuning articles<br />
as pdf les at the alternate web site,<br />
arrowtrademagazine.com.<br />
With most <strong>to</strong>urnament sights the scope is a separate purchase<br />
that involves decisi<strong>on</strong>s about magnifying power and<br />
aim point style. These machined aluminum scope housings<br />
are the Pro Series XL (above) and Pro Series models from<br />
Specialty Archery. Both incorporate a sec<strong>on</strong>d axis leveling<br />
feature in<strong>to</strong> the scope body, as shown <strong>on</strong> the inset pho<strong>to</strong>.<br />
Harness the power of the world-wide-web <strong>to</strong> bring new cus<strong>to</strong>mers <strong>to</strong> your door.<br />
Increase Your Sales<br />
Offer Cus<strong>to</strong>mers A Fully S<strong>to</strong>cked<br />
ONLINE STORE<br />
DISTRIBUTOR<br />
CATALOG<br />
Now Your Website Can Offer<br />
Over 10,000 Products<br />
- Distribu<strong>to</strong>r Product & Inven<strong>to</strong>ry Link<br />
- One-Click-To-Ship<br />
- Cus<strong>to</strong>m Design & Branding<br />
Call Today for a Free C<strong>on</strong>sultati<strong>on</strong> and Online Demo<br />
Toll Free: 1-800-699-0820<br />
www.outdoorbusinessnetwork.com<br />
105<br />
-Creati<strong>on</strong> of an<br />
E-commerce w<br />
allowing you <strong>to</strong><br />
product and sel<br />
the web.<br />
-Pape -Pape’s full prod<br />
loaded <strong>to</strong> your w<br />
Images and De<br />
-An inven<strong>to</strong>ry fe<br />
AUTOMATICAL<br />
website every 1<br />
the inven<strong>to</strong>ry le<br />
Pape’s.<br />
-Complete Prici<br />
you <strong>to</strong> easily se<br />
category or eve<br />
product level.<br />
-One Click To S<br />
you <strong>to</strong> click <strong>on</strong>e<br />
order <strong>to</strong> Pape’s<br />
fulfillment <strong>to</strong> you<br />
Pape’s warehou


