O2 Pocket Hotspot
O2 Pocket Hotspot
O2 Pocket Hotspot

Create successful ePaper yourself
Turn your PDF publications into a flip-book with our unique Google optimized e-Paper software.
o2.co.uk<br />
Telefónica UK Limited, 260 Bath Road, Slough, Berks, SL1 4DX.<br />
Registered in England and Wales No.1743099. That’s also the address for our registered office.<br />
All the information’s correct at the time of going to print, May 2012. ZTMF60QN 05/12.<br />
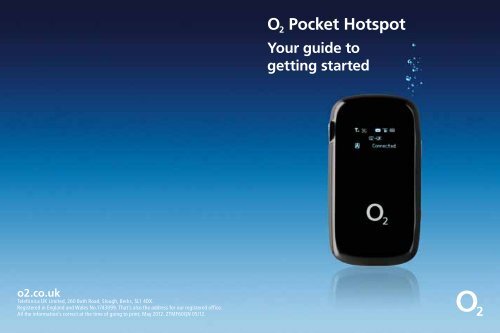
O 2 <strong>Pocket</strong> <strong>Hotspot</strong><br />
Your guide to<br />
getting started
What’s O 2 <strong>Pocket</strong> <strong>Hotspot</strong>?<br />
O 2 <strong>Pocket</strong> <strong>Hotspot</strong>’s a wireless hotspot you carry around with<br />
you. You can use it to get up to five gadgets online at the same<br />
time – without any wires. You just need to top up the data<br />
at mbb.o2.co.uk before it runs out.<br />
If you’re not happy with it<br />
We’ve given you a 30-day Happiness Guarantee. So if you’re<br />
unhappy with our O 2 <strong>Pocket</strong> <strong>Hotspot</strong>, we’ll refund you the cost.<br />
Just return it within 30 days from when you bought it.<br />
How’s your signal?<br />
If you’re getting a weak signal, it could mean you’re in an area<br />
with poor coverage. You can check your Mobile Wifi coverage at<br />
o2.co.uk/coveragechecker<br />
Contents<br />
What’s in the box ...........................................................................1<br />
Getting started ...............................................................................2<br />
Charging the battery ......................................................................4<br />
Your O 2 <strong>Pocket</strong> <strong>Hotspot</strong> features ...................................................5<br />
Connecting to an iPad, iPod Touch or iPhone ..............................6<br />
Connecting on Android .................................................................7<br />
Using WPS to connect your O 2 <strong>Pocket</strong> <strong>Hotspot</strong> ............................8<br />
Connecting to a PC ......................................................................... 9<br />
Getting connected........................................................................ 11<br />
Checking how much data you’ve used ........................................ 12<br />
How far will your data go? .......................................................... 15<br />
Pay & Go top ups .......................................................................... 17<br />
USB mode .....................................................................................22<br />
FAQs & help ..................................................................................32
What’s in the box?<br />
O 2 <strong>Pocket</strong> <strong>Hotspot</strong><br />
Battery<br />
Charger<br />
USB cable<br />
Quick start guide<br />
Forget me not card<br />
Getting started<br />
Putting in your sim and battery.<br />
1. Use the thumb catch at the bottom of the <strong>Pocket</strong> <strong>Hotspot</strong><br />
to open the battery cover.<br />
2. Put the sim into the sim holder.<br />
1 2
3. Push the battery in (like the picture). Make sure the battery<br />
connectors line up, and press the battery down into the<br />
case.<br />
4. Line the battery cover up and press gently to close the case.<br />
Charging the battery<br />
You can charge your <strong>Pocket</strong> <strong>Hotspot</strong> from the mains or<br />
use the USB port on your computer - just connect it using<br />
the USB cable.<br />
A full battery lasts about four hours.<br />
Note: If it’s been a while since you last used your <strong>Pocket</strong><br />
<strong>Hotspot</strong>, you’ll need to charge it up again.<br />
3 4
Your O 2 <strong>Pocket</strong> <strong>Hotspot</strong> features<br />
1<br />
1. Antenna connection (antenna not supplied).<br />
2. LED screen.<br />
2<br />
6<br />
3. Power – hold the power button to switch the <strong>Pocket</strong> <strong>Hotspot</strong><br />
on or off. You’ll know it’s on when the screen lights up.<br />
4. Memory card slot for a microSD card.<br />
5. WPS button (wifi protected setup – for easy connection).<br />
6. Charger and USB port.<br />
Note: If you hold down the WPS and power buttons at the same<br />
time, you’ll change your <strong>Pocket</strong> <strong>Hotspot</strong> back to its original<br />
factory settings. That will mean losing any saved connections.<br />
3<br />
4<br />
5<br />
Connecting to an iPad, iPod Touch<br />
or iPhone<br />
1. Choose Settings, then Wi-Fi. Make sure your wifi is turned<br />
on. Then you’ll see a list of networks.<br />
2. Choose your <strong>Pocket</strong> <strong>Hotspot</strong>’s name – you’ll find it under<br />
your battery and on your Forget me not card, along with<br />
your password. You can also double click the WPS button<br />
and your <strong>Pocket</strong> <strong>Hotspot</strong>’s name and password will appear<br />
on<br />
the LED screen.<br />
3. Type in your password and click Join.<br />
5 6
Connecting on Android<br />
To connect using wifi on your Android tablet or phone.<br />
1. Check that wifi is turned on, on your tablet or phone.<br />
2. Search for Wireless Networks.<br />
3. Select your <strong>Pocket</strong> <strong>Hotspot</strong>’s name from the list – you’ll<br />
find it under your battery and on your Forget me not card,<br />
along with your password. You can also double click the<br />
WPS button and your <strong>Pocket</strong> <strong>Hotspot</strong>’s name and password<br />
will appear on the LED screen.<br />
4. Type in your password and click Connect.<br />
Using WPS to connect your<br />
O 2 <strong>Pocket</strong> <strong>Hotspot</strong><br />
Certain makes of mobile phone, tablet and computer are<br />
enabled with Wireless Protected Setup (WPS) if you are not sure<br />
if your device supports WPS refer to your manual.<br />
When you press the WPS button on your <strong>Pocket</strong> <strong>Hotspot</strong><br />
and on the gadget you’re trying to get online, they securely<br />
connect to each other. So you don’t need to type in usernames<br />
or passwords.<br />
To connect:<br />
1. Turn on your <strong>Pocket</strong> <strong>Hotspot</strong>.<br />
2. Press and hold the WPS button on the <strong>Pocket</strong> <strong>Hotspot</strong> for<br />
three seconds – you’ll see ‘WPS Active Waiting’.<br />
3. Turn on WPS on the gadget you want to connect with<br />
(‘WPS Active Waiting’ will disappear).<br />
To turn off WPS, just press the button on your <strong>Pocket</strong><br />
<strong>Hotspot</strong> again.<br />
7 8
Connecting to a PC<br />
Windows 7<br />
1. Click on the icon in your menu bar.<br />
2. Choose your <strong>Pocket</strong> <strong>Hotspot</strong>’s name – you’ll find it under<br />
your battery and on your Forget me not card, along with<br />
your password. You can also double click the WPS button<br />
and your <strong>Pocket</strong> <strong>Hotspot</strong>’s name and password will appear<br />
on the LED screen. Click Connect.<br />
3. Type in your password and click OK.<br />
Windows Vista<br />
To connect to a wireless network in Windows Vista, follow<br />
these steps:<br />
1. Click Start.<br />
2. Click Connect to.<br />
3. Choose your <strong>Pocket</strong> <strong>Hotspot</strong>’s name – you’ll find it under<br />
your battery and on your Forget me not card, along with<br />
your password. You can also double click the WPS button<br />
and your <strong>Pocket</strong> <strong>Hotspot</strong>’s name and password will appear<br />
on the LED screen. Click Connect.<br />
Windows XP<br />
1. Right-click the wireless network connection icon in the<br />
notification area at the bottom right hand corner of<br />
your screen.<br />
2. Click View Available Wireless Networks.<br />
3. In Choose a Wireless Network list, choose your <strong>Pocket</strong><br />
<strong>Hotspot</strong>’s name - you’ll find it under your battery and on<br />
the Forget me not card, along with your password. You can<br />
also double click the WPS button and your <strong>Pocket</strong> <strong>Hotspot</strong>’s<br />
name and password will appear on the LED screen.<br />
Click Connect.<br />
4. Type your password in the box labelled Network Key and<br />
then again underneath in the Confirm Network Key box.<br />
5. Click Connect.<br />
9 10
Getting connected<br />
Once you are connected you will see this page when you open<br />
your internet browser.<br />
From here, you’ll be able to check your data, top up, and<br />
continue to the internet.<br />
It’s a good idea to bookmark this page so you can top up easily if<br />
you run out of credit.<br />
Checking how much data<br />
you’ve used<br />
You can check how much data you’ve used through the Mobile<br />
Wifi welcome page – just click Check your balance now. Or you<br />
can do it on the Mobile Broadband Top Up site at mbb.o2.co.uk.<br />
Don’t worry, going to either page won’t cost you a penny.<br />
Here’s how:<br />
1. From the Mobile Wifi page choose Check your balance<br />
now. Or, go to mbb.o2.co.uk (you might want to bookmark<br />
it for when you need it again).<br />
11 12
2. Type in your mobile broadband number if it’s not already<br />
there. You’ll find it on the card you popped your sim out of<br />
(and on your dispatch note, if you bought it online).<br />
You might want to make a note of your mobile broadband<br />
number on the Forget me not card that came in your<br />
<strong>Pocket</strong> <strong>Hotspot</strong> box. That way, you’ll always have it handy<br />
whenever you need it.<br />
3. Click Let’s Go.<br />
4. You’ll see your data balance and when it runs out.<br />
13 14
How far will your data go?<br />
Here’s a rough guide of what each data allowance will get you.<br />
Single activity means doing just one thing. Mixed activity gives<br />
you an idea of how much you could do if you combined all<br />
these activities.<br />
If you’re watching video clips (on YouTube for example) and<br />
movie/TV downloads, then you could use your data up quicker<br />
than what we’ve listed opposite. It all depends on the length of<br />
the clip/download as well as the quality of the picture.<br />
And if you’re sharing your O 2 <strong>Pocket</strong> <strong>Hotspot</strong> across gadgets or<br />
with friends, you’ll use your data up quicker too.<br />
1GB Single activity Mix<br />
Browsing 67 hours 11 hours<br />
Emails sent/received 100,000 16,000<br />
(10KB per email) emails emails<br />
Emails sent/received with<br />
a photo attached 2,000 300<br />
(500KB per email) emails emails<br />
Music downloads 100 songs 17 songs<br />
Watching YouTube 67 clips 11 clips<br />
Movie/TV downloads<br />
(not in HD) 4 hours 40 mins<br />
2GB Single activity Mix<br />
Browsing 133 hours 22 hours<br />
Emails sent/received 200,000 33,000<br />
(10KB per email) emails emails<br />
Emails sent/received with<br />
a photo attached 4,000 660<br />
(500KB/email) emails emails<br />
Music downloads 200 songs 33 songs<br />
Watching YouTube 133 clips 22 clips<br />
Movie/TV downloads<br />
(not in HD) 8 hours 80 mins<br />
15 16
Pay & Go top ups<br />
Buying data<br />
If you bought a Starter Kit, you’ll already have data. So you can<br />
start browsing straight away. Otherwise, you’ll need to buy data<br />
before you can go online.<br />
You get different amounts of data and time with each package.<br />
It comes in daily or monthly allowances. When you use up your<br />
data, or your time runs out (whichever happens first), you’ll need<br />
to buy more. You can run out of data before you run out of time.<br />
You can buy data with a UK registered Visa, MasterCard,<br />
Switch/Maestro or O 2 Money Card.<br />
1. From the Mobile Wifi page choose Top up Mobile Wifi and<br />
follow the steps.<br />
2. Or go to mbb.o2.co.uk – you might want to bookmark it for<br />
when you need it again.<br />
3. Type in your mobile broadband number if it’s not already<br />
there. You’ll find it on the card you popped your sim out of<br />
(and on your dispatch note, if you bought it online).<br />
You might want to make a note of your mobile broadband<br />
number on the Forget me not card that came in your O 2<br />
<strong>Pocket</strong> <strong>Hotspot</strong> box. That way, you’ll always have it handy<br />
whenever you need it.<br />
4. Click Let’s Go.<br />
17 18
5. Register your details and click Send PIN or click Skip.<br />
6. Click Buy data for yourself.<br />
7. Choose from our daily or monthly options, then<br />
click Buy now.<br />
19 20
8. Type in your card details.<br />
9 . C l i c k Submit transaction. If your bank uses extra security<br />
you’ll need to type in your password. Just follow the<br />
on-screen instructions.<br />
10. Click Continue.<br />
11. And you’re done. You’ll need to disconnect before using the<br />
internet. Just turn your <strong>Pocket</strong> <strong>Hotspot</strong> off and on again.<br />
USB mode:<br />
You can get online with a USB cable instead of using wifi. When<br />
you plug it in to a USB port on your PC or Mac, you’ll have to<br />
follow some instructions on screen.<br />
Your PC will need:<br />
• Windows XP (Service Pack 3), Windows Vista (Service Pack<br />
2) or Windows 7<br />
• USB 2.0 socket<br />
• 50MB of disk space<br />
• 32-bit and 64-bit support<br />
• WPA+WPA2 Security.<br />
Your Mac will need:<br />
• Mac OS X 10.6 – Snow Leopard or Mac OS X 10.7 – Lion<br />
• USB 2.0 socket<br />
• 50MB of disk space<br />
• Intel Processor<br />
• WPA+WPA2 Security.<br />
If you’re using a work computer and don’t have admin rights,<br />
you will need to speak to your IT department for help<br />
installing it.<br />
21 22
Connecting to a PC<br />
Once you’ve connected your O 2 <strong>Pocket</strong> <strong>Hotspot</strong> to your<br />
computer with the USB cable:<br />
1. Turn on your <strong>Pocket</strong> <strong>Hotspot</strong>.<br />
2. Wait a few moments. If the AutoPlay window pops up on<br />
your computer, click Run AutoRun.exe.<br />
If it’s taking more than a few minutes, you can do it<br />
manually by going to Start > (My) Computer. Right click<br />
on <strong>O2</strong> Mobile Wifi and choose (Open) Autoplay.<br />
3. The software will get ready to install. It could take a<br />
few minutes.<br />
4. You will get a pop-up asking you to allow the program to<br />
make changes to the computer. Click OK.<br />
5. Click Next to start installing.<br />
23 24
6. Choose where you would like to save the software (the<br />
default location is with your Program Files).<br />
Click Next.<br />
7. Once it’s done, click Finish.<br />
8. The Mobile Wifi start page will appear. From here,<br />
you’ll be able to check your data, top up and continue to<br />
the internet.<br />
Once you’re done installing, you’ll have a shortcut on<br />
your desktop, and in Start > Programmes. It’ll be called<br />
<strong>O2</strong> Mobile Wifi.<br />
25 26
Connecting to a Mac<br />
Once you’ve connected your O 2 <strong>Pocket</strong> <strong>Hotspot</strong> to your<br />
computer with the USB cable:<br />
1. Turn on your <strong>Pocket</strong> <strong>Hotspot</strong>.<br />
2. The O 2 Mobile Wifi icon will appear on your desktop,<br />
double-click it.<br />
3. Double-click on <strong>O2</strong> Mobile Wifi.mpkg to start.<br />
4. Click Continue.<br />
5. The software will get ready to install. It could take a<br />
few minutes.<br />
27 28
6. Click Continue.<br />
7. Click Install.<br />
29 30
8. If your Mac asks you for your admin name and password,<br />
type it in (this is usually the username and password you<br />
used when setting up your Mac for the first time).<br />
Click Install Software.<br />
9. The software will start to install. You’ll get a message when<br />
it’s done. You may get a popup telling you a new network<br />
interface has been detected, if so click Cancel.<br />
10. Click Close to finish.<br />
11. The Mobile Wifi start page will appear. From here, you’ll be<br />
able to check your data, top up and continue to the internet.<br />
FAQs & help<br />
What the symbols on your display mean<br />
Strength of your connection.<br />
What network you’re connected to – either 2G or 3G.<br />
Your <strong>Pocket</strong> <strong>Hotspot</strong> will connect to the internet automatically.<br />
You’ll need to manually connect to the internet.<br />
You’re using a roaming network – for when you’re<br />
connecting abroad.<br />
You have a new message.<br />
Whether your wifi is on or off, and how many gadgets<br />
you have connected (in this case 1).<br />
How much battery you have left.<br />
Putting in a microSD Card<br />
1. Pull the microSD cover out of the card slot gently.<br />
2. Put the microSD card into the slot. You’ll hear a click when it<br />
locks in place.<br />
3. Close the microSD cover.<br />
You can use a microSD card with your <strong>Pocket</strong> <strong>Hotspot</strong> to share<br />
files between connected gadgets over wifi, or for USB storage.<br />
31 32
Power saving<br />
Your <strong>Pocket</strong> <strong>Hotspot</strong> will go to sleep if you don’t use it for ten<br />
minutes. The screen will turn off, and so will your connection.<br />
To wake your <strong>Pocket</strong> <strong>Hotspot</strong> up, press the Power button.<br />
If you’re using the USB cable with your <strong>Pocket</strong> <strong>Hotspot</strong>, and<br />
don’t connect anything to it within ten minutes, the wifi will<br />
turn off. Hold the WPS button for about three seconds to<br />
turn it back on again.<br />
Getting the best indoor 3G signal<br />
You’ll get the best reception if you put your <strong>Pocket</strong> <strong>Hotspot</strong><br />
near a window.<br />
Getting the best wireless range<br />
Plug your <strong>Pocket</strong> <strong>Hotspot</strong> into the mains charger to get the best<br />
wireless range.<br />
Overheating<br />
Your <strong>Pocket</strong> <strong>Hotspot</strong> can get too hot if you use it for a long<br />
time without a good flow of air around it. If it gets too hot, it’ll<br />
switch off and disconnect from the network. Put it somewhere<br />
with a good air flow and restart it.<br />
33 34
Warranty, Safety and<br />
Regulatory Guide<br />
Please read before proceeding<br />
Warranty<br />
This product is warranted for 24 (Twenty Four) months from the date the device was<br />
originally purchased. Please ensure you keep your proof of purchase in a safe place.<br />
The warranty can only be used against presentation of your proof of purchase (receipt).<br />
The warranty is valid in the United Kingdom. For batteries and chargers, the warranty<br />
shall be 12 months from the date of original purchase. For support inquiries about ZTE<br />
products and services, you should first contact your retailer or Operator by phone or by<br />
visiting their website. For further enquiries, please contact Mobile@zte.com.cn<br />
ZTE Customer Services can be reached at: +44203 450 8722<br />
Article 1<br />
The manufacturer guarantees that the device will function with proper usage and<br />
maintenance according to the instructions of the manufacturer. The guarantee covers<br />
all device faults which came to be because of eventual errors in the material and/or the<br />
manufacturing of the device.<br />
Article 2<br />
The warranty does not cover faults occurring because of unauthorised modifications to<br />
the software, mechanical damages, improper handling, and higher forces (lightning, fire,<br />
unsuitable voltage and polarities, traffic accidents, humidity, water and alike), batteries<br />
and consumable material including<br />
a) Damages caused by using the device in contravention of the manufacturer<br />
instructions and other documentation which is enclosed with the device as well as<br />
damages caused by using the device with non manufacturer approved devices<br />
b) Damages caused by accidents, improper and wrong usage, floods, fire, earthquakes<br />
and superficial damages which include but are not limited to scratches, dents, broken<br />
plastic and alike<br />
c) Damages caused by servicing (including upgrading and extension) by an<br />
unauthorised person as well as a fault of the device or any part of it if they are<br />
altered because of the change of the functionality or other properties without prior<br />
written authorisation of the manufacturer;<br />
d) Consumable parts other than in the case of damage brought on because of faults in<br />
the material or manufacturing;<br />
e) Impossibility of partial and/or complete usage of the device because of unauthorised<br />
modification of the software.<br />
Article 3<br />
The manufacturer is obliged during the warranty, within a reasonable time frame, to<br />
remove all reported faults and defects of the device which have arisen through proper<br />
and regular use of the device, to repair the device in an authorised service centre or a<br />
replacement of the faulty device with the same but properly working device if a repair<br />
is not possible.<br />
Article 4<br />
The warranty is invalidated if:<br />
• the information from the proof of purchase (invoice) is erased or altered<br />
• the information on the device (type, and serial number of the manufacturer) are<br />
erased or altered<br />
• it is established that the device was opened by an unauthorised person.<br />
Faults or damages which are not covered by the warranty include:<br />
1. Damages caused by intentional separation, opening or disassembling<br />
2. Damages or faults with the operation caused by the removal and insertion of exterior<br />
and interior parts of the device<br />
3. Damages caused by holes in the enclosure<br />
4. Cracked glass or LCD because of misuse or accident caused by the user<br />
5. Damages or faults caused by liquids<br />
6. Damages or faults caused by liquid or dry chemical substances (such as gasoline,<br />
acids, corrosive material), dust, dirt and other foreign objects<br />
7. Damages or faults caused by outside heat or fire (damage by interior heat is covered<br />
if it did not occur through an outside reason)<br />
8. Superficial damages occurring through external reasons, including dents, shabbiness,<br />
scratches on the enclosure, discoloration, cracks, peeling or metal or plastic parts of<br />
the enclosure.<br />
You are advised to regularly make copies of your information and other contents on the<br />
device and to erase the same from the memory of the device before handing the device<br />
over to any relevant third party service agent. If you do not do this, the manufacturer<br />
is not responsible for the loss of information in the memory of the device to you or a<br />
third party.<br />
Limitation of Damages<br />
TO THE EXTENT PERMITTED BY APPLICABLE LAW, THIS LIMITED WARRANTY IS YOUR<br />
SOLE AND EXCLUSIVE REMEDY AGAINST ZTE AND ZTE’S SOLE AND EXCLUSIVE<br />
LIABILITY IN RESPECT OF DEFECTS IN PRODUCT. HOWEVER, THIS LIMITED WARRANTY<br />
SHALL NOT EXCLUDE OR LIMIT ANY OF YOUR LEGAL (STATUTORY) RIGHTS UNDER THE<br />
APPLICABLE NATIONAL LAWS. TO THE EXTENT PERMITTED BY APPLICABLE LAW, ZTE<br />
DOES NOT ASSUME ANY LIABILITY FOR LOSS OF OR DAMAGE TO OR CORRUPTION<br />
OF DATA, FOR ANY LOSS OF PROFIT, LOSS OF USE OF PRODUCTS OR FUNCTIONALITY,<br />
LOSS OF BUSINESS, LOSS OF REVENUES OR LOSS OF ANTICIPATED PROFIT, INCREASED<br />
COST OR EXPENSES OR FOR ANY INDIRECT, OR SPECIAL OR CONSEQUENTIAL LOSS OR<br />
DAMAGE. TO THE EXTENT PERMITTED BY APPLICABLE LAW, ZTE’S LIABILITY SHALL BE<br />
LIMITED TO THE PURCHASE VALUE OF THE PRODUCT. THE ABOVE LIMITATIONS SHALL<br />
NOT APPLY TO DEATH OR PERSONAL INJURY CAUSED BY DEFECT OF THE PRODUCT IN<br />
MATERIAL, DESIGN AND WORKMANSHIP.<br />
Important health and safety precautions<br />
When using this product, retain and follow all product safety and operating instructions.<br />
Observe all warnings in the operating instructions on the product.<br />
Handle the battery pack carefully<br />
• Store the battery in a cool, ventilated place away from direct sunlight.<br />
• All batteries have a limited life – which becomes shorter and shorter the more you<br />
35 36
echarge it. If charging fails several times, it’s time for a replacement.<br />
• Don’t just throw your worn-out battery in the bin. Dispose of it in designated places<br />
according to specified regulations.<br />
• Do not throw your worn-out battery into fire. It will ignite or explode.<br />
• When you’re installing the battery, be gentle. Pressing too hard can cause it to leak,<br />
overheat, explode or ignite.<br />
• Do not disassemble or reassemble the battery. It may result in leakage, overheating,<br />
explosion or fire.<br />
• If the battery becomes hot, deformed or discolored during the course of use,<br />
charging or storage, stop using it immediately and replace it.<br />
• Keep the battery away from dampness or excessive moisture to prevent overheating,<br />
smoldering or erosion.<br />
• Do not leave the battery in direct sunlight, in a vehicle or other high-temperature<br />
places. This may damage the product, overheat the battery or pose a risk to the<br />
vehicle & surroundings.<br />
• Do not continuously charge the battery over 24 hours.<br />
Note: If the battery is damaged, avoid touching it. If your skin comes into contact with<br />
any of the materials inside the battery, flush it with lots of water and seek medical<br />
assistance if necessary.<br />
Avoid wet areas<br />
Never use the product in a wet area.<br />
Avoid heat<br />
This product should be placed away from heat sources such as radiators, stoves and<br />
other products that produce heat.<br />
Small children<br />
Do not leave your device and its accessories within the reach of small children or<br />
allow them to play with it. They could hurt themselves or others, or could accidentally<br />
damage the device. Your device contains small parts that may cause an injury or which<br />
could become detached and create a choking hazard.<br />
Original accessories<br />
There’s a good reason for using only original accessories or ones authenticated by the<br />
manufacturer. Any others may affect the device’s performance, violate your warranty<br />
provisions or breach national regulations. They could even cause injury.<br />
Cleaning and maintenance<br />
You alone are responsible for how you use your device and any consequences of its use<br />
so please maintain it with care.<br />
The following maintenance tips might help you extend the life of your device.<br />
• Clean your device, battery and charger with a soft dry cloth<br />
• Do not clean with harsh chemicals, cleaning solvents or aerosols<br />
• Keep your device dry. Rain, moisture or any kind of liquid may corrupt the circuit.<br />
• Do not touch your device with wet hands. This might cause electric shock.<br />
• Keep your device in a dust free environment.<br />
• Do not let your device get too hot. This may shorten its life, damage the battery, twist<br />
or melt some plastic parts.<br />
WEEE Notice<br />
The Directive on Waste Electrical and Electronic Equipment (WEEE) which entered<br />
into force as European law on 13th February 2003, resulted in a major change in the<br />
treatment of electrical equipment at end of life.<br />
1. The WEEE logo (shown here on the left) means the product is covered by the<br />
European Directive 2002/96/CE.<br />
2. This logo, if appearing on the device or its box, indicates that it must not be disposed<br />
of or dumped with general household waste. You are liable to dispose of all of your<br />
electronic or electrical waste equipment through your specified collection point for<br />
recycling of such hazardous waste.<br />
3. The correct disposal of your device will ensure safety of human health and<br />
environment. For more information about electronic and electrical waste equipment<br />
disposal, recovery and collection points, please contact your local council, household<br />
waste disposal service, the store from where you purchased your device or<br />
manufacturer of the device.<br />
RoHS Compliance<br />
This product is in compliance with Directive 2002/95/EC of the European Parliament on<br />
the restriction of the use of hazardous substances in electrical and electronic equipment<br />
(RoHS) and its amendments with respect to the following substances:<br />
(1) Lead (Pb)<br />
(2) Mercury (Hg)<br />
(3) Cadmium (Cd)<br />
(4) Hexavalent Chromium (Cr (VI))<br />
(5) Polybrominated biphenyls (PBB’s)<br />
(6) Polybrominated diphenyl ethers (PBDE’s)<br />
(Compliance is evidenced by written declaration from our suppliers, assuring that any<br />
potential trace contamination levels of the substances listed above are below<br />
the maximum level set by EU 2002/95/EC, or are exempt due to their application.)<br />
ZTE MF60 manufactured by ZTE CORPORATION, meets the requirements of EU<br />
2002/95/EC.<br />
37 38