Set-up & tuning guide - Progressive Suspension
Set-up & tuning guide - Progressive Suspension
Set-up & tuning guide - Progressive Suspension

Create successful ePaper yourself
Turn your PDF publications into a flip-book with our unique Google optimized e-Paper software.
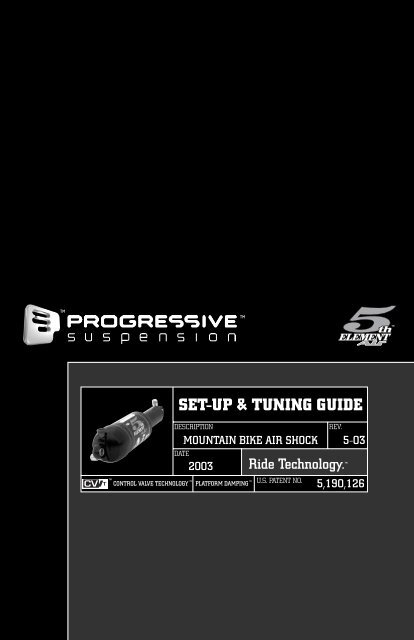
SET-UP & TUNING GUIDE<br />
DESCRIPTION<br />
MOUNTAIN BIKE AIR SHOCK<br />
DATE<br />
2003<br />
Ride Technology. <br />
REV.<br />
5-03<br />
CONTROL VALVE TECHNOLOGY PLATFORM DAMPING <br />
<br />
U.S. PATENT NO. 5,190,126
2003 SET-UP & TUNING GUIDE MOUNTAIN AIR BIKE SHOCK 5TH ELEMENT SET-UP INSTRUCTIONS<br />
TABLE OF CONTENTS<br />
Welcome ......................................................................................................................................... 2<br />
General Information & Warranty ................................................................................................ 3<br />
Detailed <strong>Set</strong> Up Info ..................................................................................................................... 4<br />
Features .......................................................................................................................................... 8<br />
Maintenance Schedule .................................................................................................................. 9<br />
Disclaimer, Consumer Warnings & Safety ................................................................................. 10<br />
Shock Talk ...................................................................................................................................... 11<br />
“Launching a new <strong>Suspension</strong> Technology for the 21st Century - Again!”<br />
1 2 3 4 5 6 7 8 9 10 11 12<br />
Welcome to the <strong>Progressive</strong> <strong>Suspension</strong> Family<br />
To all of our new mountain bike customers, our most sincere thanks for purchasing a new 5th Element <br />
shock by <strong>Progressive</strong> <strong>Suspension</strong> Inc, USA.<br />
<strong>Progressive</strong> <strong>Suspension</strong> has been in business since 1982 when Jay Tullis and Donn Rickard opened a<br />
motorcycle suspension business in Jay’s garage in Lakewood California. 20 years later, <strong>Progressive</strong> is the<br />
largest aftermarket motorcycle suspension company in the United States.<br />
Our new bicycle suspension project started in early 2001, as a race development collaboration between<br />
Roy Turner (former Kawasaki MX team manager & Director of RockShox product development), Jeff Steber<br />
(Racing development guru & owner of Intense Cycles) and Eric Carter (Dual Slalom and Downhill Champion).<br />
At the onset of the project, we had no intentions of offering the technology to the retail consumer before<br />
2003. It was also planned that any offering of the technology would be a simplified version of our megafeatured<br />
prototype race units.<br />
We developed & race tested the innovative new shock technology during the 2001 UCI World C<strong>up</strong> &<br />
NORBA race tours. Race tested by Dual Slalom Champion Eric Carter, UCI World C<strong>up</strong> winner Chris Kovarik,<br />
& top ten World C<strong>up</strong> competitor Michael Ronning, the 5th Element technology provided incredible new<br />
performance benefits without a single failure during the entire race season!<br />
The 2001 and 2002 DH Race seasons have resulted in an overwhelming number of podium finishes for our<br />
5th Element Technology. Beginning in 2003, <strong>Progressive</strong> offers this technology to the XC World.<br />
Housed in an amazingly lightweight package, bred from years of advanced suspension engineering and<br />
real-world fine <strong>tuning</strong>, our 5th Element Air Shock delivers performance as original equipment on Santa<br />
Cruz Bicycles, Intense Cycles, and other select top bicycles.<br />
From the entire staff at <strong>Progressive</strong>, we are genuinely proud and excited to continue an era of cuttingedge<br />
suspension technology for the DH and XC mountain bike community. We hope you’ll share in our<br />
excitement of the many new performance benefits of the 5th Element technology.
<strong>Progressive</strong> <strong>Suspension</strong>, Inc USA<br />
11129 G Ave<br />
Hesperia, CA 92345<br />
Ph (760)948-4012 Fax (760)948-4307<br />
E-Mail: info@progressivesuspension.com<br />
Web Site: www.progressivesuspension.com<br />
Business Hours: 7am - 4:30pm, Mon - Fri PST<br />
Warranty<br />
<br />
GENERAL INFORMATION & WARRANTY<br />
Your 5th Element shock carries a one-year warranty from the date of purchase. Where required by law, a<br />
two-year limited warranty applies from the date of purchase. Proof of performing scheduled maintenance<br />
is required to maintain this warranty. Failure to do so may void this warranty coverage. A copy of the<br />
original receipt and proof of all performed scheduled maintenance must be sent with any warranty service.<br />
Warranty will cover only defective materials or workmanship. It does NOT cover damage to the shock<br />
which has occurred from abuse, unauthorized disassembly, improper installation, improper or lack of<br />
service, modifications, improper cable routing, low seat post damage, unauthorized oil changes or shipping<br />
damage or loss.<br />
Service & Warranty Work<br />
For Warranty or service work, please contact <strong>Progressive</strong> <strong>Suspension</strong> Customer Service at 760-948-4012<br />
or e-mail for a Return Goods Authorization Number (RGA). This number must be written on the package.<br />
When returning your shock for any warranty or service work, include a note with the RGA number, name,<br />
address and phone number where we can reach you during the day along with a description of the problem<br />
with the shock (or request for service) and information about the bicycle (manufacturer, model, year) and<br />
the type of shock you are sending. Mark your return address clearly on the outside of the package. Note:<br />
Your warranty is void if you have service performed by anyone other than an authorized <strong>Progressive</strong><br />
<strong>Suspension</strong> Service Center.<br />
Authorized <strong>Progressive</strong> <strong>Suspension</strong> Service Centers<br />
Please see our website for detailed <strong>Progressive</strong> Distributor and Service Center contact information.<br />
USA<br />
<strong>Progressive</strong> <strong>Suspension</strong><br />
BTI - Distributor Only<br />
Hippie-Tech <strong>Suspension</strong><br />
QBP - Distributor Only<br />
Garageworks<br />
Canada<br />
Trident Sports<br />
Methods of payment:<br />
Visa • Master Card • Cashiers Check<br />
Wire Tranfer<br />
Overseas<br />
TF Tuned Shox - UNITED KINGDOM<br />
Neezy PTY LTD - AUSTRALIA<br />
Bike <strong>Suspension</strong> Center - ITALY<br />
Wide Open Dist. - NEW ZEALAND<br />
PC Sportech - HONG KONG<br />
Mizutani Bicycle - JAPAN<br />
Bike Right - NETHERLANDS<br />
ADP Engineering - GERMANY<br />
Method of Shipping:<br />
We use UPS Ground service within North America unless<br />
otherwise specified. Terms are FOB Hesperia, Ca.<br />
1 2 3 4 5 6 7 8 9 10 11 12
2003 SET-UP & TUNING GUIDE MOUNTAIN AIR BIKE SHOCK 5TH ELEMENT SET-UP INSTRUCTIONS<br />
DETAILED SET-UP<br />
The following information will <strong>guide</strong> you through the set-<strong>up</strong> of your 5th<br />
Element Shock. The 5th Element provides the highest level of <strong>tuning</strong> &<br />
performance features of any bicycle shock on the market. After referring to<br />
the consumer safety tips, the online quick start <strong>guide</strong> will help you find a<br />
recommended default setting for your weight range & bike model so you<br />
can hit the trail & become familiar with your bike. After your initial riding<br />
experience, the following set-<strong>up</strong> and <strong>tuning</strong> <strong>guide</strong> will help you to customize<br />
your shocks performance for your riding preferences. You should allow a<br />
one hour break-in period before determing your preferred settings. Always<br />
remember, what might be your perfect set-<strong>up</strong> may not be the same for<br />
someone else with the same bike and weight. We, like our bikes, are<br />
individuals!<br />
1. Internal Floating Piston (IFP)<br />
Air Pressure <strong>Set</strong>tings - The shock<br />
depends on air pressure to<br />
function properly. Use of the<br />
shock with improper IFP air<br />
pressure will cause damage & 1<br />
failure of the shock that is not<br />
covered by the warranty. The IFP<br />
air pressure settings control the<br />
position sensitive damping feature of the shock. IFP air pressure adjustments vary the<br />
starting compression force that affects the pedaling platform & high-speed blow-off.<br />
The IFP air pressure range is 75-125psi. Never use a pressure outside this pressure<br />
range. You can refer to the online Quick Start <strong>guide</strong> at: www.progressivesuspension.com/<br />
literature.html for accurate pressure ranges matched to your bike model and body weight.<br />
The IFP air pressure also affects sag, so you should set the IFP air pressure before<br />
setting the main spring pressure. The IFP pressure settings will vary according to rider<br />
weight, main spring pressure, your bike’s leverage ratio & your personal preferences.<br />
Lower pressures will provide a softer ride & lower blow-off threshold for sharp, highspeed<br />
bumps. Higher pressures will provide a firmer ride control, firmer pedaling &<br />
higher blow-off threshold for sharp, high-speed bumps. IFP air pressure should be<br />
added with <strong>Progressive</strong>’s GP3-300 Shock Pump.<br />
1 2 3 4 5 6 7 8 9 10 11 12
DETAILED SET-UP<br />
2. Installing Air Pressure<br />
– Remove the air cap from<br />
the Schrader valve on the<br />
end of the shock body.<br />
Attach the pump to the<br />
Schrader valve. Some people<br />
damage their pumps by<br />
2<br />
screwing them on too far.<br />
As soon as the gauge<br />
registers pressure, screw 1/2 turn more and pump to the desired level. Use the release<br />
button on the pump to reduce air pressure. The hiss you hear when unscrewing the<br />
pump is only the air from the pump and not from the shock! Likewise, when you install<br />
the pump again, you will also hear a hiss as air from the shock fills the pump and<br />
reduces the registered pressure you previously installed. All perfectly normal when<br />
pressurizing the shock! After removing the pump, be sure to reinstall the Schrader valve<br />
cap. If the shock does not dampen<br />
properly after pressurizing, the air<br />
pressure may have been lost<br />
during pump removal as a result<br />
of a worn pump fitting o-ring that<br />
needs replacement. Do not ride<br />
the bike until the shock is properly<br />
pressurized.<br />
3. Main Air Spring Pressure<br />
Adjustments – Air Spring<br />
3<br />
adjustments are made by<br />
inflating or deflating the main air<br />
spring chamber. Since your IFP air pressure adjustment (outlined above) also affects<br />
your starting spring force, you should always adjust your IFP pressure before adjusting<br />
the main air spring pressure. You can refer to the online Quick Start <strong>guide</strong> at:<br />
www.progressivesuspension.com/literature.html for accurate main air spring pressure<br />
1 2 3 4 5 6 7 8 9 10 11 12
2003 SET-UP & TUNING GUIDE MOUNTAIN AIR BIKE SHOCK 5TH ELEMENT SET-UP INSTRUCTIONS<br />
DETAILED SET-UP<br />
and sag settings matched to your bike model and body weight. Main air spring<br />
pressure settings and sag will vary according to rider weight, IFP air pressure, your<br />
bike’s leverage ratio and your personal preferences. As a general rule, the 5th Element <br />
Air shock performs best when set with 25% of the shock stroke as sag. The pressure<br />
for the main air spring can<br />
range from 75 to 150psi.<br />
The main air spring<br />
chamber should be inflated<br />
and deflated with<br />
<strong>Progressive</strong>’s GP3-300<br />
Shock Pump.<br />
4. Measuring Measuring Preload Preload & & Sag<br />
Sag<br />
Adjustments Adjustments – Refer to the<br />
Quick Start <strong>guide</strong> at www.<br />
progressivesuspension.com/<br />
literature.html for sag settings<br />
4a<br />
matched to your bike model,<br />
riding preferences, riding style, and body weight. Without compressing your bike’s<br />
suspension, measure the distance between the centers of each shock mounting bolt<br />
(eye-to-eye length of your shock) & record this first measurement. Next, sit on the<br />
bike in a normal riding position near a wall to steady yourself. Without bouncing on<br />
the saddle, distribute your<br />
weight on the saddle, pedals,<br />
and handlebar grips in a<br />
normal riding position. Have<br />
a friend measure the distance<br />
between the centers of each<br />
shock mounting bolt. Record<br />
this second measurement.<br />
The difference between the<br />
first and second measurement<br />
is your sag.<br />
O-Ring<br />
1 2 3 4 5 6 7 8 9 10 11 12
DETAILED SET-UP<br />
Note: A quick way to visually measure your sag is to measure the difference in<br />
positions of the travel indictor o-ring located on the shock body. Adjust the<br />
IFP air pressure and main air spring pressure (inflate or deflate) to achieve<br />
the desired amount of sag.<br />
5. Rebound Rebound Damping Damping Adjustment Adjustment - The rebound damping controls the return rate of<br />
the shock & rear wheel after it has compressed to absorb the bump. The rebound<br />
adjustment will vary for different air spring pressures, rider weights, leverage ratios,<br />
type of riding and individual rider preferences. As a general rule, adjustments that<br />
are too fast (counterclockwise adjustment) will produce a springy ride with excessive<br />
kick-<strong>up</strong> of the rear end during aggressive riding or racing. Adjustments that are too<br />
slow (clockwise adjustment) will cause packing of the rear wheel that is identified by<br />
a low ride height & stiff ride feeling when the rear wheel can’t return fast enough to<br />
absorb the next bump. An average starting adjustment will achieve a return movement<br />
of the shock somewhere between a “snap-back” and”“sluggish” motion. You can<br />
refer to the quick start <strong>guide</strong> for an average starting setting for your bike model,<br />
spring rate and rider weight. The rebound adjuster is a red knob found on the eyelet<br />
cap of the main air chamber. All models are fitted with a knurled knob for easy notool<br />
adjustment.<br />
5<br />
When reaching the minimum &<br />
maximum stops of the adjuster<br />
range, do not apply excessive<br />
force to continue turning the<br />
adjuster, or damage to the<br />
adjuster will occur that is not<br />
covered by the warranty.<br />
1 2 3 4 5 6 7 8 9 10 11 12
2003 SET-UP & TUNING GUIDE MOUNTAIN AIR BIKE SHOCK 5TH ELEMENT SET-UP INSTRUCTIONS<br />
FEATURES<br />
Design Features<br />
Amazingly lightweight design @ sub 200 grams (6.50 x 1.50 model).<br />
CV/T Control Valve Technology Spherical Ball Mounting Hardware<br />
Ultra-low Air Spring Compression Ratio<br />
Ultra-low Air Spring Pressures<br />
Tunable Negative Spring System<br />
Micro Cellular Foam Bottoming Bumper<br />
O-Ring Backed Piston Ring<br />
Performance Features<br />
Platform Damping – Eliminates pedal induced<br />
suspension bob & the need for lockout.<br />
Adjustable Position Sensitive Compression Damping –<br />
Can be custom tuned for any leverage ratio, type of<br />
terrain, rider weight or performance preference.<br />
Velocity Sensitive Compression Damping<br />
Adjustable Rebound Damping - Can be custom tuned<br />
for any air pressure, leverage ratio, type of terrain,<br />
rider weight or performance preference.<br />
Micro Cellular Foam Bottom-out Bumper – Eliminates<br />
harsh bottoming.<br />
Tunable Negative Spring System – provides<br />
uncompromised small bump ride.<br />
Hydraulic Controlled Top-Out – Minimizes annoying<br />
brake chatter.<br />
Spherical Ball Mounting Hardware – Eliminates side<br />
load friction for a silky smooth ride.<br />
Low Air Spring Compression Ratio ––Provides–“long<br />
travel” ride feeling.<br />
New Technology Air Spring Piston – Utilizes low air spring pressures<br />
for the resulting benefits of reduced seal friction, incredible small<br />
bump ride & improved seal life.<br />
1 2 3 4 5 6 7 8 9 10 11 12
MOUNTING PIN INSTALLATION & MAINTENANCE<br />
Install Mounting Pins and Spacers in the flowing configuration:<br />
No tools are requires to fit the pins into the spherical ball eyelets.<br />
Note: Always refer to your bicycle manufacturer’s recommendation for appropriate<br />
torque specifications of your mounting hardware.<br />
Maintenance Schedule<br />
Check IFP Pressure (75-125psi)*<br />
Check Air Spring Pressure (75-150psi)*<br />
<strong>Set</strong> Rebound Adjustment to Desired <strong>Set</strong>ting<br />
Check Mounting Hardware Torque<br />
Clean Shock, Check for Wear, Damage & Oil Leakage<br />
Clean/Inspect Mounting Hardware & Replace if Worn<br />
Clean/Inspect/Grease Air Spring Seals & Replace if Worn**<br />
Complete Inspection, Service & Oil Change**<br />
* Riding the 5th Element Air Shock with improper air pressures can result in loss of<br />
control of your bicycle that may cause injury or death. <strong>Progressive</strong> <strong>Suspension</strong> is not<br />
responsible for improper air pressure. Consult your <strong>Set</strong><strong>up</strong> and Tuning <strong>guide</strong> or call<br />
<strong>Progressive</strong> <strong>Suspension</strong> at 760-948-4012 for safety information.<br />
** Services to be completed by Authorized <strong>Progressive</strong> Service Center.<br />
<br />
New<br />
X<br />
X<br />
X<br />
X<br />
Every<br />
Ride<br />
X<br />
X<br />
X<br />
Every<br />
20 hrs<br />
X<br />
X<br />
X<br />
X<br />
Every Year<br />
or 200<br />
hours<br />
X<br />
1 2 3 4 5 6 7 8 9 10 11 12
2003 SET-UP & TUNING GUIDE MOUNTAIN AIR BIKE SHOCK 5TH ELEMENT SET-UP INSTRUCTIONS<br />
DISCLAIMER, CONSUMER WARNINGS & SAFETY<br />
Disclaimer<br />
<strong>Progressive</strong> <strong>Suspension</strong> Inc., USA is not responsible for any damages to you or others from riding,<br />
transporting or other use of your 5th Element Shock or mountain bike. User fully understands that<br />
mountain bike riding and/or racing is dangerous and hard on equipment. In the event your 5th<br />
Element shock breaks or malfunctions, <strong>Progressive</strong> <strong>Suspension</strong>, Inc USA will assume no liability or<br />
obligation beyond the repair or replacement or your shock, pursuant to the terms outlined in the<br />
Warranty provisions in this manual.<br />
Consumer Safety & Warnings<br />
Before riding, take the time to read the sections in this manual on set-<strong>up</strong>, use, adjustments and<br />
service of your 5th Element Shock. If you have any questions please do not hesitate to call our<br />
customer service dept at (760) 948-4012 or e-mail at info@progressivesuspension.com.<br />
The 5th Element Air Shock relies on air pressure to function properly! The air pressure range is<br />
75-125psi for the IFP pressure and 75-150psi for the main air spring pressure. This This setting<br />
setting<br />
must must be be checked checked before before every every ride. ride. Use of the shock with improper air pressure can cause a total<br />
loss of damping and total malfunction of the shock. RIDING RIDING YOUR YOUR YOUR BIKE BIKE WITH WITH IMPROPER IMPROPER SHOCK<br />
SHOCK<br />
AIR AIR PRESSURE PRESSURE CAN CAN RESULT RESULT IN IN LOSS LOSS OF OF CONTROL CONTROL AND AND POSSIBLE POSSIBLE SERIOUS SERIOUS INJURY INJURY OR OR DEATH.<br />
DEATH.<br />
If your 5th Element Air Shock loses oil or makes unusual noise, stop riding immediately! Have the<br />
shock inspected by an authorized service center or contact <strong>Progressive</strong> <strong>Suspension</strong>.<br />
When the shock compresses, its position within the frame will change. Always check for adequate<br />
clearance between the shock and frame/seat post for the entire stroke/motion of the shock. Do not<br />
lower the seat post below the bottom of the seat tube. Periodically inspect your frame, as extreme<br />
riding may cause frame tubes to bend and contact the shock. Some bicycle models have more than<br />
one shock mounting position to achieve different bottom bracket heights and different rear wheel<br />
travel options. Even though the 5th Element shock may statically bolt onto various bicycle models<br />
in various mounting positions, the shock may not have adequate frame clearance when the shock<br />
compresses and its position changes within the frame. It is the users responsibility to check for<br />
adequate clearance between the shock and frame/seat post for the entire stroke/motion of the<br />
shock. DO NOT USE THE SHOCK IN A MOUNTING POSITION OR RIDE YOUR BICYCLE IF ANY<br />
PORTION OF THE SHOCK CONTACTS THE FRAME OR SEAT POST DURING NORMAL OPERATION<br />
OF THE SHOCK. IF THE SHOCK TOUCHES THE FRAME OR SEAT POST, IT MAY BREAK OR TOTALLY<br />
MALFUNCTION AND CAUSE LOSS OF CONTROL AND POSSIBLE SERIOUS INJURY OR DEATH!<br />
Your 5th Element shock is pressurized. The shock should never be opened, disassembled or serviced,<br />
except by an authorized service center. OPENING A PRESSURIZED SHOCK CAN BE DANGEROUS<br />
AND CAN RESULT IN INJURY!<br />
Do not attempt to pull apart, open, disassemble or service a shock if it is compressed or has not<br />
returned to its original free length. DISASSEMBLY OF A SHOCK THAT WILL NOT RETURN TO ITS<br />
ORIGINAL FREE LENGTH IS DANGEROUS AND CAN RESULT IN INJURY!<br />
1 2 3 4 5 6 7 8 9 10 11 12
SHOCK TALK<br />
<strong>Suspension</strong> Balance: Is the matching of adjustments between your front & rear suspension to achieve<br />
the best suspension performance for a riders weight, ability level, riding style, type of riding & terrain<br />
conditions.<br />
Bobbing: Is the <strong>up</strong> and down (power loss) movement of your suspension that occurs from weight<br />
shifts of the rider during pedaling.<br />
Attitude & Rider Stability: Is created by a controlled damping (not spring) action that manages<br />
excessive dive, squatting, bobbing, chassis motion and the springy ride of conventional shocks that<br />
can throw a rider off-line in aggressive riding or racing conditions.<br />
Platform Damping: Is a new damping characteristic of the 5th Element Control Valve Technology<br />
that improves pedal bobbing & attitude/ride stability.<br />
Spike: Is the harsh feeling that occurs when riding over hi-speed bumps if the shock cannot compress<br />
fast enough to absorb the size or sharpness of initial bump contact.<br />
Blow-Off: Is the shocks ability to absorb the spike of hi-speed bumps, separately from other compression<br />
force & position sensitive functions.<br />
Eye-to-Eye: Is the shock length between the two mounting points of the shock.<br />
Travel: Is the distance the shock can compress. Travel may also be referred to when talking about the<br />
distance of wheel movement.<br />
Spring Rate: Is the pounds or kilograms of force needed to compress the spring one inch.<br />
Spring Preload: Is the difference in length between the free length and the installed length of the<br />
spring.<br />
Sag: Is the amount of shock (& rear wheel) compression caused by the riders weight while sitting on<br />
the bike in a normal riding position.<br />
Compression Damping: Is the amount of resistance produced by the shock during the bump induced<br />
movement of the shock & rear wheel. The 5th Element Control Valve Technology is the first production<br />
bicycle shock to offer both Position Sensitive & Velocity/Speed Sensitive compression damping<br />
characteristics that separately manage a variety of riding conditions such as (a) bobbing (platform<br />
damping), (b) ride, attitude & corning stability, (c) hi-speed bump absorption (blow-off), (d) low-speed<br />
bump absorption, (e) bottoming control, (f) improved traction.<br />
Rebound Damping: Is the amount of resistance produced by the shock during the return movement of<br />
the wheel. Rebound damping controls the speed at which the shock (and rear wheel) returns after<br />
being compressed. Rebound damping is typically adjusted faster (less damping) for soft spring rates<br />
and slower (more damping) for stiff spring rates to provide similar wheel movement rates.<br />
1 2 3 4 5 6 7 8 9 10 11 12
3099-050<br />
11129 G Avenue • Hesperia, CA 92345 USA<br />
For Literature Call Toll Free: 877-690-7411<br />
Techline: 760-948-4012 • Fax 760-948-4307<br />
www.progressivesuspension.com<br />
©2003 <strong>Progressive</strong> <strong>Suspension</strong> USA, Inc A MAG., Inc. Company