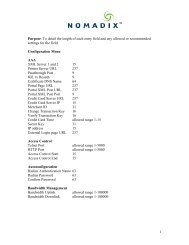
Purpose: To set the USG to allow Free Access to ... - Nomadix
Purpose: To set the USG to allow Free Access to ... - Nomadix
Purpose: To set the USG to allow Free Access to ... - Nomadix

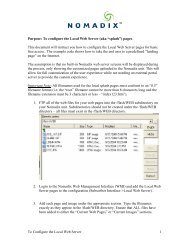
Create successful ePaper yourself
Turn your PDF publications into a flip-book with our unique Google optimized e-Paper software.
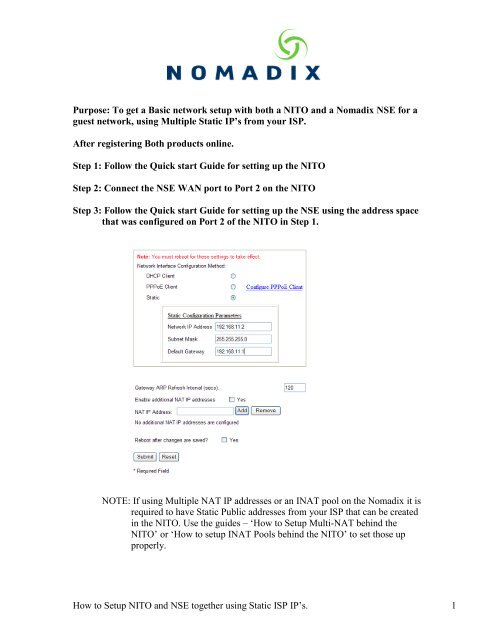
<strong>Purpose</strong>: <strong>To</strong> get a Basic network <strong>set</strong>up with both a NITO and a <strong>Nomadix</strong> NSE for a<br />
guest network, using Multiple Static IP’s from your ISP.<br />
After registering Both products online.<br />
Step 1: Follow <strong>the</strong> Quick start Guide for <strong>set</strong>ting up <strong>the</strong> NITO<br />
Step 2: Connect <strong>the</strong> NSE WAN port <strong>to</strong> Port 2 on <strong>the</strong> NITO<br />
Step 3: Follow <strong>the</strong> Quick start Guide for <strong>set</strong>ting up <strong>the</strong> NSE using <strong>the</strong> address space<br />
that was configured on Port 2 of <strong>the</strong> NITO in Step 1.<br />
NOTE: If using Multiple NAT IP addresses or an INAT pool on <strong>the</strong> <strong>Nomadix</strong> it is<br />
required <strong>to</strong> have Static Public addresses from your ISP that can be created<br />
in <strong>the</strong> NITO. Use <strong>the</strong> guides – ‘How <strong>to</strong> Setup Multi-NAT behind <strong>the</strong><br />
NITO’ or ‘How <strong>to</strong> <strong>set</strong>up INAT Pools behind <strong>the</strong> NITO’ <strong>to</strong> <strong>set</strong> those up<br />
properly.<br />
How <strong>to</strong> Setup NITO and NSE <strong>to</strong>ge<strong>the</strong>r using Static ISP IP’s. 1
Step 4: Set <strong>the</strong> Port Mapping Requirements for accessing and managing <strong>the</strong><br />
<strong>Nomadix</strong> from <strong>the</strong> internet if required<br />
A. Go <strong>To</strong> Networking -> Firewall -> Port Forwarding<br />
Suggested Ports: HTTPS, SSH, and FTP<br />
B. Leave <strong>the</strong> External Interface <strong>set</strong>ting alone.<br />
C. Set <strong>the</strong> Pro<strong>to</strong>col needed for this mapping in <strong>the</strong> Pro<strong>to</strong>col Drop down list.<br />
(TCP & UDP will <strong>allow</strong> most all pro<strong>to</strong>cols)<br />
D. If you would like <strong>to</strong> limit access <strong>to</strong> this Port Mapping <strong>to</strong> a specific IP or<br />
Network enter that in <strong>the</strong> ‘External IP or network’<br />
E. If you would like <strong>to</strong> Log access <strong>to</strong> this Port Mapping or enable <strong>the</strong><br />
Intrusion Prevention System for this mapping check <strong>the</strong> appropriate box.<br />
F. Leave <strong>the</strong> Source IP dropdown as DEFAULT<br />
G. In <strong>the</strong> Source Service Select <strong>the</strong> type of traffic coming in<strong>to</strong> <strong>the</strong> NITO from<br />
<strong>the</strong> internet this mapping is created for. (or enter <strong>the</strong> port desired in <strong>the</strong><br />
User Defined field)<br />
H. Destination IP should be <strong>the</strong> IP address of <strong>the</strong> WAN interface of <strong>the</strong><br />
<strong>Nomadix</strong> NSE.<br />
I. Destination Service can be left blank if <strong>the</strong> same ports that come in<strong>to</strong> <strong>the</strong><br />
NITO are utilized on <strong>the</strong> <strong>Nomadix</strong>. (i.e. if SSH is <strong>set</strong> as <strong>the</strong> source Service<br />
<strong>the</strong> destination can be left blank so SSH port 22 is what is connected <strong>to</strong> <strong>the</strong><br />
NSE on <strong>the</strong> internal interface of <strong>the</strong> NITO)<br />
How <strong>to</strong> Setup NITO and NSE <strong>to</strong>ge<strong>the</strong>r using Static ISP IP’s. 2