Armchair with stool 1 Introduction - Bosch-do-it.com
Armchair with stool 1 Introduction - Bosch-do-it.com
Armchair with stool 1 Introduction - Bosch-do-it.com

Create successful ePaper yourself
Turn your PDF publications into a flip-book with our unique Google optimized e-Paper software.
Robert <strong>Bosch</strong> GmbH<br />
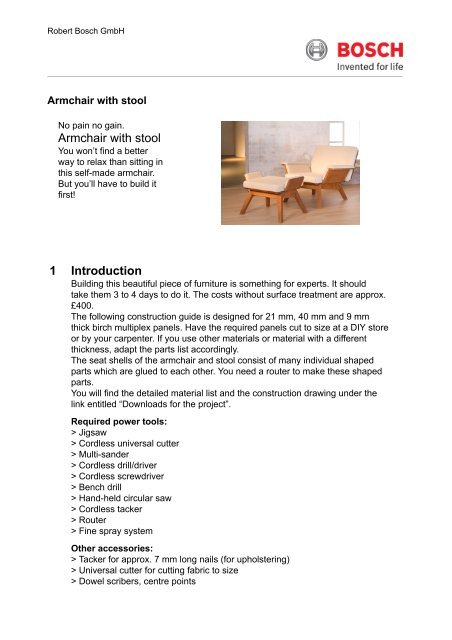
<strong>Armchair</strong> <strong>w<strong>it</strong>h</strong> <strong>stool</strong><br />
No pain no gain.<br />
<strong>Armchair</strong> <strong>w<strong>it</strong>h</strong> <strong>stool</strong><br />
You won’t find a better<br />
way to relax than s<strong>it</strong>ting in<br />
this self-made armchair.<br />
But you’ll have to build <strong>it</strong><br />
first!<br />
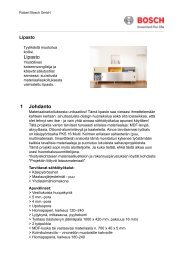
1 <strong>Introduction</strong><br />
Building this beautiful piece of furn<strong>it</strong>ure is something for experts. It should<br />
take them 3 to 4 days to <strong>do</strong> <strong>it</strong>. The costs <strong>w<strong>it</strong>h</strong>out surface treatment are approx.<br />
£400.<br />
The following construction guide is designed for 21 mm, 40 mm and 9 mm<br />
thick birch multiplex panels. Have the required panels cut to size at a DIY store<br />
or by your carpenter. If you use other materials or material <strong>w<strong>it</strong>h</strong> a different<br />
thickness, adapt the parts list accordingly.<br />
The seat shells of the armchair and <strong>stool</strong> consist of many individual shaped<br />
parts which are glued to each other. You need a router to make these shaped<br />
parts.<br />
You will find the detailed material list and the construction drawing under the<br />
link ent<strong>it</strong>led “Downloads for the project”.<br />
Required power tools:<br />
> Jigsaw<br />
> Cordless universal cutter<br />
> Multi-sander<br />
> Cordless drill/driver<br />
> Cordless screwdriver<br />
> Bench drill<br />
> Hand-held circular saw<br />
> Cordless tacker<br />
> Router<br />
> Fine spray system<br />
Other accessories:<br />
> Tacker for approx. 7 mm long nails (for upholstering)<br />
> Universal cutter for cutting fabric to size<br />
> Dowel scribers, centre points
Robert <strong>Bosch</strong> GmbH<br />
> Sanding paper, gr<strong>it</strong>s of 120–240<br />
> Set of wood drill b<strong>it</strong>s<br />
> Universal twist drill b<strong>it</strong>, 4 mm diameter<br />
> Adhesive tape<br />
> Pencil, folding rule, pencil sharpener, rubber, <strong>com</strong>pass<br />
> Work surface<br />
> 2 pieces of square timber, dimensions of approx. 500 x 58 x 38 mm<br />
> Trestles (if available)<br />
> Sheeting or old newspapers<br />
> Scrap wood to protect the workpiece<br />
> 4 G-clamps for gluing, clamping dimensions of min. 850 mm, and other small<br />
G-clamps<br />
> Cloth and paintbrush<br />
> Scribing square<br />
> Wide chisel<br />
> Spray adhesive<br />
> Blueprint paper<br />
> Red and blue felt pen<br />
> For your own protection: Face mask, protective glasses, gloves, ear<br />
protectors<br />
Detailed material list:<br />
pcs Designation Length Width Thickness Material<br />
1 Red routing template 970 mm 316 mm 10 mm MDF<br />
1 Blue routing template 970 mm 304 mm 10 mm MDF<br />
2 Leg panels for armchair 700 mm 357 mm 40.0 mm Birch<br />
multiplex<br />
2 Skirt panels for armchair 500 mm 120 mm 21.0 Birch<br />
multiplex<br />
1 Base plate for leg of<br />
armchair<br />
1 Curb for base plate of<br />
armchair<br />
2 Seating surfaces of<br />
armchair<br />
2 Sizing panels for seating<br />
surface shaped parts of<br />
armchair<br />
547 mm 514 mm 9 mm Birch<br />
multiplex<br />
514 mm 27 mm 21 mm Birch<br />
multiplex<br />
590 mm 115 mm 21 mm Birch<br />
multiplex<br />
1000 mm 970 mm 40 mm Birch<br />
multiplex<br />
1 Backrest of armchair 800 mm 640 mm 21 mm Birch<br />
multiplex<br />
1 Panel for upholstery of<br />
armchair<br />
600 mm 640 mm 9 mm Birch<br />
multiplex
Robert <strong>Bosch</strong> GmbH<br />
1 Panel for upholstery of<br />
armchair<br />
2 Panels for upholstery of<br />
armchair<br />
2 Panels for upholstery of<br />
armchair<br />
2 Leg panels (front/back)<br />
for <strong>stool</strong><br />
800 mm 560 mm 9 mm Birch<br />
multiplex<br />
530 mm 175 mm 9 mm Birch<br />
multiplex<br />
530 mm 120 mm 9 mm Birch<br />
multiplex<br />
700 mm 357 mm 40.0 mm Birch<br />
multiplex<br />
2 Skirt panels for <strong>stool</strong> 279 mm 110 mm 21 mm Birch<br />
multiplex<br />
1 Panel for leg frame of<br />
<strong>stool</strong><br />
512 mm 300 mm 9 mm Birch<br />
multiplex<br />
2 Seating surfaces of <strong>stool</strong> 590 mm 110 mm 21 mm Birch<br />
multiplex<br />
1 Sizing panel for seating<br />
surface shaped parts of<br />
<strong>stool</strong><br />
1 Panel for upholstery of<br />
<strong>stool</strong><br />
2 Panels for upholstery of<br />
<strong>stool</strong><br />
2 Dowel rods for armchair,<br />
8 mm diameter<br />
2 Dowel rods for <strong>stool</strong>, 8<br />
mm diameter<br />
1000 mm 970 mm 40 mm Birch<br />
multiplex<br />
600 mm 510 mm 9 mm Birch<br />
multiplex<br />
290 mm 120 mm 9 mm Birch<br />
multiplex<br />
520 mm<br />
280 mm<br />
8 Brackets 60 mm 30 mm 2 mm<br />
1 Velcro tape<br />
Flat head screws, 3.5 x<br />
25 mm<br />
Flat head screws, 3.5 x<br />
20 mm<br />
Flat head screws, 3.5 x<br />
35 mm<br />
Flat head screws, 4 x 40<br />
mm<br />
1 Can of spray adhesive<br />
approx. 0.7 l wood stain 1 mm<br />
approx. 0.7 l hardwax oil 1 mm<br />
2 Padding 600 mm 510 mm 70 mm Polyether<br />
foam
Robert <strong>Bosch</strong> GmbH<br />
2 Padding 600 mm 640 mm 70 mm Polyether<br />
foam<br />
2 Padding 800 mm 560 mm 40 mm Polyether<br />
foam<br />
4 Padding 290 mm 120 mm 20 mm Polyether<br />
foam<br />
4 Padding 530 mm 175 mm 20 mm Polyether<br />
foam<br />
1 Fleece 6,000<br />
mm<br />
1 Upholstery fabric 6,500<br />
mm<br />
1,500<br />
mm<br />
1,400<br />
mm<br />
Polyester<br />
fleece,<br />
100 g/m2<br />
e.g.<br />
Trevira<br />
CS<br />
2 Making the routing templates<br />
The routing template is defined for the <strong>Bosch</strong> Routers POF 1400 ACE and<br />
POF 1200 AE <strong>w<strong>it</strong>h</strong> a template guide of 24 mm diameter and a straight b<strong>it</strong> of 12<br />
mm diameter.<br />
If you use other accessories, you have to re-calculate the routing template.<br />
The offset of the routing template to the routed part is calculated using the<br />
following formula:<br />
Diameter of template guide – diameter of straight b<strong>it</strong> = x/2<br />
Download the routing template drawings and print them out. Then transfer the<br />
contour including the bore holes using the blueprint paper and a pencil onto<br />
the relevant MDF board (970 x 316 x 10 mm and 970 x 304 x 10 mm).<br />
Now saw the templates precisely along the line using the jigsaw. To make <strong>it</strong><br />
easier to saw the radii, drill holes first or use a curve-cutting saw blade. Also<br />
drill the marked holes. These are used partly for screwing the routing template<br />
and partly for scribing or marking the <strong>do</strong>wel holes. Then sand the cut edge<br />
precisely flat.<br />
To prevent confusion, now mark the templates in colour: the red template is<br />
used for routing the inner contour, while the blue template is for routing the<br />
outer contour. The finished templates are used for both the <strong>stool</strong> and for the<br />
armchair.<br />
3 Making the shaped parts for the seat shells<br />
The shaped parts for the armchair and for the <strong>stool</strong> are made in one step.<br />
The basic form is the same on both. As the <strong>stool</strong> <strong>do</strong>es not have any horizontal<br />
armrests, these will simply be sawn off in a later step.<br />
First screw the red routing template onto the sizing panel flush <strong>w<strong>it</strong>h</strong> the bottom<br />
edges for the seating surface shaped parts. Use 3.5-x-20-mm screws to <strong>do</strong> so.<br />
Make sure that the screw heads are cleanly countersunk. If necessary, use a<br />
countersink to <strong>do</strong> this.
Robert <strong>Bosch</strong> GmbH<br />
Then transfer the <strong>do</strong>wel holes onto the sizing panel. Just scribe the holes <strong>w<strong>it</strong>h</strong><br />
a 6-mm pilot drill b<strong>it</strong>. You will drill the exact vertical hole later <strong>w<strong>it</strong>h</strong> the bench<br />
drill.<br />
Now copy the contour onto the workpiece using the router. Do not plunge<br />
more than 10 mm deep <strong>w<strong>it</strong>h</strong> the straight b<strong>it</strong>. You therefore have to rout in<br />
several passes. There will automatically be approx. 8 mm left over because the<br />
straight b<strong>it</strong> only has a working length of 32 mm. As a result, the sizing panels<br />
for the seating surface shaped parts will remain in one piece.<br />
Unscrew the template again and slid <strong>it</strong> up 10 cm. Then screw the template<br />
on again, scribe the <strong>do</strong>wel holes, rout the contour in several passes, unscrew<br />
the template again and slide <strong>it</strong> up 10 cm. You now repeat this process another<br />
seven times.<br />
You then carry on <strong>w<strong>it</strong>h</strong> the blue template for the outer contour. However, when<br />
<strong>do</strong>ing so you start flush <strong>w<strong>it</strong>h</strong> the top edge of the sizing panel for the seating<br />
surface shaped parts. After every routing process, you slide this <strong>do</strong>wn 10 cm.<br />
You now also <strong>do</strong> the second sizing panel for the seating surface shaped parts<br />
of the armchair and the sizing panel for the seating surface shaped parts of the<br />
<strong>stool</strong> in the same way.<br />
When everything has been routed, you place the panels <strong>w<strong>it</strong>h</strong> the routed area<br />
facing <strong>do</strong>wn and <strong>com</strong>plete the shaped parts on the back <strong>w<strong>it</strong>h</strong> the router and<br />
the trimmer b<strong>it</strong>.<br />
4 Drilling <strong>do</strong>wel holes in the shaped parts<br />
To be able to connect the shaped parts <strong>w<strong>it</strong>h</strong> <strong>do</strong>wel rods in the next step, you<br />
now have to drill the corresponding <strong>do</strong>wel holes. To <strong>do</strong> so, use the bench drill<br />
and drill through the marked <strong>do</strong>wel holes <strong>w<strong>it</strong>h</strong> an 8-mm pilot drill b<strong>it</strong>.<br />
The two shaped parts that are each placed at the end of the seat shells are<br />
the only ones you <strong>do</strong> not drill through at the armrests. Instead only drill them<br />
partially. This will ensure that the connections <strong>w<strong>it</strong>h</strong> the <strong>do</strong>wel rods are not<br />
visible from the outside. You <strong>do</strong> however drill through the <strong>do</strong>wel holes in the<br />
seating area on all the shaped parts. This will enable you to also use these<br />
holes later for connecting to the seat panels.<br />
5 Gluing the shaped parts to form seat shells<br />
Now use the shaped parts to make the seat shells of the armchair and <strong>stool</strong>.<br />
To make sure that the parts <strong>do</strong> not slip during gluing, they are add<strong>it</strong>ionally<br />
connected <strong>w<strong>it</strong>h</strong> the <strong>do</strong>wel rods. If the <strong>do</strong>wel rods are difficult to guide through<br />
the pre-drilled <strong>do</strong>wel holes, scrape them off slightly <strong>w<strong>it</strong>h</strong> a card scraper.<br />
While the glue dries, press the parts together firmly using G-clamps and scrap<br />
wood. The excess glue that oozes out when you press the parts together<br />
can simply be wiped off <strong>w<strong>it</strong>h</strong> a damp cloth. Observe the glue manufacturer’s<br />
specifications regarding the drying time.<br />
When the glue has dried, roughly sand the bumps off the finished seat shells.<br />
6 Sawing off the armrests of the <strong>stool</strong>’s seat shell
Robert <strong>Bosch</strong> GmbH<br />
As the <strong>stool</strong> <strong>do</strong>es not need any armrests, these will now be sawn off. Mark the<br />
sawing edge <strong>w<strong>it</strong>h</strong> a scribing square and a sharp pencil. Then saw the armrests<br />
off cleanly <strong>w<strong>it</strong>h</strong> the hand-held circular saw and the matching guide rail.<br />
7 Preparing the seating surfaces<br />
Seat panels will be glued on to the seat shells at the front and back. These first<br />
have to be cut into shape.<br />
To <strong>do</strong> so, use a <strong>com</strong>pass to mark the radii on the “armchair seating surfaces”<br />
and “<strong>stool</strong> seating surfaces” panels. To make the curve easier to saw <strong>w<strong>it</strong>h</strong> the<br />
jigsaw, use a curve-cutting blade.<br />
The “armchair seating surface” panel that is glued on to the back of the seat<br />
shell needs a cutout for the backrest. Mark the cutout on the panel as specified<br />
in the construction drawing. Then drill through at all four corners <strong>w<strong>it</strong>h</strong> at least<br />
10 mm diameter, so that you can plunge the saw blade of the jigsaw into them<br />
and turn <strong>it</strong> 90 degrees. Finish the corners by hand <strong>w<strong>it</strong>h</strong> a chisel.<br />
Alternatively, the cutout can be made <strong>w<strong>it</strong>h</strong> a hand-held circular saw.<br />
8 Gluing the seating surfaces to the seat shells<br />
The seating surfaces are glued to the seat shells and add<strong>it</strong>ionally connected<br />
<strong>w<strong>it</strong>h</strong> long <strong>do</strong>wel rods for a secure hold. To <strong>do</strong> so, transfer the pos<strong>it</strong>ions of the<br />
<strong>do</strong>wel holes in the seat shells onto the seating surfaces using <strong>do</strong>wel spikes.<br />
If you have not yet drilled the holes for the <strong>do</strong>wel rods, you first have to drill<br />
<strong>do</strong>wel holes in the side of the seat shell. To <strong>do</strong> so, hold the seating surface<br />
on the seat shell and mark four holes roughly equal distance apart from each<br />
other. Use a drilling template to drill.<br />
Then drill the corresponding <strong>do</strong>wel holes in the seating surfaces using the<br />
bench drill.<br />
Use scrap wood and G-clamps again when gluing the parts together. Wipe<br />
off excess glue <strong>w<strong>it</strong>h</strong> a damp cloth. Take your time: glue the parts one after the<br />
other rather than all at once.<br />
9 Sawing the backrest for the armchair into shape<br />
Now saw the armchair backrest into the right shape. To <strong>do</strong> so, transfer the<br />
contour onto the backrest panel as specified in the construction drawing using<br />
a pencil. Mark the radii <strong>w<strong>it</strong>h</strong> a <strong>com</strong>pass and saw precisely along the line using<br />
the jigsaw. Use a curve-cutting saw blade to <strong>do</strong> so.<br />
10 Sawing the leg frame panels into shape<br />
The leg frames for both the <strong>stool</strong> and the armchair each consist of two leg<br />
panels and two connecting skirts. The basic shape of the leg panels is the<br />
same. The armchair leg panel differs only in angle and height.<br />
Now start <strong>w<strong>it</strong>h</strong> one of the leg panels for the <strong>stool</strong>. Transfer the contour onto the<br />
panel as specified in the construction drawing using a pencil. First saw the top<br />
and bottom slants at a 20-degree angle using the circular saw. Then saw the<br />
contour out <strong>w<strong>it</strong>h</strong> the jigsaw. Pre-drill the inner corners beforehand <strong>w<strong>it</strong>h</strong> a 20mm<br />
drill b<strong>it</strong>.
Robert <strong>Bosch</strong> GmbH<br />
W<strong>it</strong>h the leg panels for the armchair, you again cut the slants <strong>w<strong>it</strong>h</strong> the circular<br />
saw before sawing the contour <strong>w<strong>it</strong>h</strong> the jigsaw. The bottom slants are 20<br />
degrees, which is the same as on the <strong>stool</strong>, but the top ones are 25 degrees<br />
and 15 degrees. To avoid confusion, mark the parts in the way that they will<br />
later be assembled.<br />
To make the skirts, again transfer the contour onto the panel as specified in the<br />
construction drawing and saw <strong>it</strong> into shape <strong>w<strong>it</strong>h</strong> the circular saw.<br />
11 Assembling the leg frames<br />
The leg frames of the armchair and the <strong>stool</strong> are essentially the same: the two<br />
shaped leg panels are f<strong>it</strong>ted to the skirts using the brackets to form frames.<br />
To <strong>do</strong> so, you first have to pre-drill and countersink the brackets (four per<br />
frame) for screwdriving <strong>w<strong>it</strong>h</strong> three 4 mm diameter holes each. (You can drill<br />
aluminium <strong>w<strong>it</strong>h</strong> a normal universal b<strong>it</strong>.) Then screw together the frames via the<br />
brackets. This is easiest to <strong>do</strong> when the chair legs are pointing up. Use longer<br />
screws (3.5 x 25 mm) to screw the leg panels, and use shorter screws (3.5 x<br />
20 mm) to screw the narrower skirt panels.<br />
As the upholstery will later be screwed to the frames from below, a base plate<br />
is screwed onto the frames for each. Use 4-x-30-mm screws to <strong>do</strong> this.<br />
The base plate of the armchair clearly protrudes at the back of the frame and<br />
will also have a curb. This will later stabilise the backrest pos<strong>it</strong>ion and the glue<br />
joint between the seat shell and the rear seating surface. Mount the curb <strong>w<strong>it</strong>h</strong><br />
screws (3.5 x 25 mm). Then f<strong>it</strong> the two base plates on the frames <strong>w<strong>it</strong>h</strong> screws<br />
(4 x 30 mm).<br />
12 Making the upholstery<br />
It is advisable to use a robust upholstery fabric for the upholstery. An flat<br />
woven upholstery fabric made of 100% Polyester/Trevira CS was used for the<br />
construction guide.<br />
For the padding <strong>it</strong> is best to use polyether foam, which you can get in different<br />
thicknesses at any good specialist shop. As these foams can only be cut using<br />
special cutting machines, have the upholsterer cut the required parts to size for<br />
you.<br />
First cut the “upholstery panels” as specified in the construction drawing using<br />
the jigsaw. Make two curves <strong>w<strong>it</strong>h</strong> a 50 mm radius at the front of the panel for<br />
the seat upholstery. Then chamfer all corners and edges by lightly sanding<br />
them to a 45-degree angle. Now assign the upholstery pieces to the panels<br />
and mark them to avoid confusion.<br />
Start <strong>w<strong>it</strong>h</strong> the seating surface of the armchair: glue the corresponding padding<br />
to the panels using the spray adhesive.<br />
Transfer the dimensions onto the polyester fleece using the felt pen and cut<br />
<strong>it</strong> to size using the universal cutter. Then f<strong>it</strong> the fleece to the padding using<br />
spray adhesive. (The polyester fleece stops the fabric from rubbing against the<br />
padding. It separates, so to speak, the padding from the fabric.) Now <strong>do</strong> the<br />
same <strong>w<strong>it</strong>h</strong> all “upholstery panels”.<br />
Then cut the fabric using the universal cutter. Spread out the fabric, align the<br />
padding on the fabric and mark the cutting line <strong>w<strong>it</strong>h</strong> an excess of about 5 cm.
Robert <strong>Bosch</strong> GmbH<br />
Now spread out the cut fabric on the worktable and align the padding on <strong>it</strong><br />
<strong>w<strong>it</strong>h</strong> the panel facing up. Fold in the fabric on one side and fix <strong>it</strong> <strong>w<strong>it</strong>h</strong> one or<br />
two tacker nails in the middle of the panel. Then stand the upholstery up,<br />
smooth out the fabric and fix the oppos<strong>it</strong>e side in the middle <strong>w<strong>it</strong>h</strong> one or two<br />
tacker nails. Do the same <strong>w<strong>it</strong>h</strong> the other two sides. Then staple the fabric on<br />
each side from the middle outwards towards the edge. Now the upholstery is<br />
finished except for the corners.<br />
Fold in the fabric at the corners. At the large curves <strong>w<strong>it</strong>h</strong> 50 mm radius, make<br />
two open folds for each corner, otherwise make only one fold. Staple the folds<br />
on the back.<br />
13 Joining all parts to form a finished armchair and <strong>stool</strong>.<br />
First of all, the seating surfaces of both the <strong>stool</strong> and the armchair are screwed<br />
to the seat upholstery from below (<strong>w<strong>it</strong>h</strong> 4-x-30-mm screws). The armrest<br />
upholstery pieces for the armchair are also screwed from below. The remaining<br />
upholstery pieces are fixed using velcro. To <strong>do</strong> so, staple the velcro on the<br />
edge of each of the upholstery pieces. Now f<strong>it</strong> velcro in a mirror image on the<br />
backrests of the <strong>stool</strong> and armchair.<br />
Now for the armchair: align the seating surface <strong>w<strong>it</strong>h</strong> the upholstery on the<br />
armchair frame as specified in the construction drawing and fix <strong>it</strong> from below<br />
<strong>w<strong>it</strong>h</strong> screws (3.5 x 35 mm and 4 x 30 mm).<br />
It is important to now screw from above through the seat panel into the curb of<br />
the frame’s base plate (<strong>w<strong>it</strong>h</strong> 3.5-x-40-mm screws). Now just insert the backrest<br />
and stick on the remaining upholstery pieces <strong>w<strong>it</strong>h</strong> the velcro.<br />
Now for the <strong>stool</strong>: align the seating surface <strong>w<strong>it</strong>h</strong> the upholstery on the <strong>stool</strong>’s<br />
frame as specified in the construction drawing and fix <strong>it</strong> from below <strong>w<strong>it</strong>h</strong> screws<br />
(3.5 x 35 mm and 4 x 30 mm). Stick on the <strong>stool</strong>’s remaining upholstery pieces<br />
<strong>w<strong>it</strong>h</strong> the velcro.<br />
The armchair and the <strong>stool</strong> are now finished apart from their surface.<br />
14 Treating the surface of the frames, seating surfaces<br />
and backrest.<br />
To <strong>do</strong> the surfaces, take the upholstery off again and detach the backrest, the<br />
seating surfaces and the frames from each other.<br />
Sand the edges and the surfaces <strong>w<strong>it</strong>h</strong> a gr<strong>it</strong> of 120 to 180. When <strong>do</strong>ing so, also<br />
chamfer all edges, i.e. use the sanding paper to make a small chamfer at a 45degree<br />
angle. Then dampen the surface <strong>w<strong>it</strong>h</strong> a damp cloth. This makes the<br />
fibres of the wood stand up. Once <strong>it</strong> is dry, sand everything again <strong>w<strong>it</strong>h</strong> a gr<strong>it</strong> of<br />
180. This will remove the raised fibres.<br />
Now the wood stain is applied. Remember to use gloves for your personal<br />
protection. Generously apply the wood stain <strong>w<strong>it</strong>h</strong> the paintbrush and wipe off<br />
excess stain <strong>w<strong>it</strong>h</strong> a cloth. Then leave the wooden parts to dry thoroughly.<br />
Then you can carefully sand the parts <strong>w<strong>it</strong>h</strong> very fine sanding paper, gr<strong>it</strong> of 240,<br />
if necessary. Then apply the oil-wax mixture <strong>w<strong>it</strong>h</strong> a paintbrush, again wiping off<br />
the excess oil <strong>w<strong>it</strong>h</strong> a cloth, and leave the parts to dry.
Robert <strong>Bosch</strong> GmbH<br />
Caution: oil in a cloth can ign<strong>it</strong>e <strong>it</strong>self. For this reason, never throw the cloth<br />
away when <strong>it</strong> is crumpled up. Instead always spread <strong>it</strong> out and leave <strong>it</strong> to dry or<br />
seal <strong>it</strong> in an air-tight tin or glass.<br />
15 Finishing the armchair and <strong>stool</strong><br />
After surface finishing, assemble all the parts again. To finish <strong>w<strong>it</strong>h</strong>, you can<br />
attach slides (for carpet) or felts (for parquet) to the feet.<br />
16 Done<br />
Now you really have earned a break. It’s a good opportun<strong>it</strong>y to test your new<br />
furn<strong>it</strong>ure!<br />
<strong>Bosch</strong> <strong>do</strong>es not accept any responsibil<strong>it</strong>y for the instructions stored here. <strong>Bosch</strong> would also like to point<br />
out that you follow these instructions at your own risk. For your own safety, please take all the necessary<br />
precautions.