Screen Printing Overview - Murakami Screen
Screen Printing Overview - Murakami Screen
Screen Printing Overview - Murakami Screen

Create successful ePaper yourself
Turn your PDF publications into a flip-book with our unique Google optimized e-Paper software.
<strong>Murakami</strong> <strong>Screen</strong>
The Perfect <strong>Screen</strong><br />
Complete exposure of the emulsion film assures durable stencils.<br />
Clarity of lines and quality of print improve with proper exposure.
The Perfect <strong>Screen</strong>
<strong>Screen</strong> Tools<br />
50x Microscope Thickness Gauge Moisture Meter<br />
Tension Meter<br />
High Quality Coater
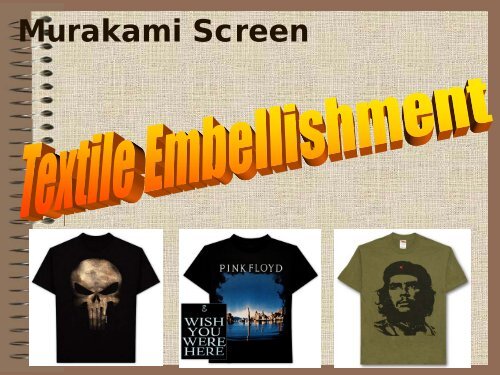
Embellishment Techniques<br />
Glitter<br />
Foil<br />
Dusting<br />
High Density<br />
Puff Inks<br />
Discharge<br />
Waterbase
Glitter <strong>Printing</strong><br />
Quality of mesh is crucial to<br />
consistent glitter printing.<br />
15T and 25T threads per inch<br />
are most commonly used for<br />
their large mesh opening.<br />
Mesh openings need to be<br />
larger than flake size to print<br />
well, otherwise the mesh will<br />
plug in.<br />
Viscosity reducers and flow<br />
additives help keep the flakes<br />
from clogging the mesh.<br />
Art should be designed so that<br />
the smallest art element is 2x<br />
the chip size.
Dusting is another method of glitter<br />
printing.<br />
A tray is filled with dry glitter flakes<br />
near the unload station of a press.<br />
All inks are flashed except the last<br />
“glue” screen.<br />
The glue screen usually is a clear<br />
gel printed through a 60 mesh<br />
screen with a 250 micron thick film.<br />
The printed side of the shirt is laid<br />
onto the glitter flake and gently<br />
pressed into the glitter.<br />
The gel picks up the glitter and<br />
binds with it when it is cured.<br />
Much more sparkle and reflection<br />
than standard glitter printing.<br />
Excess glitter flake can be<br />
vacuumed off of shirt and returned<br />
to tray.<br />
Dusting
Foil printing can be<br />
accomplished on press or off<br />
press.<br />
On press foiling is done prior to<br />
the plastisol print. Glue is flash<br />
dried enough so it is very tacky,<br />
the foil can then be burnished<br />
onto “hot” foil adhesive, usually a<br />
gel printed through a 200 micron<br />
thick stencil through a 60 mesh<br />
screen.<br />
Off press foiling will print the glue<br />
last, the shirt cured in an oven<br />
and the foil applied with a heat<br />
transfer press. Waterbase and<br />
discharge inks are commonly<br />
used with this method.<br />
Foil <strong>Printing</strong>
Recent ink improvements have<br />
allowed plastisol to be used in<br />
the same manner with a final<br />
“resist” layer of ink printed over<br />
plastisol to prevent the foil from<br />
adhering to the print.<br />
Textured foil affects can be<br />
made by printing puff ink with a<br />
coarse mezzotint pattern, flash<br />
cured, and then printing a<br />
continuous glue film over the<br />
flashed puff print. The result<br />
can simulate gold nuggets, or<br />
highly reflective facets of the foil<br />
print.<br />
Foil <strong>Printing</strong>
Avoid solid areas. Keylines and<br />
textured fills work better.<br />
Consider using a base plate<br />
underneath the glue plate to<br />
elevate glue level above the shirt<br />
surface.<br />
Foil adhesives can be printed over<br />
flashed textured puff ink or high<br />
density for a raised look.<br />
Apply foil when shirts are warm.<br />
Re-warm shirts if foiling is difficult.<br />
Use only foil designed for textile<br />
imprinting. There are many types<br />
of graphic hot stamping foils that<br />
will not wash well.<br />
Foiling Tips
Waterbase <strong>Printing</strong><br />
The stencil is the most important<br />
part of waterbase printing.<br />
<strong>Murakami</strong> Aquasol HV and TS<br />
have unmatched durability.<br />
Waterbase can print saturated<br />
prints, ones with total ink<br />
coverage and still be soft to the<br />
hand.<br />
Waterbase can overprint colors to<br />
achieve secondary colors. Ex:<br />
printing yellow over red will<br />
produce orange. The orange can<br />
be modified by adding base to<br />
either the red or yellow to shift the<br />
orange to the red side or yellow.<br />
Softer 65 durometer squeegees<br />
help saturate fabric with ink and<br />
are easier on the stencil.
Discharge <strong>Printing</strong><br />
Discharge is water base ink for<br />
dark shirts.<br />
The shirt must 100% cotton and be<br />
dyed with reactive dyes in order to<br />
discharge. Not all shirt colors<br />
discharge well, pre testing of shirts<br />
is recommended.<br />
The ink “bleaches” out the shirt<br />
color and deposits colorized<br />
waterbase component.<br />
Like waterbase the print can have<br />
100% coverage and still be soft to<br />
the hand.<br />
Raw uncolored Discharge can be<br />
used as a base for a plastisol print.<br />
This can yield a much softer hand<br />
than using a plastisol base
Discharge Examples
Simulated Process <strong>Printing</strong><br />
Simulated process is actually spot<br />
color separations with halftones.<br />
Each color is separated into a<br />
“discrete” layer.<br />
In the guitar at left are basically<br />
four colors. Rust, orange, gold,<br />
and white. The black shirt can be<br />
used for black.<br />
These four colors can be spread<br />
during the separation process to<br />
overlap.<br />
By adding 10-30% halftone base to<br />
these colors they will blend better<br />
where they overlap.<br />
Slash (the guitar player pictured<br />
here) could have a white, a mid<br />
tone gray and a darker gray to<br />
simulate the smooth tonal values
Simulated Process<br />
The base also plays a crucial role<br />
in final print quality.<br />
For a softer hand consider using a<br />
clear halftone base with opaque<br />
inks.<br />
To achieve two colors from one<br />
screen design the print to print on<br />
base and on shirt fabric. The ink<br />
printed on shirt will be darker, while<br />
the ink printed on a base much<br />
brighter.<br />
Consider using two bases to get<br />
even more color from one screen.<br />
While the guitar may have a white<br />
base, Flash may print better with a<br />
dark gray base. You can print two<br />
bases then flash to achieve a<br />
multicolor base.
Simulated Process<br />
• Simulated process has significant<br />
advantages in automatic production.<br />
• Different color shirts will all have an<br />
identical looking print since the ink<br />
system is opaque. Opaque yellow gold<br />
looks the same on black as it does on<br />
red. A valuable production trick when a<br />
customer orders many different colored<br />
shirts.<br />
• Simulated process screens generally<br />
employ a specific halftone count and<br />
angle with a tonal value of 5-95% dot.<br />
That means any positive or negative<br />
halftone less than 5% is either<br />
eliminated or output at 5 %.<br />
• Some magic numbers: A 55 line<br />
halftone output at 7 degrees can print<br />
through a 200 mesh screen. This allows<br />
good ink deposit to maintain opacity.
Simulated Process<br />
Flesh tones print much better with<br />
simulated process.<br />
Four color process does not handle flesh<br />
tones well, Sim Process by contrast can<br />
use inks that match the original exactly.<br />
Sim process colors can re-create art<br />
more accurately than 4/C process on<br />
dark shirts.<br />
Sim Process does use many more<br />
screens to achieve a print.<br />
Presses with up to 18 stations are<br />
necessary to achieve a 12 color print due<br />
to flash cure and cool down stations.
Sim Process Examples
Sim Process Examples
Four color Process<br />
Four color process screen<br />
printing is similar to magazine<br />
printing.<br />
Yellow, Magenta, Cyan, and<br />
Black are used to create a<br />
multitude of colors.<br />
Best printing is obtained on<br />
white shirts, and very light<br />
neutral shirts.<br />
4/C Process inks are very<br />
transparent to allow the colored<br />
dots to combine to make<br />
secondary and tertiary colors.<br />
4/C Process on blacks is very<br />
difficult by hand and almost<br />
impossible on an automatic<br />
press. Quite often a discharge<br />
base is used if printing on black.
4/C Process<br />
On press tips: 4/C process inks<br />
straight out of the can are often too<br />
strong.<br />
Mixing colors with 10-30% halftone<br />
base will achieve smoother<br />
blending of color.<br />
Only matched screens with similar<br />
tensions, mesh counts, and<br />
squeegee durometer should be<br />
used.<br />
If a color shift in the image makes<br />
it appear too red, add halftone<br />
base in 10% increments until you<br />
see the colors you wanted. The<br />
same holds true if it is too blue or<br />
too yellow, add clear halftone base<br />
to the strong color screen.<br />
To avoid moire select a starting<br />
angle of 7.5 degrees for yellow and<br />
standard rosette angles to 7.5.
4/C Process<br />
When printing black ink use a black<br />
specifically designed for process<br />
printing. Regular black is too<br />
strong and does not print halftones<br />
well.<br />
Some designs need very little<br />
black, some designs do not need<br />
the black plate at all.<br />
To determine proper mesh mutiple<br />
the halftone line count by 4.5 for<br />
the correct mesh.<br />
45 line halftone output at 7 degrees<br />
x 4.5 = 202.5 so a 200 tpi (threads<br />
per inch) will print with no moire.<br />
65 line x 4.5 = 292.5 so a 300 tpi<br />
screen will print without moire as<br />
long as the starting halftone angle<br />
is 7 degrees. There are many<br />
angles that won’t moire, 7 degrees<br />
for the first screen helps.
Index printing is very similar to sim<br />
process printing. The difference is in the<br />
dots.<br />
Index printing uses a random stochaistic<br />
dot that is uniform and much smaller in<br />
size. Sim Process uses halftones that<br />
have dots from 5% to 95%.<br />
Separations are a snap from Photoshop.<br />
Go to mode/index color, then select<br />
custom color from the drop down menu.<br />
A pallet will appear. These colors can be<br />
modified to allow better secondary color<br />
on screen. Anywhere two similar colors<br />
border each other can be “spread” by<br />
using the contrast tool, level tool, or<br />
curves.<br />
Index does generate odd color<br />
combinations to achieve secondary<br />
colors. It is sometimes necessary to<br />
erase dots that are in the white or very<br />
light areas. In the example shown I<br />
would remover any blue or purple dots<br />
appearing in the light beige basket or<br />
ballons. They appear as confetti in the<br />
final print and look like a pinhole.<br />
Index <strong>Printing</strong>
Index <strong>Printing</strong><br />
• Index printing can achieve<br />
more secondary and tertiary<br />
colors than sim process. By<br />
thinning colors with up to 30%<br />
clear halftone base the inks will<br />
mix together easily in printing<br />
and produce smoother color<br />
transition and improving subtle<br />
color details.<br />
• Like Sim Process, index<br />
printing can print on any color<br />
shirt since the base is generally<br />
a white base plate.
Index <strong>Printing</strong><br />
Base plates for index printing need<br />
to be “choked” so they don’t appear<br />
as a halo in the print.<br />
This can be accomplished by taking<br />
the image shown, changing it to<br />
grayscale mode, and inverting it.<br />
You print a negative image base on<br />
a colored shirt using black shirt or<br />
black ink for the shadows, the base<br />
is only under the brightest colors.<br />
With the negative grayscale of the<br />
image on the right adjusting the<br />
levels, or brightness and contrast in<br />
Photoshop will reduce the amount<br />
of base printed.<br />
Generally the base should only print<br />
90% of the image with some of the<br />
color plates printing onto the shirt.<br />
The base, unlike the colors, works<br />
better when output at 55 lines, 7.5<br />
degrees so the thick white ink can<br />
print through a 200 mesh screen.
Gel <strong>Printing</strong><br />
The webbing on the Spiderman’s<br />
suit is commonly printed with a gel.<br />
This image would be printed with<br />
sim process technique with clear<br />
stretch ink base beneath the gel<br />
print for image flexibility.<br />
The gel print would be printed last<br />
through a 250-400 micron thick film<br />
on a 60 mesh screen onto the<br />
stretchy base.<br />
Without a “high-density” thick film<br />
screen the gel ink print would be<br />
very thin.<br />
The goal is to get a raised gel print<br />
on all his webbing.<br />
Glow in the dark additives in the gel<br />
and white highlight screen could<br />
also create some great effects to<br />
boost sales.
Curing gel ink requires special<br />
handling.<br />
Oven speeds need to be<br />
slowed down and temperatures<br />
raised slightly so the gel turns<br />
clear and “domes.”.<br />
When a gel print comes out of<br />
the oven it is extremely sticky.<br />
(That’s why it is used for foiling<br />
as well.)<br />
Avoid letting the hot gel ink<br />
touch other areas of the print, it<br />
will fuse immediately with other<br />
gel ink.<br />
Gel <strong>Printing</strong>
High Density <strong>Printing</strong><br />
High density printing lends<br />
itself to spot color graphics.<br />
Both the red and white are<br />
candidates for high density ink.<br />
In most cases either the white<br />
or red could be printed in high<br />
density, the white being easier<br />
to print than red due to the<br />
large red print area.<br />
<strong>Printing</strong> a clear or a choked<br />
white base will help the high<br />
density ink stay on the surface<br />
and not get pushed into the<br />
fabric.
High Density <strong>Printing</strong><br />
Thick Film from <strong>Murakami</strong> has<br />
unique properties that make<br />
printing high density easy.<br />
Thick Film has better resolution<br />
allowing for more detailed art.<br />
When exposed and developed<br />
the side walls of the stencil<br />
have a very vertical wall with a<br />
sharp stencil shoulder.<br />
This allows ink to transfer with<br />
minimal squeegee pressure.<br />
Squeegee pressure needs to<br />
be the absolute minimum<br />
pressure to get the ink to<br />
separate from the screen.
High Density <strong>Printing</strong><br />
For dramatic high density ink<br />
thickness of 1/8” or more it is easier<br />
to print stacked layers of high<br />
density.<br />
In this image it would be possible to<br />
lay down a 200 –300 micron white<br />
high density base, flash it, and print<br />
another 200 red plate, flash it, and a<br />
300 white plate for the letters.<br />
Stacking requires analyzing the art<br />
and combining elements to raise the<br />
elevation equally.<br />
It is impossible to print the white in a<br />
400 micron screen, flash it, and then<br />
print a 400 micron red.<br />
When designing stacked high<br />
density print all elements as a base,<br />
possibly several times, then print<br />
200 micron screens for the color.<br />
Raise off contact for every new<br />
elevation of high density printing.
High Density Examples
Newman Roller Frames<br />
Retensionable – all screens<br />
can have matching tensions<br />
at optimum tension levels.<br />
Capable of Pin Registration<br />
<strong>Screen</strong>s<br />
Stretch and Glue Aluminum<br />
Lose tension immediately, and<br />
continue to lose tension in<br />
production.<br />
Only high quality mesh will<br />
maintain good tension levels.
<strong>Screen</strong>s<br />
• Stretcher with several screens being<br />
stretched on the bias to prevent<br />
moire. Easier and less costly to<br />
change angle of halftone during<br />
output of films.<br />
• Typical tension on a 300T would be<br />
to perform a rapid stretch technique.<br />
• The mesh is brought up to ever<br />
increasing tension four times.<br />
• First 15 newtons, Second 19<br />
newtons, Third 22 newtons, Fourth<br />
25-27 newtons, then allow to sit for<br />
five minutes or longer.<br />
• This will result in the highest<br />
retained tension after being cut out,<br />
about 22 newtons after cutting.<br />
• After the initial print run tension will<br />
drop to about 17-19 newtons. Only<br />
a high quality mesh will retain that<br />
tension. Cheap mesh will continue<br />
to lose tension with every print run.
Newman Roller Frames<br />
• Newman Roller Frames can be re-<br />
tensioned for the life of the mesh.<br />
• <strong>Murakami</strong> Smartmesh requires<br />
minimal re-tensioning. After the<br />
second or third re-tensioning roller<br />
frames can maintain 22-25<br />
newtons.<br />
• Higher tension is a distinct<br />
advantage when printing halftones,<br />
high density, base plates, large<br />
print areas, and overall print quality<br />
and clarity.<br />
• There are automatic stretching<br />
tables that can bring tension up<br />
very quickly minimizing labor costs.<br />
• Newman roller frames also can be<br />
fitted with a pin registration system<br />
that can cut set up time by 80%.
Presses<br />
In Line 5-color Graphic Press 12-Color Textile Press<br />
5 Color Container/Bottle printer
Textile Presses<br />
• Circular “carousel” presses are the<br />
press of choice for most textile<br />
printers.<br />
• Most printers use four “heads” for<br />
flashing the base with a cool down<br />
station, and flash the print just<br />
before the keyline print, or high<br />
light white.<br />
• This will effectively eliminate four<br />
colors from a twelve color press.<br />
• 12-18 color presses are common in<br />
fashion imprinting.<br />
• Athletic printers can use 6-8 color<br />
presses since most designs are 2-3<br />
colors. It is not uncommon for<br />
athletic printers to use two flashes<br />
as well resulting in only a few<br />
colors being printed.
Textile Presses<br />
• Commercial textile printers base<br />
their production on the presses<br />
hourly output.<br />
• The fastest presses use servo<br />
drives to move the pallets.<br />
• Servo Press: 800-1000 pcs/hour<br />
• Pneumatic Drive: 400-600/hour<br />
• The numbers above represent<br />
“index speed”.<br />
• “Yield” per hour is often half due to<br />
poor screen making, mesh falling<br />
out of registration, pinholes.<br />
• Quality <strong>Murakami</strong> emulsion and<br />
mesh can achieve non-stop<br />
production. This can often be the<br />
difference in staying in business or<br />
going out of business.
Graphic Presses<br />
• Graphic In line presses are almost<br />
exclusively printing UV ink today.<br />
• UV ink can be cured in line with a<br />
separate UV lamp positioned after<br />
each print head.<br />
• The print is completely dry after the<br />
last print since it cures immediately<br />
after passing below a UV light<br />
source.<br />
• Ink film thickness is a critical part of<br />
graphic printing.<br />
• Specific ink thicknesses are<br />
needed in order to cure completely.<br />
• Most large volume movie posters<br />
and POP displays are printed by<br />
screen rather than by digital due to<br />
production cost advantages.<br />
• Print speeds of 300-500 per hour<br />
are typical.
Container <strong>Printing</strong><br />
• Container <strong>Printing</strong> is done on<br />
high speed in line printers<br />
using UV ink and in line UV<br />
curing stations.<br />
• Designed to run extremely fast,<br />
production speeds of 1000-<br />
1500pcs per hour are possible.<br />
• Only the finest mesh and<br />
emulsion will perform well on<br />
these presses. Production<br />
needs to run non stop.<br />
• Ink film thickness needs to be<br />
controlled as well to insure ink<br />
cure.
Volume Fabric Production<br />
While not common in the US, step<br />
and repeat tables like this are still<br />
in use throughout the world.<br />
They are gradually being replaced<br />
by “roll goods” printing that uses<br />
cylindrical screens, or etched<br />
copper cylinders for volume<br />
production.<br />
Step and repeat fabric is air dried<br />
with one color at a time printed.<br />
Engineered prints of sleeves, front,<br />
and back of garments are one<br />
common use.