F-T-2907A Tanks, Potable Hot Water Storage
F-T-2907A Tanks, Potable Hot Water Storage
F-T-2907A Tanks, Potable Hot Water Storage
Create successful ePaper yourself
Turn your PDF publications into a flip-book with our unique Google optimized e-Paper software.
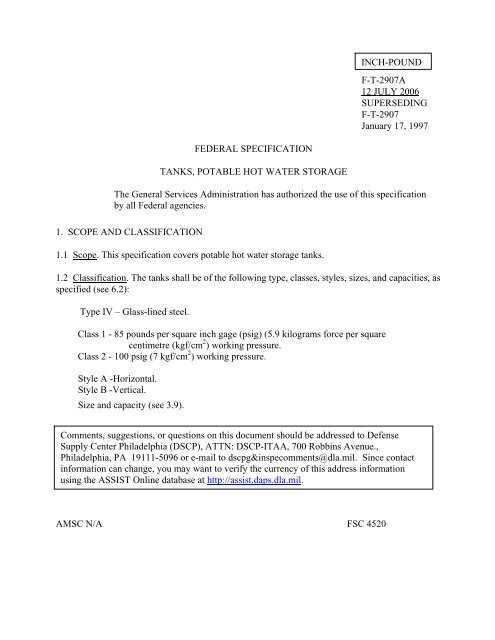
FEDERAL SPECIFICATION<br />
TANKS, POTABLE HOT WATER STORAGE<br />
F-T-<strong>2907A</strong><br />
12 JULY 2006<br />
SUPERSEDING<br />
F-T-2907<br />
January 17, 1997<br />
The General Services Administration has authorized the use of this specification<br />
by all Federal agencies.<br />
1. SCOPE AND CLASSIFICATION<br />
1.1 Scope. This specification covers potable hot water storage tanks.<br />
1.2 Classification. The tanks shall be of the following type, classes, styles, sizes, and capacities, as<br />
specified (see 6.2):<br />
Type IV – Glass-lined steel.<br />
Class 1 - 85 pounds per square inch gage (psig) (5.9 kilograms force per square<br />
centimetre (kgf/cm 2 ) working pressure.<br />
Class 2 - 100 psig (7 kgf/cm 2 ) working pressure.<br />
Style A -Horizontal.<br />
Style B -Vertical.<br />
Size and capacity (see 3.9).<br />
AMSC N/A FSC 4520<br />
INCH-POUND<br />
Comments, suggestions, or questions on this document should be addressed to Defense<br />
Supply Center Philadelphia (DSCP), ATTN: DSCP-ITAA, 700 Robbins Avenue.,<br />
Philadelphia, PA 19111-5096 or e-mail to dscpg&inspecomments@dla.mil. Since contact<br />
information can change, you may want to verify the currency of this address information<br />
using the ASSIST Online database at http://assist.daps.dla.mil.
2. APPLICABLE DOCUMENTS<br />
F-T-<strong>2907A</strong><br />
2.1 Government publications. The following documents, of the issue in effect on date of invitation<br />
for bids or request for proposal, form a part of this specification to the extent specified herein:<br />
Federal Standard<br />
FED-STD-H28 - Screw-Thread Standards for Federal Services.<br />
Military Standards<br />
MIL-STD-130 - Identification Marking of US Military Property.<br />
(Copies of these documents are available online at http://assist.daps.dla.mil/quicksearch/ or<br />
from the Standardization Document Order Desk, 700 Robbins Avenue, Building 4D,<br />
Philadelphia. PA 19111-5094.)<br />
2.2 Other publications. The following documents form a part of this specification to the extent<br />
specified herein. Unless a specific issue is identified, the issue in effect on date of invitation for bids<br />
or request for proposal shall apply.<br />
AMERICAN IRON AND STEEL INSTITUTE (AISI)<br />
Steel Products Manual - AISI Sheet Steel.<br />
(Private sector and civil agencies may purchase copies of these voluntary standards from the<br />
American Iron and Steel Institute, 150 East 42nd Street, New York, NY 10017.)<br />
AMERICAN SOCIETY FOR QUALITIY CONTROL (ASQC)<br />
ASQ - Z1.4 Sampling Procedures and Tables for Inspection by Attributes.<br />
(Private sector and civil agencies may purchase copies of these voluntary standards from the<br />
American Society for Quality Control, 611 East Wisconsin Avenue, Milwaukee, WI 53202.)<br />
AMERICAN SOCIETY OF MECHANICAL ENGINEERS (ASME)<br />
Boiler and Pressure Vessel Code, Section IV - Rules for Construction of Heating<br />
Boilers.<br />
Boiler and Pressure Vessel Code, Section IX - Welding Qualifications.<br />
(Private sector and civil agencies may purchase copies of these voluntary standards from the<br />
American Society of Mechanical Engineers, 345 East 47th Street, New York, NY 10017.)<br />
2
ASTM<br />
ASTM Bl07/B107M<br />
F-T-<strong>2907A</strong><br />
- Standard Specification for Magnesium-Alloy Extruded Bars,<br />
Rods, Shapes, Tubes, and Wire.<br />
(Private sector and civil agencies may purchase copies of these voluntary standards from<br />
www.astm.org or the American Society for Testing and Materials, 100 Barr Harbor Drive, West<br />
Conshohocken, PA 19428-2959.)<br />
AMERICAN WELDING SOCIETY (AWS)<br />
AWS Dl.l - Structural Welding Code, Section 5, Qualifications.<br />
(Private sector and civil agencies may purchase copies of these voluntary standards from the<br />
American Welding Society, 550 N.W. LeJeune Rd, Miami, FL 33126.)<br />
3. REQUIREMENTS<br />
3.1 Description. The tanks shall be of the specified type, class, style and size (see 1.2, 3.1.1,<br />
3.1.2, 3.9 and 6.2), and shall consist of welded cylindrical shells provided with heads, tappings<br />
and openings.<br />
3.1.1 Style A, horizontal. Unless otherwise specified (see 6.2), the tank shall be fabricated with<br />
plus heads.<br />
3.1.2 Style B, vertical. Unless otherwise specified (see 6.2), the tank shall be fabricated with a<br />
plus bottomhead.<br />
3.2 Standard commercial product. The tanks shall, as a minimum, be in accordance with the<br />
requirements of this specification and shall be the manufacturer’s standard commercial product.<br />
Additional or better features which are not specifically prohibited by this specification but which are<br />
a part of the manufacturer’s standard commercial product shall be included in the tanks being<br />
furnished. A standard commercial product is a product which has been sold or is currently for sale<br />
on the commercial market through advertisements or manufacturer’s catalogs, or brochures, and<br />
represents the latest production model.<br />
3.3 First article (preproduction model(s)). When specified (see 6.2), a sample shall be subjected to<br />
first article inspection in accordance with 4.3.<br />
3.4 Code compliance. The hot water storage tanks shall be constructed, tested, and marked in<br />
accordance with the applicable requirements of ASME Boiler and Pressure Vessel Code, Section IV,<br />
Rules for Construction of Heating Boilers, and as specified herein. The presence of the ASME<br />
Official Code HLW-symbol stamped or marked on the tank and the furnishing of a copy of the<br />
applicable ASME REQUIRED Manufacturers’ Master Data Report will be accepted as evidence that<br />
the tanks conform to the ASME Rules for Construction of Heating Boilers.<br />
3
F-T-<strong>2907A</strong><br />
3.5 Materials. Materials used shall be free from defects which would adversely affect the<br />
performance or maintainability of individual components or of the overall assembly. Materials not<br />
specified herein shall be of the same quality used for the intended purpose in commercial practice.<br />
Unless otherwise specified herein, all equipment, material, and articles incorporated in the work<br />
covered by this specification are to be new and fabricated using materials produced from recovered<br />
materials to the maximum extent possible without jeopardizing the intended use. The term "recovered<br />
materials" means materials which have been collected or recovered from solid waste and reprocessed<br />
to become a source of raw materials, as opposed to virgin raw materials. Unless otherwise specified,<br />
none of the above shall be interpreted to mean that the use of used or rebuilt products are allowed<br />
under this specification.<br />
3.5.1 Steel. Steel for fabrication of the water storage tank shall be of the type recommended in the<br />
ASME Boiler and Pressure Vessel Code or AISI Steel Products Manual as suitable for storage of<br />
service hot water of temperatures as high as 200 degrees Fahrenheit (°F) (93.33 degrees Celsius<br />
(°C)). The steel shall also be suitable for application of lining material. <strong>Tanks</strong> with glass linings<br />
shall be fabricated of commercial quality sheet or plate, chemically constituted and processed to<br />
adapt the steel for application of glass linings. Steel tanks shall be constructed of sheet steel with<br />
welded seams. <strong>Tanks</strong> constructed for U-tube insertion type heating elements using steam or hot<br />
water as a heating medium shall be equipped with a neck and a heating element support. The neck<br />
for U-tube insertion shall be constructed of the same material as the tank. The heating element<br />
supports shall be constructed of copper-silicon.<br />
3.6 Safety. Nonfunctional sharp edges, projecting points, welding burrs, and protruding lengths<br />
more than two full threads of tappings, handhole or manhole yokes, or fastening devices shall be<br />
avoided. Materials in contact with potable water shall be nontoxic, and shall not impart odor, color,<br />
or taste to the contained water.<br />
3.7 Tappings and openings. Unless otherwise specified (see 6.2), tappings and openings shall be<br />
provided in the tanks, except that the location of the tappings in the top of the horizontal glass-lined<br />
tanks may be located where necessary to eliminate interference with the magnesium anodic rod. The<br />
tappings shall have tapered pipe threads conforming to FED-STD-H28 and shall be equipped with<br />
plugs or caps of the same material alloy as the tapping itself. Manhole and handhole openings shall<br />
be equipped with pressure-type, yoked, covers and gasketed rims. Tappings and fittings for glasslined<br />
tank shall be of the same base material as the tank, with all surfaces exposed to storage water<br />
protected with the same lining as the tank.<br />
3.8 Tank supports. Tank supports shall be the manufacturer's standard supports. Angle legs and base<br />
rings shall be welded to the storage tank before shipment. Cradles for horizontal tanks shall be<br />
shipped loose. When specified (see 6.2), threaded bosses for pipe legs shall be provided on the<br />
supports.<br />
4
F-T-<strong>2907A</strong><br />
3.9 Sizes and capacities. The diameters, overall lengths, and rated capacities shall be as shown in<br />
table I. The storage capacity of each tank shall be within plus or minus 5 percent of rated capacity.<br />
Capacity<br />
U. S. Gallons<br />
80<br />
140<br />
200<br />
350<br />
500<br />
750<br />
1000<br />
TABLE I. Sizes and capacities of type IV.<br />
Litre<br />
303<br />
530<br />
757<br />
1 325<br />
1 893<br />
2 839<br />
3 785<br />
Inches<br />
20.0<br />
24.5<br />
30.0<br />
36.0<br />
42.0<br />
48.0<br />
54.0<br />
Inside<br />
diameter<br />
(maximum)<br />
Metric<br />
508 mm<br />
622 mm<br />
762 mm<br />
9 144 mm<br />
1 066 mm<br />
1 219 mm<br />
1 371 mm<br />
5<br />
Inches<br />
65.25<br />
77.50<br />
78.00<br />
95.00<br />
81.00<br />
97.00<br />
99.00<br />
Tank<br />
length<br />
(maximum)<br />
Metric<br />
1 657 mm<br />
1 966 mm<br />
1 981 mm<br />
2 413 mm<br />
2 057 mm<br />
2 464 mm<br />
2 515 mm<br />
3.10 Identification marking. When specified (see 6.2) each tank shall be identified in accordance<br />
with MIL-STD-130. Normally the manufacturer’s standard commercial marking are acceptable.<br />
3.11 Cleaning, treatment, and painting. Surfaces normally painted in good commercial practice shall<br />
be cleaned, treated, and painted as specified herein. The color of the finish coat shall be as specified<br />
(see 6.2). Surfaces to be painted shall be cleaned and dried to ensure that they are free from<br />
contaminants such as oil, grease, welding slag and splatter, loose mil scale, water, dirt, corrosion<br />
product, or any other contaminating substances. As soon as practicable after cleaning and before any<br />
corrosion product or other contamination can result, the surfaces shall be prepared or treated to<br />
ensure the adhesion of the coating system. The painting shall consist of at least one coat of primer<br />
and one finish coat. The primer shall be applied to a clean, dry surface as soon as practicable after<br />
cleaning and treating. Painting shall be with manufacturer’s current materials according to<br />
manufacturer’s current processes and the total dry film thickness shall be not less than 2.5 mils over<br />
the entire surface. The paint shall be free from runs, sags, orange peel, or other defects.<br />
3.12 Tank preparation. When a lined tank is specified (see 1.2 and 6.2), interior surfaces of tanks<br />
shall be cleaned prior to the application of the linings. The interior surfaces of tanks, including welds,<br />
manhole and handhole covers when applicable, shall be prepared for coating by sand blasting, grit<br />
blasting or by pickling in an acid bath.<br />
3.13 Type IV, glass-lined steel tank. Glass lining formulation shall contain not less than 70 percent<br />
of refractory oxides such as silicon oxide, aluminum oxide, calcium oxide, magnesium oxide,<br />
titanium oxide, or zirconium oxide. The glass lining shall be fused to the steel base by firing at not<br />
less than 1500 °F (815.56 °C). The glass lining shall be continuous over the entire interior surface of<br />
the tank including handhole and manhole covers when applicable. The lining may be applied with a<br />
primer coat. The type IV tanks shall conform to the following requirements:
F-T-<strong>2907A</strong><br />
a. Thickness. The thickness of the glass lining shall be not less than 0.006-inch (0.152 mm)<br />
and not greater than 0.020-inch (0.508 mm).<br />
b. Discontinuities. Discontinuities shall be not more than 0.025 square inch per square foot<br />
(173 square centimetre per square metre) of internal surface, excluding edges, fittings and welded<br />
areas, after applying the glass lining. No single defect shall be greater than 0.125-inch (6 mm) in<br />
diameter.<br />
c. Edges and fittings. All edges and fittings shall be coated with glass lining. Where sharp<br />
edges cannot be avoided, a slight “burn-off” of the lining that does not extend more than 0.062-inch<br />
(1.575 mm) back from the sharp edge will be allowed. All fittings that are welded to the tank shall be<br />
coated with the lining on those areas that are exposed to the water except for threads and small areas<br />
immediately adjacent to them.<br />
d. Welds. Removal of the glass lining due to welding or mating of parts after glass lining<br />
shall not result in exposed base metal in excess of 0.025 square inch per gallon (4.2 square mm per<br />
litre) of storage capacity.<br />
e. Glass lining solubility. The weight loss of the glass lining shall be not greater than<br />
0.231 grains per square inch (0.023 milligrams per square mm).<br />
3.14 Cathodic protection. Unless otherwise specified (see 6.2), type IV heater shall be provided with<br />
magnesium anodes for cathodic protection. The anode shall be located so as to ensure protection to<br />
all interior parts of the vessel. An electrical connection shall be established and maintained between<br />
the anode and the metal tank (heater) shell. Anode or anodes shall be located in a vertical position<br />
and shall extend to within 4 inches (100 mm) of the bottom of the tank.<br />
3.14.1 Magnesium anode. The magnesium anode shall be fabricated from material conforming to<br />
ASTM B107. Shapes of anodes shall be as applicable, and anodes shall be reinforced with steel<br />
wire.<br />
3.14.2 Other anodes. The tank (heater) wall potential for any anode used shall not be more<br />
positive than -0.85 volts.<br />
3.15 Workmanship. The general construction and assembly of the hot water storage tank shall be of<br />
a neat and workman-like character with parts well fitted and bolts and other fasteners correctly<br />
torqued to give rigidity.<br />
3.15.1 Castings and forgings. All parts, components, and assemblies of the tank which include<br />
castings and forgings shall be clean of harmful extraneous material such as sand, dirt, pits, spurs,<br />
scale, and flux. Rework shall be limited to procedures which do not reduce strength or affect<br />
function.<br />
3.15.2 Metal fabrication. Flame cutting, using tips suitable for the thickness of the steel may be<br />
employed instead of shearing and sawing. All bends shall be made with controlled means to ensure<br />
uniformity of size and shape. Corners shall be square and true. Precaution shall be taken to avoid<br />
overheating. Heated steel shall be allowed to cool slowly. External surfaces shall be free of burrs,<br />
sharp edges and corners, except when sharp edges or corners are required or where they are not<br />
detrimental to safety.<br />
6
F-T-<strong>2907A</strong><br />
3.15.3 Welding. The surfaces of parts to be welded shall be free from rust, scale, paint, grease, mill<br />
scale and other foreign matter that can be removed by chipping and wire brushing. Welds shall<br />
transmit stress without permanent deformation or failure when the parts connected by the welds are<br />
subjected to proof and service loading. Parent materials, weld filler metals, and fabrication<br />
techniques shall be as required to enable the tank to conform to the examination and test<br />
requirements specified in section 4. Parts to be joined by fillet welds shall be brought into as close<br />
contact as possible and in no event shall be separated by more than 0.187-inch (4.750 mm), unless<br />
appropriate bridging techniques are used. Unless otherwise specified (see 6.2), the welding process<br />
used in fabrication of the tanks shall be at the option of the contractor.<br />
3.15.3.1 Welders. Any welder assigned to manual welding work covered by this specification<br />
shall be certified by the contractor to the contracting officer that the welder has passed<br />
qualification tests as prescribed by either of the following listed codes for the type of welding<br />
operations to be performed and that such qualification is effective as defined by the particular<br />
code:<br />
AWS D1.1 Structural Welding Code, Section 5, Qualification.<br />
ASME Boiler and Pressure Vessel Code, Section IX, Welding Qualifications.<br />
Contractors who only make horizontal welds need not qualify welders for “all position welding.”<br />
Subject to approval by the Government, contractor's standard welder qualification may be<br />
substituted in lieu of the above codes provided that the contractor procedure is equivalent to the<br />
above codes. The contractor shall be responsible for determining that automatic welder equipment<br />
operators are capable of producing quality welds.<br />
4. QUALITY ASSURANCE PROVISIONS<br />
4.1 Responsibility for inspection. Unless otherwise specified in the contract, the contractor is<br />
responsible for the performance of all inspection requirements (examinations and tests) as specified<br />
herein. Except as otherwise specified in the contract, the contractor may use his own or any other<br />
facilities suitable for the performance of the inspection requirements specified herein, unless<br />
disapproved by the Government. The Government reserves the right to perform any of the<br />
inspections set forth in the specification where such inspections are deemed necessary to assure<br />
supplies and services conform to prescribed requirements.<br />
4.1.1 Responsibility for compliance. All items shall meet all requirements of sections 3 and 5. The<br />
inspection set forth in this document shall become a part of the contractor's overall inspection system<br />
or quality program. The absence of any inspection requirements in this document shall not relieve<br />
the contractor of the responsibility of ensuring that all products or supplies submitted to the<br />
Government for acceptance comply with all requirements of the contract. Sampling inspection, as<br />
part of manufacturing operations, is an acceptable practice to ascertain conformance to requirements,<br />
however, this does not authorize submission of known defective material, either indicated or actual,<br />
nor does it commit the Government to accept defective material.<br />
7
F-T-<strong>2907A</strong><br />
4.1.2 Component and material inspection. Component and materials shall be inspected in<br />
accordance with all the requirements specified herein and in applicable referenced documents.<br />
4.2 Classification of inspections. The inspection requirements specified herein are classified as<br />
follows:<br />
a. Preproduction inspection (see 4.3).<br />
b. Quality conformance inspection (see 4.4).<br />
c. Inspection of packaging (see 4.6).<br />
4.3 Preproduction inspection.<br />
4.3.1 Examination. The preproduction tank shall be examined as specified in 4.5. Presence of<br />
one or more defects shall be cause for rejection.<br />
4.3.2 Tests. The tank shall be tested as specified in table II. Failure of any test shall be cause for<br />
rejection.<br />
Table II. Test Schedule.<br />
Preproduction Inspection<br />
Examination or test Inspection paragraph Requirement paragraph<br />
Capacity test 4.6.1 3.9<br />
Glass lining test 4.6.2 3.13<br />
Cathodic protection test 4.6.4 3.14<br />
4.4 Quality conformance inspection. The quality conformance inspection shall include the<br />
examination of 4.5, the tests of 4.6, and the packaging inspection of 4.7. This inspection shall be<br />
performed on the samples selected in accordance with 4.3.<br />
4.5 Examination. Each tank shall be examined for compliance with the requirements specified in<br />
section 3 of this specification. Any redesign or modification of the contractor's standard product to<br />
comply with specified requirements, or any necessary redesign or modification following failure to<br />
meet specified requirements shall receive particular attention for adequacy and suitability. This<br />
element of inspection shall encompass all visual examinations and dimensional measurements.<br />
Noncompliance with any specified requirements or presence of one or more defects preventing or<br />
lessening maximum efficiency shall constitute cause for rejection.<br />
4.6 Tests. Each distillation unit shall be tested as specified in 4.3.2. The first article unit shall be<br />
tested as specified in 4.3.2. Failure to pass any test shall be cause for rejection of a unit.<br />
4.6.1 Capacity. If tank dimensions are different from those specified in tables I, determine the<br />
storage capacity of the tank by weighing the empty tank and then fill the tank with water and<br />
reweigh. Convert the liquid capacity of the tank to U.S. gallons or liters. Nonconformance to the<br />
capacity rating specified shall constitute failure of this test.<br />
8
F-T-<strong>2907A</strong><br />
4.6.2 Glass lining tests. Type IV glass (porcelain enamel) linings shall be inspected and tested as<br />
follows for coverage, thickness, and solubility. Upon approval of the contracting officer, the<br />
manufacturer may furnish a certification of compliance as part of the first article. The certification<br />
shall provide data necessary to evaluate compliance with the coverage, thickness, and solubility<br />
requirements of 3.13. Nonconformance with 3.13 shall constitute failure of this test.<br />
4.6.2.1 Lining coverage. A glass lined tank that has not been subjected to test pressure greater than<br />
150 pounds per square inch gage (psig) (10 kgf/cm 2 ) shall be cut into four or more segments using a<br />
band saw, bayonet saw, or other suitable mechanical cutting device. Each segment shall be visually<br />
inspected for the presence of areas of exposed metals except that cracked and spalled areas of lining<br />
caused by the cutting operation shall not be considered. Exposed areas of metal shall be measured<br />
with a low powered microscope with a calibrated eyepiece. Nonconformance to 3.13(b) and 3.13(c)<br />
shall constitute failure of this test.<br />
4.6.2.2 Thickness of glass lining. Thickness measurements shall be taken at not less than 10<br />
representative points on the shell and heads of the tank using a calibrated magnetic or similar<br />
thickness gauge. Nonconformance to 3.13(a) shall constitute failure of this test.<br />
4.6.2.3 Solubility of glass lining.<br />
a. Apparatus. The cylinder assembly shall be constructed of 16 gage, type 304 stainless steel;<br />
the ends shall be ground so as to conform with the curvature of the tank to be tested. The gaskets<br />
shall be made of neoprene rubber. The cell shall be heated with a small gas burner or a small electric<br />
heater placed immediately below the cylinder assembly midway between the ends.<br />
b. Test specimens. The test specimens for this test shall consist of four 3.5-inch by 3.5-inch<br />
(88 mm by 88 mm) sections cut from the outer wall (not the center flue) of the tank approximately<br />
midway between the ends.<br />
c. Preparation of specimens. The specimens shall be buffed with a rubbing stone or suitable<br />
abrasive paper around the entire perimeter of the panel to completely remove rough edges and glass<br />
lining fragments. The specimens shall then be scrubbed on both sides using a nylon brush and a<br />
mildly abrasive detergent cleaner powder, rinsed with distilled water, dried for 1 hour in a drying<br />
oven at 225 °F (107.22 °C) and placed in a desiccator while hot.<br />
d. Initial weight measurements. The specimens, after cooling to room temperature, shall<br />
be weighed to the closest 0.002 grain (0.1 milligram).<br />
e. Calibration of test cell. Because of small variations in cell dimensions and configuration,<br />
each test cell must be calibrated before it is used. The procedure is as follows:<br />
(1) Assemble the cell as it is to be operated.<br />
(2) Fill with water to just below where the condenser tube is welded into the cylinder.<br />
9
F-T-<strong>2907A</strong><br />
(3) Adjust the input of the heat source to give a slow, rolling boil. If water rises in the<br />
condenser, remove small amounts of water until the boil will operate without<br />
surging.<br />
(4) Remove from the heat and check to see if water level is completely covering the<br />
panels.<br />
(5) Cool to room temperature, then measure the volume of water contained in the<br />
cell.<br />
(6) Record this volume in the cell and use this amount of test solution in all<br />
subsequent tests.<br />
f. Test solution. The test solution used for each exposure cycle shall consist of 6.17 grains<br />
(400 milligrams) of reagent grade sodium bicarbonate dissolved in 0.264 gallons (1 L) of<br />
distilled water.<br />
g. Test procedure.<br />
(1) Assembly the test cell using weighed specimens from the same tank on each<br />
end of the test cell.<br />
(2) Pour the correct volume of test solution into the cell.<br />
(3) Adjust the input of the heater to give a consistent slow, rolling boil.<br />
(4) After 18 hours boil time, dismantle the cell and discard the used test solution.<br />
(5) Clean the specimens using a soft cloth wetted with a solution of 1 percent<br />
trisodiun phosphate to remove loosely adhering deposits, wipe dry, and store in<br />
desiccator between solution treatment.<br />
(6) After 8 cycles of 18 hours each, clean specimens as above, rinse with distilled<br />
water, and dry at 225 °F (107.22 °C) for 1 hour. Place the specimens in a<br />
desiccator while hot and after cooling to room temperature, weigh to the closest<br />
0.002 grain (0.1 milligram).<br />
h. Calculation of results. The exposed areas of each specimen shall be calculated from<br />
the average diameter of the test spot, pressured to the closed 0.015-inch (0.381 mm)<br />
taken in three different locations. The solubility of the lining shall be calculated by<br />
dividing the weight loss in milligrams (grains) by the exposed area in square inches.<br />
i. Interpretation of results. Nonconformance with 3.13(e) shall constitute failure of this test.<br />
4.6.3 Toxicity, odor, color and taste. A certification of compliance with the ASME Code, as<br />
required by 3.4, will be accepted as evidence that materials in contact with potable water are<br />
nontoxic and do not impart objectionable odor, color, or taste to the water.<br />
10
F-T-<strong>2907A</strong><br />
4.6.4 Cathodic protection. Measure the tank wall potential relative to a standard copper sulphate<br />
half cell before and after installation of the anode or anodes. Locate the copper sulphate half cell<br />
inside the tank adjacent to the tank shell at maximum distance from the anode or anodes. Use a<br />
portable potentiometer or high-resistance voltmeter to measure the potential. Nonconformance to<br />
3.14 shall constitute failure of this test.<br />
4.7 Inspection of packaging.<br />
4.7.1 Preproduction pack inspection.<br />
4.7.1.1 Examination. The preproduction pack shall be examined for the defects listed in table III.<br />
Presence of one or more defects shall be cause for rejection of the preproduction pack.<br />
4.7.1.2 Tests. When specified (6.2), the preproduction pack shall be subjected to the rail-impact<br />
test (see 6.7). The test car shall strike a string of five empty cars with draft gear extended and<br />
brakes set, at a speed of not less than 10 miles per hour (mph) (16 kilometre/hr (km/h)) and not<br />
more than 11 mph (18 km/h).<br />
4.7.1.3 Basis for rejection. Any shifting of contents, visible damage to the contents, or any loose,<br />
broken, or displaced anchoring, blocking, or bracing within the container shall be cause for rejection.<br />
4.7.2 Quality conformance inspection of pack.<br />
4.7.2.1 Unit of product. For the purpose of inspection, a completed pack prepared for shipment<br />
shall be considered a unit of product.<br />
11
F-T-<strong>2907A</strong><br />
Classification<br />
TABLE III. CLASSIFICATION OF DEFECTS.<br />
Defect Requirement<br />
paragraph<br />
Critical<br />
Major<br />
None defined.<br />
101<br />
ASME stamp not as specified.<br />
3.4<br />
102<br />
103<br />
104<br />
105<br />
106<br />
107<br />
Minor<br />
201<br />
202<br />
203<br />
204<br />
205<br />
Materials not as specified.<br />
Tappings and openings not provided or not as specified.<br />
Tank supports not as specified.<br />
Components comprising of glass lining material not as<br />
specified.<br />
Dimensions not as specified.<br />
Tank lining not as specified.<br />
Missing or incorrect identification markings.<br />
Treatment and painting not as specified.<br />
Area of no coating, coating not dry, evidence of rust or<br />
corrosion, and runs or sags.<br />
Color of coating not as specified.<br />
Sharp edges, points, or corners, welding burrs, excessively<br />
long tappings, yokes and fastening devices.<br />
12<br />
3.5<br />
3.7<br />
3.8<br />
3.13<br />
3.9<br />
3.7, 3.13<br />
3.10<br />
3.11<br />
3.11<br />
3.11<br />
3.15.2, 3.15.3<br />
4.7.2.2 Sampling. Sampling for examination shall be in accordance with ASQC Z1.4.<br />
5. PACKAGING<br />
5.1 Packaging requirements. The preservation, packing, and marking shall be as specified in the<br />
contract or order.<br />
6. NOTES<br />
(This section contains information of a general or explanatory nature that may be helpful, but is<br />
not mandatory.)<br />
6.1 Intended use. The tanks are intended for storing potable service hot water.
F-T-<strong>2907A</strong><br />
6.2 Acquisition requirements. Acquisition documents should specify the following:<br />
a. Title, number, and date of this specification.<br />
b. Type, class, style, size, and capacity required (see 1.2, 3.1, 3.1.1, 3.1.2, and 3.12).<br />
c. Whether tank fabrication shall be other than as specified (see 3.1.1 and 3.1.2).<br />
d. When a first article is required, number of first article tanks required and time<br />
frame required for submission of first article tank(s) when required (see 3.3 and 4.3).<br />
e. Tappings and openings if other than as specified (see 3.7).<br />
f. When threaded pipe leg bosses are required in tank supports (see 3.8).<br />
g. When identification marking is to be other than manufacturer’s standard commercial<br />
marking and in accordance with MIL-STD-130 (see 3.10).<br />
h. When color of finish coat is required (see 3.11).<br />
i. When cathodic protection shall be other than as specified (see 3.14).<br />
j. When rail-impact test is required (see 4.7.1.2)<br />
k. Packaging requirements (see 5.1).<br />
6.3 First article tanks. When first article tanks are specified, any changes or deviations of production<br />
tanks from the first article tanks during production will be subject to the approval of the contracting<br />
officer. Approval of the first article tanks will not relieve the contractor of his obligation to furnish<br />
tanks conforming to this specification.<br />
6.4 Tank construction. Minus heads are generally not available commercially from contractors and<br />
should only be specified when a particular need exists. Tank supports should be the contractor's<br />
commercial supports and should be used for economic reasons. A 4-inch by 6-inch (100 mm by 150<br />
mm) handhole may be specified in tanks 36 inches (915 mm) or less in diameter when required.<br />
6.5 Preproduction packs. Any changes or deviations of production packs from the approved<br />
preproduction pack will be subject to the approval of the contracting officer. Approval of the<br />
preproduction pack will not relieve the contractor of his obligation to preserve, pack, and mark the<br />
tanks in accordance with this specification.<br />
6.6 First article test. When first article tests are required, appropriate provisions should be included<br />
in the contract, to allow the contracting officer to waive completely or in part the first article tests<br />
and reduce the bid price accordingly if the successful bidder has previously performed any or all of<br />
the first article tests in recent procurements, or if quantities involved are less than 10. When the<br />
contract allows for waiver of first article tests, the contract should require that the successful bidder<br />
seeking such a waiver submit satisfactory evidence, including test and inspection reports that the<br />
tests have been performed successfully in the past and additional information such as the contract<br />
identification, the procuring activity, the date, and other pertinent data deemed necessary by the<br />
contracting officer. If the first article tests are desired, the contracting officer will normally elect to<br />
have these performed at the manufacturer’s plant. He may also elect to have these tests performed at<br />
a Government laboratory, or at an independent private test organizations. Note that deletion of first<br />
article tests does not delete the tests required by Section IV of the ASME Code.<br />
13
F-T-<strong>2907A</strong><br />
6.7 Rail-impact test. The packed item, in its normal shipping configuration, shall be adequately<br />
blocked and secured to the floor of the test rail car to prevent any longitudinal, vertical or lateral<br />
movement. Loading and tie downs shall be in accordance with applicable practices of the<br />
Association of American Railroads. The test car shall be impacted into two to five buffer cars. The<br />
buffer cars shall be located on a level section of track with the air and hand brakes set and draft gear<br />
extended. The total weight of the buffer cars shall be 250,000 pounds minimum. All cars shall be<br />
equipped with standard draft gear and conventional under frame. Three impacts shall take place at<br />
4, 6 and 8 miles per hour (MPH) in one direction and one impact at 8 mph in the opposite direction.<br />
The velocities given are minimum values and should not be exceeded by more than is necessary to<br />
insure that these values are met.<br />
6.8 Part or Identifying Numbers (PINs). The specification number, type, class, and size are<br />
combined to form PINs for diesel-engine-driven water distillation units covered by this document<br />
(see 1.2). PINs for the diesel-engine-driven water distillation units are established as follows:<br />
6.9 Subject term (key word) listing.<br />
Glass-lined steel<br />
Plus bottomhead<br />
Plus heads<br />
<strong>Potable</strong> hot water storage tanks<br />
6.10 Changes from previous issue. Marginal notations are not used in this revision to identify<br />
changes with respect to the previous issue due to the extent of the changes.<br />
Custodians: Preparing Activity:<br />
Navy - YD DLA-IS<br />
Air Force - 99<br />
Review Activities:<br />
Army – CE, MD (Project 4520-2006-002)<br />
Navy - CG, MC<br />
NOTE: The activities listed above were interested in this document as of the date of this document.<br />
Since organizations and responsibilities can change. You should verify the currency of the<br />
information above using the ASSIST online database at http://assist.daps.dla.mil.<br />
14


