ELECTRIC SAUNA HEATER: Helo CONTROL UNITS: Operating ...
ELECTRIC SAUNA HEATER: Helo CONTROL UNITS: Operating ...
ELECTRIC SAUNA HEATER: Helo CONTROL UNITS: Operating ...

Create successful ePaper yourself
Turn your PDF publications into a flip-book with our unique Google optimized e-Paper software.
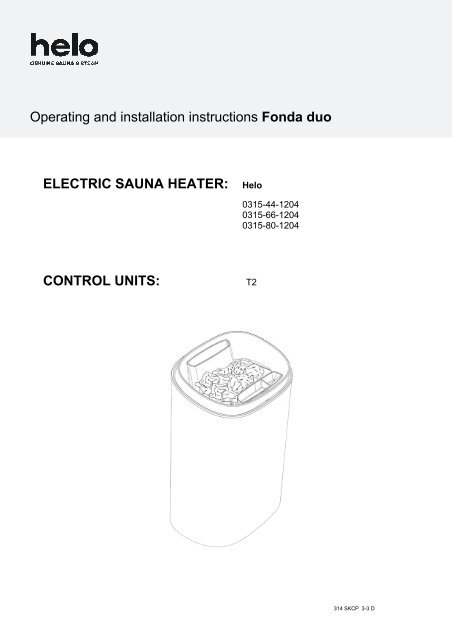
<strong>Operating</strong> and installation instructions Fonda duo<br />
<strong>ELECTRIC</strong> <strong>SAUNA</strong> <strong>HEATER</strong>: <strong>Helo</strong><br />
<strong>CONTROL</strong> <strong>UNITS</strong>: T2<br />
0315-44-1204<br />
0315-66-1204<br />
0315-80-1204<br />
314 SKCP 3-3 D
<strong>Operating</strong> and installation instructions Fonda duo<br />
Contents<br />
1. Quick instructions for sauna heater 3<br />
1.1 Check before taking a sauna bath 3<br />
1.2 Using the heater's controls 3<br />
2. Information for users 3<br />
2.1 Sauna room 3<br />
2.2 Recommended sauna ventilation 4<br />
2.3 Heating the sauna 4<br />
2.4 Sauna stones 5<br />
2.5 Disconnecting electrical heating, terminal #55 (output) 6<br />
2.6 If the sauna heater does not heat up 6<br />
2.7 Control unit T2 6<br />
2.8 <strong>Operating</strong> the control unit 8<br />
2.9 The sauna heater’s water tank 9<br />
3. Preparing for sauna heater installation 10<br />
3.1. Installing the heater 10<br />
3.2. Connecting the sauna heater to the mains 11<br />
3.3. Installation of control unit and sensor 11<br />
3.4. The sauna heater's safety clearances 12<br />
3.5. Installation steps 13<br />
3.6. Locating the junction box for the connection cable in the sauna 14<br />
3.7. Outline diagram when T2 is control unit 15<br />
3.8. Wiring diagram 16<br />
3.9 The settings menu 17<br />
4. ROHS 18<br />
Illustrations and tables<br />
Illustration 1 Recommended ventilation in the sauna 4<br />
Illustration 2 Junction box location 14<br />
Illustration 3 Outline diagram 15<br />
Illustration 4 Wiring diagram 16<br />
Table 1 Connection cable and fuses 11<br />
2
<strong>Operating</strong> and installation instructions Fonda duo<br />
1. Quick instructions for sauna heater<br />
1.1 Check before taking a sauna bath<br />
1. that the condition of the sauna room is suitable for taking a sauna.<br />
2. that doors and windows are closed<br />
3. that the stones in the heater are recommended by the manufacturer, that the stones cover the heating<br />
elements and that the stones are piled sparsely.<br />
NOTE! Ceramic stones must not be used.<br />
The sauna bath is comfortable at a temperature of about 70 °C.<br />
Rearrange the unit's stones at least once a year and replace crumbled stones. This enhances air circulation between<br />
the stones, extending the life of the heating elements.<br />
Further information about sauna baths is available at: www.helo.fi<br />
1.2 Using the heater's controls<br />
The main switch is located in the base of the heater. The type plate shows the switch positions ( 0 I ).<br />
See the instructions for the control unit in the "Using the Control Unit" section.<br />
2. Information for users<br />
Persons with reduced physical or mental capacity, disabilities, or little experience or knowledge of the equipment's<br />
use (e.g. children), should only operate the equipment under supervision or according to instructions from the person<br />
responsible for their safety.<br />
Ensure that children do not play close to the sauna heater.<br />
2.1 Sauna room<br />
The walls and ceiling of the sauna room should be thermally well insulated. All surfaces that store heat, such as tiled<br />
and plastered surfaces, must be insulated. Wood paneling is recommended for the sauna room's walls and ceiling. If<br />
the sauna room's walls and ceiling have been clad with material that is highly heat-insulating (e.g. different types of<br />
decorative stones, standard glass etc.), it must be remembered that this prolongs the sauna's heating-up time, even<br />
though the sauna room is otherwise well insulated (see page 10, section 3 - Preparing for sauna heater installation).<br />
3
<strong>Operating</strong> and installation instructions Fonda duo<br />
2.2 Recommended sauna ventilation<br />
5 5<br />
4<br />
2<br />
6<br />
Illustration 1 Recommended ventilation in the sauna<br />
1. Sauna room 3. Electric sauna heater 5. Flue or channel<br />
2. Bathroom 4. Exhaust air valve 6. The sauna room's door<br />
7. A ventilation valve can also be installed here which is kept closed while the sauna is heating up and while bathing.<br />
An inlet vent for fresh air can be positioned within area A. It must then be checked that the fresh air that enters does<br />
not interfere with (cools down) the heater's thermostat that is located near the ceiling.<br />
Area B is used for intake of fresh air if the sauna room does not have mechanical ventilation. If this is the case the<br />
exhaust air valve must be positioned a minimum of 1 m higher than the inlet valve.<br />
THE INTAKE VALVE FOR FRESH AIR MUST NOT BE POSITIONED WITHIN AREA C IF THE <strong>HEATER</strong>'S<br />
<strong>CONTROL</strong> THERMOSTAT IS ALSO LOCATED WITHIN AREA C.<br />
2.3 Heating the sauna<br />
1<br />
7<br />
4<br />
Before turning the heater on: ensure that the sauna room is suitable for taking a sauna bath. When heated for the first<br />
time, the sauna heater may emit some odor. If this is the case, disconnect the sauna heater briefly, and air the room.<br />
Then turn the sauna heater on again.<br />
Turn the heater on at the control panel, where you can adjust the temperature and the time.<br />
1<br />
C C AA<br />
The heating of a sauna should be started roughly an hour before you plan to take a sauna bath, so that the stones<br />
have time to heat up properly and the air warms up evenly in the sauna room.<br />
Do not put any objects on the sauna heater. Do not dry clothes on the sauna heater or anywhere in its<br />
vicinity.<br />
C<br />
1000 mm<br />
3B<br />
3<br />
B<br />
C<br />
B<br />
3<br />
1<br />
A<br />
min<br />
500 mm<br />
4
<strong>Operating</strong> and installation instructions Fonda duo<br />
2.4 Sauna stones<br />
Good quality sauna stones should meet the following requirements:<br />
- The stones must withstand heat and heat variation caused by vaporization of the water thrown on the<br />
stones.<br />
- The stones must be rinsed before use in order to avoid odor and dust.<br />
- The stones must have an uneven surface so that the water ”sticks” on the surface of the stones and<br />
evaporates more effectively.<br />
- The stones must be sufficiently large (50–100 mm) to allow air to circulate between the stones. This<br />
extends the life of the heating elements.<br />
- The stones must be piled sparsely so that air circulates as effectively as possible between the stones. The<br />
elements must not be wedged together nor wedged against the casing.<br />
- The ventilation chambers on the sides of the stone compartment must not be filled with stones. Filled<br />
ventilation chambers will lead to slower heat-up time of the sauna room and could also cause the heater to<br />
overheat.<br />
- The stones must be rearranged sufficiently often (at least once a year) so that small, crumbled stones can<br />
be removed and replaced with larger new stones.<br />
- The stones must be piled in such a way as to cover the elements. However, do not pile the stones too high<br />
above the elements. Information about a suitable amount of stones is to be found in the table on page 12.<br />
Any smaller stones in the package must not be placed on the heater.<br />
- The guarantee does not cover defects caused by smaller and too tightly stacked stones that impede the air<br />
circulation between the stones.<br />
- Ceramic stones must not be used. Ceramic stones can cause damage to the heater that will not be covered<br />
by the guarantee.<br />
5
<strong>Operating</strong> and installation instructions Fonda duo<br />
2.5 Disconnecting electrical heating, terminal #55 (output)<br />
The electric heating disconnecting applies to homes with an electric heating system.<br />
The sauna heater outputs 230-240V to terminal #55 when the heater is activated, i.e. this signal can be used to<br />
(partly) deactivate house heating when the sauna heater switches on the current to the heating elements. May be<br />
used in case the main fuses can´t take the full load of a sauna heater and electric space heaters.<br />
2.6 If the sauna heater does not heat up<br />
If the sauna heater does not heat up, check that<br />
- the current is switched on<br />
- the heater's main fuses are intact<br />
- that the control panel is not displaying an error message. If the control panel displays an<br />
error message read the operating instructions for the control panel.<br />
2.7 Control unit T2<br />
Display<br />
Activated functions<br />
Touch screen with<br />
buttons<br />
Meaning of the symbols on the screen:<br />
Starting and stopping the heater<br />
Motion<br />
detector<br />
Setting the sauna room's temperature. Reference value 20–110 °C<br />
Setting the sauna room's humidity. Reference value 0–10<br />
Setting preselected time. It is possible to set the start time 0–24 hours in advance.<br />
Settings menu. Option of setting language, time and other details.<br />
OK<br />
6
<strong>Operating</strong> and installation instructions Fonda duo<br />
Meaning of activated symbols:<br />
The buttons' functions:<br />
General information:<br />
The sauna heater is on / Drying of sauna room.<br />
The lighting in the sauna room is on.<br />
A preselected time has been set.<br />
The water tank is full / Water in the water tank / The water tank is empty (flashes)<br />
The button lock is on. Unlock by pressing the ”HOME” and ”RETURN” buttons<br />
simultaneously for about two seconds.<br />
Selection of function/approval of selection.<br />
Activation of sauna light.<br />
Move upwards in the menu/increase set value.<br />
Move downwards in the menu/decrease set value.<br />
”HOME” button. Return to the first page from the submenus.<br />
”RETURN” button. Go back incrementally in the submenus.<br />
Pressing the button on the first page displays temperature and time.<br />
‐ The control unit must be installed outside the sauna room.<br />
‐ The heater and the control is intended for private use only.<br />
‐ The control unit is suitable for the following heater models:<br />
• SKCP - … - DET<br />
‐ The longest time for a sauna bath is 12 hours.<br />
‐ Preselected time up to 24 hours.<br />
‐ There is a motion detector in the control unit's front section. If the control unit does not detect motion, the<br />
screen saver starts in order to reduce energy consumption. Activated operations continue to function<br />
normally.<br />
‐ The control unit is fitted with a button lock to prevent misuse.<br />
‐ Always follow the fitting dimensions specified.<br />
‐ The sauna heater must be connected to the mains by a qualified electrician and in compliance with current<br />
regulations.<br />
NOTE! Ensure that the sauna room is ready for use before the heater is turned on.<br />
7
<strong>Operating</strong> and installation instructions Fonda duo<br />
2.8 <strong>Operating</strong> the control unit<br />
Resting mode:<br />
When the control unit is in the resting mode its screen is blank. The screen is automatically<br />
activated when the control unit detects an object (e.g. a hand) closer than 5 cm from its front<br />
surface. When the object is removed the screen returns to save mode after the set time.<br />
The screen shutoff time can be set at between 10 and 60 seconds (see section: Settings -<br />
General information - Screen shutoff).<br />
Starting the heater:<br />
Start the heater by selecting the upper menu on the first page and pressing the ”OK” button.<br />
The heater then starts immediately with the temperature and time for sauna bath that has<br />
been saved in the memory. Changing sauna temperature – see next chapter. The heater is<br />
on for the time defined in Settings - Service - Settings - Limit for bath time. However, it is<br />
possible to turn off the heater at any time by pressing the ”OK” button again.<br />
Pressing the ”RETURN” button on the first page displays the time and the sauna room's<br />
temperature.<br />
Setting sauna temperature:<br />
You can set the desired sauna temperature by selecting the menu that is second from top<br />
on the first page and pressing the ”OK” button. Change the temperature with the ”Arrow up”<br />
or ”Arrow down” buttons. Confirm the change with the ”OK” button.<br />
You can restrict the adjustable temperature in Settings - Service - Settings - Temperature<br />
limit.<br />
Setting the sauna room's humidity:<br />
You can set the increased humidity that the sauna heater produces by selecting the third<br />
menu on the first page.<br />
You can control the humidity on a 0 to 10 scale, where 0 indicates no steam and 10<br />
indicates maximum steam production. The sauna room’s actual humidity depends on room<br />
size and temperature.<br />
35°c<br />
19:34<br />
Temperature<br />
Humidity<br />
65°c<br />
5rH<br />
OK<br />
OK<br />
OK<br />
OK<br />
OK<br />
8
<strong>Operating</strong> and installation instructions Fonda duo<br />
Setting preselected time.<br />
You can set a preselected time by selecting the fourth menu on the front page. The<br />
preselected time is the time when you want the heater to start heating. A symbol in the<br />
lower part of the display will indicate that a preselected time has been set.<br />
To cancel the preselected time function, re-enter into the timer menu and select<br />
“Deactivate”<br />
Settings for control:<br />
In the fifth menu on the front page, you can manually access the settings for the control<br />
unit that include, for instance, Sauna settings, General settings and Service settings. The<br />
Service settings have been protected with a PIN code (124) that prevents unintentional<br />
changes to important settings.<br />
For more information about the settings in this menu, see section 3.9 at the end of this<br />
manual.<br />
2.9 The sauna heater’s water tank<br />
Filling the tank<br />
Fill the sauna heater's water tank using the steam nozzle. The water tank holds about five litres of water<br />
If the tank is empty when the sauna heater starts, the heater emits three short beeps. A drop of water indicating the<br />
steam function will flash at the same time in the control device.<br />
The sauna heater also emits a beep if the tank is full after it has been filled. The sauna heater must always be in<br />
standby mode (main power switch in position I) when you fill the water tank. This is to prevent the tank overfilling.<br />
NOTE!<br />
Do not pour fragrance oil or other chemicals (except lime remover) in the water tank.<br />
Use the removable aroma cup at the front of the sauna heater for this purpose.<br />
Water refill<br />
Timer<br />
Start Time<br />
Activate<br />
Settings<br />
Sauna<br />
General<br />
Service<br />
00:00<br />
OK<br />
OK<br />
9
<strong>Operating</strong> and installation instructions Fonda duo<br />
1.<br />
Emptying the tank<br />
Empty the water tank after each time it is used. This action reduces the risk of any limescale deposits which over time<br />
accumulate on the inside of the tank. Empty the tank as follows (see illustration).<br />
As the drainage hose and the water in the tank gets scalding hot during use of the heater it is safest to drain the tank<br />
after the heater has cooled down!<br />
2.<br />
1. Remove the water tank’s drainage hose from its support (located behind the sauna heater, underneath the<br />
water tank).<br />
2. Take out the hose from under the sauna heater.<br />
3. Loosen the hose clamp by sliding the two jaws in opposite direction to each other.<br />
4. Place a container that holds at least 5 liters under the hose and remove the plug.<br />
5. After the water has drained from the tank reattach the plug and tighten the hose clamp by pressing the two<br />
jaws together. Finally place the hose back on its support.<br />
3. Preparing for sauna heater installation<br />
THE PERSON WHO INSTALLS THE <strong>HEATER</strong> SHOULD LEAVE THESE INSTRUCTIONS IN THE SAME PLACE<br />
FOR SUBSEQUENT USERS.<br />
Check the following before installing the sauna heater:<br />
- The heater's output (kW) in relation to the sauna room's volume (m 3 ). The tables on page 12 contain<br />
information about the recommended dimensions for the sauna heater's output. The minimum and maximum<br />
volume must not be exceeded.<br />
- The sauna room height must be at least 1900 mm.<br />
- A masonry wall without heat insulation increases the preheating time. Each square meter of plastered<br />
ceiling or wall surface adds 1,2 m 3 to the sauna room's volume.<br />
- Check table 1 on page 11 for the size of fuse (A) and power cable (mm²) suitable for the heater.<br />
- Check that the safety clearance around the sauna heater is sufficient.<br />
- There must be sufficient room, i.e. so-called maintenance access around the sauna heater's control devices.<br />
The doorway can also be regarded as a maintenance access.<br />
3.1. Installing the heater<br />
Note! The installation template is printed on the lid of the sauna heater box.<br />
The sauna heater is installed in the sauna room according to the safety clearance on page 12. A thin panel is not<br />
sufficient as a mounting base; the base must be strengthened with a board behind the panel. The minimum distance<br />
specified on page 12 must be observed even if the wall materials are fireproof.<br />
An optional stand is available for floor installation. The sauna heater must be fixed to the wall using the upper<br />
fasteners even if the stand is used. For more detailed instructions, see page 13, paragraph 3.5.<br />
Walls and ceiling must not be clad with a simple protective cladding such as fiber-reinforced cement board, as it can<br />
constitute a fire hazard.<br />
Only one sauna heater is to be installed in the sauna room.<br />
3.<br />
4. 5.<br />
10
<strong>Operating</strong> and installation instructions Fonda duo<br />
3.2. Connecting the sauna heater to the mains<br />
The sauna heater must be connected to the mains by a qualified electrician and in compliance with current<br />
regulations. The electric sauna heater is semi-permanently connected to the mains. Use H07RN-F (60245 IEC 66)<br />
cables, or alternatively an equivalent or higher quality cable. Other cables in the heater (to the signal lamp and the<br />
electric heating's cross connector) must also be of an equivalent type. PVC-insulated cables must not be used as<br />
connection cables.<br />
A multi pole cable (e.g. 7-pole) can also be used as a connecting cable when the voltage is the same. In the absence<br />
of a separate control current fuse, the diameter of all cables must be the same, i.e. in accordance with the main fuse.<br />
The junction box on the sauna wall should be located within the minimum safety clearance specified for the sauna<br />
heater. The maximum height for the junction box is 500 mm from the floor (see illustration on page XX). If the junction<br />
box is located more than 500 mm from the heater, the maximum height is 1,000 mm from the floor.<br />
The sauna heater's insulation resistance: Moisture can build up on the sauna heater's fuses during storage. This<br />
may cause current leakage. The moisture is dispelled when the sauna heater has been heated up a few times. Do<br />
not connect the heater's power outlet to an earth fault breaker.<br />
Applicable electrical safety regulations must be followed when installing the heater.<br />
Output<br />
kW<br />
4,4<br />
6,6<br />
8,0<br />
The heater's<br />
connection cable<br />
H07RN-F/<br />
60245 IEC 66<br />
mm 2<br />
400–415 V 3N~<br />
4 x 1.5 (2N~)<br />
5 x 1.5<br />
5 x 2.5<br />
Fuse<br />
Table 1 Connection cable and fuses<br />
3.3. Installation of control unit and sensor<br />
A<br />
2 x 10<br />
3 x 10<br />
3 x 16<br />
The heater's<br />
connection cable<br />
H07RN-F/<br />
60245 IEC 66<br />
mm 2<br />
230 V 3~<br />
------<br />
4 x 6<br />
4 x 6<br />
The control unit has been connected electrically by a cable to the sauna heater. The control unit must be installed<br />
outside the sauna room.<br />
The sensor is mounted to the sauna wall, directly on the center line of the sauna heater, 40 mm from the ceiling.<br />
NOTE!<br />
If the wall on which the sensor is to be installed is made of highly heat insulating material (e.g. concrete, brick etc.) or<br />
if the wall is made of toughened glass, the sensor can be installed directly above the heater (on the heater’s center<br />
line viewed from both the front and from the side).<br />
Deviations from the fitting dimensions specified can lead to a risk of fire!<br />
The temperature limiter in the sensor interrupts the heater's temperature output if the heater's temperature increases<br />
to such an extent that it represents a danger for the sauna’s wooden parts. When the temperature has fallen, the<br />
limiter can be reset by pressing the reset button.<br />
Before resetting you must always investigate why the temperature limiter was triggered!<br />
Fuse<br />
A<br />
------<br />
3 x 20<br />
3 x 25<br />
The heater's<br />
connection cable<br />
H07RN-F/<br />
60245 IEC 66<br />
mm 2<br />
230–240 V 1N~ / 2~<br />
3 x 6.0<br />
3 x 6.0<br />
3 x 6.0<br />
Fuse<br />
A<br />
1 x 20 / 2 x 10<br />
1 x 35 / 2 x 25<br />
1 x 35 / 2 x 25<br />
11
<strong>Operating</strong> and installation instructions Fonda duo<br />
3.4. The sauna heater's safety clearances<br />
*) = Absolute<br />
dimension<br />
min. 20<br />
Safety clearance<br />
Output Sauna room The heater's min. clearance Stones<br />
Volume Height From sides From front To ceiling To floor<br />
kW<br />
4,4<br />
6,6<br />
8,0<br />
min. 30<br />
K<br />
m 3<br />
4-6<br />
5-9<br />
8-12<br />
40 *)<br />
A 448 A<br />
mm<br />
1900<br />
1900<br />
1900<br />
A<br />
mm<br />
50<br />
50<br />
50<br />
D<br />
mm<br />
50<br />
50<br />
50<br />
F<br />
mm<br />
1135<br />
1135<br />
1135<br />
**) (mm)<br />
364 D<br />
**) = See section 3.3<br />
30 min.<br />
K<br />
mm<br />
100<br />
100<br />
100<br />
765 F<br />
20 min.<br />
approx.<br />
kg<br />
20<br />
20<br />
20<br />
min. 1900<br />
12
<strong>Operating</strong> and installation instructions Fonda duo<br />
3.5. Installation steps<br />
1. Secure the wall mounts in the wall with the accompanying screws (6 x 40 and 6 x 16).<br />
Note the heater’s minimum clearance. If the sauna heater is going to be fitted with legs<br />
you don't need to attach the bottom brackets.<br />
The top wall mounts should be installed so that the holes in the heater’s locking screws<br />
are upwards. The bottom wall mounts can be turned so that the holes are downward as<br />
no locking screws will be screwed into them.<br />
2. Then install the sauna heater so that the upper supporting iron<br />
is touching the groove in the wall mount and move the heater<br />
backwards as far as it goes (towards the wall).<br />
It might be necessary to slightly loosen the wall mount's screws<br />
so that it is easier to locate the supporting iron on the wall<br />
brackets.<br />
3. If you loosened the wall mounts' screws in the previous point,<br />
you must tighten them again.<br />
Then place the locking screws in the holes in the upper wall<br />
mounts and fully tighten them.<br />
Ensure that the heater has been locked in place by trying to<br />
move it forwards and backwards.<br />
6 x 40<br />
6 x 16<br />
M5 x 12<br />
13
<strong>Operating</strong> and installation instructions Fonda duo<br />
500 mm<br />
200 mm<br />
3.6. Locating the junction box for the connection cable in the sauna<br />
Illustration 2 Junction box location<br />
A = Minimum safety clearance<br />
A A<br />
Sauna heater<br />
1. Recommended location for junction box.<br />
2. A metal junction box should be used within this area.<br />
3. This area should be avoided and a metal junction box must always be used.<br />
3.<br />
2.<br />
Heat resistant boxes (T 125 °C) and heat resistant cables (T 170 °C) must be used within other areas. The junction<br />
box must have free access. If the box is to be positioned within areas 2 and 3, refer to the local energy supplier's<br />
instructions and regulations.<br />
500 mm<br />
1.<br />
14
<strong>Operating</strong> and installation instructions Fonda duo 15<br />
3.7. Outline diagram when T2 is control unit<br />
Heater<br />
A<br />
B<br />
11<br />
12<br />
Heater<br />
Heater<br />
18 4<br />
17 3<br />
SR2 2<br />
SR1 1<br />
Illustration 3 Outline diagram<br />
Sensor<br />
Silicone 4 * 0.25<br />
1 Blue<br />
2 White<br />
3 Red<br />
4 Yellow<br />
A Brown<br />
B White<br />
11 Green<br />
12 Yellow<br />
Terminal block<br />
4<br />
3<br />
2<br />
1<br />
Sensor<br />
Control panel<br />
LiYCY 4 * 0.25<br />
OK<br />
Limiter<br />
Control panel<br />
A<br />
B<br />
11<br />
12<br />
Power supply<br />
230-240V 1N~ / 2~<br />
230V 3~<br />
400-415V 3N~
<strong>Operating</strong> and installation instructions Fonda duo 16<br />
3.8. Wiring diagram<br />
Teho, Effekt<br />
Input, Potencia<br />
Leistung, Moc<br />
Vöimsus,Wejscie<br />
Puissance<br />
власть<br />
kW<br />
4,4<br />
6,6<br />
8,0<br />
K1<br />
1 2 3 4 5 6<br />
1.<br />
4<br />
3<br />
2<br />
1<br />
F1<br />
T 1 AH<br />
Lämpövastukset, Värmeelement, Tennid, Heating elements,<br />
Heizeelement, Resistores Térmicos, Éléments chauffants,<br />
Elementy grzewcze, ТЭНы,<br />
230 V<br />
SEPC SEPC SEPC<br />
2200W 2200W 2267W<br />
2,3<br />
1,2,3<br />
1,2,3<br />
K2<br />
F2<br />
T 1 AH<br />
N 55 N<br />
2.<br />
R<br />
8<br />
R<br />
6<br />
R<br />
3<br />
R<br />
4<br />
R R R<br />
9 7 5<br />
3.<br />
N<br />
L<br />
E1<br />
E2<br />
E3<br />
OLEA 97<br />
E1<br />
E2<br />
E3<br />
SR1<br />
SR2<br />
17<br />
R1 18<br />
Lamp<br />
A<br />
R2 B<br />
11<br />
SR3 12<br />
Securityrelay<br />
SR4<br />
0315 - ... - 1204<br />
1<br />
2<br />
3<br />
4<br />
A<br />
B<br />
11<br />
12<br />
Pu<br />
Mu<br />
Va<br />
4.<br />
1 2 3 4<br />
1 2 3 4<br />
5.<br />
0315 - ... - 1204<br />
2000W<br />
4<br />
4<br />
4<br />
4,4 kW<br />
230V - 240V 1N~ / 2~<br />
1 2 3 4 5 6<br />
N / L1 L1 / L2<br />
4,4 kW<br />
400V - 415V 2N~<br />
1 2 3 4 5 6<br />
N<br />
6,6 - 8,0 kW<br />
230V - 240V 1N~ / 2~<br />
1 2 3 4 5 6<br />
N / L1<br />
6,6 - 8,0 kW<br />
230 V 3~<br />
1 2 3 4 5 6<br />
L1 L2 L3<br />
N<br />
L1<br />
L1 / L2<br />
L2<br />
6,6 - 8,0 kW<br />
400V - 415V 3N~<br />
1 2 3 4 5 6<br />
L1 L2 L3<br />
1. Syöttö / Nätet / Stromnetz / Power input. / Puissance absorbée / Vermogensingang / Entrada de<br />
alimentación / Входное напряжение / Wejście zasilania.<br />
2. Sähkölämmityksen vuorottelu / Alternering med elvärme / Signal kontakt / Signal contact / Contact<br />
du signal / Signaalcontact / Contacto señal / сигнала контакт / Sterowanie ogrzewaniem elektrycznym<br />
3. Saunavalo / Bastu belysning / Saunabeleuchtung / Sauna light / Éclairage du sauna /<br />
Saunaverlichting / Luz de sauna / Выход для освещения / Oświetlenie sauny<br />
4. Ohjauskeskus / Styrpanel / Steuergerät / Control panel. / Panneau de commande / Bedieningspaneel<br />
Panel de control / Пульт управления / Panel sterujący<br />
5. Tuntoelin / Sensor / Fühler / Sensor / Capteur / Sensor / Czujnik / Датчик<br />
Illustration 4 Wiring diagram<br />
354 SKCP 1 B
<strong>Operating</strong> and installation instructions Fonda duo<br />
3.9 The settings menu<br />
The setting menu includes the following submenus:<br />
Sauna<br />
- Bath Type Priority<br />
• Default Priority<br />
• Sauna Priority<br />
• Steam Priority<br />
- Standby<br />
• Temperature drop at standby. Range of setting is 0 – 20°C (32 – 68°F). The control panel lowers the sauna<br />
room temperature by the set value when the heater enters standby-mode.<br />
General<br />
- Set Time<br />
• Set the time on the control panel with the Arrow-up / Arrow-down buttons. Accept with OK-button.<br />
- Set Date<br />
• Set the date on the control panel. The date form is year-month-day<br />
- Region<br />
• Language. There are 10 different languages to choose from<br />
• Temperature Scale. Select the preferred temperature scale, either Celsius (°C) or Fahrenheit (°F).<br />
• Time Format. Select the preferred time format, either 12 hour or 24 hour time format.<br />
- Sleep Delay<br />
• The time the control panel waits if no button has been pressed before it shuts down the display. Range of<br />
setting is 10 s – 5 min.<br />
- Key lock<br />
• Automatic Key lock. The key lock is activated after the delay set in this menu if no key is pressed. Range of<br />
setting is 15 – 60 s. To open the key lock press the “Home” and “Return” buttons simultaneously for approx.<br />
2 seconds.<br />
• Code lock. The control panel can be locked with a four digit code. The code lock will only be activated if the<br />
automatic key lock also is activated. When opening the key lock the code will be requested.<br />
• Set Code. Set the code to be used with the code lock. Factory setting is 0000.<br />
- Vibration<br />
• With this setting the control panel can give a tactile feedback in the form of vibration when a key is pressed.<br />
- About<br />
• The soft- and hardware versions can be found under this menu<br />
Service<br />
Attn.! The service menu is intended only for persons that are in charge of installation and / or maintenance of the unit.<br />
Changing the settings in this menu without the proper knowledge could lead to unwanted behavior of the unit. Because<br />
of this a security code (124) is needed to access this menu. The security code cannot be changed.<br />
- Settings<br />
• Bath time Limit. With this setting it is possible to set the maximum bath time the end user can request.<br />
Range of setting is 1 min – 12 hours. Attn.! In private use the maximum time is 6 hours.<br />
• Standby Bath Time Limit. With this setting it is possible to set the maximum standby bath time the end user<br />
can request. Range of setting is 1 min – 12 hours<br />
• Temperature Limit. With this setting it is possible to set the maximum temperature the end user can request.<br />
Range of setting is 20 – 110°C (68-230°F)<br />
• Filtered Temperature. With this setting it is possible to choose between a realtime (No) or a filtered (Yes)<br />
temperature display. The realtime display shows even the smallest temperature fluctuations in the display.<br />
The filtered display evens out the measured temperature thus giving a less “restless” display<br />
- Diagnostics<br />
• Relay Control. With this function individual relays can be operated, for example when troubleshooting the<br />
unit.<br />
• System Status. This function gives the system status such as temperature, runtime counter and soft- and<br />
hardware versions.<br />
• Heaternet Node List. This function shows the units that are connected to the system (control panel,<br />
heater,etc.)<br />
• Error Log. Faults and error situations are logged under this menu.<br />
- Factory Reset<br />
• This function resets the unit to its pre-installation state. The function is protected with a security code (421),<br />
which cannot be changed.<br />
17
<strong>Operating</strong> and installation instructions Fonda duo<br />
4. ROHS<br />
Ympäristönsuojeluun liittyviä ohjeita<br />
Tämän tuotteen käyttöiän päätyttyä sitä ei<br />
saa hävittää normaalin talousjätteen<br />
mukana, vaan se on toimitettava<br />
sähkö- ja elektroniikkalaitteiden kierrätykseen<br />
tarkoitettuun keräyspisteeseen.<br />
Symboli tuotteessa,<br />
käyttöohjeessa tai<br />
pakkauksessa tarkoittaa sitä.<br />
Valmistusaineet ovat kierrätettävissä merkintänsä<br />
mukaan. Käytettyjen laitteiden<br />
uudelleenkäytöllä, materiaalien hydöyntämisellä<br />
tai muulla uudelleenkäytöllä teet arvokkaan teon<br />
ympäristömme hyväksi.<br />
Tuote palautetaan ilman kiuaskiviä ja verhouskiviä<br />
kierrätyskeskukseen.<br />
Tietoa kierrätyspaikoista saat<br />
kuntasi palvelupisteestä.<br />
Instructions for environmental protection<br />
This product must not be disposed with<br />
normal household waste at the end of<br />
its life cycle. Instead, it should be<br />
delivered to a collecting place for the recycling<br />
of electrical and electronic devices.<br />
The symbol on the product, the<br />
instruction manual or the<br />
package refers to this.<br />
The materials can be recycled according to the<br />
markings on them. By reusing, utilising the<br />
materials or by otherwise reusing<br />
old equipment, you make an important<br />
contribution for the protection of our environment.<br />
Please note that the product is returned to the<br />
recycling centre without any sauna rocks and<br />
soapstone cover.<br />
Please contact the municipal administration<br />
with enquiries concerning the recycling place.<br />
Anvisningar för miljöskydd<br />
Denna produkt får inte kastas med<br />
vanliga hushållssopor när den<br />
inte längre används. Istället ska den<br />
levereras till en återvinningsplats<br />
för elektriska och elektroniska apparater.<br />
Symbolen på produkten,<br />
handboken eller<br />
förpackningen refererar till detta.<br />
De olika materialen kan återvinnas enligt<br />
märkningen på dem. Genom att återanvända,<br />
nyttja materialen eller på annat sätt återanvända<br />
utsliten utrustning, bidrar du till att skydda vår<br />
miljö.<br />
Produkten returneras till återvinningscentralen<br />
utan bastusten och eventuell täljstensmantel.<br />
Vänligen kontakta de kommunala myndigheterna<br />
för att ta reda på var du hittar närmaste<br />
återvinningsplats.<br />
Hinweise zum Umweltschutz<br />
Dieses Produkt darf am Ende seiner Lebens-<br />
Dauer nicht über den normalen Haushaltsabfall<br />
Entsorgt werden, sondern muss an einem<br />
Sammelpunkt für das Recycling von elektrischen<br />
und elektronischen Geräten abgegeben werden.<br />
Das Symbol auf dem produkt, der<br />
Gebrauchsanleitung oder der<br />
Verpackung weist darauf hin.<br />
Die Werkstoffe sind gemäß ihrer Kennzeichnung<br />
wiederverwertbar, Mit der Wiederverwendung,<br />
der stofflichen Verwertung oder anderen Formen<br />
der Verwertung von Altgeräten leisten Sie einen<br />
wichtigen Beitrag zum Schutze unserer Umwelt.<br />
Dieses Produkt soll ohne Steine und<br />
Specksteinmantel an dem Sammelpunkt für<br />
Recycling zurückgebracht werden.<br />
Bitte erfragen Sie bei der Gemeindeverwaltung<br />
die zuständige Entsorgungsstelle.<br />
18