
Create successful ePaper yourself
Turn your PDF publications into a flip-book with our unique Google optimized e-Paper software.
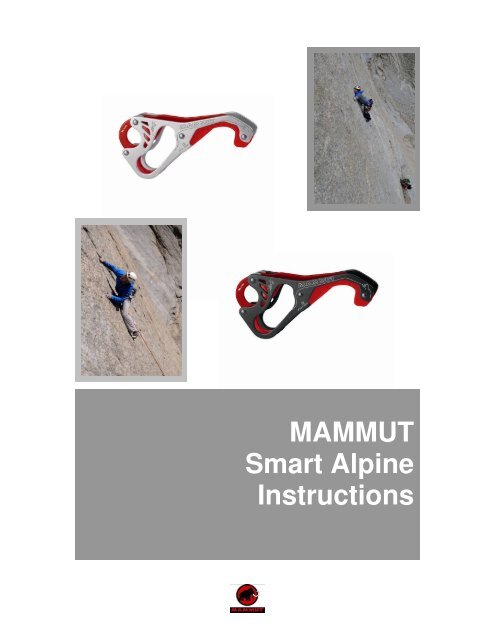
MAMMUT <strong>Smart</strong> <strong>Alpine</strong> <strong>Instructions</strong><br />
1<br />
MAMMUT<br />
<strong>Smart</strong> <strong>Alpine</strong><br />
<strong>Instructions</strong>
MAMMUT <strong>Smart</strong> <strong>Alpine</strong> <strong>Instructions</strong><br />
2<br />
<strong>Mammut</strong> know-how<br />
<strong>Mammut</strong> is a world-leading all-around<br />
supplier of mountain sports equipment.<br />
From recreational climbers to extreme<br />
mountaineers, from competitive climbers<br />
to big wall experts – wherever they are in<br />
the world, they all put their trust in the<br />
know-how of <strong>Mammut</strong>s product<br />
designers and our intensive process of<br />
testing both in the lab and in the field.<br />
The <strong>Smart</strong> <strong>Alpine</strong> is one example of our<br />
unwillingness to compromise on quality<br />
of mountain sports equipment we<br />
manufacture. We are not satisfied until<br />
our customers are.<br />
However, our philosophy of customer<br />
satisfaction goes beyond the simple<br />
desire to manufacture the best possible<br />
products. For us, it is just as important to<br />
provide information about how to use our<br />
products correctly. That's why we've<br />
created this booklet. It contains tips on<br />
how to use the <strong>Smart</strong> <strong>Alpine</strong> belay<br />
device correctly. We try to explain the<br />
highly technical features in easily<br />
understandable language.<br />
Your <strong>Mammut</strong> Team.
MAMMUT <strong>Smart</strong> <strong>Alpine</strong> <strong>Instructions</strong><br />
3<br />
How to use the <strong>Smart</strong> <strong>Alpine</strong> belay device<br />
The <strong>Mammut</strong> <strong>Smart</strong> <strong>Alpine</strong> is the first belay device with braking force support that<br />
can be used with twin and half ropes as well as single ropes. By “braking force<br />
support” we mean that in a fall the device exerts most of the braking action itself,<br />
virtually locking the device. The shape and geometry of the <strong>Smart</strong> <strong>Alpine</strong> provides<br />
dynamic braking of the rope in order to minimize impact on the fallen climber and the<br />
equipment, so the belayer only needs to apply a small amount of force to lock the<br />
rope completely in the belay device. For the lead climber these features are<br />
particularly useful in alpine environments, allowing falls to be held dynamically yet<br />
safely. The <strong>Smart</strong> <strong>Alpine</strong> can also be used to independently belay one or two second<br />
climbers from the belay anchor. After you have reached the summit, the <strong>Smart</strong> <strong>Alpine</strong><br />
is also ideal for abseiling /rappelling.<br />
Certain aspects of handling are described below. If you follow the instructions you<br />
can be sure that you are using the <strong>Smart</strong> <strong>Alpine</strong> correctly:<br />
<strong>Smart</strong> <strong>Alpine</strong> and rope diameters<br />
The <strong>Smart</strong> <strong>Alpine</strong> is available in two versions: the <strong>Smart</strong> <strong>Alpine</strong> 7.5 – 9.5 (silver) and<br />
the <strong>Smart</strong> <strong>Alpine</strong> 8.9 – 10.5 (black).<br />
Why are there two versions?<br />
New climbing ropes are being developed all the time, with advanced technologies<br />
allowing thinner and thinner – and therefore lighter – ropes. These days, rope<br />
diameters commonly range from 7.5 mm diameter twin ropes (each strand) to 10.5<br />
mm single ropes.<br />
During the development of the <strong>Smart</strong> <strong>Alpine</strong>, it was obvious that no single belay<br />
device could handle the wide range of rope diameters – from 7.5 mm to 10.5 mm –<br />
while offering the same high level of protection. That is why the <strong>Smart</strong> <strong>Alpine</strong> is<br />
available in two versions, one for ropes of 7.5 mm – 9.5 mm diameter and one for<br />
ropes of 8.9 mm – 10.5 mm. For clarity the compatible rope diameters are included in<br />
the product name and are also clearly printed on the belay device itself:
MAMMUT <strong>Smart</strong> <strong>Alpine</strong> <strong>Instructions</strong><br />
4<br />
Which version is best for what purpose?<br />
<strong>Alpine</strong> climbers often use Half or Twin ropes. Half ropes and Twin ropes usually<br />
have a diameter in the range of 7.5 mm (<strong>Mammut</strong> Twilight twin rope) to 8.5 mm<br />
(<strong>Mammut</strong> Genesis half rope).<br />
This means that the <strong>Smart</strong> <strong>Alpine</strong> 7.5 – 9.5 is suitable for all widely-used double<br />
ropes, and can also be used with thin single ropes. The <strong>Smart</strong> <strong>Alpine</strong> 7.5 – 9.5 is<br />
therefore the ideal choice for alpine climbing routes, ice climbers or challenging highaltitude<br />
tours - whenever double ropes are needed. The device can also be used with<br />
single ropes up to 9.5 mm in diameter for indoor and outdoor climbing walls.<br />
The <strong>Smart</strong> <strong>Alpine</strong> 8.9 – 10.5 is the best choice if you are climbing with a single<br />
rope (8.9 mm or larger diameter) and you plan to abseil / rappel back down the<br />
route. Examples include many alpine sport climbing routes as well as various sport<br />
and especially trad climbing areas in the USA.<br />
Can ropes with different diameters be used?<br />
In the situation described above (climbing with a single rope then abseiling /<br />
rappelling back down the route), climbers will often bring a much thinner second rope<br />
with them. The idea of the second rope is to allow a longer abseiling / rappelling<br />
distance than would be possible using a doubled single rope (which is often essential<br />
in alpine routes).<br />
However, the <strong>Smart</strong> <strong>Alpine</strong> is not suitable for use with different rope diameters,<br />
either in the 7.5 – 9.5 version or in the 8.9 – 10.5 version.<br />
Because the belayer only needs to apply a small amount of force to lock the rope<br />
completely in the belay device, using ropes of different diameters poses a real risk<br />
that the thicker rope will be locked, leaving the thinner rope to pass through the<br />
device. In this situation the climber is likely to fall – that is why our instructions so<br />
clearly state that the <strong>Smart</strong> <strong>Alpine</strong> should not be used with different rope diameters.<br />
To find out more about using the <strong>Smart</strong> <strong>Alpine</strong> for abseiling / rappelling, see<br />
"Abseiling / Rappelling" on page 18.
Belaying a lead climber<br />
MAMMUT <strong>Smart</strong> <strong>Alpine</strong> <strong>Instructions</strong><br />
5<br />
The <strong>Smart</strong> <strong>Alpine</strong> can be used to belay a lead climber using the single rope or double<br />
rope technique. The belay device is always operated and handled in the same way<br />
regardless of the type of rope, so the following description only peripherally mentions<br />
twin or half ropes. Steps 1 to 4 are identical if you are using single or double ropes.
MAMMUT <strong>Smart</strong> <strong>Alpine</strong> <strong>Instructions</strong><br />
6<br />
1 Threading the rope/basic position<br />
The two rope strands are threaded into the safety device as shown in the diagrams<br />
on the device itself.<br />
The rope leading to the climber passes up and out of the curved opening of the<br />
<strong>Smart</strong> <strong>Alpine</strong>:<br />
The brake line passes forwards out of the curved opening, over the bar/handle of the<br />
<strong>Smart</strong> <strong>Alpine</strong>:<br />
A symmetrical locking carabiner (e.g. <strong>Mammut</strong> Element<br />
<strong>Smart</strong> HMS) is then placed through the curved opening of<br />
the <strong>Smart</strong> <strong>Alpine</strong> and also through the two strands of the<br />
double rope.<br />
In the basic position, the braking hand (the left hand in<br />
figure 1) is always below the belay device, grasping the<br />
brake line. The guide hand (the right hand in figure 1) feeds<br />
the rope to the climber, so it is above the <strong>Smart</strong> <strong>Alpine</strong>.<br />
Can I remove the braking hand from the brake line and<br />
rely on the braking effect of the safety device?<br />
It is true that the <strong>Smart</strong> <strong>Alpine</strong> is designed to exert an<br />
enormous braking effect on the rope, virtually locking it –<br />
however, you must always keep the braking hand on the<br />
brake line. This is because the braking effect of the <strong>Smart</strong><br />
<strong>Alpine</strong> depends on two important factors: the carabiner and
MAMMUT <strong>Smart</strong> <strong>Alpine</strong> <strong>Instructions</strong><br />
7<br />
the rope. If the wrong combination of carabiner and rope is used, the braking effect is<br />
much lower, and the rope will continue to pass through the device. This is why the<br />
braking hand must always grasp the brake line, allowing the rope to be locked if<br />
necessary with a small amount of force.<br />
2 Paying out rope when belaying<br />
To pay out rope for the lead climber place the thumb of the braking hand under the<br />
nose at the end of the bar/handle of the <strong>Smart</strong> <strong>Alpine</strong>. Now, with your thumb under<br />
the nose, pull the device away from your body horizontally. From this position, you<br />
can quickly and precisely pay out rope by loosening your grip of the brake line and<br />
pulling the rope through the device with the guide hand.<br />
While paying out rope, do not move the <strong>Smart</strong> <strong>Alpine</strong><br />
vertically upwards as this movement is similar to the action<br />
that cancels the braking effect.<br />
What happens if the lead climber falls while you are<br />
paying out rope?<br />
You cannot pay out any rope unless you pull the <strong>Smart</strong><br />
<strong>Alpine</strong> away from your body horizontally. If you do not do<br />
this, the rope will be locked when you attempt to pay it out.<br />
If the lead climber falls just as you are paying out rope, you<br />
quickly discover one of the main advantages of the <strong>Smart</strong><br />
<strong>Alpine</strong> compared to other belay devices: the way the <strong>Smart</strong><br />
<strong>Alpine</strong> works corresponds to the natural reflexes of the<br />
human body. If the lead climber falls, the braking hand<br />
automatically moves down toward the body as a reflex –<br />
precisely the position in which the belayer can lock the rope<br />
in the device with just a small amount of force. In other<br />
words, a reflex movement holds the fall. The <strong>Smart</strong> <strong>Alpine</strong> brakes the fall<br />
dynamically, meaning that a small amount of rope slips through the device – gently<br />
braking the fall before the rope is finally locked in the device. This lowers the impact<br />
on the fallen climber and the equipment.
3 Taking in rope when belaying<br />
MAMMUT <strong>Smart</strong> <strong>Alpine</strong> <strong>Instructions</strong><br />
8<br />
If you need to take in rope after paying it out (for example<br />
after the lead climber has attached an intermediate belay),<br />
pull rope with the guide hand leading to the climber. At the<br />
same time, briefly move the braking hand up and pull the<br />
brake line through the device. Immediately return the<br />
braking hand, now loosely encircling the brake line, to the<br />
basic position underneath the device. If the lead climber<br />
falls at this moment, you can immediately use the braking<br />
hand encircling the brake line to brake and then lock the<br />
rope.<br />
How can I lock the rope at the request of the lead<br />
climber?<br />
The lead climber often clips to an intermediate belay for a<br />
rest in order to gather strength and prepare for difficult<br />
sections. The lead climber gives the belayer a climbing<br />
command (agreed in advance) like "lock" or "take" to<br />
indicate that he wants the belayer to lock the rope in this position.<br />
The belayer must react quickly to the command and quickly take in rope once or<br />
twice as described above. It is then extremely important to immediately move the<br />
braking hand back down to the basic position underneath the device, where it<br />
stabilises the brake line and pulls it down – this locks the rope in the <strong>Smart</strong> <strong>Alpine</strong>.<br />
Alternatively the belayer can take a couple of steps backwards to take the slack out<br />
of the rope, keeping the braking hand in the basic position underneath the device<br />
throughout.<br />
You must always keep the braking hand on the brake line even when the lead<br />
climber is suspended from the locked rope. As mentioned above, the wrong<br />
combination of carabiner and rope may prevent the <strong>Smart</strong> <strong>Alpine</strong> from fully locking<br />
the rope if you let go with the braking hand. The rope might start passing through the<br />
device, but since the rope is still heavily braked by the device it will only slip slowly.<br />
However, if you keep the braking hand on the rope and apply a small amount of<br />
force, the <strong>Smart</strong> <strong>Alpine</strong> will always lock the rope completely.
MAMMUT <strong>Smart</strong> <strong>Alpine</strong> <strong>Instructions</strong><br />
9<br />
4 Lowering the climber when belaying<br />
When lowering a climber, always grasp the brake line with<br />
both hands. Place the thumb of the guide hand under the<br />
nose of the <strong>Smart</strong> <strong>Alpine</strong> and pull the device up towards the<br />
horizontal to cancel the braking effect. Now loosen your grip<br />
of the brake line and let the rope pass through the <strong>Smart</strong><br />
<strong>Alpine</strong> in a controlled way.<br />
How can I control the lowering speed?<br />
The easiest way to control the lowering speed is to adjust<br />
the amount of pressure you apply to the brake line.<br />
With a little practice, you can also control the speed by<br />
changing the position of the device – the closer to the<br />
horizontal you raise the device, the faster you lower the<br />
climber. To slow down again, lower the device – in other<br />
words move it so it points down more.<br />
Unless the <strong>Smart</strong> <strong>Alpine</strong> is raised to the horizontal, the<br />
device will almost completely lock the rope. In fact, with the<br />
right combination of rope and carabiner, the device will lock<br />
the rope completely. Even so, you must always keep the braking hand on the brake<br />
line while lowering so you can react quickly and lock the rope if you need to.<br />
Belaying one or two second climbers from the belay<br />
anchor<br />
In alpine climbing, the second climber(s) are often belayed from the belay anchor. In<br />
a two-man rope team, a half rope, a twin rope or (in alpine sport climbing) a single<br />
rope can be used. In a three-man rope team however, you must use a half rope<br />
because both second climbers are each belayed to one strand.<br />
When the <strong>Smart</strong> <strong>Alpine</strong> is used to belay second climbers, it works in self-locking<br />
mode. This means that the rope is completely locked if the second climber falls, with<br />
no additional force needed from the belayer. But the braking hand rule applies here<br />
too: the braking hand must always be left on the brake line. If the second climber<br />
starts climbing again, the locking function automatically disengages. If a second<br />
climber falls from an overhang and is left suspended too far away from the wall to<br />
reach it, there are two ways you can override the locking function of the <strong>Smart</strong> <strong>Alpine</strong><br />
and lower the second climber back down.
MAMMUT <strong>Smart</strong> <strong>Alpine</strong> <strong>Instructions</strong><br />
10<br />
In a three-man rope team, the two second climbers usually climb at the same time,<br />
one slightly ahead of the other. If one of them falls, his rope is locked automatically. It<br />
is still possible to continue belaying the other second climber as normal. If he falls<br />
too, his rope is also reliably locked. This makes it easy for the two second climbers to<br />
switch – one of them can rest while suspended on the rope, while the other continues<br />
climbing until he wants to rest too. The lower climber can then start climbing again,<br />
belayed from the belay anchor / stance.
MAMMUT <strong>Smart</strong> <strong>Alpine</strong> <strong>Instructions</strong><br />
11<br />
5 Belaying one or two second climbers from the belay anchor /<br />
stance<br />
After the lead climber has set up the belay anchor and<br />
made himself secure, he can start setting up the belay for<br />
second climbers. This involves clipping a locking<br />
carabiner to the central point of the belay anchor. Then<br />
fix the <strong>Smart</strong> <strong>Alpine</strong> to the carabiner through the red<br />
suspension loop and lock the carabiner.<br />
If possible, the <strong>Smart</strong> <strong>Alpine</strong> should hang loose, without touching the rock face.<br />
Next, thread the rope strands from above all the way through the curved<br />
opening of the <strong>Smart</strong> <strong>Alpine</strong> and clip a locking carabiner through both strands<br />
outside the curved opening:<br />
The strands leading to the second climber(s) must be above the strands leading<br />
to the braking hand.<br />
Now pull the two strands with the braking hand until there is no slack to the second<br />
climbers. A climbing command (agreed in advance) like "climb when ready" is given,<br />
and the second climbers can unclip and start climbing. The belayer constantly takes<br />
in rope with the braking hand, according to the different paces of the second<br />
climbers, feeding through one strand and then the other. There should never be any<br />
slack between the belay anchor and the second climbers.
MAMMUT <strong>Smart</strong> <strong>Alpine</strong> <strong>Instructions</strong><br />
12<br />
What happens if the braking carabiner is clipped inside the curved opening<br />
rather than outside it?<br />
There are no immediate safety consequences if the braking carabiner is incorrectly<br />
clipped through the two rope strands within the curved opening instead of outside the<br />
<strong>Smart</strong> <strong>Alpine</strong> as described above – the rope will still be locked in the device if it is<br />
placed under load by the second climber. However, it will be much more difficult (or<br />
even impossible with thicker ropes) to take in the braking rope if the braking<br />
carabiner is in the wrong position, because when the belayer takes in rope, it is<br />
locked in the device. As a result, the belayer should quickly notice when taking up the<br />
initial slack (with the second climbers still secured) that he has set up the belay<br />
incorrectly. This gives the belayer the opportunity to put things right and clip the<br />
braking carabiner correctly through both rope strands outside the curved opening.<br />
What happens if the rope is threaded through the <strong>Smart</strong> <strong>Alpine</strong> the wrong way<br />
around?<br />
If the rope is threaded through the curved opening of the <strong>Smart</strong> <strong>Alpine</strong> the wrong way<br />
around – i.e. the rope leading to the second climbers is underneath the brake line –<br />
this is a clear case of incorrect use with dangerous consequences. If the second<br />
climber(s) fall, the <strong>Smart</strong> <strong>Alpine</strong> would not provide any braking effect, and the rope<br />
would simply pass through the device without braking. For this reason, the belayer<br />
must ensure that the two rope strands are correctly arranged when setting up<br />
the belay for second climbers. The images on the device are there to help you<br />
avoid mistakes like this:<br />
On both sides of the <strong>Smart</strong> <strong>Alpine</strong> there are diagrams<br />
intended to make the device easier to use correctly. The<br />
diagrams on the right side (looking from above) show<br />
how to correctly set up a belay for the lead climber, and<br />
those on the left side show how to set up a belay for<br />
second climbers. The diagrams for second climbers<br />
appear the right way around when the <strong>Smart</strong> <strong>Alpine</strong> is<br />
installed at the belay anchor – with the red loop on top.<br />
The belayer can see that the rope strands leading to the<br />
second climbers must be on top (climber symbol). The<br />
strands leading to the braking hand are underneath<br />
(braking hand symbol). A carabiner is also shown with<br />
an arrow, indicating that the braking carabiner must be<br />
clipped through both rope strands outside the curved<br />
opening.
MAMMUT <strong>Smart</strong> <strong>Alpine</strong> <strong>Instructions</strong><br />
13<br />
What happens if one or both second climbers fall?<br />
If one or both second climbers fall, the <strong>Smart</strong> <strong>Alpine</strong> automatically locks the relevant<br />
rope strand – this means the belayer is not required to react or apply any force in<br />
order to hold the fall. But the braking hand rule applies: the braking hand must be left<br />
on the brake line.<br />
If just one of the two second climbers falls, only his rope is locked. The belayer can<br />
continue to belay the second climber as normal. It is also easy to switch from one<br />
second climber to the other while taking in the rope, allowing one of them to rest<br />
while supported by the rope while you continue belaying the other.<br />
How do I disengage the self-locking feature when belaying second climbers?<br />
If the second climber is still in contact with the rock face and is able to take the load<br />
off the rope, the self-locking feature can be disengaged easily. As soon as the<br />
second climber takes the tension off the rope by resuming the climbing position on<br />
the rock face, the self-locking feature disengages automatically and the belayer can<br />
continue taking in rope. If the tension during the fall causes the rope to cross over in<br />
the belay device, it will have to be rearranged so it passes through the device<br />
correctly. To do this, the belayer pulls up sharply on the rope (which is now<br />
underneath).<br />
If the second climber cannot reach the rock face after a fall (e.g. a hanging fall from<br />
an overhang), there are two ways to override the self-locking feature. The two<br />
methods are described below.<br />
6 Disengaging the self-locking feature when belaying second<br />
climbers: Method 1<br />
The first way you can override self-locking is to use your<br />
free guide hand to lift up the <strong>Smart</strong> <strong>Alpine</strong>. Place the guide<br />
hand underneath the bar/handle of the <strong>Smart</strong> <strong>Alpine</strong> and<br />
push it up towards a horizontal position. It is essential to<br />
keep the braking hand on the brake line. As the <strong>Smart</strong><br />
<strong>Alpine</strong> approaches the horizontal position, the locking<br />
mechanism disengages and you can use the braking hand<br />
to let out rope in a controlled way.<br />
This method sometimes requires you to use a great deal of<br />
force. The belayer must be very strong in order to lift up the<br />
<strong>Smart</strong> <strong>Alpine</strong> far enough to disengage the locking<br />
mechanism – the braking hand rule means that there is only<br />
one hand free to perform the action.<br />
How can I control the lowering speed in method 1?<br />
When the <strong>Smart</strong> <strong>Alpine</strong> is raised to the horizontal position<br />
and the locking mechanism is disengaged, you can control<br />
the lowering speed with the braking hand. To slow down, reduce the upwards<br />
pressure on the bar/handle of the <strong>Smart</strong> <strong>Alpine</strong> so it moves down towards the original
MAMMUT <strong>Smart</strong> <strong>Alpine</strong> <strong>Instructions</strong><br />
14<br />
vertical position. This causes the braking mechanism to start re-engaging and finally<br />
lock completely once you remove all upwards pressure on the bar/handle of the<br />
<strong>Smart</strong> <strong>Alpine</strong>.<br />
7 Disengaging the self-locking feature when belaying second<br />
climbers: Method 2<br />
A slightly more elaborate way of disengaging the selflocking<br />
feature when belaying second climbers involves<br />
setting up a lifting arrangement. However, the big<br />
advantage of this method is that it requires much less force,<br />
so it can be used with any combination of belayer/climber.<br />
To set up the lifting arrangement, you will need to use<br />
another anchor or intermediate belay higher up than the<br />
position where the <strong>Smart</strong> <strong>Alpine</strong> is fixed to the belay<br />
anchor. Clip a locking carabiner to the higher anchor.<br />
Securely tie a cord to the small hole in the bar/handle of the<br />
<strong>Smart</strong> <strong>Alpine</strong>:<br />
Thread the cord through the carabiner and attach a<br />
webbing sling to the other end and redirect this through the<br />
higher carabiner. Put your foot in the webbing sling and press lightly to raise the<br />
<strong>Smart</strong> <strong>Alpine</strong> to the horizontal position via the carabiner arrangement. Make sure you<br />
follow the braking hand rule and never remove the braking hand from the rope. As<br />
the <strong>Smart</strong> <strong>Alpine</strong> approaches the horizontal position, the self-locking feature is<br />
disengaged, and you can use the braking hand on the brake line to lower the second<br />
climber in a controlled way.<br />
How can I control the lowering speed in method 2?<br />
As with method 1 you can control the lowering speed simply by grasping the brake<br />
line. However, with a little practice you can also control the lowering speed by<br />
changing the pressure applied to the webbing sling. The harder you press down with<br />
your foot, the closer the <strong>Smart</strong> <strong>Alpine</strong> gets to the horizontal position, and the faster<br />
the second climber is lowered. As you apply less pressure, the <strong>Smart</strong> <strong>Alpine</strong> returns<br />
to its original vertical position, starts to apply a braking force, and finally locks<br />
completely if you take your foot away.
MAMMUT <strong>Smart</strong> <strong>Alpine</strong> <strong>Instructions</strong><br />
15<br />
Changing from belaying a second climber to belaying a<br />
lead climber and abseiling / rappelling<br />
In alpine climbing, the role of lead climber often alternates between team members<br />
as the climb progresses. In other words, the lead climber reaches the belay anchor,<br />
from where he belays the second climber(s). When the second climber(s) reach the<br />
belay anchor, one of them becomes the lead climber and climbs the next pitch. For<br />
the belayer, this means switching from belaying the second climber to belaying the<br />
lead climber. When belaying a lead climber it is recommended to only attach the<br />
<strong>Smart</strong> <strong>Alpine</strong> to the climbing harness as described in point 1.
MAMMUT <strong>Smart</strong> <strong>Alpine</strong> <strong>Instructions</strong><br />
16<br />
8 Switching from belaying a second climber to belaying a lead<br />
climber<br />
When the second climber(s) have reached the belay anchor and made themselves<br />
safe, the belayer can unclip the <strong>Smart</strong> <strong>Alpine</strong> from the belay anchor. The rope<br />
should remain in the device (see figure 8a):<br />
Now remove the carabiner passing through both rope strands outside the<br />
device, leaving the rope in exactly the same position (figure 8b):
MAMMUT <strong>Smart</strong> <strong>Alpine</strong> <strong>Instructions</strong><br />
17<br />
Now clip the same carabiner on again, this time through the curved opening of<br />
the <strong>Smart</strong> <strong>Alpine</strong> and therefore automatically also through both rope strands<br />
(figure 8c):<br />
If you now clip this carabiner to the belay loop of the climbing harness, the basic<br />
position (see point 1) is restored (figure 8d and figure 1):<br />
The lead climber can now be belayed as described in steps 1 to 4 above.<br />
Can the <strong>Smart</strong> <strong>Alpine</strong> be used at the belay anchor to belay the lead climber?<br />
You are advised against clipping the <strong>Smart</strong> <strong>Alpine</strong> directly to the belay anchor to<br />
belay a lead climber. There are certain requirements needed to allow this to happen<br />
(anchors in the optimum positions, the <strong>Smart</strong> <strong>Alpine</strong> must move freely without<br />
touching the rock), that in the real world would rarely be met. In addition, when<br />
belaying is carried out via the belay station, the safety chain loses much of its<br />
dynamism – meaning that a lead climber can only be held statically if he falls, which<br />
puts more impact on the climber and the equipment. This is a major drawback
MAMMUT <strong>Smart</strong> <strong>Alpine</strong> <strong>Instructions</strong><br />
18<br />
compared to belaying from your harness, and negates the important dynamic braking<br />
feature of the <strong>Smart</strong> <strong>Alpine</strong>.<br />
9 Abseiling / Rappelling<br />
To use the <strong>Smart</strong> <strong>Alpine</strong> for abseiling / rappelling, insert<br />
both rope strands into the device in the same way as<br />
for the basic position (see figure 1). The carabiner can be<br />
clipped to a webbing sling to extend the belay loop on the<br />
climbing harness.<br />
For extra safety while abseiling / rappelling, use a prusik<br />
sling: the sling is attached to the rope using a prusik knot,<br />
and clipped to a leg loop of the climbing harness using a<br />
carabiner. The protection at the belay anchor can now be<br />
unclipped. Take hold of the rope around the prusik knot and<br />
pull it down as you abseil / rappel. With the other hand,<br />
push the bar/handle of the <strong>Smart</strong> <strong>Alpine</strong> upwards,<br />
which reduces the braking force until the rope starts to pass<br />
through the device allowing the climber to abseil / rappel<br />
down. You can control your abseiling / rappelling speed by<br />
varying the amount of upwards force you apply to the<br />
<strong>Smart</strong> <strong>Alpine</strong>.<br />
Another abseiling / rappelling method involves using the <strong>Smart</strong> <strong>Alpine</strong> in almost<br />
the same way as a tube-style belay device:<br />
Feed the rope through the <strong>Smart</strong> <strong>Alpine</strong> as shown in this<br />
diagram: the brake line is arranged so it comes out of the<br />
curved opening of the <strong>Smart</strong> <strong>Alpine</strong> from the rear (and not<br />
over the bar/handle of the device – the opposite of the first<br />
abseiling method described above). Clip the carabiner to<br />
the tie-in loop of the climbing harness so that the bar/handle<br />
of the <strong>Smart</strong> <strong>Alpine</strong> points towards the climber's body. You<br />
can now abseil / rappel with both hands around the brake<br />
line.<br />
Note that when using this method, the braking effect of the<br />
<strong>Smart</strong> <strong>Alpine</strong> is much lower than the first method. As with<br />
the first method it is essential in this method to use a<br />
prusik sling for extra safety. You also need to grasp the brake line very hard in<br />
order to control the abseiling speed.<br />
Is the prusik sling really necessary, bearing in mind the strong braking effect of<br />
the <strong>Smart</strong> <strong>Alpine</strong>?<br />
If you are abseiling / rappelling with the <strong>Smart</strong> <strong>Alpine</strong> in combination with the right<br />
carabiner and rope, it is easy to believe that the device is self-locking – so the added<br />
safety of the prusik sling might seem unnecessary. However, this added safety<br />
really is essential. The braking effect gradually falls, especially towards the end of<br />
the rope when the lower rope weight reduces any locking function applied by the
MAMMUT <strong>Smart</strong> <strong>Alpine</strong> <strong>Instructions</strong><br />
19<br />
<strong>Smart</strong> <strong>Alpine</strong>. For this reason, and also because the system is so dependent on the<br />
particular carabiner and rope used, the prusik sling is an indispensable safety<br />
enhancement.<br />
For further information about the correct use of the <strong>Smart</strong> <strong>Alpine</strong>, please consult the<br />
manufacturer's information included with every <strong>Smart</strong> <strong>Alpine</strong>. Please also visit<br />
www.mammut.ch/smartalpine, where you can watch a video explaining how to use<br />
the <strong>Smart</strong> <strong>Alpine</strong>.<br />
<strong>Mammut</strong><br />
<strong>Mammut</strong> Sports Group AG<br />
Industriestrasse Birren<br />
P.O. Box<br />
5703 Seon<br />
Switzerland<br />
E-mail info@mammut.ch<br />
Internet www.mammut.ch<br />
©<strong>Mammut</strong>, Switzerland