common hand tools and their proper use - Dcfpnavymil.org
common hand tools and their proper use - Dcfpnavymil.org
common hand tools and their proper use - Dcfpnavymil.org

You also want an ePaper? Increase the reach of your titles
YUMPU automatically turns print PDFs into web optimized ePapers that Google loves.
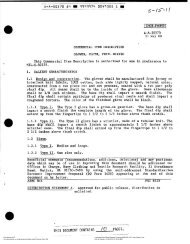
COMMON HAND TOOLS<br />
AND<br />
THEIR PROPER USE<br />
From Machine Shop Work<br />
by<br />
John T. Shuman<br />
Digitally reprinted by Shopdawg Publishing<br />
www.shopdawg.com<br />
©2006 Kevin Bohn, Shopdawg.com<br />
1
CONTENTS<br />
HAMMERS ................................... 3<br />
SCREW DRIVERS ...................... 4<br />
WRENCHES ................................. 6<br />
THE BENCH VISE ....................... 9<br />
THE HACK SAW .......................... 12<br />
2
COMMON HAND TOOLS<br />
Simultaneous <strong>use</strong> of <strong>h<strong>and</strong></strong> <strong>tools</strong> <strong>and</strong> machines.<br />
Machine shop work is usually understood to include all cold metal<br />
work in which a portion of the metal is removed, either by powerdriven<br />
or <strong>h<strong>and</strong></strong> <strong>tools</strong>, to make the piece of the required shape <strong>and</strong><br />
size. However, there are some branches of cold metal work, such<br />
as sheet-iron work <strong>and</strong> coppersmithing that are not usually included<br />
in machine shop work.<br />
As the <strong>h<strong>and</strong></strong>-operated <strong>tools</strong> are much simpler, <strong>and</strong> as the operations<br />
performed with them are in every case more typical, <strong>their</strong> description<br />
<strong>and</strong> <strong>use</strong> should precede that of power-driven <strong>tools</strong>. It should be<br />
clearly understood, however, that machine shop practice involves<br />
the <strong>use</strong> of both classes at the same time. Even <strong>h<strong>and</strong></strong> <strong>tools</strong> are not<br />
<strong>use</strong>d in the same order on different classes of work; it is, therefore,<br />
impossible to describe them in the order of <strong>use</strong>. Simplicity of construction<br />
<strong>and</strong> operation will be the guide for discussing the <strong>use</strong>s of<br />
various <strong>tools</strong>.<br />
HAMMERS<br />
Classification.<br />
The machinist <strong>use</strong>s hammers of three shapes: ball peen, cross peen,<br />
<strong>and</strong> straight peen, Fig. 1. The ball peen is the most <strong>common</strong>; it<br />
varies in weight from 4 ounces to 3 pounds. The cross peen <strong>and</strong><br />
straight peen hammers vary from 4 ounces to 2 pounds <strong>and</strong> are<br />
<strong>use</strong>d principally in riveting. Hammers are made from a good grade<br />
of tool steel, hardened, <strong>and</strong> drawn to a blue color at the eye <strong>and</strong> a<br />
dark straw on the face <strong>and</strong> peen. The eye is elliptical in shape, <strong>and</strong><br />
the <strong>h<strong>and</strong></strong>le is fastened by driving wedges, either wood or iron, into<br />
the end of the <strong>h<strong>and</strong></strong>le, thus spreading it to fill the eye. The <strong>h<strong>and</strong></strong>le<br />
is of hard wood, preferably hickory, <strong>and</strong> of a length suited to the<br />
weight of the hammerhead. When the <strong>h<strong>and</strong></strong>le is <strong>proper</strong>ly inserted,<br />
the axis of the head st<strong>and</strong>s at right angles to the axis of the <strong>h<strong>and</strong></strong>le.<br />
Soft Hammers.<br />
Soft hammers are <strong>use</strong>d for striking heavy blows where the steel<br />
3
hammer would bruise the metal or mar the surface. They are made<br />
of rawhide, copper, or Babbitt metal, <strong>and</strong> vary in weight from 6<br />
ounces to 6 pounds. They are subject to rapid wear, but are indispensable<br />
in setting up <strong>and</strong> taking down machinery.<br />
How To Use Hammers<br />
1. Make sure the head is fastened securely. If the <strong>h<strong>and</strong></strong>le is loose,<br />
drive the wedge farther into the <strong>h<strong>and</strong></strong>le. A loose hammer head is<br />
dangerous.<br />
2. Grasp the hammer firmly near the end of the <strong>h<strong>and</strong></strong>le.<br />
3. Start all work with light blows to get it started <strong>proper</strong>ly.<br />
Screw Drivers<br />
On tool work of various kinds flat head <strong>and</strong> fillister head screws<br />
<strong>and</strong> set screws are <strong>use</strong>d. Therefore it is necessary for the toolmaker<br />
to have one or more screw drivers to drive these screws or to remove<br />
them.<br />
Screw drivers are made with blades of various widths, in lengths<br />
suited to special purposes. Fig. 2 shows a regular type screw driver.<br />
The blade section is made of f<strong>org</strong>ed carbon tool steel, heat treated<br />
to give the hardness <strong>and</strong> toughness needed to withst<strong>and</strong> the twisting<br />
motion employed in driving a screw. Wooden <strong>h<strong>and</strong></strong>les are<br />
fastened to the blades with rivets.<br />
The stubby ball-<strong>h<strong>and</strong></strong>le screw driver is <strong>use</strong>d on jobs where there is<br />
little clearance. The <strong>h<strong>and</strong></strong>le is designed to fit the palm of the <strong>h<strong>and</strong></strong><br />
<strong>and</strong> to give a firm grip. With this type of screw driver it is possible<br />
to <strong>h<strong>and</strong></strong>le large size screws.<br />
4
Sometimes it is necessary to make up special screw drivers for<br />
driving the largest size screws. For this purpose a piece of drill rod<br />
is <strong>use</strong>d. The blade section is f<strong>org</strong>ed to the <strong>proper</strong> width, ground<br />
to the approximate size, then heat treated. Often a square or flat is<br />
milled on the shank so a wrench can be <strong>use</strong>d for added leverage. In<br />
some cases a hole is drilled through the shank so that a steel pin or<br />
bar can be inserted to provide leverage.<br />
Offset Screw Drivers<br />
This screw driver, Fig. 3, is made so that screws can be tightened<br />
or removed in places that would be inaccessible to the ordinary<br />
type of screw driver. Four blades cover eight different positions of<br />
the screw slot. A turn of only 1/8 inch is required for operation.<br />
How To Use Screw Drivers<br />
1. See that the tip of the screw driver is in good condition, the bottom<br />
squared, <strong>and</strong> the sides straight, as shown in Figs. 4 <strong>and</strong> 5.<br />
2. With the right <strong>h<strong>and</strong></strong>, grasp the <strong>h<strong>and</strong></strong>le. With the left <strong>h<strong>and</strong></strong>, guide<br />
the tip into the screw slot, as shown in Fig. 6.<br />
3. Tightening large screws. Use a square-shanked screw driver, <strong>and</strong><br />
with a wrench that fits the square shank, turn the screw driver. See<br />
Fig. 7. Pressure must be kept on the <strong>h<strong>and</strong></strong>le to keep the tip in the<br />
slot.<br />
5
4. Do not strike the <strong>h<strong>and</strong></strong>le of the screw driver with a hard object.<br />
This will split the <strong>h<strong>and</strong></strong>le.<br />
5. Do not <strong>use</strong> your screw driver as a wedge, or chisel.<br />
6. Be sure that the screw driver fits the screw slot.<br />
Questions<br />
1. Why should a screw driver blade have parallel sides?<br />
2. Why are screw driver blades made from carbon tool steel?<br />
3. Why are the larger sizes of screw drivers frequently made with<br />
square blades?<br />
4. How is a screw driver blade hardened? Why?<br />
5. What is an offset screw driver?<br />
6. How should a screw driver be held?<br />
7. Why is it necessary to exert two different forces when using a<br />
screw driver, namely, turning force <strong>and</strong> a holding or pushing force?<br />
8. What method can be <strong>use</strong>d to make the tightening of large screws<br />
easier?<br />
9. What might happen if the screw driver jumps out of the screw<br />
slot?<br />
10. What might ca<strong>use</strong> a screw driver to jump from the screw slot?<br />
Wrenches<br />
Many different types of wrenches are made for turning nuts, bolts,<br />
pipes, etc. They usually derive <strong>their</strong> names from characteristic<br />
shapes as S wrench, angle wrench; from the object they are <strong>use</strong>d<br />
to turn, as pipe wrench, tap wrench; or from <strong>their</strong> construction, as<br />
spanner wrench. See Fig. 8.<br />
6
Whenever the correct sizes are available, the open <strong>and</strong> closed end<br />
types of wrenches are to be preferred to the adjustable wrenches.<br />
Since the wrench is a lever the mechanical advantage or the leverage<br />
secured is in proportion to the length of the <strong>h<strong>and</strong></strong>le. Usually,<br />
the <strong>h<strong>and</strong></strong>le of a solid wrench is made so that it will give all the leverage<br />
the part to be turned will probably st<strong>and</strong>. This is not so with<br />
an adjustable wrench. Hence, when a large adjustable or monkey<br />
wrench is <strong>use</strong>d on a small nut or bolt, the part may be broken easily<br />
unless <strong>proper</strong> judgment is exercised.<br />
How To Use Open And Closed End Type~wrenches<br />
1. The wrench should fit closely, Fig. 9. A loose fitting wrench<br />
will round the corners of the bolt <strong>and</strong> slip badly, resulting in <strong>h<strong>and</strong></strong><br />
injuries.<br />
2. A quick jerk, when tightening a bolt, or a blow with the ball of<br />
the <strong>h<strong>and</strong></strong> when loosening a nut or bolt, Fig. 10, is often more effective<br />
than a steady pull.<br />
8
3. When doing heavy work <strong>and</strong> you are sure that the bolt <strong>and</strong> the<br />
wrench will st<strong>and</strong> the strain, you can secure greater leverage by<br />
putting a piece of pipe over the wrench <strong>h<strong>and</strong></strong>le, as shown in Fig.<br />
11. Good judgment must be <strong>use</strong>d when this is done.<br />
How To Use Adjustable Wrenches<br />
1. Place the wrench on the bolt to be turned. Be sure jaws are<br />
pointed in<br />
the direction in which the work is to be turned.<br />
2. Adjust the jaws until they fit the part tightly, as shown in Fig. 12.<br />
Questions<br />
1. Is a wrench a lever?<br />
2. Why are wrench <strong>h<strong>and</strong></strong>les made rather short?<br />
3. Why are open-end <strong>and</strong> closed-end wrenches to be preferred to<br />
adjustable wrenches?<br />
4. In which direction should force be applied to the monkey<br />
wrench?<br />
5. Should a large monkey wrench be <strong>use</strong>d to turn small parts?<br />
Why?<br />
6. Is a push or a blow more effective in loosening a tight nut?<br />
7. How can more leverage be secured on a particular wrench?<br />
8. Why should a monkey wrench usually not be <strong>use</strong>d around any<br />
precision or production machinery?<br />
The Bench Vise<br />
In order that work may be held rigidly for the performance of <strong>h<strong>and</strong></strong><br />
operations, the machinist <strong>use</strong>s what is termed a vise. Vises are<br />
made in a great variety of forms <strong>and</strong> sizes, but all consist essentially<br />
of a fixed jaw, a movable jaw, a screw, a nut fastened to the<br />
fixed jaw, <strong>and</strong> a <strong>h<strong>and</strong></strong>le by which the screw is turned in the nut to<br />
bring the movable jaw into position. The sectional view, Fig. 13,<br />
shows these parts clearly <strong>and</strong> also a device, present in some form<br />
in all vises, by which the movable jaw is separated from the fixed<br />
jaw when the screw is backed out of the nut.<br />
In the machinist’s vise, both jaws are made of cast iron with removable<br />
faces of cast steel. These may be checkered to provide a<br />
9
firm grip for heavy work, or may be smooth to avoid marking the<br />
surface of the plate operated upon. When holding soft metal, even<br />
the smooth steel jaws would mar the surface; <strong>and</strong> in such cases it is<br />
customary to <strong>use</strong> false jaws of brass or Babbitt metal, or to fasten<br />
leather or paper directly to the steel jaws to protect the work. The<br />
screw <strong>and</strong> <strong>h<strong>and</strong></strong>le are made from steel <strong>and</strong> the nut from malleable<br />
Iron.<br />
The <strong>common</strong> method of fastening a vise to the bench is by means<br />
of the fixed base, although a swivel base, as shown in Fig. 14, is<br />
preferable. Another type of vise in <strong>common</strong> <strong>use</strong> has a swivel jaw,<br />
which enables it to hold tapered work firmly. This swivel jaw is<br />
provided with a locking-pin, which fixes the jaws in a parallel<br />
position. The height of the vise from the floor depends somewhat<br />
on the class of work to be performed, but a general rule is to have<br />
the top of the jaws about 1 1/2 inches below the point of the elbow<br />
10
11<br />
when st<strong>and</strong>ing erect beside the vise.<br />
The vise is indispensable to the toolmaker when filing or when<br />
laying out work.<br />
How To Use The Bench Vise<br />
1. Clean the vise daily <strong>and</strong> keep the clamp screw oiled.<br />
2. When clamping finished work on soft metals, always place a<br />
pair of soft jaws over the regular jaws. The false jaws may be made<br />
from copper, brass, lead, or leather.<br />
3. Place a block below the work, as shown in Fig. 15, to keep it<br />
from slipping down between the jaws.<br />
4. Use judgment in tightening the vise. Be careful not to press cylindrical<br />
pieces out of round or to crack light pieces <strong>and</strong> metals.<br />
5. Never strike the vise <strong>h<strong>and</strong></strong>le with a hammer or other object to<br />
tighten it.<br />
6. Never pound work on the movable jaw.<br />
Questions<br />
1. How are false jaws held on the regular vise jaws?<br />
2. For what are soft, false jaws <strong>use</strong>d?<br />
3. From what materials are soft, false jaws made?<br />
4. How can you prevent work from slipping down between the<br />
jaws?<br />
5. Which jaw is movable; which is fixed?<br />
6. Why should the front jaw never be <strong>use</strong>d as an anvil for pounding<br />
anything?<br />
7. Give three important directions for clamping work.
The Hack Saw<br />
12<br />
Hack Saw Frames.<br />
Hack saw frames are either fixed or adjustable. They are made to<br />
take 8-, 10-, or 12-inch blades. Tension is applied to the blade to<br />
make it taut by means of a wing nut on the pistol grip type frame<br />
or by turning a threaded <strong>h<strong>and</strong></strong>le on the straight <strong>h<strong>and</strong></strong>le type. See<br />
Fig. 16.<br />
Hack Saw Blades.<br />
Hack saw blades are made from high-grade steels, hardened <strong>and</strong><br />
tempered. Since they are very hard they are also very brittle. Some<br />
blades, however, are more flexible beca<strong>use</strong> only the teeth are hardened,<br />
leaving the blade comparatively flexible.<br />
Proper Pitch.<br />
Pitch refers to the number of teeth per inch. Sixteen pitch means 16<br />
teeth to the inch. Pitch is always the most important factor to consider<br />
when cutting. When cutting small size stock, be sure to <strong>use</strong> a<br />
pitch which will have at least two teeth always in contact with the<br />
sawed surface. See Fig. 17.<br />
The most important consideration in the <strong>use</strong> of the hacksaw is the<br />
selection of the <strong>proper</strong> blade. One of the chief ca<strong>use</strong>s of the break-
13<br />
age of blades is due to teeth or pitch unsuited to the work. Table 1<br />
shows the <strong>proper</strong> pitch for various types of materials.<br />
How To Use The Hack Saw<br />
You will find the following procedures helpful in learning to <strong>use</strong><br />
<strong>proper</strong>ly the <strong>h<strong>and</strong></strong> hack saw.<br />
1. Hold the stock to be cut securely in a vise, so that the saw will<br />
cut about 1/4 inch from the vise jaws. Cutting close to the vise<br />
prevents the stock springing. The cut should be parallel to the side<br />
of the vise, as in Fig. 18.<br />
2. To start the saw cut in the right place, make a small nick in the<br />
stock with the edge of a file.<br />
3. Hold the frame <strong>h<strong>and</strong></strong>le securely in the right <strong>h<strong>and</strong></strong>. Keep the<br />
thumb on top of <strong>h<strong>and</strong></strong>le. Hold the front end of the frame with the<br />
left <strong>h<strong>and</strong></strong> to guide the saw <strong>and</strong> to give pressure when sawing.<br />
4. Keep the cut straight. If the cut “runs,” turn the stock <strong>and</strong> start a<br />
new cut.<br />
5. About sixty strokes per minute is the best cutting speed. Beca<strong>use</strong><br />
the teeth point away from the operator, the forward stroke is the<br />
cutting stroke. Pressure should not be <strong>use</strong>d on the return stroke.<br />
6. If the blade breaks in a partly finished cut, start the new blade in<br />
another place. The new blade is always thicker than a worn blade;<br />
hence, the new blade will bind if <strong>use</strong>d to continue an old cut.<br />
7. Do not <strong>use</strong> oil as a hack saw lubricant in <strong>h<strong>and</strong></strong> sawing.<br />
Hints On Using The Hack Saw<br />
1. To saw thin stock, clamp the, stock between two pieces of wood<br />
or soft steel <strong>and</strong> saw through all three pieces.<br />
2. Four <strong>common</strong> ca<strong>use</strong>s that break saw blades are as follows:
(a) Using too coarse a blade on thin stock.<br />
(b) Cutting at an angle, then trying to cut straight.<br />
(c) Exerting too much pressure.<br />
(d) Work insecurely clamped.<br />
3. After replacing a worn blade with a new one, start a new cut beca<strong>use</strong><br />
the cut of the old blade will be narrower than that of the new<br />
blade. The new blade will probably break if forced into the old cut.<br />
4. The following suggestions are given for holding the work in the<br />
vise <strong>proper</strong>ly:<br />
(a) Expose as much of the work as possible so that the maximum<br />
number of teeth may be engaged in the cutting.<br />
(b) Be sure the work is held rigidly.<br />
14
(c) Always start the cut with the least possible angle facing the<br />
thrust of the saw teeth.<br />
The above points are especially important in cutting such shapes as<br />
angle iron or other odd shaped material.<br />
(d) To prevent chattering, saw as close as possible to the vise<br />
where work is held.<br />
5. Do not <strong>use</strong> excessive pressure <strong>and</strong> saw carefully when the saw is<br />
almost through the cut.<br />
15<br />
Questions<br />
1. Which stroke is the cutting stroke?<br />
2. Which way should a saw blade be placed in the frame?<br />
3. Does the saw cut on the return stroke?<br />
4. What makes the hack saw blade rather brittle?<br />
5. In what position should a piece of flat stock about ¼ inch by 1<br />
inch be placed in the vise for cutting?<br />
6. Make a sketch showing the position in which you would hold a<br />
piece of angle iron for cutting.<br />
7. What is meant by pitch?<br />
8. What general rules or principles can you give for selecting<br />
blades of <strong>proper</strong> pitch?