Crime Scene Gel Electrophoresis - College of Science and ...
Crime Scene Gel Electrophoresis - College of Science and ...
Crime Scene Gel Electrophoresis - College of Science and ...

You also want an ePaper? Increase the reach of your titles
YUMPU automatically turns print PDFs into web optimized ePapers that Google loves.
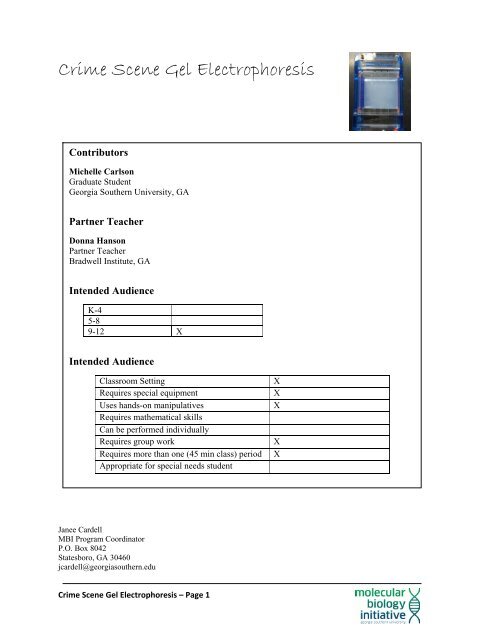
<strong>Crime</strong> <strong>Scene</strong> <strong>Gel</strong> <strong>Electrophoresis</strong><br />
Contributors<br />
Michelle Carlson<br />
Graduate Student<br />
Georgia Southern University, GA<br />
Partner Teacher<br />
Donna Hanson<br />
Partner Teacher<br />
Bradwell Institute, GA<br />
Intended Audience<br />
K-4<br />
5-8<br />
9-12 X<br />
Intended Audience<br />
Classroom Setting X<br />
Requires special equipment X<br />
Uses h<strong>and</strong>s-on manipulatives X<br />
Requires mathematical skills<br />
Can be performed individually<br />
Requires group work X<br />
Requires more than one (45 min class) period X<br />
Appropriate for special needs student<br />
Janee Cardell<br />
MBI Program Coordinator<br />
P.O. Box 8042<br />
Statesboro, GA 30460<br />
jcardell@georgiasouthern.edu<br />
<strong>Crime</strong> <strong>Scene</strong> <strong>Gel</strong> <strong>Electrophoresis</strong> – Page 1
Introduction<br />
Description<br />
In this activity, students will get h<strong>and</strong>s-on experience using gel electrophoresis to size separate<br />
DNA fragments.<br />
Abstract<br />
Students will learn the concepts <strong>of</strong> gel electrophoresis, including electrical currents <strong>and</strong> size<br />
separation <strong>of</strong> DNA fragments, through a made up scenario.<br />
Students will get h<strong>and</strong>s-on experience using micropipettes <strong>and</strong> gel electrophoresis boxes while<br />
getting to visualize DNA on a gel.<br />
Core Themes Addressed<br />
Microbial Cell Biology<br />
Microbial Genetics<br />
Microorganisms <strong>and</strong> Humans<br />
Microorganisms <strong>and</strong> the Environment<br />
Microbial Evolution <strong>and</strong> Diversity<br />
Other –Molecular Biology X<br />
Keywords<br />
DNA, <strong>Science</strong> <strong>and</strong> Technology, Pipette<br />
Learning Objectives<br />
At completion <strong>of</strong> this activity, students will be able to:<br />
1. Demonstrate the ability to transfer liquid into wells.<br />
2. Explain the uses <strong>of</strong> gel electrophoresis <strong>and</strong> how it works.<br />
3. Describe the needed materials to run gel electrophoresis.<br />
4. Identify the charge <strong>of</strong> DNA.<br />
National <strong>Science</strong> Education St<strong>and</strong>ards Addressed<br />
St<strong>and</strong>ard E: <strong>Science</strong> <strong>and</strong> Technology<br />
Underst<strong>and</strong>ings about science <strong>and</strong> technology<br />
<strong>Crime</strong> <strong>Scene</strong> <strong>Gel</strong> <strong>Electrophoresis</strong> – Page 2
<strong>Crime</strong> <strong>Scene</strong> <strong>Gel</strong> <strong>Electrophoresis</strong> – Page 3<br />
Teacher H<strong>and</strong>out<br />
<strong>Crime</strong> <strong>Scene</strong> <strong>Gel</strong> <strong>Electrophoresis</strong><br />
Student Prior Knowledge<br />
The students need a background on how gel electrophoresis works <strong>and</strong> the reasons for its use <strong>and</strong> will<br />
need to know how to use micropipettes to successfully load the gels.<br />
Teacher Background Information<br />
Micropipettors are st<strong>and</strong>ard laboratory equipment in micro <strong>and</strong> molecular biology laboratories. They are<br />
used to measure <strong>and</strong> transfer small volumes <strong>of</strong> liquids.<br />
Disposable plastic tips are placed on the end <strong>of</strong> the micropipettor for use in measuring liquids.<br />
The plunger on top <strong>of</strong> the micropipette can be twisted to set the desired volume <strong>of</strong> liquid to be measured.<br />
It also has two different stopping points when depressed. The first stopping point is used to measure out<br />
the desired volume <strong>of</strong> liquid. The second stop is only used for the complete discharging <strong>of</strong> liquid from the<br />
tips.<br />
Micropipettes are expensive <strong>and</strong> certain rules should be followed.<br />
Class Time<br />
Never adjust the volume beyond the specific micropipettors range.<br />
Always keep pipettes upright when liquid is in the plastic tip.<br />
This activity will require a minimum <strong>of</strong> one <strong>and</strong> a half 90 minute class periods<br />
DAY 1<br />
DAY 2<br />
1. Explanation <strong>of</strong> scenario (10 minutes)<br />
2. Students “extract” DNA (5 minutes)<br />
3. Students are taught about gel electrophoresis how it works <strong>and</strong> why it’s used<br />
1. Load DNA into gels (10 minutes)<br />
2. Run gel electrophoresis (30 min)<br />
3. Fast blast stain (10 min)<br />
4. Analyze gels (10 min)
Teacher Preparation Time<br />
This lesson will require approximately 20 minutes <strong>of</strong> preparation time.<br />
1. Teacher must know how to use a micropipette to teach students (10 minutes)<br />
2. Make copies <strong>of</strong> h<strong>and</strong>out (5 minutes)<br />
3. Setup tubes with food coloring (5 minutes)<br />
Safety Precautions<br />
Safety goggles <strong>and</strong> aprons should be worn.<br />
Materials <strong>and</strong> Equipment (4/ group)<br />
Methods<br />
1. <strong>Gel</strong> box (per 2 groups)<br />
2. 10 mL agarose gel<br />
3. Tube Rack<br />
4. Box <strong>of</strong> pipette tips<br />
5. micropipettor<br />
6. 4 DNA samples<br />
7. Power Box (per 2 groups)<br />
8. 500 mL 1X TAE buffer<br />
9. Plastic tray (for staining)<br />
10. 50mL 5X FastBlast stain<br />
1. The gel <strong>and</strong> the buffer have already been prepped <strong>and</strong> placed in the gel box.<br />
2. Remembering correct pipetting procedures, add 5.0 µl loading dye to all 4 DNA<br />
samples.<br />
3. Pipette 10.0 µl <strong>of</strong> DNA into their appropriate wells using the figure above.<br />
4. We will be running 2 gels to a box. Once both groups have loaded their DNA, place<br />
the lid on the gel box. Do not hook up the power box until both groups have loaded<br />
the DNA into their gels.<br />
5. Make sure the power box is <strong>of</strong>f <strong>and</strong> plugged into the outlet. Connect the black <strong>and</strong><br />
red wires to the appropriate outlets on the power box. Power on the gel box <strong>and</strong> make<br />
sure the current is set to 100 V.<br />
6. Once the box is turned on there should be bubbles rising on the sides <strong>of</strong> the gel box.<br />
7. It will take some time before we can analyze the results (20 – 30 minutes). You need<br />
to let the colored dye run ½ to ¾ <strong>of</strong> the way down the gel.<br />
8. Once your DNA has migrated to an appropriate length, power down the power box<br />
<strong>and</strong> remove the lid.<br />
<strong>Crime</strong> <strong>Scene</strong> <strong>Gel</strong> <strong>Electrophoresis</strong> – Page 4
9. Using gloves remove the gel carefully <strong>and</strong> place it in the tray with the FastBlast stain.<br />
Leave it in the stain until you begin to see b<strong>and</strong>s. You can then compare each suspect<br />
to the DNA left behind by the suspect.<br />
<strong>Crime</strong> <strong>Scene</strong> <strong>Gel</strong> <strong>Electrophoresis</strong> – Page 5
Materials<br />
Aquarium with dead<br />
pet (rubber snake)<br />
<strong>Crime</strong> <strong>Scene</strong> <strong>Gel</strong> <strong>Electrophoresis</strong> – Page 6<br />
Scenario<br />
<strong>Crime</strong> <strong>Scene</strong> <strong>Gel</strong> <strong>Electrophoresis</strong><br />
Bottle <strong>of</strong> poison (water with<br />
a skull <strong>and</strong> cross bone)<br />
Criminal’s hair left<br />
at the crime scene<br />
Ziplock bag<br />
for evidence<br />
Water dish<br />
Fingerprint (4) 1.5 mL tubes Tweezers Ink pad Cue tips<br />
Day 1 <strong>Crime</strong> scene setup:<br />
Mrs. McCook <strong>and</strong> Mrs. Lewis have been fighting over the pet snake that they found ab<strong>and</strong>oned on the<br />
side <strong>of</strong> the road for weeks now. They both want to have it in their classroom <strong>and</strong> haven’t been able to<br />
come to an agreement. It has recently been kept in Mrs. Baisden’s room until an agreement could be<br />
made. This morning we found the snake <strong>and</strong> it had been poisoned. Left at the crime scene was a note that<br />
said “If I can’t have him no one can have him”<br />
We need to figure out who killed the pet snake?<br />
Students can then be taken to the crime scene where they will collect evidence, (hair from criminal,<br />
fingerprint, scales from snake)<br />
Evidence must also be taken from suspects (Lewis <strong>and</strong> McCook)<br />
DNA<br />
Could use spit (water)<br />
Skin cells (swab h<strong>and</strong>)<br />
Hair<br />
Student will then collect DNA from the different teachers. The DNA will be sent out for extraction at a<br />
DNA lab. DNA b<strong>and</strong>ing patterns will include<br />
1) Lambda DNA uncut (Suspect 1 <strong>and</strong> killer)<br />
2) Lambda Hind III (Suspect 2)<br />
3) Lambda EcoR I (Pet snake)<br />
So the students can see what will be happening at the DNA lab they will then do a virtual DNA extraction<br />
lab http://learn.genetics.utah.edu/content/labs/extraction/
Day 2: <strong>Gel</strong> electrophoresis<br />
Students will be given different Suspects DNA <strong>and</strong> will micropipette loading dye <strong>and</strong> DNA<br />
together.<br />
Each student will get the chance to load a DNA sample into Agarose gel. The gels will be run in<br />
a gel electrophoresis box in 0.25 TAE running buffer, stained using 5x fast blast stain, <strong>and</strong> then<br />
dried down.<br />
During the time it takes the gel to run a short power point on how gel electrophoresis <strong>and</strong> agarose<br />
gel works can be given.<br />
Materials:<br />
- 1 gel box<br />
- 1 10mL agarose gel<br />
- 1 tube rack<br />
- 1 box <strong>of</strong> pipette tips<br />
- 1 micropipetter<br />
- 4 DNA samples (Pet, CS, S1, S2)<br />
- 1 power box<br />
- 500 mL 1X TAE buffer<br />
- 1 plastic tray (for staining)<br />
- 50 mL 5X FastBlast stain<br />
Procedure:<br />
1. ____The gel <strong>and</strong> the buffer have already been prepped <strong>and</strong> placed in the gel box.<br />
2. ____ Remembering correct pipetting procedures, add 5.0 µl loading dye to all 4 DNA<br />
samples.<br />
3. ____ Pipette 10.0 µl <strong>of</strong> DNA into their appropriate wells using the figure above.<br />
4. ____ We will be running 2 gels to a box. Once both groups have loaded their DNA, place the<br />
lid on the gel box. Do not hook up the power box until both groups have loaded the DNA into<br />
their gels.<br />
5. ____ Make sure the power box is <strong>of</strong>f <strong>and</strong> plugged into the outlet. Connect the black <strong>and</strong> red<br />
wires to the appropriate outlets on the power box. Power on the gel box <strong>and</strong> make sure the<br />
current is set to 100 V.<br />
<strong>Crime</strong> <strong>Scene</strong> <strong>Gel</strong> <strong>Electrophoresis</strong> – Page 7<br />
Pet<br />
CS‐ DNA from crime scene<br />
S1 – Teaher 1<br />
S2 – Teacher 2
6. ____ Once the box is turned on there should be bubbles rising on the sides <strong>of</strong> the gel box.<br />
7. ____ It will take some time before we can analyze the results (20 – 30 minutes). You need to<br />
let the colored dye run ½ to ¾ <strong>of</strong> the way down the gel.<br />
8. ____ Once your DNA has migrated to an appropriate length, power down the power box <strong>and</strong><br />
remove the lid.<br />
9. ____ Using gloves, remove the gel carefully <strong>and</strong> place it in the tray with the FastBlast stain.<br />
Leave it in the stain until you begin to see b<strong>and</strong>s. You can then compare each suspect to the<br />
DNA left behind by the suspect.<br />
<strong>Crime</strong> <strong>Scene</strong> <strong>Gel</strong> <strong>Electrophoresis</strong> – Page 8