HP Universal Print Driver System Administrator's Guide - ENWW
HP Universal Print Driver System Administrator's Guide - ENWW
HP Universal Print Driver System Administrator's Guide - ENWW

Create successful ePaper yourself
Turn your PDF publications into a flip-book with our unique Google optimized e-Paper software.
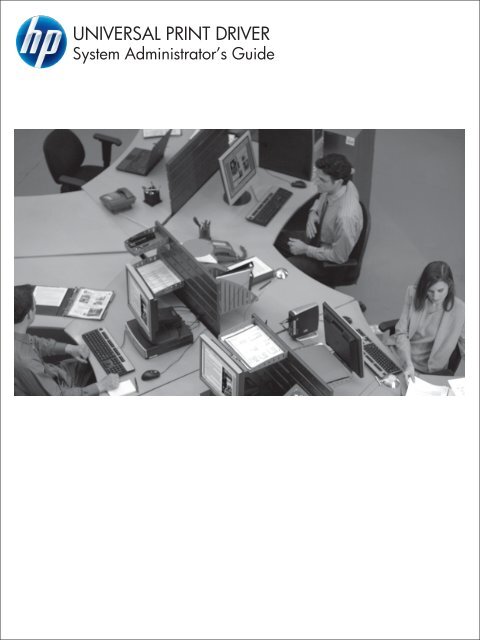
UNIVERSAL PRINT DRIVER<br />
<strong>System</strong> Administrator’s <strong>Guide</strong>
<strong>HP</strong> <strong>Universal</strong> <strong>Print</strong> <strong>Driver</strong><br />
<strong>System</strong> <strong>Administrator's</strong> <strong>Guide</strong>
Copyright and license<br />
©2009 Copyright Hewlett-Packard<br />
Development Company, L.P.<br />
Reproduction, adaptation or translation<br />
without prior written permission is prohibited,<br />
except as allowed under the copyright laws.<br />
The information contained herein is subject<br />
to change without notice.<br />
The only warranties for <strong>HP</strong> products and<br />
services are set forth in the express warranty<br />
statements accompanying such products<br />
and services. Nothing herein should be<br />
construed as constituting an additional<br />
warranty. <strong>HP</strong> shall not be liable for technical<br />
or editorial errors or omissions contained<br />
herein.<br />
Edition 7, 7/2009<br />
Trademark credits<br />
Adobe®, Acrobat®, PostScript®, and the<br />
Acrobat logo® are trademarks of Adobe<br />
<strong>System</strong>s Incorporated.<br />
Java is a trademark of Sun Microsystems,<br />
Incorporated.<br />
Linux® is a U.S. registered trademark of<br />
Linus Torvalds.<br />
Microsoft®, Windows®, Windows NT®,<br />
Windows® XP, and Windows® Vista are<br />
U.S. registered trademarks of Microsoft<br />
Corporation.<br />
Pentium® is a trademark or registered<br />
trademark of Intel Corporation or its<br />
subsidiaries in the United States and other<br />
countries.<br />
UNIX® is a registered trademark of The<br />
Open Group.
Table of contents<br />
1 Purpose and scope<br />
Introduction ........................................................................................................................................... 1<br />
Conventions used in this guide ............................................................................................................ 3<br />
<strong>HP</strong> UPD Supported products ............................................................................................................... 4<br />
2 Software description<br />
Introduction ........................................................................................................................................... 9<br />
<strong>System</strong> requirements ......................................................................................................................... 11<br />
Software availability ............................................................................................................................ 12<br />
Select the best PDL ............................................................................................................................ 12<br />
PCL 6 UPD ........................................................................................................................ 13<br />
PCL 5 UPD ........................................................................................................................ 13<br />
<strong>HP</strong> PS UPD ....................................................................................................................... 13<br />
3 Plan an <strong>HP</strong> UPD deployment<br />
The five steps to a successful deployment ......................................................................................... 16<br />
Initiation and planning ........................................................................................................................ 17<br />
Understand your printing requirements and environment .................................................. 17<br />
Determine deployment objectives ..................................................................... 17<br />
<strong>Print</strong> servers or Direct IP ................................................................................... 17<br />
Identify stakeholders ......................................................................................... 17<br />
Make an inventory ............................................................................................. 17<br />
Consider PDL needs ......................................................................................... 17<br />
<strong>Driver</strong> considerations ........................................................................................ 18<br />
Pre-configuration, policy and access requirements .......................................... 18<br />
Environment and network compatibility ............................................................. 18<br />
Baseline the system .......................................................................................... 18<br />
Risk management ............................................................................................. 18<br />
Key deployment decisions ................................................................................................. 19<br />
Create a list of required drivers ......................................................................... 19<br />
Choose an installation method .......................................................................... 19<br />
<strong>Driver</strong> Pre-Configuration ................................................................................... 19<br />
Traditional and dynamic Mode .......................................................................... 20<br />
Manage the <strong>HP</strong> UPD with MPA or Active Directory Group Policy .................... 20<br />
<strong>ENWW</strong> iii
Estimate time requirements .............................................................................. 20<br />
Communication and training ............................................................................................................... 22<br />
Training .............................................................................................................................. 22<br />
Conducting a pilot ............................................................................................................................... 22<br />
Testing and Evaluation ....................................................................................................................... 22<br />
Deploy to production .......................................................................................................................... 22<br />
4 Preconfigure the <strong>HP</strong> UPD<br />
Pre-configure the <strong>HP</strong> UPD using Install.exe ...................................................................................... 24<br />
Pre-configure the <strong>HP</strong> UPD using the <strong>HP</strong> Managed <strong>Print</strong>ing Administrator (MPA) ............................. 24<br />
Pre-configure the <strong>HP</strong> UPD using the Group Policy Objects in Active Directory ................................. 25<br />
Pre-configure the <strong>HP</strong> UPD using <strong>HP</strong> <strong>Driver</strong> Configuration Utility ....................................................... 27<br />
Pre-configure the <strong>HP</strong> UPD using <strong>HP</strong> <strong>Driver</strong> Deployment Utility (DDU) .............................................. 28<br />
Pre-configuration utilities and configurable functions ......................................................................... 28<br />
5 Install and Uninstall of the <strong>HP</strong> UPD<br />
Install .................................................................................................................................................. 32<br />
Download and unzip the <strong>HP</strong> UPD ...................................................................................... 32<br />
Windows client/server: Use the Add <strong>Print</strong>er Wizard .......................................................... 32<br />
Windows client/server: Use Install.exe .............................................................................. 33<br />
Windows client/server: Use the command prompt ............................................................ 34<br />
Configure default print settings while installing by command prompt<br />
install ................................................................................................................. 34<br />
Duplex .............................................................................................. 35<br />
Economode ...................................................................................... 35<br />
Private printing .................................................................................. 35<br />
Private printing with Pin .................................................................... 36<br />
Edgeline QAC ................................................................................... 36<br />
Available command options .............................................................................. 37<br />
Windows client/server: Use Point and <strong>Print</strong> ....................................................................... 40<br />
Windows client/server: Use the <strong>HP</strong> Web Jetadmin <strong>Print</strong> Queue Creation ......................... 40<br />
Windows Cluster server environment ................................................................................ 40<br />
Alternative install with printer automatic configuration disabled ........................ 41<br />
Windows Terminal Server/Citrix environment .................................................................... 42<br />
Versions of Terminal Server and Citrix supported by <strong>HP</strong> .................................. 42<br />
Known limitations of the <strong>HP</strong> UPD when used for auto– created printers or<br />
redirected printers with client printers that are directly attached ....................... 42<br />
Novell ................................................................................................................................. 43<br />
Install the <strong>HP</strong> UPD in a Novell environment ...................................................... 43<br />
NDPS ................................................................................................................ 44<br />
Plug and play installation ................................................................................................... 44<br />
Hardware first installation .................................................................................. 45<br />
Software first (unattended) installation .............................................................. 45<br />
iv <strong>ENWW</strong>
Uninstall the <strong>HP</strong> UPD ......................................................................................................................... 45<br />
6 <strong>HP</strong> UPD Administrative features<br />
<strong>HP</strong> UPD 5.0 Features ......................................................................................................................... 48<br />
<strong>Print</strong>ing to unsupported products enabled by default ........................................................ 48<br />
Installation to allow <strong>HP</strong> UPD version control ..................................................................... 48<br />
Create and edit shortcuts with the <strong>HP</strong> <strong>Driver</strong> Configuration Utility ................................... 48<br />
Custom media types recognized by the <strong>HP</strong> UPD .............................................................. 49<br />
Username added to watermark selections ........................................................................ 49<br />
<strong>HP</strong> EasyColor .................................................................................................................... 49<br />
Global per machine policy management ........................................................................... 49<br />
<strong>HP</strong> UPD 4.7 Features ......................................................................................................................... 50<br />
Manually configure product settings .................................................................................. 50<br />
Pinless private printing ....................................................................................................... 50<br />
Job separator page ............................................................................................................ 51<br />
Web Jetadmin language monitor support .......................................................................... 51<br />
Eco-<strong>Print</strong> (Two-sided printing) shortcut ............................................................................. 52<br />
Cache printer settings ........................................................................................................ 52<br />
Job storage and PIN printing .............................................................................................................. 52<br />
How the <strong>HP</strong> UPD works with job storage .......................................................................... 52<br />
Access and configure the job storage feature. .................................................................. 52<br />
Pre-configure job storage capabilities ................................................................................ 53<br />
Modify <strong>HP</strong> UPD using Install.exe ....................................................................................................... 54<br />
<strong>Print</strong>er Automatic Configuration ......................................................................................................... 55<br />
Device Automatic Configuration defined ............................................................................ 55<br />
Automatic <strong>Print</strong>er Configuration status .............................................................. 55<br />
User Interface .................................................................................................... 56<br />
Command line interface .................................................................................... 58<br />
Disabling <strong>Print</strong>er Automatic Configuration ......................................................................... 59<br />
Benefits Comparison ......................................................................................................... 59<br />
Automatic configuration enabled ....................................................................... 60<br />
Automatic configuration disabled ...................................................................... 60<br />
Default capabilities without automatic configuration ......................................... 60<br />
Steps to disable the <strong>Print</strong>er Automatic Configuration ........................................ 61<br />
Communication protocols .................................................................................................. 62<br />
<strong>Print</strong>er Automatic Configuration services ........................................................................... 62<br />
Steps to Disable ................................................................................................ 62<br />
Steps to Remove ............................................................................................... 62<br />
Symptoms when <strong>Print</strong>er Automatic Configuration fails ...................................................... 63<br />
Troubleshooting ................................................................................................................. 63<br />
1. Can the <strong>HP</strong> UPD print to the target device? ................................................. 63<br />
2. Is the <strong>HP</strong> UPD printer defined with <strong>Print</strong>er Auto Configuration enabled? ..... 63<br />
3. After running "Update Now" were expected results returned? ...................... 64<br />
<strong>ENWW</strong> v
4. What is the physical connection method between the <strong>HP</strong> UPD installed<br />
printer and the target printing device? ............................................................... 64<br />
5. Troubleshoot network connection/port .......................................................... 64<br />
6. Distinguish if target product is communicating bidirectional for printer auto<br />
configuration via HTTP or SNMP? .................................................................... 65<br />
7. Install and test a new print queue? ............................................................... 65<br />
FAQ ................................................................................................................................... 66<br />
7 Use <strong>HP</strong> <strong>Universal</strong> print drivers<br />
Introduction ......................................................................................................................................... 69<br />
Use the <strong>HP</strong> UPD ................................................................................................................................ 70<br />
<strong>Universal</strong> print driver modes .............................................................................................. 70<br />
Traditional mode ............................................................................................... 70<br />
Dynamic mode .................................................................................................. 70<br />
Configure <strong>HP</strong> UPD dynamic mode settings ....................................................................... 70<br />
Change the settings for the <strong>HP</strong> UPD ................................................................................. 71<br />
Change General <strong>HP</strong> UPD settings .................................................................... 71<br />
Change Device Verification settings (number 5 on ) ......................................... 72<br />
Change driver properties (print job preferences) ............................................................... 72<br />
Change driver properties while printing ............................................................. 72<br />
Change driver properties from the <strong>Print</strong>ers and Faxes folder ........................... 73<br />
Help ................................................................................................................................... 73<br />
<strong>Print</strong> using the <strong>HP</strong> UPD ...................................................................................................................... 73<br />
<strong>Print</strong> using the <strong>HP</strong> UPD in dynamic mode ......................................................................... 74<br />
Dynamic mode options – Default configuration ................................................. 74<br />
Use dynamic mode ........................................................................................... 75<br />
Select a recently used printer (number 1 on ) ................................................... 75<br />
Find a printer (number 3 on ) ............................................................................ 75<br />
Enter a print address ........................................................................ 76<br />
Search for network printers .............................................................. 76<br />
Search for print shares ..................................................................... 77<br />
<strong>Print</strong> using the <strong>HP</strong> UPD in traditional mode ....................................................................... 77<br />
Add a printer to the <strong>Print</strong>ers and Faxes folder .................................................................................... 77<br />
Add a printer to the <strong>Print</strong>ers folder using the dynamic mode user interface. ..................... 78<br />
Add a printer to <strong>Print</strong>ers and Faxes folder from within <strong>Print</strong>ers and Faxes folder ............. 78<br />
Organize the Recently Used <strong>Print</strong>ers list ........................................................................... 78<br />
8 Manage the <strong>HP</strong> UPD using <strong>HP</strong> Managed <strong>Print</strong> Administration (MPA) and Active Directory Group Policy<br />
Manage the <strong>HP</strong> UPD using <strong>HP</strong> MPA ................................................................................................. 82<br />
Introduction ........................................................................................................................ 82<br />
MPA version information .................................................................................................... 82<br />
Supported <strong>HP</strong> MPA versions ............................................................................ 82<br />
Supported environments for managing the <strong>HP</strong> UPD ......................................................... 82<br />
vi <strong>ENWW</strong>
Install and uninstall the <strong>HP</strong> MPA software ......................................................................... 83<br />
<strong>HP</strong> MPA software requirements ........................................................................ 83<br />
Software availability .......................................................................................... 83<br />
Install the <strong>HP</strong> MPA software ............................................................................. 84<br />
Back up the <strong>HP</strong> MPA software .......................................................................... 84<br />
Uninstall the <strong>HP</strong> MPA software ......................................................................... 84<br />
Uninstall <strong>HP</strong> MPA using <strong>HP</strong> Managed <strong>Print</strong>ing Admin Setup<br />
Wizard .............................................................................................. 84<br />
Uninstall <strong>HP</strong> MPA using Add/Remove Programs ............................. 85<br />
Access <strong>HP</strong> MPA ................................................................................................................ 85<br />
Classic interface ................................................................................................ 85<br />
Graphic interface ............................................................................................... 86<br />
Use Managed <strong>Print</strong>er Policies (MPPs) .............................................................................. 89<br />
Create a new MPP ............................................................................................ 90<br />
UseMode settings ............................................................................. 91<br />
Default <strong>Print</strong> settings ........................................................................ 93<br />
Color Access settings ....................................................................... 95<br />
User Search capabilities ................................................................... 97<br />
Status & Supplies Notification settings ............................................. 98<br />
Basic MPP settings ......................................................................... 100<br />
Update an MPP .............................................................................. 101<br />
Edit an existing MPP ....................................................................................... 102<br />
Duplicate an existing MPP .............................................................................. 102<br />
Associate MPLs with an MPP ......................................................................... 102<br />
Associate user groups with an MPP ............................................................... 103<br />
Remove an existing MPP ................................................................................ 104<br />
Use Managed <strong>Print</strong>er Lists (MPLs) .................................................................................. 104<br />
Create a new MPL .......................................................................................... 105<br />
Auto printer discovery ..................................................................... 106<br />
Manual printer entry ........................................................................ 109<br />
Edit an existing MPL ....................................................................................... 112<br />
Associate an MPL with an MPP ...................................................................... 112<br />
Duplicate an existing MPL ............................................................................... 112<br />
Manage the MPL view ..................................................................................... 113<br />
Select a view .................................................................................. 113<br />
Advanced view settings .................................................................. 118<br />
Manage virtual printers .................................................................................... 119<br />
Create a new virtual printer ............................................................ 120<br />
Edit existing virtual printer .............................................................. 120<br />
Remove an existing MPL ................................................................................ 120<br />
Remove printers from an MPL ........................................................................ 121<br />
Use User Groups ............................................................................................................. 121<br />
Create a new user group ................................................................................. 121<br />
Edit an existing user group .............................................................................. 122<br />
<strong>ENWW</strong> vii
Associate a user group with a MPP ................................................................ 122<br />
Remove a user group ...................................................................................... 122<br />
Manage Active Directory Group Policy with the <strong>HP</strong> UPD using <strong>HP</strong> Active Directory<br />
Templates ......................................................................................................................................... 123<br />
Supported <strong>HP</strong> UPD versions ........................................................................................... 123<br />
Use <strong>HP</strong> Active Directory Group Policy versus <strong>HP</strong> MPA to manage <strong>HP</strong> UPD<br />
policies ............................................................................................................................. 123<br />
Install the <strong>HP</strong> UPD Active Directory Administrative template .......................................... 123<br />
Install template on Windows Server 2003 and Server 2008 using Microsoft<br />
Group Policy Management Console (GPMC) ................................................. 123<br />
Remove the <strong>HP</strong> UPD Administrative template ................................................ 124<br />
Upgrade the <strong>HP</strong> UPD Administrative template ............................................... 124<br />
Enable Active Directory Group Policy for <strong>HP</strong> UPD Active Directory<br />
Administrator Template for a new or existing <strong>HP</strong> UPD installation ................. 124<br />
For new installations of the <strong>HP</strong> UPD when an <strong>HP</strong> Active Directory<br />
Template is installed ....................................................................... 125<br />
For existing installations of the <strong>HP</strong> UPD ......................................... 125<br />
Configure policies with the <strong>HP</strong> UPD Active Directory Administrative<br />
template .......................................................................................................... 125<br />
UseMode settings ........................................................................... 125<br />
Default <strong>Print</strong> Settings ...................................................................... 128<br />
Color access control ....................................................................... 129<br />
User Search Capabilities ................................................................ 130<br />
Status Notification Pop-ups ............................................................ 130<br />
Job Accounting ............................................................................... 131<br />
Job Delivery .................................................................................... 131<br />
MPP Information Settings ............................................................... 132<br />
Managed <strong>Print</strong>er List settings ......................................................... 133<br />
Implement Managed <strong>Print</strong>er Lists (MPLs) within the <strong>HP</strong> UPD Active Directory<br />
template file ..................................................................................................... 133<br />
Verification and troubleshooting ...................................................................... 134<br />
Functional test ................................................................................ 134<br />
Registry population ......................................................................... 134<br />
Final test ......................................................................................... 135<br />
Appendix A Manage Status Notification Pop–ups<br />
Description and benefits ................................................................................................................... 138<br />
How the SNP works ......................................................................................................................... 138<br />
SNP default behavior ....................................................................................................................... 138<br />
<strong>HP</strong> Special Offers Program .............................................................................................................. 138<br />
Use Device Settings tab in the property page to enable or disable SNP ......................................... 140<br />
Use the pop-up window to enable/disable SNP ............................................................................... 141<br />
Manage the SNP with the <strong>HP</strong> <strong>Driver</strong> Configuration Utility ................................................................ 141<br />
Manage SNP with <strong>HP</strong> Managed <strong>Print</strong>ing Administration (MPA) ...................................................... 142<br />
viii <strong>ENWW</strong>
Manage SNP through the command prompt install (Install.exe) ...................................................... 142<br />
Manage SNP through registry settings ............................................................................................. 142<br />
Appendix B Frequently Asked Questions<br />
<strong>Driver</strong> installation and configuration ................................................................................................. 146<br />
<strong>Driver</strong> Policy ..................................................................................................................................... 149<br />
Operating system ............................................................................................................................. 150<br />
Versioning ........................................................................................................................................ 151<br />
Appendix C <strong>HP</strong> UPD Deployment Worksheet<br />
General Information .......................................................................................................................... 154<br />
Port and protocol information ........................................................................................... 154<br />
<strong>Print</strong> server environment .................................................................................................................. 155<br />
<strong>Print</strong> server information .................................................................................................... 155<br />
Goal ................................................................................................................................. 156<br />
Set up new server that has new queue names ............................................... 156<br />
Point and <strong>Print</strong> Client Information .................................................................................... 157<br />
Direct IP printing ............................................................................................................................... 158<br />
General client information ................................................................................................ 158<br />
Goal ................................................................................................................................. 158<br />
Upgrade-<strong>Driver</strong>s: ............................................................................................................. 159<br />
Upgrade-Settings configuration ....................................................................................... 159<br />
<strong>HP</strong> UPD/MPA/AD Customized Options ........................................................................... 159<br />
Appendix D <strong>HP</strong> UPD Deployment Flowcharts<br />
Start .................................................................................................................................................. 162<br />
Choose PDL: (PCL 5, PCL 6 or PS) ................................................................................ 162<br />
Citrix environment ............................................................................................................ 163<br />
Novell environment .......................................................................................................... 163<br />
Microsoft Windows <strong>Print</strong> Server ....................................................................................... 163<br />
Direct IP <strong>Print</strong>ing .............................................................................................................. 163<br />
Client <strong>Driver</strong> deployment and Software Distribution <strong>System</strong>s ......................................... 164<br />
Update server/replace server ........................................................................................................... 165<br />
Client printing ................................................................................................................................... 167<br />
Policy ................................................................................................................................................ 169<br />
Add/new queues ............................................................................................................................... 171<br />
Create queues .................................................................................................................................. 173<br />
Ports and protocols .......................................................................................................................... 176<br />
Replace drivers ................................................................................................................................ 178<br />
Versioning of printer driver shared files ............................................................................................ 179<br />
Automating the process through scripting ........................................................................................ 182<br />
Appendix E Glossary of terms<br />
<strong>ENWW</strong> ix
Appendix F Support information to collect<br />
1) Symptoms .................................................................................................................................... 187<br />
2) <strong>Print</strong>er driver ................................................................................................................................. 187<br />
3) Environment specifications .......................................................................................................... 188<br />
4) <strong>Print</strong>er information ........................................................................................................................ 190<br />
5) Application .................................................................................................................................... 191<br />
6) Files to collect .............................................................................................................................. 191<br />
Index ................................................................................................................................................................. 193<br />
x <strong>ENWW</strong>
1 Purpose and scope<br />
Introduction<br />
This system administrator's guide provides information about the <strong>HP</strong> <strong>Universal</strong> <strong>Print</strong> <strong>Driver</strong> (<strong>HP</strong> UPD)<br />
software.<br />
This guide is distributed in an electronic format to serve as a quick-reference tool for information<br />
technology (IT) administrators, Customer Care Center (CCC) agents, support engineers, system<br />
administrators, management information systems (MIS) personnel, and printer users.<br />
This guide includes the following information:<br />
● Procedures for installing and uninstalling software components, including command line<br />
configuration and installation of the <strong>HP</strong> UPD.<br />
● Descriptions of the <strong>HP</strong> <strong>Universal</strong> <strong>Print</strong> <strong>Driver</strong> (<strong>HP</strong> UPD), and the features, benefits, use and<br />
management of the <strong>HP</strong> UPD.<br />
● Descriptions of the <strong>HP</strong> Managed <strong>Print</strong> Administration (MPA) software, including Managed <strong>Print</strong>er<br />
Policies (MPPs) and Managed <strong>Print</strong>er Lists (MPLs). Used by administrators to configure and<br />
manage the <strong>HP</strong> UPD.<br />
● Descriptions of the <strong>HP</strong> Active Directory Template used to manage the <strong>HP</strong> UPD.<br />
The following table describes the structure of this <strong>System</strong> <strong>Administrator's</strong> <strong>Guide</strong>.<br />
Table 1-1 <strong>HP</strong> <strong>Universal</strong> <strong>Print</strong> <strong>Driver</strong> <strong>System</strong> <strong>Administrator's</strong> <strong>Guide</strong> overview<br />
Chapter Content<br />
Chapter 1, Purpose and scope This chapter describes the focus and intent of this system administrator's guide,<br />
including the conventions in this description, and the hardware to which this guide<br />
pertains.<br />
Chapter 2, Software description This chapter describes the <strong>HP</strong> UPD software, including the software requirements<br />
for installing the <strong>HP</strong> UPD and software availability. This chapter also describes the<br />
different driver versions (<strong>HP</strong> PCL 6, <strong>HP</strong> PCL 5, and <strong>HP</strong> PS emulation), their<br />
specific purposes, and the modes for installing these <strong>HP</strong> UPD versions.<br />
Chapter 3, Plan an <strong>HP</strong> UPD deployment This chapter provides information for planning and deploying the <strong>HP</strong> UPD in your<br />
environment.<br />
Chapter 4, Preconfigure the <strong>HP</strong> UPD This chapter includes information about the methods for preconfiguring the<br />
<strong>HP</strong> UPD.<br />
● Preconfigure the <strong>HP</strong> UPD.<br />
◦ Using Install.exe<br />
◦ Using the <strong>HP</strong> Managed <strong>Print</strong>ing Administrator (MPA)<br />
<strong>ENWW</strong> Introduction 1
Table 1-1 <strong>HP</strong> <strong>Universal</strong> <strong>Print</strong> <strong>Driver</strong> <strong>System</strong> <strong>Administrator's</strong> <strong>Guide</strong> overview (continued)<br />
Chapter Content<br />
Chapter 5, Install and uninstall of the <strong>HP</strong><br />
UPD<br />
◦ Using Group Policy Objects in Active Directory<br />
◦ Using <strong>Driver</strong> Configuration Utility (DCU)<br />
◦ Using <strong>HP</strong> <strong>Driver</strong> Deployment Utility (DDU)<br />
● Pre-configuration utilities and configurable functions<br />
This chapter provides instructions for installing and uninstalling of the <strong>HP</strong> UPD in<br />
dynamic and traditional mode.<br />
Chapter 6, <strong>HP</strong> UPD Administrative features This chapter describes configuration features for the <strong>HP</strong> UPD.<br />
● <strong>HP</strong> UPD 5.0 Features<br />
● <strong>HP</strong> UPD 4.7 Features<br />
● Job storage and PIN printing<br />
● Modify <strong>HP</strong> UPD using Install.exe<br />
● <strong>Print</strong>er Automatic Configuration<br />
Chapter 7, Use <strong>HP</strong> <strong>Universal</strong> print drivers This chapter includes information about using the <strong>HP</strong> UPD<br />
Chapter 8, Manage the <strong>HP</strong> UPD using<br />
<strong>HP</strong> Managed <strong>Print</strong> Administration (MPA)<br />
and Active Directory Group Policy<br />
● Use the <strong>HP</strong> UPD<br />
● <strong>Print</strong> using the <strong>HP</strong> UPD<br />
● Add a printer to the <strong>Print</strong>ers and Faxes folder<br />
● Manage the <strong>HP</strong> UPD using <strong>HP</strong> MPA<br />
● Manage Active Directory Group Policy with the <strong>HP</strong> UPD using <strong>HP</strong> Active<br />
Directory Templates<br />
Appendix A–Manage SNP Pop-ups This appendix provides information for managing Status Notification Pop–ups.<br />
Appendix B–Frequently Asked Questions This appendix provides answers to common questions regarding the <strong>HP</strong> UPD.<br />
Appendix C–<strong>HP</strong> UPD Deployment<br />
Worksheet<br />
Appendix D–<strong>HP</strong> UPD Deployment<br />
Flowcharts<br />
This appendix provides an worksheet containing <strong>HP</strong> UPD deployment line items.<br />
This appendix contains flowcharts describing deployment of the <strong>HP</strong> UPD.<br />
Appendix E–Glossary of terms This appendix contains explanations of commonly used terms in reference to the<br />
<strong>HP</strong> UPD.<br />
Appendix F–Support information to collect This appendix contains a list of support related questions for troubleshooting <strong>HP</strong><br />
UPD issues.<br />
For more information about the location of information within these chapters, see the table of contents.<br />
An index is provided in the back of this guide.<br />
2 Chapter 1 Purpose and scope <strong>ENWW</strong>
Conventions used in this guide<br />
This guide uses the following conventions:<br />
● Keyboard keys appear in colored font. For example, Press the Shift key.<br />
● Directory paths, file names, and file extensions appear in user-interface (UI)-specific font. File<br />
names and file extensions appear in uppercase.<br />
For example, Find the SAMPLE.TXT file in the C:\Temp directory<br />
● Menu names, field names, and options to select display in bold type.<br />
For example, On the File menu, click New.<br />
● Windows©, screens, and panels display in bold type.<br />
For example, The Job Manager window displays.<br />
● References to other sections in this guide are underlined.<br />
For example, For more information, see Software description on page 9.<br />
<strong>ENWW</strong> Conventions used in this guide 3
<strong>HP</strong> UPD Supported products<br />
For an updated list of supported products, see the following Web site.<br />
www.hp.com/go/upd<br />
Table 1-2 products supported by <strong>HP</strong> UPD and <strong>HP</strong> MPA<br />
<strong>HP</strong> printer/MFP Plug and play <strong>HP</strong> UPD PDL Support<br />
<strong>HP</strong> LaserJet/Color LaserJet (network<br />
and direct-connect)<br />
CM1015 MFP Yes PCL5, PCL6, PS<br />
1200 series No PCL5, PCL6, PS<br />
1300 series No PCL5 ONLY<br />
CM1312 MFP series Yes PCL5, PCL6, PS<br />
1320 series Yes PCL5 ONLY<br />
CP1510 series Yes PCL5, PCL6, PS<br />
M1522 MFP series Yes PCL5, PCL6, PS<br />
P2015 series Yes PCL5, PCL6, PS<br />
CP2020 series Yes PCL5, PCL6, PS<br />
P2030 series Yes PCL5 ONLY<br />
P2050 series Yes PCL5, PCL6, PS<br />
2100 series No PCL5 ONLY<br />
2200 series No PCL5, PCL6, PS<br />
2300 series No PCL5, PCL6, PS<br />
CM2320 MFP series Yes PCL5, PCL6, PS<br />
2400 series Yes PCL5, PCL6, PS<br />
2500 series No PCL5, PCL6, PS<br />
2550 series Yes PCL5, PCL6, PS<br />
2605 series Yes PCL6, PS ONLY<br />
2700 series Yes PCL6, PS ONLY<br />
M2727 MFP series Yes PCL5, PCL6, PS<br />
P3005 series Yes PCL5, PCL6, PS<br />
3015 AiO No PCL5 ONLY<br />
3020 AiO series No PCL5, PCL6, PS<br />
M3027 MFP series Yes PCL5, PCL6, PS<br />
3030 AiO series No PCL5, PCL6, PS<br />
M3035 MFP series Yes PCL5, PCL6, PS<br />
3050 AiO Yes PCL5, PCL6, PS<br />
4 Chapter 1 Purpose and scope <strong>ENWW</strong>
Table 1-2 products supported by <strong>HP</strong> UPD and <strong>HP</strong> MPA (continued)<br />
<strong>HP</strong> printer/MFP Plug and play <strong>HP</strong> UPD PDL Support<br />
3052 AiO No PCL5, PCL6, PS<br />
3055 AiO No PCL5, PCL6, PS<br />
3200 AiO series No PCL5, PCL6, PS<br />
3300 MFP series No PCL5, PCL6, PS<br />
3390 AiO Yes PCL5, PCL6, PS<br />
3392 AiO Yes PCL5, PCL6, PS<br />
CP3505 series Yes PCL5, PCL6, PS<br />
CP3520 series Yes PCL5, PCL6, PS<br />
CM3530 MFP series Yes PCL5, PCL6, PS<br />
3700 series No PCL5, PCL6, PS<br />
3800 series No PCL5, PCL6, PS<br />
4000 series No PCL5, PCL6, PS<br />
CP4005 series Yes PCL5, PCL6, PS<br />
P4014 series Yes PCL5, PCL6, PS<br />
P4015 series Yes PCL5, PCL6, PS<br />
4050 series No PCL5, PCL6, PS<br />
4100 series No PCL5, PCL6, PS<br />
4100mfp No PCL5, PCL6, PS<br />
4200 series No PCL5, PCL6, PS<br />
4240 series No PCL5, PCL6, PS<br />
4250 series No PCL5, PCL6, PS<br />
4300 series No PCL5, PCL6, PS<br />
4345mfp series No PCL5, PCL6, PS<br />
M4345 MFP series Yes PCL5, PCL6, PS<br />
M4349 MFP series Yes PCL5, PCL6, PS<br />
4350 series No PCL5, PCL6, PS<br />
4500 series No PCL5, PCL6, PS<br />
P4510 series Yes PCL5, PCL6, PS<br />
4550 series No PCL5, PCL6, PS<br />
4600 series No PCL5, PCL6, PS<br />
4610 series No PCL5, PCL6, PS<br />
4650 series No PCL5, PCL6, PS<br />
4700 series Yes PCL5, PCL6, PS<br />
4730 MFP series Yes PCL5, PCL6, PS<br />
<strong>ENWW</strong> <strong>HP</strong> UPD Supported products 5
Table 1-2 products supported by <strong>HP</strong> UPD and <strong>HP</strong> MPA (continued)<br />
<strong>HP</strong> printer/MFP Plug and play <strong>HP</strong> UPD PDL Support<br />
CM4730 MFP series Yes PCL5, PCL6, PS<br />
5000 series No PCL5, PCL6, PS<br />
M5025 MFP series Yes PCL5, PCL6, PS<br />
M5035 MFP series Yes PCL5, PCL6, PS<br />
5100 series No PCL5, PCL6, PS<br />
5200 series Yes PCL5, PCL6, PS<br />
5500 series No PCL5, PCL6, PS<br />
5550 series Yes PCL5, PCL6, PS<br />
CP6015 series Yes PCL5, PCL6, PS<br />
CM6030 MFP series Yes PCL5, PCL6, PS<br />
CM6040 MFP series Yes PCL5, PCL6, PS<br />
CM6049 MFP series Yes PCL5, PCL6, PS<br />
8000 series No PCL5, PCL6, PS<br />
CM8050 Color MFP with Edgeline<br />
Technology<br />
CM8060 Color MFP with Edgeline<br />
Technology<br />
Yes PCL5, PCL6, PS<br />
Yes PCL5, PCL6, PS<br />
8100 series No PCL5, PCL6, PS<br />
8150 series No PCL5, PCL6, PS<br />
8150mfp series No PCL5, PCL6, PS<br />
9000 series No PCL5, PCL6, PS<br />
9000mfp series No PCL5, PCL6, PS<br />
9040 series Yes PCL5, PCL6, PS<br />
9040mfp series Yes PCL5, PCL6, PS<br />
M9040 MFP series Yes PCL5, PCL6, PS<br />
9050 series Yes PCL5, PCL6, PS<br />
9050mfp series Yes PCL5, PCL6, PS<br />
M9050 MFP series Yes PCL5, PCL6, PS<br />
M9059 MFP series Yes PCL5, PCL6, PS<br />
9055mfp No PCL5, PCL6, PS<br />
9065mfp No PCL5, PCL6, PS<br />
9500 series No PCL5, PCL6, PS<br />
9500mfp series No PCL5, PCL6, PS<br />
<strong>HP</strong> Business Inkjet/Officejet (network<br />
only)<br />
6 Chapter 1 Purpose and scope <strong>ENWW</strong>
Table 1-2 products supported by <strong>HP</strong> UPD and <strong>HP</strong> MPA (continued)<br />
<strong>HP</strong> printer/MFP Plug and play <strong>HP</strong> UPD PDL Support<br />
2250 series No PCL5, PS ONLY<br />
2280 series No PCL5, PS ONLY<br />
2300 series No PCL5, PS ONLY<br />
2600 series No PCL5, PS ONLY<br />
2800 series No PCL5, PS ONLY<br />
3000 series No PCL5, PS ONLY<br />
9100 series all-in-one No PCL5, PS ONLY<br />
<strong>ENWW</strong> <strong>HP</strong> UPD Supported products 7
8 Chapter 1 Purpose and scope <strong>ENWW</strong>
2 Software description<br />
Introduction<br />
The <strong>HP</strong> <strong>Universal</strong> <strong>Print</strong> <strong>Driver</strong> helps eliminate driver chaos in your print environment by dramatically<br />
reducing the number of drivers needed. Broad compatibility ensures it works with many <strong>HP</strong> print<br />
products, often reducing driver use to a single driver.<br />
● The <strong>HP</strong> <strong>Universal</strong> <strong>Print</strong> <strong>Driver</strong> works well with a broad range of networked and direct-connected<br />
<strong>HP</strong> LaserJet and Edgeline print products using PCL 5, PCL 6 or postscript emulation. <strong>HP</strong> products<br />
share state-of-the-art technology, allowing the <strong>HP</strong> <strong>Universal</strong> <strong>Print</strong> <strong>Driver</strong> to support complex<br />
capabilities across many <strong>HP</strong> products, making them easier to use, support, certify and deploy.<br />
● The <strong>HP</strong> <strong>Universal</strong> <strong>Print</strong> <strong>Driver</strong> offers optional dynamic mode, in addition to traditional mode, to<br />
enhance mobile printing. Dynamic mode locates network printers where you are, or you can enter<br />
a printer name or address and print anywhere on your network. It's great when you're on the road<br />
or want to print to a new product. Traditional mode is just like a traditional driver. Both modes can<br />
be used on the same PC to allow you to print what you want no matter where you are.<br />
● Local language drivers available in 35 spoken languages.<br />
● You can rely on the <strong>HP</strong> <strong>Universal</strong> <strong>Print</strong> <strong>Driver</strong> to perform because it's built on the same technology<br />
we've been using in our product-specific drivers for years.<br />
Easy management tools help meet your unique needs.<br />
<strong>HP</strong> provides tools and services to customize and manage drivers and printers, so you choose driver<br />
capabilities that best suit your unique environment, from managing print queues and color use, to<br />
ensuring secure printing for sensitive documents.<br />
● Create print queues and update drivers on remote systems from one location via <strong>HP</strong> Web Jetadmin.<br />
● Color access control allows you to determine who uses color and when.<br />
● <strong>Print</strong> private documents securely with or without a PIN.<br />
● Help make your printing environment and your printers more secure.<br />
● Create, import and modify Managed <strong>Print</strong>er Lists for mobile users in remote offices or on the road.<br />
Helps reduce paper use and save money.<br />
● The <strong>HP</strong> <strong>Universal</strong> <strong>Print</strong> <strong>Driver</strong>'s new Eco <strong>Print</strong> short cut has two-sided printing enabled, making it<br />
easier to reduce paper use.<br />
● The <strong>HP</strong> Managed <strong>Print</strong>ing Administration and Active Directory templates support a variety of policy<br />
controls that can help your company lessen its impact on the environment and save money via<br />
<strong>ENWW</strong> Introduction 9
your <strong>HP</strong> LaserJet and Edgeline print products. The Duplex Default setting reduces paper use and<br />
Edgeline Quality Modes Control ensures the right print quality is pre-set for <strong>HP</strong> Edgeline MFPs.<br />
Helps increase productivity, reduce support calls.<br />
● The <strong>HP</strong> <strong>Universal</strong> <strong>Print</strong> <strong>Driver</strong> enables advanced functions on all the printers it supports--from twosided<br />
printing and stapling to Private (PIN) <strong>Print</strong>ing and color themes--so users are not held up or<br />
held back by a lack of advanced print features.<br />
● The <strong>HP</strong> <strong>Universal</strong> <strong>Print</strong> <strong>Driver</strong> supports PCL 5, PCL 6 and postscript emulation printer languages.<br />
● By providing real-time print job and print product information, the <strong>HP</strong> <strong>Universal</strong> <strong>Print</strong> <strong>Driver</strong><br />
empowers you to resolve common problems yourself and place fewer calls to the help desk. This<br />
can mean faster problem resolution, improved printer uptime, and increased productivity.<br />
New Features<br />
The following are the new features of the <strong>HP</strong> UPD 5.0.<br />
● <strong>HP</strong> EasyColor technology<br />
● <strong>HP</strong> UPD version control using an Install.exe switch<br />
● Ability to create/delete/modify shortcuts in the driver using driver preconfiguration tools.<br />
● Recognizes user-defined media types<br />
● Choose "username" as a default watermark<br />
● Enable printing to <strong>HP</strong> UPD unsupported products<br />
The following were new features of the <strong>HP</strong> UPD 4.7.2. (Off-cycle limited release. Refer to driver release<br />
table.)<br />
● Tower Tray support added<br />
● Form-to-tray assignments are retained in upgrades<br />
● Removed "User <strong>Guide</strong>" printing shortcut<br />
● Performance improvements for PCL6 through Delta Row Compression and JPEG "pass through”<br />
The following were the new features of the <strong>HP</strong> UPD version 4.7.<br />
● Ability to turn off automatic configuration ("printer auto-configuration")<br />
● Pinless private printing<br />
● Support for job separator pages<br />
● Support for <strong>HP</strong> Web Jetadmin local product status<br />
● New Eco-print shortcut added to <strong>Print</strong>ing Shortcuts tab (enables two-sided printing)<br />
● Status Notification Pop-ups can be enabled/disabled from the Device Settings tab<br />
● Status Notification Pop-ups are disabled by default for enterprise environments<br />
10 Chapter 2 Software description <strong>ENWW</strong>
● <strong>HP</strong> UPD version control using the Add <strong>Print</strong>er Wizard<br />
● Users who do not have administrator rights on their workstation can add printers to their<br />
<strong>Print</strong>ers folder in dynamic mode<br />
Available PDLs<br />
The <strong>HP</strong> UPD is available in three Page Description Languages (PDLs).<br />
● <strong>HP</strong> PCL 6<br />
● <strong>HP</strong> PCL 5<br />
● <strong>HP</strong> postscript level 2 and level 3 emulation<br />
Topics:<br />
● <strong>System</strong> requirements<br />
● Software availability<br />
● Select the best PDL<br />
<strong>System</strong> requirements<br />
The following are the minimum system requirements for <strong>HP</strong> UPD 5.0.<br />
Client operating systems supported:<br />
● Microsoft Windows Vista Business, Enterprise, Home Basic, Home Premium, and Ultimate; x86<br />
and x64<br />
● Microsoft Windows XP (SP2 and later) Home Edition, and Professional; x86 and x64<br />
● Microsoft Windows 7 Starter, Home Premium, Professional, Enterprise, and Ultimate; x86 and x64<br />
(Windows 7 Logo Program tested, Windows 7 Release Candidate 1, build 7100)<br />
Server operating systems supported:<br />
● Microsoft Windows Server 2008 Datacenter (SP1), Enterprise and Standard Editions<br />
◦ Architectures: x86 and x64<br />
◦ Services: Terminal Server, Cluster Server<br />
● Microsoft Windows Server 2003 (SP1 and later) Datacenter, Enterprise, and Standard Editions<br />
◦ Architectures: x86 and x64<br />
◦ Services: Terminal Server, Cluster Server<br />
● Citrix Presentation Server 4.0 and 4.5<br />
● Citrix XenApp 5.0<br />
● Novell NetWare 6.5 SP7<br />
● Novell i<strong>Print</strong> Client for Windows 5.12<br />
<strong>ENWW</strong> <strong>System</strong> requirements 11
● Novell i<strong>Print</strong> Client for Windows Vista 5.08<br />
● Novell iManager 2.7<br />
<strong>HP</strong> UPD can be used independently of the <strong>HP</strong> MPA software. For network administrators,<br />
<strong>HP</strong> recommends <strong>HP</strong> MPA software.<br />
Requirements for MPA Software<br />
● Supported Operating <strong>System</strong>s<br />
◦ Microsoft Windows XP<br />
◦ Microsoft Windows XP x64<br />
◦ Microsoft Windows Server 2003 (32-bit and 64-bit)<br />
● Supported Internet Browsers<br />
◦ Internet Explorer 6.0<br />
● IIS Internet Information <strong>System</strong>s. Versions provided by the following OSs.<br />
◦ Windows XP<br />
◦ Windoes Server 2003<br />
● Java JRE (Runtime Environment, required for graphical views) version 1_5_0_9 and newer. The<br />
latest version is available at the following website: www.java.com/en/download/index.jsp.<br />
Software availability<br />
The <strong>HP</strong> <strong>Universal</strong> <strong>Print</strong> <strong>Driver</strong> version 5.0 is available in the following languages:<br />
Table 2-1 <strong>HP</strong> UPD supported languages<br />
Arabic Bulgarian Catalan Croatian<br />
Czech Danish Dutch English<br />
Estonian Finnish French German<br />
Greek Hebrew Hungarian Italian<br />
Japanese Korean Latvian Lithuanian<br />
Norwegian Polish Portuguese (Brazilian) Romanian<br />
Russian Serbian (Latin) Simplified Chinese Slovak<br />
Slovenian Spanish Swedish Thai<br />
Traditional Chinese Turkish Ukrainian<br />
Select the best PDL<br />
<strong>HP</strong> recommends the <strong>HP</strong> UPD when printing to multiple printer models or from a mobile Microsoft<br />
Windows computer. In an enterprise or managed print server environment, the <strong>HP</strong> UPD is the preferred<br />
driver to multiple printer models in either a traditional or dynamic print environment.<br />
12 Chapter 2 Software description <strong>ENWW</strong>
The <strong>HP</strong> UPD is available in three page description languages (PDLs). See the following topics for more<br />
information about choosing the best PDL for your printing needs.<br />
Topics:<br />
PCL 6 UPD<br />
PCL 5 UPD<br />
<strong>HP</strong> PS UPD<br />
● PCL 6 UPD<br />
● PCL 5 UPD<br />
● <strong>HP</strong> PS UPD<br />
The PCL 6 <strong>Universal</strong> <strong>Print</strong> <strong>Driver</strong> provides the best overall performance, print quality, and printer-feature<br />
support for most users. The driver aligns with Microsoft Windows graphic device interface (GDI) for the<br />
best performance in Microsoft Windows environments.<br />
NOTE: Third party solutions are integrated products that are designed, developed, and sold by<br />
companies that target specific business printing needs. Environments with third party solutions in place<br />
or under consideration should contact their providers for advice and guidance about their driver<br />
selection.<br />
For more information about third party solutions, see www.hp.com/go/gsc.<br />
<strong>HP</strong> recommends the PCL 5 <strong>Universal</strong> <strong>Print</strong> <strong>Driver</strong> for general office monochrome printing in Microsoft<br />
Windows environments. The driver is compatible with previous versions of PCL and legacy <strong>HP</strong> LaserJet<br />
printers.<br />
The PCL 5 <strong>Universal</strong> <strong>Print</strong> <strong>Driver</strong> is the best choice for any third party or home-grown custom solutions<br />
that use forms, fonts, and SAP programs.<br />
<strong>HP</strong> recommends the <strong>HP</strong> PS UPD for printing from Adobe or other graphics-rich software programs. The<br />
driver is compatible with postscript level 2 and level 3, and supports Adobe PostScript interpreter DIMM.<br />
Use the <strong>HP</strong> PS UPD in primarily postscript-specific software programs, such as Adobe and Corel.<br />
NOTE: If the <strong>HP</strong> UPD is used to print to an unsupported product, <strong>HP</strong> recommends using the <strong>HP</strong> PS<br />
UPD for best print results.<br />
<strong>ENWW</strong> Select the best PDL 13
14 Chapter 2 Software description <strong>ENWW</strong>
3 Plan an <strong>HP</strong> UPD deployment<br />
This chapter is designed to help you make strategic deployment decisions as you transform your printing<br />
environment to a <strong>HP</strong> <strong>Universal</strong> <strong>Print</strong> <strong>Driver</strong> environment. The deployment of the <strong>HP</strong> UPD in your printing<br />
environment will be unique based upon your specific objectives and current IT infrastructure. This<br />
chapter assumes that you have a basic understanding of the functionality of print drivers and the<br />
Windows printing architecture.<br />
This chapter provides you with the options and recommendations to customize your deployment<br />
experience based on your current printing environment and your printing goals and objectives. Although<br />
your environment will vary slightly from the installation models below, you should be able to use the<br />
recommendations in this document so your <strong>HP</strong> UPD deployment will be smooth and have the least<br />
impact to your printing environment. In some cases you will use more than one solution provided in the<br />
information below.<br />
<strong>ENWW</strong> 15
The five steps to a successful deployment<br />
1. Initiation and planning<br />
● Fully understand your printing requirements and environment<br />
● Make decisions<br />
2. Communication and training<br />
● Executive sponsorship<br />
● Training<br />
3. Conducting a pilot<br />
4. Test and evaluation<br />
5. Roll out to production<br />
16 Chapter 3 Plan an <strong>HP</strong> UPD deployment <strong>ENWW</strong>
Initiation and planning<br />
To gain the maximum benefit from the <strong>HP</strong> UPD, it is important to:<br />
● Fully understand your printing requirements and environment.<br />
● Develop an <strong>HP</strong> UPD deployment strategy.<br />
An <strong>HP</strong> UPD deployment needs to be considered similar to any other major change to your IT<br />
environment and should be treated accordingly. Make sure you back up your print servers and print<br />
queues before beginning any installation.<br />
Understand your printing requirements and environment<br />
Determine deployment objectives<br />
This is a description of the objectives of the deployment. The intent is to get a clear and detailed picture<br />
of what the end result will be after the migration or upgrade. See <strong>HP</strong> UPD Deployment Worksheet<br />
on page 153 for details<br />
<strong>Print</strong> servers or Direct IP<br />
With improvements in desktop computing power, available printing management tools, and the growing<br />
concerns about reducing printing management costs, some enterprise customers are starting to<br />
question whether they should move to Direct IP printing or continue with client-server printing.<br />
For additional information on whether direct IP printing is right for you please refer to Direct IP <strong>Print</strong>ing<br />
with the <strong>HP</strong> <strong>Universal</strong> <strong>Print</strong> <strong>Driver</strong> available on www.hp.com. <strong>HP</strong> UPD supports either environment.<br />
Identify stakeholders<br />
The stakeholders are anyone impacted by the plan. Stakeholders can include, but are not limited to the<br />
following groups.<br />
● End users – Will there be downtime, what will change?<br />
● IT staff – How much time and resources?<br />
● Help Desk – What do they need to know?<br />
Make an inventory<br />
You must inventory all printing products, print servers, print queue names, printer drivers, IP Addresses,<br />
and page description languages (PDLs) that you are using. If you have print servers, you also need to<br />
determine if all of the print queues are still active.<br />
Consider PDL needs<br />
Some business applications rely on a specific version of <strong>Print</strong>er Command Language (PCL) or require<br />
Adobe® PostScript®. As a result, test that the applications you are using are compatible with the<br />
<strong>HP</strong> UPD versions of PCL and postscript emulation. If your testing proves that some applications are not<br />
compatible with the <strong>HP</strong> UPD versions of PCL and postscript emulation, you should retain the current<br />
<strong>ENWW</strong> Initiation and planning 17
drivers and queues for the non-compatible applications. See Select the best PDL on page 12 for more<br />
information.<br />
● Specialty products<br />
● Specific business applications, such as ERP<br />
● The use of certified drivers, such as SAP<br />
● Line printers<br />
● Large format printing products<br />
● <strong>HP</strong> products that feature edge-to-edge printing, which require product-specific drivers<br />
<strong>Driver</strong> considerations<br />
Please consider the following to determine if the <strong>HP</strong> UPD is the correct solution for your printing<br />
environment.<br />
● The <strong>HP</strong> UPD is supported and tested on <strong>HP</strong> printers only. For non-<strong>HP</strong> products, <strong>HP</strong> recommends<br />
using the driver supplied by the product manufacturer.<br />
● Not all <strong>HP</strong> printers are supported by the <strong>HP</strong> UPD. The <strong>HP</strong> UPD supports most workgroup class<br />
<strong>HP</strong> LaserJet printers and MFPs, and a number of business inkjet printers. Some personal<br />
<strong>HP</strong> LaserJet and inkjet printers are not supported. For the most current list of <strong>HP</strong> UPD supported<br />
products, see the following website www.hp.com/go/upd.<br />
Pre-configuration, policy and access requirements<br />
If you have a goal of setting up custom default settings, or restricting access to printers or printer<br />
capabilities like color printing, now is the time to make a list of all those requirements.<br />
Environment and network compatibility<br />
Validate that the <strong>HP</strong> UPD is compatible with your current environment and network communication<br />
protocols. Make sure that the SNMP and mDNS protocols are not being filtered or blocked. The <strong>HP</strong> UPD<br />
requires these protocols for discovery and communication with products. See <strong>HP</strong> UPD Deployment<br />
Worksheet on page 153 to make sure the <strong>HP</strong> UPD will work in your environment<br />
Baseline the system<br />
Test that all your applications (shrink wrapped and home-grown) are compatible with the <strong>HP</strong> UPD. Run<br />
performance and printing tests using “typical” documents.<br />
Risk management<br />
As is true of all projects, there are risks involved. Spend some time identifying the risks and making<br />
plans on how to mitigate serious risks. Some suggestions are:<br />
● Make a backup of all systems before making any modifications.<br />
● Thoroughly test before going into production.<br />
● Plan your activities for a time of low print server usage to minimize user impact.<br />
● When migrating to a new server, keep the old server operational for a period of time just in case<br />
you need to fall back to it.<br />
18 Chapter 3 Plan an <strong>HP</strong> UPD deployment <strong>ENWW</strong>
Key deployment decisions<br />
● Create a list of required drivers<br />
● Choose an installation method<br />
● <strong>Driver</strong> Pre-Configuration<br />
● Traditional and dynamic Mode<br />
● Manage the <strong>HP</strong> UPD with MPA or Active Directory Group Policy<br />
● Estimate time requirements<br />
Create a list of required drivers<br />
● <strong>HP</strong> UPD PDLs<br />
● Product specific drivers<br />
● Non-<strong>HP</strong> products<br />
Choose an installation method<br />
<strong>HP</strong> UPD can be installed using multiple methods including:<br />
● Add <strong>Print</strong>er Wizard<br />
● Install.exe<br />
● Web JetAdmin<br />
● Microsoft <strong>Print</strong> Management Console<br />
● Custom scripts<br />
Note that there are pre-configuration implications.<br />
See <strong>HP</strong> UPD Deployment Flowcharts on page 161 for additional guidance on which installation option<br />
is best for your environment..<br />
<strong>Driver</strong> Pre-Configuration<br />
The default settings of the <strong>HP</strong> UPD can be changed to suit specific needs. For example, the administrator<br />
may want to set duplex printing, and print in grayscale as the defaults. This can be done on a perinstallation,<br />
per user, per group, or per site basis. For more information, see Manage the <strong>HP</strong> UPD using<br />
<strong>HP</strong> MPA on page 82, Manage Active Directory Group Policy with the <strong>HP</strong> UPD using <strong>HP</strong> Active<br />
Directory Templates on page 123, the <strong>HP</strong> <strong>Driver</strong> Configuration Utility documentation, or by referring to<br />
the list of installation options in Install on page 32.<br />
<strong>ENWW</strong> Initiation and planning 19
Traditional and dynamic Mode<br />
The <strong>HP</strong> <strong>Universal</strong> <strong>Print</strong> <strong>Driver</strong> (UPD) can operate in two different modes, traditional or dynamic.<br />
● Traditional mode functions like the product-specific drivers. When installed in traditional mode, the<br />
<strong>HP</strong> UPD is associated with a specific printing product, which can then be selected from the<br />
application print menu. Once selected, the <strong>HP</strong> UPD user interface is similar in appearance to a<br />
traditional, product-specific driver.<br />
● Dynamic mode allows the user to find printers on a network. This is ideal when traveling or printing<br />
to a new product in the office. An easy-to-use interface helps users connect to <strong>HP</strong> printing products<br />
on their own. There are four methods for finding printers in dynamic mode: manually enter printer<br />
address, recently used printers, managed printer lists, or search options.<br />
Dynamic mode and traditional mode are not mutually-exclusive. You can deploy print queues using<br />
traditional mode and also deploy the <strong>HP</strong> UPD using dynamic mode for mobile users.<br />
For more information about traditional and dynamic mode, see Install on page 32.<br />
Manage the <strong>HP</strong> UPD with MPA or Active Directory Group Policy<br />
<strong>HP</strong> MPA and Active Directory provide options for managing the <strong>HP</strong> UPD in your environment. The<br />
<strong>HP</strong> UPD has the capabilities and features that can be managed and controlled on a per-user or group<br />
level. This means that the features like Use Mode settings, Color Access Control, Search Capabilities,<br />
SNP Pop-ups, and more can be managed down to the user level, or at a group level.<br />
For more information about Managed <strong>Print</strong> Administration and the Active Directory Administrative<br />
Templates, see the chapters onManage the <strong>HP</strong> UPD using <strong>HP</strong> MPA on page 82 and Manage Active<br />
Directory Group Policy with the <strong>HP</strong> UPD using <strong>HP</strong> Active Directory Templates on page 123.<br />
Estimate time requirements<br />
Make sure that you allow sufficient time to complete all the steps. The following are some things to<br />
consider.<br />
● Planning<br />
● Performing <strong>System</strong> Backups<br />
● Gathering tools and/or write scripts<br />
● Server Installation<br />
● Client Installation<br />
● Testing<br />
The amount of time it will take to install the <strong>HP</strong> UPD depends on a number of factors including the<br />
number of drivers, the number of print queues on the server, and the number of host clients receiving<br />
the installation either PnP vended or through UPD install / apw. Typically, the installation of the <strong>HP</strong> UPD<br />
driver itself only takes a minute or two, but this can be significantly slower if there are other printer drivers<br />
on the system.<br />
See the http://support.microsoft.com/kb/832219 - Users cannot print after you install a service pack,<br />
update rollup, or printer hot fix on a server.<br />
20 Chapter 3 Plan an <strong>HP</strong> UPD deployment <strong>ENWW</strong>
Creating a print queue using an existing driver typically takes only 30-60 seconds depending on<br />
processor speed, etc. However, if you have 1000 print queues to create, this could easily add up to<br />
between 8 and 16 hours.<br />
<strong>ENWW</strong> Initiation and planning 21
Communication and training<br />
Training<br />
<strong>HP</strong> strongly suggests having a communication plan in place prior to beginning your deployment of the<br />
<strong>HP</strong> UPD. This helps overcome objections and ease the fears of end-users who might be worried about<br />
losing some of their printing functionality. Make sure your end-users and the IT staff members<br />
understand the benefits gained by using the <strong>HP</strong> UPD.<br />
Develop training reference materials and identify resources to help your end-users successfully<br />
transition to the <strong>HP</strong> UPD from standard product drivers. For example, a change from traditional mode<br />
printing user interface to the dynamic mode interface requires planning and in some cases simple<br />
training. Include information about how to identify products through the <strong>HP</strong> UPD. Employ a survey to<br />
gauge customer satisfaction.<br />
Conducting a pilot<br />
<strong>HP</strong> recommends that you create a test-environment during your <strong>HP</strong> UPD implementation. Select a part<br />
of your printing environment that will not affect many users to test the implementation prior to deploying<br />
to the entire printing environment. Make sure this test environment (applications and printers) is<br />
representative of the overall printing environment.<br />
Testing and Evaluation<br />
● Measure against the performance baselines.<br />
● Determine variances and if they warrant corrective action or a change.<br />
● Make any necessary entries into the configuration management log.<br />
Deploy to production<br />
<strong>HP</strong> strongly recommends a phased approach to deploying the <strong>HP</strong> UPD.<br />
Deploying in a phased manner across the IT environments helps to:<br />
● Minimize issues and provide valuable information about each type of environment.<br />
● Uncover issues that could be documented and considered prior to the next phase.<br />
● Increase the confidence of end-users and sponsors in the project.<br />
Closing<br />
● Confirm work is done to requirements<br />
● Gain formal acceptance of the product<br />
● Hand off completed product<br />
22 Chapter 3 Plan an <strong>HP</strong> UPD deployment <strong>ENWW</strong>
4 Preconfigure the <strong>HP</strong> UPD<br />
This chapter outlines several options for configuring the default behavior of the <strong>HP</strong> UPD. The options<br />
vary based on the installation method selected. Please review each option to determine which method<br />
is right for your environment.<br />
The table at the end of this chapter, Pre-configuration utilities and configurable functions<br />
on page 28, lists the available settings for each pre-configuration utility and installation method. This<br />
chapter provides some representative examples, but is not a comprehensive list of available settings.<br />
The information in this chapter will help you select an option that best meets your needs.<br />
The following methods are available for pre-configuring the <strong>HP</strong> UPD default settings.<br />
● Pre-configure the <strong>HP</strong> UPD using Install.exe<br />
● Pre-configure the <strong>HP</strong> UPD using the <strong>HP</strong> Managed <strong>Print</strong>ing Administrator (MPA)<br />
● Pre-configure the <strong>HP</strong> UPD using the Group Policy Objects in Active Directory<br />
● Pre-configure the <strong>HP</strong> UPD using <strong>HP</strong> <strong>Driver</strong> Configuration Utility<br />
● Pre-configure the <strong>HP</strong> UPD using <strong>HP</strong> <strong>Driver</strong> Deployment Utility (DDU)<br />
● Pre-configuration utilities and configurable functions<br />
<strong>ENWW</strong> 23
Pre-configure the <strong>HP</strong> UPD using Install.exe<br />
The <strong>HP</strong> UPD installer allows some driver default settings to be modified via command line switches.<br />
Some of these switches will change the system-wide behavior of the <strong>HP</strong> UPD, while other changes are<br />
specific to a single print queue.<br />
A list of the available options for the Install.exe utility can be listed by entering install /? from the<br />
command prompt in the <strong>HP</strong> UPD driver folder.<br />
The screen that appears is a comprehensive list of the available configuration options that are available<br />
during installation of the <strong>HP</strong> UPD. Some of the more popular install switches include the following:<br />
● /pfduplex – Allows an administrator to enable duplex by default<br />
● /gdssnp – Disables the Status Notification Pop–ups for all queues<br />
● /pfpjob – Enables job storage capabilities<br />
● /q – Quite mode, no prompts<br />
● /h – Hides the install dialogue<br />
Multiple switches can be used to create a command-line installation that is customized to meet your<br />
requirements.<br />
The default settings are changed to reflect the chosen options in each of the printers installed in this<br />
manner.<br />
Pre-configure the <strong>HP</strong> UPD using the <strong>HP</strong> Managed <strong>Print</strong>ing<br />
Administrator (MPA)<br />
The MPA utility pre-configures some driver default settings in a managed <strong>HP</strong> UPD environment. Settings<br />
made within the MPA environment control the <strong>HP</strong> UPD at a user level. The resulting policies are<br />
maintained for every printer attached to the <strong>HP</strong> UPD. They are global user policies that affect <strong>HP</strong> UPD<br />
users. For more information about MPA software, see Manage the <strong>HP</strong> UPD using <strong>HP</strong> MPA<br />
on page 82.<br />
NOTE: Policy management for the <strong>HP</strong> UPD is disabled by default, and must be enabled to use the<br />
MPA software to manage the <strong>HP</strong> UPD capabilities. Enabling policy management for the <strong>HP</strong> UPD is only<br />
available through the Install.exe method. See step two below in Process Flow for <strong>HP</strong> UPD management<br />
with MPA on page 25 to enable policy management for the <strong>HP</strong> UPD. An example of a command line<br />
instruction for enabling policy management is install /sm1.1.1.1 /<br />
policy"mpaservername" /h /q /n"<strong>HP</strong> Color LaserJet CP3525".<br />
MPA settings that can be pre-configured include:<br />
● Duplex<br />
● Economode<br />
● Private <strong>Print</strong>ing<br />
● Edgeline QAC (Quality Access Control)<br />
● Services tab<br />
● Status Notification Pop–ups<br />
24 Chapter 4 Preconfigure the <strong>HP</strong> UPD <strong>ENWW</strong>
Each of these settings can be locked down to prevent users from making modifications to the settings.<br />
Process Flow for <strong>HP</strong> UPD management with MPA<br />
1. Administrator installs and configures MPA User Groups, Policies, and <strong>Print</strong>er Lists.<br />
2. To enable MPA policy management, the <strong>HP</strong> UPD is installed or upgraded using Install.exe with<br />
one of the following switches:<br />
● /empa - Installs the <strong>HP</strong> UPD and enables policy management for the MPA server named<br />
“managed-<strong>Print</strong>”.<br />
● /policy”MPAservername”–Enables the <strong>HP</strong> UPD to be managed by MPA and allows the<br />
administrator to enter the name of the server running MPA.<br />
● /gpolicy”servername” – Globally enables policy management for all users who log onto a PC<br />
and uses the MPA server defined in the servername field.<br />
Pre-configure the <strong>HP</strong> UPD using the Group Policy Objects<br />
in Active Directory<br />
Like MPA settings, the changes made within the Group Policy Objects control the global <strong>HP</strong> UPD user<br />
capabilities. Available for download at www.hp.com/go/mpa, an <strong>HP</strong> UPD Administrative Template can<br />
be added to an existing Group Policy Object to manage the user UPD capabilities. The settings apply<br />
to any queue that uses the <strong>HP</strong> UPD. Care should be used when locking configuration settings as the<br />
user is unable to change a locked setting. As an example, if duplex is enabled and locked, the user will<br />
be unable to override this to print transparencies.<br />
NOTE: See Manage Active Directory Group Policy with the <strong>HP</strong> UPD using <strong>HP</strong> Active Directory<br />
Templates on page 123for detailed information on installing and using the Active Directory template.<br />
Using these templates will also require that the <strong>HP</strong> UPD be installed with the management option<br />
enabled. See the following list for the installation switches to enable policy management for the <strong>HP</strong> UPD.<br />
The following settings are available for preconfiguration and are located in the Default <strong>Print</strong> Settings<br />
section of the <strong>HP</strong> UPD AD Admin Templates:<br />
● Duplex<br />
● Economode<br />
● Private <strong>Print</strong>ing with PIN<br />
● Edgeline QAC<br />
● Services tab<br />
● Status Notification Pop–ups<br />
<strong>HP</strong> UPD management capabilities are disabled by default. To take advantage of the management<br />
capabilities through the Group Policy Objects on new and existing queues, the <strong>HP</strong> UPD management<br />
capabilities must be enabled. Please see the example below for steps on enabling policy management<br />
for existing queues.<br />
<strong>ENWW</strong> Pre-configure the <strong>HP</strong> UPD using the Group Policy Objects in Active Directory 25
The following switches are used in conjunction with the Install.exe utility to enable policy management<br />
using the Active Directory template.<br />
● /eads–Enables policy management for the active user only on the PC.<br />
● /geads–globally enables policy management for all users who log onto the PC.<br />
To enable policy management for an existing UPD based print queue use the following example as a<br />
guide.<br />
Install /ni /eads /n"existing print queue" (plus any other install switches used during<br />
the original installation. This command will modify the print queue to enable policy management for<br />
Active Directory.<br />
26 Chapter 4 Preconfigure the <strong>HP</strong> UPD <strong>ENWW</strong>
Pre-configure the <strong>HP</strong> UPD using <strong>HP</strong> <strong>Driver</strong> Configuration<br />
Utility<br />
Usage<br />
The <strong>HP</strong> <strong>Driver</strong> Configuration Utility (DCU) is a small Windows application used to edit the configuration<br />
file associated with a particular driver. The configuration file controls the print driver settings and takes<br />
effect when the driver is installed.<br />
The <strong>HP</strong> <strong>Driver</strong> Configuration Utility does not handle any part of the deployment or installation of the<br />
driver. Rather, the default configuration file is modified and saved back to the same driver directory in<br />
which it was opened. The <strong>HP</strong> <strong>Driver</strong> Configuration Editor is intended for use in environments where<br />
there is an established process for deploying drivers or where the server platform is not Windows-based<br />
(i.e.- Novell).<br />
The DCU utility provides the most comprehensive list of configurable options and settings, but it does<br />
not include all of the available options. In some cases, DCU is the only method to configure a specific<br />
driver setting. It may become necessary to combine some of the pre-configuration tools to get a<br />
completely configured driver for your environment. Please refer to the readme notes for additional<br />
information on using the DCU utility.<br />
Use DCU to pre-configure printer drivers before installing the drivers on a client or server. Follow these<br />
steps to pre-configure.<br />
1. Launch the driver configuration utility. From the File menu, select Open, and then browse to the<br />
directory that contains the cf file of the driver you wish to configure. These files have a ".cf_"<br />
extension.<br />
2. Choose a printer bundle from the list.<br />
3. Choose any desired changes on the <strong>Print</strong>er Preferences tab.<br />
4. Choose any desired changes on the Device Settings tab.<br />
NOTE: Depending on how you save the configuration file, you could affect the digital signature of the<br />
driver. For more details, please see the support guide for the DCU at www.hp.com/go/dcu. Click on the<br />
Manuals link.<br />
Sample list of the features available within the DCU.<br />
● <strong>Print</strong> on both sides (duplex)<br />
● Paper Size<br />
● Create Shortcuts<br />
● Watermarks with user name<br />
<strong>ENWW</strong> Pre-configure the <strong>HP</strong> UPD using <strong>HP</strong> <strong>Driver</strong> Configuration Utility 27
Pre-configure the <strong>HP</strong> UPD using <strong>HP</strong> <strong>Driver</strong> Deployment<br />
Utility (DDU)<br />
The DDU simplifies the deployment of printer drivers onto a client computer. DDU enables print<br />
administrators to create driver packages that include the printer driver files and the code needed for<br />
deployment. The custom package is then run on a client computer to copy the printer driver files to the<br />
Windows driver store, and for network packages to install the product.<br />
The DDU works with <strong>HP</strong> printer drivers that can be installed by an .INF file.<br />
The DDU is used to pre-configure a printer driver for deployment. When the package is run on the client<br />
computer, the new configuration file configures the printer driver after it is installed, and does not interfere<br />
with WHQL certification. The DDU contains the standalone DCU utility inside the package and is<br />
launched when Pre-configure driver is selected from the DDU tool.<br />
For more information about the <strong>HP</strong> <strong>Driver</strong> Deployment Utility, go to www.hp.com/go/ddu. Select<br />
Manuals from the left navigation bar.<br />
Pre-configuration utilities and configurable functions<br />
Table 4-1 Pre-configuration utilities and configurable functions on page 28 shows which utility, or<br />
utilities, can be used to configure several commonly-used driver features. In some cases, more than<br />
one method will need to be used depending on the combination of settings that are to be changed. For<br />
example, to enable policy management and set the Watermarks to Username, use the Install.exe utility<br />
to enable policy management and the DCU tool to set the default Watermark option.<br />
Table 4-1 Pre-configuration utilities and configurable functions<br />
Function Install.exe MPA/AD DCU DDU<br />
Duplex (lock) X X X X<br />
Economode X X X X<br />
Job Storage (lock) X X X X<br />
90Edgeline QAC X X X X<br />
Color Access Control X X X<br />
Enable Policy mgmt X<br />
Status Notification<br />
Pop-up<br />
Disable <strong>Print</strong>er<br />
Automatic<br />
Configuration<br />
X X X X<br />
X X<br />
Gray scale (lock) X X<br />
Paper size X X<br />
Shortcuts X X<br />
Watermarks X X<br />
Orientation X X<br />
<strong>Print</strong> quality X X<br />
28 Chapter 4 Preconfigure the <strong>HP</strong> UPD <strong>ENWW</strong>
Table 4-1 Pre-configuration utilities and configurable functions (continued)<br />
Function Install.exe MPA/AD DCU DDU<br />
Memory X X<br />
Hard disk X X<br />
Media type (lock) X X<br />
Paper source (lock) X X<br />
Services X X X X<br />
Collate X X<br />
<strong>ENWW</strong> Pre-configuration utilities and configurable functions 29
30 Chapter 4 Preconfigure the <strong>HP</strong> UPD <strong>ENWW</strong>
5 Install and Uninstall of the <strong>HP</strong> UPD<br />
Install the <strong>HP</strong> UPD in either traditional or dynamic mode. The mode determines the <strong>HP</strong> UPD user<br />
experience and also influences the extent of <strong>HP</strong> UPD management.<br />
● Traditional mode<br />
An <strong>HP</strong> UPD installed in Traditional mode behaves like a product specific driver. During installation,<br />
the driver is associated to a specific printer, creating a permanent instance of the driver.<br />
● Dynamic mode<br />
An <strong>HP</strong> UPD installed in Dynamic mode allows the most flexibility. A user can find and print to any<br />
supported <strong>HP</strong> product within any network or print environment without downloading a productspecific<br />
driver. The <strong>HP</strong> UPD discovers the product capabilities so that users can print using most<br />
product capabilities, including advanced printing options such as watermarks and booklet printing.<br />
Creating a permanent instance makes the printer appear (in the UI) more like a traditional printer<br />
driver but its features can still be updated dynamically. This also reduces the number of mouse<br />
clicks a user goes through when selecting a printer that is used often.<br />
The following information provides detailed instructions for installing the <strong>HP</strong> UPD in either traditional or<br />
dynamic mode, along with instructions on how to remove the <strong>HP</strong> UPD.<br />
● Install<br />
● Uninstall the <strong>HP</strong> UPD<br />
<strong>ENWW</strong> 31
Install<br />
Install the <strong>HP</strong> UPD by using one of the following methods.<br />
● Download and unzip the <strong>HP</strong> UPD<br />
● Windows client/server: Use the Add <strong>Print</strong>er Wizard<br />
● Windows client/server: Use Install.exe<br />
● Windows client/server: Use the command prompt<br />
● Windows client/server: Use Point and <strong>Print</strong><br />
● Windows client/server: Use the <strong>HP</strong> Web Jetadmin <strong>Print</strong> Queue Creation<br />
● Windows Cluster server environment<br />
● Windows Terminal Server/Citrix environment<br />
● Novell<br />
● Plug and play installation<br />
Download and unzip the <strong>HP</strong> UPD<br />
1. Go to the following Web site:<br />
www.hp.com/go/upd<br />
2. Download and save the <strong>HP</strong> UPD that is specific to your operating system, and printing needs.<br />
3. Navigate to the <strong>HP</strong> UPD download file.<br />
4. Unzip the <strong>HP</strong> UPD download file.<br />
a. Double-click the downloaded file.<br />
b. Deselect the When done unzipping open install.exe option.<br />
c. Click the Unzip button.<br />
Windows client/server: Use the Add <strong>Print</strong>er Wizard<br />
Follow these steps to install the <strong>HP</strong> UPD in Traditional mode with the Windows Add <strong>Print</strong>er<br />
Wizard.<br />
NOTE: The Windows Add <strong>Print</strong>er Wizard does not provide any customization options. If you install<br />
the <strong>HP</strong> UPD by using this method, the driver installs so that the user has common printing functionality.<br />
1. From the Control Panel, navigate to the <strong>Print</strong>ers folder..<br />
2. The Add <strong>Print</strong>er Wizard opens. Click Next.<br />
3. Select Local printer attached to this computer, deselect Automatically detect and install my<br />
Plug and Play printer, and then click Next.<br />
NOTE: If you are using an existing port, or if you are specifying the Port Name instead of using<br />
the default, make sure that the name you use does not contain the colon ‘:’ character. This character<br />
is not allowed, and will cause configuration and status communication problems with the printer.<br />
32 Chapter 5 Install and Uninstall of the <strong>HP</strong> UPD <strong>ENWW</strong>
4. Select Create a new port, and then select Standard TCP/IP Port. Click Next.<br />
5. The Add Standard TCP/IP <strong>Print</strong>er Port Wizard opens. Click Next.<br />
6. The Add Port window opens. In the Host Name or IP Address field, type the DNS or WINS host<br />
name or IP Address. Click Next.<br />
NOTE: If the DNS host name is used for the port, click the Always print to device, even if its<br />
ID address changes check box.<br />
NOTE: If the Additional Port Information Required window opens, it means the printer is not<br />
connected. Under these circumstances it is best to cancel out of the installation, connect and turn<br />
on the product, and then start over. If you must continue the installation, then under Device<br />
Type, select Standard, and then select Hewlett Packard JetDirect from the menu. Click Next.<br />
NOTE: Installing the <strong>HP</strong> UPD with the product disconnected or off line prevents the <strong>HP</strong> UPD from<br />
receiving the product configuration, which results in the used default settings (monochrome, no job<br />
storage, etc). Following complete install of the <strong>HP</strong> UPD, to update the <strong>HP</strong> UPD product<br />
configuration, right-click on the printer, select Properties, select the Device Settings tab, scroll<br />
down to Automatic Configuration and select Update Now.<br />
7. The Completing the Add Standard TCP/IP Port Wizard window opens. Click Finish.<br />
8. The Install <strong>Print</strong>er Software window opens. Click Have Disk.<br />
9. Browse to the folder in which the unzipped <strong>HP</strong> UPD download file is saved.<br />
10. In the unzipped <strong>HP</strong> UPD file, select any .inf file, and then click Open. You will be prompted to select<br />
a driver name, either the generic name or a version specific name. See Versioning of printer driver<br />
shared files on page 179.<br />
If an <strong>HP</strong> UPD is currently installed, select Replace existing driver.<br />
11. Click OK.<br />
12. The Install <strong>Print</strong>er Software window lists the driver under the <strong>Print</strong>ers box. Select the<br />
<strong>HP</strong> <strong>Universal</strong> <strong>Print</strong>ing driver and then click Next.<br />
13. The Name Your <strong>Print</strong>er window opens.<br />
The name specified In the <strong>Print</strong>er name: field is the name of the installed printer and displays in<br />
the <strong>Print</strong>ers and Faxes folder. The default printer name is “<strong>HP</strong> <strong>Universal</strong> <strong>Print</strong>ing PCL6” for the<br />
first installation. However, this increments to “<strong>HP</strong> <strong>Universal</strong> <strong>Print</strong>ing PCL6 (copy1)” and so on for<br />
subsequent installs.<br />
Rename the printer to better identify the printer.<br />
14. Under Do you want to use this printer as the default printer?, select Yes or No. Click Next.<br />
15. The <strong>Print</strong>er Sharing window opens. Select Do not share this printer, or enter a Share name: to<br />
share the printer. Click Next.<br />
16. The <strong>Print</strong> Test Page window opens. Select Yes or No, and then click Next.<br />
17. The Completing the Add <strong>Print</strong>er Wizard opens. Click Finish.<br />
Windows client/server: Use Install.exe<br />
NOTE: Use the Install.exe command to create traditional mode queues (only) on your print server.<br />
<strong>ENWW</strong> Install 33
Follow these steps to install the <strong>HP</strong> UPD by using the <strong>HP</strong> <strong>Universal</strong> <strong>Print</strong>ing Installer Wizard.<br />
1. Download and unzip the <strong>HP</strong> UPD.<br />
2. Navigate to and open the unzipped <strong>HP</strong> UPD folder. (See Select the best PDL on page 12 for more<br />
information.)<br />
3. Double-click Install.exe.<br />
4. The <strong>Universal</strong> <strong>Print</strong>ing Installer Wizard opens. Read the software license agreement, and then<br />
click Yes to continue.<br />
5. Double-click Install.exe.<br />
6. The <strong>Universal</strong> <strong>Print</strong>ing Installer Wizard opens. Read the software license agreement, and then<br />
click Yes to continue.<br />
7. The Installation Mode window opens. Select Traditional mode and click Install.<br />
NOTE: Only traditional mode queues are supported on print servers. Do not create and share<br />
dynamic mode queues on any print server.<br />
8. The Finish window opens. Click Finish.<br />
Windows client/server: Use the command prompt<br />
At the command prompt, type C:\Folder\Install /option, where Folder is the location of the<br />
INSTALL.EXE file, / is a forward slash, and option is the command option. For a list of available command<br />
options, see Available command options on page 37. Use the command options to control the<br />
installation and the behavior of the <strong>HP</strong> UPD after installation.<br />
NOTE: In an enterprise environment, a login script may be used to install the <strong>HP</strong> UPD on a client.<br />
NOTE: To view a complete list of installer options, type the following at the command prompt:<br />
c:\folder\install /?<br />
For example, to make the installation completely silent by making it available through an .EXE-based<br />
administration tool (such as SMS), type the following syntax:<br />
C:\folder\Install /q /h<br />
Or, to install the driver in dynamic mode, type the following:<br />
C:\folder\Install /dm<br />
Topics:<br />
● Configure default print settings while installing by command prompt install<br />
● Available command options<br />
Configure default print settings while installing by command prompt install<br />
The <strong>HP</strong> UPD 4.5 and later provides a means of preconfiguring default settings within the printing<br />
environment. The following settings can be reconfigured on the <strong>HP</strong> UPD before deployment. When the<br />
settings are configured and not locked, users see these default settings which can be changed by the<br />
user. If the Lock feature is selected, the users do not have the ability to change the settings.<br />
34 Chapter 5 Install and Uninstall of the <strong>HP</strong> UPD <strong>ENWW</strong>
Duplex<br />
Economode<br />
NOTE: See Pre-configure the <strong>HP</strong> UPD using Install.exe on page 24 for more information on<br />
preconfiguring the <strong>HP</strong> UPD.<br />
In addition to managing these default settings through the <strong>HP</strong> Managed <strong>Print</strong>ing Administrator and the<br />
<strong>HP</strong> Active Directory Templates, default settings can be configured when installing the <strong>HP</strong> UPD through<br />
the Install.exe utility.<br />
Use the following information as a guideline when configuring the default settings.<br />
Table 5-1 Duplex default configuration<br />
Main switch Description Code<br />
/pfduplex=<br />
Example: /pfduplex=2<br />
Table 5-2 Economode default configuration<br />
DEFAULT_DUPLEX_SETTING =0<br />
DUPLEX_ON =1<br />
DUPLEX_FLIP_PAGES_UP_ON =2<br />
DUPLEX_ON_AND_LOCKED =101<br />
DUPLEX_FLIP_PAGES_UP_ON_AND<br />
_LOCKED<br />
=102<br />
Main switch Description Code<br />
/pfecono=<br />
Private printing<br />
Example: /pfecono=101<br />
Table 5-3 Private printing default configuration<br />
ECONOM0DE_DEFAULT_SETTINGS =0<br />
ECONOMODE_ON =1<br />
ECONOMODE_ON_AND_LOCKED =101<br />
Main switch Description Code<br />
/pfpjob=<br />
PRIVATE_PRINTING_DEFAULT_SET<br />
TING<br />
PRIVATE_PRINTING_PROOF_AND_H<br />
OLD<br />
<strong>ENWW</strong> Install 35<br />
=0<br />
=1
Main switch Description Code<br />
Example: /pfpjob=3<br />
Private printing with Pin<br />
Edgeline QAC<br />
Table 5-3 Private printing default configuration (continued)<br />
PRIVATE_PRINTING_PERSONAL_JO<br />
B<br />
=2<br />
PRIVATE_PRINTING_QUICK_COPY =3<br />
PRIVATE_PRINTING_STORED_JOB_<br />
REQUIRE_PIN<br />
PRIVATE_PRINTING_PROOF_AND_H<br />
OLD_LOCKED<br />
PRIVATE_PRINTING_PERSONAL_JO<br />
B_LOCKED<br />
PRIVATE_PRINTING_QUICK_COPY_<br />
LOCKED<br />
PRIVATE_PRINTING_STORED_JOB_<br />
REQUIRE_PIN_LOCKED<br />
Table 5-4 Private printing with Pin default configuration<br />
=5<br />
=101<br />
=102<br />
=103<br />
=105<br />
Main switch Description Code<br />
/pfpjpin=<br />
Example: /pfpjpin=8574<br />
Table 5-5 Edgeline QAC default configuration<br />
(4 numeric characters only)<br />
Main switch Description Code<br />
/pfelqac<br />
EDGELINE_QAC_DEFAULT_SETTIN<br />
GS<br />
=0<br />
EDGELINE_QAC_PROFESSIONAL =1<br />
EDGELINE_QAC_GENERAL_OFFICE =2<br />
EDGELINE_QAC_MONOCHROME =3<br />
EDGELINE_QAC_PROFESSIONAL_L<br />
OCKED<br />
EDGELINE_QAC_GENERAL_OFFICE<br />
_LOCKED<br />
36 Chapter 5 Install and Uninstall of the <strong>HP</strong> UPD <strong>ENWW</strong><br />
=101<br />
=102
Table 5-5 Edgeline QAC default configuration (continued)<br />
Main switch Description Code<br />
Example: /pfelqac=3<br />
Available command options<br />
EDGELINE_QAC_MONOCHROME_L<br />
OCKED<br />
To view the available command options, enter the following at the command prompt:<br />
C:\Folder\Install /?<br />
where<br />
● Folder is the location of the INSTALL.EXE file.<br />
● / is a forward slash.<br />
The command options are explained in the following table.<br />
Table 5-6 Command options<br />
=103<br />
Command option Definition Description<br />
/q Quiet mode, no prompts Use this option to install the driver and<br />
present only a single progress dialog box<br />
to the user. All other warnings and<br />
confirmations are hidden, and default<br />
actions occur in cases where user input<br />
would otherwise be expected.<br />
/npf Do not open the <strong>Print</strong>ers folder on<br />
completion.<br />
/ru Restricted user mode only displays<br />
<strong>HP</strong> Managed <strong>Print</strong>er Lists<br />
The default behavior of the installer is to<br />
open the <strong>Print</strong>ers folder on completion.<br />
This option disables that functionality.<br />
Use this option to configure the driver so<br />
that users can only print to the products<br />
that you specified in the managed printer<br />
lists. The <strong>Print</strong>er Selection dialog box is<br />
replaced with a dialog box that lists the<br />
printers in the managed printer list. For<br />
more information, see Use Managed<br />
<strong>Print</strong>er Lists (MPLs) on page 104.<br />
/sc Simple confirmation Use this option to install the driver so that<br />
location profiles are disabled in the<br />
<strong>Print</strong>er Selection dialog box in dynamic<br />
mode.<br />
/h Hides the install dialog box; must be<br />
used with Quiet mode (/q)<br />
Use this option to hide the primary<br />
installation dialog box and produce a<br />
completely silent installation.<br />
<strong>ENWW</strong> Install 37
Table 5-6 Command options (continued)<br />
Command option Definition Description<br />
/sm Creates a static printer instance bound<br />
to a specific , for example,. /sm\<br />
\server\printer, /smhostname, /<br />
sm15.65.98.111<br />
/n”<strong>Print</strong>er Name” Uses the specified name as the name of<br />
the printer, for example, /n”<strong>HP</strong> LaserJet<br />
P4515”<br />
/ni Does not perform the printer install, only<br />
processes other install options<br />
/aml Adds a new managed printer list name<br />
using the specified URL, for example, /<br />
aml”MyServer, http://<br />
mywebserver or /<br />
aml”My<strong>Print</strong>ers”, \\myprinters<br />
\printerlist\printerlist.xml<br />
/rml”” Removes a previously added managed<br />
list<br />
Use this option to create a statically<br />
bound printer that points to the specified<br />
port (local, TCP/IP, IPX/SPX, Hostname,<br />
UNC). The printer operates as a normal<br />
queue.<br />
When installed in traditional mode, the<br />
<strong>HP</strong> <strong>Universal</strong> <strong>Print</strong> <strong>Driver</strong> behaves as a<br />
standard printer driver but can also be<br />
installed from non-Windows servers as a<br />
Point and <strong>Print</strong> driver.<br />
NOTE: If the <strong>HP</strong> <strong>Universal</strong> <strong>Print</strong> <strong>Driver</strong><br />
is installed in traditional mode, the static<br />
mode printer does not allow the user to<br />
use the universal printing functionality or<br />
change the destination address of the<br />
static mode printer.<br />
This option uses the specified name as<br />
the name of the printer (for example,<br />
<strong>HP</strong> LaserJet P4515).<br />
This option is helpful when using the<br />
traditional mode (/sm) option, but can be<br />
used for common printing as well.<br />
Use this option to process the specified<br />
install options without creating a printer in<br />
the <strong>Print</strong>ers folder.<br />
You can then create subsequent<br />
instances of the <strong>HP</strong> UPD that show only<br />
the configured options that are not<br />
queue-specific.<br />
Use this option to specify a location<br />
where the target system can look for the<br />
managed printer list.<br />
Use this option to delete the specified<br />
managed printer list.<br />
/nd Does not set the printer as the default. This option does not change the current<br />
default printer on the client system. By<br />
default, the installer sets the newly<br />
installed or updated common printer as<br />
the default printer.<br />
/dst Disables the Services tab in the <strong>HP</strong><br />
UPD<br />
/dod Disables the Online Diagnostic option<br />
on the Services tab in the <strong>HP</strong> UPD<br />
/dos Disables the Online Support option on<br />
the Services tab in the <strong>HP</strong> UPD<br />
Use this option to completely disable and<br />
hide the Services tab when accessing<br />
the printer property pages.<br />
Use this option to remove the Online<br />
Diagnostic Tools choice from the<br />
Services menu.<br />
Use this option to remove the Support<br />
and Troubleshooting choice from the<br />
Services tab.<br />
38 Chapter 5 Install and Uninstall of the <strong>HP</strong> UPD <strong>ENWW</strong>
Table 5-6 Command options (continued)<br />
Command option Definition Description<br />
/dpm Disables the Online Product Manual<br />
option on the Services tab in the <strong>HP</strong><br />
UPD<br />
/ddu Disables the Online <strong>Driver</strong> Updates<br />
option on the Services tab in the <strong>HP</strong><br />
UPD<br />
/dso Disables the Online Supplies<br />
Ordering option on the Services tab in<br />
the <strong>HP</strong> UPD<br />
/dssnp Disables the Status Notification Pop-ups<br />
for the selected printer<br />
/gdssnp Disables the Status Notification Pop-ups<br />
for all printers<br />
/snptm=0 Disables the Special Offers program<br />
pop–ups.<br />
Use this option to remove the Product<br />
Manuals choice from the Services tab.<br />
Use this option to remove the Check for<br />
<strong>Driver</strong> Updates choice from the<br />
Services tab.<br />
Use this option to remove the Order<br />
Supplies choice from the Services tab.<br />
When used with /sm or /tm, this option<br />
disables the SNPs for the selected<br />
printer.<br />
Use this option to turn off SNPs for all<br />
printers.<br />
/tm Installs the printer in traditional mode Use this option to force the <strong>HP</strong> UPD to<br />
install in traditional mode. This routine<br />
launches the Add <strong>Print</strong>er Wizard, and<br />
prompts the user to select a printer port<br />
to complete the process. Do not use this<br />
option when using the /sm option.<br />
/dm Installs the printer in dynamic mode Use this option to force the <strong>HP</strong> UPD to<br />
install in dynamic mode.<br />
/u Use the existing printer driver if it is<br />
already installed<br />
/qcomname”name” Specifies a queue-specific SNMP<br />
community name<br />
/gcomname”name” Specifies a system-global SNMP<br />
community name<br />
/m Provides the ability to specify the driver<br />
version name allowing multiple versions<br />
of UPD to be installed onto one system.<br />
Table 5-7 Command options for policy management<br />
Command option Description<br />
Use this option to remove the dialog box<br />
asking the user to “Use existing driver” or<br />
to “Replace existing driver.”<br />
The /sm is required. Cannot be used<br />
with /sm\server\printer. The /n is optional.<br />
Syntax example<br />
/m"<strong>HP</strong> <strong>Universal</strong> <strong>Print</strong>ing PCL<br />
5 (v5.0)" /sm10.1.3.2<br />
If a syntax error exists in the command<br />
line switch, installation proceeds without<br />
implementing the /m version specific<br />
installation of the <strong>HP</strong> UPD.<br />
/Policy“MPA server name” Enables <strong>HP</strong> MPA policy checking for all users using current policy settings<br />
(default is to use managed-print). Using the /gpolicy”your_mpa_server”<br />
command line option is the equivalent of enabling MPA policy checking and<br />
forcing the MPA server to query the http server “your_mpa_server”.<br />
<strong>ENWW</strong> Install 39
Table 5-7 Command options for policy management (continued)<br />
/empa<br />
Enables <strong>HP</strong> MPA policy checking for current user using current policy settings<br />
(default is to use managed-print). Using the /policy”your_mpa_server”<br />
command line option is the equivalent of enabling MPA policy checking and<br />
forcing the MPA server to query the http server “your_mpa_server”.<br />
/gempa Enables <strong>HP</strong> MPA policy checking for all users using current policy settings<br />
(default is to use managed-print). Using the /policy”your_mpa_server”<br />
command line option is the equivalent of enabling MPA policy checking and<br />
forcing the MPA server to query the http server “your_mpa_server”.<br />
/dmpa Disables <strong>HP</strong> MPA policy checking for current user.<br />
/eads Enables ADS policy checking for current user using current policy settings.<br />
/geads Enables ADS policy checking for all users using current policy settings.<br />
/dads Disables ADS policy checking for current user.<br />
/pqdmpa Disables MPA policy checking for the current print queue (logical windows<br />
printer) no matter who uses it.<br />
/pqdads Disables ADS policy checking for the current print queue (logical windows<br />
printer) no matter who uses it.<br />
/gpolicy See the /Policy example above. The difference between these switches is<br />
that /gpolicy specifies the MPA Policy URL for all users of a system. /<br />
Policy specifies this information on a per user basis.<br />
Windows client/server: Use Point and <strong>Print</strong><br />
To use the <strong>HP</strong> UPD and Point and <strong>Print</strong>, install the driver on a server in Traditional mode. After the<br />
driver installs on the server workstation from a Windows server system it behaves as it behaves as any<br />
other installed driver. The user prints to a statically bound port established on the server.<br />
When a client PC connects to a shared printer, the <strong>HP</strong> UPD automatically downloads to the client PC<br />
through Point and <strong>Print</strong>.<br />
Vending of 32-bit drivers is supported from all 64-bit server OSs. Vending of 64-bit drivers is supported<br />
from all 32-bit OSs that support 64-bit alternate drivers.<br />
Windows client/server: Use the <strong>HP</strong> Web Jetadmin <strong>Print</strong> Queue Creation<br />
The <strong>HP</strong> UPD can also be installed via <strong>HP</strong> Web Jetadmin <strong>Print</strong> Queue Creation. For more information,<br />
go to the following Web site.<br />
www.hp.com/go/webjetadmin<br />
Windows Cluster server environment<br />
The <strong>HP</strong> UPD installs with automatic configuration enabled by default and requires a specific installation<br />
procedure. The <strong>HP</strong> UPD requires that certain COM objects be registered and initialized in order to<br />
perform the automatic configuration of the products during setup. Please follow the instructions below<br />
to install the <strong>HP</strong> UPD in a Windows Cluster server environment.<br />
NOTE: <strong>HP</strong> UPD 4.7 introduced the capability to disable <strong>Print</strong>er Automatic Configuration<br />
communications. This capability is useful if <strong>HP</strong> UPD cannot be installed on each physical node, as<br />
recommended by <strong>HP</strong>. See Manually configure product settings on page 50 for more details on<br />
disabling bidirectional communication, and manually configuring the driver.<br />
40 Chapter 5 Install and Uninstall of the <strong>HP</strong> UPD <strong>ENWW</strong>
The <strong>HP</strong> UPD must be installed and initialized on every physical node that makes up the cluster<br />
environment before creating queues on the virtual servers. <strong>HP</strong> recommends installing the <strong>HP</strong> UPD in<br />
traditional mode and creating an LPT1 port on the nodes. After the printer is created, it can be deleted<br />
from the Node’s <strong>Print</strong>ers and Faxes folder if desired. This will leave the <strong>HP</strong> UPD driver intact and<br />
properly initialized.<br />
Only traditional mode printer queues can be shared from any of the Microsoft based print servers.<br />
Sharing of dynamic mode queues is not supported on any print servers using the <strong>HP</strong> UPD.<br />
Repeat Step 1 on each physical node before proceeding.<br />
1. Install the driver on each physical node in the cluster, using the Add <strong>Print</strong>er <strong>Driver</strong> Wizard.<br />
a. Download the latest version of the <strong>HP</strong> UPD from the following Web site: www.hp.com/go/upd<br />
b. Log into or remotely connect to one of the nodes.<br />
c. Open the <strong>Print</strong>ers folder.<br />
d. Click Add <strong>Print</strong>er.<br />
e. Select Local printer attached to this computer. Click Next.<br />
f. Click Use the following port and select LPT1: (Recommended) <strong>Print</strong>er Port.<br />
g. Click Next.<br />
h. Browse to your <strong>HP</strong> UPD Installation files and click Next.<br />
i. Follow the rest of the Add <strong>Print</strong>er Wizard procedure to complete the installation. See Windows<br />
client/server: Use the Add <strong>Print</strong>er Wizard on page 32 for more information.<br />
2. Install the <strong>HP</strong> UPD on the virtual print server.<br />
Installing the <strong>HP</strong> UPD on the virtual server is similar to installing the <strong>HP</strong> UPD on any print server.<br />
Install the traditional Mode of the driver, using the Add <strong>Print</strong>er Wizard.<br />
a. Log into the active node of the cluster. You can log in while at the machine or remotely.<br />
b. Access the virtual print server by clicking Start, then Run, and then typing the<br />
\\virtualservername<br />
c. Open the <strong>Print</strong>ers folder.<br />
d. Run the Add <strong>Print</strong>er Wizard and install the driver in traditional mode.<br />
Alternative install with printer automatic configuration disabled<br />
If the <strong>HP</strong> UPD cannot be installed on every physical node in your cluster, you can follow the steps below<br />
to disable <strong>Print</strong>er automatic configuration and install <strong>HP</strong> UPD.<br />
Please refer to the section in this guide for disabling bidirectional communications. These steps assume<br />
that you will be using the DCU utility to disable the bidirectional communication functionality as well as<br />
save the configuration file as CFM in order to retain the digital signature driver files.<br />
Use the DCU (<strong>Driver</strong> Configuration Utility) tool to disable the bidirectional setting as well and preset<br />
other default settings as you wish. Once the cfm file has been created, it resides in the <strong>HP</strong> UPD driver<br />
folder where the files are located. Copy this cfm file to the virtual server w32x86\3 folder before installing<br />
printer queues using <strong>HP</strong> UPD.<br />
<strong>ENWW</strong> Install 41
Use the following steps to copy the cfm file to the proper folder prior to creating printer queues on the<br />
virtual server.<br />
1. Browse to the print$ share of the virtual server. Enter \\virtualserver\print$ You have accessed the<br />
<strong>Print</strong>ers folder for the Physical node that is hosting the virtual server. You will see a few folders<br />
here representing both the printing environment for the Physical Node as well as the GUID folder<br />
which represents the virtual server printing environment. The print$ folder will appear with the<br />
following folders:<br />
● \BIDI<br />
● \color<br />
● \e7776de2-fbd9-4644-9jdt-0jsy —Virtual Server printing folder<br />
● \w32x86–Physical node printing folder<br />
2. Browse to the folder with the long GUID as the file name. Your GUID name will be different. This<br />
is the print environment for the virtual server.<br />
3. Browse to the \<strong>Driver</strong>s\w32x86\3 directory of the GUID folder<br />
4. Copy the cfm file previously created by the DCU utility here.<br />
5. Use the Microsoft recommended method to create printers using the Add <strong>Print</strong>er Wizard.<br />
Windows Terminal Server/Citrix environment<br />
<strong>HP</strong> supports the <strong>HP</strong> UPD 4.5 and later in Citrix and Terminal Server environments. <strong>HP</strong> has tested the<br />
<strong>HP</strong> <strong>Universal</strong> <strong>Print</strong>ing PCL6, <strong>HP</strong> <strong>Universal</strong> <strong>Print</strong>ing PCL5, and the <strong>HP</strong> <strong>Universal</strong> <strong>Print</strong>ing PS drivers in<br />
Citrix environments.<br />
For network printers, the <strong>HP</strong> UPD can be installed in dynamic mode on the Citrix server for all clients<br />
to access as a universal driver.<br />
When the <strong>HP</strong> UPD is installed on the Terminal Server or Citrix server in traditional mode, it can be used<br />
as the printer driver of choice for the fallback or auto-created printers.<br />
For auto created printers, the <strong>HP</strong> <strong>Universal</strong> <strong>Print</strong> PCL 5 driver can be mapped to all PCL 5-capable<br />
<strong>HP</strong> client printers or the <strong>HP</strong> <strong>Universal</strong> <strong>Print</strong> postscript emulation driver to all postscript-capable <strong>HP</strong> client<br />
printers through driver mapping in the Citrix management tools.<br />
For further information see the <strong>HP</strong> white paper "<strong>HP</strong> <strong>Print</strong>ers Supported in Citrix Presentation Server<br />
Environments" on www.hp.com/go/upd.<br />
Versions of Terminal Server and Citrix supported by <strong>HP</strong><br />
See <strong>System</strong> requirements on page 11.<br />
Known limitations of the <strong>HP</strong> UPD when used for auto– created printers or redirected<br />
printers with client printers that are directly attached<br />
The <strong>HP</strong> UPD, outside a Citrix environment, has the ability to configure itself according to the<br />
configuration of the printer by communicating directly with the printer.<br />
<strong>HP</strong> UPD 4.5 and higher is limited when installed on the Citrix Presentation Server and mapped for auto<br />
created printers. It cannot communicate with directly attached printers, such as by USB.<br />
42 Chapter 5 Install and Uninstall of the <strong>HP</strong> UPD <strong>ENWW</strong>
Novell<br />
If the printer is connected to a network, automatic configuration is supported. For full feature support of<br />
locally connected printers, <strong>HP</strong> recommends the Citrix UPD be mapped to the <strong>HP</strong> UPD on the client.<br />
For directly attached printers on the client, the <strong>HP</strong> UPD PCL driver defaults to black and white, no extra<br />
trays, no product-specific paper handling, etc.<br />
NOTE: <strong>Print</strong>ers attached to the client by network ports are unaffected. The <strong>HP</strong> UPD, installed on the<br />
server, can communicate with client printers that are available on the network.<br />
<strong>HP</strong> UPD in a traditional Mode installation, not in dynamic mode, is supported. This includes use of the<br />
<strong>HP</strong> UPD's Enterprise Auto Configuration capabilities (bidirectional communication between printer<br />
product and <strong>HP</strong> UPD enables the driver user interface to change showing the functionality provided by<br />
the product). In addition, preconfiguration of the driver using the <strong>HP</strong> <strong>Driver</strong> Configuration Utility is<br />
supported so administrators can define defaults before driver installation.<br />
Since Novell does not provide a way for the <strong>HP</strong> UPD to query the product configuration from the printer,<br />
the <strong>HP</strong> UPD only makes the default settings available. No trays, output bins, or other printer specific<br />
features are visible in the driver user interface.<br />
i<strong>Print</strong> cannot present the correct printer driver options to the administrator to configure the PDP when<br />
the driver is universal.<br />
For additional details on using i<strong>Print</strong>'s <strong>Print</strong> <strong>Driver</strong> Profile, see www.novell.com/support/viewContent.do?<br />
externalId=7001400.<br />
Enterprise Auto Configuration (bidirectional communciation) can be turned off through the <strong>HP</strong> <strong>Driver</strong><br />
Configuration Utility.<br />
Install the <strong>HP</strong> UPD in a Novell environment<br />
NOTE: Use Novell's most current i<strong>Print</strong> client. It is critical to have the client installed even if all you are<br />
doing is uploading the driver to the Novell server. Novell has posted the i<strong>Print</strong> client at the i<strong>Print</strong>: Novell<br />
Open Enterprise Server 2 website. Click here to go to the i<strong>Print</strong>: Novell Open Enterprise Server 2 website<br />
(http://www.novell.com/iprint).<br />
NOTE: UPD for Novell only supports static mode and not dynamic mode.<br />
NOTE: This has been tested with both User and Workstation printer setups.<br />
To add the <strong>HP</strong> UPD driver and create the printer on the server, go to a computer that has the i<strong>Print</strong> client<br />
installed.<br />
1. Unpack the UPD installer but do not run the installer. Just have it unpack itself to the local PC.<br />
2. Upload the driver to the Novell server by using the Novell iManager web page.<br />
a. Select the Manage Broker task.<br />
b. Click the RMS <strong>Driver</strong>s tab.<br />
c. Click the Add from file button.<br />
d. Select the <strong>HP</strong> UPD inf file, and click OK.<br />
<strong>ENWW</strong> Install 43
The driver will begin to upload to the server. This process can take several minutes. Do not<br />
touch the Internet Explorer (IE) window while it is doing this.<br />
e. When it is done, you should see the <strong>HP</strong> UPD driver in the driver list.<br />
3. Create an <strong>HP</strong> UPD printer on the server by using the Novell iManager web page.<br />
a. Select the Create <strong>Print</strong>er task.<br />
b. Type a printer name and click Next.<br />
c. Type an IP address and click Next.<br />
d. Select the <strong>HP</strong> UPD driver in the Microsoft Windows XP driver dropdown.<br />
e. Click Next or OK to create the printer.<br />
To use the newly created printer on a PC.<br />
NDPS<br />
1. Close any browser windows that you have open.<br />
2. Install the i<strong>Print</strong> client on the PC.<br />
3. Go to the IPP printer page on the Novell server, that is, http://foo.example.com/ipp.<br />
4. Click the newly created printer.<br />
You will get a message stating that the printer needs to be installed.<br />
5. Click OK .<br />
The driver will download and install. This will take a few minutes.<br />
The printer is now installed on the local PC and will route print jobs to the Novell server.<br />
The <strong>HP</strong> UPD will function with limited capabilities in the Novell NDPS environment. This is due to the<br />
<strong>HP</strong> UPD not being able to communicate with the product directly, therefore loosing the ability to gather<br />
product-specific information back from the printers.<br />
The <strong>HP</strong> UPD can only be used in traditional mode in the NDPS environment. In this mode, the <strong>HP</strong> UPD<br />
operates the same as a product-specific driver.<br />
Since Novell does not provide a way for the UPD to query the product configuration from the printer, the<br />
<strong>HP</strong> UPD will only make the default settings available. No trays, no output bins, or other printer specific<br />
features will be visible in the driver user interface.<br />
The latest patches for i<strong>Print</strong> and Winspool must be applied to get the advanced printing features<br />
supported (such as N-up and Watermarks). URLs related to this information will be forthcoming.<br />
Plug and play installation<br />
The <strong>HP</strong> UPD can be installed for use with plug and play products as either a hardware first or a software<br />
first installation.<br />
● Hardware first installation<br />
● Software first (unattended) installation<br />
44 Chapter 5 Install and Uninstall of the <strong>HP</strong> UPD <strong>ENWW</strong>
Hardware first installation<br />
In a hardware first installation, a USB cable is connected to the PC first and then the <strong>HP</strong> UPD is installed.<br />
When the operating system detects that no driver is installed for the connected product, it will prompt<br />
for a disk or a location from which to install the driver. This method requires that the user be logged on<br />
to an account with administrator privileges.<br />
● Download and unzip the <strong>HP</strong> UPD from www.hp.com/go/upd.<br />
● Plug in the product USB cable.<br />
● When prompted, browse to the location where the <strong>HP</strong> UPD was downloaded and unzipped.<br />
Software first (unattended) installation<br />
In a software first installation, the <strong>HP</strong> UPD has already been pre-loaded on the PC, and will be found<br />
and used by the operating system when the new product is connected. This method does not require<br />
any interaction by the current user, and does not require the user to have administrator privileges.<br />
Pre-configure the <strong>HP</strong> UPD for use with software first installation<br />
To pre-configure the <strong>HP</strong> UPD for a Software first, plug and play installation, use the <strong>HP</strong> <strong>Driver</strong><br />
Distribution Utility (DDU), and select the Preload the <strong>Driver</strong> option. This method creates a package<br />
with a setup.exe utility that is easy to deploy interactively or via scripting. See Pre-configure the <strong>HP</strong> UPD<br />
using <strong>HP</strong> <strong>Driver</strong> Deployment Utility (DDU) on page 28 for more information.<br />
Uninstall the <strong>HP</strong> UPD<br />
The recommend, and safest, method to remove installed instances of the UPD is the following steps.<br />
To fully remove the <strong>HP</strong> UPD involves additional steps that, if done incorrectly, can result in unintended<br />
consequences to the printing system and therefore is not recommended.<br />
1. Select the <strong>HP</strong> UPD PDL instance from the <strong>Print</strong>ers folder.<br />
2. Stop and restart the <strong>Print</strong> Spooler using one of the following methods.<br />
● From a command line, type net stop spooler && net start spooler.<br />
● Open the Services applet in Control Panel (Start-Run-services.msc), select <strong>Print</strong> Spooler,<br />
select Stop then Start.<br />
3. In the <strong>Print</strong>ers folder, open the File menu, and click Server Properties. Identify, in the list of<br />
installed printer drivers, the <strong>HP</strong> UPD driver PDL and <strong>HP</strong> UPD version to be removed. Click the<br />
<strong>Driver</strong>s tab, select <strong>HP</strong> <strong>Universal</strong> <strong>Print</strong>ing… and then click Remove.<br />
<strong>ENWW</strong> Uninstall the <strong>HP</strong> UPD 45
46 Chapter 5 Install and Uninstall of the <strong>HP</strong> UPD <strong>ENWW</strong>
6 <strong>HP</strong> UPD Administrative features<br />
This chapter contains configuration information for features in <strong>HP</strong> UPD 5.0 and <strong>HP</strong> UPD 4.7.<br />
● <strong>HP</strong> UPD 5.0 Features<br />
● <strong>HP</strong> UPD 4.7 Features<br />
● Job storage and PIN printing<br />
● Modify <strong>HP</strong> UPD using Install.exe<br />
● <strong>Print</strong>er Automatic Configuration<br />
<strong>ENWW</strong> 47
<strong>HP</strong> UPD 5.0 Features<br />
This section lists the features available in <strong>HP</strong> UPD 5.0.<br />
<strong>Print</strong>ing to unsupported products enabled by default<br />
<strong>HP</strong> UPD 5.0 allows for printing to unsupported or non-<strong>HP</strong> products by default. The list of supported<br />
printers for the <strong>HP</strong> UPD is located on the Specifications tab at www.hp.com/go/upd. <strong>Print</strong>ers on this<br />
list are tested, verified, and supported by <strong>HP</strong> to work with the <strong>HP</strong> UPD. The <strong>HP</strong> UPD may also provide<br />
basic printing functionality to products not listed on the Supported printers list. The following list applies<br />
to all installation methods.<br />
● All available features and capabilities of the non-<strong>HP</strong> or unsupported target product may not be<br />
present, may not work, or may not provide a consistent user experience. <strong>HP</strong> recommends that<br />
customers test and validate the printing experience before adopting.<br />
● <strong>HP</strong> is unable to add additional new features for non-<strong>HP</strong> products into the <strong>HP</strong> UPD.<br />
● Technical support is available for <strong>HP</strong> UPD printing to products on the <strong>HP</strong> UPD supported printers<br />
list only.<br />
● When printing to a non-<strong>HP</strong> printer, using postscript emulation 2 and 3 may provide more consistent<br />
results than PCL5 or PCL6.<br />
Installation to allow <strong>HP</strong> UPD version control<br />
<strong>HP</strong> UPD version specific installation allows multiple versions of the UPD to be installed on the same<br />
system (i.e- UPD v4.5, UPD v4.7 and UPD v5.0). Beginning with UPD v4.7 a traditional mode installation<br />
of the UPD driver using the Add <strong>Print</strong>er Wizard allowed two different installation paths, each installing<br />
the same version of the driver. Selecting generic "<strong>HP</strong> <strong>Universal</strong> <strong>Print</strong>ing" upgrades all queues utilizing<br />
the UPD to the version being installed. Selecting "<strong>HP</strong> <strong>Universal</strong> <strong>Print</strong>ing PCL 6 (vX.Y)" creates a version<br />
specific instance of the UPD without upgrading existing UPD queues. Beginning with UPD v5.0, version<br />
specific UPD installation is added to the INSTALL.EXE options command line. The /m switch only applies<br />
to traditional mode driver installation, therefore the /sm switch is required and supports only IP address<br />
or hostname.<br />
Example: install /m"<strong>HP</strong> <strong>Universal</strong> <strong>Print</strong>ing PCL 6 (v5.0)" /sm10.1.1.200<br />
Additional details on the use and purpose of version specific installation can be found in the installation<br />
chapter of this document Install and Uninstall of the <strong>HP</strong> UPD on page 31<br />
NOTE: You must use the exact name and syntax of the driver when using this feature. For example,<br />
"<strong>HP</strong> <strong>Universal</strong> <strong>Print</strong>ing PCL 6 (v5.0)". Failure to provide proper command line syntax will<br />
result in the UPD installing using the generic UPD install.<br />
Create and edit shortcuts with the <strong>HP</strong> <strong>Driver</strong> Configuration Utility<br />
Using the DCU, administrators can pre-configure the driver before installation to customize the shortcuts<br />
presented to the client in the driver user interface. This includes removing <strong>HP</strong> product default shortcuts<br />
(all except the Factory Default) and creation of administrator defined shortcuts. Shortcuts defined<br />
through pre-configuration will become the defaults.<br />
For more details on using the <strong>HP</strong> <strong>Driver</strong> Configuration Utility, please refer to www.hp.com/go/DCU and<br />
click Manuals.<br />
48 Chapter 6 <strong>HP</strong> UPD Administrative features <strong>ENWW</strong>
Custom media types recognized by the <strong>HP</strong> UPD<br />
The <strong>HP</strong> UPD can now recognize up to five custom media types. Administrators can define these five<br />
media types by using Web Jetadmin.<br />
1. Obtain the most current version Web Jetadmin from www.hp.com/go/webjetadmin.<br />
2. Change all five paper types through Web Jetadmin. This functionality is dependent upon product<br />
support.<br />
3. Install <strong>HP</strong> UPD in traditional mode and perform Update Now from Advanced tab<br />
4. View the Paper Type from the Paper Quality tab.<br />
Username added to watermark selections<br />
This feature adds a new pre defined watermark called [User Name]. The user's name is retrieved from<br />
the computer and becomes the text for the watermark. This feature is available by default in the <strong>Print</strong>er<br />
Property pages under the Effects tab, or pre-configurable using the updated version of the <strong>HP</strong> <strong>Driver</strong><br />
Pre-configuration Utility.<br />
To configure a watermark to contain a username from the printer property pages, follow these steps.<br />
1. In the property page of the product, click on <strong>Print</strong>ing Preferences.<br />
2. Click the Effects tab.<br />
3. Select [User Name] from the menu for watermarks.<br />
To pre-configure the watermark feature in DCU, follow these steps.<br />
1. Load the driver's .cf_ file in DCU.<br />
NOTE: DCU can be downloaded from www.hp.com/go/dcu.<br />
2. Select Advanced Features from the <strong>Print</strong>ing Preferences tab<br />
3. Select [User Name] from the Watermarks pull down menu.<br />
<strong>HP</strong> EasyColor<br />
For PCL6 installations, <strong>HP</strong> EasyColor automatically selects settings in the driver to optimize the print<br />
experience and printed quality (color theme, color options, image enhancements) of images.<br />
<strong>HP</strong> EasyColor is enabled by default but can be turned off on the driver's Color tab so the selection of<br />
features becomes the user's decision.<br />
The <strong>HP</strong> EasyColor feature will behave differently depending on whether or not <strong>HP</strong> UPD Bidirectional<br />
communications is enabled.<br />
<strong>HP</strong> Easy color takes advantage of applications that support PNG and JPEG pass through. Examples<br />
of these applications are Microsoft Office applications. <strong>HP</strong> Easy Color will have no effect on PDF,<br />
Illustrator or Photoshop images as the technology differs from Microsoft Office applications.<br />
Global per machine policy management<br />
Prior to <strong>HP</strong> UPD 5.0, policy management was enabled for the user that installed the driver. Other users<br />
who logged onto the machine were not managed. With the release of the <strong>HP</strong> UPD 5.0, new Install.exe<br />
<strong>ENWW</strong> <strong>HP</strong> UPD 5.0 Features 49
switches allow the administrator to enable MPA or AD policy for all users logging onto the PC. See<br />
Available command options on page 37 for the specific install switches.<br />
<strong>HP</strong> UPD 4.7 Features<br />
This section lists the features available in <strong>HP</strong> UPD 4.7. These new features are also available in UPD<br />
5.0.<br />
Manually configure product settings<br />
The <strong>HP</strong> UPD 4.7 supports turning off the automatic configuration forcing the manual configuration of<br />
product settings.<br />
In previous versions of the <strong>HP</strong> UPD, the driver queried the product to request the product capabilities,<br />
including the presence of installed trays, output bins, duplexer, and so on. If turned on and connected<br />
to the network, the product returned its capabilities to the driver. The product capabilities were displayed<br />
in the driver user interface.<br />
The following scenarios might be reasons for disabling bidirectional communications, otherwise <strong>HP</strong><br />
recommends the default behavior.<br />
● Hardware capabilities can be managed for defined queues or user groups. Administrators can<br />
disable bidirectional communication and control specific product capabilities made available<br />
through the driver user interface.<br />
● The queue is created before the product is available and the administrator wants it ready to go with<br />
no further intervention.<br />
● The product is connected over an NDPS queue on a Novell Server.<br />
● Security concerns around having services running or SNMP V2 traffic on the network.<br />
● Any of these produce the need to manually configure the queue to get access to product<br />
capabilities.<br />
<strong>HP</strong> recommends that unless you have a specific reason for disabling <strong>Print</strong>er Automatic Configuration,<br />
you should leave it enabled. Using the <strong>HP</strong> <strong>Driver</strong> Configuration Utility to manually configure the products<br />
does not allow for configuring a product as color, or setting the trays or envelope feeders. These items<br />
must be configured manually and must be done for every queue through the product properties. Also,<br />
Update Now is disabled and the update process cannot be automated. Dynamic mode will not work in<br />
this configuration.<br />
The <strong>HP</strong> UPD provide a generic list of basic capabilities when bidirectional communication is set to<br />
Off. The same basic capabilities are presented as when bidirectional communication is enabled and the<br />
product cannot be queried by the <strong>HP</strong> UPD over the network.<br />
If a feature is defined for a product that does not support the feature, the product behaves the same as<br />
an improperly configured traditional mode driver.<br />
Status Notification Pop-ups do not work when bidirectional communication is set to Off.<br />
Pinless private printing<br />
The <strong>HP</strong> UPD 4.7 can store personal print jobs on the product and does not require a PIN to print. This<br />
functionality is similar to Pinless Private <strong>Print</strong>ing with product-specific drivers.<br />
50 Chapter 6 <strong>HP</strong> UPD Administrative features <strong>ENWW</strong>
Follow these steps to perform Pinless Private <strong>Print</strong>ing:<br />
● An <strong>HP</strong> UPD driver with Pinless private printing<br />
● An <strong>HP</strong> product that supports Job Storage<br />
● An <strong>HP</strong> product with the firmware that supports Pinless Private <strong>Print</strong>ing<br />
To perform Pinless Private <strong>Print</strong>ing, do the following:<br />
1. Open the software program that you want to print from. Select File File><strong>Print</strong>, and then click the<br />
Properties button.<br />
2. Select the Job Storage tab, and then click Personal Job. Leave the Make Job Private area blank.<br />
3. Click OK to start the print job, and then go to the printer.<br />
4. Select the job from the list on the printer control panel and print.<br />
Job separator page<br />
A job separator page can be added to print jobs with the <strong>HP</strong> UPD. Job separator pages are useful for<br />
separating print jobs in the output tray printed by different users. Each job is accompanied by a separator<br />
page which provides information on which user has printed the job.<br />
To enable the job separator page feature, follow these steps.<br />
1. Open the <strong>Print</strong>ers folder, right-click the printer, and select Properties.<br />
2. Click the Device Settings tab.<br />
3. Click Job Separator:, under Installable Options, and then select Enabled.<br />
4. Click OK.<br />
At least one feature for Output Bins should be selected to show up on the Output tab. A button displays<br />
on the Output tab when the job separator feature is enabled. Click this button to open a dialog box to<br />
configure the separator page. Select the Separator Page Details option in the separator page dialog<br />
box to enable all controls on the dialog box. The default value for Source Is is Automatically Select<br />
and for Media Type the default value is Plain. The other four check boxes are unchecked by default.<br />
Once the job separator page feature is enabled, follow these steps to select it.<br />
1. Open the <strong>Print</strong>ers folder, right-click the printer, and select <strong>Print</strong>ing Preferences.<br />
2. Select the Finishing tab.<br />
3. Click the Job Separator button.<br />
Web Jetadmin language monitor support<br />
The Web Jetadmin language monitor can be integrated into an <strong>HP</strong> UPD installation package. Doing so<br />
enables Web Jetadmin to support products that use direct connect over USB for status and monitoring<br />
proper Web Jetadmin client dependencies. This feature is only available as PCL6, PS, and PCL5 in<br />
dynamic mode (not added for XPS or traditional mode).<br />
<strong>ENWW</strong> <strong>HP</strong> UPD 4.7 Features 51
Eco-<strong>Print</strong> (Two-sided printing) shortcut<br />
A new printing shortcut named Eco-print (Two-sided printing) is available on the <strong>Print</strong>ing<br />
Shortcuts tab with the <strong>HP</strong> UPD 4.7. Eco-print (Two-sided printing) allows duplex printing to be<br />
enabled by default.<br />
Cache printer settings<br />
<strong>Print</strong>er settings can be cached to allow switching of physical products while maintaining the same TCP/<br />
IP address.<br />
The (node member) element can be used to control how often the current MPP refreshes.<br />
What this means is that downloaded MPP content is cached for the specified (or default) amount of time,<br />
and any future requests for retrieval of the MPP result in using the cached content.<br />
Job storage and PIN printing<br />
Job storage is the capability of a printer to store a print job on the target product's hard drive or in its<br />
memory. Job storage allows a print job to be stored and printed at the user's convenience. Job storage<br />
also provides features for making a print job a personal job with a personal identification number (PIN)<br />
and proofing a print job.<br />
How the <strong>HP</strong> UPD works with job storage<br />
During installation, the <strong>HP</strong> UPD queries the products for installed options and additional equipment using<br />
<strong>Print</strong>er Automatic Configuartion. When job storage capabilities are detected, the <strong>HP</strong> UPD enables the<br />
job storage feature and mopier function. To override these product derived settings, set Mopier<br />
mode to Disabled in Device Settings. This disables job storage as well as product based collation.<br />
Since printer drivers do not perform capacity checks before attempting to store print jobs, the job storage<br />
area may become full. If this occurs, an Unable to store job at printer error message will display.<br />
Access and configure the job storage feature.<br />
To access the job storage features open the printer Properties and then select <strong>Print</strong>ing<br />
Preferences. Click on the Job Storage tab.<br />
NOTE: If the <strong>HP</strong> UPD detects the presence of a hard drive or RAM disk on a printer, the Job<br />
Storage tab is displayed and job storage is enabled by default.<br />
52 Chapter 6 <strong>HP</strong> UPD Administrative features <strong>ENWW</strong>
Table 6-1 Job Storage tab features<br />
Feature Function<br />
Job Storage Mode Proof and Hold–Proof and Hold allows users to print the first<br />
page of a multi-page print job and verify their print appears as<br />
designed. After the first page is proofed, users print the<br />
remaining pages at the printer control panel.<br />
Personal Job–A user's print job is stored on the printer, but<br />
not printed, until the print job is printed at the control panel.<br />
After the job is printed, it is automatically removed from the<br />
printer’s job storage. Personal jobs can be secured with a PIN.<br />
Quick Copy–Quick Copy allows users to print a job through<br />
the print driver and to then store the print job on the printer’s<br />
hard drive for printing at a later time, without the need to reaccess<br />
the print job at their PC.<br />
Stored Job–This feature allows users to send a print job to a<br />
printer's hard drive or RAM disk and store the print job<br />
indefinitely. The stored job can be printed at any time from the<br />
printer’s control panel, eliminating the need to send commonly<br />
printed jobs or forms from a user PC each time they are printed.<br />
Stored jobs can be secured with a PIN.<br />
User Name The User Name section defines how a job is stored and<br />
identified on the printer. By default, a job is stored under a user<br />
name. Selecting the Custom option allows a user to create a<br />
new identifier for stored jobs.<br />
Make Job Private Personal jobs and stored jobs can be made private by selecting<br />
PIN to print and entering a 4-digit PIN. The PIN must be<br />
entered at the control panel to print the personal or stored job.<br />
This setting can be preconfigured using Install.exe, MPA, AD<br />
group policy, DCU, or DDU.<br />
NOTE: If a print job is made private and no PIN is entered,<br />
the PIN defaults to “0000”.<br />
Job Name This feature allows a user to identify the stored job by a custom<br />
name. The default settings are increased in numerical value<br />
as they are stored on the printers.<br />
If job name exists: This setting allows the user to make a decision regarding same<br />
name print jobs that are being stored on the printer.<br />
Job Notification Options This option allows the user to decide if the job storage message<br />
and job name are displayed on the user's screen when the job<br />
is sent to the printer.<br />
Pre-configure job storage capabilities<br />
The job storage feature can be preconfigured and, if desired, locked down during printing. For security<br />
purposes a company may decide to force every print job to be stored on the printer and retrieved by a<br />
user, so no documents reside on the output tray unattended. The following section describes the<br />
different methods for pre-configuring the job storage feature.<br />
<strong>ENWW</strong> Job storage and PIN printing 53
Pre-configuration method Notes<br />
<strong>HP</strong> UPD Install.exe utility The <strong>HP</strong> UPD Install.exe utility includes switches that allow the<br />
job storage feature to be pre-configured.<br />
● /pfpjob–This switch enables the job storage capabilities<br />
for the <strong>HP</strong> UPD. Refer to Available command options<br />
on page 37 in this manual for the arguments available with<br />
this switch<br />
● /pfpjpin–This switch allows an administrator to pre-set a<br />
unique 4 digit code to be used with the Pin printing or<br />
personal job feature. Only numeric values are permitted,<br />
and 4 digits must be used. The default value is 0000 if a<br />
PIN is not selected.<br />
<strong>HP</strong> <strong>Driver</strong> Configuration Utility The <strong>HP</strong> <strong>Driver</strong> Configuration Utility, DCU allows for job<br />
storage, in this case known as Job Retention Mode, to be<br />
enabled and locked prior to driver deployment. Use the pull<br />
down menu to select the proper method of job storage desired.<br />
Put a check mark in the Lock section if you want to force the<br />
Job retention mode.<br />
If Personal Job or Stored Job is selected an additional pull<br />
down menu is created to allow for the setting of custom PIN<br />
numbers. Click on the (+) Plus icon to enable require a PIN<br />
setting and click on the next + icon to enter a unique PIN.<br />
Please refer to the DCU release notes for additional<br />
information.<br />
Managed <strong>Print</strong>ing Administrator MPA allows an administrator to pre-set the job storage<br />
settings. The job storage settings are configured inside the<br />
Managed <strong>Print</strong> Policies in the Default <strong>Print</strong> Settings. Create a<br />
new template in the Default <strong>Print</strong> Settings and use the Private<br />
<strong>Print</strong>ing option to choose the storage option and lock option.<br />
See Manage the <strong>HP</strong> UPD using <strong>HP</strong> MPA on page 82 for more<br />
information.<br />
<strong>HP</strong> UPD Active Directory Template The Default <strong>Print</strong> Settings section is used to enable and<br />
configure the job storage feature. Enable the feature and<br />
choose the Private <strong>Print</strong>ing option. Enter a custom 4-digit PIN<br />
or use the default PIN of 0000. See Manage Active Directory<br />
Group Policy with the <strong>HP</strong> UPD using <strong>HP</strong> Active Directory<br />
Templates on page 123 for more details.<br />
<strong>Driver</strong> Deployment Utility The DDU tool utilizes the <strong>Driver</strong> Pre-configure Utility to allow<br />
an administrator to preconfigure the driver settings prior to<br />
creating the driver package. Please refer to the Readme notes<br />
accompanying the DDU tool for additional details.<br />
Modify <strong>HP</strong> UPD using Install.exe<br />
Method 1: Upgrade queues on a print server.<br />
When upgrading queues on the print server, the new version of the <strong>HP</strong> UPD is automatically installed<br />
on to the client PCs at the next use of the printer. <strong>HP</strong> recommends that client PCs delete their connection<br />
and then re-establish their connection to the printer queue on the server to make sure the new version<br />
of the <strong>HP</strong> UPD installs on the client.<br />
Method 2: Upgrade queues on a client.<br />
54 Chapter 6 <strong>HP</strong> UPD Administrative features <strong>ENWW</strong>
This method upgrades the queues, using the same driver as the printer mentioned above to the latest<br />
version of the <strong>HP</strong> UPD. The <strong>HP</strong> UPD installs in traditional mode.<br />
install /ni /n”existing-queue-name” /tm /eads<br />
Table 6-2 Install.exe command line switches<br />
/ni no install; does not install a new printer<br />
/n”existing-queue-name” point to an existing queue<br />
/tm select traditional mode<br />
/eads Enables <strong>HP</strong> UPD policy management via Group Policy<br />
Objects.<br />
<strong>Print</strong>er Automatic Configuration<br />
This chapter contains information on using printer automatic configuration.<br />
Device Automatic Configuration defined<br />
Within the <strong>Universal</strong> <strong>Print</strong> <strong>Driver</strong>'s (UPD) core functionality is Automatic Configuration enabling the UPD<br />
driver user interface to change to reflect the supported capabilities of the target print device. Automatic<br />
configuration occurs through bidirectional communication between the device and a UPD. This<br />
communication can occur over the network or to a USB direct connect device. When the user installs<br />
the driver the default printer model options will be base model. Successful implementation requires the<br />
UPD installed bidirectional services are loaded, the correct port settings, and the target device is<br />
available direct connect to the host or over the network. If the communication is successful, the printer<br />
options will be updated in the driver user interface. This process of the UPD sending request and<br />
accepting responses directly between the driver the device is referred as 'bidi' for bidirectional<br />
communication. The UPD driver user interface options will change to enable features of the target device<br />
based on the result of the response query (installable trays, Duplexer, Accessory Output Bin, <strong>HP</strong> Easy<br />
Color, etc). If the communication is unsuccessful, the driver will still have base model functionality<br />
presented in the UPD driver user interface and extended options will not be displayed or available for<br />
use during FILE-PRINT.<br />
The benefit of <strong>Print</strong>er Auto-Configuration is enabling the driver to query the printer and recognize the<br />
device’s capabilities with a level of automation and accuracy.<br />
<strong>Print</strong>er Automatic Configuration can only be launched in the following methods.<br />
1. UPD driver installation (automatic update to all queues utilizing the UPD driver)<br />
2. Dynamic mode- each time PRINT is selected from the UPD client.<br />
3. Update Now GUI: Traditional mode installations can manually launch through the UPD driver User<br />
Interface: <strong>Print</strong>er Properties-Device Settings tab-Installable Options-Automatic Configuration-<br />
Update Now.<br />
4. UPDATE COMMAND LINE: Traditional mode installations can execute a command line using<br />
Microsoft's Rundll32.dll allowing change updates to occur through scripting (reference table A).<br />
Automatic <strong>Print</strong>er Configuration status<br />
Dynamic mode: invoke <strong>Print</strong>er Automatic Configuration each time the <strong>HP</strong> UPD user interface is invoked<br />
(ie- print properties for FILE-PRINT from the application).<br />
<strong>ENWW</strong> <strong>Print</strong>er Automatic Configuration 55
User Interface<br />
Traditional mode: <strong>Print</strong>er Automatic Configuration status can be determined by checking the About<br />
tab of the <strong>HP</strong> UPD available through the <strong>HP</strong> UPD <strong>Print</strong>er Properties.<br />
Figure 6-1 <strong>Print</strong>er Automatic Configuration status<br />
Traditional Mode About status.<br />
● Auto-Configured MM/DD/YYYY: Automatic configuration through the <strong>Print</strong>er Automatic<br />
Configuration has successfully executed and updated the printer's configuration. Status of "Last<br />
Configured xx/yy/zzzz" displays date of the last attempted automatic configuration.<br />
● Not Auto-Configured: will apply if the driver is <strong>Print</strong>er Automatic Configuration enabled, and<br />
PRINTER AUTOMATIC CONFIGURATION runs, but could not update the configuration (i.e.,<br />
unable to communicate with the printer). Status of Last Configured xx/yy/zzzz displays the date<br />
of the last attempted automatic configuration.<br />
● Auto-Configuration Not Attempted: will apply when the driver is <strong>Print</strong>er Automatic Configuration<br />
enabled, but <strong>Print</strong>er Automatic Configuration did not run. This would be a case such as when the<br />
driver is <strong>Print</strong>er Automatic Configuration enabled, but the registering of the services fail loading a<br />
DLL.<br />
NOTE: If the <strong>Print</strong>er Auto-Configuration options has been disable via driver pre-configuration the<br />
Configuration Status box will show<br />
Administrator Preferences Not Applied<br />
Last Configured xx/yy/zzzz (which is the date of install)<br />
Default Configuration<br />
Traditional Mode installations: the <strong>Print</strong>er Auto-Configuration is automatically executed at the end of the<br />
installation routine. When the printer’s capabilities have changed the ‘Update Now’ process can be<br />
56 Chapter 6 <strong>HP</strong> UPD Administrative features <strong>ENWW</strong>
launched from the driver user interface to allow the UPD to query the target device: <strong>Print</strong>er Properties-<br />
Device Settings tab-Installable Options-Automatic Configuration-Update Now.<br />
Figure 6-2 Setting Automatic Configuration through the user interface<br />
Automatic configuration selectable options<br />
● Automatic Configuration:= Off: The update now bidirectional communication is not currently in<br />
progress<br />
● Automatic Configuration:= Update Now: The driver is in process of communicating with the target<br />
product; this process can take minutes dependent upon environment and configuration. When<br />
finished, the status will change to Off.<br />
Dynamic mode installations: The <strong>Print</strong>er Automatic Configuration is happen automatic using the<br />
following methods:<br />
a. Hitting <strong>Print</strong>.<br />
b. After Enter a <strong>Print</strong>er Address.<br />
c. Selecting Check Status... of an existing printer.<br />
d. Searching for products on the network subnet.<br />
The configuration is automatically updated each time the client connects to the printer via Dynamic mode<br />
connection.<br />
<strong>ENWW</strong> <strong>Print</strong>er Automatic Configuration 57
Command line interface<br />
Starting with <strong>HP</strong> UPD 4.0, administrators can script the Update Now process from a command line for<br />
traditional mode installations of the <strong>HP</strong> UPD driver. This applies only to <strong>HP</strong> UPD traditional mode<br />
installation. The files used and file location required for configuration entry point are different with <strong>Print</strong>er<br />
Automatic Configuration release and therefore Microsoft platform UPD version specific.<br />
Table 6-3 Platform specific commands for scripting the Update Now process<br />
<strong>HP</strong> UPD version Platform Example command line<br />
<strong>HP</strong> UPD 4.5 x86 rundll32<br />
x64 rundll32<br />
<strong>HP</strong> UPD 4.7 x86 rundll32<br />
x64 rundll32<br />
<strong>HP</strong> UPD 4.7.2 x86 rundll32<br />
x64 rundll32<br />
<strong>HP</strong> UPD 5.0 x86 rundll32<br />
x64 rundll32<br />
%systemroot%\system32\spool\drivers\w32x86\3<br />
\hpmux081.dll,UpdateStaticMode<strong>Print</strong>er "printer<br />
name here" /q<br />
%systemroot%\system32\spool\drivers\x64\3<br />
\hpmux081.dll,UpdateStaticMode<strong>Print</strong>er "printer<br />
name here" /q<br />
%systemroot%\system32\spool\drivers\w32x86\3<br />
\hpmux083.dll,UpdateStaticMode<strong>Print</strong>er "printer<br />
name here" /q<br />
%systemroot%\system32\spool\drivers\x64\3<br />
\hpmux083.dll,UpdateStaticMode<strong>Print</strong>er "printer<br />
name here" /q<br />
%systemroot%\system32\spool\drivers\w32x86\3<br />
\hpmux084.dll,UpdateStaticMode<strong>Print</strong>er "printer<br />
name here" /q<br />
%systemroot%\system32\spool\drivers\x64\3<br />
\hpmux084.dll,UpdateStaticMode<strong>Print</strong>er "printer<br />
name here" /q<br />
%systemroot%\system32\spool\drivers\w32x86\3<br />
\hpmux091.dll,UpdateStaticMode<strong>Print</strong>er "printer<br />
name here" /q<br />
%systemroot%\system32\spool\drivers\x64\3<br />
\hpmux091.dll,UpdateStaticMode<strong>Print</strong>er "printer<br />
name here" /q<br />
58 Chapter 6 <strong>HP</strong> UPD Administrative features <strong>ENWW</strong>
Example steps to initiate <strong>Print</strong>er Automatic Configuration via command line<br />
1. Note the <strong>Print</strong>er Name and Platform Specific DLL of the installed <strong>HP</strong> UPD. From the system's<br />
<strong>Print</strong>ers and Fax folder, right mouse on the printer name and select Properties, About to locate<br />
the <strong>HP</strong>MUX*.DLL and the installed driver name instance.<br />
Figure 6-3 Locate the platform specific DLL<br />
2. Open a command prompt: START-RUN-CMD.EXE [enter]<br />
C:\> rundll32 %systemroot%\system32\spool\drivers\w32x86\3<br />
\hpmux091.dll,UpdateStaticMode<strong>Print</strong>er "<strong>HP</strong> <strong>Universal</strong> <strong>Print</strong>ing PCL 5<br />
(v5.0)" /q<br />
User dialogue box opens stating, “Getting printer information… Establishing Communication with<br />
printer… Finishing printer validation”<br />
3. Open the <strong>HP</strong> UPD <strong>Print</strong>er Properties-About tab and check the Configuration Status box. The<br />
status should display the current system date for Last configured xx/yy/zzzz and default options<br />
for the printer or <strong>HP</strong> UPD preconfigurations of the driver display in the <strong>HP</strong> UPD user interface.<br />
Disabling <strong>Print</strong>er Automatic Configuration<br />
UPD installed services provide bi-directional I/O capability outside the context of the user, application,<br />
or print job. Most printing functions will work without the driver to device communication, and print quality<br />
and speed are not affected by the services enablement. UPD 4.7 added support for manual configuration<br />
of the driver to both enable and configure device capabilities without requiring Automatic Update to be<br />
enabled. The Installable Options section of the UPD’s Device Settings tab can be manually defined<br />
using <strong>Driver</strong> Configuration Utility or the <strong>Driver</strong> Deployment Utility.<br />
Benefits Comparison<br />
NOTE: Using bi-directional communication is strongly recommended.<br />
<strong>ENWW</strong> <strong>Print</strong>er Automatic Configuration 59
Automatic configuration enabled<br />
1. Accuracy in Device capabilities: capabilities of the target device can change without end user<br />
awareness. Automatic configuration allows the UPD to accurately reflect the capabilities of the<br />
target device.<br />
2. Staged deployment: If the printers are not yet available printer automatic configuration is a good<br />
option. The install.exe utility will still create the port. The only consequence of not having the printer<br />
connected is that they would get the defaults for the printers, but a simple update now (user<br />
interface or command line) after the device is added to the host or network synchronizes the UPD<br />
driver to device capabilities.<br />
3. Manual configuration of every setting for every device connection introduces additional<br />
management overhead defining settings or correcting misconfigurations.<br />
4. Manual configuration requires managing multiple <strong>Driver</strong> Configuration Utility settings files (*.cf_ or<br />
*.cfm).<br />
Automatic configuration disabled<br />
1. Administrator’s can disable printer automatic configuration to control which device capabilities are<br />
presented through the print user interface. For example, if a device supports a particular feature<br />
that does not comply with standard fleet deployment, the features enablement can be centrally<br />
controlled.<br />
2. Pre-Installed queues: administrators can manually configure device capabilities regardless of the<br />
device’s status on the network. For example, an administrator could define duplex printing in the<br />
driver without the device having to be on the network at the time of pre-configuration (the driver<br />
does not have to confirm the targeted device capabilities).<br />
3. The device is hooked up over an NDPS queue on a Novell Server.<br />
Default capabilities without automatic configuration<br />
<strong>Print</strong>er Automatic Configuration can be disabled through pre-configuration of the UPD driver. If the<br />
Automatic Update feature is disabled using the <strong>Driver</strong> Configuration Utility tool prior to the UPD’s<br />
installation standard printing defaults or cached settings will be utilized by the UPD and Status<br />
Notification Pop-ups (SNP) will not work.<br />
If a capability is enabled though pre-configuration of the driver that the target device does not support,<br />
printing failures or unexpected results will occur. For example, setting duplex for a device that only prints<br />
simplex will output simplex.<br />
Table 6-4 Defaults applied when the <strong>Print</strong>er Automatic Configuration fails attempted communication.<br />
PLC5, PLC6 Post Script<br />
Trays 1,2 1,2<br />
Manual Feed Tray 1 Tray 1<br />
Envelope Feeder Not installed Not installed<br />
Duplex Installed Installed<br />
Accessory output bin Not installed Not installed<br />
Hard disk Installed Installed<br />
Device type Monochrome (1) Color (2)<br />
60 Chapter 6 <strong>HP</strong> UPD Administrative features <strong>ENWW</strong>
NOTE: Device type can be changed to Color by reconfiguring the Device Type on the Properties -><br />
Device Settings tab. Monochrome PCL 5 and PCL 6 devices cannot handle color data. If color data is<br />
sent, the device will either generate an error or unexpected print output.<br />
NOTE: Postscript driver always sends color regardless of device type. Monochrome devices are able<br />
to handle the color data properly. However, the driver color tab may not display.<br />
Steps to disable the <strong>Print</strong>er Automatic Configuration<br />
Disabling the <strong>Print</strong>er Automatic Configuration is accomplished through pre-configuration of the UPD<br />
driver before installation onto the client or server. The <strong>HP</strong> <strong>Driver</strong> Configuration Utility available for<br />
download from the <strong>HP</strong> public website:<br />
www.hp.com/go/dcu<br />
1. Using the <strong>Driver</strong> Configuration Utility, path out to the UPD driver files and open the *.cf_ file or the<br />
*.cfm if modifying pre-configuration setting file of UPD already installed onto a system.<br />
2. From the Device Settings tab, select "<strong>Print</strong>er Auto-Configuration" drop down menu.<br />
a. Disabled<br />
1. <strong>Print</strong>er Automatic Configuration will not run at install time<br />
2. Auto Configuration will be grayed out/disabled in the Device Settings tab<br />
3. Feature will not apply to dynamic Mode<br />
4. The Auto-Configuration UI control on the Device Settings tab will remain ENABLED<br />
allowing Administrators to manually invoke the <strong>Print</strong>er Automatic Configuration from the<br />
driver itself.<br />
5. The SNP Pop–ups will not be displayed if bidirectional communication is disabled. SNP<br />
requires the ability to communicate to the devices via SNMP.<br />
b. Enabled (Auto Configuration Takes Priority)<br />
c. Enabled (<strong>Driver</strong> Pre-Configuration Takes Priority)<br />
1. Is the current Processing order for DMC /PRINTER AUTOMATIC CONFIGURATION<br />
2. Is the default for PRINTER AUTOMATIC CONFIGURATION.<br />
d. Help About in the Configuration Status box will display<br />
◦ Administrator Preferences Not Applied<br />
◦ Last Configured xx/yy/zzzz<br />
◦ Default Configuration<br />
If bidirectional communication is successful followed by bidirectional communication failing on<br />
successive attempts, the driver user interface options will utilize cached settings of the last successful<br />
<strong>Print</strong>er Automatic Configuration.<br />
<strong>ENWW</strong> <strong>Print</strong>er Automatic Configuration 61
Communication protocols<br />
Bidirectional communication between the UPD driver and the target device occur direct or over the<br />
network:<br />
● SNMP over the network: UDP ports 120 (general request/response messages) and 121 (traps).<br />
● HTTP over the network (Job Capabilities Ticket): a compressed file that can be sent to the UPD<br />
over http that defines specifications for the target device. JCT implementation in UPD v5 only<br />
includes media types, paper type and <strong>HP</strong> Easy Color. Device supporting JCT will also communicate<br />
SNMP information during bidirectional communication, therefore JCT supported devices may<br />
display more capabilities compared to non JCT supported devices.<br />
● PML over DOT4: DOT4 is based on the IEEE 1284.4 protocol. For direct connect, DOT4 over USB<br />
or DOT4 over LPT is used for most devices. Many composite devices do not support DOT4 and<br />
may support an alternate directional mechanism.<br />
● Low end device model (LEDM) over Composite USB: Beginning with UPD v4.7 the UPD can<br />
query low end laser models direct to get device configuration, status and alerts over composite<br />
USB. If the low end device is also networked, UPD printer automatic configuration will use the<br />
network.<br />
<strong>Print</strong>er Automatic Configuration services<br />
<strong>HP</strong> UPD installs two services that enable <strong>Print</strong>er Automatic Configuration to function. In combination<br />
these services allow the <strong>HP</strong> UPD to retrieve device configuration after installation, using UPDATE NOW,<br />
or via command line using RUNDLL32.<br />
● Net <strong>Driver</strong> <strong>HP</strong>Z12: Provides channelized data transfers over the network for scan and fax<br />
● Pml <strong>Driver</strong> <strong>HP</strong>Z12: For USB connected devices that support PML or for network SNMP, provides<br />
the ability to determine what features a device has using printer automatic configuration and device<br />
status.<br />
Steps to Disable<br />
By default two UPD installed services are set to load Automatic. If the UPD is preconfigured prior to<br />
installation to disable <strong>Print</strong>er Automatic Configuration using the <strong>Driver</strong> Configuration Utility or <strong>Driver</strong><br />
Deployment Utility, and the system installing UPD does not already have the UPD or other <strong>HP</strong> driver<br />
utilizing bidirectional communications, the UPD services will not be registered to the system.<br />
If the “PML <strong>Driver</strong> <strong>HP</strong>Z12” is stopped and set to Manual the service will restart when UPD Update<br />
Process is launched; if set to Disable when the UPD Update Process is launched an error may be<br />
generated.<br />
Steps to Remove<br />
See Uninstall the <strong>HP</strong> UPD on page 45<br />
62 Chapter 6 <strong>HP</strong> UPD Administrative features <strong>ENWW</strong>
Symptoms when <strong>Print</strong>er Automatic Configuration fails<br />
When the <strong>HP</strong> UPD <strong>Print</strong>er Automatic Configuration services have not or can communicate direct to the<br />
target printing device the exact capabilities of the target device will be unknown to the installed <strong>HP</strong> UPD<br />
printer. Symptoms or observable changes to the <strong>HP</strong> UPD installed driver can include the following.<br />
● Error message displays, This command could not be completed because a printer<br />
communication error occurred.<br />
● No special device features or device attachments available for selection.<br />
● Black and white printing only (even to color devices).<br />
● No color tab.<br />
● No duplex unit.<br />
● No hard drive (no Job Storage tab).<br />
● No Status Notification Pop-ups during FILE-PRINT (this feature may also be disabled through<br />
administrator settings at time of <strong>HP</strong> UPD install).<br />
Troubleshooting<br />
<strong>Print</strong>er Automatic Configuration can fail communication with the device because of issues in the<br />
communication path, the client or network configuration may prevent communication, or the feature has<br />
been disabled by the print administrator at install via driver preconfiguration. Take the following steps<br />
to isolate issues when Auto–Configuration is not successful.<br />
1. Can the <strong>HP</strong> UPD print to the target device?<br />
No, then bidirectional communication may also fail because of connection issues between the <strong>HP</strong> UPD<br />
and the target print device.<br />
2. Is the <strong>HP</strong> UPD printer defined with <strong>Print</strong>er Auto Configuration enabled?<br />
Check the <strong>Print</strong>er properties-Device Settings tab. Under Installable Options, is Automatic-Configuration<br />
grayed out?<br />
a. Yes, run "Update Now" to check bidirectional communication<br />
b. b) No, then Auto-Configuration has been disabled either through driver configuration or disabling<br />
the bidirectional communication services. Suggested steps.<br />
◦ Are the Net <strong>Driver</strong> <strong>HP</strong>Z12 and PML <strong>Driver</strong> <strong>HP</strong>Z12 services installed (My Computer- Manage-<br />
Services or by NET START at the command line)?<br />
◦ Reinstall the driver after confirming the source *.cf_ file or *.cfm file has not been preconfigured<br />
to disable <strong>Print</strong>er Auto Configuration. If unsure, download the source driver package from<br />
www.hp.com/go/upd and perform a default installation without using <strong>HP</strong> <strong>Driver</strong><br />
Preconfiguration Utility.<br />
<strong>ENWW</strong> <strong>Print</strong>er Automatic Configuration 63
3. After running "Update Now" were expected results returned?<br />
a. Check the <strong>Print</strong>er Properties-About tab and verify "Last Configured xx/yy/zzzz" date matches the<br />
Microsoft OS system date (confirmed typing START-RUN-cmd /k date). If not then Auto<br />
Configuration did not succeed.<br />
b. Was an error message returned?<br />
"This command could not be completed because a printer communication error occurred" Check<br />
for the correct port, port address, physical and logical connection to the target device.<br />
c. Paper types supported by the target device are not in the UPD driver user interface?<br />
1. For some older device the UPD may not retrieve the device's full list of supported paper types.<br />
Instead, the UPD driver presents a subset of paper types, a generic list believed to be<br />
supported by most all printers. Presenting a generic list supported by most all printers prevents<br />
selecting a paper type through that perhaps the device would not support. For a small class<br />
of devices the penalty for this level of protection is not displaying a paper type that the device<br />
might support. If the paper type is not part of the generic list of paper types it will not be<br />
presented through the UPD driver UI.<br />
2. ii. Changes to media such as paper size or paper types settings made via the device’s<br />
embedded web server, <strong>HP</strong> Web Jetadmin to the device, or the device’s control panel would<br />
not change or update the UPD driver display options. To administrate these types of change<br />
to appear in the UPD drive user interface:<br />
(a) The end user would need to go to PROPERTIES-ADVANCE-<strong>Print</strong>ing Defaults and<br />
manually change.<br />
(b) Point and <strong>Print</strong> vended client would see the defined setting under <strong>Print</strong>ing Preferences<br />
(c) Pre-configuration of the UPD driver with the <strong>HP</strong> <strong>Driver</strong> Configuration Utility or the <strong>HP</strong> <strong>Driver</strong><br />
Deployment Utility prior to install or reinstallation of the driver.<br />
4. What is the physical connection method between the <strong>HP</strong> UPD installed printer and the<br />
target printing device?<br />
Bidirectional communication between the <strong>HP</strong> UPD driver and the target device is possible through direct<br />
connection to the device or over the network by means of TCPIP. To confirm your connection method,<br />
select the <strong>HP</strong> UPD in <strong>Print</strong>ers folder, <strong>Print</strong> Properties, and check the Port tab. Is the selected port<br />
defined correctly?<br />
● No, set to the correct port type or port address (tcpip address or DNS name)<br />
● Yes, proceed to next steps, either Troubleshoot Network connected or Troubleshoot Direct<br />
connected.<br />
5. Troubleshoot network connection/port<br />
a. Can you ping the target print product by the TCPIP address? By host name?<br />
b. Can you ping the print server by the TCPIP address? By host name?<br />
c. Is the UPD’s target port defined by hostname or IP address?<br />
d. If by host name fails, is the hostname registered in DNS? nslookup dns_name_of_device<br />
64 Chapter 6 <strong>HP</strong> UPD Administrative features <strong>ENWW</strong>
e. Is the UPD installed client traversing network subnets to the target print server or printing device?<br />
Is yes, is http and snmp traffic allowed through these connection paths? To define the segments<br />
in the network path run the following from the UPD install client: tracert print_device_ipaddress<br />
f. Is the localhost or the target print server running an internet firewall? Are ports 120, 121, and/or<br />
80 open?<br />
g. Can the UPD client host access the device's embedded web server? http://device_ip_address or<br />
https://device_ip_address<br />
h. Network issues such as denial-of-service at the print server or printing device, network service<br />
interruption, or unauthorized and privileged access to the target print device or print server<br />
i. TCP filter enabled: TCPIP-ADVANCED-Options Tab-PROPERTIES (types of traffic allowed to<br />
pass to the TCP protocol)<br />
6. Distinguish if target product is communicating bidirectional for printer auto<br />
configuration via HTTP or SNMP?<br />
HTTP<br />
SNMP<br />
Bidirectional communication over the network could occur via HTTP and SNMP dependent upon target<br />
device. Errors specific to the protocol:<br />
a. Does the device support hp job capabilities ticket? To determine,<br />
http://device_ip_address/hp/device/JobCapabilities/<br />
JobCapabilitiesTicket.zip<br />
b. HTTP port 80/tcp is enabled in the \ % <strong>System</strong>Root %\<strong>System</strong>32\<strong>Driver</strong>s\Etc\services file?<br />
c. Does the <strong>HP</strong> UPD installed host firewall allow HTTP traffic?<br />
d. If the target product is on a separate subnet, does the network route HTTP traffic?<br />
a. Do community names of the installed <strong>HP</strong> UPD host match the community name of target print<br />
product?<br />
b. Does the <strong>HP</strong> UPD installed host firewall allow SNMP traffic?<br />
c. If the <strong>HP</strong> UPD installed host is on a separate subnet, does the network route SNMP traffic?<br />
d. Wireless network security often disable SNMP routing as a security measure.<br />
e. SNMP ports 161/upd and 162/upd are enabled in the \ % <strong>System</strong>Root %\<strong>System</strong>32\<strong>Driver</strong>s<br />
\Etc\services file are enabled?<br />
7. Install and test a new print queue?<br />
Reducing complexity to isolate variables. A simple test is to install the UPD driver taken from<br />
www.hp.com/go/upd using the default installation options onto a clean system. This insures the driver<br />
has not been pre-configured before installation, that upgrade from one version to the next in a<br />
contaminated environment is reduced, and the print queue itself is new and self managed. During<br />
installation, create a new print queue targeted to a device with an address on the test machine’s subnet.<br />
<strong>ENWW</strong> <strong>Print</strong>er Automatic Configuration 65
FAQ<br />
1. For non permanent instance installations of the UPD will the printer be queried every<br />
time? For cases where a user has chosen to create a permanent instance of a printer, settings are<br />
permanently saved to the local registry (like any other printer driver) and the user would continue<br />
to print to that permanently created instance. For cases where a user has not chosen to create a<br />
permanent instance of a driver, registry entries are saved in a .CREG file (cached registry). Initially<br />
the driver will attempt to save the CREG files to the "C:\Program Files\Hewlett-Packard\<strong>HP</strong><br />
<strong>Universal</strong> <strong>Print</strong>ing" directory. If that directory is not available or is locked, the driver will attempt to<br />
cache settings in the %TEMP% then %TMP% directories. If neither of these directories are<br />
available then the <strong>HP</strong> <strong>Universal</strong> <strong>Print</strong> <strong>Driver</strong> will query the printer every time for non-permanent<br />
instances.<br />
2. How does enabling or disabling the Microsoft port Enable bidirectional support impact the<br />
<strong>HP</strong> UPD's bidirectional communication? The <strong>HP</strong> UPD uses the MS port’s bidirectional<br />
communication for basic status level related to print spooler operations such as ‘<strong>Print</strong>er Online’ and<br />
‘Paper Out.’ However, for product configuration and capabilities the <strong>HP</strong> UPD uses its own installed<br />
services for bidirectional communication between the <strong>HP</strong> UPD and the target product (NET<br />
DRIVER <strong>HP</strong>Z12 and PML DRIVER <strong>HP</strong>Z12).<br />
Figure 6-4 Enabling bidirectional support<br />
3. Does <strong>HP</strong> UPD <strong>Print</strong>er Autoconfiguration bidirectional communication cause slow print<br />
performance? No, the traffic send/receive response is very small (SNMP around 65 kilobytes) and<br />
infrequent. For traditional mode installation the UPD only queries for printer information at time of<br />
installation, when executed through Update Now or RUNDLL32 at the UPD installed client, and for<br />
a simple change id at the beginning of <strong>Print</strong>er Automatic Configuration job to verify that the<br />
configuration has not changed.<br />
4. After the PRINTER AUTOMATIC CONFIGURATION has completed a successful bidirectional<br />
update several device features appear in the UPD driver user interface that my device does<br />
not support. For example, why does the DEVICE SETTINGS tab show "Tray 3: Not Installed"<br />
for several trays? The settings are place holders for the UPD. Because the UPD does not know<br />
before an Automatic or Preconfiguration of the driver's exact configuration the UPD driver UI<br />
66 Chapter 6 <strong>HP</strong> UPD Administrative features <strong>ENWW</strong>
structure must remain capable of displaying settings beyond the standard default settings in the<br />
UDP drivers UI design. By preserving the setting locations, after completing <strong>Print</strong>er Automatic<br />
Configuration update the user interface can dynamically update the "Not Installed" settings to the<br />
current configuration when a change has occurred to configuration of the device.<br />
5. <strong>Print</strong> Properties-Device Settings-Installable Options, the Automatic Configuration option is<br />
grayed out and unavailable for selection. What could be the cause?<br />
Two possibilities dependent upon how the driver was installed onto the host.<br />
a. Point and <strong>Print</strong> connection the driver is a printing client to print server connection. Updates<br />
would be centrally controlled from the print server and not the client, therefore the print client<br />
would not initiate the <strong>Print</strong>er Auto Configuration between the print queue and the target printing<br />
product. However, printing clients can check their <strong>Print</strong>er Properties-About tab to display the<br />
server's last update status between the print server and printing target product:<br />
Auto-Configured MM/DD/YYYY<br />
Not Auto-Configured<br />
Auto-Configuration Not Attempted<br />
b. <strong>Print</strong>ing Automatic Configuration may have been disabled by pre-configuration of the driver<br />
before the <strong>HP</strong> UPD was installed. This can be confirmed by checking the About tab; the<br />
following will display if disabled by your Administrator:<br />
Auto-Configured MM/DD/YYYY<br />
Not Auto-Configured<br />
Auto-Configuration Not Attempted<br />
6. Is there a good method for testing <strong>Print</strong>er Automatic Configuration?<br />
a. a) Install UPD with default options (do not utilize switches on the INSTALL.EXE command<br />
line) using an <strong>HP</strong> default driver package downloaded from www.hp.com/go/upd. This step<br />
ensures the driver has not been pre-configured.<br />
b. During installation, create a new printer port with an invalid TCPIP address. During the UPD<br />
installation the Automatic Configuration will attempt to communicate to the invalid device IP<br />
address. Install will complete without error and provide default options. For example, the Color<br />
tab will not display because automatic configuration could not validate a color printer at the<br />
defined TCPIP address.<br />
c. For the newly install UPD printer check <strong>Print</strong>er Automatic Configuration is enabled (<strong>Print</strong>er<br />
Properties-Device Settings tab-Installable Options-Automatic Configuration-Update Now)<br />
d. Check the ABOUT tab and note the "Last Configured xx/yy/zzzz" which identifies if <strong>Print</strong>er<br />
Automatic Configuration has communicated with the target device.<br />
e. Optional: Note the date of the MS system clock<br />
START-RUN, cmd.exe /k date<br />
Change the Microsoft OS system date forward (make sure the system is not set to synchronize<br />
with a time server).<br />
f. Change the UPD install printer TCPIP port address to a valid device IP address.<br />
<strong>ENWW</strong> <strong>Print</strong>er Automatic Configuration 67
g. Run UPD's <strong>Print</strong>er Automatic Configuration through the UPD driver user interface or the<br />
command line specific to the installed UPD version (see Command line interface<br />
on page 58).<br />
h. Check the device capabilities updated from the default settings.<br />
i. Optional: If you forced the date change in the previous step, check the ABOUT tab and note<br />
the "Last Configured xx/yy/zzzz." The date should change to the system’s date.<br />
7. Does the following message, "Windows Security Alert: Spooler Subsystem App" generated<br />
during the installation relate the UPD's installed bidirectional communication services over<br />
the network? UPD installation can make calls over the network utilizing different ports and<br />
communication protocols for configuration, device capabilities and status. For example, ports 120,<br />
121, and 80 might all be utilized in the <strong>Print</strong>er Automatic Configuration process when the UPD<br />
communicates bidirectional over the network to the target device. If the ports used by the print<br />
spooler are not open, the firewall may need to be configured.<br />
8. Is there a tool or steps to test SNMP port access required by UPD printer automatic<br />
configuration? The SNMP port utilization by UPD will not be active until traffic is being sent or<br />
received during the Update Now process. Full diagnosis involves checking port access at all<br />
connection points of the network between the UPD printing client and target device (gateway/<br />
routers/switches/server and host firewalls). Utilities to help troubleshoot connection path access<br />
can include Net <strong>Print</strong>, netstat, tracert, and pathping to identify network device access. SNMP port<br />
utilization by UPD will not be active until traffic is being sent or received during the Update Now<br />
process making a network sniffer one of the best tools for diagnostics during the update process.<br />
68 Chapter 6 <strong>HP</strong> UPD Administrative features <strong>ENWW</strong>
7 Use <strong>HP</strong> <strong>Universal</strong> print drivers<br />
Introduction<br />
The <strong>HP</strong> <strong>Universal</strong> <strong>Print</strong> <strong>Driver</strong> (<strong>HP</strong> UPD) combines a general-purpose print driver with additional<br />
functionality allowing users to print to:<br />
● Devices on a local port<br />
● Devices on a network<br />
● Devices on a managed printer list<br />
The following sections describe how to use the <strong>HP</strong> UPD and its features.<br />
● Use the <strong>HP</strong> UPD<br />
● <strong>Print</strong> using the <strong>HP</strong> UPD<br />
● Add a printer to the <strong>Print</strong>ers and Faxes folder<br />
<strong>ENWW</strong> Introduction 69
Use the <strong>HP</strong> UPD<br />
● <strong>Universal</strong> print driver modes<br />
● Configure <strong>HP</strong> UPD dynamic mode settings<br />
● Change the settings for the <strong>HP</strong> UPD<br />
● Change driver properties (print job preferences)<br />
● Help<br />
<strong>Universal</strong> print driver modes<br />
The look and feel of the <strong>HP</strong> UPD varies depending on whether it has been installed in dynamic or<br />
traditional mode.<br />
For more information about installing the <strong>HP</strong> UPD in these modes, see Install and Uninstall of the<br />
<strong>HP</strong> UPD on page 31.<br />
Traditional mode<br />
Dynamic mode<br />
When installed in traditional mode, the <strong>HP</strong> UPD behaves as a product-specific driver, associated to a<br />
specific printer with a permanent instance of the driver in the <strong>Print</strong>ers folder. Traditional mode installs<br />
using the Add <strong>Print</strong>er Wizard in the <strong>Print</strong>ers folder or by using Install.exe.<br />
An <strong>HP</strong> UPD installed in Dynamic mode allows the most flexibility for the users to locate and connect<br />
to products.<br />
A user can print to a wide variety of supported <strong>HP</strong> products using the <strong>HP</strong> UPD without having to download<br />
a product-specific driver.<br />
When printing in a mobile environment, the user also has the ability to search for printers through any<br />
of the three search features enabled by default.<br />
Dynamic mode offers a unique, easy to use user interface that steps the user through the printer<br />
discovery and selection process. Dynamic mode requires user interaction because it presents the user<br />
with a dialog box for entry of the printer's IP address or the printer's host name. This interaction can be<br />
minimized by adjusting the dynamic mode settings mentioned in this section.<br />
Advanced features available for the <strong>HP</strong> UPD allow an administrator to offer additional printer discovery<br />
options and management control via <strong>HP</strong> Managed <strong>Print</strong>ing Administrator and the <strong>HP</strong> UPD Active<br />
Directory Administrative Template.<br />
The following information describes the driver in Dynamic mode unless otherwise stated.<br />
Configure <strong>HP</strong> UPD dynamic mode settings<br />
The processes for entering the Dynamic mode UI and changing the default behavior is outlined below.<br />
70 Chapter 7 Use <strong>HP</strong> <strong>Universal</strong> print drivers <strong>ENWW</strong>
To access the <strong>Print</strong>ing Preferences and Properties, do the following:<br />
1. Click Start, Settings, then <strong>Print</strong>ers.<br />
2. In the <strong>Print</strong>ers window, right-click the driver.<br />
3. Click Properties or <strong>Print</strong>ing Preferences.<br />
Change the settings for the <strong>HP</strong> UPD<br />
Access the settings of the <strong>HP</strong> UPD in one of the following ways:<br />
● When printing: In the <strong>Print</strong> dialog box, select <strong>HP</strong> <strong>Universal</strong> <strong>Print</strong>ing and click Properties.<br />
● From the <strong>Print</strong>ers folder: Right-click <strong>HP</strong> <strong>Universal</strong> <strong>Print</strong>ing and select Properties or <strong>Print</strong>ing<br />
Preferences.<br />
Change General <strong>HP</strong> UPD settings<br />
To specify the prompt you receive for destination printers when you are printing, follow these steps:<br />
1. Do one of the following:<br />
● When printing: In the <strong>Print</strong> dialog box, select <strong>HP</strong> <strong>Universal</strong> <strong>Print</strong>ing and click Properties.<br />
● From the <strong>Print</strong>ers folder: Right-click <strong>HP</strong> <strong>Universal</strong> <strong>Print</strong>ing and select Properties or<br />
<strong>Print</strong>ing Preferences.<br />
2. Click Settings (number 5 on Figure 7-1 <strong>HP</strong> UPD dialog box on page 74) and click the General<br />
tab.<br />
3. Select one of the following options:<br />
● Always prompt for the printer when printing a job.<br />
The <strong>HP</strong> <strong>Universal</strong> <strong>Print</strong>ing dialog box displays every time <strong>HP</strong> <strong>Universal</strong> <strong>Print</strong>ing is the selected<br />
printer. You can select a destination printer in this dialog box.<br />
● Only prompt the first time a job is printed from an application.<br />
The <strong>HP</strong> <strong>Universal</strong> <strong>Print</strong>ing dialog box displays the first time <strong>HP</strong> <strong>Universal</strong> <strong>Print</strong>ing is selected<br />
as the printer from an application. This option is helpful if other print jobs from that application<br />
are sent to the same printer by reducing the number of key clicks required by the user.<br />
● Only prompt if the last known printer is no longer available.<br />
4. Click OK.<br />
The <strong>HP</strong> <strong>Universal</strong> <strong>Print</strong>ing dialog box displays if the last used printer is no longer available.<br />
<strong>ENWW</strong> Use the <strong>HP</strong> UPD 71
Change Device Verification settings (number 5 on Figure 7-1 <strong>HP</strong> UPD dialog box<br />
on page 74)<br />
To set the level of verification required to allow printing, follow these steps:<br />
1. Do one of the following:<br />
● When printing: In the <strong>Print</strong> dialog box, select <strong>HP</strong> <strong>Universal</strong> <strong>Print</strong>ing and click Properties.<br />
● From the <strong>Print</strong>ers folder: Right-click <strong>HP</strong> <strong>Universal</strong> <strong>Print</strong>ing and select Properties or<br />
<strong>Print</strong>ing Preferences.<br />
2. Click Settings and the Device Verification tab.<br />
NOTE: See Figure 7-1 <strong>HP</strong> UPD dialog box on page 74 for a picture of the dynamic mode screen.<br />
3. Set the level of verification required to allow printing:<br />
● Verify bidirectional communication with device and language compatibility with driver<br />
(High) to block printing if bidirectional communication and language compatibility cannot be<br />
verified.<br />
● Verify device ID and Model Name can be obtained from port (Medium) to block printing<br />
if the product ID and Model Name cannot be verified. Medium is the default setting.<br />
● Verify port can be opened for printing (Low) to allow printing (but issue a warning message)<br />
if the port can be opened for printing.<br />
4. Click OK.<br />
Change driver properties (print job preferences)<br />
Access <strong>HP</strong> UPD properties in one of the following ways:<br />
● When printing from an application—Recommended to change print settings for a single print<br />
job, or for print jobs during a single session in an application.<br />
● From the <strong>Print</strong>ers and Faxes folder—Recommended to change default print settings for all<br />
applications that use this driver.<br />
Change driver properties while printing<br />
NOTE: The changed settings apply only to the current print job or only to print jobs sent within the<br />
same session in that application.<br />
1. From an application, click File and <strong>Print</strong>.<br />
2. Select the <strong>Print</strong>er representing the dynamic mode use and click Properties. The <strong>HP</strong> <strong>Universal</strong><br />
<strong>Print</strong>ing dialog box opens.<br />
3. Select a printer from the Recently Used <strong>Print</strong>ers list, or find a printer, and click OK. The<br />
<strong>HP</strong> <strong>Universal</strong> <strong>Print</strong>ing Properties window opens.<br />
4. After making changes to the driver settings, click OK. The <strong>Print</strong> window returns.<br />
5. Click OK to print the job according to the changed settings.<br />
72 Chapter 7 Use <strong>HP</strong> <strong>Universal</strong> print drivers <strong>ENWW</strong>
Change driver properties from the <strong>Print</strong>ers and Faxes folder<br />
Help<br />
NOTE: The changed settings apply as default settings for all print jobs in any application that uses<br />
this driver.<br />
1. In the <strong>Print</strong>ers folder, right-click on the printer representing <strong>HP</strong> UPD dynamic mode use and select<br />
Properties or <strong>Print</strong>ing Preferences. The <strong>HP</strong> <strong>Universal</strong> <strong>Print</strong>ing dialog opens.<br />
2. Select a printer from the Recently Used <strong>Print</strong>ers list, or find a printer, and click OK. The<br />
<strong>HP</strong> <strong>Universal</strong> <strong>Print</strong>ing Properties window opens.<br />
3. After making changes to the driver settings, click OK.<br />
Click the Help button in the <strong>HP</strong> <strong>Universal</strong> <strong>Print</strong> <strong>Driver</strong> software to open the <strong>HP</strong> <strong>Universal</strong> <strong>Print</strong> <strong>Driver</strong> for<br />
Windows User <strong>Guide</strong>.<br />
<strong>Print</strong> using the <strong>HP</strong> UPD<br />
<strong>Print</strong>ing using the <strong>HP</strong> UPD depends on the installation mode of the <strong>HP</strong> UPD.<br />
An <strong>HP</strong> UPD installed in dynamic mode functions within the constraints established by the administrator<br />
to manage the printer. If a feature does not behave normally, the administrator might have limited the<br />
functionality.<br />
An <strong>HP</strong> UPD installed in traditional mode behaves like a product-specific driver. The <strong>HP</strong> UPD behaves<br />
according to the driver features available for the product to which the driver is attached.<br />
See the following sections for more information. This section is divided according to the installation<br />
method, as the installation method dictates how the <strong>HP</strong> UPD behaves.<br />
● <strong>Print</strong> using the <strong>HP</strong> UPD in dynamic mode<br />
● <strong>Print</strong> using the <strong>HP</strong> UPD in traditional mode<br />
<strong>ENWW</strong> <strong>Print</strong> using the <strong>HP</strong> UPD 73
<strong>Print</strong> using the <strong>HP</strong> UPD in dynamic mode<br />
Figure 7-1 <strong>HP</strong> UPD dialog box<br />
1<br />
2<br />
3<br />
4<br />
5<br />
6<br />
When the <strong>HP</strong> UPD is installed in dynamic mode, it appears as a typical printer in the user's <strong>Print</strong>ers<br />
folder. Dynamic mode provides a unique interface to the users allowing them to instantly locate and<br />
connect to printers on the fly.<br />
Search for printers using any of these methods:<br />
● Enter a printer address.<br />
● Search the local subnet for printers.<br />
● Enter the name of a print server.<br />
The next section details each of the dynamic mode options. <strong>Print</strong>ers found via dynamic mode are<br />
temporary connections and do not appear individually in the <strong>Print</strong>ers folder. Dynamic mode installation<br />
of the <strong>HP</strong> UPD does not require the user to have any elevated rights or printing permissions, allowing<br />
the existing user permissions to remain intact. Dynamic mode is supported in Direct IP and local printing<br />
only and is not supported as shared printers on print servers at any time.<br />
See the following for more information.<br />
● Dynamic mode options – Default configuration<br />
● Use dynamic mode<br />
● Select a recently used printer (number 1 on )<br />
● Find a printer (number 3 on )<br />
Dynamic mode options – Default configuration<br />
By default the name of the dynamic mode printer created is the same as the name of the driver. In the<br />
case of PCL6, the default queue name is <strong>HP</strong> <strong>Universal</strong> <strong>Print</strong>ing PCL6. This name can be changed during<br />
installation, or renamed to something more descriptive like “Search for a <strong>Print</strong>er”.<br />
74 Chapter 7 Use <strong>HP</strong> <strong>Universal</strong> print drivers <strong>ENWW</strong>
NOTE: The printer name is changed in the printers folder after the driver is installed.<br />
Use dynamic mode<br />
1. From an application, click File and <strong>Print</strong>.<br />
2. Select <strong>HP</strong> <strong>Universal</strong> <strong>Print</strong>ing as the printer, and click OK. The <strong>HP</strong> <strong>Universal</strong> <strong>Print</strong>ing dialog box<br />
(Figure 7-1 <strong>HP</strong> UPD dialog box on page 74) opens.<br />
3. For the quickest way to print, select a printer from the Recently Used <strong>Print</strong>ers list, and then click<br />
<strong>Print</strong>.<br />
If no printer is available in the Recently Used <strong>Print</strong>ers list, or if you prefer to find a different printer,<br />
you can find a printer immediately by using one of the options under Find a printer.<br />
Select a recently used printer (number 1 on Figure 7-1 <strong>HP</strong> UPD dialog box on page 74)<br />
The Recently Used <strong>Print</strong>ers list contains all the products to which the <strong>HP</strong> <strong>Universal</strong> <strong>Print</strong> driver has<br />
recently printed. After you have determined which recently used printer to use, click <strong>Print</strong>.<br />
Additional options:<br />
To verify whether or not this printer contains the necessary supplies for the print job before printing, click<br />
the Check Status button.<br />
To add a recently used printer to the <strong>Print</strong>ers folder, select the Add this printer to my <strong>Print</strong>ers<br />
folder option. This option allows you to print directly to this printer rather than accessing it through the<br />
<strong>HP</strong> <strong>Universal</strong> <strong>Print</strong>ing dialog box.<br />
NOTE: Recent changes to the <strong>HP</strong> UPD (Version 4.5 and newer) no longer require that the user have<br />
elevated rights to create a permanent instance of the selected printer. Restricted or “locked down” users<br />
can now create traditional mode queues from within the dynamic mode routine.<br />
Find a printer (number 3 on Figure 7-1 <strong>HP</strong> UPD dialog box on page 74)<br />
From the <strong>HP</strong> <strong>Universal</strong> <strong>Print</strong>ing dialog box, you can find a printer (number 3 on Figure 7-1 <strong>HP</strong> UPD<br />
dialog box on page 74) locally or on the network and print to it immediately.<br />
The following methods for locating and connecting to a printer are available:<br />
● Enter a printer address—Recommended if the IP address, host name or UNC path is known or<br />
if you want to use a printer that is outside your local subnet.<br />
NOTE: To determine the printer address, print a configuration page from the printer.<br />
● Search for network printers—Recommended if you do not have the printer address for a printer<br />
or you want to see what products are available on your subnet. This feature uses a local subnet<br />
broadcast known as Multicast DNS (mDNS) and is similar to the Bonjour or Rendezvous protocol.<br />
For Devices to show up in the Network <strong>Print</strong>ers list, the following requirements must be met:<br />
◦ The printer must be on the same subnet as the PC running dynamic mode.<br />
◦ mDNS, TCP/IP V4 protocol, port 9100 printing must be enabled.<br />
<strong>ENWW</strong> <strong>Print</strong> using the <strong>HP</strong> UPD 75
NOTE: The printer list returned represents the list of printers available on the local subnet. The<br />
information for each printer by default represents the mDNS service name and is a text field that<br />
can be changed to provide more descriptive information for the users.<br />
● Search for print shares—Recommended if you want to view shared printers on the network or<br />
products that use a print server.<br />
NOTE: The above are all default options. Other options might be available depending on the print<br />
policies created by your system administrator. Contact your system administrator for more information<br />
about these options.<br />
See the following for more information.<br />
● Enter a print address<br />
● Search for network printers<br />
● Search for print shares<br />
Enter a print address<br />
NOTE: To determine the printer address, print a configuration page from the printer.<br />
1. Click Enter a printer address.<br />
2. Type the printer address (IP address, host name, or UNC path) and click OK. If the printer address<br />
is found, the printer is displayed under the <strong>Print</strong>er Information pane on the right side of the window.<br />
3. Click <strong>Print</strong>.<br />
Check Status<br />
To verify the status of the product or whether the printer contains the necessary supplies for the print<br />
job before printing, click the Check Status button.<br />
Add this printer to my <strong>Print</strong>ers folder<br />
To add the currently selected printer to the <strong>Print</strong>ers folder as a traditional mode print queue, select the<br />
Add this printer to my <strong>Print</strong>ers folder option (number 6 on Figure 7-1 <strong>HP</strong> UPD dialog box<br />
on page 74). This option allows you to print directly to this printer rather than accessing it through the<br />
<strong>HP</strong> <strong>Universal</strong> <strong>Print</strong>ing dialog box. Adding a traditional mode printer via dynamic mode no longer requires<br />
that the user have elevated rights.<br />
Search for network printers<br />
When selecting Search for Network <strong>Print</strong>ers, the <strong>HP</strong> UPD will use the mDNS protocol to discover<br />
products on the local subnet only. This means that only products on the same subnet as the <strong>HP</strong> UPD<br />
will be displayed in the list. mDNS, or Multicast DNS is also known as Bonjour protocol.<br />
1. Click Search for network printers. The available printers appear under <strong>Print</strong>ers in the Search<br />
for network printers dialog box.<br />
If necessary, click Refresh to update the list.<br />
2. Select the desired printer and click OK. The selected printer is displayed under the <strong>Print</strong>er<br />
Information window. Click OK to return to the main dynamic mode window. The selected printer<br />
also appears on the right side of the pane under <strong>Print</strong>er Information.<br />
3. Click OK to proceed.<br />
76 Chapter 7 Use <strong>HP</strong> <strong>Universal</strong> print drivers <strong>ENWW</strong>
More options:<br />
To verify whether or not this printer contains the necessary supplies for the print job before printing, click<br />
the Check Status button, number 4 on Figure 7-1 <strong>HP</strong> UPD dialog box on page 74 .<br />
To add a recently used printer to the <strong>Print</strong>ers folder, select the Add this printer to my <strong>Print</strong>ers<br />
folder option. This option allows you to print directly to this printer rather than accessing it through the<br />
<strong>HP</strong> <strong>Universal</strong> <strong>Print</strong>ing dialog box.<br />
Search for print shares<br />
1. Click Search for print shares.<br />
2. Enter the network printer address, example \\servername\sharename or click Browse to<br />
browse the network for shared printer resources, a print share, or a shared printer.<br />
3. Click OK. The printer displays under the Search for print shares option.<br />
4. Click <strong>Print</strong>.<br />
More options:<br />
To verify whether or not this printer contains the necessary supplies for the print job before printing, click<br />
the Check Status button.<br />
To add a recently used printer to the <strong>Print</strong>ers folder, select the Add this printer to my <strong>Print</strong>ers<br />
folder option, number 6 on Figure 7-1 <strong>HP</strong> UPD dialog box on page 74. This option allows you to print<br />
directly to this printer rather than accessing it through the <strong>HP</strong> <strong>Universal</strong> <strong>Print</strong>ing dialog box.<br />
<strong>Print</strong> using the <strong>HP</strong> UPD in traditional mode<br />
When a printer is installed using the <strong>HP</strong> UPD in traditional mode, it behaves just like the product specific<br />
drivers.<br />
1. In the program, click File, and then click <strong>Print</strong>.<br />
2. The <strong>Print</strong> dialog box opens. Select the printer from the list of available printers.<br />
3. Click Properties and modify the driver features as needed. (For example, select the Finishing<br />
tab, and select <strong>Print</strong> on both sides.)<br />
Click OK when complete.<br />
4. Click <strong>Print</strong>.<br />
Add a printer to the <strong>Print</strong>ers and Faxes folder<br />
Use the <strong>HP</strong> <strong>Universal</strong> <strong>Print</strong>ing dialog box to add a printer to the <strong>Print</strong>ers folder while printing from a<br />
program or from within the <strong>Print</strong>ers folder.<br />
NOTE: When a printer is created using the Add <strong>Print</strong>er Wizard, or from within the dynamic mode UI<br />
screen, a traditional mode version of the <strong>HP</strong> UPD is created for the printer. This means that both<br />
traditional mode and dynamic mode queues can be used on the same system. Also, when a printer is<br />
created from dynamic mode, the new traditional mode printer takes on the same driver PDL: version as<br />
the dynamic mode queue. This means that if PCL6 is used for the dynamic mode queue, then the<br />
traditional mode printers created from this will also be using the PCL6 version of the driver.<br />
See the following for more information:<br />
<strong>ENWW</strong> Add a printer to the <strong>Print</strong>ers and Faxes folder 77
● Add a printer to the <strong>Print</strong>ers folder using the dynamic mode user interface.<br />
● Add a printer to <strong>Print</strong>ers and Faxes folder from within <strong>Print</strong>ers and Faxes folder<br />
● Organize the Recently Used <strong>Print</strong>ers list<br />
Add a printer to the <strong>Print</strong>ers folder using the dynamic mode user interface.<br />
1. In the software program, click File and <strong>Print</strong>.<br />
2. Select <strong>HP</strong> <strong>Universal</strong> <strong>Print</strong>ing and click <strong>Print</strong>. The <strong>HP</strong> <strong>Universal</strong> <strong>Print</strong>ing dialog box opens.<br />
3. To add a previously used printer, select one of the printers in the Recently Used <strong>Print</strong>ers list.<br />
4. To discover a printer to add, select one of the following options under Find a printer:<br />
● Enter a printer address. Type the IP address, host name, or UNC path, and click OK.<br />
NOTE: To find the printer address of a printer, print a configuration page.<br />
● Search for network printers. Select one of the printers listed and click OK.<br />
● Search for print shares. Type the network printer address or click Browse to browse to the<br />
printer. Click OK.<br />
5. Select Add this printer to my <strong>Print</strong>ers folder, number 6 on Figure 7-1 <strong>HP</strong> UPD dialog box<br />
on page 74.<br />
6. Click OK.<br />
Add a printer to <strong>Print</strong>ers and Faxes folder from within <strong>Print</strong>ers and Faxes<br />
folder<br />
1. In the <strong>Print</strong>ers folder, right-click <strong>HP</strong> <strong>Universal</strong> <strong>Print</strong>ing and select Properties or <strong>Print</strong>ing<br />
Preferences. The <strong>HP</strong> <strong>Universal</strong> <strong>Print</strong>ing dialog box opens.<br />
2. To add a previously used printer, select one of the printers from the Recently Used <strong>Print</strong>ers list.<br />
3. To discover a printer to add, select one of the following options under Find a printer:<br />
● Enter a printer address. Type the IP address, host name, or UNC path, and then click OK.<br />
NOTE: To find the printer address of a printer, print a configuration page.<br />
● Search for network printers. Select one of the printers listed and click OK.<br />
● Search for print shares. Type the network printer address or click Browse to browse to the<br />
printer. Click OK.<br />
4. Select Add this printer to my <strong>Print</strong>ers folder.<br />
5. Click OK.<br />
Organize the Recently Used <strong>Print</strong>ers list<br />
The products listed under the Recently Used <strong>Print</strong>ers list can be organized by deleting products,<br />
moving products into folders, and creating new folders.<br />
NOTE: By default, no folders are listed under the Recently Used <strong>Print</strong>ers list.<br />
78 Chapter 7 Use <strong>HP</strong> <strong>Universal</strong> print drivers <strong>ENWW</strong>
Add a new folder<br />
1. Right-click Recently Used <strong>Print</strong>ers, and select New Folder.<br />
2. In the New Folder dialog box, type a name for the folder, and click OK. The folder displays under<br />
Recently Used <strong>Print</strong>ers.<br />
Move devices into folders<br />
● Drag and drop the products you want to move into the desired folder.<br />
● Right-click the product to move, select Move to Folder, and select the desired folder.<br />
To delete a product or a folder, right-click the product or folder and click Delete.<br />
<strong>ENWW</strong> Add a printer to the <strong>Print</strong>ers and Faxes folder 79
80 Chapter 7 Use <strong>HP</strong> <strong>Universal</strong> print drivers <strong>ENWW</strong>
8 Manage the <strong>HP</strong> UPD using <strong>HP</strong> Managed<br />
<strong>Print</strong> Administration (MPA) and Active<br />
Directory Group Policy<br />
● Manage the <strong>HP</strong> UPD using <strong>HP</strong> MPA<br />
● Manage Active Directory Group Policy with the <strong>HP</strong> UPD using <strong>HP</strong> Active Directory Templates<br />
<strong>ENWW</strong> 81
Manage the <strong>HP</strong> UPD using <strong>HP</strong> MPA<br />
Introduction<br />
The <strong>HP</strong> Managed <strong>Print</strong> Administration (MPA) software enables the <strong>HP</strong> UPD to create a controlled and<br />
customized print environment.<br />
The <strong>HP</strong> MPA software consists of three main components.<br />
● Managed <strong>Print</strong>er Policies (MPPs)<br />
● Managed <strong>Print</strong>er Lists (MPLs)<br />
● User Groups<br />
For more information, see the <strong>HP</strong> MPA website www.hp.com/go/mpa<br />
● MPA version information<br />
● Supported environments for managing the <strong>HP</strong> UPD<br />
● Install and uninstall the <strong>HP</strong> MPA software<br />
● Access <strong>HP</strong> MPA<br />
● Use Managed <strong>Print</strong>er Policies (MPPs)<br />
● Use Managed <strong>Print</strong>er Lists (MPLs)<br />
● Use User Groups<br />
MPA version information<br />
Each <strong>HP</strong> MPA version represents a new release that describes updates and feature enhancements.<br />
The table below identifies these changes. For more information about each release, review the <strong>HP</strong> MPA<br />
release notes.<br />
Supported <strong>HP</strong> MPA versions<br />
Table 8-1 <strong>HP</strong> MPA supported version information<br />
<strong>HP</strong> MPA version Release date New features Required <strong>HP</strong> UPD version<br />
2.5.7 July, 2009 Added new printer images for<br />
<strong>Print</strong>er lists<br />
2.5.2 Jan, 2009 Added support for Personal<br />
Job Pin-Less <strong>Print</strong>ing<br />
Added support for WJA 10.1<br />
printer list creation via XML<br />
lists<br />
Supported environments for managing the <strong>HP</strong> UPD<br />
Requires <strong>HP</strong> UPD 4.5 or<br />
newer to use this feature<br />
All <strong>HP</strong> UPD versions apply<br />
To enable policy management with <strong>HP</strong> MPA, install the <strong>HP</strong> UPD locally on each PC by using Install.exe<br />
and the appropriate policy enablement switch. This includes print server environments where Point and<br />
<strong>Print</strong> is normally used to vend drivers to the client PCs. Installing the <strong>HP</strong> UPD on the print server and<br />
82 Chapter 8 Manage the <strong>HP</strong> UPD using <strong>HP</strong> Managed <strong>Print</strong> Administration (MPA) and Active<br />
Directory Group Policy<br />
<strong>ENWW</strong>
enabling policy management is not sufficient to manage the client-based printing, the policy information<br />
is not propagated to the client PCs during Point and <strong>Print</strong> driver vending.<br />
Install and uninstall the <strong>HP</strong> MPA software<br />
By default, the <strong>HP</strong> UPD assumes that the <strong>HP</strong> MPA is installed on a server named managed-print. As<br />
a result, the <strong>HP</strong> UPD searches the network for http://managed-print for Managed <strong>Print</strong>er Policies or<br />
Managed <strong>Print</strong>er Lists. If you install the <strong>HP</strong> MPA on a computer with a name other than managedprint,<br />
you must change the <strong>HP</strong> UPD default settings. To change the <strong>HP</strong> UPD default settings, install<br />
the <strong>HP</strong> UPD with the following switch options.<br />
Install/Policy”” or Install/Policy”” where the computer<br />
name or IP address represents the name of the computer with <strong>HP</strong> MPA installed.<br />
For example, to install the <strong>HP</strong> MPA on a server named mgmt-srvr, the complete command line switch<br />
for the install would be.<br />
Install /Policy”mgmt-srvr” /sm192.168.1.10 /n”print queue name” /h /q<br />
● <strong>HP</strong> MPA software requirements<br />
● Software availability<br />
● Install the <strong>HP</strong> MPA software<br />
● Back up the <strong>HP</strong> MPA software<br />
● Uninstall the <strong>HP</strong> MPA software<br />
<strong>HP</strong> MPA software requirements<br />
Requirements for MPA Software<br />
● Supported Operating <strong>System</strong>s<br />
◦ Microsoft Windows XP<br />
◦ Microsoft Windows XP x64<br />
◦ Microsoft Windows Server 2003 (32-bit and 64-bit)<br />
● Supported Internet Browsers<br />
◦ Internet Explorer 6.0<br />
● IIS Internet Information <strong>System</strong>s. Versions provided by the following OSs.<br />
◦ Windows XP<br />
◦ Windoes Server 2003<br />
● Java JRE (Runtime Environment, required for graphical views) version 1_5_0_9 and newer. The<br />
latest version is available at the following website: www.java.com/en/download/index.jsp.<br />
Software availability<br />
The <strong>HP</strong> MPA is available in the following languages.<br />
● English<br />
<strong>ENWW</strong> Manage the <strong>HP</strong> UPD using <strong>HP</strong> MPA 83
Install the <strong>HP</strong> MPA software<br />
Follow these steps to install to install the <strong>HP</strong> MPA software.<br />
1. Go to the following website.<br />
www.hp.com/go/mpa<br />
2. Download the <strong>HP</strong> MPA software and save the <strong>HP</strong>MPAInstall.msi file to a chosen location.<br />
3. Browse to the <strong>HP</strong>MPAInstall.msi file on your computer.<br />
4. Double-click <strong>HP</strong>MPAInstall.msi.<br />
5. The <strong>HP</strong> Managed <strong>Print</strong>ing Admin Setup Wizard opens. Click Next.<br />
6. The Confirm Installation window opens. Click Next.<br />
7. The Installing <strong>HP</strong> Managed <strong>Print</strong>ing Admin window opens. A progress bar indicates the<br />
progression of the install. Wait until the next window opens.<br />
8. The Installation Complete window opens. Click Close.<br />
Back up the <strong>HP</strong> MPA software<br />
<strong>HP</strong> MPA stores information about users, groups, policy, and printer lists in a Microsoft Access database<br />
file. <strong>HP</strong> recommends periodic back ups of this database in case the database becomes corrupted. Back<br />
up the database before performing an upgrade.<br />
1. Browse to C:\Inetpub\<strong>HP</strong>Managed<strong>Print</strong>Admin\Database.<br />
2. Copy the file hpmpa.mdb to your backup location.<br />
Uninstall the <strong>HP</strong> MPA software<br />
When uninstalling the <strong>HP</strong> MPA, the hpmpa.mdb database file created during installation is not removed.<br />
An older version <strong>HP</strong> MPA must be uninstalled before a newer version can be installed and this database<br />
file is left behind to accommodate the updating of <strong>HP</strong> MPA versions without losing any data.<br />
There are two ways to uninstall the <strong>HP</strong> MPA software from the computer.<br />
● <strong>HP</strong> Managed <strong>Print</strong>ing Admin Setup Wizard<br />
● Add/Remove Programs<br />
Uninstall <strong>HP</strong> MPA using <strong>HP</strong> Managed <strong>Print</strong>ing Admin Setup Wizard<br />
1. Double-click the <strong>HP</strong>MPAInstall.msi file used to install <strong>HP</strong> MPA. The <strong>HP</strong> Managed <strong>Print</strong>ing Admin<br />
Setup Wizard opens.<br />
2. Two options are available in the <strong>HP</strong> Managed <strong>Print</strong>ing Admin Setup Wizard window.<br />
● Repair <strong>HP</strong> Managed <strong>Print</strong>ing Admin<br />
● Remove <strong>HP</strong> Managed <strong>Print</strong>ing Admin<br />
Select Remove <strong>HP</strong> Managed <strong>Print</strong>ing Admin.<br />
84 Chapter 8 Manage the <strong>HP</strong> UPD using <strong>HP</strong> Managed <strong>Print</strong> Administration (MPA) and Active<br />
Directory Group Policy<br />
<strong>ENWW</strong>
3. Click Finish. The Removing <strong>HP</strong> Managed <strong>Print</strong>ing Admin window opens.<br />
4. The Installation Complete window opens, indicating the <strong>HP</strong> MPA is successfully removed. Click<br />
Close to exit.<br />
Uninstall <strong>HP</strong> MPA using Add/Remove Programs<br />
1. Click Start, Settings, Control Panel, and then Add or Remove Programs.<br />
2. Select <strong>HP</strong> Managed <strong>Print</strong>ing Admin.<br />
3. Click Remove.<br />
4. A confirmation dialog box displays, Are you sure you want to remove <strong>HP</strong> Managed <strong>Print</strong>ing<br />
Admin from your computer? Click Yes.<br />
Access <strong>HP</strong> MPA<br />
The software is removed from the computer.<br />
The <strong>HP</strong> MPA opens in one of the following two views.<br />
● Classic interface: Uses typical Windows format to facilitate management of the <strong>HP</strong> MPA through<br />
text.<br />
● Graphic interface: Uses Java to facilitate management of the <strong>HP</strong> MPA through images.<br />
Follow these steps to open the to open the <strong>HP</strong> MPA software.<br />
1. Double-click the <strong>HP</strong> Managed <strong>Print</strong>ing Admin icon on the desktop.<br />
2. The Welcome to the <strong>HP</strong> Managed <strong>Print</strong>ing Administrator control panel screen displays. Click<br />
Classic interface or Graph interface.<br />
For more information about the feature layout of each interface, see the following sections.<br />
● Classic interface<br />
● Graphic interface<br />
Classic interface<br />
The classic interface screen briefly describes the main components of the program and shows the<br />
relationship between Users, Groups, Policies, and <strong>Print</strong>er Lists.<br />
In the classic interface, a navigation bar located in the upper left of the main screen provides links to all<br />
features and tasks within the <strong>HP</strong> MPA software and is used to manage printer use.<br />
Table 8-2 <strong>HP</strong> MPA classic interface options on page 86 lists the options provided in the leftmost<br />
navigation bar. The left-side of the table lists the main headings, and the right-side of the table lists the<br />
corresponding task-oriented subheadings available.<br />
<strong>ENWW</strong> Manage the <strong>HP</strong> UPD using <strong>HP</strong> MPA 85
Table 8-2 <strong>HP</strong> MPA classic interface options<br />
Graphic interface<br />
Option Item<br />
Managed <strong>Print</strong>er Lists Create a new list<br />
Edit an existing list<br />
Associate with a policy<br />
Duplicate an existing list<br />
Manage MPL view<br />
Manage virtual printers<br />
Remove an existing list<br />
Managed <strong>Print</strong>er Policies Create a new policy<br />
Edit an existing policy<br />
Duplicate an existing policy<br />
Associate printer lists<br />
Associate user groups<br />
Remove an existing policy<br />
User Groups Create a new user group<br />
Edit an existing user group<br />
Associate with a policy<br />
Remove a user group<br />
Help Service Administration <strong>Guide</strong><br />
The graphic interface screen displays a real-time mapping of Users, Groups, Policies, and <strong>Print</strong>er Lists.<br />
86 Chapter 8 Manage the <strong>HP</strong> UPD using <strong>HP</strong> Managed <strong>Print</strong> Administration (MPA) and Active<br />
Directory Group Policy<br />
<strong>ENWW</strong>
Figure 8-1 <strong>HP</strong> MPA—Graphic interface view on page 87 shows the main screen of the graphic<br />
interface.<br />
Figure 8-1 <strong>HP</strong> MPA—Graphic interface view<br />
To manage printer use, a navigation bar located on the top of the screen provides links to all features<br />
and tasks within the <strong>HP</strong> MPA software.<br />
Follow these steps to browse through the possible settings and features available in the <strong>HP</strong> MPA<br />
software.<br />
1. Use the toolbar menus at the top of the screen to customize any of the following options.<br />
● Graph Size<br />
● Color Scheme<br />
● Show associations<br />
● Font Size<br />
Settings for each of these options are identified in Table 8-3 <strong>HP</strong> MPA graphic interface options<br />
on page 87.<br />
2. Right-click an entry that you want to modify in the Users, Groups, Policies (MPPs), or <strong>Print</strong>er<br />
Lists (MPLs) column and select one of the options shown in the following table.<br />
Table 8-3 <strong>HP</strong> MPA graphic interface options<br />
Column Option<br />
Users Remove 'user name'<br />
Rename 'user name'<br />
Show policy XML for 'user name': The user name policy<br />
displays in XML format.<br />
Change association to: Select a group name.<br />
<strong>ENWW</strong> Manage the <strong>HP</strong> UPD using <strong>HP</strong> MPA 87
Table 8-3 <strong>HP</strong> MPA graphic interface options (continued)<br />
Column Option<br />
Groups Remove 'group name': Opens the Confirm Object<br />
Removal dialog box. Click Yes to confirm the removal.<br />
Remove all users from this group<br />
Edit 'group name': See Edit an existing user group<br />
on page 122 for more information.<br />
Rename 'group name': Opens the Edit Groups Name dialog<br />
box. Enter a new name and click OK.<br />
Show policy XML for 'group name': The group-name policy<br />
displays in XML format.<br />
Change association to: Select a group name.<br />
Remove association from: Select the MPP from which to<br />
remove the association.<br />
Add a user to this group: Enter a new user name in the New<br />
user dialog box.<br />
Create a new user group: Enter a new user-group name in<br />
the Add new user to group dialog box.<br />
Policies (MPPs) Remove policy 'policy name': The Confirm Removal dialog<br />
box displays. Click Yes to confirm the removal.<br />
Edit 'policy name': For more information, see Edit an existing<br />
MPP on page 102.<br />
Rename 'policy name': Opens Edit Policies (MPPs) name<br />
dialog box. Enter a new name and click OK.<br />
Show policy 'policy name': The policy displays in XML<br />
format.<br />
Export policy 'policy name' to XML file: The policy displays<br />
in XML format. You can save this file as an XML file and edit it<br />
later.<br />
Add user group association: For more information, see<br />
Associate user groups with an MPP on page 103.<br />
Edit user group associations: For more information, see<br />
Associate user groups with an MPP on page 103.<br />
Add printer list association: For more information, see<br />
Associate MPLs with an MPP on page 102.<br />
Edit printer list association: Select a policy name. For more<br />
information, see Associate MPLs with an MPP on page 102.<br />
Remove user group association from: Select a user-group<br />
name from which to remove the association.<br />
Remove printer list association from: Select a printer-list<br />
name from which to remove the association.<br />
Create a new policy (MPP): The Add a new Managed<br />
<strong>Print</strong>er Policy (MPP) dialog box displays. Enter a new name<br />
and click OK.<br />
88 Chapter 8 Manage the <strong>HP</strong> UPD using <strong>HP</strong> Managed <strong>Print</strong> Administration (MPA) and Active<br />
Directory Group Policy<br />
<strong>ENWW</strong>
Table 8-3 <strong>HP</strong> MPA graphic interface options (continued)<br />
Column Option<br />
<strong>Print</strong>er Lists (MPLs) Remove 'printer list name'<br />
Use Managed <strong>Print</strong>er Policies (MPPs)<br />
Edit 'printer list name': For more information, see Edit an<br />
existing MPL on page 112.<br />
Rename 'printer list name' settings...: The Edit <strong>Print</strong>er<br />
Lists (MPL) Name dialog box displays. Modify the name and<br />
click OK.<br />
Show XML for 'printer list name'...: The printer lists name<br />
displays in XML format.<br />
Manage MPL view: The Manage MPL view dialog box<br />
displays. For more information, see Manage the MPL view<br />
on page 113.<br />
Manage virtual printers: The Manage virtual printers dialog<br />
box displays.<br />
Show MPL Preview: Shows information according to the<br />
option selected in the Manage MPL view dialog box.<br />
Export printer list 'printer list name' to XML file...: Displays<br />
the printer list in XML format. You can save this file as an .XML<br />
file for later editing.<br />
Add association to: Select a policy name to which you want<br />
to add the association.<br />
Remove association from: Select a policy name from which<br />
you want to remove the association.<br />
Create a new printer list (MPL): The Add a new Managed<br />
<strong>Print</strong>er List (MPL) dialog box displays. Enter a new name and<br />
click OK.<br />
Use Managed <strong>Print</strong>er Policies (MPPs) to control the driver operation mode, customize the print<br />
environment for the user, and limit user network access to certain printers or features. When enabled,<br />
MPPs prevent users from overriding or circumventing settings by downloading a new version of the<br />
driver.<br />
A Managed <strong>Print</strong>er Policy (MPP) is an XML document that controls the driver operation mode in a<br />
particular printing environment. For example, users in one environment could search or discover printers<br />
using any available search option. In turn, the same user running the same driver in another environment<br />
could be limited to printing a select few products, as defined by the restricted mode use settings.<br />
One benefit of an MPP is that IT administrators have extended control over the printer environment,<br />
ultimately reducing support costs, supplies costs, and productivity costs. Another benefit is that the IT<br />
Administrator can use a policy ticket to define how the <strong>HP</strong> UPD behaves when operating in a specific<br />
environment. Every user printing through the <strong>HP</strong> UPD in the specific environment is limited or controlled<br />
by the defined policy, if they download the driver from an IT specified location or from the <strong>HP</strong> website,<br />
the first time or the 100th time. That control also extends to laptop computers that have <strong>HP</strong> UPD installed<br />
and are used at a site that defines an MPP. The printing is controlled by the defined policy.<br />
<strong>ENWW</strong> Manage the <strong>HP</strong> UPD using <strong>HP</strong> MPA 89
The MPP contains the following features.<br />
● UseMode settings. Controls the mode users use to access the printing environment; and, controls<br />
printing attributes, detection of <strong>HP</strong> printers, product-verification level, and availability of services.<br />
(See UseMode settings on page 91 for detailed instructions.)<br />
● Default print settings. Controls basic user experience of the print driver.<br />
● Color access. Controls user access to printing color on a color-capable product. (See Color<br />
Access settings on page 95 for detailed instructions.)<br />
● User search capabilities. Controls user searches based on local ports, network print shares, and<br />
network printers (in dynamic mode). (See User Search capabilities on page 97 capabilities for<br />
detailed instructions.)<br />
● Status and supplies notifications. Controls what status and supplies notifications (if any) appear<br />
when the user opens the <strong>HP</strong> UPD dialog box. (See Status & Supplies Notification settings<br />
on page 98 for detailed instructions.)<br />
● Job accounting. Controls what job accounting information to submit to an external program or<br />
post to a web server.<br />
● Job delivery. Controls what print-job data to submit to an external program. For example, the job<br />
data can be used in a pay-for-print environment.<br />
● Basic MPP settings. Controls basic features such as refresh rate, name, and a default MPP for<br />
users not associated to a specific MPP.<br />
This section contains more information on the following topics.<br />
Topics<br />
● Create a new MPP<br />
● Edit an existing MPP<br />
● Duplicate an existing MPP<br />
● Associate MPLs with an MPP<br />
● Associate user groups with an MPP<br />
● Remove an existing MPP<br />
Create a new MPP<br />
Follow these steps to create a new MPP.<br />
1. On the Managed <strong>Print</strong> Policies menu, select Create a new policy. The Create a new MPP screen<br />
displays.<br />
2. In the Name field, enter a unique name for the new MPP.<br />
3. Click Next. The Properties screen displays.<br />
4. Modify the settings as necessary.<br />
5. In the Update Policy group box, click Apply (to apply selected options and leave the<br />
Properties screen open) or Done (to apply selected options and close the screen). Until you have<br />
clicked Apply or Done, any settings that have changed are not saved in the MPP.<br />
90 Chapter 8 Manage the <strong>HP</strong> UPD using <strong>HP</strong> Managed <strong>Print</strong> Administration (MPA) and Active<br />
Directory Group Policy<br />
<strong>ENWW</strong>
See the following topics for information about configuring specific properties for a new MPP.<br />
Topics<br />
UseMode settings<br />
● UseMode settings<br />
● Default <strong>Print</strong> settings<br />
● Color Access settings<br />
● User Search capabilities<br />
● Status & Supplies Notification settings<br />
● Basic MPP settings<br />
● Update an MPP<br />
1. In the UseMode Settings section of the Properties screen, click Configure. The UseMode<br />
Settings panel displays.<br />
2. From the Template menu, select one of the following options from Table 8-4 UseMode Settings<br />
panel–Template menu options on page 91.<br />
Table 8-4 UseMode Settings panel–Template menu options<br />
Options Description<br />
(None) Select this option to remove all UseMode setting from the selected MPP.<br />
NOTE: Selecting this option prevents the change of any settings.<br />
(Create a new template) Select this option to create a new UseMode template. When you select this<br />
option, all fields can be modified. Name the template in a way that is meaningful<br />
to your organization. You might also determine whether a naming convention<br />
exists for your organization.<br />
<strong>HP</strong> Default When this option is selected, <strong>HP</strong> default UseMode values are applied to this<br />
MPP.<br />
Existing template name Select a previously defined UseMode template to apply to the selected MPP.<br />
3. In the New template field, enter a name for the new template of UseMode settings.<br />
4. Then, select options to apply to all users assigned to this policy, based on the descriptions in Table<br />
8-5 UseMode Settings—Properties panel options on page 91.<br />
Table 8-5 UseMode Settings—Properties panel options<br />
Option Description<br />
Show device address Select this option to provide the product address to users associated with this<br />
MPP. (Selected by default.)<br />
<strong>ENWW</strong> Manage the <strong>HP</strong> UPD using <strong>HP</strong> MPA 91
Table 8-5 UseMode Settings—Properties panel options (continued)<br />
Option Description<br />
Restricted mode Select this option to restrict the selection of destination printers not selected<br />
through a defined MPL or normal mode. In Restricted mode, only those printers<br />
defined in the MPL are available for printing. When this box is not selected<br />
(clear), the default is to operate in Normal mode. (Not selected by default.)<br />
When this option is not selected (clear), the following additional options can be<br />
selected.<br />
● Show <strong>HP</strong> UPD dialog settings window.<br />
Select this option to display the link to the <strong>HP</strong> UPD dialog settings window.<br />
If this option is enabled, a note at the bottom of the <strong>HP</strong> <strong>Universal</strong> <strong>Print</strong>ing<br />
dialog box displays the <strong>HP</strong> <strong>Universal</strong> <strong>Print</strong>er Setting link.<br />
● Allow user to add printers to OS <strong>Print</strong>ers folder.<br />
Select this option to allow users to create a permanent instance of the<br />
selected printer in the OS printers folder. If this option is disabled, the Make<br />
a permanent instance of this printer in my <strong>Print</strong>ers folder check box<br />
does not appear in the <strong>HP</strong> <strong>Universal</strong> <strong>Print</strong>ing dialog box. To add a printer,<br />
use the Add <strong>Print</strong>er Wizard. (See Windows client/server: Use the Add<br />
<strong>Print</strong>er Wizard on page 32.)<br />
Device verify level The device verify level controls the <strong>HP</strong> UPD behavior when the <strong>HP</strong> UPD is<br />
unable to get model name and PDLs information from the printer. The device<br />
verification level determines if the user is allowed to use the product and the<br />
strictness of compatibility checking. Select one of the following options from the<br />
menu to determine the device-verification level.<br />
● (Do not specify).<br />
● Verify communication and compatibility with driver (High).<br />
Select this option to check for the highest level of positive identification.<br />
This option validates that the user has access to the printer and there is<br />
PDL support from a network-connected product or direct-connected<br />
product. If verification fails, you cannot use the address or product. An error<br />
message conveys that the product is unsupported.<br />
● Verify device ID and Model Name can be obtained (Medium).<br />
Select this option to validate the printer model name, product ID, and PDL<br />
support from a network-connected product or direct-connected product. If<br />
verification fails because the product can not be verified, but the model is<br />
recognized, you are prompted that a driver incompatibility might exist. At<br />
this point, you can cancel out, or continue using the product at your own<br />
risk.<br />
● Verify port can be opened for printing (Low).<br />
Select this option to verify that the port can be opened before the product<br />
is available for printing. The model name and PDL are verified, but not<br />
validated. This setting assumes that the printer is available and there are<br />
no driver compatibility problems. Use this option in the following situations.<br />
◦ The product is directly connected, but bidirectional communication is<br />
not configured for the local port connection (USB, LPT, COM).<br />
◦ A network print queue exists when the network printer server is non-<br />
Windows based and the <strong>HP</strong> UPD cannot communicate directly with<br />
the product.<br />
92 Chapter 8 Manage the <strong>HP</strong> UPD using <strong>HP</strong> Managed <strong>Print</strong> Administration (MPA) and Active<br />
Directory Group Policy<br />
<strong>ENWW</strong>
Option Description<br />
When printing This list controls how the <strong>HP</strong> UPD prompts users who are associated to this<br />
MPP when they select a destination printer based on the selection of one of the<br />
following options.<br />
NOTE: Selecting one of these options (with the exception of (Do not<br />
specify)) overrides the local configuration.<br />
● (Do not specify).<br />
Select this option to maintain local configuration.<br />
● Always prompt for the destination when printing a job.<br />
Select this option to prompt users to select a destination printer each time<br />
a job is sent.<br />
● Only prompt the first time a job is printed from an application.<br />
Select this option to prompt users to select a destination printer only the<br />
first time a job is printed from an application.<br />
● Only prompt if the last known destination is no longer available.<br />
Select this option to prompt users to select a destination printer only if the<br />
last known destination is no longer available.<br />
Enable services tab Select this option to enable the Services tab for users associated to this MPP.<br />
When this option is selected, the following check boxes are automatically<br />
selected and can be cleared, if necessary. (Selected by default.)<br />
● Enable online diagnostics<br />
● Enable online support<br />
● Enable product manuals<br />
● Enable driver updates<br />
● Enable supply ordering<br />
5. Click Apply to save your changes, or click Hide to close the UseMode settings panel without<br />
saving your the changes.<br />
NOTE: You receive a prompt with an error message at the top of the screen if you click Apply<br />
without providing enough information in the UseMode settings panel.<br />
The following is an example of such an error message. Please review the following errors: You<br />
specified creation of a new template for UseMode settings, but did not give a name.<br />
6. Optionally, if no more properties have to be applied to the selected MPP, select one of the options<br />
in the Update policy panel. For more information, see Update an MPP on page 101.<br />
Default <strong>Print</strong> settings<br />
Table 8-5 UseMode Settings—Properties panel options (continued)<br />
1. In the Default <strong>Print</strong> Settings panel of the Properties screen, click Configure. The Default <strong>Print</strong><br />
Settings panel expands.<br />
2. From the Template: menu, select one of the following.<br />
Table 8-6 Default <strong>Print</strong> Settings panel–Template: menu options<br />
Options Descriptions<br />
<strong>ENWW</strong> Manage the <strong>HP</strong> UPD using <strong>HP</strong> MPA 93
Table 8-6 Default <strong>Print</strong> Settings panel–Template: menu options (continued)<br />
(None) Select this option to remove all Default <strong>Print</strong> settings from<br />
the selected MPP.<br />
NOTE: Selecting this option prevents the change of more<br />
settings.<br />
(Create a new template) Select this option to create a new Default <strong>Print</strong> Settings<br />
template. When you select this option, all fields can be<br />
modified. Choose a name for the new template that is<br />
meaningful to your organization. You might also determine<br />
whether a naming convention exists for your organization.<br />
<strong>HP</strong> Default When this option is selected, <strong>HP</strong> default values are applied<br />
to this MPP.<br />
“Existing template name” Select a previously defined Default <strong>Print</strong> Settings template<br />
to apply to the selected MPP.<br />
3. In the New Template: field, enter a name for the new template.<br />
4. Then, select the settings for the users assigned to this policy. See Table 8-7 Default <strong>Print</strong> Settings<br />
option on page 94 for more information.<br />
Table 8-7 Default <strong>Print</strong> Settings option<br />
Option Description<br />
Duplex ● (Do not specify)<br />
● <strong>Driver</strong> Default<br />
● <strong>Print</strong> on both sides<br />
● Lock Duplex check box<br />
Economode ● (Do not specify)<br />
● <strong>Driver</strong> Default<br />
● Economode on<br />
● Economode off<br />
● Lock Economode check box<br />
94 Chapter 8 Manage the <strong>HP</strong> UPD using <strong>HP</strong> Managed <strong>Print</strong> Administration (MPA) and Active<br />
Directory Group Policy<br />
<strong>ENWW</strong>
Private <strong>Print</strong>ing ● (Do not specify)<br />
● <strong>Driver</strong> Default (Off)<br />
● Proof and hold<br />
● Private Job (require pin)<br />
● Private Job (no pin)<br />
● Quick Copy<br />
● Stored Jobs (no pin)<br />
● Stored Jobs (require pin)<br />
● Lock Private <strong>Print</strong>ing check box<br />
Edgeline QAC ● (Do not specify)<br />
● <strong>Driver</strong> Default<br />
● Professional<br />
● General Office<br />
● Black and White<br />
● Lock Edgeline check box<br />
5. Click Apply to save your changes, or click Hide to close the Default <strong>Print</strong> Settings panel without<br />
saving changes.<br />
NOTE: A prompt with an error message displays at the top of the screen if you click Apply without<br />
providing enough information in the Default <strong>Print</strong> Settings panel.<br />
The following is an example of such an error message. Please review the following errors: You<br />
specified creation of a new template for Default <strong>Print</strong> Settings, but did not give a name.<br />
6. If no more properties are applied to the selected MPP, select one of the options in the Update<br />
policy panel. For more information, see Update an MPP on page 101.<br />
Color Access settings<br />
Table 8-7 Default <strong>Print</strong> Settings option (continued)<br />
Control color printing by setting up templates that define how and when color can be used. This is useful<br />
when restricting color printing to a specific time of day (for example, only during work hours) or a specific<br />
application (for example, only photo application software).<br />
1. In the Color Access panel of the Properties screen, click Configure. The Color Access panel<br />
expands.<br />
2. From the Template: menu, select one of the following options listed in Table 8-8 Color Access<br />
panel–Template menu options on page 95.<br />
Table 8-8 Color Access panel–Template menu options<br />
Options Description<br />
(None) Select this option to remove all color access restrictions from the selected MPP.<br />
NOTE: Selecting this option prevents the change of any more settings.<br />
<strong>ENWW</strong> Manage the <strong>HP</strong> UPD using <strong>HP</strong> MPA 95
Table 8-8 Color Access panel–Template menu options (continued)<br />
(Create a new template) Select this option to create a new color access template. When you select this<br />
option, all fields can be modified. Use a template name that is meaningful to<br />
your organization. You might also determine whether a naming convention<br />
exists for your organization.<br />
<strong>HP</strong> Default When this option is selected, <strong>HP</strong> default color access values are applied to this<br />
MPP.<br />
Existing template name Select a previously defined color access template to apply to the selected MPP.<br />
3. In the New Template: field, enter a name for the new template.<br />
4. Then, select the settings for the users assigned to this policy.<br />
See Table 8-9 Color-printing user access on page 96 for more information.<br />
Table 8-9 Color-printing user access<br />
Setting Description<br />
Allow color printing controls ● If this setting is unchecked, no color printing is allowed.<br />
● If this setting is checked, color printing is allowed, and can be further<br />
controlled by more specific settings of Day/Time and Application.<br />
NOTE: Times ranges specified must be in military time. For example, 9<br />
am to 5 pm would be noted as the following.<br />
From: 09:00 To: 17:00<br />
The following Day controls are available.<br />
◦ Allow color printing on Sunday<br />
◦ Allow color printing on Monday<br />
◦ Allow color printing on Tuesday<br />
◦ Allow color printing on Wednesday<br />
◦ Allow color printing on Thursday<br />
◦ Allow color printing on Friday<br />
◦ Allow color printing on Saturday<br />
Applications controls The following controls are available.<br />
● Do not control color printing by application.<br />
● Allow color printing for only the applications listed below.<br />
Color printing can be limited to a specified set of applications. Specify to<br />
which applications this applies by typing the applications in the<br />
Applications filenames: field.<br />
● Allow color printing for all applications except those listed below.<br />
Color printing can also be allowed for all applications except a specified<br />
set. Specify to which applications this applies by typing the applications in<br />
the Applications filenames: field.<br />
5. Click Apply to save your changes, or click Hide to close the Color Access panel without saving<br />
changes.<br />
96 Chapter 8 Manage the <strong>HP</strong> UPD using <strong>HP</strong> Managed <strong>Print</strong> Administration (MPA) and Active<br />
Directory Group Policy<br />
<strong>ENWW</strong>
NOTE: A prompt with an error message displays at the top of the screen if you click Apply without<br />
providing enough information in the Color Access panel.<br />
The following is an example of such an error message. Please review the following errors: You<br />
specified creation of a new template for Color Access, but did not give a name.<br />
6. If no more properties are applied to the selected MPP, select one of the options in the Update<br />
policy panel. For more information, see Update an MPP on page 101.<br />
User Search capabilities<br />
1. In the User Search Capabilities section of the Properties screen, click Configure. The User<br />
Search Capabilities panel displays.<br />
2. In the Template menu, select one of the options listed in Table 8-10 User Search Capabilities<br />
panel–Template menu options on page 97.<br />
Table 8-10 User Search Capabilities panel–Template menu options<br />
Options Description<br />
(None) Select this option to remove all user search restrictions from the selected MPP.<br />
NOTE: Selecting this option prevents the changing of any more settings.<br />
(Create a new template) Select this option to create a new user search template. When you select this<br />
option, all fields can be modified. Name the template in a way that is meaningful<br />
to your organization. You might also determine whether a naming convention<br />
exists for your organization.<br />
<strong>HP</strong> Default When this option is selected, <strong>HP</strong> default user search values are applied to this<br />
MPP.<br />
Existing template name Select a previously defined user search template to apply to the selected MPP.<br />
3. Modify the user search settings for all users associated with this MPP using the options described<br />
in Table 8-11 User search capabilities on page 97.<br />
NOTE: Clearing the settings provided in Table 8-11 User search capabilities on page 97<br />
prevents users from printing to an address of the search type that you cleared. For example, if the<br />
Network printers option is cleared, users cannot locate printers with an address type of TCP/IP<br />
or host name.<br />
Table 8-11 User search capabilities<br />
Options Description<br />
Network print shares Select this option to allow users to browse for and use printer shares on the<br />
network. (Selected by default.)<br />
Network printers Select this option to allow users to search for and use TCP/IP printers connected<br />
to the network. (Selected by default.)<br />
4. In the New template field, enter a name for the new user-search template.<br />
<strong>ENWW</strong> Manage the <strong>HP</strong> UPD using <strong>HP</strong> MPA 97
5. Click Apply to save your changes, or click Hide to close the User search capabilities panel<br />
without saving your the changes.<br />
NOTE: Do not disable Network <strong>Print</strong>ing. The Network <strong>Print</strong>ers option is required to be enabled<br />
at all times. When a user searches for printers in dynamic mode, the code contains internal links<br />
that require this feature be continually enabled. A solution is available in a future release of MPA.<br />
Figure 8-2 Network <strong>Print</strong>ing error message on page 98 figure represents the error message that<br />
is displayed when Network <strong>Print</strong>ers is disabled.<br />
Figure 8-2 Network <strong>Print</strong>ing error message<br />
NOTE: An error message displays at the top of the screen if you click Apply without providing<br />
enough information in the User search capabilities panel.<br />
The following is an example of such an error message. Please review the following errors: You<br />
specified creation of a new template for user search capabilities, but did not give a name.<br />
6. If no more properties must be applied to the selected MPP, select one of the options in the Update<br />
policy panel. For more information, see Update an MPP on page 101.<br />
Status & Supplies Notification settings<br />
This section provides instructions to configure status and supplies notifications settings. The settings<br />
on the Status & Supplies Notification panel control the information that displays in the pop-up window<br />
when an end user opens the <strong>HP</strong> <strong>Universal</strong> <strong>Print</strong>ing dialog box.<br />
1. In the Status & Supplies Notifications section of the Properties screen, click Configure. The<br />
Status & Supplies Notifications panel expands.<br />
98 Chapter 8 Manage the <strong>HP</strong> UPD using <strong>HP</strong> Managed <strong>Print</strong> Administration (MPA) and Active<br />
Directory Group Policy<br />
<strong>ENWW</strong>
2. From the Template menu, select one of the following options listed in Table 8-12 Supplies Status<br />
Notifications panel–Template menu options on page 99.<br />
Table 8-12 Supplies Status Notifications panel–Template menu options<br />
Options Description<br />
(None) Select this option to remove all status and supplies notifications restrictions from<br />
the selected MPP.<br />
NOTE: Selecting this option prevents the change of any more settings.<br />
(Create a new template) Select this option to create a new status-and-supplies notification template.<br />
When you select this option, all status-and-supplies notification options are<br />
modifiable. Name the new template in a way that is meaningful to your<br />
organization. You might also determine whether a naming convention exists for<br />
your organization.<br />
<strong>HP</strong> Default When this option is selected, <strong>HP</strong> default status-and-supplies notification values<br />
are applied to this MPP.<br />
Existing template name Select a previously defined supplies status notifications template to apply to the<br />
selected MPP.<br />
3. In the New template field, enter a name for the new Status & Supplies notifications template.<br />
4. In the <strong>Print</strong>er Alert Notification Settings menu, select one of the following options.<br />
Table 8-13 Status & Supplies Notifications panel—<strong>Print</strong>er Alert Notification Settings menu options<br />
Options Descriptions<br />
(Do not specify) No policy applies. The client or user policy determines these settings.<br />
Disabled Select this option to disable the Status and Supplies Notifications pop-up<br />
window so that it does not appear in the <strong>HP</strong> <strong>Universal</strong> <strong>Print</strong> <strong>Driver</strong> dialog box.<br />
Show for Every <strong>Print</strong> job Opens the Status & Supplies Notifications pop-up window in the <strong>HP</strong><br />
<strong>Universal</strong> <strong>Print</strong> <strong>Driver</strong> dialog box for every printed job or when the product<br />
detects a warning or error. This option shows the print-job status. Show for<br />
every print job is the default value unless another setting is specified.<br />
Show for Device Errors and<br />
Warnings<br />
Show for Device Errors (printing<br />
stops)<br />
Opens the Status & Status and Supplies Notifications pop-up window only<br />
when a warning or error is detected on the product. This setting does not show<br />
print-job status.<br />
Displays the Status & Supplies Notifications pop-up window only when an<br />
error is active that prevents the product from printing. This setting does not show<br />
print-job status.<br />
5. In the Device Query Interval menu, select one of the following options.<br />
Table 8-14 Status & Supplies Notifications panel—Device Query Interval menu options<br />
Options Description<br />
(Do not specify) No policy applies. The client or user policy determines these settings.<br />
Normal The client computer sends out queries to the product about every 10 seconds.<br />
This is the default value unless another setting is specified.<br />
Minimize Network Traffic The client computer sends out queries to the product about every 20 seconds.<br />
6. Modify the user search settings for all users associated with this MPP, using the options described<br />
in Table 8-15 Status and supplies notification options on page 100.<br />
<strong>ENWW</strong> Manage the <strong>HP</strong> UPD using <strong>HP</strong> MPA 99
Table 8-15 Status and supplies notification options<br />
Option Description<br />
Supplies Details Select this option to allow users to click the Supplies Details link in the Status<br />
& Supplies Notifications pop-up window. (Selected by default.)<br />
Shop for Supplies Select this option to allow users to click the Shop for Supplies link in the Status<br />
& Supplies Notifications pop-up window. (Selected by default.)<br />
Allow special device information<br />
offers to be displayed<br />
Select this option to enable the driver to provide valuable information about your<br />
<strong>HP</strong> product for things such as supplies, warranty, and support status.<br />
Access <strong>HP</strong> Online Product Support Select this option to allow users to click an <strong>HP</strong> Online Product Support link that<br />
displays on the Status & Supplies Notifications pop-up window. (Selected by<br />
default.)<br />
Alternate Online <strong>HP</strong> Support URL Enter a URL to show an alternative <strong>HP</strong> Online Product Support link specified by<br />
the system administrator instead of the <strong>HP</strong> default URL. This link displays on<br />
the Status & Supplies Notifications pop-up window. Use an alternate URL<br />
that is meaningful and valid. (Not selected by default.)<br />
7. Click Apply to apply the changes, or click Hide to close the Status & Supplies Notifications panel<br />
without saving your the changes.<br />
Basic MPP settings<br />
NOTE: If you click Apply without providing the required information, an error message displays<br />
at the top of the screen in the Status & Supplies Notification window.<br />
The following is an example of such an error message. You specified creation of a new template<br />
for status & supplies notification, but did not give a name.<br />
The Basic MPP settings panel is shown in the following figure.<br />
In the Basic MPP settings panel of the Properties screen, select the following settings to apply for all<br />
users assigned to this MPP.<br />
Options Description<br />
Save as XML This field is automatically populated with the path to save the XML file for the selected<br />
MPP. This path is an active link that opens the File Download dialog box. Click<br />
Save to save the XML file to a local directory, or click Open to view the XML file in<br />
a browser window.<br />
100 Chapter 8 Manage the <strong>HP</strong> UPD using <strong>HP</strong> Managed <strong>Print</strong> Administration (MPA) and Active<br />
Directory Group Policy<br />
<strong>ENWW</strong>
Update an MPP<br />
Refresh rate Select one of the following values from the Refresh rate menu to determine how<br />
often the MPL refreshes.<br />
● Once per week<br />
● Once per 24 hours<br />
● Once per 18 hours<br />
● Once per 12 hours (<strong>HP</strong> default value)<br />
● Once per 6 hours<br />
● Once per hour<br />
● Once per 30 minutes<br />
● Once per minute<br />
● Once per 30 seconds<br />
● Once per second<br />
● Every UPD Query<br />
Select this option to refresh the MPL every time the <strong>HP</strong> UPD executes a query<br />
for printer products.<br />
NOTE: Determine the Refresh rate setting by the frequency of MPP and MPL<br />
content changes. For example, during initial setup and testing/validation, set<br />
this value to Every UPD query or Once per minute. If an administrator plans<br />
to change MPP and MPL content settings multiple times each day, set the<br />
Refresh rate to be more frequent so the new settings are applied to each client<br />
computer. A typical setting might be Once per 24 hours so that new settings<br />
are applied daily.<br />
Info link name Enter a name for the selected MPP to display as an active link in the <strong>HP</strong> UPD dialog<br />
box. This link allows administrators to provide policy-specific printing information to<br />
users. An example might be a link to a <strong>Print</strong>ing Help and FAQs. This link displays in<br />
orange on the lower-left corner of the <strong>HP</strong> <strong>Universal</strong> <strong>Print</strong>ing dialog box.<br />
Info link URL Enter the Internet address of the web server for the location of the file to include<br />
policy-specific printing information to users.<br />
MPP name This field is optional. Enter a new name to save the modified MPP.<br />
Make this the default policy for<br />
unassociated users<br />
Select this option to apply the selected MPP to user groups not associated with an<br />
MPP.<br />
NOTE: A parenthetical message follows this option and indicates the current MPP<br />
association for unassociated users. For example, “MPP_Demo” is currently the<br />
default policy or There is currently no default policy specified.<br />
Optionally, if no more properties are applied to the selected MPP, select one of the options in the Update<br />
policy panel. For more information, see Update an MPP on page 101.<br />
In the Update policy section located at the bottom of the Properties screen, select one of the following<br />
options listed in Table 8-16 Managed <strong>Print</strong> Policy–Update policy panel options on page 101.<br />
Table 8-16 Managed <strong>Print</strong> Policy–Update policy panel options<br />
Option Description<br />
<strong>ENWW</strong> Manage the <strong>HP</strong> UPD using <strong>HP</strong> MPA 101
Table 8-16 Managed <strong>Print</strong> Policy–Update policy panel options (continued)<br />
Back Select this option to return to the Select an MPP screen without saving any changes.<br />
Apply Select this option to apply the changes to the selected MPP. Use this option to remain<br />
in the Properties screen and make more changes.<br />
Associate MPL(s) Select this option to save your changes to the selected MPP, and then browse to the<br />
Associate MPLs with an MPP screen to establish an association with MPLs. For<br />
more information, see Associate an MPL with an MPP on page 112.<br />
Associate User Group(s) Select this option to save your changes to the selected MPP, and then browse to the<br />
Associate User Groups with an MPP screen to establish an association with user<br />
groups. For more information, see Associate a user group with a MPP<br />
on page 122.<br />
Done Select this option to apply your changes to the MPP. The Done screen displays,<br />
providing a confirmation of successful change to the MPP and a list of possible next<br />
steps.<br />
Edit an existing MPP<br />
1. On the Managed <strong>Print</strong>er Policies menu, select Edit an existing policy. The Select an MPP<br />
screen displays.<br />
2. In the Name drop-down menu, select the MPP to edit.<br />
3. Click Next. The Properties screen displays.<br />
4. Modify the settings for the selected MPP, as necessary. For more information, see Create a new<br />
MPP on page 90.<br />
Duplicate an existing MPP<br />
1. On the Managed <strong>Print</strong> Policies menu, select Duplicate an existing policy.<br />
The Select an MPP to duplicate screen displays.<br />
2. From the Copy from menu, select the name of an existing MPP.<br />
3. In the New name field, enter a name for the new MPP.<br />
4. Click Next. The Properties screen displays.<br />
5. Modify the settings for the selected MPP, as necessary. For more information, see Create a new<br />
MPP on page 90.<br />
Associate MPLs with an MPP<br />
1. On the Managed <strong>Print</strong>er Policies menu, select Associate printer lists.<br />
The Associate MPLs with an MPP screen displays.<br />
2. From the Name drop-down menu, select the name of an existing MPP that you want to associate<br />
with an existing user group.<br />
3. Click Refresh. The Manage MPL associations window populates automatically with the names<br />
of all existing MPLs and their current associations.<br />
4. Select the check box next to any MPL that displays in the two panels listed in Table 8-17 Managed<br />
<strong>Print</strong>er Policy—Manage MPL associations panel options on page 103.<br />
102 Chapter 8 Manage the <strong>HP</strong> UPD using <strong>HP</strong> Managed <strong>Print</strong> Administration (MPA) and Active<br />
Directory Group Policy<br />
<strong>ENWW</strong>
Table 8-17 Managed <strong>Print</strong>er Policy—Manage MPL associations panel options<br />
Option Descriptions<br />
Associated with other MPP(s) To establish an association with the selected MPP, select the check box next<br />
to any MPL listed in this panel, as necessary.<br />
Not associated with any MPP To establish an association with the selected MPP, select the check box next<br />
to any MPL listed in this panel, as necessary.<br />
5. Select one of the options listed in Table 8-18 Managed <strong>Print</strong>er Policy—Associate with an MPP<br />
panel options on page 103.<br />
Table 8-18 Managed <strong>Print</strong>er Policy—Associate with an MPP panel options<br />
Option Descriptions<br />
Apply Click this button to apply the associations and remain in the Associate MPLs<br />
with an MPL screen to make any more changes. The Associated with this<br />
MPP panel populates automatically with any MPLs selected for association with<br />
the MPP.<br />
View/edit policy settings Click this link to modify the settings for the selected MPP. For more information,<br />
see Create a new MPP on page 90.<br />
Done Click this button to apply the associations and close the screen.<br />
Associate user groups with an MPP<br />
1. On the Managed <strong>Print</strong>er Policies menu, select Associate User Groups. The Associate User<br />
Groups with an MPP screen displays.<br />
2. From the Name menu, select the name of the MPP with which you want to establish an association<br />
with existing user groups.<br />
3. Click Refresh. The Manage user group associations populates automatically with the existing<br />
user groups and their current associations.<br />
4. Select the check box next to user groups that appear in the following two panels.<br />
Table 8-19 Managed <strong>Print</strong>er Policy—Manage MPL associations panel options<br />
Option Descriptions<br />
Associated with other MPP(s) To establish an association with the selected MPP, select the check box next<br />
to user groups listed in this panel, as necessary.<br />
Not associated with any MPP To establish an association with the selected MPP, select the check box next<br />
to the user groups listed in this panel, as necessary.<br />
5. Select one of the following options.<br />
Table 8-20 Managed <strong>Print</strong>er Policy—Associate with an MPP panel options<br />
Option Descriptions<br />
Apply Click this button to apply the associations and remain in the Associate MPLs<br />
with an MPL screen to make any more changes. The Associated with this<br />
MPP panel populates automatically with any MPLs selected for association with<br />
the MPP.<br />
<strong>ENWW</strong> Manage the <strong>HP</strong> UPD using <strong>HP</strong> MPA 103
Table 8-20 Managed <strong>Print</strong>er Policy—Associate with an MPP panel options (continued)<br />
View/edit policy settings Click this link to modify the settings for the selected MPP. For more information,<br />
see Edit an existing MPP on page 102.<br />
Remove an existing MPP<br />
Done Click this button to apply the associations and close the screen.<br />
1. On the Managed <strong>Print</strong> Policies menu, select Remove an existing policy.<br />
2. From the Name menu, select the MPP name to remove.<br />
3. Click Next. The Confirm screen automatically populates with the MPLs and user groups<br />
associated with the MPP selected for removal.<br />
4. Click Remove to continue with the removal of the selected MPP, or click Back to return to the<br />
Select an MPP screen without removing the MPP.<br />
The confirmation screen provides confirmation of successful removal of the MPP.<br />
Use Managed <strong>Print</strong>er Lists (MPLs)<br />
Use the <strong>HP</strong> MPA software to create Managed <strong>Print</strong>er Lists (MPLs), add printers to existing MPLs, and<br />
establish associations with MPPs and User Groups.<br />
The MPLs provide a simple method for users to find and use <strong>HP</strong> printing products. The MPL defines<br />
groupings of printers based on various attributes and also controls features at both the group and<br />
individual printer levels.<br />
Administrators can use the <strong>HP</strong> MPA software to customize HTML views of MPLs to assist users in<br />
locating available printers in their own environments.<br />
Use the <strong>HP</strong> MPA tool to create, edit, and manage the content available to the <strong>HP</strong> UPD without having<br />
to worry about the XML syntax and contents for each document type. <strong>HP</strong> MPA stores policy and printer<br />
settings in a database running on a centrally managed server. When the <strong>HP</strong> UPD queries for the MPP<br />
or MPL content, scripts convert the stored database settings into the correctly formatted XML content<br />
consumed by the <strong>HP</strong> UPD. Use the <strong>HP</strong> MPA tool to manage the MPP and MPL settings and to manage<br />
the associations between them.<br />
What is an MPL?<br />
MPLs are XML documents that provide the information required for print jobs to use printing products.<br />
These centrally managed XML documents contain the printer details in an easy-to-read and modify text<br />
file format. To assist users in finding supported printers for printing with the <strong>HP</strong> UPD for Windows, the<br />
administrator defines printer details in the XML files. <strong>HP</strong> UPD MPLs provide administrators with the<br />
ability to specify the products that users can use for printing.<br />
MPLs create a reliable and seamless way of discovering and connecting to products in the office or to<br />
public printing venues.<br />
MPLs allow users to select a printer with a descriptive name from a predefined list. Users do not need<br />
to know about network print shares, TCP/IP addresses, printer host names, user access permissions,<br />
or other printer connection details. Instead, users select a printer from the list dialog box and print.<br />
Create and Edit MPLs<br />
The MPLs can be created and edited through the <strong>HP</strong> MPA. <strong>HP</strong> MPA formats and manages the XML<br />
files that contain the printer details such as the addresses, the <strong>HP</strong> UPD display names, comments, and<br />
other printer settings.<br />
104 Chapter 8 Manage the <strong>HP</strong> UPD using <strong>HP</strong> Managed <strong>Print</strong> Administration (MPA) and Active<br />
Directory Group Policy<br />
<strong>ENWW</strong>
<strong>HP</strong> MPA can also customize the view of each MPL so that users can select printers by clicking an image<br />
map or a picture of the printer to help the user find a printer.<br />
Who should use MPLs?<br />
MPLs can simplify printing for users and improve administrator control over the environment. Costs<br />
savings in productivity, security, support, and supplies frequently justify the effort of implementing MPLs.<br />
Any business with a Microsoft Windows printing environment can benefit from the flexibility and ease of<br />
use that MPLs provide. For example,<br />
● Hotels that offer printing to their guests who log in to their private network can use the <strong>HP</strong> UPD<br />
with MPLs to quickly connect to in-room or centrally located printers.<br />
● Restaurants, coffee shops, and other printing hot spots that provide Internet access can also define<br />
<strong>HP</strong> MPLs to allow guests to quickly connect to printers on their premises.<br />
● Enterprise environments with large campuses or offices spread across countries/regions can<br />
greatly benefit from MPLs, especially the mobile users who travel from site to site or building to<br />
building.<br />
MPLs support administrative personnel responsible for managing printers and printing within their<br />
environment. Depending on the configuration of the <strong>HP</strong> UPD on the client machine, MPLs can either<br />
simplify printer discovery for users or restrict printing to a defined set of printers within the environment.<br />
Use the <strong>HP</strong> MPA software to create, edit, and remove MPLs. MPLs are lists of printers that<br />
administrators can use to manage printer attributes. Manage the view of MPLs through the <strong>HP</strong> MPA<br />
software.<br />
For more information, see the following topics.<br />
● Create a new MPL<br />
● Edit an existing MPL<br />
● Associate an MPL with an MPP<br />
● Duplicate an existing MPL<br />
● Manage the MPL view<br />
● Manage virtual printers<br />
● Remove an existing MPL<br />
● Remove printers from an MPL<br />
Create a new MPL<br />
Follow these steps to create a new MPL.<br />
1. On the Managed <strong>Print</strong>er Lists menu, select Create a new list. The Create a new MPL screen<br />
displays.<br />
2. In the Name field, enter a unique name for the new MPL.<br />
3. Click Next. The MPL printers panel displays.<br />
4. Select one of the following options listed in Table 8-21 MPL printers panel–Options<br />
on page 106.<br />
<strong>ENWW</strong> Manage the <strong>HP</strong> UPD using <strong>HP</strong> MPA 105
Table 8-21 MPL printers panel–Options<br />
Option Description<br />
Auto printer discovery Select this option to add printers to the selected MPL through auto discovery<br />
methods.<br />
Manual printer entry Select this option to add printers to the selected MPL manually.<br />
Remove printer(s) Select this option to remove printers from the selected MPL.<br />
See the following topics for information about configuring specific settings for a new MPL.<br />
● Auto printer discovery<br />
● Manual printer entry<br />
Auto printer discovery<br />
In the MPL printers screen, click Auto printer discovery to open the Add Automatically screen.<br />
Use Auto printer discovery to create a new MPL or to add printers to an MPL. Three methods of auto<br />
printer discovery are available.<br />
● Discover locally connected network printers<br />
● Discover printers on a print server (\\serverName)<br />
● Import printers from an XML file<br />
After printers have been discovered by using each of these method, all fields can be modified manually,<br />
as necessary. For more information, see Manual printer entry on page 109.<br />
Discover locally connected network printers<br />
Follow these steps to discover locally connected network printers and add them to an MPL.<br />
1. In the MPL printers window, click Auto printer discovery. The Add automatically screen<br />
displays.<br />
2. On the Discover locally connected network printers panel, click Discover.<br />
During discovery, the <strong>HP</strong> MPA performs a local mDNS discovery on the local subnet. <strong>Print</strong>ing<br />
products that have the mDNS protocol enabled, and are on the same subnet as the <strong>HP</strong> MPA<br />
software, show up in the printer list.<br />
The Discovered printers screen displays, and locally connected printers discovered automatically<br />
populate the <strong>Print</strong>er group box.<br />
3. In the <strong>Print</strong>er group box, select the check box next to printers that you want to add to the MPL.<br />
(All printers are selected by default.)<br />
4. Modify the settings listed in Table 8-22 Discovered printers screen options on page 106 as<br />
necessary.<br />
Table 8-22 Discovered printers screen options<br />
Option Description<br />
Select/deselect all printers Select this check box to toggle between selecting all or none of the printers in<br />
the <strong>Print</strong>er window to include in the selected MPL. (Selected by default.)<br />
106 Chapter 8 Manage the <strong>HP</strong> UPD using <strong>HP</strong> Managed <strong>Print</strong> Administration (MPA) and Active<br />
Directory Group Policy<br />
<strong>ENWW</strong>
Table 8-22 Discovered printers screen options (continued)<br />
Query device configuration Select this check box to query the printing product to determine the following<br />
information. (Selected by default.)<br />
Use resolved hostname in place of IP<br />
address<br />
Set printer's IP address in the<br />
comments field<br />
● Presence of printer features such as hard disk, duplexer, and color<br />
● <strong>Print</strong>er model name<br />
● Address of the printer (for example, IP address, UNC path, IPX/SPX<br />
protocol, or host name)<br />
Select this check box to replace the printer IP address in the Address field with<br />
the resolved host name. (Not selected by default.)<br />
Select this check box to include the printer IP address in the Comments field.<br />
(Not selected by default.)<br />
5. Click Add checked printers to add the selected printers to the MPL. The information associated<br />
with the selected printer automatically populates the MPL <strong>Print</strong>ers screen.<br />
Alternatively, click Back to return to the Add automatically screen without saving the changes.<br />
6. Modify any more fields as necessary. For more information, see Manual printer entry<br />
on page 109.<br />
Discover printers on a print server (\\serverName)<br />
Follow these steps to add any number of printers installed on a known print server.<br />
1. In the MPL printers screen, click Auto printer discovery. The Add automatically screen<br />
displays.<br />
2. In the Discover printers on a print server (\\serverName) section, specify a name in the <strong>Print</strong><br />
server field. For example,<br />
● \\printserver<br />
● \\winprintserver<br />
● \\novellServer.tree1<br />
● \\novellServer.context1.context2<br />
3. Optionally, in the Connect as user field, enter the user name for the server that you provided in<br />
the <strong>Print</strong> server field, and enter the corresponding password in the Password field.<br />
4. Select the <strong>Print</strong> server is a non-Windows machine check box if the print server is a non-Windows<br />
computer.<br />
5. Click Discover.<br />
The Discovered printers screen displays. The printers discovered on the specified server<br />
automatically populate the <strong>Print</strong>ers group box.<br />
6. In the <strong>Print</strong>ers panel, select the check box next to the printers that you want to add to the MPL.<br />
(All printers are selected by default.)<br />
7. Modify the settings listed in Table 8-23 Discovered printers screen options on page 108 as<br />
necessary.<br />
<strong>ENWW</strong> Manage the <strong>HP</strong> UPD using <strong>HP</strong> MPA 107
Table 8-23 Discovered printers screen options<br />
Option Description<br />
Select/deselect all printers Select this check box to toggle between selecting all or none of the printers in<br />
the <strong>Print</strong>er window include in the selected MPL. (Selected by default.)<br />
Query device configuration Select this check box to query the printing product to determine the following<br />
information. (Selected by default.)<br />
Use resolved hostname in place of IP<br />
address<br />
Set printer's IP address in the<br />
comments field<br />
● Presence of printer features such as hard disk, duplexer, and color<br />
● <strong>Print</strong>er model name<br />
● Address of the printer (for example, IP address, UNC path, IPX/SPX<br />
protocol, or host name)<br />
Select this check box to replace the printer IP address in the Address field with<br />
the resolved host name. (Not selected by default.)<br />
Select this check box to include the printer IP address in the Comments field.<br />
(Not selected by default.)<br />
8. Click Add checked printers to add the selected printers to the MPL. The information associated<br />
with the selected printer automatically populates the MPL <strong>Print</strong>ers screen.<br />
Alternatively, click Back to return to the Add automatically screen without saving the changes.<br />
9. Modify any more fields as necessary. For more information, see Manual printer entry<br />
on page 109.<br />
Import printers from an XML file<br />
Administrators can use this method to add static printer information from an XML file. For example, an<br />
XML file from a previous MPL or a web Jetadmin file. When the XML file is imported the data remains<br />
the same; only its format is converted when added to the MPL.<br />
Follow these steps to add static printer information from an XML file.<br />
1. On the MPL printers screen, click Auto printer discovery. The Add automatically screen<br />
displays.<br />
2. In the Import printers from XML file panel, you must provide the URL of the XML file or UNC path<br />
to continue. In the XML URL or UNC field, enter the Internet address that corresponds to the<br />
location of the XML file on a web server or the <strong>Universal</strong> Naming Convention (UNC) that<br />
corresponds to the location of the XML file on a local-area network.<br />
3. Click Next. The Discovered printers screen displays. The printers discovered from the imported<br />
information automatically populate the <strong>Print</strong>ers panel group box.<br />
4. In the <strong>Print</strong>er group box, select the check box next to the printers that you want to add to the MPL.<br />
(All printers are selected by default.)<br />
5. Modify the settings listed in Table 8-24 Discovered printers screen options on page 108 as<br />
necessary.<br />
Table 8-24 Discovered printers screen options<br />
Option Description<br />
Select/deselect all printers Select this check box to toggle between selecting all or none of the printers in<br />
the <strong>Print</strong>er window in the selected MPL. (Selected by default.)<br />
108 Chapter 8 Manage the <strong>HP</strong> UPD using <strong>HP</strong> Managed <strong>Print</strong> Administration (MPA) and Active<br />
Directory Group Policy<br />
<strong>ENWW</strong>
Query device configuration Select this check box to query the printing product to determine the following<br />
information. (Selected by default.)<br />
Use resolved hostname in place of IP<br />
address<br />
Set printer's IP address in the<br />
comments field<br />
● Presence of printer features such as hard disk, duplexer, and color<br />
● <strong>Print</strong>er model name<br />
● Address of the printer (for example, IP address, UNC path, IPX/SPX<br />
protocol, or host name)<br />
Select this check box to replace the printer IP address in the Address field with<br />
the resolved host name. (Not selected by default.)<br />
Select this check box to include the printer IP address in the Comments field.<br />
(Not selected by default.)<br />
6. Click Add checked printers to add the selected printers to the MPL. The information associated<br />
with the selected printer automatically populates the MPL <strong>Print</strong>ers screen.<br />
Alternatively, click Back to return to the Add automatically screen without saving changes.<br />
7. Modify more printer attributes as necessary. For more information, see Manual printer entry<br />
on page 109.<br />
Manual printer entry<br />
Table 8-24 Discovered printers screen options (continued)<br />
This section provides instructions to add printers to an MPL manually or edit printers previously added.<br />
If you have performed one of the methods for auto printer discovery, many of the fields described here<br />
might automatically populate. For more information, see Auto printer discovery on page 106.<br />
NOTE: Changes that you make in this section apply only to printers selected in the <strong>Print</strong>ers window.<br />
To select multiple printers, press and hold the Ctrl key and then select printers.<br />
Follow these steps to add printers to an MPL manually, or to modify printer attributes manually.<br />
1. Click Manual printer entry. The MPL printers screen displays with all fields available for<br />
modification.<br />
2. Modify the fields listed in Table 8-25 MPL printers panel–Manual <strong>Print</strong>er Entry options<br />
on page 109 as necessary.<br />
Table 8-25 MPL printers panel–Manual <strong>Print</strong>er Entry options<br />
Option Description<br />
<strong>Print</strong>ers This panel populates automatically with previously retrieved printer information.<br />
Click a specific printer to modify the fields.<br />
<strong>Print</strong>er name Enter the name of the printer to add to the MPL, replacing the text “Default:<br />
Unnamed printer (current date and time).”<br />
<strong>ENWW</strong> Manage the <strong>HP</strong> UPD using <strong>HP</strong> MPA 109
Table 8-25 MPL printers panel–Manual <strong>Print</strong>er Entry options (continued)<br />
Address Provide one of the following addresses to define the type of connection and the<br />
printer address for users to connect to the printer.<br />
Replace address with resolved<br />
hostname on query<br />
● IP address:<br />
Retrieve the IP address of the printer from the configuration page (for<br />
example, 115.22.112.151).<br />
● UNC path:<br />
The UNC path tag includes any Windows printer share (also known as a<br />
Network print queue) or non-Windows print queues such as a PSA or<br />
Novell (for example, \\serverName\printerName, \\printServer\hplj4000, \<br />
\NovellTree1\Context1 \Context2\OU3.hplj5500, or \\LabTree<br />
\Bldg7.SEMeetingRoom.<strong>Print</strong>ers.hp4100).<br />
● Hostname:<br />
Retrieve the host name of a product from the configuration page (for<br />
example, NPIBB99EE, testlab.hou.com).<br />
● IPX/SPX:<br />
The IPX/SPX protocol includes the “NetworkNumber.NodeNumber”<br />
format.<br />
NOTE: To use an IPX/SPX protocol, the IPX/SPX client networking<br />
software must be installed on the computer. Also, the <strong>HP</strong> IPX port monitor<br />
must be installed, which is supported only in Windows 2000.<br />
After the Address field populates with a valid printer address, select this option<br />
to query the printing product to determine the following information.<br />
● Presence of printer features such as hard disk, duplexer, and color<br />
● <strong>Print</strong>er model name<br />
● Address of the printer (for example, IP address, UNC path, IPX/SPX<br />
protocol, or host name)<br />
Model name Enter the model name of the printer (for example, <strong>HP</strong> LaserJet 4100 MFP).<br />
Physical location Enter the physical location of the printer to add to the MPL (for example,<br />
<strong>HP</strong> LaserJet 4100 in Room 1002).<br />
Comments Enter in any comments (for example, tray 2 contains color paper).<br />
Check boxes The following two check boxes are available. Select as appropriate.<br />
● Duplex unit installed<br />
● Hard disk installed<br />
<strong>Print</strong>er group The following two options are available.<br />
● (None).<br />
Select this option if this MPL is not associated with a specific printer group.<br />
● (Create new group).<br />
Select this option to define a new printer group. Enter the name of this<br />
group in the New <strong>Print</strong>er Group field.<br />
Cost per page Provide a cost value to appear in a pay-for-print environment where a cost is<br />
assigned to print jobs (for example, $1.09).<br />
110 Chapter 8 Manage the <strong>HP</strong> UPD using <strong>HP</strong> Managed <strong>Print</strong> Administration (MPA) and Active<br />
Directory Group Policy<br />
<strong>ENWW</strong>
3. Another option is to click Advanced to open the Advanced panel. Select one of the options listed<br />
in Table 8-26 MPL printers–Advanced panel options on page 111 as necessary.<br />
Table 8-26 MPL printers–Advanced panel options<br />
Option Description<br />
Disable color printing Select this check box to disable color printing for the selected printer.<br />
Validate when printing Select this check box to require communication with the printer before it is<br />
available for printing. If the printer is on a print server (for example, Novell) that<br />
does not allow bidirectional communication, this check box should be clear.<br />
Select for job delivery Select this check box to apply the job delivery settings for all the print jobs<br />
submitted to the selected printer.<br />
NOTE: This option is applicable only when the job-delivery settings are<br />
configured in the MPP.<br />
Secure print path Select this check box to indicate to users that the selected printer is on a secure<br />
print path.<br />
Configuration Select the appropriate configuration option.<br />
● Use the configuration from the address specified:<br />
The configuration will be queried directly from the printer at this address.<br />
● Use the device from an alternate address:<br />
The configuration will be queried from the printer at this alternate address.<br />
● Use the device from a virtual printer:<br />
The configuration will be queried from a virtual printer. See Manage virtual<br />
printers on page 119 for more information about setting up a virtual printer.<br />
4. Click Hide to save the settings to the selected printer, and close the Advanced panel.<br />
5. In the MPL settings panel, select the options listed in Table 8-27 MPL settings panel<br />
on page 111 as necessary.<br />
Table 8-27 MPL settings panel<br />
Option Description<br />
Direct URL This field populates automatically with the local path to the selected MPL. The<br />
URL provided is an active link to provide direct access to the selected MPL. For<br />
more information, see Auto printer discovery on page 106.<br />
Save as XML This field populates automatically with the path to the XML file for the selected<br />
MPL. This path is an active link that initiates the File Download dialog box.<br />
<strong>ENWW</strong> Manage the <strong>HP</strong> UPD using <strong>HP</strong> MPA 111
Refresh rate Select the refresh rate from the menu to determine how often the MPL refreshes.<br />
The selected refresh rate applys only to this MPL. The available controls are as<br />
follows.<br />
● Once per week<br />
● Once per 24 hours<br />
● Once per 18 hours<br />
● Once per 12 hours<br />
● Once per 6 hours<br />
● Once per hour<br />
● Once per 30 minutes<br />
● Once per minute<br />
● Once per 30 seconds<br />
● Once per second<br />
● Once per UPD query<br />
MPL name Optionally, enter a modified name in the MPL name field to save the MPL with<br />
more printers included.<br />
6. In the MPL settings panel, click Apply (to apply selected options and leave the MPL printers<br />
screen open) or Done (to apply selected options and close the screen). Until you have clicked<br />
Apply or Done, any settings that have changed are not saved in the MPL.<br />
Edit an existing MPL<br />
Table 8-27 MPL settings panel (continued)<br />
A message displays indicating successful change of the MPL and listing further steps.<br />
Follow these steps to edit an existing MPL.<br />
1. On the Managed <strong>Print</strong>er Lists menu, select Edit an existing list. The Select an MPL screen<br />
displays.<br />
2. In the Name menu, select the MPL to modify<br />
3. Click Next. The MPL printers screen displays, automatically populated with the values assigned<br />
to the selected MPL.<br />
4. Modify the settings for the selected MPL as necessary. For more information, see Auto printer<br />
discovery on page 106 or Manual printer entry on page 109.<br />
Associate an MPL with an MPP<br />
For more information, see Associate MPLs with an MPP on page 102.<br />
Duplicate an existing MPL<br />
Follow these steps to duplicate an existing MPL.<br />
1. In the Managed <strong>Print</strong>er List menu, select Duplicate an existing list. The Select an MPL to<br />
duplicate screen displays.<br />
2. In the Copy from: drop-down menu, select the MPL to duplicate.<br />
112 Chapter 8 Manage the <strong>HP</strong> UPD using <strong>HP</strong> Managed <strong>Print</strong> Administration (MPA) and Active<br />
Directory Group Policy<br />
<strong>ENWW</strong>
3. In the New name: field, enter the name for the new MPL.<br />
4. Click Next. The MPL printer screen displays and automatically populates with the values assigned<br />
to the duplicated MPL.<br />
5. Modify the settings for the selected MPL, as necessary. For more information, see Auto printer<br />
discovery on page 106 or Manual printer entry on page 109.<br />
6. Click Apply (to apply selected options and leave the MPL printers screen open) or Done (to apply<br />
selected options and close the screen). Until you have clicked Apply or Done, any settings that<br />
have changed are not saved in the MPL.<br />
Manage the MPL view<br />
Select a view<br />
A message displays indicating successful modification of the MPL and listing further steps.<br />
MPL views can be modified to assist users in selecting printers.<br />
Follow these steps to modify views.<br />
1. On the Managed <strong>Print</strong>er Lists menu, click Manage MPL view. The Select an MPL screen<br />
displays.<br />
2. From the Name menu, select the name of an existing MPL.<br />
3. Click Next. The Select a view type screen displays.<br />
Modify views from one or both of the following panels.<br />
● Select a view<br />
● Advanced view settings<br />
1. On the Select a view type panel, click one of the following options to select a view type.<br />
NOTE: The Don’t require user to confirm printer after selection from view check box is<br />
located below the MPL view-type options. Select this box after you create a view if you want to<br />
allow users to select printers from a view without providing more confirmation. This box is the default<br />
selection.<br />
Table 8-28 Select a view type panel—View options<br />
Option Description<br />
Default UPD view Select this option to show a specified MPL in the <strong>HP</strong> UPD dialog box.<br />
Clickable image map Select this option to create a clickable image map for the selected MPL.<br />
List with printer graphics Select this option to create a list of printers that contains a graphic for the<br />
selected MPL.<br />
Tabular HTML view Select this option to create a table of printers for the selected MPL.<br />
2. Optionally, to view the result in a new window, click the Preview button below the selection.<br />
3. Click Configure to apply the selections.<br />
See the following topics for more information about each view type.<br />
<strong>ENWW</strong> Manage the <strong>HP</strong> UPD using <strong>HP</strong> MPA 113
● Clickable image map view<br />
● List with printer graphics view<br />
● Tabular HTML view<br />
Clickable image map view<br />
The clickable image map view is an interactive image-based map that lists selectable printers associated<br />
with the specified MPL. The clickable image map allows users to drill down from a large-scale image to<br />
a local image that provides links to local printers.<br />
1. From the Select a view type screen, select Clickable image map.<br />
2. Click Configure. The Image map screen displays.<br />
3. On the View settings panel, click Select background image from library to select a background<br />
image. The Select a background image screen displays.<br />
4. Select the option button above the image to apply to image-map background, and then click one<br />
of the options listed in Table 8-29 Clickable image map view options on page 114.<br />
Table 8-29 Clickable image map view options<br />
Option Description<br />
Back Select this option to return to the Configure image map screen without applying<br />
a new image.<br />
Delete selected image Select this option to remove the selected image from the <strong>HP</strong> MPA software.<br />
Upload new image Select this option to upload a new image from an external source. The Upload<br />
a new background image screen displays.<br />
When the Upload new image option is selected, you must perform the following<br />
steps.<br />
1. Click Browse to the right of the File field. The Choose file window<br />
displays.<br />
2. Select the file to upload and click Open. The File field populates<br />
automatically with the file name and path.<br />
3. Optionally, in the Description field, enter a description for the selected<br />
background image.<br />
4. Click Upload Image. The image becomes available for selection on the<br />
Select a background image screen.<br />
Select image The selected image displays in the Image map panel with graphics for added<br />
printers on the leftmost side.<br />
5. Select Show legend to include a legend at the bottom of the image map. (This option is not selected<br />
by default.)<br />
6. In the <strong>Print</strong>er select panel, select a printer to which you want to assign an image.<br />
7. Click Auto match images for all printers to automatically match all the printers with their<br />
corresponding image. The printer image selected in the <strong>Print</strong>er select drop-down menu displays<br />
in the <strong>Print</strong>er image panel.<br />
Other automatically matched images appear as icons in the Image map panel<br />
114 Chapter 8 Manage the <strong>HP</strong> UPD using <strong>HP</strong> Managed <strong>Print</strong> Administration (MPA) and Active<br />
Directory Group Policy<br />
<strong>ENWW</strong>
8. In the <strong>Print</strong>er image panel, select one of the following options.<br />
Table 8-30 <strong>Print</strong>er image panel options<br />
Option Description<br />
Replace image Select this option to replace the image automatically assigned to the selected<br />
printer with an image from the library. When you select this option, you must<br />
perform the following steps.<br />
1. Click Browse images to view the list of available images to match with the<br />
selected printer. The Select an image for [ <strong>Print</strong>er Name ] screen<br />
displays.<br />
2. Click the option button above the image that you want to assign to the<br />
selected printer.<br />
3. Click Select image. The selected printer image displays in the <strong>Print</strong>er<br />
image section.<br />
Add to map Click this option to place the image on the image map.<br />
Refresh<br />
Reduce to Optionally, select the check box to modify the size of the image selected on the<br />
image map. When this option is selected, the following options are available.<br />
● (original size)<br />
● 35 pixels<br />
● 50 pixels<br />
● 75 pixels<br />
● 100 pixels<br />
● 150 pixels<br />
● 200 pixels<br />
9. Drag the images in the Image map panel to the chosen location by clicking the image, holding<br />
down the left-mouse button, and then dragging to the appropriate location.<br />
10. In the Labels panel, click Show. The Labels panel displays.<br />
A label can be created for an image already added to the Image map panel, or can be used instead<br />
of an image.<br />
● To add a label to an image in the Image map panel, select the image and continue with the<br />
following steps.<br />
● To add a label to the Image map panel not associated with an image, continue with the<br />
following steps.<br />
11. From the Labels drop-down menu, select the name of a label, or select (Create a new text<br />
label).<br />
12. Modify the following settings, as necessary.<br />
NOTE: These settings will be automatically reflected on the Image map panel.<br />
<strong>ENWW</strong> Manage the <strong>HP</strong> UPD using <strong>HP</strong> MPA 115
Table 8-31 Labels panel options<br />
Option Description<br />
Text Enter the text to appear on the label.<br />
Size Select one of the following to apply the appropriate font size. (Medium is the<br />
default.)<br />
● Large<br />
● Medium<br />
● Small<br />
Weight Select one of the following to apply the appropriate font weight. (Normal is the<br />
default.)<br />
● Normal<br />
● Bold<br />
Color Select one of the following color options from the menu to apply the color to the<br />
label text. (Black is the default.)<br />
● Black<br />
● Red<br />
● Blue<br />
● Green<br />
Width Select one of the following options to set the width of the label text box. (The<br />
200 pixels option is the default.)<br />
● 100 pixels<br />
● 200 pixels<br />
● 300 pixels<br />
13. Click Add to map. The new label is automatically added to the image map.<br />
14. To move the label to a location on the image map, click the label text box on the image map and<br />
drag to the location.<br />
15. Click a new printer on the image map to add more labels as necessary, or click Hide to close the<br />
label panel.<br />
NOTE: To remove a label, select the label in the Image map panel or in the Labels drop-down menu.<br />
Then, click Remove label in the Labels panel.<br />
List with printer graphics view<br />
1. Click the option button next to List with printer graphics.<br />
2. Optionally, select the Show device address check box to display the product address in the list<br />
with the printer graphics view. (This box is not selected by default.)<br />
3. Click one of the options listed in Table 8-32 Graphics view—List format options on page 117 to<br />
specify the list format.<br />
116 Chapter 8 Manage the <strong>HP</strong> UPD using <strong>HP</strong> Managed <strong>Print</strong> Administration (MPA) and Active<br />
Directory Group Policy<br />
<strong>ENWW</strong>
Table 8-32 Graphics view—List format options<br />
Option Description<br />
All printer groups on one page Click this option to format the table with all printer groups on one page.<br />
Each printer group in its own frame Click this option to format the table with one printer group per frame.<br />
4. Click Preview to view the list with the selected options. A new browser window displays that<br />
contains the list output.<br />
5. Click Configure to make more changes to the list. The Configure list with printer graphics<br />
screen displays.<br />
6. On the <strong>Print</strong>er select menu, select a printer to include in the list.<br />
7. Click Auto match images for all printers.<br />
8. Optionally, on the <strong>Print</strong>er image panel, click Replace image to replace the auto match image.<br />
The <strong>Print</strong>er image panel changes to show the following options. Select one.<br />
Table 8-33 <strong>Print</strong>er image panel options<br />
Option Description<br />
Auto match image Click this button to automatically search for images that match the product. If<br />
the image is available in the image library, the automatically matched image<br />
displays.<br />
Browse images Click this button to select an image from a library of printer images.<br />
In the select image screen, three options are available.<br />
● Back.<br />
Select this option to return to the Configure image map screen without<br />
applying a new image.<br />
● Delete selected image.<br />
Select this option to remove the selected image from the <strong>HP</strong> MPA software.<br />
● Upload new image.<br />
Select this option to upload a new image from an external source. The<br />
Upload a new background image screen displays. See the following for<br />
more instructions for uploading a new image.<br />
Select the Upload new image option and perform the following steps.<br />
1. Click Browse to the right of the File field. The Choose file window<br />
displays.<br />
2. Select the file to upload and click Open. The File field populates<br />
automatically with the file name and path.<br />
3. Optionally, in the Description field, enter a description for the selected<br />
background image.<br />
4. Click Upload Image. The image becomes available for selection on the<br />
Select a background image screen.<br />
Select image The selected image displays in the Image map panel with graphics for added<br />
printers on the leftmost side.<br />
<strong>ENWW</strong> Manage the <strong>HP</strong> UPD using <strong>HP</strong> MPA 117
9. In the Complete panel, select one of the options listed in Table 8-34 Complete panel options<br />
on page 118.<br />
Tabular HTML view<br />
Table 8-34 Complete panel options<br />
Option Description<br />
Back Click Back to return to the Select an MPL screen without saving the changes.<br />
Apply Click Apply to apply your changes to the MPL view and remain in the Configure<br />
list with graphics view screen to make any more modifications.<br />
Preview Click Preview to view the applied changes. A new browser window displays with<br />
the list output.<br />
Done Click Done to apply the changes to the MPL view. A confirmation screen<br />
displays and provides a list of suggested next steps.<br />
To create a table of all available printers in the specified MPL, follow these steps.<br />
1. Click the option button next to Tabular HTML view.<br />
2. Optionally, select the Hide empty columns check box to hide any columns that have no values.<br />
3. Optionally, select the Show device address check box to show the product address in the tabular<br />
HTML view.<br />
4. Click one of the option buttons listed in Table 8-35 Tabular HTML view options on page 118 to<br />
select the list format.<br />
Table 8-35 Tabular HTML view options<br />
Option Description<br />
All printer groups on one page Click this option to format the table with all the printer groups on one page.<br />
Each printer group in its own frame Click this option to format the table with one printer on each frame.<br />
5. Click Preview to preview the tabular HTML output. A new browser window displays that contains<br />
the HTML output.<br />
6. In the Select a view type panel, click one of the options listed in Table 8-36 Select a view panel<br />
options on page 118.<br />
Advanced view settings<br />
Table 8-36 Select a view panel options<br />
Option Description<br />
Back Click Back to return to the Select an MPL screen without saving the changes.<br />
Apply Click Apply to apply your changes to the MPL view and remain in the Select a<br />
view type panel to make any more modifications.<br />
Done Click Done to apply the changes to the MPL view. A confirmation screen<br />
displays and provides a list of suggested next steps.<br />
Use the advanced view settings to design a custom MPL view to assist users in selecting printing<br />
products from an image map. The URL in this section links directly to the Final URL field that displays.<br />
118 Chapter 8 Manage the <strong>HP</strong> UPD using <strong>HP</strong> Managed <strong>Print</strong> Administration (MPA) and Active<br />
Directory Group Policy<br />
<strong>ENWW</strong>
With this method, you can allow users to select a printer by drilling down from a high-level image map<br />
to the low-level view within the clickable image map.<br />
In Advanced view, you can point to a starting web page. This web page can be made using standard<br />
web publishing tools with or without images to help ease users through a layer view of MPLs.<br />
For example, the starting web page could show a state with links to individual cites. Each city would<br />
open to a web page with individual buildings linked. Then, each building could be linked to a web page<br />
with the building floors linked, and each floor to individual printers.<br />
1. In the Advanced view settings section of the Select a view screen, click Show. The Advanced<br />
view settings panel displays.<br />
NOTE: The Final URL field populates automatically with the Internet address for the final MPL<br />
view that you selected for this MPL ID.<br />
2. In the Starting URL field, enter the Internet address of the image that provides a starting point for<br />
the clickable image map.<br />
3. Perform one of the following actions.<br />
Manage virtual printers<br />
Option Description<br />
Back Click Back to return to the Select an MPL screen without saving the changes.<br />
Apply Click Apply to apply your changes to the MPL view and remain in the Advanced<br />
view settings panel to make any more modifications.<br />
Done Click Done to apply the changes to the MPL view and return to the Select an<br />
MPL screen.<br />
Hide Click Hide to close the Advanced view settings panel.<br />
In some environments, it is not possible for the <strong>HP</strong> UPD to communicate with the destination printer.<br />
This might occur because the <strong>HP</strong> UPD and the printer are not on the same network, there is a firewall,<br />
or communication has been disabled for some other reason. In these environments, the <strong>HP</strong> UPD is<br />
unable to determine the physical capabilities of the product, and only basic printing options are provided<br />
to the user.<br />
By using the Use the device configuration from a virtual printer option and then selecting one of the<br />
previously defined <strong>HP</strong> MPA virtual printers, the administrator can enable the <strong>HP</strong> UPD to act as though<br />
it communicated with the target product. The administrator can also set up the driver features as though<br />
the product detected the specific hardware features. Once a virtual printer is selected, the capabilities<br />
of that virtual printer are displayed for the administrator.<br />
● Create a new virtual printer<br />
● Edit existing virtual printer<br />
<strong>ENWW</strong> Manage the <strong>HP</strong> UPD using <strong>HP</strong> MPA 119
Create a new virtual printer<br />
Follow these steps to set up a virtual printer.<br />
1. On the Managed <strong>Print</strong>er Lists menu, select Manage Virtual <strong>Print</strong>ers. The Create a new virtual<br />
printer screen displays.<br />
2. Enter the address of the printer in TCP/IP or hostname format.<br />
3. Click Add. See Edit existing virtual printer on page 120 for more information.<br />
Edit existing virtual printer<br />
Follow these steps to edit an existing virtual printer.<br />
1. On the Managed <strong>Print</strong>er List menu, select Manage Virtual <strong>Print</strong>ers. The Edit existing virtual<br />
printers panel opens.<br />
2. In the Edit existing virtual printers panel, modify the settings listed in Table 8-37 Edit existing<br />
virtual printers panel options on page 120 as necessary.<br />
Table 8-37 Edit existing virtual printers panel options<br />
Option Description<br />
Name Edit the name.<br />
Re-query this device to update its<br />
capabilities<br />
Select/deselect all printers for<br />
requerying<br />
Select/deselect all printers for<br />
removal<br />
Select this check box to query the printing product to update the printer's<br />
features (such as hard disk or duplexer).<br />
Select this check box to toggle between selecting all or none of the printers for<br />
requery.<br />
Select this check box to toggle between selecting all or none of the printers for<br />
removal.<br />
3. Click Apply (to apply selected options and leave the Edit virtual printers screen open) or Done<br />
(to apply selected options and close the screen). Until you have clicked Apply or Done, any settings<br />
that have changed are not saved in the MPL.<br />
A message displays, stating that the virtual printer has been successfully modified and, listing<br />
further steps.<br />
Remove an existing MPL<br />
Follow these steps to remove an existing MPL.<br />
1. On the Managed <strong>Print</strong>er Lists menu, select Remove an existing list. The Select an MPL screen<br />
displays.<br />
2. From the Name menu, select the name of an existing MPL.<br />
3. Click Next. A confirmation screen displays and automatically populates with the list of all printers<br />
currently assigned to the selected MPL.<br />
4. Click Remove to confirm the removal of the selected MPL, or click Back to return to the Select a<br />
MPL screen without saving the changes.<br />
120 Chapter 8 Manage the <strong>HP</strong> UPD using <strong>HP</strong> Managed <strong>Print</strong> Administration (MPA) and Active<br />
Directory Group Policy<br />
<strong>ENWW</strong>
Remove printers from an MPL<br />
Follow these steps to remove printers from an MPL.<br />
1. On the Managed <strong>Print</strong>er Lists menu, click Edit an existing list. The Select an MPL screen<br />
displays.<br />
2. Select the MPL from which a printer or printers are to be removed and click Next. The <strong>Print</strong>ers<br />
screen display.<br />
3. On the MPL printers screen, select the printers to remove by clicking them in the <strong>Print</strong>ers panel.<br />
(Press and hold the Ctrl key to select more than one printer.)<br />
4. Click Remove printer(s). A confirmation dialog box displays that contains the list of the printers<br />
that you selected for deletion.<br />
5. Click OK to confirm, or click Cancel to return to the Confirm screen to view printer details.<br />
Use User Groups<br />
Use the <strong>HP</strong> MPA software to create, import, and modify groups of users. The <strong>HP</strong> MPA software also<br />
establishes associations for existing user groups with available MPPs to manage user group access to<br />
available printers and to control features. Users added to these groups are likely to be domain users,<br />
although users can be added with their local login name.<br />
Use the <strong>HP</strong> MPA software to create user groups and modify permissions for <strong>HP</strong> UPD users.<br />
For more information about creating user groups, see the following topics.<br />
● Create a new user group<br />
● Edit an existing user group<br />
● Associate a user group with a MPP<br />
● Remove a user group<br />
Create a new user group<br />
Follow these steps to create a new user group.<br />
1. On the User Groups menu, select Create a new user group. The Create a new user group<br />
screen displays.<br />
2. In the Name field, enter a name for the new user group.<br />
3. Click Next. The Users screen displays.<br />
4. In the Users field on the Included Users panel, enter the user entries in the format specified on<br />
the screen.<br />
Alternatively, you can paste user entries from an external, semicolon-delimited list.<br />
5. Optionally, in the User group name field on the User Group Settings panel, enter a name for the<br />
new user group.<br />
6. Perform one of the following actions.<br />
Option Description<br />
<strong>ENWW</strong> Manage the <strong>HP</strong> UPD using <strong>HP</strong> MPA 121
Back Click Back to return to the main menu without saving the changes.<br />
Apply Click Apply to update the user entries and remain in the Included users screen<br />
to make more modifications.<br />
Done Click Done to update user entries and return to the main menu.<br />
Edit an existing user group<br />
Follow these steps to edit an existing user group.<br />
1. On the User Groups menu, select Edit an existing user group. The Edit an existing user<br />
group screen displays.<br />
2. From the Name menu, select the name of an existing user group.<br />
3. Click Next. The Included users screen displays and populates automatically with all users in the<br />
selected user group.<br />
4. In the Users: field, enter the user entries in the format specified on the screen.<br />
Alternatively, you can paste user entries from an external, semicolon-delimited list.<br />
5. Optionally, in the User group name: field, enter a name for the new user group.<br />
6. Perform one of the following actions.<br />
Option Description<br />
Back Click Back to return to the main menu without saving the changes.<br />
Apply Click Apply to update the user entries and remain in the Included users screen<br />
to make more modifications.<br />
Done Click Done to update user entries and return to the main menu.<br />
Associate a user group with a MPP<br />
See Associate user groups with an MPP on page 103 for detailed instructions.<br />
Remove a user group<br />
Follow these steps to remove a user group.<br />
1. On the User Groups menu, select Remove a user group. The Remove an existing user<br />
group screen displays.<br />
2. From the Name menu, select the name of the user group to remove.<br />
3. Click Next. A Warning screen displays. The Included users panel populates automatically with<br />
users in the selected user group.<br />
4. Click Remove to continue with the removal of the selected user group, or click Back to return to<br />
the Select a user group screen without removing the user group.<br />
122 Chapter 8 Manage the <strong>HP</strong> UPD using <strong>HP</strong> Managed <strong>Print</strong> Administration (MPA) and Active<br />
Directory Group Policy<br />
<strong>ENWW</strong>
Manage Active Directory Group Policy with the <strong>HP</strong> UPD<br />
using <strong>HP</strong> Active Directory Templates<br />
Active Directory Group Policy and the <strong>HP</strong> UPD Active Directory Administrative template allow complete<br />
management of the <strong>HP</strong> UPD printing experience within your Active Directory infrastructure.<br />
You can use the <strong>HP</strong> UPD Active Directory Administrative Template to add policies to an existing Group<br />
Policy Object or create new, custom <strong>HP</strong> UPD Group Policy Objects for each user, group, or<br />
Organizational Unit.<br />
In addition to creating policies for the <strong>HP</strong> UPD, you can also enter the location of managed printer lists<br />
created by the <strong>HP</strong> MPA or by exporting printer groups from your <strong>HP</strong> web Jetadmin database in XML<br />
format.<br />
● Supported <strong>HP</strong> UPD versions<br />
● Use <strong>HP</strong> Active Directory Group Policy versus <strong>HP</strong> MPA to manage <strong>HP</strong> UPD policies<br />
● Install the <strong>HP</strong> UPD Active Directory Administrative template<br />
Supported <strong>HP</strong> UPD versions<br />
The <strong>HP</strong> UPD Active Directory Administrator Template version 4.1 is supported with <strong>HP</strong> UPD version<br />
5.0 and is available for download at www.hp.com/go/upd.<br />
Use <strong>HP</strong> Active Directory Group Policy versus <strong>HP</strong> MPA to manage <strong>HP</strong> UPD<br />
policies<br />
The decision to use <strong>HP</strong> Active Directory Group Policy or <strong>HP</strong> MPA to manage the <strong>HP</strong> UPD depends on<br />
the size of your business and the current software infrastructure within your business.<br />
In an enterprise business, use Active Directory Group Policy when your enterprise environment requires<br />
user and Organizational Unit (OU) level <strong>HP</strong> UPD configuration settings that might be based on how the<br />
users are currently configured in your Active Directory. The <strong>HP</strong> UPD Active Directory Administrative<br />
template integrates into an existing Active Directory infrastructure and allows for creation of group Policy<br />
Objects to be linked to user groups and OUs. An experienced Active Directory administrator will be able<br />
to easily integrate the <strong>HP</strong> UPD Group Policy objects in large enterprise environments.<br />
In a smaller business, use the <strong>HP</strong> Managed <strong>Print</strong>ing Administrator software when a fewer number of<br />
policy variations are necessary or when a smaller number of users actually need the behavior of their<br />
<strong>HP</strong> UPD managed.<br />
Install the <strong>HP</strong> UPD Active Directory Administrative template<br />
The <strong>HP</strong> UPD Active Directory Administrative template can be added to the current Active Directory<br />
infrastructure. How the template is added depends on whether the system has the Microsoft Group<br />
Policy Management Console (GPMC). See the following for more information.<br />
Install template on Windows Server 2003 and Server 2008 using Microsoft Group Policy<br />
Management Console (GPMC)<br />
The following procedure provides details for creating and linking group policy objects using Microsoft<br />
Group Policy Management Console (GPMC). The Microsoft GPMC is available for Microsoft Server<br />
2003 and Windows XP. The following example creates a group policy object and sets it as the default<br />
<strong>ENWW</strong> Manage Active Directory Group Policy with the <strong>HP</strong> UPD using <strong>HP</strong> Active Directory Templates 123
policy for the entire domain, which in this case is named test.local. The procedure is similar for creating<br />
and linking group policy objects for organizational units and groups.<br />
1. Download the <strong>HP</strong> UPD Active Directory template from the following location.<br />
www.hp.com/go/UPD<br />
2. Copy the template to the \windows\inf directory on the domain server.<br />
3. Open the Microsoft Group Policy Console.<br />
4. Right-click the server name test.local.<br />
5. Click Create and Link a GPO here.<br />
6. Give the new GPO a name and click OK.<br />
7. Right-click the new Group Policy object in the rightmost window pane.<br />
8. Click Edit. The Microsoft Group Policy Object Editor opens.<br />
9. Select User Configuration, click Administrative Templates, and select Add/Remove<br />
Templates.<br />
10. Browse to and select the <strong>HP</strong> UPD Active Directory template (<strong>HP</strong>_MPP_3.adm).<br />
The policies configured to manage the <strong>HP</strong> UPD behaviors are similar to those found in the <strong>HP</strong> Managed<br />
<strong>Print</strong>ing Administrator tool. See Manage the <strong>HP</strong> UPD using <strong>HP</strong> MPA on page 82 for more information.<br />
Remove the <strong>HP</strong> UPD Administrative template<br />
1. Open the Microsoft Group Policy Editor.<br />
2. Click User Configuration, select Administrative Templates, and then select <strong>HP</strong> Managed <strong>Print</strong><br />
Policies.<br />
3. Set each of the policies to Not configured.<br />
4. Click Administrative Templates, and select Add/Remove Templates.<br />
NOTE: Failure to set all the template settings to Not configured before removing the template will<br />
leave registry settings that are no longer associated with an administrative template, resulting in errors<br />
when the Group Policy Modeling Wizard is run.<br />
Upgrade the <strong>HP</strong> UPD Administrative template<br />
To upgrade the <strong>HP</strong> UPD Administrative template, follow the steps to remove the old template in Remove<br />
the <strong>HP</strong> UPD Administrative template on page 124, then follow the steps to install the new template in<br />
Install the <strong>HP</strong> UPD Active Directory Administrative template on page 123.<br />
Enable Active Directory Group Policy for <strong>HP</strong> UPD Active Directory Administrator<br />
Template for a new or existing <strong>HP</strong> UPD installation<br />
124 Chapter 8 Manage the <strong>HP</strong> UPD using <strong>HP</strong> Managed <strong>Print</strong> Administration (MPA) and Active<br />
Directory Group Policy<br />
<strong>ENWW</strong>
For new installations of the <strong>HP</strong> UPD when an <strong>HP</strong> Active Directory Template is installed<br />
NOTE: When using <strong>HP</strong> UPD 5.0 and the latest version of the <strong>HP</strong> Active Directory Administrative<br />
template (version 4.1), policy can be enabled directly from the template settings, so no special<br />
installation switches are required.<br />
To install a new instance of the <strong>HP</strong> UPD with <strong>HP</strong> UPD Active Directory group policy enabled, use any<br />
of the following examples from a command line.<br />
NOTE: These steps are only required if you are currently using policy objects created with AD template<br />
4.0 or earlier.<br />
● To install in traditional mode.<br />
install /sm /n”printer name” /eads<br />
● To install in traditional mode with machine-wide policy.<br />
install /sm /n”printer name” /geads<br />
● To install in dynamic mode.<br />
install /dm /n”search for printers” /eads<br />
● To disable <strong>HP</strong> UPD Active Directory group policy settings with an <strong>HP</strong> UPD installation use the<br />
following argument rather than the /eads argument in the examples above.<br />
/dads<br />
For existing installations of the <strong>HP</strong> UPD<br />
To enable your existing installations of the <strong>HP</strong> UPD to recognize the Active Directory group policies,<br />
use the following procedure for every UPD GPO that you create.<br />
1. Open the Microsoft Group Policy Editor.<br />
2. Select User Configuration, Administrative Templates, <strong>HP</strong> Managed <strong>Print</strong> Policies, UseMode<br />
Settings.<br />
3. Open General Settings, click Enabled, and check Enable Policy for all users.<br />
Configure policies with the <strong>HP</strong> UPD Active Directory Administrative template<br />
UseMode settings<br />
General Settings<br />
To manage and configure the <strong>HP</strong> UPD Policies settings, open the Microsoft Group Policy editor and<br />
select User Configuration, Administrative Templates, and then <strong>HP</strong> Managed <strong>Print</strong> Policies.<br />
Configuring the policies for the <strong>HP</strong> UPD is similar to configuring any other Group Policy within the Active<br />
Directory Group Policy environment.<br />
The following are policies that are part of the <strong>HP</strong> UPD Active Directory template.<br />
<strong>ENWW</strong> Manage Active Directory Group Policy with the <strong>HP</strong> UPD using <strong>HP</strong> Active Directory Templates 125
Table 8-38 UseMode settings–General settings<br />
Option Description<br />
Not Configured<br />
Enabled Select this option button to make the following options<br />
available.<br />
Disabled<br />
User Interaction Settings<br />
Table 8-39 User Interaction settings<br />
● Disable Color<br />
Option Description<br />
Not Configured<br />
● Show device address<br />
● Enable Policy for all users. This setting allows the<br />
administrator to configure the <strong>HP</strong> UPD to enable AD<br />
policy without having to configure every installed instance<br />
of the <strong>HP</strong> UPD.<br />
Enabled Select this option button to make the following options<br />
available.<br />
Disabled<br />
● Show UPD dialog settings window check box<br />
● Allow user group printers by location check box<br />
● Allow user group printers to OS <strong>Print</strong>ers folder check<br />
box<br />
● Device verify level.<br />
◦ (Do not specify)<br />
◦ Verify communication and compatibility with<br />
driver (High)<br />
◦ Verify device ID and Model Name can be<br />
obtained (Medium)<br />
◦ Verify port can be opened for printing (Low)<br />
● When printing.<br />
◦ (Do not specify)<br />
◦ Always prompt for the destination when printing<br />
◦ Only prompt if the last known driver is no<br />
◦ Only prompt the first time a job is printed from a<br />
126 Chapter 8 Manage the <strong>HP</strong> UPD using <strong>HP</strong> Managed <strong>Print</strong> Administration (MPA) and Active<br />
Directory Group Policy<br />
<strong>ENWW</strong>
Enabled Services tab<br />
Table 8-40 Enabled Services tab<br />
Option Description<br />
Not Configured<br />
Enabled Select this option button to make the following options<br />
available.<br />
Disabled<br />
● Enabled online diagnostics<br />
● Enabled driver updates<br />
● Enabled online support<br />
● Enabled supply ordering<br />
● Enabled product manuals<br />
<strong>ENWW</strong> Manage Active Directory Group Policy with the <strong>HP</strong> UPD using <strong>HP</strong> Active Directory Templates 127
Default <strong>Print</strong> Settings<br />
NOTE: When the Default <strong>Print</strong> Settings Properties window is set for Not Configured, the <strong>HP</strong> UPD<br />
uses the driver defaults for the settings.<br />
Table 8-41 Default <strong>Print</strong> settings<br />
Option Description<br />
Not Configured<br />
Enabled Select this option button to make the following options available.<br />
● Duplex.<br />
◦ <strong>Driver</strong> Default<br />
◦ <strong>Print</strong> on both sides<br />
◦ <strong>Print</strong> on both sides–Flip pages up<br />
◦ <strong>Print</strong> on both sides–Flip pages up–Lock<br />
● Economode.<br />
◦ <strong>Driver</strong> Default<br />
◦ Economode On<br />
◦ Economode On–Locked<br />
● Private <strong>Print</strong>ing.<br />
◦ <strong>Driver</strong> Default (Off)<br />
◦ Private Job<br />
◦ Private Job–Lock<br />
◦ Proof and Hold<br />
◦ Proof and Hold–Lock<br />
◦ Quick Copy<br />
◦ Quick Copy–Lock<br />
◦ Stored Job (no PIN)<br />
◦ Stored Job (no PIN)–Lock<br />
◦ Stored Job (require PIN)<br />
◦ Stored Job (require PIN)–Lock<br />
● Private <strong>Print</strong> Pin<br />
● Edgeline QAC.<br />
◦ <strong>Driver</strong> Default<br />
◦ Black and White<br />
◦ Black and White–Lock<br />
◦ General Office<br />
128 Chapter 8 Manage the <strong>HP</strong> UPD using <strong>HP</strong> Managed <strong>Print</strong> Administration (MPA) and Active<br />
Directory Group Policy<br />
<strong>ENWW</strong>
Table 8-41 Default <strong>Print</strong> settings (continued)<br />
Option Description<br />
Disabled<br />
Color access control<br />
Application Filtering<br />
Table 8-42 Application Filtering<br />
◦ General Office–Lock<br />
◦ Professional<br />
◦ Professional–Lock<br />
● Allow special device information and offers to be displayed check box<br />
Option Description<br />
Not Configured<br />
Enabled Select this option button to make the following options<br />
available.<br />
Disabled<br />
Time of Day Restriction<br />
Table 8-43 Time of Day Restriction<br />
Option Description<br />
Not Configured<br />
● Exclude these Applications check box<br />
◦ Name: field<br />
Enabled Select this option button to make the following options<br />
available.<br />
Disabled<br />
● [Day] drop-down menu.<br />
◦ Specify time<br />
◦ Allow Color all day<br />
◦ Restrict Color all day<br />
● Hour on: field<br />
● Hour off: field<br />
<strong>ENWW</strong> Manage Active Directory Group Policy with the <strong>HP</strong> UPD using <strong>HP</strong> Active Directory Templates 129
User Search Capabilities<br />
Table 8-44 User Search Capabilities<br />
Option Description<br />
Not Configured<br />
Enabled Select this option button to make the following options<br />
available.<br />
Disabled<br />
Status Notification Pop-ups<br />
Table 8-45 Status Notification Popups<br />
Option Description<br />
Not Configured<br />
● Network print shares check box–Allow users to browse<br />
for and use printer shares on the network.<br />
● Network printers check box–Allow users to search for<br />
and use TCP/IP printers connected to the network.<br />
Enabled Select this option button to make the following options<br />
available.<br />
Disabled<br />
● <strong>Print</strong>er Alert Notification Settings.<br />
◦ Disabled<br />
◦ Show for Device Errors (printing stops)<br />
◦ Show for Device Errors and Warnings<br />
◦ Show for Every <strong>Print</strong> Job<br />
● Device Query Internal.<br />
◦ Normal<br />
◦ Minimize Network Traffic<br />
● Supplies Details check box–Allow users to select the<br />
Supplies Details link.<br />
● Shop for Supplies check box–Allow users to select the<br />
Shop for Supplies link.<br />
● Access <strong>HP</strong> Online Product Support check box–Allow<br />
users to select the <strong>HP</strong> Support link for product-specific<br />
online help.<br />
● Alternate Online <strong>HP</strong> Support URL: field<br />
130 Chapter 8 Manage the <strong>HP</strong> UPD using <strong>HP</strong> Managed <strong>Print</strong> Administration (MPA) and Active<br />
Directory Group Policy<br />
<strong>ENWW</strong>
Job Accounting<br />
Job accounting information can be passed as xml to a Windows DLL function call or posted to an http<br />
or https server.<br />
Pass the job accounting XML to a Windows DLL function call<br />
Table 8-46 Pass the job accounting XML to a Windows DLL function call<br />
Option Description<br />
Not Configured<br />
Enabled Select this option button to make the following options<br />
available:<br />
Disabled<br />
Post the job accounting XML to an http or https web server<br />
Job Delivery<br />
Job Delivery<br />
● Module name: field<br />
● API name: field<br />
Table 8-47 Post the job accounting XML to an http or https web server<br />
Option Description<br />
Not Configured<br />
Enabled Select this option button to make the following options<br />
available.<br />
Disabled<br />
● URL: field<br />
Job delivery information can be passed as xml to a Windows DLL function call or posted to an http or<br />
https server.<br />
Table 8-48 Job Delivery<br />
Option Description<br />
Not Configured<br />
<strong>ENWW</strong> Manage Active Directory Group Policy with the <strong>HP</strong> UPD using <strong>HP</strong> Active Directory Templates 131
Table 8-48 Job Delivery (continued)<br />
Option Description<br />
Enabled Select this option button to make the following options<br />
available:<br />
Disabled<br />
● Job Delivery Mode.<br />
Call a Windows DLL function to handle delivery of the print job data<br />
◦ All printers will deliver job according to this<br />
scheme<br />
◦ Only printers that have been selected in the MPL<br />
will deliver jobs<br />
● Delivery port name: field<br />
● URL for job completion: field<br />
Table 8-49 Call a Windows DLL function to handle delivery of the print job data<br />
Option Description<br />
Not Configured<br />
Enabled Select this option button to make the following options<br />
available.<br />
Disabled<br />
Post the print job data to an http or https web server<br />
● Module name: field<br />
● API name: field<br />
Table 8-50 Post the print job data to an http or https web server<br />
Option Description<br />
Not Configured<br />
Enabled Select this option button to make the following options<br />
available.<br />
Disabled<br />
MPP Information Settings<br />
Table 8-51 MPP Information settings<br />
Option Description<br />
Not Configured<br />
● Job submit URL: field<br />
132 Chapter 8 Manage the <strong>HP</strong> UPD using <strong>HP</strong> Managed <strong>Print</strong> Administration (MPA) and Active<br />
Directory Group Policy<br />
<strong>ENWW</strong>
Table 8-51 MPP Information settings (continued)<br />
Option Description<br />
Enabled Select this option button to make the following options<br />
available.<br />
Disabled<br />
Managed <strong>Print</strong>er List settings<br />
Table 8-52 Managed <strong>Print</strong>er List settings<br />
Option Description<br />
Not Configured<br />
● Info Link Name: field<br />
● Info Link URL: field<br />
Enabled Select this option button to make the following options<br />
available.<br />
Disabled<br />
● Custom MPL Count: selection box<br />
● <strong>HP</strong> MPL Only check box<br />
● Custom MPL [#]:—(up to 40)<br />
◦ Name: field<br />
◦ Path: field<br />
◦ Enter: drop-down menu –<br />
— Standard <strong>HP</strong> UPD MPL<br />
— web Jetadmin XML MPL<br />
Implement Managed <strong>Print</strong>er Lists (MPLs) within the <strong>HP</strong> UPD Active Directory template<br />
file<br />
<strong>Print</strong>er lists for use in the Active Directory Group Policy environment are created outside the Active<br />
Directory Group Policy object, and linked to the <strong>HP</strong> UPD Active Directory Administrative template within<br />
each Group Policy Object. Create Managed <strong>Print</strong>er Lists by using the <strong>HP</strong> MPA or by exporting printer<br />
lists from web Jetadmin. For each policy created, up to 40 managed printer lists can be selected.<br />
● Custom MPL Count. This number must match the number of printer lists entered.<br />
● <strong>HP</strong> MPL Only. Check this if the printer lists have been created by the <strong>HP</strong> MPA software tool.<br />
● Name. This is the name displayed for each group.<br />
● Path. The information in the Path field depends on the type of MPL and the location of the data.<br />
In these examples the data is on an http web server.<br />
<strong>ENWW</strong> Manage Active Directory Group Policy with the <strong>HP</strong> UPD using <strong>HP</strong> Active Directory Templates 133
NOTE: The path string consists of a prefix like http, and a folder or subfolders separated by a<br />
colon (‘:’).<br />
◦ If the data is the default MPL view from MPA, the prefix is http.<br />
◦ If the data is XML (exported from web JetAdmin), the prefix is http.<br />
◦ If the data is a graphical view exported from MPA (an Image map, <strong>Print</strong>er Graphics View, or<br />
Tabular view), the prefix is hpmpl.<br />
● Type. Choose the correct type of printer list being selected. Standard UPD MPL for printer lists<br />
created by <strong>HP</strong> MPA, or web JetAdmin MPL XML for printer lists exported by web Jetadmin.<br />
When entering the path for printer lists created by <strong>HP</strong> MPA, you can cut-and-paste the direct location<br />
of the printer list by entering edit mode for the printer list, and cutting and pasting the Direct URL entry<br />
found at the bottom of the printer list.<br />
Verification and troubleshooting<br />
Functional test<br />
Use this section to verify that the users are obtaining the <strong>HP</strong> UPD policies correctly; also, use this section<br />
as a guide to see where to apply settings.<br />
1. Use the group Policy Modeling tool to run simulations on specific users or groups and specific<br />
machines.<br />
NOTE: The GPMC is a Microsoft supplied tool (not available on Windows Server 2000) and is<br />
an optional component on later server versions that can be downloaded from the Microsoft website.<br />
2. Run the modeling wizard to verify your settings.<br />
3. Right-click Group Policy Modeling.<br />
4. Click Group Policy Modeling Wizard.<br />
5. Enter the user that you want to model.<br />
6. Select the Skip to the final page check box.<br />
Registry population<br />
Use this test to verify that the settings in the group policy object populate in the registry of the client<br />
computer.<br />
1. Log in as a member of the domain.<br />
2. Verify that the current user is logged into the domain.<br />
3. Run regedit.exe and verify that the registry populates correctly. The registry path is HKCU/<br />
Software/Policies/Hewlett-Packard/<strong>HP</strong> <strong>Print</strong> Settings/ADS<strong>Print</strong>Policy.<br />
NOTE: Active Directory does not refresh settings immediately after you make a change to the<br />
Group Policy object. To refresh the settings on the client, you must log out and then log back in,<br />
or you can use the gpupdate utility with the /Force option run from a command window to force<br />
Active Directory to update the settings.<br />
Example: c:/> gpupdate /Force<br />
134 Chapter 8 Manage the <strong>HP</strong> UPD using <strong>HP</strong> Managed <strong>Print</strong> Administration (MPA) and Active<br />
Directory Group Policy<br />
<strong>ENWW</strong>
Final test<br />
Install the latest version of the <strong>HP</strong> UPD and verify that the screens and final print result reflect the policy<br />
settings entered in the Group Policy Editor (gpedit.msc).<br />
<strong>ENWW</strong> Manage Active Directory Group Policy with the <strong>HP</strong> UPD using <strong>HP</strong> Active Directory Templates 135
136 Chapter 8 Manage the <strong>HP</strong> UPD using <strong>HP</strong> Managed <strong>Print</strong> Administration (MPA) and Active<br />
Directory Group Policy<br />
<strong>ENWW</strong>
A Manage Status Notification Pop–ups<br />
The <strong>HP</strong> UPD provides a feature named Status Notification Pop-ups (SNPs). SNPs provide immediate<br />
job information and printer status information by a small pop-up window on the client PC. SNPs also<br />
provide current information about printer consumables, such as toner levels and links to <strong>HP</strong> SureSupply<br />
ordering system and <strong>HP</strong> Instant Support page. The SNP feature, which displays during the submittal of<br />
a print job, is fully configurable through a variety of tools available to print administrators.<br />
● Description and benefits<br />
● How the SNP works<br />
● SNP default behavior<br />
● <strong>HP</strong> Special Offers Program<br />
● Use Device Settings tab in the property page to enable or disable SNP<br />
● Use the pop-up window to enable/disable SNP<br />
● Manage the SNP with the <strong>HP</strong> <strong>Driver</strong> Configuration Utility<br />
● Manage SNP with <strong>HP</strong> Managed <strong>Print</strong>ing Administration (MPA)<br />
● Manage SNP through the command prompt install (Install.exe)<br />
● Manage SNP through registry settings<br />
<strong>ENWW</strong> 137
Description and benefits<br />
Available with all PDLs, a Status Notification Pop-up (SNP) provides <strong>HP</strong> UPD users with the following<br />
information:<br />
● <strong>Print</strong> status and error messages. Provides users with printer status information so they can<br />
respond to and resolve many minor printer problems such as an open cover or paper jams, reducing<br />
the number of Help Desk calls.<br />
● Dashboard view of supply levels. Dashboard view allows users to plan ahead to ensure that<br />
sufficient supplies exist in the printer before printing large print jobs.<br />
● Links to the <strong>HP</strong> SureSupply ordering system. This makes it convenient to order genuine<br />
<strong>HP</strong> supplies. Click the SNP Windows option, “Shop for Supplies,” to access the <strong>HP</strong> SureSupply<br />
ordering system.<br />
● Links to <strong>HP</strong> Support pages. Get instant support for many printer problems by clicking on<br />
“<strong>HP</strong> Support” for detailed information on printer status and printer error messages.<br />
How the SNP works<br />
When selected for printing, the <strong>HP</strong> UPD attempts to communicate directly with the printer to gather<br />
status and job information during printing. By querying the printer through SNMP get commands,<br />
network traffic is kept to a minimum and is only present during printing. If the <strong>HP</strong> UPD is unable to<br />
communicate with the printer, possibly due to security settings, or SNMP community names set on the<br />
printing products, then the pop-ups do not appear on the client PCs. Normal printing is unaffected.<br />
SNP default behavior<br />
In small to medium business environments, defined as having fewer than 100 users or when domain<br />
names end in .local, the supplies and support links at the bottom of the pop-up window are active.<br />
Individual users also have the opportunity to enable the <strong>HP</strong> Special Offers Program for their product.<br />
In larger enterprise environments, defined as having 100 users or more, and where domain names do<br />
not end in .local, the <strong>HP</strong> UPD programmatically disables the following:<br />
● SNP<br />
● <strong>HP</strong> Support and Shop for Supplies links<br />
● <strong>HP</strong> Special Offers Program features<br />
In most enterprise environments, internal centralized ordering personnel handle the ordering of supplies,<br />
and internal Help Desks assist users with daily solutions. Administrators can alter the default SNP<br />
behavior through methods defined in this chapter.<br />
Administrators can alter the default SNP behavior through methods defined in this chapter.<br />
<strong>HP</strong> Special Offers Program<br />
NOTE: The <strong>HP</strong> Special Offers Program is automatically disabled in an enterprise environment of 100<br />
or more users, or if SNP runs on a print server queue. In these situations, the <strong>HP</strong> Special Offers Program<br />
cannot be enabled.<br />
138 Appendix A Manage Status Notification Pop–ups <strong>ENWW</strong>
The <strong>HP</strong> Special Offers Program enables <strong>HP</strong> to present <strong>HP</strong> customers with 'targeted' offers to buy <strong>HP</strong> and<br />
<strong>HP</strong> partner products, use <strong>HP</strong> and <strong>HP</strong> partner services, and learn more about <strong>HP</strong> and <strong>HP</strong> partner<br />
offerings. For example, a printer with low toner 'triggers' a toner offer to the customer.<br />
The <strong>HP</strong> Special Offers Program includes various methods for specifying offers to present to customers;<br />
offers are dependent on the information collected from the product, application, print driver, and<br />
operating system. There are four categories of offers, including:<br />
● Consumables—toner, media.<br />
● Support—paper jams, troubleshooting.<br />
● Entitlement—care packs (1 or 11 months past the purchase date); the product may be eligible for<br />
care packs.<br />
● Timed—various special offers every three days for such things as the following: (accessories,<br />
duplexer, informational (recycling)<br />
The <strong>HP</strong> Special Offers Program is configured and managed. There are two main ways to enable/disable<br />
The <strong>HP</strong> Special Offers Program: the Privacy Settings window and the SNP Notification Settings window.<br />
The Privacy Settings window displays soon after installing the <strong>HP</strong> UPD. In this window, the user can<br />
opt-in to the <strong>HP</strong> Special Offers Program program. The following options appear in Privacy Settings<br />
window:<br />
● Yes, allow this info to be sent to <strong>HP</strong><br />
● No, do not send this info to <strong>HP</strong><br />
● I'm not sure, ask me again later<br />
If Yes, allow this info to be sent to <strong>HP</strong> is selected, the <strong>HP</strong> Special Offers Program feature is enabled.<br />
If No, do not send this info to <strong>HP</strong> is selected, the <strong>HP</strong> Special Offers Program feature is disabled.<br />
To modify whether or not the <strong>HP</strong> Special Offers Program feature is enabled, use the settings available<br />
in the SNP Notification Settings window.<br />
To enable or disable <strong>HP</strong> Special Offers Program, select or deselect Allow special device information<br />
and offers to be displayed in the SNP Notification Settings window.<br />
<strong>ENWW</strong> <strong>HP</strong> Special Offers Program 139
Use Device Settings tab in the property page to enable or<br />
disable SNP<br />
SNP can be enabled or disabled from the Device Settings tab of the driver with <strong>HP</strong> UPD 4.7. Before<br />
<strong>HP</strong> UPD 4.7, SNP could only be disabled from the SNP window. When SNP was disabled, it could not<br />
be enabled through the SNP window.<br />
Enabling or disabling SNP requires the following items:<br />
● Bidirectional communication is enabled and functional. Bidirectional communication can be<br />
disabled in the <strong>HP</strong> UPD version 4.7. See Manage the <strong>HP</strong> UPD using <strong>HP</strong> Managed <strong>Print</strong><br />
Administration (MPA) and Active Directory Group Policy on page 81 for more information.<br />
● The product supports SNP functionality<br />
● The product is not a PCL3 product<br />
Follow these steps to enable or disable SNP from the Device Settings tab:<br />
1. Open the <strong>Print</strong>ers and Faxes folder, right-click the <strong>HP</strong> UPD, and then select Properties.<br />
2. Click the Device Settings tab.<br />
3. In the Installable Options section, set <strong>Print</strong>er Status Notification to either Enable or Disable.<br />
4. Click OK.<br />
Figure A-1 Enable or disable <strong>Print</strong>er Status Notifications<br />
140 Appendix A Manage Status Notification Pop–ups <strong>ENWW</strong>
The following conditions describe the possible situations that can enable or disable the <strong>Print</strong>er Status<br />
Notification setting in the driver's Device Settings properties.<br />
● When no <strong>HP</strong> MPA or AD policy is defined for SNP and SNP is enabled, the <strong>Print</strong>er Status<br />
Notification combo box in the Device Settings user interface is set to Enable. The user can modify<br />
this setting.<br />
● If SNP is disabled through the SNP pop-up or through the Device Settings user interface, then no<br />
SNP pop-up is visible for that queue and the <strong>Print</strong>er Status Notification combo box is set to<br />
Disable. The user can re-enable SNP pop-up by selecting Enable in the <strong>Print</strong>er Status<br />
Notification combo box.<br />
● If SNP is disabled through Install.exe, DCU or any of the policies (<strong>HP</strong> MPA , AD), the <strong>Print</strong>er Status<br />
Notification combo box in the Device Settings user interface is set to Disable. In addition, the<br />
Device Settings user interface combo box appears dimmed so that the user cannot overwrite the<br />
policy settings<br />
Use the pop-up window to enable/disable SNP<br />
It is possible to alter the behavior of the SNPs within the pop-up window by using the Notifications<br />
Settings tab. To view the Notification settings, click the Notifications Settings link any time the popup<br />
is visible.<br />
NOTE: The Notification Settings tab only displays in the pop-up window in an environment where no<br />
Managed <strong>Print</strong> Policies appear on the network.<br />
The options available for configuration are as follows:<br />
● Enabled. Allows the user to select whether the pop-ups appear based on the condition of the printer<br />
status. Choose from three levels of severity as to when you wish the pop-ups to appear.<br />
● Disabled. Allows the user to permanently disable the pop-up window for any printer condition.<br />
Manage the SNP with the <strong>HP</strong> <strong>Driver</strong> Configuration Utility<br />
The <strong>HP</strong> <strong>Driver</strong> Configuration utility is a software program that Information Technology (IT) administrators<br />
can use to pre-configure the <strong>HP</strong> UPD before deploying and installing on an operating system. It is most<br />
beneficial when configuring the <strong>HP</strong> UPD for multiple workstations or printer servers for print queues that<br />
share the same configuration.<br />
Follow these steps to pre-configure the SNP behavior of the <strong>HP</strong> UPD:<br />
1. Open www.hp.com. Download and open the <strong>Driver</strong> Configuration utility.<br />
www.hp.com/go/hpdriverpre-config<br />
NOTE: Depending on how the <strong>HP</strong> UPD driver is installed, a message may open indicating that<br />
changes made to the <strong>HP</strong> UPD may invalidate the digital signature and Microsoft might display a<br />
warning message. The warning message is normal behavior. Click OK to continue.<br />
2. Click File, then Open and browse to the directory where the <strong>HP</strong> UPD is located.<br />
3. Select the .INF file for the <strong>HP</strong> UPD and click Open.<br />
4. Click Device settings and expand the SSNP_Level listing by clicking the +.<br />
<strong>ENWW</strong> Use the pop-up window to enable/disable SNP 141
5. Select the desired pop-up options.<br />
6. Click File and Save to complete.<br />
A file (.CFG) is created in the same folder as the <strong>HP</strong> UPD. This configuration file follows all installations<br />
of the <strong>HP</strong> UPD and controls the SNP behavior for each installation. For more information about the<br />
<strong>HP</strong> <strong>Driver</strong> Configuration Utility, see the <strong>HP</strong> <strong>Driver</strong> Pre-Configuration Support <strong>Guide</strong>.<br />
Manage SNP with <strong>HP</strong> Managed <strong>Print</strong>ing Administration<br />
(MPA)<br />
Unlike any other print driver, the <strong>HP</strong> UPD can be controlled by a Managed <strong>Print</strong>er Policy (MPP). A MPP<br />
is an XML document that controls the driver operation mode in a particular printing environment. In<br />
addition, the MPPs can also manage the behavior of the SNP each printer user experiences. The new<br />
<strong>HP</strong> Managed <strong>Print</strong> Administration tool (MPA) allows print administrators to create MPP to attain the<br />
desired SNP experience. The <strong>HP</strong> MPA tool is available at: www.hp.com/go/mpa.<br />
Edit a policy, or create a new policy and use this screen to make the desired changes to affect the printer<br />
client behavior of the SNP.<br />
See User Search capabilities on page 97 for more information.<br />
Manage SNP through the command prompt install<br />
(Install.exe)<br />
The <strong>HP</strong> UPD includes an installer that allows administrators to install the <strong>HP</strong> UPD from the command<br />
prompt, or as part of other install batch files. Optional command line switches available to the Install.exe<br />
program allow the administrator to modify the <strong>HP</strong> UPD install experience. From the command prompt,<br />
type install /? to view the complete list of install printer options.<br />
The two installation switches that enable you to manage the behavior of the SNP during the <strong>HP</strong> UPD<br />
installation include:<br />
● install /dssnp—disables the SNP for a specified printer.<br />
● install /gdssnp—disables the SNP for all printers installed.<br />
Manage SNP through registry settings<br />
Changes are made to specific registry settings by all previous methods for changing SNP behavior. It<br />
is also possible to change the SNP settings by editing the registry directly.<br />
The registry location below contains the entries that modify the SNP behavior for each installed printer<br />
on the client PC or server. Modify the SNP behavior by making changes to each of the installed printers.<br />
HKEY_LOCAL_MACHINE\SYSTEM\CurrentControlSet\Control\<strong>Print</strong>\<strong>Print</strong>ers<br />
\\<strong>Print</strong>er<strong>Driver</strong>Data<br />
Where represents the names of each of your installed printers.<br />
142 Appendix A Manage Status Notification Pop–ups <strong>ENWW</strong>
Table A-1 SNP settings<br />
Setting Type Value<br />
SSNPDeviceUpdateInterval REG_DWORD 0x00000000 (0)<br />
0 = Normal, 1 = Minimize<br />
SSNPDisableAll REG_DWORD 1 = SNP turned off for all queues on the<br />
system<br />
SSNP<strong>Driver</strong>UISetting REG_DWORD 0 = SNP Enable/Disable feature is<br />
disabled. The UI feature is NOT dimmed<br />
so the user can re-enable this feature<br />
later on.<br />
SSNPNotifyEventSetting REG_DWORD 0x00000001 (1)<br />
SSNPShowAlertLink REG_DWORD 0x00000001 (1)<br />
1 = SNP Enable/Disable feature is<br />
enabled. The UI feature is NOT dimmed<br />
and the user can disable this feature later<br />
on.<br />
NOTE: SSNP<strong>Driver</strong>UISetting registry<br />
setting does NOT have precedence over<br />
policy settings. This registry value is also<br />
located in printerdriverdata for the<br />
queue.<br />
0 = Disabled, 1 = When <strong>Print</strong>ing, 2 = On<br />
Warnings or Errors 3 = On Errors only<br />
0 = Hide, 1 = Show<br />
SSNPShowShopLink REG_DWORD 0x00000000 (0)<br />
0 = Hide, 1 = Show<br />
SSNPShowSSNSettings REG_DWORD 0x00000000 (0)<br />
0 = Hide, 1 = Show<br />
SSNPShowSupportLink REG_DWORD 0x00000000 (0)<br />
0 = Hide, 1 = Show<br />
<strong>ENWW</strong> Manage SNP through registry settings 143
144 Appendix A Manage Status Notification Pop–ups <strong>ENWW</strong>
B Frequently Asked Questions<br />
<strong>ENWW</strong> 145
<strong>Driver</strong> installation and configuration<br />
Use this section to find answers to common installation and configuration questions.<br />
1. Can I pre-configure the <strong>HP</strong> UPD using <strong>HP</strong> Web Jetadmin and the <strong>HP</strong> <strong>Driver</strong> Configuration Utility?<br />
Yes. The <strong>HP</strong> UPD supports pre-configuration through <strong>HP</strong> Web Jetadmin and the <strong>HP</strong> <strong>Driver</strong><br />
Configuration Utility.<br />
2. Is the printer queried every time it is printed to?<br />
For traditional mode queues, no, in general, settings are cached. For cases where a user chooses<br />
to create a permanent instance of a printer, settings are permanently saved to the local registry<br />
(as with any other printer driver), and the user can continue to print to that permanently created<br />
instance.<br />
For dynamic mode queues, for cases where a user has not chosen to create a permanent instance<br />
of a driver, registry entries are saved in a .CREG (cached registry) file. Initially the driver attempts<br />
to save the CREG files to the “C:\Program Files\Hewlett-Packard\<strong>HP</strong> <strong>Universal</strong> <strong>Print</strong>ing” directory.<br />
If that directory is not available, or is locked, the driver attempts to cache settings in the %TEMP<br />
% and then %TMP% directories. If neither of these directories is available, the <strong>HP</strong> UPD will query<br />
the printer every time for non-permanent instances.<br />
When the Status Notification Pop-ups (SNP) are enabled, the <strong>HP</strong> UPD sends a few packets to the<br />
printer to gather printer status information.<br />
3. Are traditional mode queues updated with new driver too?<br />
Yes. The Microsoft operating system will update all instances because the driver name is the same<br />
(with different registry entries) for permanent instances. All queues sharing the same driver name<br />
will update.<br />
4. How can I have permanent instances re-query a product?<br />
As with other <strong>HP</strong> drivers, there is the ability to select an Update Now button or use the command<br />
line option. See <strong>Print</strong>er Automatic Configuration on page 55.<br />
5. Which port monitor is used with the <strong>HP</strong> UPD?<br />
By default, the <strong>HP</strong> UPD uses the standard TCP/IP port monitor. The <strong>HP</strong> Standard TCP/IP port<br />
monitor is no longer used by default due to conflicts with earlier versions of the <strong>HP</strong> UPD. The<br />
<strong>HP</strong> Standard TCP/IP port monitor, as of version 7.x.3.5, can be used but it is not the default.<br />
<strong>HP</strong> has its own version of the TCP/IP port monitor for communicating with network products. It is<br />
not part of the installer package of the <strong>HP</strong> UPD.<br />
For cases where the <strong>HP</strong> UPD is pointed to an existing print queue shared out from a print server<br />
instead of a printer itself, the “<strong>HP</strong> UNC Port” monitor is used.<br />
For cases where locally installed products are selected, the LPTX, USB00X, or Dot4 port will be<br />
used. This depends on the USB protocol that is negotiated between the <strong>HP</strong> UPD, and the product.<br />
6. Is it possible to suppress the <strong>HP</strong> UPD Status Notification Pop-ups (SNPs) on the client machine<br />
installed from a print server?<br />
Yes, see Manage Status Notification Pop–ups on page 137 for more information about managing<br />
SNPs.<br />
146 Appendix B Frequently Asked Questions <strong>ENWW</strong>
7. How do I set defaults for the driver on the server so all installs have the same defaults?<br />
Configure the driver using the <strong>HP</strong> <strong>Driver</strong> Pre-configuration Utility.<br />
8. Does the currently installed version of the <strong>HP</strong> UPD need to be removed from the PC before<br />
upgrading to the newest version?<br />
If upgrading from versions prior to <strong>HP</strong> UPD 4.5, the queue should be deleted. If upgrading from<br />
<strong>HP</strong> UPD 4.5 or newer the queue can be upgraded using Install.exe or the Add <strong>Print</strong>er Wizard.<br />
9. How does the static mode install command line switch work?<br />
The static mode install command line switch, in versions 3.0 and newer, uses the port name<br />
specified by the /sm switch if the specified port exists. If that port does not exists, the <strong>HP</strong> UPD<br />
install creates a new port. In the normal operation of printing with the <strong>HP</strong> UPD, once the printer<br />
binds to a port, the job is delivered to that port (and associated port monitor) no matter what the<br />
port is named.<br />
10. If my product can be discovered by the <strong>HP</strong> UPD via mDNS but cannot communicate via SNMP,<br />
what is the issue?<br />
If the product can be discovered by way of mDNS but cannot communicate by way of SNMP, it is<br />
possible that Jetdirect is configured so that SNMP is disabled. It is also possible that SNMP is<br />
disabled or may be using a non-default SNMP community name.<br />
11. Can the <strong>HP</strong> UPD installation change the target port's SNMP community name (i.e. can it replace<br />
the current name and with a different SNMP community name)?<br />
Yes. You can set or change the community name in the port using Install.exe. The installer switch<br />
was put there to set the community name at the time the port is created. Example: /<br />
gcomname”name”.<br />
12. What version did the <strong>HP</strong> UPD begin using unique file names?<br />
Starting with <strong>HP</strong> UPD 4.5 driver file names for each release are uniquely named to prevent<br />
overwriting existing files that may have shared dependency. Beginning with <strong>HP</strong> UPD 4.7, more<br />
than one <strong>HP</strong> UPD version can be installed onto the host if during the installation process the model<br />
specific version of the <strong>HP</strong> UPD was selected through the Add <strong>Print</strong>er Wizard and, beginning with<br />
<strong>HP</strong> UPD 5.0, using the /m switch with Install.exe.<br />
13. Any tips for using Microsoft's <strong>Print</strong>Mig?<br />
Testing has found limitations using the <strong>Print</strong>Mig tool with both <strong>HP</strong> and non <strong>HP</strong> drivers. For the<br />
<strong>HP</strong> UPD, install the <strong>HP</strong> UPD first on the target host to register all files and COM objects, then<br />
perform the <strong>Print</strong>Mig restore onto the host. <strong>Print</strong>Mig tool has been placed end of life by Microsoft.<br />
14. What is our first step during upgrade?<br />
Avoiding unintended issues resulting in change to UniDrv and postscript has been an issue.<br />
Updates to these files come unannounced and unplanned through update services, installation of<br />
service packs, etc that may negatively impact driver upgrades dependent upon Unidrv and Pscript<br />
version.<br />
Upgrade has several steps that should be followed. Specific to this issue, check Server<br />
Properties, <strong>Driver</strong>s to see what version of UniDrv and postscript are on the system and compare<br />
against the version you are about to install. If they are different this may increase the scope of<br />
testing required for an uneventful upgrade. Refer to Install and Uninstall of the <strong>HP</strong> UPD<br />
on page 31 for <strong>HP</strong> recommended steps.<br />
<strong>ENWW</strong> <strong>Driver</strong> installation and configuration 147
15. Is there a tool or method available to force clients to disconnect their print connection to the print<br />
server and re-establish the connection?<br />
No.<br />
16. <strong>HP</strong> UPD displays "<strong>HP</strong> <strong>Universal</strong> <strong>Print</strong>ing PDL**" in the <strong>Print</strong>ers folder. How can I make the <strong>HP</strong> UPD<br />
display the printer model instead?<br />
Non-universal print drivers display the model hardware name "<strong>HP</strong> Laserjet 4000" found at the end<br />
of the print path which is a beneficial indicator of product capabilities of the selected target print<br />
destination. The field labeled "model" was never actually the model name, but was always the<br />
driver name. The Microsoft operating system works on the assumption there would always be a<br />
one to one relationship between drivers and products. This was never the case, as there were<br />
always "series" drivers. The driver name is used all over the place in the registry, in Point and <strong>Print</strong>,<br />
etc, and to try and make changes would cause a nightmare ripple effect. The model name which<br />
appears in the <strong>HP</strong> UPD's GPD/PPD (or INF) displays as “<strong>HP</strong> <strong>Universal</strong> <strong>Print</strong>ing [PDL]” (e.g. “<strong>HP</strong><br />
<strong>Universal</strong> <strong>Print</strong>ing PCL6”). Beginning with <strong>HP</strong> UPD 4.7 it can be installed to display the <strong>HP</strong> UPD<br />
version number in the INF as “<strong>HP</strong> <strong>Universal</strong> <strong>Print</strong>ing [PDL] ([VERSION])”.<br />
Model name in the Comments field: One <strong>HP</strong> UPD workaround is to use the Comments field to<br />
populate with the product model in the UPD's print path. This can be manually inserted or populated<br />
in batch running using an <strong>HP</strong> provided script available by contacting <strong>HP</strong> Technical<br />
Support. Customers may also want to investigate the use of Microsoft tools lie PRINTUI.DLL and<br />
PRNCONFG.VBS to alter the comment field.<br />
17. Are there threshholds or guidance limiters to scaling the <strong>HP</strong> UPD on a single print server?<br />
<strong>HP</strong> UPD does not have a bounded limit to scale of installation. The recommendation of how many<br />
queues to install on a single server is entirely site dependent. Questions such as this are best<br />
answered by IT administrative policy placing criteria on status and monitoring, server disk/CPU/<br />
network IO utilization rates, print job throughput, peak load times etc. Some very well managed<br />
sites with resources can run 1000 print queues on the right server with redundancy and high<br />
availability requirements satisfied.<br />
18. What does WHQL look at when it breaks: file byte size, date of file, etc?<br />
When the driver is signed, part of the process is creating a hash of the contents of all the files that<br />
are part of the driver, including the .cfg or .cf_ file. If you alter even one bit in any file, the hash<br />
breaks.<br />
19. Why am I unable to delete the <strong>HP</strong> UPD print driver?<br />
The print spooler must be stopped to release the <strong>HP</strong> UPD print driver. Perform the following on the<br />
command line: C:\NET STOP SPOOLER && NET START SPOOLER.<br />
148 Appendix B Frequently Asked Questions <strong>ENWW</strong>
<strong>Driver</strong> Policy<br />
Use this section to find answers to common questions regarding use of the <strong>HP</strong> UPD with <strong>HP</strong> MPA and<br />
Active Directory.<br />
1. What are managed printer lists and policies?<br />
Managed <strong>Print</strong>er Lists (MPLs) and Managed <strong>Print</strong>er Policies (MPPs) are features of <strong>HP</strong> Managed<br />
<strong>Print</strong>er Administration software which allows administrators to manage and control printing<br />
environments. See Manage the <strong>HP</strong> UPD using <strong>HP</strong> MPA on page 82 for more information.<br />
2. Does <strong>HP</strong> MPA support products not found on the <strong>HP</strong> UPD Supported Device list?<br />
The <strong>HP</strong> UPD can print to unsupported products, but the MPA will not provide managed print control<br />
of products not found on the <strong>HP</strong> UPD supported printer list.<br />
3. If I have the <strong>HP</strong> MPA and the <strong>HP</strong> UPD Active Directory Group Policy running simultaneously, which<br />
set of policies take priority?<br />
The <strong>HP</strong> UPD Active Directory Group Policy takes precedence over both <strong>HP</strong> MPA defined policies<br />
and default settings.<br />
4. How can I set up printer lists for each user?<br />
<strong>Print</strong>er lists can be created within the <strong>HP</strong> MPA software tool, or by exporting printer lists from Web<br />
Jetadmin into XML format.<br />
5. Are both modes of the <strong>HP</strong> UPD (traditional and dynamic) managed through Active Directory<br />
templates and <strong>HP</strong> MPA?<br />
Both operating modes of the <strong>HP</strong> UPD are manageable through the Active Directory Group Policy<br />
and the <strong>HP</strong> MPA application.<br />
6. What versions of the <strong>HP</strong> UPD support the Active Directory Group Policy?<br />
<strong>HP</strong> UPD version 4.0 and newer.<br />
7. How much does the <strong>HP</strong> UPD Active Directory Template cost?<br />
The <strong>HP</strong> UPD Active Directory Administrator Template file is available for download at no charge<br />
from www.hp.com/go/upd<br />
<strong>ENWW</strong> <strong>Driver</strong> Policy 149
Operating system<br />
Use this section to find answers to common questions regarding use of the <strong>HP</strong> UPD with various<br />
operating systems.<br />
1. What about use in an Apple Macintosh Environment?<br />
There are no plans for a Macintosh version of the driver. <strong>HP</strong> drivers can be used, however, with<br />
the Apple Bonjour (formerly Rendezvous) discovery mechanism. Bonjour behaves the same<br />
way the <strong>HP</strong> UPD does when looking for products on the local subnet (using mDNS).<br />
2. Does the <strong>HP</strong> UPD support XPS print paths?<br />
XPS print path requires a product that consumes native XPS, an application that sends native XPS<br />
and an XPS print driver to send XPS data to the an XPS print product. If each step in the path is<br />
not native XPS requires conversion of the print content. <strong>HP</strong> UPD does offer an <strong>HP</strong> XPS print driver.<br />
Please contact <strong>HP</strong> support for download location and documentation.<br />
3. What is the <strong>HP</strong> Port Monitor?<br />
The port monitor that the <strong>HP</strong> UPD uses is the standard TCP/IP port monitor that is part of the<br />
operating system. There is an <strong>HP</strong> UPD Port monitor that is installed, but it is used only to provide<br />
a print path to UNCpaths or shares, send print settings to a local printer, and send jobs to a defined<br />
HTTP location for job tracking.<br />
150 Appendix B Frequently Asked Questions <strong>ENWW</strong>
Versioning<br />
This section provides answers to common <strong>HP</strong> UPD versioning questions.<br />
1. How do interim version releases display (Major.Minor.MinorMinor)?<br />
Only Major.Minor version numbers display in the MODEL field. For example, “<strong>HP</strong> <strong>Universal</strong> <strong>Print</strong>ing<br />
PCL6 (v4.7)” displays in the MODEL field for version 4.7.x of the <strong>HP</strong> UPD. If version 4.7.0 is<br />
installed followed by an installation of version 4.7.2, all queues using version 4.7.0 would upgrade<br />
to version 4.7.2. <strong>HP</strong> targets releasing a Major.Minor UPD version upgrade two times per year<br />
(Spring and Fall).<br />
2. Is one key value of the <strong>HP</strong> UPD to not manage multiple print driver versions?<br />
This feature allows choice in the upgrade experience. Customers can upgrade at their discretion.<br />
The number of drivers will still be small (we expect 2 or 3 coexisting versions at any time for most<br />
customers) to support all <strong>HP</strong>’s commercial LaserJet fleet.<br />
3. If a system has two or more versions of the <strong>HP</strong> UPD installed, are there any shared files?<br />
The Windows printer system files—unidrv.dll, unidrvui.dll and unires.dll—are shared among<br />
versions of the <strong>HP</strong> UPD.<br />
4. Assuming my system has two versions of the <strong>HP</strong> UPD installed, what is the process for upgrading<br />
all the queues to one version of the UPD?<br />
Upgrade each of the old queues using the Add <strong>Print</strong>er Wizard (manually or using a scripting tool).<br />
5. What displays to the user during FILE-PRINT using this new MODEL field enhancement?<br />
The name of the printers are displayed.<br />
6. How is Plug and Play impacted?<br />
Plug and Play uses the GENERIC MODEL NAME ONLY. More naming capabilities primarily benefit<br />
print server environments.<br />
<strong>ENWW</strong> Versioning 151
152 Appendix B Frequently Asked Questions <strong>ENWW</strong>
C <strong>HP</strong> UPD Deployment Worksheet<br />
Use this worksheet to guide your <strong>HP</strong> UPD deployment.<br />
<strong>ENWW</strong> 153
General Information<br />
Do you primarily print in color or black and white?<br />
● Would your company prefer that all users to print in grayscale, with the option to manually select<br />
color?<br />
Are users defaulted to print in simplex (single-sided) or duplex (double-sided)?<br />
● Would your company prefer that all users or user groups to print in simplex or duplex?<br />
Are all users in your Windows environment Local Administrators to their PC?<br />
● If not, please specify the default capabilities for the user.<br />
Are there any SEC regulations or restrictions regarding the process of print jobs?<br />
● Are all printer log files retained? What is your process for retaining printer log files?<br />
Is there a default driver language (PCL5, PCL 6, or PS) for printing?<br />
Do users have any special production or operational environments (non-application print) which require<br />
specialized drivers or non-standard printer drivers?<br />
Do any groups or users use PIN printing? If so, please specify the groups or users that use PIN printing.<br />
Port and protocol information<br />
Port Monitor<br />
● Standard TCP/IP Port?<br />
● <strong>HP</strong> Standard Port Monitor?<br />
RAW or LPR?<br />
How are IP addresses distributed to your printers?<br />
● If static IP addresses are distributed, how are they reserved (DNS, DHCP reservation, BOOTP)?<br />
● Are printers set to DHCP, BOOTP, or Manual when configuring the IP address?<br />
Ports and protocols<br />
● Is SNMP enabled in your environment across all subnets?<br />
◦ If not, please describe the subnets where SNMP is disabled and if it is possible to enable<br />
SNMP.<br />
● What versions of SNMP (SNMPv1, v2, v3, other) are enabled in your network infrastructure?<br />
● Verify that "Get Community" names values are consistent.<br />
● Bi-directional communication – between the <strong>HP</strong> UPD and printer – is required to gather productspecific<br />
configuration information.<br />
154 Appendix C <strong>HP</strong> UPD Deployment Worksheet <strong>ENWW</strong>
● Make sure mDNS broadcasts and IP multicast services are allowed on the network for the <strong>HP</strong> UPD<br />
to discover products.<br />
◦ In dynamic mode, the <strong>HP</strong> UPD will only discover products within the same subnet when<br />
Search for network printers is selected.<br />
● Activate the mDNS protocol on the printer/product using the <strong>HP</strong> Embedded Web Server (EWS).<br />
● Make sure a firewall or router is properly configured to allow the <strong>HP</strong> UPD to communicate over the<br />
necessary network ports.<br />
Table C-1 Network Ports used by the <strong>HP</strong> UPD<br />
Port Type Service Used by<br />
161 udp SNMP <strong>HP</strong> UPD<br />
162 udp SNMPTRAP <strong>HP</strong> UPD<br />
53 tcp DNS query <strong>HP</strong> UPD<br />
5353, 5354 udp Multicast DNS <strong>HP</strong> UPD<br />
80 tcp HTTP <strong>HP</strong> UPD, <strong>HP</strong> MPA server,<br />
<strong>HP</strong> EWS<br />
9100 tcp <strong>Print</strong> Data <strong>HP</strong> UPD, <strong>Print</strong>er<br />
<strong>Print</strong> server environment<br />
Please fill out this section for each server to be migrated.<br />
<strong>Print</strong> server information<br />
How many current print servers are in production in your current environment?<br />
Is there a print server for each location or are there regional print servers?<br />
● If the answer is more than one, a checklist needs to be filled out for each of the servers that are to<br />
be created or migrated.<br />
Server Name____________________________________<br />
Operating system<br />
● Version______________________<br />
● 32 or 64 bit?______________________<br />
Cluster environment? _______________<br />
● Active-Active or Active-Passive?_______<br />
● Names of Physical Nodes_______<br />
Is this print server dedicated, or does this server have other server roles (file/printer, DNS/print, etc)?<br />
Total number of print queues on the server? ____________<br />
<strong>ENWW</strong> <strong>Print</strong> server environment 155
Goal<br />
<strong>Print</strong> queue settings<br />
● Pre-configuration settings<br />
◦ ______________________<br />
◦ ______________________<br />
◦ ______________________<br />
● Are any security settings such as Access Control Lists (ACLs) that you want configured for products<br />
at the printer or queue level?<br />
● New-Set up new server that has new queue names?<br />
● Replace-Set up new server to replace an existing server that has the same queue names as the<br />
existing server?<br />
● Upgrade-Upgrading print queues on an existing server to the <strong>HP</strong> UPD?<br />
Set up new server that has new queue names<br />
<strong>Print</strong> queues and drivers:<br />
● Prepare a list of list of the following information.<br />
◦ Queue name<br />
◦ <strong>HP</strong> printer model<br />
◦ Port name and/or IP address<br />
<strong>Driver</strong> List<br />
● Not all <strong>HP</strong> printer models are supported by <strong>HP</strong> UPD. Compare this newly created list to the list of<br />
products supported by <strong>HP</strong> UPD.<br />
● Mark the list to indicate which queues will use <strong>HP</strong> UPD, and which queues will require a native<br />
driver.<br />
Setting up a new server that has the same queue names as the old server<br />
Upgrading print queues on an existing server to the <strong>HP</strong> UPD?<br />
Upgrade-How will be server be backed up before the migration begins?<br />
● Use the Microsoft <strong>Print</strong> Migrator 3.1 tool or the Server 2008/Vista <strong>Print</strong>Brm.exe utility to back up<br />
the print servers.<br />
● Will the backup be verified? _____<br />
Upgrade-Test server available? ____________<br />
● Attempting to upgrade drivers to the <strong>HP</strong> UPD on a running production server is NOT<br />
RECOMMENDED.<br />
● Will the test server become the new production server, or will the production server need to also<br />
be updated? __________<br />
156 Appendix C <strong>HP</strong> UPD Deployment Worksheet <strong>ENWW</strong>
Upgrade-Microsoft file version information<br />
● UNIDRV.DLL File Version? ________________<br />
● PSCRIPT5.DLL File Version? ________________<br />
<strong>Print</strong> queues and drivers:<br />
● Prepare a list of list of the following information.<br />
◦ Queue name<br />
◦ <strong>HP</strong> <strong>Driver</strong> name or <strong>HP</strong> printer model<br />
◦ <strong>Driver</strong> version<br />
◦ Port name and IP address<br />
◦ Kernel or user mode driver?<br />
● You can create this list automatically by running the prnmngr.vbs script on the server.<br />
<strong>Driver</strong> Mapping<br />
● Not all of the hp drivers on the existing system can be migrated to the <strong>HP</strong> UPD. Compare this newly<br />
created list to the list of products supported by <strong>HP</strong> UPD to develop a list of potential migration<br />
candidates.<br />
● Decide what you want to migrate?<br />
◦ Everything that is supported by the <strong>HP</strong> UPD to the <strong>HP</strong> UPD<br />
◦ Only <strong>HP</strong> kernel mode drivers<br />
◦ Install the <strong>HP</strong> UPD for new products only<br />
● Mark the list to indicate which queues will use the <strong>HP</strong> UPD, and which queues will require a “native”<br />
driver.<br />
<strong>Print</strong> queue settings<br />
● Pre-configuration settings<br />
◦ ______________________<br />
◦ ______________________<br />
◦ ______________________<br />
● Are any security settings such as Access Control Lists (ACLs) that you want configured for products<br />
at the printer or queue level?<br />
Point and <strong>Print</strong> Client Information<br />
Citrix, or Terminal Services? _______<br />
How many clients?<br />
● Windows XP 32 bit _______<br />
● Windows XP 64 bit _______<br />
<strong>ENWW</strong> <strong>Print</strong> server environment 157
● Vista 32 bit _______<br />
● Vista 64 bit _______<br />
Does the capability exist to run software or adjust client settings via login scripts or AD Group Policy?<br />
____________<br />
Direct IP printing<br />
General client information<br />
Goal<br />
Citrix, or Terminal Services? _______<br />
How many clients?<br />
● Windows XP 32 bit _______<br />
● Windows XP 64 bit _______<br />
● Vista 32 bit _______<br />
● Vista 64 bit _______<br />
Does the capability exist to run software or adjust client settings via login scripts or AD Group Policy?<br />
____________<br />
Are the client PC’s typically used exclusively by one user or shared by many users?<br />
How many current drivers are stored in the printer driver repository/library (if applicable)?<br />
Is there a default driver language (PCL5, PCL 6 or PS) for end-user printing?<br />
● Can users request an alternate <strong>Driver</strong> language from the default (i.e., prefers PS over PCL5 for .pdf<br />
files?)<br />
Total number of printers on a typical client? ____________<br />
<strong>Print</strong>er settings<br />
● Pre-configuration settings<br />
◦ ______________________<br />
◦ ______________________<br />
◦ ______________________<br />
● New-Set up new printers on a client using the <strong>HP</strong> UPD in traditional mode.<br />
● Dynamic-Install the <strong>HP</strong> UPD in dynamic mode.<br />
● Upgrade-Upgrade existing printers on the client to the <strong>HP</strong> UPD traditional mode.<br />
158 Appendix C <strong>HP</strong> UPD Deployment Worksheet <strong>ENWW</strong>
Upgrade-<strong>Driver</strong>s:<br />
● Run the prnmngr.vbs script on the client to create a list of the hp drivers currently on the client.<br />
● If you create this list yourself, please include the following information.<br />
◦ <strong>Driver</strong> name or printer model supported<br />
◦ Version<br />
◦ Kernel or user mode?<br />
● Not all of the hp drivers on the client can be upgraded to the <strong>HP</strong> UPD. Compare the newly created<br />
list with the list of products supported by the <strong>HP</strong> UPD to develop a list of potential migration<br />
candidates.<br />
Upgrade-Settings configuration<br />
Existing printer settings. Do you want to:<br />
● Keep current queue settings? __________<br />
● Pre-configure settings in addition to migrating current settings? __________<br />
● Pre-configuration settings<br />
◦ ______________________<br />
◦ ______________________<br />
◦ ______________________<br />
● Pre-configure the queues that cannot have settings migrated? __________<br />
● Pre-configuration settings<br />
◦ ______________________<br />
◦ ______________________<br />
◦ ______________________<br />
Are any security settings such as Access Control Lists (ACLs) configured for products at the printer or<br />
queue level?<br />
<strong>HP</strong> UPD/MPA/AD Customized Options<br />
Would you like policy or access control restrictions to be set based on user ID?<br />
Would you like Color access control to be set configured with Time of Day restrictions (days/hours)?<br />
Is there a preference to allow or disable specific applications (winword.exe, excel.exe, etc) to print in<br />
Color?<br />
Is there a preference as to how users can search for printers (see below)?<br />
● On the user’s local subnet<br />
● Using Managed printer lists<br />
<strong>ENWW</strong> Direct IP printing 159
How would you prefer users view the list of printers (see below)<br />
● A default view (list of printer names)<br />
● Through a list showing customized groups (i.e., MFP, Color, B/W)<br />
● A clickable image (possibly a floor layout in .jpg, .bmp or html format) that may be uploaded<br />
Would you like for your users to receive a pop-up status message of their job?<br />
● Which message pop-ups are preferred? Select to show all, some, or none from the following:<br />
◦ Job Completion<br />
◦ Supplies Details link<br />
◦ Shop for Supplies link<br />
◦ <strong>HP</strong> Support link for product specific online help<br />
◦ Other<br />
160 Appendix C <strong>HP</strong> UPD Deployment Worksheet <strong>ENWW</strong>
D <strong>HP</strong> UPD Deployment Flowcharts<br />
The <strong>HP</strong> UPD can be installed and configured many ways. The following flowcharts contain green lines<br />
which outline the recommended deployment paths. These configurations allow for the simplest<br />
deployment and implement the full functionality of the <strong>HP</strong> UPD. All of the paths outlined on the flowcharts<br />
are supported, but following some of the paths may involve extra steps or limit the functionality of the<br />
<strong>HP</strong> UPD. There are valid technical and business reasons for using the alternate paths, but when in<br />
doubt, follow the green line.<br />
<strong>ENWW</strong> 161
Start<br />
Figure D-1 <strong>HP</strong> UPD deployment start<br />
New Server<br />
with new queue<br />
Names?<br />
`<br />
Add new<br />
queues to<br />
existing<br />
server?<br />
No<br />
New Server<br />
replacing old<br />
server?<br />
No<br />
Upgrade<br />
drivers on<br />
existing<br />
server?<br />
No<br />
End<br />
Yes<br />
Yes<br />
Yes<br />
Yes<br />
Replace<br />
Server<br />
Update<br />
Server<br />
Start<br />
Choose PDL<br />
(PCL 5, PCL 6 or PS)<br />
New<br />
Queues<br />
Add<br />
Queues<br />
Citrix<br />
environment?<br />
Novell<br />
environment?<br />
Microsoft<br />
Windows <strong>Print</strong><br />
Server?<br />
Choose PDL: (PCL 5, PCL 6 or PS)<br />
Yes<br />
Yes<br />
Direct IP print<br />
Refer to Citrix<br />
specific<br />
instructions and<br />
white papers<br />
Refer to Novell<br />
specific<br />
instructions and<br />
white papers<br />
Moving from<br />
print servers to<br />
direct IP?<br />
No<br />
New client with<br />
new printer<br />
names?<br />
No<br />
New client<br />
replacing old<br />
client?<br />
No<br />
Upgrade<br />
drivers on<br />
existing client?<br />
No<br />
End<br />
Yes<br />
Yes<br />
Yes<br />
End<br />
Move to<br />
direct IP<br />
Policy<br />
Replace<br />
Client<br />
Update<br />
Client<br />
The first step is to decide which <strong>HP</strong> UPD PDLs (Page Description Language) to install. The <strong>HP</strong> UPD<br />
offers a choice of postscript, PCL 5, and PCL 6. See Select the best PDL on page 12 for more<br />
information.<br />
162 Appendix D <strong>HP</strong> UPD Deployment Flowcharts <strong>ENWW</strong>
Citrix environment<br />
See the <strong>HP</strong> white paper <strong>HP</strong> <strong>Print</strong>ers Supported in Citrix Presentation Server Environments at<br />
www.hp.com/go/upd for more information.<br />
Novell environment<br />
See Novell on page 43 for more information.<br />
Microsoft Windows <strong>Print</strong> Server<br />
In a print server environment there are four possible ways to deploy the <strong>HP</strong> UPD.<br />
1. New server with new queue names.<br />
In this scenario the administrator sets up a new print server and assigns new names to all the print<br />
queues.<br />
2. Add new queues to existing server.<br />
In this scenario the administrator adds the <strong>HP</strong> UPD to an existing print server and creates additional<br />
queues using the <strong>HP</strong> UPD.<br />
3. A new server replacing an old server.<br />
In this scenario the administrator sets up a new print server that replaces an existing print server.<br />
This scenario differs from scenario #1 because the administrator wants this server to have the<br />
same queue names as the server it replaces to minimize impact on existing traditional mode<br />
installed client connections.<br />
4. Upgrade drivers on existing server<br />
Direct IP <strong>Print</strong>ing<br />
In this scenario the administrator upgrades the existing <strong>HP</strong> drivers on an existing print server to<br />
the latest version of the <strong>HP</strong> UPD.<br />
Direct IP printing is an environment where the Windows client prints directly to the product, either<br />
network connected or directly connected with an <strong>HP</strong> UPD or LPT port. In the Direct IP <strong>Print</strong>ing<br />
environment there are four possible ways to deploy the <strong>HP</strong> UPD.<br />
1. Moving from print servers to direct IP printing.<br />
In this scenario the administrator moves from a print server environment to direct IP printing.<br />
2. New client with new printer names<br />
In this scenario the administrator installs new client PC’s and uses the <strong>HP</strong> UPD.<br />
3. New client replacing old client.<br />
In this scenario the administrator replaces or upgrades client PC hardware or operating systems<br />
and uses the <strong>HP</strong> UPD. The administrator wants the new PC to have the same list of printers with<br />
the same names as the old PC to minimize impact on the users, or the users may not have<br />
administrator rights and can’t add printers.<br />
4. Upgrade drivers on existing client.<br />
<strong>ENWW</strong> Start 163
In this scenario the administrator upgrades the existing <strong>HP</strong> drivers on an existing client to the latest<br />
version of the <strong>HP</strong> UPD.<br />
Client <strong>Driver</strong> deployment and Software Distribution <strong>System</strong>s<br />
<strong>Print</strong>er driver installation must be done through an account that has administrator rights on the client<br />
PC. This is how the Windows operating system is designed, and it is for good security reasons.<br />
If all the client users have administrator rights, the <strong>HP</strong> UPD can be deployed with the following methods.<br />
● Create a login script that will perform the installation.<br />
● Put the <strong>HP</strong> UPD on local file system or a file share that is accessible to all users.<br />
If the client users do not have administrative rights, then the installations need to be done either by<br />
someone that has administrator rights, or by a software distribution system.<br />
Details about specific software distribution systems (SDS) are beyond the scope of this document,<br />
however some general guidelines can be offered. The steps in this document should be compatible with<br />
any SDS that has the following capabilities.<br />
● Create a package that contains a program (Install.exe) and the driver.<br />
● Deploy the package to the client(s).<br />
● Log on as an administrator, and run the program (Install.exe) with <strong>HP</strong> UPD's command line options.<br />
164 Appendix D <strong>HP</strong> UPD Deployment Flowcharts <strong>ENWW</strong>
Update server/replace server<br />
This section applies to print server deployments only.<br />
Update server<br />
When considering an update to a operating production server, it is strongly advised to set up a test<br />
server and perform the initial upgrade and testing on the test server.<br />
Create a test server?<br />
The procedure for a clean start is similar to replacing an existing server.<br />
Replace server–clean start<br />
Get queue and port information from the old server.<br />
<strong>ENWW</strong> Update server/replace server 165
The Microsoft tools prnmngr.vbs and prnport.vbs simplify the task of gathering information such as<br />
queue names, driver names, port names, and IP addresses from the old server. This information can<br />
be used later to create the new queues manually, or to automate the process by scripting. See<br />
Automating the process through scripting on page 182 for more information about automation and<br />
scripting.<br />
Replace server–import drivers and queues from old server<br />
Run <strong>Print</strong>Mig.exe or <strong>Print</strong>Brm.exe on old server.<br />
Restore <strong>Print</strong>-Migrator image on new server.<br />
If the test server requires the same configuration as the old server, the Microsoft tools <strong>Print</strong>Mig.exe or<br />
<strong>Print</strong>Brm.exe can be used to import the configuration from the old server to the test server.<br />
NOTE: Not all drivers are compatible with PintMig.exe, so the error log must be inspected after the<br />
restore. The <strong>Print</strong>Brm.exe tool is only available on later version Microsoft operating systems such as<br />
Vista and Server 2008. <strong>Print</strong>Brm.exe can import from a down level OS, but may not be able to restore<br />
to a down level OS.<br />
Verify existing driver compatibility with the latest UNIDRV and PSCRIPT versions.<br />
<strong>HP</strong> does not recommend updating drivers on an operating production server. Besides the obvious<br />
interruption of printing while the drivers are being replaced, there are other unforeseen problems that<br />
can occur due to incompatibilities between versions of shared files currently on the system and the<br />
versions of the shared files about to be installed. See Versioning of printer driver shared files<br />
on page 179. If this is the only option, then <strong>HP</strong> recommends that a full backup of the server be made<br />
before any changes are done, so that in the event of a problem there is a fallback plan.<br />
166 Appendix D <strong>HP</strong> UPD Deployment Flowcharts <strong>ENWW</strong>
Client printing<br />
This section applies to direct IP print deployments only.<br />
Move to<br />
direct IP<br />
Get connection<br />
and port<br />
information from<br />
old server<br />
Policy<br />
Replace client–clean start<br />
Update<br />
Client<br />
Backup client<br />
Verify client<br />
Verify existing<br />
driver compatibility<br />
with latest<br />
UNIDRV and<br />
PSCRIPT versions<br />
Replace<br />
<strong>Driver</strong>s<br />
Get queue and port information from old client.<br />
No Clean Start?<br />
Yes<br />
Run <strong>Print</strong>Mig.exe<br />
or <strong>Print</strong>Brm.exe on<br />
old client<br />
Restore <strong>Print</strong>-<br />
Migrator image on<br />
new client<br />
Replace<br />
Client<br />
Get queue and<br />
port information<br />
from old client<br />
The Microsoft tools prnmngr.vbs and prnport.vbs simplify the task of gathering information such as<br />
queue names, driver names, port names, and IP addresses from the old server. This information can<br />
be used later to create the new queues manually, or to automate the process by scripting. See<br />
Automating the process through scripting on page 182 for more information about automation and<br />
scripting.<br />
Proceed to the section on Policy on page 169.<br />
Replace client–import drivers and queues from old client<br />
Run <strong>Print</strong>Mig.exe or <strong>Print</strong>Brm.exe on old client.<br />
Restore <strong>Print</strong>-Migrator image on new client.<br />
The Microsoft tools <strong>Print</strong>Mig.exe or <strong>Print</strong>Brm.exe can be used to import the configuration from the old<br />
client to the test client.<br />
<strong>ENWW</strong> Client printing 167<br />
Policy
NOTE: Not all drivers are compatible with PintMig.exe, so the error log must be inspected after the<br />
restore. Also, the <strong>Print</strong>Brm.exe tool is only available on later version Microsoft operating systems such<br />
as Vista and Server 2008. <strong>Print</strong>Brm.exe can import from a down level OS, but may not be able to restore<br />
to a down level OS.<br />
Update client<br />
When updating a client, it is strongly advised to set up a test client and perform the initial upgrade and<br />
testing on the test client. See Versioning of printer driver shared files on page 179 for more information<br />
on versioning printer driver shared files.<br />
Verify existing driver compatibility with latest UNIDRV and PSCRIPT versions.<br />
<strong>HP</strong> does not recommend updating drivers on an operating production server. Besides the obvious<br />
interruption of printing while the drivers are being replaced, there are other unforeseen problems that<br />
can occur due to incompatibles between versions of shared files currently on the system and the<br />
versions of the shared files about to be installed. See Versioning of printer driver shared files<br />
on page 179 for more information on versioning printer driver shared files. If this is the only option, then<br />
<strong>HP</strong> recommends that a full backup of the server be made before any changes are done, so that in the<br />
event of a problem there is a fallback plan.<br />
168 Appendix D <strong>HP</strong> UPD Deployment Flowcharts <strong>ENWW</strong>
Policy<br />
This section applies to direct IP print deployments only.<br />
Policy means choosing settings other than the <strong>HP</strong> UPD defaults and applying them during or after the<br />
deployment. These settings can include who can print in color, setting grayscale or duplex to be the<br />
default setting, or assigning printers to users, based on department, floor, etc.<br />
Policy/MPLs per machine?<br />
If an administrator wants to assign settings to one or more computers and wants the settings to apply<br />
to anyone that uses those computers, then the best way to set up those policies is to configure them at<br />
the time the driver is installed. If this is the case, refer to Create queues on page 173.<br />
Policy/MPLs per user or group?<br />
<strong>ENWW</strong> Policy 169
If the administrator wants to assign settings or printers based on who is using the computer, the choice<br />
is whether to use Active Directory (AD) or Managed <strong>Print</strong> Administration (MPA).<br />
Use Active Directory?<br />
The decision to use Active Directory versus MPA depends first on whether there is an Active Directory<br />
domain available, and the granularity of policy desired.<br />
To set up Active Directory Policy, the administrator defines the policy settings in a Group Policy Object,<br />
(GPO) and then assigns that GPO to the domain, site, one or more Organizational Units (OU) or users.<br />
Group Policy Objects cannot be assigned to security groups. If the administrator wants to set up domain<br />
wide or site wide policy with overrides for specific individuals, then AD is a viable choice. On the other<br />
hand, if the administrator wants finer grained policy than the OU structure can provide, the options are<br />
to restructure the AD structure or use MPA.<br />
Managed <strong>Print</strong> Administration allows the administrator to set up arbitrary groups and to assign users to<br />
those groups. MPA also provides the means to set up a default policy, which is the policy that a user<br />
will receive if there is no specific user or group policy assigned to them. This way only exceptions to the<br />
general policy need to be managed, instead of adding all the users to the MPA database.<br />
See Manage the <strong>HP</strong> UPD using <strong>HP</strong> MPA on page 82 for more information on Managed <strong>Print</strong>er Lists<br />
and AD templates.<br />
170 Appendix D <strong>HP</strong> UPD Deployment Flowcharts <strong>ENWW</strong>
Add/new queues<br />
This section applies to both server deployments and direct IP print deployments.<br />
Add<br />
queue<br />
Backup server<br />
Verify backup<br />
Verify existing<br />
driver compatibility<br />
with latest<br />
UNIDRV and<br />
PSCRIPT versions<br />
Add queues<br />
Policy<br />
No<br />
New<br />
Queues queue<br />
Prepare list of<br />
printers, queue<br />
and port names<br />
Prepare list of<br />
drivers required for<br />
printer models<br />
<strong>Print</strong> server?<br />
Yes<br />
Create<br />
queues<br />
When you add a new driver (<strong>HP</strong> UPD) and new print queues to an existing server, you may encounter<br />
change management issues similar to upgrading drivers. Besides the problems that can occur from<br />
increasing the load on an existing server, there can be unforeseen problems that occur due to<br />
incompatibles between versions of shared files currently on the system and the versions of the shared<br />
files about to be installed. See Versioning of printer driver shared files on page 179 for more information<br />
on versioning printer driver shared files. If this is the only option, then <strong>HP</strong> recommends that a full backup<br />
of the server be made before any changes are done, so that in the event of a problem there is a fallback<br />
plan.<br />
<strong>ENWW</strong> Add/new queues 171
New queues<br />
Prepare list of printers, queue and port names and port settings.<br />
To create new queues on a new server or client, make a list of all the printers that are to be connected.<br />
Include the printer the IP address or hostname. You may want to also decide on a printer naming<br />
convention, location information, and port name convention if you decide not to use default port naming.<br />
Prepare list of drivers required for printer models.<br />
Once you have a list of all the printers, the next step is to decide what drivers to use. Refer to the list of<br />
printers supported by the <strong>HP</strong> UPD, in <strong>HP</strong> UPD Supported products on page 4. For those products that<br />
are not supported by the <strong>HP</strong> UPD, download the appropriate driver(s) from the manufacture’s web site.<br />
<strong>Print</strong> server?<br />
The <strong>HP</strong> UPD in the Direct IP print mode supports the application of policy in a user by user basis. If this<br />
type of configuration is desired, proceed to Policy on page 169 section.<br />
If no per-user policy is desired, or if the <strong>HP</strong> UPD deployment is on a print server, proceed to Create<br />
queues on page 173.<br />
172 Appendix D <strong>HP</strong> UPD Deployment Flowcharts <strong>ENWW</strong>
Create queues<br />
This section applies to both server deployments and direct IP print deployments.<br />
Will drivers other than the <strong>HP</strong> UPD be installed?<br />
The <strong>HP</strong> UPD ships with a current version of the Microsoft UNIDRV and PSCRIPT5 files. If drivers other<br />
than the <strong>HP</strong> UPD will be installed, follow these steps to verify all drivers you plan to install are compatible.<br />
1. Verify the other drivers are compatible with the <strong>HP</strong> UPD provided unidrv/postcript version.<br />
2. Verify the other drivers are compatible with Microsoft's latest unidrv/postcript version.<br />
3. Verify the <strong>HP</strong> UPD is compatable with with Microsoft's latest unidrv/postcript version.<br />
Cluster Server?<br />
In a Microsoft Cluster server environment there are significant restrictions placed on the installation and<br />
configuration of the <strong>HP</strong> UPD. Refer to Windows Cluster server environment on page 40 for more<br />
information.<br />
<strong>ENWW</strong> Create queues 173
DCU only settings?<br />
Install.exe setting only?<br />
DCU and Install.exe settings?<br />
The DCU is available at www.hp.com/go/dcu and allows an administrator to preconfigure the <strong>HP</strong> UPD<br />
before installation. All of the queues created from this preconfigured driver have the same default<br />
settings. The <strong>HP</strong> UPD Install.exe utility also offers the administrator a number of configuration options.<br />
To get the list, run Install.exe /? However, some of the options that are available from Install.exe<br />
are not available from DCU, and vice versa. Refer to Table D-1 DCU options on page 174 for specific<br />
details. If all the options you want are available from DCU, you can use DCU to preconfigure the driver<br />
and then use Install.exe, or the Add <strong>Print</strong>er Wizard, to install the driver and create print queues. Or you<br />
can use Install.exe alone if it has all the desired options.<br />
Table D-1 DCU options<br />
Features Install APW APW<br />
cluster<br />
Alternate driver name Y Y Y<br />
DCU MPA AD<br />
Alternate Job Delivery Y Y<br />
Color Access Control (CAC) Y Y<br />
Bidi enable and disable Y<br />
Duplex Y 1 Y Y Y<br />
Dynamic mode Y<br />
Economode Y 1 Y Y Y<br />
Edgeline Quality Access Control<br />
(QAC)<br />
Enable MPA or AD policy Y<br />
Y Y Y<br />
Grayscale as default 1 Y<br />
Job tracking Y Y<br />
Private <strong>Print</strong>ing / Job storage Y 1 Y Y Y<br />
Private <strong>Print</strong> default PIN Y Y Y<br />
Restricted mode, MPL display only Y Y Y<br />
Services Tab Y 1 Y Y Y<br />
SNP options (3) Yg 1 2 Y Y Y<br />
SNP <strong>HP</strong> Special Offers Program Yg 2 Y Y<br />
SNMP Community Name Yg 2 Y<br />
Managed <strong>Print</strong>er List Y Y Y<br />
Non-<strong>HP</strong> products Y<br />
1 DCU can be used with Install.exe, or APW, and must be run on driver first.<br />
2 Option must be specified when Install.exe is run on all physical nodes.<br />
3 See Manage Status Notification Pop–ups on page 137 for more information about turning off SNP Pop-ups.<br />
g These Install.exe options apply to all queues and all users. Otherwise, the settings apply only to the current user.<br />
174 Appendix D <strong>HP</strong> UPD Deployment Flowcharts <strong>ENWW</strong>
Notes<br />
● DCU options apply to the driver and all print queues created with that driver.<br />
● AD and MPA configurations apply only to Direct IP printing, not server printing.<br />
● Only Install.exe and the Add <strong>Print</strong>er Wizard actually install the driver and create print queues. DCU<br />
is used to configure the driver prior to installation; AD and MPA configure the driver at print time.<br />
<strong>ENWW</strong> Create queues 175
Ports and protocols<br />
This section applies to both server deployments and direct IP print deployments.<br />
Port Monitor?<br />
176 Appendix D <strong>HP</strong> UPD Deployment Flowcharts <strong>ENWW</strong>
By default, the <strong>HP</strong> UPD uses, and <strong>HP</strong> recommends the use of, the Microsoft supplied Standard TCP/<br />
IP port monitor for all network communications. If it is necessary to use the <strong>HP</strong> Standard Port Monitor,<br />
create and configure all the network ports before <strong>HP</strong> UPD print queue creation, or reconfigure the ports<br />
after installation.<br />
<strong>ENWW</strong> Ports and protocols 177
Replace drivers<br />
178 Appendix D <strong>HP</strong> UPD Deployment Flowcharts <strong>ENWW</strong>
Versioning of printer driver shared files<br />
All the files for all the printer drivers on Windows operating systems are located in one folder: %WINDIR<br />
%\system32\spool\drivers\, where can be W32X86 for 32 bit processors, IA64<br />
for 64 bit processors, etc.<br />
The <strong>HP</strong> UPD consists of <strong>HP</strong> specific files and shared Microsoft files. The shared files are part of the<br />
UNIDRV or postscript architectures. These files are shared by other <strong>HP</strong> drivers, and printer drivers from<br />
other manufacturers. They can be upgraded at any time by installing a new printer driver from <strong>HP</strong>, or<br />
other manufacturer, or by installing a service pack, .NET framework, or hot fix from Microsoft. For that<br />
reason, it is important to know the current version of these files on your system, and if the installations<br />
of a driver, service pack, etc, will cause an upgrade. When an upgrade takes place, all drivers that use<br />
those shared files will be impacted, so steps must be taken to verify that all the drivers that use these<br />
shared files work with the latest versions. <strong>HP</strong> does not support upgrading from .5 to .6 versioning<br />
To determine the current version of these shared files, use the following methods.<br />
1. Right-click in the <strong>Print</strong>ers folder, select Server Properties, and then select the <strong>Driver</strong>s tab.<br />
2. To get the currently installed version of UNIDRV.DLL or PSCRIPT5.DLL, select an <strong>HP</strong> PS, PCL 5<br />
or PCL 6 driver.<br />
3. Select Properties.<br />
4. Scroll down until you see driver file UNIDRV.DLL, or <strong>Driver</strong> File PSCRIPT5.DLL and click<br />
Properties.<br />
5. If UNIDRV.DLL or PSCRIPT5.DLL do not appear in the list, the driver you selected is an old,<br />
“monolithic” driver that does not use the shared Microsoft components. Select another driver and<br />
try again.<br />
6. Select the Version tab.<br />
7. Select Item name: File Version. The Value: is the version of the file.<br />
The problem described in this section is not unique to the <strong>HP</strong> UPD. It applies to all print drivers, including<br />
Product Specific drivers and drivers from out competitors. It applies to both monolithic and Unidrv/<br />
postscript based drivers. The <strong>HP</strong> UPD, however, is the only driver that has the capability to efficiently<br />
address this problem.<br />
In the enterprise, the goal is to standardize on a particular version of driver, deploy it throughout the<br />
enterprise, and stay with that version until business need dictates the need to upgrade. However, due<br />
to many legitimate reasons, different versions of a particular driver will be deployed at any given time.<br />
<strong>ENWW</strong> Versioning of printer driver shared files 179
It is in these situations that care must be taken in how the different versions are deployed to avoid<br />
potential problems and unwanted side effects.<br />
Figure D-2 Basic <strong>Print</strong>ing<br />
USB or TCP/IP<br />
<strong>HP</strong> <strong>Universal</strong> <strong>Print</strong>ing<br />
`<br />
<strong>HP</strong> <strong>Universal</strong> <strong>Print</strong>ing<br />
<strong>HP</strong> <strong>Universal</strong> <strong>Print</strong>ing<br />
In both of the two topologies described in the diagram above, the version of the driver does not matter<br />
as long as it is compatible with the printing products. On the left, only one driver needs to be installed<br />
on the client in order to print to one or more products. On the right there is depicted a simple point and<br />
print configuration, in which only one driver needs to be vended down from the server to the client for<br />
printing.<br />
Figure D-3 Complex print environments<br />
<strong>Print</strong>er A<br />
<strong>Print</strong>er C<br />
TCP/IP<br />
Server A<br />
<strong>Driver</strong> Version 1.0<br />
USB or TCP/IP<br />
<strong>Driver</strong> Version ?<br />
`<br />
Server B<br />
<strong>Driver</strong> Version 2.0<br />
`<br />
TCP/IP<br />
TCP/IP<br />
<strong>Print</strong>er B<br />
180 Appendix D <strong>HP</strong> UPD Deployment Flowcharts <strong>ENWW</strong>
The diagram above depicts a more typical enterprise printing environment, where a client may be<br />
connected to more than one print server, and may also have directly connected products. It is in these<br />
situations that careful driver version management is critical.<br />
Consider the following scenario: The client first Plugs and Plays with printer C, causing the pre-loaded<br />
printer driver version 3.0 to be installed. Next, the client connects and prints to server A. Microsoft Point<br />
and <strong>Print</strong> recognizes that the driver version on the client (3.0) does not match the driver version on the<br />
server (1.0), so the server installs driver version 1.0 on the client.<br />
Then the client connects to and prints to server B. Again Point and <strong>Print</strong> recognizes the driver version<br />
difference and installs driver version 2.0 onto the client.<br />
The net result is that every time the client switches from one print server to another, a driver installation<br />
takes place. And as for the client Plug and Play connection to printer C, the driver is also changed from<br />
the original version 3.0 to either version 1.0 or version 2.0.<br />
Figure D-4 Solution<br />
<strong>Print</strong>er A<br />
<strong>Print</strong>er C<br />
TCP/IP<br />
Server A<br />
<strong>HP</strong> <strong>Universal</strong> <strong>Print</strong>ing (v4.7)<br />
USB or TCP/IP<br />
<strong>HP</strong> <strong>Universal</strong> <strong>Print</strong>ing<br />
<strong>HP</strong> <strong>Universal</strong> <strong>Print</strong>ing (v4.7)<br />
<strong>HP</strong> <strong>Universal</strong> <strong>Print</strong>ing (v5.0)<br />
Server B<br />
<strong>HP</strong> <strong>Universal</strong> <strong>Print</strong>ing (v5.0)<br />
`<br />
TCP/IP<br />
<strong>Print</strong>er B<br />
There are two solutions to this problem: One is to make sure that every client and every server in the<br />
enterprise is using the same version of driver. However, given the size of most networks this solution is<br />
impractical. The other is to use the version management feature of the <strong>HP</strong> UPD.<br />
Starting with version 4.7, <strong>HP</strong> UPD has the ability to be installed either using a generic name, (<strong>HP</strong><br />
<strong>Universal</strong> <strong>Print</strong>ing), or a version specific name, (<strong>HP</strong> <strong>Universal</strong> <strong>Print</strong>ing (v4.7)). The recommended<br />
practice is to install <strong>HP</strong> UPD on clients using the generic name, and to install it on servers using the<br />
version specific name. The diagram above describes this. <strong>Print</strong>er C Plugs and Plays with the driver<br />
named <strong>HP</strong> <strong>Universal</strong> <strong>Print</strong>ing. This driver can be version 4.7, 5.0, or even 4.5. Server A downloads <strong>HP</strong><br />
<strong>Universal</strong> <strong>Print</strong>ing (v4.7) and Server B downloads <strong>HP</strong> <strong>Universal</strong> <strong>Print</strong>ing (v5.0). The net result is that<br />
there are now 3 drivers installed on the client, and no unintended driver upgrades/downgrades taking<br />
place.<br />
When Server A is upgraded to <strong>HP</strong> UPD 5.0, it will see that <strong>HP</strong> UPD 5.0 is already installed on the client<br />
(from the connection to Server B) and use it.<br />
<strong>ENWW</strong> Versioning of printer driver shared files 181
Automating the process through scripting<br />
Get queue and port information from old server or client<br />
The Microsoft tools prnmngr.vbs and prnport.vbs can simplify the task of gathering information such as<br />
queue names, driver names, port names, IP addresses, etc, from the old server. This information can<br />
be used later to create the new queues either manually or to automate the process by scripting.<br />
Creating print queues and ports<br />
The Microsoft tools prnport.vbs, prnmngr.vbs and printUI.dll can simplify the task of creating print<br />
queues.<br />
The Microsoft Windows 2003 Resource Kit contains the prnadmin.dll which can be used to automate<br />
many printing tasks.<br />
Other scripting examples<br />
There is a wealth of information and scripting examples available on the Microsoft web site at Microsoft<br />
Script Repository: <strong>Print</strong>ing.<br />
182 Appendix D <strong>HP</strong> UPD Deployment Flowcharts <strong>ENWW</strong>
E Glossary of terms<br />
Term Definition as related to the <strong>HP</strong> UPD<br />
Bidirectional Communication (bidi) See printer automatic configuration<br />
hpcpuXXX.cf_ file <strong>Driver</strong> Configuration Utility file used for pre-configuration of the<br />
<strong>HP</strong> UPD driver<br />
hpcpuXXX.cfm file <strong>Driver</strong> Configuration Utility file used for pre-configuration of the<br />
UPD driver<br />
<strong>Driver</strong> Deployment Utility (DDU) Enables print administrators to create driver packages that<br />
include the printer driver files and code needed for deployment<br />
to run on a client computer.<br />
Product–specific driver The driver is specific to a particular model of print product and<br />
not universal.<br />
<strong>Driver</strong> Configuration Utility (DCU) Now referred to as <strong>HP</strong> <strong>Driver</strong> Configuration Utility.<br />
DOT4 DOT4 is based on the IEEE 1284.4 protocol that allows a<br />
multicommunication through single port; often associated with<br />
USB ports.<br />
Duplex <strong>Print</strong>ing on both sides of a single sheet; opposite of the terms<br />
Simplex or Single Side.<br />
Dynamic mode Selected during installation of <strong>HP</strong> UPD and opposite of<br />
traditional mode. Dynamic mode locates network printers<br />
within your subnet or by providing the printer name or address<br />
on any subnet of the network. Dynamic mode is not directly<br />
tied to one product connection.<br />
Enterprise Auto Configuration (EAC) See printer automatic configuration.<br />
Embedded Web Server (EWS) Embedded Web Server in the <strong>HP</strong> printing product accessable<br />
by browser over HTTPS that allows status and configuration<br />
access to the product.<br />
Graphics Device Interface (GDI) The Microsoft® Windows® graphics device interface (GDI)<br />
enables applications to use graphics and formatted text on<br />
both the video display and the printer. Windows-based<br />
applications do not access the graphics hardware directly.<br />
Instead, GDI interacts with device drivers on behalf of<br />
applications. http://msdn.microsoft.com/en-us/library/<br />
dd145203(VS.85).aspx<br />
Generic <strong>Print</strong>er Discription (GPD) Microsoft's Generic <strong>Print</strong>er Description that uses Microsoft<br />
Unidrv architecture to present printer features in the user<br />
interface allowing configuration of the printer. The GPD also<br />
contains the commands that allow Unidrv to generate printer<br />
data for output from Windows based applications.<br />
<strong>ENWW</strong> 183
Term Definition as related to the <strong>HP</strong> UPD<br />
Group Policy Management Console (GPMC) Microsoft tool used for management of group policy objects in<br />
an Active Directory.<br />
In Box <strong>Driver</strong> <strong>HP</strong> provided print drivers distributed with the Microsoft<br />
operating system.<br />
[filename].inf <strong>Driver</strong> information file designed within required Microsoft<br />
operating sytem specification used during installation of the<br />
Windows print driver. http://msdn.microsoft.com/en-us/library/<br />
aa506024.aspx<br />
Job Capability Ticket (JCT)<br />
LEDM Low End Device Model<br />
Multicast Domain Name Service (mDNS) Multicast DNS (aka Zeroconf, aka Apple Rendezvous, aka<br />
Apple Bonjour), effectively allowing name resolution by<br />
common Unix/Linux programs in the ad-hoc mDNS<br />
domain.local. Used by the <strong>HP</strong> UPD to discover printers in<br />
dynamic mode and by the Managed <strong>Print</strong> Administrator tool.<br />
Managed <strong>Print</strong> Administrator (MPA) Separate stand alone utility used for managing <strong>HP</strong> UPD<br />
policies and created printer lists.<br />
Managed <strong>Print</strong>er List (MPL) <strong>Print</strong>er list created within MPA for printer discovery in <strong>HP</strong> UPD<br />
dynamic mode.<br />
Manage <strong>Print</strong> Policy (MPP) Created in MPA, user based policies that control <strong>HP</strong> UPD<br />
functionality.<br />
Net <strong>Driver</strong> <strong>HP</strong>Z12 service <strong>HP</strong> UPD installed service that provides bi-directional I/O for the<br />
<strong>HP</strong> UPD, outside the context of the user, application, or print<br />
job.<br />
PCL <strong>Print</strong>er Control Language<br />
PML <strong>Driver</strong> <strong>HP</strong>Z12 service <strong>HP</strong> UPD installed service that provides bi-directional I/O for the<br />
<strong>HP</strong> UPD, outside the context of the user, application, or print<br />
job.<br />
PNG Portable Network Graphics<br />
PnP Point and <strong>Print</strong>. Context dependent, sometimes used to refer<br />
to as Plug and Play.<br />
Port Monitor<br />
PPD Postcript <strong>Print</strong>er Description<br />
<strong>Print</strong>er automatic configuration Executed at installation or using the feature Update Now within<br />
the <strong>HP</strong> UPD driver user interface from the Device Settings tab,<br />
the <strong>HP</strong> UPD will communicate with the device to retrieve<br />
device capabilities directly from the device. Information passed<br />
to the device can be in the form of a Job Capability Ticket over<br />
HTTP, SNMP response over the <strong>HP</strong> UPD, Dot4 or LEDM.<br />
PSCRIPT5.DLL Microsoft postscript specific printer driver file used for Microsoft<br />
<strong>Universal</strong> <strong>Print</strong> driver functionality.<br />
SAG <strong>System</strong> Administrator <strong>Guide</strong><br />
Scrubber <strong>HP</strong> internal test tool that removes all print drivers from the<br />
Windows system.<br />
Simplex Single sided printing, opposite of the term duplex.<br />
184 Appendix E Glossary of terms <strong>ENWW</strong>
Term Definition as related to the <strong>HP</strong> UPD<br />
SNP Status Notification Pop-up.<br />
Traditional Mode/Static Mode Selected at the time of <strong>HP</strong> UPD installation and opposite of<br />
dynamice mode method, traditional mode (sometimes referred<br />
Static mode) behaves like a product-specific driver. During<br />
installation, the driver is associated to a specific printer,<br />
creating a permanent instance of the driver.<br />
<strong>HP</strong> Special Offers Program Displayed via the driver user interface Status Notification Pop–<br />
ups, the <strong>HP</strong> Special Offers Program allows <strong>HP</strong> to present <strong>HP</strong><br />
customers with targeted offers to buy <strong>HP</strong> and <strong>HP</strong> partner<br />
products, use <strong>HP</strong> and <strong>HP</strong> partner services, and learn more<br />
about <strong>HP</strong> and <strong>HP</strong> partner offerings. For example, a printer with<br />
low toner 'triggers' a toner offer to the customer.<br />
Unidrv The <strong>Universal</strong> <strong>Print</strong>er <strong>Driver</strong> (Unidrv) is the Microsoft<br />
Corporation's standard printer driver for non-PostScript<br />
printers<br />
Update Now See EAC<br />
WHQL Windows Hardware Quality Lab is a testing process required<br />
to receive the "Certified for Windows" logotype. This certifies<br />
the <strong>HP</strong> UPD driver has completed testing by Microsoft before<br />
<strong>HP</strong> released the driver. <strong>Driver</strong>s that do not have WHQL<br />
certification at time of installtion will prompt The software you<br />
are installing for this hardware [DEVICE] has not passed<br />
Windows Logo testing... Continue Anyway / Stop<br />
Installation.<br />
WJA <strong>HP</strong> Web Jetadmin software is a print and imaging peripheral<br />
management software tool that helps optimize product<br />
utilization, control color costs, secure products, and streamline<br />
supplies management by enabling remote configuration,<br />
proactive monitoring, security, troubleshooting, and reporting<br />
of printing and imaging products.<br />
<strong>ENWW</strong> 185
186 Appendix E Glossary of terms <strong>ENWW</strong>
F Support information to collect<br />
Efficient troubleshooting leading to issue resolution requires collection of basic and extended information<br />
related to the reported incident. Use this worksheet as the first step to contacting technical support.<br />
1) Symptoms<br />
a. What is the reported issue?<br />
b. What are the symptoms?<br />
c. Location of the issue (client, server, printer)?<br />
d. Provide error messages and location source?<br />
e. How often does problem occur?<br />
f. Exact steps that produced the reported issue?<br />
2) <strong>Print</strong>er driver<br />
a. Determine the <strong>HP</strong> UPD driver version<br />
1. In the <strong>Print</strong>ers folder, right-click on the <strong>HP</strong> UPD driver/queue and then select Properties.<br />
● For a traditional mode installation, select the About tab. The version displays at the top.<br />
● For a dynamic mode installation, the version displays on the lower left.<br />
2. Test the latest version of the <strong>HP</strong> UPD available from www.hp.com/go/upd<br />
Does the error occur with the latest version of the driver from hp.com?<br />
b. Determine the installation details<br />
1. What is the printer description language, PS, PCL5, PCL6, or XPS?<br />
2. Is this a new installation of the <strong>HP</strong> UPD, or an upgrade of an existing <strong>HP</strong> UPD installation?<br />
3. Is the installation <strong>HP</strong> UPD onto the server, the print client, or vended from print server to client<br />
(PnP)?<br />
<strong>ENWW</strong> 1) Symptoms 187
4. What is the method of installation? Does each method produce the same result?<br />
1. Add <strong>Print</strong>er Wizard<br />
2. Install.exe<br />
a. Dynamic mode or traditional mode?<br />
b. Optional switches?<br />
3. Point and <strong>Print</strong> vended from Microsoft <strong>Print</strong> Server<br />
4. Other<br />
a. <strong>Print</strong>ers folder- Properties - Advanced - New <strong>Driver</strong><br />
b. <strong>Print</strong>ers folder- Server Properties- <strong>Driver</strong>s tab - Add or Reinstall<br />
c. Custom printUI.dll.<br />
5. Determine which port is in use (TCP, LPT1 etc). Open the <strong>Print</strong>ers folder, right-click the printer<br />
name, select Properties and then click the Ports tab. Which Port is selected? What settings are<br />
defined for the port (select Configure Port)?<br />
6. Determine which print processor is in use. Open the <strong>Print</strong>ers folder, right-click the printer name,<br />
select Properties, select the Advanced tab, and then click <strong>Print</strong> Processor button. Which <strong>Print</strong><br />
processor is highlighted/selected?<br />
7. Was the driver pre-configured before the <strong>HP</strong> UPD installation?<br />
1. Device Configuration Utility. What settings were altered compared to the <strong>HP</strong> default *.cf_.<br />
2. <strong>Driver</strong> Deployment Utility. What settings were altered compared to the <strong>HP</strong> default.<br />
c. Is <strong>Print</strong>er Automatic Configuration enabled (default)? <strong>Print</strong>er Properties-Device Settings tab-<br />
Installable Options-Automatic Configuration-Update Now.<br />
d. What is the “Configuration Status” provided on the About tab? <strong>Print</strong>er Properties-About, see<br />
“Configuration Status”.<br />
e. Management Tools<br />
1. <strong>Driver</strong> Configuration Utility version? Select file hpbcfgre.dll, Properties-Details tab-<br />
Product Version.<br />
2. MPA version?<br />
3. AD Template? Version is part of the template’s file name.<br />
4. DDU version? Select the About button.<br />
3) Environment specifications<br />
a. Version of Microsoft operating system (print server and print client)<br />
188 Appendix F Support information to collect <strong>ENWW</strong>
To obtain system information, use any of the following methods.<br />
1. Brief–click Start, click Run, and then type WINVER.EXE<br />
2. Extended–click Start, click Run, and then type cmd.exe to open the command prompt window.<br />
Type /k systeminfo.exe at the command prompt.<br />
3. Complete–click Start, click Run, and then type MSINFO32.<br />
b. Microsoft Event log (spooler errors, etc)?<br />
Click Start, click Run, and then type Eventvwr.msc.<br />
c. <strong>Print</strong>er connectivity<br />
1. Is the printer USB direct connected?<br />
2. Network and connectivity settings<br />
d. Citrix<br />
1. IP addresses<br />
a. <strong>Print</strong>er server<br />
b. <strong>Print</strong> client<br />
c. <strong>Print</strong> product<br />
2. <strong>Print</strong> path network availability (client/server/printer)<br />
a. ping ip_address<br />
b. telnet ip_address<br />
c. Tracert ip_address<br />
d. http://device_ip_address<br />
https://device_ip_address<br />
3. Is SNMP enabled?<br />
a. Is it routable in your network?<br />
b. SNMP Community Name. prnport -l<br />
1. Server–Citrix server version<br />
2. Client–operating system and Citrix client version<br />
3. Auto created printers configuration<br />
1. Client printers or session printers?<br />
2. If client printers, what driver is mapped to the client for autocreation (Citrix UPD; <strong>HP</strong> UPD; <strong>HP</strong><br />
model specific driver)?<br />
<strong>ENWW</strong> 3) Environment specifications 189
e. Microsoft Terminal Services<br />
1. Version of the Terminal Server.<br />
2. RDP client version.<br />
3. Operating system version of client.<br />
4. What driver is mapped to be redirected to the printer?<br />
5. Does the same issue exist outside of a Terminal Server session?<br />
f. Novell<br />
1. Version of Novell print server.<br />
2. Installation method of print queue on server (i.e.- iManager).<br />
3. Version of i<strong>Print</strong> client.<br />
4. Does same issue exist printing to a non-Novell print queue?<br />
4) <strong>Print</strong>er information<br />
a. <strong>Print</strong>er model name<br />
b. <strong>Print</strong>er model firmware. Methods to obtain:<br />
1. <strong>Print</strong>er control panel (print a configuration page).<br />
2. Embedded Web Server (http://ip_of_print_device). See Device Configuration “Firmware<br />
Datecode”.<br />
3. Web Jetadmin.<br />
c. Error information displayed or printed out from the product<br />
1. Error message content<br />
2. Event log<br />
◦ Displayed from the control panel or Embedded Web Server.<br />
◦ <strong>Print</strong>ed on the configuration page (last 3 items).<br />
◦ <strong>Print</strong>ed from the control panel or Embedded Web Server (entire log).<br />
d. Device configuration page. The product configuration can be obtained with either of the following<br />
methods.<br />
● <strong>Print</strong>ing at the printer control panel.<br />
● By printing a test page. Open the <strong>Print</strong>ers folder, right-click the printer name, select Properties,<br />
and then click the <strong>Print</strong> Test Page button.<br />
190 Appendix F Support information to collect <strong>ENWW</strong>
5) Application<br />
● Application(s) affected and application version number. Open the Help menu in the application and<br />
select About to find the application version number.<br />
● Test documents specific to reproducing the issue.<br />
6) Files to collect<br />
The following list contains information that may be requested to continue troubleshooting for the purpose<br />
of debugging, analyzing and creating reproducible test cases.<br />
a. MSINFO32: Click Start, click Run, and then type MSINFO32.exe. Save the*. NFO file to disk.<br />
b. <strong>System</strong> Information: From a command prompt, pipe the output to file: C:\>systeminfo.exe<br />
>systeminfo.txt.<br />
c. Microsoft Product Support Reports: For details and information refer to Microsoft Product<br />
Support Reports<br />
d. Microsoft Event Viewer Logs: Click Start, click Run, and then type “Eventvwr.msc”. Select the<br />
tree node, and from the Action menu select Save Log File As... to save the log file.<br />
e. PRN file: Application dependent. Example: START-RUN-WRITE.EXE, select FILE-PRINT and<br />
select <strong>Print</strong> To File to save FILENAME.PRN<br />
f. Application file: Provide a sample file from the application which created the reported issue.<br />
g. <strong>Print</strong> a test page: Open the <strong>Print</strong>ers folder, right-click the printer name, select Properties, and<br />
then click the <strong>Print</strong> Test Page button. Scan the output page to a distributable computer file format.<br />
Options to create the page include the following.<br />
1. Device Configuration Page: <strong>Print</strong> from the printer control panel.<br />
2. <strong>Print</strong>ers folder- Properties - <strong>Print</strong> Test Page.<br />
h. Scan of printed document: After printing a page, use a colored pen to mark up and identify the<br />
issue with the printed output. Scan the marked up page back to a distributable computer file format.<br />
i. <strong>Driver</strong> Configuration Utility (DCU): Provide the pre-configuration files *.cf_ or *.cfm<br />
j. Device Network Settings: Methods available to capture information<br />
1. Telnet to the product, output all information to console, select upper left icon and right mouse,<br />
EDIT-SELECT-ALL. Repeat right mouse, EDIT-COPY. Paste into file and save.<br />
2. Use Web Jetadmin views to create an export file<br />
3. Embedded web server to printer: http://ip_of_printdevice<br />
k. Screen shots: Error dialogs, user interface, etc.<br />
<strong>ENWW</strong> 5) Application 191
l. Microsoft crash dump file<br />
1. XP/Server 2000, 2003 and 2008: http://support.microsoft.com/kb/254649 (dump files, when<br />
enabled, are stored by default in %<strong>System</strong>Root%\Minidump folder).<br />
2. VISTA: http://support.microsoft.com/kb/931673 (dump files, when enabled, are stored by<br />
default in Drive:\Users\UserName\AppData\Local\Temp)<br />
m. Directory file listing:<br />
C:\>DIR %SYSTEMROOT\system32\spool\drivers /s >C:\w32x86.tx<br />
n. SetupAPI.log: Located in %SYSTEMROOT%<br />
o. Screen shots: Error dialogs, user interface, etc.<br />
p. Registry exports (three targets)<br />
regedit.exe /e c:\updreg1.txt<br />
"HKEY_LOCAL_MACHINE\SOFTWARE\Hewlett-Packard\<strong>HP</strong> <strong>Print</strong> Settings"<br />
“HKEY_LOCAL_MACHINE\SOFTWARE\Hewlett-Packard\<strong>HP</strong> SSNP”<br />
“HKEY_CURRENT_USER\Software\Hewlett-Packard\<strong>HP</strong> <strong>Print</strong> Settings”<br />
192 Appendix F Support information to collect <strong>ENWW</strong>
Index<br />
A<br />
Active Directory Policy<br />
management, enable 54<br />
Active Directory template<br />
Application Filtering 129<br />
Color Access Control 129<br />
Default <strong>Print</strong> Settings 128<br />
Enabled services tab 127<br />
General settings 125<br />
<strong>HP</strong> Managed <strong>Print</strong><br />
Policites 125<br />
Job Accounting 131<br />
Job Delivery 131<br />
Managed <strong>Print</strong>er List<br />
settings 133<br />
Managed <strong>Print</strong>er Lists<br />
(MPLs) 133<br />
MPP Information Settings 132<br />
Status Notification Pop-ups<br />
(SNPs) 130<br />
Time of Day Restriction 129<br />
UseMode settings 125<br />
User configuration 125<br />
User Interaction Settings 126<br />
User Search Capabilities 130<br />
Active Directory template, install<br />
Microsoft Group Policy<br />
Management Console<br />
(GPMC) 123<br />
Add <strong>Print</strong>er Wizard 32<br />
C<br />
Citrix environment<br />
<strong>HP</strong> UPD, install 42<br />
classic interface, <strong>HP</strong> MPA<br />
options 85<br />
cluster server<br />
<strong>HP</strong> UPD, install 40<br />
command prompt<br />
command options 34<br />
custom install 34<br />
D<br />
dynamic mode<br />
about 31<br />
description 70<br />
<strong>HP</strong> <strong>Universal</strong> <strong>Print</strong>ing Installer<br />
Wizard 33<br />
Install.exe 33<br />
print 74<br />
G<br />
graphic interface, <strong>HP</strong> MPA<br />
options 86<br />
H<br />
<strong>HP</strong> Managed <strong>Print</strong> Policies (MPPs)<br />
Active Directory template 125<br />
<strong>HP</strong> Managed <strong>Print</strong>ing Administrator<br />
(MPA). See <strong>HP</strong> MPA<br />
<strong>HP</strong> MPA<br />
access 85<br />
Add/Remove Programs 85<br />
classic interface 85<br />
control panel 85<br />
graphic interface 86<br />
<strong>HP</strong> MPA Setup Wizard 84<br />
<strong>HP</strong> UPD, SNPs 142<br />
languages available 83<br />
Managed <strong>Print</strong>er Lists<br />
(MPLs) 37<br />
Managed <strong>Print</strong>er Policies<br />
(MPPs) 89<br />
software availability 83<br />
software requirements 83<br />
uninstall 84<br />
User Groups 121<br />
<strong>HP</strong> MPA Setup Wizard 84<br />
<strong>HP</strong> MPA, install<br />
<strong>HP</strong> MPA Setup Wizard 84<br />
<strong>HP</strong> MPA, uninstall<br />
Add/Remove Programs 85<br />
<strong>HP</strong> MPA Setup Wizard 84<br />
<strong>HP</strong> postscript emulation driver<br />
about 13<br />
<strong>HP</strong> <strong>Universal</strong> <strong>Print</strong> <strong>Driver</strong><br />
(<strong>HP</strong> UPD). See <strong>HP</strong> UPD<br />
<strong>HP</strong> <strong>Universal</strong> <strong>Print</strong> <strong>Driver</strong> <strong>System</strong><br />
Administrator <strong>Guide</strong>. See <strong>HP</strong> UPD<br />
SAG<br />
<strong>HP</strong> <strong>Universal</strong> <strong>Print</strong>ing Installer<br />
Wizard 33<br />
<strong>HP</strong> UPD<br />
Cache printer settings 52<br />
description of software 3<br />
Device Verification settings 72<br />
driver properties 72<br />
driver versions, selection 12<br />
dynamic mode, about 31<br />
Dynamic mode, configure 70<br />
dynamic mode, description 70<br />
Dynamic modes, settings 70<br />
General settings, modify 71<br />
Help features 73<br />
install 19<br />
languages available 12<br />
new features 10<br />
PCL 5, about 13<br />
print 73<br />
print driver modes,<br />
description 70<br />
print job preferences 72<br />
PS emulation driver, about 13<br />
software availability 12<br />
system requirements 11<br />
traditional mode 31<br />
<strong>ENWW</strong> Index 193
traditional mode,<br />
description 70<br />
uninstall 45<br />
versions 11<br />
<strong>HP</strong> UPD Active Directory<br />
Administrative template 123<br />
See also Active Directory<br />
template<br />
<strong>HP</strong> UPD SAG<br />
conventions 3<br />
overview 1<br />
<strong>HP</strong> UPD, install<br />
Add <strong>Print</strong>er Wizard 32<br />
Citrix environment 42<br />
cluster server 40<br />
command prompt 34<br />
<strong>HP</strong> <strong>Universal</strong> <strong>Print</strong>ing Installer<br />
Wizard 33<br />
<strong>HP</strong> Web Jetadmin <strong>Print</strong> Queue<br />
Creation 40<br />
Install.exe 33<br />
Novell 43<br />
point and print 40<br />
Terminal server 42<br />
<strong>HP</strong> UPD, manage<br />
Cache printer settings 52<br />
<strong>HP</strong> MPA, SNPs 142<br />
Registry settings, SNPs 142<br />
<strong>HP</strong> UPD, print<br />
dynamic mode 74<br />
traditional mode 77<br />
<strong>HP</strong> UPD, uninstall 45<br />
<strong>HP</strong> UPD, upgrade<br />
printers on printer server 54<br />
<strong>HP</strong> Web Jetadmin <strong>Print</strong> Queue<br />
Creation<br />
<strong>HP</strong> UPD, install 40<br />
M<br />
Managed <strong>Print</strong> Policies (MPPs)<br />
Associate printer lists 88<br />
Associate user groups 88<br />
Basic MPP settings 100<br />
Color Access settings 90<br />
Create a new MPP 90<br />
Default <strong>Print</strong> settings 93<br />
Duplicate an existing<br />
policy 102<br />
Edit an existing MPP 88<br />
Remove an existing<br />
policy 104<br />
Status & Supplies Notification<br />
settings 90<br />
Status Notification Popups<br />
(SNPs) 90<br />
Update an MPP 93<br />
UseMode settings 90<br />
User Search capabilities 90<br />
Managed <strong>Print</strong>er Lists (MPLs)<br />
Advanced View settings 118<br />
Associate an existing list 102<br />
Auto printer discover 106<br />
Clickable image map<br />
view 114<br />
Create a new list 105<br />
Duplicate an existing list 112<br />
Edit an existing list 89<br />
<strong>HP</strong> UPD Active Directory<br />
template 133<br />
Manage MPL view 89<br />
Manual printer entry 106<br />
<strong>Print</strong>er graphics view 116<br />
Remove an existing list 120<br />
Remove printers from list 121<br />
Select a MPL view 113<br />
Tabular HTML view 118<br />
View, Clickable image<br />
map 114<br />
View, options 113<br />
View, Tabular HTML 118<br />
virtual printers 111<br />
Managed <strong>Print</strong>er Policies<br />
(MPPs) 89<br />
Microsoft Group Policy<br />
Management Console<br />
(GPMC) 123<br />
N<br />
Novell<br />
<strong>HP</strong> UPD, install 43<br />
P<br />
PCL 5 driver<br />
about 13<br />
PCL 6 driver<br />
about 13<br />
point and print<br />
<strong>HP</strong> UPD, install 40<br />
S<br />
software availability<br />
<strong>HP</strong> MPA 83<br />
<strong>HP</strong> UPD 12<br />
software requirements<br />
<strong>HP</strong> MPA 83<br />
Status Notification Pop-ups (SNPs)<br />
Active Directory template 130<br />
<strong>HP</strong> MPA 142<br />
Registry settings 142<br />
Status Notification Popups (SNPs)<br />
<strong>HP</strong> MPA 90<br />
Managed <strong>Print</strong> Policies<br />
(MPPs) 90<br />
supported products 4<br />
system requirements<br />
<strong>HP</strong> UPD 11<br />
T<br />
Terminal server<br />
<strong>HP</strong> UPD, install 42<br />
traditional mode<br />
about 31<br />
Add <strong>Print</strong>er Wizard 32<br />
description 70<br />
<strong>HP</strong> <strong>Universal</strong> <strong>Print</strong>ing Installer<br />
Wizard 33<br />
Install.exe 33<br />
print 77<br />
U<br />
User Groups<br />
Associate with a policy 102<br />
Create a new user group 121<br />
Edit an existing user group 88<br />
Remove a user group 122<br />
V<br />
virtual printers 111<br />
194 Index <strong>ENWW</strong>
© 2009 Hewlett-Packard Development Company, L.P.<br />
www.hp.com