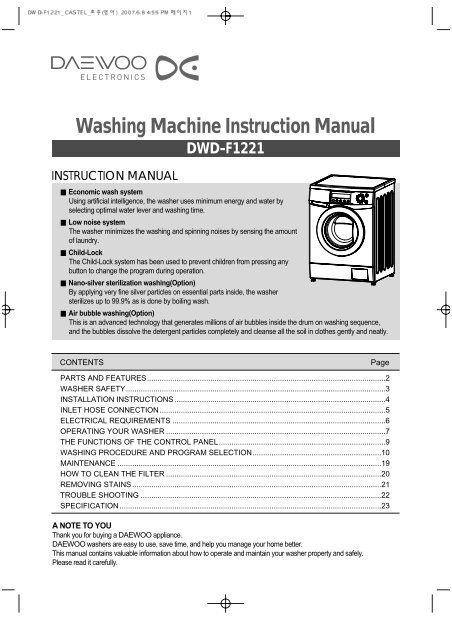
Washing Machine Instruction Manual DWD-F1221 - Castel Daewoo
Washing Machine Instruction Manual DWD-F1221 - Castel Daewoo
Washing Machine Instruction Manual DWD-F1221 - Castel Daewoo

You also want an ePaper? Increase the reach of your titles
YUMPU automatically turns print PDFs into web optimized ePapers that Google loves.
PARTS AND FEATURES<br />
The parts and features of your washer are illustrated on the page.<br />
Become familiar with all parts and features before using your washer.<br />
NOTE<br />
The drawings in the book may vary from your washer model.<br />
They are designed to show the different features of all models coverd by this book,<br />
Your model may not include all features.<br />
Accessories<br />
DETERGENT CASE<br />
DOOR<br />
INLET HOSE<br />
LOWER COVER<br />
Hose drain Inlet hose <strong>Manual</strong> Cap holder(3EA)<br />
2<br />
ADJUSTABLE LEG<br />
POWER CORD<br />
CONTROL PANEL<br />
HOSE DRAIN
WASHER SAFETY<br />
Save these instructions<br />
Your safety is important to us.<br />
To reduce the risk of fire, electrical shock, or injury when using your washer adhere to the<br />
following basic precautions.<br />
• Flammable fluids (dry-cleaning solvents,<br />
kerosene, gasoline, etc.) should not be used<br />
or stored in or near your washer.<br />
Do not add flammable fluids to your wash<br />
water.These substances give off vapors that<br />
can create a fire hazard or explosion.<br />
• After starting a cycle, do not reach into the<br />
washer until all motions stop.<br />
• Do not tamper with the controls.<br />
• The appliance is not intended for use by<br />
young children or infirm persons without<br />
supervision.<br />
• If the supply cord is damaged, it must be<br />
replaced by the manufacturer, or its service<br />
agent or a similarly qualified person in order<br />
to avoid a hazard.<br />
• If the appliance is supplied from a cord<br />
extension set or electrical portable outlet<br />
device it should be positioned so that it is not<br />
subjected to splashing or ingress of<br />
moisture.<br />
Understanding your responsibilities<br />
Read all instructions before using your washer<br />
• Do not use chlorine bleach and ammonia or acid(such as vinegar or rust remover) in the same<br />
wash. Hazardous fumes can form.<br />
• Unplug power supply cord before attempting to service your washer.<br />
• Do not wash fiberglass material.<br />
Small particles can stick to fabrics washed in following loads and cause skin irritation.<br />
• Do not spray water on the control panel of the washer.<br />
It could cause fire or an electric shock.<br />
• In case of the dual valve model, if you connect only cold water inlet valve, while water<br />
temperature is selected as hot or warm, there can be water leakage from unconnected water<br />
inlet valve.<br />
• This appliance must be grounded.<br />
To avoide electrical shock, use a metal pipe for the ground connection.<br />
3<br />
Please ...<br />
• Have only a qualified person install, repair,<br />
or replace parts on washer.<br />
• Maintain washer properly.<br />
• Protect washer from the weather and keep<br />
it where the temperature will not fall below<br />
freezing.<br />
• Do not install the washer at a place of<br />
extremely high humidity. It could cause an<br />
electric shock or a short circuit.<br />
• Connect washer to the correct outlet,<br />
electrical supply, water supply, and drain<br />
supply.
INSTALLATION INSTRUCTIONS<br />
Removing transit bolts<br />
1. Before operating the washer, remove the<br />
transit bolts(3ea) along with the rubber.<br />
• If the bolts are not removed, it may cause<br />
heavy vibration, noise and malfunction.<br />
3. Close the holes with the cap holders supplied.<br />
4<br />
2. Unscrew the 3 bolts with the 10mm hex<br />
wrench or spanner or cross-tip screwdriver.<br />
Keep the 3 bolts for a later time.<br />
• When the appliance is transported, transit<br />
bolts will be re-used.<br />
Location of washer<br />
• Check location where the washer will be installed. Make sure you have everything necessary for<br />
correct installation.<br />
• Do not place or store your washer below 0°C (32°F) to avoid any damage from freezing.<br />
• Do not place or store laundry products on top of washer at any times.<br />
• Install the washer on the horizontal solid floor.<br />
If the washer is installed on an unsuitable floor, it could make<br />
considerable noise, vibrate severely and cause a malfunction. If the<br />
washer is not level, adjust leg up or down for horizontal installation.<br />
• Ventilation openings must not be obstructed by carpeting when the<br />
washer is installed on a carpeted floor.<br />
• Leave some space (right & left : 2cm, rear : 10cm).<br />
• In case of built-in installation, the distance between top of the washer<br />
and bottom of upper plate should be at least 3mm.<br />
Washer<br />
approx.<br />
2cm<br />
Drain Hose<br />
Laundry<br />
Tub
INLET HOSE CONNECTION<br />
The washer should be connected to the water mains using new hose sets and old hose sets<br />
should not be reused.<br />
In using only one water tap or in case of only one water inlet valve, connect the inlet hose to the<br />
cold water inlet valve.<br />
Option : Be careful not to confuse hot water inlet and cold water inlet.<br />
For Ordinary Tap<br />
1 Pull down the collar of the<br />
inlet hose to separate it<br />
from the water tap<br />
adapter.<br />
4 Remove the tape, and<br />
screw connector B into<br />
connect A tightly.<br />
For Screw-Shaped Tap<br />
1 Connect the inlet hose to<br />
the water tap by screwing<br />
the connector tightly.<br />
Connector<br />
Hose<br />
Connector A<br />
Connector B<br />
Rubber<br />
Packing<br />
Connector<br />
2 Loosen the four screws<br />
properly in order to fit into<br />
water tap.<br />
5 Connect the inlet hose to<br />
the water tap adapter by<br />
pulling down the collar of<br />
the hose end.<br />
2 Connect the connectorinlet<br />
supplied if necessary.<br />
Connector<br />
inlet<br />
Connector<br />
Hose<br />
5<br />
Rubber<br />
Packing<br />
Connector<br />
3 Fit the water tap adapter<br />
into the water tap and<br />
tighten the four screws<br />
evenly while pushing up<br />
the adapter so that the<br />
rubber packing can stick<br />
to the water tap tightly.<br />
TAPE<br />
6 Connect the inlet hose<br />
adapter of the hose to the<br />
water inlet of the washer<br />
by turning it clockwise to<br />
be fixed tightly.<br />
• Please check the rubber<br />
packing present inside the inlet<br />
hose adapter of the hose.<br />
3Connect the inlet hose<br />
adapter to the water inlet<br />
of a washer and turn it to<br />
be fixed.<br />
*Check the packing in the inlet
ELECTRICAL REQUIREMENTS<br />
WARNING<br />
• Electrical earth is required on this washer<br />
• If it does not fit the outlet, have a proper outlet<br />
installed by a qualified electrician.<br />
C<br />
B<br />
A<br />
Electrical shock hazard : Failure to follow these instructions could result in<br />
death or serious injury.<br />
Recommended earthing method<br />
6<br />
• Don’t earth to a gas pipe.<br />
• Don’t change the power supply cord plug.<br />
• Check with a qualified electrician if you are not<br />
sure the washer is properly earthed.<br />
For your personal safety, this washer must be earthed.<br />
This washer is equipped with a power supply cord ‘A’ having a earthing plug ‘B’.<br />
To minimize possible shock hazard, the cord must be plugged into a mating<br />
earthing-type wall receptacle ‘C’. If a mating wall receptacle is not available,<br />
it is the personal responsibility and obligation of the customer to have the<br />
proper earthed wall receptacle installed by a qualified electrician.<br />
Drain system<br />
• Never forget to install drain hose before operating your washer.<br />
• Open the packing box, and there is a drain hose inside the drum.<br />
• Connect the drain hose to the drain outlet at the back side of the washer.<br />
• Top of laundry tub must be at least 60cm high and no higher than 100cm from bottom of washer.<br />
• When installing the drain hose to tub(sink), secure it tightly with a string.<br />
• Proper securing of the drain hose will protect the floor from damage due to water leakage.<br />
• When the drain hose is too long, do not force it back into the washer.<br />
This will cause abnormal noise.<br />
Level adjustment<br />
1 If the washer is installed on an<br />
unsuitable floor, it could make<br />
considerable noise, vibrate and<br />
cause a malfunction.
2 Adjust the level of washer using adjustable legs.<br />
• Please check if there is any gap between the<br />
four adjustable legs and the floor.<br />
• Adjust the level of washer by turning<br />
adjustable legs. And make it sure that there is<br />
no swaying of washer.<br />
• After the adjustment is finished, turn the fixing<br />
nuts up tightly so that the washer maintains<br />
the adjustment.<br />
3 Make it sure that the washer does not sway when you press<br />
down the four corners of the washer's top plate.<br />
NOTE<br />
There should be no swaying of washer and all the<br />
adjustable legs should stick to the floor closely.<br />
OPERATING YOUR WASHER<br />
7<br />
adjustable leg<br />
To obtain the best washing results, you must operate your washer properly.<br />
This section gives you this important information.<br />
• Close zippers, snaps, and hooks to avoid<br />
snagging other items.<br />
Remove pin, buckles, and other hard<br />
objects to avoid scratching the washer<br />
interior.<br />
• Empty pockets and pull them inside out.<br />
Preparing clothes for washing<br />
• Turn down cuffs and turn synthetic knits<br />
inside out to avoid pilling.<br />
• Tie strings and sashes to avoid tangling.<br />
• Treat spots and stains.<br />
(See “Removing stains” on page 21)<br />
Fixing Nut
• Drop items into washer loosely. Items<br />
should move easily through wash water for<br />
best cleaning and wrinkle-free results.<br />
• Load washer properly and select correct<br />
load size setting.<br />
Overloading and selecting a setting too<br />
small for the wash load can :<br />
- Cause poor cleaning<br />
- Increase wrinkling<br />
- Create excessive lint<br />
- Wear out items faster (because of pilling)<br />
Sorting<br />
• Separate heavily soiled items from lightly soiled ones, even if they would normally be washed<br />
together.<br />
• Separate dark colors from light colors, colorfast items from non-colorfast item.<br />
Soil (Heavy, Normal, Light) Separate clothes according to amount of soil.<br />
Color (White, Lignts, Darks) Separate white clothes from colored clothes.<br />
Lint (Lint producers, Collectors) Wash lint producers and lint collectors separately.<br />
Loading<br />
Adding detergent<br />
8<br />
• Mix large and small items in each load. Load<br />
evenly to maintain washer balance.<br />
An unbalanced load can make the washer<br />
vibrate during spin.<br />
• Reduce wash time when using a small load<br />
size setting. Load with only a few small<br />
items needs less wash time.<br />
• Use a large load size setting to reduce<br />
wrinkling with permanent press clothes and<br />
some synthetic knits. These items should<br />
have more room to move in the water than<br />
heavy items. (towels, jeans)<br />
1 Detergent case 2 Adding fabric softener<br />
• If desired, add measured liquid fabric<br />
softener to the softener inlet.<br />
• Pour liquid fabric softener into the<br />
dispenser using the amount<br />
recommended on the package.<br />
• Do not exceed the maximum fill line.<br />
Overfilling can cause early dispensing of the<br />
fabric softener which could stain clothes.<br />
• Do not open the detergent case when<br />
Main wash<br />
Pre wash<br />
water is supplied.<br />
• Avoid pouring fabric softener directly on<br />
Fabric softener<br />
the clothes.
WASHING PROCEDURE AND PROGRAM SELECTION<br />
1. COTTON IS AUTOMATICALLY SELECTED UPON POWER ON<br />
• Press the Power button to start.<br />
• Press the Start/Hold button<br />
• Initial condition<br />
- Program : Cotton<br />
- Wash : main wash<br />
- Rinse : 3 times<br />
- Spin : 800 rpm<br />
- Water temperature : 40˚ C<br />
2. MANUAL SELECTING<br />
• Press the Power button to start<br />
• Select the conditions which you want to use by turning the program dial and pressing each button.<br />
• Press the Start/Hold button.<br />
3. RESERVED WASHING<br />
• Reservation can be made from 2 hours to 12 hours.<br />
example) To make reservation to complete washing in 8 hours.<br />
- Procedure to press the button.<br />
select the<br />
program<br />
or manual<br />
* Each pressing of the button advances time delay by one hour.<br />
• Now the reservation is made.<br />
• If you want to check the selected program, press the “Start/Hold” button again.<br />
• Preparing washing before starting “Time Delay”;<br />
- Turn on the water tap<br />
- Load laundry and close the door<br />
- Place the detergent and fabric softener in the detergent case.<br />
• To cancel the time delay, press the Power button.<br />
10<br />
ajust to "8"
4. FUNCTION<br />
• Recommended programs according to the laundry type<br />
Program<br />
Cotton<br />
Eco<br />
Synthetic<br />
Delicate<br />
Wool<br />
Hand Wash<br />
Quick<br />
Fabirc<br />
Type<br />
First check if laundry is machine<br />
washable.(white cotton, linen<br />
towel and sheets..)<br />
Colorfast garments<br />
(shirts, night dresses, pajamas..)<br />
and lightly soiled white cottons<br />
(underwear..)<br />
Laundry type is the same as<br />
Cotton.<br />
Polyamide, Acrylic, Polyester<br />
Delicate laundry easily<br />
damaged<br />
(silk, curtains..)<br />
<strong>Machine</strong> washable woolens<br />
with pure new wool only.<br />
“Hand wash” marked delicate<br />
and wool laundry<br />
Colored laundry which<br />
is lightly soiled fast.<br />
• Pre Wash : If the laundry is heavily soiled, “Pre Wash” program is recommended.<br />
Pre Wash is available in Cotton and Synthetic programs.<br />
• Rinse+ : Used to introduce an additional rinse, which may assist in removing traces of detergent residue.<br />
• Eco : By selecting Eco function, the water temperature is lowered and washing time is increased.<br />
So you can economize your consumption of heating energy.<br />
11<br />
Proper<br />
Temp.<br />
60˚ C<br />
(95˚ C)<br />
40˚ C<br />
(60˚ C, 30˚ C)<br />
60˚ C<br />
40˚ C<br />
(60˚ C, 30˚ C)<br />
Cold<br />
Cold<br />
Cold<br />
(30˚ C)<br />
30˚ C<br />
(Cold, 40˚ C)<br />
Option<br />
Pre Wash<br />
Rinse+<br />
Crease Care<br />
Pre Wash<br />
Rinse+<br />
Crease Care<br />
Pre Wash<br />
Rinse+<br />
Crease Care<br />
Pre Wash<br />
Rinse+<br />
Crease Care<br />
Rinse+<br />
Crease Care<br />
Rinse+<br />
Crease Care<br />
Rinse+<br />
Crease Care<br />
Rinse+<br />
Crease Care<br />
Maximum<br />
Load<br />
Rating<br />
Rating<br />
Rating<br />
Less than<br />
1.5kg<br />
Less than<br />
1.0kg<br />
Less than<br />
1.0kg<br />
Less than<br />
1.0kg<br />
Less than<br />
1.0kg
* COTTON PROGRAM<br />
1<br />
2<br />
3<br />
4<br />
Put the laundry in to the drum. Put detergent and softener into the detergent case.<br />
Then close the door.<br />
• Put detergent into the main wash and prewash compartments in the detergent case.<br />
Softener should be below the ‘MAX’ level.<br />
• Put detergent into the pre wash compartment only if you want to add prewash.<br />
• When you want to use bleach, put it into the main wash compartment with detergent.<br />
Press the Power button.<br />
• The LED shows only ‘---’ and all Program Lights turn on.<br />
Select the ‘Cotton’ program using program selection dial.<br />
• If you press Start/Hold button after power button without selecting program, the<br />
‘Cotton’ program is selected as default program.<br />
• <strong>Washing</strong> temperature ‘40’ ˚ C, spin ‘800’ rpm and rinse ‘3’ times are selected<br />
automatically.<br />
• If you want to change washing temperature, the spin velocity or add wash options<br />
(Rinse+, Crease Care), press each button.<br />
Press Start/Hold button.<br />
• The Door is locked. By sensing the weight of laundry and supplying wash water,<br />
The appliance starts washing.<br />
Note<br />
• If you want to change the setting during operation, press the Start/Hold button to hold the operation and<br />
press the button you want.<br />
• ‘30’, ‘40’, ‘60’ and ‘95’ ˚ C washing temperatures are selectable with Cotton program.<br />
• ‘Prewash’, ‘Rinse+’, and ‘Crease Care’ wash options are selectable with Cotton program.<br />
Caution!<br />
• If you select washing temperature ‘95’ ˚ C, some cold water is supplied before the drain of main wash. This<br />
is to protect the user from the hazard of burn injury by lowering the temperature of hot wash water instead<br />
of directly draining it. Therefore this is not a malfuction.<br />
(Be careful with the draining water, since it can be still hot although the temperature is lowered.)<br />
12
* ECO PROGRAM<br />
1<br />
2<br />
3<br />
4<br />
Put the laundry in the drum. Put detergent and softener into the detergent case. Then<br />
close the door.<br />
• Put detergent into the main wash and prewash compartments in the detergent<br />
case. Softener should be below the ‘MAX’ level.<br />
• Put detergent into the pre wash compartment only if you want to add prewash.<br />
• When you want to use bleach, put it into the main wash compartment with<br />
detergent.<br />
Press the Power button.<br />
• The LED shows only ‘---’ and all Program Lights turn on.<br />
Select the ‘Eco’ program using program selection dial.<br />
• <strong>Washing</strong> temperature ‘60’ ˚ C, spin ‘800’ rpm and rinse ‘3’ times are selected<br />
automatically.<br />
• If you want to change the spin velocity or add wash options (Rinse+, Crease Care),<br />
press each button.<br />
Press Start/Hold button.<br />
• The Door is locked. By sensing the weight of laundry and supplying wash water,<br />
The appliance starts washing.<br />
Note<br />
• If you want to change the setting during operation, press the Start/Hold button to hold the operation and<br />
press the button you want.<br />
• Only ‘60’ ˚ C washing temperature is selectable with Eco program.<br />
• Only ‘Rinse+’ and ‘Crease Care’ of all wash options are selectable with Eco program.<br />
13
* SYNTHETIC PROGRAM<br />
1<br />
2<br />
3<br />
4<br />
Put the laundry in the drum. Put detergent and softener into the detergent case. Then<br />
close the door.<br />
• Put detergent into the main wash and prewash compartments in the detergent<br />
case. Softener should be below the ‘MAX’ level.<br />
• Put detergent into the pre wash compartment only if you want to add prewash.<br />
• When you want to use bleach, put it into the main wash compartment with<br />
detergent.<br />
Press the Power button.<br />
• The LED shows only ‘---’ and all Program Lights turn on.<br />
Select the ‘Synthetic’ program using program selection dial.<br />
• <strong>Washing</strong> temperature ‘40’ ˚ C, spin ‘800’ rpm and rinse ‘3’ times are selected<br />
automatically.<br />
• If you want to change washing temperature, the spin velocity or add wash options<br />
(Prewash, Rinse+, Crease Care), press each button.<br />
Press Start/Hold button.<br />
• The Door is locked. By sensing the weight of laundry and supplying wash water,<br />
The appliance starts washing.<br />
Note<br />
• If you want to change the setting during operation, press the Start/Hold button to hold the operation and<br />
press the button you want.<br />
• Only ‘30’, ‘40’ and ‘60’ ˚ C washing temperatures are selectable with Synthetic program.<br />
• ‘Prewash’, ‘Rinse+’, and ‘Crease Care’ wash options are selectable with Synthetic program.<br />
• The appropriate amount of laundry for Synthetic program is below 1.5kg.<br />
14
* DELICATE PROGRAM<br />
1<br />
2<br />
3<br />
4<br />
Put the laundry in the drum. Put detergent and softener into the detergent case. Then<br />
close the door.<br />
• Put detergent into the main wash and prewash compartments in the detergent<br />
case. Softener should be below the ‘MAX’ level.<br />
• Put detergent into the pre wash compartment only if you want to add prewash.<br />
• When you want to use bleach, put it into the main wash compartment with<br />
detergent.<br />
Press the Power button.<br />
• The LED shows only ‘---’ and all Program Lights turn on.<br />
Select the ‘Delicate’ program using program selection dial.<br />
• <strong>Washing</strong> temperature ‘Cold’, spin ‘400’ rpm and rinse ‘2’ times are selected<br />
automatically.<br />
• If you want to change the spin velocity or add wash options (Rinse+, Crease Care),<br />
press each button.<br />
Press Start/Hold button.<br />
• The Door is locked. By sensing the weight of laundry and supplying wash water,<br />
The appliance starts washing.<br />
Note<br />
• If you want to change the setting during operation, press the Start/Hold button to hold the operation and<br />
press the button you want.<br />
• Only ‘cold’ of washing temperature is selectable with Delicate program.<br />
• ‘1000’ rpm of spin velocity is NOT selectable with Delicate program.<br />
• Only ‘Rinse+’ and ‘Crease Care’ wash options are selectable with Delicate program.<br />
• The appropriate amount of laundry for Delicate program is below 1.0kg.<br />
15
* WOOL PROGRAM<br />
1<br />
2<br />
3<br />
4<br />
Put the laundry in the drum. Put detergent and softener into the detergent case. Then<br />
close the door.<br />
• Put detergent into the main wash and prewash compartments in the detergent<br />
case. Softener should be below the ‘MAX’ level.<br />
• Put detergent into the pre wash compartment only if you want to add prewash.<br />
• When you want to use bleach, put it into the main wash compartment with<br />
detergent.<br />
Press the Power button.<br />
• The LED shows only ‘---’ and all Program Lights turn on.<br />
Select the ‘Wool’ program using program selection dial.<br />
• <strong>Washing</strong> temperature ‘Cold’, spin ‘400’ rpm and rinse ‘2’ times are selected<br />
automatically.<br />
• If you want to change the spin velocity or add wash options (Rinse+, Crease Care),<br />
press each button.<br />
Press Start/Hold button.<br />
• The Door is locked. By sensing the weight of laundry and supplying wash water,<br />
The appliance starts washing.<br />
Note<br />
• If you want to change the setting during operation, press the Start/Hold button to hold the operation and<br />
press the button you want.<br />
• Only ‘Cold’ washing temperature is selectable with Wool program.<br />
• ‘1000’ rpm of spin velocity is NOT selectable with Hand program in order to protect damage on laundry.<br />
• Only ‘Rinse+’ and ‘Crease Care’ wash options are selectable with Wool program.<br />
• The appropriate amount of laundry for Wool program is below 1.0kg.<br />
• Use only special detergent for wool.<br />
(Since special neutral detergent for wool creates a lot of bubbles, use appropriate amount).<br />
16
* HAND WASH<br />
1<br />
2<br />
3<br />
4<br />
Put the laundry in the drum. Put detergent and softener into the detergent case. Then<br />
close the door.<br />
• Put detergent into the main wash and prewash compartments in the detergent<br />
case. Softener should be below the ‘MAX’ level.<br />
• Put detergent into the pre wash compartment only if you want to add prewash.<br />
• When you want to use bleach, put it into the main wash compartment with<br />
detergent.<br />
Press the Power button.<br />
• The LED shows only ‘---’ and all Program Lights turn on.<br />
Select the ‘Hand Wash’ program using program selection dial.<br />
• <strong>Washing</strong> temperature ‘Cold’, spin ‘400’ rpm and rinse ‘3’ times are selected<br />
automatically.<br />
• If you want to change the washing temperature, spin velocity or add wash options<br />
(Rinse+, Crease Care), press each button.<br />
Press Start/Hold button.<br />
• The Door is locked. By sensing the weight of laundry and supplying wash water,<br />
The appliance starts washing.<br />
Note<br />
• If you want to change the setting during operation, press the Start/Hold button to hold the operation and<br />
press the button you want.<br />
• Only ‘Cold’ and ‘30’ ˚ C washing temperatures are selectable with Hand Wash program.<br />
• ‘1000’ rpm of spin velocity is NOT selectable with Hand program.<br />
• Only ‘Rinse+’ and ‘Crease Care’ wash options are selectable with Hand Wash program.<br />
• Use Hand Wash program for the laundry that is marked ‘Hand wash’ in the care label.<br />
17
* QUICK 30<br />
1<br />
2<br />
3<br />
4<br />
Put the laundry in the drum. Put detergent and softener into the detergent case. Then<br />
close the door.<br />
• Put detergent into the main wash and prewash compartments in the detergent<br />
case. Softener should be below the ‘MAX’ level.<br />
• Put detergent into the pre wash compartment only if you want to add prewash.<br />
• When you want to use bleach, put it into the main wash compartment with<br />
detergent.<br />
Press the Power button.<br />
• The LED shows only ‘---’ and all Program Lights turn on.<br />
Select the ‘Quick’ program using program selection dial.<br />
• <strong>Washing</strong> temperature ‘30’ ˚ C, spin ‘800’ rpm and rinse ‘2’ times are selected<br />
automatically.<br />
• If you want to change the washing temperature, spin velocity or add wash options<br />
(Rinse+, Crease Care), press each button.<br />
Press Start/Hold button.<br />
• The Door is locked. By sensing the weight of laundry and supplying wash water,<br />
The appliance starts washing.<br />
Note<br />
• If you want to change the setting during operation, press the Start/Hold button to hold the operation and<br />
press the button you want.<br />
• Only ‘Cold’, ‘30’ ˚ C and ‘40’ ˚ C washing temperatures are selectable with Quick 30 program.<br />
• Only ‘Rinse+’ and ‘Crease Care’ wash options are selectable with Quick 30 program.<br />
18
MAINTENANCE<br />
Proper care of your washer can extend its life. This section explains how to care for your washer<br />
properly and safely.<br />
Cleaning your washer<br />
Exterior Interior<br />
Wipe up detergent, bleach, and other spills with<br />
a soft, damp cloth or sponge as they occur.<br />
Occasionally wipe the outside of the washer to<br />
keep its looking like new one.<br />
Do not put sharp or metal object in your washer, or they<br />
can damage the finish. Check all pockets for pins, clips,<br />
money, bolts, nuts, etc.<br />
Do not lay these objects in your washer after emptying<br />
pockets.<br />
Winter storage or moving care<br />
Install and store your washer where it will not freeze. Because some water may stay in the<br />
hoses, freezing can damage your washer.<br />
If you store or move your washer during freezing weather, winterize it.<br />
• Turn off water faucet.<br />
• Disconnect and drain water inlet hoses.<br />
• Run washer on a drain and spin setting (see<br />
page 10) for 1 minute.<br />
• Unplug the power supply cord.<br />
Non-use or vacation care<br />
Operate your washer only when you are at home.<br />
If you are on vacation or don’t use your washer for an extended period of time, you should:<br />
• Unplug the power supply cord or turn off eletrical power to the washer.<br />
• Turn off the water supplier to the washer.<br />
This helps avoid accidental flooding (due to a water pressure surge) while you are away.<br />
19<br />
Clean interior with 250ml of chlorine bleach<br />
mixed with 500ml of detergent.<br />
Run washer through a complete cycle.<br />
Repeat this process if necessary.<br />
To winterize washer To use washer again<br />
• Flush water pipes and hoses.<br />
• Reconnect water inlet hoses.<br />
• Turn on water faucet.<br />
• Reconnect power supply cord.
HOW TO CLEAN THE FILTER<br />
Cleaning the water inlet filter<br />
• Clean the filter when water leaks from the water inlet.<br />
1 Pull the power<br />
plug out before<br />
cleaning it.<br />
Cleaning the drain filter<br />
• This drain filter is used to screen the foreign stuffs such as threads, coins, pins, buttons etc..<br />
• If the drain filter is not cleaned at proper time(every 10 times of use), drain problem could be<br />
caused.<br />
CAUTION : Be careful when draining if the water is hot.<br />
1. Open the lower cover(1) by<br />
using a coin. Remove the cap<br />
hose(2) to pull out the hose.<br />
100<br />
1<br />
2 Turn off the water<br />
supply to the<br />
washer and<br />
separate the inlet<br />
hose.<br />
Cleaning the detergent case<br />
*After a while detergent and fabric softeners leave a deposit in the case;<br />
- It should be cleaned from time to time with a jet of running water.<br />
- If necessary it can be removed completely from the machine by pressing the catch downwards<br />
and by pulling it out.<br />
- To facilitate cleaning, the upper part of the fabric softener compartment can be removed.<br />
*Detergent can also accumulate inside the recess which should be<br />
cleaned occasionally with a brush.<br />
*Once you have finished cleaning, replace the case and run a rinse<br />
cycle without laundry.<br />
20<br />
3 Pull the inlet filter<br />
out.<br />
2. Unplug the cap hose(2), allowing<br />
the water to flow out. At this time<br />
use a vessel to prevent water<br />
flowing on to the floor. When water<br />
does not flow any more, turn the<br />
pump filter(3) open to the left.<br />
2 3 2<br />
4 Remove the dirt<br />
from the inlet filter<br />
with a brush.<br />
3. Remove any foreign material<br />
from the pump filter(3). After<br />
cleaning, turn the pump filter<br />
clockwise and insert the cap<br />
hose(2) to the original place.<br />
Close the lower cover.<br />
3
REMOVING STAINS<br />
Stained, heavily-soiled, or greasy items may need to be prewashed or soaked for best results.<br />
Soaking helps remove protein-type stains like blood, milk or grass. Prewashing helps loosen soil<br />
before washing.<br />
Stain removal rules<br />
• Use warm water for soaking or prewashing stained laundry. Hot water can set stains.<br />
• Most stains are easier to remove when they are fresh.<br />
• Before treating any stain, find out what kind of stain it is, how old the stain is, what kind of<br />
fabric it is, and whether the fabric is colorfast. (Check the care label)<br />
• <strong>Washing</strong> and drying can set some stains.<br />
• Start with cold or warm water. Hot water can set some stains.<br />
• When bleach is recommended, use a bleach that is safe for the fabric.<br />
• Put the stained area face down on a paper towel or white cloth. Apply the stain remover to the<br />
back of the stain. This forces the stain off fabric instead of through it.<br />
Stain removal guide<br />
Blood<br />
Chewing gum<br />
Cocoa, Chocolate<br />
Coffee<br />
Cream/Milk<br />
Ice cream<br />
Deodorant<br />
Egg<br />
Fabric/Softener<br />
Fruit stains<br />
Grass<br />
Grease and oil<br />
Iron or rust<br />
Lipstick<br />
Mildew<br />
Mud<br />
STAIN TO REMOVE<br />
Paint-oil based<br />
Paint-water based<br />
Scorch marks<br />
Rinse immediately in COLD water.<br />
If stain remains, soak in cold water with an enzyme prewash.<br />
Use ice in plastic bag to harden the gum.<br />
Scrape off what you can and the sponge with white spirits.<br />
Sponge with COLD water and soak in an enzyme prewash.<br />
If stains persist, rub in a little detergent and rinse in cold water.<br />
Blot up quickly and rinse out in COLD water.<br />
Rub in a little detergent and wash in the maximum temperature allowed for the<br />
fabric type.<br />
Rinse in COLD water and wash normally.<br />
If stain is still apparent, sponge with white spirits.<br />
Rub affected area with white vinegar and then rinse out in COLD water.<br />
Sponge with white spirits.<br />
Treat stiffened areas with enzyme prewash.<br />
Soak in a COLD enzyme prewash, rinse and wash normally.<br />
Rub affected area with bar soap and wash normally.<br />
Treat as soon as possible by sponging with COLD water.<br />
Rub a little detergent on the stain and wash normally.<br />
Sponge with white spirits.<br />
Rub in an enzyme prewash and wash as normally.<br />
Lay the affected area face down on an absorbent cloth and work from the back.<br />
Sponge with white spirits or dry cleaning fluid. Wash normally.<br />
Apply lemon juice and salt and place in the sun. Wash normally.<br />
Sponge with white methylated spirits and wash normally.<br />
Wash in WARM water and detergent.<br />
Moisten area with lemon juice, dry in the sun and wash normally.<br />
If stain persists and the fabric allows, use a bleach.<br />
Brush off any dry mud. Rinse in cold water.<br />
If stain persists rub in a little detergent and wash normally.<br />
Scrape off any fresh paint and sponge with a non flammable dry cleaning fluid<br />
and wash normally.<br />
Treat while still wet, rinse in WARM water and wash normally.<br />
Dampen a cloth with hydrogen peroxide, lay it over the affected area and press<br />
with a fairly hot iron.<br />
21
TROUBLE SHOOTING<br />
Most problems are easily solved if you understand the cause.<br />
Check the following list for problem before calling for service.<br />
If the error mode such as IE, OE, UE were displayed on the control part, in order to solve these<br />
problem, first turn off the power of the washing machine and then turn on the power pressing<br />
Power button.<br />
If PFE error mode was displayed on the control part, in order to solve this problem, first turn off the<br />
power of the washing machine, second turn on the power pressing Power button, third press SPIN<br />
button and last press Start/Hold button.<br />
• The washer will not<br />
operate at all.<br />
• Water is not supplied<br />
Error display<br />
• The washer will not drain<br />
Error display<br />
• The washer will not spin<br />
Error display<br />
• The washer will stop<br />
during spinning .<br />
• Spinning is insufficient.<br />
Error display<br />
PROBLEM CHECK POINT<br />
• Vibrating and too noisy<br />
• Is there a power failure?<br />
• Is the power cord correctly connected to an electric outlet?<br />
• Did you turn on the power?<br />
• Did you press Start/Hold button?<br />
• Is there correct amount of laundry in the washer?<br />
• Did you connect the inlet hose and open the water tap?<br />
• Is the inlet hose or the water tap frozen?<br />
• Is the water supply shot off?<br />
• Is there any foreign matter blocking up the inlet hose filter?<br />
• Is the drain hose frozen or blocked up by dirt?<br />
• Is the drain hose kinked or deformed?<br />
• Is the end of the drain hose immersed in water?<br />
• Is there excessive dirt inside the drain filter?<br />
• Is the clothes in the drum collected on one side?<br />
• Is the washer installed on an uneven floor or is the vibration<br />
serious?<br />
• Is the door open? (The lamp “ ” will light up in this case.)<br />
• Is the filter of the drain pump clogged?<br />
• Is the drain pump operated?<br />
• Did you use the proper amount of detergent?<br />
• Is the drain hose placed higher than 1m above floor?<br />
• Is the washer installed on an uneven floor?<br />
• Have all the transit bolts removed?<br />
These cases are not malfunctions;<br />
• The sound “wing” heard during water supply is the operating sound made by the water inlet valve.<br />
22
SPECIFICATION<br />
MODEL <strong>DWD</strong>-<strong>F1221</strong><br />
Dimension (mm)<br />
Maximum mass of textile (kg)<br />
Unit Weight (kg)<br />
Standard Water Consumption<br />
Spin Speed (RPM)<br />
Operating Water Pressure<br />
WIRING DIAGRAM<br />
23<br />
595 x 540 x 850 (WxHxD)<br />
6.5 kg<br />
64(Net) / 68(Gross)<br />
50 l<br />
No Spin/400/800/1000<br />
0.03MPa ~ 0.8MPa (0.3kgf/cm 2 ~ 8kgf/cm 2 )